 I don’t want to write about baking today—I want to write about how much I love the Olympics. I’ve watched the coverage every night and had it on in the background while I’ve baked during the day. This isn’t a recent habit—I grew up in a family that gathered to watch the games (summer or winter) every night they were on, and I even once had a wall of my teenage bedroom dedicated to the decorated short track speedskater Apolo Ohno.
Yeah…when it comes to the Olympics, I’m a real big nerd. I’m also a baseball nerd and an Oscars nerd, so…well, maybe I just watch too much TV. That’s probably it.
 Anyway, this isn’t an Olympics blog. It’s a baking blog. So, let’s talk about baked goods, specifically Almond Joy Shortbread Bars.
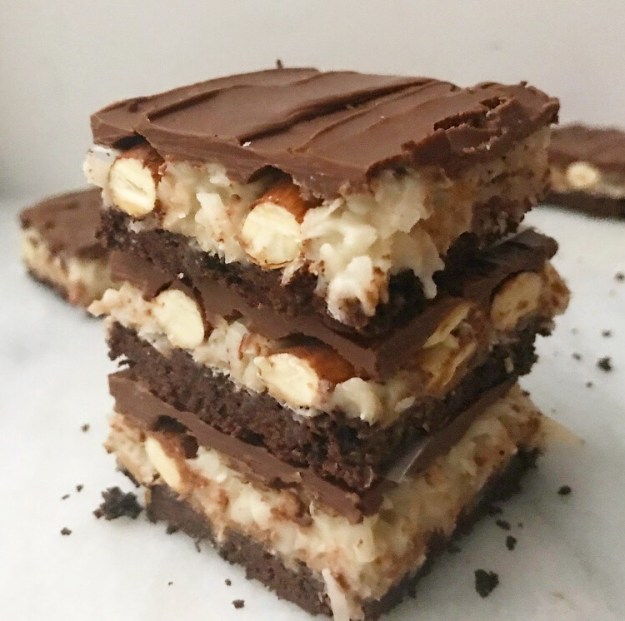
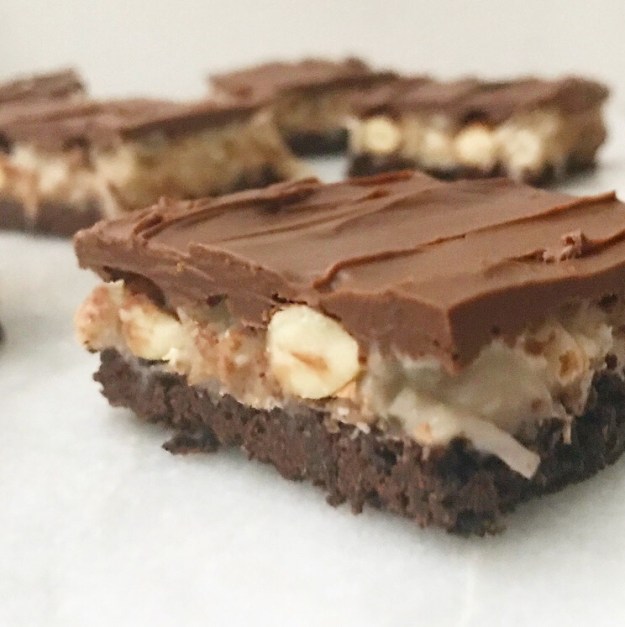 If you’re going to try to improve on the practically perfect combination of chocolate, almonds, and sweet coconut filling, layering it all onto a buttery chocolate shortbread crust is a pretty good way to start.
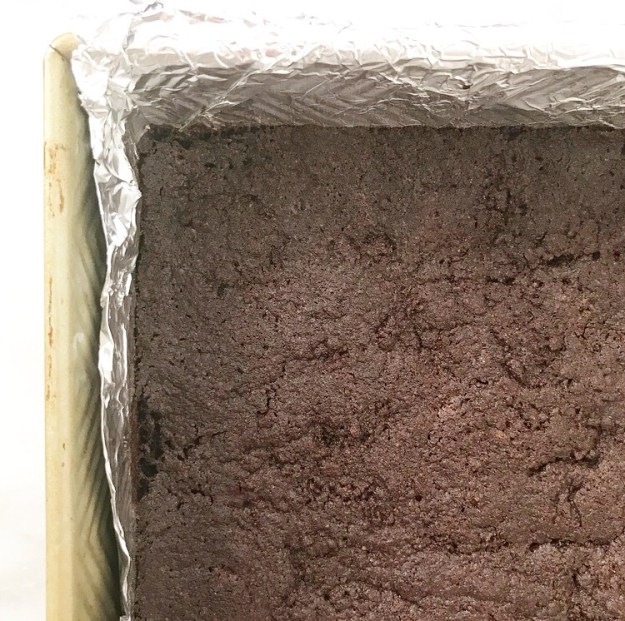
 All the layers in these bars make them look like they take hours to prepare, but in reality, they take about 90 minutes from start to finish and are nearly no-bake. That easy chocolate shortbread crust is the only layer that has to spend time in the oven.
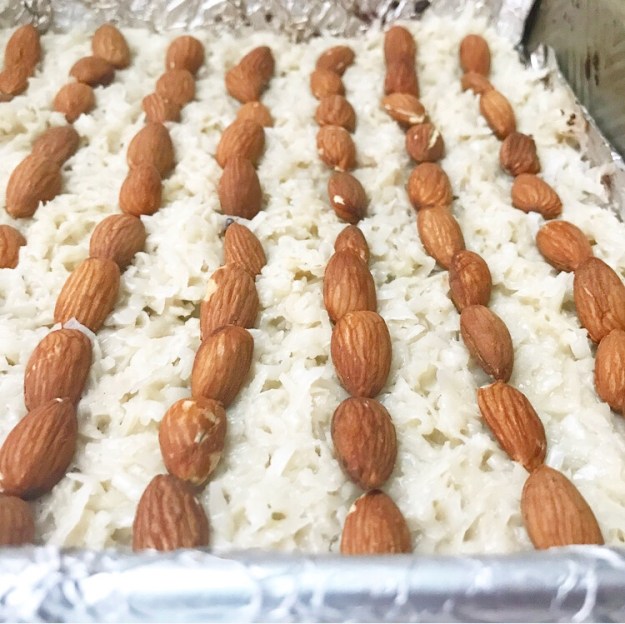
 It’s topped with a thick layer of coconut filling and dotted with whole roasted almonds…
…and a layer of milk chocolate. You can use dark chocolate if you like, but apparently Almond Joys are made with milk chocolate. I’ve been wrong for two years. Oh well.

 But back to the bars. Slice ‘em up and admire your handiwork. #thoselayerstho
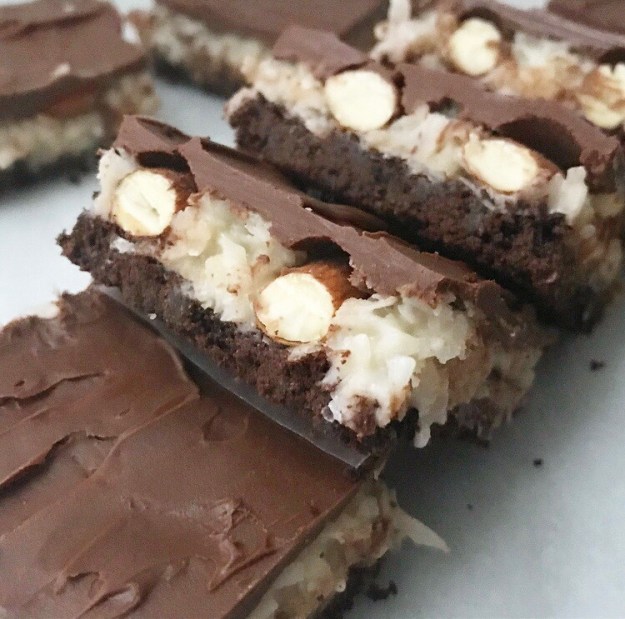 The flavor is everything you love about sweet, chewy, crunchy Almond Joys, but better because they’re homemade. Oh, and because they have a crispy layer of chocolate shortbread offsetting all their sweetness. After sinking your teeth into one of these, you’ll never be able to go back to the mass-produced candy bar.
Y’all, these are seriously good. I know I say that about everything on this blog, but I really mean it today. These are a gold medal recipe for sure.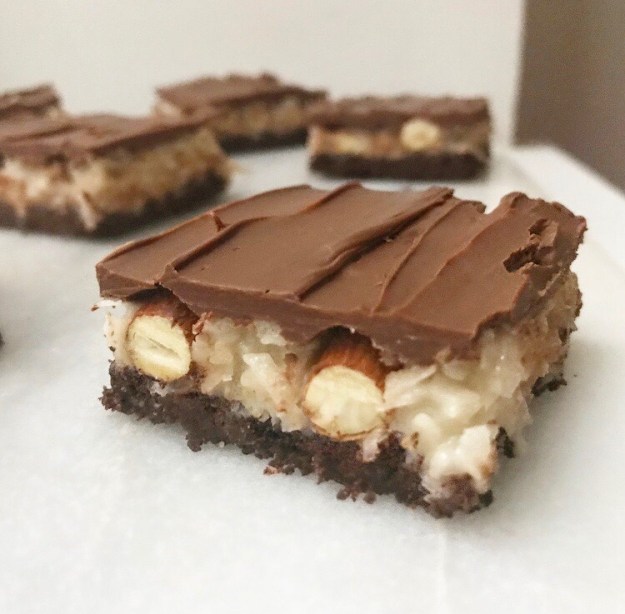
Almond Joy Shortbread Bars
makes one 9-inch square pan, about 16 bars
Chocolate Shortbread Crust:
3/4 cup all-purpose flour
1/4 cup cocoa powder (natural or Dutch process)
1/4 cup light brown sugar, packed
pinch of Kosher or sea salt
1/2 cup (1 stick) unsalted butter, cold, cut into cubes
Coconut Filling:
1/2 cup whole raw almonds
5 fluid ounces (10 tablespoons) sweetened condensed milk
1 cup confectioners sugar
1/4 teaspoon Kosher or sea salt
1 tablespoon pure vanilla extract
3 cups sweetened flaked coconut
Chocolate Topping:
6 ounces milk chocolate, chopped
2 tablespoons unsalted butter, cut into pieces
Preheat oven to 350F. Line a 9-inch square pan with foil and grease well with butter. Set aside.
In a medium mixing bowl, whisk together flour, cocoa powder, light brown sugar, and salt. Use your fingertips to rub butter into dry ingredients until the largest pieces are the size of small peas. It will be powdery, but should hold together when pinched. Pour mixture into prepared pan. Spread it around to cover the bottom of the pan before using your hand to pack it down into an even layer. Prick several times with a fork. Bake 14-15 minutes, until no longer wet-looking. Let shortbread crust cool completely in the pan on a rack.
Make the filling. Place almonds on a dry baking sheet. Toast in the oven for 5-7 minutes, or until fragrant. Set aside.
In a medium mixing bowl, whisk together sweetened condensed milk, confectioners sugar, vanilla extract, and salt. Use a silicone spatula or wooden spoon to fold in coconut. Mixture will be very thick. Drop filling in spoonfuls over the cooled crust and spread across the entire surface. Arrange almonds in lines (or as desired) over the top of the coconut and press down to adhere. Freeze full pan for 15 minutes.
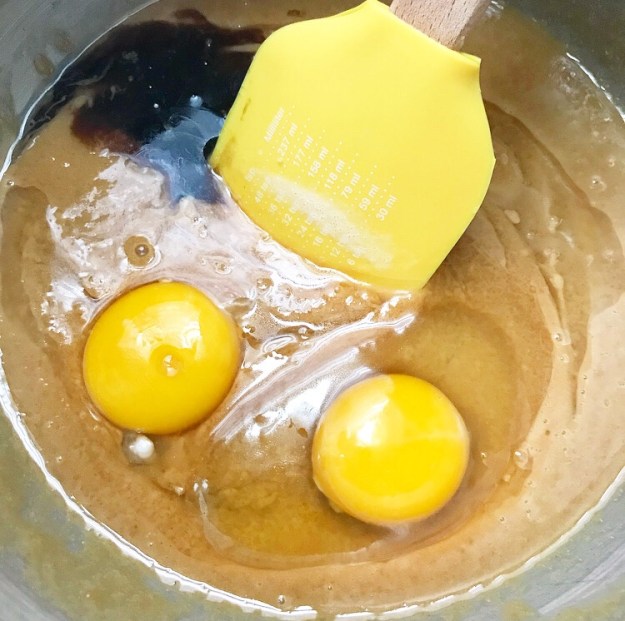
Make the chocolate topping. Combine chopped milk chocolate and butter in a small microwave-safe bowl. Microwave in 15 second increments, stirring in between, just until melted. Drop chocolate over filling one spoonful at a time. Use a small offset icing knife (or a silicone spatula) to carefully spread it over a section of the filling. Continue dropping and spreading chocolate until it’s all used and the almonds are covered. Freeze until chocolate has hardened, about 15 minutes.
Use foil overhang to remove bars to a cutting board. Carefully peel foil down the sides. Use a lightly-greased sharp chef’s knife to slice bars. Lift bars from foil with a thin spatula. Serve.
Bars may be kept in an airtight container at room temperature for up to three days. Layer them with wax paper if they are to be stacked.

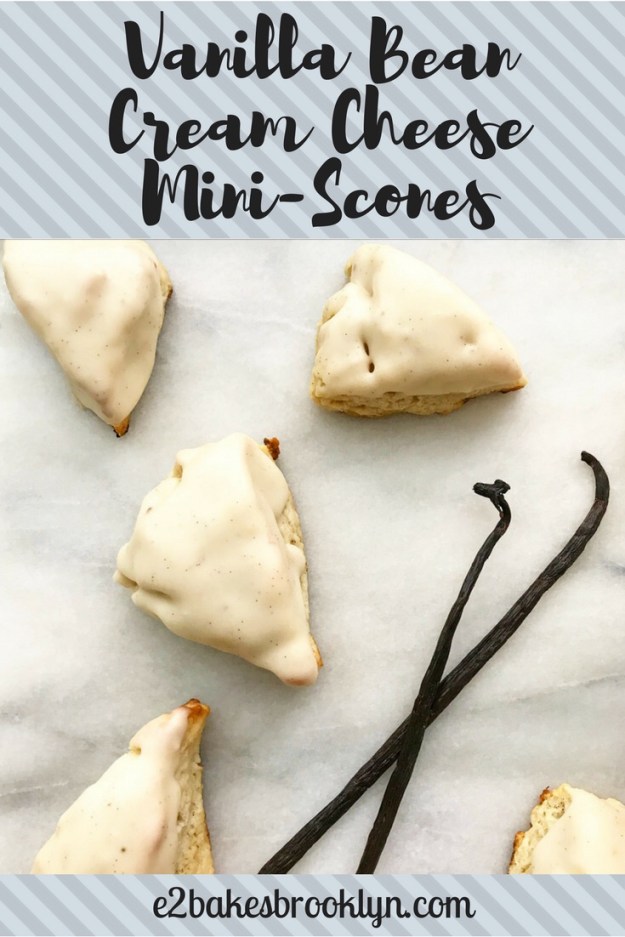
 Over the weekend, I posted a picture of my
 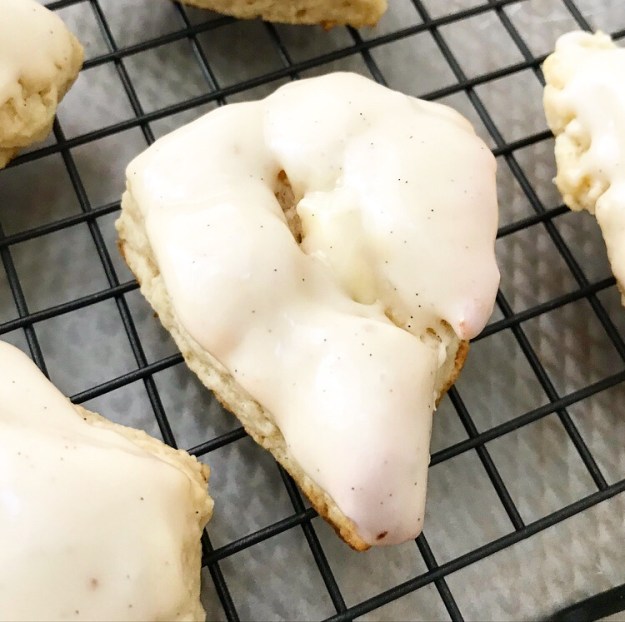 And so, I’m bringing you more scones today—my first since that meyer lemon version last year. I can’t believe I’ve gone that long without a new variation!
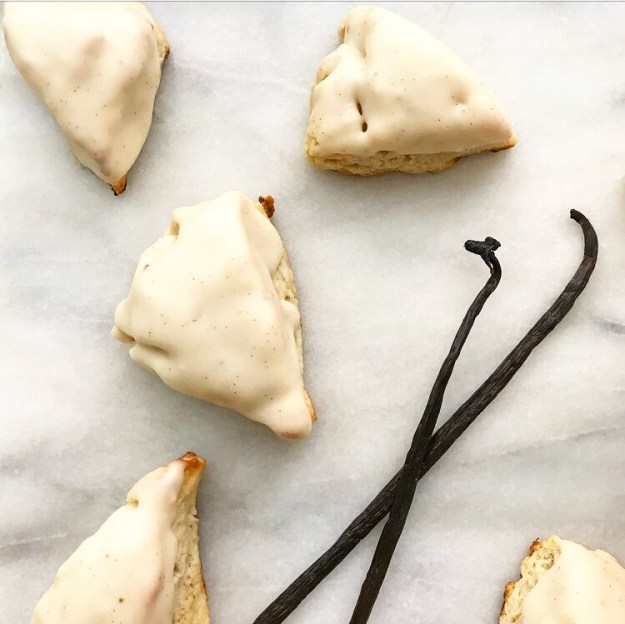
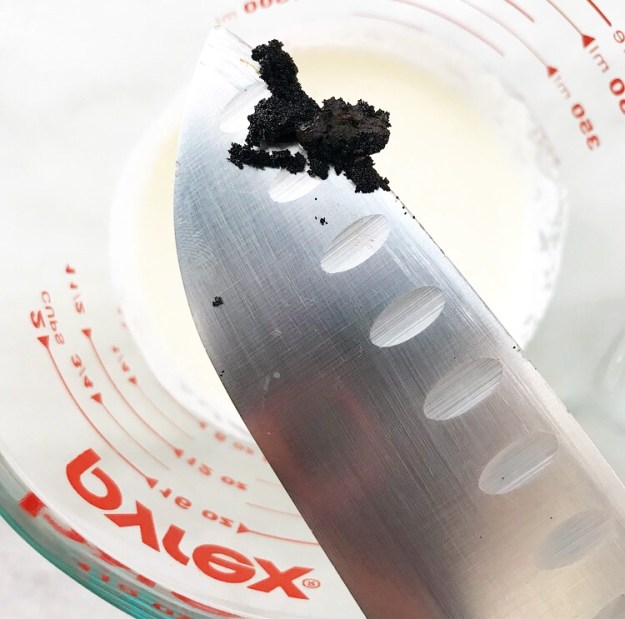
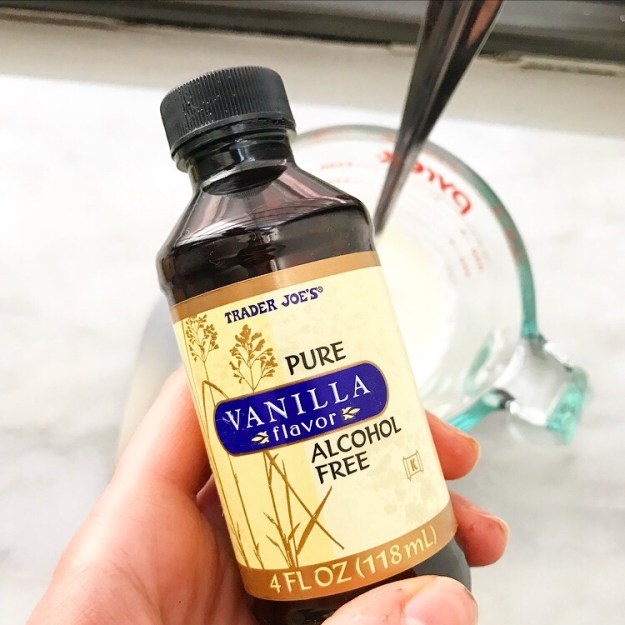
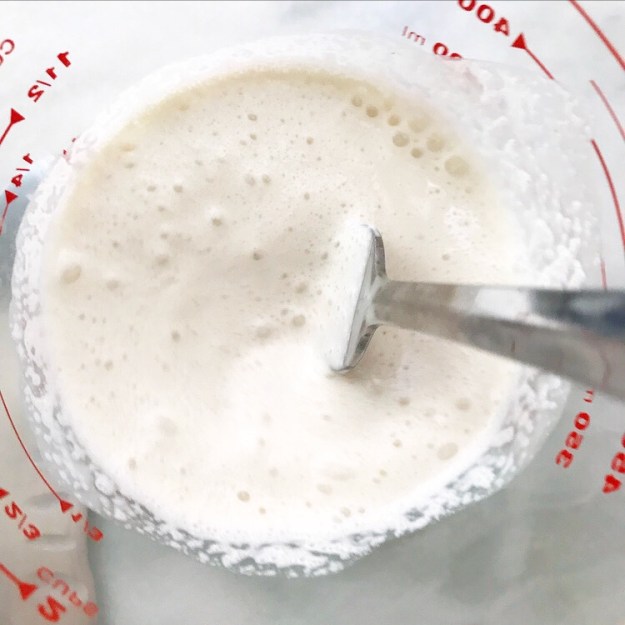
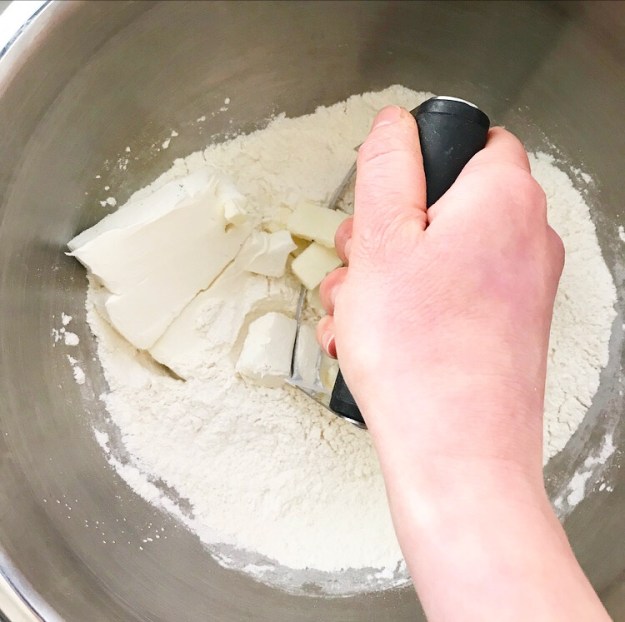
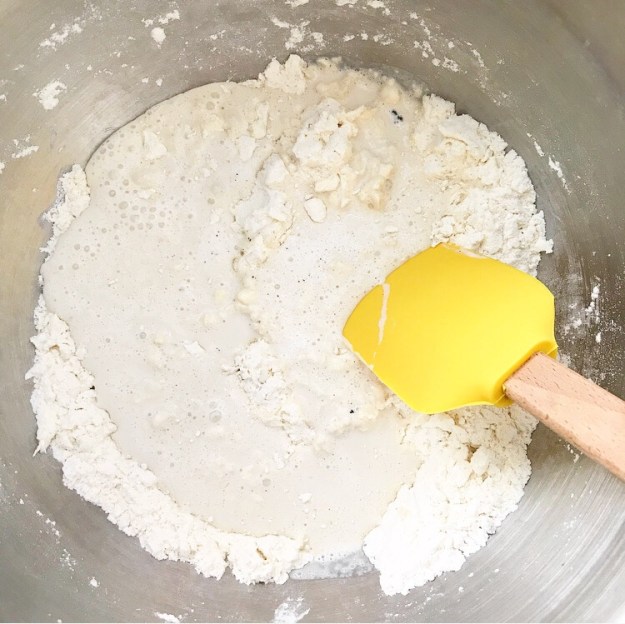
 These are made with cream cheese too, but also vanilla bean. My dear friend, David, *gave* me a package of vanilla beans on New Year’s Day and I’ve been dreaming up uses for them ever since.

 In case you are wondering, giving me a surprise package of vanilla beans is a very good way to become my favorite person 🙂
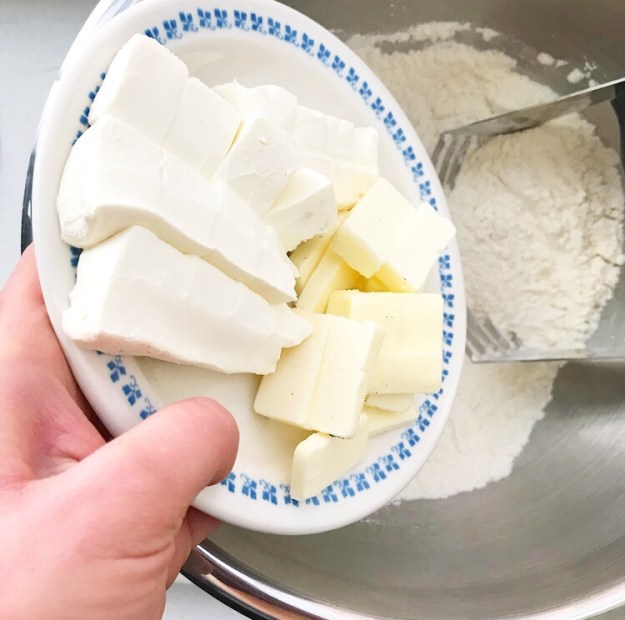

 But back to the scones. I made them miniature—small food just tastes better, amiright?!
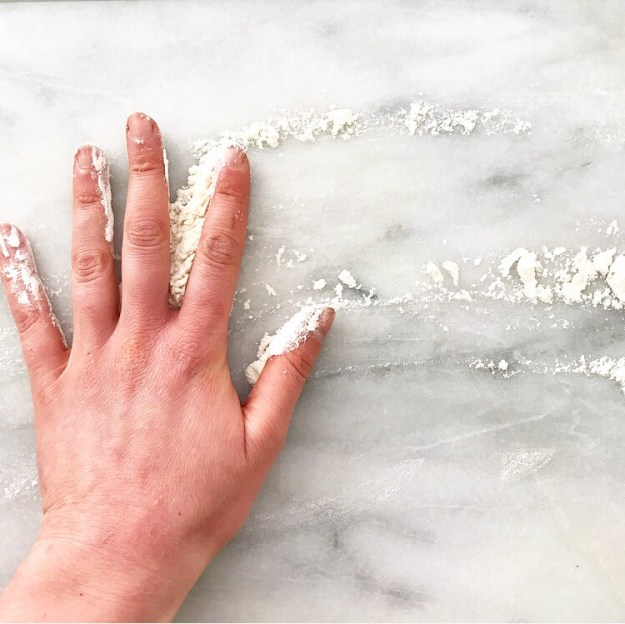

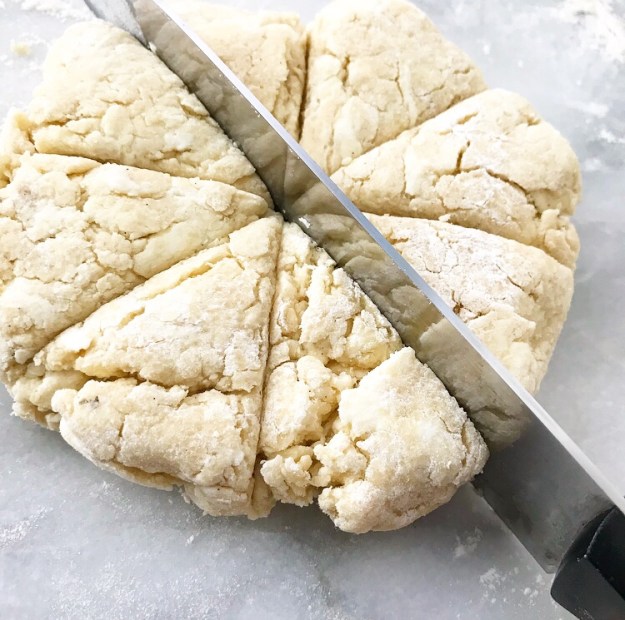

 Each mini-scone is about half the size of a traditional scone. That means you can have two, right?

 I’d be lying if I said I have never eyed the Petit Vanilla Bean Scones at Starbucks. They are adorable, but they are sort of dry and spongy and absolutely not worth the calories.
 These Vanilla Bean Cream Cheese Mini-Scones are nothing like that mass-produced version though—they’re worth all the calories. All of them.
 They’re super tender from the combination of butter, cream cheese, and heavy cream, and the edges are crumbly and nubbly and totally delightful.
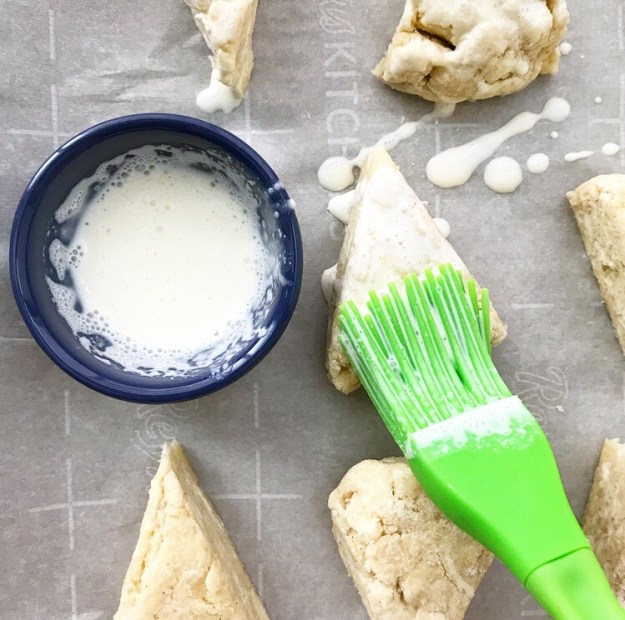
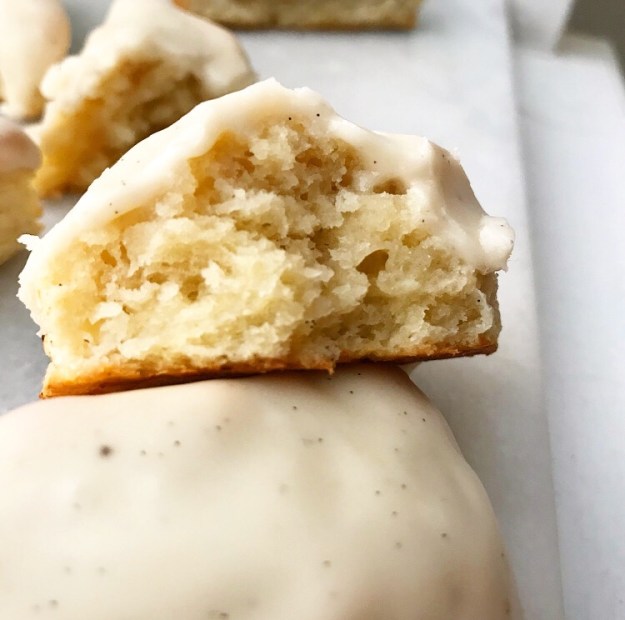 That’s to say nothing of their huge vanilla flavor, which comes from a combination of vanilla bean and vanilla extract. I love the little black flecks of vanilla bean all over the place ❤
 And the thick, luxurious glaze. Be still my
  Yep. I’d say these were worth the wait.
 If you scroll back through my
 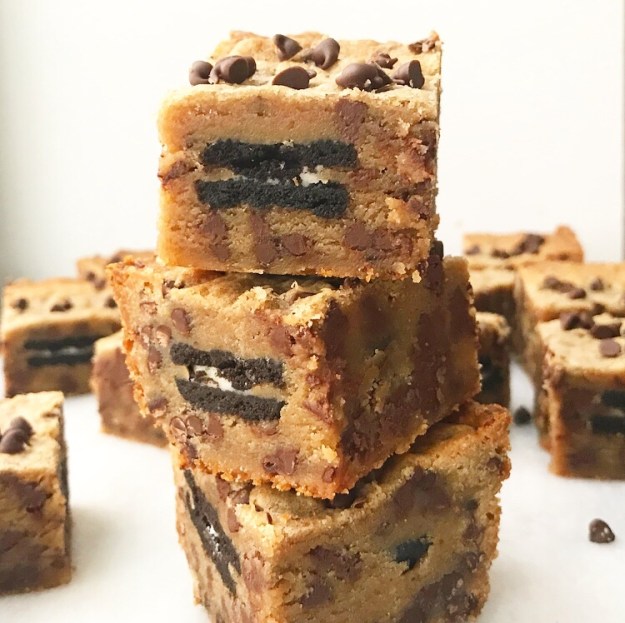 There were a few repeats and many variations (so. many. scones.), but I feel like that year was crucial to my development into the baker I was when I first hit
  In turn, all the recipes and photos I’ve posted since that first day as a blogger have helped me evolve into the baker I am right now. These days, I’m very excited about
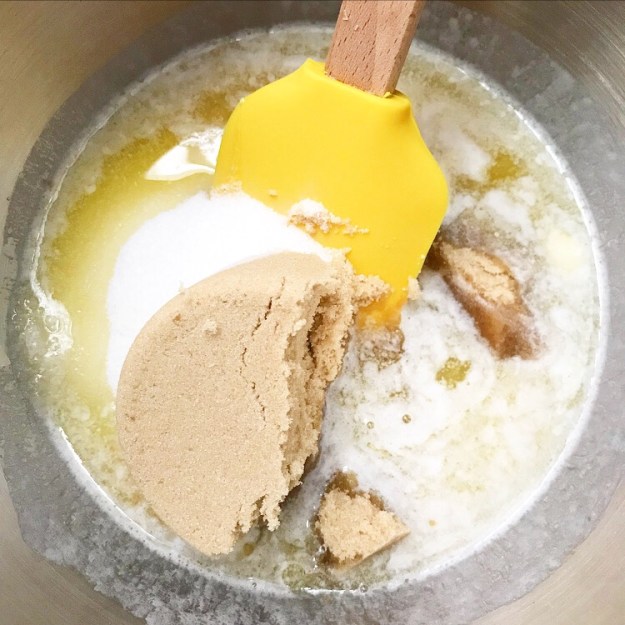

 That’s all well and good, but sometimes I can’t decide what to blog about or I’m testing a recipe that’s more complicated than I anticipated. Those are the moments when I am very glad I have that year of photos to serve as inspiration and remind me of what I was really excited to bake when I was just getting started, before I learned new skills and started complicating things.
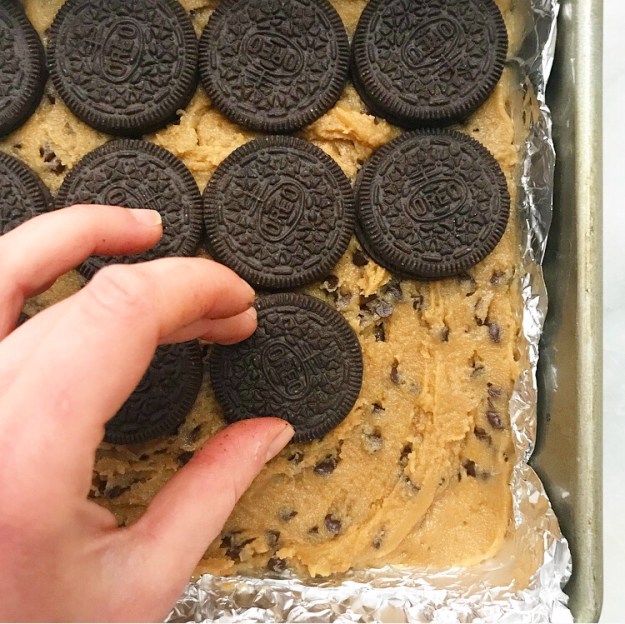
 I rarely look at that old section of my Instagram these days, but it’s full of simple, solid recipes that I was once totally jazzed about. Luckily, I was smart enough to write down almost all of them (even the ones that didn’t work) so that Future Me would know where to start when I revisited them.
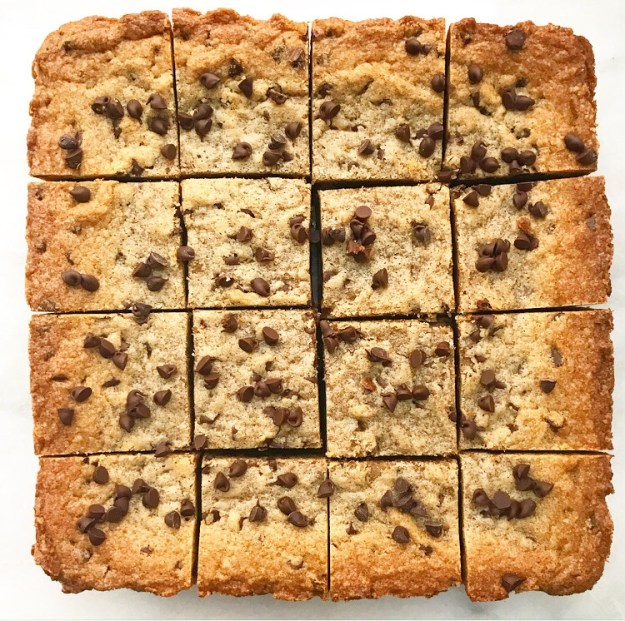
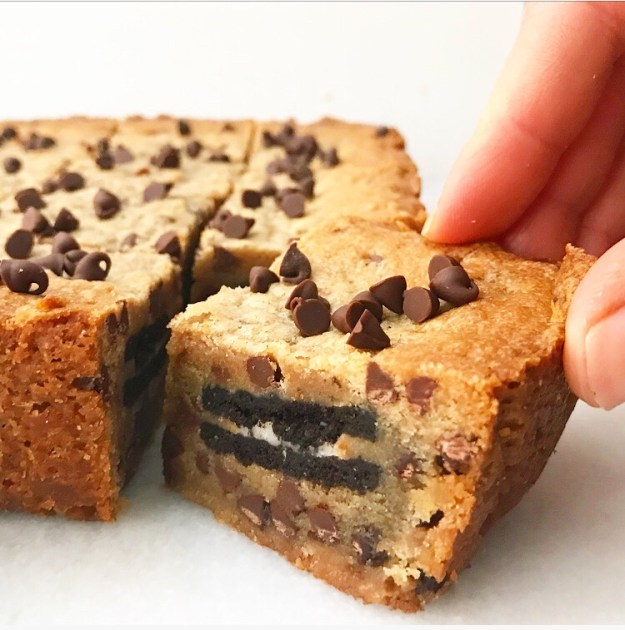
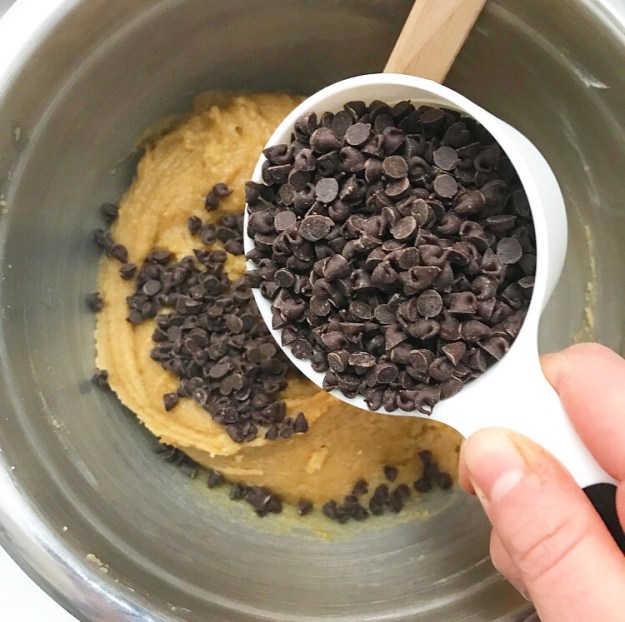
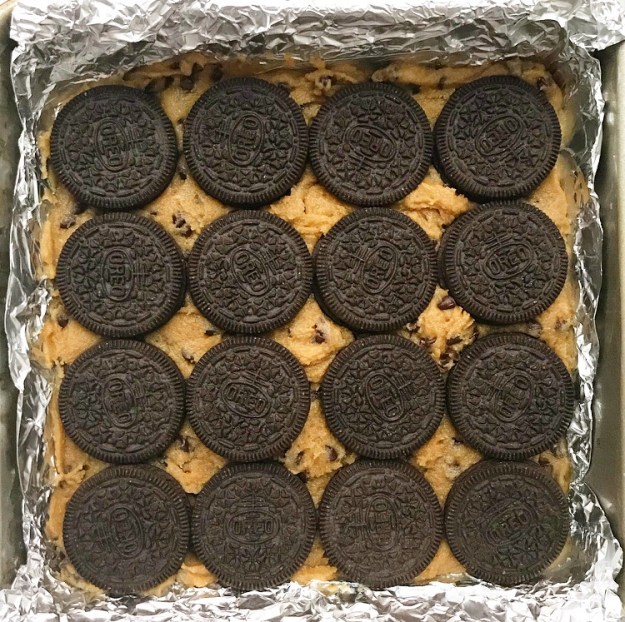
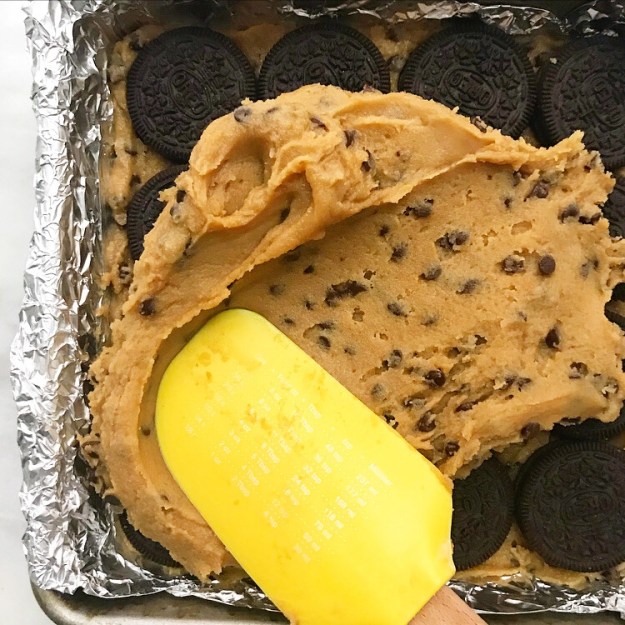
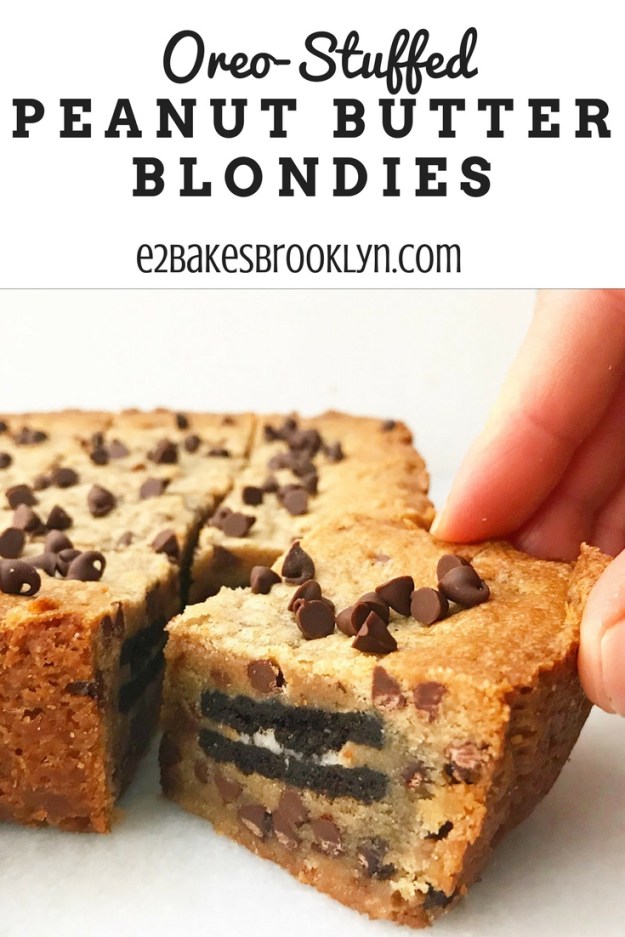
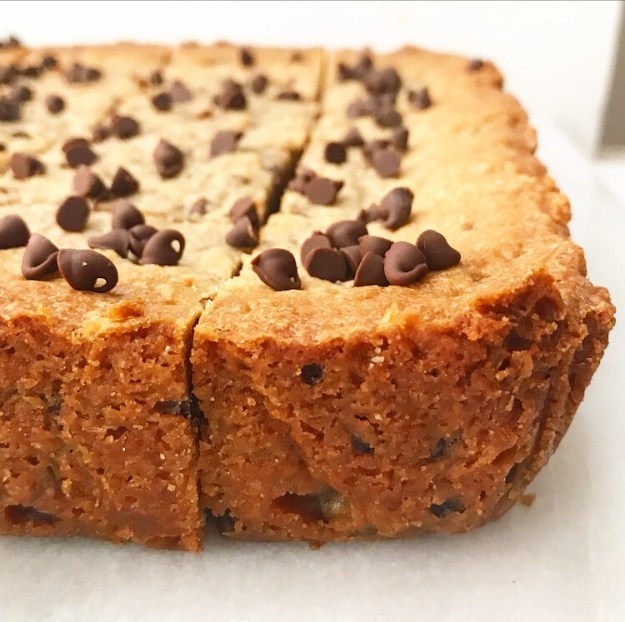 Let’s all give a quick shout-out to Past Me for filing away the recipe for these Oreo-Stuffed Peanut Butter Blondies. The version I posted to Insta three years ago was damn good, but with all the experience I’ve gained, it’s even better now. I didn’t even know it was possible to improve upon the combination of
 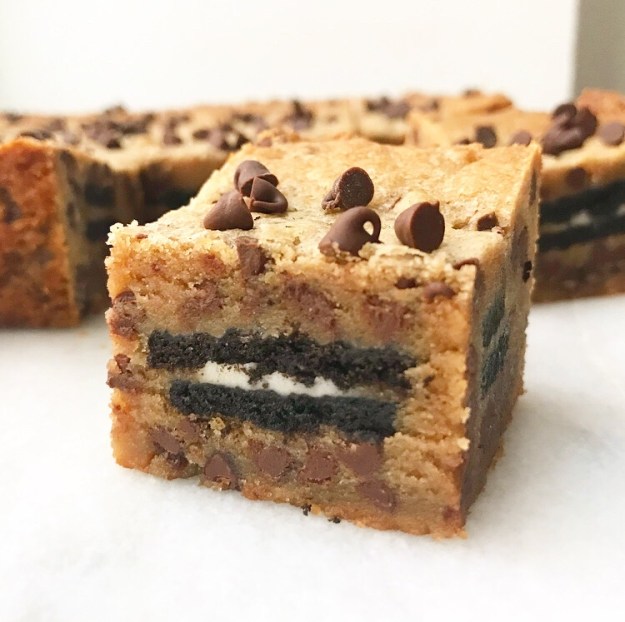 This easy, no-mixer recipe comes together in under an hour and is far more than the sum of its parts. The peanut butter blondie base is soft, chewy, and studded with melty mini chocolate chips. Oh, and it’s stuffed with a layer of Oreo cookies. I’m totally obsessed with the cross-sections of cookie on the sides of every blondie ❤
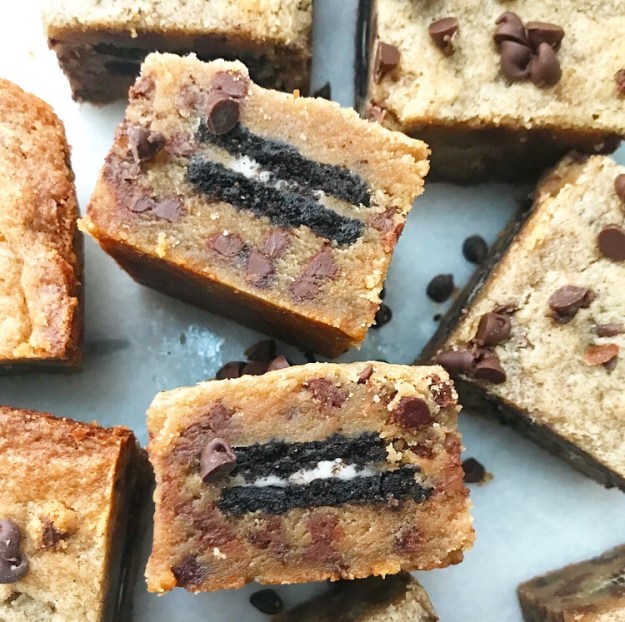 Yeah, I was pretty psyched about these when I posted them to Instagram on
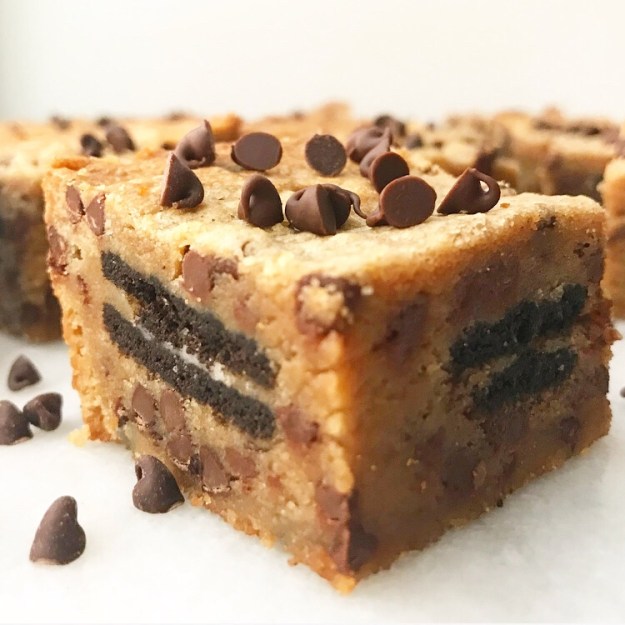
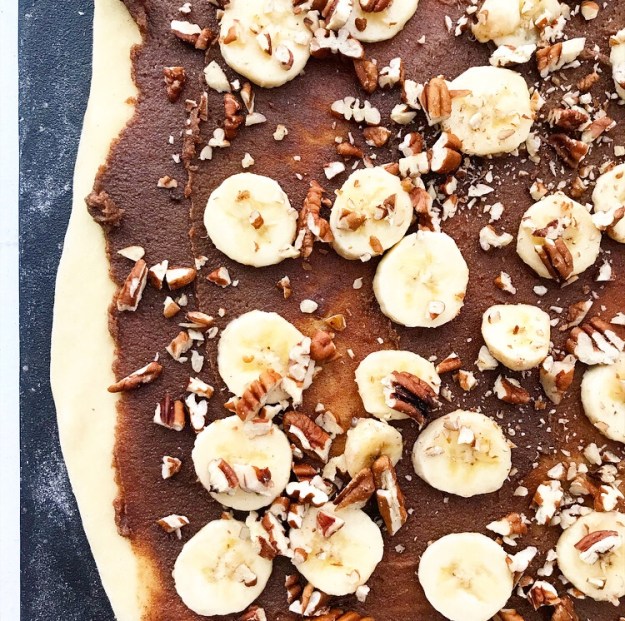
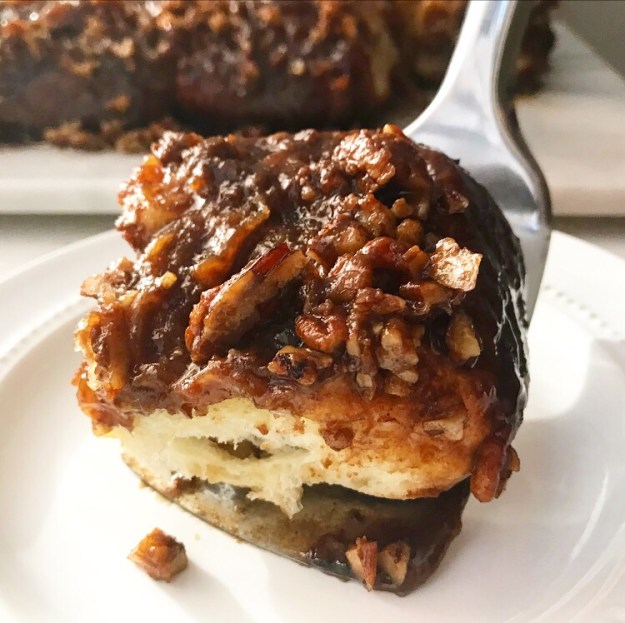
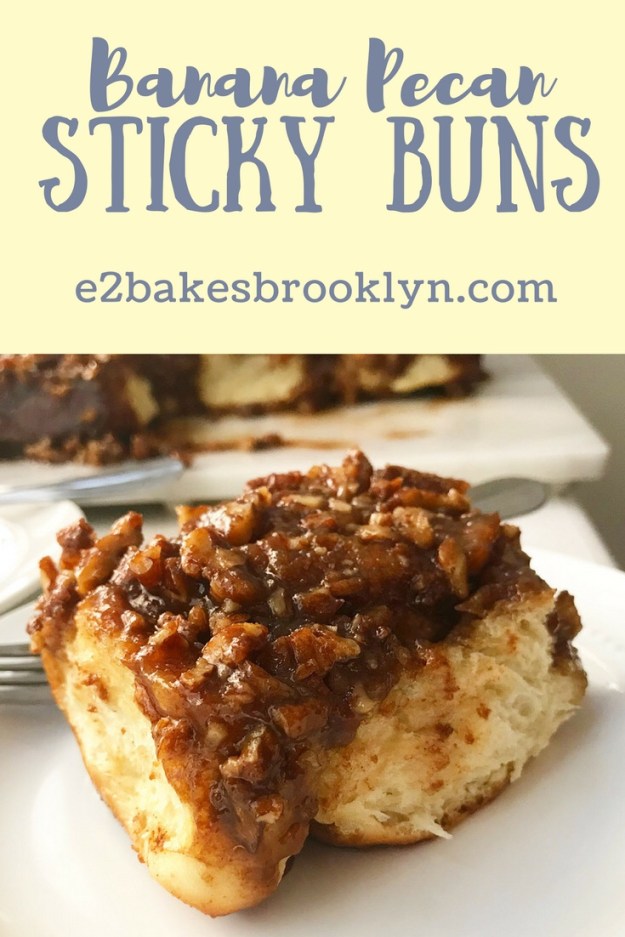
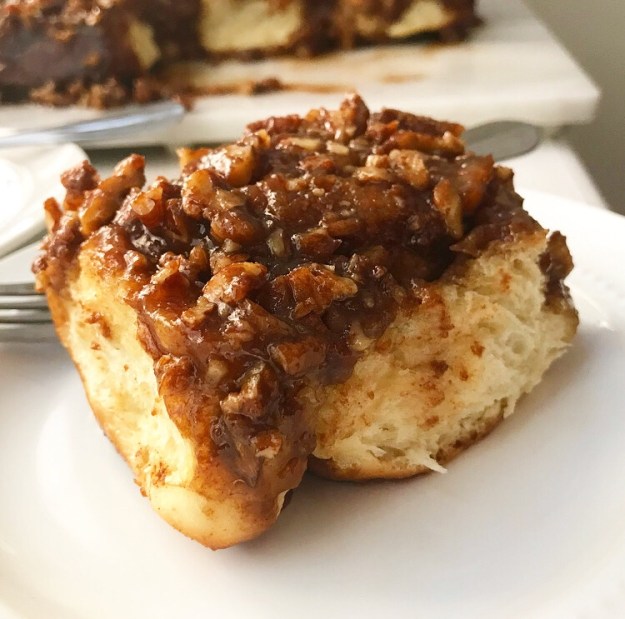 My only issue with today’s recipe is that I wish it were easier to photograph. I don’t hate these photos, but they just don’t do these Banana Pecan Sticky Buns any sort of justice.
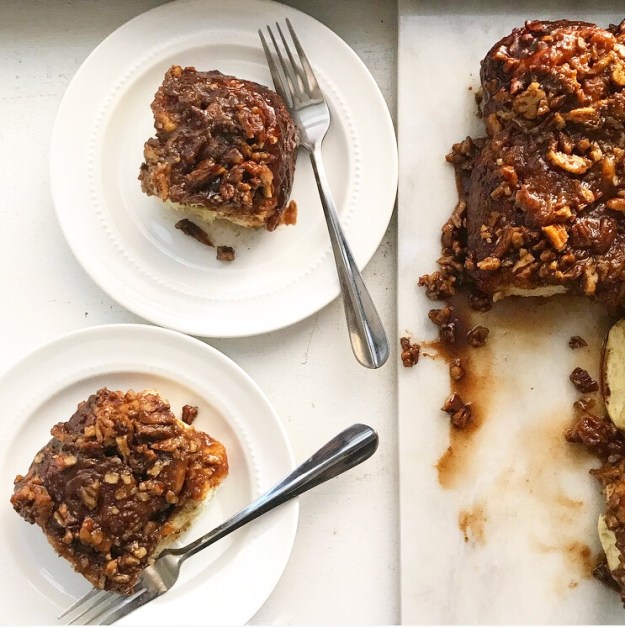 But really, what prop or angle could? Banana Pecan Sticky Buns are everything that’s wonderful about
 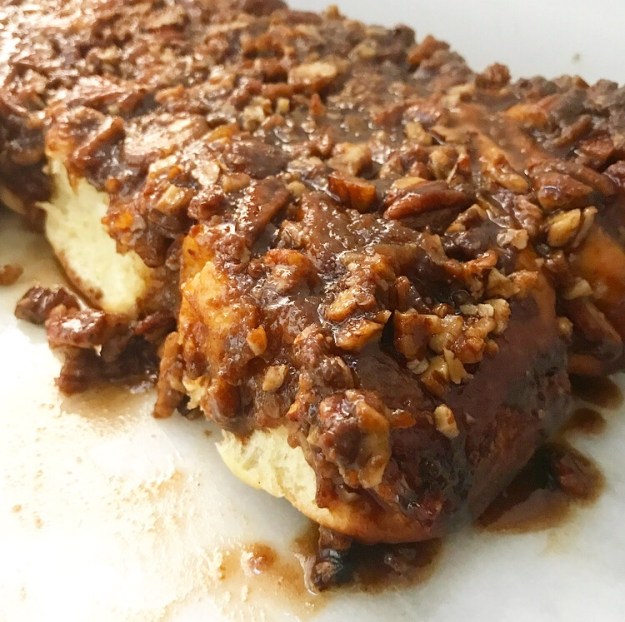 I can wax on and on about the soft pastry (my favorite
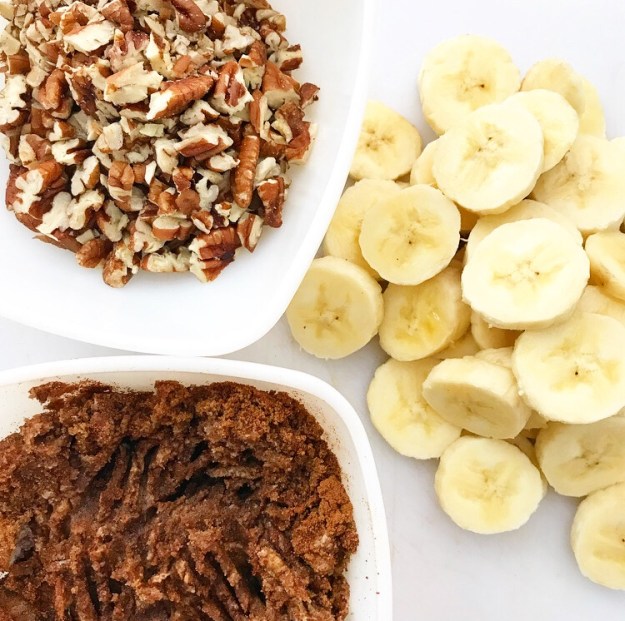
 I could really talk your ear off about the easiest butterscotch ever, flavored with dark brown sugar, honey, and vanilla, and topped with 1 1/2 cups of chopped toasted pecans.
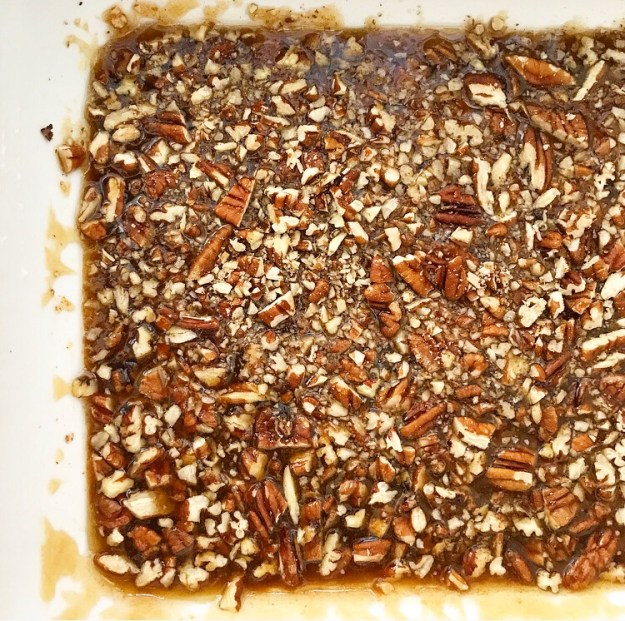 And I can show you all sorts of prep photos, from slicing the rolls…
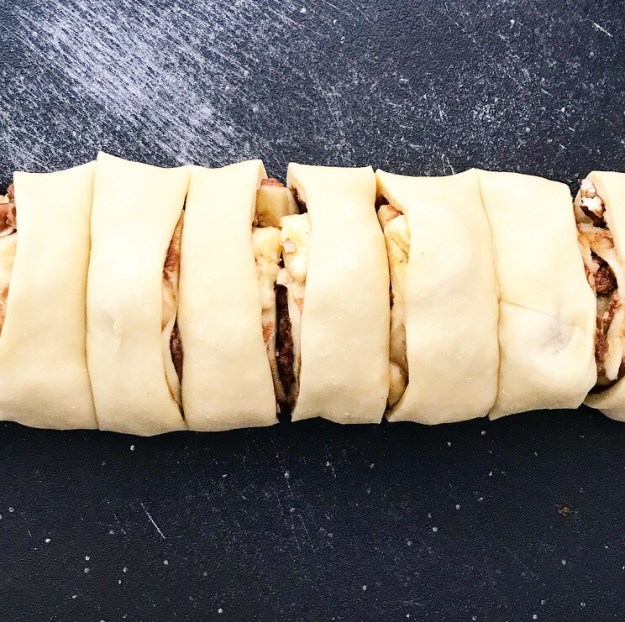 to arranging them over the sticky butterscotch and pecans…
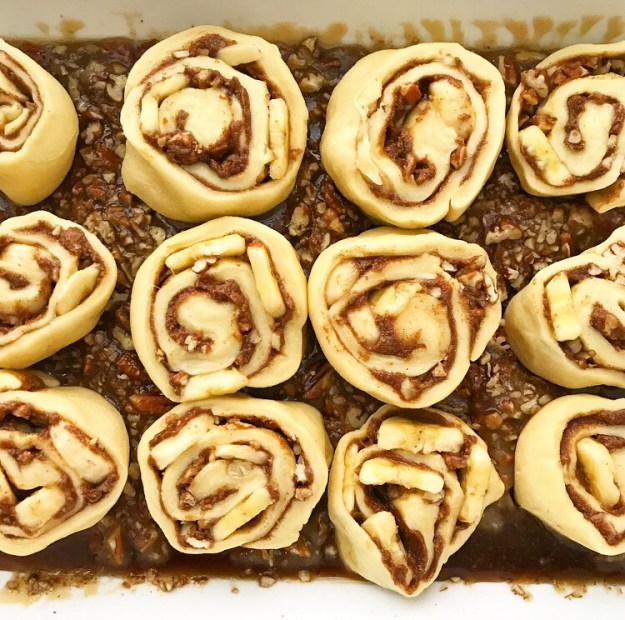 to an hour later, when they’re soft and puffy…
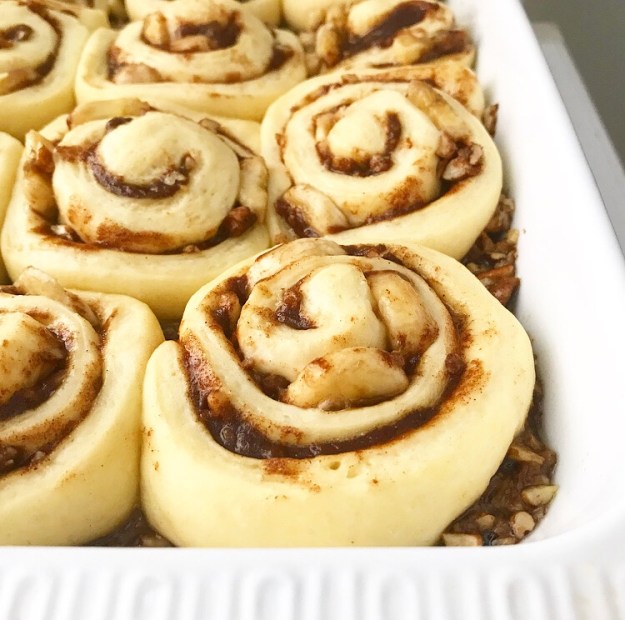 to when they’re golden and bubbly, fresh from the oven.
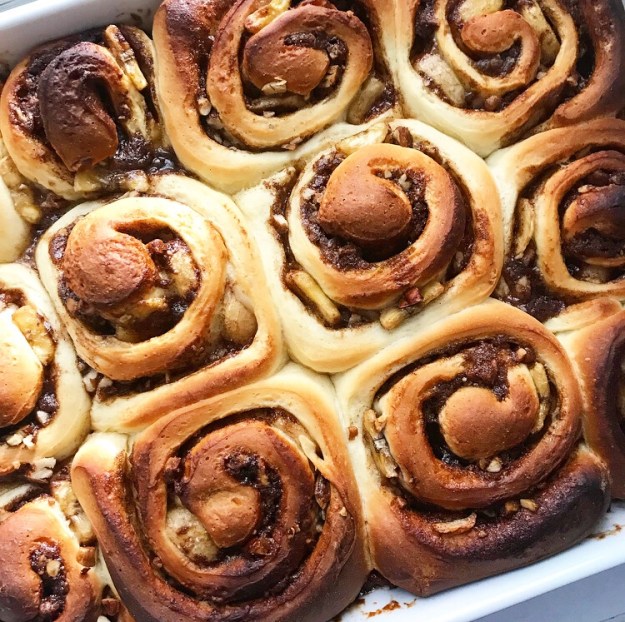 But none of that can do justice to the moment the pan is inverted to reveal a dozen warm Banana Pecan Sticky Buns dripping with butterscotch and clustered pecans.
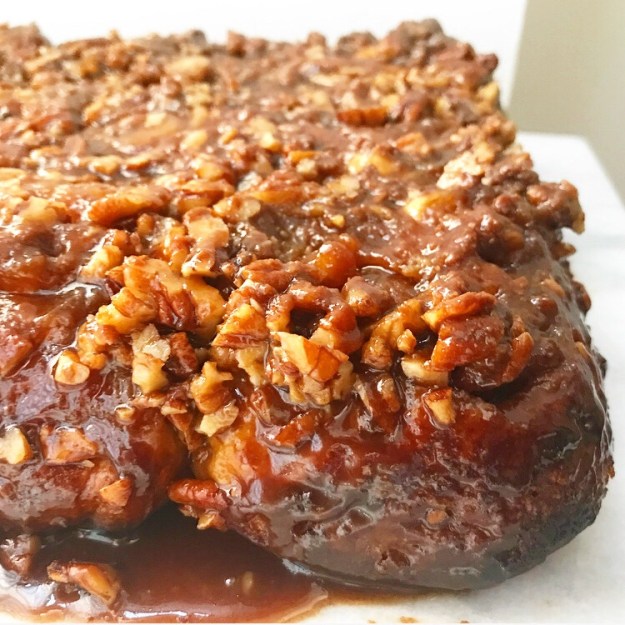 Or that moment when you take a bite and the combination of pastry, cinnamon, banana, pecan, and butterscotch is almost enough to make you cry. But not really.
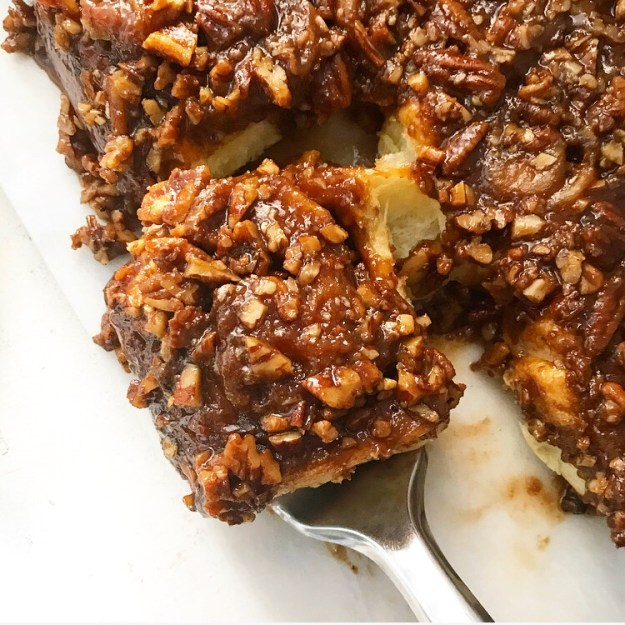

 I guess you’ll just have to make them for yourself. Then you’ll understand.
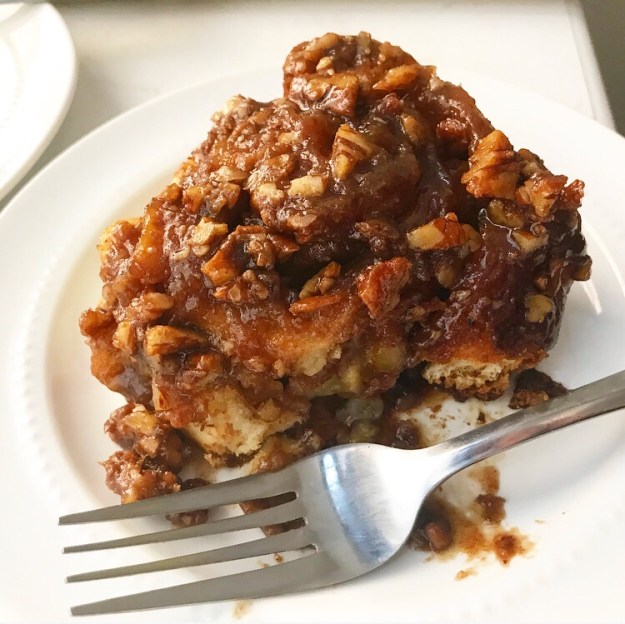
 As with everything else in life, patience is a huge part of being a food blogger. For instance, I first made a version of these cookies for an order last April and knew immediately that I wanted to put them on the blog…but who eats shortbread in April?
 I’m sure someone does, but most everybody I know reserves it for Christmas, so I waited. And then December came and went, and nary a shortbread made an appearance on this blog. I suppose I could have held out for the end of the year, but instead I’m making shortbread for Valentine’s Day and you should too.
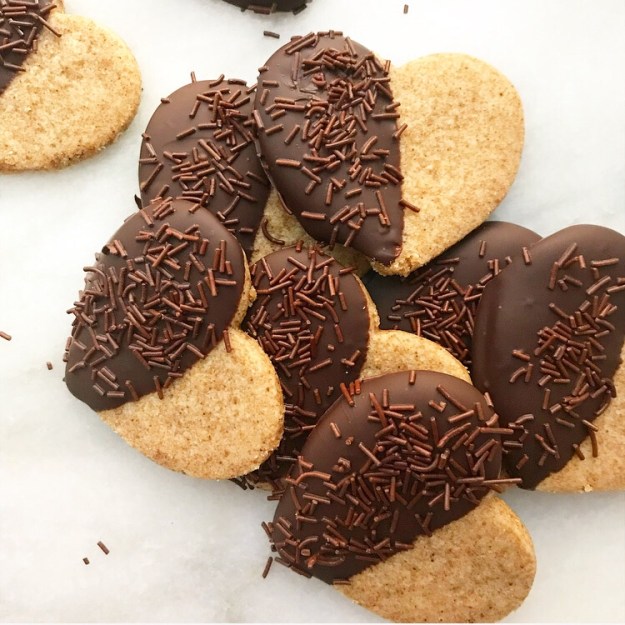
 I mean, all
 This version is made with brown butter. It’s one of my very favorite ingredients (see
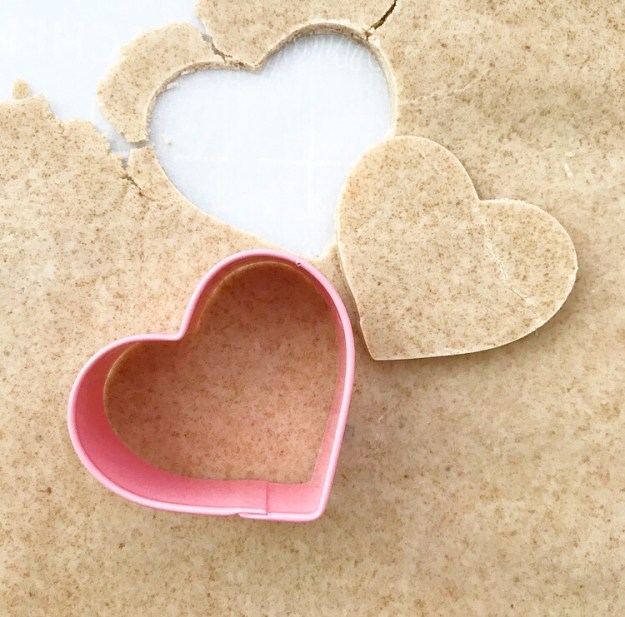
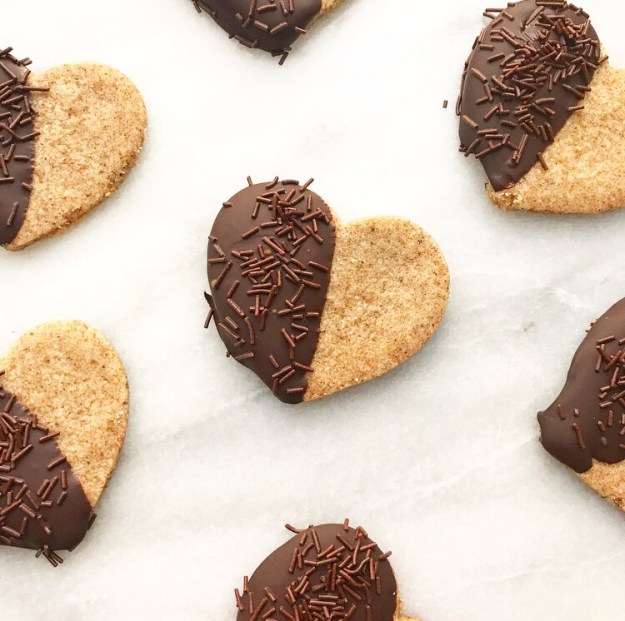
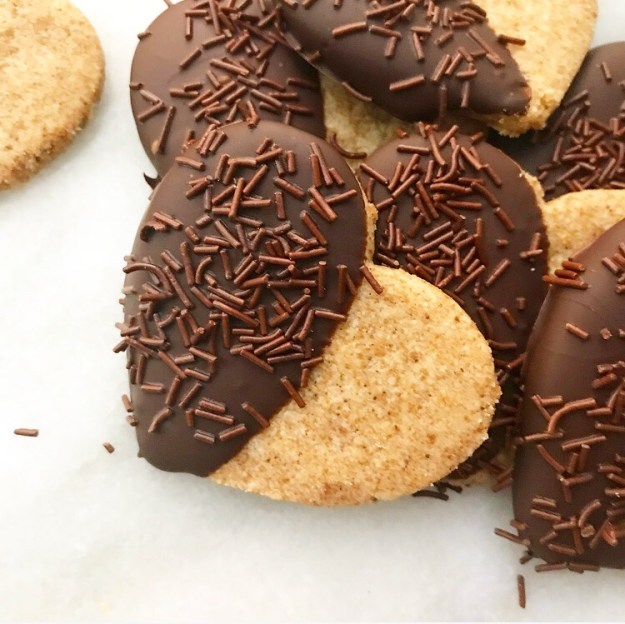
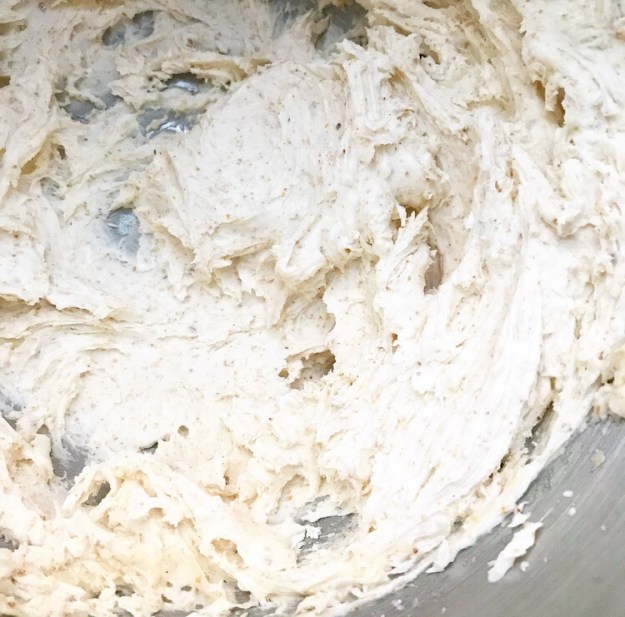
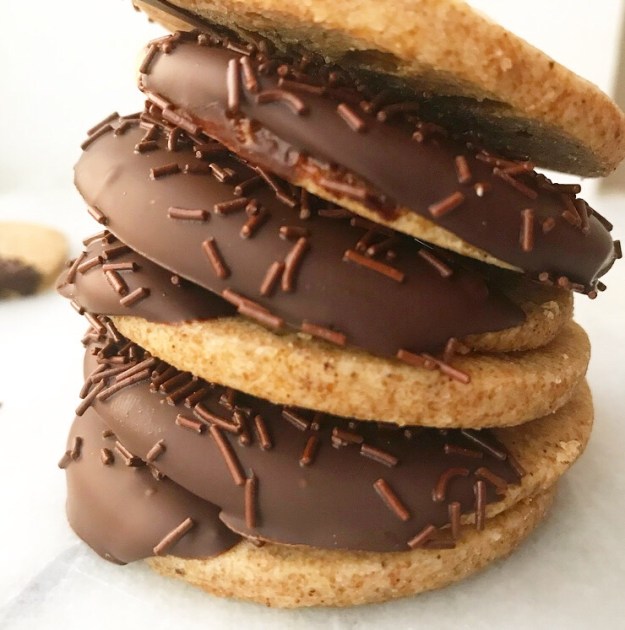
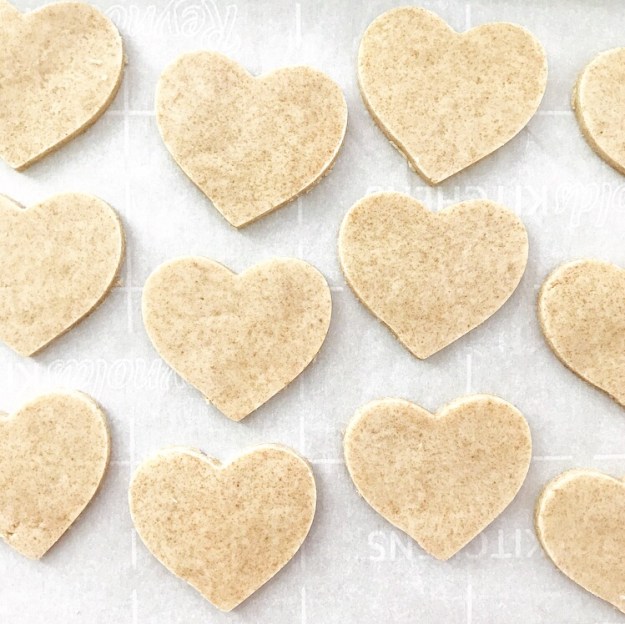 Brown butter is good in basically everything, but it really shines in these simple six-ingredient cookies. See those dark specks? Those are browned milk solids—tiny bits of flavor alllllll over the place, y’all!
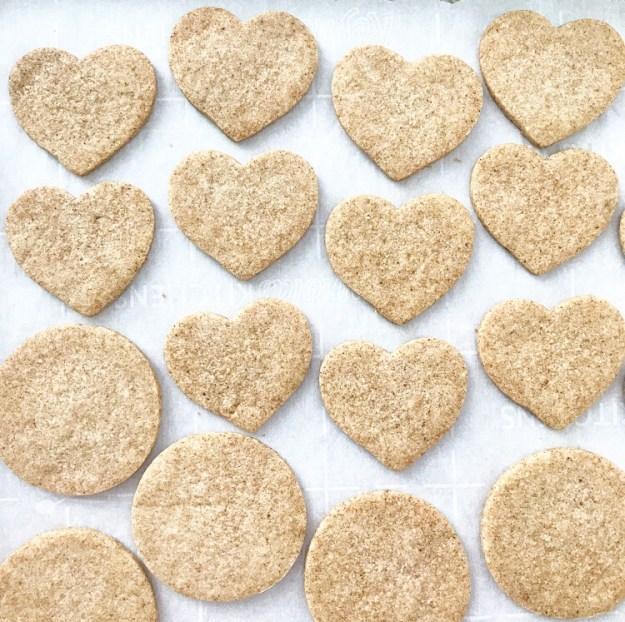
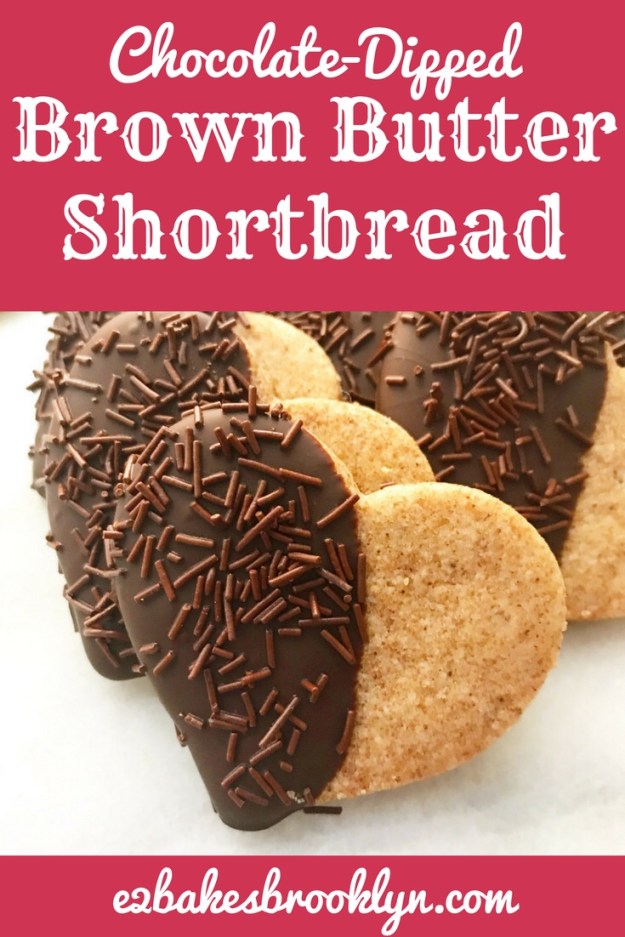
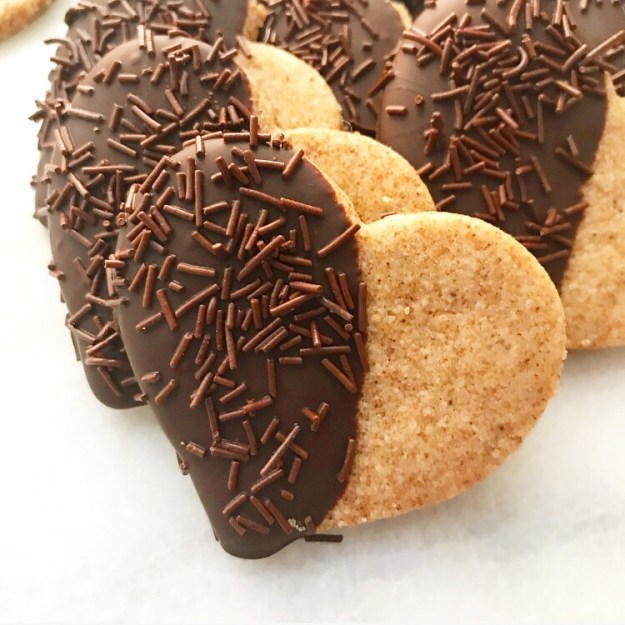
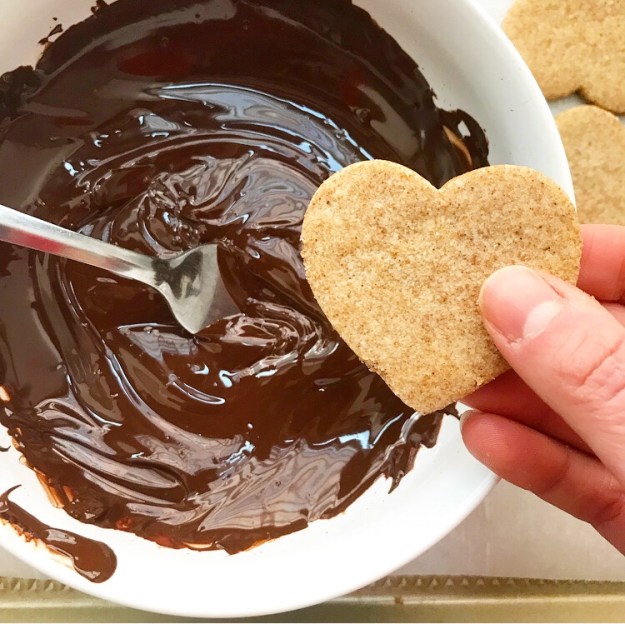 And then, as if things could possibly get better, the baked shortbread are dipped in melted dark chocolate.
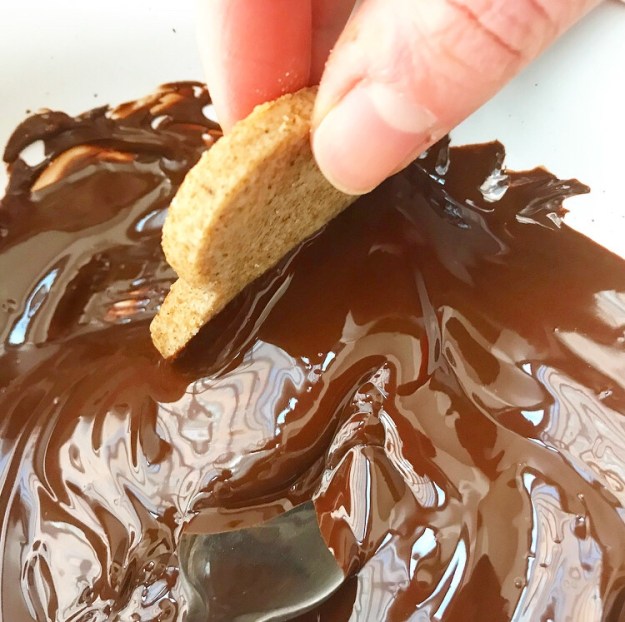 Tender, buttery, melt-in-your-mouth brown butter shortbread dipped. in. chocolate.
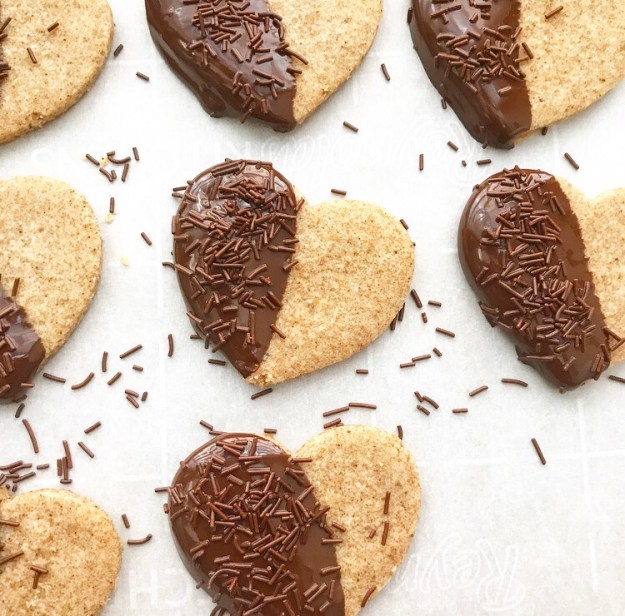 Oh my word.
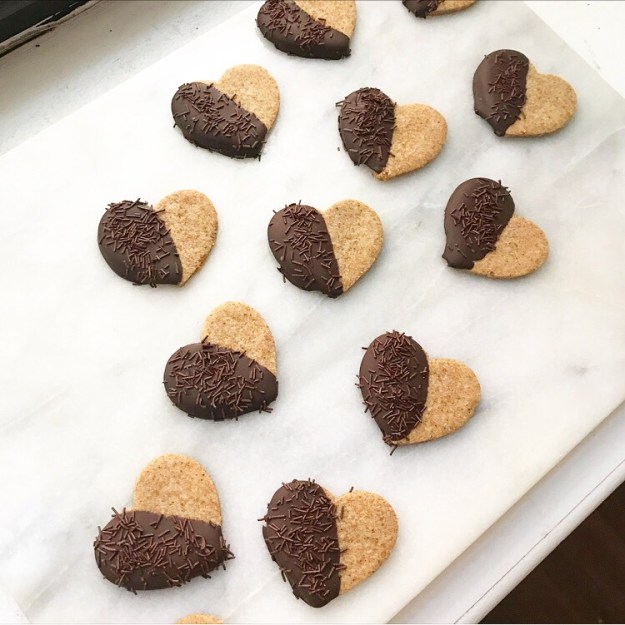 You could certainly leave the chocolate half plain, but I am not the sort of baker who leaves things plain. I used my fanciest chocolate sprinkles here (they’re called
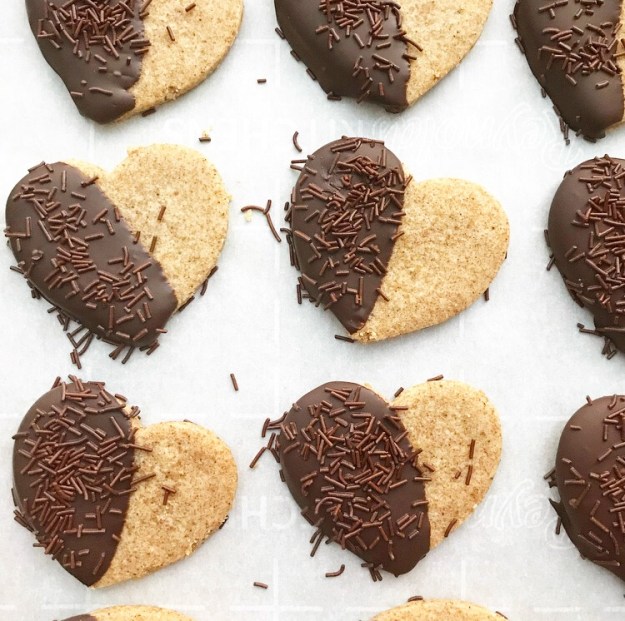
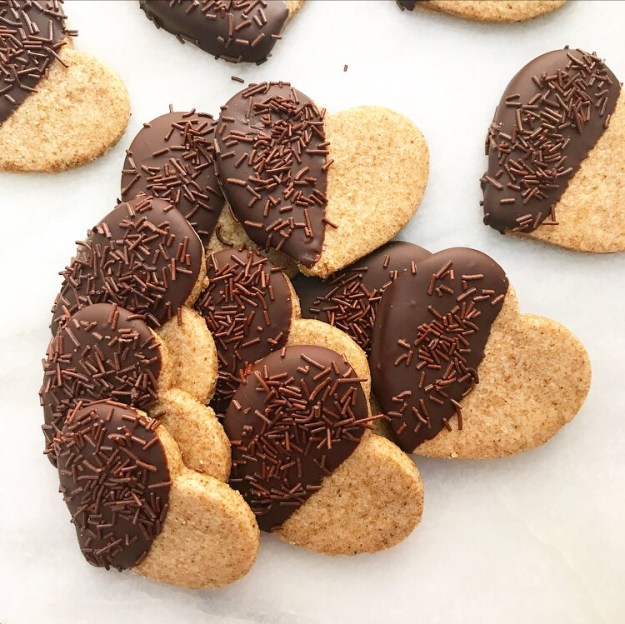 There’s something luxurious about the name of this recipe, and they certainly look fancy, but I assure you that these Chocolate-Dipped Brown Butter Shortbread are as easy as they are delicious. I made them five times this week (and in multiple shapes!), so I know.
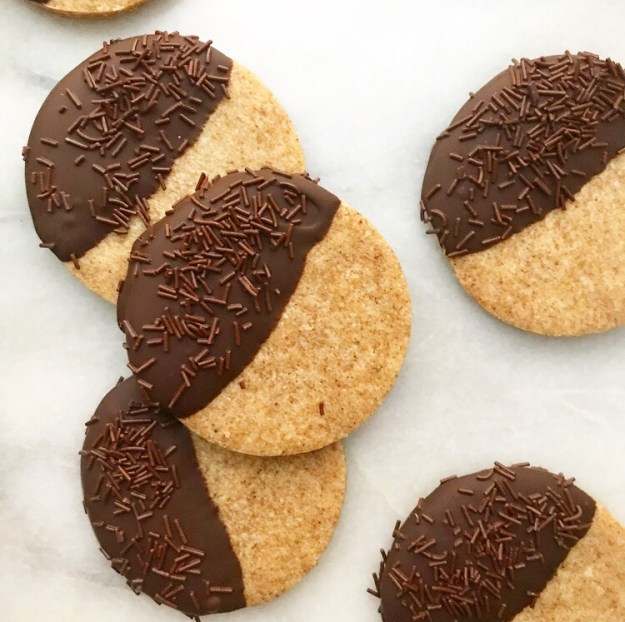
 Another thing I know? If someone presented me with a batch of these, I’d definitely feel loved.