 Does anyone else think it’s weird that strawberries are considered Valentine’s Day-appropriate? I mean, I get that they’re an aphrodisiac and that their red color goes with the whole lovey-dovey puffy heart aesthetic of the holiday, but strawberries aren’t in season in February.
 Before I go any further: yes, I know that we live in a time where fresh strawberries are available year-round. I saw huge displays of them at Trader Joe’s yesterday. Available or not though, the fact remains that a mid-winter strawberry will never be as good as one you have in June. Period. End of story.
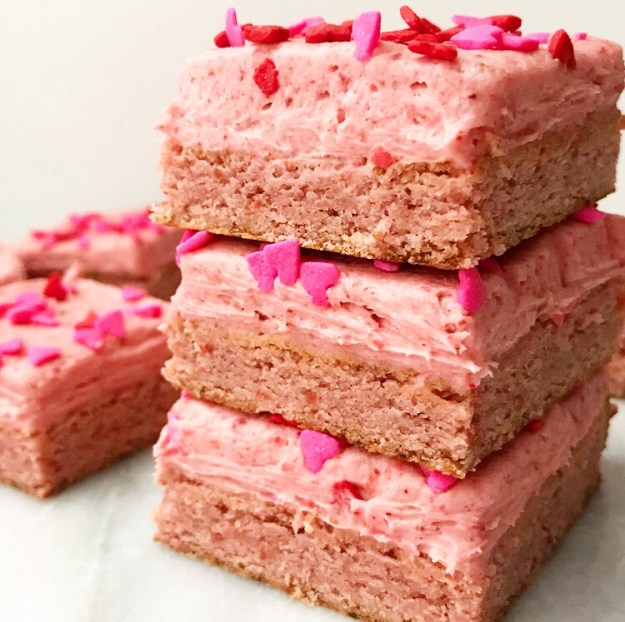
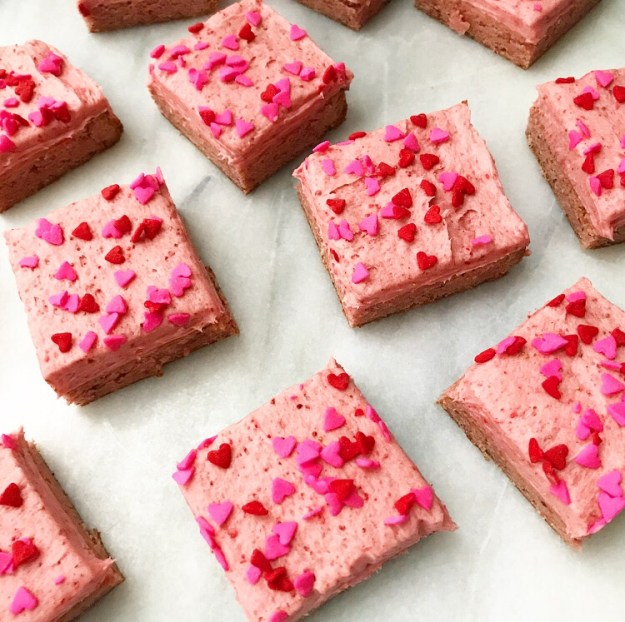
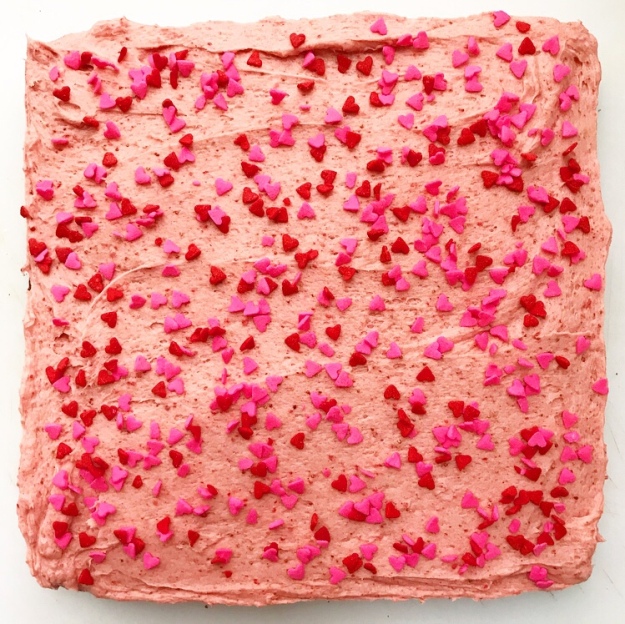
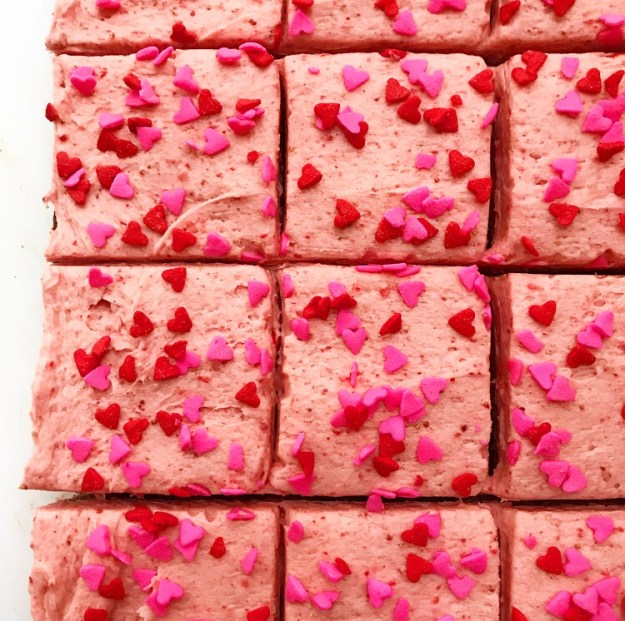
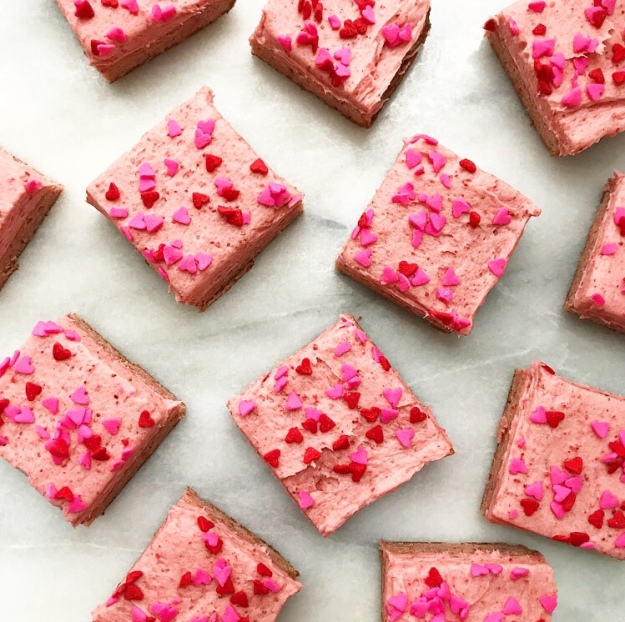
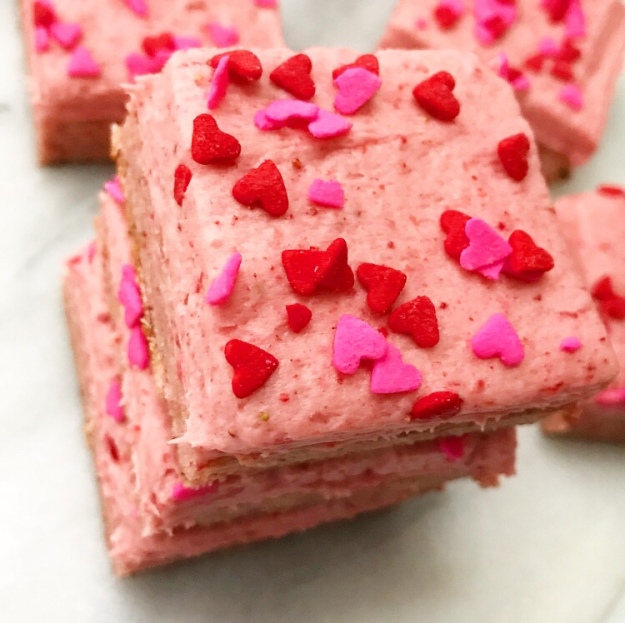
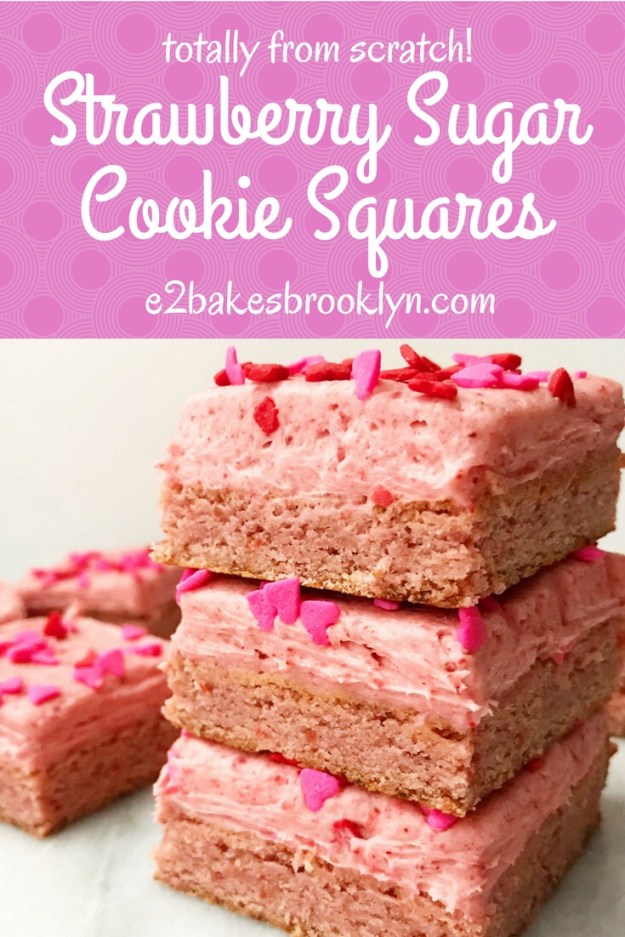
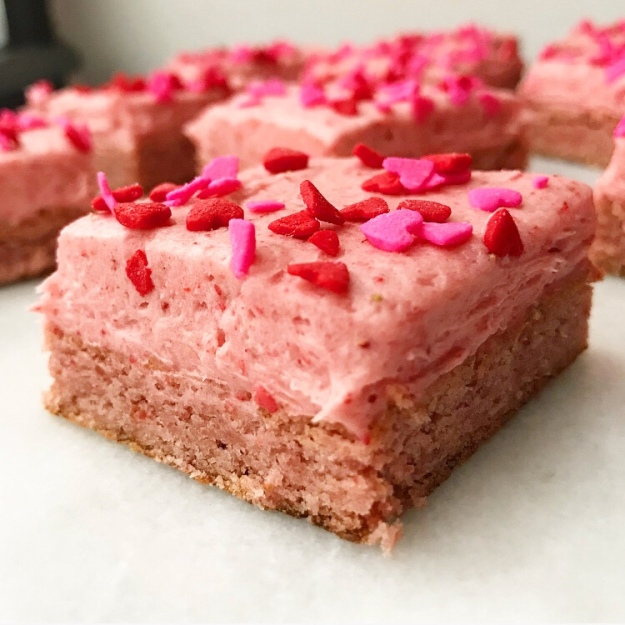 All that said, today I’m bringing you some Strawberry Sugar Cookie Squares. They may not be seasonal, but they are pink, fabulous, easy, and totally perfect for Valentine’s Day.
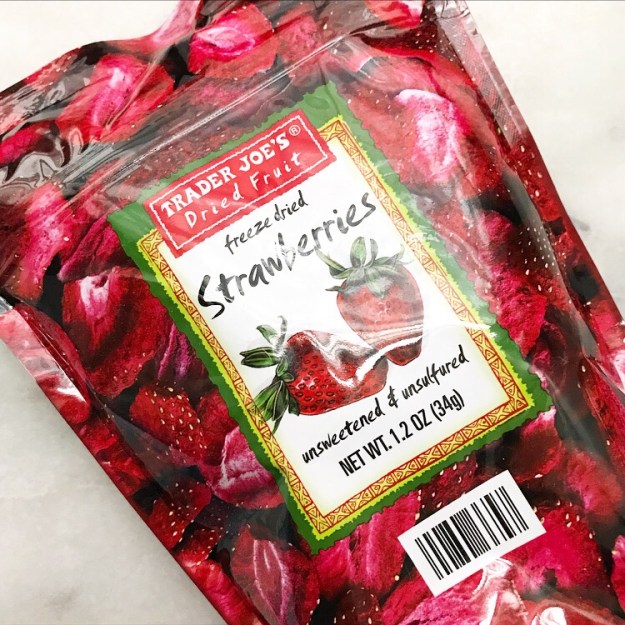
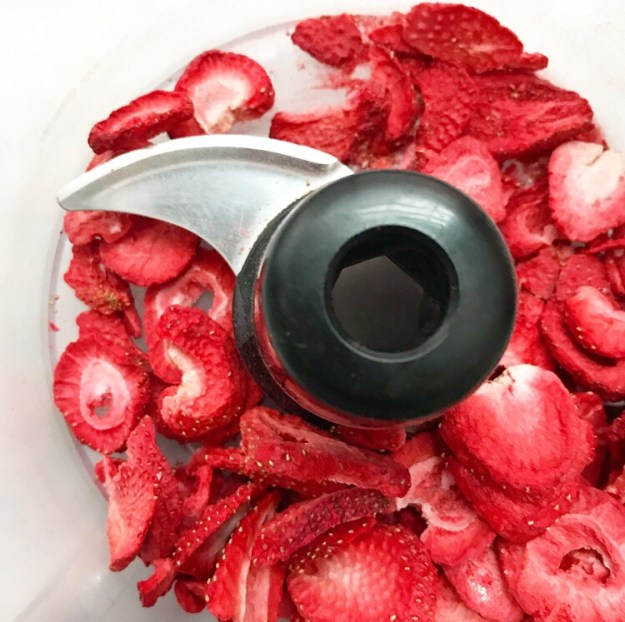
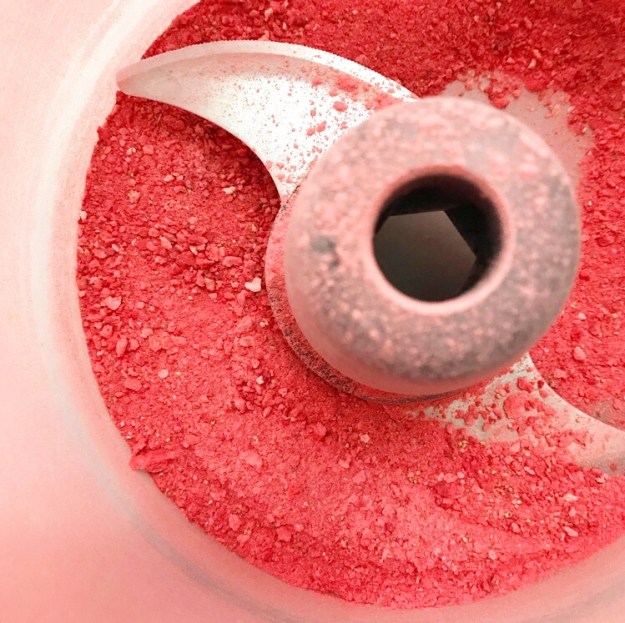 The strawberry flavor in these sweet squares comes from freeze dried strawberries. Their concentrated flavor, lack of moisture, year-round availability, and consistent quality make them perfect for all sorts of baked goods, especially cookies and bars. Here they’re pulverized in a food processor until they’re nothing but powder and then whipped into sugar cookie dough and a batch of fluffy buttercream.
 These squares must be baked to be believed—if you’re into strawberry desserts, this recipe is absolutely for you. The strawberry flavor is decidedly real, unlike anything you’ll find in a boxed mix.
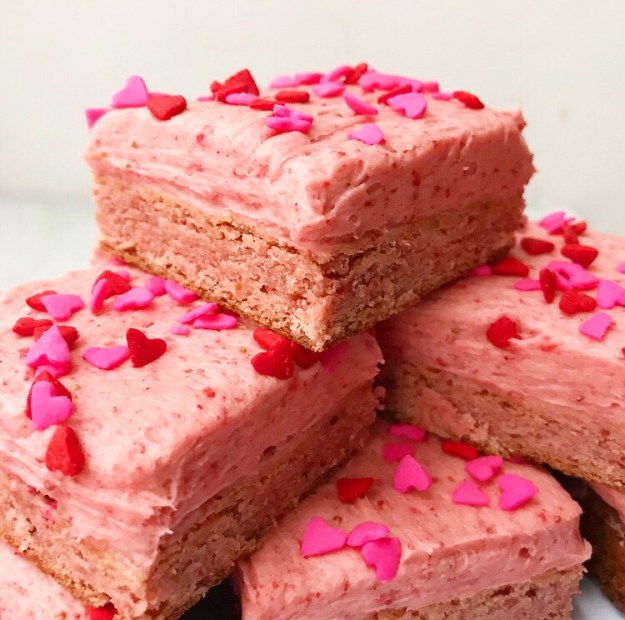 Oh, did I mention that there’s no food coloring in these bars? That happy pink color is all from the pulverized strawberries 🙂
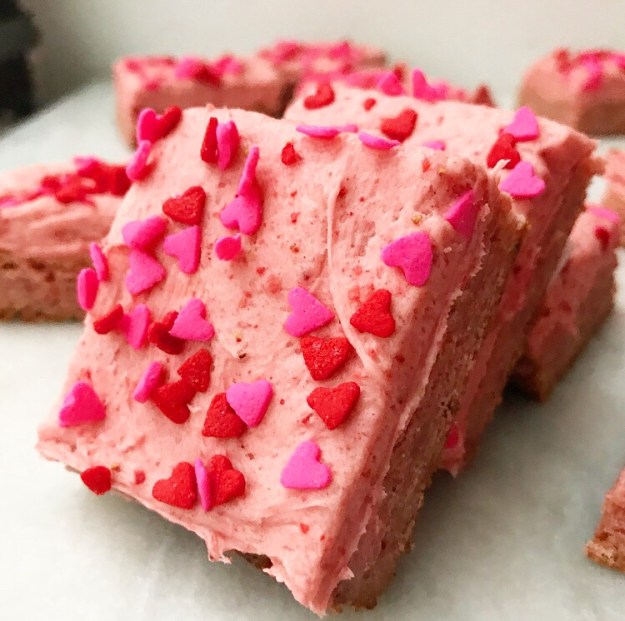 Well, I suppose there is food coloring in the sprinkles, but they’re just so cute! Feel free to leave them off though if sprinkles aren’t your thing.
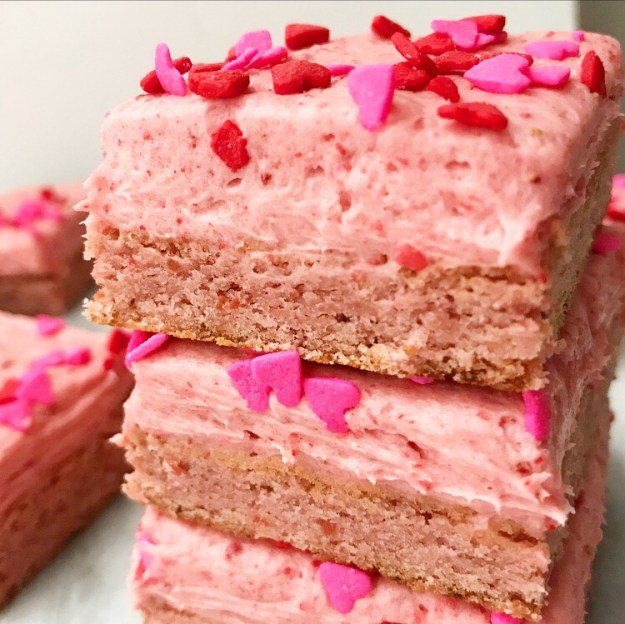
(They are definitely my thing. They are basically my favorite thing.)
 Make these Strawberry Sugar Cookie Squares for someone you love ❤
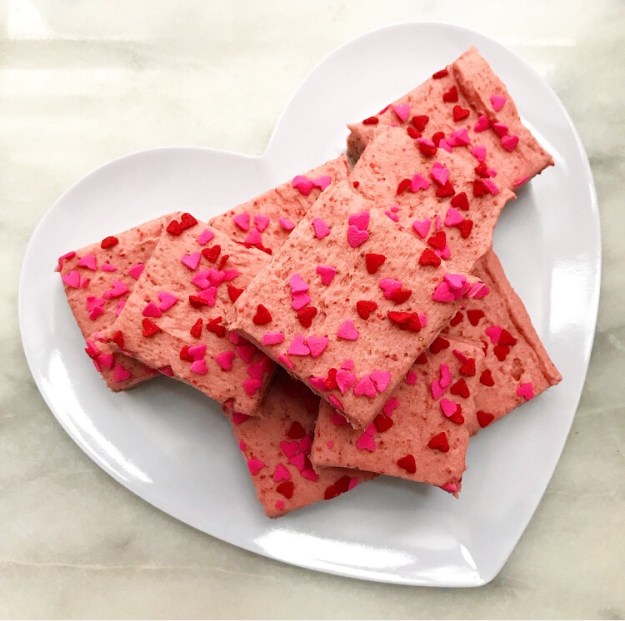
Strawberry Sugar Cookie Squares
makes one 9-inch pan, about 9-16 bars
Cookie Layer:
1 1.2-ounce package freeze dried strawberries
1/2 cup (1 stick) unsalted butter, softened to room temperature
3/4 cup granulated sugar
1 large egg + 1 large egg yolk, room temperature
2 teaspoons pure vanilla extract
1 1/3 cups all-purpose flour
1 tablespoon cornstarch
1/2 teaspoon baking powder
1/4 teaspoon Kosher or sea salt
Frosting:
1 1.2-ounce package freeze dried strawberries
1/2 cup (1 stick) unsalted butter, softened to room temperature
2 cups confectioners sugar
pinch of Kosher or sea salt
2 teaspoons pure vanilla extract
5-6 tablespoons heavy cream
sprinkles, for decorating (optional)
Preheat oven to 350F. Line a 9-inch square pan with foil and grease lightly. Set aside.
Make the cookie layer. Place freeze dried strawberries in a food processor and process until they are powder, about 30 seconds. Set aside.
In a medium-large mixing bowl, beat butter with an electric mixer until fluffy, about 2 minutes. Beat in sugar, followed by egg, yolk, and vanilla. Add strawberry powder, flour, cornstarch, baking powder, and salt, and mix until combined. Dough will be thick.
Press dough into prepared pan with a silicone spatula or lightly-oiled hands. Bake 20-22 minutes, or until no longer wet-looking. A toothpick inserted in the center should come out clean. Let cookie layer cool completely in the pan on a rack.
Make the frosting. Place freeze dried strawberries in a food processor and process until they are powder, about 30 seconds.
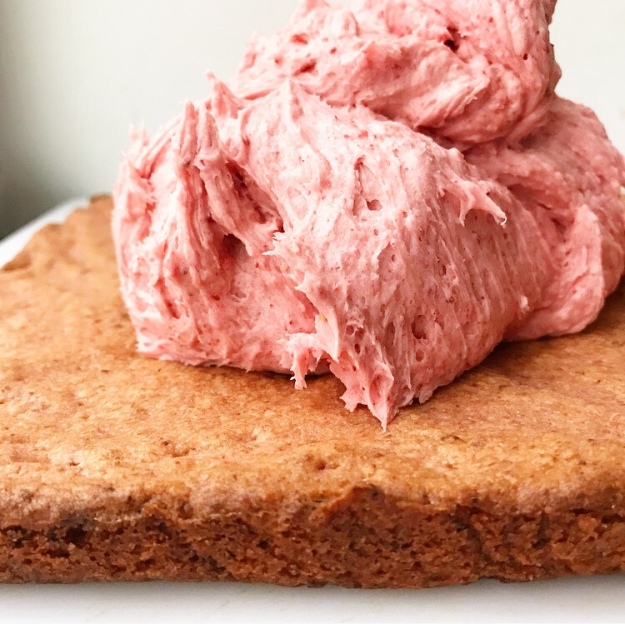
In a medium-large mixing bowl, use an electric mixer to beat butter until light and fluffy, about 2 minutes. With the mixer on low, beat in confectioner’s sugar, strawberry powder, and salt. Mixture may be alarmingly crumbly—this is normal. Add vanilla and 5 tablespoons of heavy cream. Beat until very fluffy, about 2 minutes. If desired, mix in another tablespoon of heavy cream until the proper consistency is reached.
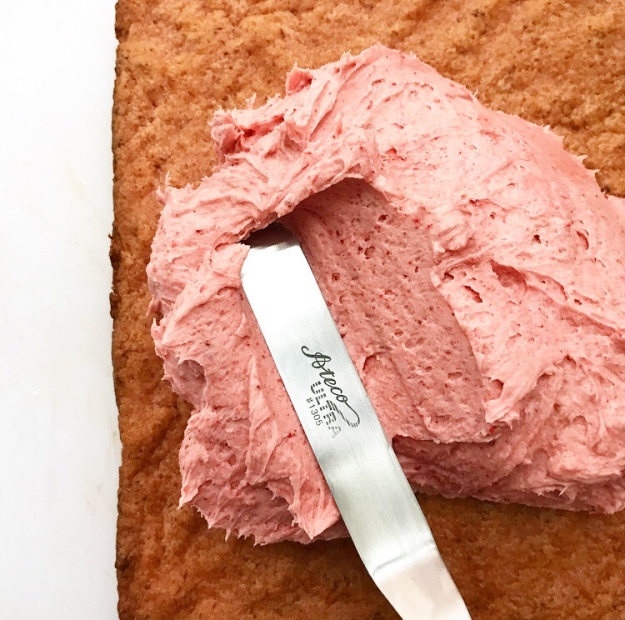
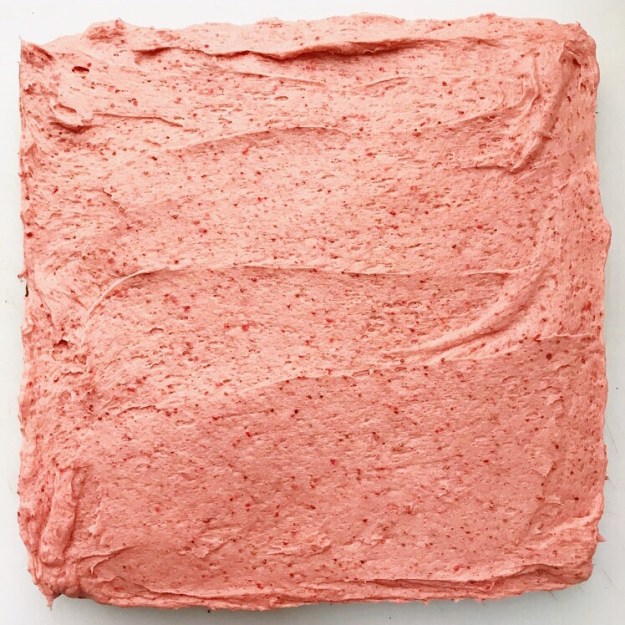
Remove foil from the cookie layer and place on a cutting board. Spread a thick layer of frosting over the cookie later. Top with sprinkles, if desired. Let sit at room temperature for minutes, or until frosting crusts a bit.
Use a large, sharp chef’s knife, slice into squares. Wipe knife clean between cuts.
Serve squares. Leftovers will keep in an airtight container at room temperature for up to two days or in the refrigerator for up to five.
 Have you ever been to New Orleans? I have a few times, including a three week stint of post-Hurricane Katrina relief work, but I’ve never been for Mardi Gras.
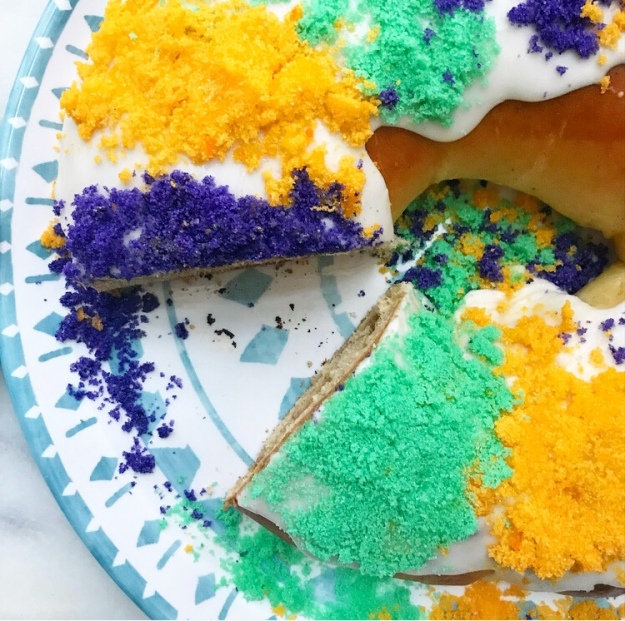 As a college student in Texas, it occurred to me that it might be a fun thing to do once (I’m very into road trips), but then I remembered that I am a tried and true introvert and that spending a weekend in a loud, crowded city might be my idea of hell…
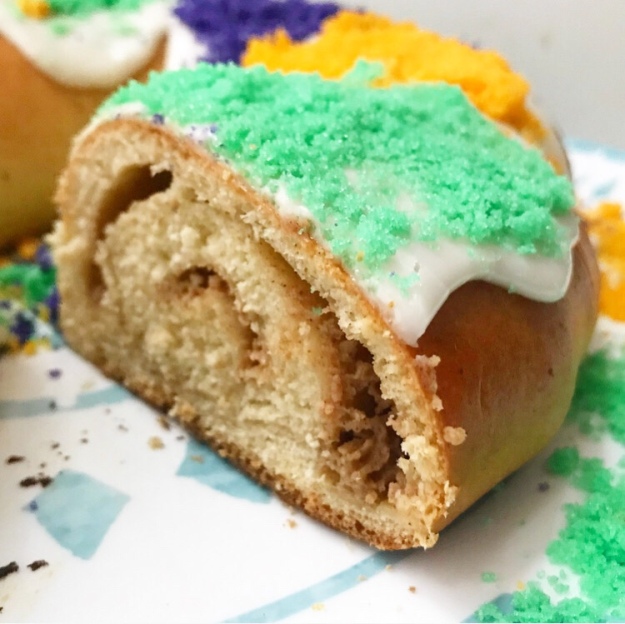
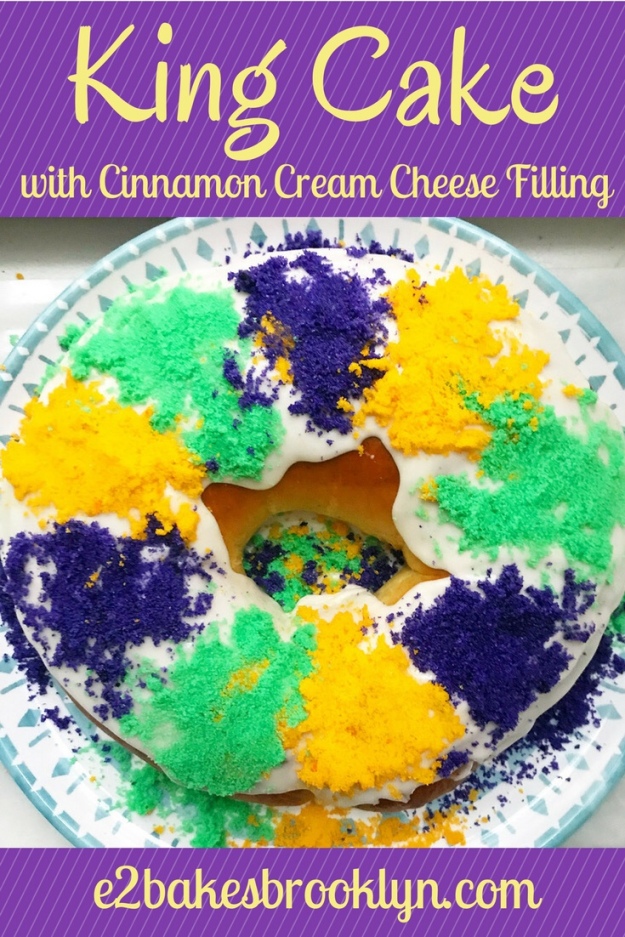
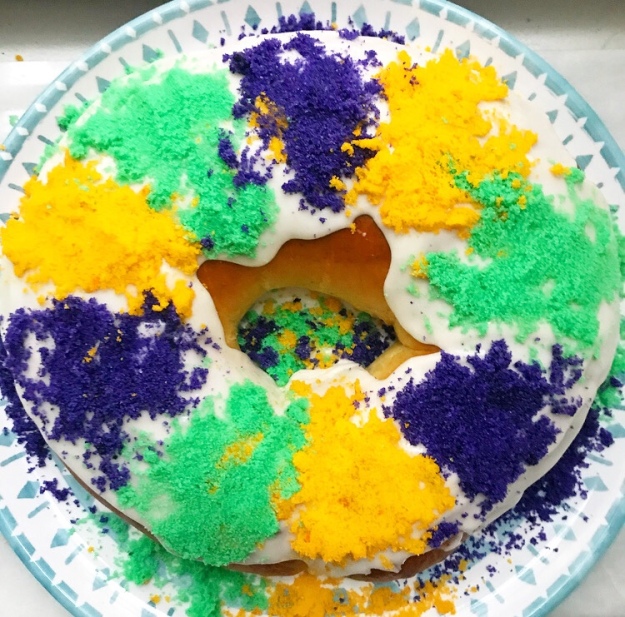 While I love the idea of a whole state with its own unique way of celebrating a holiday, my party days are well behind me and I don’t envision any circumstance in which I’ll ever find myself in Louisiana in early February. But I love King Cake. I mostly associate it with Epiphany (or Three Kings Day or Twelfth Night or January 6th, or whatever you call it), but I’m okay for breaking with personal traditions if it means I get to eat this:
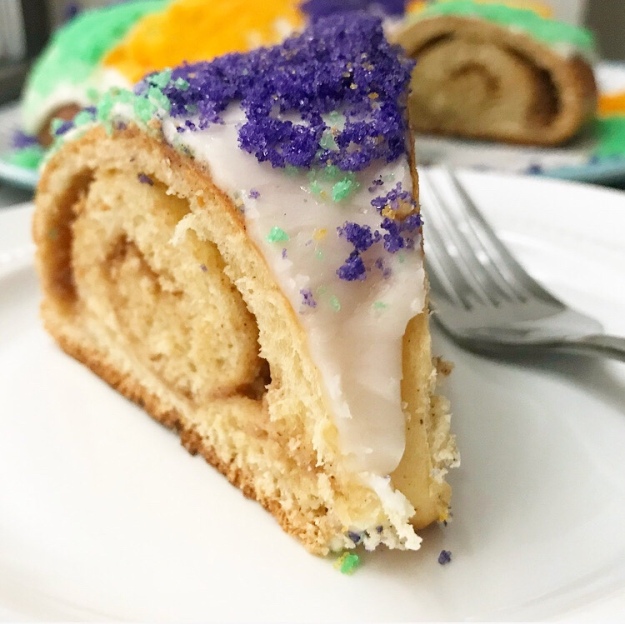 If you’ve somehow never had King Cake, you’re in for a treat. It’s a fluffy yeasted coffee cake served in Louisiana (and lots of other places) in the religious season between Christmas and Lent. To describe King Cake plainly, it’s sort of like
 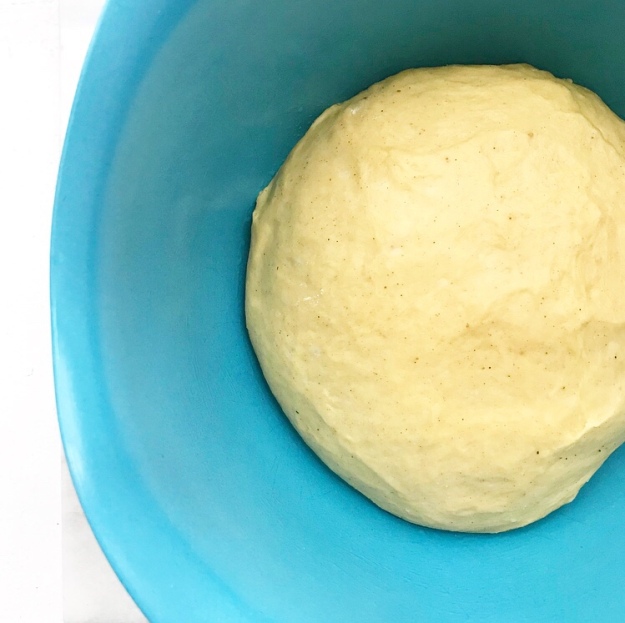 From what I can tell from all my research, if you have a flavor preference, there is a King Cake recipe out there for you. The traditional filling is a mixture of butter and cinnamon-sugar (again, like cinnamon rolls), but I have seen pecan praline, strawberry, and cherry-almond variations. I have become entranced by the idea of cream cheese filling, so I did a little mash-up of my own: cinnamon cream cheese, y’all!
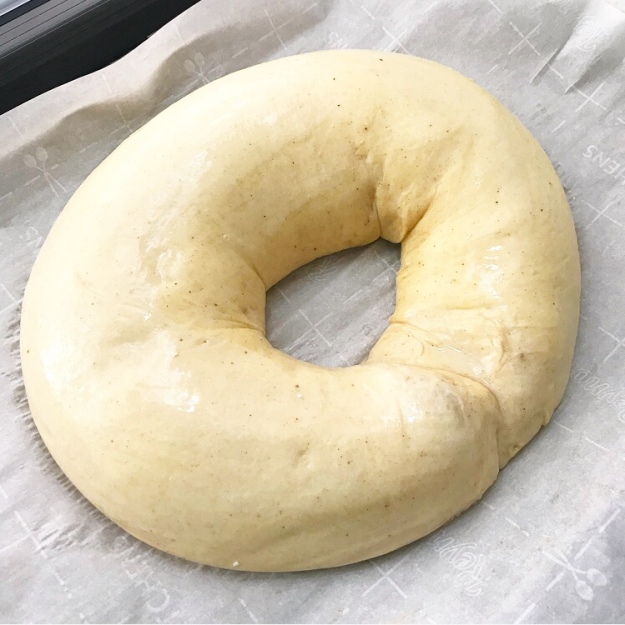
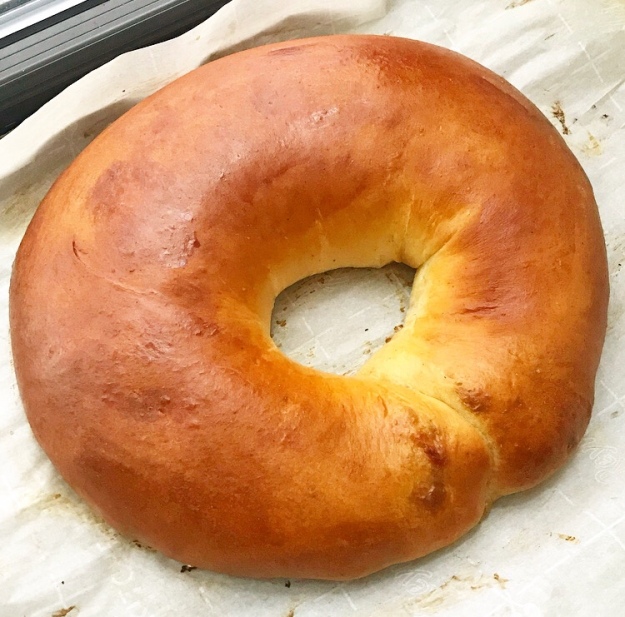
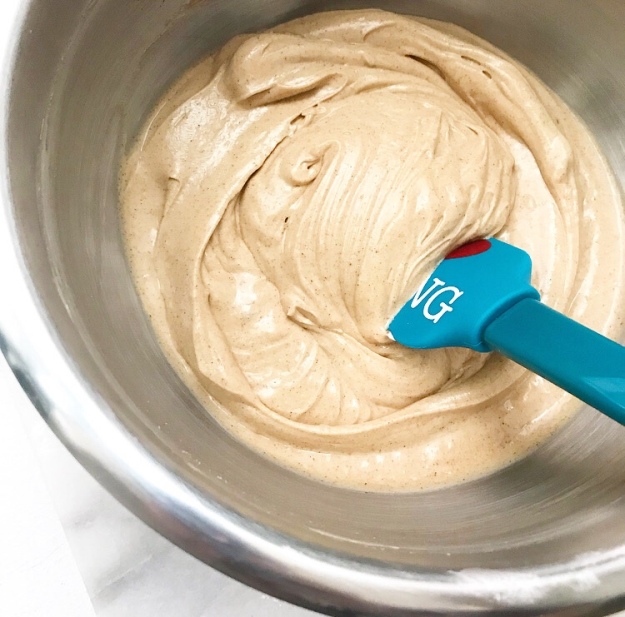 The filling is rolled up into the dough like it is in sweet rolls. The cylinder of dough is formed into a ring and set aside to rise for about an hour, until it doubles in size. Then it’s painted with an egg wash and baked until golden brown all over.
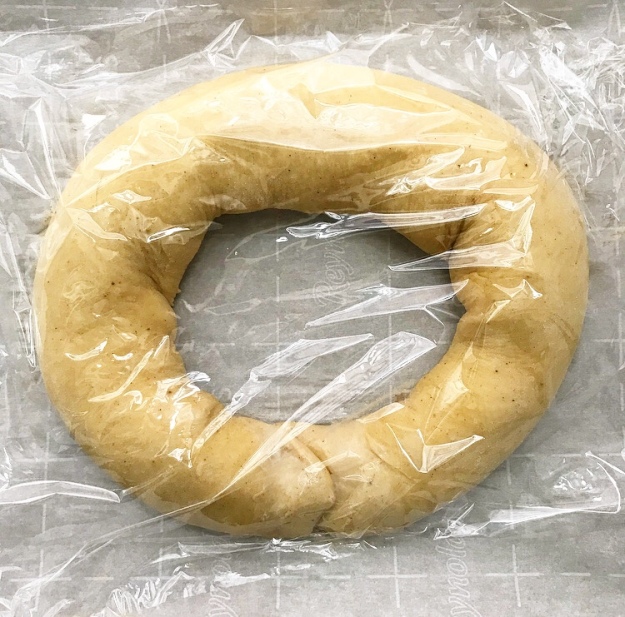
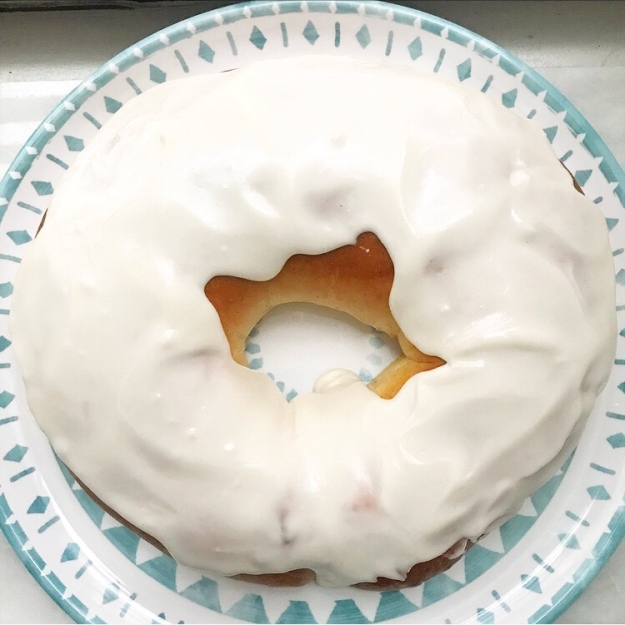
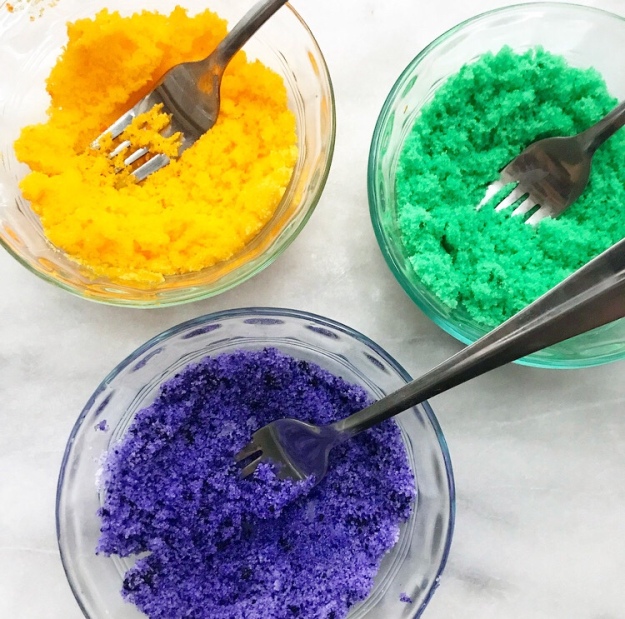
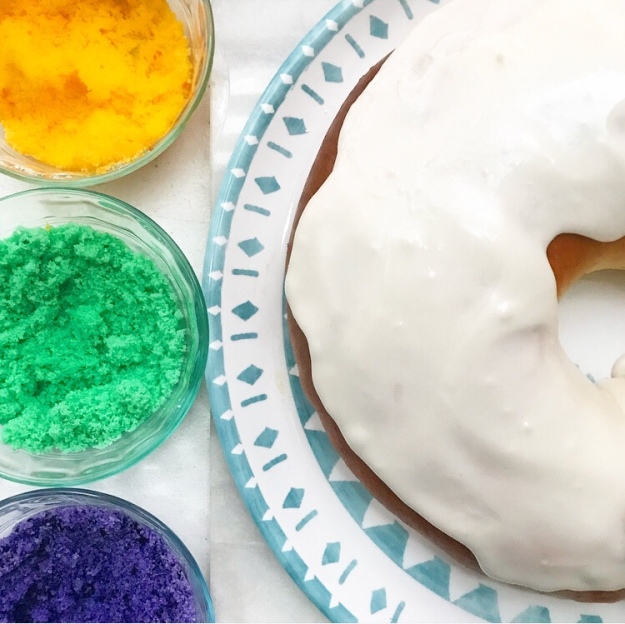
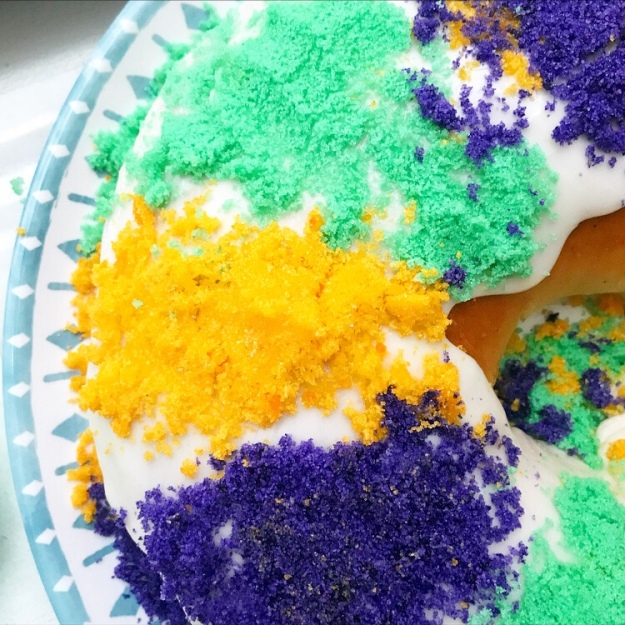
 King Cakes are traditionally decorated with a thick white icing and yellow, green, and purple sugars (representing power, faith, and justice, respectively). I had a hard time tracking down sugars in the appropriate colors, so I just stirred a few drops of food coloring into 1/3 cup increments of granulated sugar.
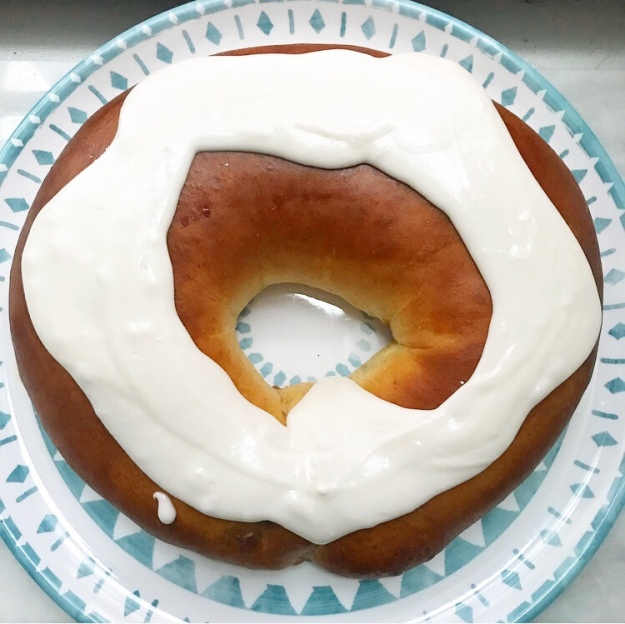
 A tiny plastic baby doll is also traditionally inserted into the cake after baking. The person who receives the slice with the baby doll is king/queen for the day and is responsible for procuring next year’s cake. I didn’t put a doll in this cake because I simply don’t have it together enough to remember to order things in time for scheduled blog posts. But anyway…
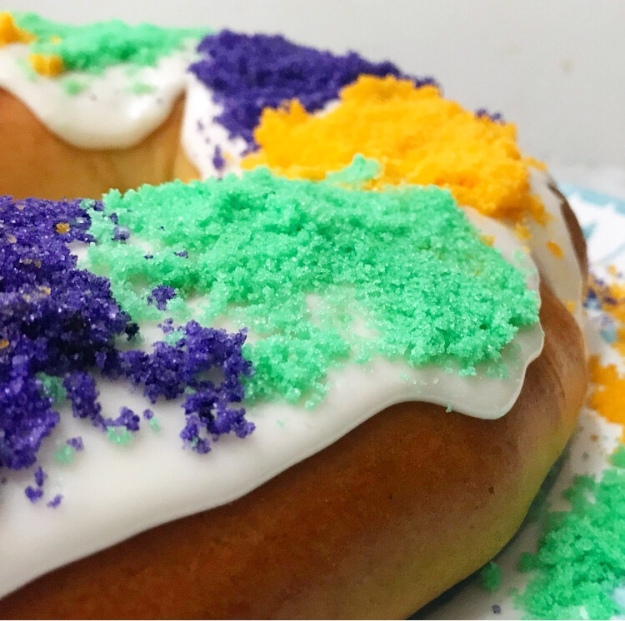 If you love the look of the golden cake, the white icing, and the sparkling, colorful sugars, just wait ‘til you slice it up.
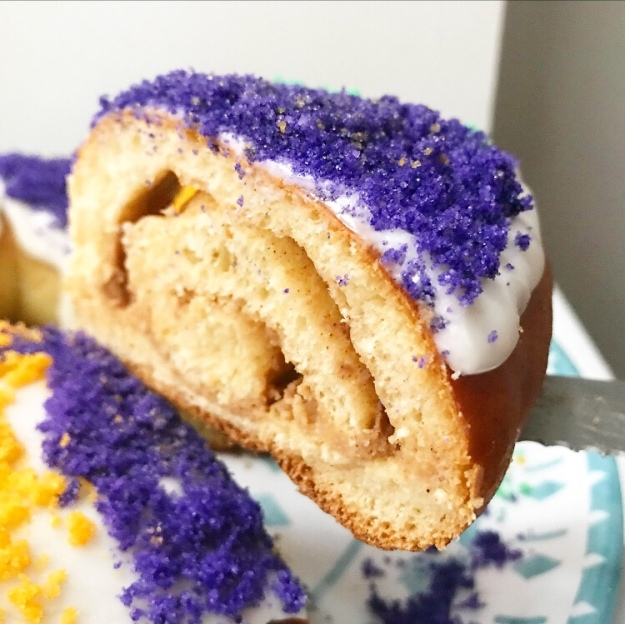 That swirl y’all! And the soft, fluffy interior! And the cinnamon in the cake and the filling! And the cream cheese! It’s a win all around 🙂
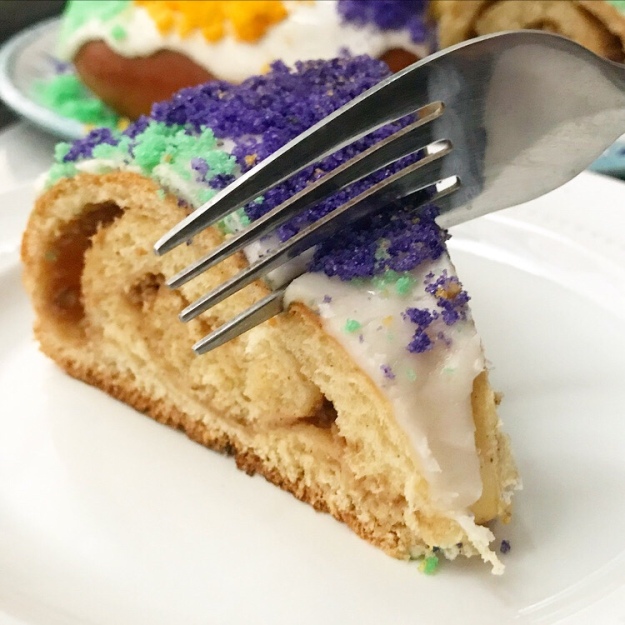 One last thing: this recipe makes two King Cakes. Before you click away, never to return, here is a list of reasons to have two King Cakes.
 It has come to my attention that a shocking amount of my friends and acquaintances have never attempted to roast a chicken. In fact, some have admitted to being terrified of the process. Not intimidated. Terrified.
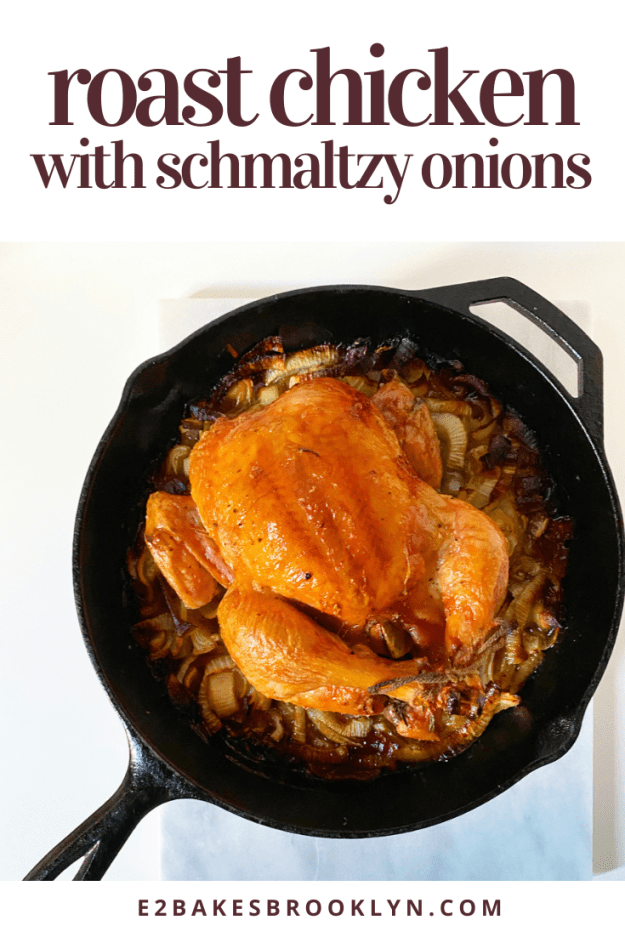
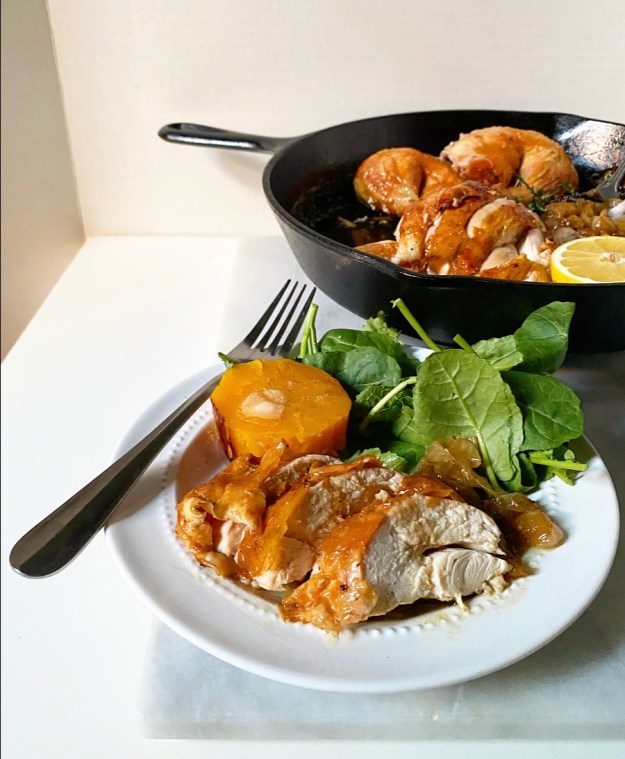 Here’s everything you’ll need to make a quality roast chicken: salt and pepper, olive oil, garlic, thyme (or rosemary), a lemon, a lot of onions, and a whole chicken.
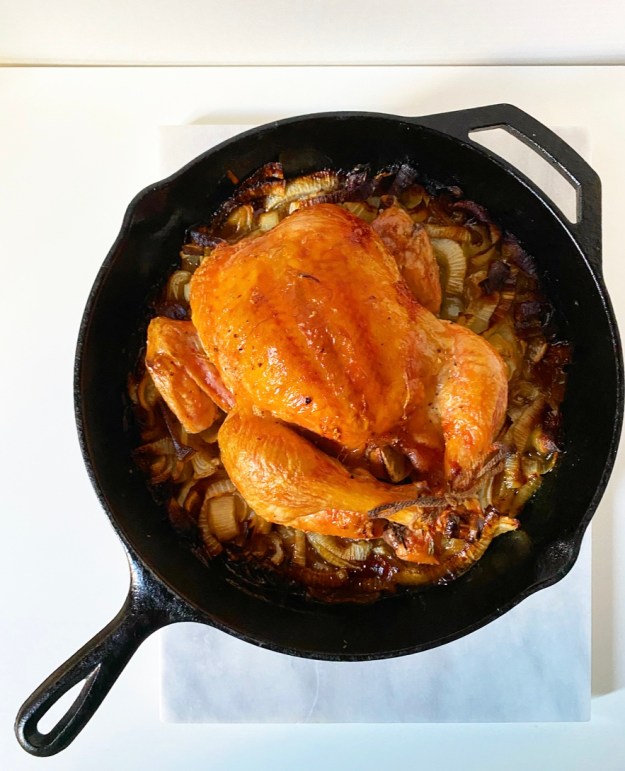
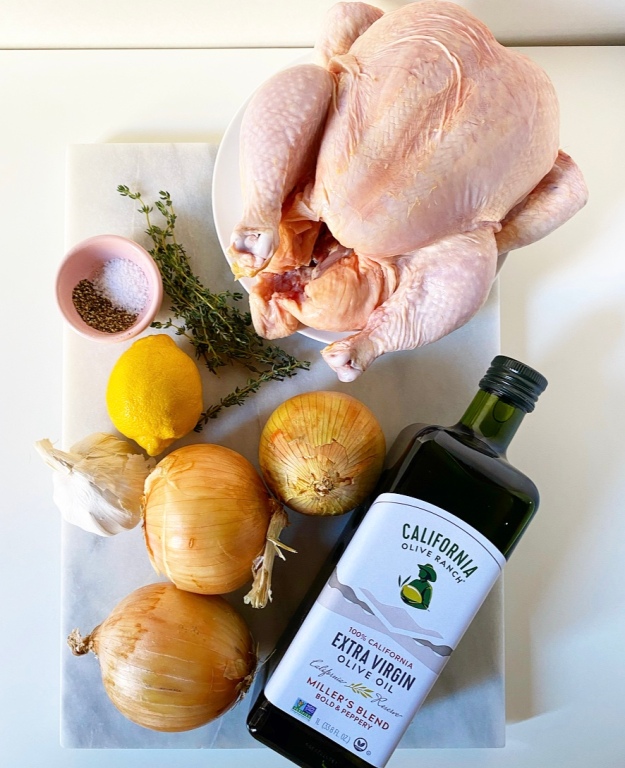 First things first—slice up the onions and toss them together in the pan. You want your pan to be almost full of onions.
 Stuff the lemon, garlic, and thyme in the cavity, and truss the legs (tie them together) if that’s your bag. Whether you choose to truss or not, the next step is to slide the chicken into a 450F oven. Yes, 450F. This initial burst of high heat helps the skin turn golden. As the cooking time moves on, the heat will be turned down to 400F. This keeps the chicken from burning or drying out throughout the long roasting time.
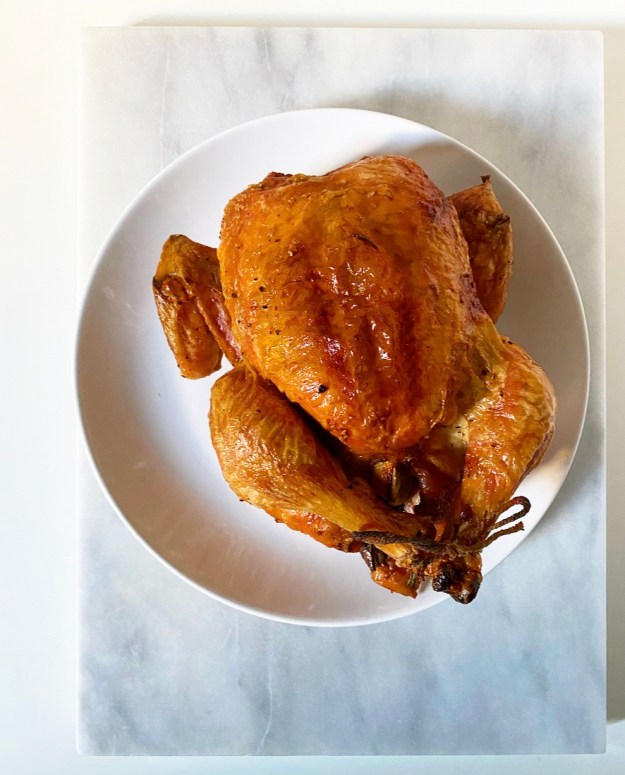 When you finally remove the chicken from the oven, it’ll be golden and beautiful. When I roast chickens, I nearly always get comments on how aesthetically pleasing they look.
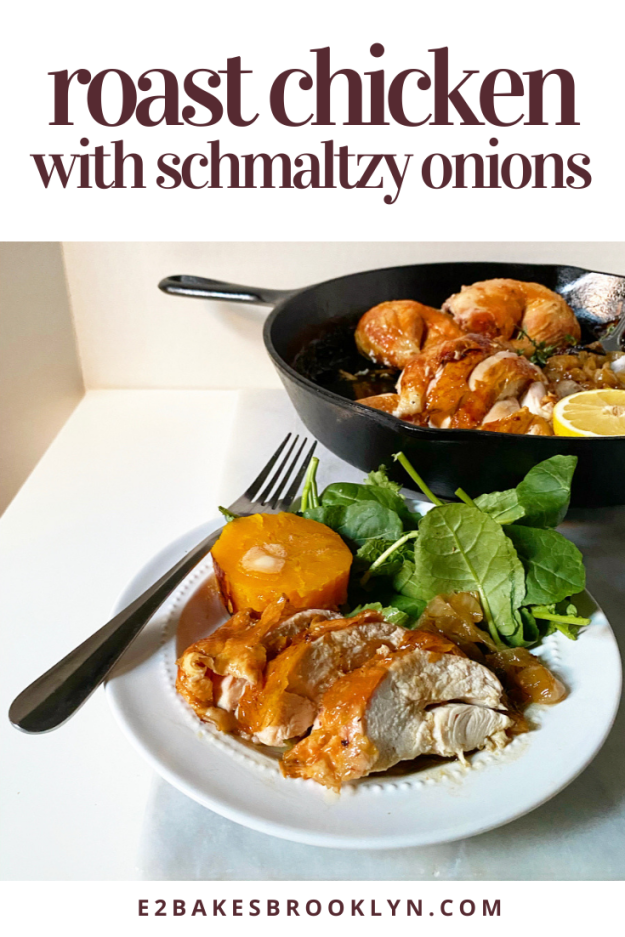
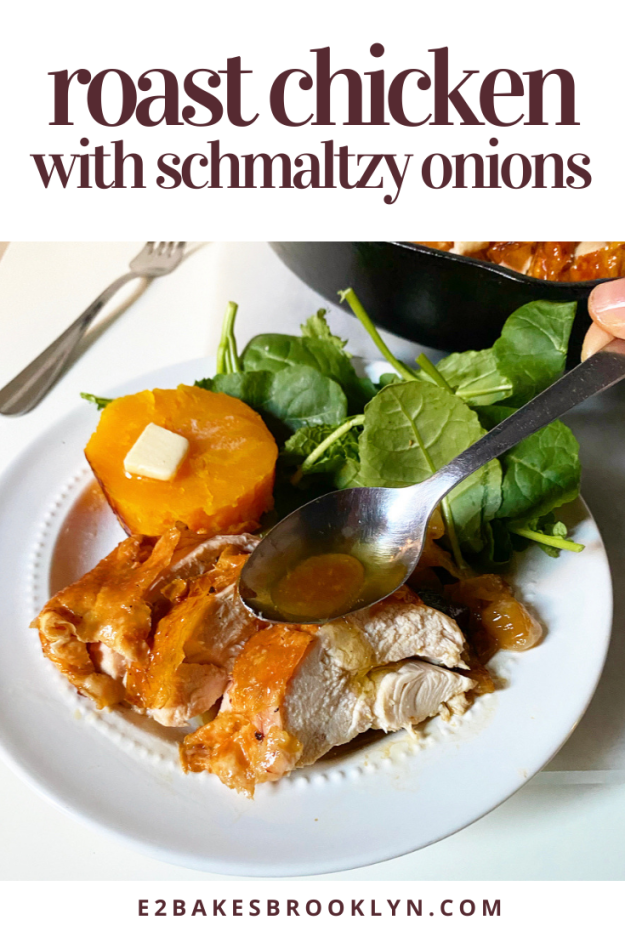
 But who cares about looks—it’s all about flavor! And this chicken has plenty of it. The skin is crispy, the meat is moist, and everything is well seasoned.
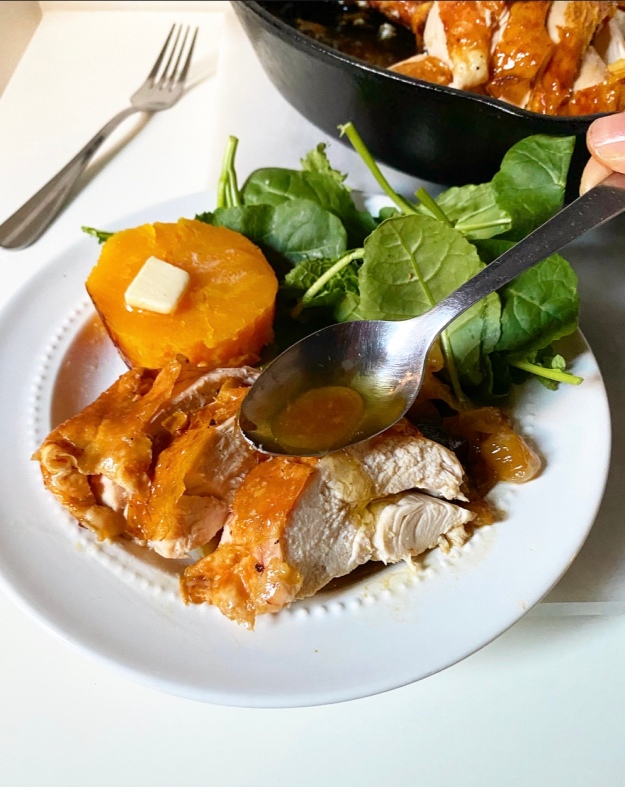 And that’s to say nothing of the soft roasted onions that are coated in rendered chicken fat (aka schmaltz). Seriously, if you’ve never tasted a sweet onion that’s been cooked in chicken fat, you’ve been deprived.
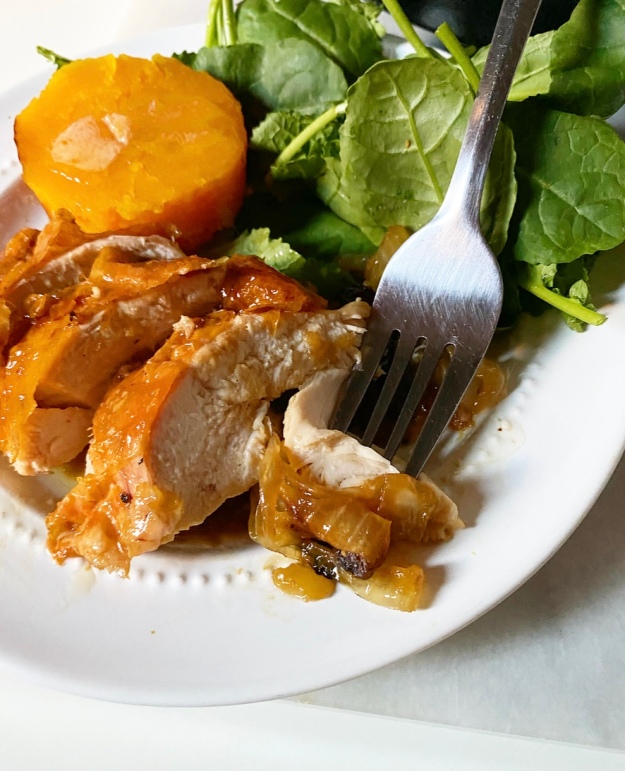
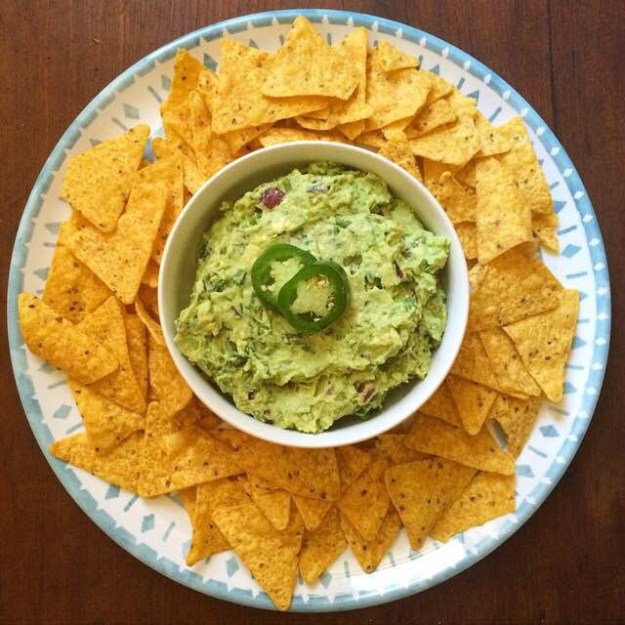
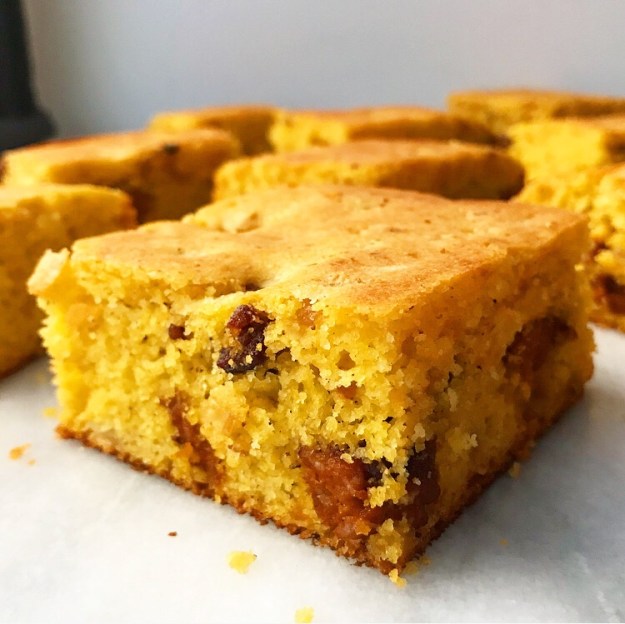
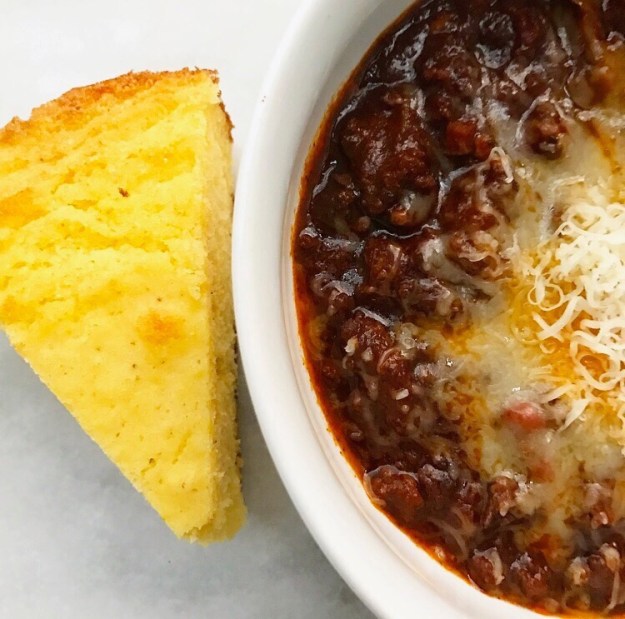

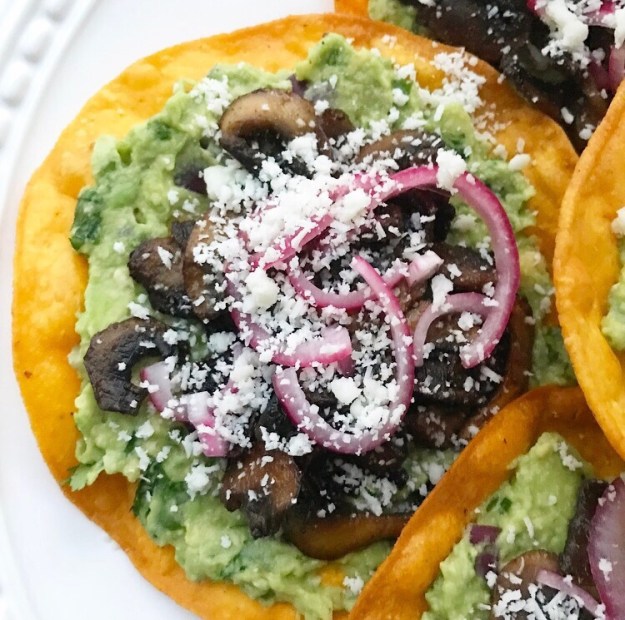
 Will you be serving any of these dishes next Sunday? Let me know on
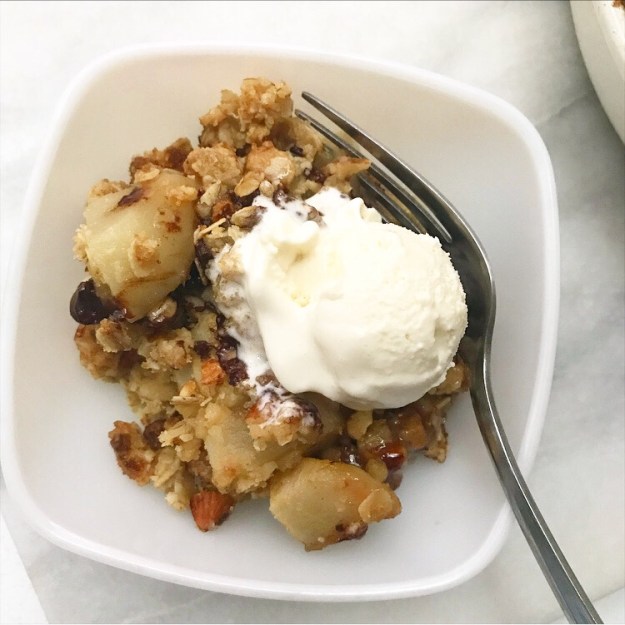
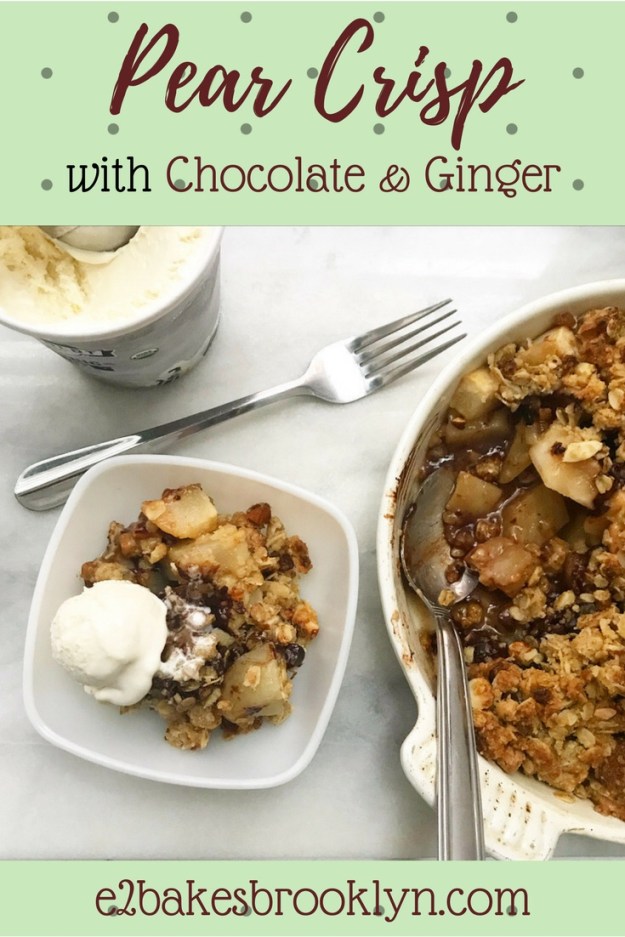
 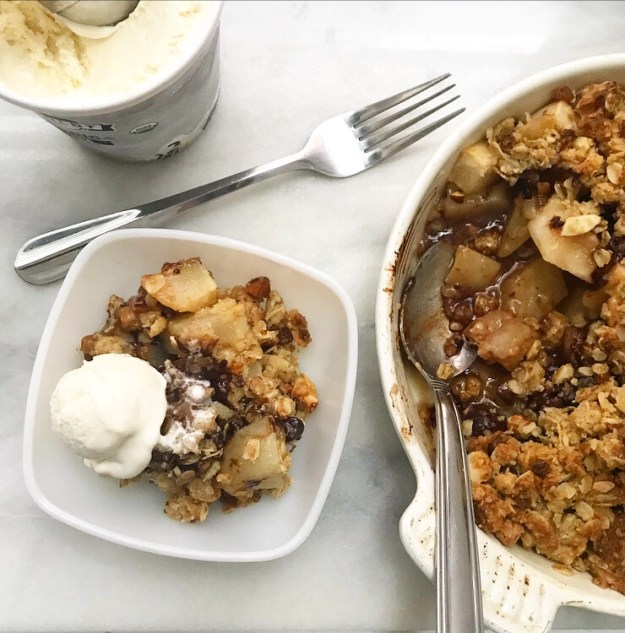 On any other day, I would probably go on and on about how how I prefer my chocolate desserts to be all chocolate and my fruit desserts to be just fruit, but for right now, I must say otherwise. And even if I were feeling that way this particular Wednesday, I’d be hard-pressed to get the words out, what with shoveling bites of warm Pear Crisp with Chocolate & Ginger into my face.
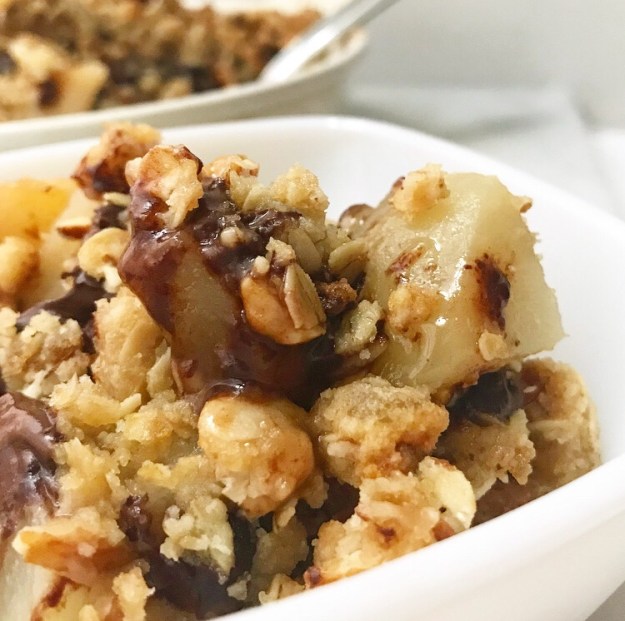 As far as late-January desserts go, this is about as good as it gets. I mean, when it comes to warm, soft pieces of pear, bits of melty chocolate and crunchy oat topping with two kinds of ginger, what’s not to love?!
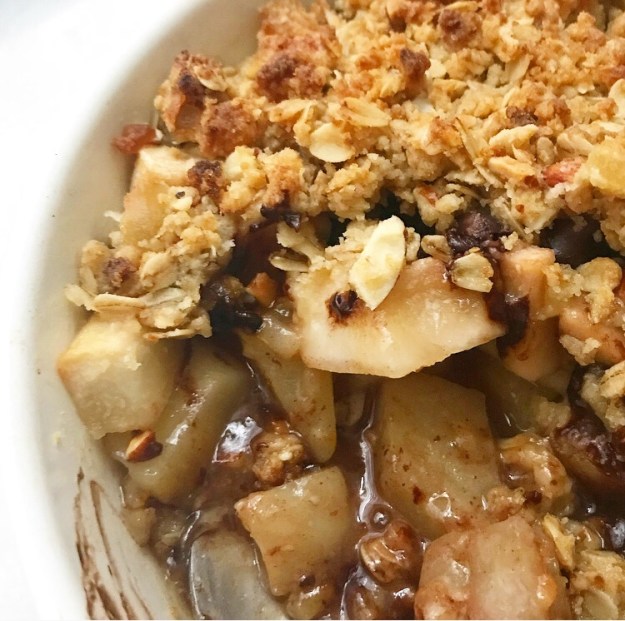 Beyond being delicious, this crisp is wonderfully easy to make. If you are at all intimidated by making pie from scratch, this is the dessert for you. There’s no finicky dough or chilling or crimping, and definitely no lengthy cooling time. In fact, the whole process of making a crisp takes one hour, as opposed to the three or four (or more!) that it takes to make and cool a fruit pie.
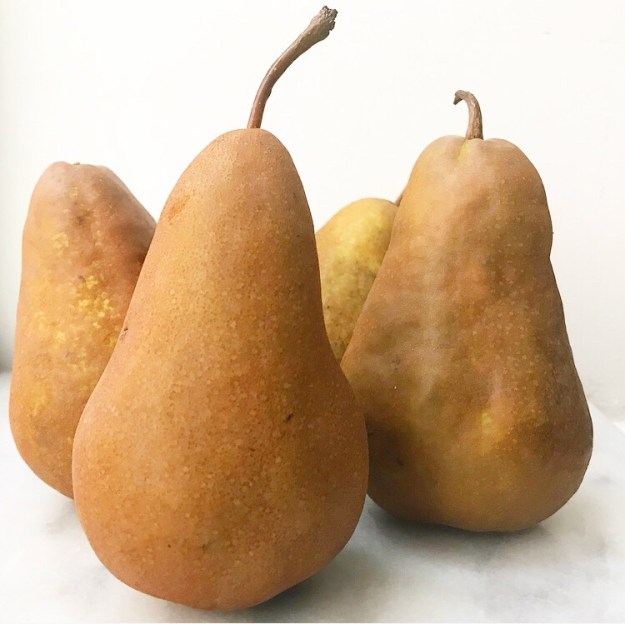
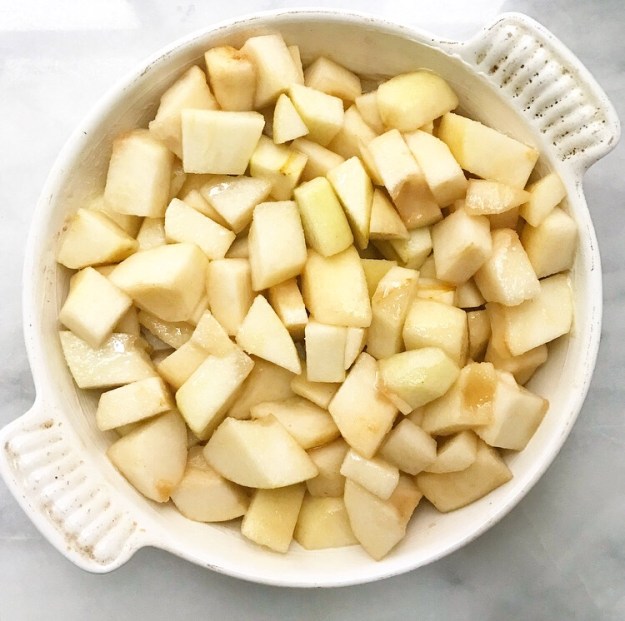 To start, pears are peeled, diced, and tossed with sugar, cornstarch, ground ginger, and lemon.
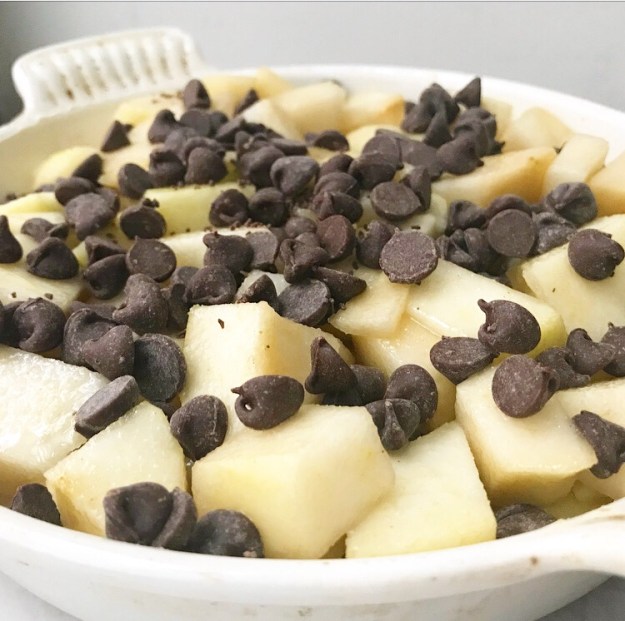 Chocolate chips are scattered over the top.
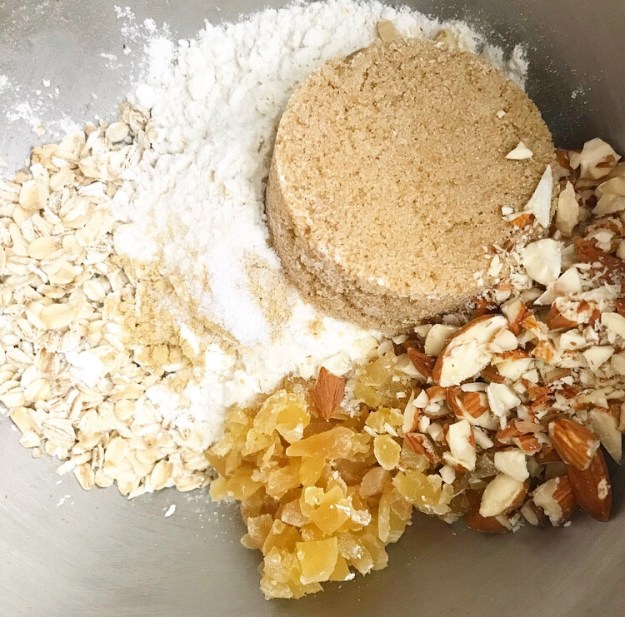
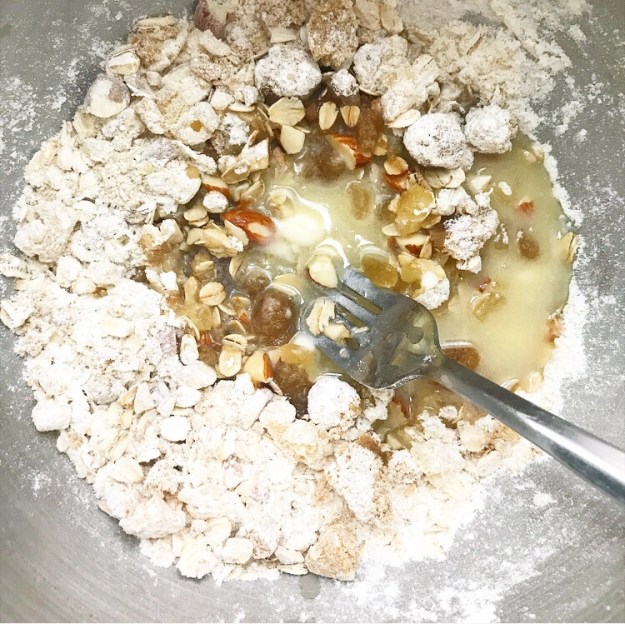
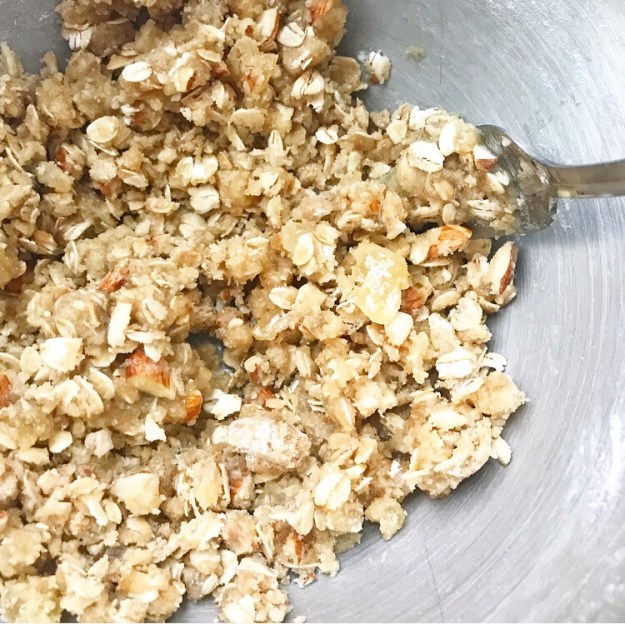 The crisp topping is made from oats, flour, light brown sugar, chopped almonds, and both ground and candied ginger. Oh, and butter.
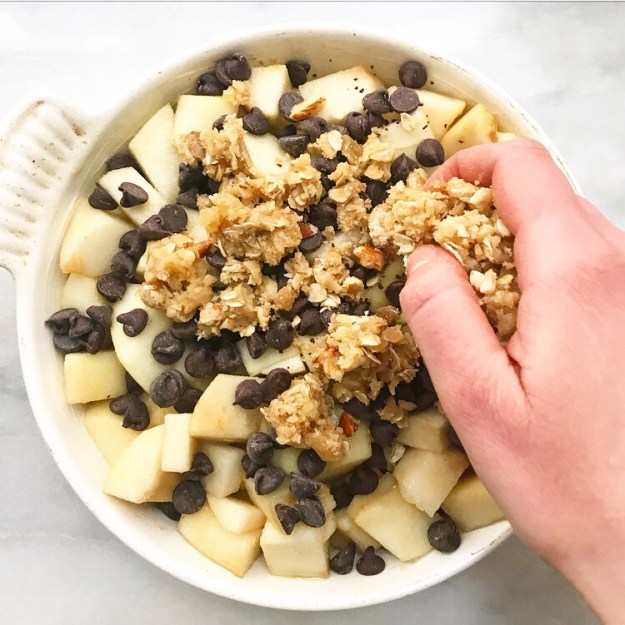
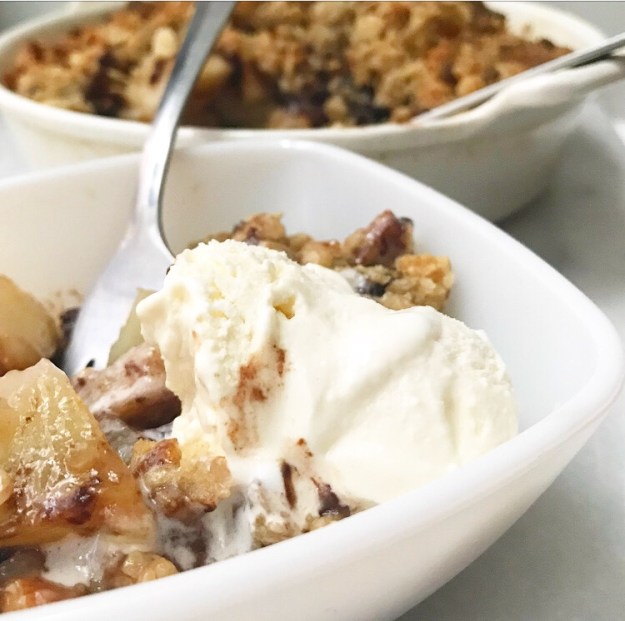
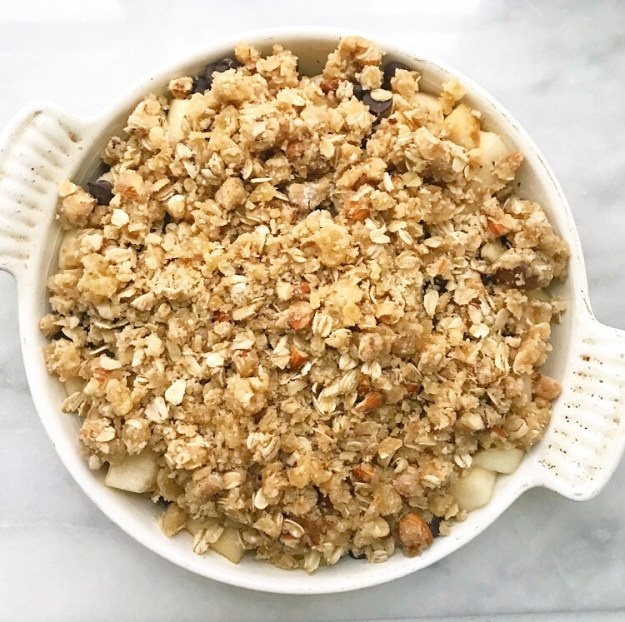 Scatter the topping over the fruit, being careful to cover most of the chocolate. This will keep it from overcooking.
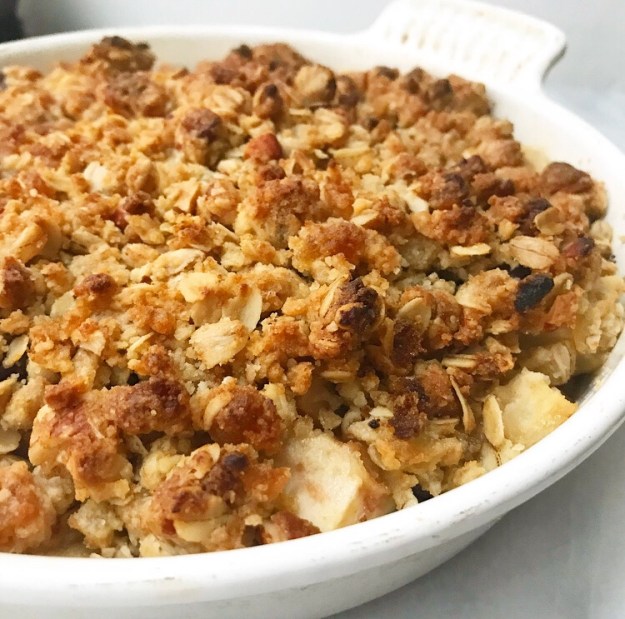 Bake the crisp for half an hour and let it cool for ten minutes.
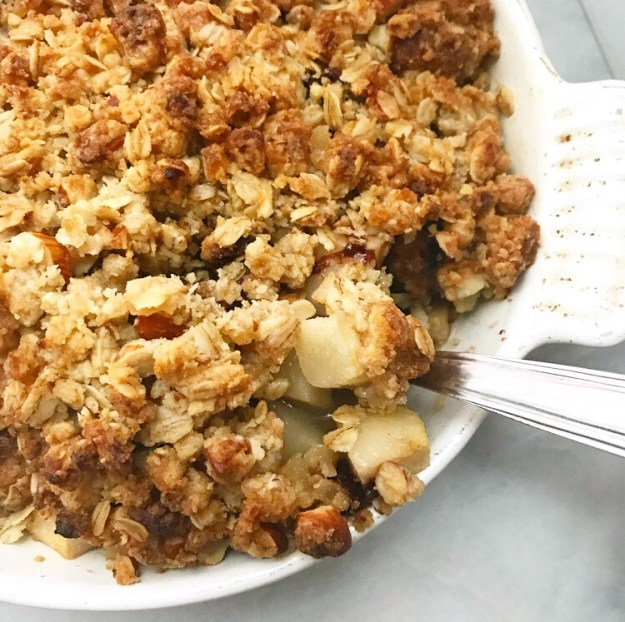
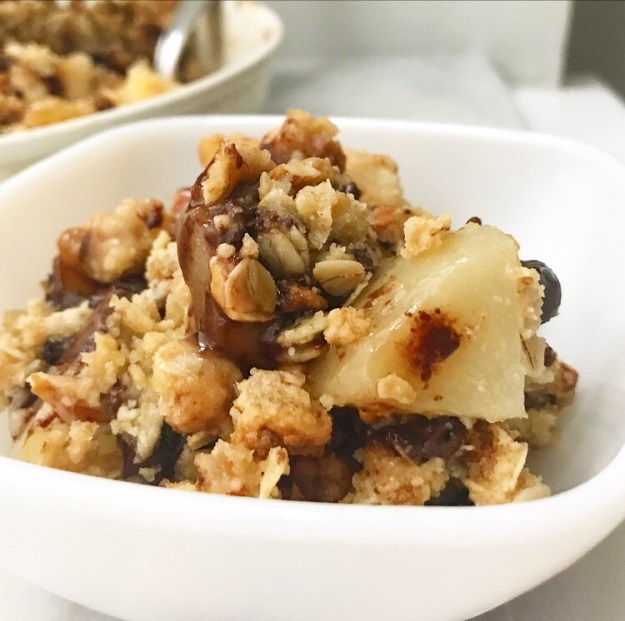
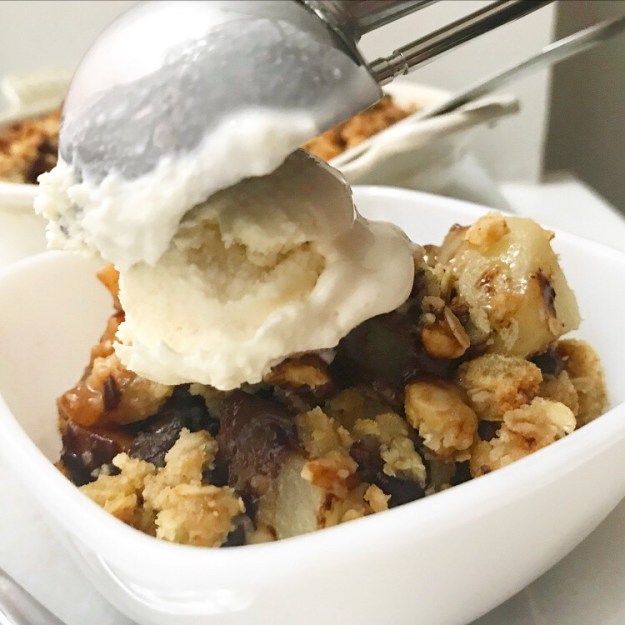 While it’s warm, scoop it into bowls and top it with vanilla ice cream. The recipe says this addition is only “if desired,” but I like to think of it as mandatory.