 It’s a tradition of mine to make a red velvet treat for Oscar Night, which happens to be this Sunday. It’s sort of my “thing.”
 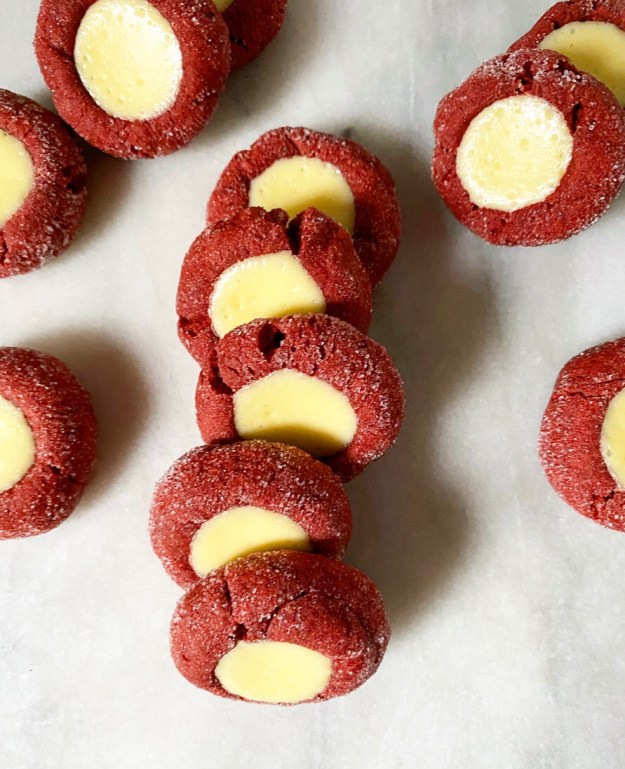 Yes, I know the Oscars are silly, but I, too, am silly. Also, I love a theme, especially when it means I get to watch 15 or 20 movies, cheer/curse/cry at my TV and eat red velvet baked goods. There was once a whole meal I made only for this occasion, but over the years it’s been reduced down to a “red velvet something.” This is what restraint looks like for me.
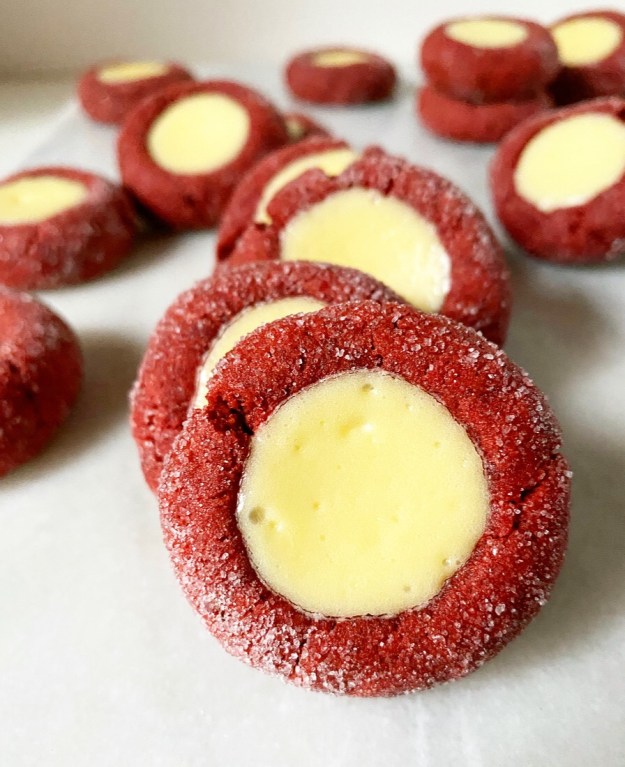
As far as the red velvet something goes, it could be the classic cake or cookies or a cookie cake—it’s just got to have that perfect mix of chocolate and vanilla flavors, preferably have a cream cheese element, and be an astonishing shade of crimson. Or, as I like to explain it, it has to be red like the red carpet.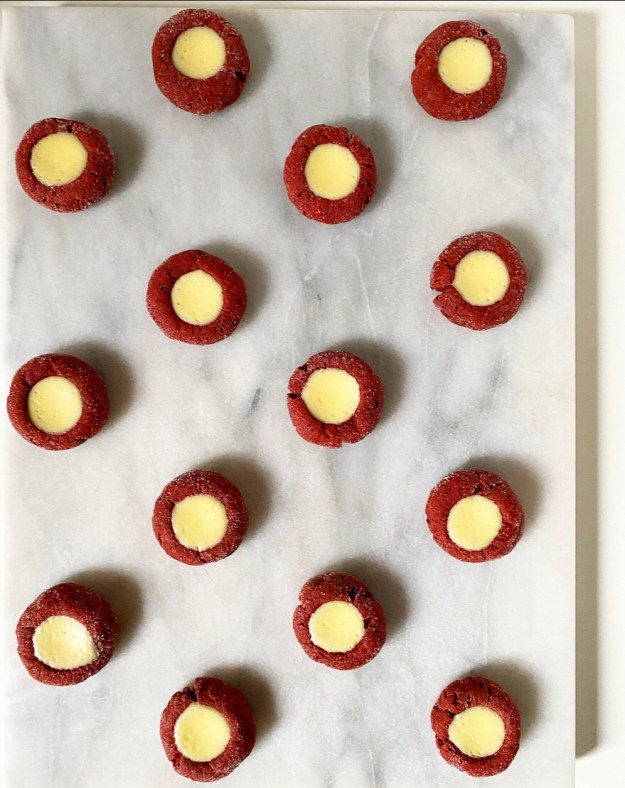 This year’s treat? Red Velvet Cheesecake Thumbprints. They’re exactly what they sound like—red velvet cookies with little wells of cheesecake baked into their centers—and they are also as delicious as you’d expect. Chocolate, vanilla and tangy cheesecake are a match made in heaven. And also my kitchen. And soon, yours.
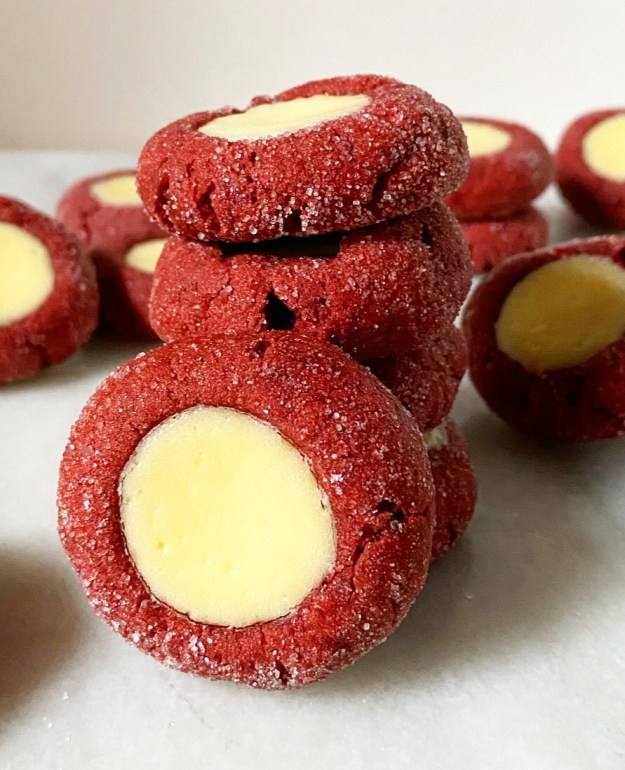 The base for these cookies is a slight variation on my Red Velvet Cut-Out Cookie dough; as with my sugar cookie-based thumbprints, the “variation” is a reduction of baking powder. The dough is mixed ahead of time and chilled before being scooped, formed into balls, and rolled in sugar for both texture and sparkle.
I mean, I guess you could skip the roll in sugar if you want, but you’d be missing out on a crisp sugar crust/sugar cookie/squidgy cheesecake textural experience *and* sparkle. Sparkle is very important on Oscar Night.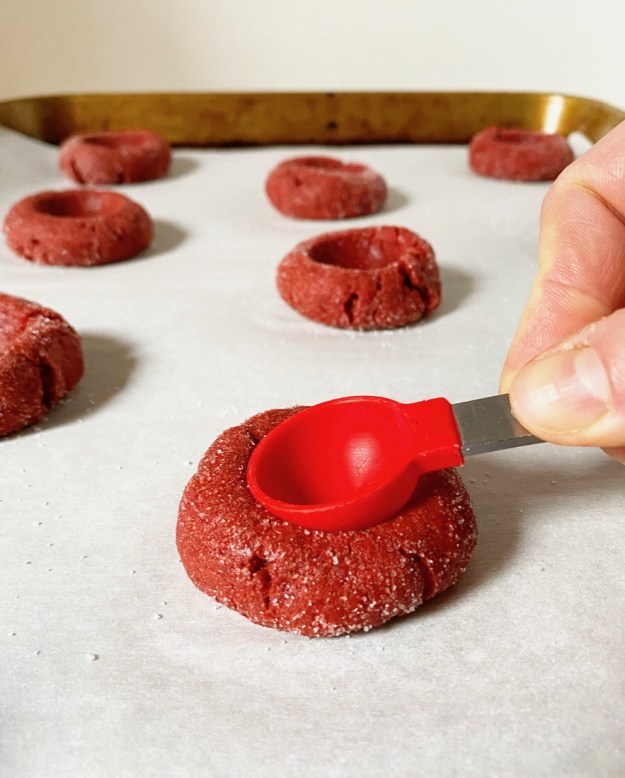 Next come the thumbprints or, if you want to keep things transparent, spoon-prints. Each sugar-crusted dough ball is indented with the back of a rounded 1/2 teaspoon measure. You could, of course, do this with your thumb, but a spoon is a more accurate (and less messy) tool for the job.
 The cookies are baked at a fairly low temperature (300F for ten minutes) before the thumbprints are deepened and widened with the back of a 1 teaspoon measure. Oh, and filled with cheesecake ♥️
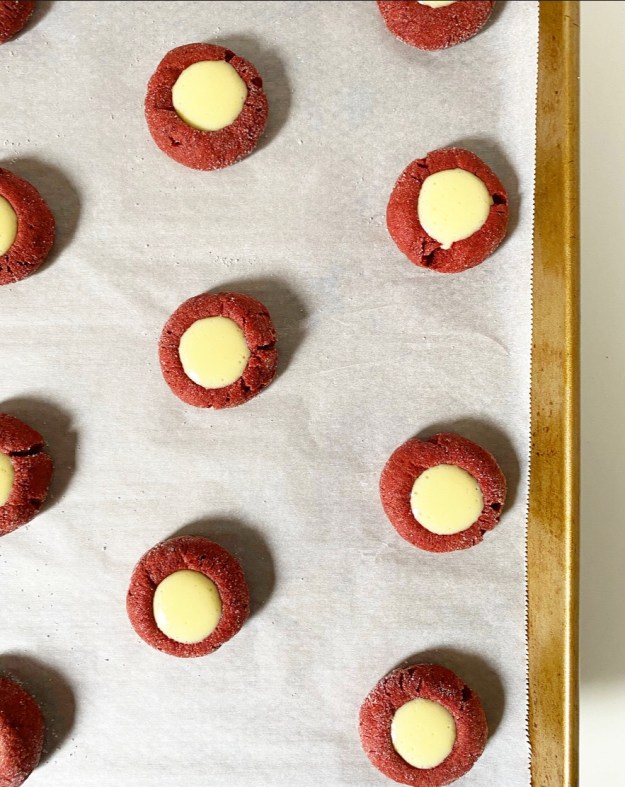 After ten more minutes in the oven, the cookies will be set and the cheesecake will be a little puffy. Let them cool to room temperature—the centers will deflate a bit—before chilling for at least 45 minutes. You want those little wells of cheesecake to be nice and cold when you’re snacking on them mid-Oscar broadcast.
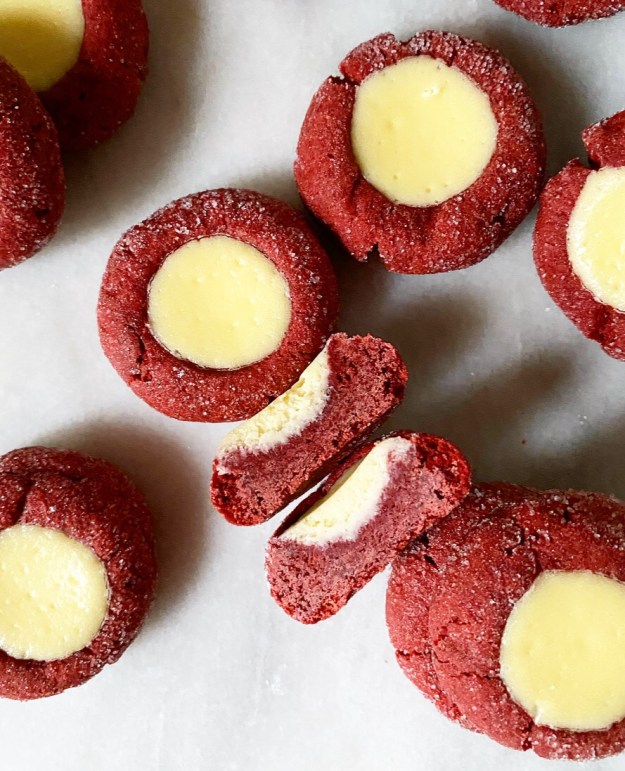 If you don’t have traditions and superstitions (and an entire friendship) based around an awards show, you can make these Red Velvet Cheesecake Thumbprints for Valentine’s Day. They’re the right color *and* they’re full of cheesecake. Nothing says love like cheesecake.
Red Velvet Cheesecake Thumbprints
makes 3.5 dozen cookies
Cookie Dough:
2 3/4 cups all-purpose flour
1/2 cup natural unsweetened cocoa powder (not Dutch process)
1 teaspoon baking powder
1/2 teaspoon Kosher or sea salt
1/2 cup unsalted butter, softened to room temperature
4 ounces (1/2 brick) full-fat brick-style cream cheese, softened to room temperature
1 cup granulated sugar
1 large egg + 1 large egg yolk, room temperature
1 1/2 teaspoons white vinegar (or apple cider vinegar)
2 teaspoons pure vanilla extract
1 teaspoon red gel food coloring
Cheesecake Filling:
4 ounces (1/2 brick) full-fat brick-style cream cheese, softened to room temperature
2 tablespoons granulated sugar
1 large egg yolk, room temperature
1/2 teaspoon pure vanilla extract
For Rolling:
1/4 cup granulated sugar
In a large mixing bowl, whisk together flour, cocoa powder, baking powder, and salt. Set aside.
In a separate large mixing bowl, use an electric mixer to beat butter and cream cheese until light and fluffy, about 2 minutes. Cream in granulated sugar, followed by the egg, egg yolk, vinegar, vanilla extract, and gel food coloring. Add dry ingredients in 3 installments, combining completely after each. Divide dough into quarters and wrap each in plastic wrap. Chill for at least 3 hours, or up to 3 days.
Preheat oven to 300F. Line two baking sheets with parchment.
Make the cheesecake filling. In a small mixing bowl, use an electric mixer to beat cream cheese until fluffy. Mix in sugar, followed by egg yolk and vanilla. Transfer to a piping bag (or ziptop sandwich bag). Set aside.
Place rolling sugar in a small bowl.
Scoop cookie dough by the tablespoon and roll into balls. Roll each ball in sugar and place at least 2 inches apart on prepared baking sheets. Use the back of a rounded 1/2 teaspoon to slowly press a well into each dough ball. They may crack a bit—just carefully press/pinch big cracks back together with your fingers.
Bake cookies 10 minutes. Remove the cookies from the oven, then carefully press the back of a rounded 1 teaspoon measuring spoon into the centers again. Pipe cheesecake filling into each well. Carefully tap the pan on the counter a couple of times to release large air bubbles. Bake cookies another 10 minutes, until cheesecake is set and a bit puffed.
Let cookies cool on the pans for 10 minutes before carefully removing to a rack to cool completely. Cheesecake will deflate a bit. Repeat rolling and baking process with all remaining dough, letting the cookie sheets come back to room temperature between batches.
Refrigerate cookies for at least 45 minutes, until chilled, before serving. Leftovers may be kept in an airtight container in the refrigerator for up to five days.
 Has anyone else’s week been five years long? Mine started with two babkas, three layer cakes and a Rosh Hashanah dinner, continued with some early morning construction in my apartment, and was followed up with a neck-ache and a midweek heatwave.
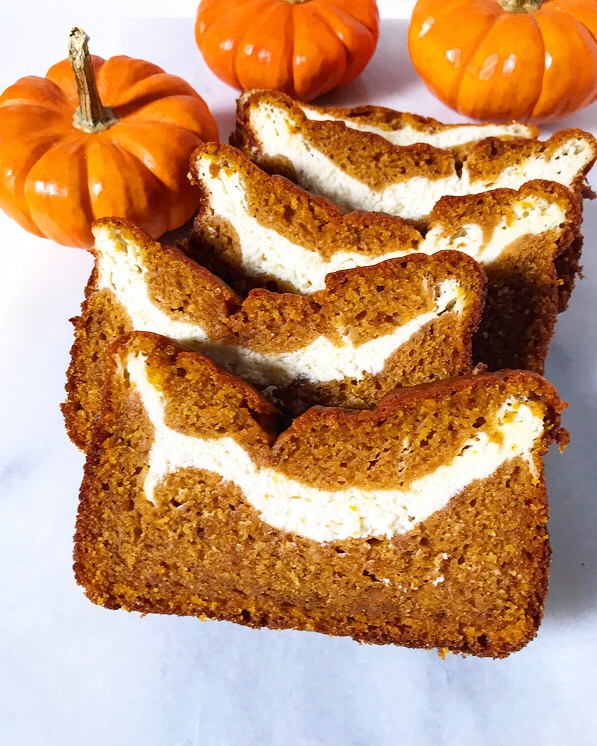
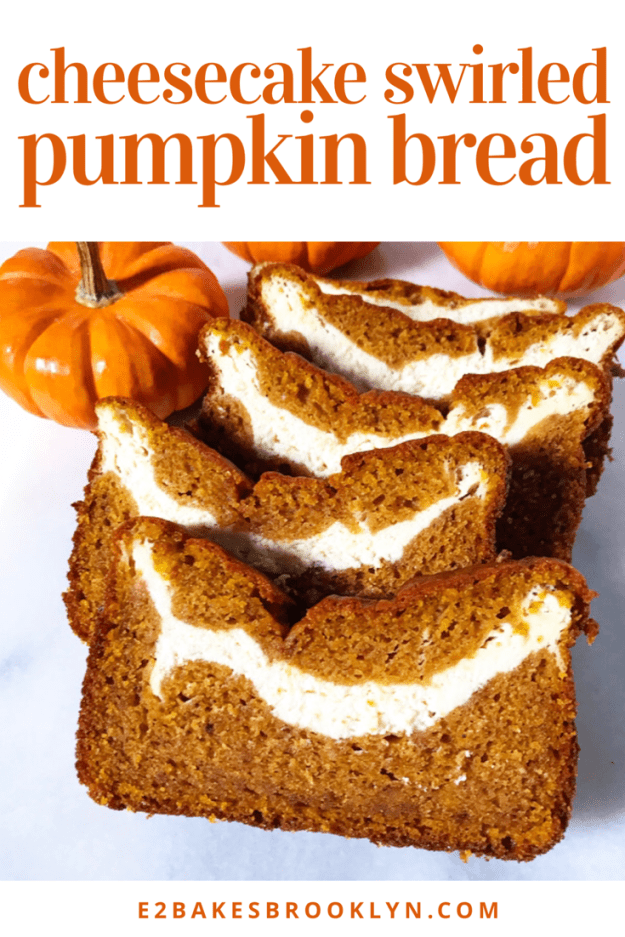
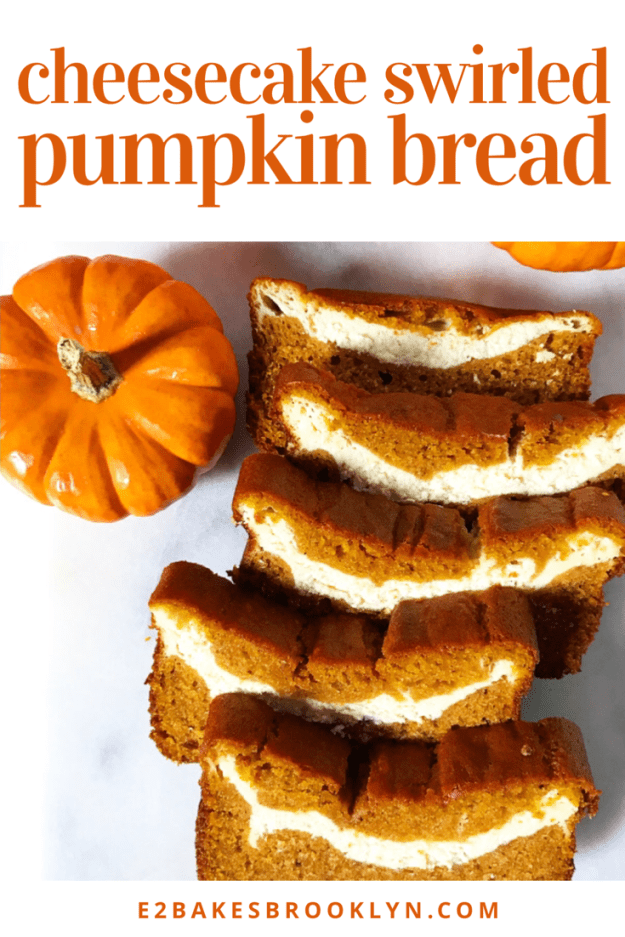
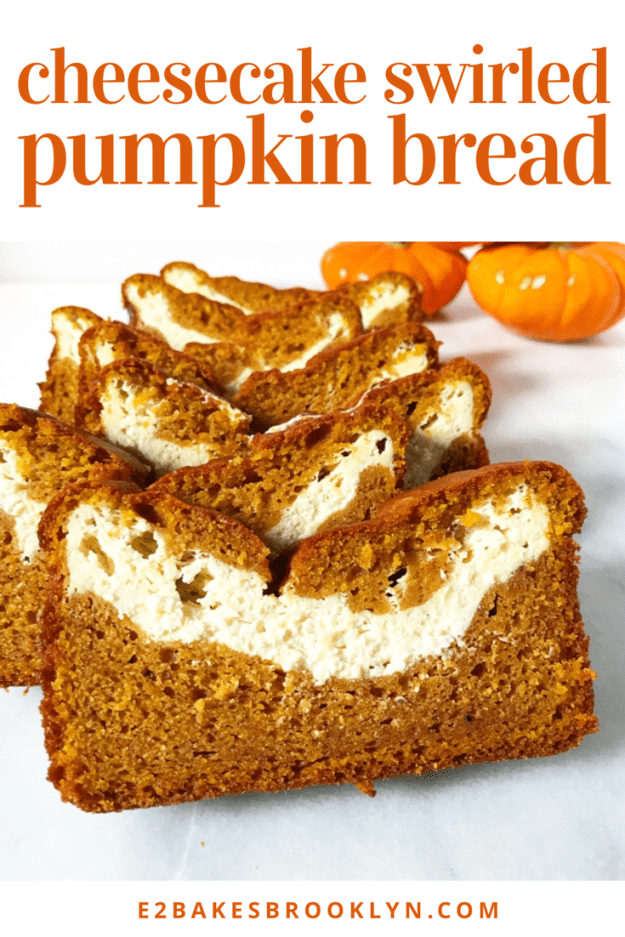
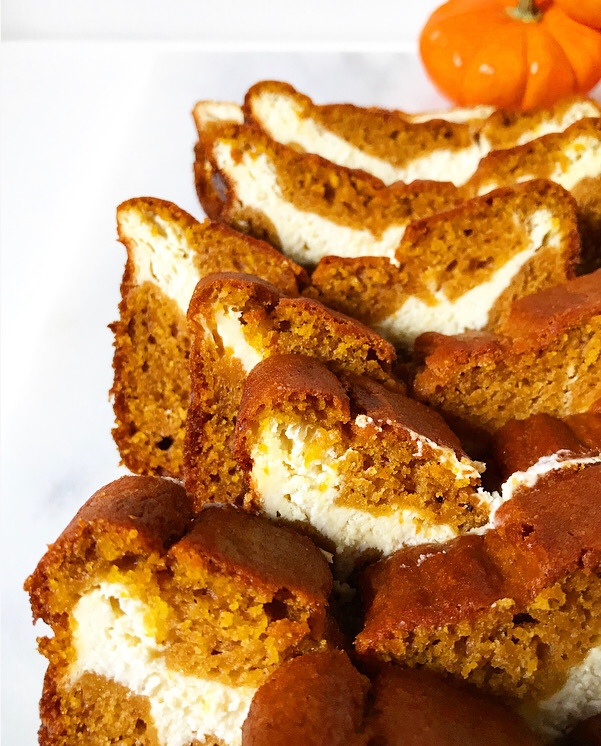 The good news is that NYC weather is finally starting to get with the autumnal program (I am so tired of summer clothes) and that my only plans for this weekend are to take my visiting godparents out for lunch and watch postseason baseball. Then two more work days before going on vacation next Wednesday—it can’t get here soon enough! But more on that later. For now, let’s talk about Cheesecake Swirled Pumpkin Bread.
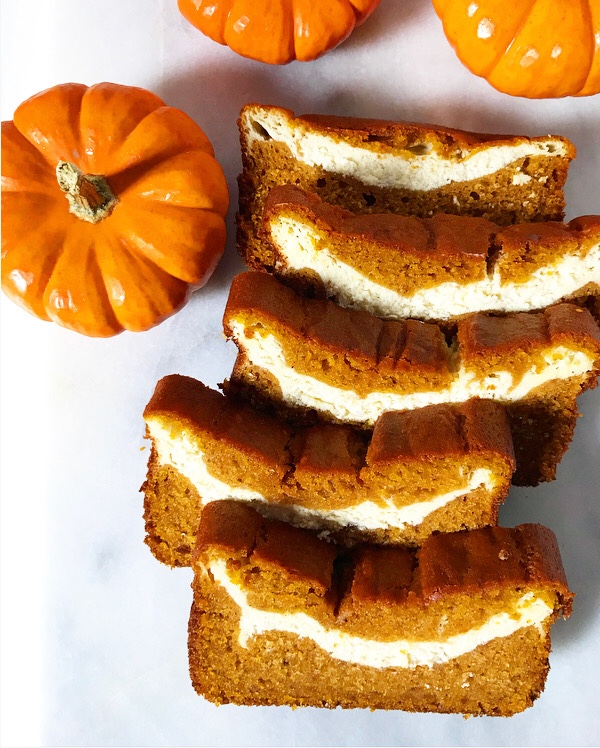 Cheesecake. Swirled. Pumpkin. Bread.
 Cheesecake Swirled Pumpkin Bread begins with a half-recipe of my
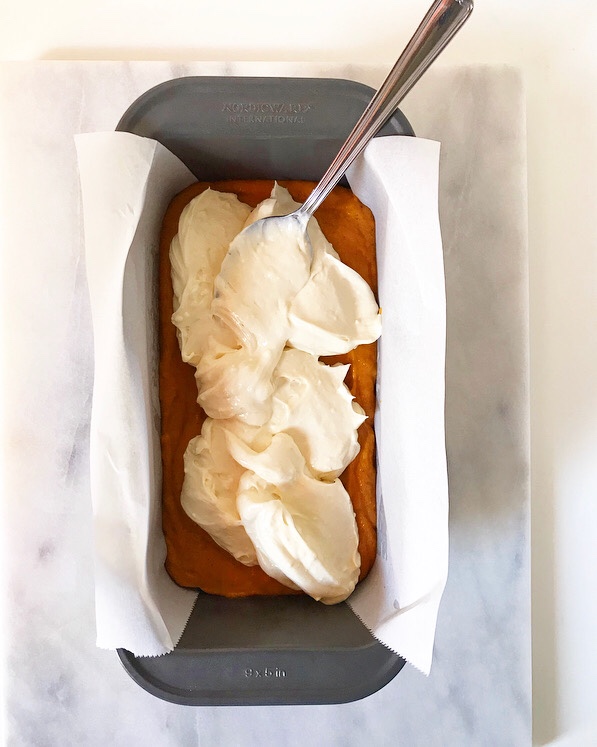

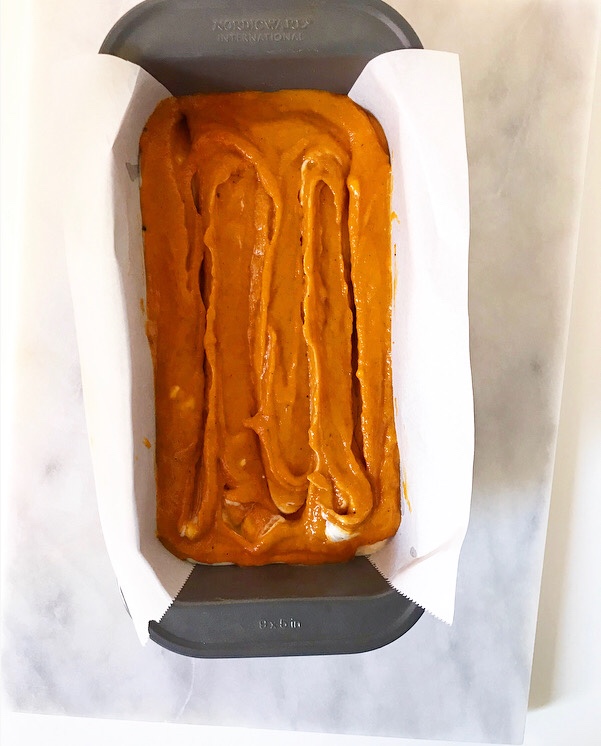
 To assemble, you’ll need the pumpkin batter and a small batch of cheesecake—don’t worry, they’re both easy to make. Set aside a cup of the pumpkin batter and put the rest in your loaf pan. Top it with the cheesecake, followed by the remaining batter. Swirl it all with a thin knife or skewer before baking for the better part of an hour. The bread will be puffed when it comes out of the oven, but sink a bit as it cools. This is just the cheesecake buckling a bit—not a bad thing.
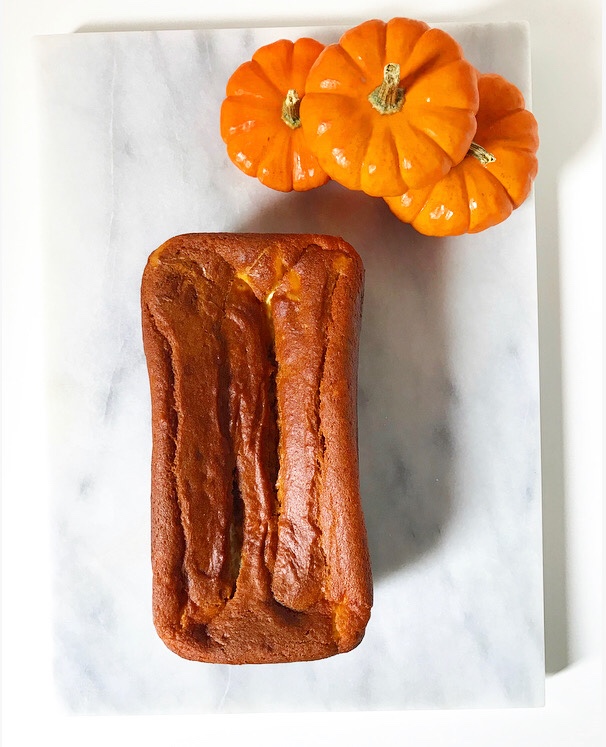
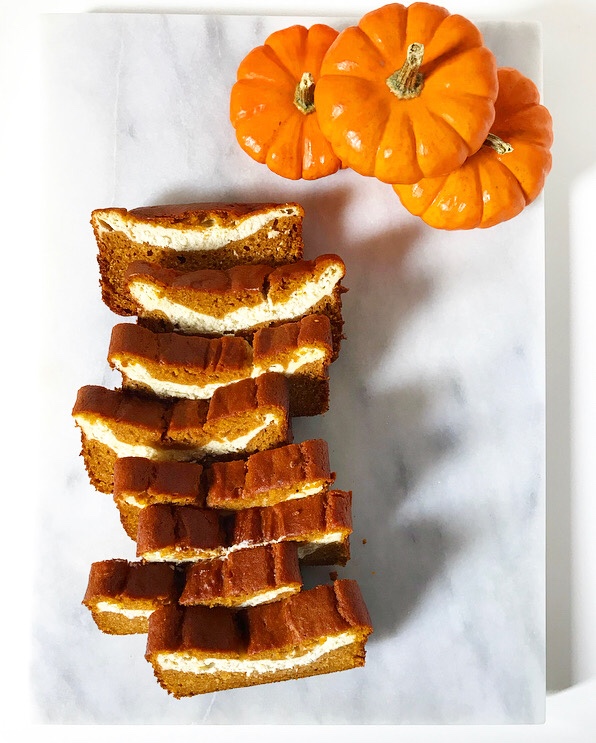 This bread needs to be cooled at room temperature and then chilled in the refrigerator, making it an ideal make-ahead treat. Don’t rush to serve this. Pumpkin is a flavor that blooms over time and nobody loves room temperature (or warm 😬) cheesecake. Good things come to those who wait.
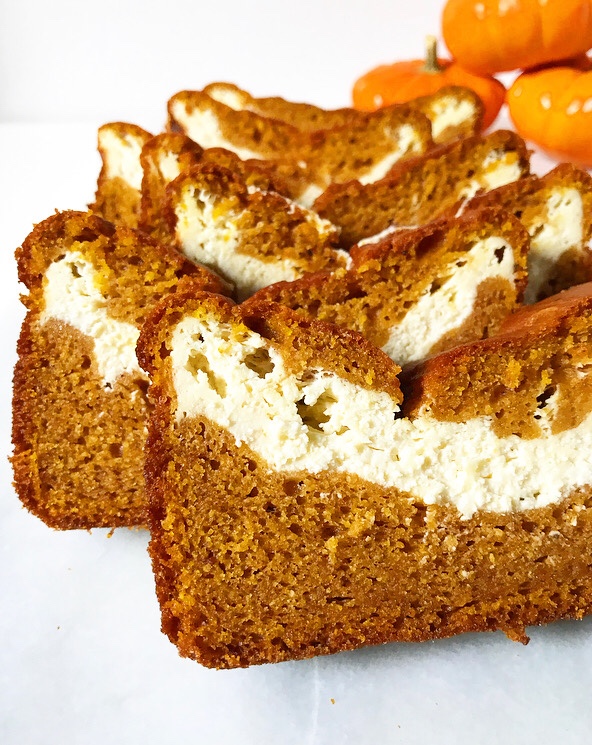
 Three years ago, I went home to Texas for three weeks over Christmas. I was there for the holidays and a family wedding a week into the new year, and I had determined that it was easier to spend an extended period in my home state than it was to fly back and forth. My little sister was home for her winter break too, so we had an odd period of time where our childhood living arrangements were real again, except that everyone had a driver’s license and their own bathroom this time.
 But! But. I was going to make a cheesecake with my mom, even going so far as to have my older sister give her a Fat Daddio cheesecake pan for Christmas. I was going to do this thing. And then…I didn’t because we found 43 other ways to fill our time and there was the wedding and then it was time to go back to NYC.
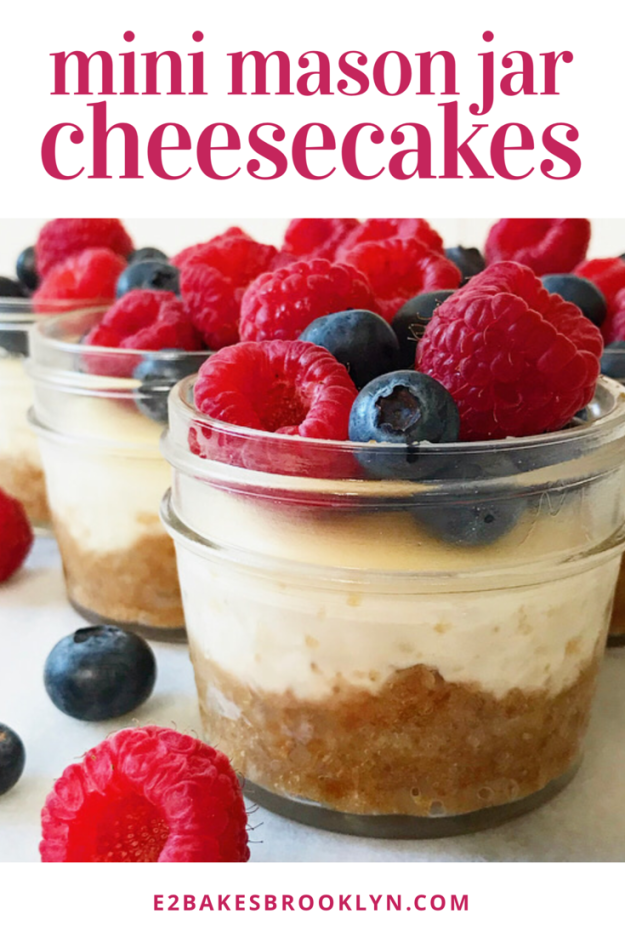
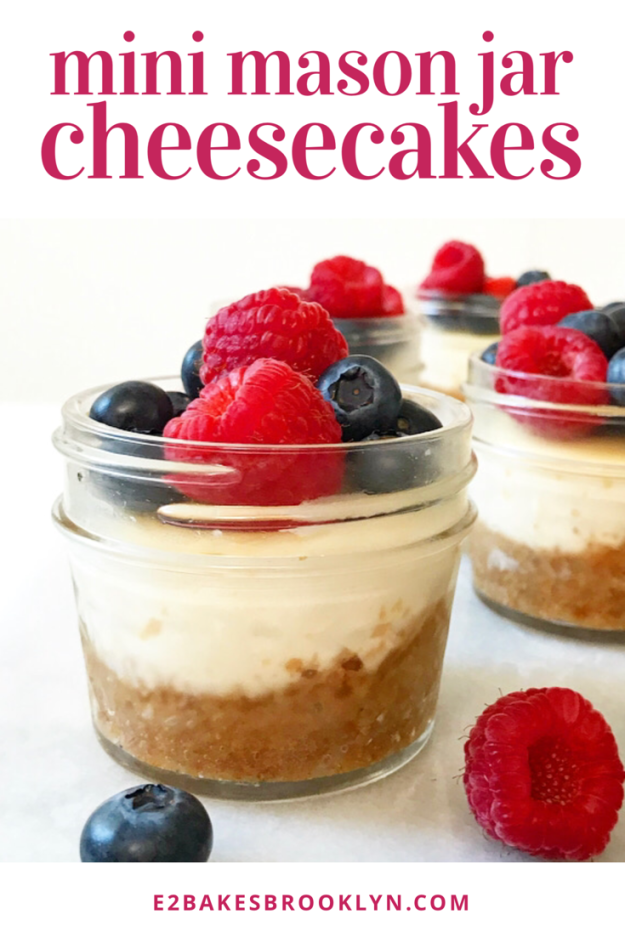
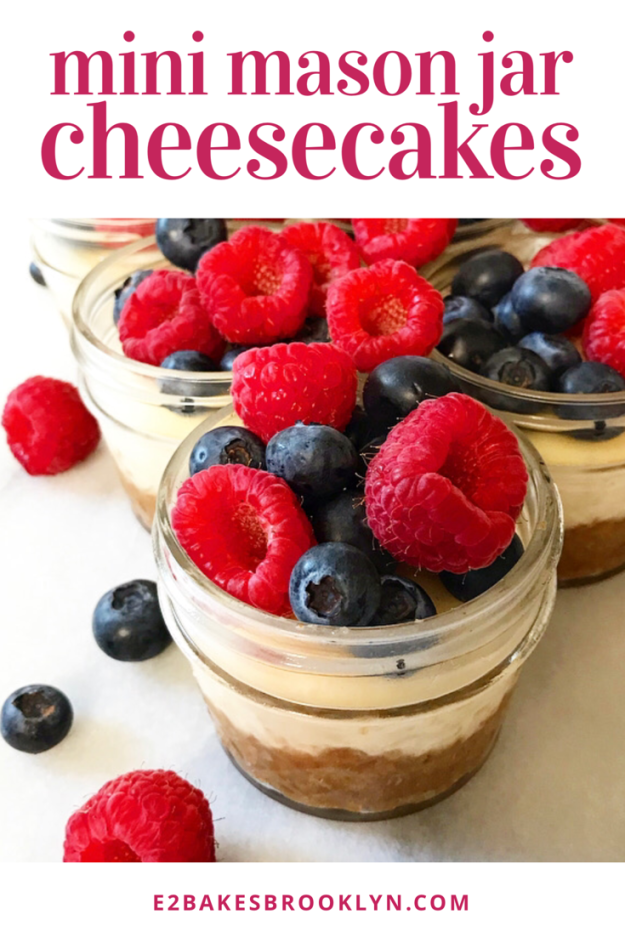
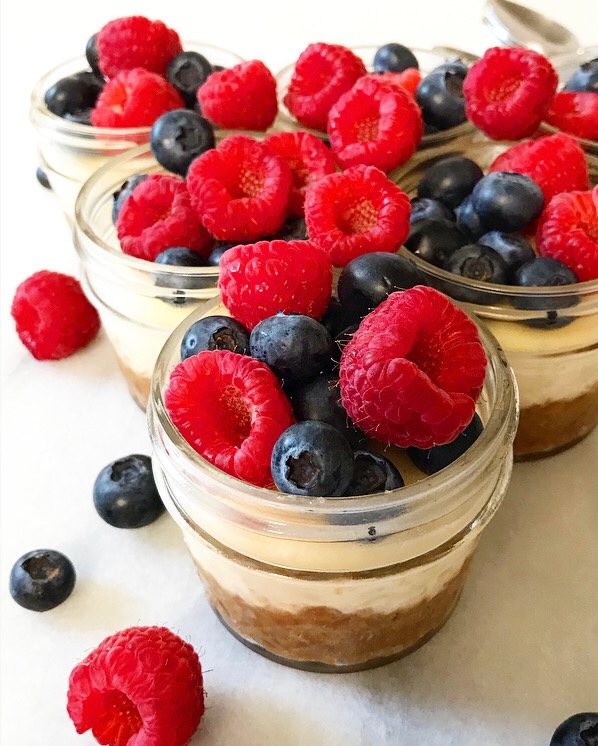 Now it’s Mother’s Day weekend three years later and I still owe my mom a cheesecake. I remain reticent about attempting a big one (yes, I know it’s silly) and I don’t know when I’ll be with her long enough to carve out the time, so I have made it easy on both of us and made miniature versions that don’t involve a foil-wrapped pan. Happy Mother’s Day, Mom! I made you six cheesecakes.
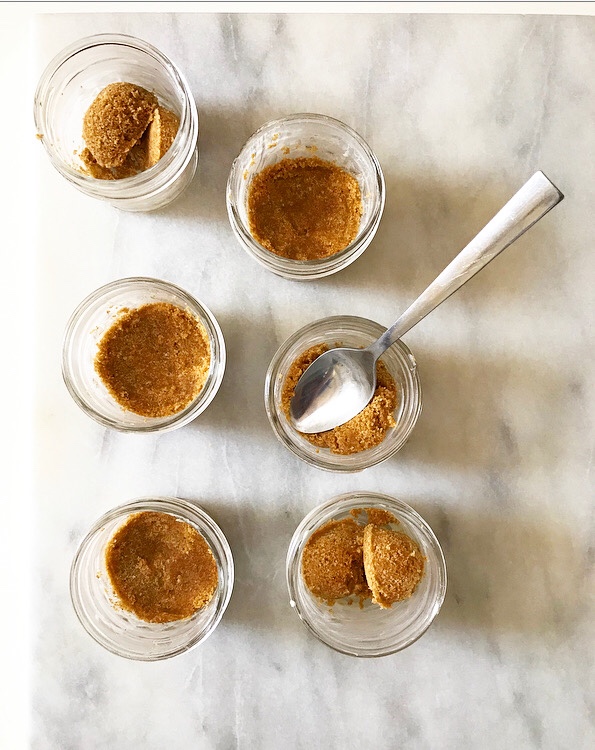
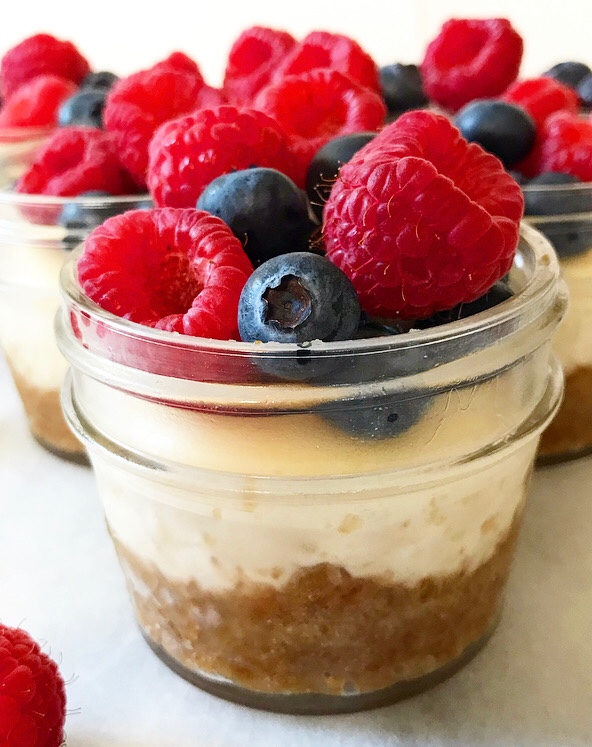
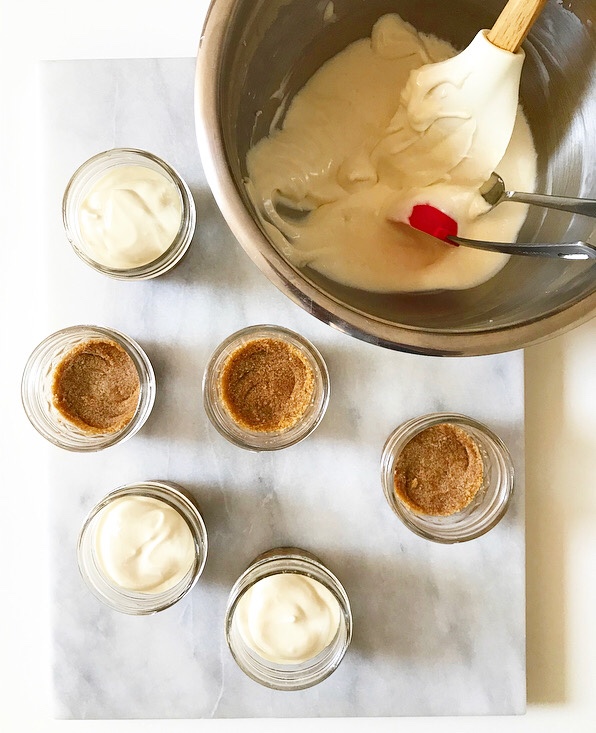 This small-batch recipe makes just enough to fill six 4-ounce mason jars, but you can easily scale it up depending on your needs. The cheesecake itself is remarkably easy to make—it has a total of nine ingredients and two major steps (both of which are easy), and most of the time commitment is spent waiting for things to cool.
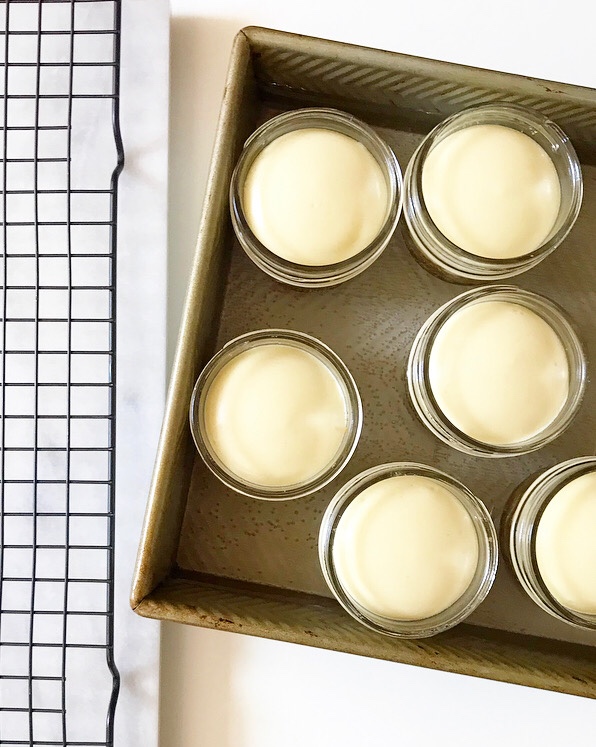
 As for the water bath (“bain-marie”) step that I fear so much, it’s a breeze. Mason jars are water-tight, so my fear of soggy cheesecake foiled-by-foil doesn’t apply here. These mini desserts bake up evenly and beautifully every time!
 They are delicious, too: rich, creamy and tangy with a brown sugary graham cracker crust. You can top them with anything you like:
 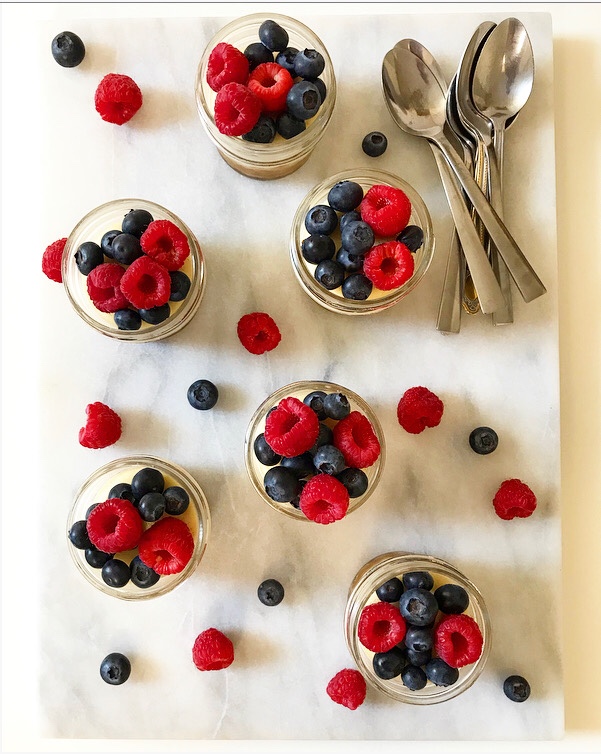 Aside from being cute, delicious, and portion-controlled, I love that these cheesecakes are portable. Just press a little plastic wrap to their surfaces after chilling, screw on the mason jar lids, and pack them into a cooler for premium picnicking. Pack the topping(s) separately and let everyone customize their own!
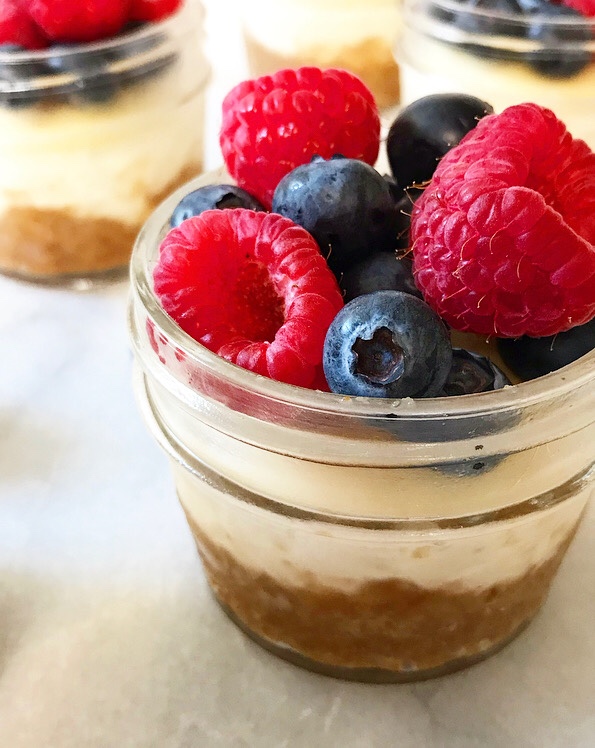 So, after 3.5 years of blogging, there is my first “traditional” cheesecake! Maybe I’ll be brave enough for the real deal before Labor Day. Got any leak-proofing tips for me? Leave them in the comments!
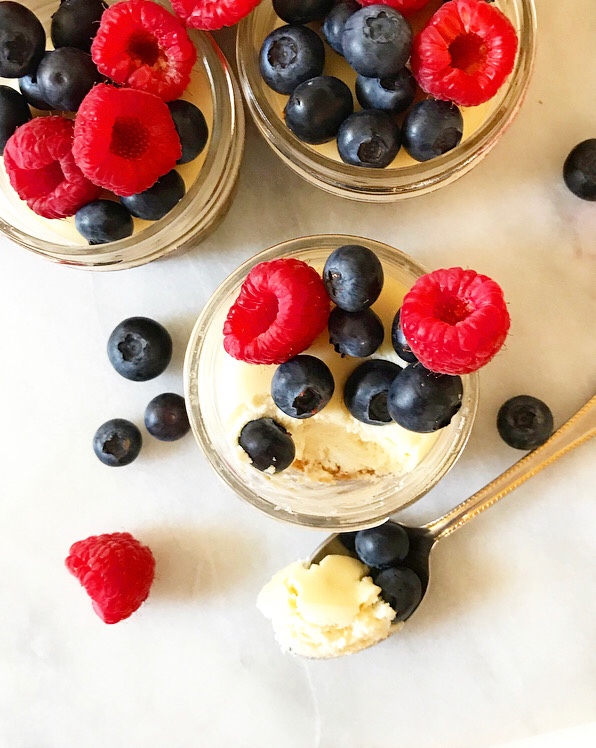 Happy Mother’s Day to all those celebrating, especially my cute mom ❤
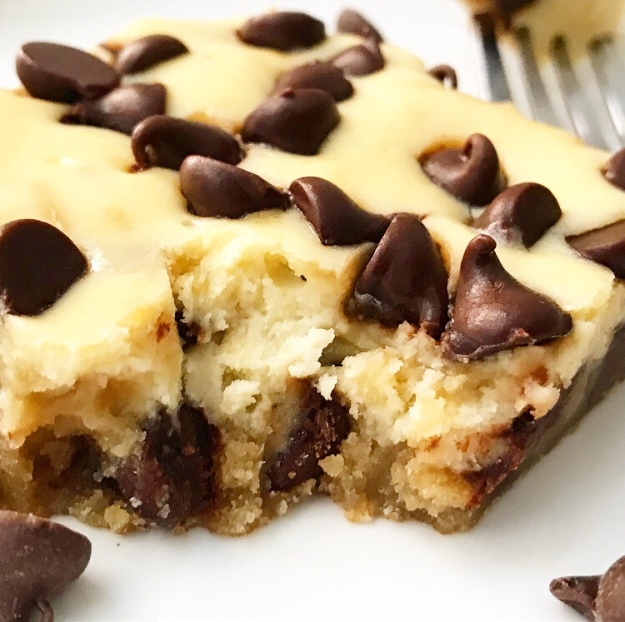
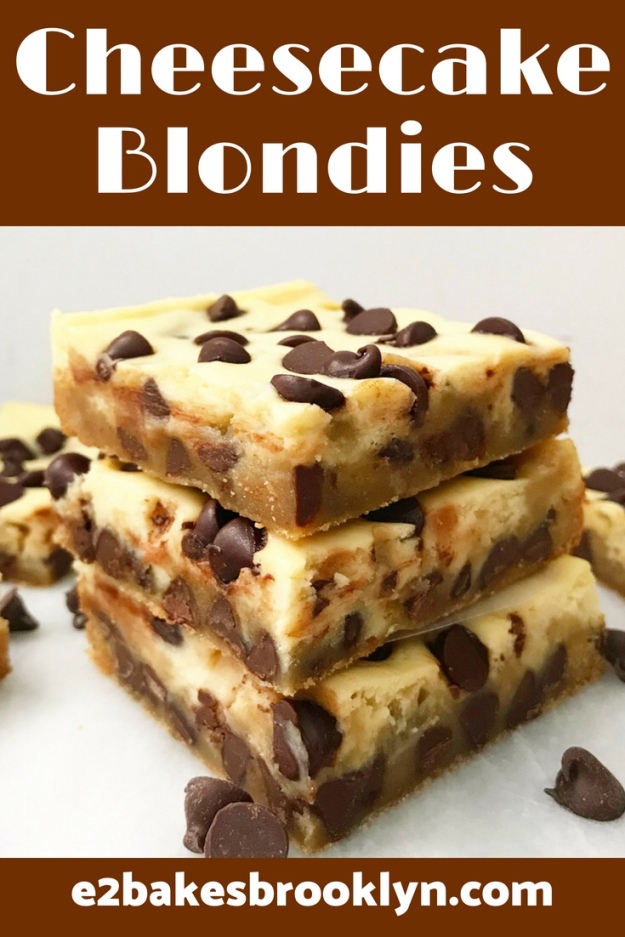
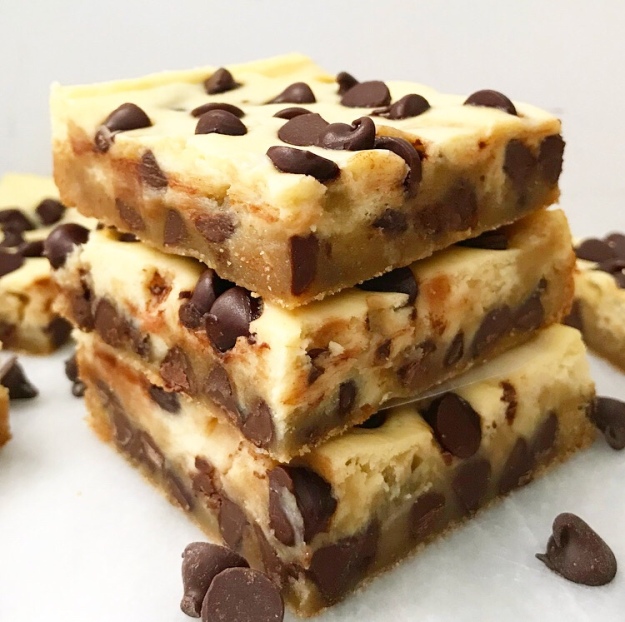 I have been debating for three days whether or not I should post these Cheesecake Blondies or use Independence Day as a “free pass” to take a rare blog day off.
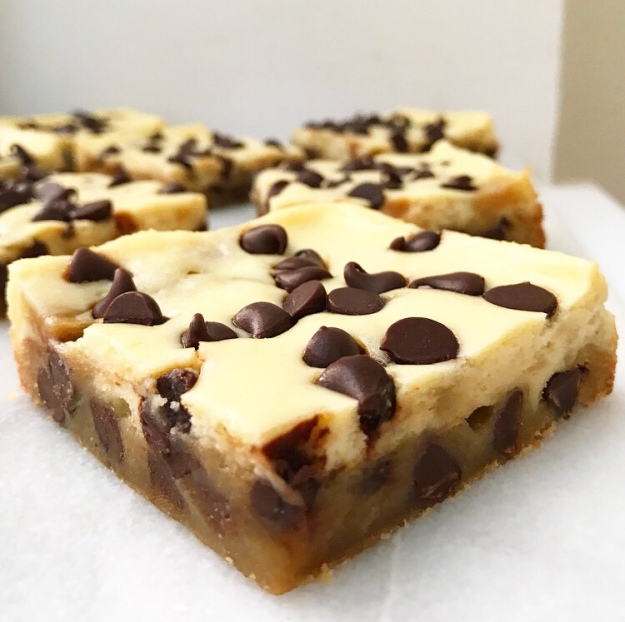 Cheesecake Blondies won out though, because they are the perfect treat to sink your teeth into while you watch the fireworks. Creamy cheesecake and chewy
 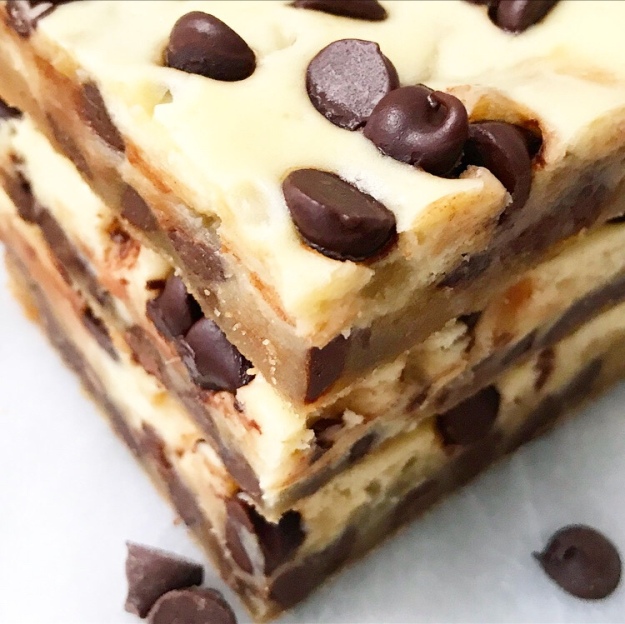 Another great thing about these blondies? They are super easy to make and bake up in just 25 minutes!
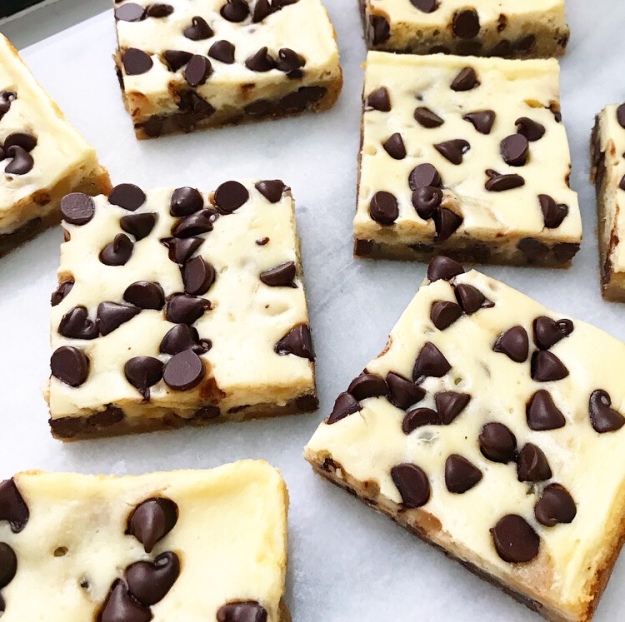 The most difficult part of making Cheesecake Blondies is waiting for them to chill. Those three hours can seem eternal, but they are completely necessary—nobody likes warm cheesecake.
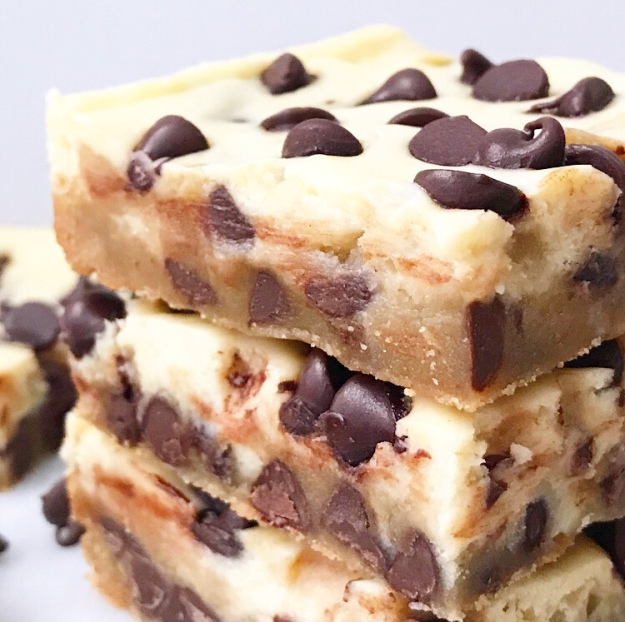 Once the chill time is up, slice up the blondies and revel in their cuteness. Chocolate chips have a way of making things more adorable, don’t they?
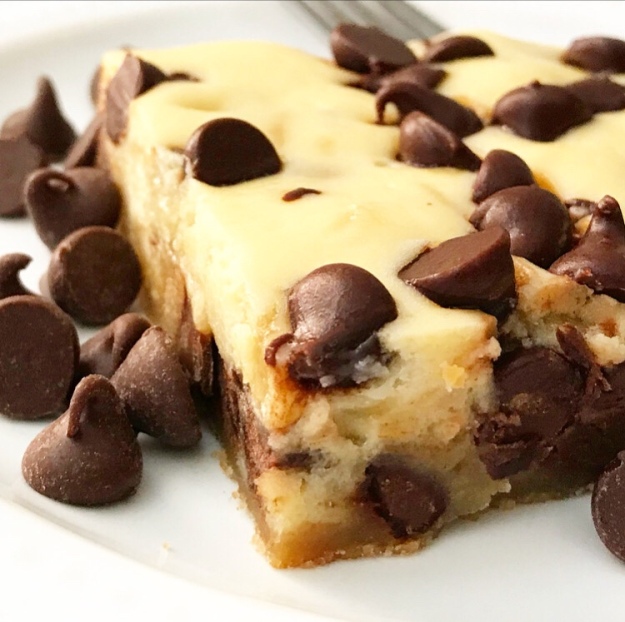 Make a batch of Cheesecake Blondies for your holiday cookout or pack a box into a cooler and take them on the go! You and your friends and family will love the combination of tangy cheesecake and sweet, brown buttery blondie ❤
 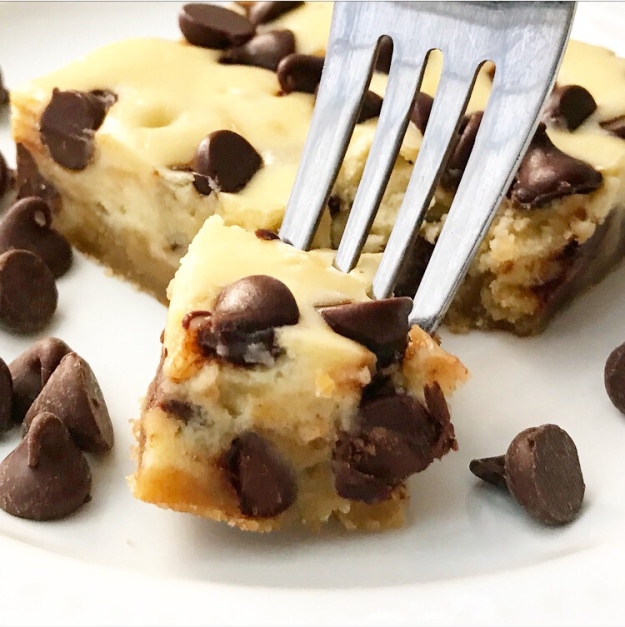 Happy Fourth of July!