 If you want to know what kind of person I am outside of this blog, you should know that I once spent six months of my life obsessively making jam (and preserves) in a kitchen that is smaller that my current closet. Strawberry, cherry, grapefruit marmalade, gingered nectarine—you name it. I had all the preserving equipment you can imagine and an entire kitchen shelf filled with jars of colorful fruit-based spreads.
Years later, I’m pretty sure all that equipment (except for my beloved jar funnels—great stocking stuffer, btw!) and that jam is still sitting in that apartment because I left it all there when I moved out…because I don’t particularly care for jam. I just like to make it.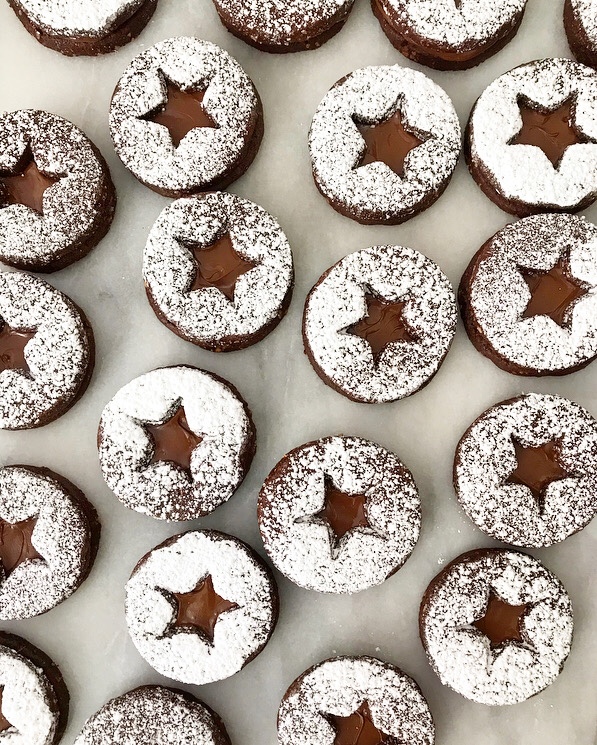 So, to wrap that up: I am prone to intense kitchen projects (hello, three year-old food blog with 338 unique recipes) and I have never once wanted a linzer cookie.
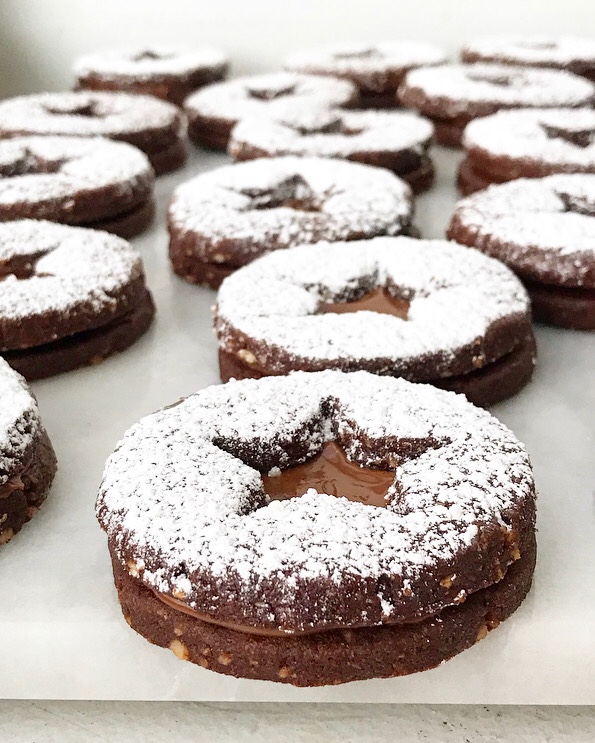 I mean, I am all about crunchy, nutty roll-out cookies, but why must they always be sandwiched with jam? Jam is not a dessert food, at least as far as I am concerned. A breakfast food? Sure. Lunch? You bet. Dessert? No way.*
*Except in these.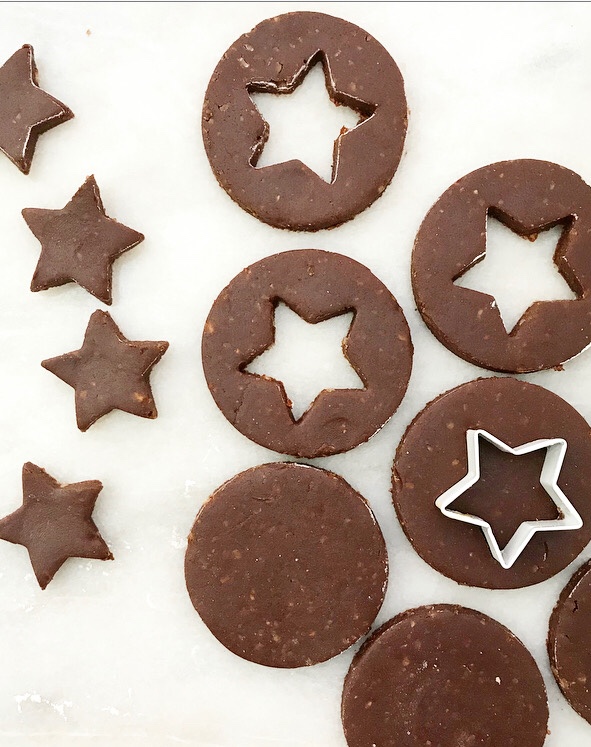
 You know what absolutely *is* a dessert food? Nutella.
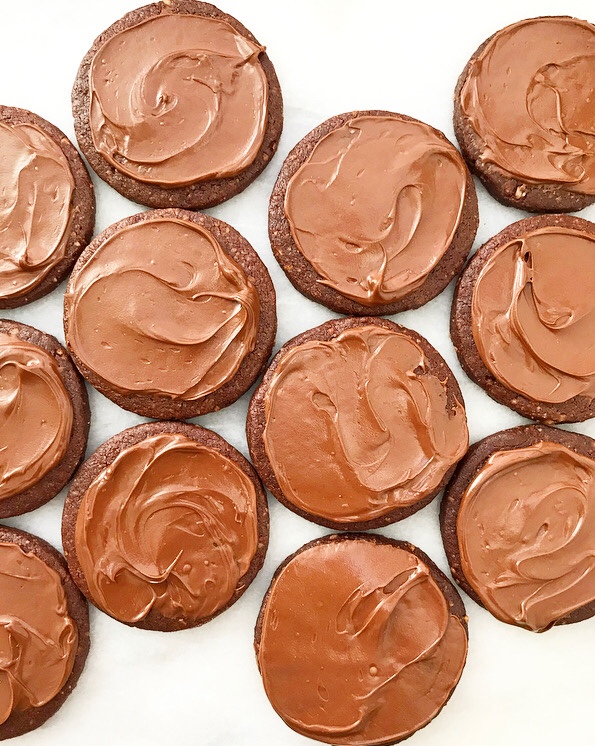 Chocolate hazelnut spread = dessert food.
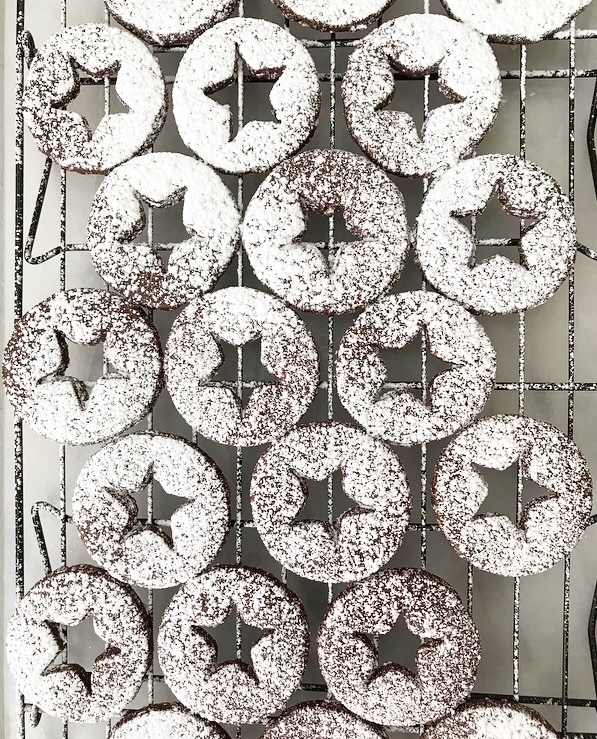 Chocolate hazelnut cookies = dessert food.
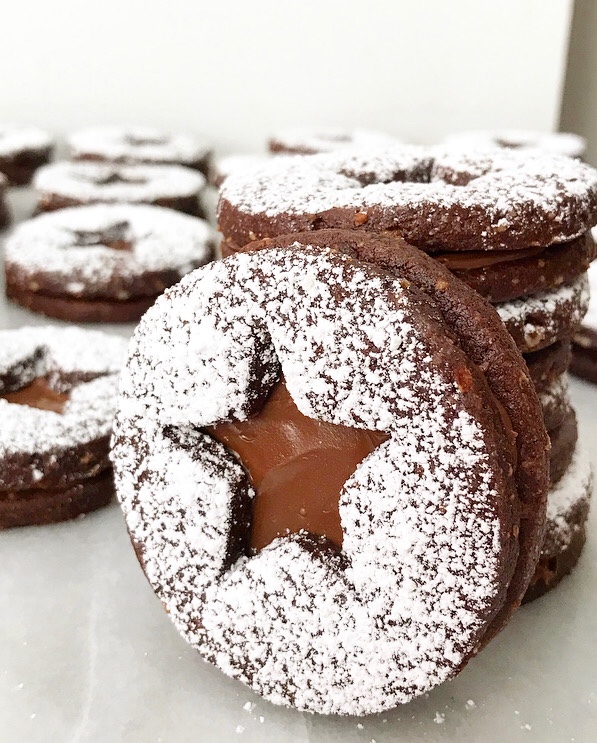
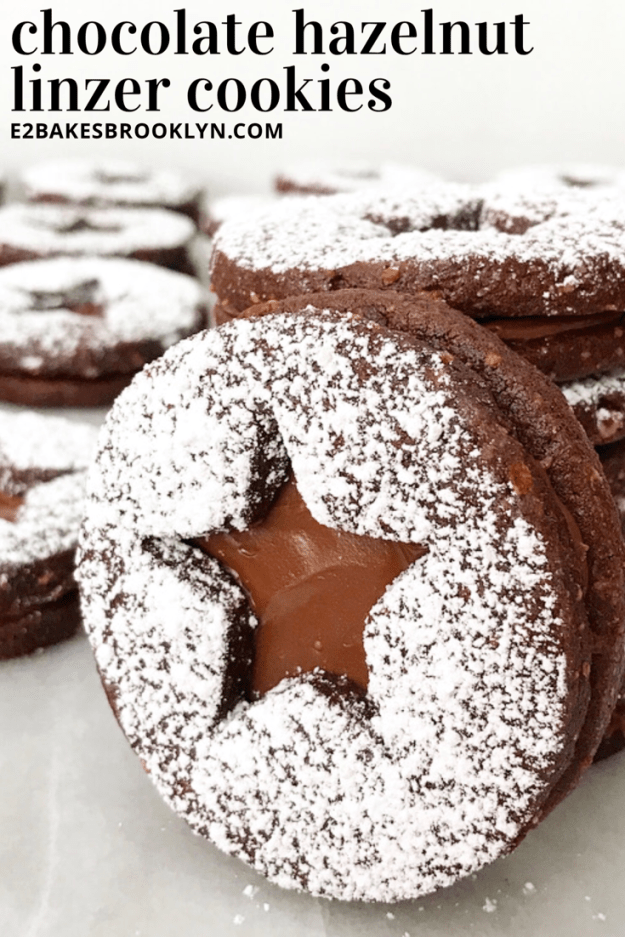
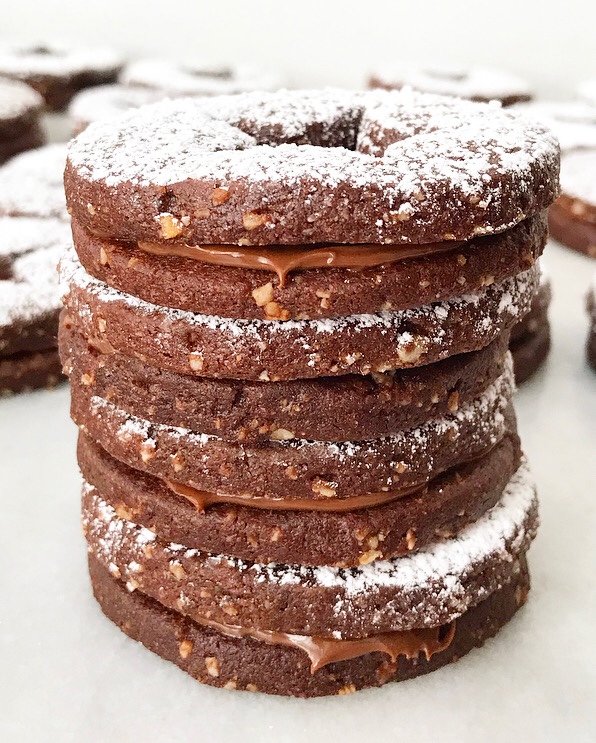 A layer of Nutella chocolate hazelnut spread sandwiched between two crunchy chocolate hazelnut cookies = the dessertiest dessert food.
(“Dessertiest” is a word today.) So, in conclusion, when it comes to Chocolate Hazelnut Linzer Cookies, no jam, no problem.
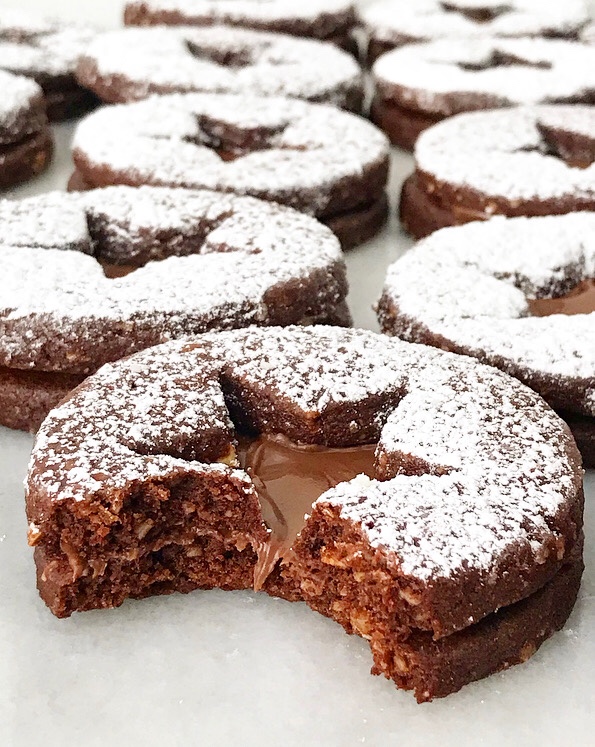
Looking for more chocolate hazelnut? Check out this cake, this granola, these grain-free cookies, these brownies, and this pie. Oh, and this other pie. And this buttercream. I ❤ chocolate hazelnut.
Chocolate Hazelnut Linzer Cookies
makes 22-24 sandwich cookies
1/2 cup raw whole hazelnuts
1 3/4 cups all-purpose flour
3/4 cup unsweetened cocoa powder (preferably dutch process)
1 teaspoon baking powder
1/2 teaspoon Kosher or sea salt
1 cup (2 sticks) unsalted butter, softened to room temperature
1 cup granulated sugar
1 large egg, room temperature
2 teaspoons pure vanilla extract
1 tablespoon confectioners sugar, for dusting
1/4-1/2 cup Nutella chocolate hazelnut spread (based on preference)
Special Equipment:
rolling pin
2 1/2-inch round cookie cutter
1-inch cookie cutter
sifter or mesh sieve
Preheat oven to 350F. Place hazelnuts on a dry, rimmed sheet pan. Toast in the oven for 5-7 minutes, or until fragrant. Immediately transfer hazelnuts to a clean, dry, textured hand towel. Fold towel around the hazelnuts and then rub the towel with the palm of your hand. This will allow the hazelnut skins to loosen. This step does not have to be done perfectly.
Once hazelnuts are cool, transfer them to the bowl of a food processor. Pulse until a fine meal forms. Set aside.
Make the cookie dough. In a large mixing bowl, whisk together flour, cocoa powder, baking powder, and salt. Set aside.
In a separate large mixing bowl, cream butter with an electric mixer. When butter is fluffy and lighter in color, beat in sugar, followed by egg and vanilla. Mix in hazelnut meal. Add dry ingredients to in two installments, scraping down the bowl as necessary. Cover with plastic wrap and refrigerate for 3 hours or up to 3 days.
Preheat oven to 350F. Line two baking sheets with parchment. Set aside.
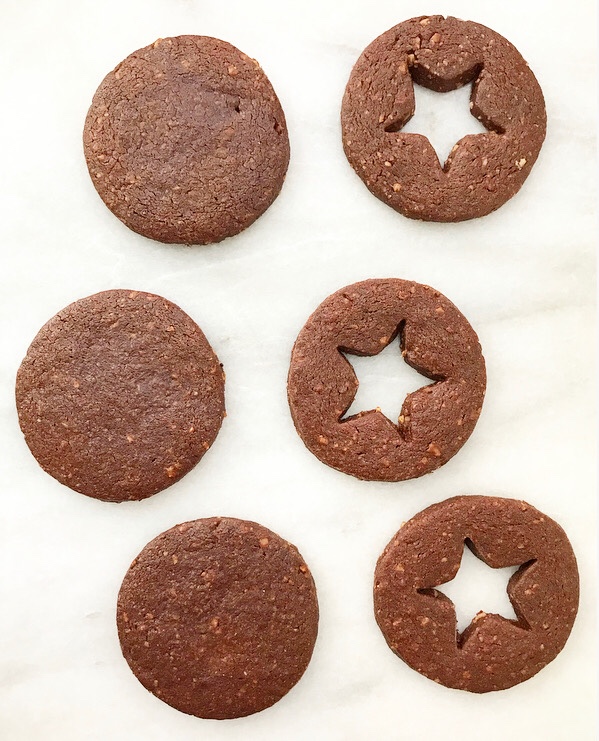
Lightly flour a surface and a rolling pin. Roll dough to 1/8-inch thickness. Cut dough with a 2 1/2-inch round cookie cutter. Place half the cut cookies on prepared pans. Use a smaller cutter to cut a small hole in the center of the remaining cookies before placing them on the prepared pans. If dough becomes too warm, freeze pans of cut cookies for 10 minutes before baking.
Bake 12-13 minutes, until slightly puffed. They will be a touch soft, but will crisp up as they cool. Let cookies cool at least 10 minutes on their pans before carefully removing to a rack to cool completely. Repeat rolling, cutting, and baking until all dough has been used.
Set a cooling rack over a piece of parchment. Once all cookies are baked and cooled, set the cookies with the centers cut out on a prepared rack. Sift confectioners sugar over the tops.
Spread each whole cookie with 1/2-1 teaspoon of Nutella (amount is based on your preference). Carefully sandwich cookies together. Serve.
Chocolate Hazelnut Linzer Cookies will keep in an airtight container for several days. Place wax paper between layers for best storage.

 How freaking cute are these Hand-Painted Sugar Cookies?!
 They’re a favorite from my
  It all goes back to a sweet request from a seven year-old (who is now eleven, which is enough to make me want to cry). He and I had gotten into the rather enjoyable habit of baking together on Friday afternoons. I usually chose what we made, but then he asked if we could decorate cookies one day and…well, it sounded a little fun and a little insane and I like to think I’m a little of both of those things.
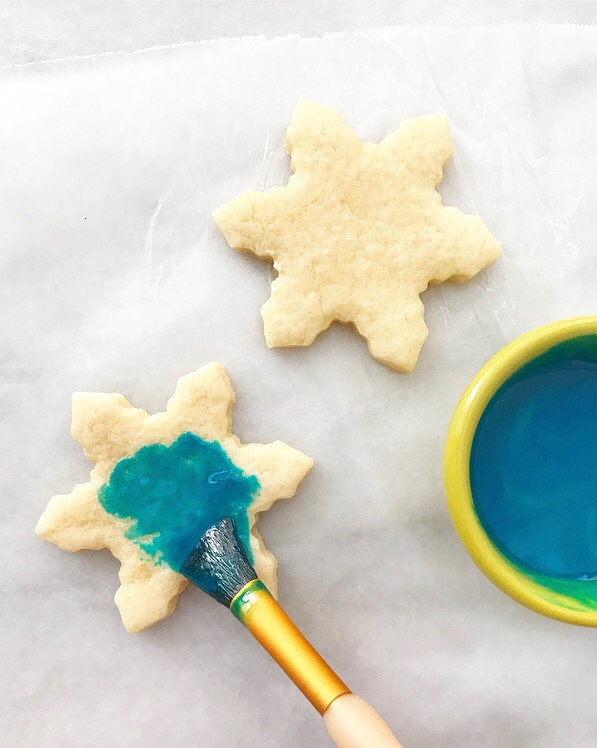
 I knew I was not going to give this kid a bag of royal icing—he had difficulty with basic motor skills, so giving him a bag of sugar-based concrete simply was not an option. Also, he had a two year-old little sister (who is now six…*sobs*) who was prone to very enthusiastic Taylor Swift dance parties and getting stuff everywhere (because she was, in fact, two). But I wanted to fulfill his request, so I spent that night baking a batch of plain sugar cookies and took five minutes the following day to whisk together a few different colors of sweetened condensed milk paint. I lined the breakfast table with wax paper, tied aprons around both kids and, with some real hesitation, gave them paintbrushes.
 While I was aware that this little culinary arts & crafts project could have gone very messy, it actually ended up being one of the happiest afternoons of my nannying career. Since both kids had handled a paintbrush before, they had the motor skills to paint the cookies the way they wanted. Once they were done with their masterpieces, I baked them a few minutes to set. Once the painted cookies were cool and no longer sticky, I piped on some icing with their direction.
 By far, the best part was that the kids were super excited and proud to show their work to their parents, and their parents and I were happy that they had spent an entire afternoon without asking for a screen, or worse, saying they were bored. #childcarewin
  After that, we had a cookie-painting party for every holiday, birthday, and sleepover. There was always a little mess, of course, but there’s also mess when I, a real-live adult, paint cookies too. In this case, it can be wiped away easily, instead of chiseled off counters and floors while saying every curse word I know (and I know a lot of them).
 Now, it has been a few years since I last nannied, and I don’t have kids or nieces and nephews, but I still love to decorate cookies this way. Painting with sweetened condensed milk paint is a very meditative process, and I can very happily while away a few hours with a few colors of paint and a pack of brushes. I’ve even considered having friends over for an afternoon of cookie painting instead of a more traditional swap. Doesn’t that sound fun?!
 I highly recommend using a fresh (or at least, food-dedicated) set of paintbrushes for painting cookies. Don’t use the cheapest you find—those tend to lose bristles in the painting process. The second-cheapest are totally okay though. The set I used here goes for $5 at Michaels.
 You could absolutely detail your Hand-Painted Sugar Cookies with royal icing, but I think a very thick batch of simple icing works just as well and is twice as easy to make. Whatever you choose to use, know that it will take several hours to fully dry.
 But like, you can definitely eat cookies with slightly damp icing. It’s the holidays. Live your best life.


 I’m continuing through my list of classic Christmas cookies/treats of which I have previously been deprived My latest observation in this multi-year endeavor is that a lot of popular holiday desserts are just variations on sugar cookie dough. If you need proof, see
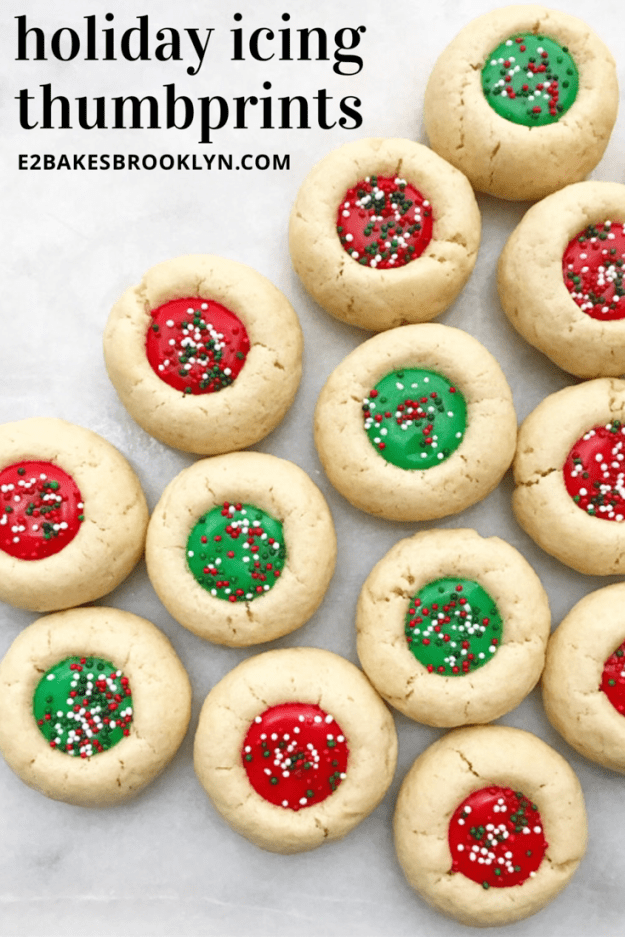
 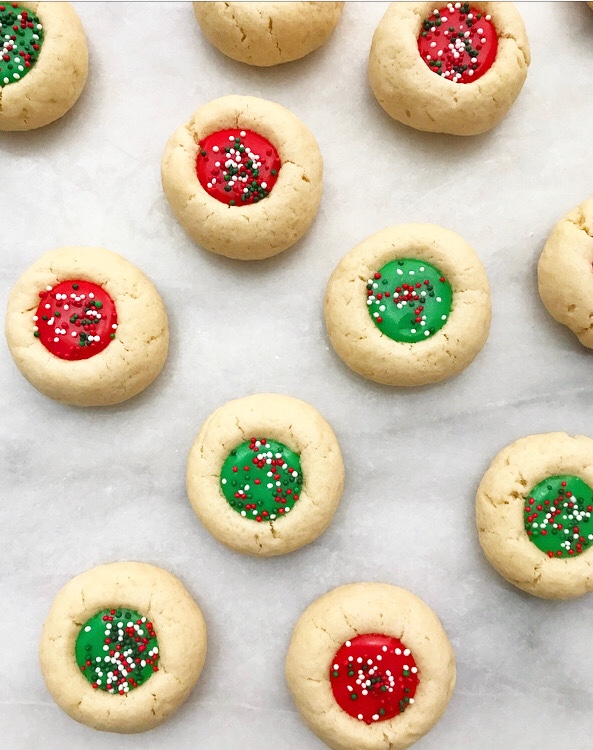 You’d think this would somehow make Christmas cookie trays boring, but how could anyone *possibly* be bored when there are Holiday Icing Thumbprints to be had?!
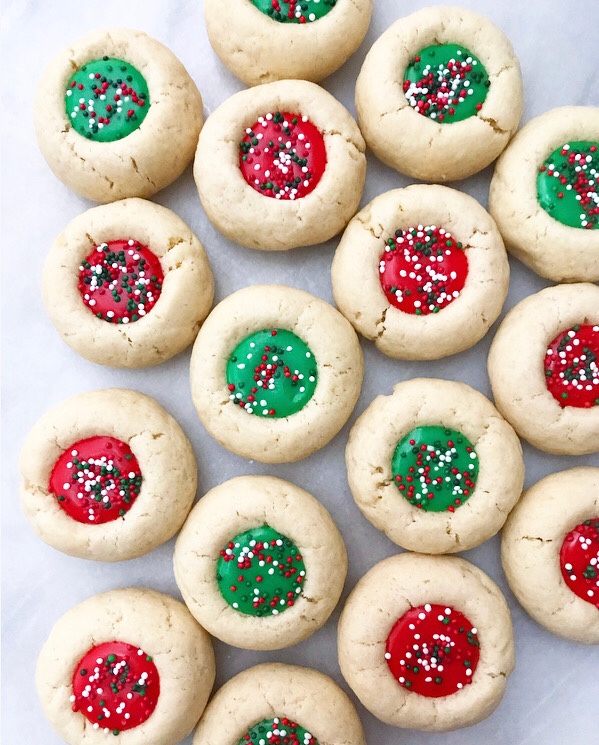 You are probably familiar with the more traditional jam thumbprints—usually a sugar or shortbread cookie with a little well of jam (the titular “thumbprint”) baked into the middle. Those are great and all, but these are their more fun cousins. I mean, these are basically just a socially acceptable vehicle for eating icing. And they have sprinkles. Yesssssss.
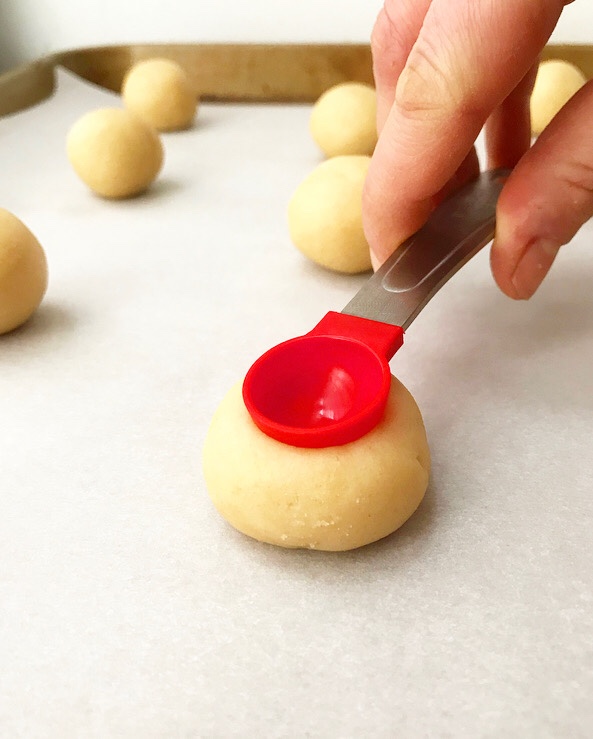
 Holiday Icing Thumbprints are super easy to make. Mix the dough and then chill, scoop, and roll it into balls. Press the back of a small spoon into each dough ball before baking for 12-13 minutes. You could, of course, make the “thumbprints” with your thumb, but I vastly prefer the consistent shape that comes from using a 1/2 teaspoon.
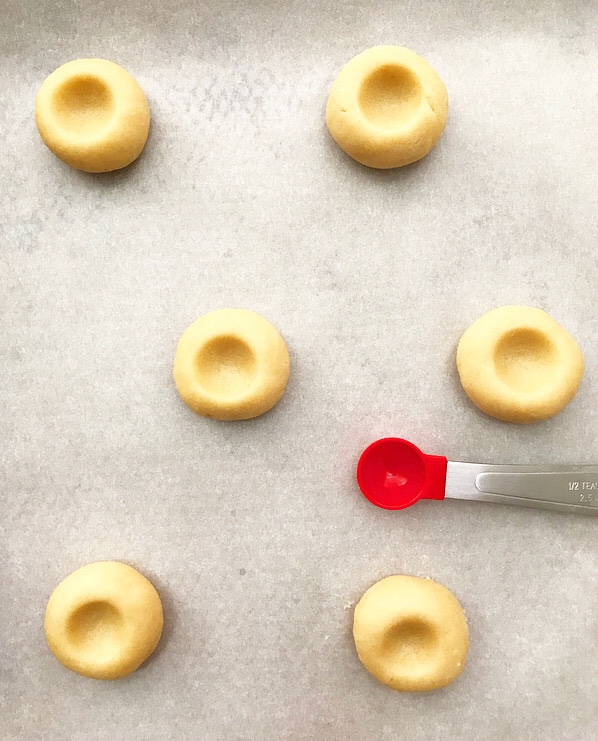
 Since these thumbprints are baked without a filling, their centers will puff dramatically while they’re in the oven. The pre-baking press is less for the sake of the wells and more because it means the cookies won’t be as prone to unsightly cracking when you press wells into them again after baking. It’s the most tedious part of this recipe, but it makes for really aesthetically pleasing results. (Also, it’s really satisfying.)
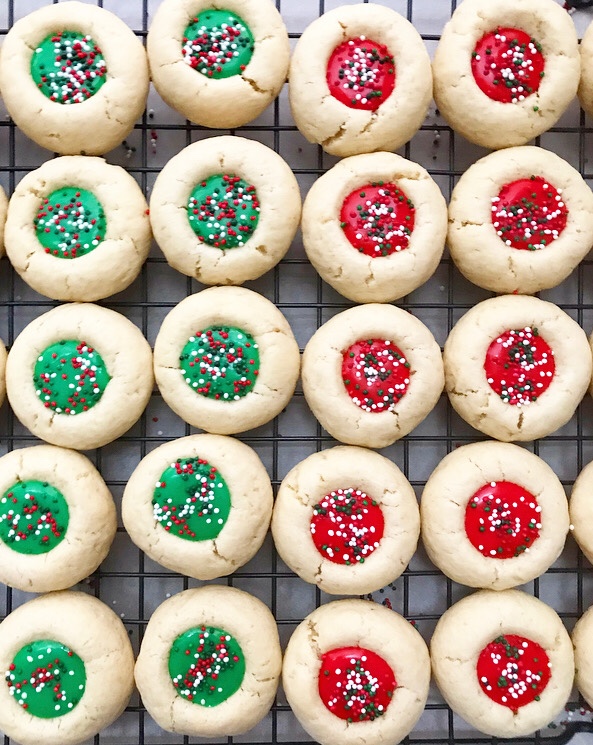 After that, there’s nothing left to do but squeeze red and green icing into the wells and scatter holiday sprinkles over the tops!
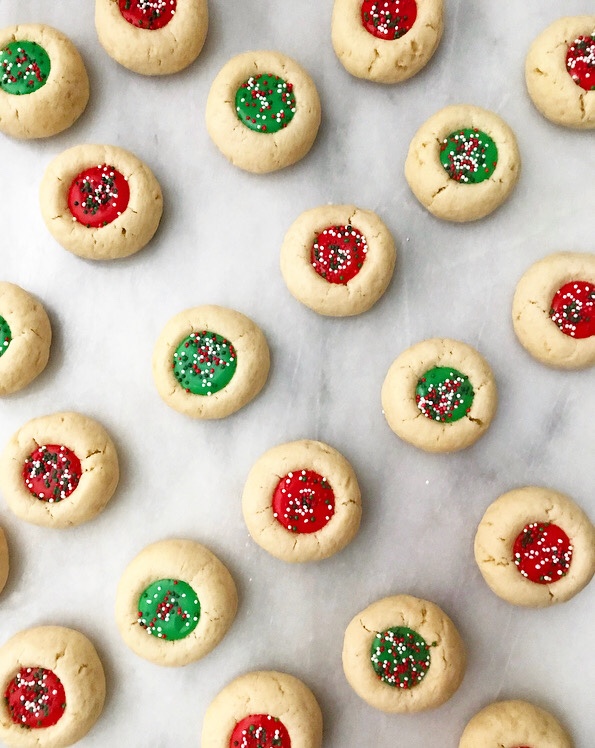 Oh, and to admire them for their undeniable cuteness and holiday cheer. And to eat like four of them while nobody’s looking.
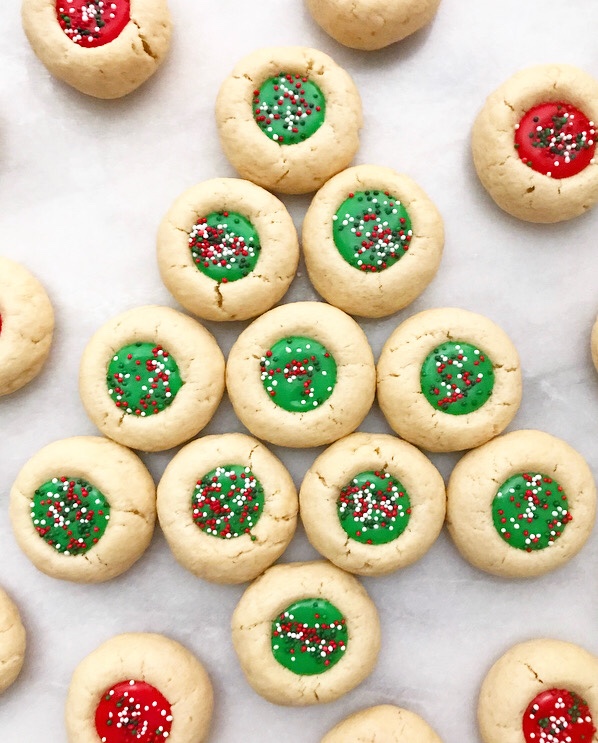


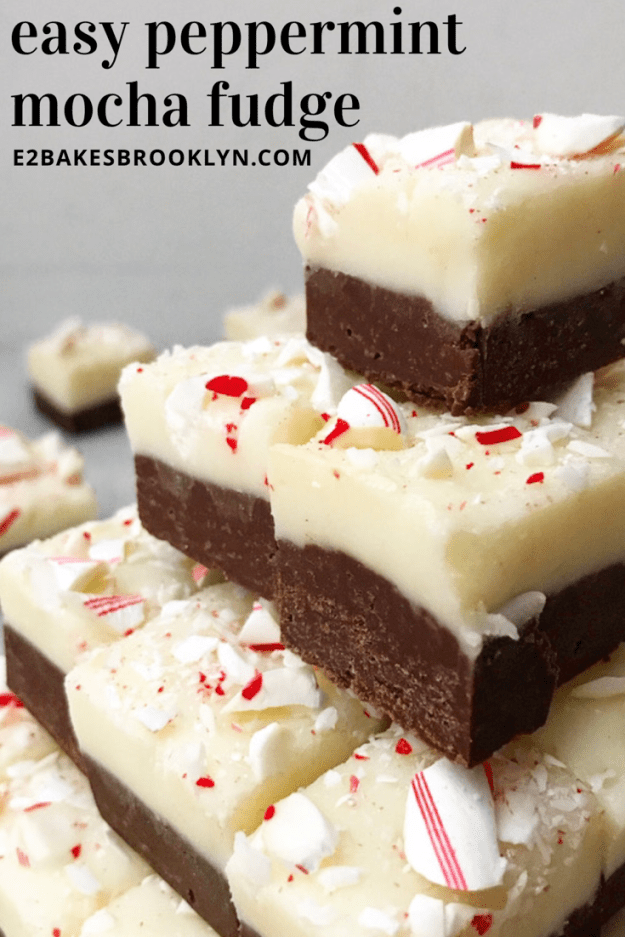
 Over the course of the next twenty days, there will come a moment where you’re glad to have this Easy Peppermint Mocha Fudge recipe in your back pocket.
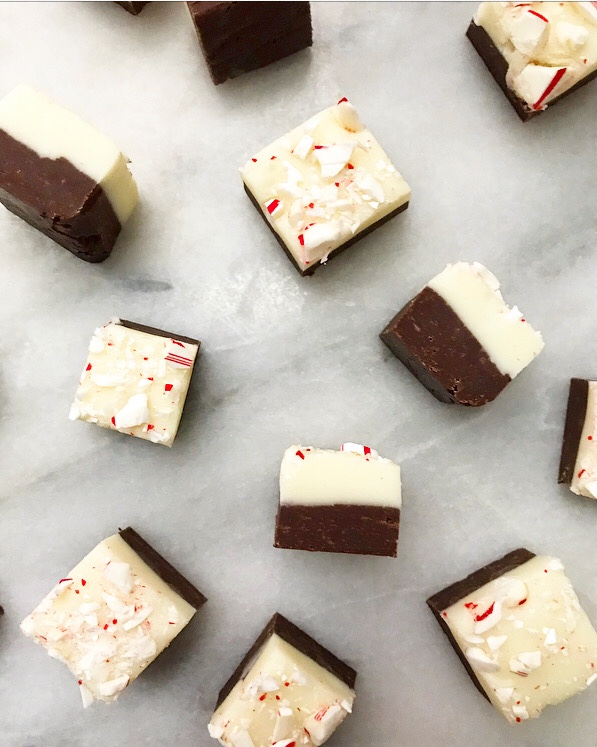 Because it really is easy. Like six ingredients easy.
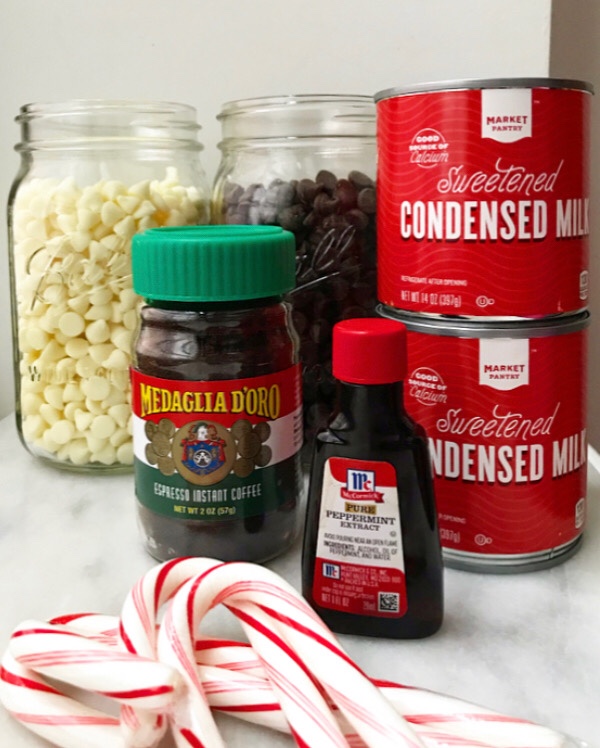 No boiling sugar, no candy thermometer easy.
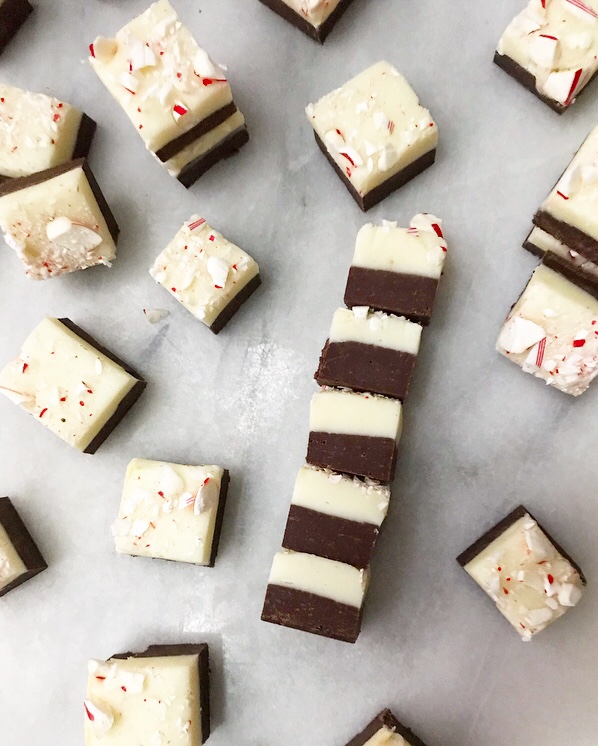 Make it in 20 minutes in a double boiler or—even easier—the microwave…easy.
 But nobody will know that you made these little morsels of holiday magic without having to think too hard, or that the batch makes enough for multiple holiday gifts (just add cute bags or tins), so you didn’t have to overextend yourself.
 And nobody is going to bite into this rich, dense, silky fudge and think “I bet he/she/they made this with sweetened condensed milk and chocolate chips instead of the ‘traditional’ way.” Nope.
 In fact, I guarantee you that all anybody will be thinking is how to get another piece of this double-layer minty coffee confection into their faces as soon as possible.


 A few years ago, I posted a question on social media asking for Christmas cookie recommendations. Since I grew up largely without homemade Christmas treats, holiday baking was a bit of a mystery to me. Since then, I’ve spent the holidays steadily working my way through the (very) long list supplied by various Facebook friends. Those classics have been interspersed with other festive treats, of course, but I work my way through that list a little more each holiday season. Over the years, there have been
  I found these twisty two-tone vanilla-mint cookies super intimidating. I have pretty sad motor skills and was afraid I didn’t have a dough in my arsenal that wouldn’t spread out and get weird. As usual though, I shouldn’t have been concerned.*
 My Candy Cane Cookies are totally adorable, delicious, and festive as all get-out! The dough I use here is a slight variation on the one I use for my
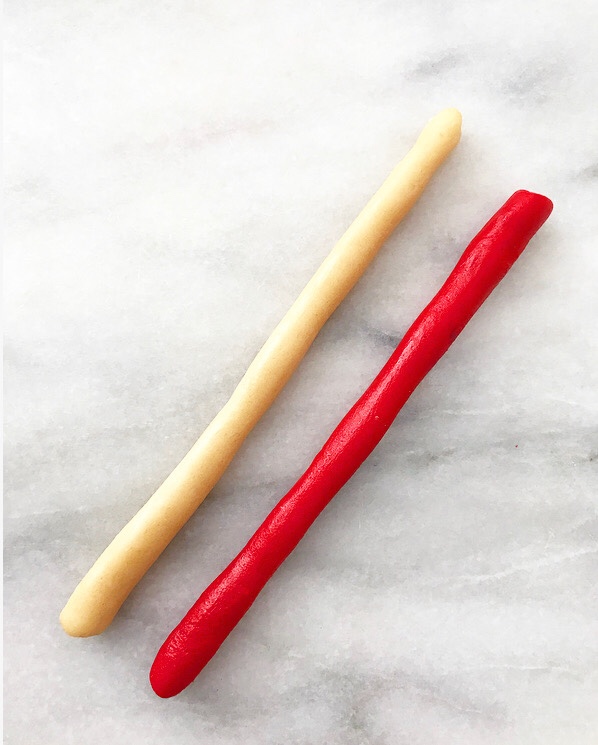
 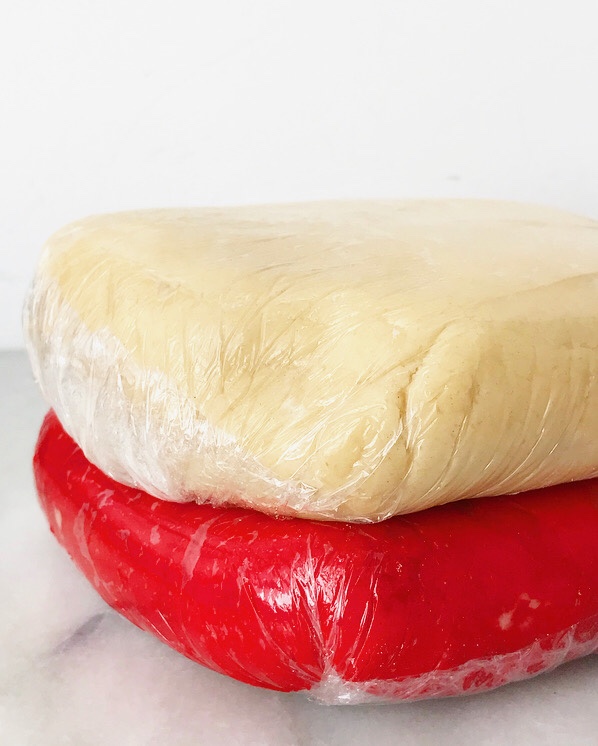 This dough gets a three hour chill before it’s formed into cookies. A tablespoon of each color of dough is rolled into a rope.
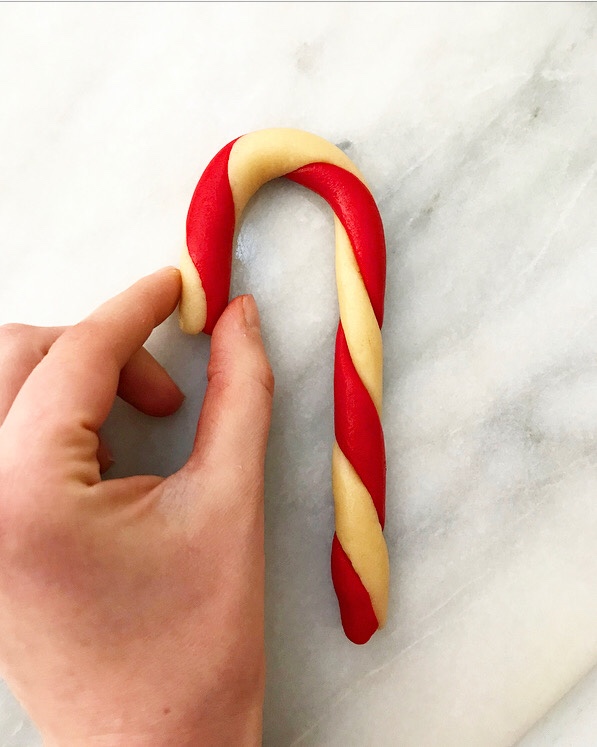
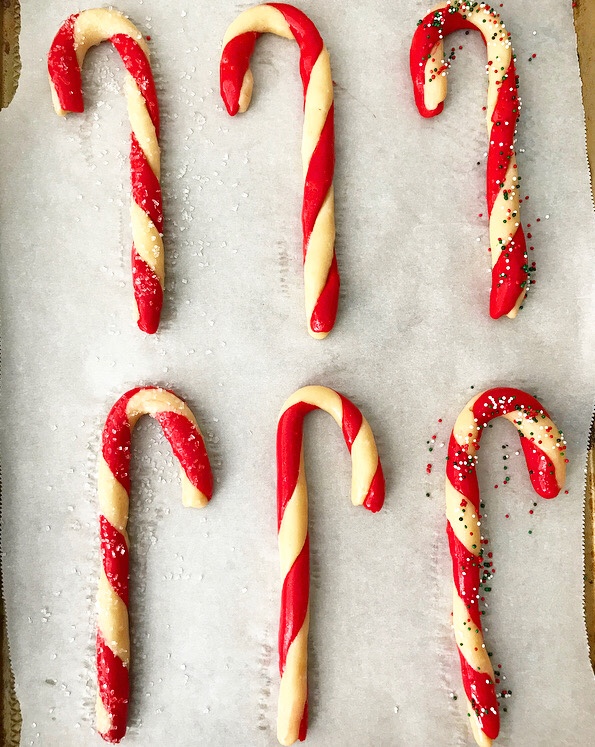
 They’re twisted together and smoothed before being formed into candy cane shapes.
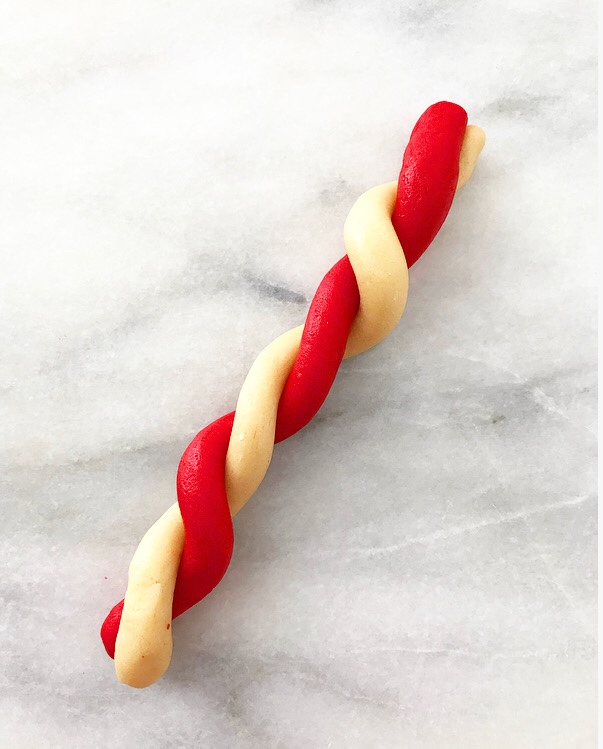
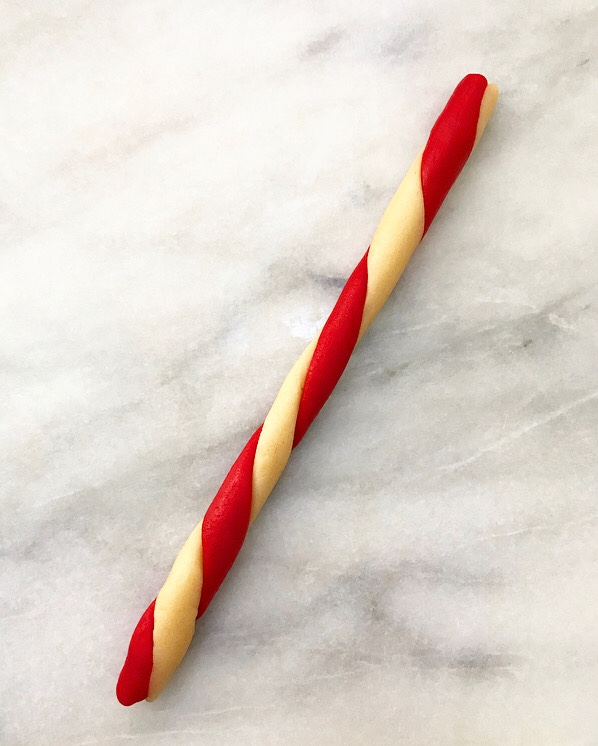
 If you want your cookies to have a more “arts & crafts” look, you can skip the smoothing step. Your cookies will be a little shorter and chunkier, but just as delicious as their more realistic-looking counterparts.
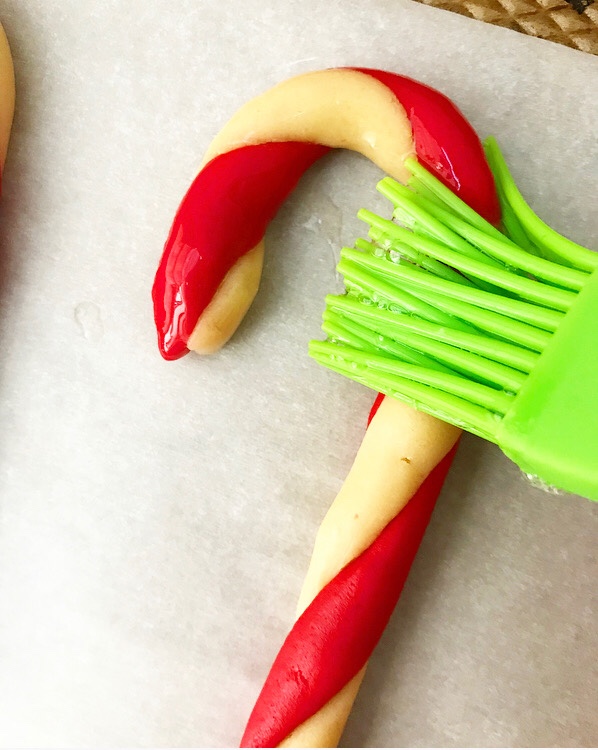
 The formed cookies each get a brush of egg white glaze before baking. This gives them a little sheen post-baking, and also allows you to decorate with holiday sprinkles and sparkling sugar. Cute, right?!
 Candy Cane Cookies expand a tiny bit while baking, but only enough to hide any imperfections incurred during the shaping process. I kind of like that they’re not all carbon copies of each other though.
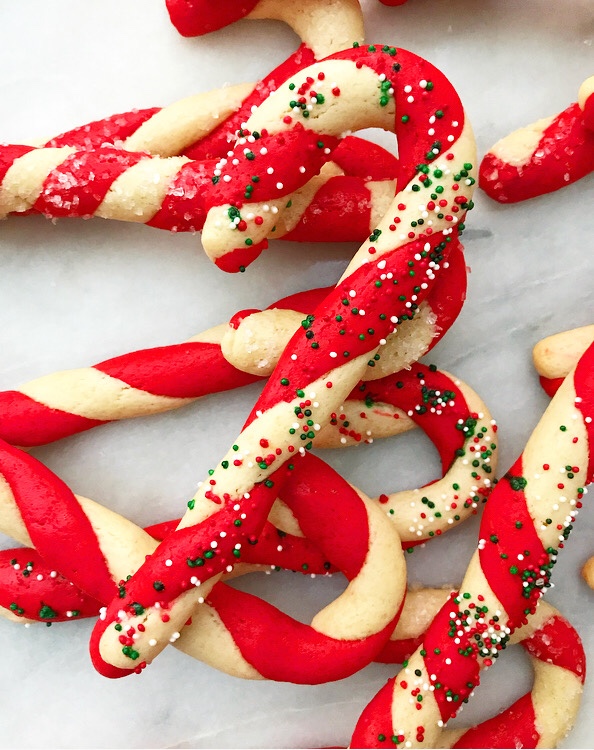 I’m also a big fan of their crisp edges, soft centers, and buttery mint flavor. Add in their hefty dose of holiday cheer and…well, what’s not to love? ❤