Gone are the days of cinnamon rolls being a prep-ahead/only for a holiday/enough to feed a crowd/“what am I going to to with all these leftovers?” treat. Or they are in my house anyway, now that I can make just two cinnamon rolls at the drop of a hat.

To that end, if I can whip up two muffin-sized cinnamon rolls in forty minutes, what’s stopping me from taking over the world?! Well, aside from a general distaste for telling people what to do, lack of ambition to do so, and keeping up with Oscar season…not a whole lot. It’s a feeling of power that is unmatched.
Truly, the fact that I can slap together a dough from the most basic kitchen ingredients in tiny amounts, roll it up with sweet cinnamon filling and have two fully-formed rolls to show for it in less than an hour is…well, it should be a special skill on my résumé. And maybe soon, yours.

Now, with a forty minute turn-around time, you’ve probably guessed that these breakfast buns don’t have yeast in them, but that doesn’t mean we’re sacrificing flavor or texture. Ohhh no, we will not be doing that. This dough is leavened with a combination of baking powder and baking soda, and made tender and flavorful thanks to a little DIY buttermilk and a pat of butter. Oh, and it’s egg-free, which seems like a perk at the moment.
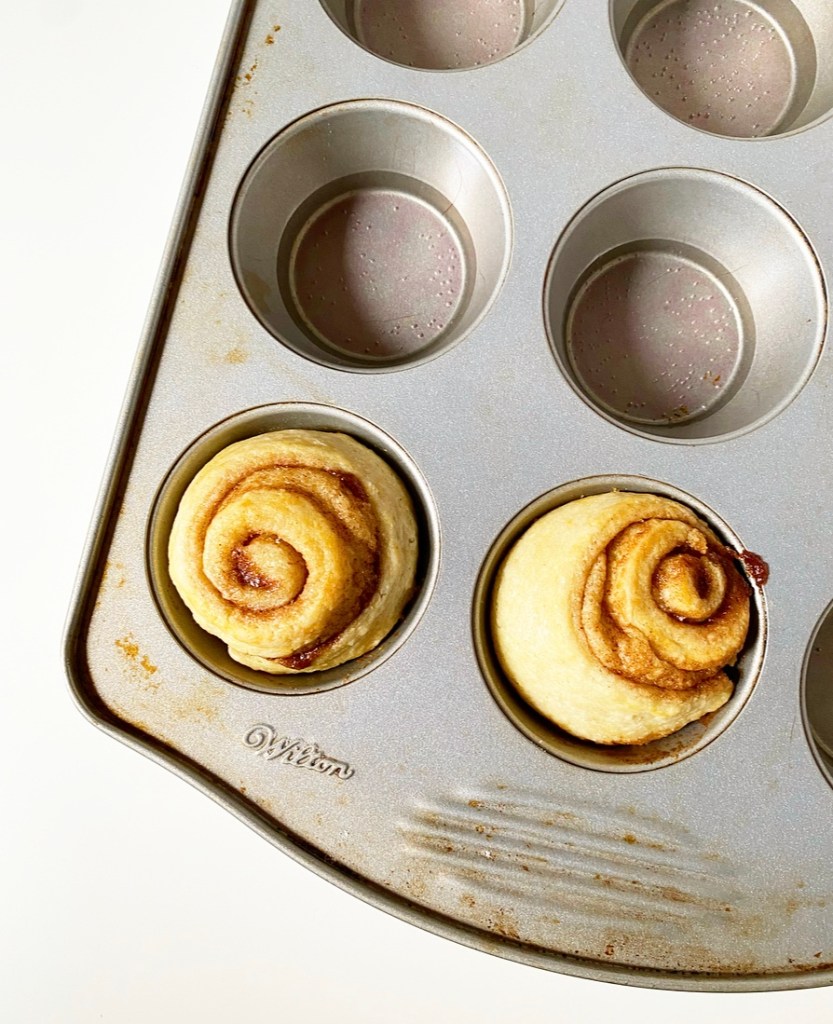
Everything is mixed up in just a couple of minutes before getting rolled out, filled with a paste of cinnamon-sugar and butter, sliced lengthwise, and rolled back up into two portions. Since these cinnamon rolls don’t have a rise time or other rolls in the pan to help them maintain their shape, I like to bake them in a buttered muffin tin. This works for shaping and aesthetics, and frankly, muffin-shaped foods are just cuter than other foods. Period, end of story.
Add the cut rolls to the muffin tin cut-side-up for the best swirl, and give them a gentle smush to adhere to the bottom—this will encourage them to rise up instead of trying to tip over. I always have one that is a little wonky, but a tilted cinnamon roll is still a cinnamon roll.
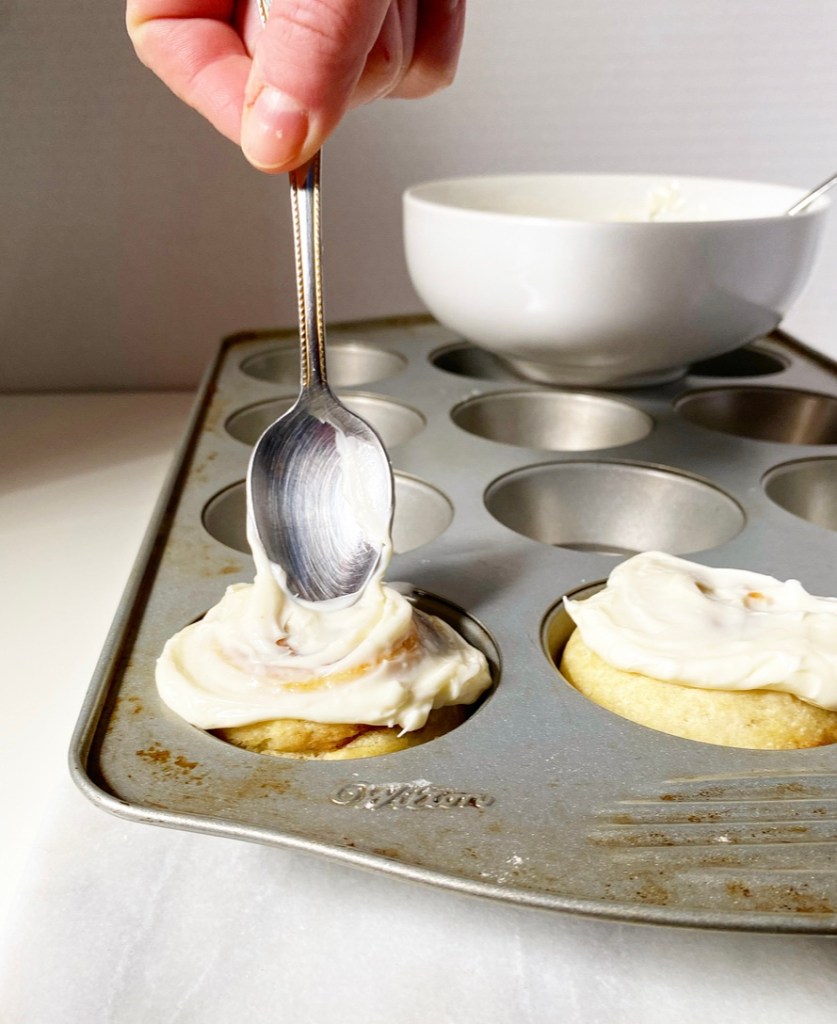
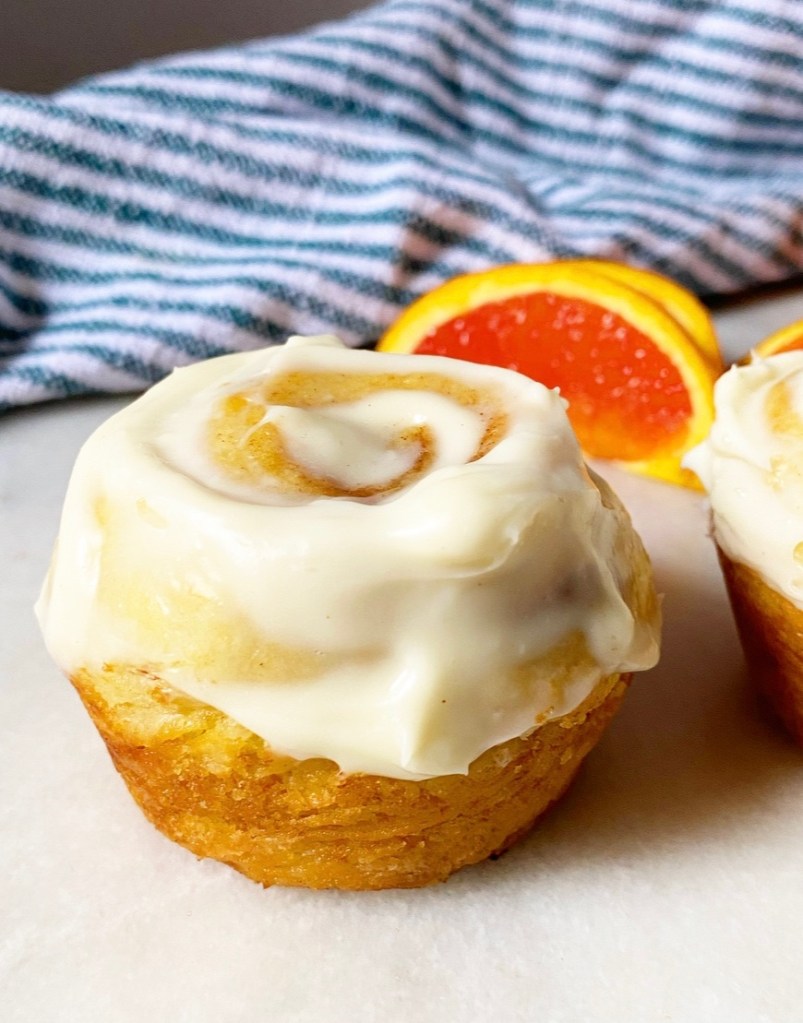
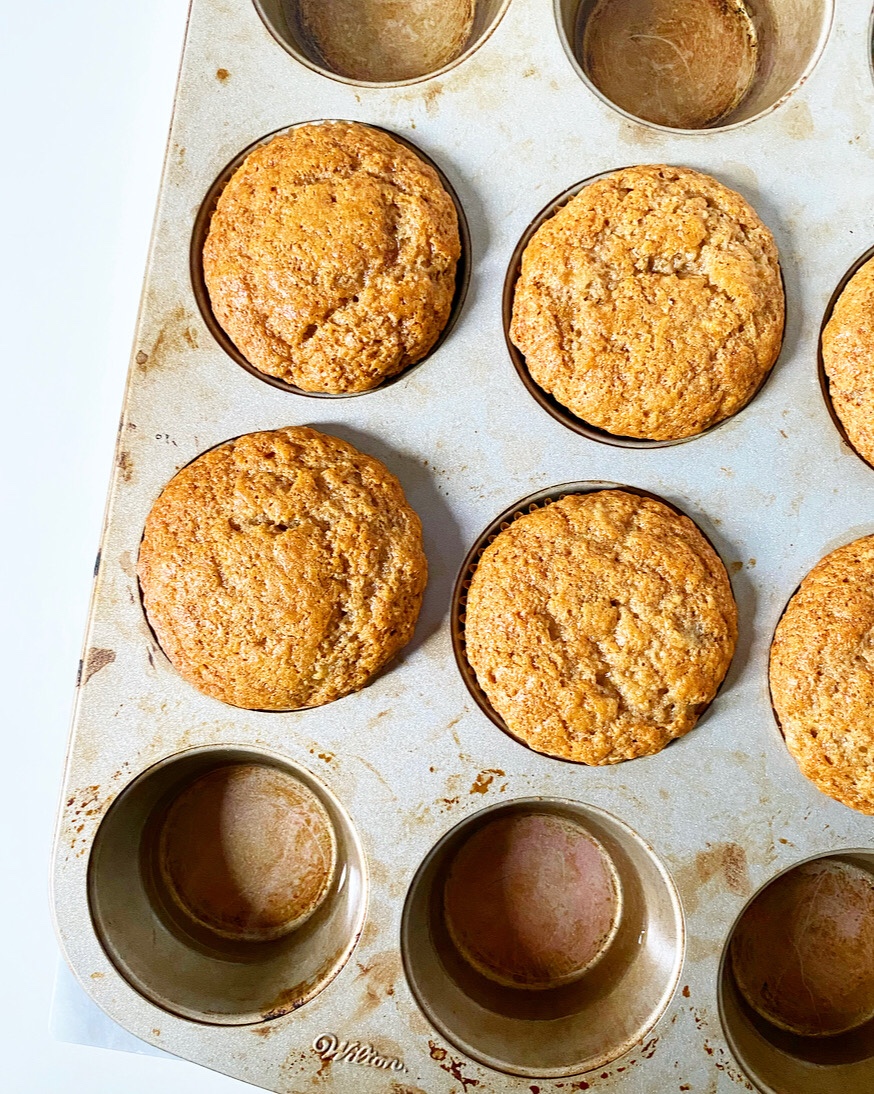
These buns bake up in about 16 minutes, which is just enough time to wash the dishes and the counter top and stir together a cream cheese icing. It takes me all weekend to convince myself to pick up a pile of clothes off my floor, but when there are cinnamon rolls at stake, it’s all “executive dysfunction who?” As with all cinnamon rolls, you may eat these at whatever temperature you like, but I think they’re always best warm with two layers of icing—one to melt into the swirl, one to sit on top. Rarely have my weekend mornings known such luxury.
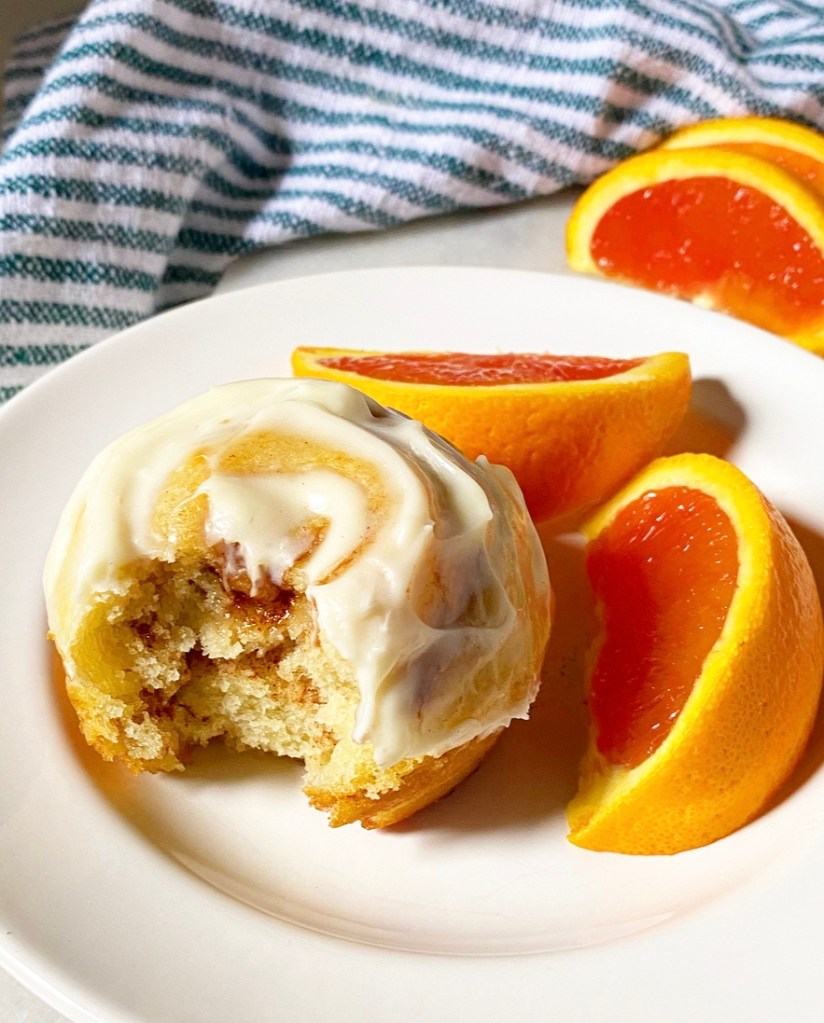
This recipe makes enough to share if you’d like, but I personally like to have one roll now and another later. Somewhere in between, I might figure out what’s stopping me from taking over the world. It’s probably all the time I spend thinking about, making, and eating cinnamon rolls. That’s fine by me.
Just Two Cinnamon Rolls
makes just 2 cinnamon rolls
Dough:
1/4 teaspoon apple cider vinegar
2 1/2 tablespoons milk of choice
1 tablespoon unsalted butter, cut into cubes
7 tablespoons all-purpose flour
1 tablespoon granulated sugar
1/4 teaspoons baking powder
1/8 teaspoon baking soda
1/4 teaspoon Kosher or sea salt
Filling:
1 tablespoon unsalted butter, melted
2 tablespoons light or dark brown sugar, packed
3/4 teaspoon ground cinnamon
small pinch of Kosher or sea salt
Icing:
2 ounces (1/4 brick) full-fat brick-style cream cheese, softened
1/4 cup confectioner’s sugar
1 teaspoon milk of choice
1/4 teaspoon pure vanilla extract (optional, but recommended)
Preheat oven to 375F. Grease 2 cups in a standard muffin tin well with butter. Fill the remaining unused cups halfway with water to keep the pan from warping.
Make the dough. Combine vinegar, milk and butter a small microwave-safe bowl or liquid measuring cup. Microwave for 30 seconds, or until butter has melted. Stir and set aside.
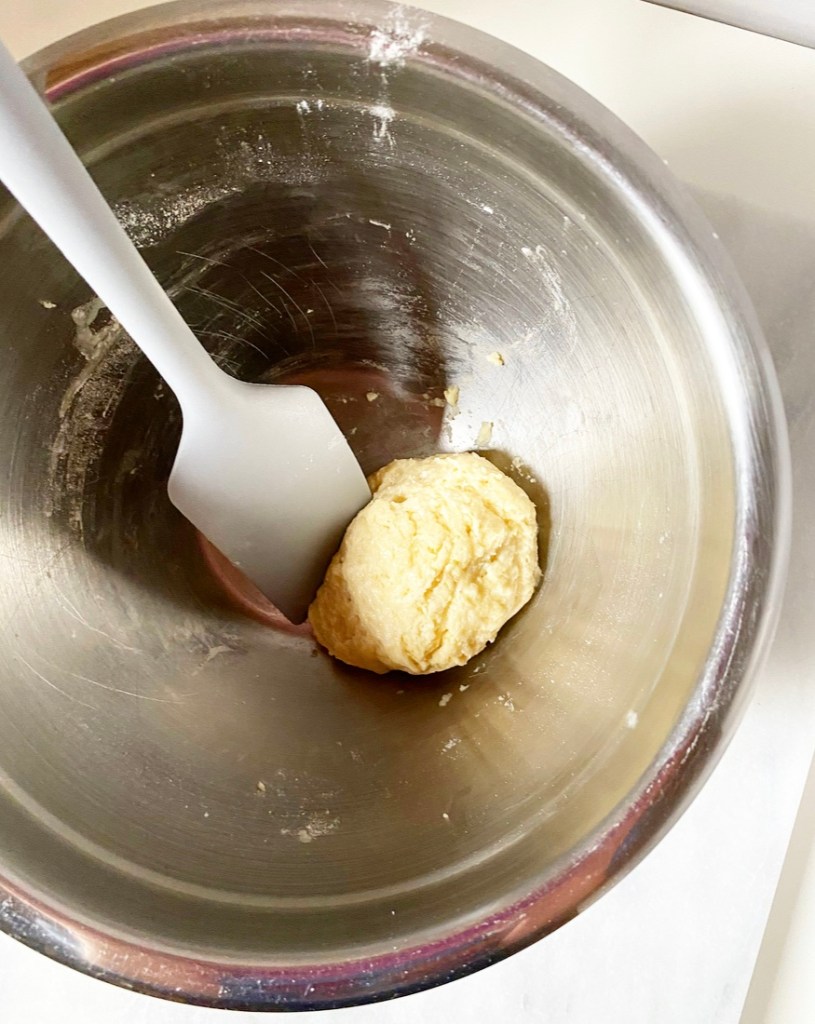
In a small mixing bowl, use a fork to whisk together flour, sugar, baking powder, baking soda, and salt. Add milk mixture and stir until a dough forms. Let rest 5 minutes.
Meanwhile, make the filling. In a small bowl, use a fork to mix together melted butter, sugar, cinnamon, and salt. Set aside.
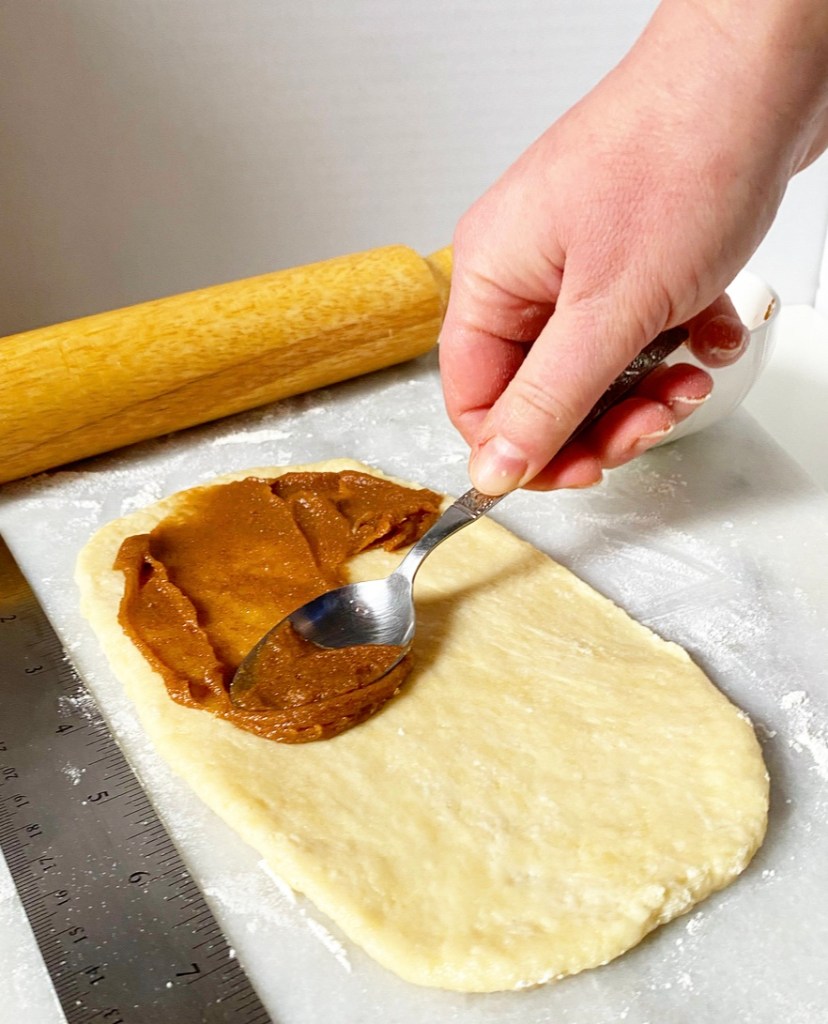
Flour a surface and a rolling pin. Turn dough onto the surface and roll into an 8x4-inch rectangle. Use the back of a spoon to spread filling over the top.
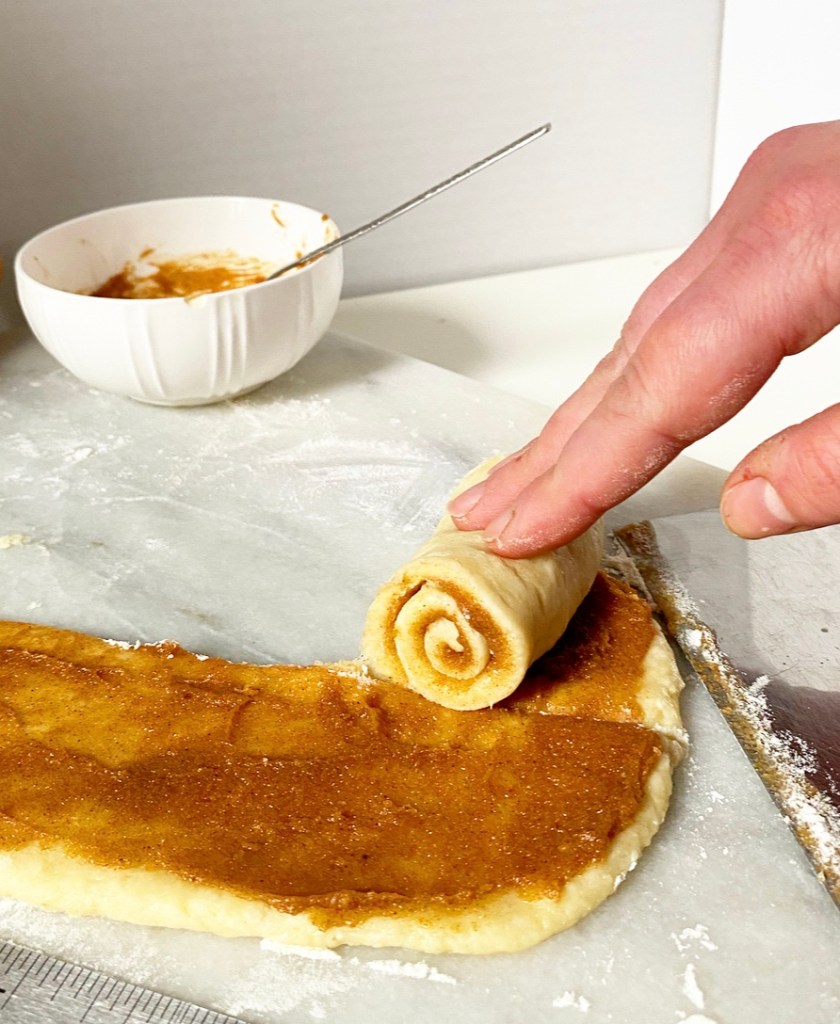
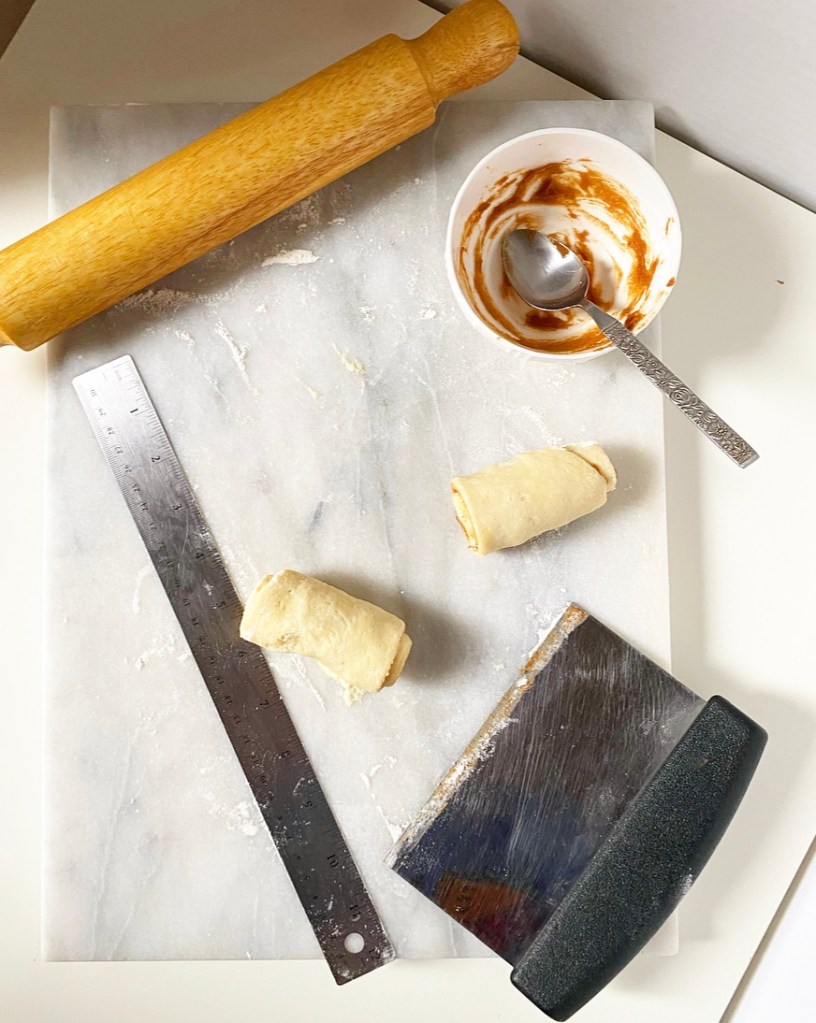
Use a bench scraper or large, sharp chef’s knife to slice rectangle in half lengthwise so that you have 2 8x2-inch rectangles. Starting at a narrow end, roll each up tightly into a cinnamon roll shape.
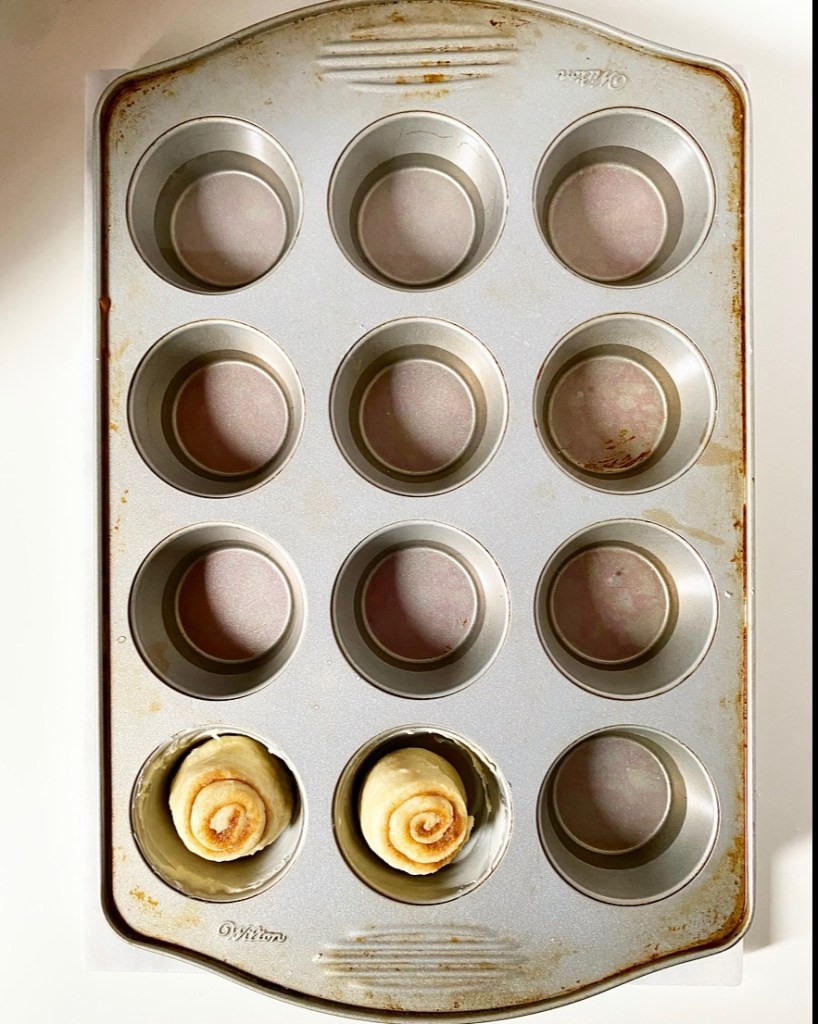
Place both rolls cut-sides-up in the prepared muffin cups. Press down on the tops to help the bottoms adhere to the pans. Don’t worry if they look a little smushed, as they will rise up while baking. Bake rolls 15-16 minutes.
While the rolls are baking, make the icing. In a small mixing bowl, use a spoon to help loosen up cream cheese. Mix in confectioner’s sugar, followed by milk and vanilla.
Once baked, let rolls cool in the pan for a couple of minutes before removing to a plate. Top each with 1/4 of the frosting. Let sit for 3-5 minutes so that the icing melts into the spiral. Top with remaining frosting as desired.
Serve rolls warm or at room temperature. Leftovers will keep covered for a day or so.
 It has been documented on here that I fear making cheesecakes, but that’s not exactly true. I don’t fear cheesecake, I fear a leaking springform pan in a water bath (bain marie). Yes, I know you are supposed to wrap it in foil, but I’ve never seen anyone explain in exacting, painstaking, borderline-dull detail how you should do that so that there is absolutely no risk of leakage. And so, I have still (!!!) never made a traditional baked-in-a-springform cheesecake.
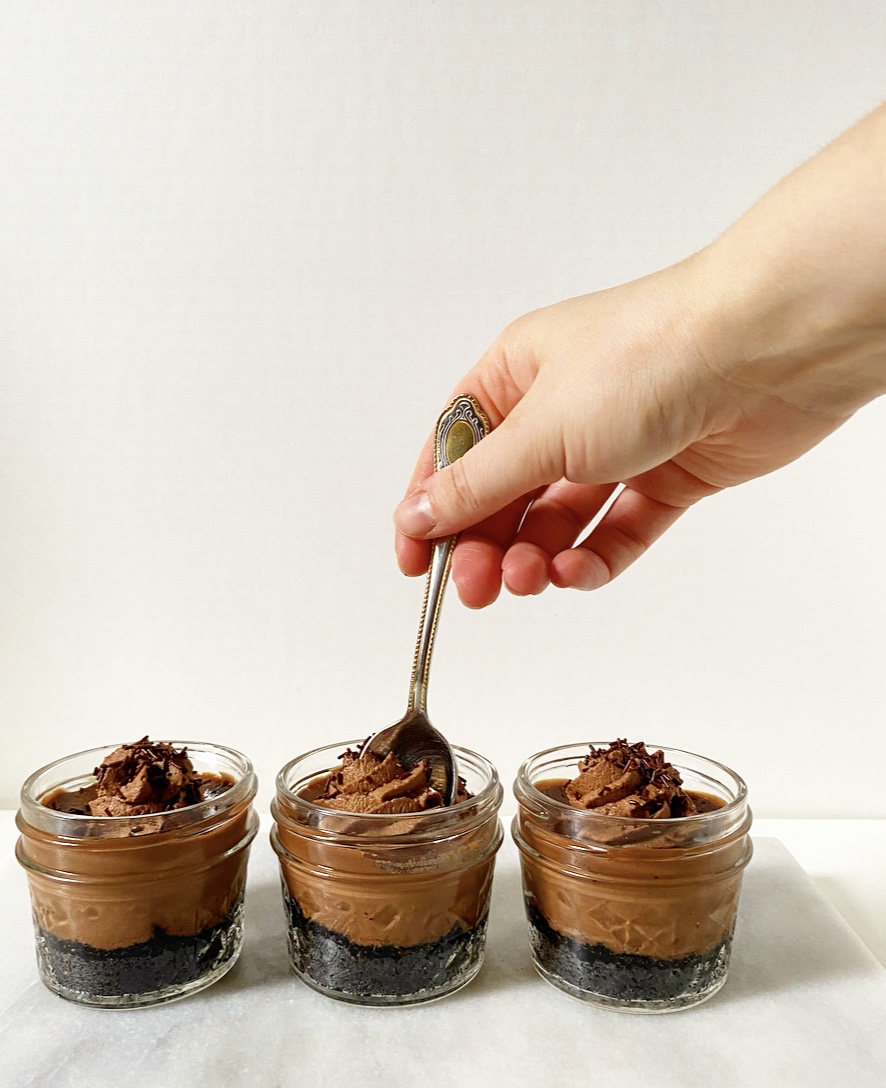
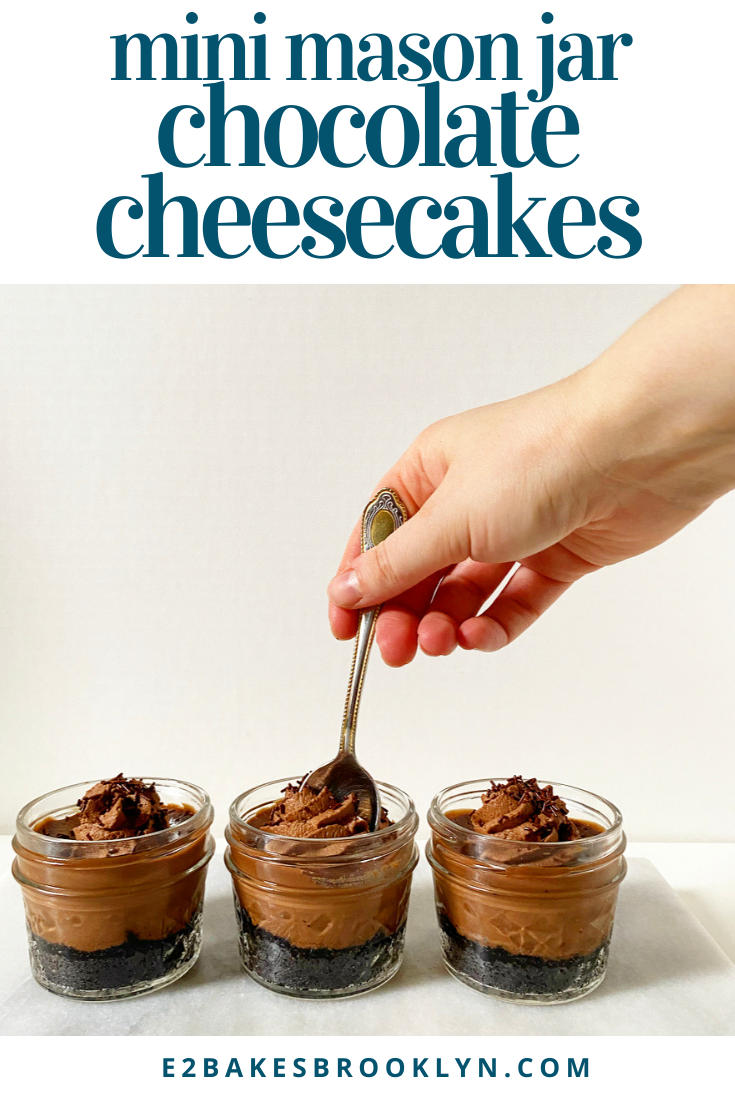
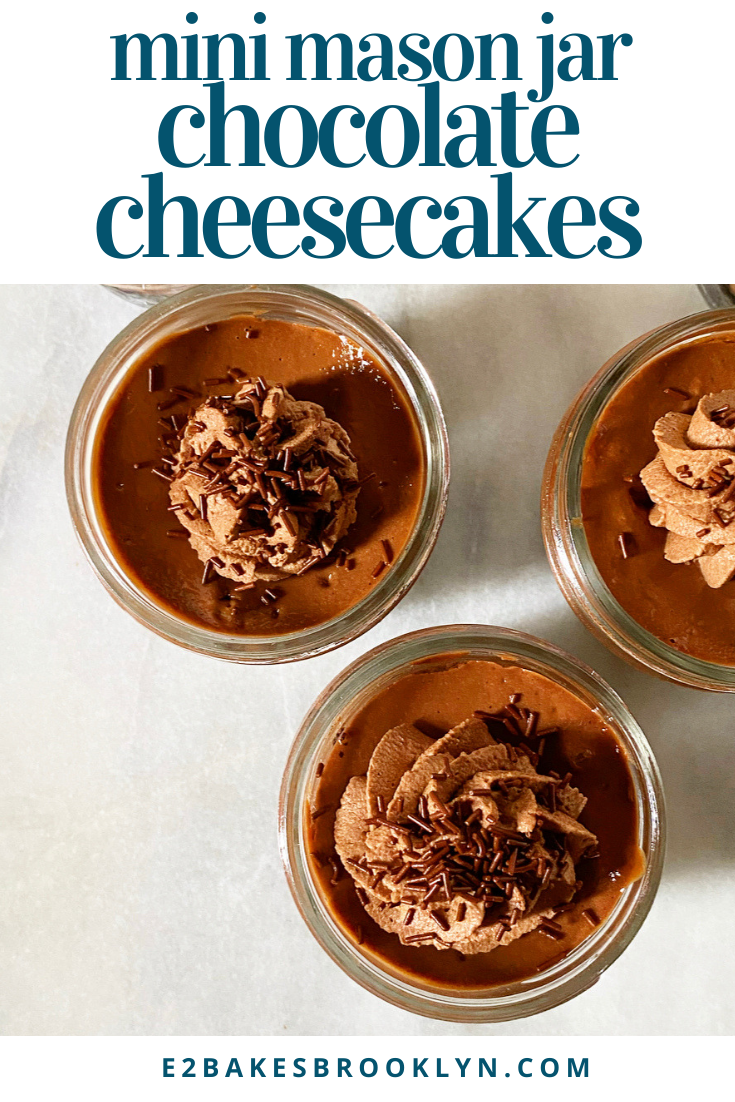
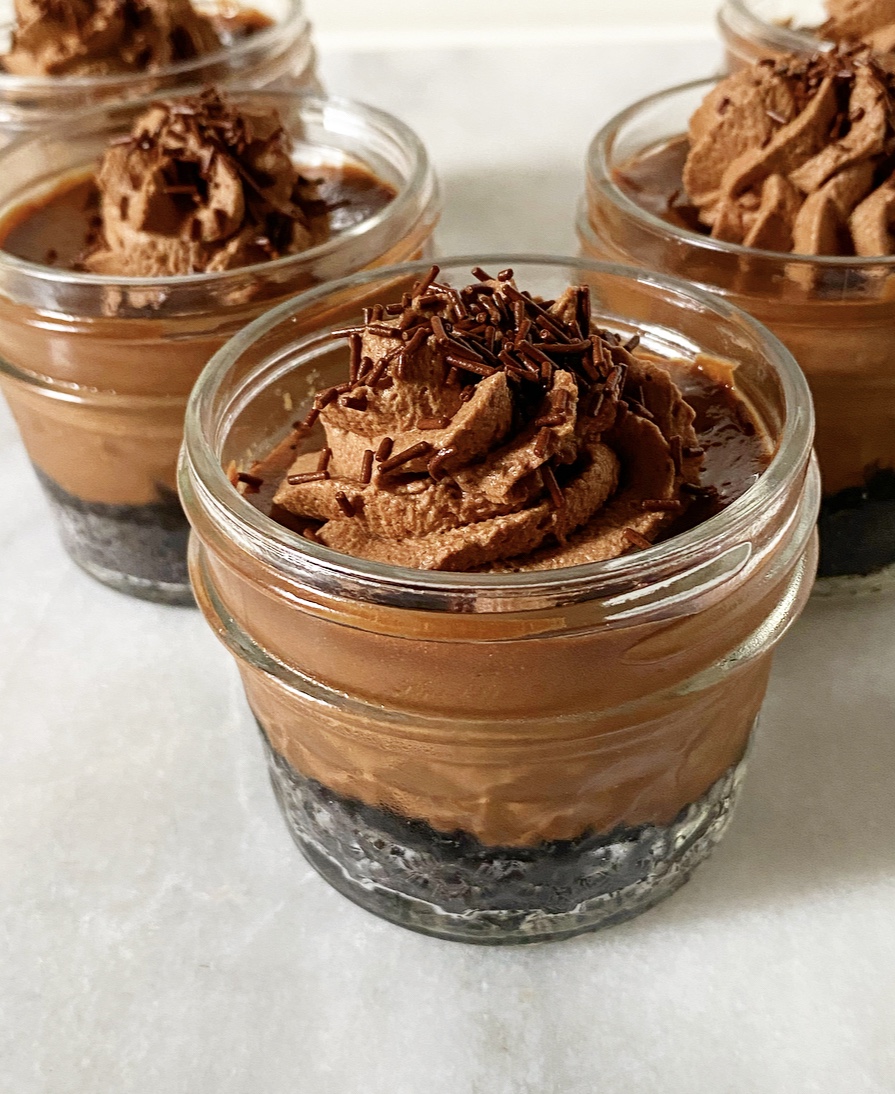 These Mini Mason Jar Chocolate Cheesecakes are SO good, y’all. So. Good. And they come in very cute, water tight, social distancing-approved serving vessels. Super rich, chocolaty filling, Oreo crust *and* no fiddling with a springform pan? Sign me up!
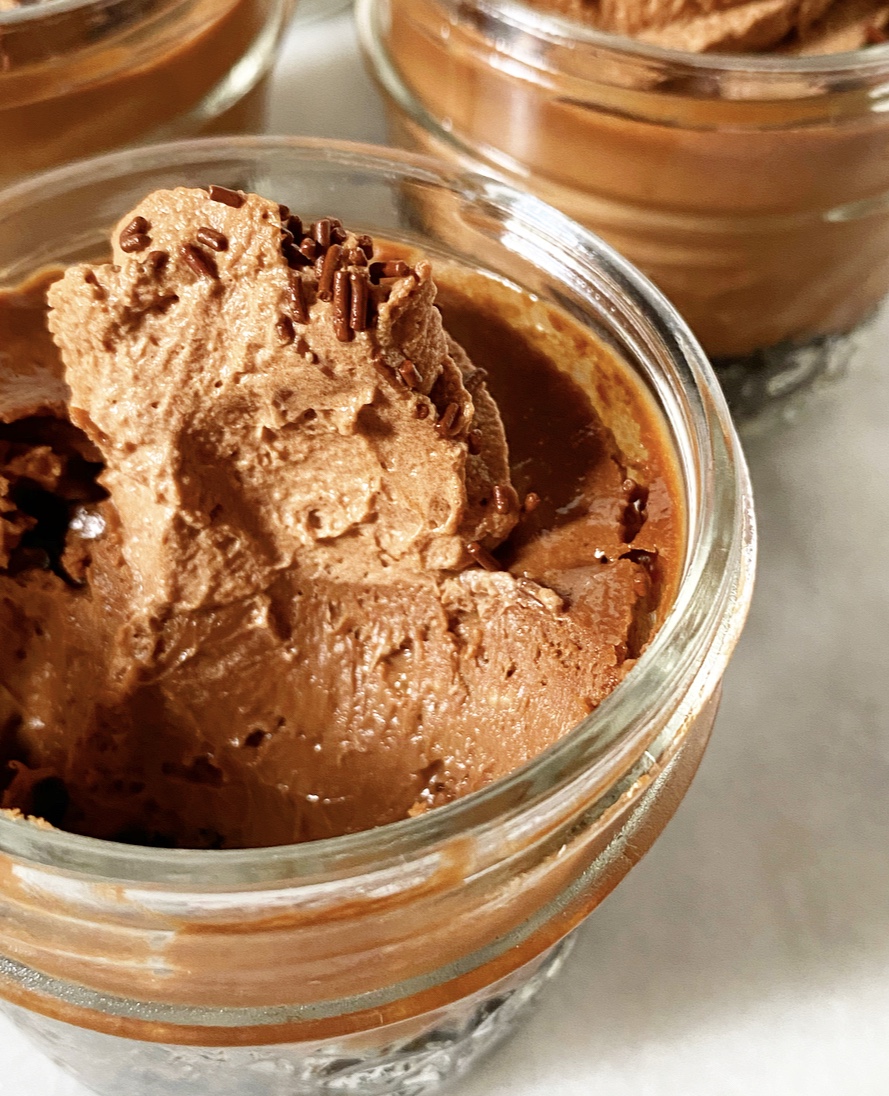 The crusts for these little cheesecakes are just Oreos and melted butter blitzed together in a food processor. Spoon a couple tablespoons into each of your mason jars and give them a few minutes in the oven before adding your filling.
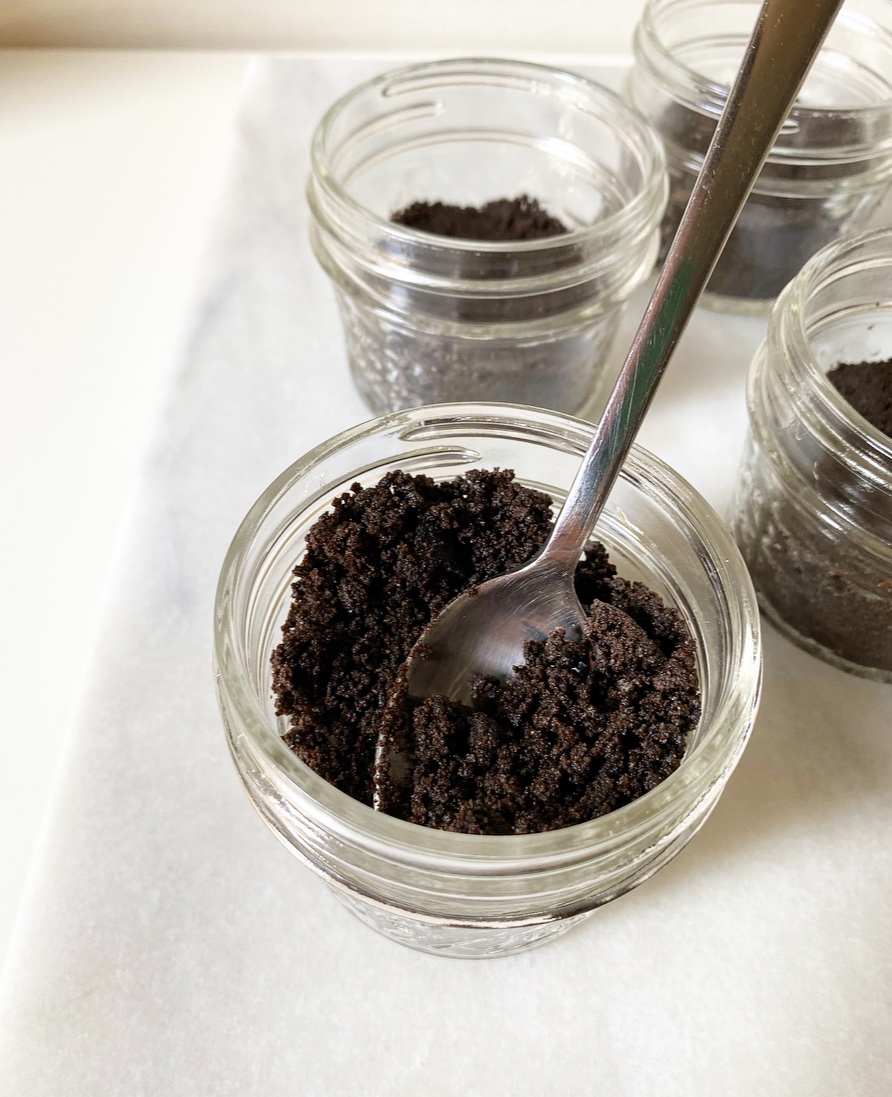 This chocolate cheesecake filling is super chocolaty from melted dark chocolate and cocoa powder, and has a little extra depth from light brown sugar (though granulated works too). The rest of the ingredients are standard cheesecake fare: cream cheese, sour cream, vanilla and an egg.
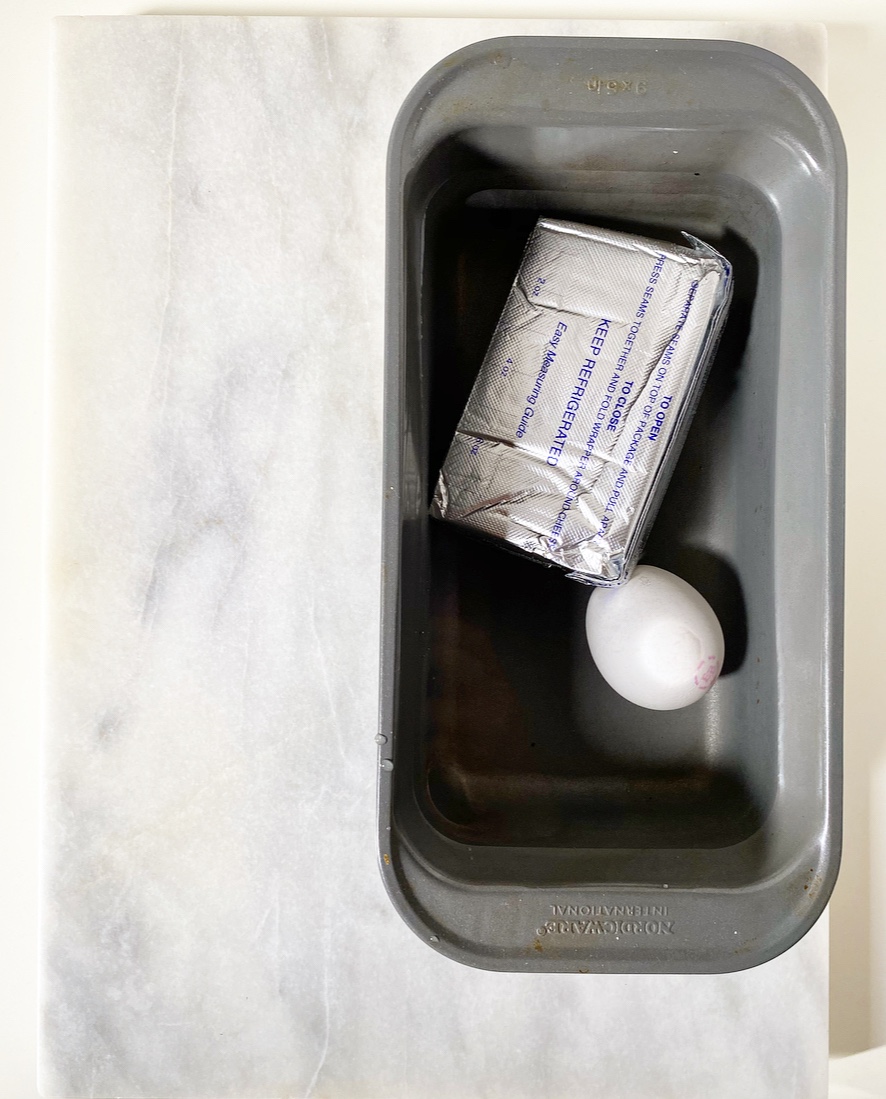 By far, the most important advice I can give you about making cheesecake is to make absolutely sure that your ingredients are at room temperature. If you’re more organized than I am, you can set your cream cheese out the night before. If you’re like me, just let it hang out (in its packaging) in a bowl of lukewarm tap water for 15 minutes. Throw your egg in there for maximum efficiency.
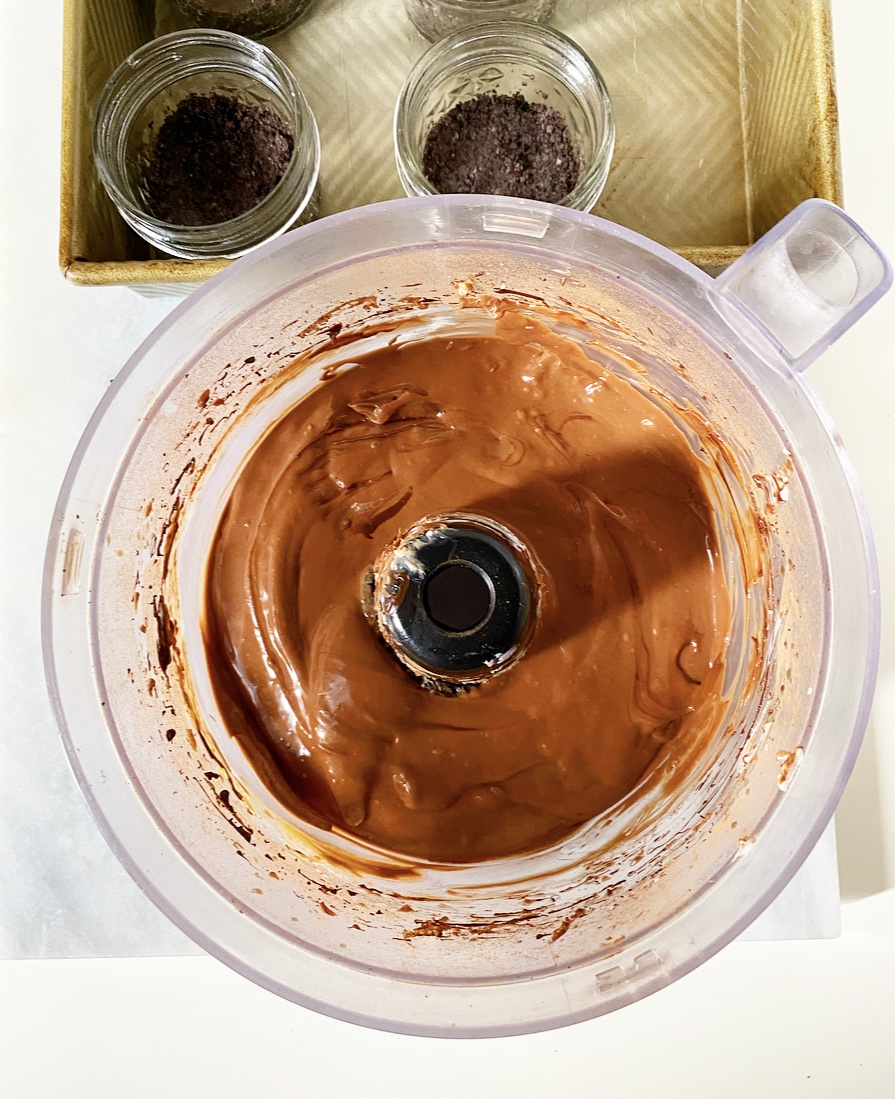
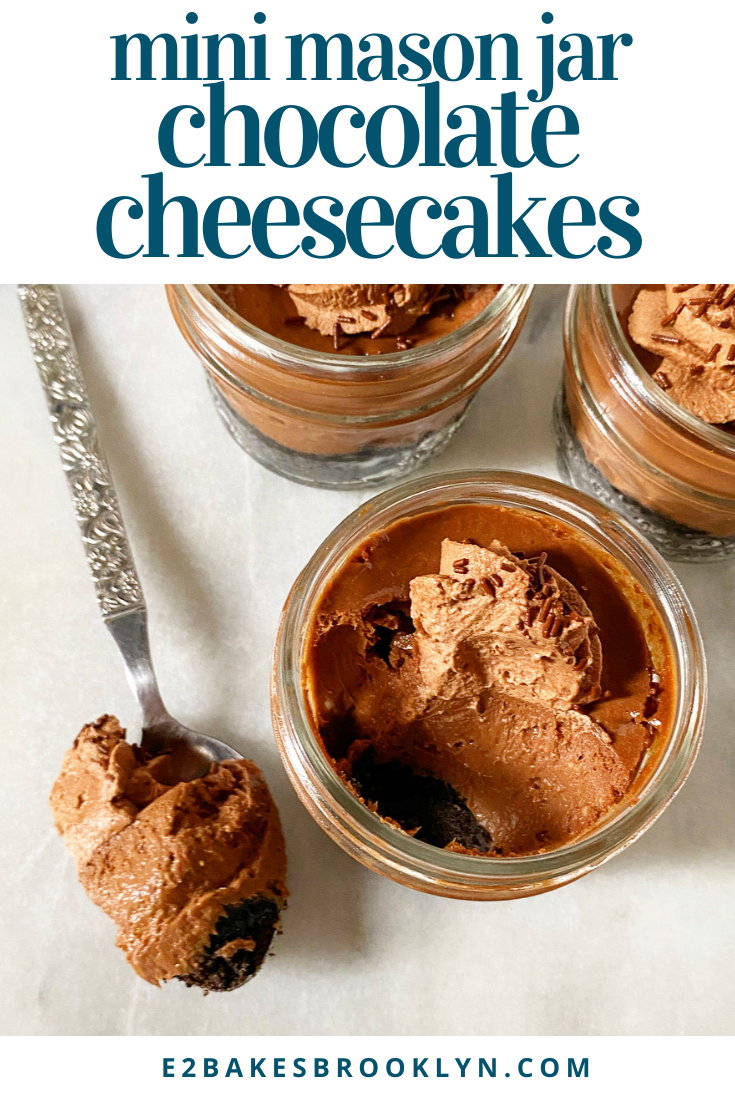
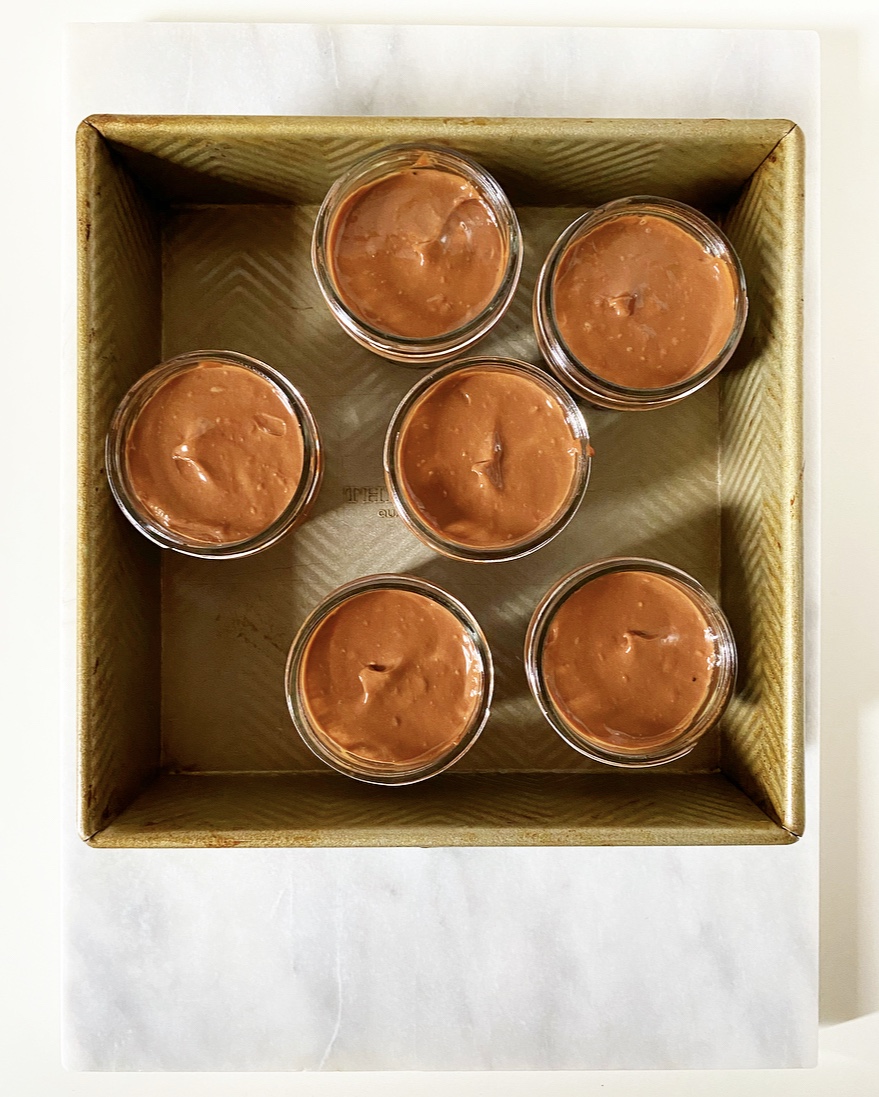 You can make the filling in your food processor (just wipe it out) or use a mixer. Either way, make sure to give the bowl some taps on the counter and let it rest a few minutes to release any large air bubbles before baking. Then spoon it onto your crusts and bake for about 25 minutes. Let the baked cheesecakes hang out in their water bath for five more minutes before transferring them to a rack to cool completely. This brief step helps them transition from the hot oven to your cooler counters more seamlessly. Cheesecakes are divas, in case you couldn’t already tell.
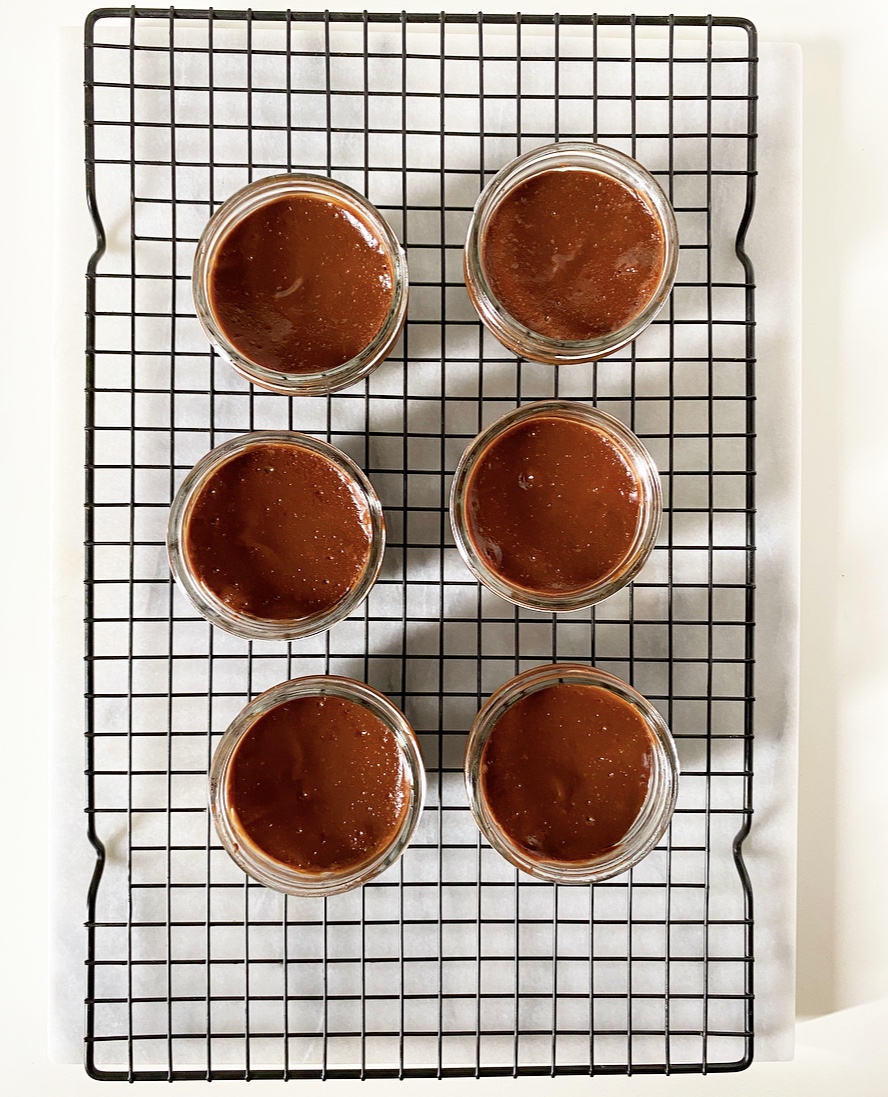 Once your chocolate cheesecakes hit room temperature, throw them in the fridge for a few hours to get nice and cold. This will seem endless, but will give you plenty of time to dream up toppings. I went for my new favorite
 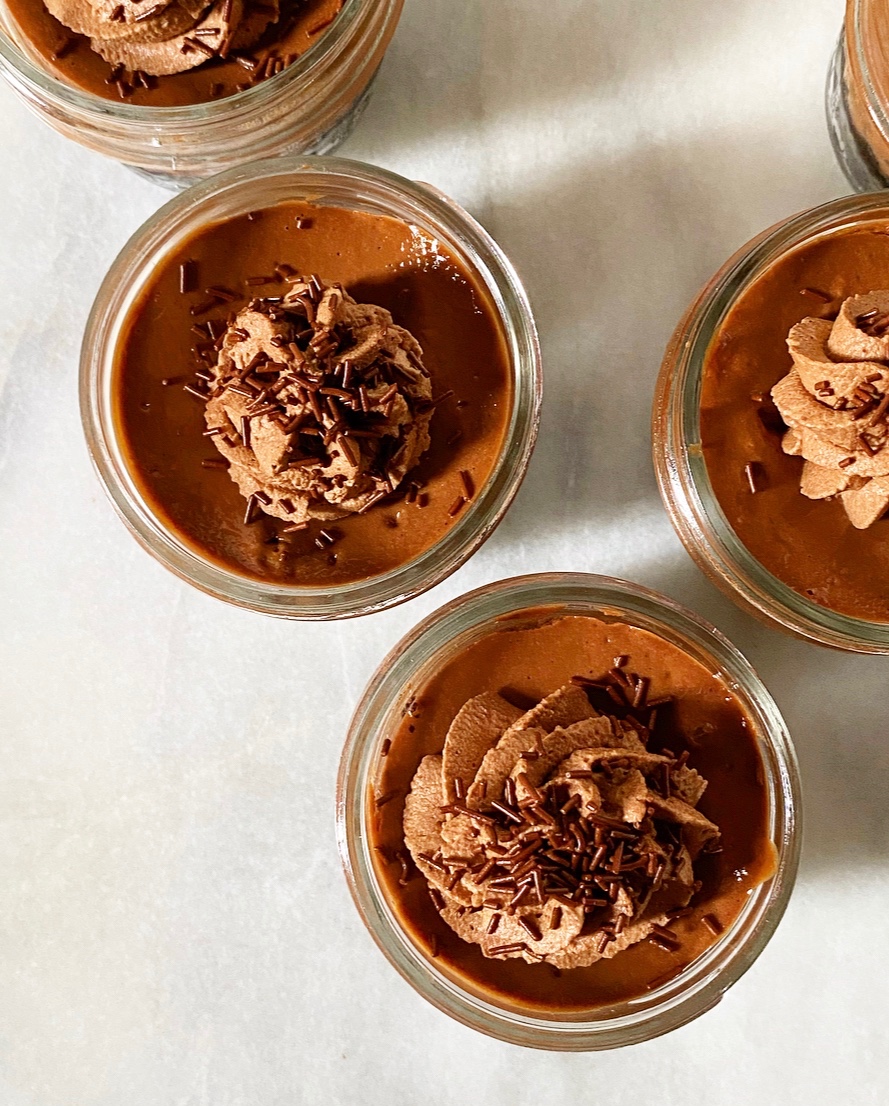 I won’t lie to you, Mini Mason Jar Chocolate Cheesecakes are a commitment, but take one bite and I promise you’ll agree that theyre entirely worth the effort. They’re super smooth and tangy with a big hit of chocolate, and that Oreo crust…well, I think we can all agree that Oreo crust should probably run for president.
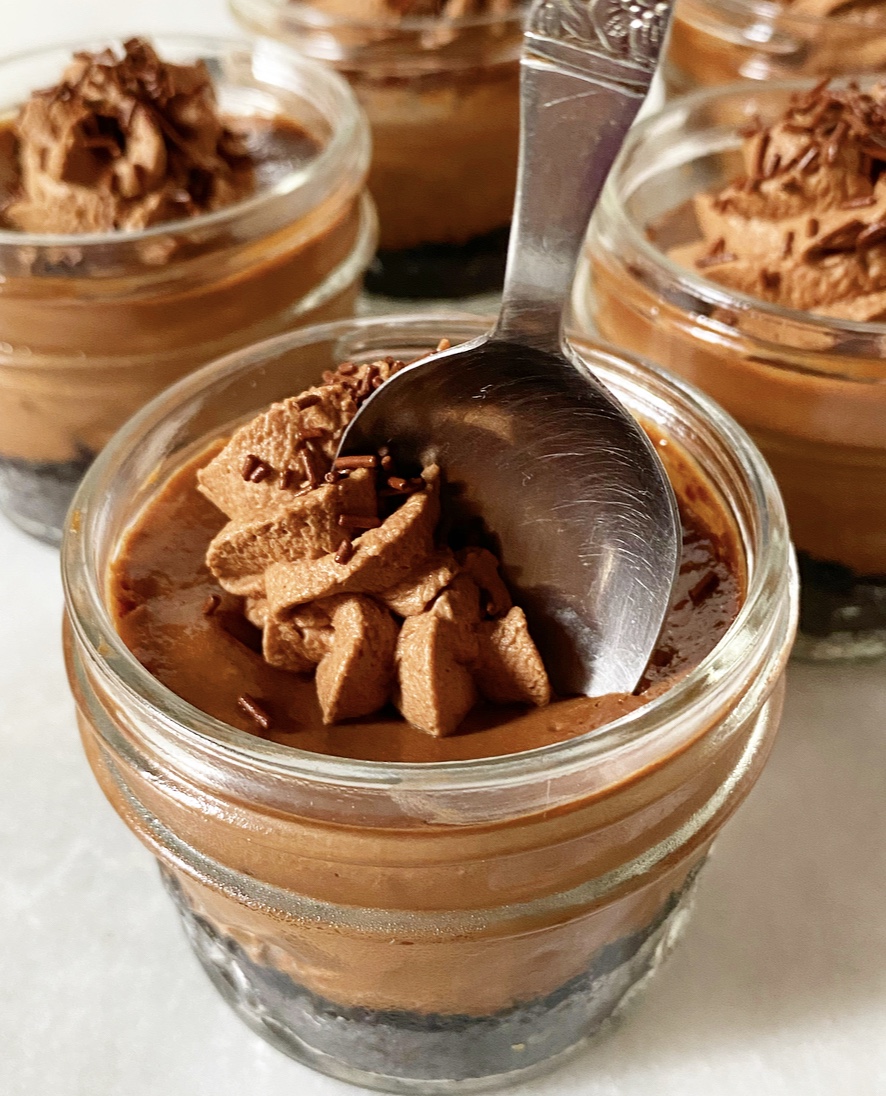 And on that note, enjoy this unofficial last weird weekend of this extremely weird summer. It’ll be two more weeks before I break out the pumpkin, and while that seems like eternity, I hope these chocolate cheesecakes soften the blow.
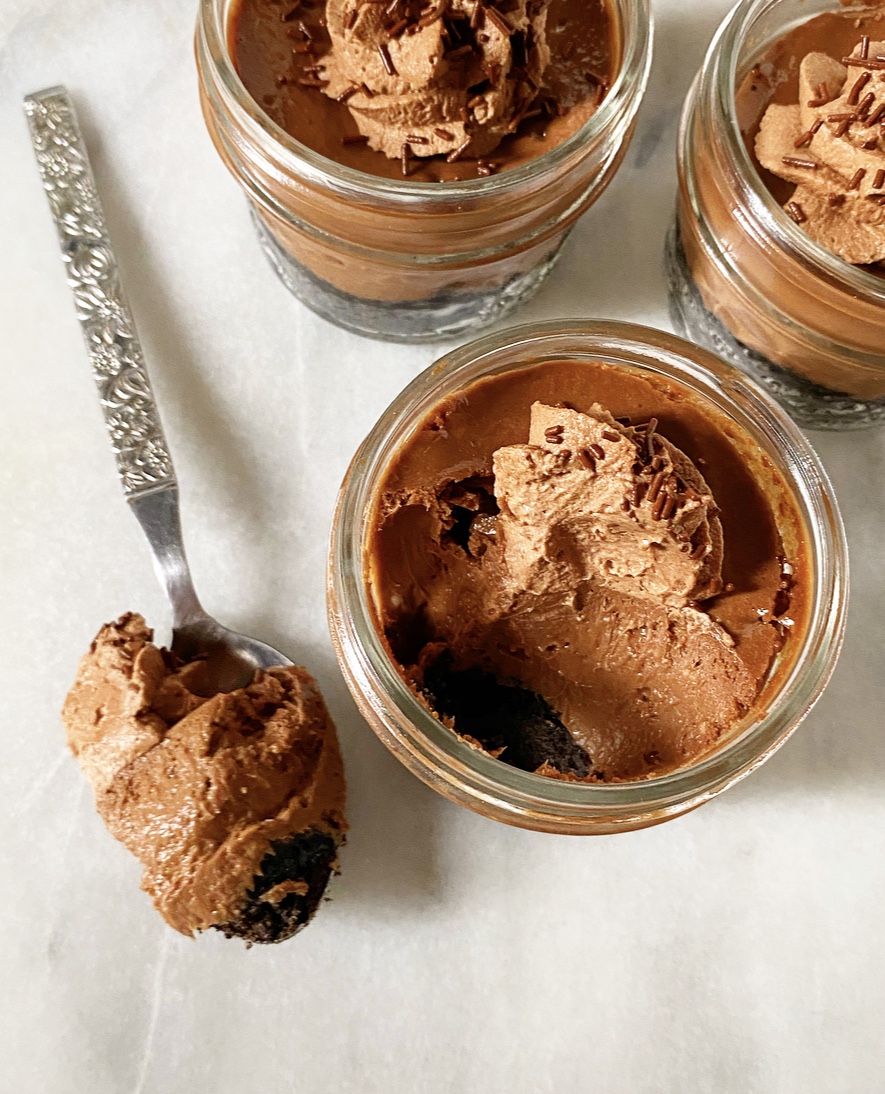
 Just in case you were wondering, if you decide to take my
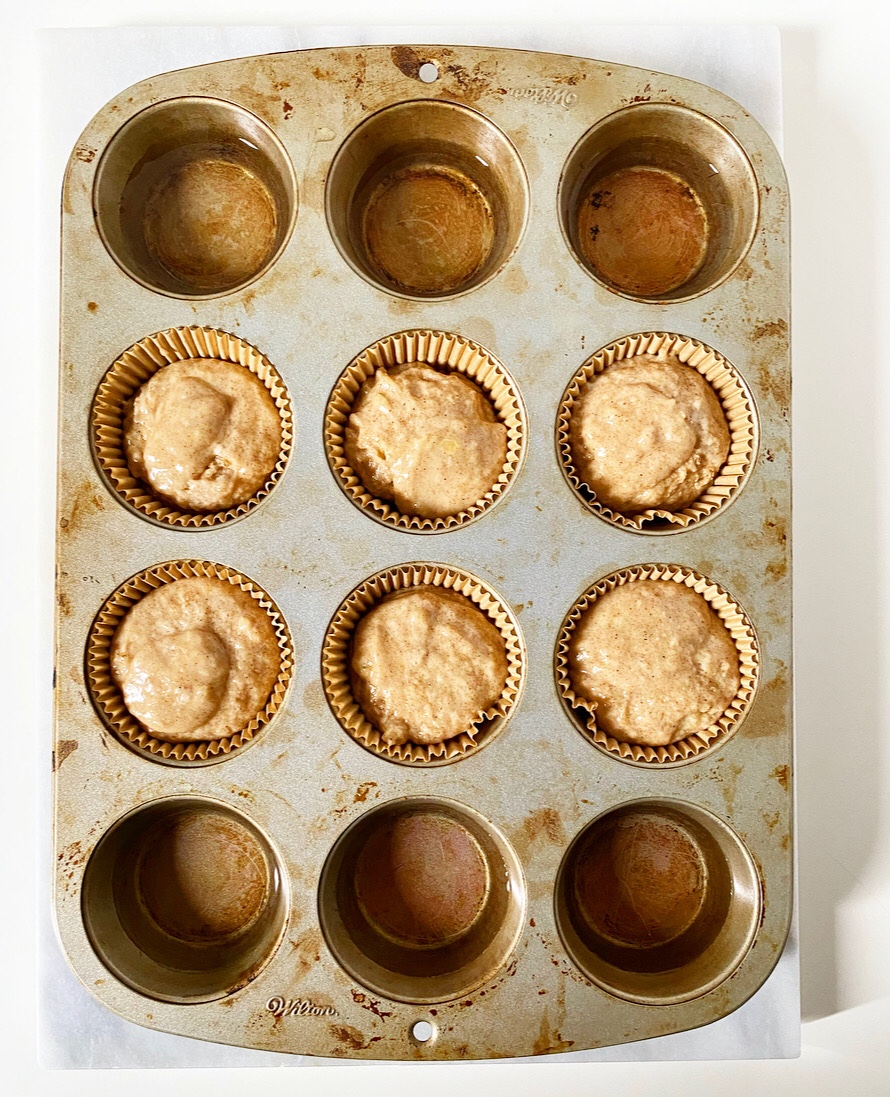
 It will work if you use non-dairy milk or whole milk. It will work if you use lemon juice or white vinegar instead of apple cider vinegar.
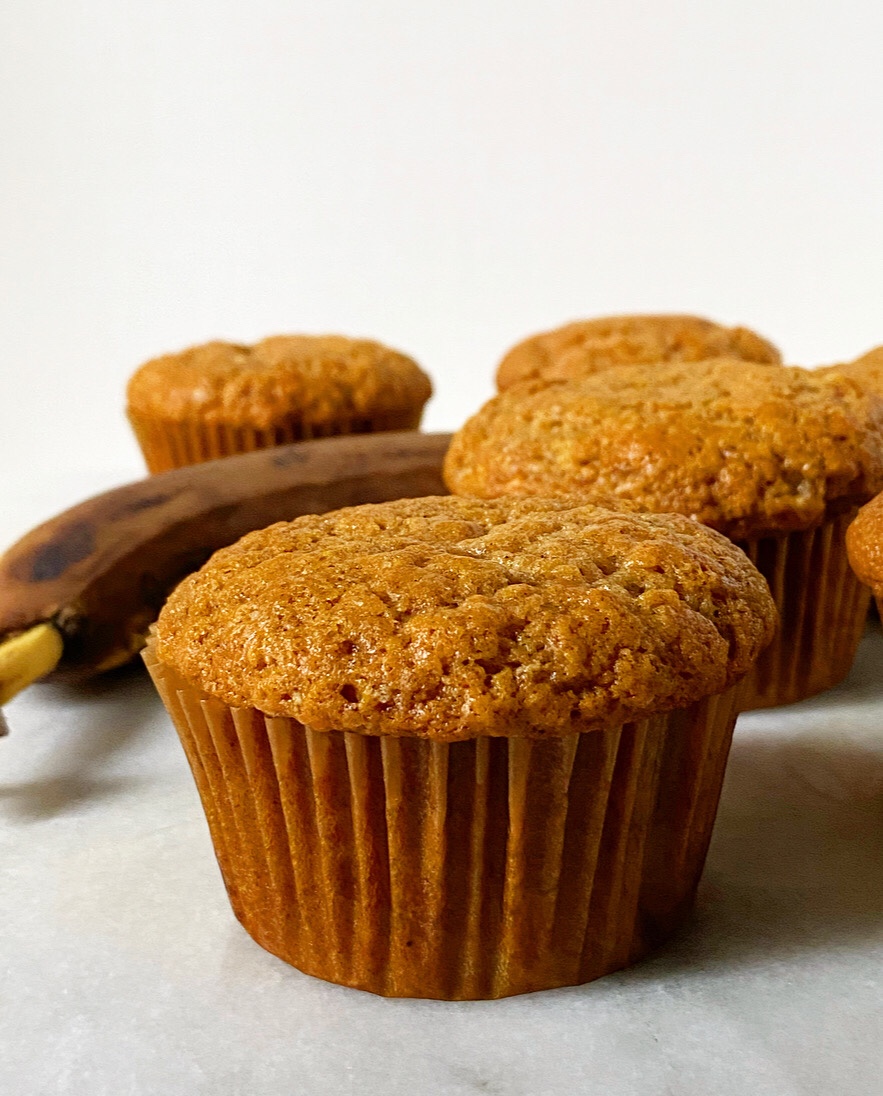 It will work if you use dark brown sugar instead of light brown. It will work if all you have is granulated sugar.
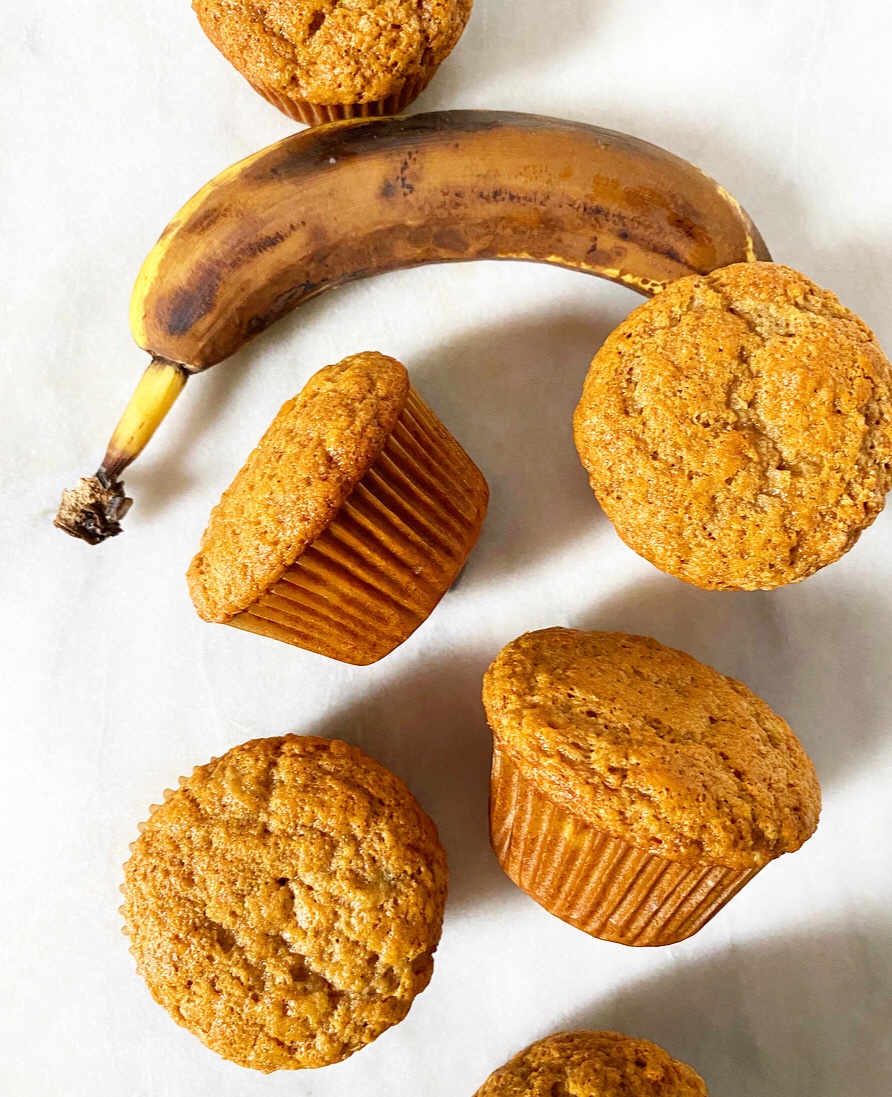 It will work if you use canola oil or coconut oil or melted butter.
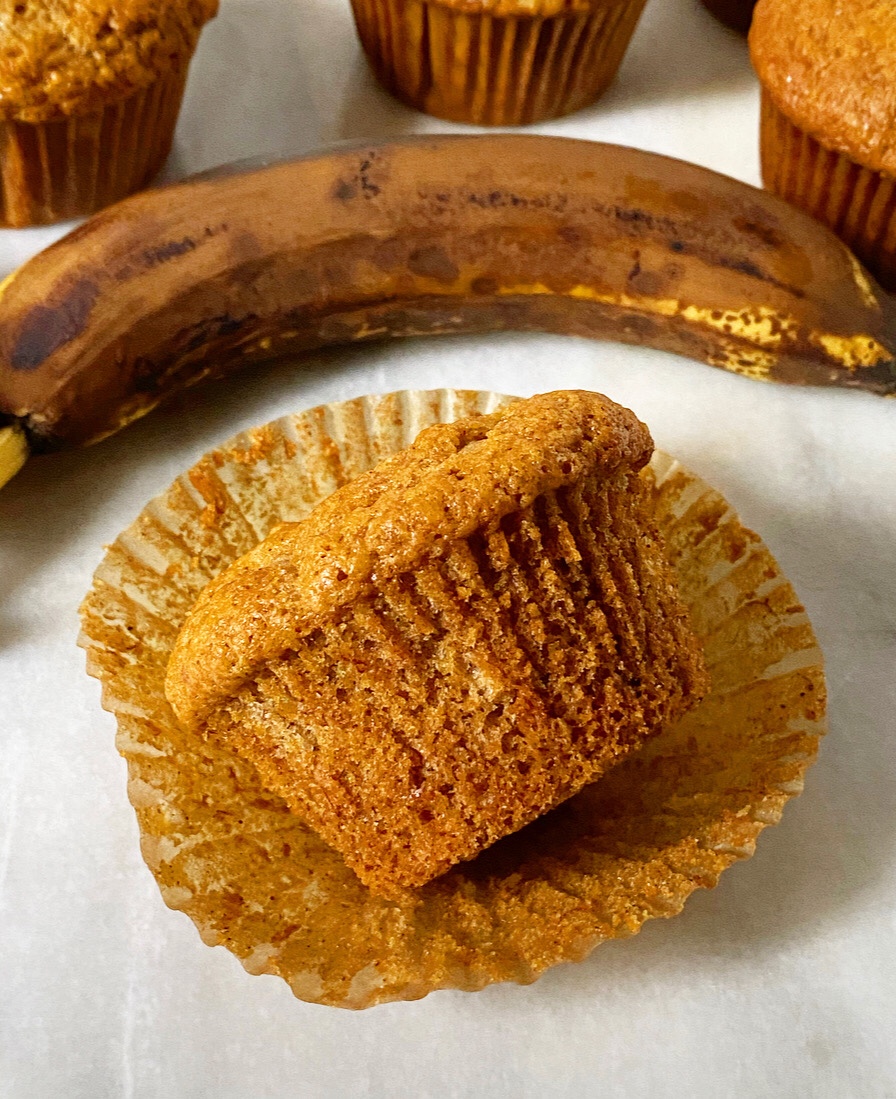 It will work even when you get distracted by a Zoom call with friends and forget the (flax or regular) egg. In fact, your muffins will actually be better *because* you skipped the egg. I swear.
 Er, *six* quarantine miracles.