Hey there! I put all my Thanksgiving recipes on their own page for maximum convenience. Just click the menu at the top of the page and then go to “Thanksgiving Recipes.”
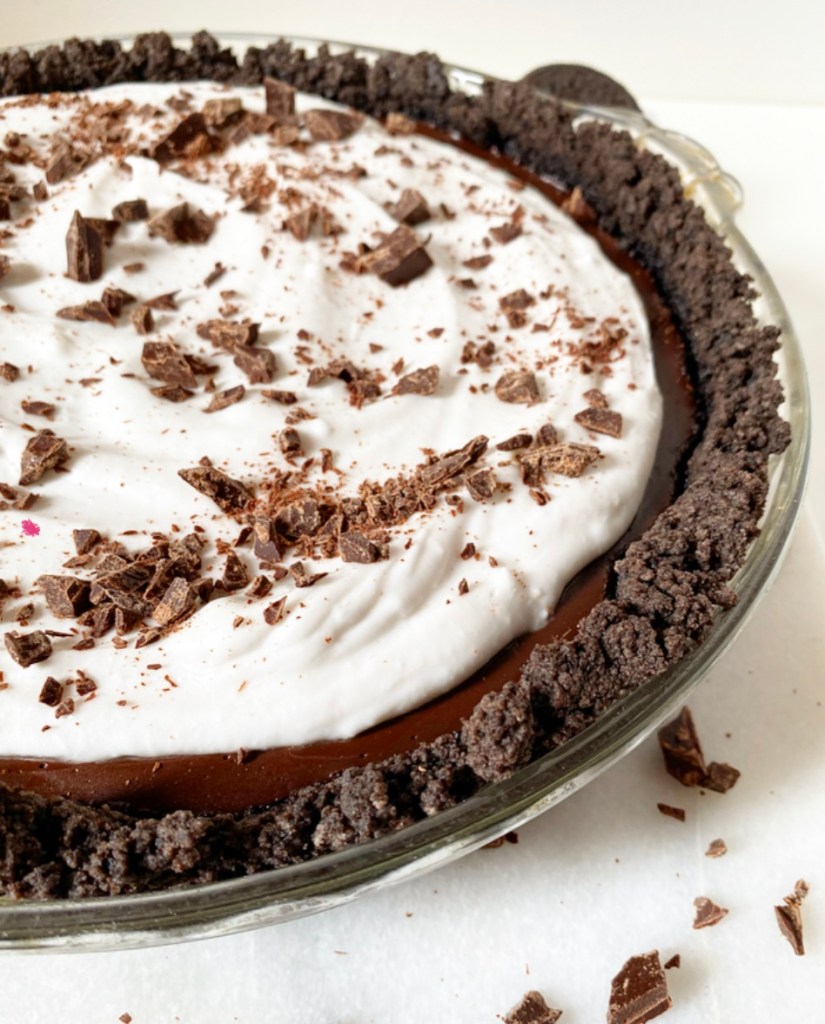
It’s funny how recipes sometimes just hit me out of nowhere. Like this past September I was in Maine making Vegan Chocolate Pudding for dessert, and I accidentally made it just a little too stiff. While it worked for a no-frills vacation treat, I knew that I needed to make adjustments for a better pudding consistency, but I also knew I had just made a perfect Vegan Chocolate Cream Pie filling.
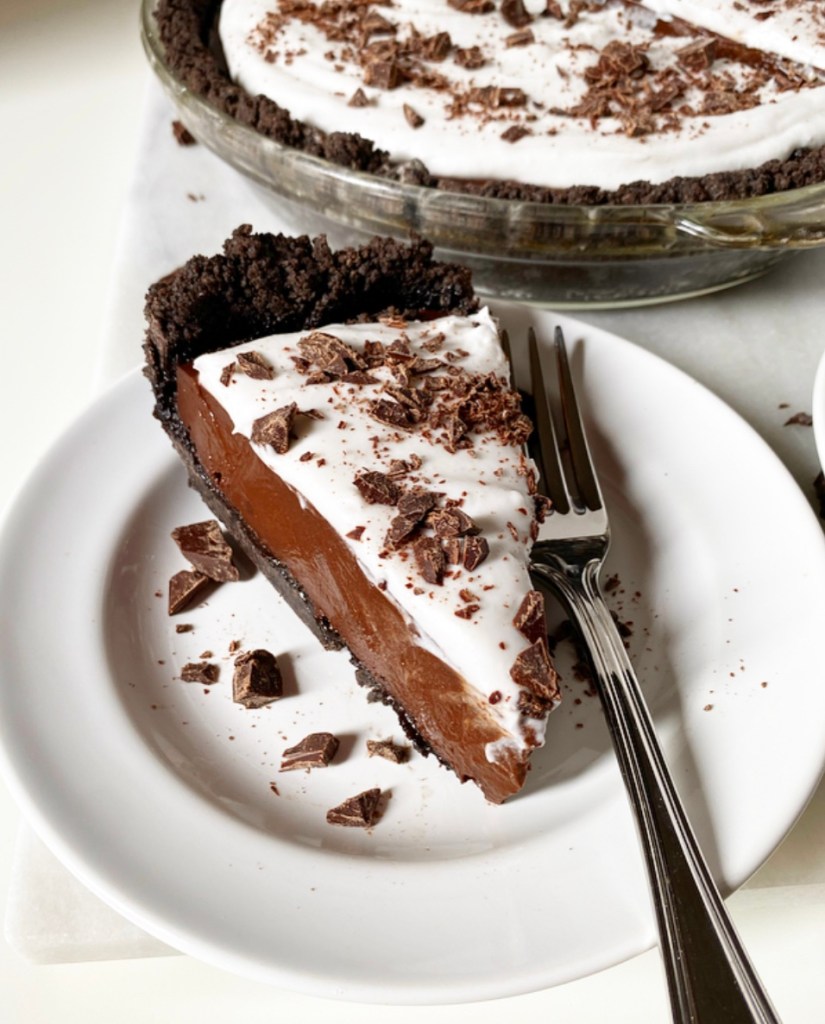
And I do mean perfect. Sliceable, but not bouncy. Rich and chocolaty, but completely devoid of dairy and eggs. I had a vision of it sitting in a chocolate cookie crust with a whisper of vegan whipped cream on top, and two months later, here we are.
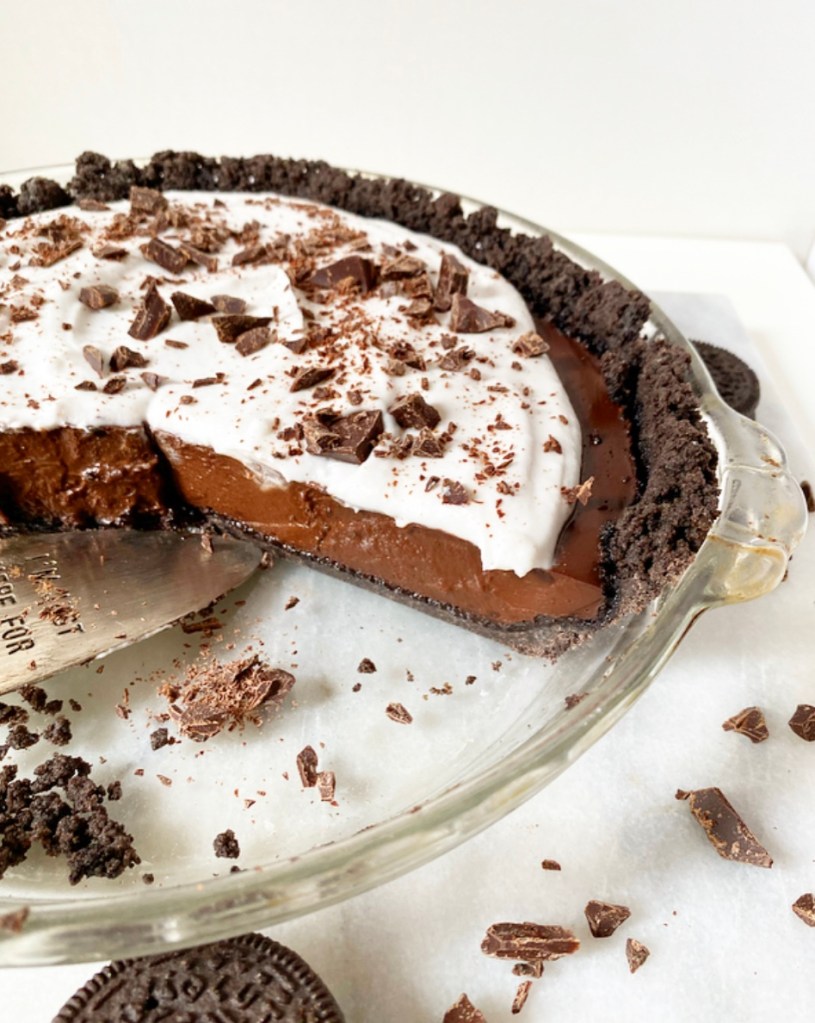
As with my traditional Chocolate Cream Pie, this vegan version is nearly no-bake and very simple to make. The crust is just crushed Oreos (I used gluten-free) and vegan butter that are mixed together and baked just to set. The filling is made by whisking things together in a certain order, as all pudding is. No need to sieve this one though—no eggs means no worrying about solids! To assemble, just pour the filling into the crust and refrigerate until very, very cold.
Oh yes, this cold, creamy crowd pleaser of a pie is an all-out winner. I mean, who doesn’t love delicious Chocolate Cream Pie and food everyone can eat and enjoy? Dessert and inclusivity are two of my favorite things!

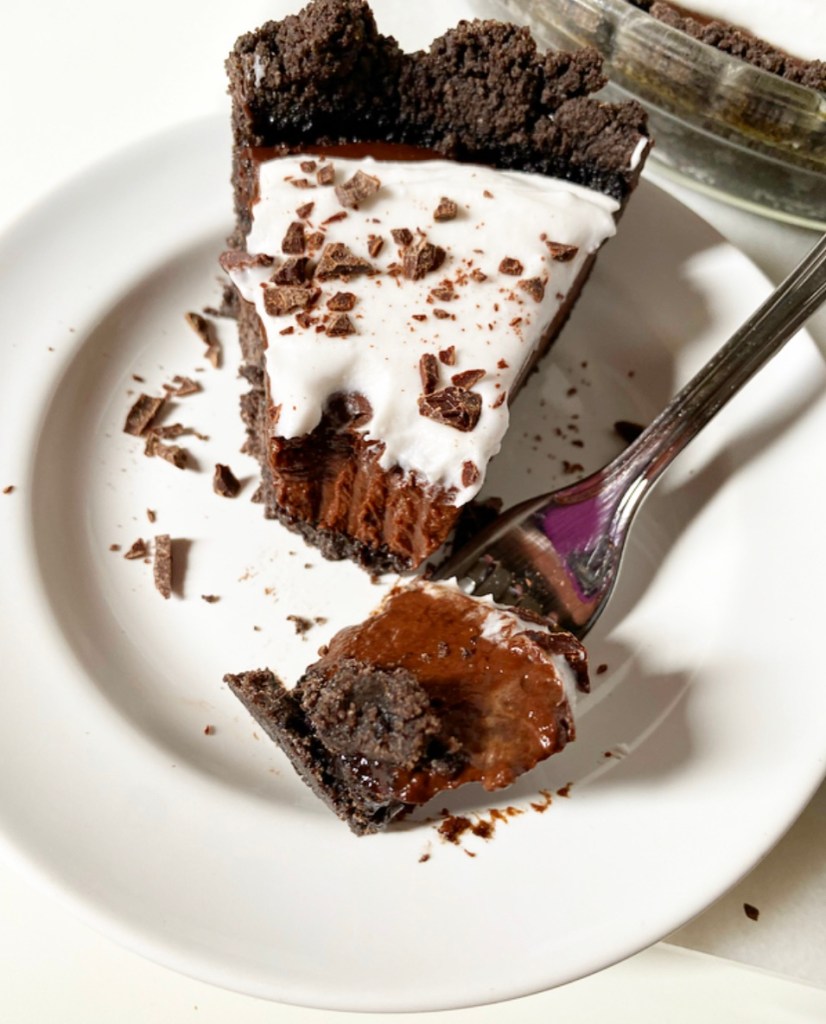
Before serving, top the pie with some vegan whipped cream! I went with an easy coconut cream-based recipe by Minimalist Baker, and it’s outrageously good. If you’re not up to making your own vegan whipped cream, Reddi Wip makes a good coconut whipped cream in a can that you can find in most grocery stores. Just put a little on each slice immediately before serving (and then spray the rest in your mouth because you’re a grown-up and you can).
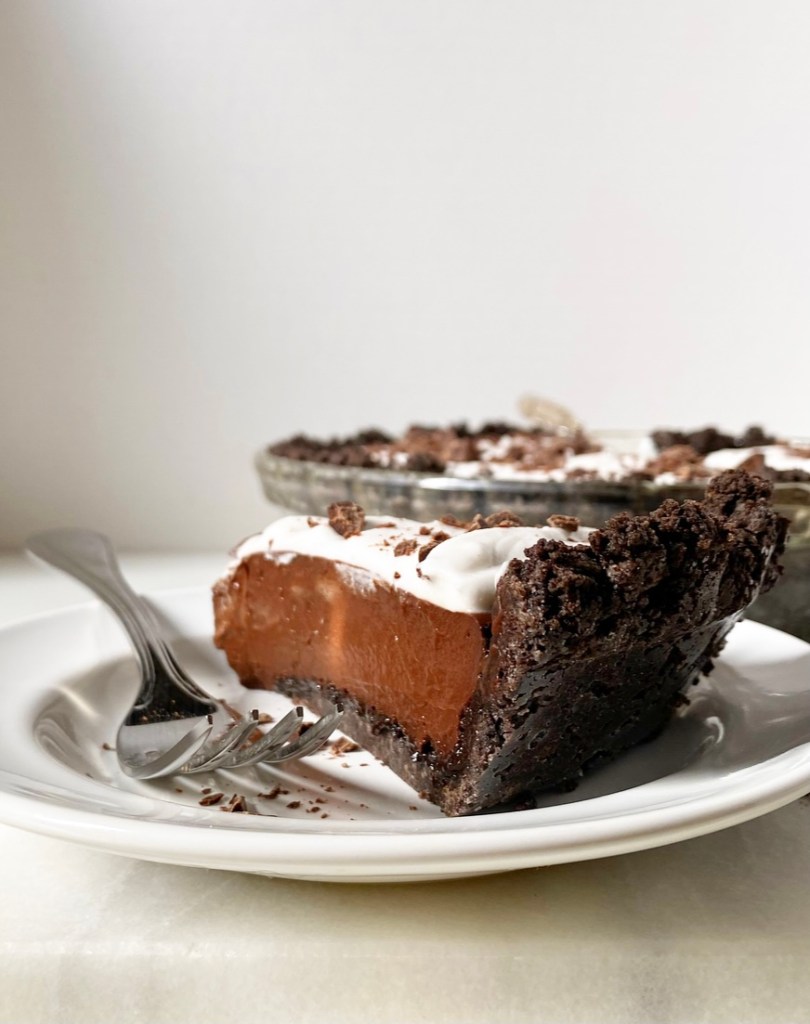
Speaking of slices, can we discuss how beautiful this is? Defined layers! Gorgeous chocolaty filling! And it’s gluten-free and vegan? I think it’s safe to say we have a Thanksgiving showstopper on our hands.
Vegan Chocolate Cream Pie
makes 1 pie

Crust:
24 regular or gluten-free Oreos (original or Double Stuf)
5 tablespoons vegan butter, melted

Filling:
5 tablespoons cornstarch
2/3 cup granulated sugar
1/2 cup natural unsweetened cocoa powder
pinch of Kosher or sea salt
3 cups unsweetened non-dairy milk (I used almond milk)
1 teaspoon pure vanilla extract
5 ounces dark chocolate, chopped
1 tablespoon vegan butter

Topping:
Vegan Whipped Cream (I made it with Thai Kitchen Coconut Cream)
finely chopped dark chocolate

Make the crust. Place Oreos in the bowl of a food processor and blitz until they are crumbs. Add melted butter and pulse until the mixture can be pinched together. Press it into the bottom and up the sides of the pie plate (I find that a 1/4 cup measuring cup works for this). Bake the crust for 10 minutes and then let it cool for 20 (or until you can handle the pie plate).

Make the filling. In a medium pot, whisk together cornstarch, sugar, cocoa powder and salt. Whisk in half the non-dairy milk, followed by the remainder.

Place pot over medium heat. Whisking continuously throughout cooking, cook pudding until it has boiled for 1 minute. This process should take 8-10 minutes from start to finish.

Pour filling into the crust. Tap the full pan on the counter a few times to release large bubbles. Press plastic wrap to the surface. Refrigerate for 6 hours or overnight, until cold.

When ready to serve pudding, peel off and discard plastic wrap. Top with vegan whipped cream of choice and finish with chopped dark chocolate. Refrigerate until ready to slice and serve.

Leftover pie will keep covered in the fridge for 3-4 days.
 Last
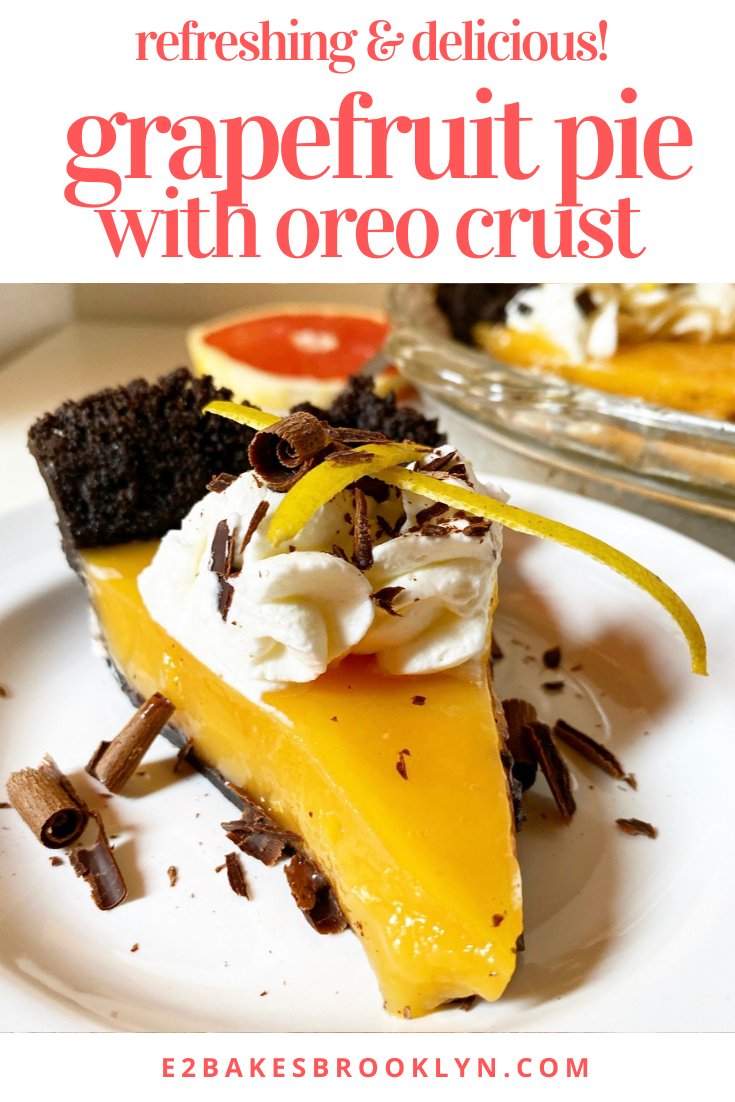
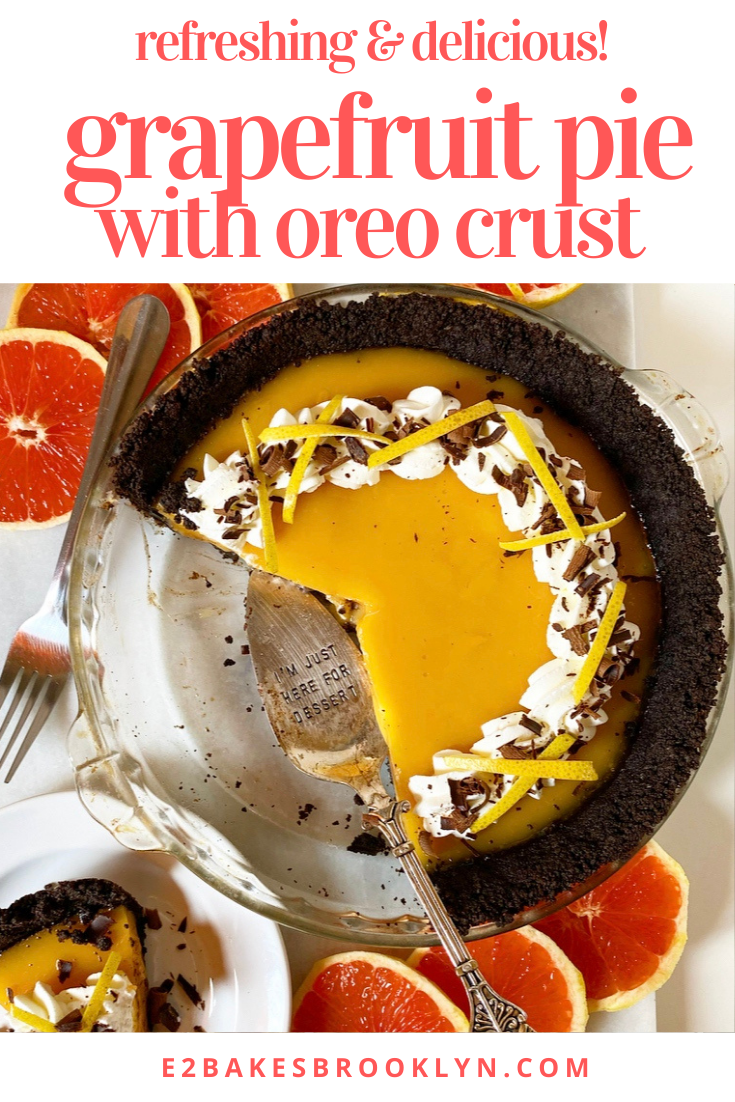
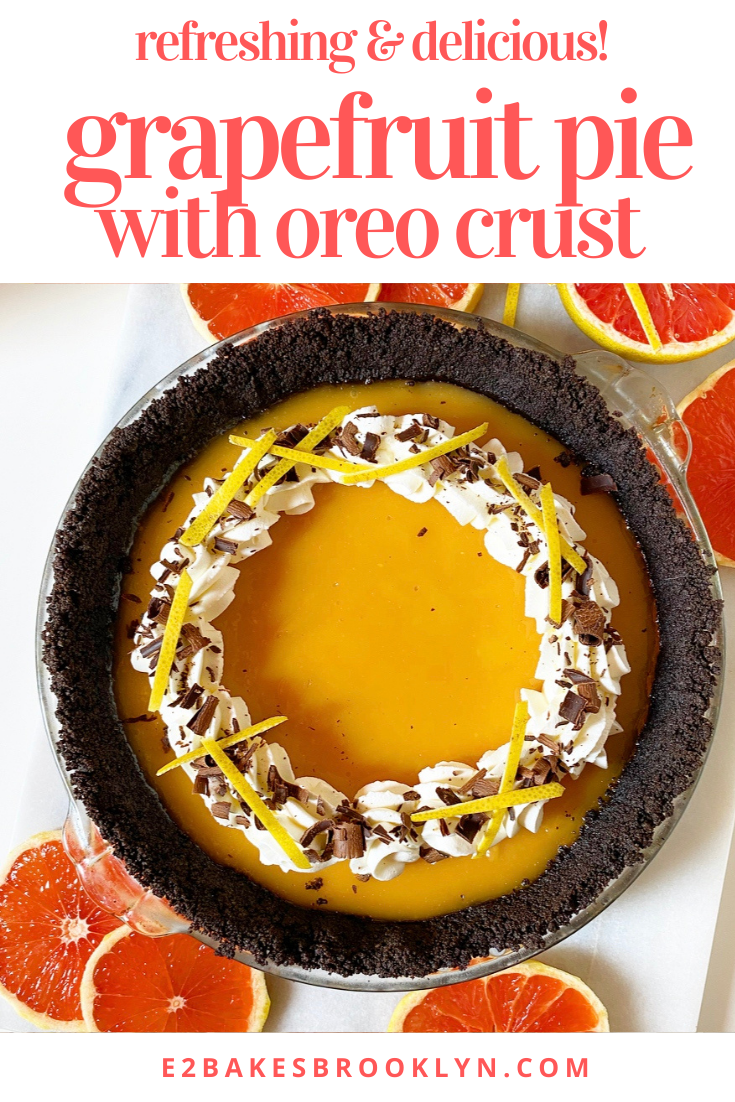
Last 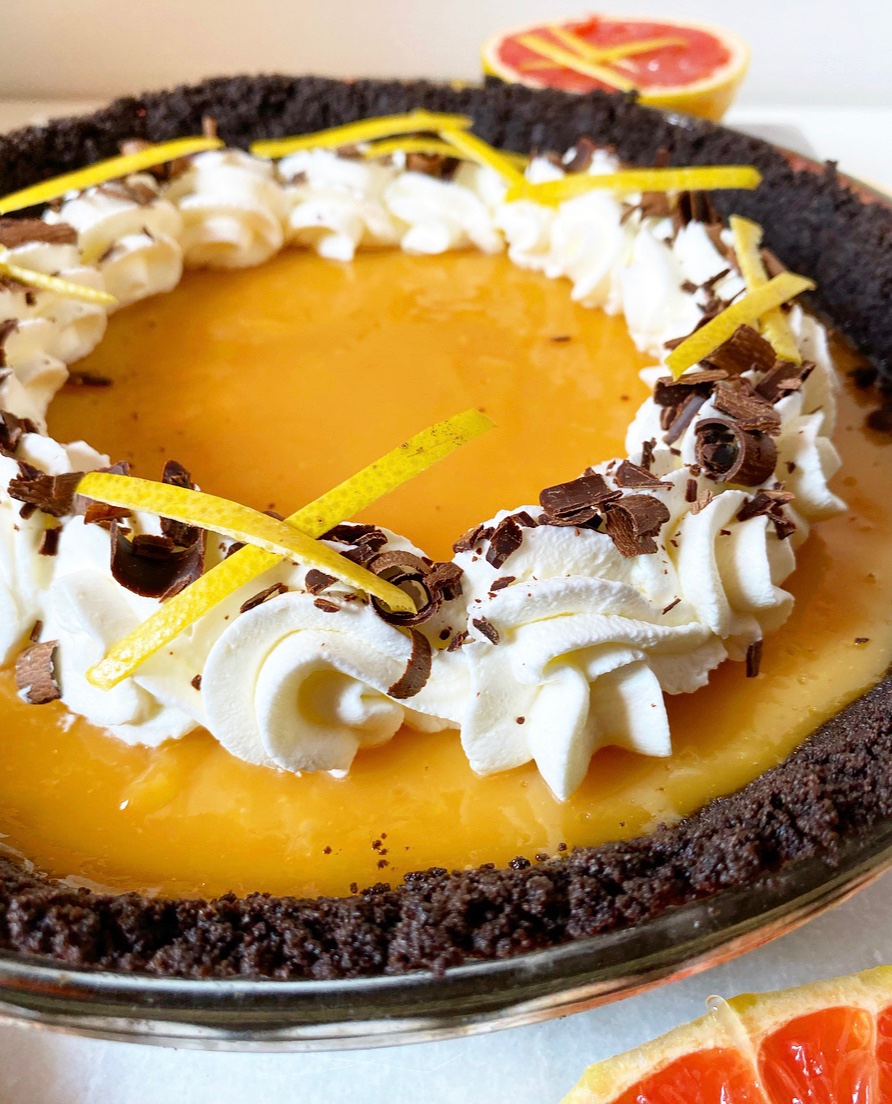 Grapefruit Pie with Oreo Crust is out of this world delicious and a stunner to boot. Crumbly Oreo crust is filled with a soft and tangy Grapefruit filling and finished with whipped cream, chocolate curls and thin strips of grapefruit zest.
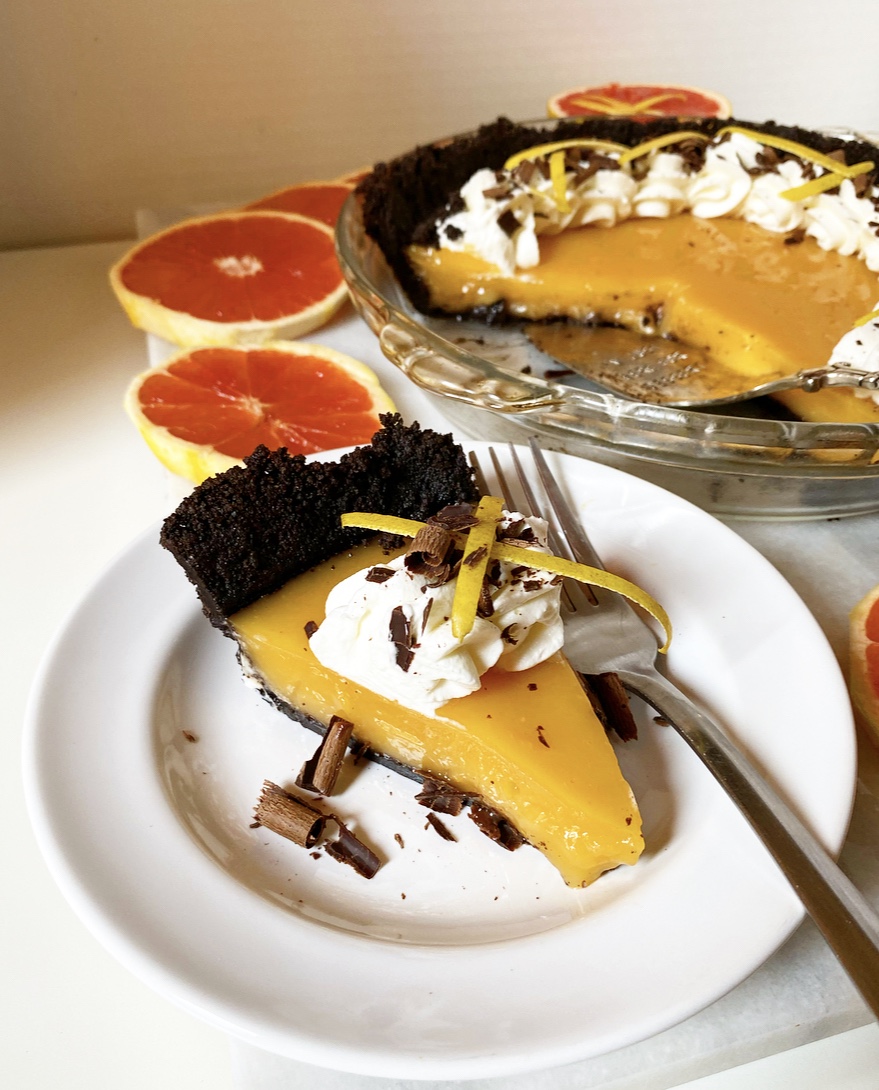 If you think I’ve lost my mind combining grapefruit and chocolate, know that I would have turned my nose up at this just a few years ago. However, after trying
 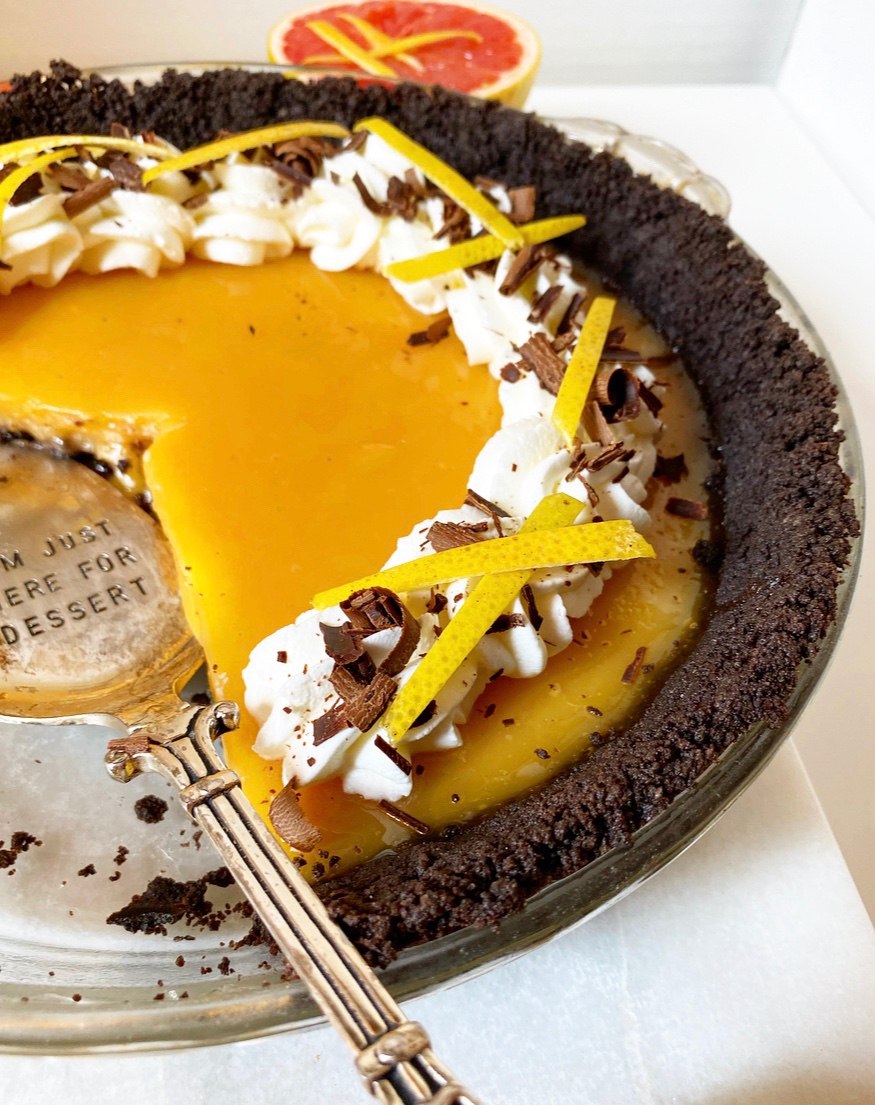 This pie is pretty simple to make, but as with most simple things, it does require some preparation. The filling is a play on my
 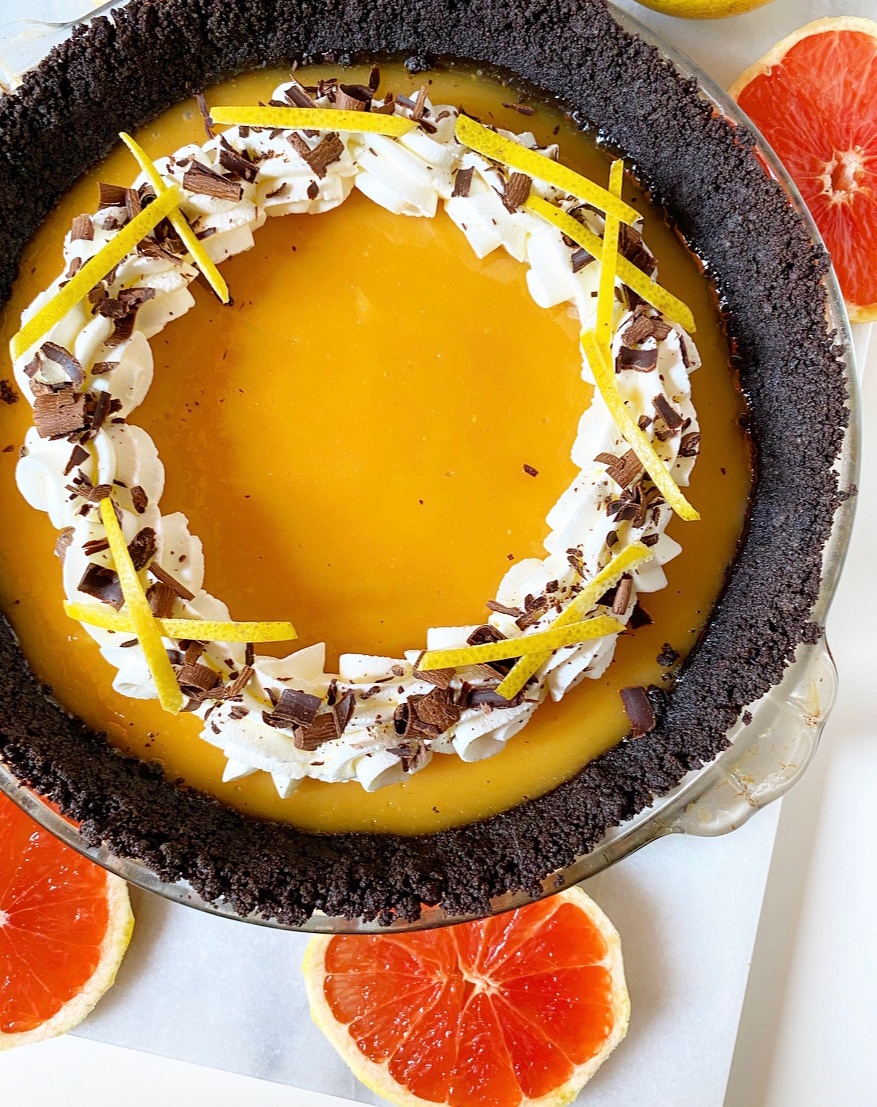 Once the filling and crust are prepared, it’s just a matter of pouring one into the other and letting them get nice and cold together. This cannot be rushed, so plan ahead.
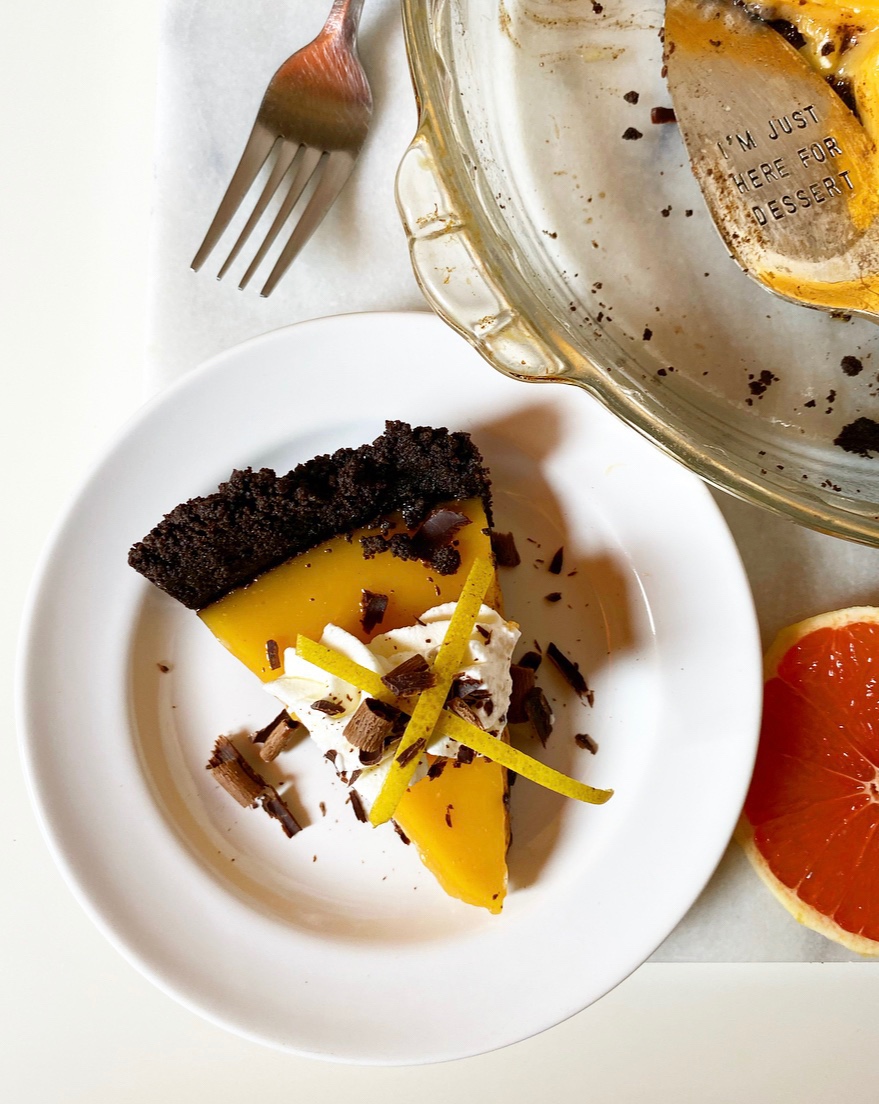
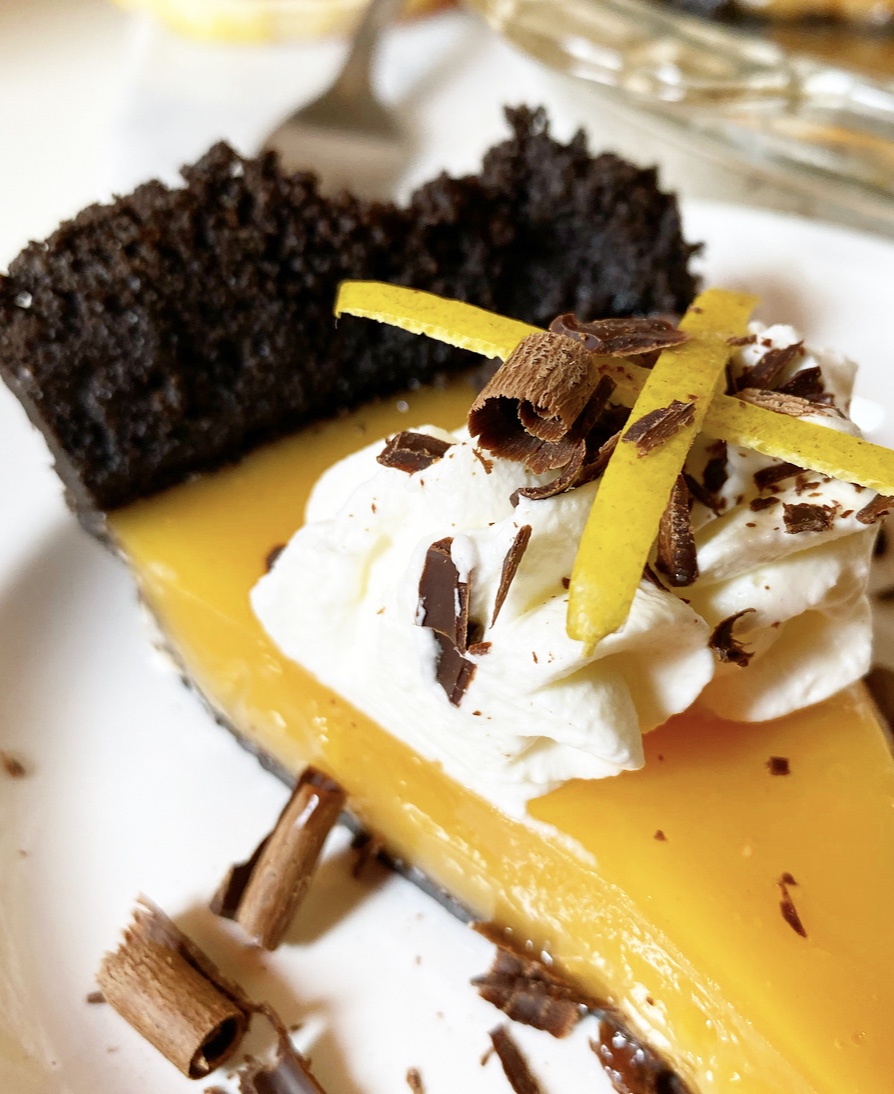 When Grapefruit Pie with Oreo Crust is completely chilled, it will still be a little on the jiggly side, like a
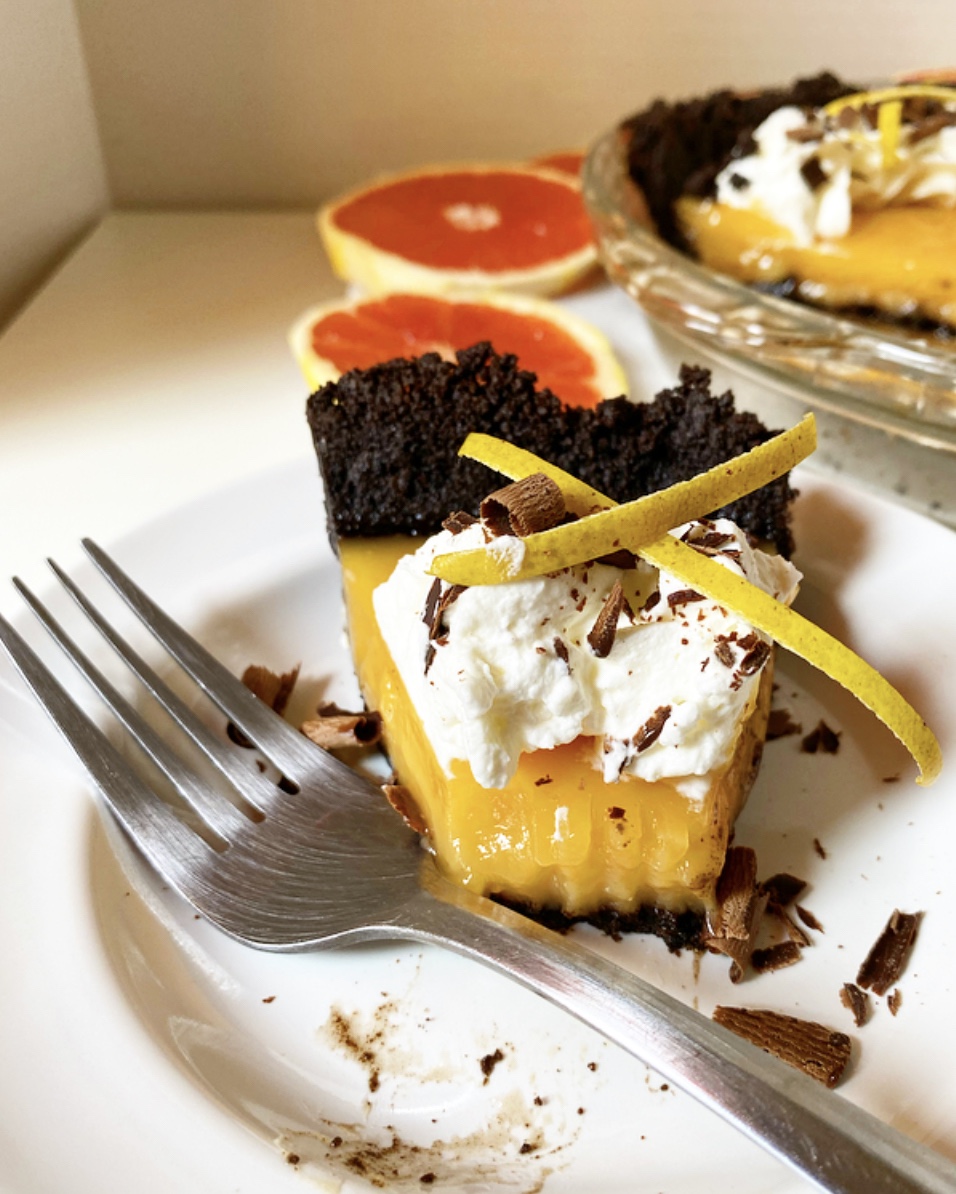
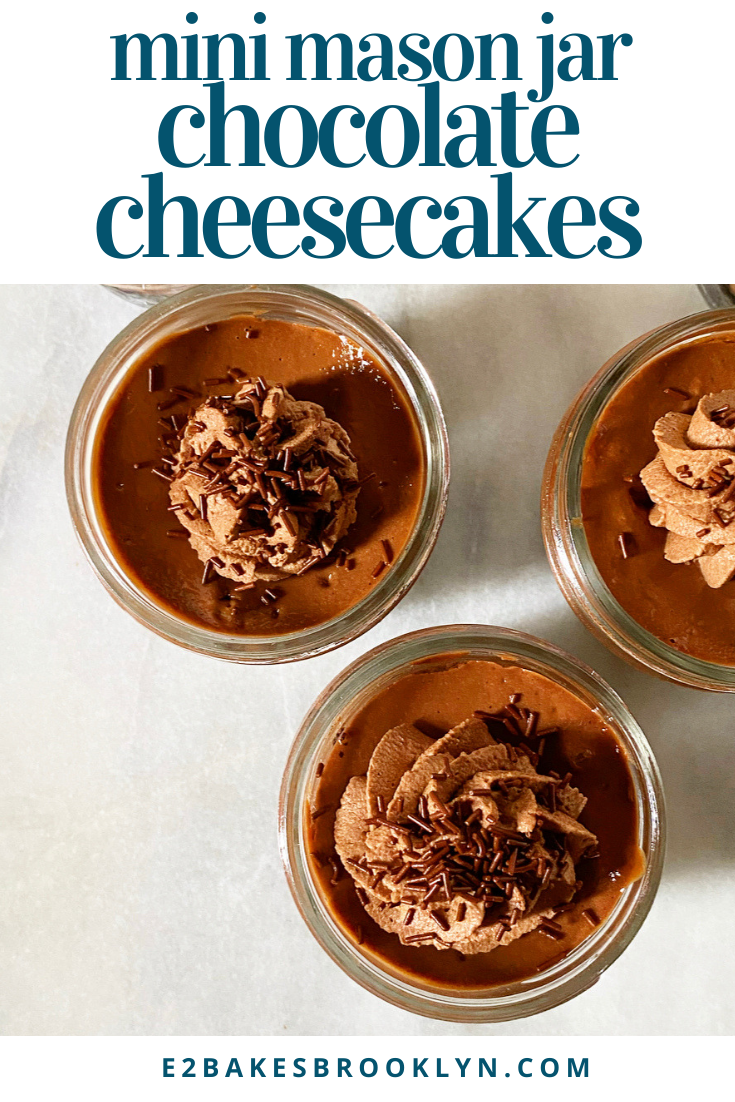
 It has been documented on here that I fear making cheesecakes, but that’s not exactly true. I don’t fear cheesecake, I fear a leaking springform pan in a water bath (bain marie). Yes, I know you are supposed to wrap it in foil, but I’ve never seen anyone explain in exacting, painstaking, borderline-dull detail how you should do that so that there is absolutely no risk of leakage. And so, I have still (!!!) never made a traditional baked-in-a-springform cheesecake.
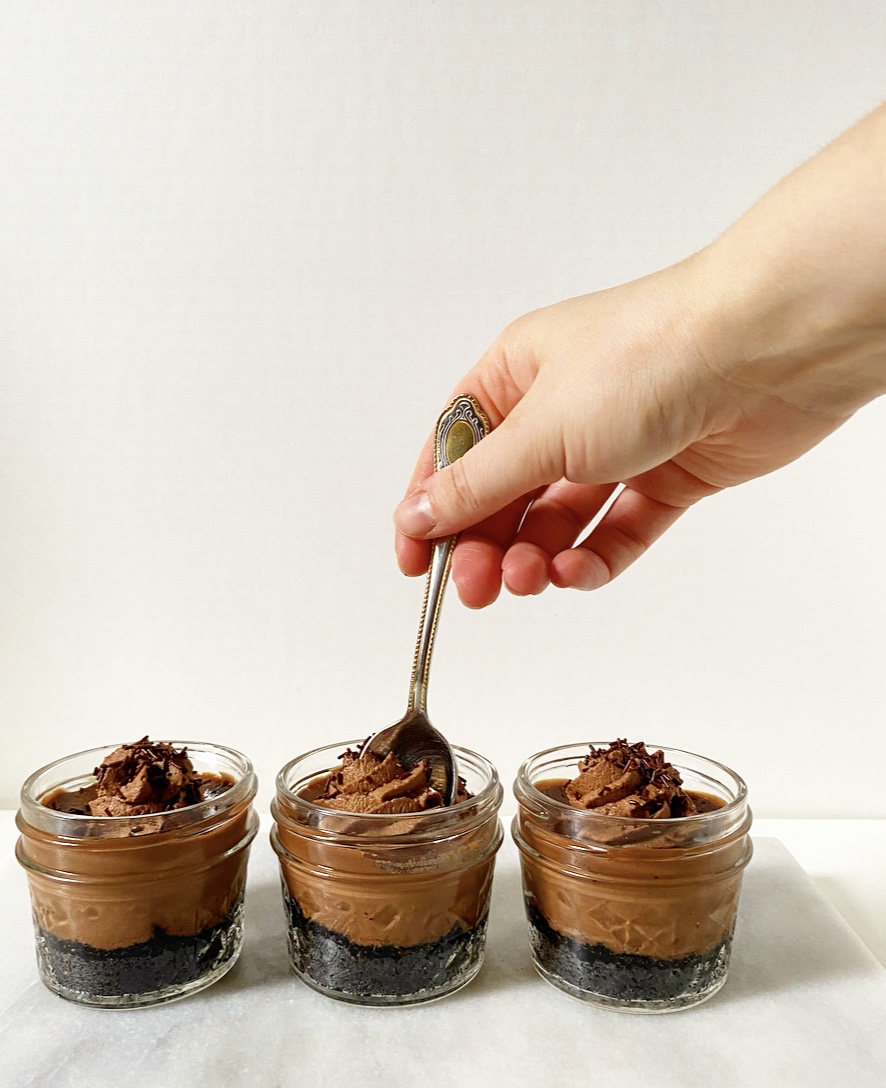
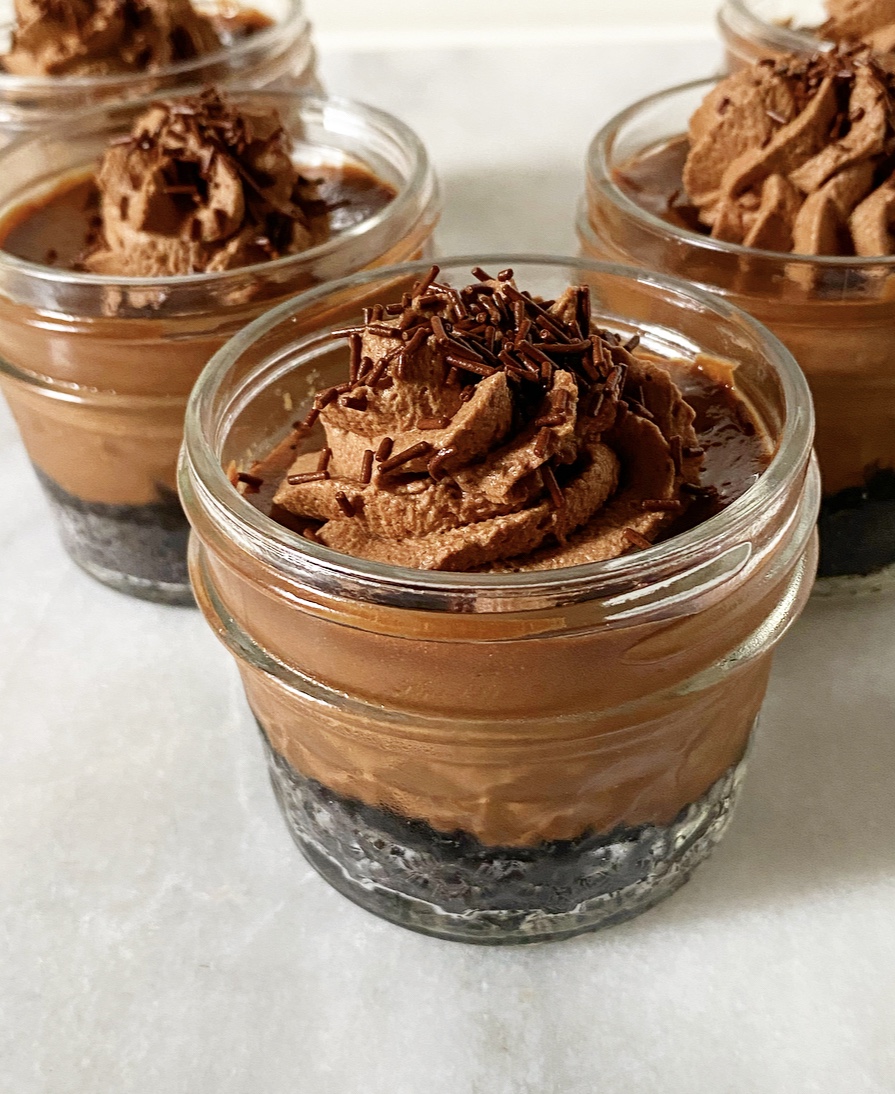 These Mini Mason Jar Chocolate Cheesecakes are SO good, y’all. So. Good. And they come in very cute, water tight, social distancing-approved serving vessels. Super rich, chocolaty filling, Oreo crust *and* no fiddling with a springform pan? Sign me up!
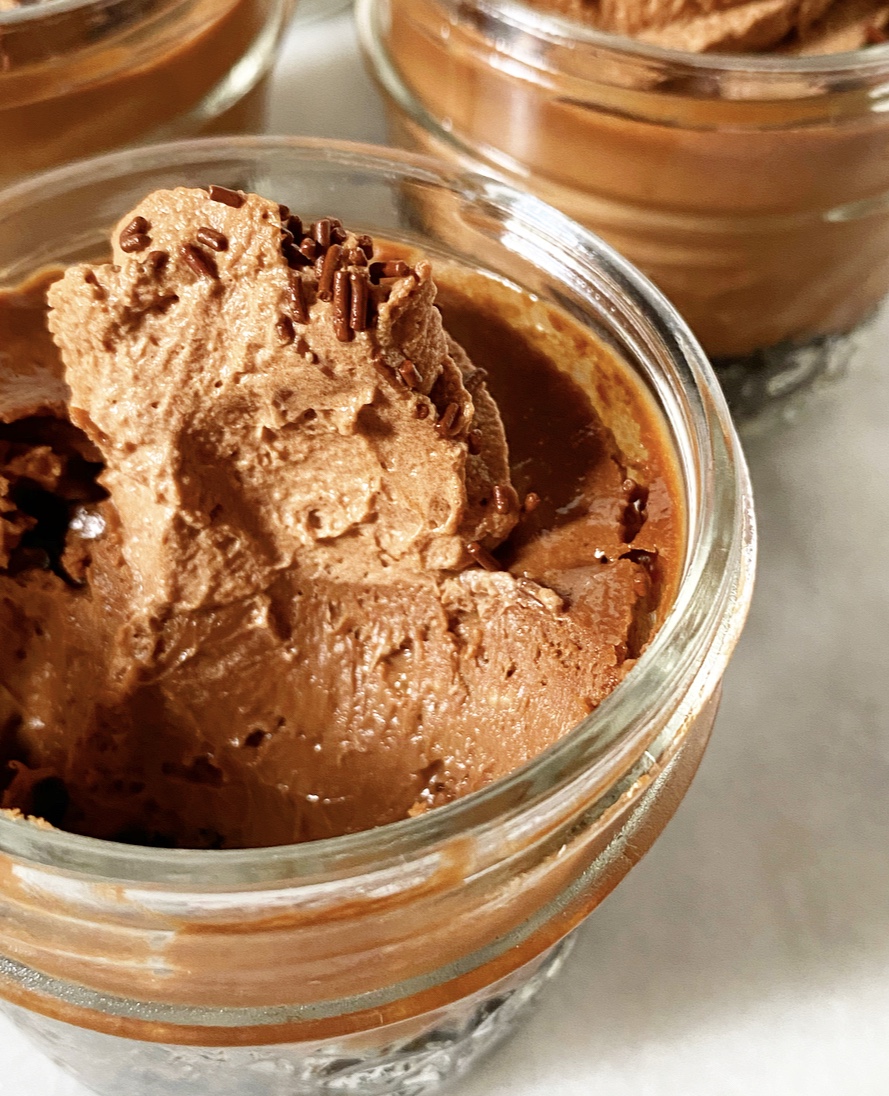 The crusts for these little cheesecakes are just Oreos and melted butter blitzed together in a food processor. Spoon a couple tablespoons into each of your mason jars and give them a few minutes in the oven before adding your filling.
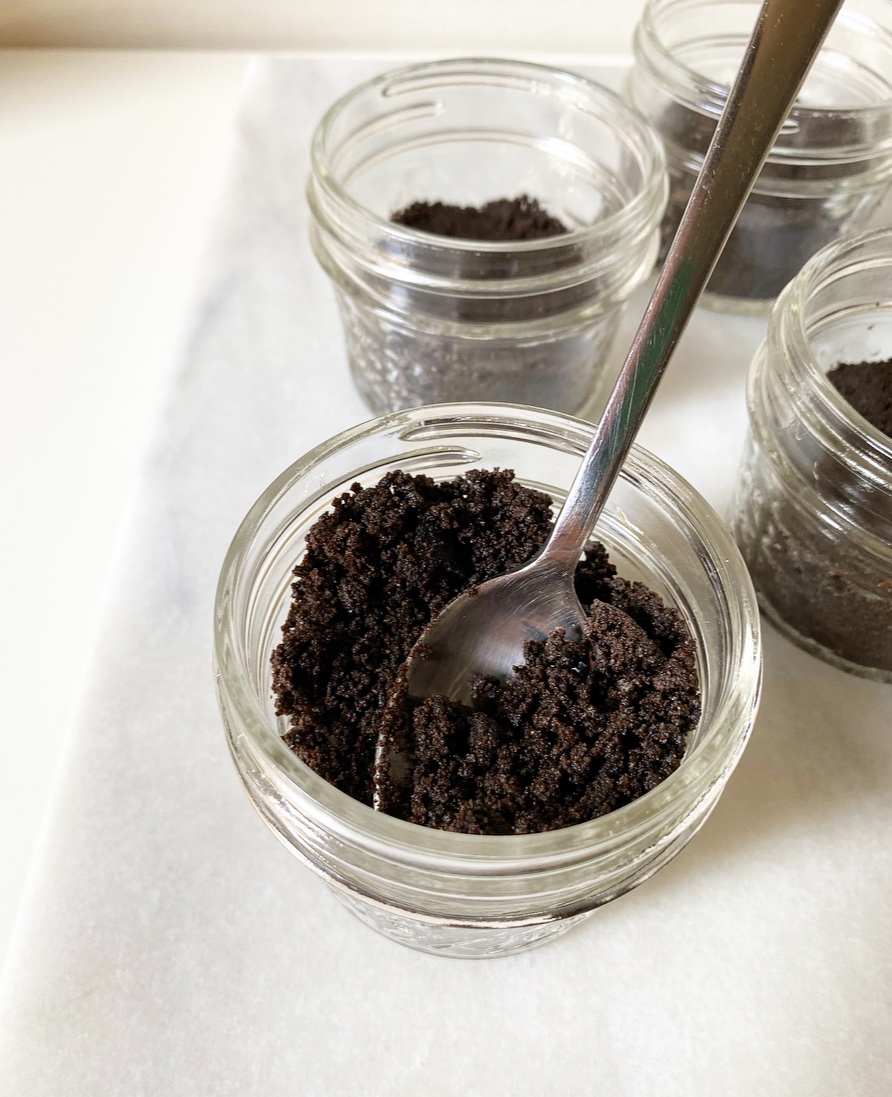 This chocolate cheesecake filling is super chocolaty from melted dark chocolate and cocoa powder, and has a little extra depth from light brown sugar (though granulated works too). The rest of the ingredients are standard cheesecake fare: cream cheese, sour cream, vanilla and an egg.
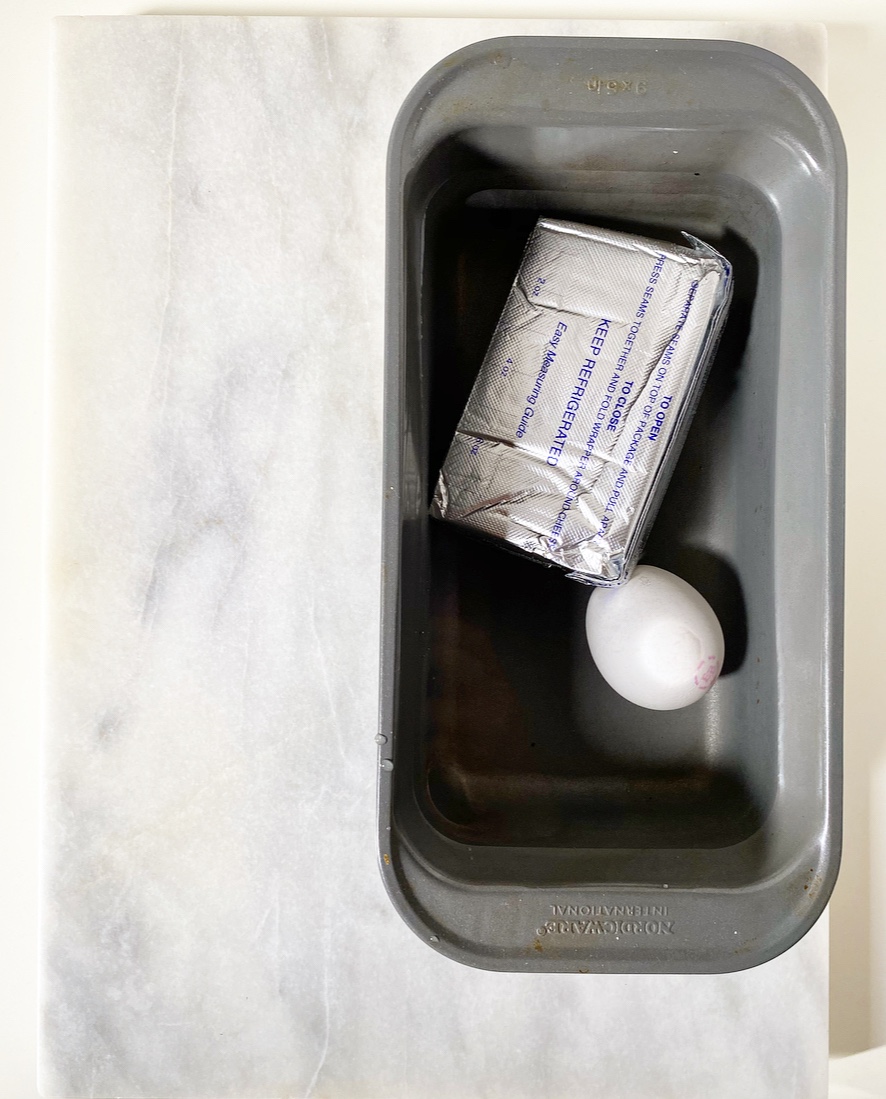 By far, the most important advice I can give you about making cheesecake is to make absolutely sure that your ingredients are at room temperature. If you’re more organized than I am, you can set your cream cheese out the night before. If you’re like me, just let it hang out (in its packaging) in a bowl of lukewarm tap water for 15 minutes. Throw your egg in there for maximum efficiency.
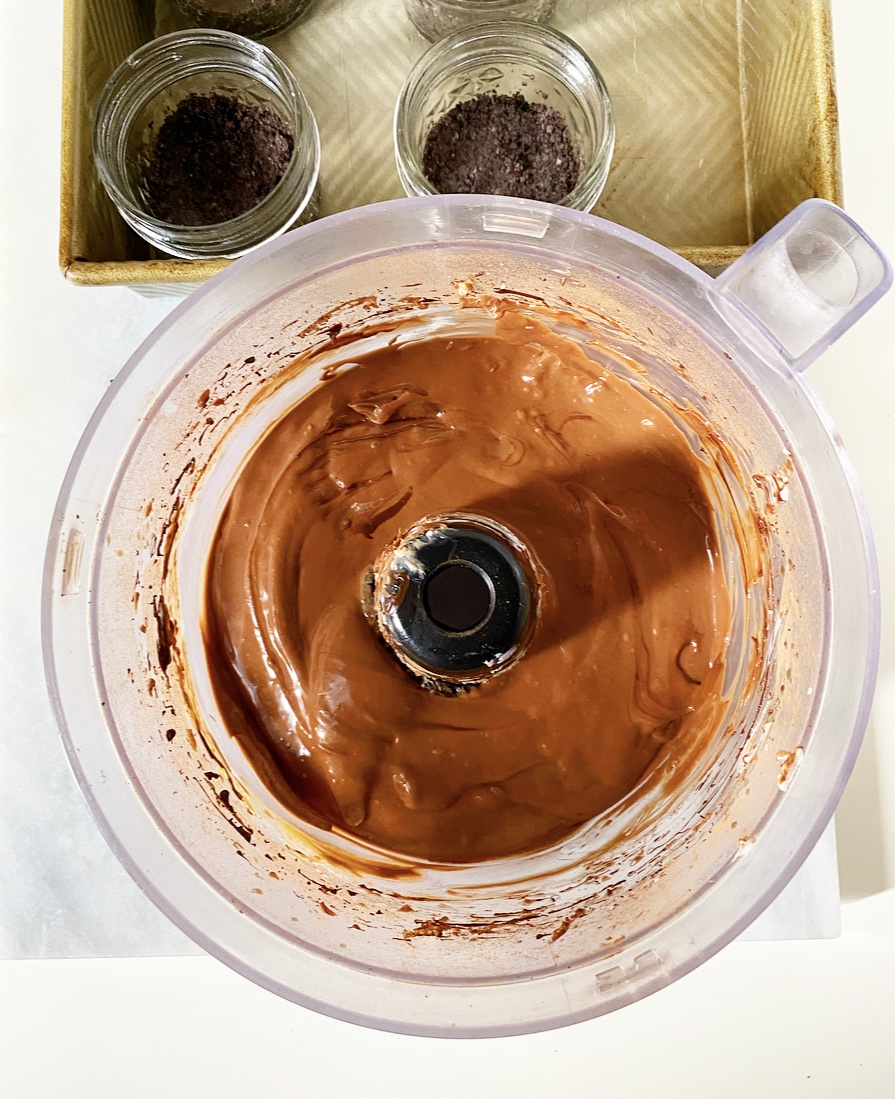
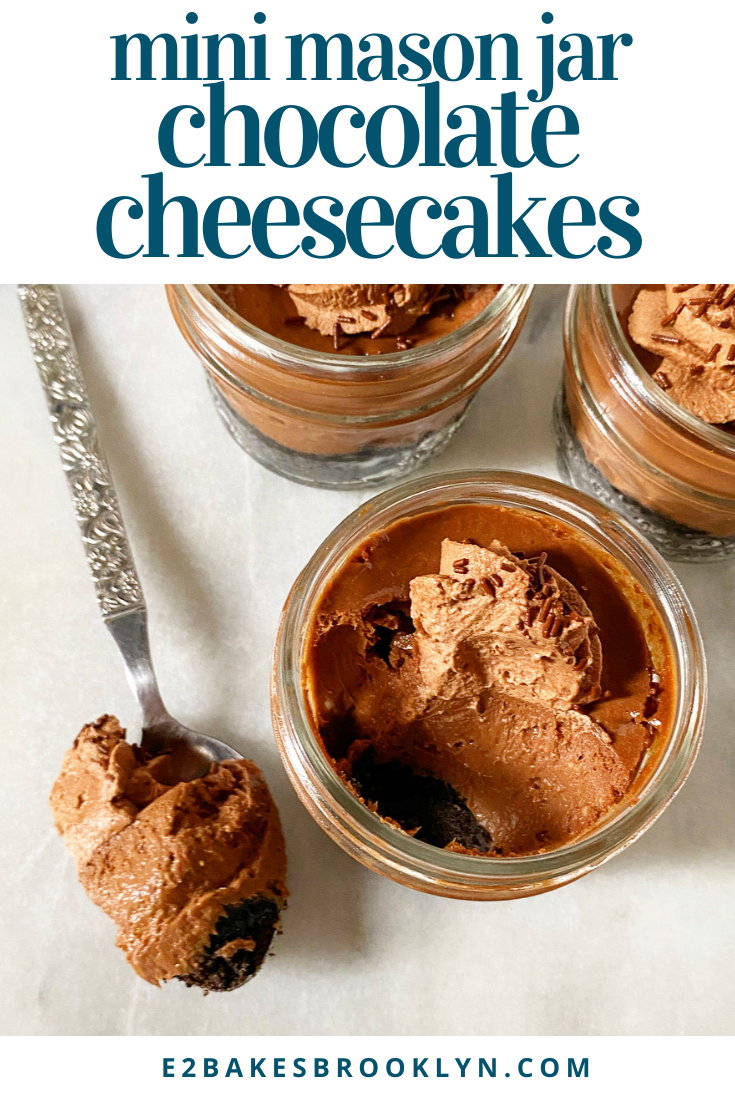
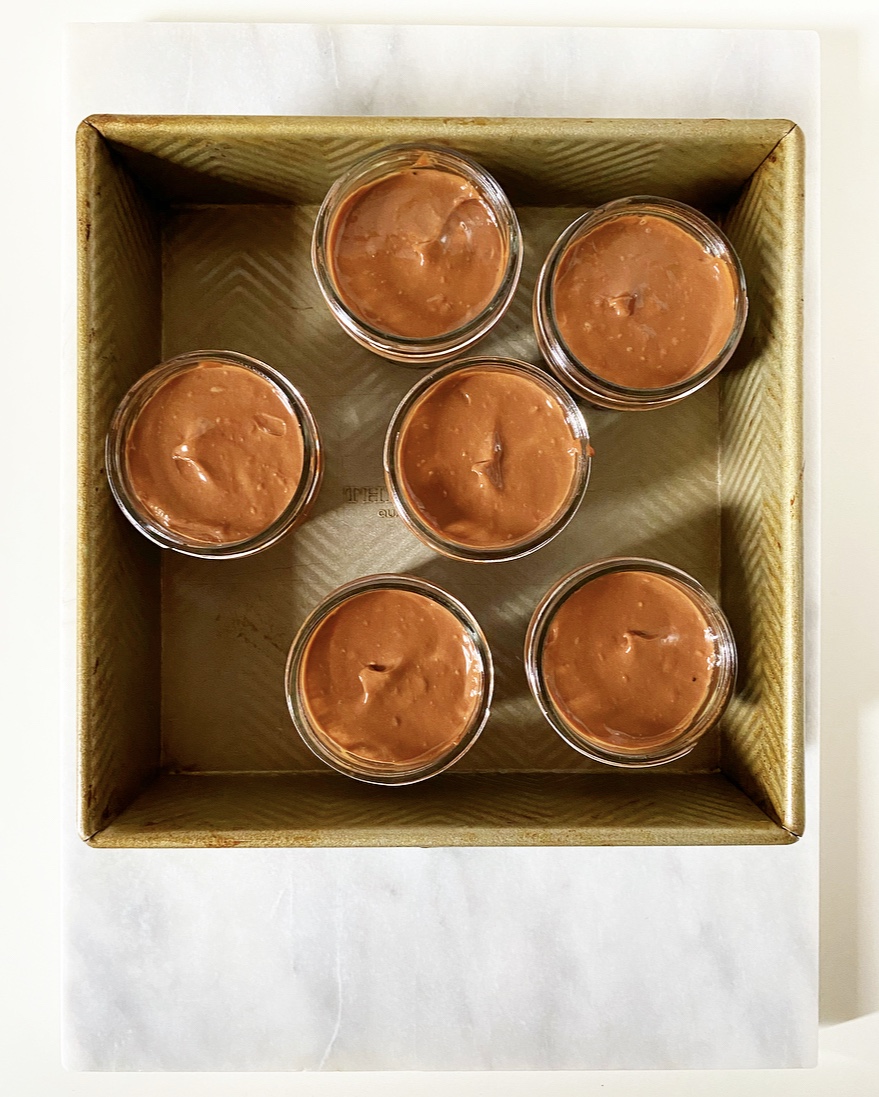 You can make the filling in your food processor (just wipe it out) or use a mixer. Either way, make sure to give the bowl some taps on the counter and let it rest a few minutes to release any large air bubbles before baking. Then spoon it onto your crusts and bake for about 25 minutes. Let the baked cheesecakes hang out in their water bath for five more minutes before transferring them to a rack to cool completely. This brief step helps them transition from the hot oven to your cooler counters more seamlessly. Cheesecakes are divas, in case you couldn’t already tell.
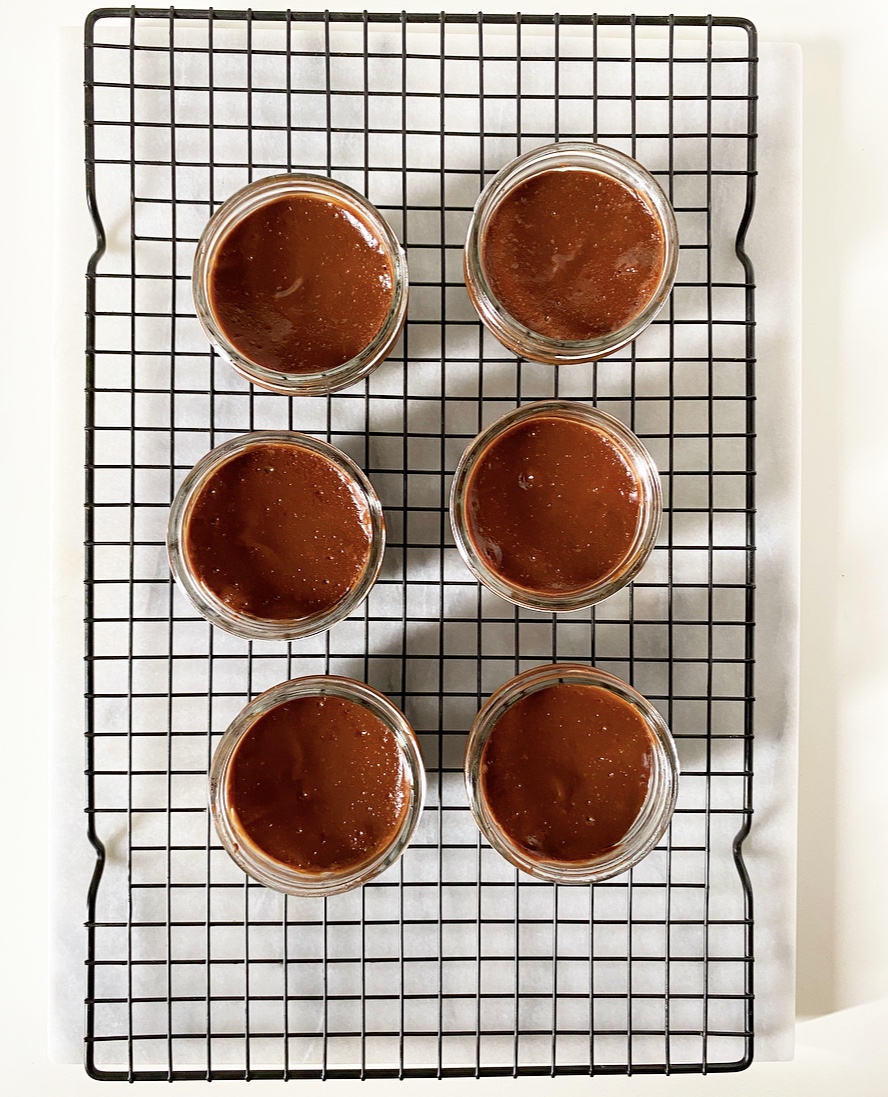 Once your chocolate cheesecakes hit room temperature, throw them in the fridge for a few hours to get nice and cold. This will seem endless, but will give you plenty of time to dream up toppings. I went for my new favorite
 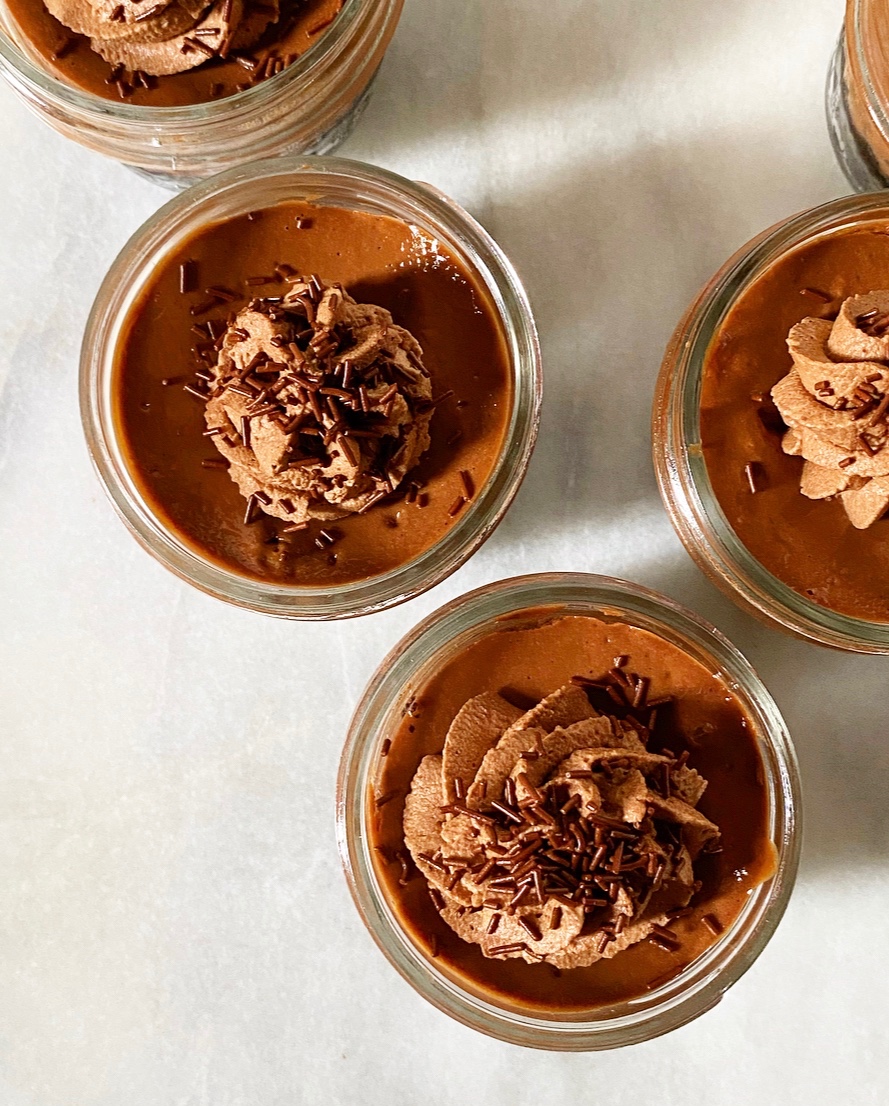 I won’t lie to you, Mini Mason Jar Chocolate Cheesecakes are a commitment, but take one bite and I promise you’ll agree that theyre entirely worth the effort. They’re super smooth and tangy with a big hit of chocolate, and that Oreo crust…well, I think we can all agree that Oreo crust should probably run for president.
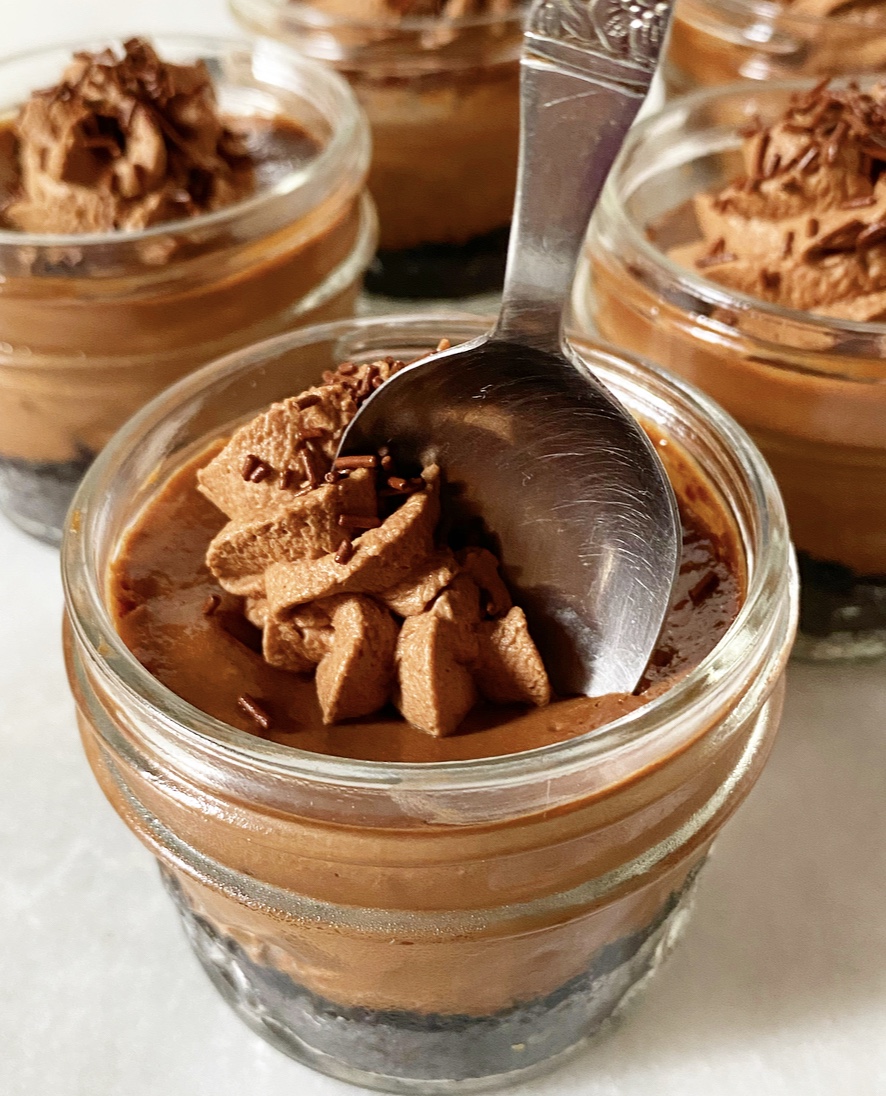 And on that note, enjoy this unofficial last weird weekend of this extremely weird summer. It’ll be two more weeks before I break out the pumpkin, and while that seems like eternity, I hope these chocolate cheesecakes soften the blow.
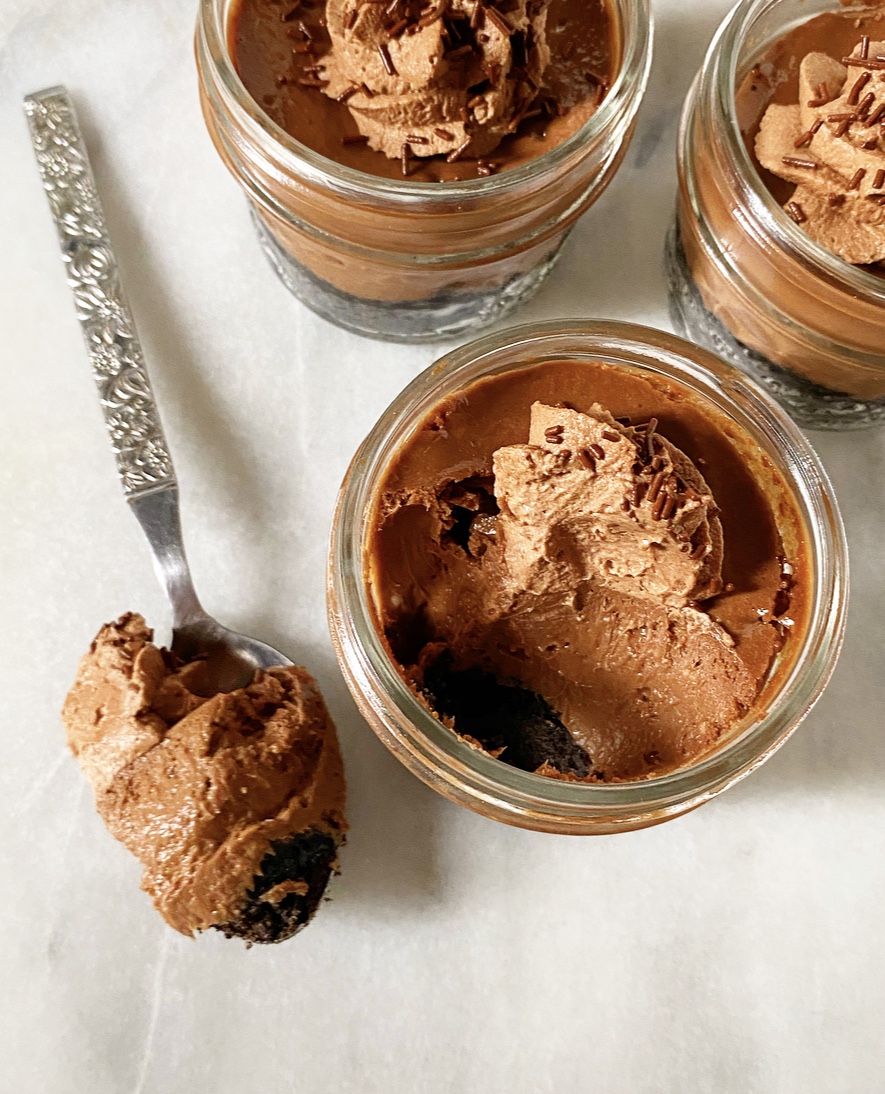
 Let me take this moment to express gratitude for the 1998 remake of
  Besides the obvious dipping of Oreos directly into peanut butter, I’ve paired the two in
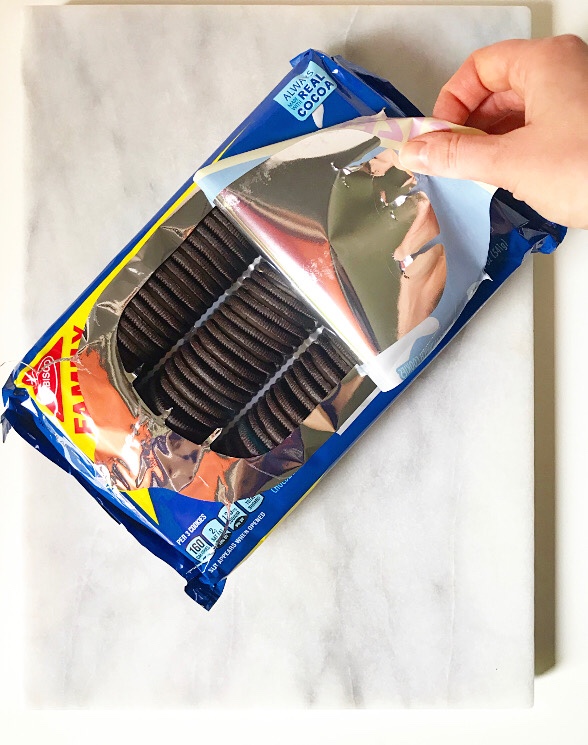

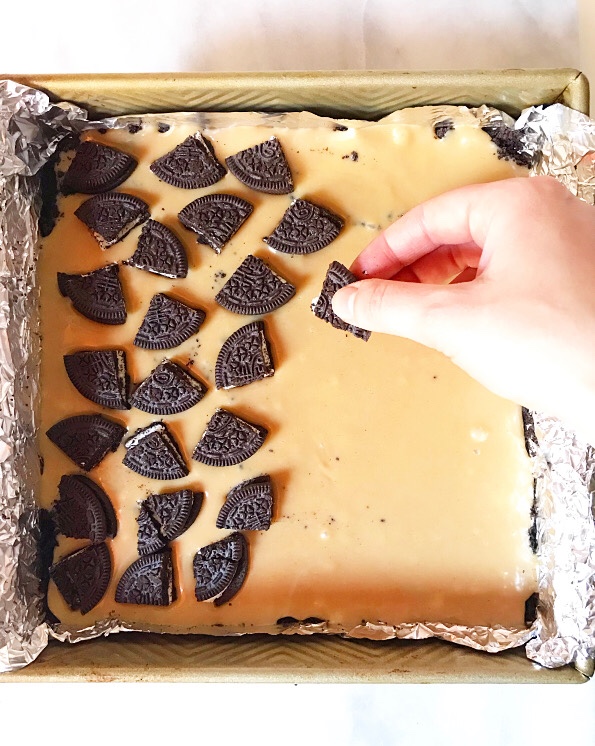
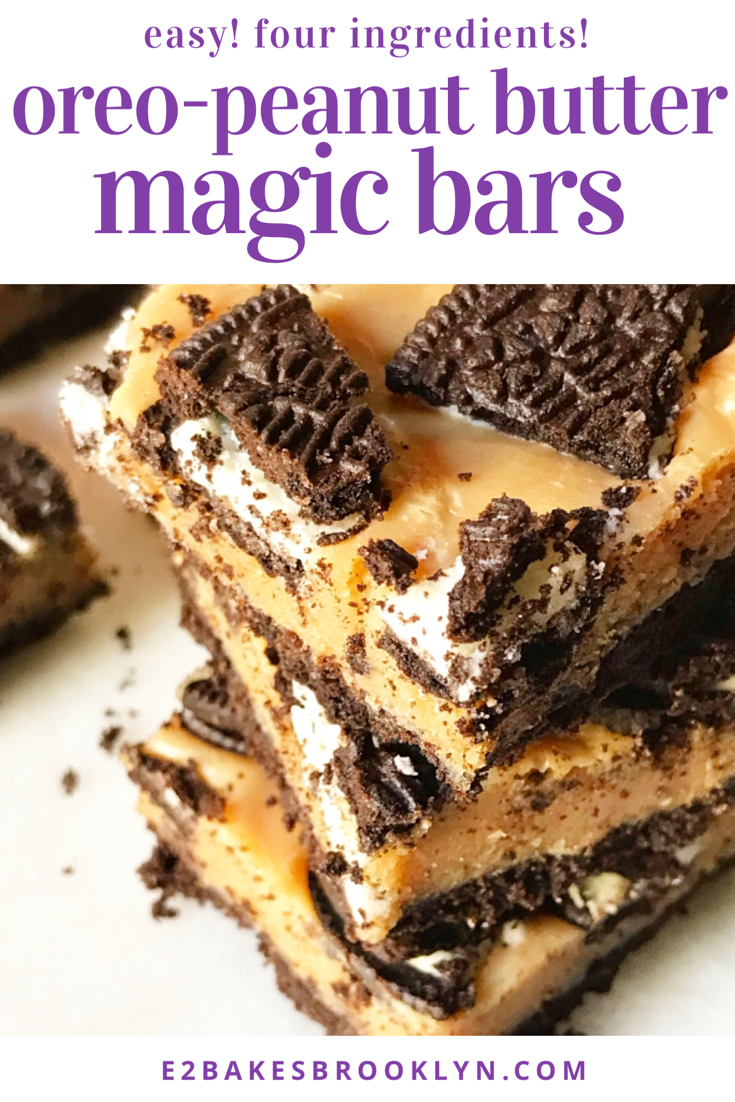
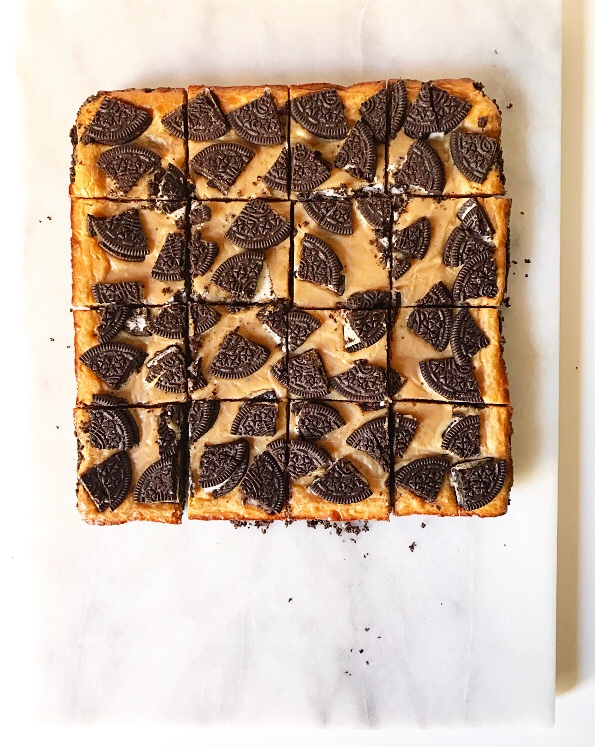 They have just four ingredients–Oreos, peanut butter, butter & sweetened condensed milk–and come together in less than 45 minutes. Oh, and they’re ridiculously easy and far more delicious than any baked good with four (!) ingredients should be.
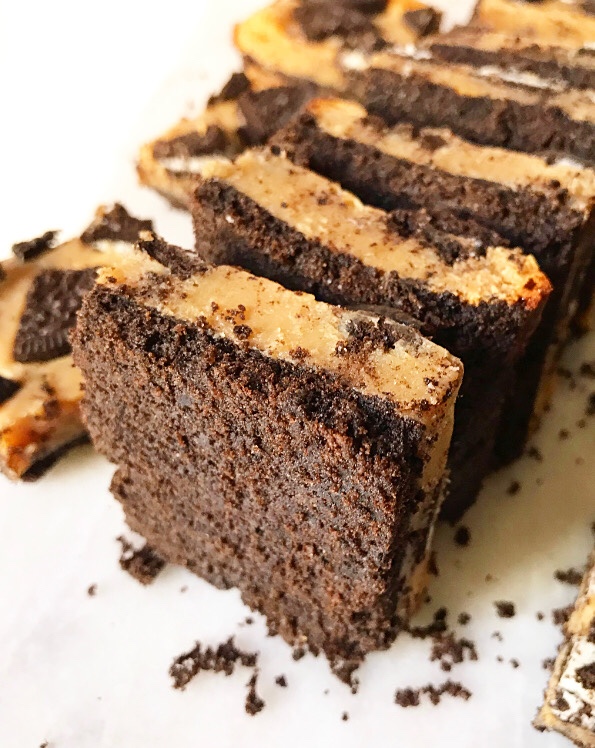 We’re talking soft, chewy peanut butter filling and buttery Oreo crust here, people!
 Those are two of my very favorite things. One of the great duos, if you will.