 I’m on the first of two back-to-back trips to Maine, but I’m popping in to tell you something important:
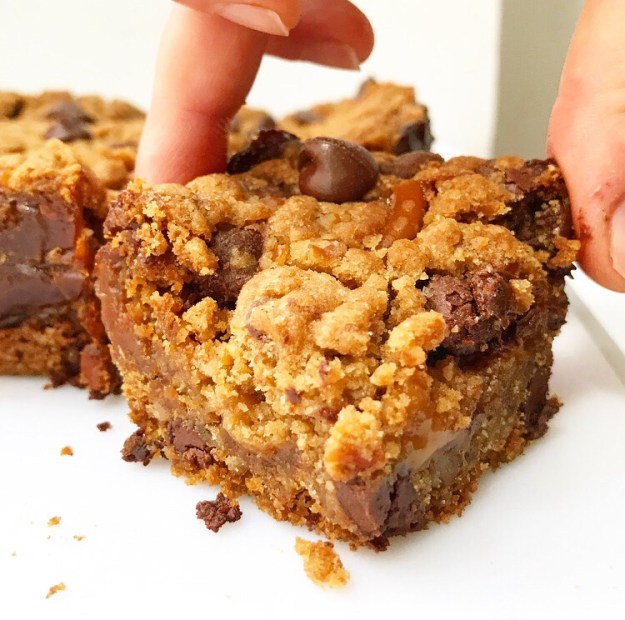
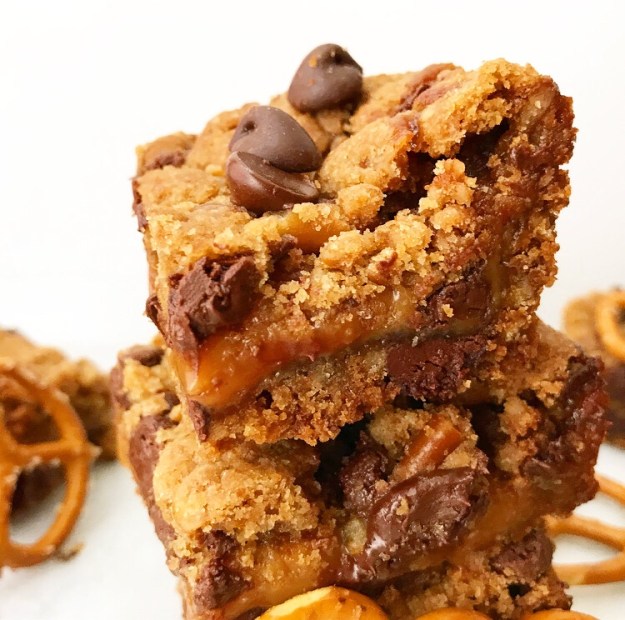 You should make these Salty Pretzel Carmelitas ASAP. Like tomorrow. Or tonight. Or right now. Call in sick, go get yourself some pretzels and a bag of caramels, and get ready to fall in love.
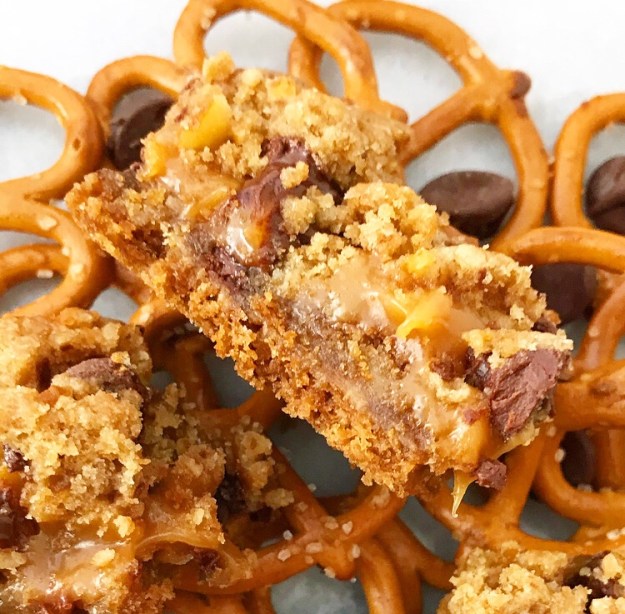 Okay, maybe don’t skip work, but definitely do make some time for these.
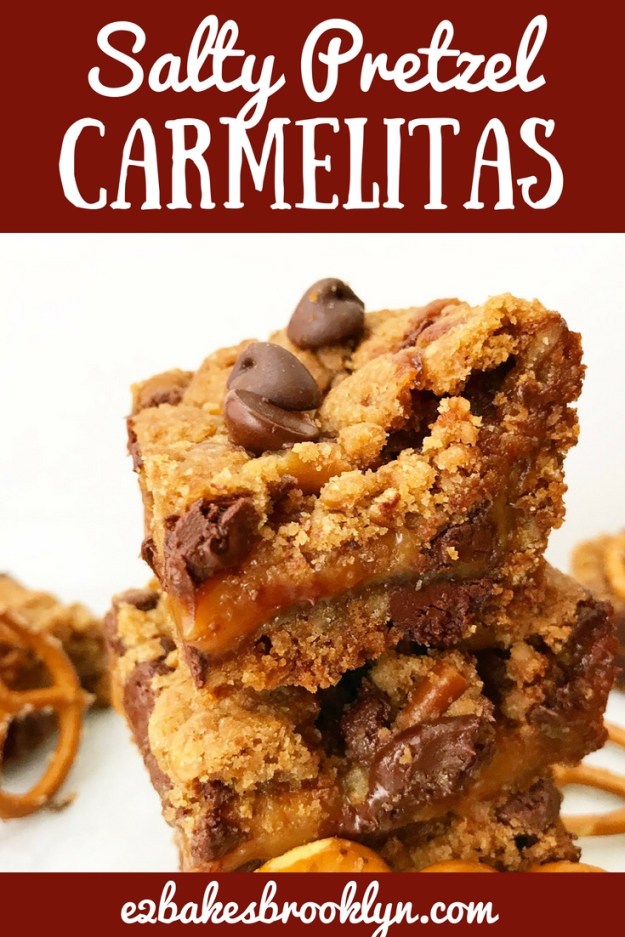
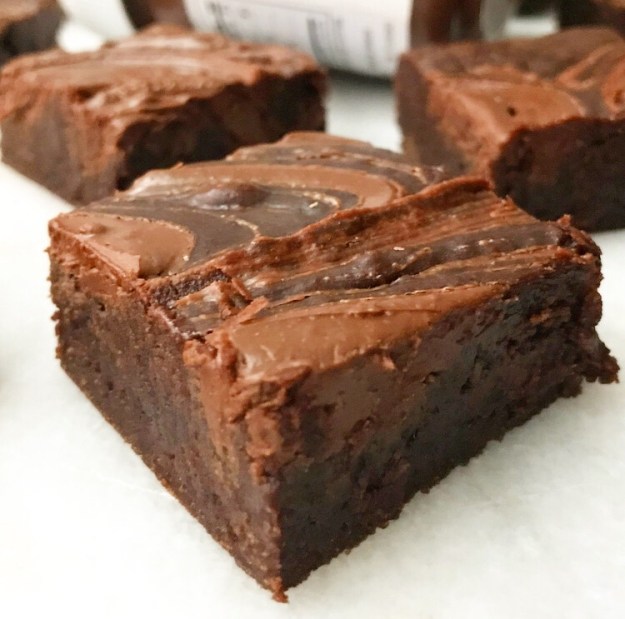
 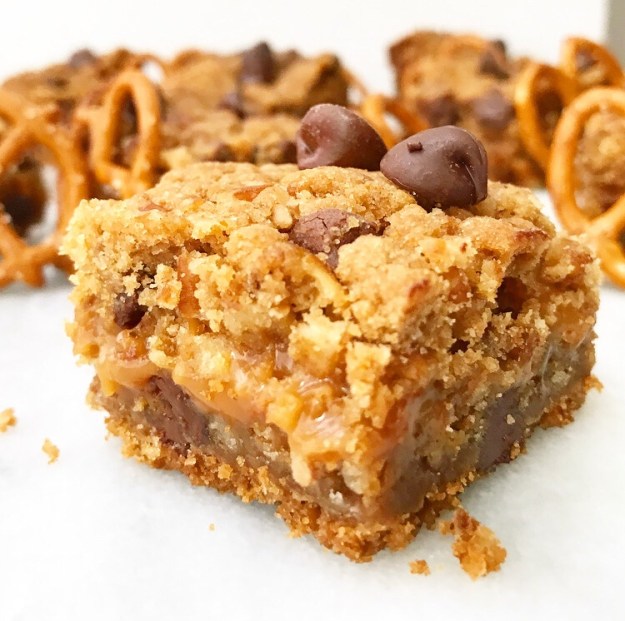 Salty Pretzel Carmelitas are everything. I’m not exaggerating. They’re sweet and salty…
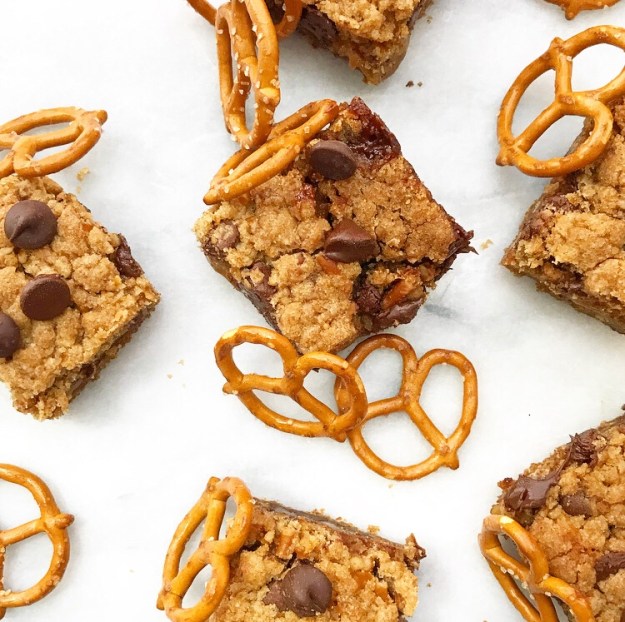 crispy, crunchy…
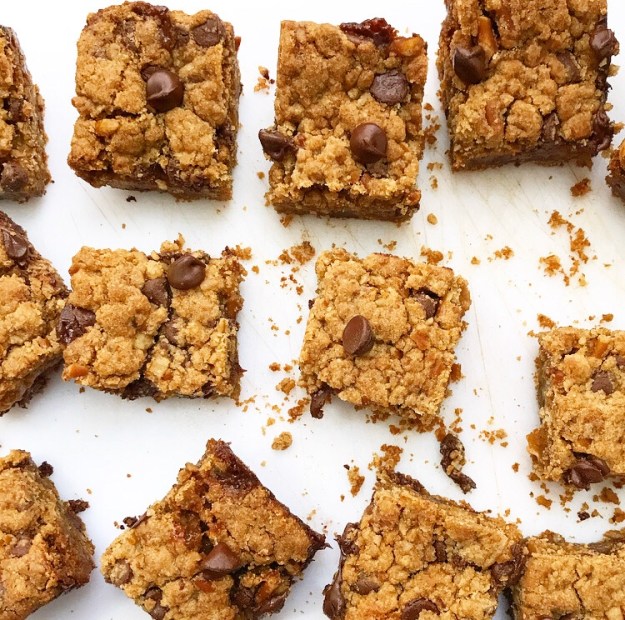 chewy, gooey…
 easy peasy bites of magic. Magic, I tell you.
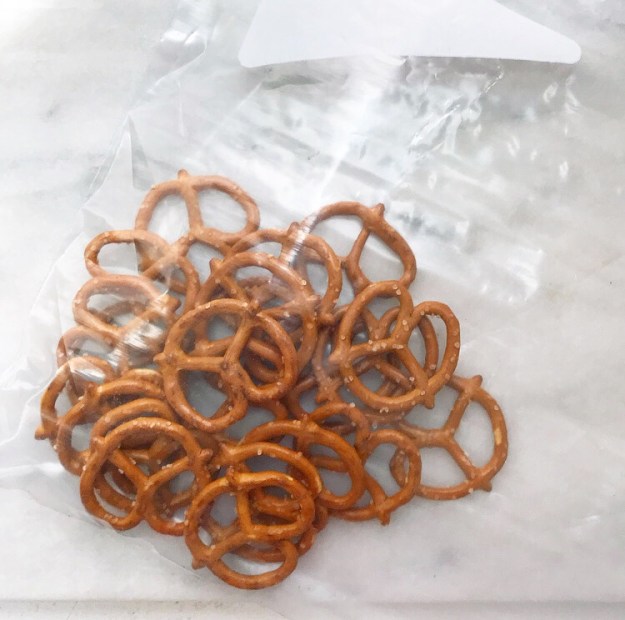
 I really feel like I could just leave it at that, but perhaps you need a more convincing argument as to why you absolutely should make these this weekend.
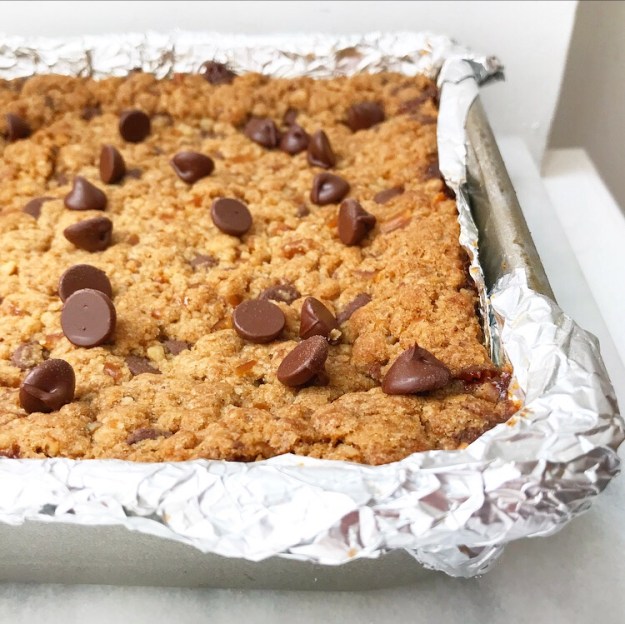 But if two layers of salted, brown sugary, pretzel- and chocolate chip-studded cookie…
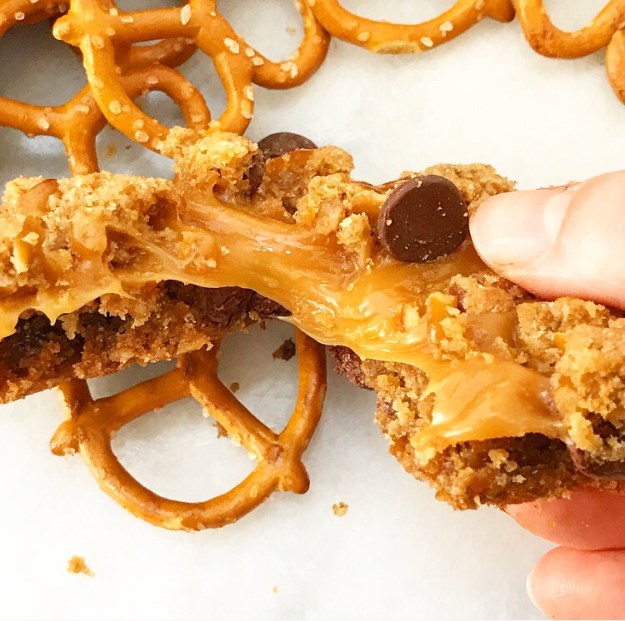 and stretchy, glossy caramel don’t have you running to the kitchen, I don’t know what will.
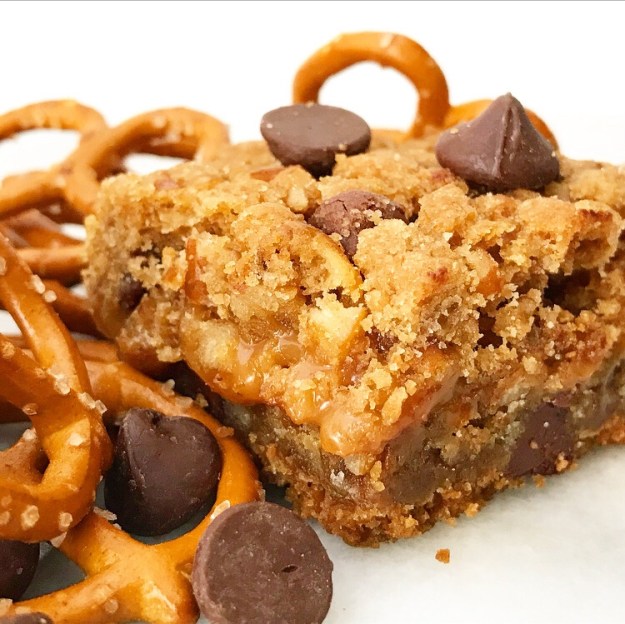
Salty Pretzel Carmelitas
makes one 8-inch square pan, about 9-16 bars
3 cups salted pretzels
1 cup all-purpose flour
1 cup light brown sugar, packed
1 teaspoon baking soda
1/2 teaspoon Kosher or sea salt
3/4 cup (1 1/2 sticks) unsalted butter, melted & cooled slightly
3/4 cup semisweet chocolate chips + more for sprinkling (optional)
1 11-ounce bag caramel candies, unwrapped
6 tablespoons heavy cream
Preheat oven to 350F. Line an 8-inch square pan with aluminum foil and grease with butter. Set aside.
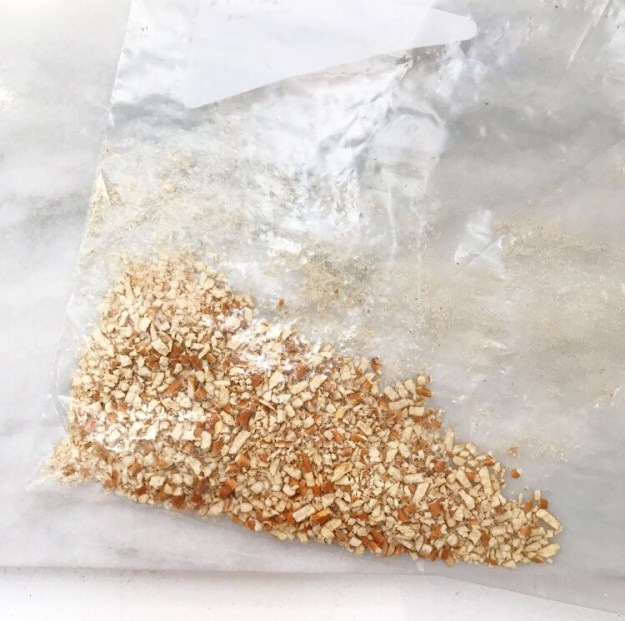
Place pretzels in a large zip-top bag. Seal bag and place on a counter or other hard, durable surface. Use a rolling pin or heavy pan to crush pretzels until the largest pieces are no more than 1/2-inch in length. This should yield about 1-1 1/3 cups crushed pretzels.
In a medium mixing bowl, whisk together flour, brown sugar, baking soda, salt, and crushed pretzels. Use a silicone spatula or wooden spoon to fold in melted butter—mixture may be crumbly, but should hold together when pinched. Ensure that the dough is not too warm before folding in chocolate chips. Set aside.
Combine caramels and heavy cream in a small saucepan over medium heat. Stir constantly until melted and smooth, about 5 minutes. Remove from heat. Set aside.
Firmly press half the dough (about 2 cups) into an even layer at the bottom of the prepared pan. Pour caramel over the top and smooth to the edges. Scatter remaining dough mixture over the top. Use the palms of your hands to gently pack it into a even layer, covering the caramel.
Bake full pan for 23 minutes, or until turning golden at the edges. Let cool completely in the pan on a rack (you can speed this up in the refrigerator).
Slice bars with a lightly greased chef’s knife, wiping the blade clean between cuts. Do not try to slice bars until they are completely room temperature. If you cooled them in the refrigerator, let them return to room temperature before slicing.
Bars will keep in an airtight container at room temperature for up to five days. Layer them with wax paper to keep them from sticking together.
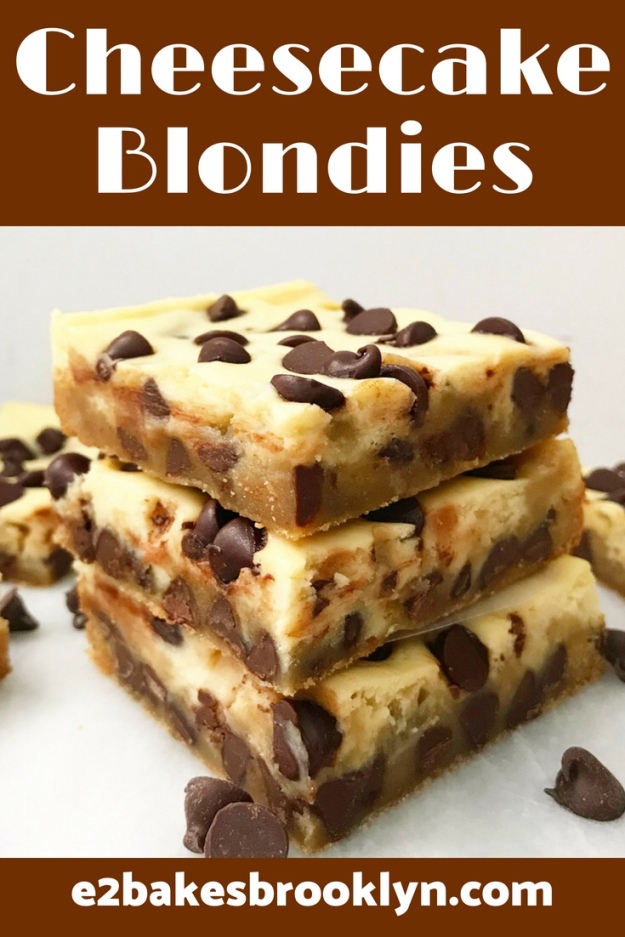
 I have been debating for three days whether or not I should post these Cheesecake Blondies or use Independence Day as a “free pass” to take a rare blog day off.
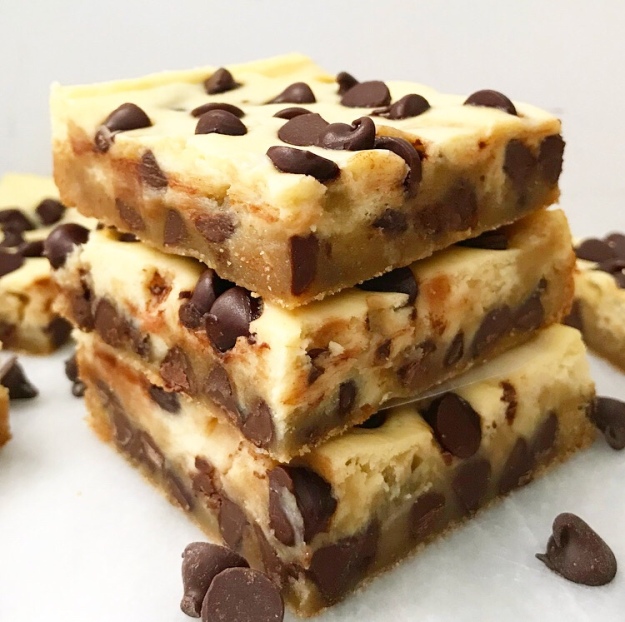
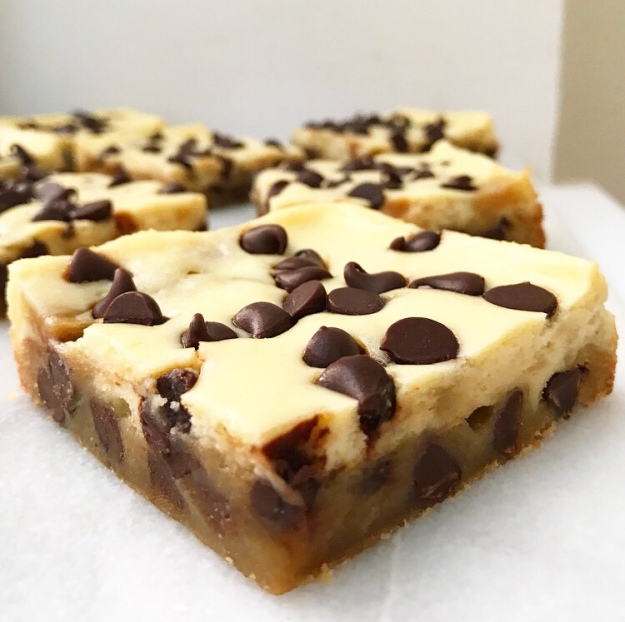 Cheesecake Blondies won out though, because they are the perfect treat to sink your teeth into while you watch the fireworks. Creamy cheesecake and chewy
 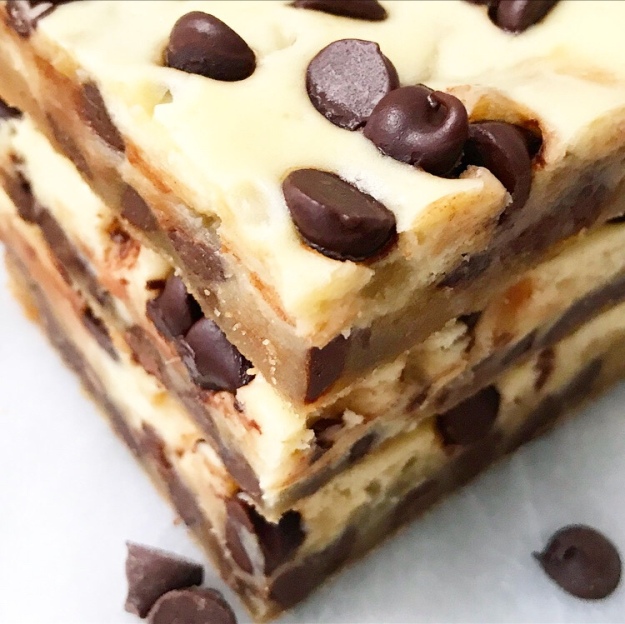 Another great thing about these blondies? They are super easy to make and bake up in just 25 minutes!
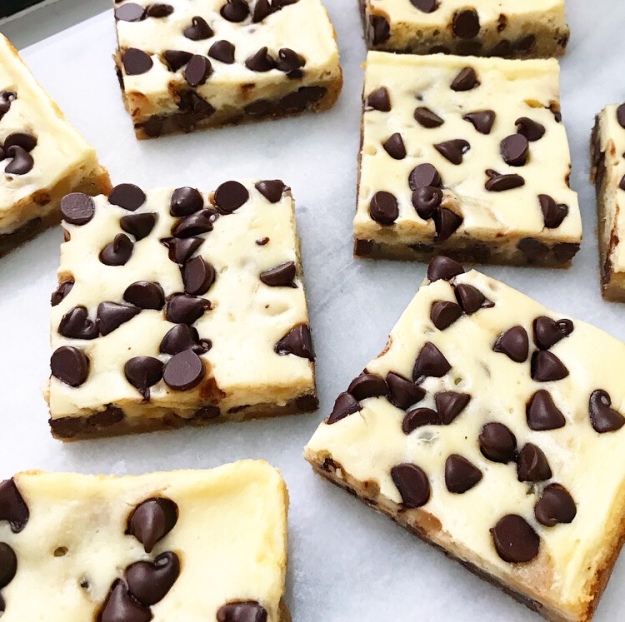 The most difficult part of making Cheesecake Blondies is waiting for them to chill. Those three hours can seem eternal, but they are completely necessary—nobody likes warm cheesecake.
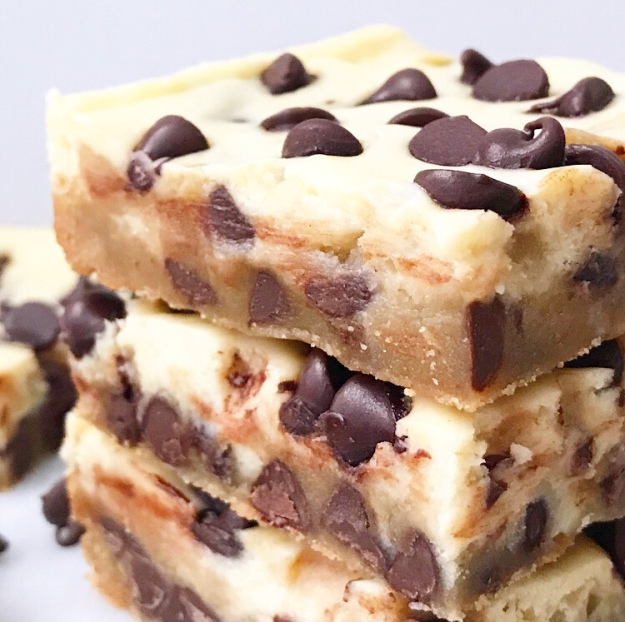 Once the chill time is up, slice up the blondies and revel in their cuteness. Chocolate chips have a way of making things more adorable, don’t they?
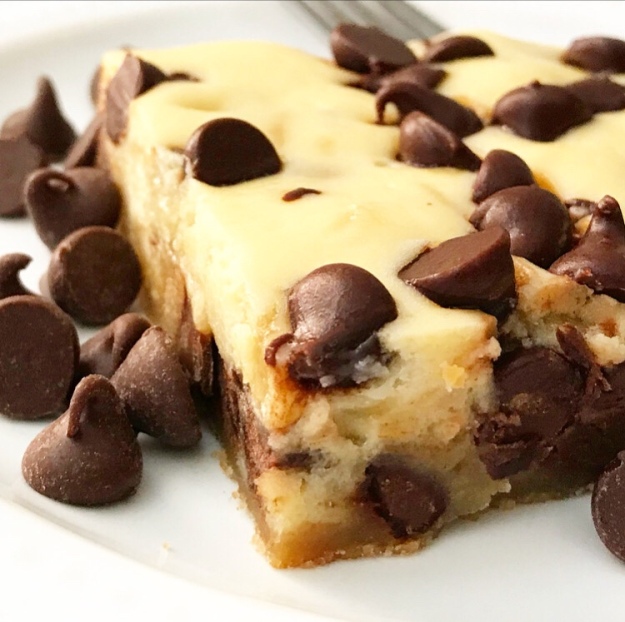 Make a batch of Cheesecake Blondies for your holiday cookout or pack a box into a cooler and take them on the go! You and your friends and family will love the combination of tangy cheesecake and sweet, brown buttery blondie ❤
 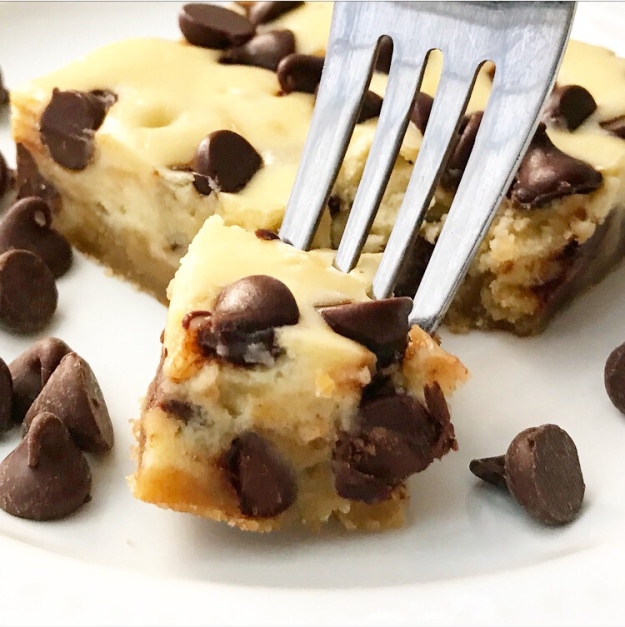 Happy Fourth of July!
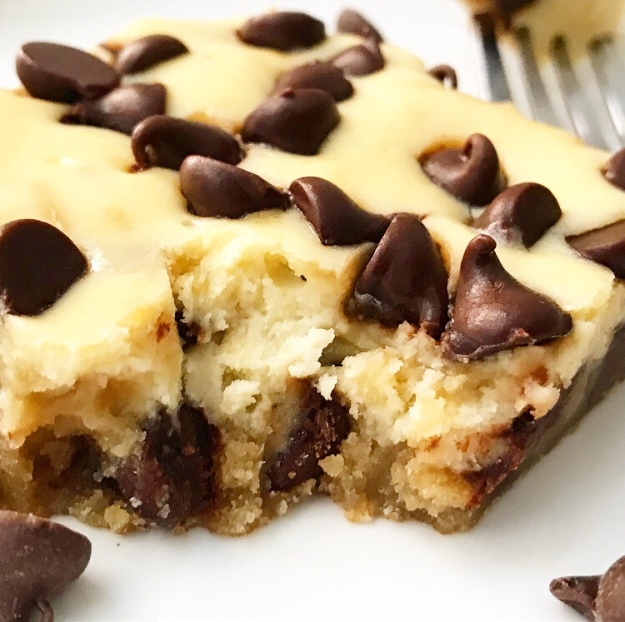
 Hey y’all! I’m writing from Cambridge, Massachusetts, where my baby sister (who is not a baby—she’s 30) is graduating from Harvard.


 Remember that huge, ridiculous
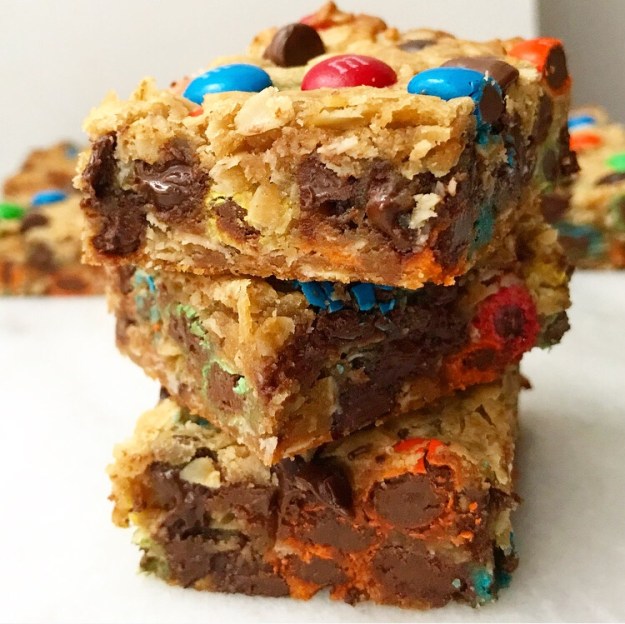
  You know what’s still taking up space in my kitchen? This comically large container of M&Ms. It’s made it through two of those cakes, a batch of cookies and lots of late night snacks, and it’s still kickin’.
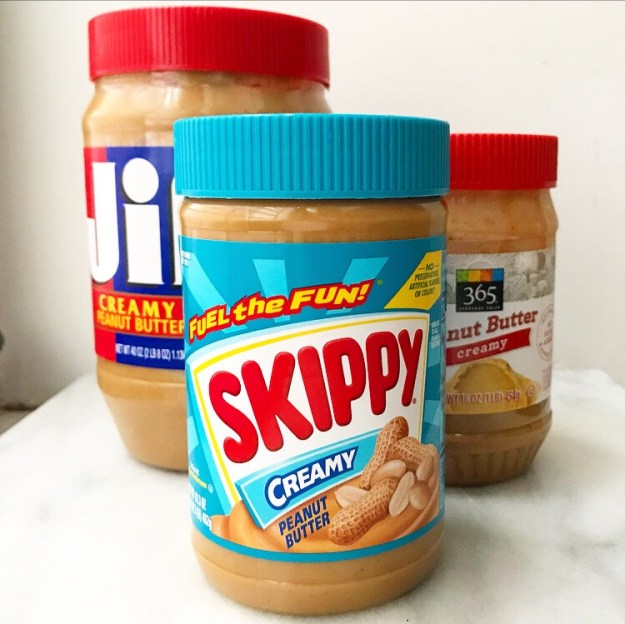 Also taking up space in my kitchen? Three different jars of peanut butter. THREE. And they’re all different brands. Just…what? I really need an Excel spreadsheet to keep track of all my baking supplies so I’m not compelled to pick up peanut butter every time I see it on sale.
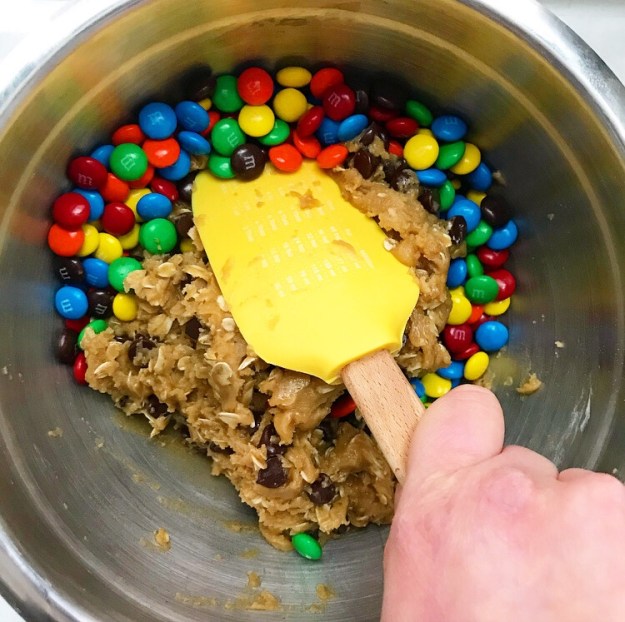
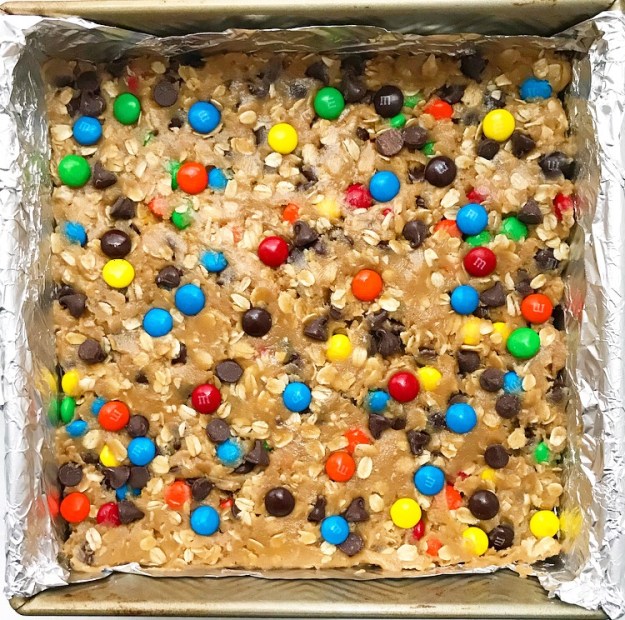
 So, what does one do with all that peanut butter and that huge container of M&Ms? Add some oats and make Monster Blondies, of course!
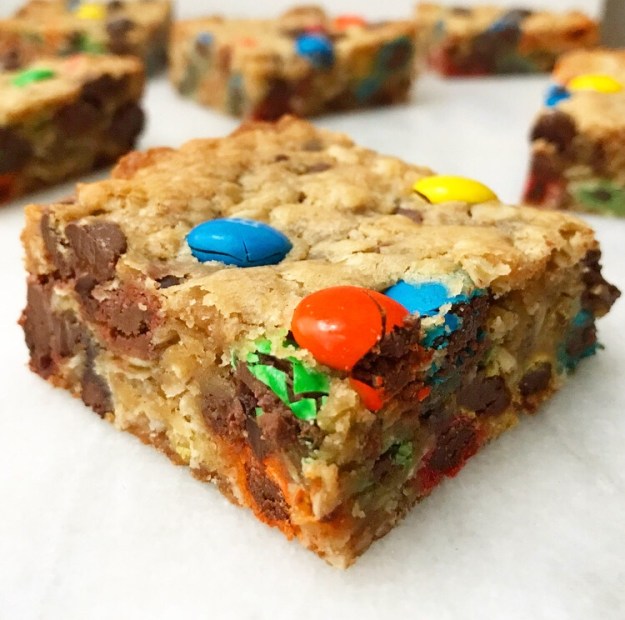 What makes these blondies so…monstrous? Well, they’re a riff on Monster Cookies, a sort of “everything but the kitchen sink” cookie that, at its most basic, contains peanut butter, oats, M&Ms and chocolate chips.
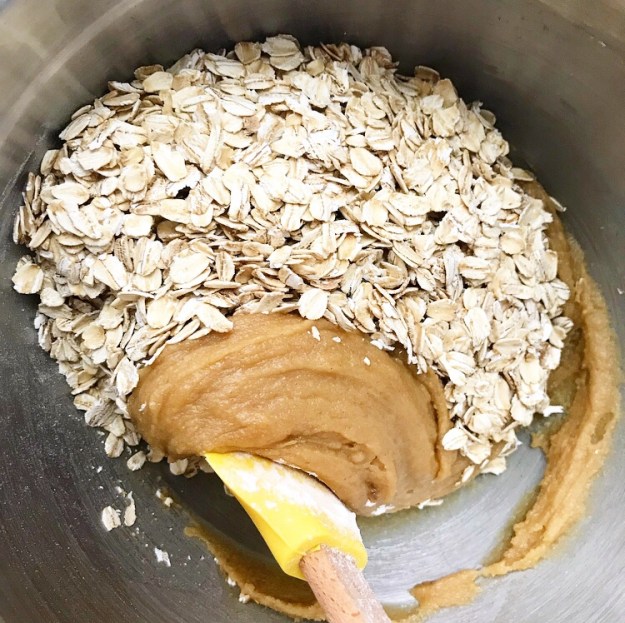
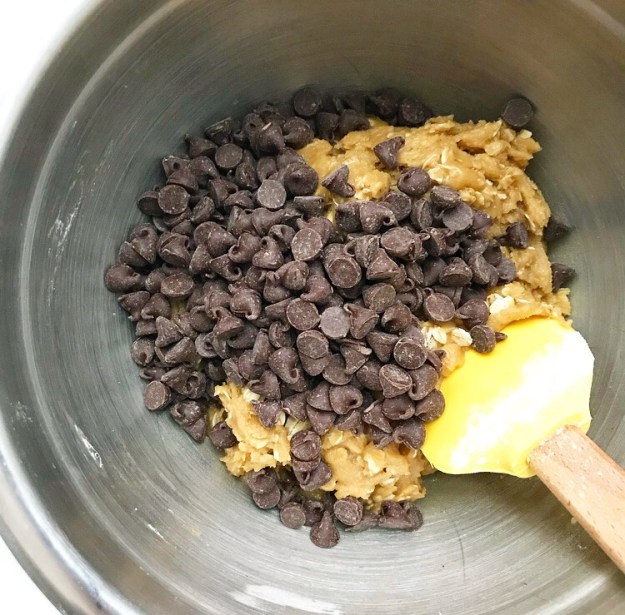
 The original cookies are terrific, but skipping the cookie dough and tossing all those ingredients into blondie batter is absolutely the way to go! The resulting blondies have all the flavors and textures from their namesake recipe, but with an extra thick and chewy
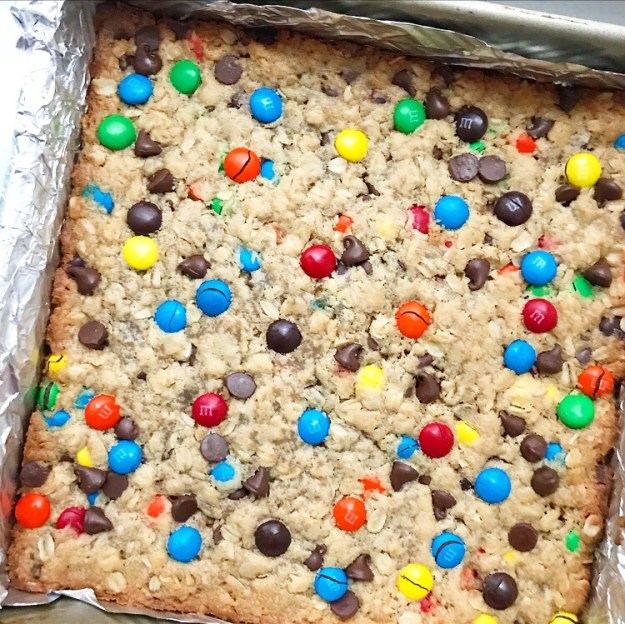
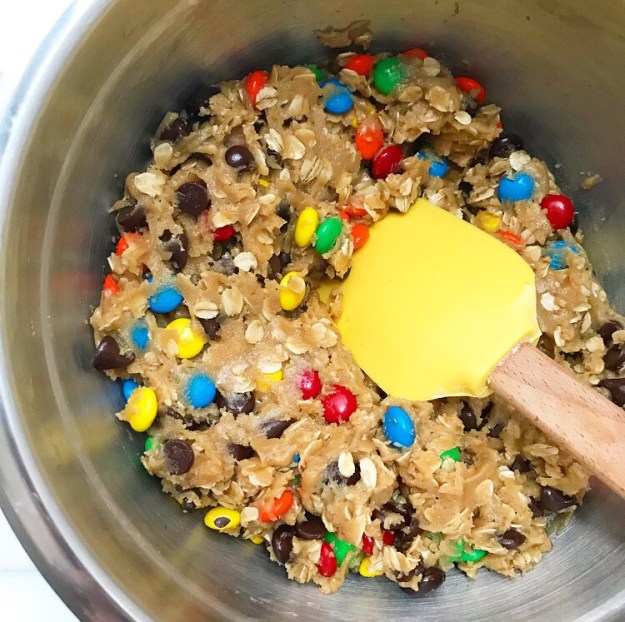
 Not only that, but blondies are way easier to make than cookies—this recipe comes together with just one bowl and a silicone spatula! And, of course, they don’t require baking in batches. Monster Blondies are ready to come out of the oven just 40 minutes after you start making the batter!
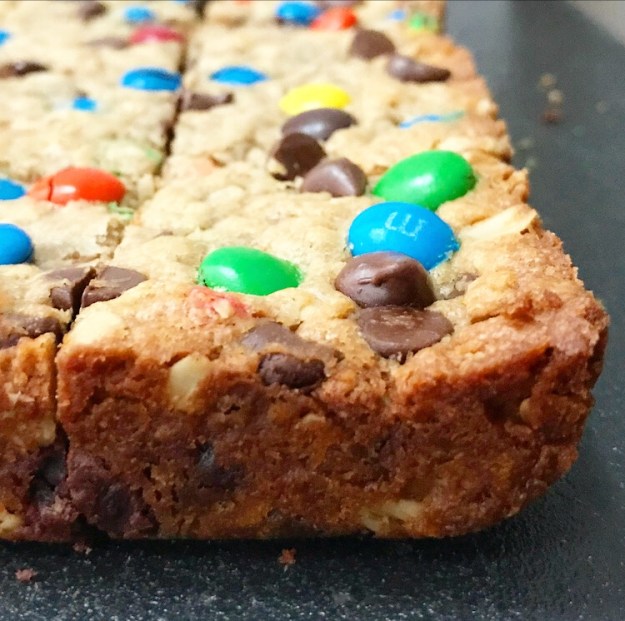
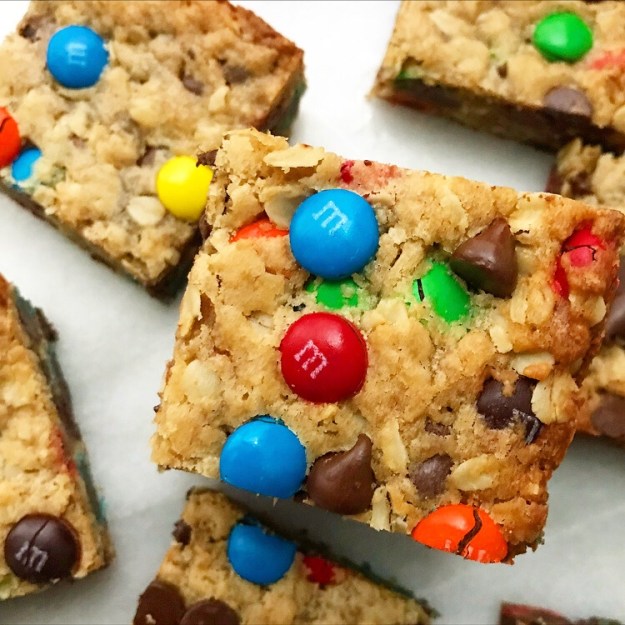
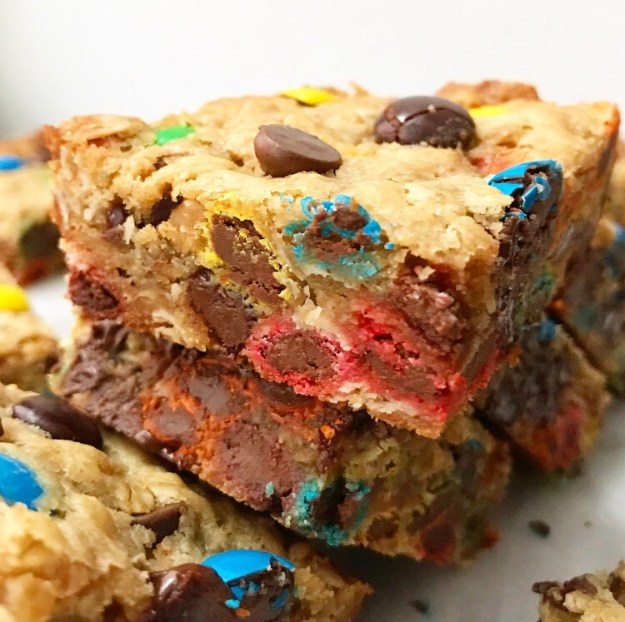 Once the blondies have cooled slice them up and dig in! You’ll love the soft & chewy blondie base, the slight saltiness from the peanut butter, the texture from the oats and crackly candy coating, and tons of chocolate. As far as I’m concerned, they’re the very best kind of mid-week pick-me-up ❤
 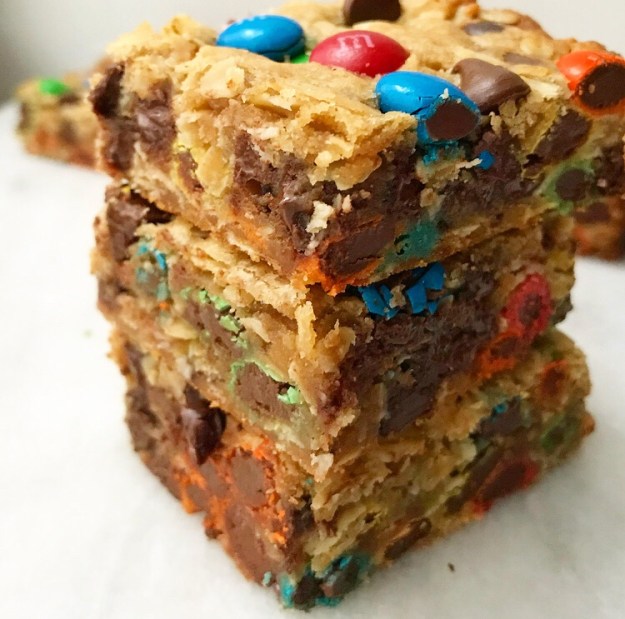 Monster Blondies
 I don’t want to write about baking today—I want to write about how much I love the Olympics. I’ve watched the coverage every night and had it on in the background while I’ve baked during the day. This isn’t a recent habit—I grew up in a family that gathered to watch the games (summer or winter) every night they were on, and I even once had a wall of my teenage bedroom dedicated to the decorated short track speedskater Apolo Ohno.
 Anyway, this isn’t an Olympics blog. It’s a baking blog. So, let’s talk about baked goods, specifically Almond Joy Shortbread Bars.
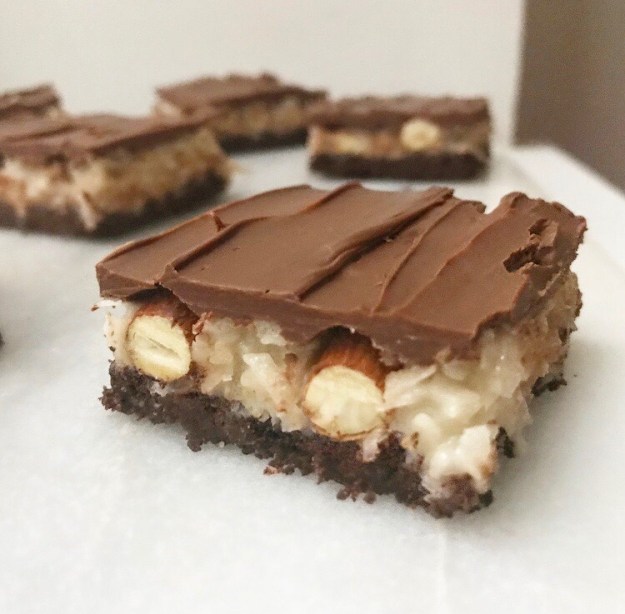
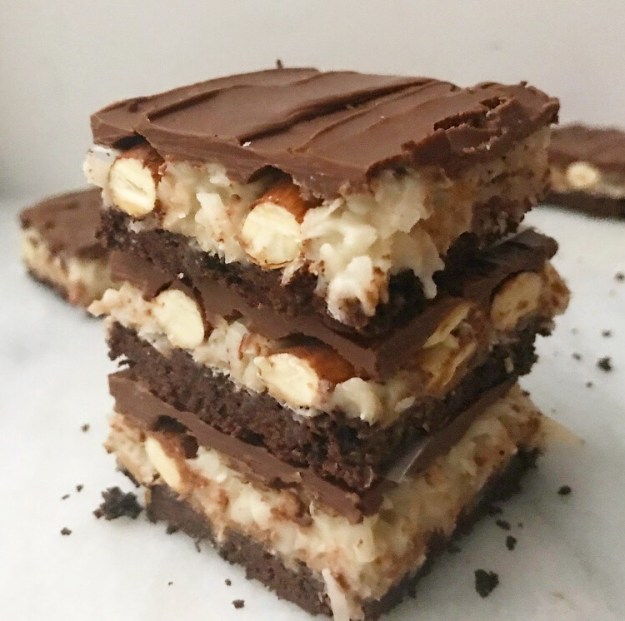
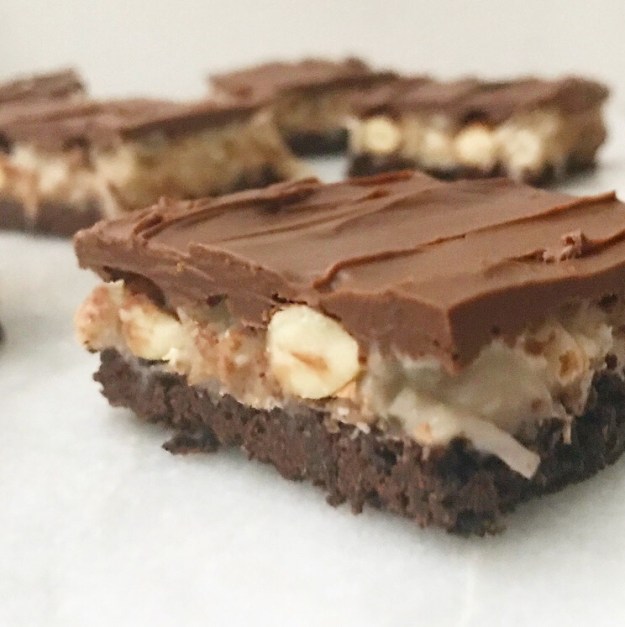 If you’re going to try to improve on the practically perfect combination of chocolate, almonds, and sweet coconut filling, layering it all onto a buttery chocolate shortbread crust is a pretty good way to start.
 All the layers in these bars make them look like they take hours to prepare, but in reality, they take about 90 minutes from start to finish and are nearly no-bake. That easy chocolate shortbread crust is the only layer that has to spend time in the oven.
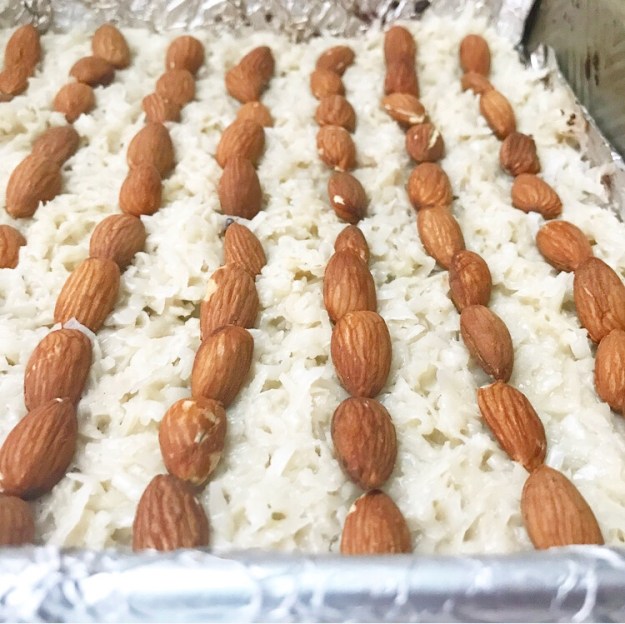
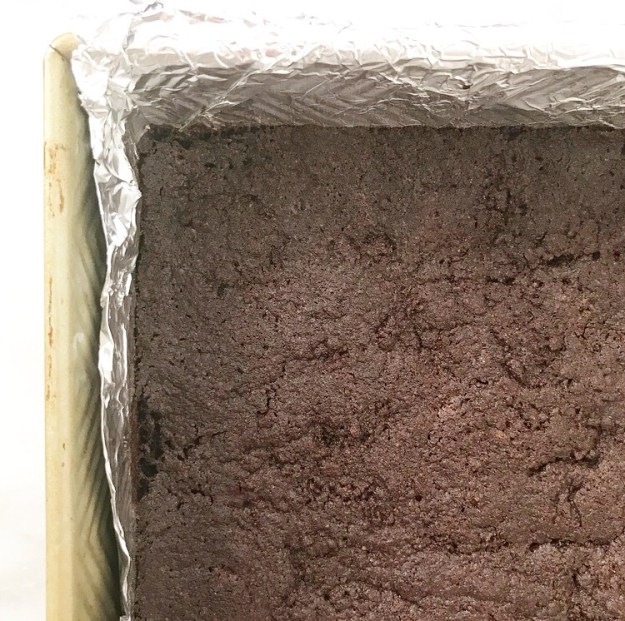 It’s topped with a thick layer of coconut filling and dotted with whole roasted almonds…

 But back to the bars. Slice ‘em up and admire your handiwork. #thoselayerstho
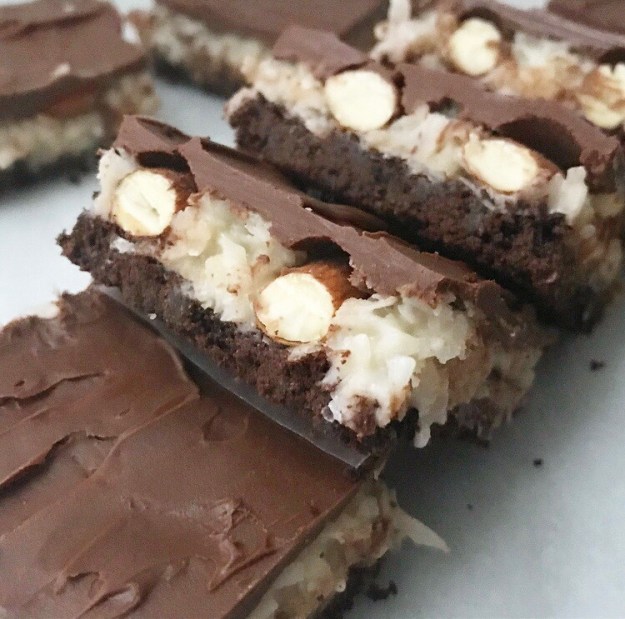 The flavor is everything you love about sweet, chewy, crunchy Almond Joys, but better because they’re homemade. Oh, and because they have a crispy layer of chocolate shortbread offsetting all their sweetness. After sinking your teeth into one of these, you’ll never be able to go back to the mass-produced candy bar.