Notice anything different? I updated the look of this site on Wednesday afternoon!
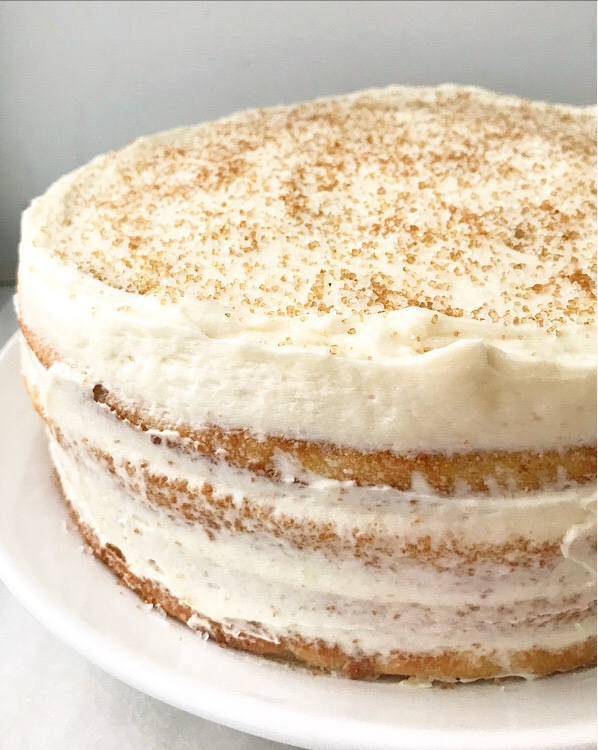 I haven’t made any major aesthetic changes to this site since I started blogging almost three years ago. I mean, I’d thought about it on and off, but had never actually gone through with anything until two days ago. I’d love to say this was planned, but it absolutely was not. I just decided on a whim that it was time to change the theme and streamline a few things, so here we are.
 Now, I’m not someone who makes many impulse decisions—I’m a big over-thinker—so changing the look of my blog is a pretty big deal for me. I still need to make a few formatting adjustments, but other than those, this look is here to stay.
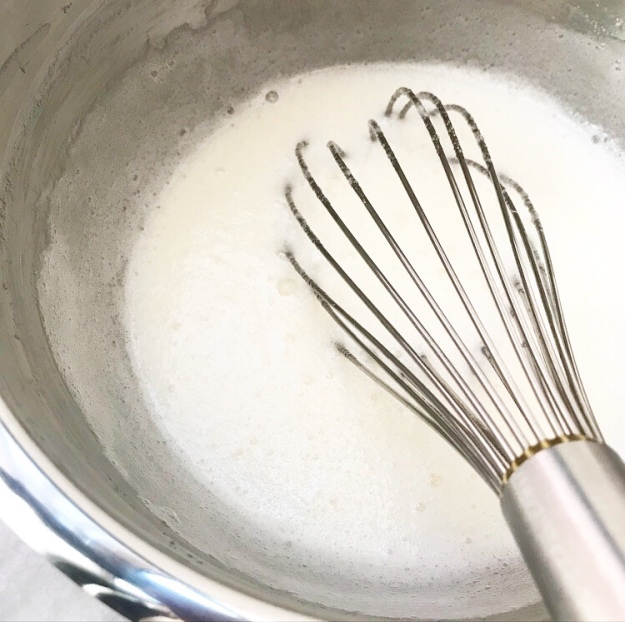
 Another impulse decision I made recently? Baking this Maple Layer Cake! One minute, I thought “I should make a maple cake this fall,” and the next, I was whisking up batter and whipping buttercream.

 That’s really something, considering that I was deep in the babka zone at the time, working on a recipe that I overthought to the point of making 18 (!) babkas.

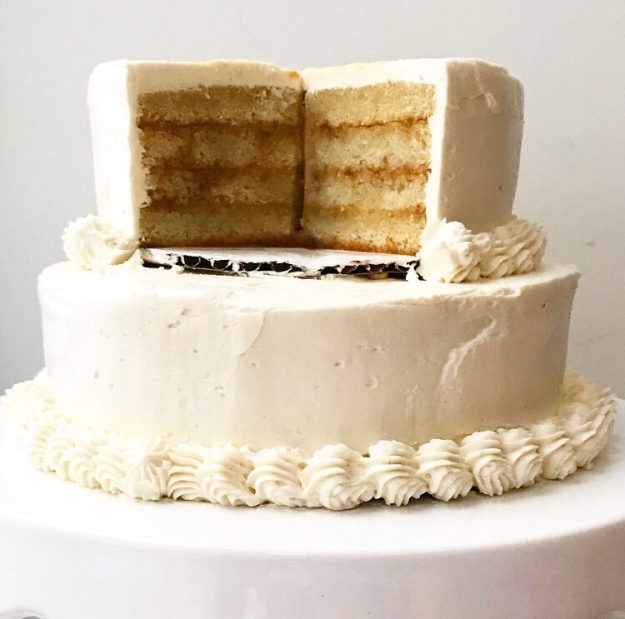
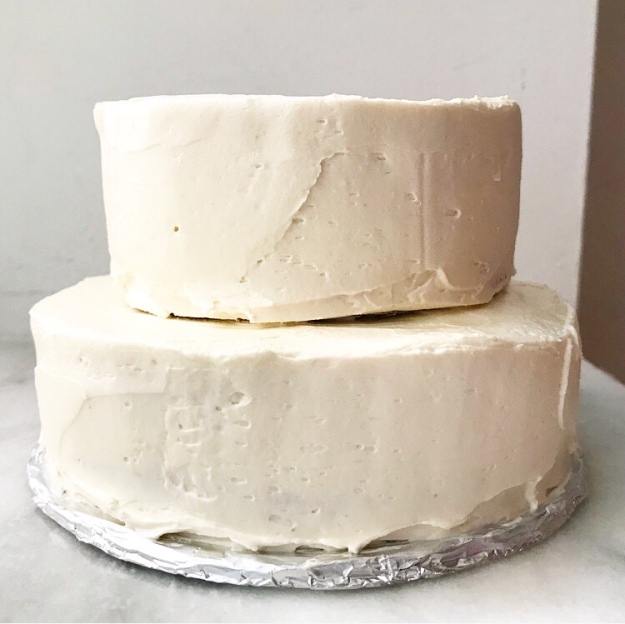
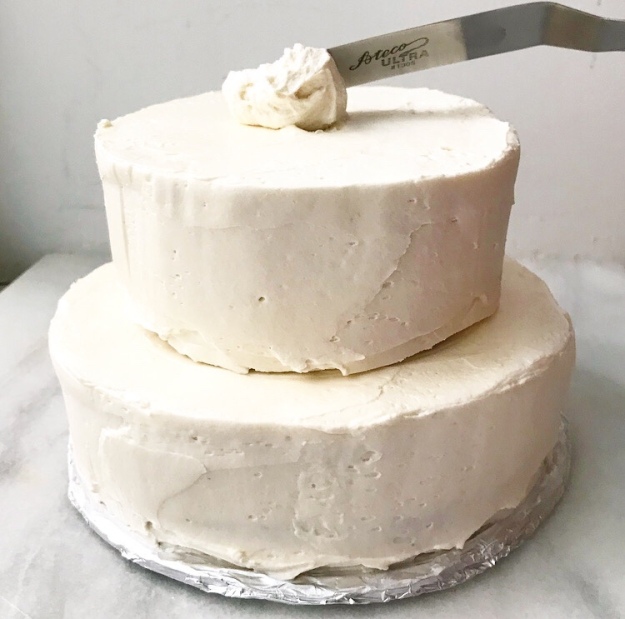
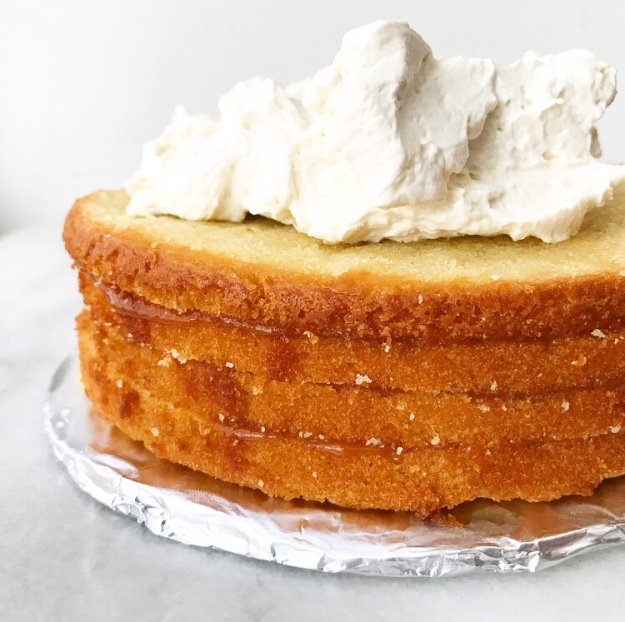
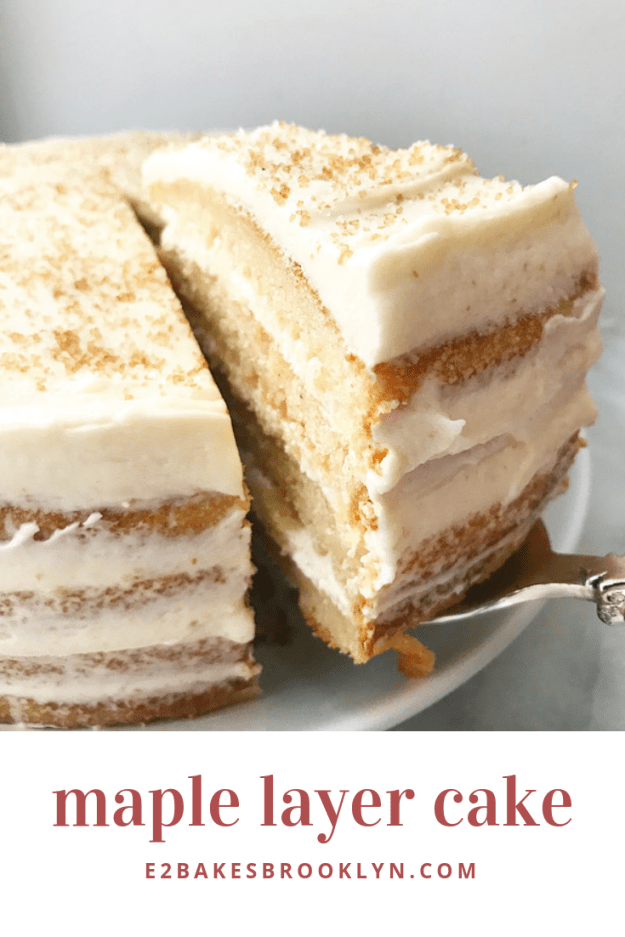
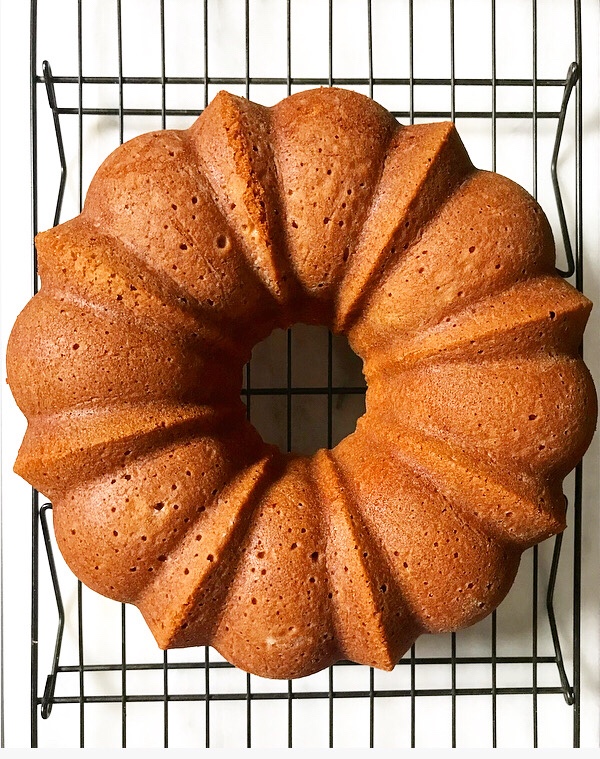
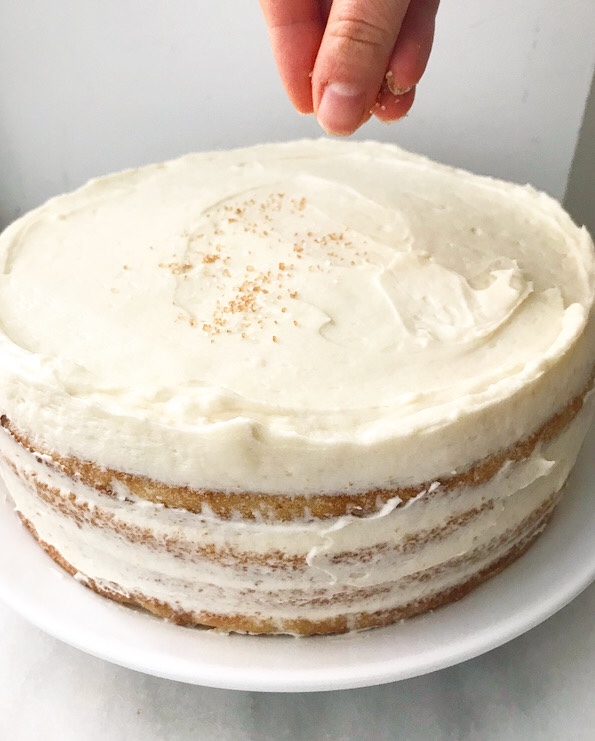 In the midst of all that self-imposed craziness, this cake went from a one-off thought to a sparkling four-layer naked cake in the span of an afternoon. Isn’t it a stunner?!
 That’s not all! This cake tastes as good as it looks 🙂
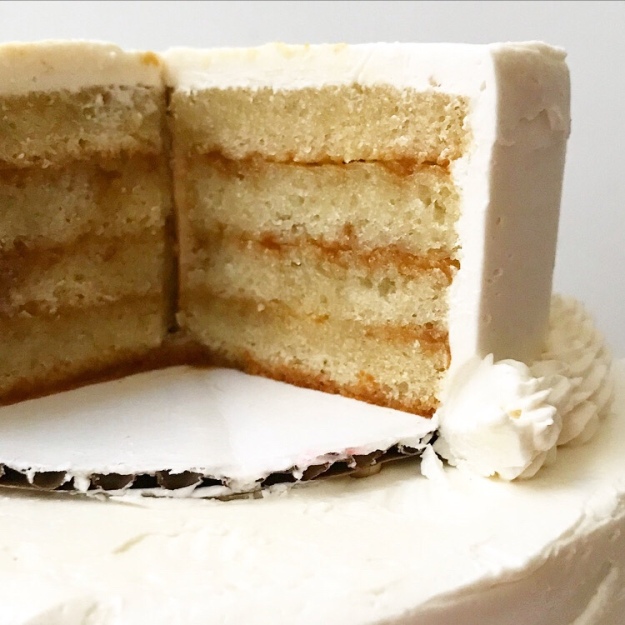
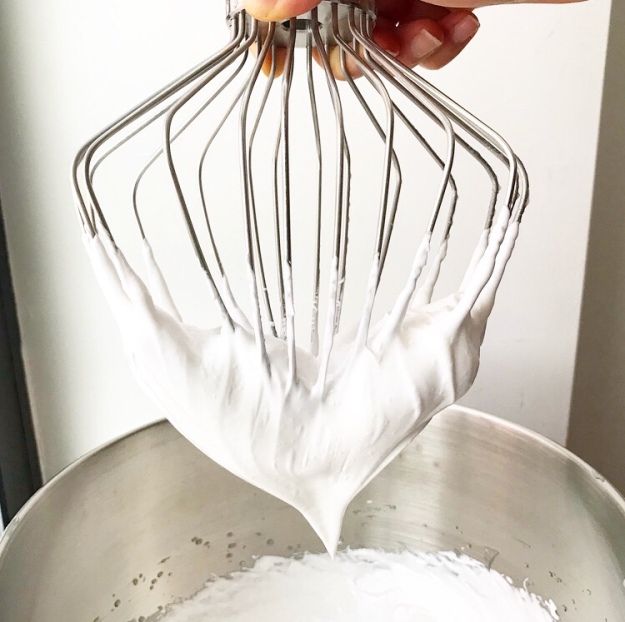
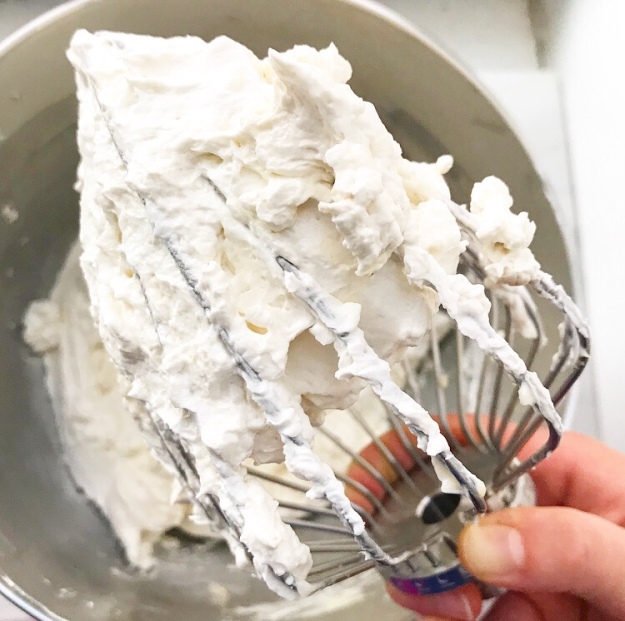
 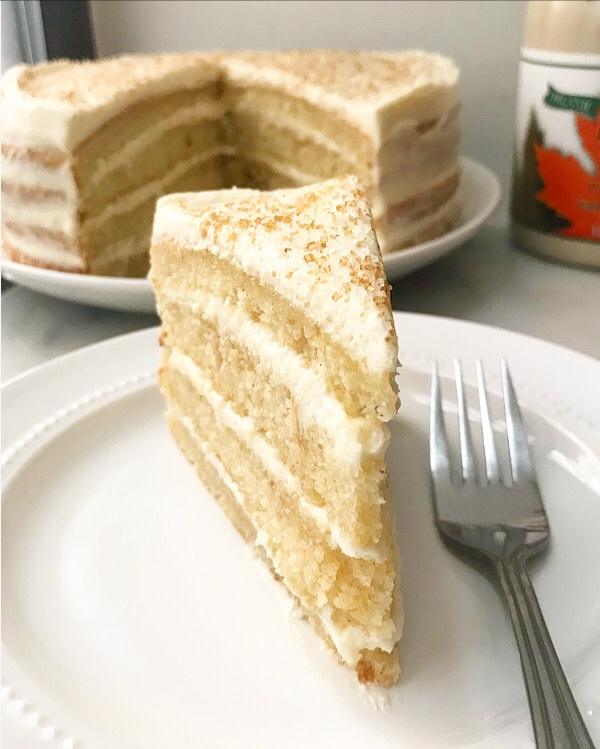 There are 1 1/3 cups of pure maple syrup in the entire cake—in addition to the cake and fluffy buttercream, each buttery layer is torted (sliced in half equatorially) and brushed with the good stuff. There is absolutely no mistaking the flavor of this cake!
 I’m sure I will continue to be an over-thinker for years to come, but if this Maple Layer Cake proves anything, it’s that it’s good trust my gut every now and then.
Maple Layer Cake
makes one 9-inch round cake
Cake:
3 cups all-purpose flour
1/3 cup cornstarch
1/4 teaspoon ground cinnamon
1/4 teaspoon ground nutmeg
1 teaspoon baking powder
1/2 teaspoon baking soda
1 teaspoon Kosher or sea salt
1 cup (2 sticks) unsalted butter, melted
2 cups granulated sugar
4 large eggs, room temperature
1/2 cup pure maple syrup
2 teaspoons pure vanilla extract
2 cups buttermilk,* room temperature
Frosting:
1 1/2 cups (3 sticks) unsalted butter, softened to room temperature
4 cups confectioners sugar
1/2 teaspoon Kosher or sea salt
1 teaspoon pure vanilla extract
1/2 cup pure maple syrup
3 tablespoons heavy cream
For Assembly:
1/3 cup pure maple syrup
sparkling sugar (optional)
Preheat oven to 350F. Grease two 9-inch round cake pans. Line with parchment and grease again. Set aside.
In a medium mixing bowl, whisk together flour, cornstarch, cinnamon, nutmeg, baking powder, baking soda, and salt. Set aside.
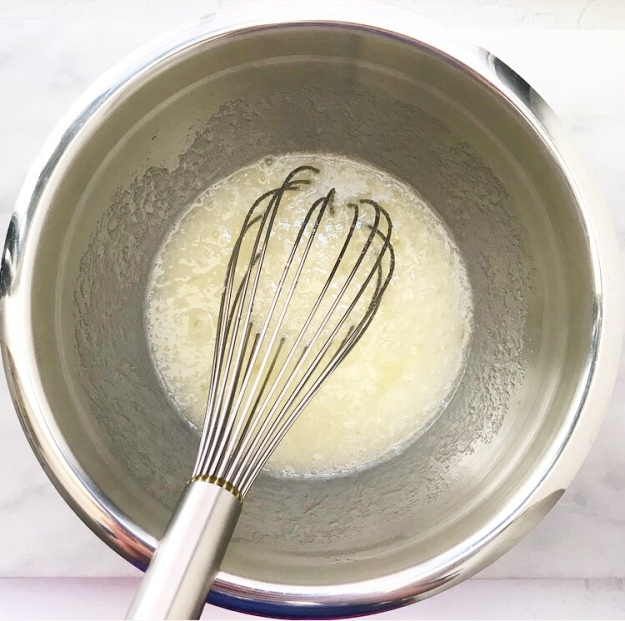
In a large mixing bowl, whisk together melted butter and granulated sugar. Whisk in eggs one at a time, followed by maple syrup and vanilla. Whisk in half the dry ingredients, followed by half the buttermilk. Add the remaining dry ingredients, followed by remaining buttermilk.
Divide batter evenly between prepared pans. Tap each pan on the counter 5 times to release any large air bubbles. Bake 32-35 minutes, or until a toothpick inserted in the centers comes out clean. Let cakes cool in their pans for 15 minutes. Run a small, think knife around the edges, invert onto racks, and remove parchment. Allow cakes to cool completely.
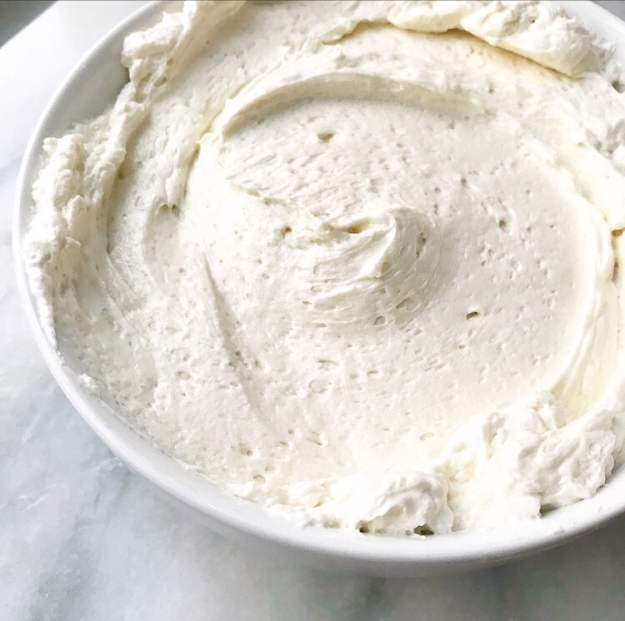
Make the frosting. In a large mixing bowl, beat butter until light and fluffy, about two minutes. Beat in confectioner’s sugar in two installments, scraping down the bowl as necessary. Beat in salt, followed by vanilla. Beat in maple syrup, followed by heavy cream.
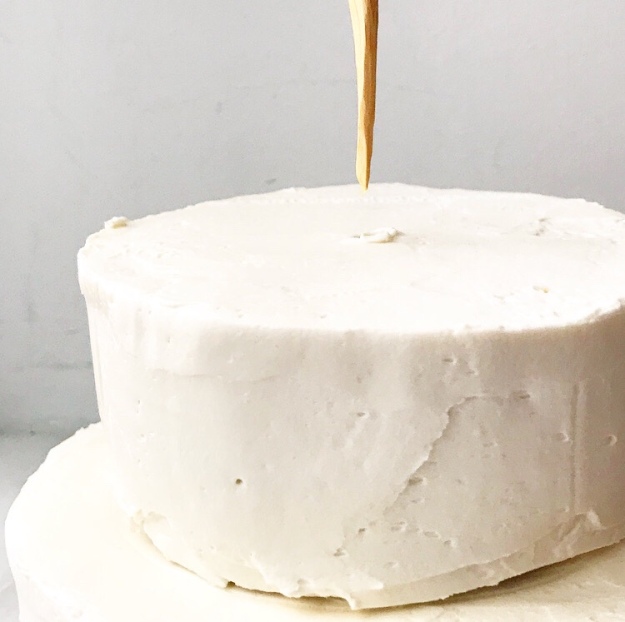
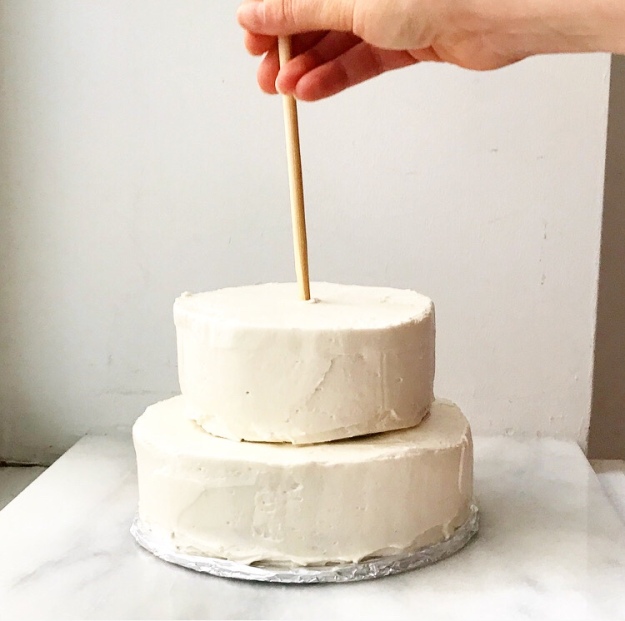
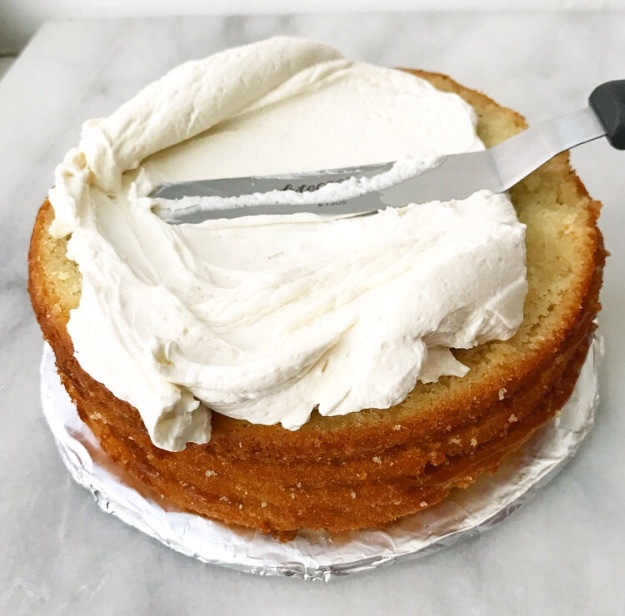
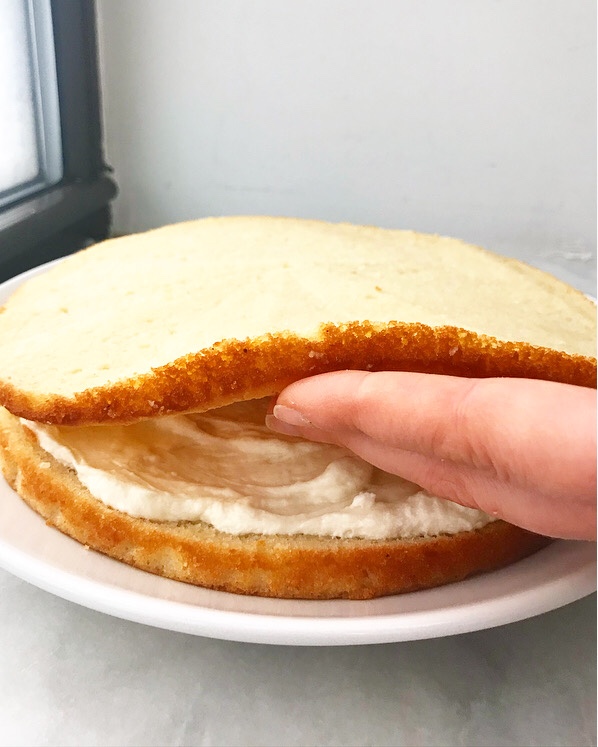
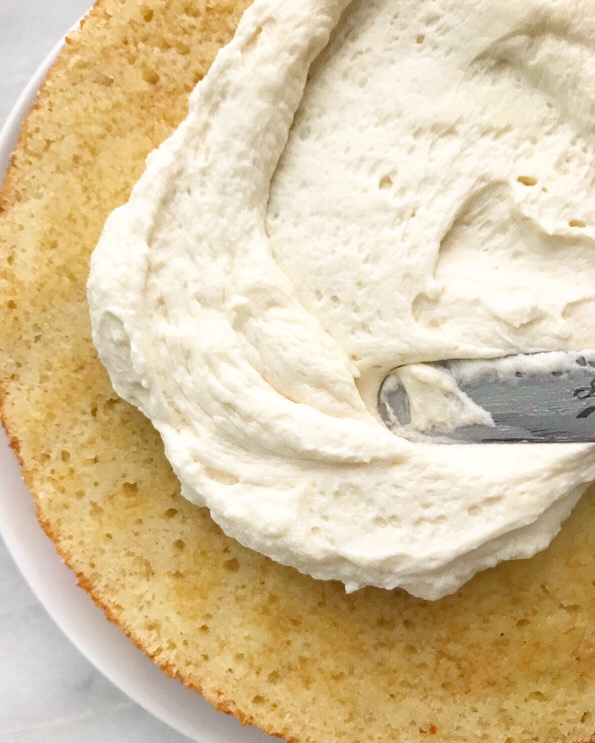
Assemble the cake. Use a serrated knife to slice cake layers equatorially so that you are left with 4 very thin layers. Place one layer, cut-side-up on a serving plate or cake stand. Brush layer with maple syrup. Top with a thin layer of frosting. Top with another thin layer of cake and repeat the brushing and frosting. Repeat layering process one more time. Top with the last remaining thin layer of cake, cut-side-down. Frost cake as desired. Top with sparkling sugar, if using.
Slice and serve. Leftover layer cake will keep covered at room temperature for up to three days, or in the refrigerator for up to a week.
Note:
If you do not have buttermilk on hand, you may make a substitute. Place 2 tablespoons of vinegar (or lemon juice) in a liquid measuring cup. Pour milk up to the 2 cup mark and stir. Let the mixture sit for 5-10 minutes, or until curdled. Continue with the recipe as written.

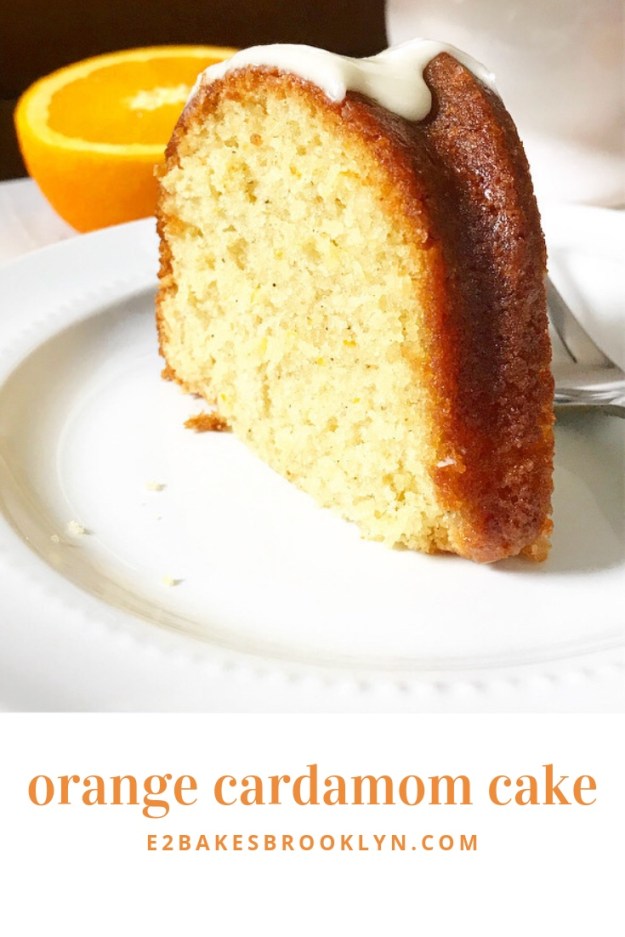
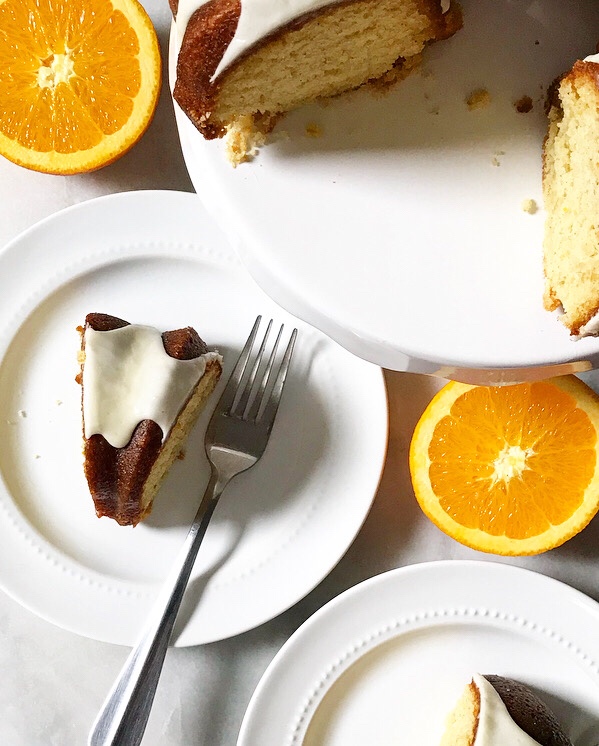 I don’t know if I’ve mentioned before that I do all my blog photo shoots in a corner of my bedroom. I’ve got wide windowsills and my carrara marble pie board, so it’s a pretty sweet deal…except when it’s gray outside for days on end and my viewless east-facing window gets terrible light. I’ve made it work in the past, but just couldn’t bear the idea of taking grainy, sub-par photos of this Orange Cardamom Cake.
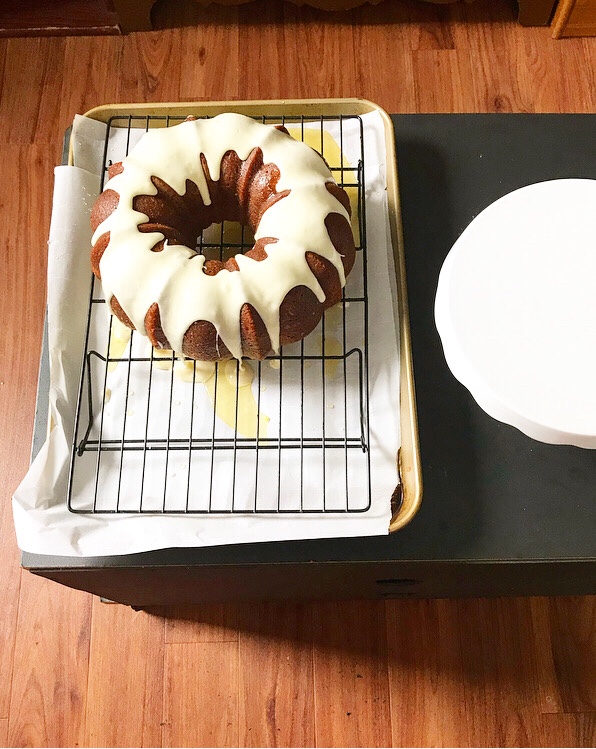 So, uh, hello from my make-shift photo set-up in the living room! Look at this cake I made for you!
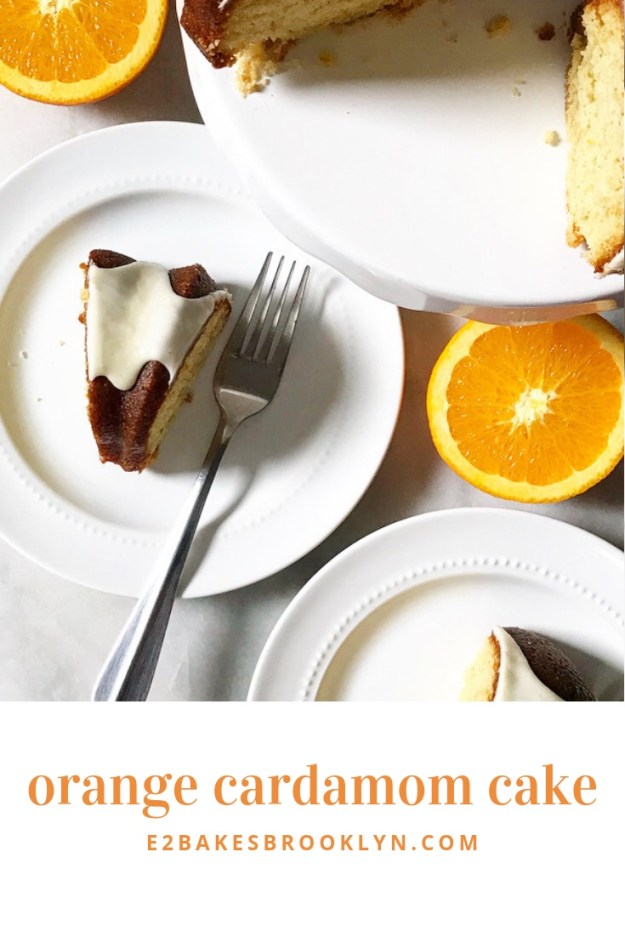
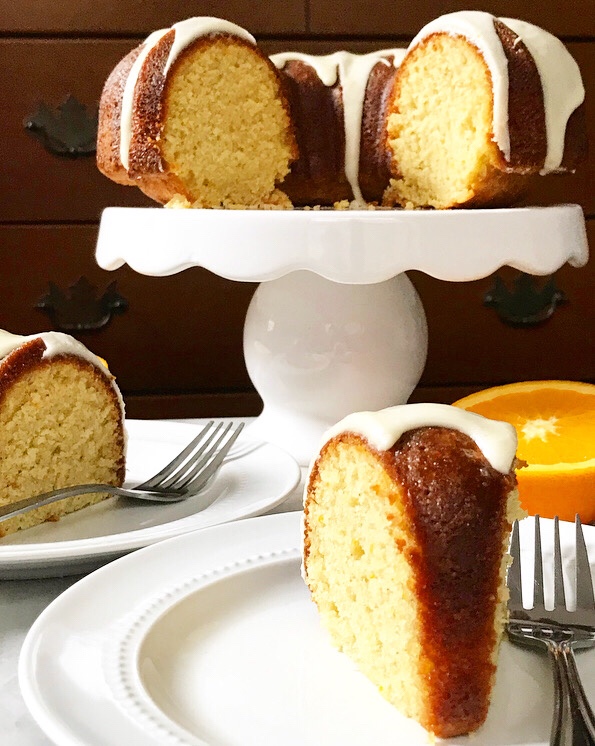 If early autumn could be baked into a cake, it would be this Orange Cardamom beauty. It’s got plenty of brightness and tang from a triple hit of fresh orange, a little warmth from ground cardamom, and a moist, tight crumb that’ll have you going back for seconds.
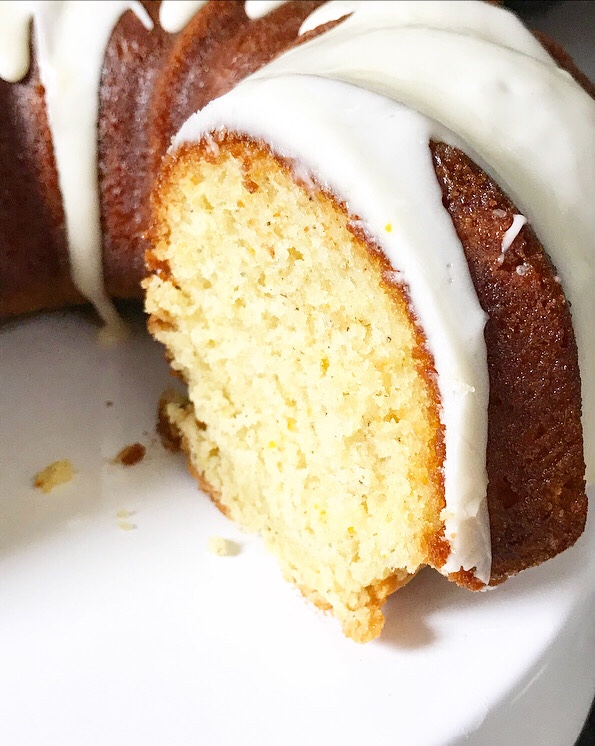 It’s like the joyful feeling you get when you finally get to break out your chunky sweaters after a long, hot summer. You’re so happy to be wearing a sweater that you don’t even care that you’re wearing it with cut-offs and sandals.
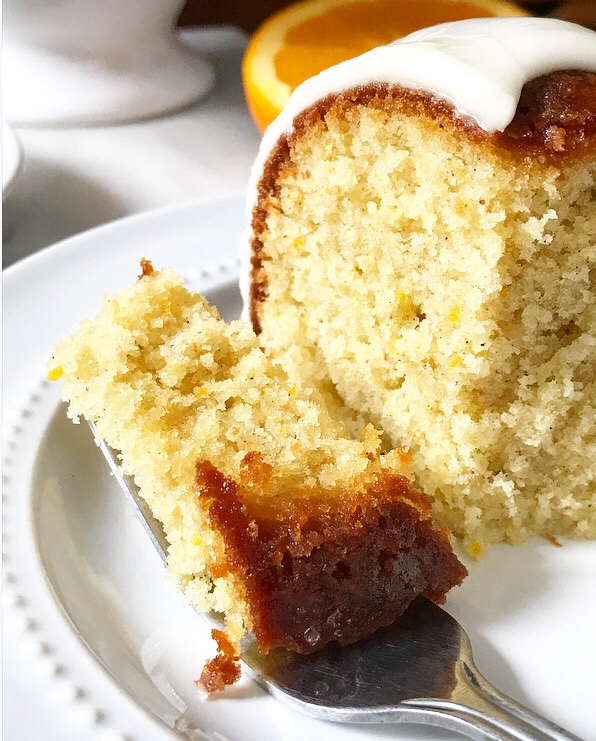 But you know, it’s cake. Really, really good cake. The sort of cake you eat when you’re not ready to go all-pumpkin/apple/pear all the time, but if you have to eat one more berry anything, you’ll scream.
 This cake is stupid easy to make. Yesssssss. It requires a mixer, but just one bowl and three steps.
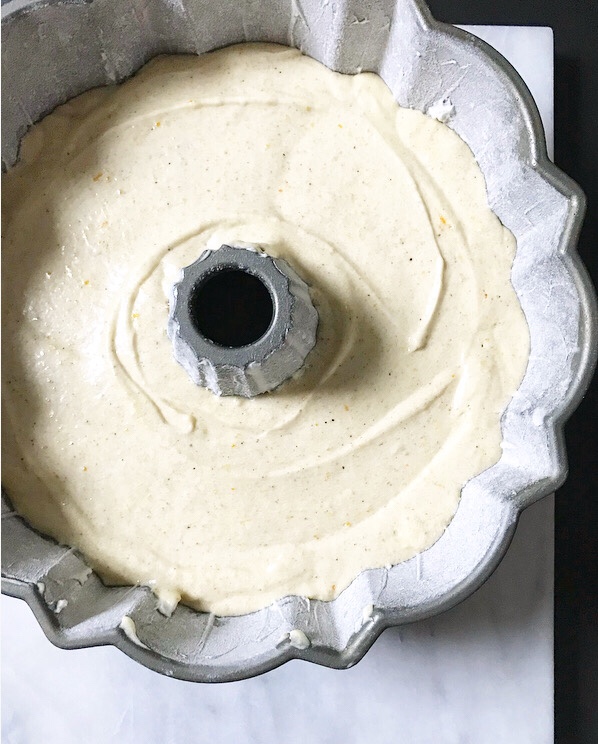
 Seriously, that’s it. Put the batter in the pan and bake it for a little more than an hour.
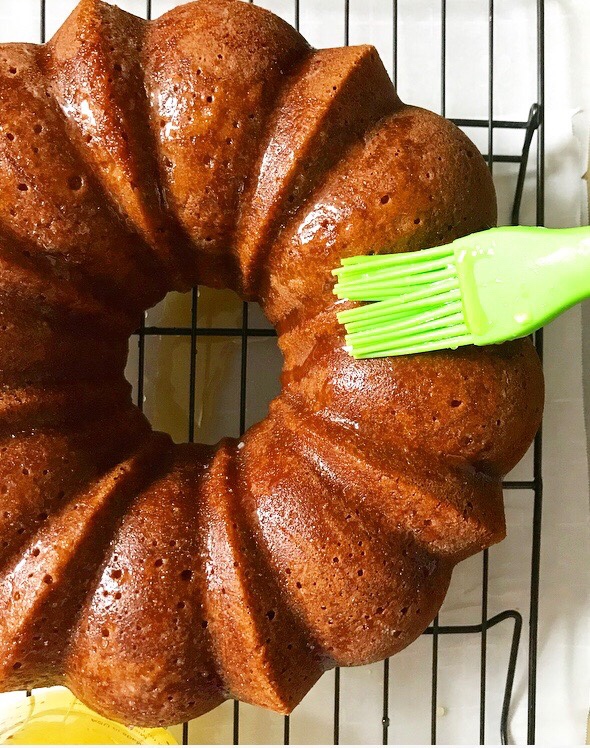 Once it’s cool, paint the cake with a fresh orange glaze.
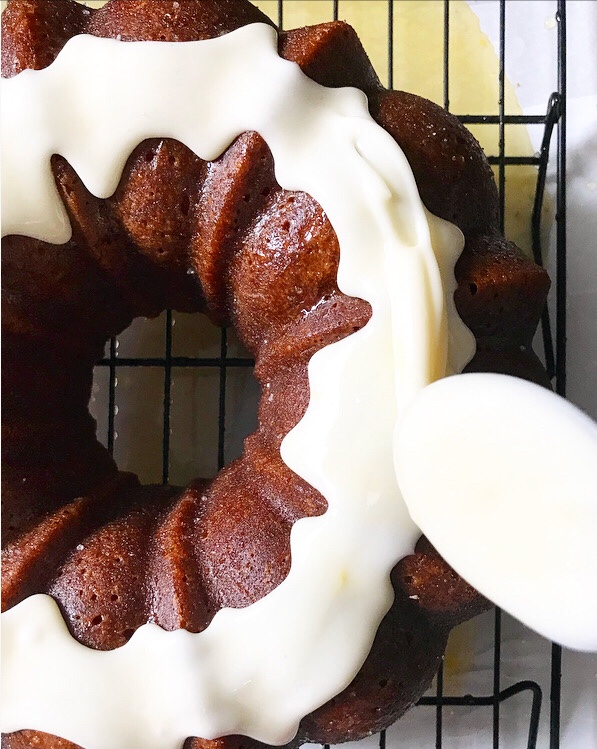
 Top it with a thick orange icing. That’s the stuff.
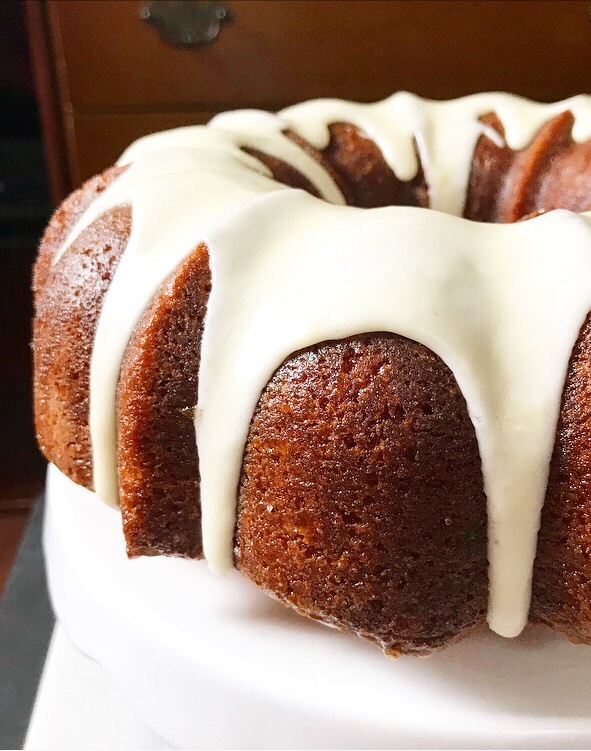 Make yourself a pot of tea, cut yourself a slice, cozy up, and enjoy.
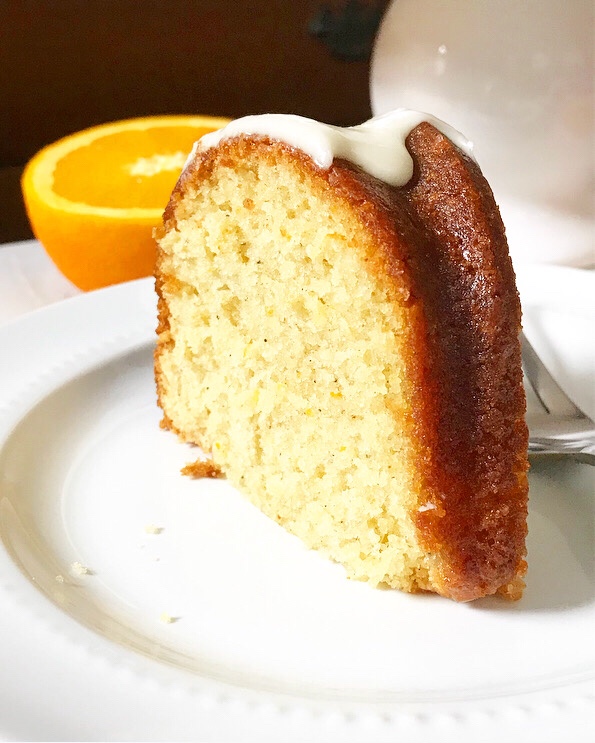
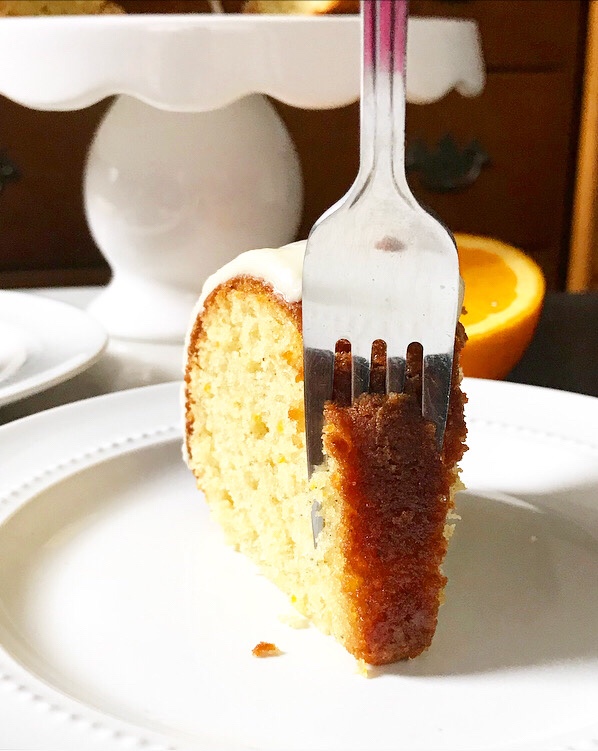 Chunky sweater optional, but encouraged.
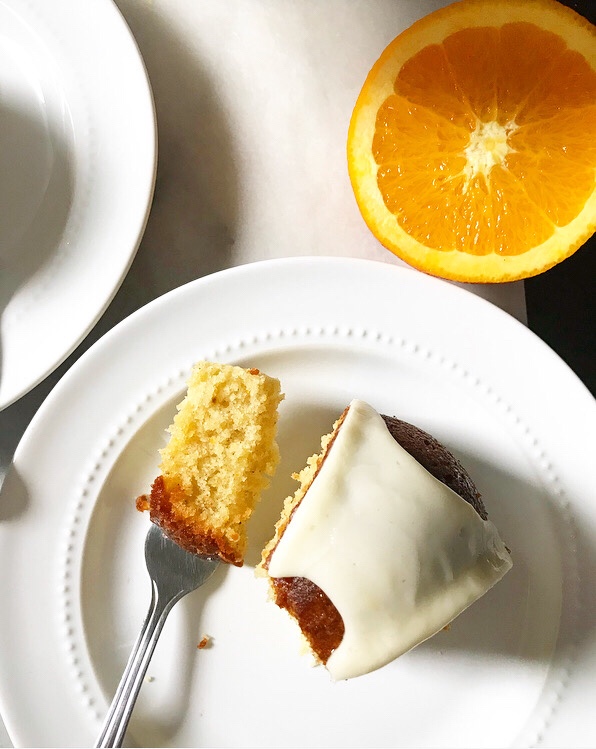
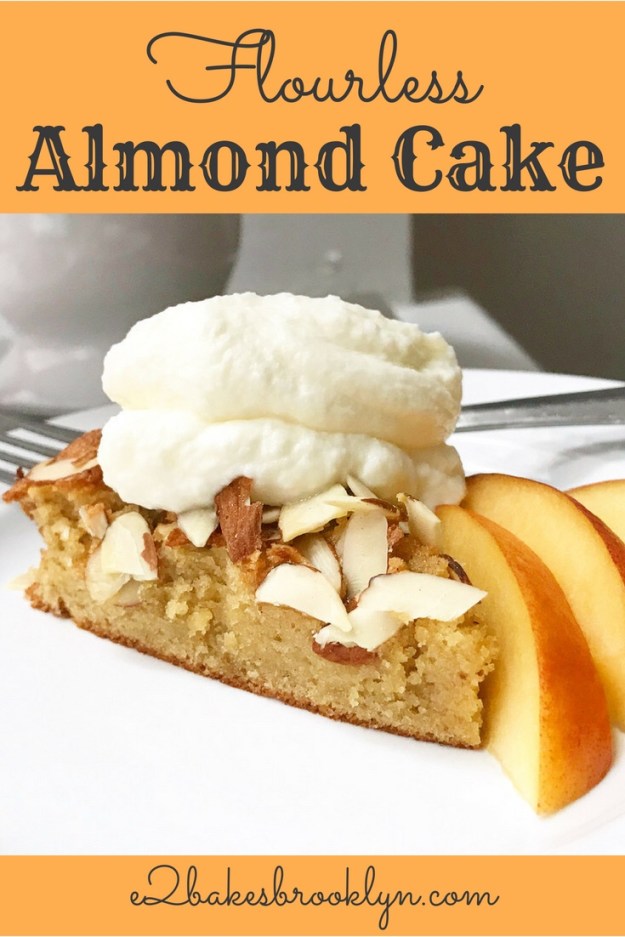
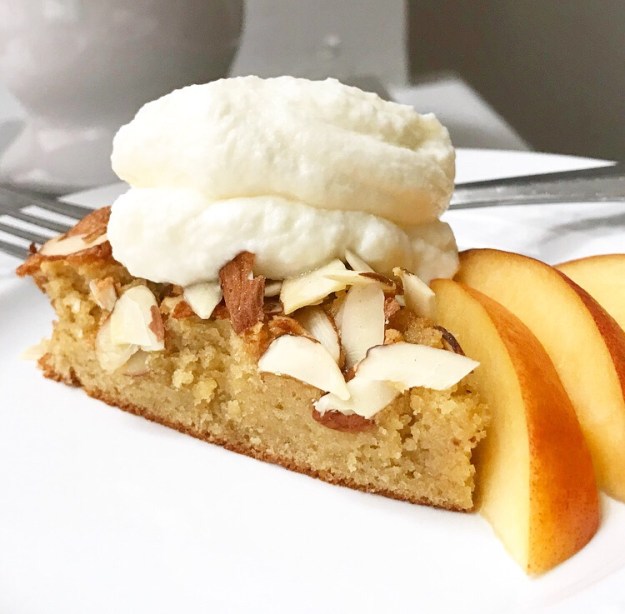 This is my third gluten-free
 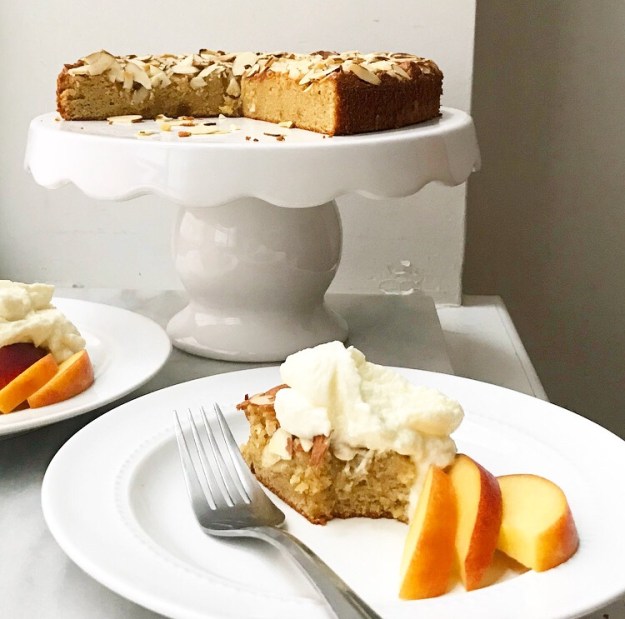 You might think that since I kept it for last, it’s subpar in some way. Quite the opposite—Flourless Almond Cake is really something special. It’s one of those recipes you’ll want to have in your repertoire not only because it’s grain-free and relatively quick and simple, but because it can adapt to any occasion. It’s as perfect for a dinner party as it is for a cookout or taking to a friend who needs a pick-me-up. The holidays are still a while away, but I can imagine this cake being a welcome addition to any dessert spread.
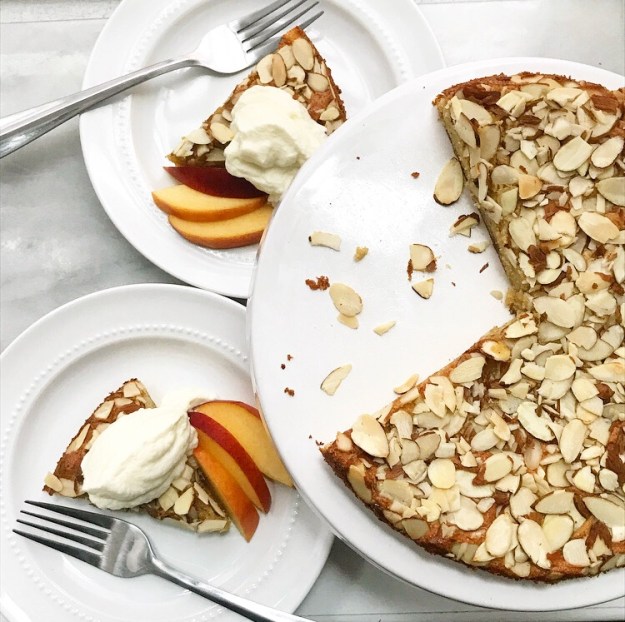 But it’s barely August and I’m getting ahead of myself. Let me show you how this cake comes together.
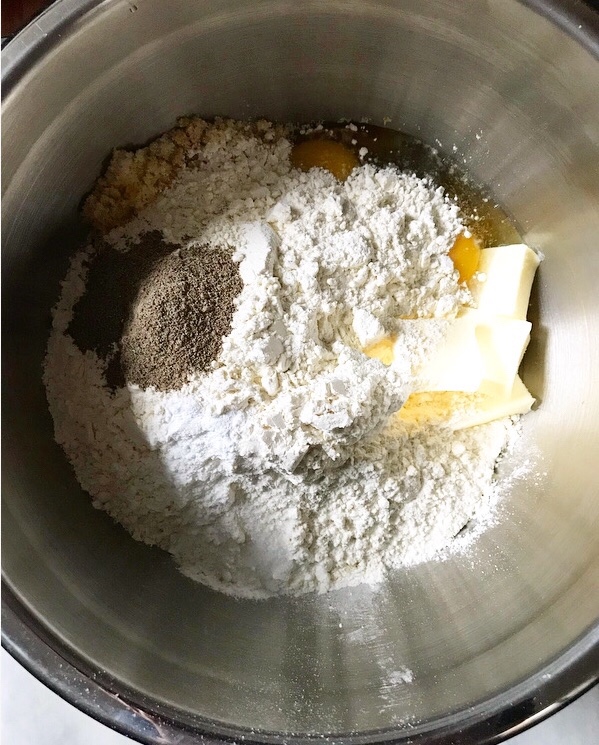
 It starts by measuring out some blanched almond flour. I measure using the spoon & level method, as I do with all my
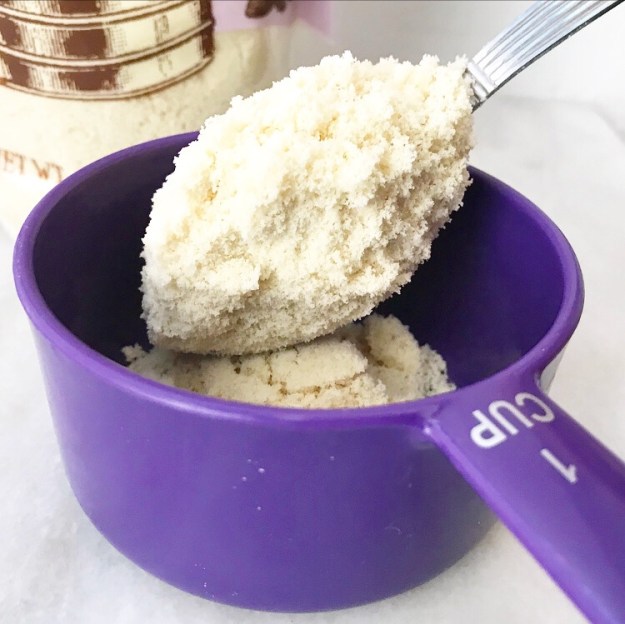
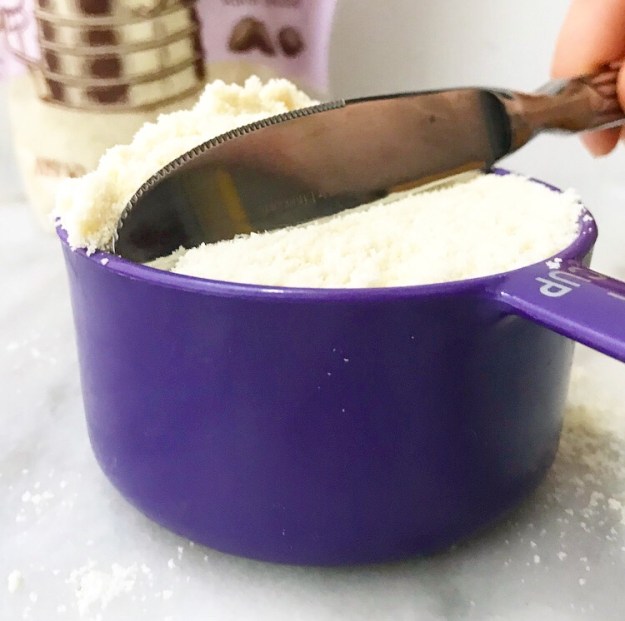 This may sound tedious if you’ve never done it before, but it only takes a few seconds longer than other common volume-based measuring techniques. While it’s appealing to scoop ingredients with a measuring cup directly, it may cause your final product to be too dense.
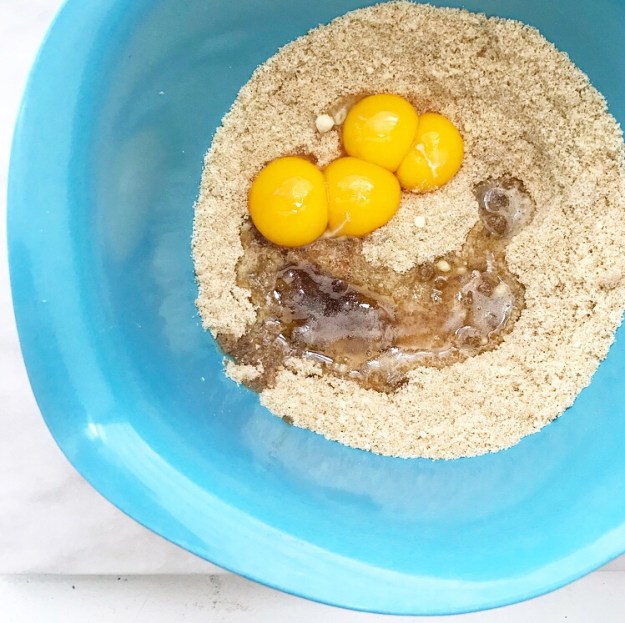 Put your almond flour in a large mixing bowl and mix in some light brown sugar, salt, and touches of cinnamon and nutmeg. Next come four egg yolks, vanilla and almond extracts, and a little butter. You may certainly just use plain melted butter here, but I like to use brown butter for the extra toasty flavor it imparts.
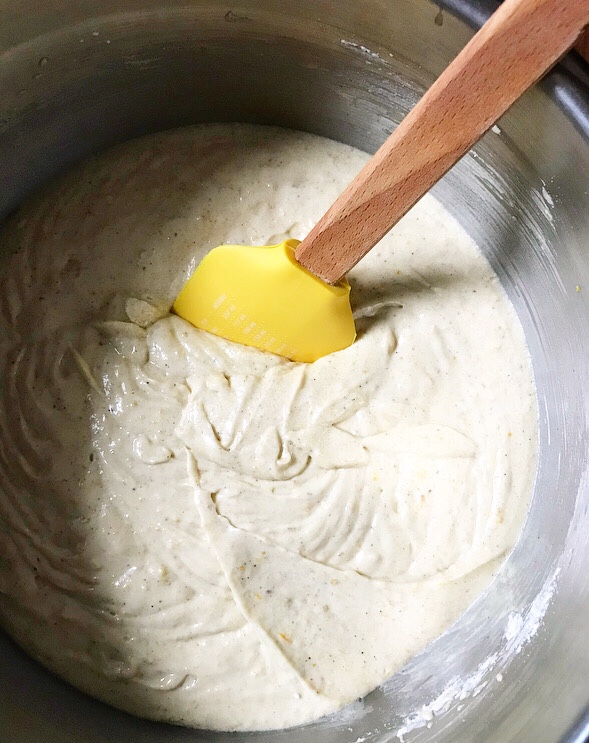
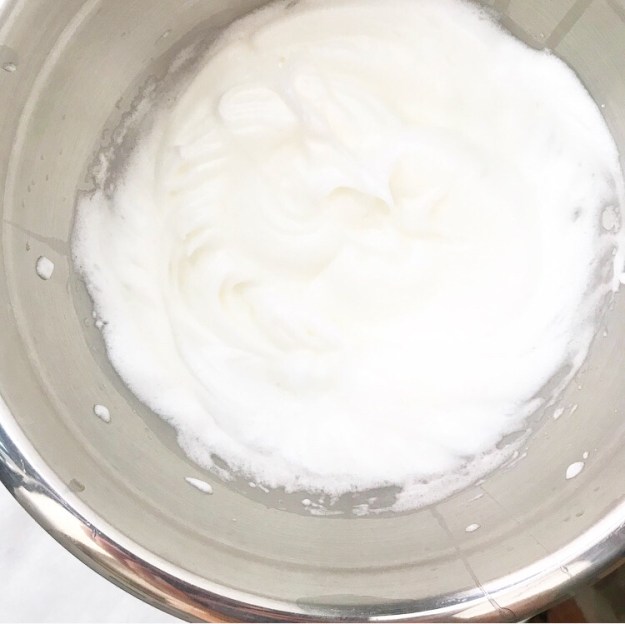 Next up, wash and dry your mixer attachment and whip four egg whites to stiff peaks. Don’t skip the wash/dry step or your egg whites won’t whip, and you’ll be cursing my name while you separate four more eggs. I tried bypassing this step and using the egg whites as-is, and the result was a dense, flat cake. No, thanks.
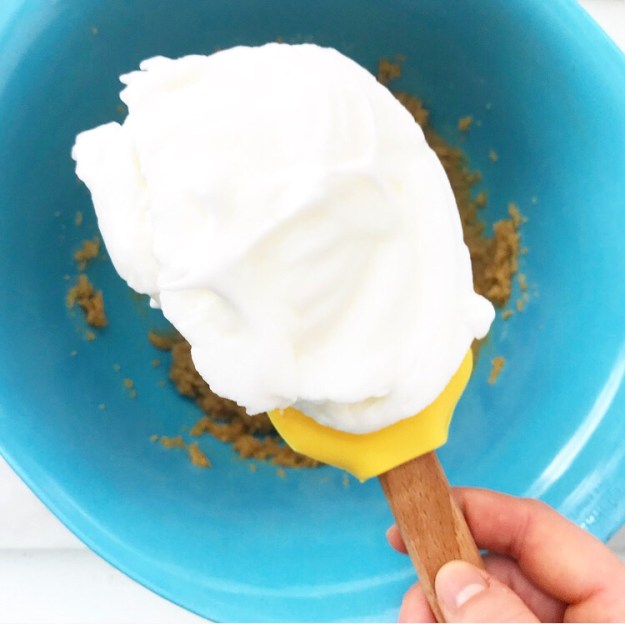
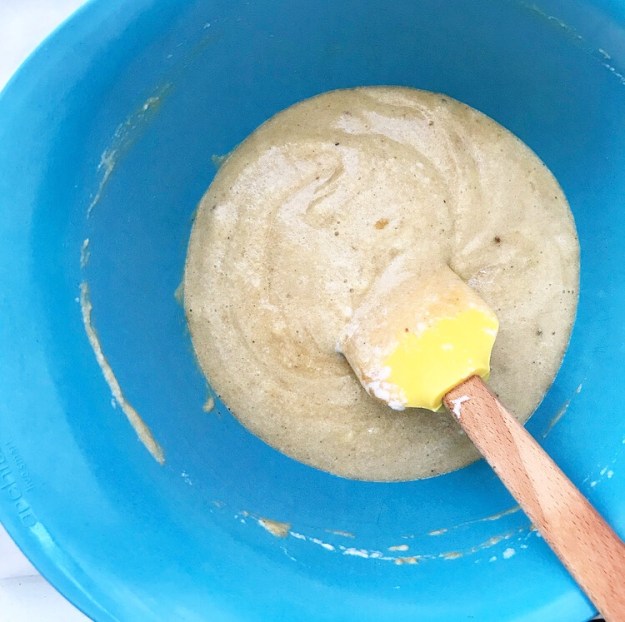 Stir 1/3 of the whipped egg whites into the almond mixture before gently folding in the rest.
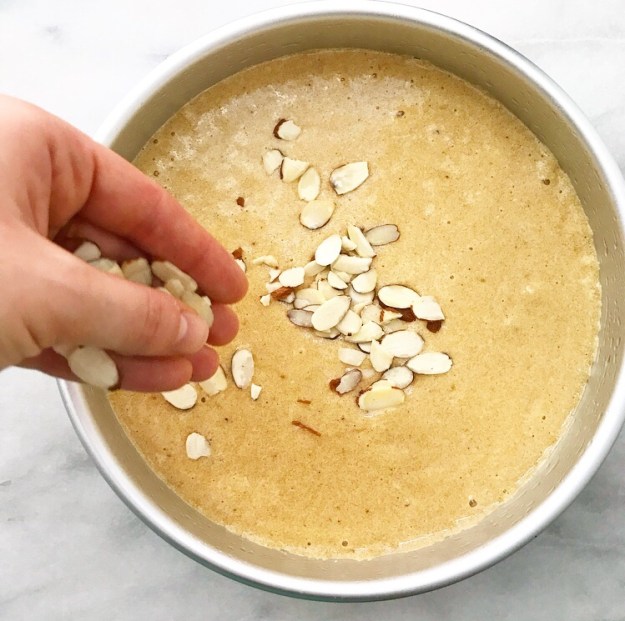 Pour the batter into a prepared pan, scatter sliced almonds over the top, and bake until the center is firm.
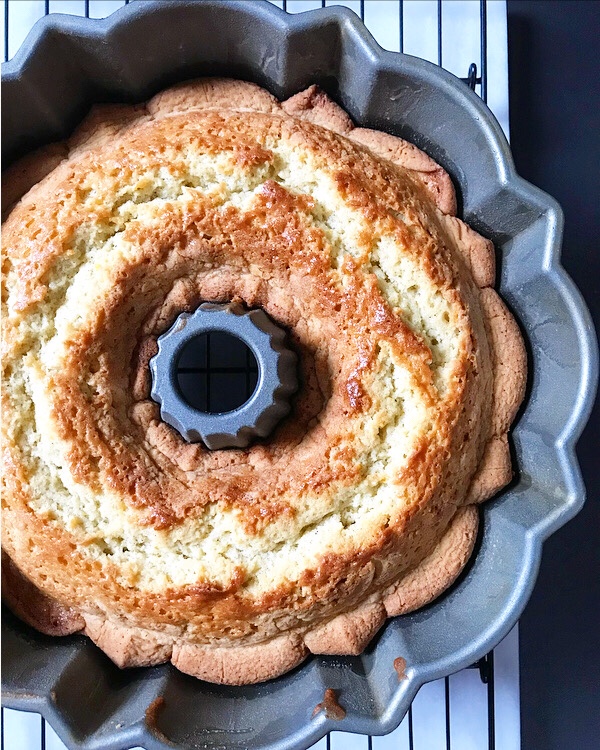
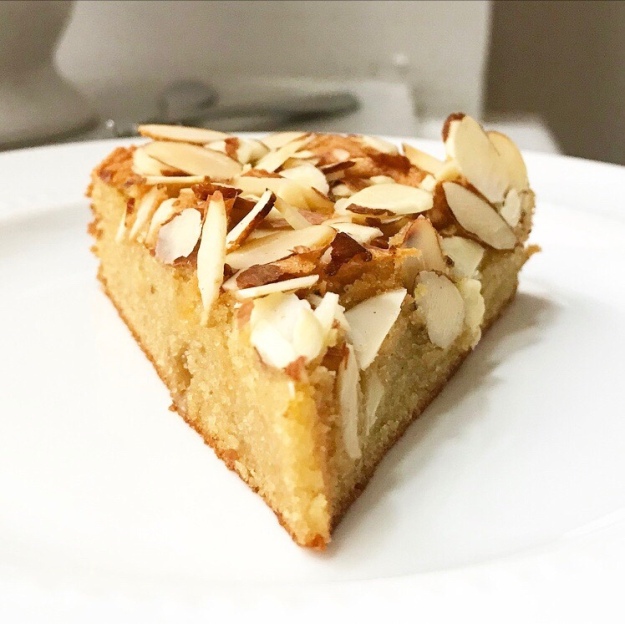 Turn the cake out onto a serving platter and let it cool completely. Slice it up and serve it any way you see fit.
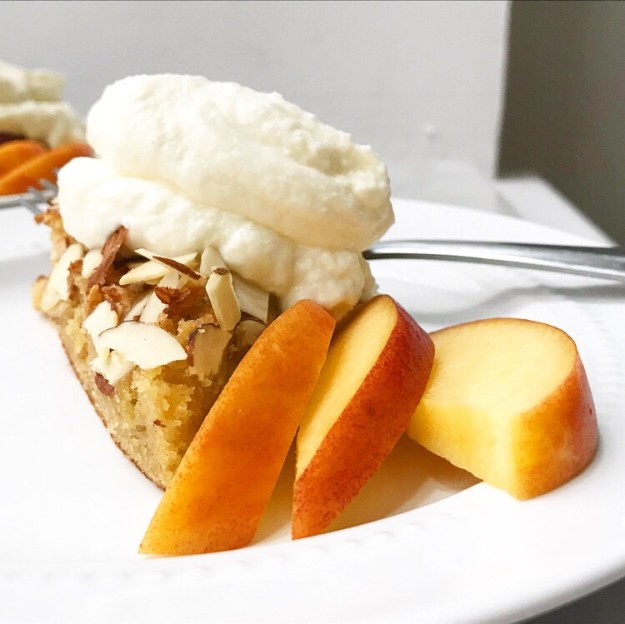 Like
Like 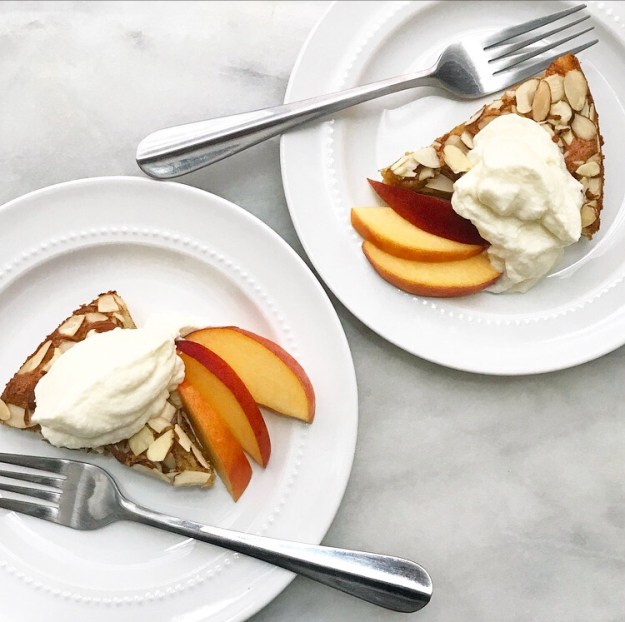 No matter which suggestion you go with, this simple little cake is sure to be a winner.
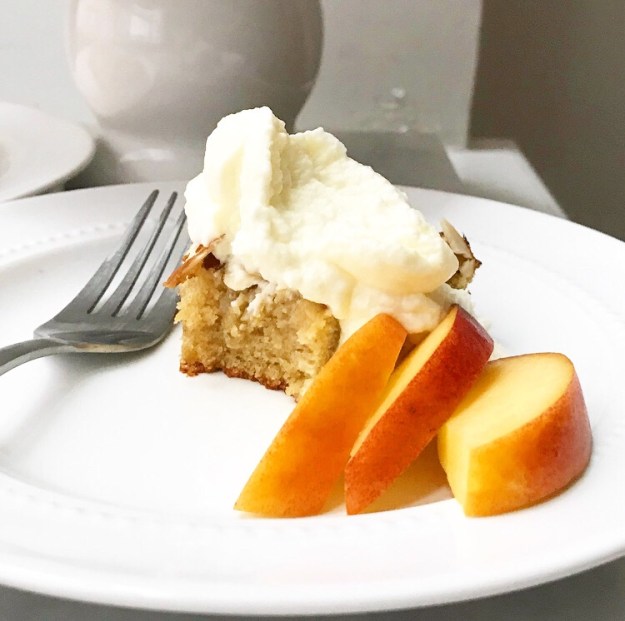
 I sort of expected to have a little cake assembly drama to tell you about, but the truth is that it basically went off without a hitch.
 When last we spoke, I painstakingly laid out my wedding weekend plan…and then I promptly changed it. After making the fillings on Friday morning, I started fearing that if I filled the cakes that night, the mocha and caramel puddings would soak into the layers too much by Sunday, leaving everything sort of…mushy. Gross.
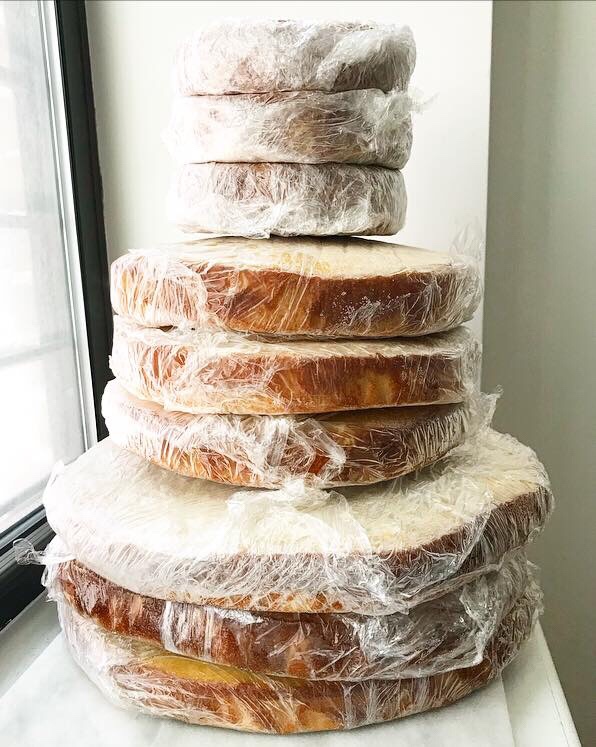
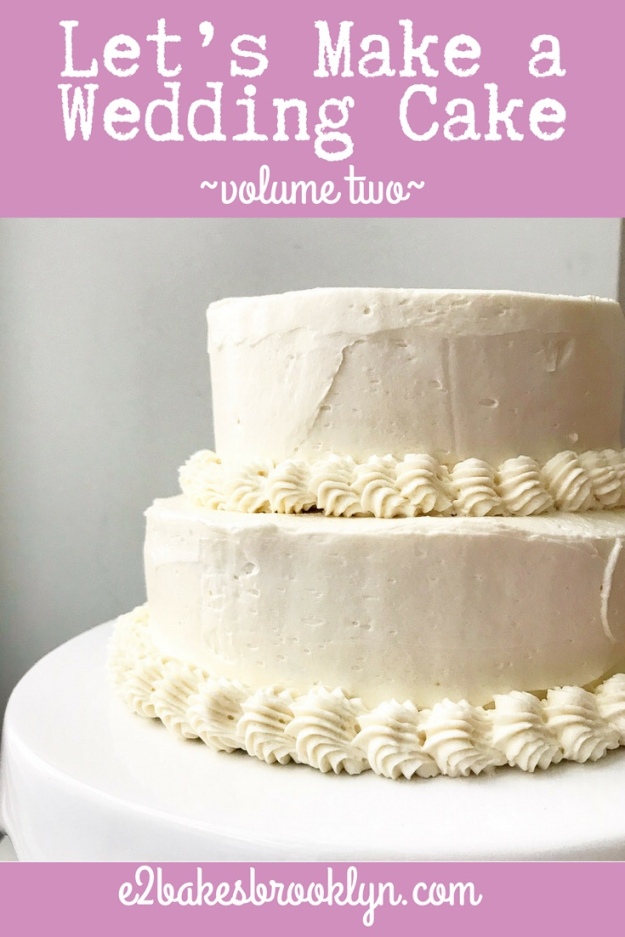
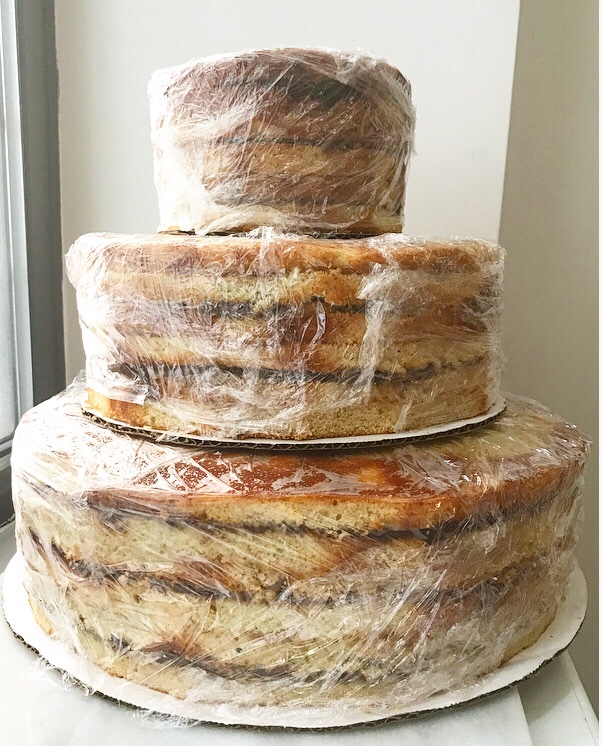 Instead, I chose to get up early on Saturday morning to torte, fill, and level the tiers. As you might have expected, the 14-inch base took the longest, clocking in at 1:40. The 10-inch center and 6-inch topper took 90 minutes combined. Each tier ended up being 3 1/2-inches tall.
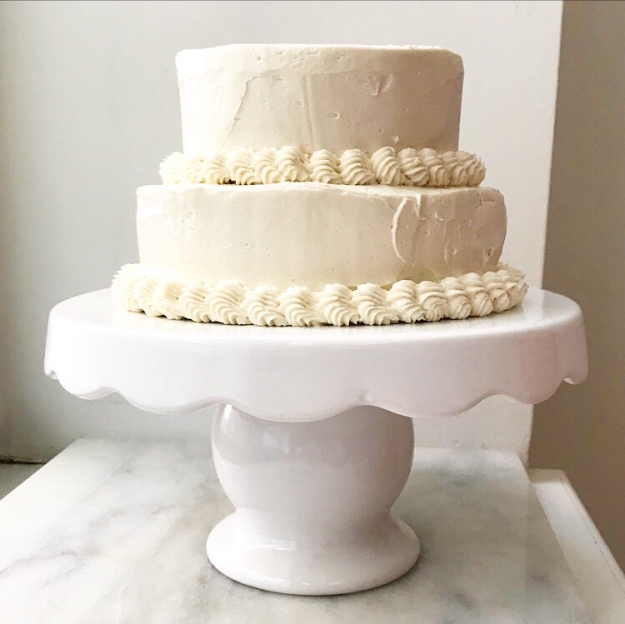
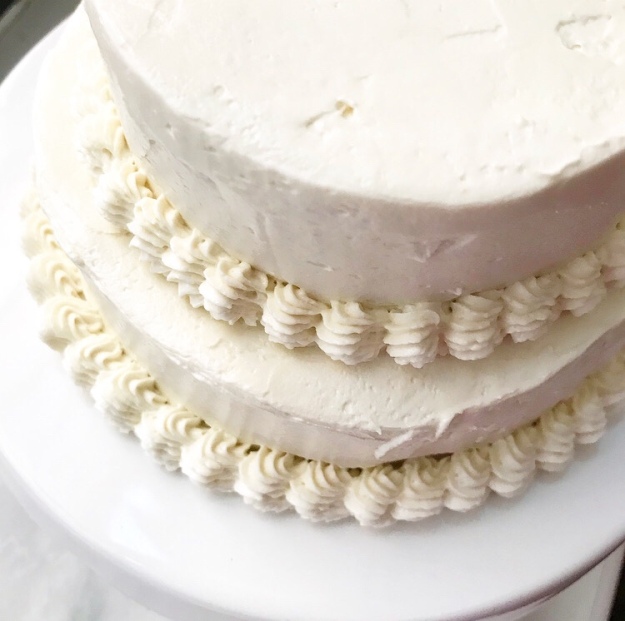
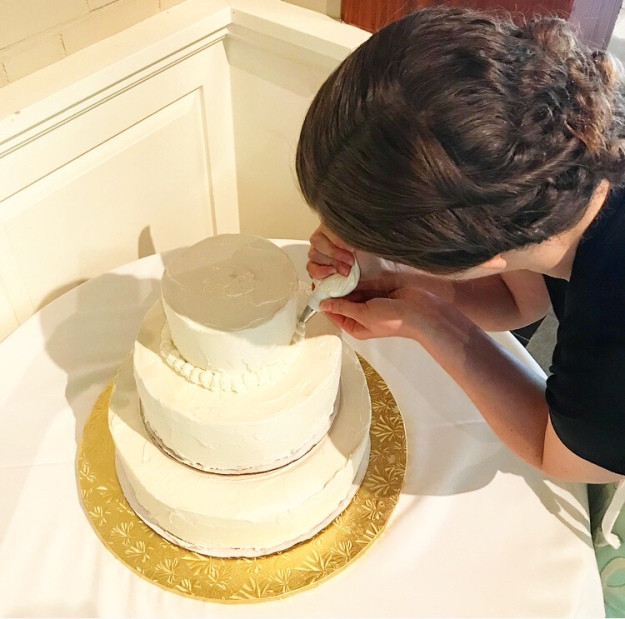
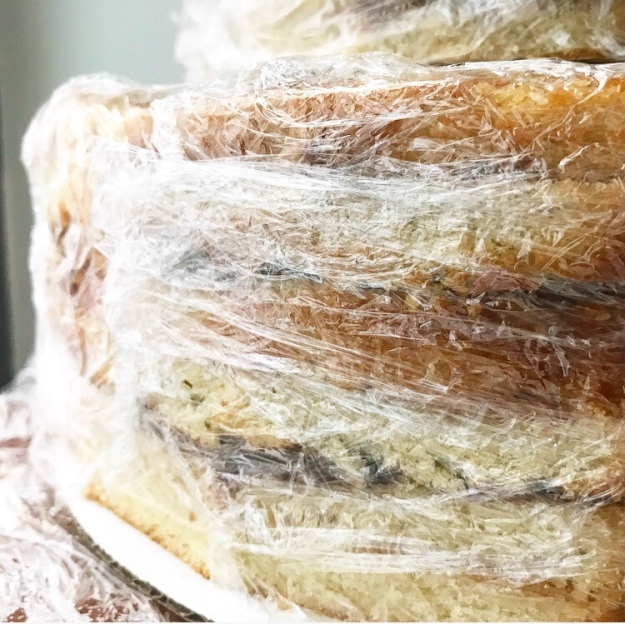 When I returned home, I made a triple batch of Swiss Meringue Buttercream. I used a dozen egg whites (leftover from the fillings), which I had stored overnight in a very clean, dry mason jar. It was crazy humid here on Saturday so I had to give the frosting a few 15 minute chills to keep it workable. Crumb-coating, frosting, and doweling took about two hours, although I probably could have done it faster if I hadn’t been so tired from getting up so early. I refrigerated all the tiers uncovered overnight.
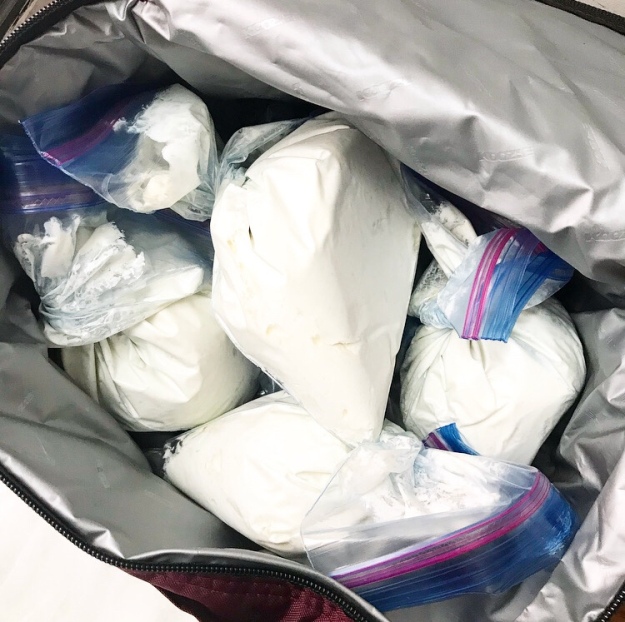 On Sunday morning, I made a double batch (8 egg whites) of Swiss Meringue Buttercream. I divided it among four piping bags and refrigerated them while I went to have my hair done. #bridesmaidlife
 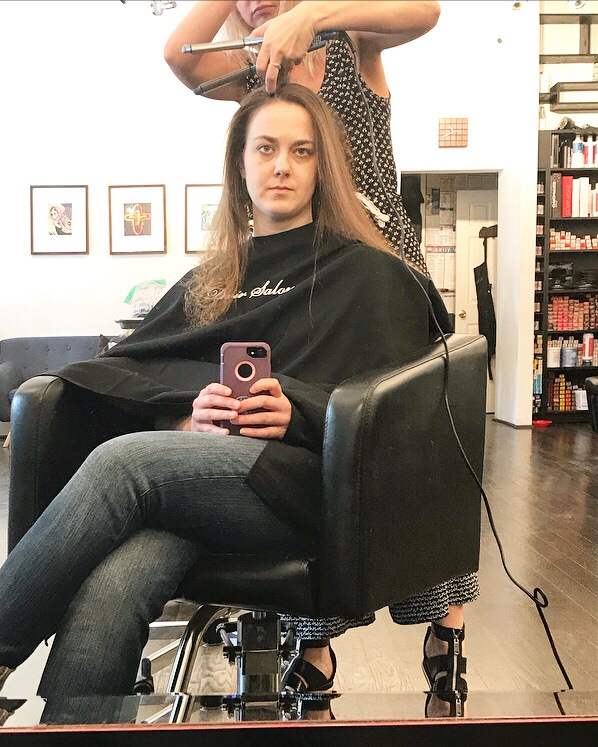 I got home about an hour before the cake and I were scheduled to be picked up and taken to the venue. I scurried around my apartment, grabbing anything that seemed like it might be important. Think icing spatulas of every conceivable variety, loads of ziplock bags, scissors, tape, three piping bags fitted with couplers and star tips, extra cake dowels, a weight-bearing central dowel, a permanent marker for marking those extra dowels, a box of food safety gloves, and a dozen damp paper towels. And insulated cooler bags. And wax paper. And aprons.
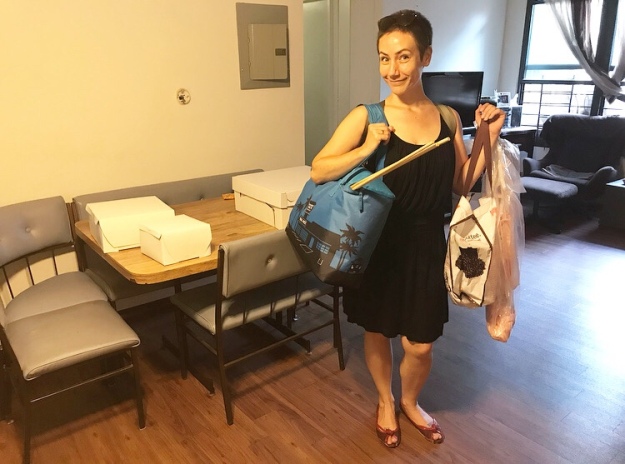 Also, a bridesmaid’s dress, four-inch heels (because I was too busy worrying about cake to get my dress tailored), makeup, deodorant, jewelry, and my trusty friend, VJ.
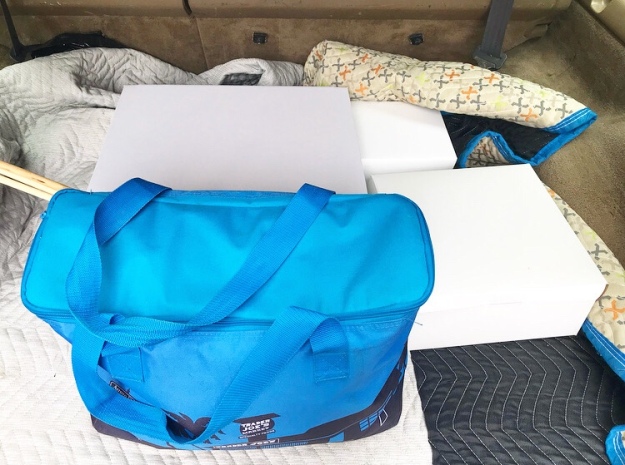
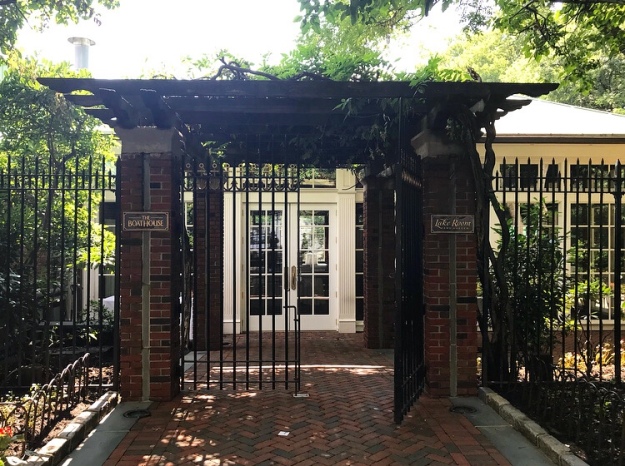 We loaded all the tiers into the back of my friend, David’s Volvo station wagon and set off for the Central Park Boathouse.
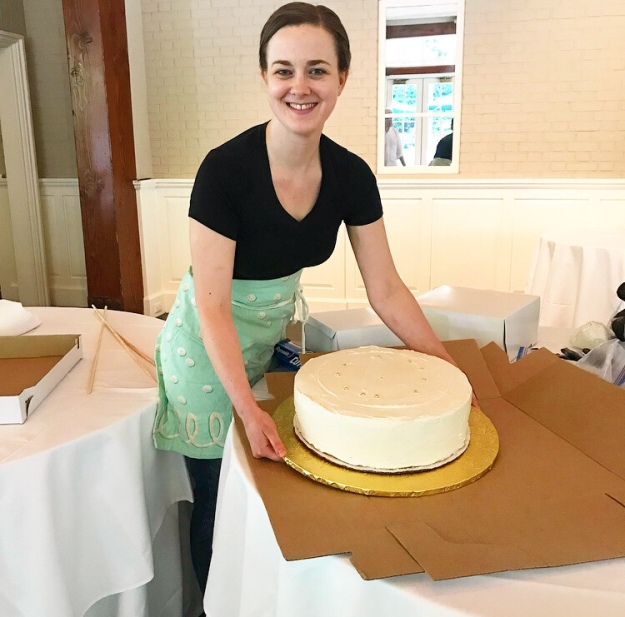
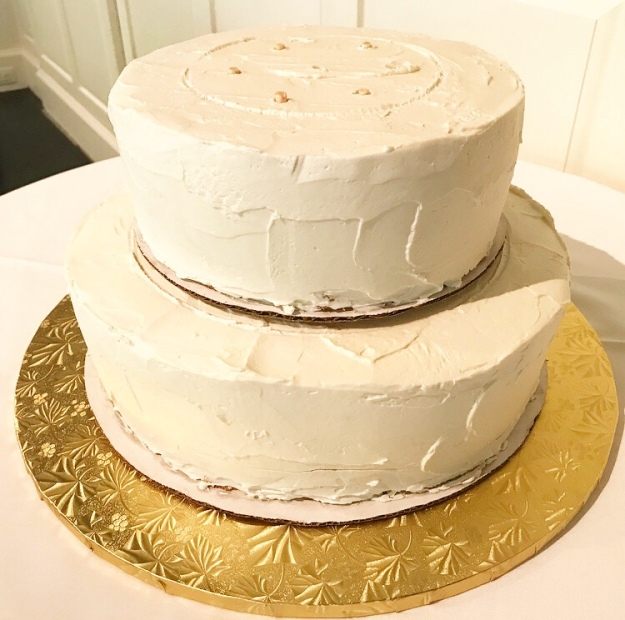

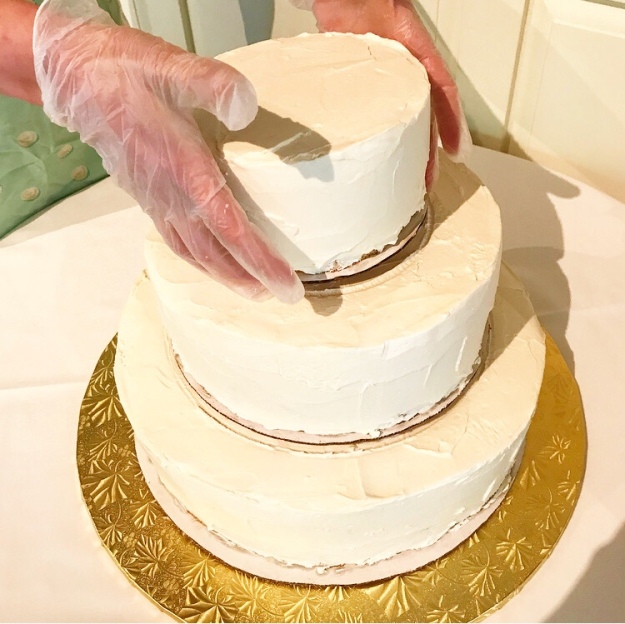
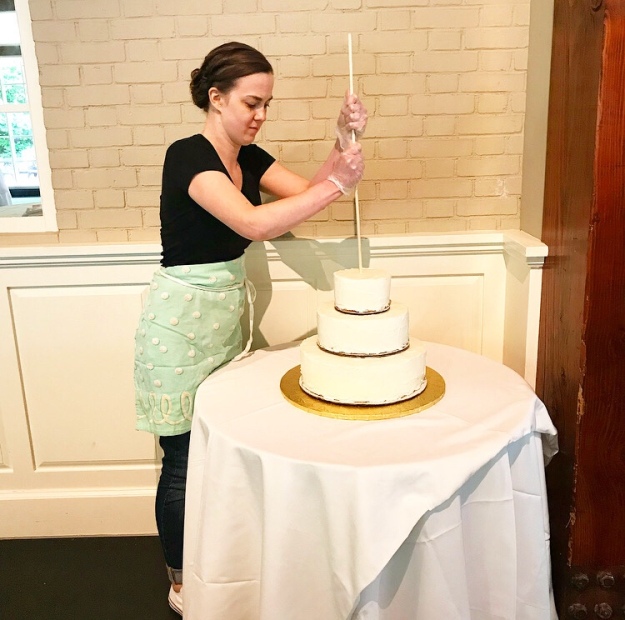
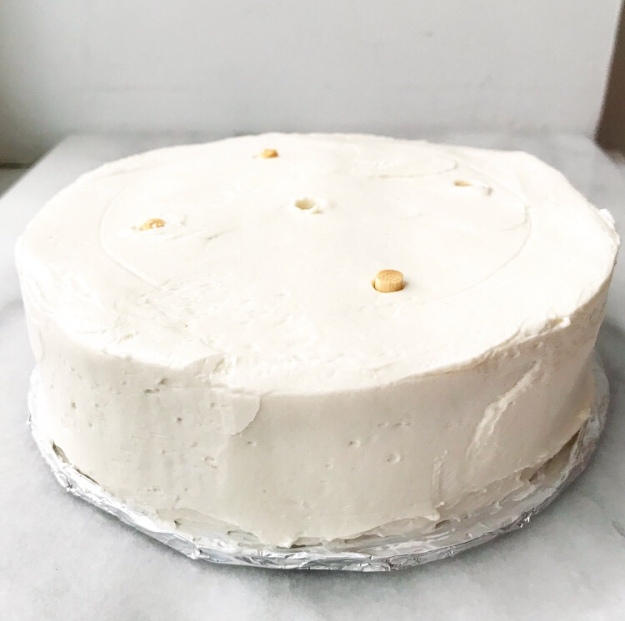
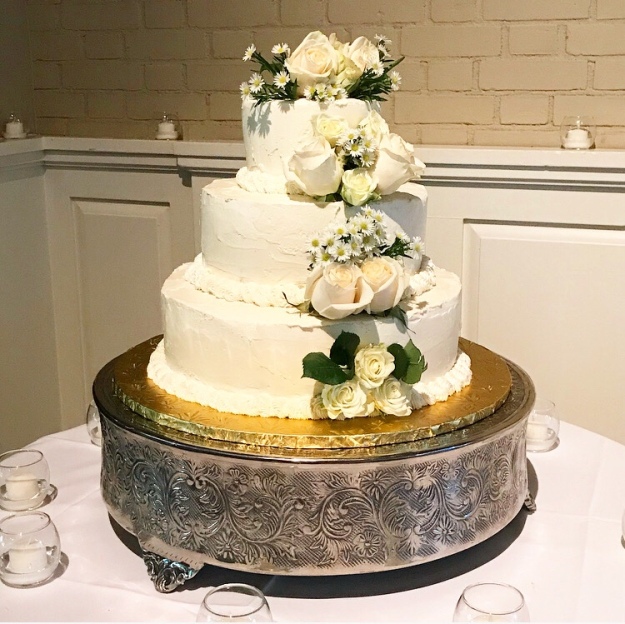
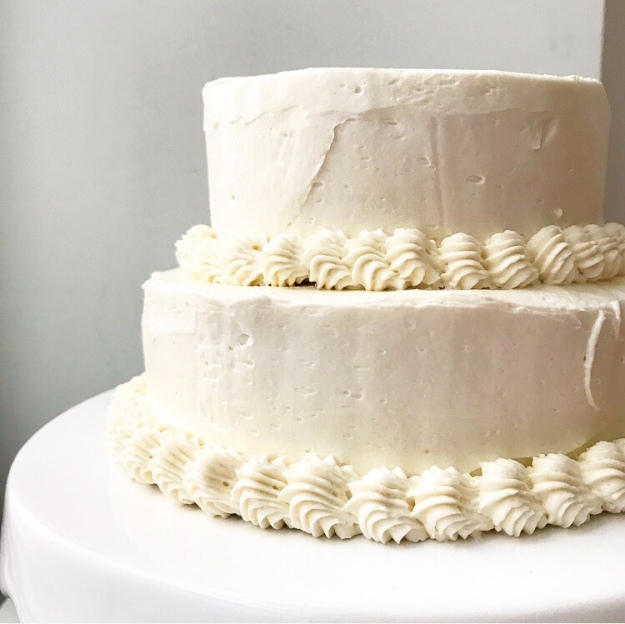
 My favorite part of assembling tiered cakes remains inserting the central dowel. I used a 3/8-inch dowel that I sharpened with a vegetable peeler, and it popped through the cake boards just fine. I couldn’t find much information on how thick the central dowel should be, so this diameter (1.5x the tier dowels) was a guess. I saw the cake lifted and moved three times without incident, so I suppose it was a good guess.
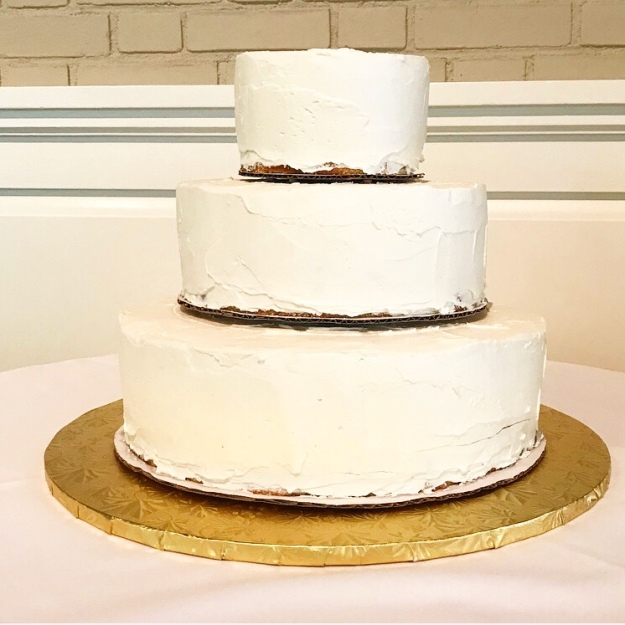
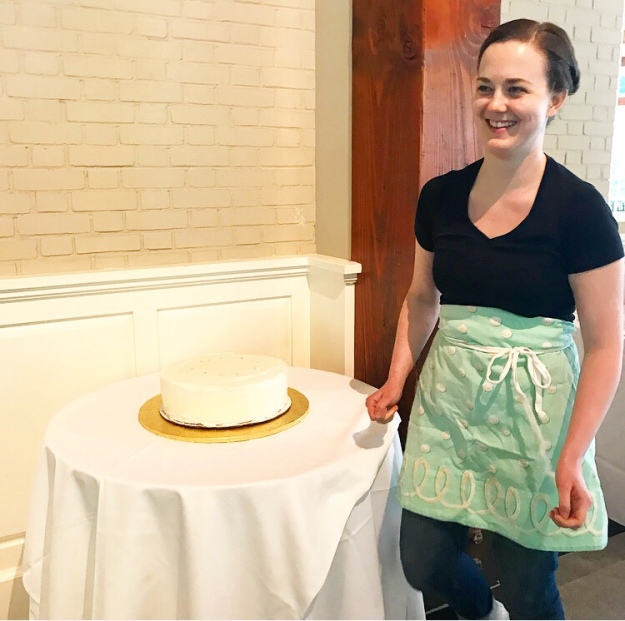
 Once the cake was assembled, I got myself glammed up to be a bridesmaid. The ceremony and reception were beautiful.
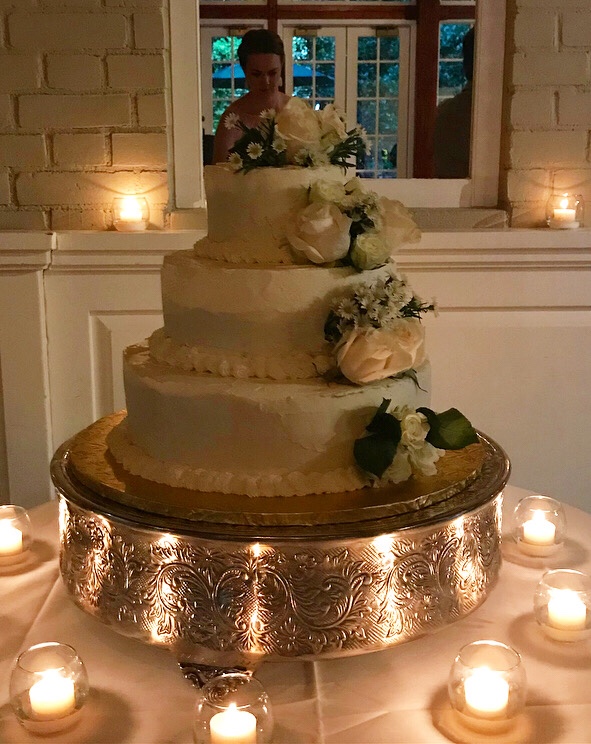
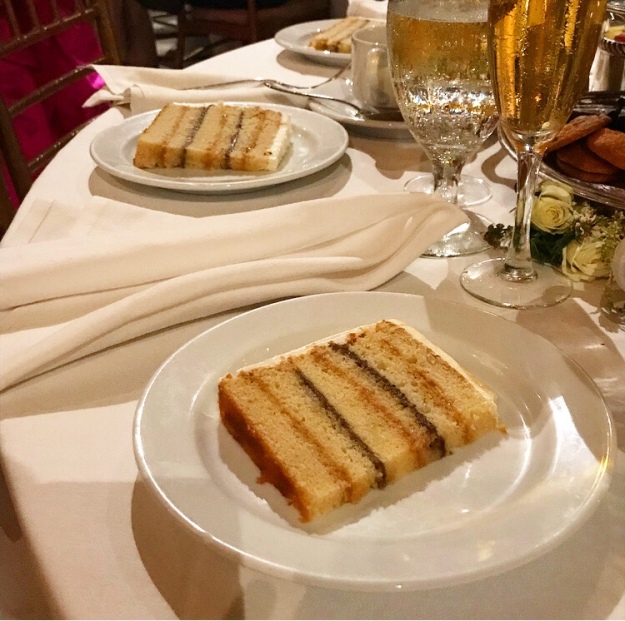 The cake was sliced at the end of the night and it looked just how I had hoped it would. I love those alternating stripes of filling!
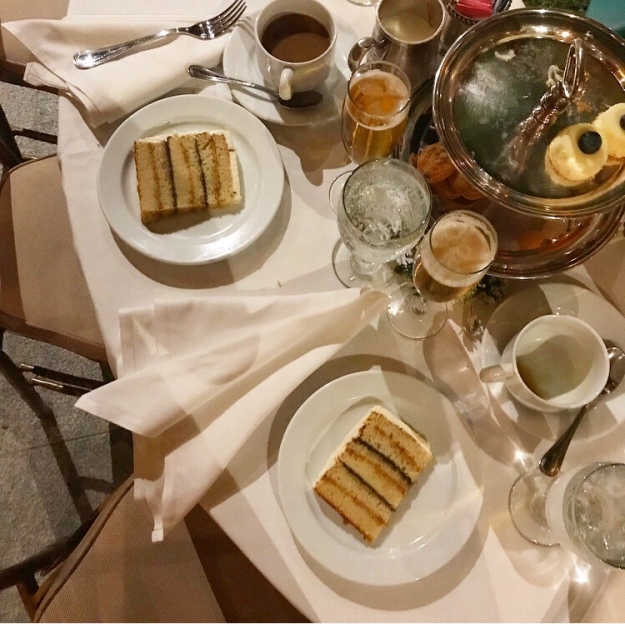 I got loads of compliments on this cake. The guests loved the mix of flavors and that this wedding cake was lighter than most—a benefit of using puddings and Swiss Meringue Buttercream instead of all-butter American buttercream.
 There was also one peanut-allergic teenager who was so happy this cake was peanut-free that he gave me a bear hug and ate two slices! Who knew so many people have peanut butter wedding cakes?!
 The bride and groom were happy with it too, and that is the most important part. I’ve known Ariella and Bob for several years now and love them both. Ariella, in particular, was a huge support when I began to take baking seriously, so I was really touched that she wanted an E2 cake for her big day. It was such an honor to be asked to participate in their wedding day as both a baker and a bridesmaid.
 Wedding Day is two days away and things are getting *real* around here. I have not lost my mind yet, but that’s a very big “yet.”