Category Archives: Cheese

French Onion Grilled Cheese

French Onion Grilled Cheese

When I was in college, I thought French Onion Soup was pure luxury. That may have been because I lived in a very small town at the time, or perhaps because caramelized onions, gruyere cheese, and well-browned croutons are delicious and feel inherently fancy. Gruyere, at least, has the price tag to prove it. This classic and an extra saucy order of Strawberries Romanoff were my meal of choice at a local chain every time I went to Dallas for solo dinner & a movie during those years. It always hit the spot and felt like a treat.

(For those of you wondering what kind of college student drives an hour each way to get chain restaurant soup and see movies by herself, know that I was 85 years old at birth. Thirty six years later, I am still 85 years old.)

While things have changed since college—you won’t find me eating at many chain restaurants and I live in the largest city in my country of origin—I still dig French Onion Soup. I’ve made Julia Child’s recipe several times and it’s pretty perfect, and there are many good versions around NYC too. It’s simple food, made of caramelized onions, herbs, beef stock and cognac, and finished off with a crouton and some blistered gruyere cheese. It’s so good!

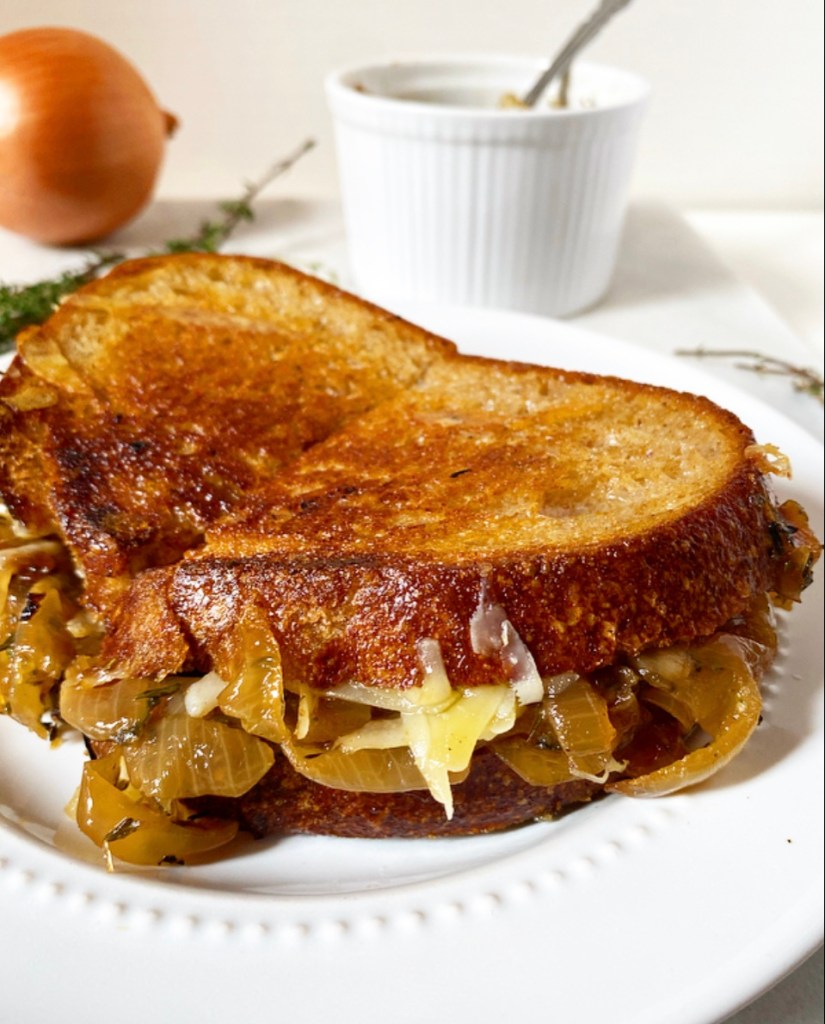
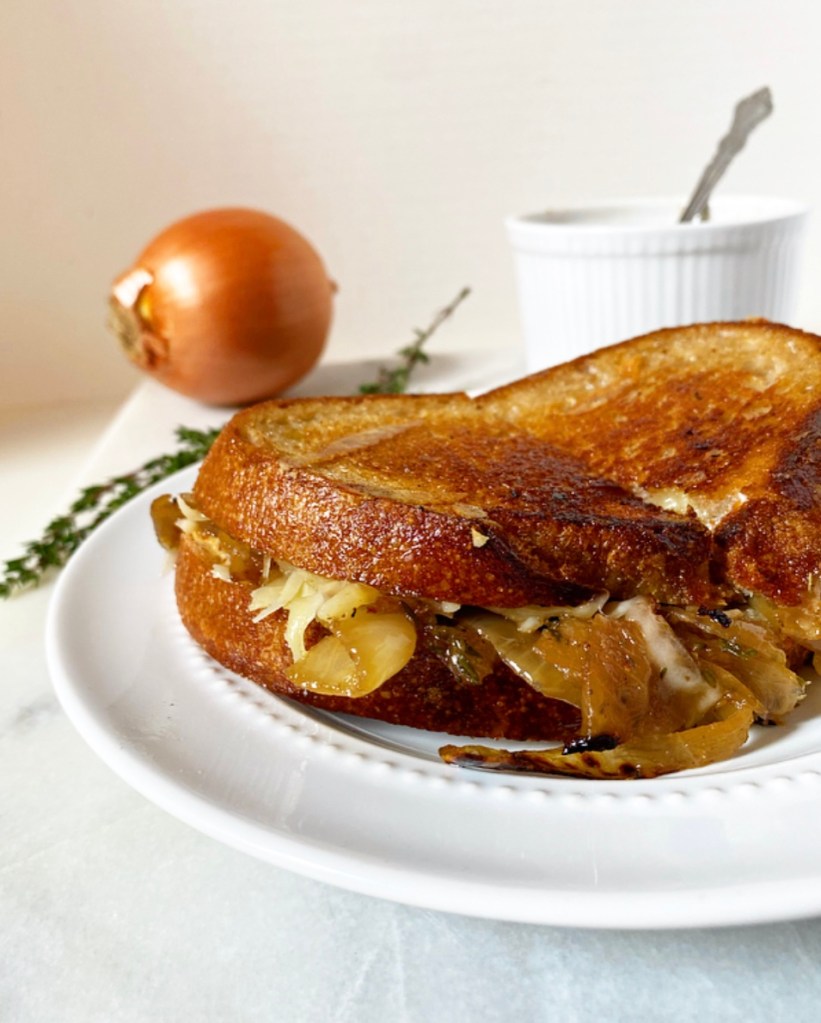
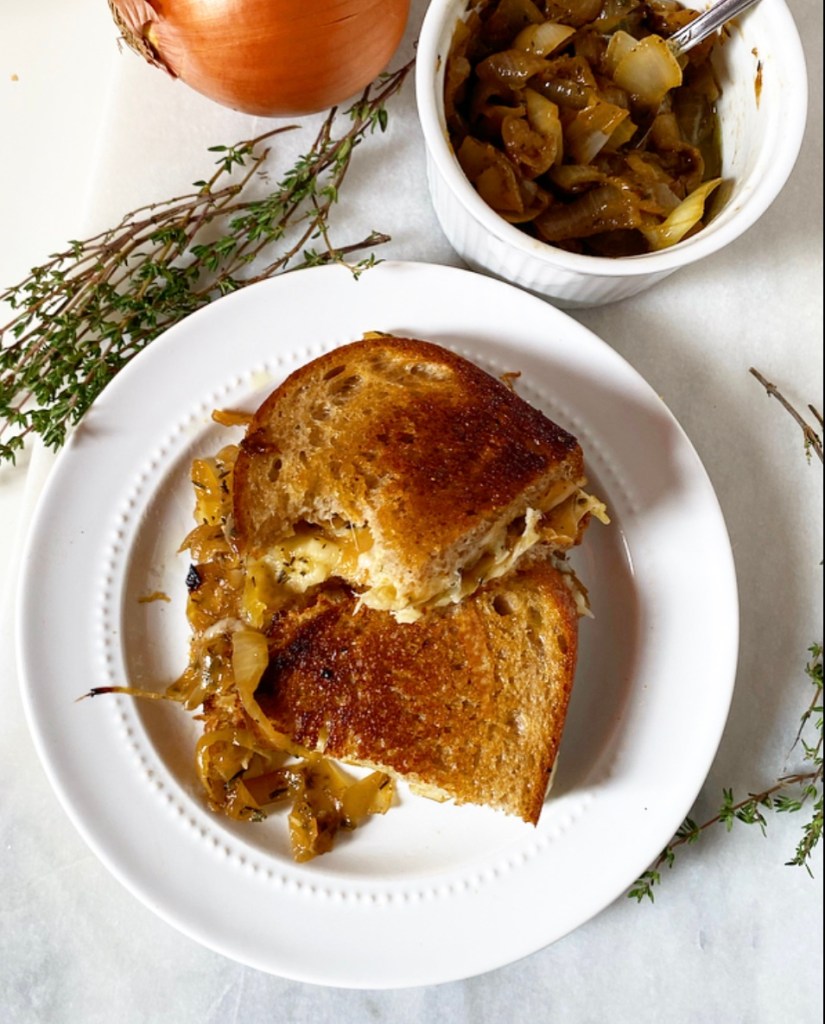
All that said, may I suggest that you leave the soup for another day and make French Onion Grilled Cheese instead? Think about it: herby caramelized onions and gruyere stacked on buttered sourdough and then seared to golden brown, crunchy, cheesy perfection. I mean, what’s not to love?!

French Onion Grilled Cheese

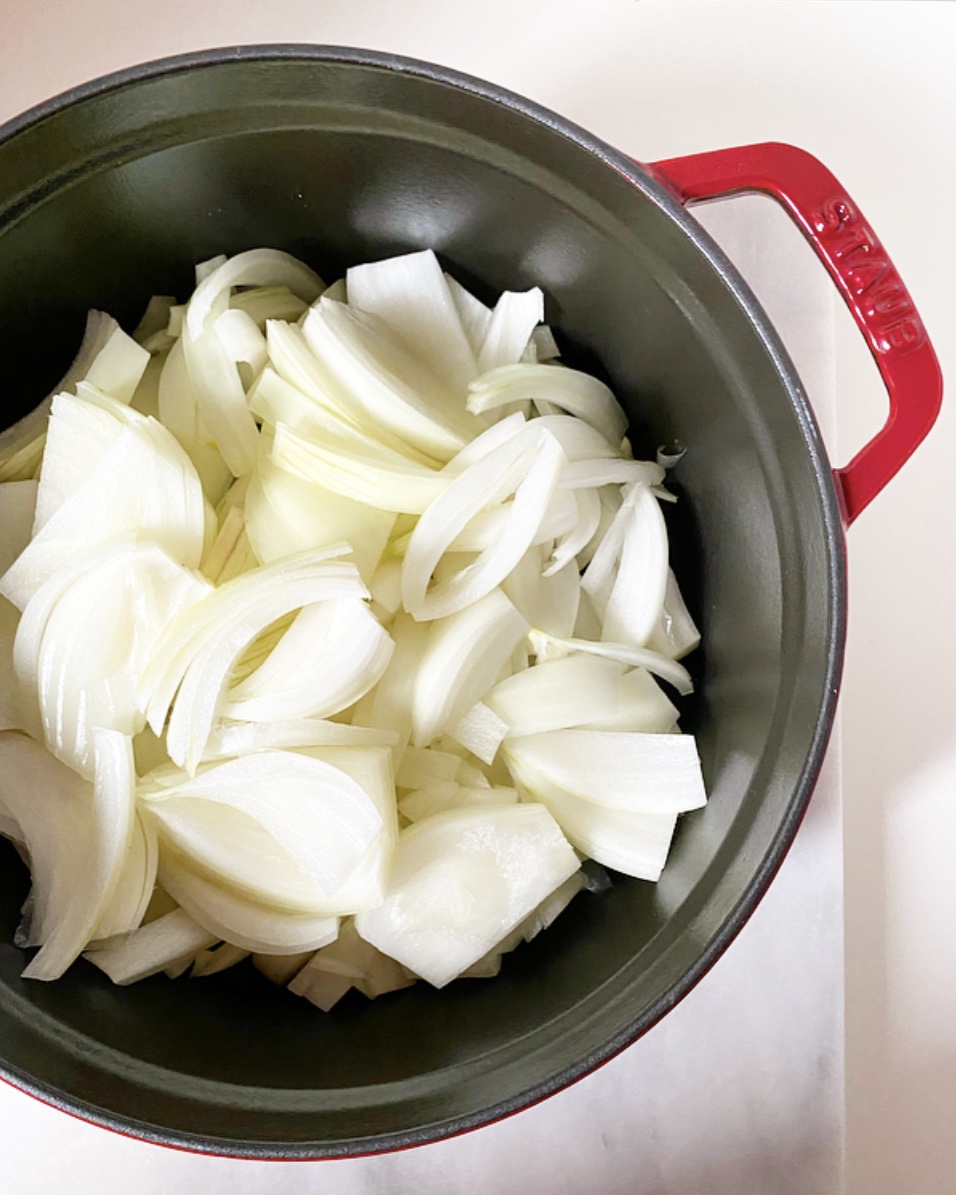
The most time consuming step of this whole recipe is caramelizing the onions. Some cooks will tell you that you can do this in 15 minutes over medium-high heat, but they are wrong. What they’re doing is sautéing, which is a great technique, but that’s not what we’re after in our French Onion Grilled Cheeses. Nope! We’re going the low and slow route, watching the onions collapse and then take on color as their natural sugars are drawn out little by little. This will take anywhere from 45-75 minutes, but I assure you it will be worth the investment.

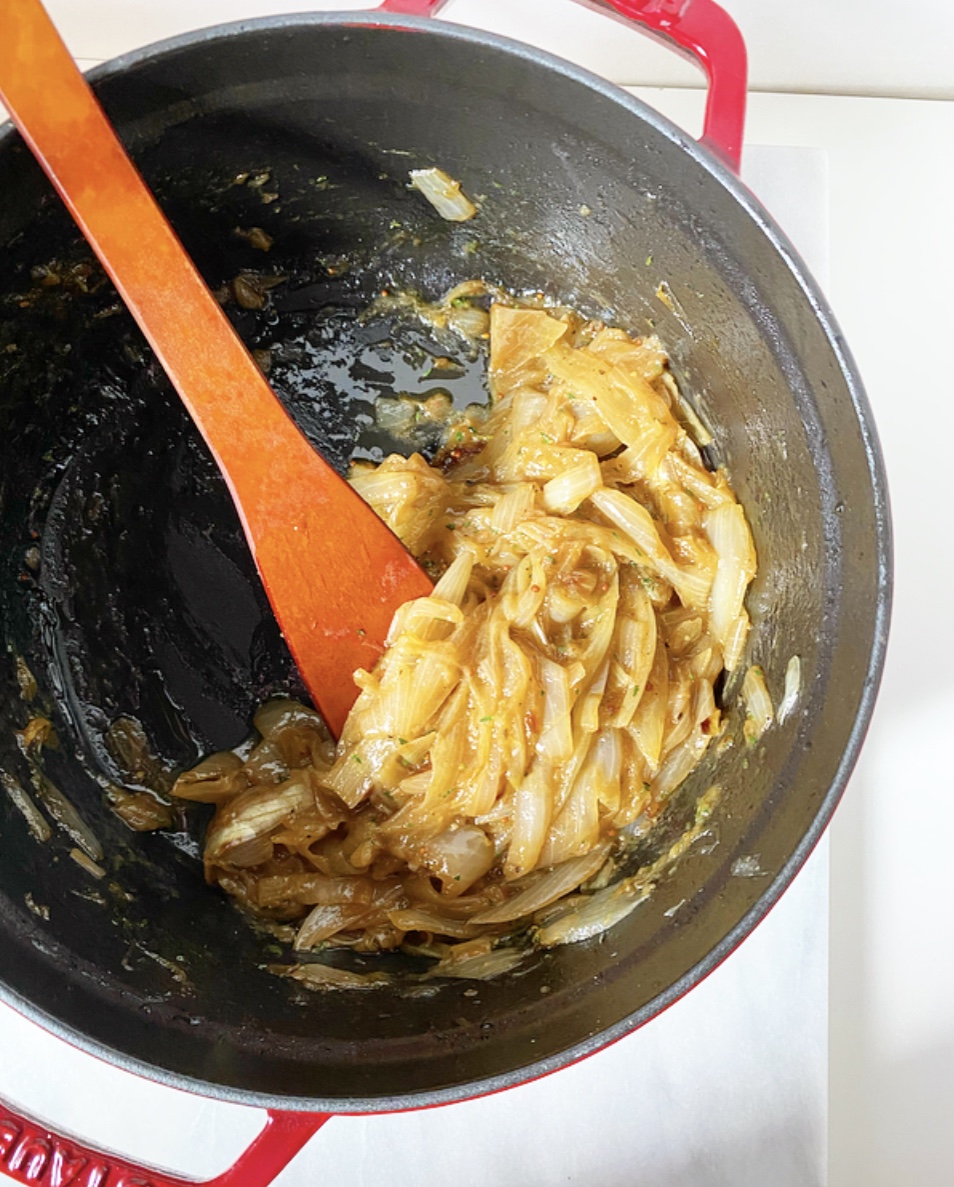
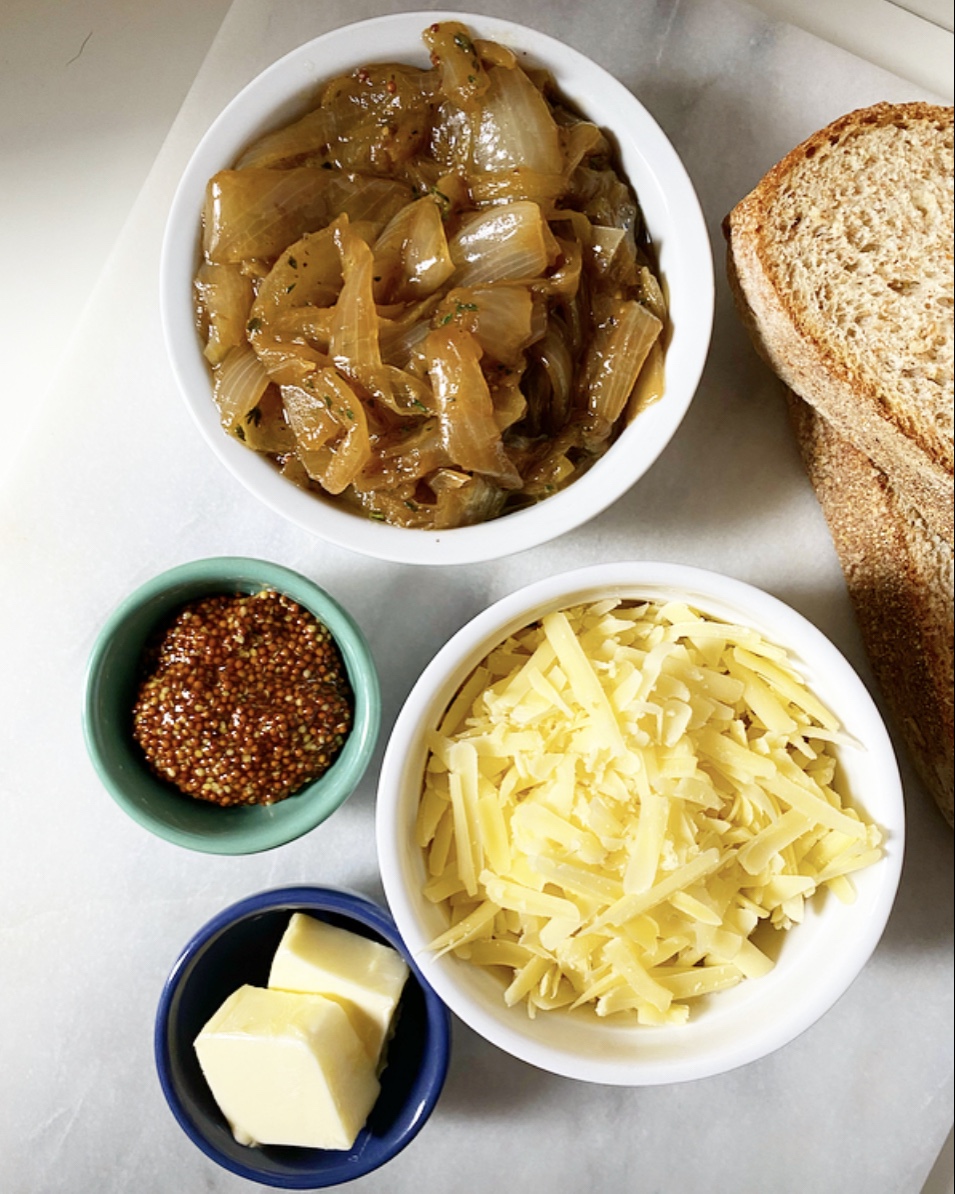
Yes, caramelizing onions takes time, but it’s easy as can be. I frequently put a pan on the back burner while I’m working on another dish, occasionally reaching over and giving them a stir until they are browned to my preference. While caramelized onions need no help to be delicious, I like to add some French Onion flavor here so I finish them off with thyme, dijon mustard, beef (or vegetable) stock, salt & pepper. I don’t drink, so I leave the cognac out of the equation, but feel free to add a splash to the mix.

Once finished, you can use your onions right away or cover and refrigerate for later. I like to think of this as having French Onion Grilled Cheese on demand.

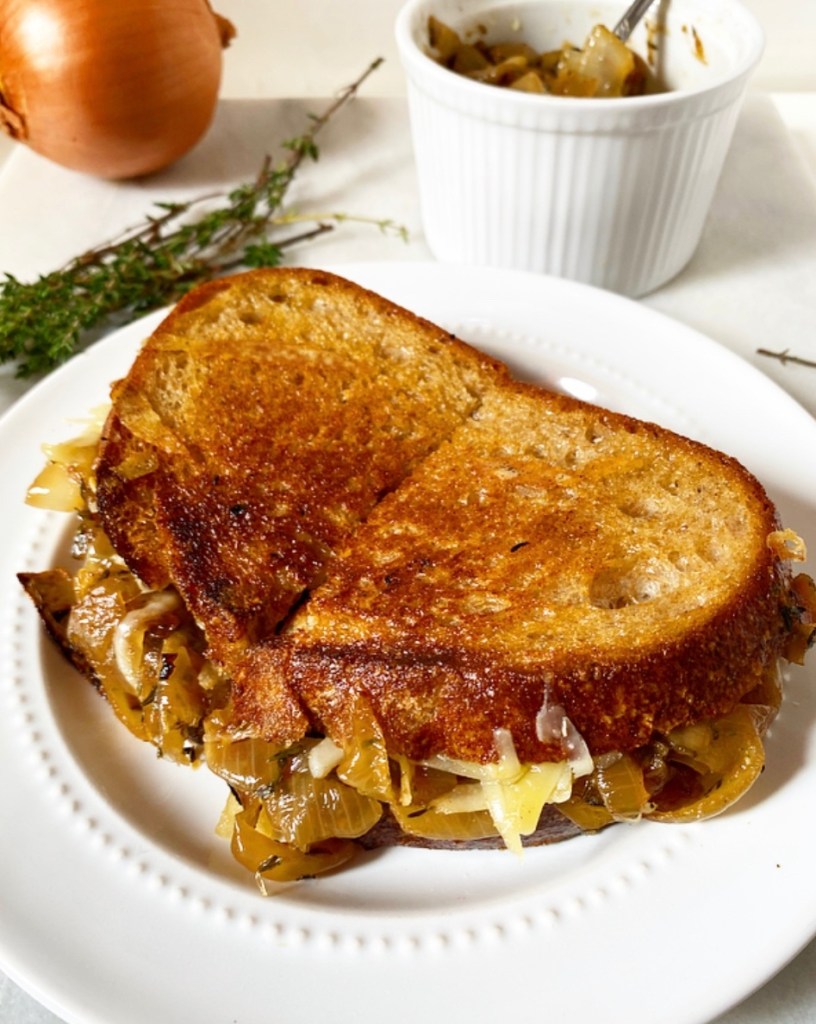
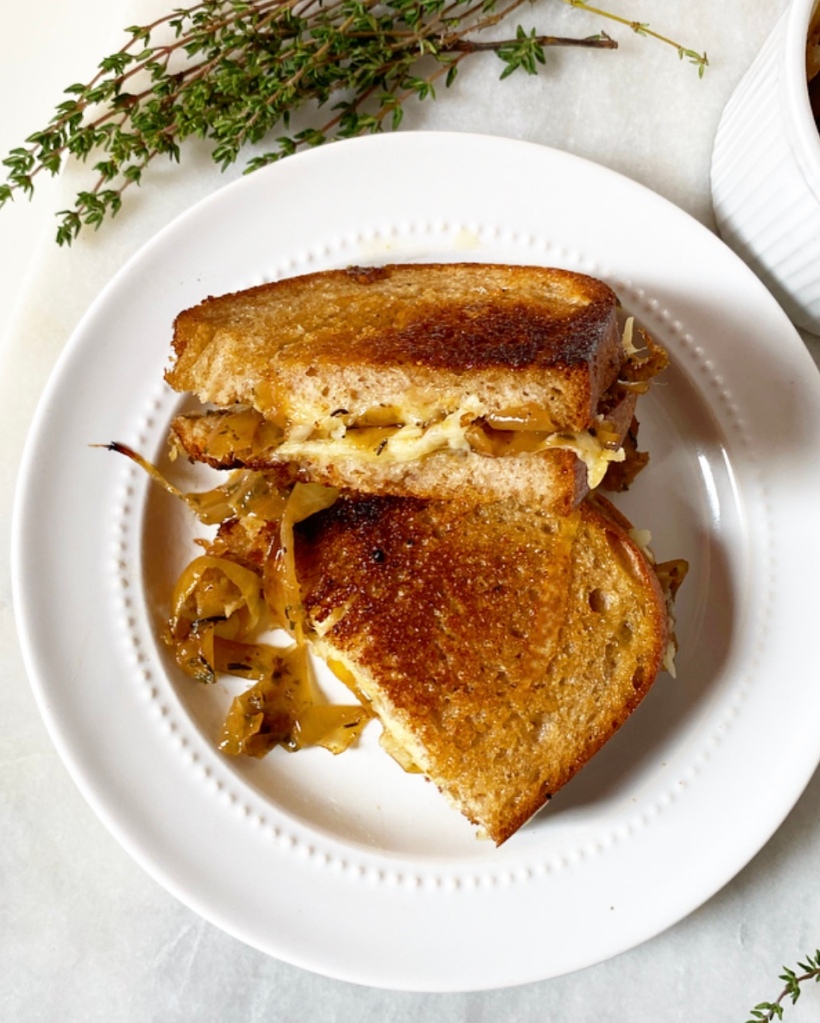
As for the sandwiching, it’s Grilled Cheese 101. Low heat, lots of butter, and time (about 8 minutes) are all that stand between you and crispy, cheesy, savory French Onion perfection. Pure luxury, indeed.

French Onion Grilled Cheese
makes 4 sandwiches

For the Onions:
2 tablespoons olive oil
3 medium Spanish or white onions, 1/2-inch thick half moons
Kosher or sea salt, to taste
1 tablespoon chopped fresh thyme leaves (or 1 teaspoon dried)
1/2 teaspoon dijon or grainy mustard
1/4 cup beef or vegetable stock
freshly-cracked black pepper, to taste

For the Sandwiches:
8 slices sourdough
dijon or grainy mustard
8 ounces gruyere cheese, shredded
4 tablespoons butter, softened to room temperature
few pinches of Kosher or sea salt, as needed

Make the onions. Heat olive oil in a large, heavy-bottomed pan over medium-low heat. Add onions and a pinch of salt. Cook, stirring frequently, until soft and deeply caramelized; this will take 45-75 minutes. Do not rush this step.

When onions are caramelized, stir in thyme, mustard, and stock, stirring until incorporated, but not soupy. Taste for seasoning and add salt and pepper to taste. Remove from heat. At this point, you may either use the onions immediately or cover and refrigerate for up to 4 days.

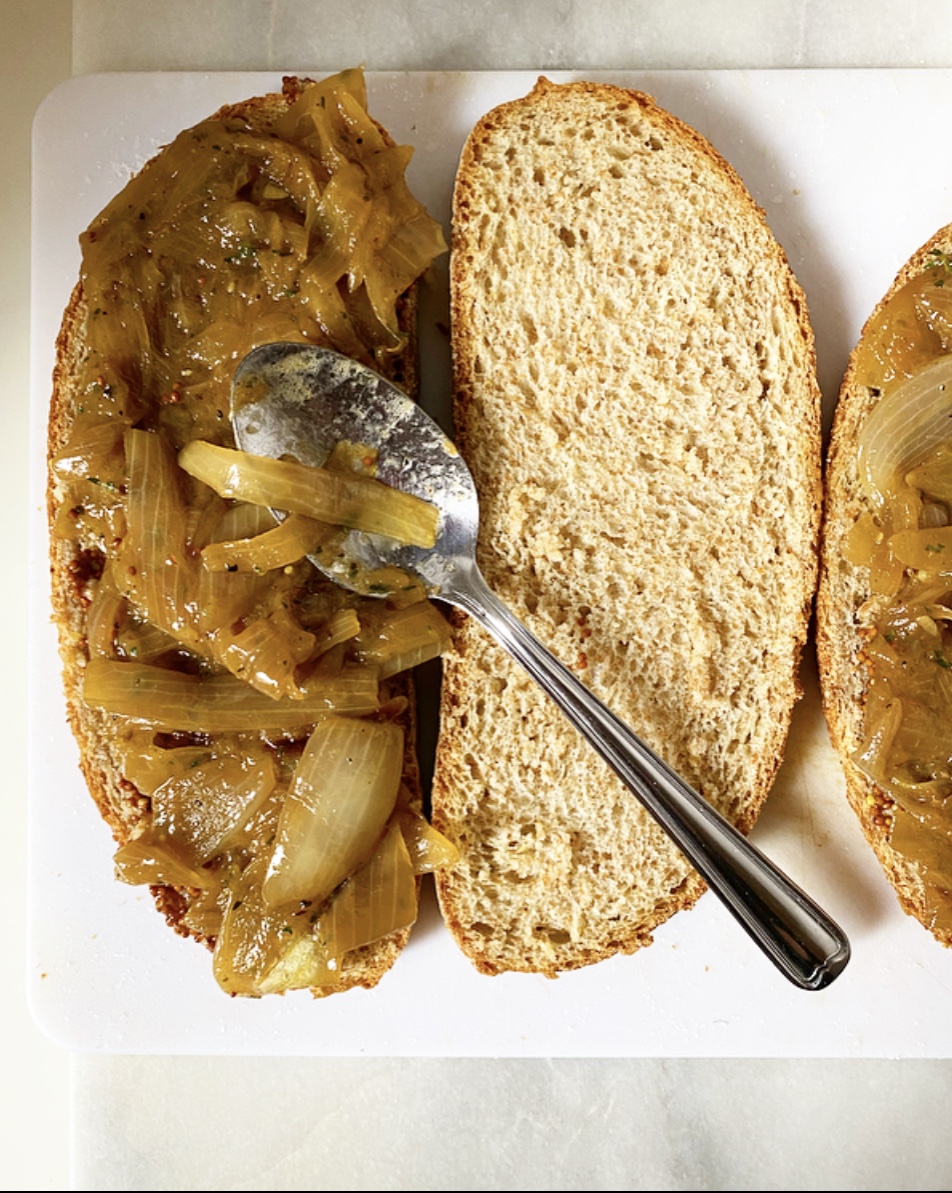
Lay all slices of bread on a surface. Spread four of the slices with mustard. Top mustard slices with ~2 tablespoons caramelized onions each, spreading to cover. Sprinkle each one with 1/4 of the gruyere. Top cheese with plain slices of bread, “closing” the sandwiches. Use a knife to spread 1/2 tablespoon softened butter on both sides of each sandwich (1 tablespoon butter per sandwich). Sprinkle butter with salt if using unsalted butter.

Heat a medium-large heavy-bottomed skillet over medium-low heat. Add sandwiches buttered-bread-side-down. Let sandwiches cook, without moving or squishing, until they are golden on the bottom, about 3-4 minutes. Flip sandwiches and let cook, without moving or squishing, until they are golden on the other side, about 3 more minutes.

Remove to plates and serve immediately.

Olive Oil Crackers

Olive Oil Crackers

Listen, I am not going to try to convince you to always make your own homemade crackers because I am not insane. I buy so few things pre-made, but crackers are one that I do—even dedicated home bakers need a convenience food every now and then! You know, like when you get home at 10pm after working 14 hours straight and if you have to cook one more thing, you will throw a toddler-style tantrum of epic proportions right there on the kitchen floor.

Not that I’ve ever done anything like that. Ahem.

Olive Oil Crackers

That said, sometimes it’s fun to DIY, especially when it’s both fancy and easy, and it doesn’t get much fancier or easier than homemade Olive Oil Crackers. The recipe is only five ingredients long, takes less than an hour start-to-finish, and makes the most delicious crispy, crunchy crackers I’ve ever had.

The recipe itself is a breeze—just mix together flour, salt, olive oil, and water, then roll, cut and bake ‘til crispy—but there are a couple of unusual things that I want to explain before I get to it.

First, you need to rest your dough before rolling it out. This isn’t a prolonged thing, just 15 minutes to let the gluten in the flour relax before you roll it out paper thin. If you skip this step, the dough will shrink back somewhat dramatically at the edges when you roll it—not the worst thing that’s ever happened, but not the best if you’re seeking wafer thin crackers, which I very much am.

The other thing is the way you roll, cut, and bake these crackers, which happens to be on the back of a sheet pan. I learned this technique from my favorite food writer, Julie Van Rosendaal, and it’s…well, it’s genius. This allows you to get the crackers extra thin with your rolling pin without running into those pesky pan edges and negates the need to transfer each individual cracker to the pan, which usually results in thicker, irregularly shaped results. No thanks! If you have coated pans or simply don’t want to use this method, roll your dough out on a large piece of parchment and transfer that to the pan.

Olive Oil Crackers

These crackers bake up in about 15 minutes. You’ll know they’re perfect when the edges are dark and the center has browned in places. In my experience, it’s better to brown them a little too much than leave them pale—nobody wants chewy crackers. You may have to sacrifice some of the edge pieces, but honestly, I kind of dig the overdone parts.

Olive Oil Crackers

Olive Oil Crackers are a great blank slate cracker because their primary flavors are—you guessed it—olive oil and salt. You can absolutely leave them plain, but I love dressing them up with whatever spices sound good. The batch pictured was seasoned with cracked pepper, Maldon salt, and dried rosemary, but I’ve included a bunch of suggestions in the recipe.

You can save this recipe for your next get-together or cozy night in with someone you like, or you can just make them for yourself, like I do. Because I like to eat Olive Oil Crackers and extra sharp cheddar for dinner after 14 hour workdays. And also because I’m a little bit fancy (but only a little bit).

Olive Oil Crackers
Olive Oil Crackers
makes lots

2 cups all-purpose flour
1 teaspoon Kosher salt
1/3 cup olive oil
2/3 cup warm tap water
spices of choice

Spice suggestions: freshly cracked black pepper, flaky salt, dried rosemary, dried thyme, everything bagel seasoning, za’atar, sesame seeds, poppyseeds

In a medium mixing bowl, whisk together flour and salt. Add oil and warm water and whisk just until combined. Divide dough in two. Wrap each portion in plastic wrap and let rest at room temperature for 15 minutes.

Place oven racks in central positions. Preheat oven to 400F. Lightly flour the backs of 2 sheet pans.

Roll out the crackers. Place one half of the dough on one of the floured pans. Use a rolling pin to roll it as thinly and evenly as possible (without being transparent) in all directions. The edges will shrink back slightly; if they are snapping back dramatically, cover the partially rolled dough with plastic wrap and let rest for another 15 minutes. Once rolled out, the dough should cover most of the pan and have irregular edges. Repeat with remaining dough and pan.

Sprinkle desired spices over the dough and lightly roll the rolling pin over the top to adhere.

Cut the crackers. Use a sharp chef’s knife, pizza cutter or bench scraper to cut dough into crackers. Mine are roughly 1 1/2 x 2 inches, but you may cut them as big or small as you like, keeping in mind that baking time may be affected. Prick each cracker with a toothpick or fork.

Bake crackers for 15-18 minutes, or until dark at the edges with some browning in the center. If they are pale, in the center, return them to the oven for a minute or two until they develop some darker spots.

Let crackers cool completely on their pans. Serve with cheese, cured meat and/or fruit.

Crackers will keep in an airtight container for at least a week.

Pumpkin Ricotta Gnocchi with Spicy Sage Brown Butter

Whether you’re vegetarian or just not into the usual turkey, you’re going to want to add these Pumpkin Ricotta Gnocchi to your Thanksgiving line-up. These little dumplings may not be a traditional part of the holiday menu, but they are tender, seasonal, and an oh-so-fun way to jazz things up.

If you’re stressed out by the idea of making homemade gnocchi, please listen to me: you (yes, you!) can make gnocchi at home during the holidays and not lose your mind in the process. Really! For the longest time, I thought gnocchi were one of those things I needed to leave to the professionals. Turns out, they are much simpler to make than anticipated. Oh, and I guess working in food for six years makes me one of the professionals—oops.

Let’s get down to it. First of all, for a beginner gnocchi maker, ricotta is the way to go. I’ve futzed around with the traditional potato variety and while that’s fun for a weekend project, it’s not the type of recipe I’m looking to take on a week before the biggest food holiday of the year. Nope. Enter ricotta gnocchi, the potato version’s just-as-good, low-maintenance cousin. It can be made in under an hour start-to-finish with no fretting over leaden results. Today’s version is getting a little autumnal flair from pumpkin purée. Yesssss.

The process of making Pumpkin Ricotta Gnocchi is very simple, but here are some tips for success.

  • Make sure to drain your pumpkin purée and ricotta on paper towels before mixing. This comes straight from the brilliant J. Kenji Lopez-Alt, so you know it’s important. Getting rid of the extra moisture in your cheese and purée will make your dough much easier to work with and your final gnocchi much prettier.
  • Flour your surface, knife, and hands really well. Like with other doughs, this will make the whole process much less frustrating (and sticky).
  • You don’t have to shape the gnocchi. Nobody is going to care if your gnocchi have ridges or are simply shaped like little pillows. I took the liberty of rolling mine across the back of a fork, but this is completely cosmetic and in no way required for gnocchi success.
  • You can make these ahead and freeze them! Once they’re cut, you can flash freeze your Pumpkin Ricotta Gnocchi on a baking sheet and store them in a freezer bag until you’re ready to cook. You can boil them straight from the freezer; starting frozen will only add 30-60 seconds to the cook time.
  • Cooking gnocchi takes just a minute or two! Boil them just until they float, then drain immediately.
  • Serve Pumpkin Ricotta Gnocchi with any sauce you like! Despite their seasonal ingredients and color, their flavor is pretty mild and will go with a multitude of sauces. I went with Spicy Sage Brown Butter because it’s exactly what I want this time of year, but I think a seasonal pesto (kale! beet greens! pepitas! feta!) would be amazing. Get creative with it!

Y’all, these are so good. Pumpkin Ricotta Gnocchi are sophisticated seasonal comfort food at its finest—a perfect vegetarian dish or starter for Thanksgiving, or any fall day. They’re so quick and simple, you could even make them for a weeknight dinner like you’re Ina freaking Garten or something.

That said, if you’re dishing up homemade gnocchi on a Wednesday night, please invite me over.

Pumpkin Ricotta Gnocchi
makes 4-6 servings

1 cup pure pumpkin purée
1 cup whole milk ricotta cheese (2/3 of a 15-ounce tub)
3 large egg yolks
1/2 cup grated parmesan or pecorino cheese
1 teaspoon Kosher or sea salt
1 1/2 cups all-purpose or “00” flour

For cooking:
water
Kosher or sea salt

For serving:
Spicy Sage Brown Butter (recipe below)
parmesan or pecorino cheese, for serving

Line a plate with 2-3 layers of paper towels. Spread pumpkin and ricotta onto the paper towels and press 2-3 more layers of paper towels on top. Let sit 15-20 minutes. Peel off and discard top layers of paper towel and then remove pumpkin and ricotta to a medium mixing bowl. Discard remaining paper towels.

With a silicone spatula or wooden spoon, stir together pumpkin and ricotta. Stir in egg yolks, followed by Parmesan and salt. Add half the flour, followed by the remaining half. The dough should be a little sticky but not impossible to handle. If needed, add more flour by the tablespoon until it is coming away from the walls of the bowl in a single mass.

Flour your hands, a chef’s knife (or bench scraper), and a surface. Pat the dough into a circle, then slice it into 8 wedges.

Use your hands to roll each wedge into a rope about 3/4-inch thick. Slice the gnocchi into bite-size pieces (keep in mind that they will expand slightly during cooking). If you would like your gnocchi to have ridges, you can roll each one along the back of a fork (or a special gnocchi board if you’re fancy), but this is totally optional.

At this point you may freeze your gnocchi. Heavily flour a rimmed sheet pan and add your gnocchi, making sure they are in an even layer. Freeze for a couple of hours, until frozen, then transfer to a freezer bag for up to a couple of months.

To cook gnocchi, bring a large pot of water to a boil. Salt well. Add gnocchi and let cook just until they float (1-2 minutes). Drain immediately and toss with Spicy Sage Brown Butter (or other sauce). Garnish with cheese and enjoy immediately.

Spicy Sage Brown Butter
makes enough for 1 batch Pumpkin Ricotta Gnocchi

1/2 cup (1 stick) unsalted butter, cut into pieces
20 fresh sage leaves
2 cloves garlic, crushed
1/4-1/2 teaspoon Kosher or sea salt
1/8-1/4 teaspoon red pepper flakes
1 tablespoon apple cider vinegar
parmesan cheese, for garnish

Add butter, sage leaves, garlic, 1/4 teaspoon salt, and red pepper flakes to a small light-colored saucepan over medium heat. Butter will bubble and crackle as the water content evaporates. Swirl the pan frequently for 5-7 minutes, keeping an eye on the color. When the solids are turning brown and the butter is nutty and fragrant, remove the pot from the heat.

Use a fork or slotted spoon to fish out the sage leaves (they should be crispy) and place them on a a paper towel-lined plate.

Stir vinegar into the butter and taste and adjust for salt. Toss with gnocchi and use sage leaves as a garnish.

Pesto Mozzarella Grilled Cheese

Pesto Mozzarella Grilled CheeseAs far back as I can remember, I’ve always wanted to be a gangster loved the Oscars. I couldn’t tell you when I first watched them, but I don’t recall ever missing a ceremony. Oscar Night is my favorite holiday. One of my best friends and I bonded over our mutual love of Oscar politics. I put great effort into predicting each year’s nominees and winners. I consider Martin Scorsese’s win in 2007 one of the happiest moments of *my* life. Put simply, I love them I love them I love them.

To that end, it will come as no surprise that I have a traditional Oscar Night meal. If you’ve been around here a while, you know by now that my Oscar dessert is always red velvet (because it’s “red like the red carpet”). The main though? I’ve never posted it. I’ve barely mentioned it. Until now, duh.Pesto Mozzarella Grilled Cheese
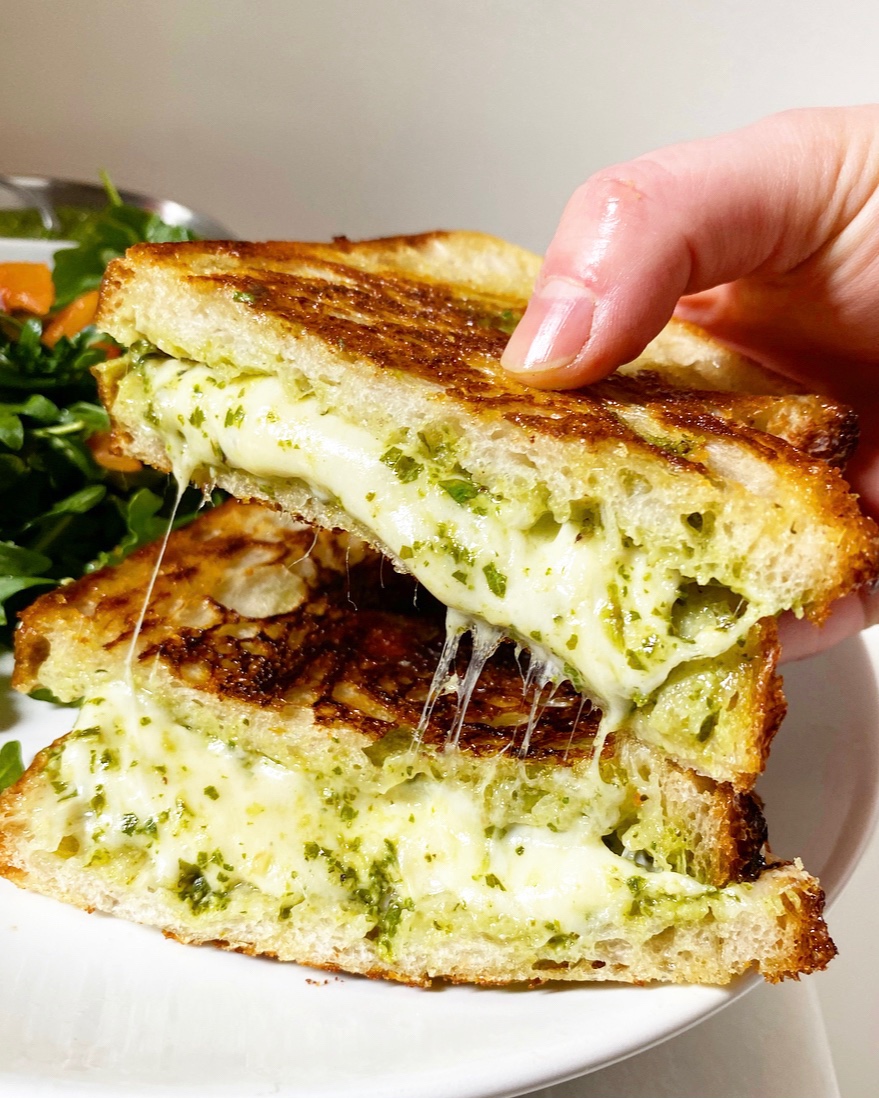
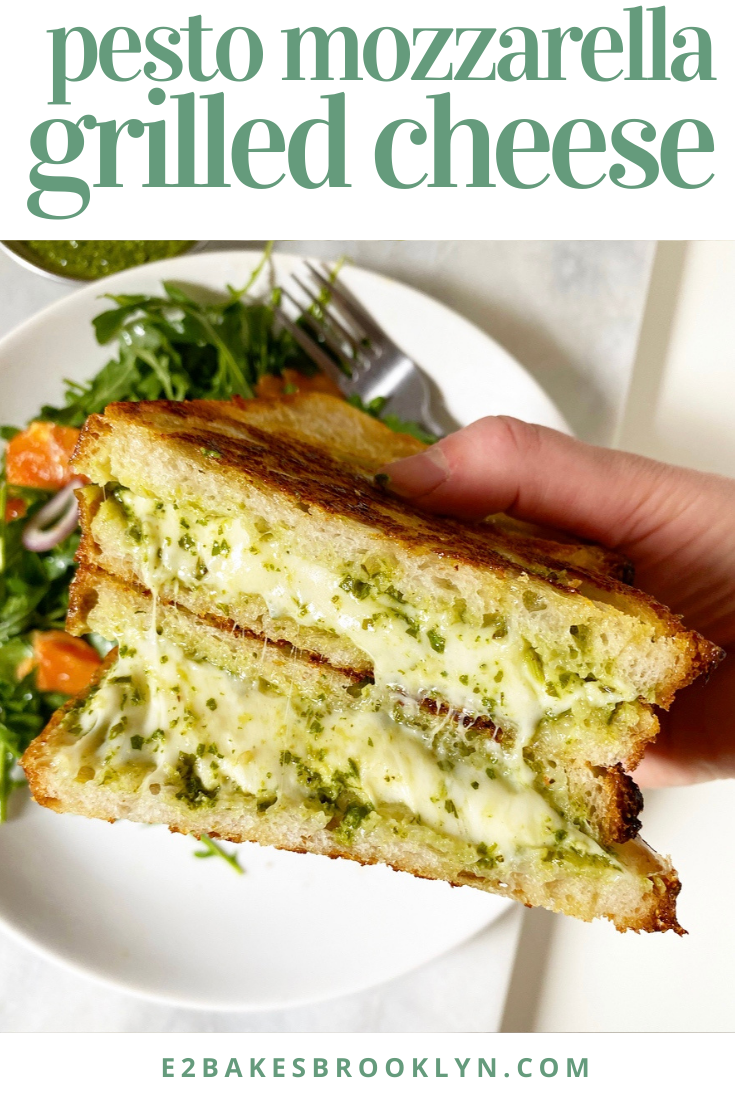
I’ve been making Pesto Mozzarella Grilled Cheeses for dinner on every Oscar Night since 2005. Why? Because:

A) it’s effing delicious, as all cheesy pesto things are.
B) it’s easy, and that’s important when you’re cooking and watching red carpet coverage at the same time.
C) 20 year old me could afford all the ingredients and churn these out on the illegal electric burner I had in my dorm room. Pesto Mozzarella anything seemed very special to all my college pals and was enough to get them to watch the Oscars with me.
D) this is the height of sophistication in the category of Things I Once Cooked in a Residence Hall That I Still Make.

Anyway…this sandwich. This simple, simple sandwich. I’ve been making it for sixteen years and I won’t go an Oscar Night without it. It’s cheesy, it’s herby. It brings me so much joy on Oscar Night (and any night).Pesto Mozzarella Grilled Cheese
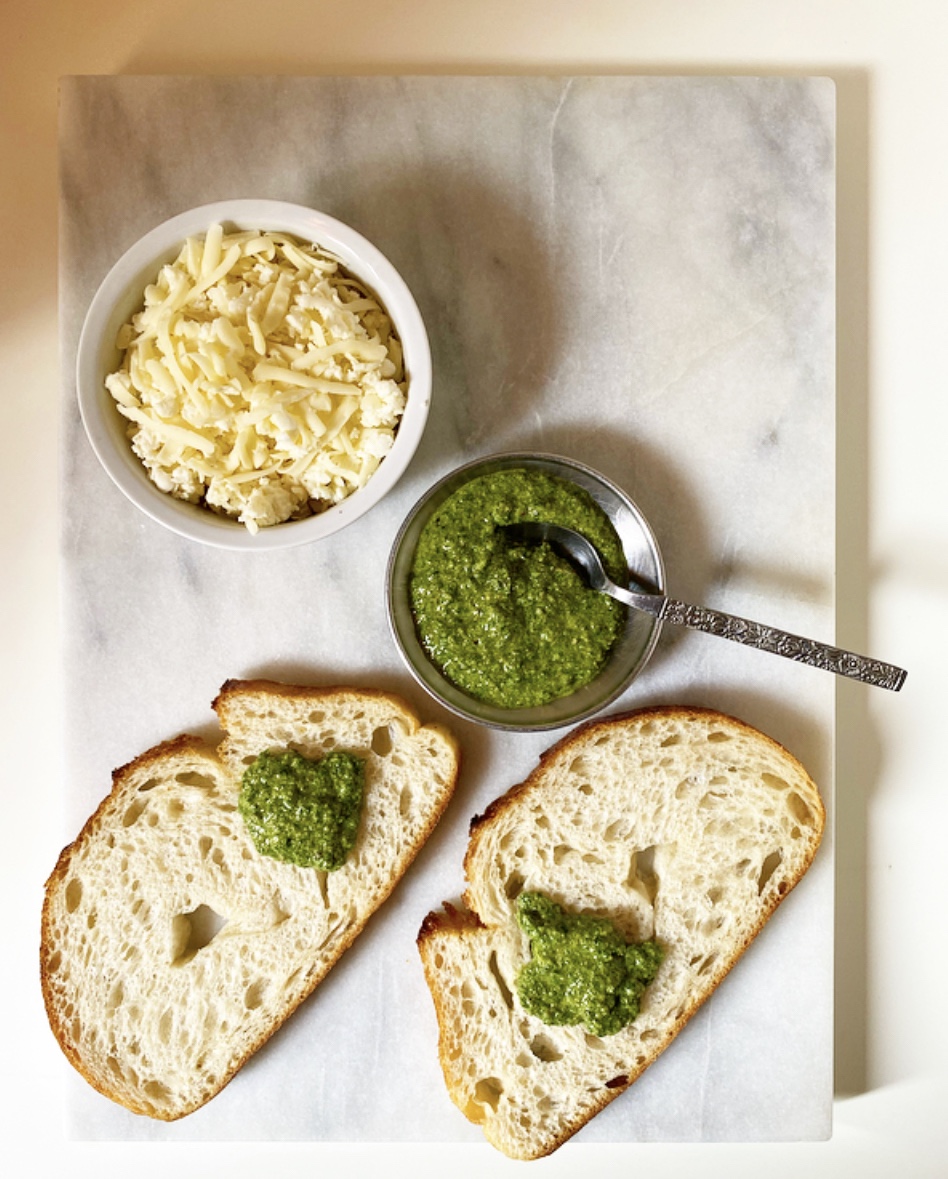
Let’s talk ingredients. First things first: get the good sandwich bread. I mean, whatever you have will absolutely work, but might I suggest sourdough? Or something crusty and chewy with an open structure so that some of the cheese melts through to the pan and gets crispy? Can you tell I’ve thought about this a lot???Pesto Mozzarella Grilled Cheese
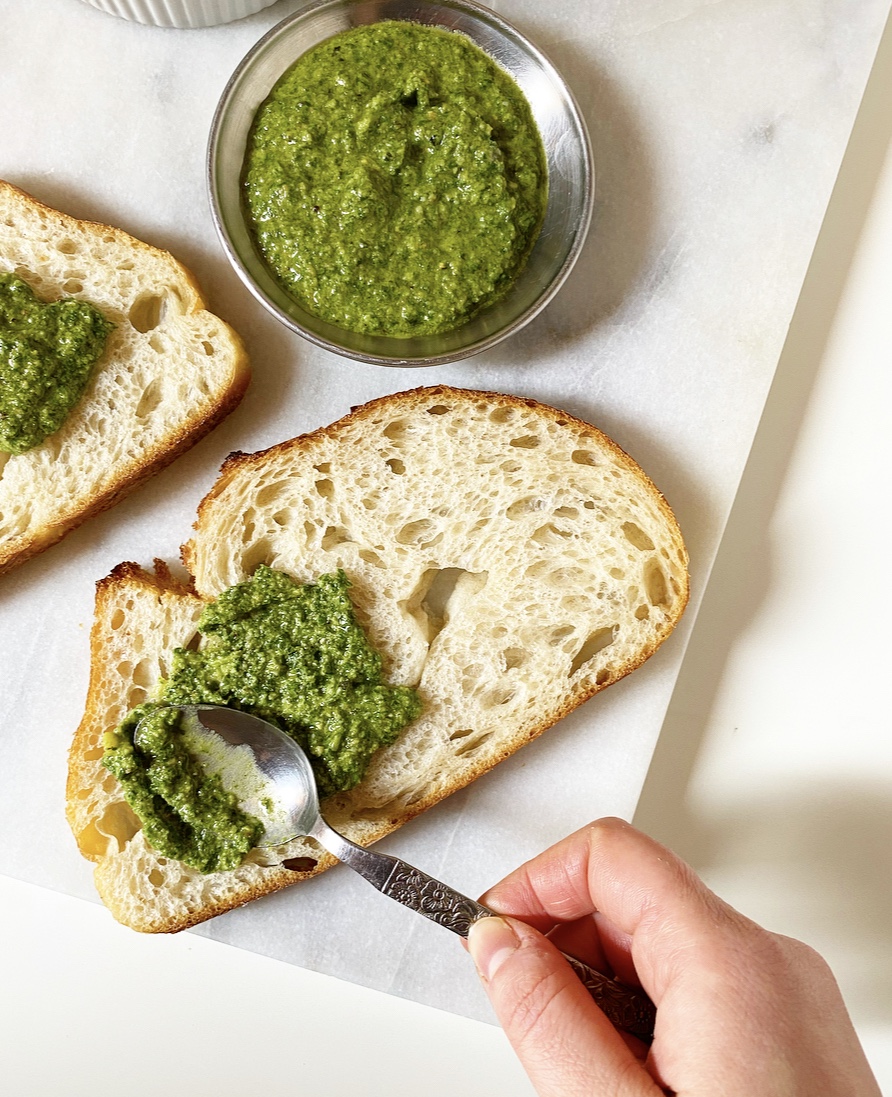
Next up, Basil Pesto. It’s spread on both slices of bread involved in this grilled cheese and is the thing that makes it pop! The pesto pictured is my homemade stuff, but feel free to use store bought. Keep in mind that it’s a primary flavor though, so whatever you choose, make sure you really like it.Pesto Mozzarella Grilled CheesePesto Mozzarella Grilled Cheese
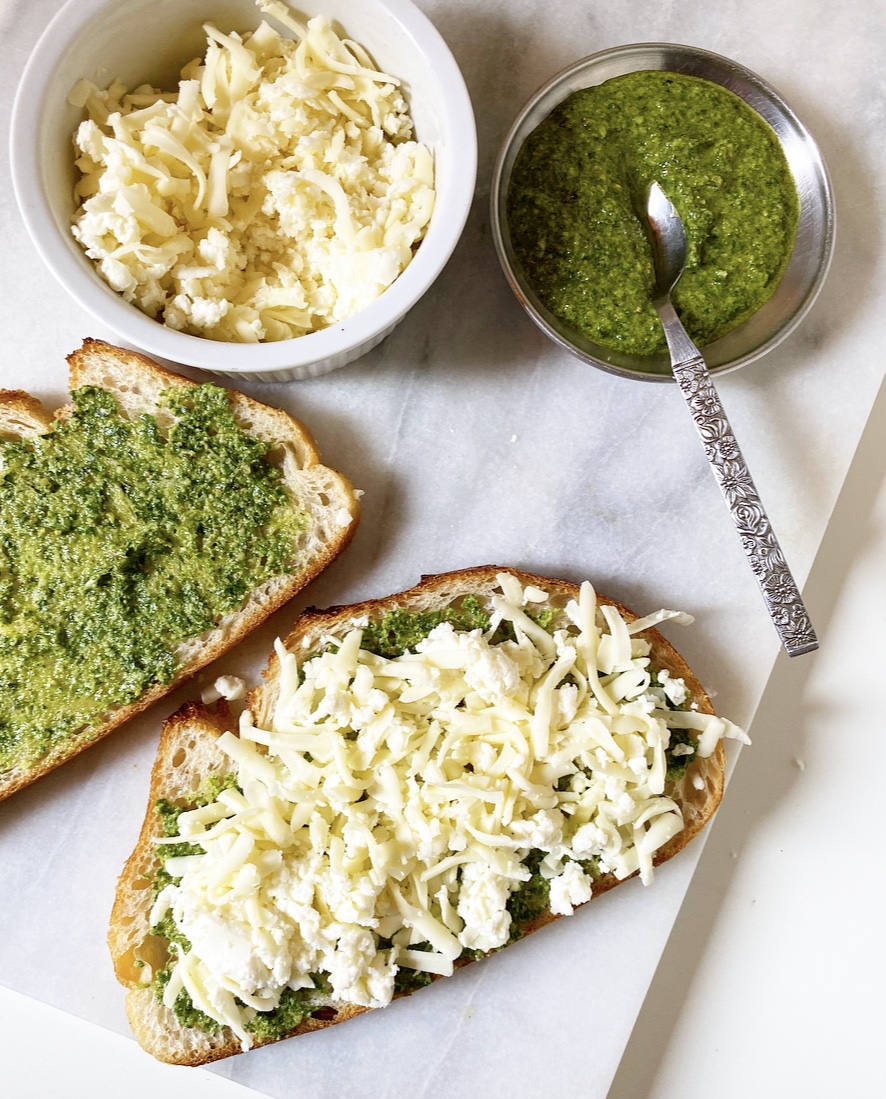
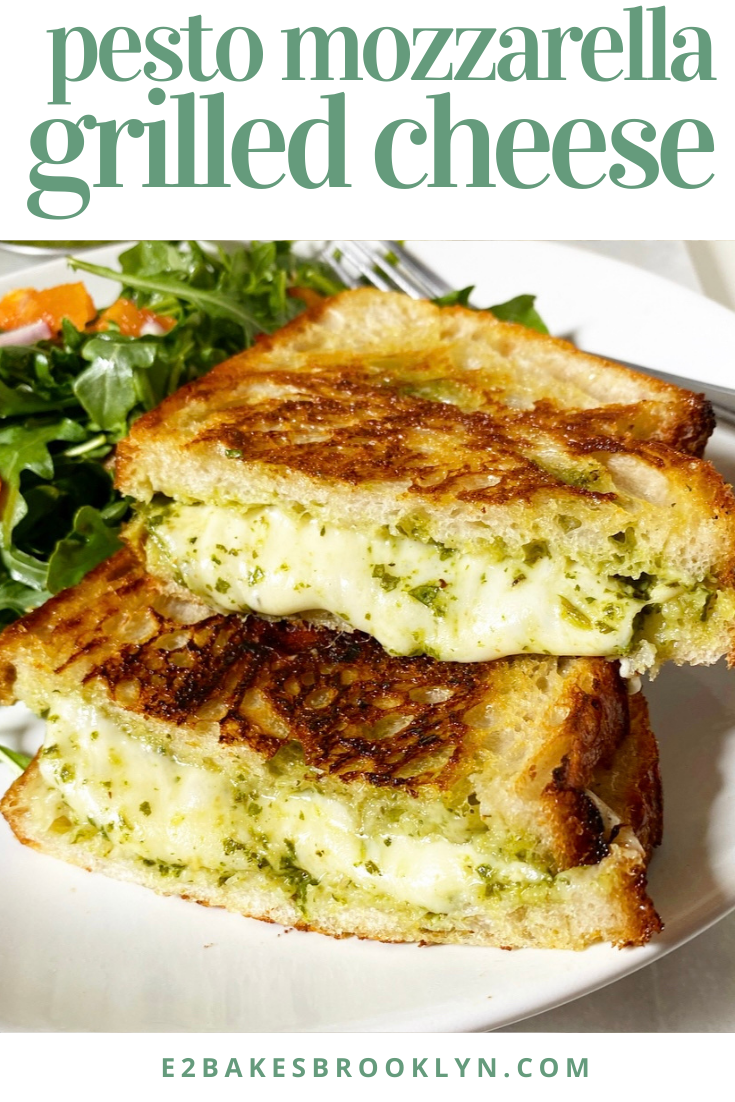
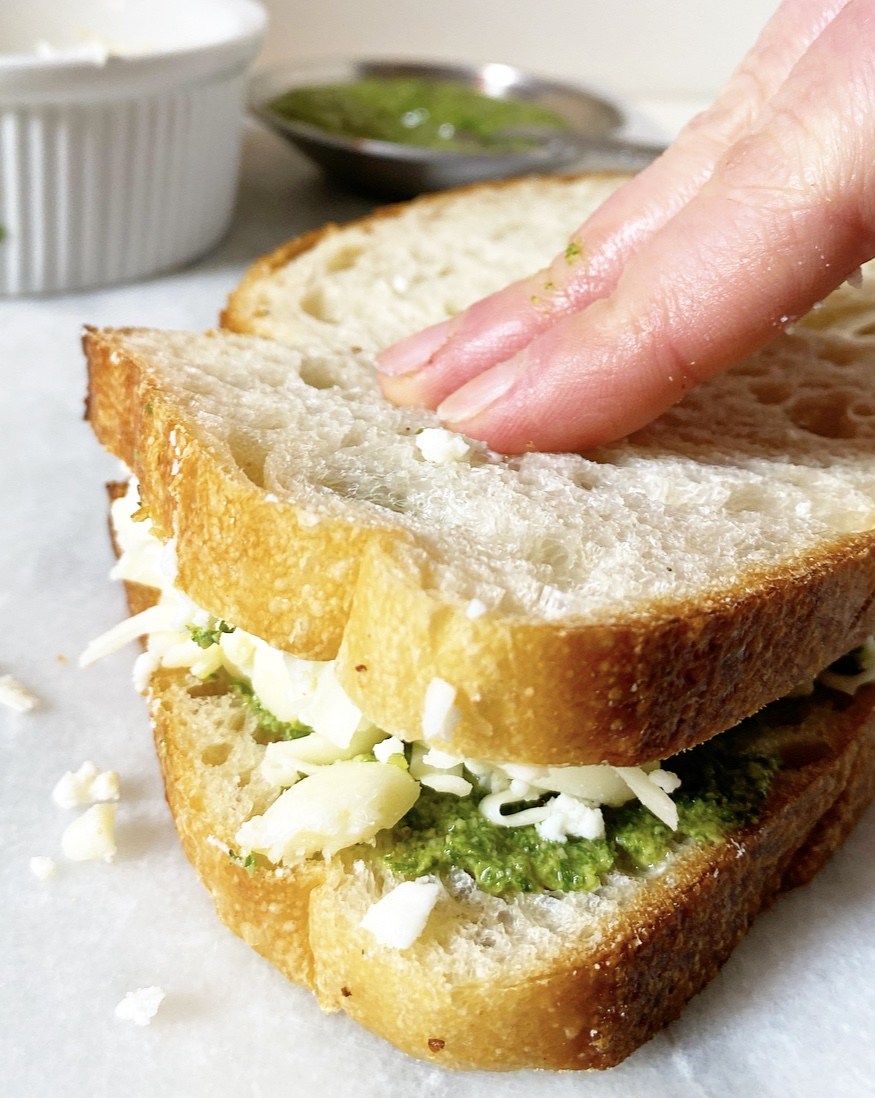
You can’t have a grilled cheese without cheese! I use a mix of equal parts fresh mozzarella and low-moisture whole milk mozzarella that I shred on the large hole side of my box grater. This gives the sandwich the rich flavor of the fresh cheese with the perfect meltability (?) of the more processed stuff.

Don’t want to buy both? Don’t! You can use all of either one with good results. I am just persnickety after sixteen years and like a mix. You can also just slice and layer it instead of grating–whatever you like. A word to the wise: don’t buy the pre-shredded stuff. It just doesn’t melt right.Pesto Mozzarella Grilled Cheese
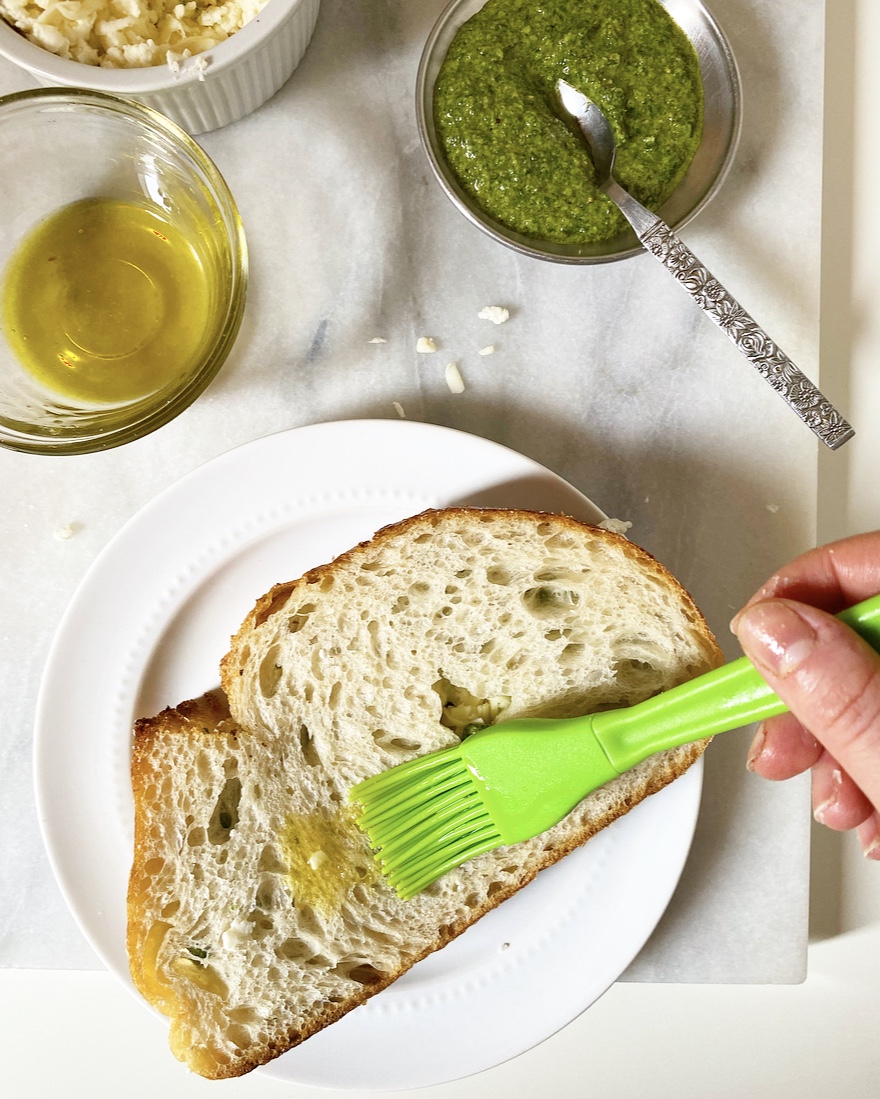
Though most grilled cheeses are made with butter, I choose to use olive oil here to keep with the pesto flavor profile. I brush a little on both sides of my assembled sandwich before cooking.Pesto Mozzarella Grilled Cheese
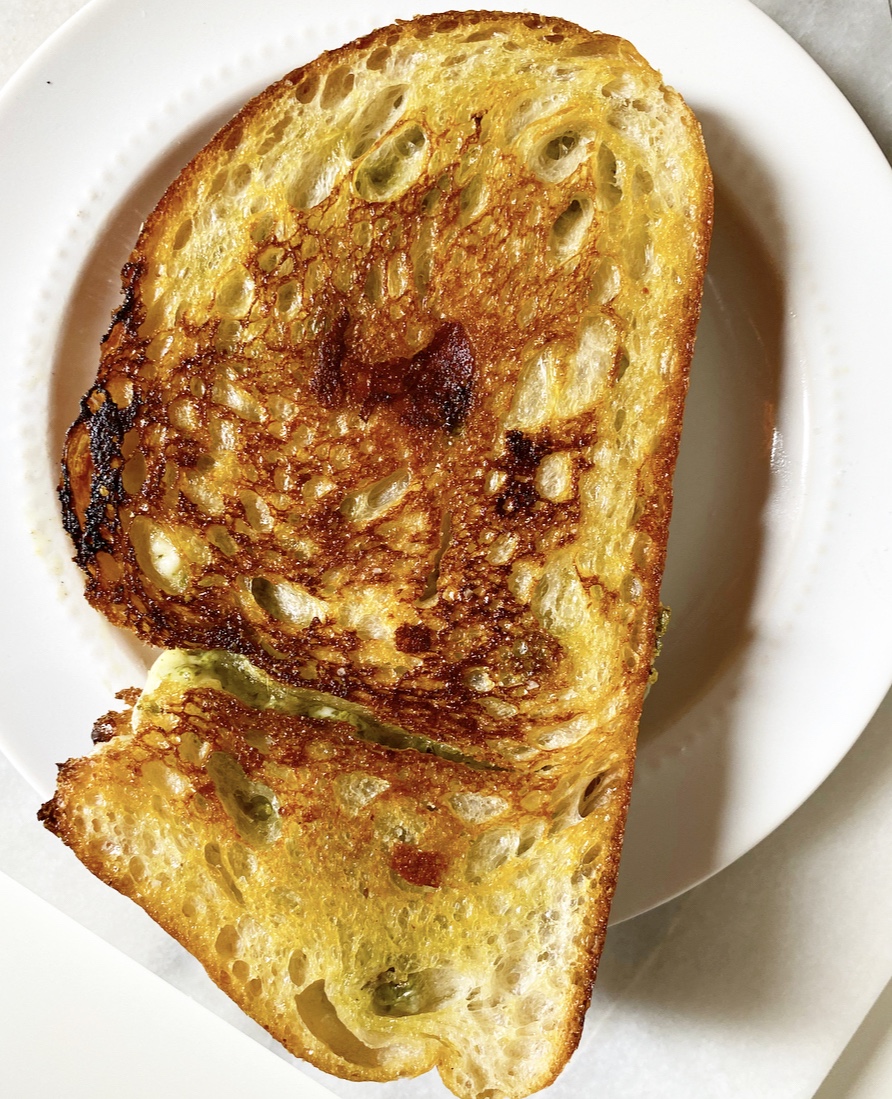
And speaking of cooking, as with my favorite classic grilled cheese, Pesto Mozzarella Grilled Cheese is cooked over medium-low heat so that the bread crisps and the cheese melts at similar rates—no burnt outsides and cold cheese allowed! It’s all gooey, stretchy cheese, garlicky pesto and crispy edges up in here.Pesto Mozzarella Grilled Cheese
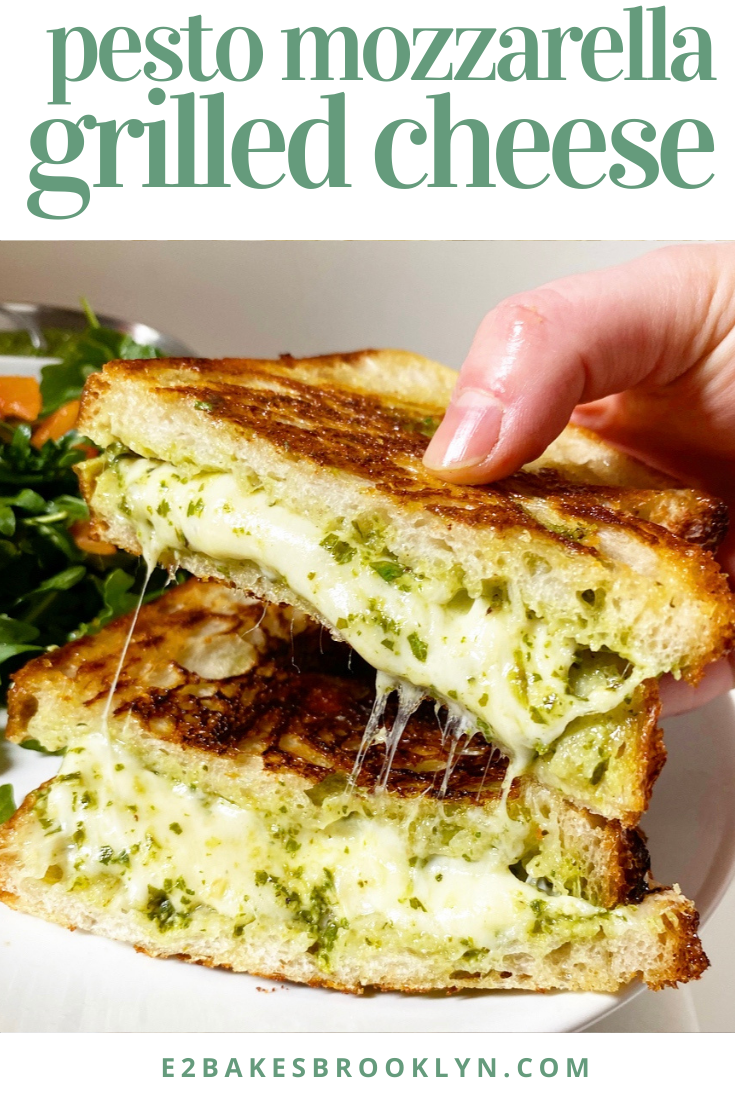
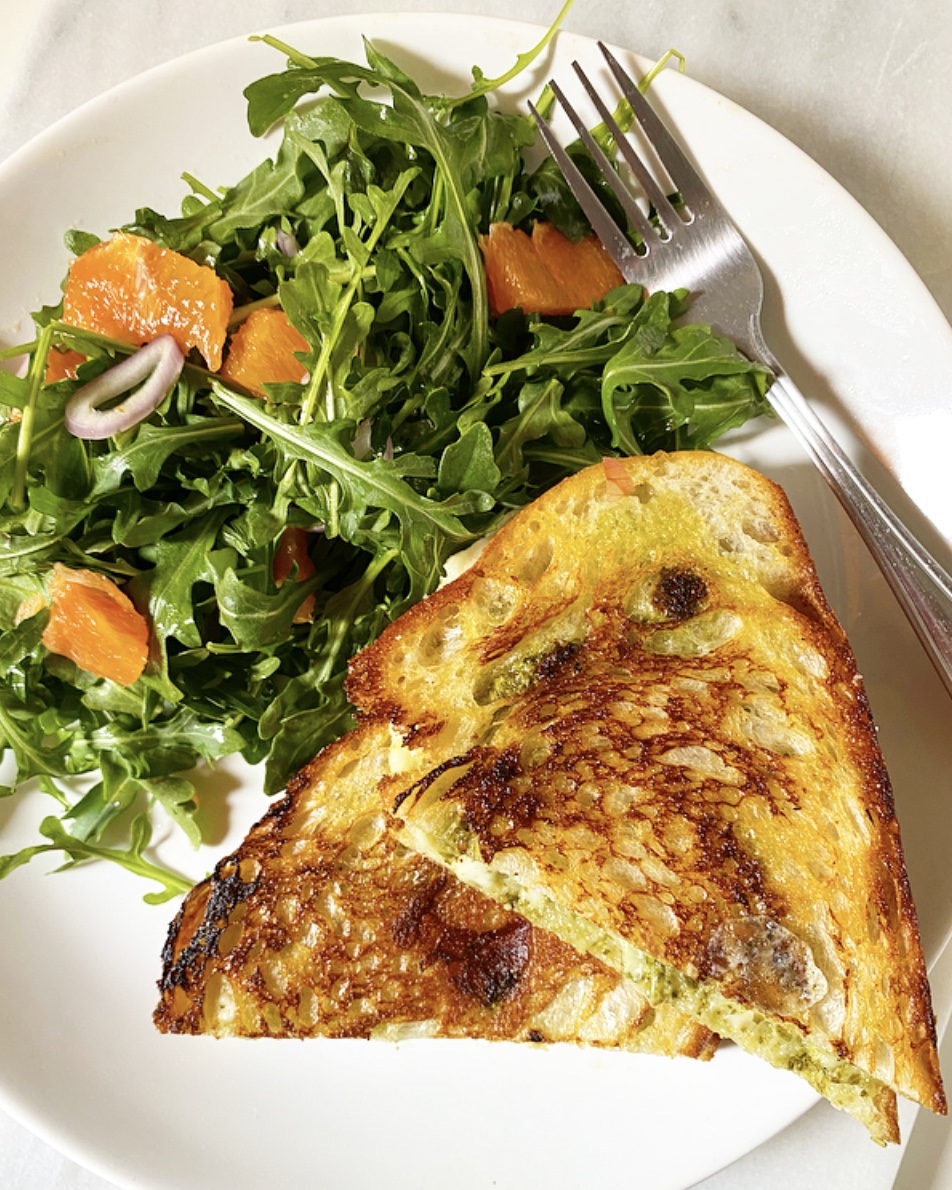
I almost always serve these up with a green salad with cara cara oranges, red onion and balsamic vinaigrette (more “sophisticated” college food), but you do whatever makes you happy. I mean, the Oscars tend to be volatile enough that this sandwich may be the only thing that goes your way come Sunday night. But oh, what a win.Pesto Mozzarella Grilled Cheese

Pesto Mozzarella Grilled Cheese
makes 2 sandwiches

4 slices sourdough or other good sandwich bread
2 heaping tablespoons prepared basil pesto
2 ounces fresh mozzarella cheese, grated*
2 ounces low-moisture whole milk mozzarella,* grated (I used Trader Joe’s)
olive oil, for brushing
pinch or two of Kosher or sea salt

Lay all slices of bread on a surface. Spread about a 1/2 tablespoon (1 1/2 teaspoons) of pesto over each one. Top two of the slices with the grated cheeses. Top cheese with remaining pieces of pesto-spread bread, “closing” the sandwiches. Use a pastry brush to brush olive oil on exposed plain bread. Sprinkle with salt.

Heat a medium-large heavy-bottomed skillet over medium-low heat. Add sandwiches oiled-bread-side-down. Brush the exposed (plain-side-up) pieces of bread with olive oil and sprinkle with salt.

Let sandwiches cook, without moving or squishing, until they are golden on the bottom, about 3-4 minutes. Flip sandwiches and let cook, without moving or squishing, until they are golden on the other side, about 3 more minutes.

Remove to plates and serve immediately.

Note:

1. Fresh mozzarella doesn’t grate cleanly, but will still crumble nicely enough on the side of a box grater.

2. Low-moisture mozzarella is the kind that comes shrink-wrapped and is usually near the bricks of cheddar and pre-sliced cheese. Leftovers can be used in pasta dishes or for homemade pizza bagels or English muffin pizzas.

Pesto Mozzarella Grilled CheesePesto Mozzarella Grilled CheesePesto Mozzarella Grilled Cheese

Grilled Cheese & Tomato Soup

Grilled Cheese & Tomato SoupOver the past couple of years, I’ve learned that a shocking number of people I know and love don’t know how to make one of the simplest recipes in the wide world: Grilled Cheese. It’s not because they’re incapable in the kitchen—it’s just that nobody ever taught them how to make it so that the bread cooks and the cheese melts at similar rates, and the butter doesn’t blacken and smoke up the house.Grilled Cheese & Tomato Soup
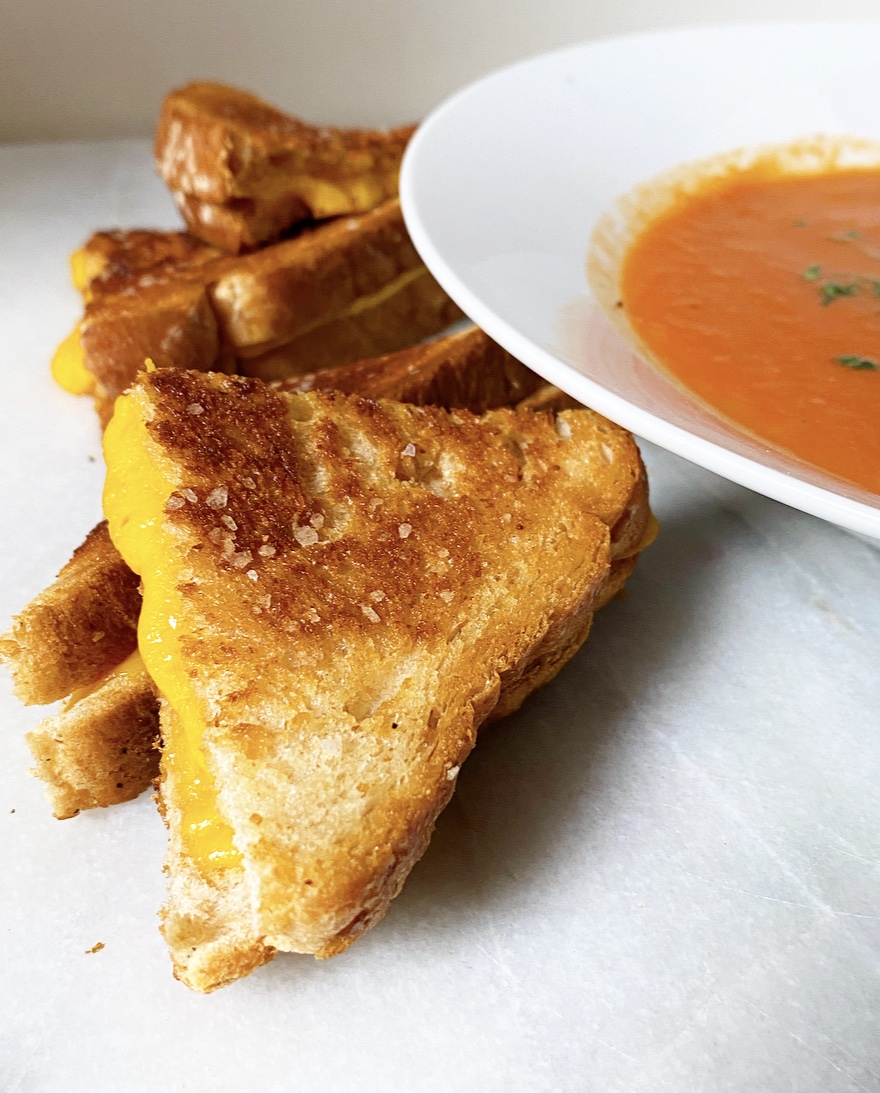
Luckily (maybe?), they’re friends with me, a person who will make them a grilled cheese in the moment and then spend four months dwelling on the (non-)event until the middle of January when she decides to write a blog post about the whole (inconsequential) thing. And that’s how we got here. Luckily. Maybe.

Anyway…Grilled Cheese & Tomato SoupI make Grilled Cheese for dinner at least once a week because a) it’s easy and I don’t have to think about it too hard, and b) I always have sandwich bread, butter and some sort of melting cheese (usually extra sharp cheddar). It only takes a couple of minutes to butter two pieces of bread and layer cheese in the middle. You’ll notice I don’t use sliced cheese here—that’s simply because I prefer to buy the brick and slice it myself. Do whatever works for you, with the exception of pre-shredded cheese because it’s coated in an anti-caking agent that prevents proper melting. You do not want to impede proper melting on a Grilled Cheese!Grilled Cheese & Tomato Soup
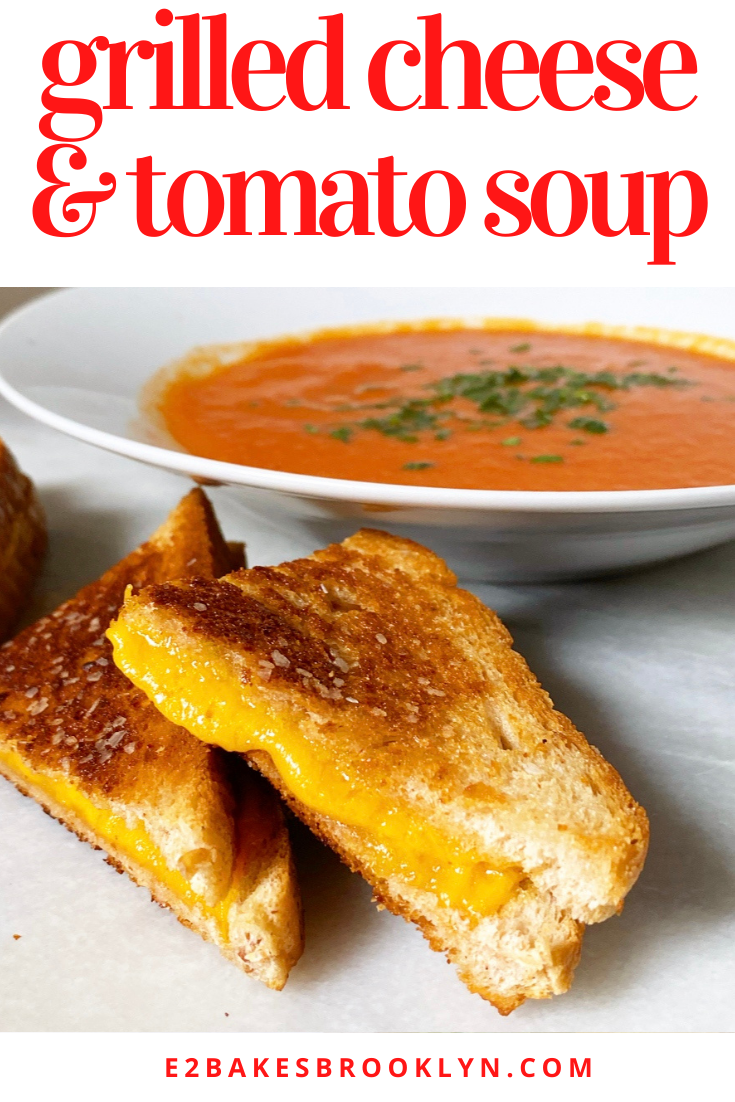
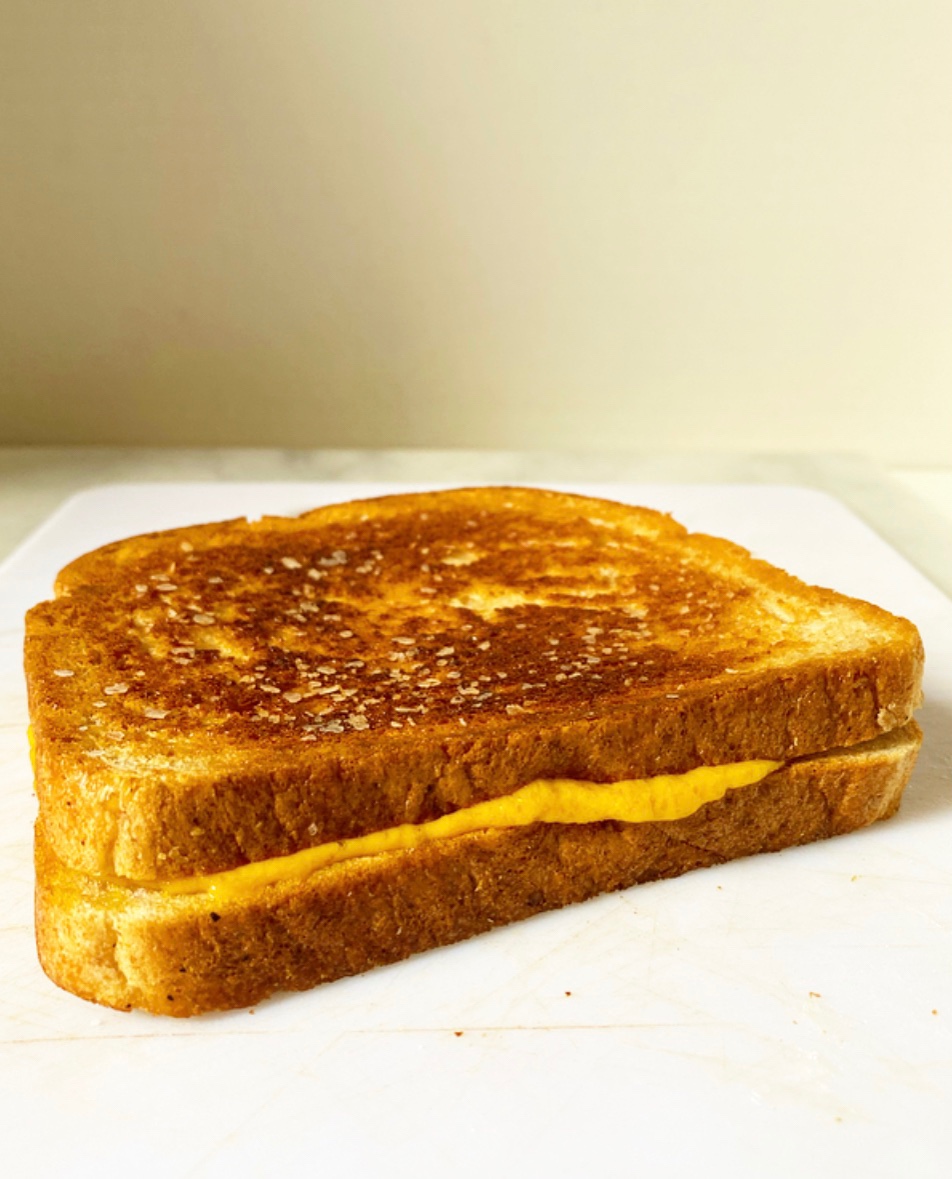
As far as cooking goes, I think it’s a pretty human thing to want to cook crispy foods over the highest heat for a couple of minutes, but when it comes to Grilled Cheese (and so many other things), it’s best to ignore that thought, turn down the flame and take your time. Whereas 3-4 minutes over high will yield cold cheese between burnt slices of bread, 7-8 over medium-low will give you perfect melted cheese and buttery, golden edges every time. Those extra four minutes make all the difference in the world.Grilled Cheese & Tomato Soup
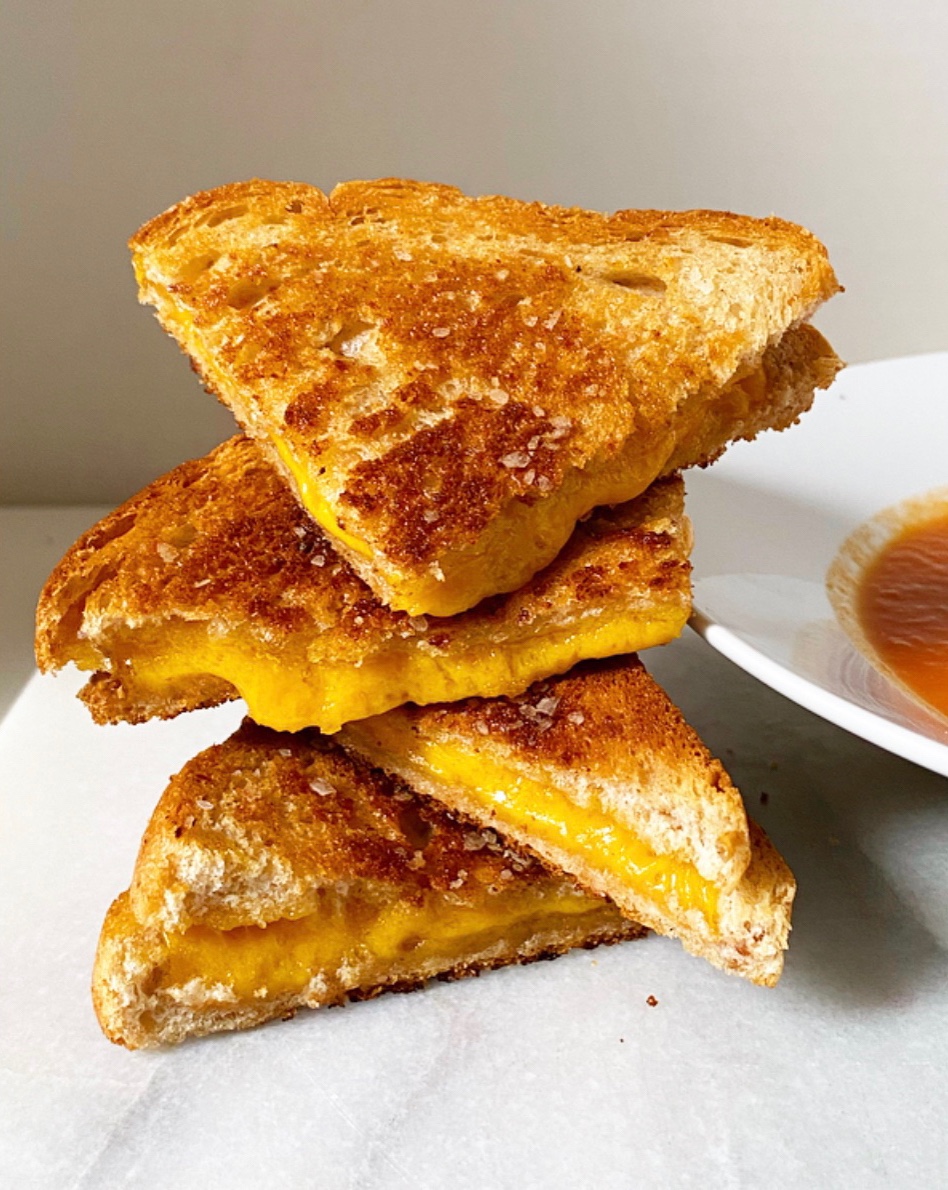
Boom! That’s all you need to know to make a basic Grilled Cheese. You can change up the cheese and bread depending on your mood, but as long as you butter the outsides of the bread instead of melting butter in the skillet and cook things low and slow, you will always have perfect Grilled Cheese.Grilled Cheese & Tomato Soup
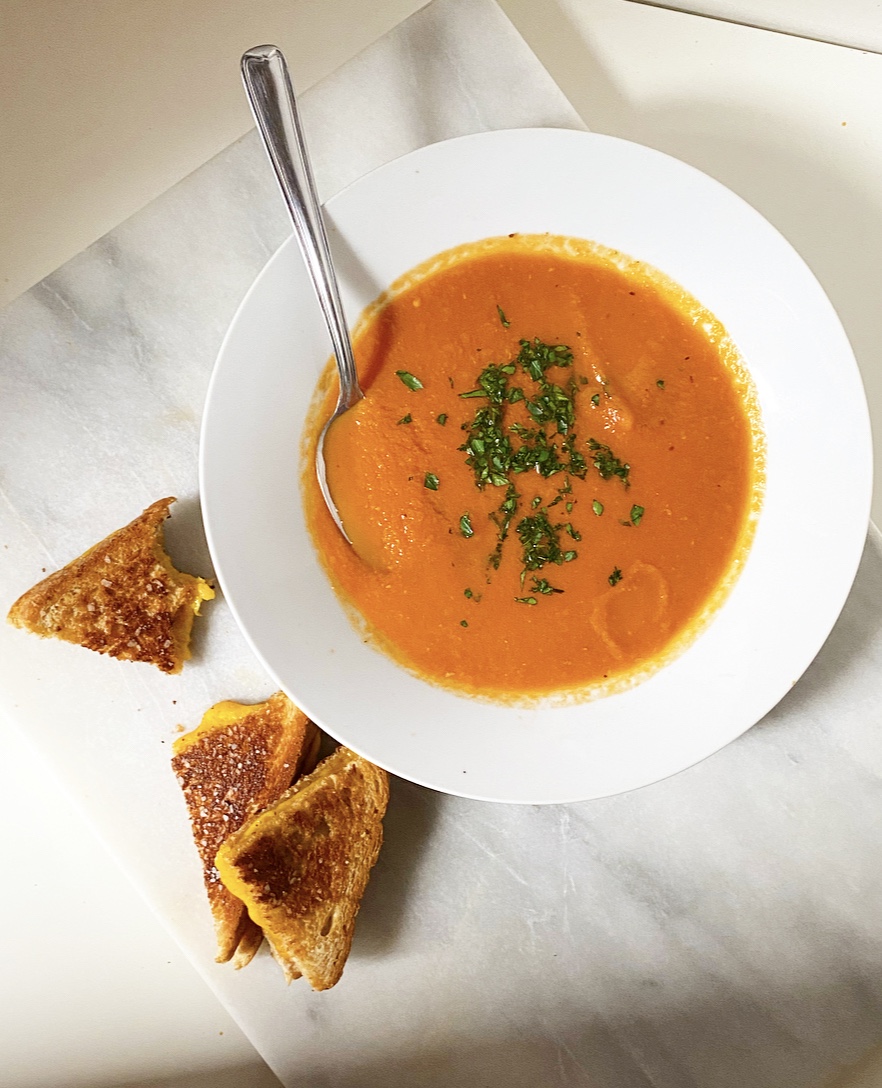
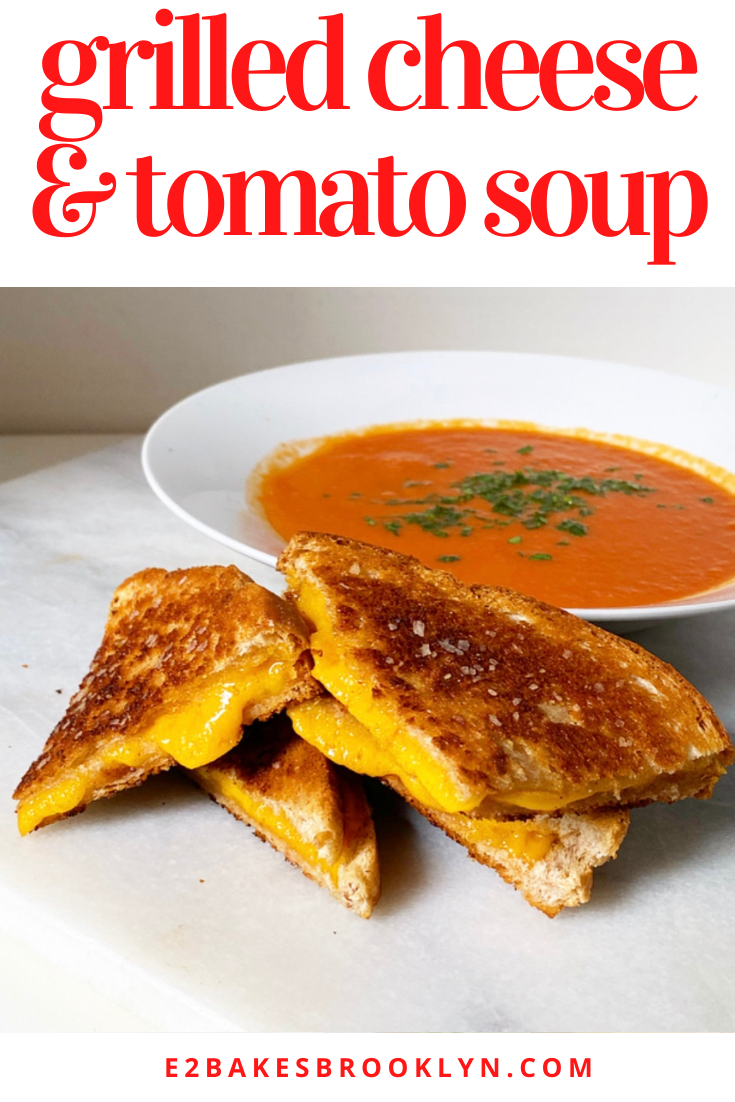
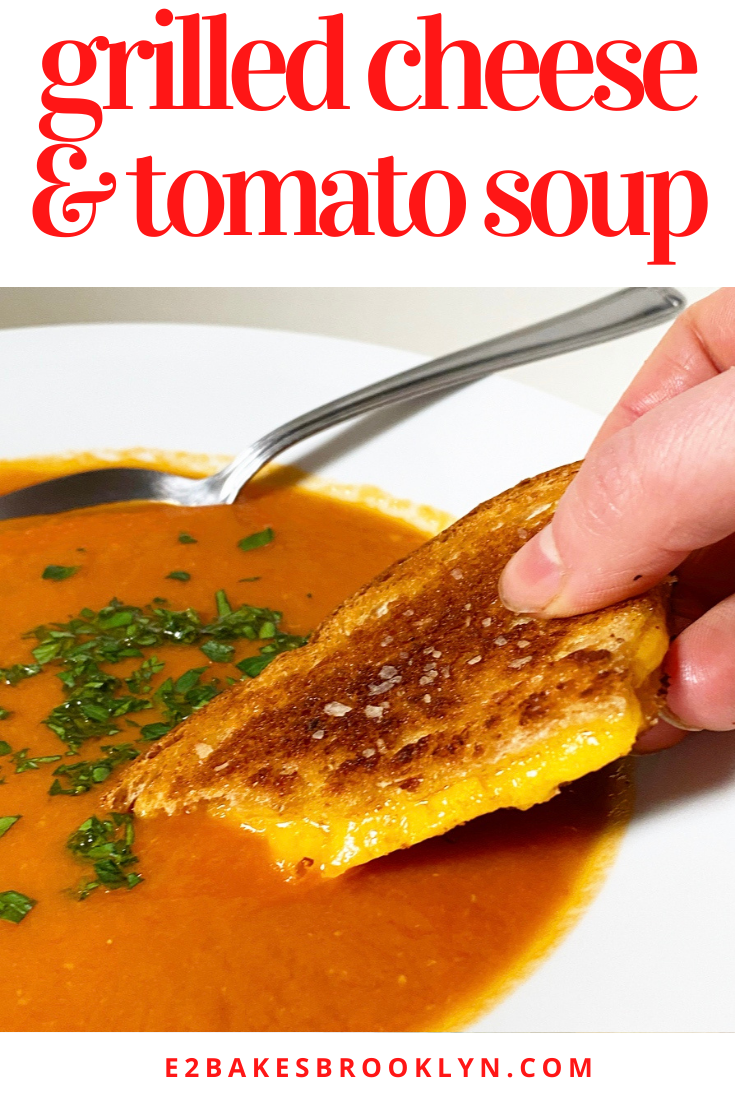
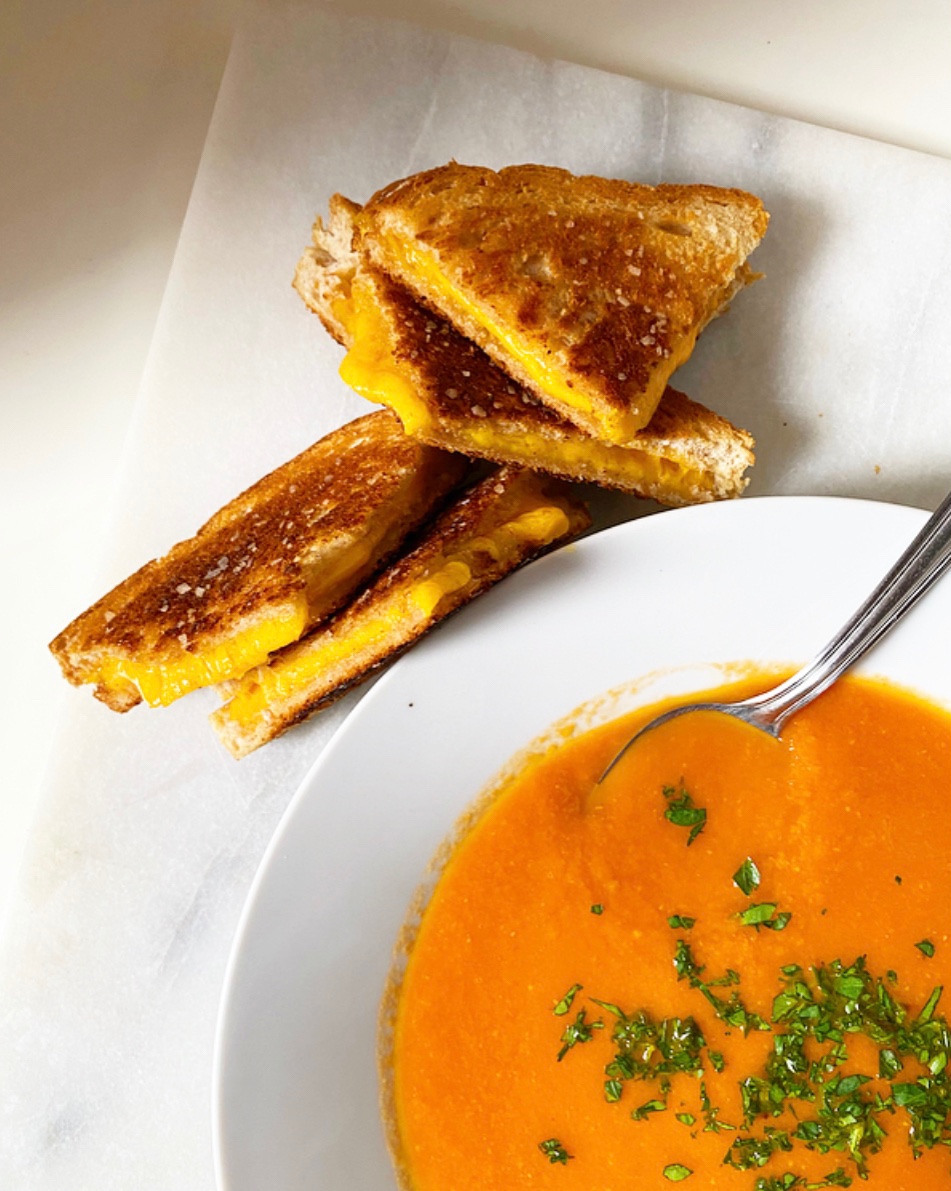
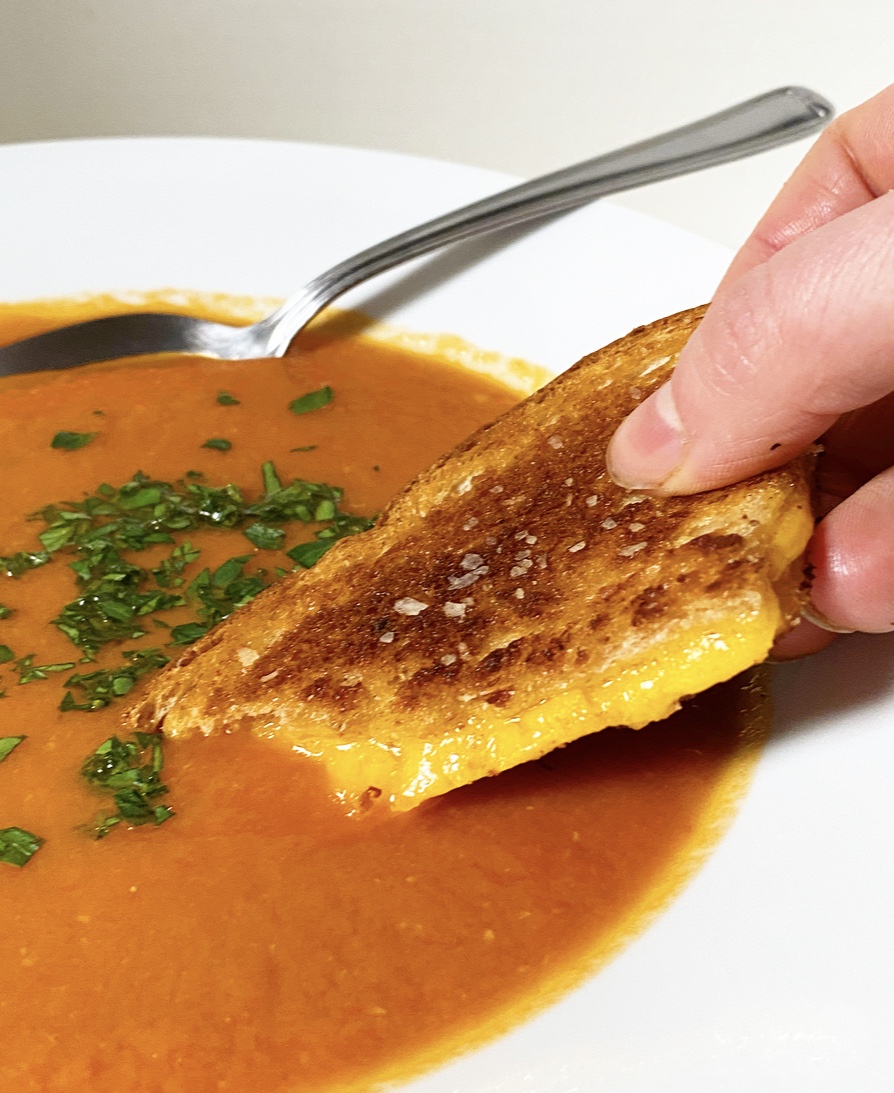
And what’s Grilled Cheese without Tomato Soup? This combination is a classic for a reason—the tang of tomato pairs perfectly with the rich, cheesy, crispy sandwich, making for a simple, satisfying meal.Grilled Cheese & Tomato SoupAs with Grilled Cheese, my go-to Tomato Soup recipe is easy as can be. Whole peeled tomatoes are crushed by hand, then simmered in vegetable stock with carrots, onion, garlic, tomato paste and spices before being puréed until velvety smooth. Easy peasy.
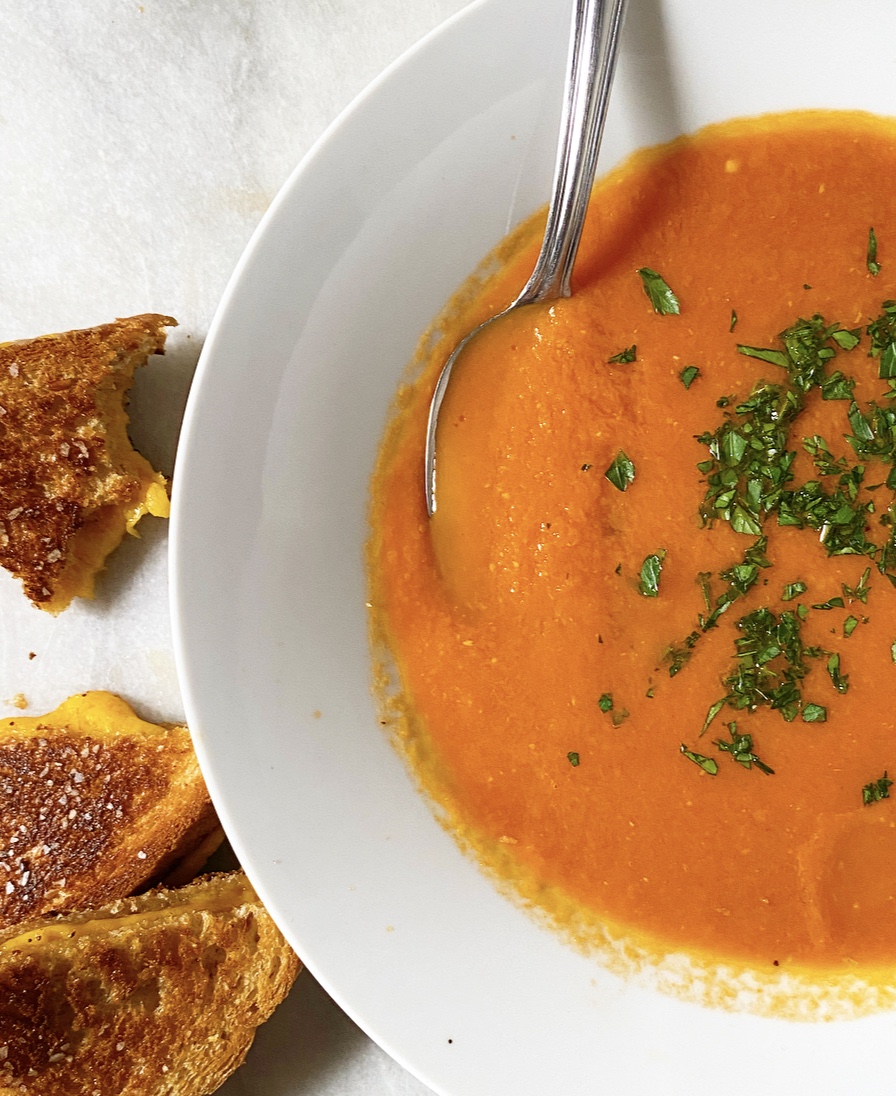
Grilled Cheese & Tomato SoupTwo things to note:

• I prefer to use canned whole peeled tomatoes instead of fresh. This is for a few reasons, but mainly because canned tomatoes give consistently delicious results. I love fresh tomatoes, but they are only in season for a few months of the year and January isn’t one of them.
• You’ll notice I like to add a pinch of baking soda at the end of cooking to neutralize some of the acidity, but you may also use a teaspoon of sugar or honey. Whatever works for you.Grilled Cheese & Tomato Soup
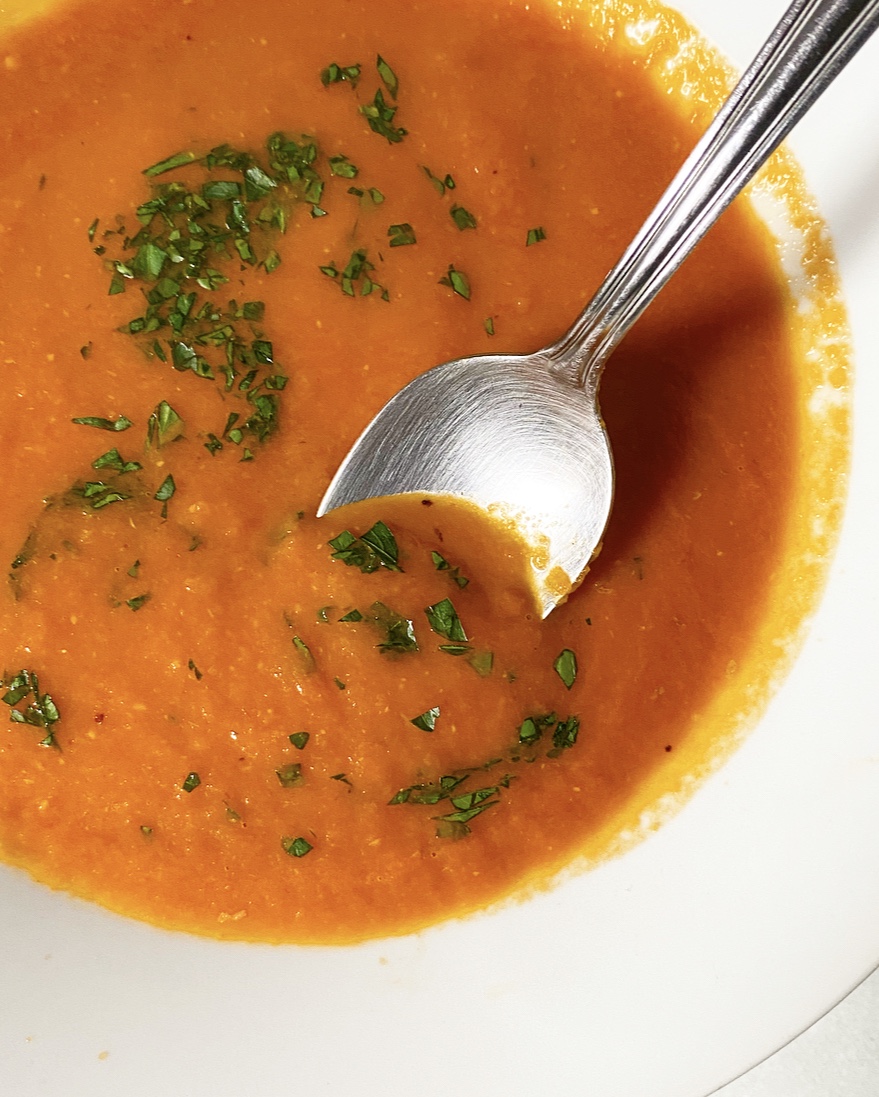
So there you have it—one of the simplest meals in the world, explained. Maybe you knew all this or maybe you didn’t. Either way, I hope you treat yourself this weekend. I know we could all use some comfort. No “maybe” about it.Grilled Cheese & Tomato Soup

Grilled Cheese Sandwiches
makes 2 sandwiches

4 slices sandwich bread (I like Dave’s Killed Bread White Bread Done Right)
2 tablespoons butter, softened
small pinch of salt, if using unsalted butter
4 ounces extra sharp cheddar or other melting cheese, thinly sliced

Spread 1/2 tablespoon of softened butter over one side of each piece of sandwich bread. If using unsalted butter, sprinkle butter with a small pinch of salt.

Turn 2 pieces of bread plain-side-up. Lay sliced cheese evenly over each plain side. Top cheese with remaining pieces of bread, buttered-side-up, so that the buttered sides of each slice of bread are on the outsides of the sandwiches.

Heat a medium-large heavy-bottomed skillet over medium-low heat. Add sandwiches and let cook, without moving or squishing, until they are golden on the bottom, about 4 minutes. Flip sandwiches and let cook, without moving or squishing, until they are golden on the other side, about 3-4 more minutes.

Serve immediately, with tomato soup (recipe below), if desired.

Tomato Soup
makes about 4 servings

1 28-ounce can whole peeled tomatoes
3 tablespoons unsalted butter
1 medium-large Spanish onion, diced
3-4 medium carrots, peeled and diced (about 1 cup)
1/2-1 teaspoon Kosher or sea salt, divided
4 cloves garlic, smashed, peeled & sliced
1/4 cup tomato paste
1/8-1/4 teaspoon red pepper flakes (or a pinch of ground cayenne)
4 cups vegetable stock (I use Better than Bouillon)
small pinch of baking soda or teaspoon of sugar, optional
chopped parsley, optional

Place tomatoes and any liquid in a mixing bowl. Use your clean hands to crush the tomatoes. Set aside.

Melt butter in a heavy-bottomed pot over medium heat. Add onion, carrots and pinch of salt, and cook for 5-7 minutes, until onion is starting to turn translucent but nothing has browned. Add minced garlic and cook about 1 minute or until fragrant. Add tomato paste and cook, stirring frequently, for about 5 minutes, until starting to darken.

Stir in red pepper flakes, hand-crushed tomatoes & their liquid, followed by vegetable stock. Bring to a boil, reduce to a simmer, and let cook for 20-25 minutes, until carrots have softened.

Purée soup with a hand blender. Alternatively, let hot soup cool for 15 minutes before transferring to a high-powered blender and puréeing. Be careful, as hot liquids expand during blending.

Taste soup and add salt as desired. If soup is too acidic, stir in a small pinch of baking soda or a teaspoon of sugar. Garnish with parsley and serve, with Grilled Cheese (recipe above) if desired.

Leftover soup will keep in an airtight container in the refrigerator for up to four days.

Grilled Cheese & Tomato SoupGrilled Cheese & Tomato SoupGrilled Cheese & Tomato Soup