 For a short week, this one has seemed endless. There has been change and growth and letting go and construction and a migraine that began on Tuesday night and continued well into Wednesday afternoon.
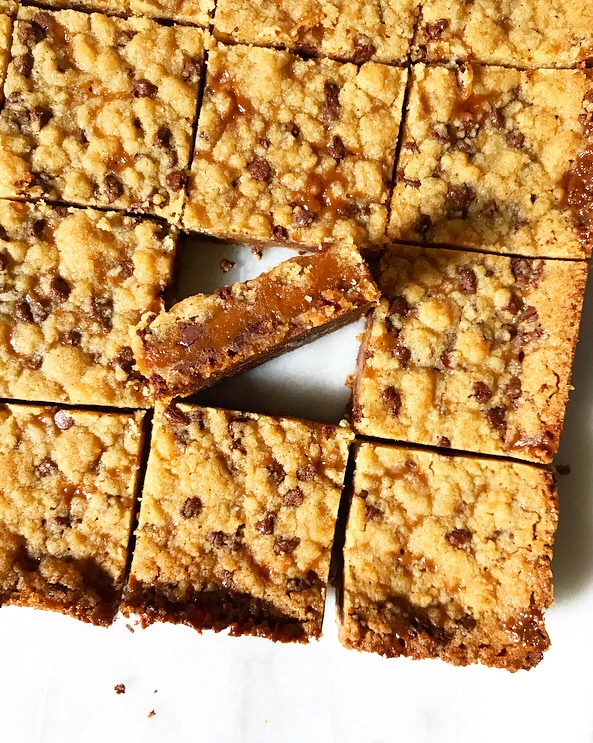
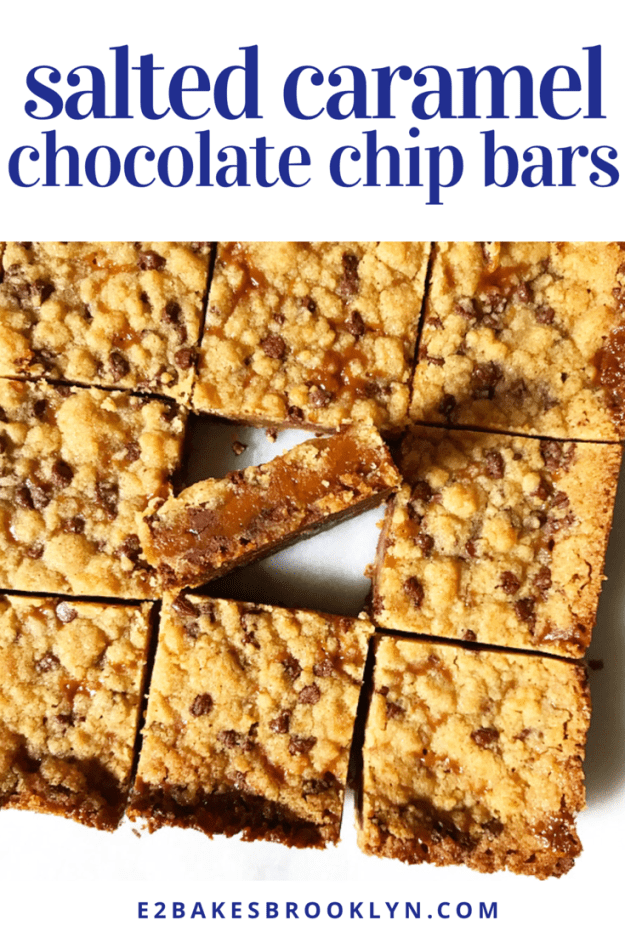
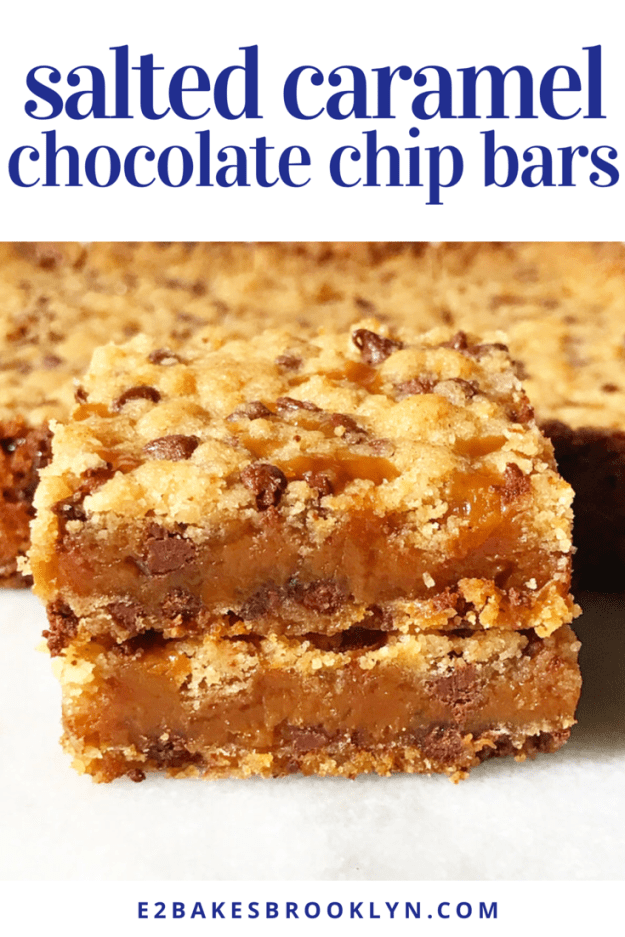
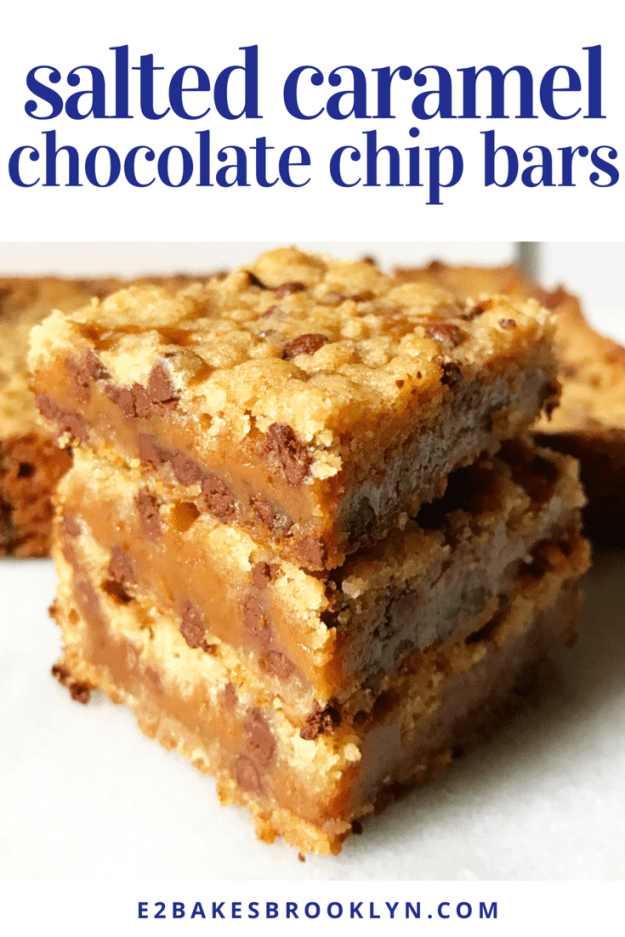
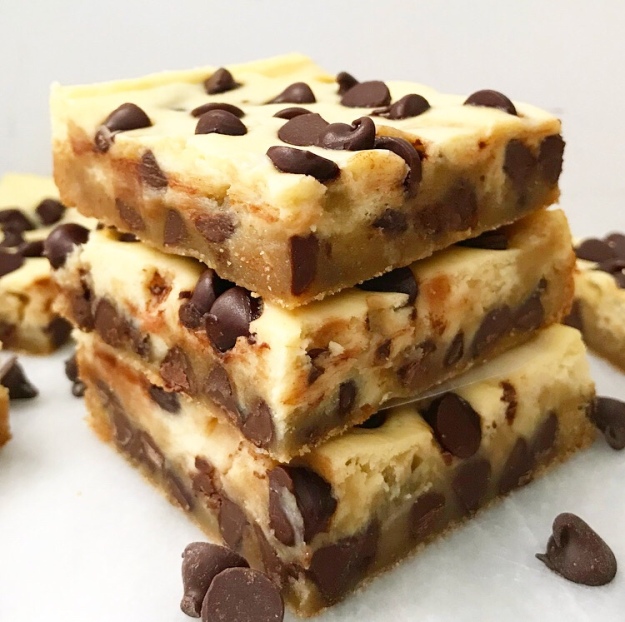
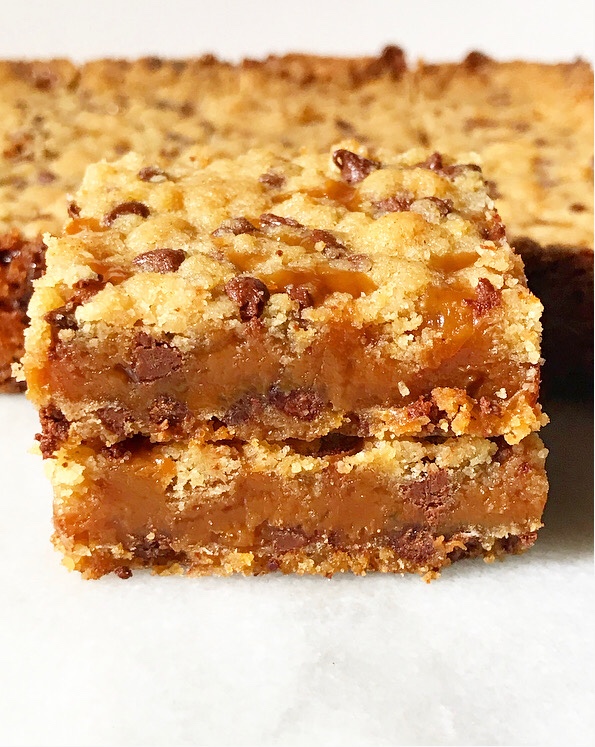 What I’m saying is that I could use a treat. Luckily, I have a refrigerator full of these Salted Caramel Chocolate Chip Bars, which are the perfect chewy, gooey, crispy-edged, chocolate-studded sweet to counteract all the negative energy in my immediate vicinity.
 In addition to being a perfect flavor and textural combination, these bars are super easy to make. The cookie layers are simply a chocolate chip cookie play on the crumb I used in my Sweet Cherry Sugar Cookie Crumble. It comes together in five minutes and only requires one bowl—score!
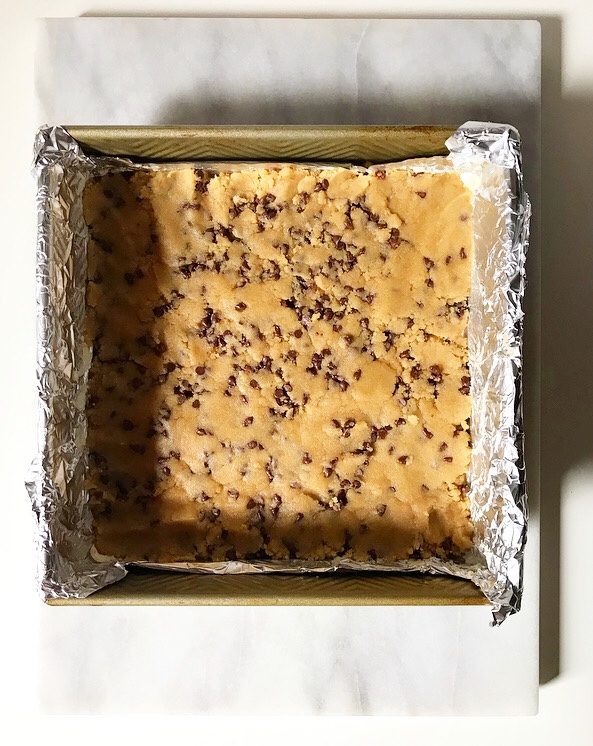 A little more than half of the cookie mix gets pressed into the bottom of a 9-inch square pan. Then comes the salted caramel, which is simply a bag of soft caramel candies that are melted with salt and heavy cream.
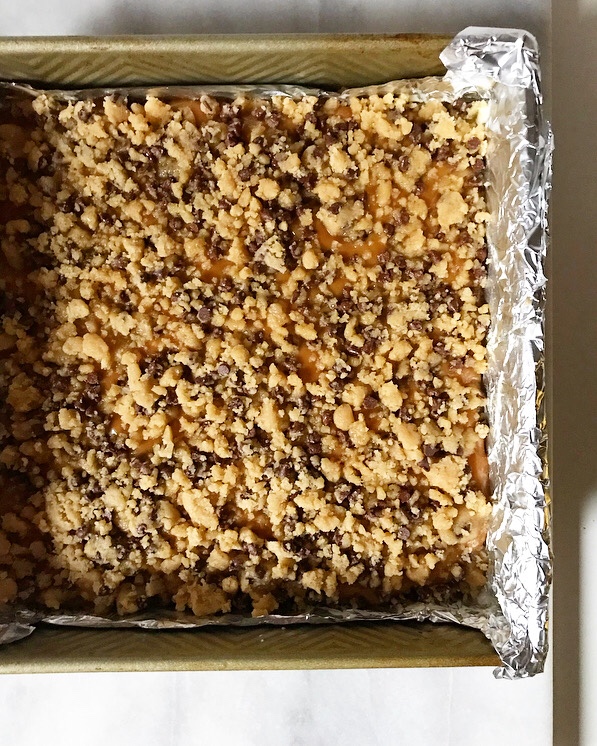 The remaining cookie mix is scattered over the top of the caramel and then everything is baked until the edges are crisp and the caramel is starting to bubble up through the cookie crumble.
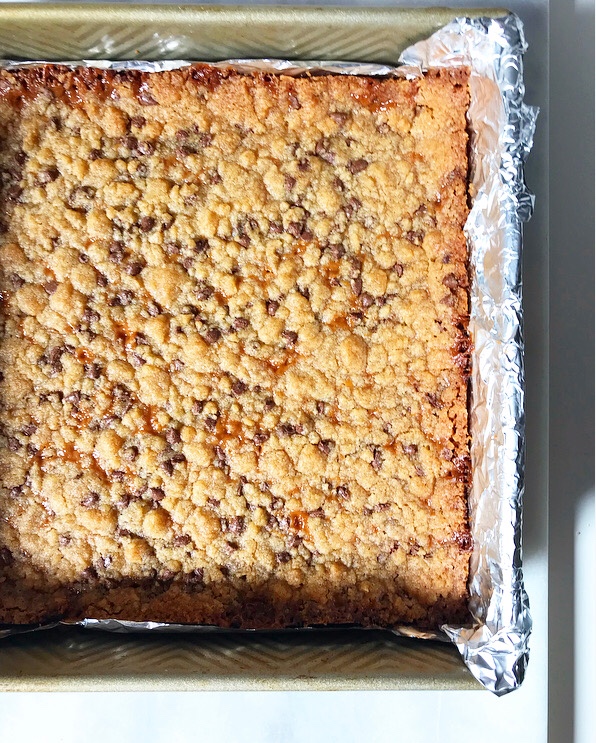 Let your bars cool completely before slicing. If you try to cut them before they’re cool, you won’t get the satisfaction that comes with clean edges and beautiful layers (if not perfect evenness).
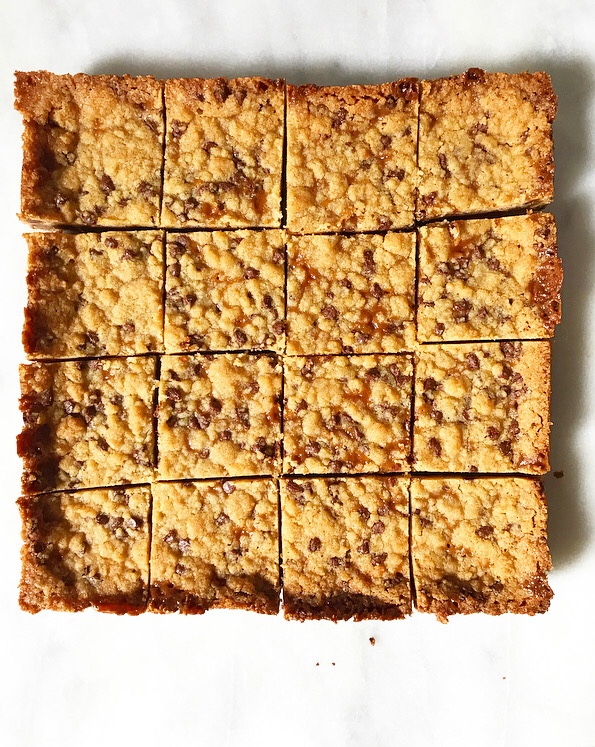 And that’s to say nothing of the buttery chocolate chip cookie layers and the gooey, salty caramel filling, which are a match made in dessert heaven. So, so delicious.
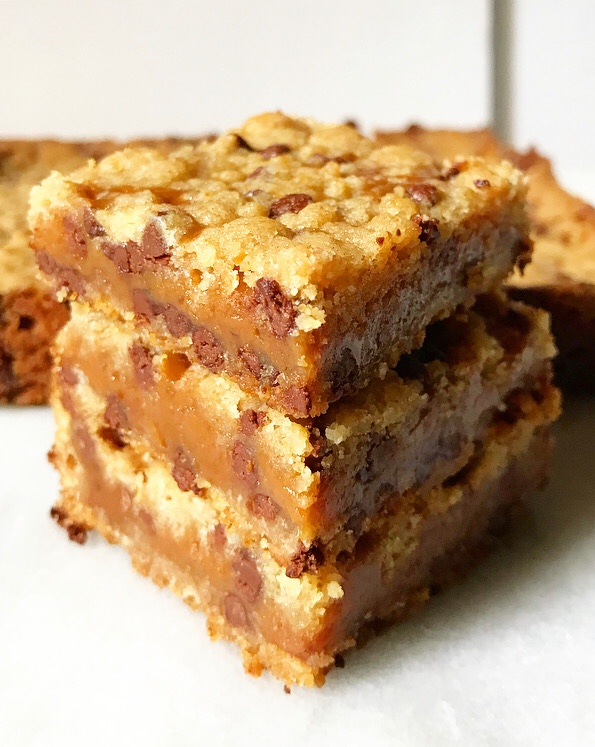 I logically know that dessert is not going to change the world, but I can’t seem to look at these and see anything but goodness. Salted Caramel Chocolate Chip Bars can’t solve my problems, but four bites of salty-sweet caramel sandwiched between layers of crisp cookie can certainly help soften the blow, am I right?!
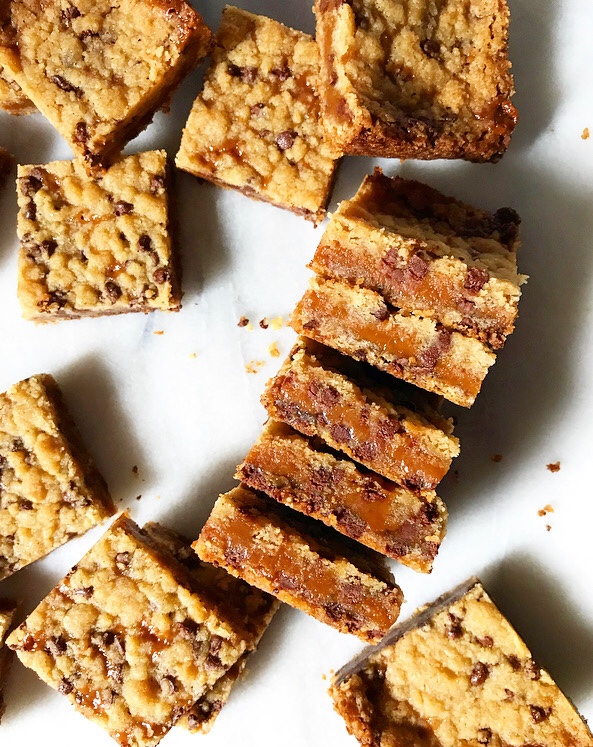
Salted Caramel Chocolate Chip Bars
makes about 16 bars
Chocolate Chip Dough:
1 1/2 cups all-purpose flour
1 cup light or dark brown sugar, packed
1 teaspoon baking powder
1/4 teaspoon Kosher or sea salt
1 1/2 reaspoons pure vanilla extract
3/4 cup (1 1/2 sticks) unsalted butter, melted
1/2 cup mini chocolate chips
Salted Caramel Filling:
1 11-ounce bag caramel candies, unwrapped
6 tablespoons heavy cream
1/2 teaspoon fine sea salt (or 3/4 teaspoon Kosher salt)
Preheat oven to 350F. Line an 8- or 9-inch square pan with aluminum foil and grease with butter. Set aside.
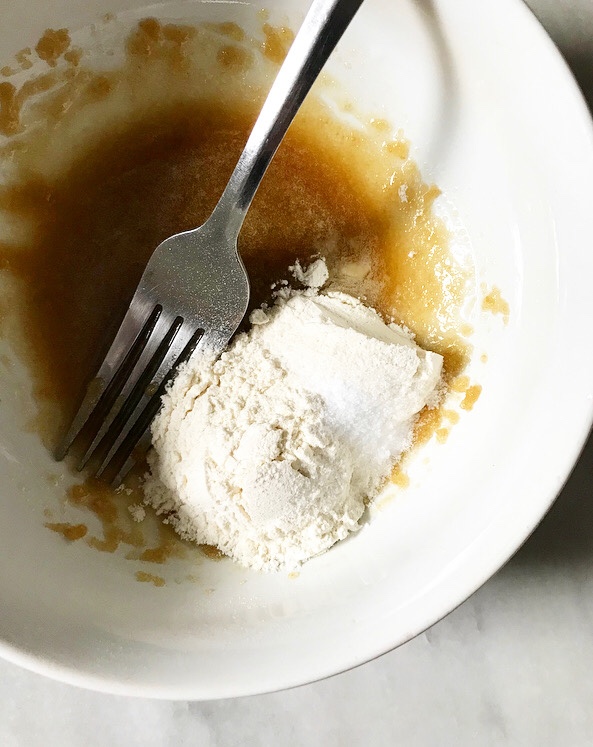
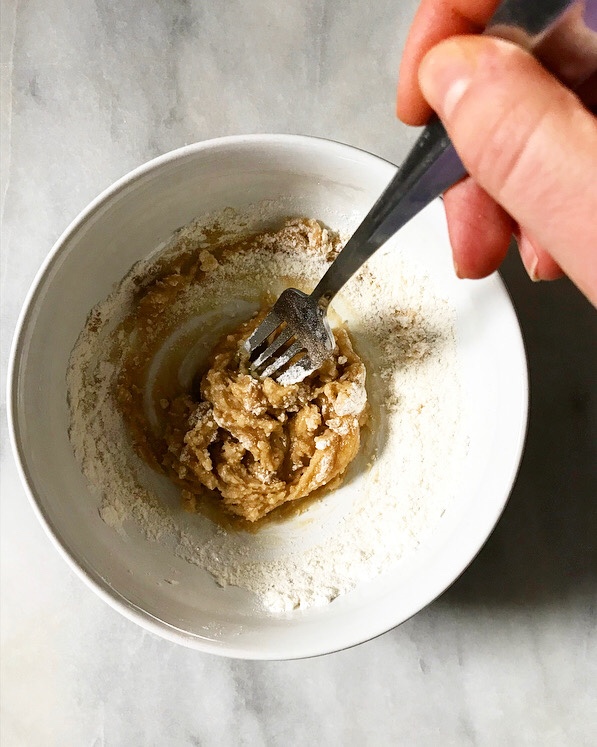
Make the chocolate chip dough. In a medium mixing bowl, whisk together flour, brown sugar, baking powder, and salt. Add vanilla and melted butter and whisk until combined. Use a silicone spatula or wooden spoon to fold in mini chocolate chips. Set aside. Dough may seem crumbly.
Make the salted caramel layer. Combine caramels, heavy cream, and salt in a small saucepan over medium heat. Stir constantly until melted and smooth, about 5 minutes. Remove from heat. Set aside.
Firmly press about 1 1/2 cups of the chocolate chip dough into a thin, even layer at the bottom of the prepared pan. Pour caramel over the top and smooth to the edges. Scatter remaining dough mixture over the top. Try not to leave any huge areas of caramel uncovered, lest it burn.
Bake full pan for 23-26 minutes, or until turning golden at the edges. Caramel will be liquid straight out of the oven, but will set as bars cool. Let cool completely in the pan on a rack.
Slice bars with a lightly greased chef’s knife, wiping the blade clean between cuts. Do not try to slice bars until they are completely room temperature.
Bars will keep in an airtight container at room temperature for up to five days. Layer them with wax paper to keep them from sticking together.
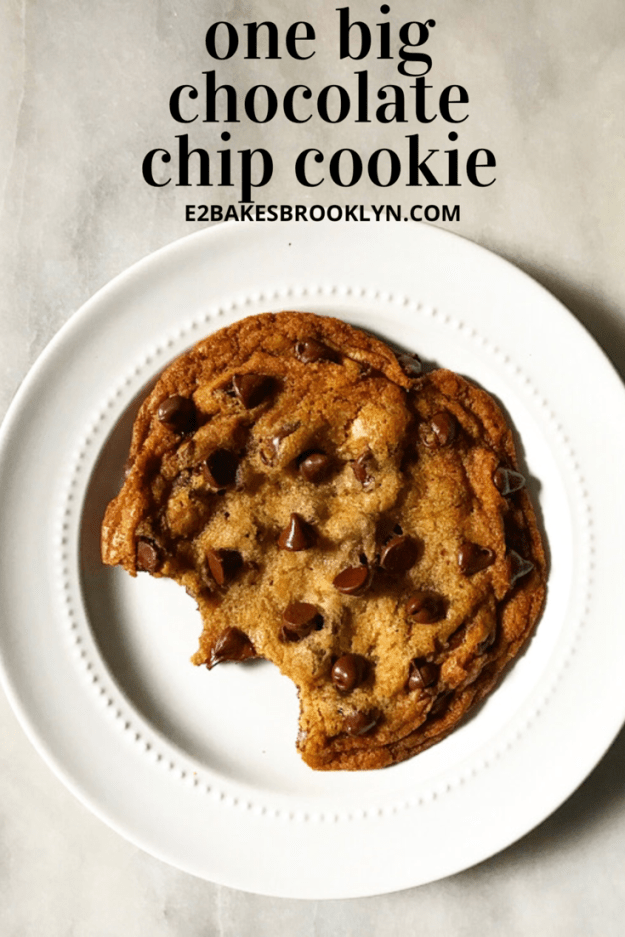
 I know I’ve been keeping it
 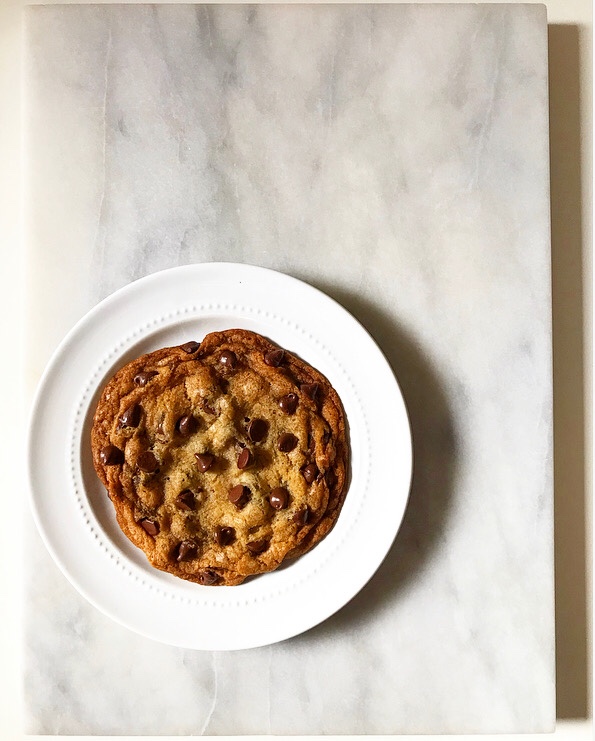 My partying days are well behind me now. I don’t drink or smoke anymore. I quit Diet Coke completely and have cut my seltzer intake to a maximum of two a day. My coffee…well, that’s neither here nor there.
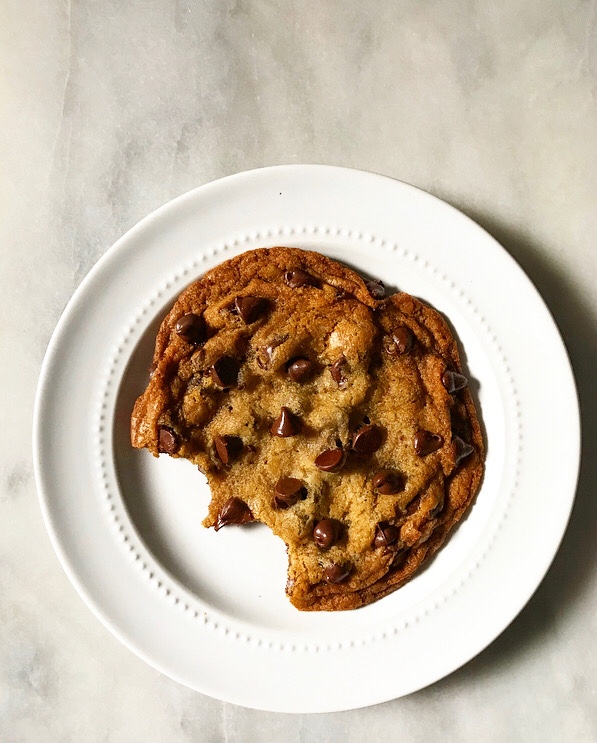
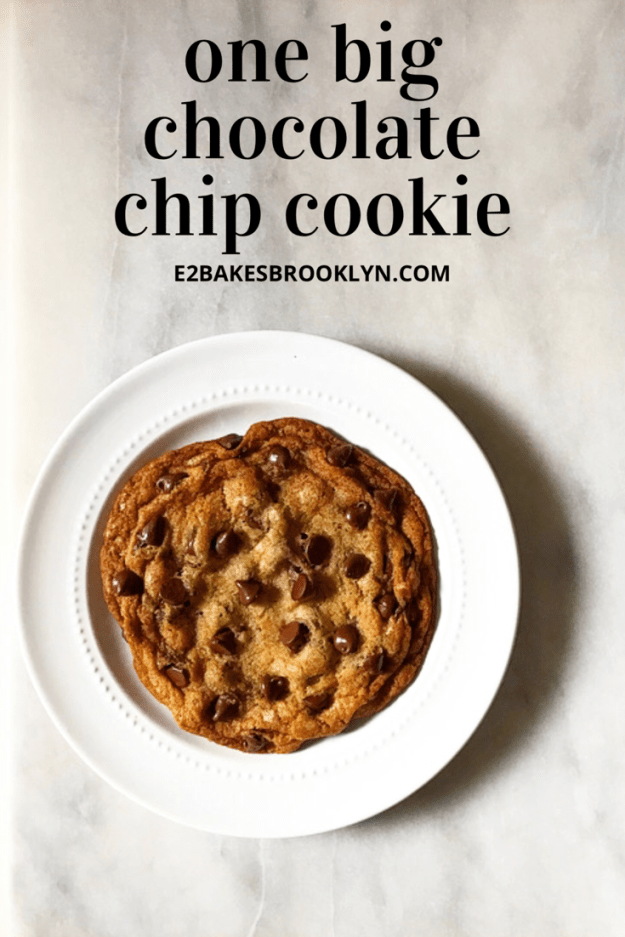
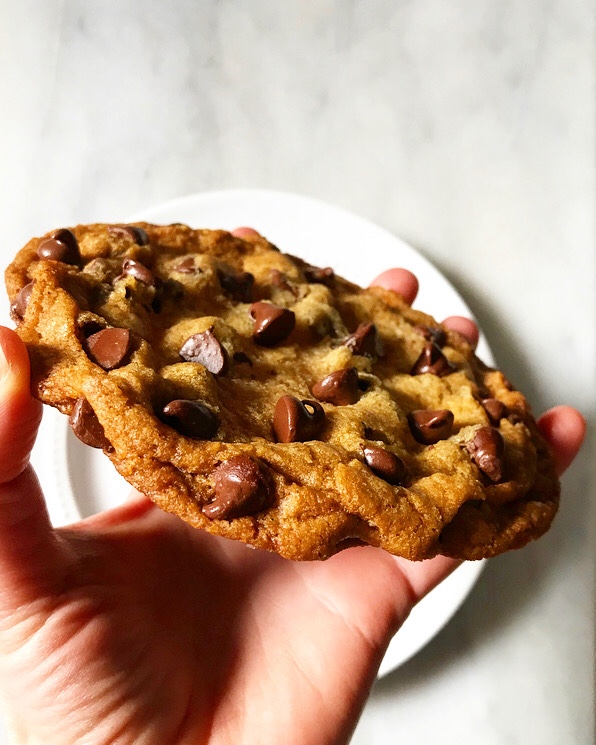 The point is that my list of vices is pretty short these days, but making myself One Big Chocolate Chip Cookie on the occasional late night is one that I have no intention of parting with. Sometimes you just need a cookie the size of your face. Sometimes it’s the answer to all your problems.
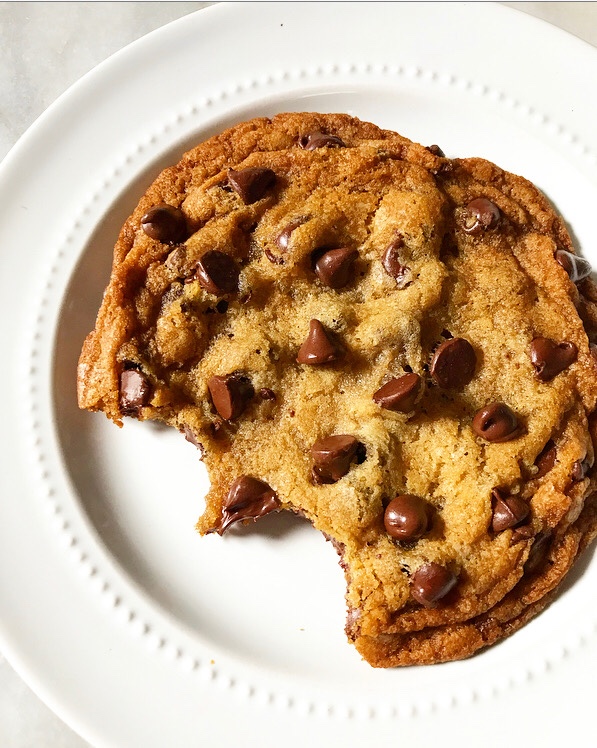 But this is a baking blog so…back to this big, no-sharing-required dessert for one (or two, if you’re feeling benevolent). It requires miniscule amounts of 8 ingredients that you likely already have, and only about 25 minutes start-to-finish.
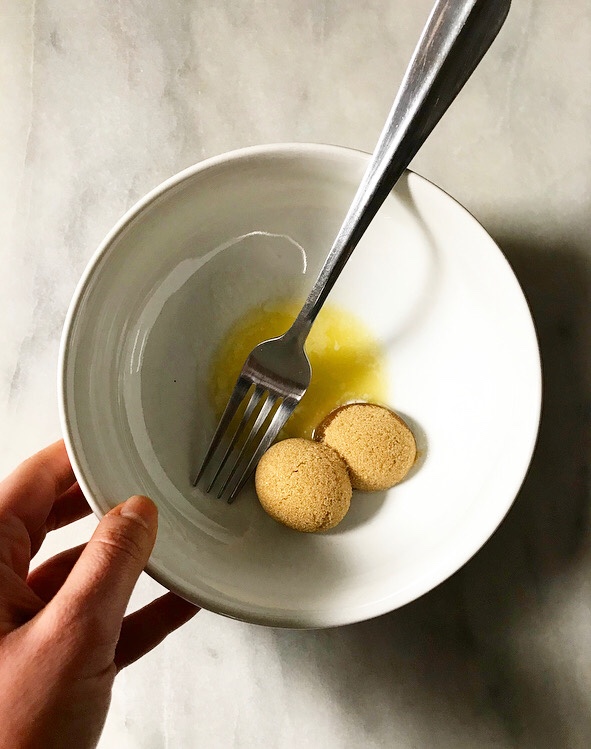
 This recipe differs drastically from that of my usual
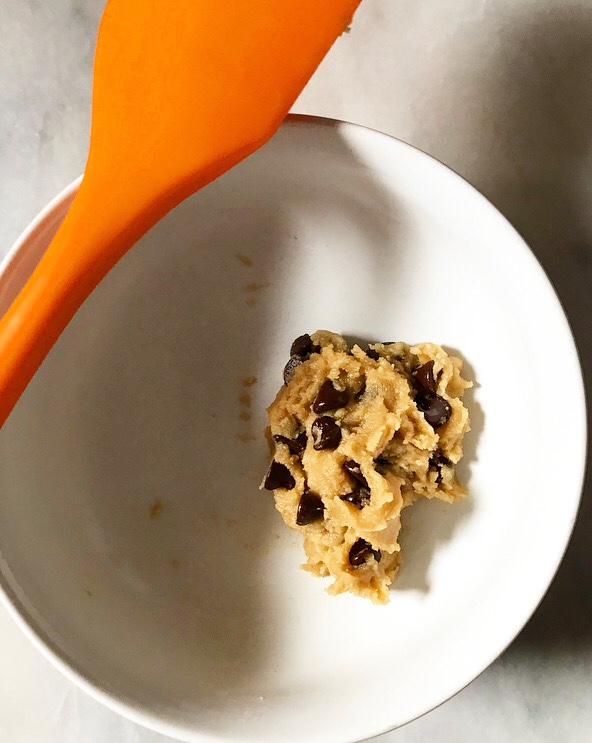
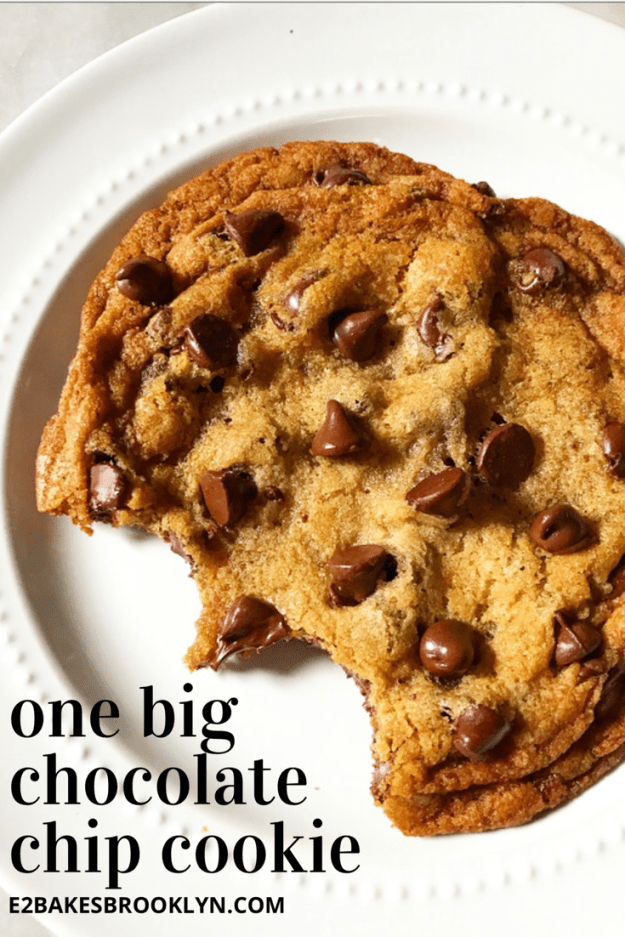
 The other differences from my regular recipe are less…scientific. I use melted butter here because creaming one tablespoon of butter is ridiculous and unnecessary. Oh, and there’s no need to chill your dough. This recipe is meant to be made on the fly and enjoyed while the chocolate is still melty.
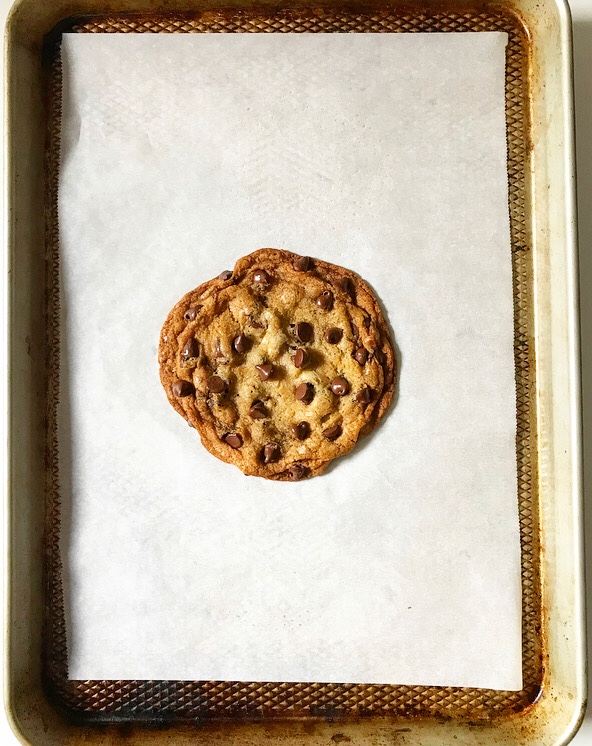 Melted chocolate + soft centers + chewy caramelized edges = ❤ ❤ ❤
 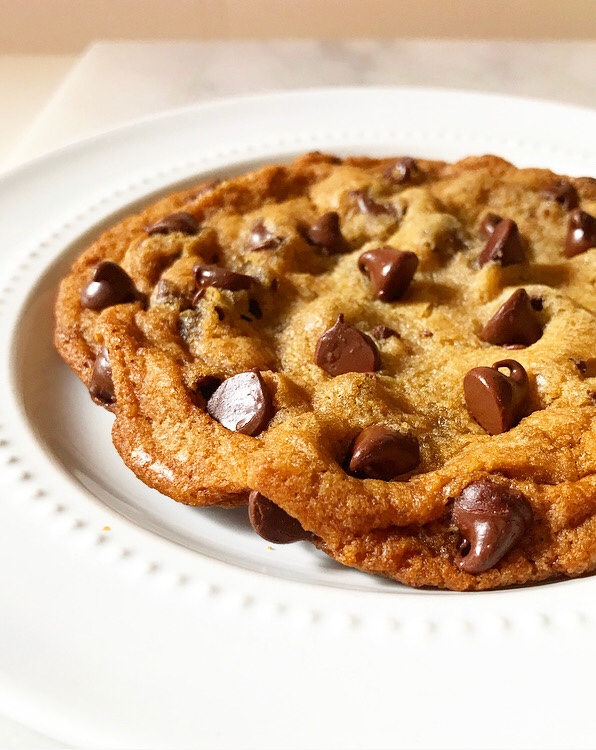 A quick word about leaveners before I get to the recipe. I tested this recipe seven times (!) with both baking soda and baking powder. Baking soda, which I use in my large-batch recipe because it produces browner cookies with more surface area, won out, but just barely.
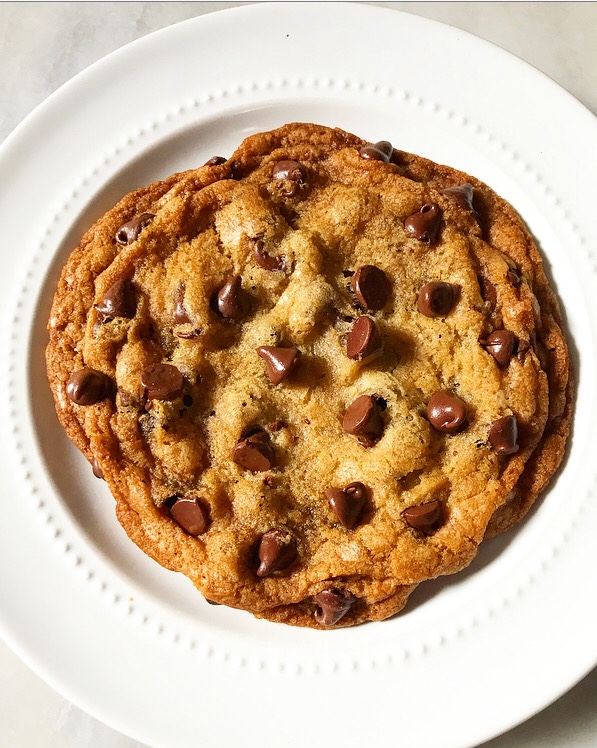 Thank me later.
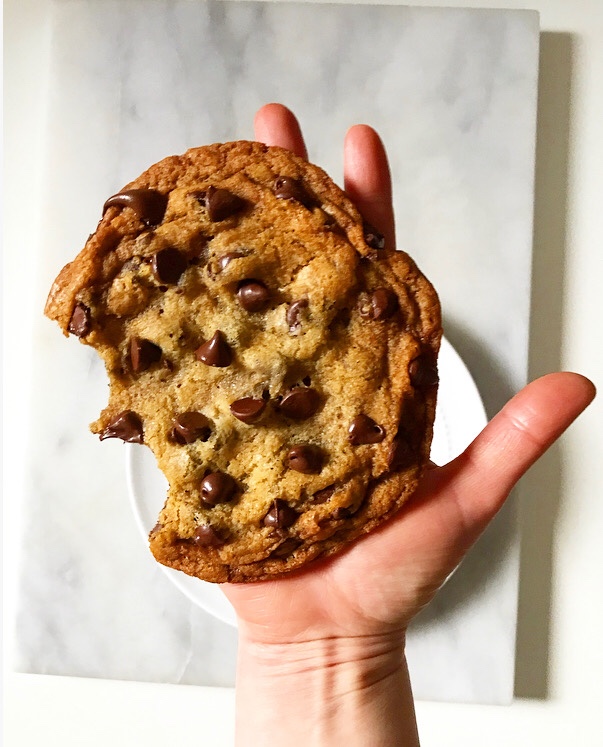
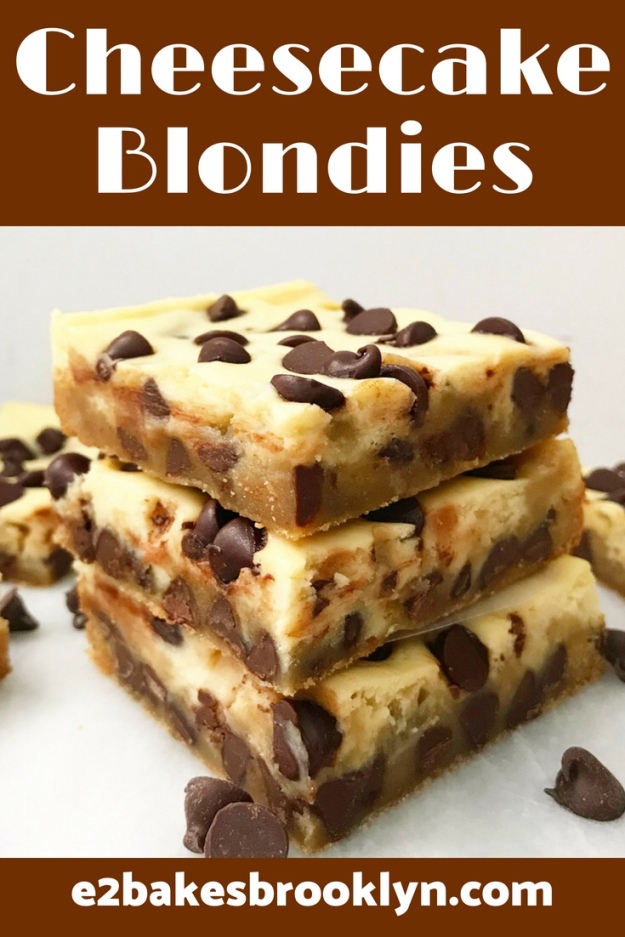
 I have been debating for three days whether or not I should post these Cheesecake Blondies or use Independence Day as a “free pass” to take a rare blog day off.
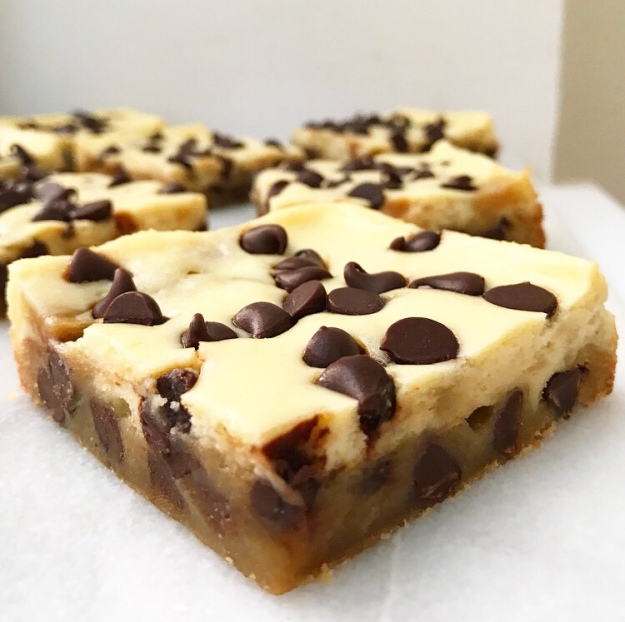 Cheesecake Blondies won out though, because they are the perfect treat to sink your teeth into while you watch the fireworks. Creamy cheesecake and chewy
 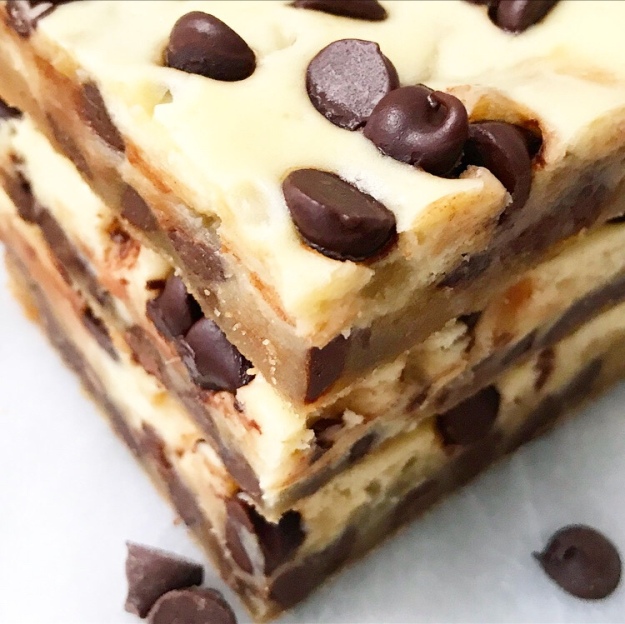 Another great thing about these blondies? They are super easy to make and bake up in just 25 minutes!
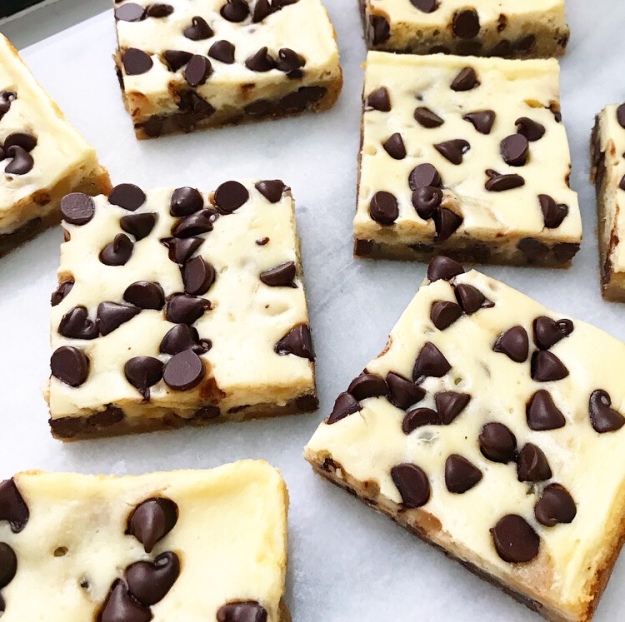 The most difficult part of making Cheesecake Blondies is waiting for them to chill. Those three hours can seem eternal, but they are completely necessary—nobody likes warm cheesecake.
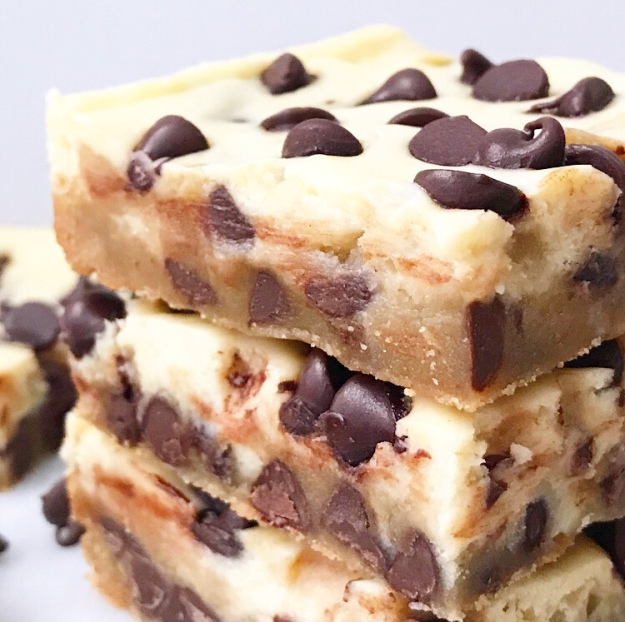 Once the chill time is up, slice up the blondies and revel in their cuteness. Chocolate chips have a way of making things more adorable, don’t they?
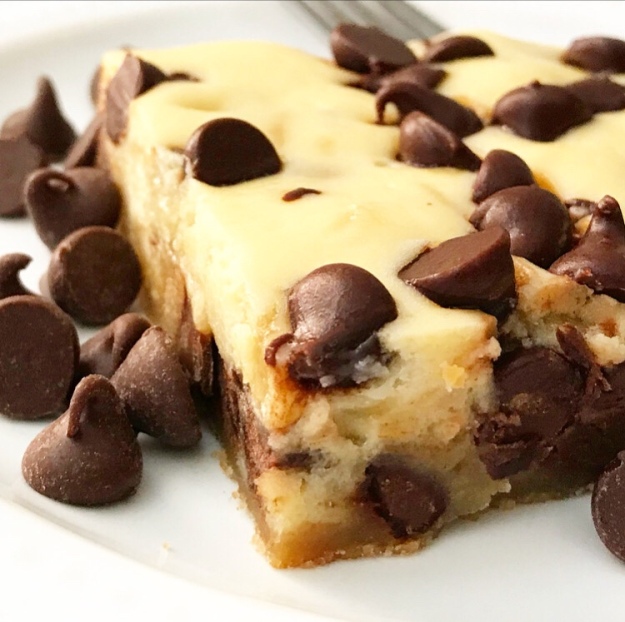 Make a batch of Cheesecake Blondies for your holiday cookout or pack a box into a cooler and take them on the go! You and your friends and family will love the combination of tangy cheesecake and sweet, brown buttery blondie ❤
 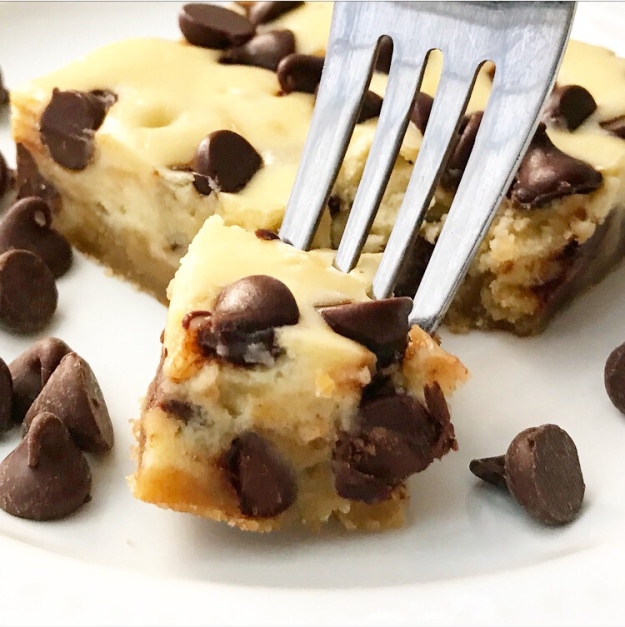 Happy Fourth of July!
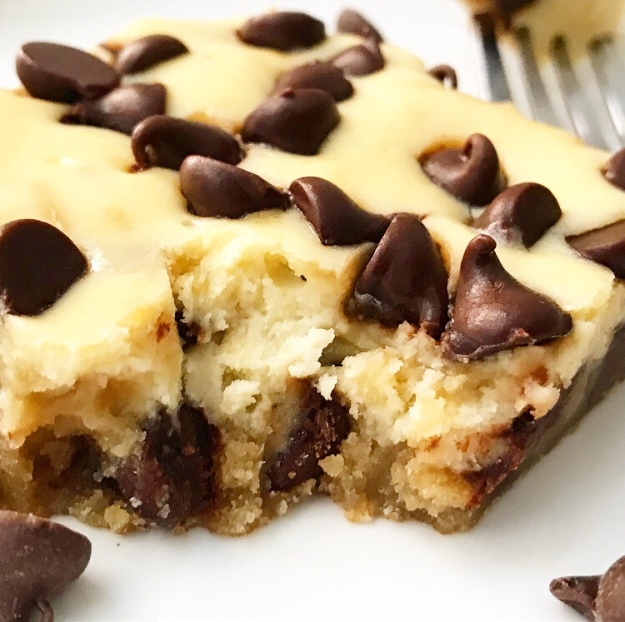
 I put a poll on my
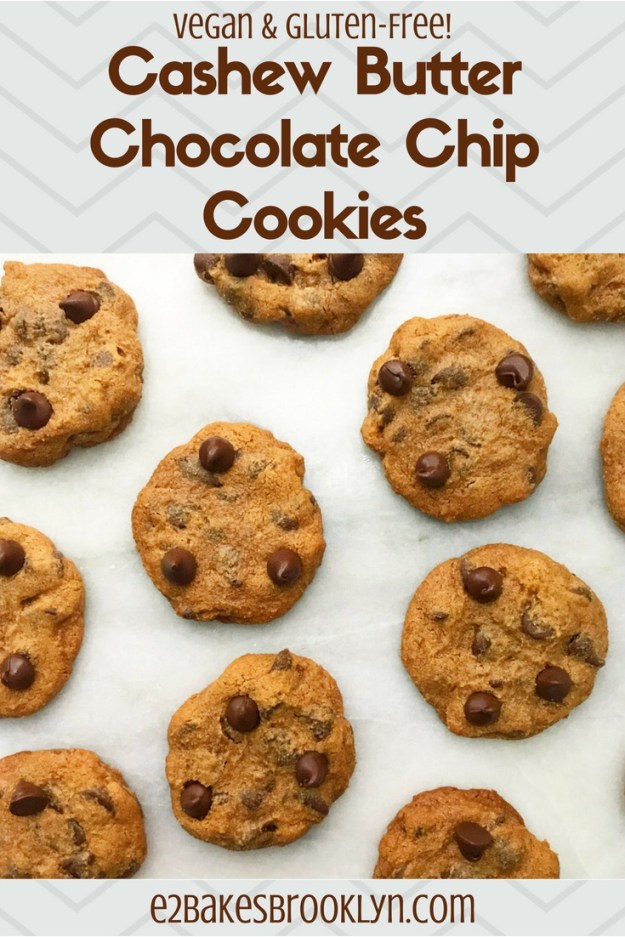
 I’ve eaten a lot of desserts in my life—A LOT—but as far as sheer enjoyment goes, I still think it’s pretty hard to beat homemade chocolate chip cookies. The combination of caramelized brown sugar cookie and semisweet chocolate chips is about as perfect as it gets, don’t you think?
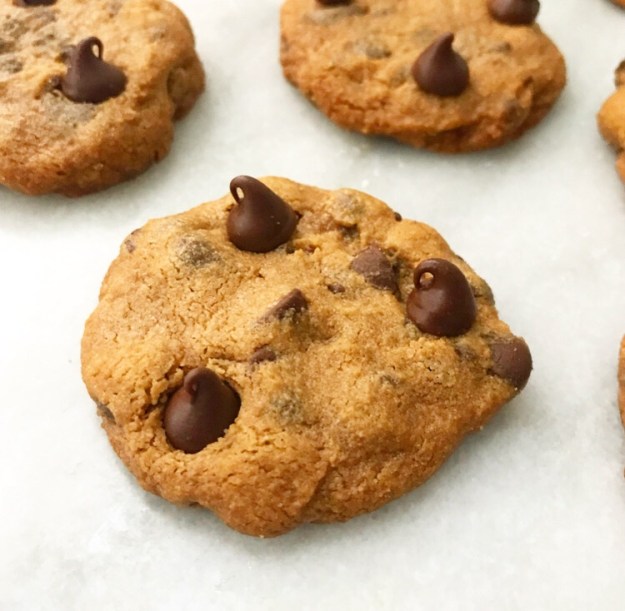 My favorite chocolate chip cookie
 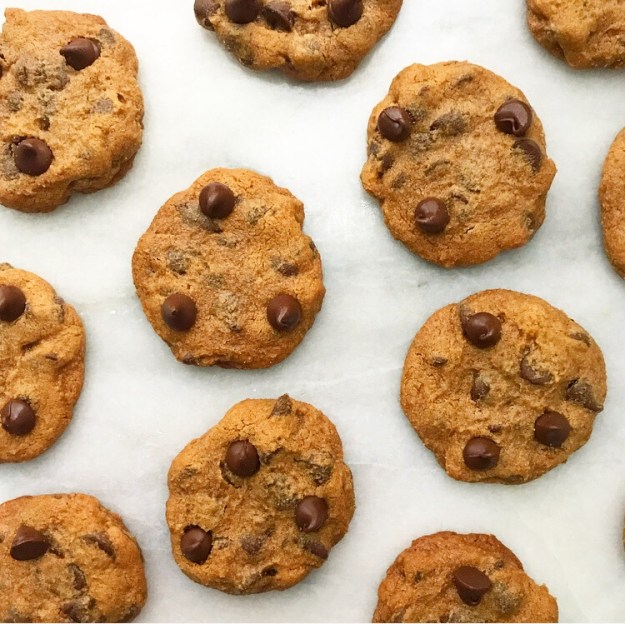 That’s right—these delectable chocolate chip cookies are made with creamy cashew butter in place of a traditional flour base, making them gluten-free. If you’ve been around here for a while, you know I have a bit of an obsession with reimagining classic cookies with a cashew butter base. The smooth, buttery flavor of cashews is a perfect jumping off point for revamping all sorts of cookie jar favorites! I posted
 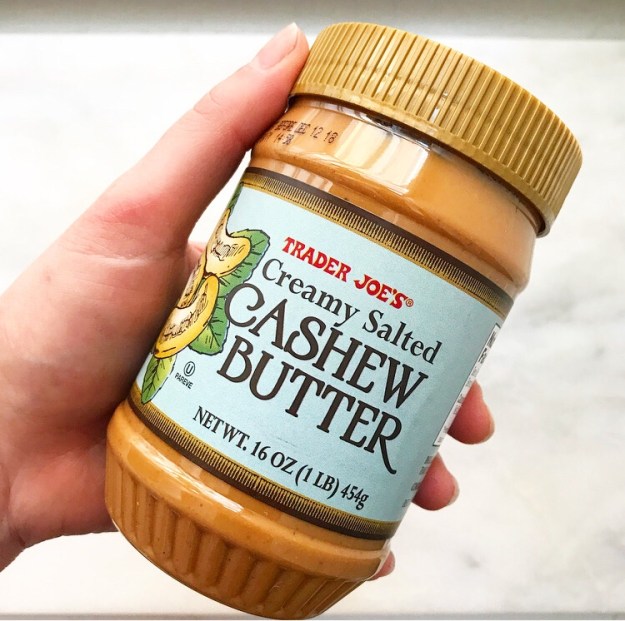 Another great thing about these Cashew Butter Chocolate Chip Cookies? They’re vegan! The natural oil in the cashew butter negates the need for butter, and the usual egg is swapped for a few tablespoons of
 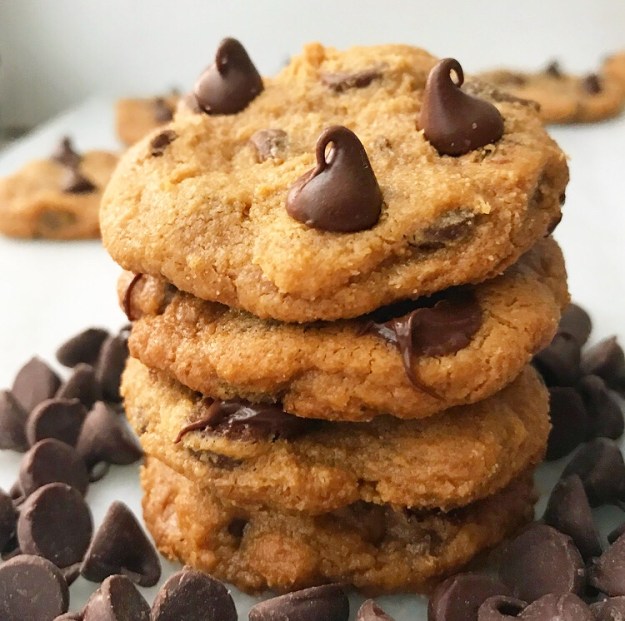 You’ll notice that these cookies don’t have the slightly raggedy edges of my other forays into cashew butter cookies. That’s because I finally figured out that these cookies bake up in a more aesthetically pleasing way if you flatten them before they go in the oven.
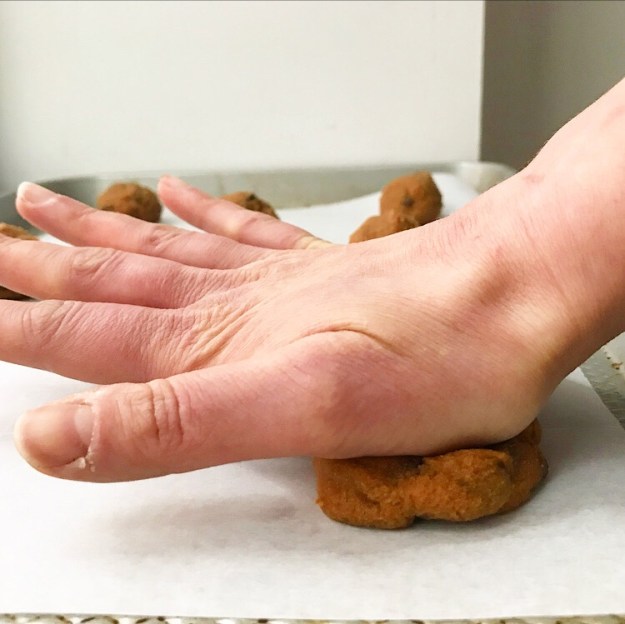 *cue
*cue 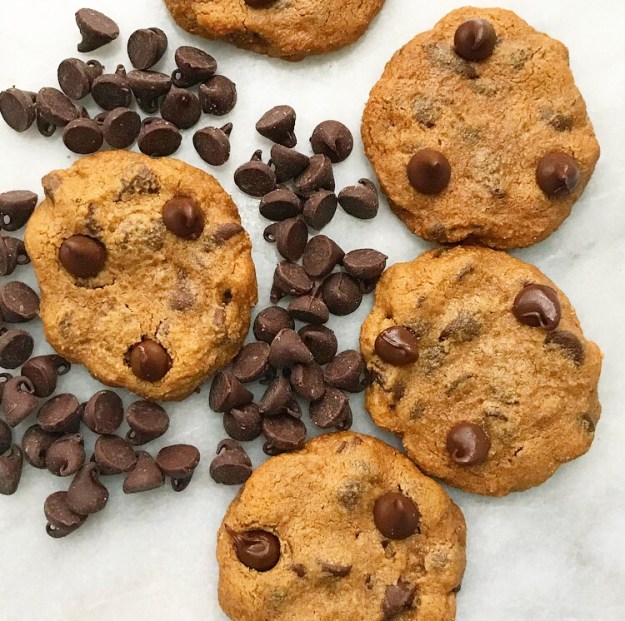 I’m going to gush a little more about these cookies and then I swear I’m done 😉 This recipe doesn’t require anything beyond a whisk, a silicone spatula, and a bowl. There’s no required chill either–if you turn on the oven right now, you can have an entire batch of cookies ready to go in just about an hour!
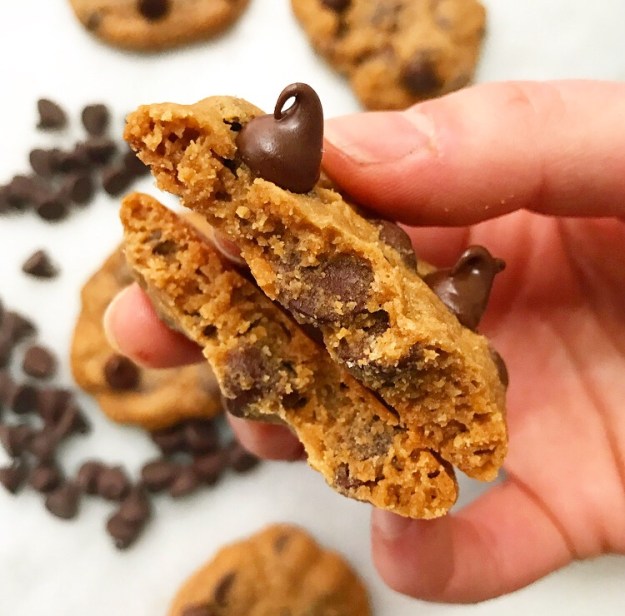 Seriously, there are so many good things to say about Cashew Butter Chocolate Chip Cookies. Their shockingly-close-to-the-real-deal flavor and soft & chewy texture are enough to capture just about any cookie-loving heart ❤ My favorite thing about them though is that they’re vegan and gluten-free, so I can share them with more friends. I’m pretty sure that the only thing better than a fresh homemade batch of chocolate chip cookies is having people to share them with.
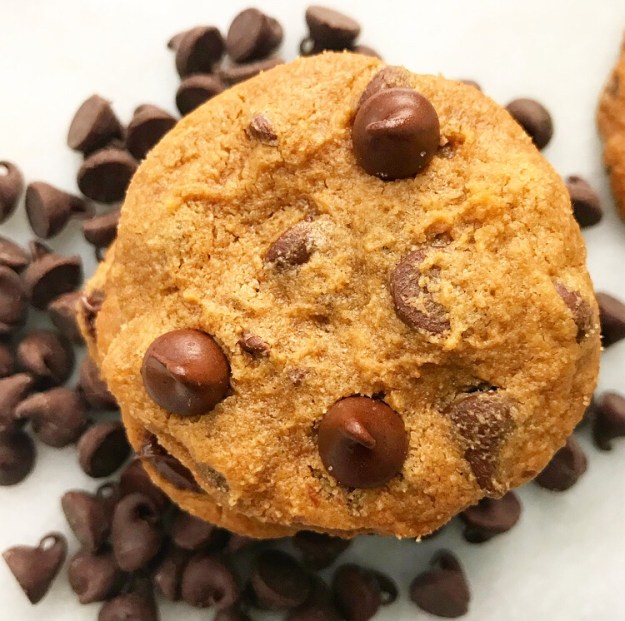 Cashew Butter Chocolate Chip Cookies {Vegan & Gluten-Free}