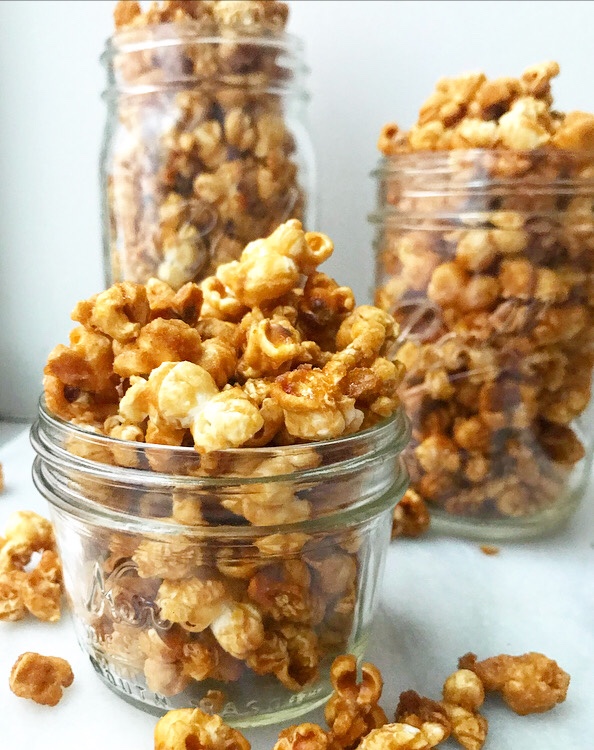
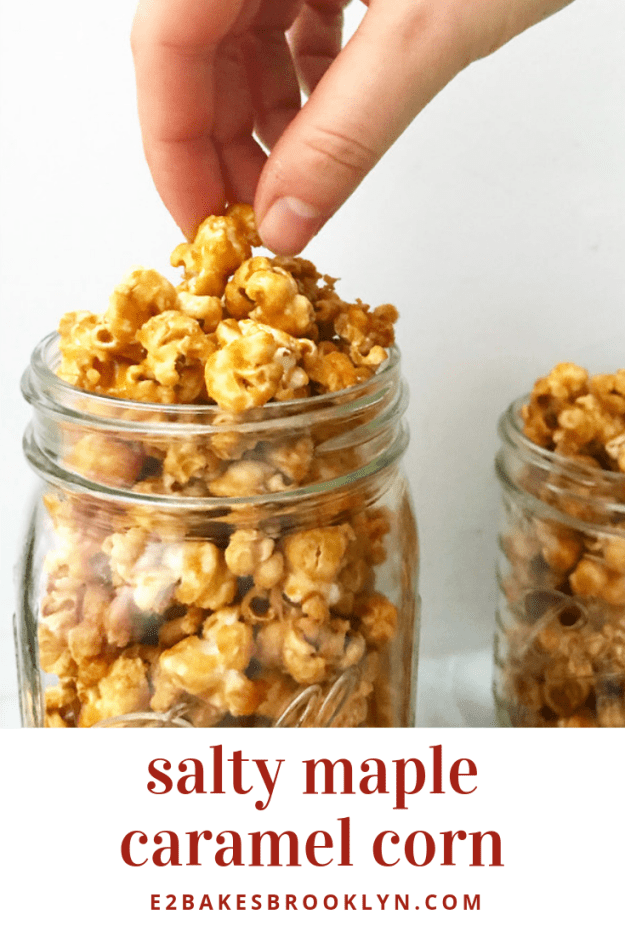
 I’ve got maple syrup on my mind, y’all! Last week, it was in the form of a Maple Layer Cake. Today, it’s Salty Maple Caramel Corn!
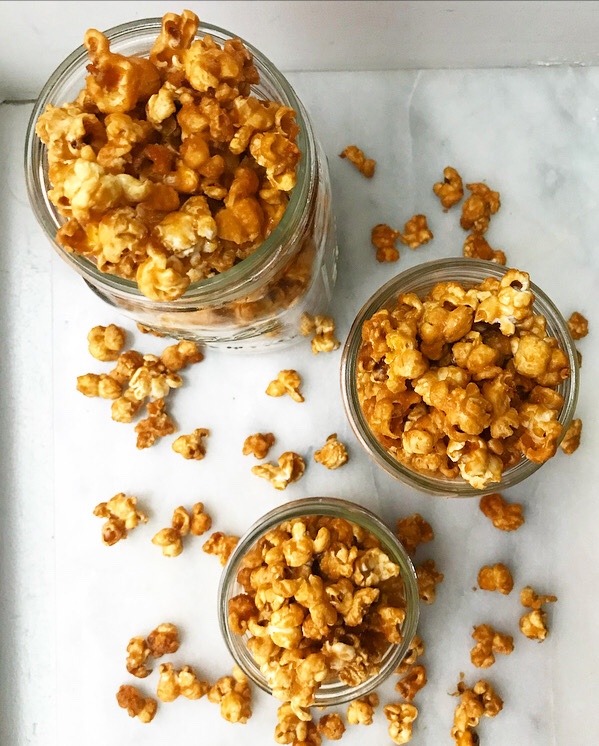 Y’all—this stuff is phenomenal. Phe-nom-e-nal. Crispy, crunchy, sweet and salty. Oh, and easy. Salty Maple Caramel Corn comes together in four simple steps.
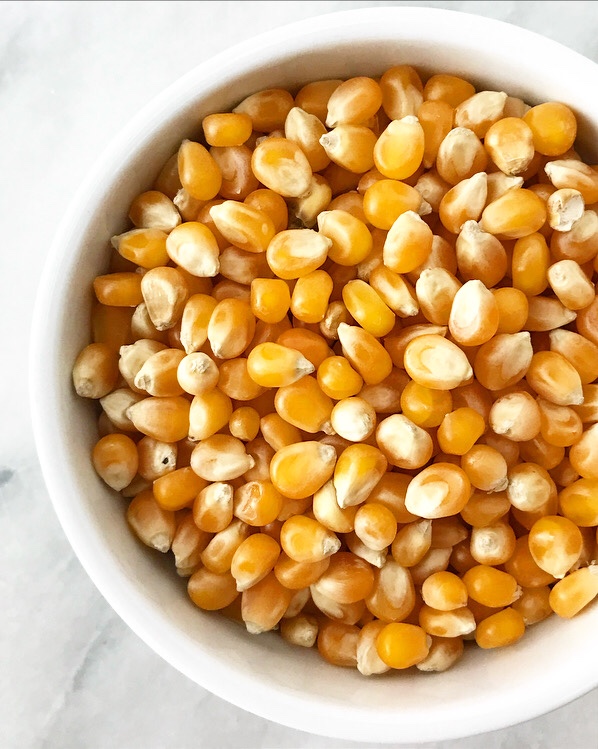
Pop some popcorn.
I pop my popcorn in a heavy-bottomed pot on the stove. Just heat a tablespoon of oil with a few kernels in it over medium heat. When they start popping, add the rest of the kernels, put a lid on it and jostle until all your corn is popped!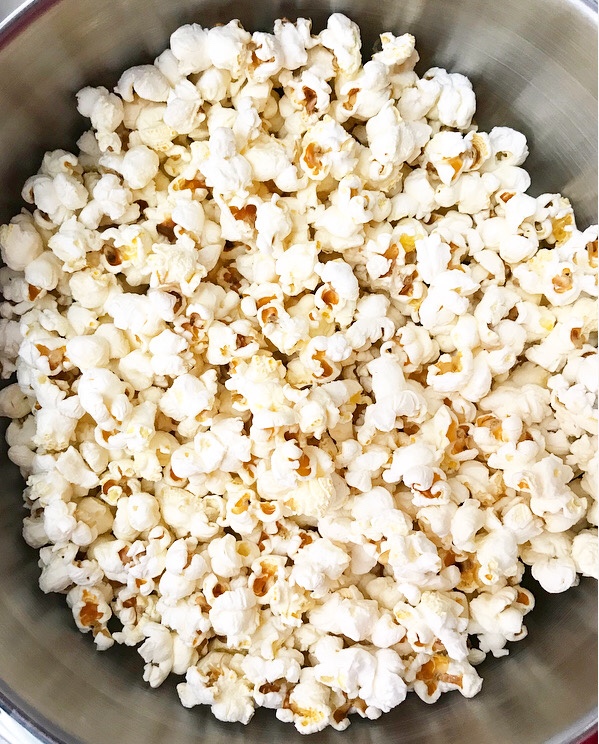
I used Pop-Secret Jumbo Popping Corn in all my testing. I found that 3/4 cup unpopped kernels usually yielded 12 cups of popcorn, but I know that other brands act differently. I’ve seen some that purport to make 16 cups from 1/2 cup kernels! Basically, what I’m saying is to measure your popped popcorn to make sure you have the necessary 12 cups for this recipe 🙂 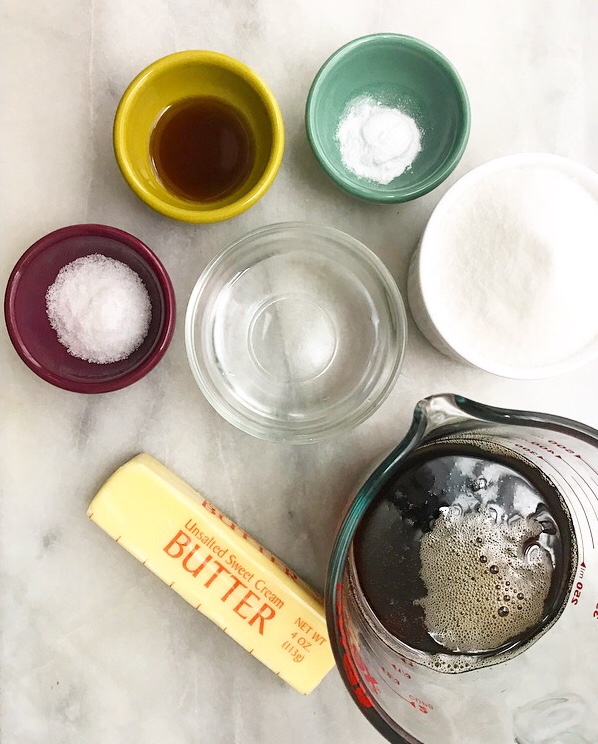
Make the salty maple caramel.
This is one of the easiest caramels you will ever make. There is no pot-watching or streaming heavy cream into molten sugar. You don’t need a candy thermometer either!
Just put sugar, maple syrup, salt, butter, and water in a pot and boil for five minutes. Don’t stir, swirl, or otherwise agitate the pot in any way—this will lead to crystallization and sad, dull caramel corn. No, thank you! Just add the ingredients to the pot (without stirring) and turn on the heat. I promise you, the caramel will form properly on its own.
Once the boiling time is up, turn off the heat. Stir in some vanilla and baking soda. The caramel will bubble up once the baking soda dissolves.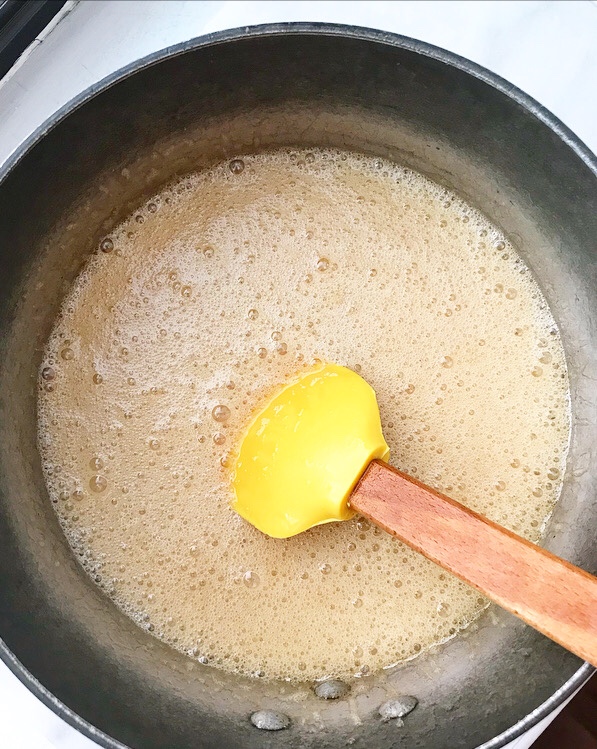
Two quick recipe notes:
- I chose to use granulated sugar in this recipe, rather than the usual light brown sugar. While brown sugar is very delicious in caramel corn, I found that the molasses in it competed too much with the maple syrup. If I’m going to use pricey maple syrup in a recipe, I want to be able to taste it!
- This recipe calls for 2 teaspoons of salt. It will give the finished caramel corn a salty finish, but shouldn’t be overwhelming. If you think it’s too much for you, feel free to reduce it to 1-1 1/2 teaspoons.

Toss the salty maple caramel with the popcorn.
This sounds mindlessly easy, but I’m going to talk about it anyway.
This recipe calls for tossing the popcorn and caramel together in a large oiled bowl with oiled silicone spatulas before spreading it onto oiled rimmed sheet pans. Don’t be tempted to skip the bowl and do the tossing on the pans. Many recipes recommend this, but I burned the everliving crap out of my hand using that method. If you think hot oil burns are the worst, it’s only because you haven’t experienced the unrelenting torture of a molted sugar burn. For the same reasons, don’t touch any pieces of coated popcorn that fly out of the bowl during mixing. Wait until they cool for a few minutes before picking them up.
Bake at a low temperature and stir occasionally.
This is the easiest of all the steps. Bake the coated caramel corn at 250F for an hour, stirring every 15 minutes to prevent burning. It’s a lot like making granola.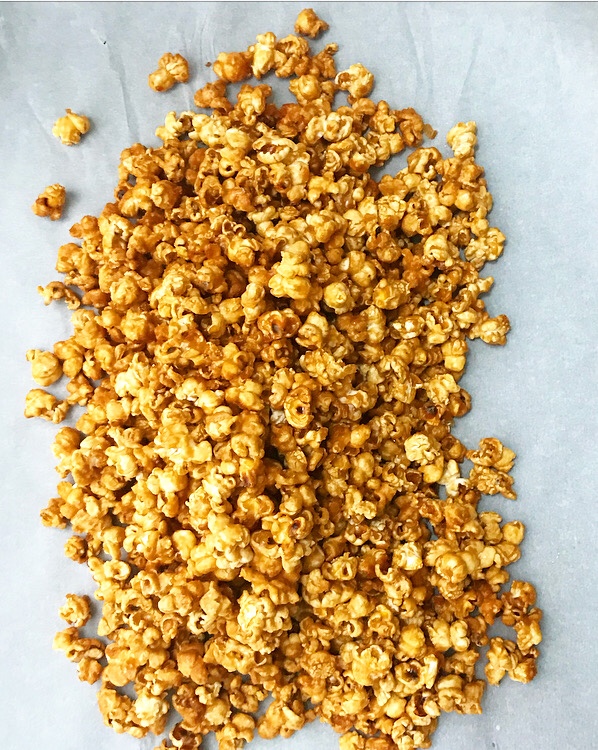
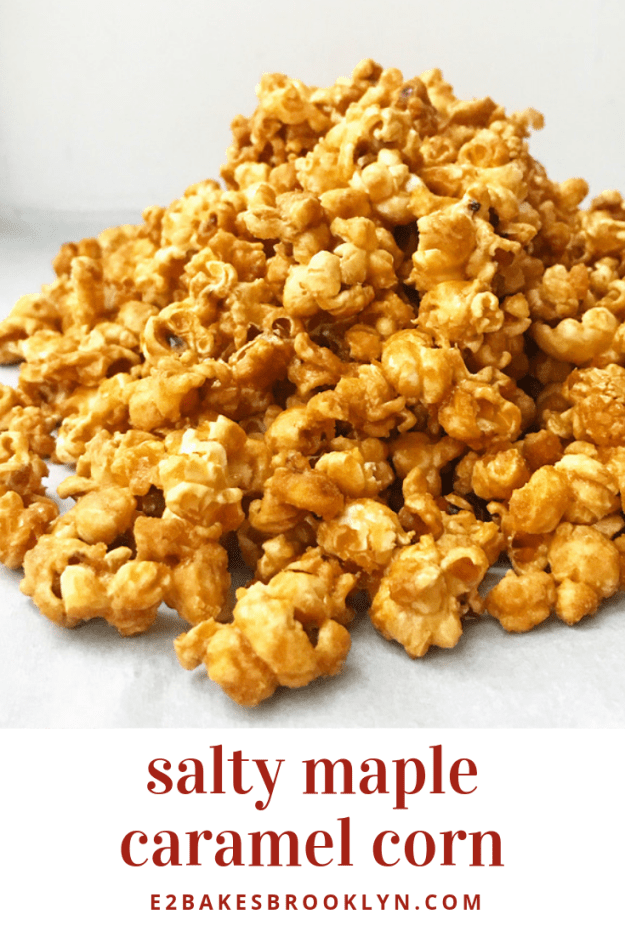
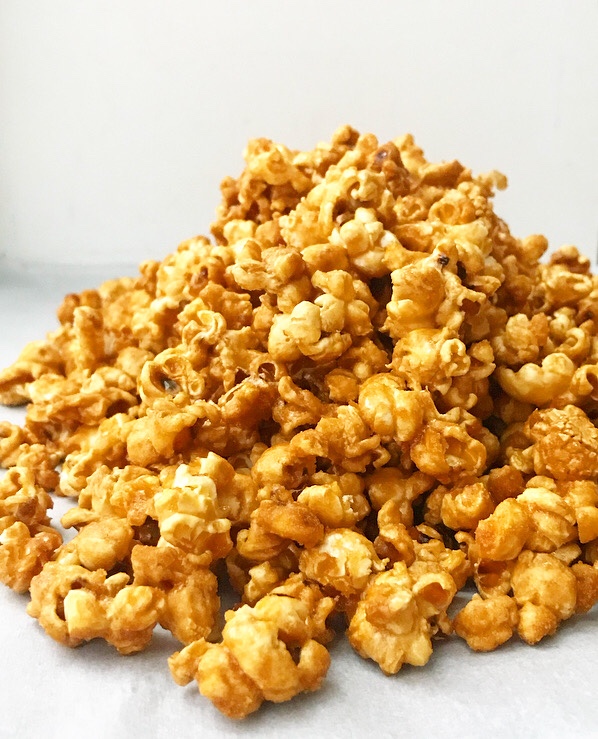 The caramel corn will seem very wet at first, but will harden to a crispy, glossy finish. Once the hour is up, scatter the caramel corn onto a big piece of parchment and let it cool to room temperature. After that, snack away!
 You’re going to love this Salty Maple Caramel Corn! It’s a great sweet & salty snack or dessert. I think it would make for a wonderful finishing touch on a bowl of ice cream. You could even pile it high as a finishing touch on a Maple Layer Cake!
 I highly recommend making a batch over the next couple of days. It’s a guaranteed way to upgrade your weekend ❤
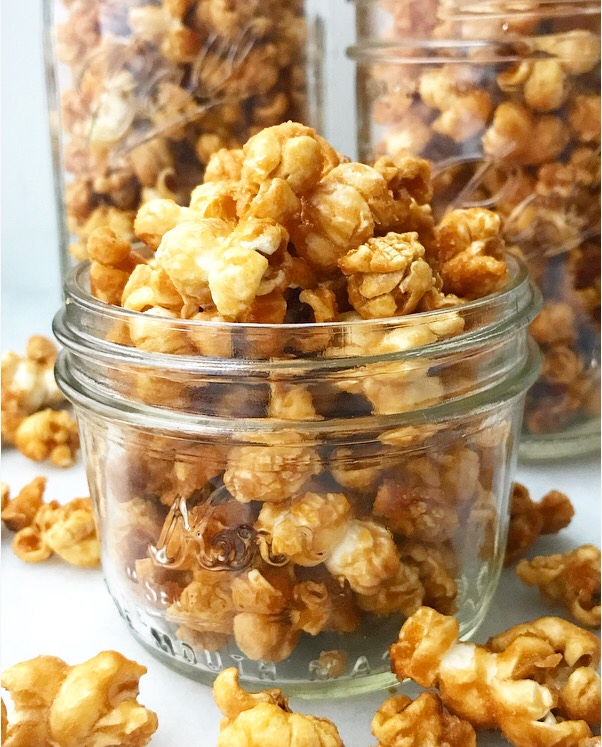
Salty Maple Caramel Corn
makes 12 cups
1 tablespoon neutral-flavored oil
3/4 cup unpopped popcorn kernels
2/3 cup granulated sugar
1 cup pure maple syrup
2 teaspoons Kosher or sea salt
1/2 cup (1 stick) unsalted butter, sliced into 8 pieces
3 tablespoon water
2 teaspoons pure vanilla extract
1 teaspoon baking soda
Pour oil in a large heavy-bottomed pot. Add 4-5 popcorn kernels. Heat over medium heat until kernels begin to pop. Add remaining kernels and cover with lid, leaving it a little bit ajar. Jostle constantly while popcorn pops, until pops are 2-3 seconds apart. Do not burn.
Remove pot from heat and pour popcorn into a bowl. Measure popcorn to ensure there are 12 cups. Set aside excess or pop more, as needed to meet the 12-cup requirement for this recipe.
Preheat oven to 250F. Heavily grease two rimmed sheet pans, your largest mixing bowl, and 2 silicone spatulas with oil or non-stick spray. Put popped popcorn in the bowl. Set aside.
Without stirring or jostling, combine sugar, maple syrup, salt, butter and water in a 4-quart pot. Bring to a boil over medium heat. Let boil 5 minutes. Do not stir. Remove from heat. Stir in vanilla and baking soda; mixture will bubble up.
Pour maple caramel over popcorn and use greased spatulas to toss together. Do not touch any coated pieces that fly out of the bowl—the molten sugar will burn you. Wait til they cool a bit before picking them up.
Divide coated popcorn among sheet pans. Bake for 1 hour, stirring every 15 minutes.
Line a sheet pan or a surface with parchment. Pour baked popcorn on top. Let cool to room temperature. Serve
Leftover Salty Maple Caramel Corn will keep in a ziptop bag for up to 2 weeks. It may soften slightly on humid days.

 Notice anything different? I updated the look of this site on Wednesday afternoon!
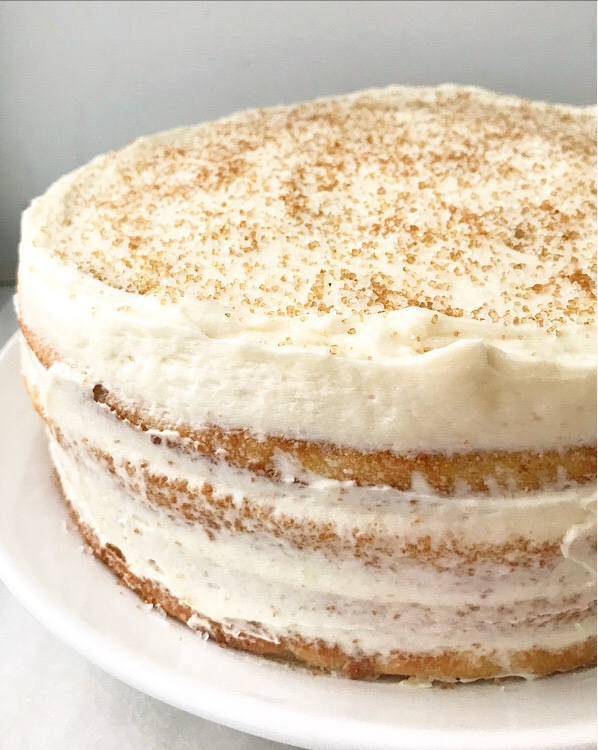 I haven’t made any major aesthetic changes to this site since I started blogging almost three years ago. I mean, I’d thought about it on and off, but had never actually gone through with anything until two days ago. I’d love to say this was planned, but it absolutely was not. I just decided on a whim that it was time to change the theme and streamline a few things, so here we are.
 Now, I’m not someone who makes many impulse decisions—I’m a big over-thinker—so changing the look of my blog is a pretty big deal for me. I still need to make a few formatting adjustments, but other than those, this look is here to stay.
 Another impulse decision I made recently? Baking this Maple Layer Cake! One minute, I thought “I should make a maple cake this fall,” and the next, I was whisking up batter and whipping buttercream.

 That’s really something, considering that I was deep in the

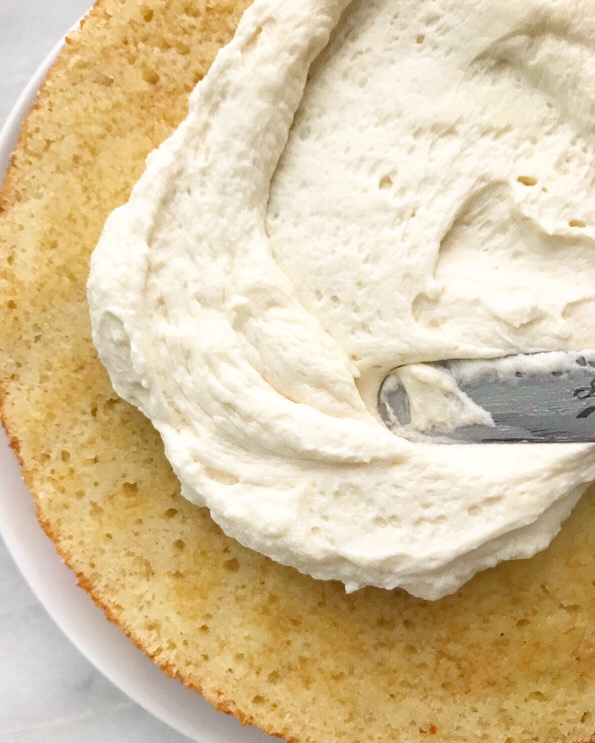
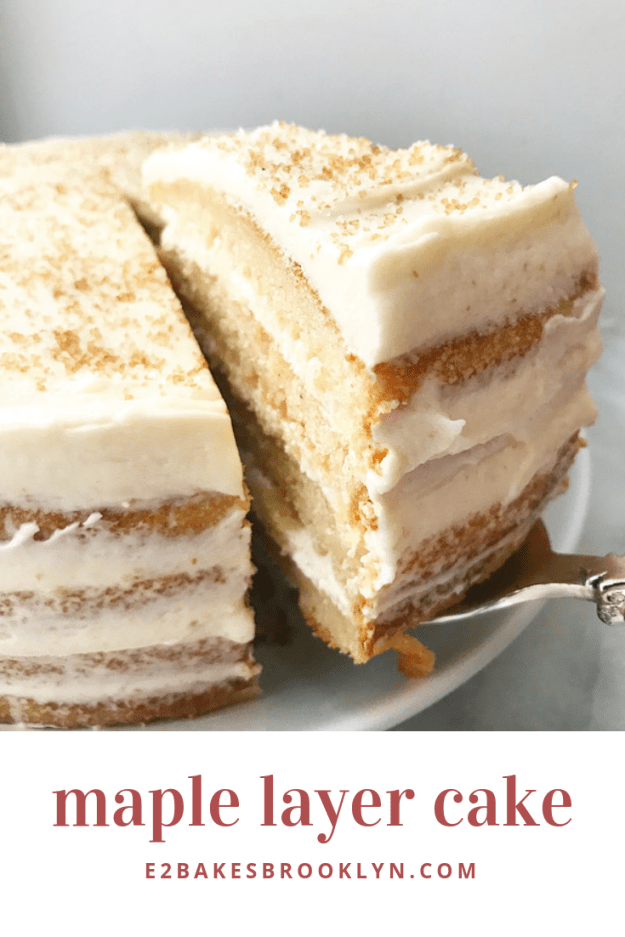
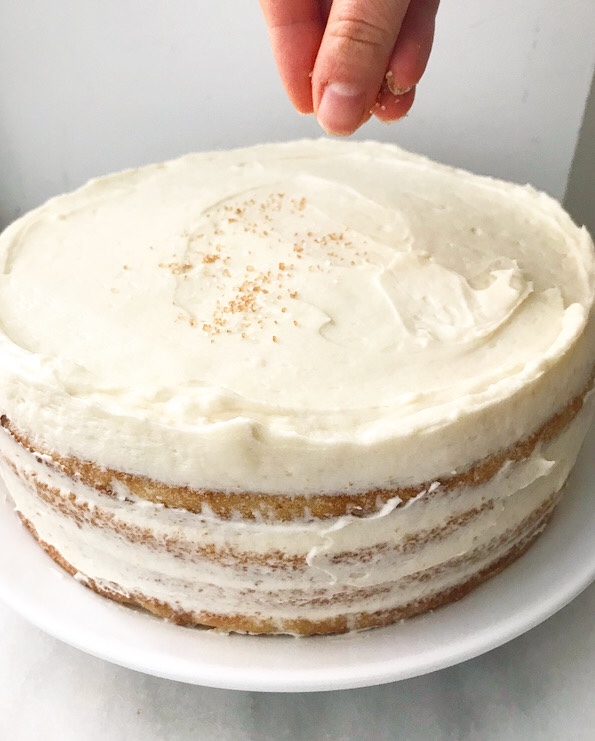 In the midst of all that self-imposed craziness, this cake went from a one-off thought to a sparkling four-layer naked cake in the span of an afternoon. Isn’t it a stunner?!
 That’s not all! This cake tastes as good as it looks 🙂
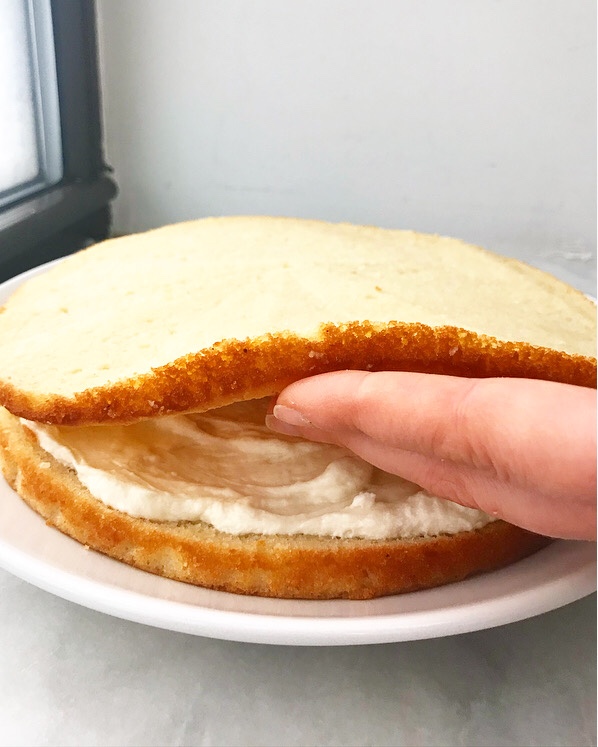
 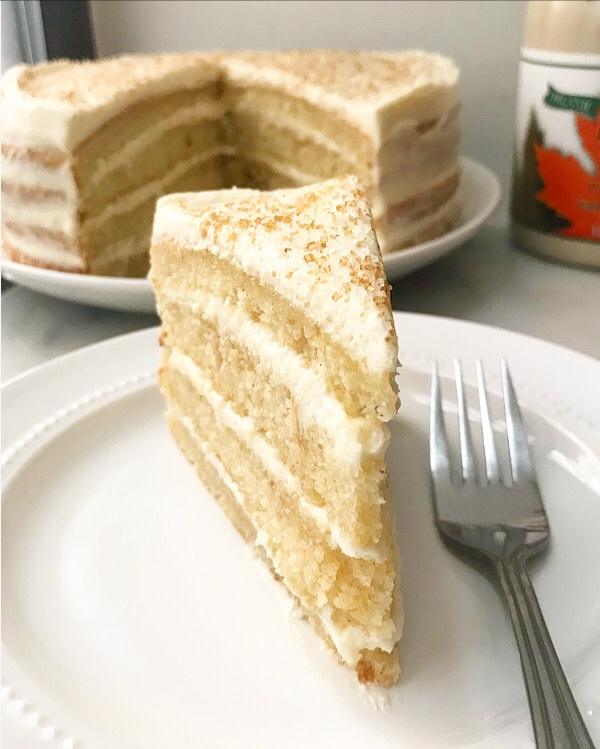 There are 1 1/3 cups of pure maple syrup in the entire cake—in addition to the cake and fluffy buttercream, each buttery layer is torted (sliced in half equatorially) and brushed with the good stuff. There is absolutely no mistaking the flavor of this cake!
 I’m sure I will continue to be an over-thinker for years to come, but if this Maple Layer Cake proves anything, it’s that it’s good trust my gut every now and then.


 Tomorrow’s a big day–this little blog is turning one year old! That’s 140 posts, 136 recipes, and more flour and sugar than I care to think about. It’s also late nights, hours of recipe testing, and a lot of joy. I have a job and a side business, but this blog is what matters most to me. It’s probably the biggest project I’ve ever undertaken, and I can’t wait to see how it grows in year two.
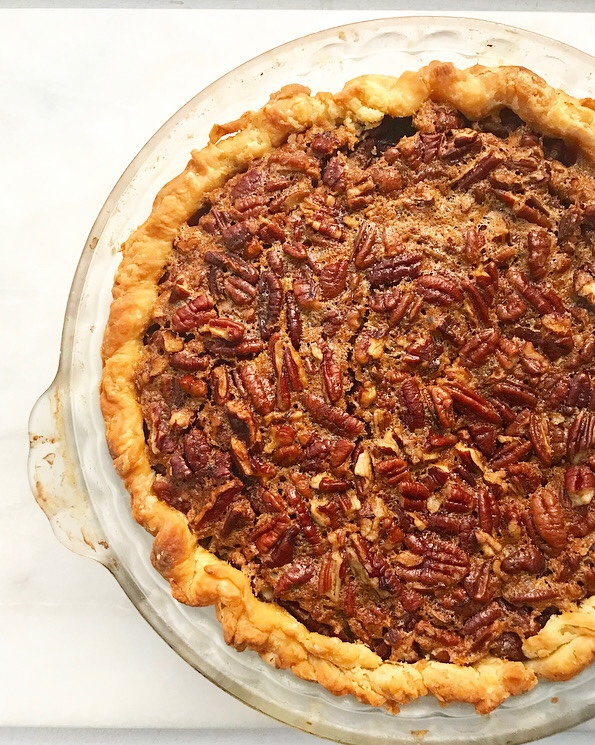 So, how does one celebrate their blog’s anniversary? Well, they furiously text their little sister and two close friends saying “What should I make for the blog’s one year anniversary?” One recommended a throwback to my
 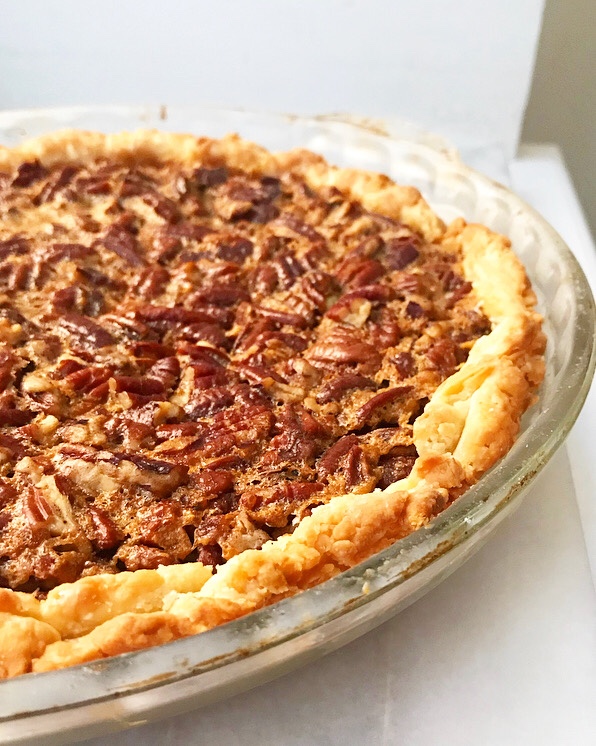 With their suggestions in mind, I started thinking about pecans and about my grandmother,
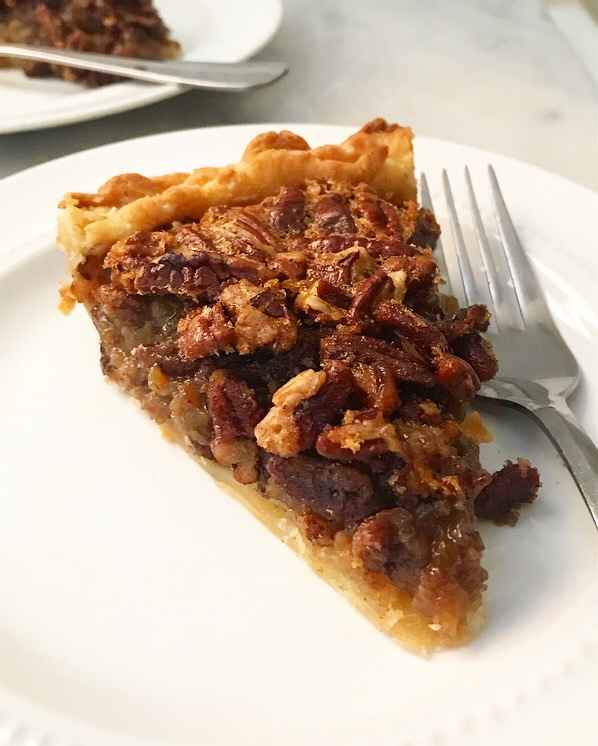
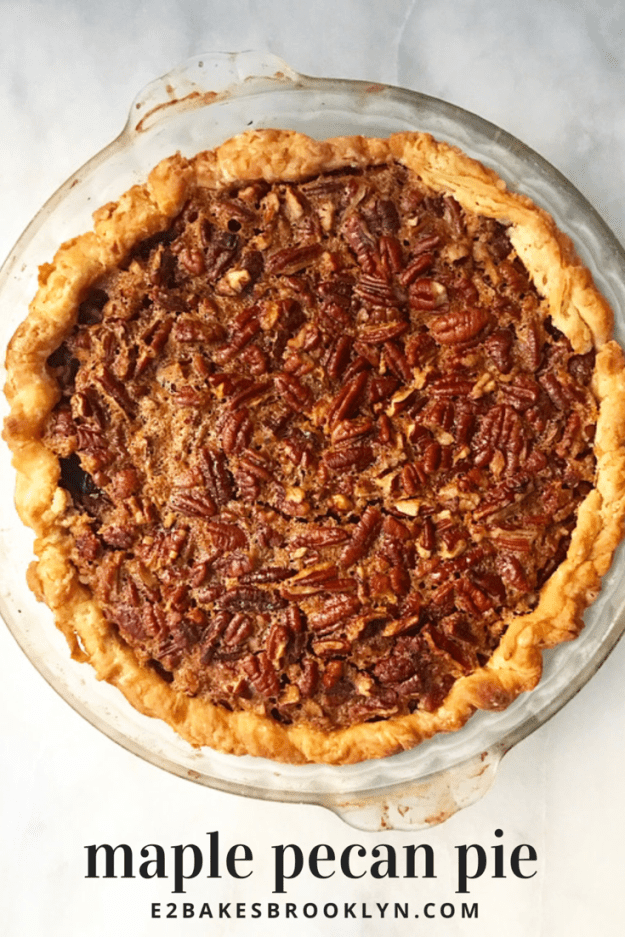
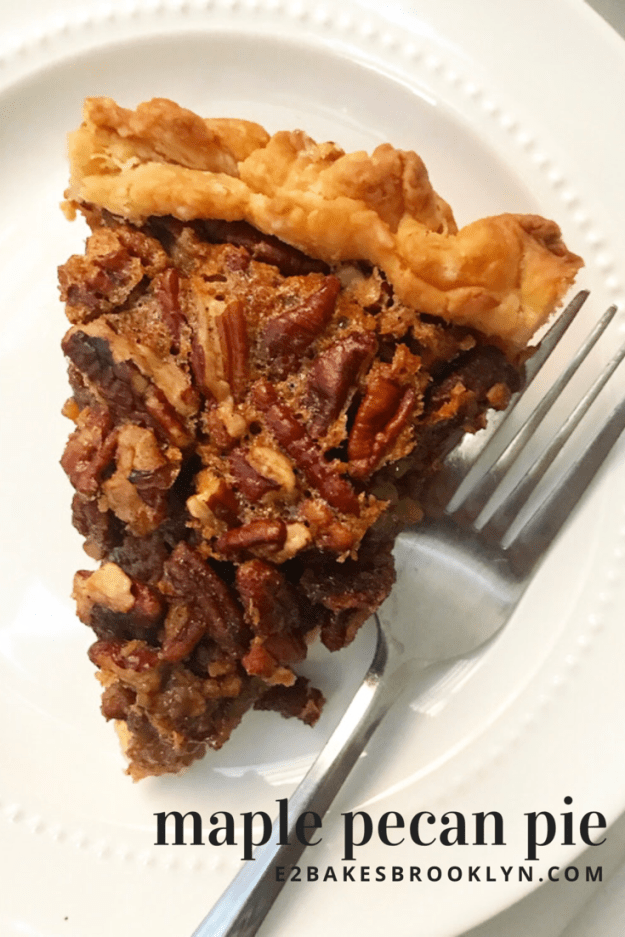
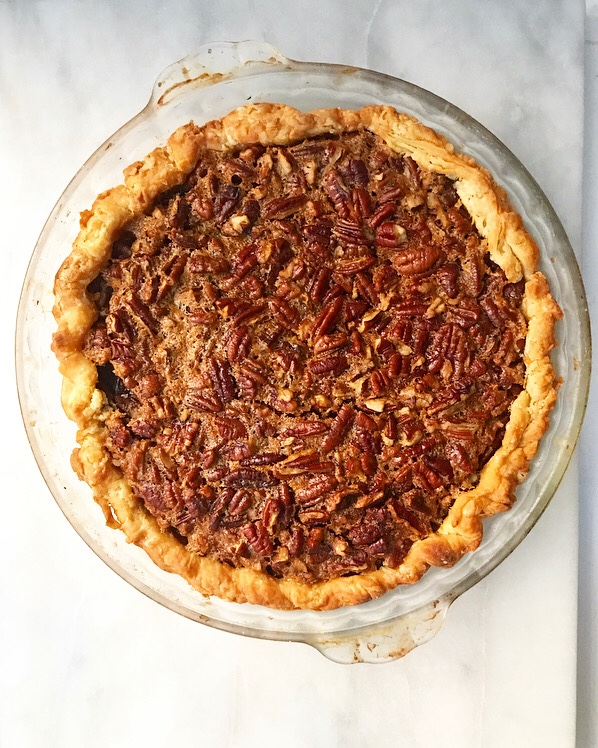
 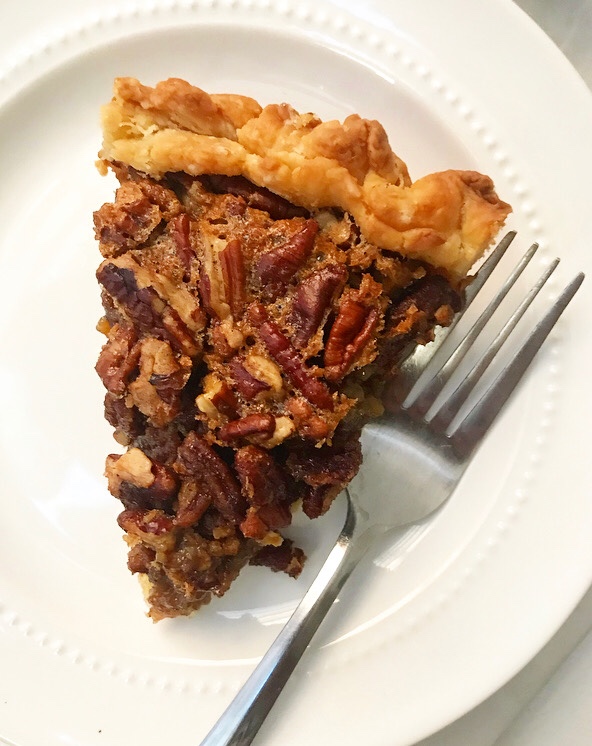 So, today, let’s celebrate one year of blogging with Maple Pecan Pie, the perfect tribute to my family, my Texan childhood, and my northeastern adulthood. This pie has everything you love about traditional pecan pie, but with a hefty dose of maple syrup and my go-to Cream Cheese Pie Crust. The filling is sweet, but not cloying, thanks to a little apple cider vinegar, and it has a little depth from the addition of nutmeg. If you’re going to mess with something as iconic as pecan pie, this is the way to do it.