On New Year’s Eve, I made dinner for 300 people. Well, it wasn’t all me–I had spectacular help, including a professional chef who cooked with me for ten straight hours on his day off–but I was in charge. This wasn’t my first rodeo with large-scale cooking (I make pies and cakes for groups of 100 or more many times throughout the year), but three hundred is a lot for someone who doesn’t list catering on her résumé. When I was asked to do this event in November, I had decided on a Tex-Mex menu that included five types of enchiladas, Borracho beans, rice, and chips and salsa. At first it seemed feasible, but as the weeks went on, I started to panic. How was I going to roll a thousand enchiladas? Even with help and a professional kitchen, that’s a lot. How was I even going to get the thousand tortillas from the factory in Queens? Like many New Yorkers, I don’t have a car. Does the Brooklyn Costco actually carry sweet potatoes (for the vegetarians)? This remains a mystery. I left for Christmas in Austin feeling doomed to fail. But then, there was pozole.
 The day after Christmas, my mom, younger sister, and I went for lunch at El Alma. My sister said their nopales salad was the best (and she was right), but we wanted something to go with it. Since it was midday, a full enchilada plate seemed…heavy. We were about to pester our waiter with a million questions when he mentioned their daily special, red pozole: a pork and hominy* stew in a delicious chile-based broth, served with all sorts of toppings so each person can customize their bowl. Ours arrived with little plates of sliced cabbage, avocado, radishes, chopped cilantro, crumbled queso fresco, fried tortillas, and lime wedges. I added a little bit of everything and dug in. Now, I knew it was going to be good, but I didn’t know that it would change the course of my week. Part way through lunch, my mom suggested that this would be good for the New Year’s Eve party.
*Hominy is maize that has been washed in an alkaline solution. It’s chewy, hearty, and fantastic.
At first I shrugged it off, but then I got to thinking: stew is generally simple to make, it’s easy to expand, and everybody loves toppings. By the end of the weekend, I had cancelled the tortilla order, looked at every posole recipe I could find, and rewritten the menu–three types of posole, a salad, and chips and salsa. After a few huge shopping trips (including one during which a friend and I bought 91 pounds of canned hominy while the employees of a Sunset Park supermarket looked on in horror), two days of cooking, and only one hour of absolute panic (just before service), it was time for dinner.
 In all of my preparation, I didn’t anticipate one thing: New Yorkers–the ones I know, at least–have never heard of Pozole. At first, people didn’t quite know what to make of their dinners, but with a little instruction, soon everybody was raving and coming back for seconds. I made a chicken version and a vegan sweet potato-black bean, but pork was the most popular by a long shot. It was gone before everyone had gotten through the line the first time! Since the party, I’ve gotten at least ten requests for my recipe, and I am happy to oblige.
Pozole starts with mixing together a combination of chili powder(s), cumin, and salt. This will be the entire basis for flavor in this dish. You may use any chili powder you prefer here. I like to use a 1:1 combination of ancho chile powder and standard chili powder, just because the ancho adds a lot of authenticity to the finished dish. If you’d like to go a little spicier, I recommend adding chile de arbol powder or a pinch of cayenne. Just taste as you mix–make sure you like the baseline flavor. Toss half of your spice mix with some pork shoulder that you’ve cut into bite-sized pieces, then sear in batches. You don’t need to cook the pork all the way through (it’ll cook for a long time in the broth); you’re just adding flavor and texture. Once all the meat has been seared, sauté an onion and some garlic for a few minutes, until everything is fragrant. Then add in a 6-ounce can of tomato paste. Cook the tomato paste/onion/garlic mixture for several minutes, so that it starts to darken and caramelize. Add in the remainder of your spice mixture, some dried oregano, the pork, and a bay leaf, and then submerge everything in water. Cover the pot, bring everything to a boil, and reduce it to a simmer for 90 minutes to two hours, until the meat is very tender. Then add two cans of hominy that have been drained and rinsed, cover the pot again, and cook for an additional 30 minutes. Finally, take the stew off the heat, squeeze in some lime juice and adjust the salt, and serve with a plate of toppings. The tender pork and chewy hominy, in combination with the chile broth and crunchy, fragrant toppings, are to die for.
 Red Pozole is a warm, comforting, and fairly healthy meal for these cold days. It’s great for a Sunday dinner, and with so many options for topping, even picky eaters will be excited about it. Speaking of toppings, you can eat it multiple times in a week without having the same bowl twice! It’s easy to scale up or down (this recipe was originally for 150!), so it’s great for entertaining or freezing for later. I’m sure Red Posole could even be made in a slow cooker, but I don’t have one, so I haven’t tried. If you do, let me know! I really can’t say enough good things about this recipe. Warm up with Red Pozole this winter!
 Red Pozole
heavily adapted from the Chicago Tribune
makes 8 to 10 servings
Spice Mixture:
1/4 cup chili powder*
2 tablespoons ground cumin
1/2 teaspoon Kosher or sea salt
Stew:
3-4 tablespoons canola or vegetable oil
2 pounds pork shoulder*, cut into 1-inch pieces
1 large white onion, diced
3-4 cloves garlic, minced
1 6-ounce can tomato paste
1 teaspoon dried oregano
1 bay leaf
water
2 15-ounce cans yellow or white hominy*, drained and rinsed
juice of 1 lime
1 teaspoon Kosher or sea salt (or more, to taste)
Garnishes:
crumbled queso fresco
sliced avocado
sliced cabbage (any color)
chopped fresh cilantro
sliced radishes
lime wedges
fried tortilla strips or crushed tortilla chips
In a small bowl, combine chili powder, cumin, and salt. Coat pork in 3 tablespoons of the mixture.
Heat a large stock pot over medium-high heat. Add 2 tablespoons of oil and swirl to coat. Sear pork in batches. Cook 2-3 minutes per side, adding oil as necessary–do not worry about cooking it through. Once all pork has been seared, pour off all but one tablespoon of leftover fat.
Turn heat to medium. Sauté diced onion until translucent, about five minutes. Add garlic and cook until fragrant, about one minute. Stir tomato paste into onion and garlic. Cook for 5-7 minutes, stirring frequently, until it starts to darken and caramelize. Stir in remaining spice mixture and oregano. Add seared pork back to the pot, followed by enough water so that everything is fully submerged. Add the bay leaf, and give everything a good stir. Cover the pot and bring it to a boil. When it reaches a boil, reduce the heat to a simmer and let cook for 90 minutes to two hours, until meat is tender. Do not uncover the pot unless to stir the stew. Add more water if it reduces at all.
When meat is tender, stir in hominy and let continue to simmer, covered, for thirty minutes. Remove from heat, and squeeze in the juice of a lime. Check for seasoning, and adjust salt as necessary. Ladle Pozole into shallow bowls, and serve with garnishes of choice.
Leftover Posole keeps well in the refrigerator for up to five days. Discard any solidified fat before reheating.
Notes:
1. You may use any chili powder you choose. I prefer a combination of 2 tablespoons each ancho chile powder and regular chili powder.
2. You may also use pork stew meat or pork butt. When I can’t find pork shoulder, I use a combination of pork tenderloin and pork butt. This recipe also works well with chicken.
3. Hominy can be found at most large supermarkets. I find mine in the Goya aisle of Key Food. If you can’t find any, frozen corn might be a good (if inauthentic) substitute.

 I go to the same coffee place everyday. It’s an institution on Atlantic Avenue–Moon’s Palace. It’s not flashy, and you won’t find any fancy pour-over there, but the owner, known to me as Mr. Moon, makes a solid cup of coffee. I don’t even have to ask for my order anymore–he and his sons know that if its a weekday, I want a large black coffee, and if it’s a weekend, a second large coffee with foamed half-and-half, for Henry. I’ve been going there so frequently for the last three years that we even have a deal during the summer: they keep all their sad-looking overripe bananas for me (instead of tossing them in the garbage), and I buy them at half-price for banana bread. It’s the best deal in town, as far as I’m concerned: twenty-five cent bananas, and I don’t even have to wait for them to ripen!
 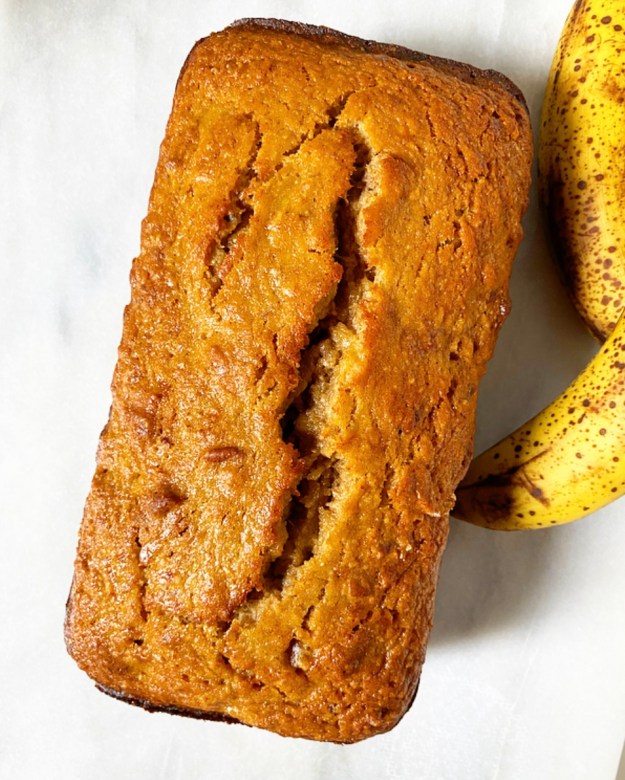 But now it’s winter, and ready-made overripe bananas are harder to come by. I went in last week and grabbed a few bananas that were still bright yellow, hoping to make banana bread in about a week. I put them in a paper bag and left them to ripen, but they refused. Sure, they started to turn a little brown in places, but not nearly enough for really good banana bread. Being the impatient, banana bread-deprived woman I was, I resorted to one of those hacks that probably plague your Facebook feed. I placed the bananas on a lined baking sheet, put them in a 250F oven for twenty minutes, and was rewarded with overripe results!
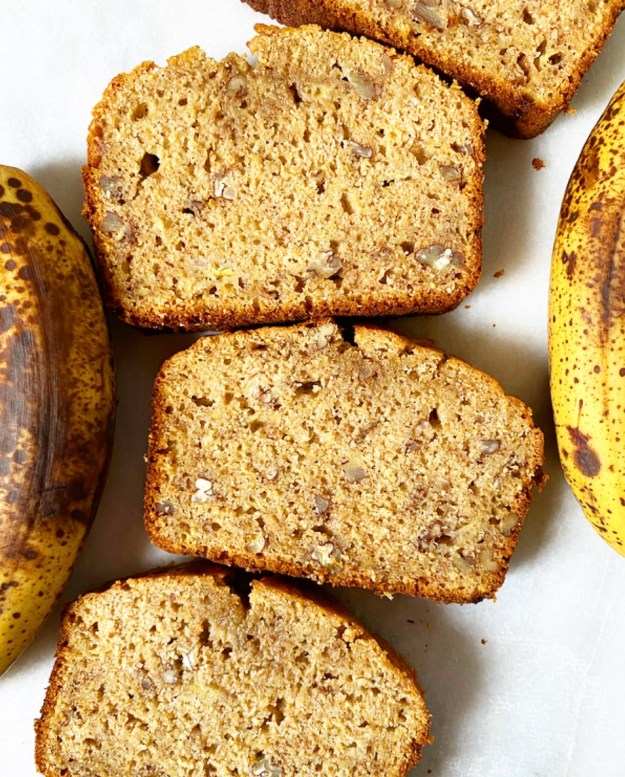
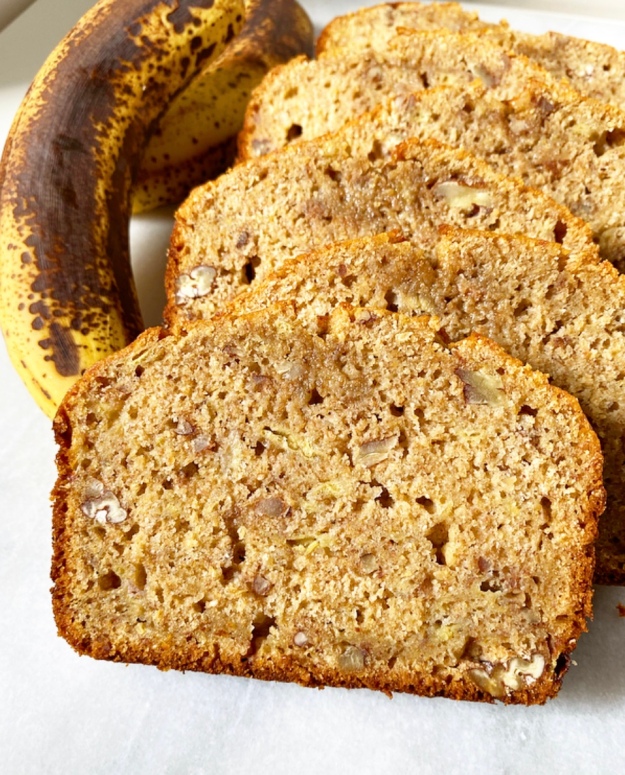 So, now that I’ve played Mother Nature with these bananas, let’s make some banana bread. Whole Wheat Banana Bread, to be exact. Sweet, cinnamon-scented quickbread chock full of bananas and walnuts, with all the nutty goodness of whole wheat. Now, baking with whole wheat flour can be tricky. Since it hasn’t been stripped of the bran and germ like all-purpose flour, whole wheat flour has a grainier texture and higher protein content. Higher protein = more gluten. More gluten = greater potential for tough, dense results. We have to follow a few guidelines to keep this banana bread from being a brick.
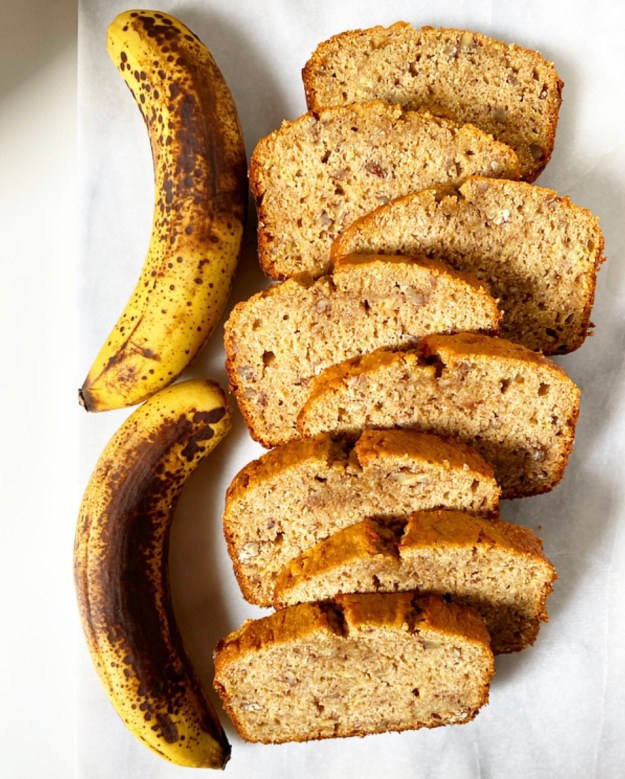 1. Measure the flour properly. American baking is notoriously unreliable when it comes to measurements. This isn’t a problem in countries where they bake by weight–100 grams is always 100 grams. In the U.S., though, measuring is a problem. Since we traditionally measure ingredients by volume, there’s no way to know if two people are using exactly the same amount of an ingredient. Some people measure flour by just scooping it with the measuring cup. This doesn’t allow any air into the flour, and can therefore contribute to over-measuring. In cakes and breads, this can lead to things becoming too dense and dry. In cookies, this can lead to toughness and/or cakey results.
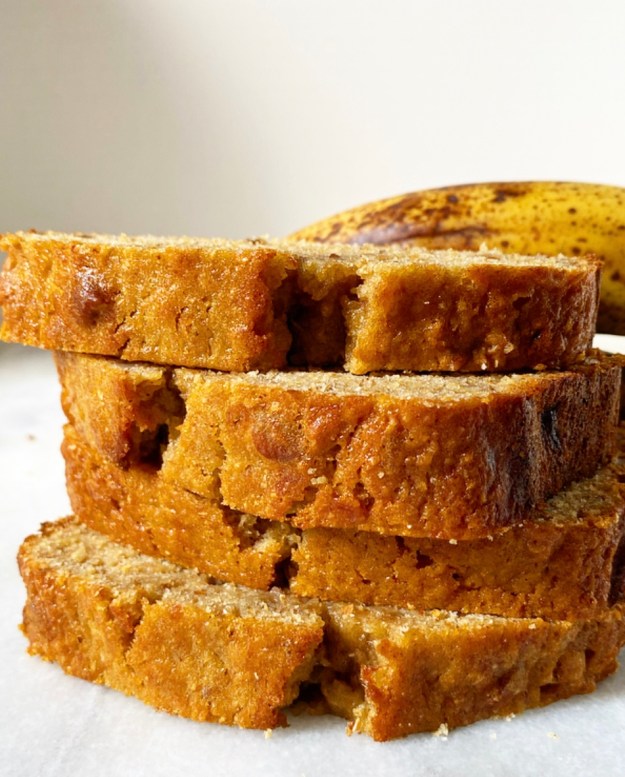 3. Add enough moisture. (Warning: I’m about to say “moist” a lot.) In this banana bread, we need a ton of moisture to counteract the density potential from the whole wheat flour. Here, we use oil so our banana bread stays soft and springy. If we used butter, which is around 15% water, our bread would dry out as the water evaporated over time. Also, there’s so much flavor going on between the bananas, cinnamon, and walnuts that we won’t even notice the lack of butter. So, break out the neutral-flavored oil: canola, vegetable, whatever you have. You may also use melted coconut oil. Next comes brown sugar. We use only brown sugar in this recipe because it’s more moist than granulated sugar, thanks to the molasses. After that, two large eggs. The eggs provide moisture, chew, and additional structure. They help the final product to stay soft and moist-crumbed, which is exactly what we want in banana bread. Lastly comes the milk, which is just extra moisture insurance. You may use any milk you like (including buttermilk, almond, oat, soy, etc.), although I do not recommend skim or fat-free cow’s milk.
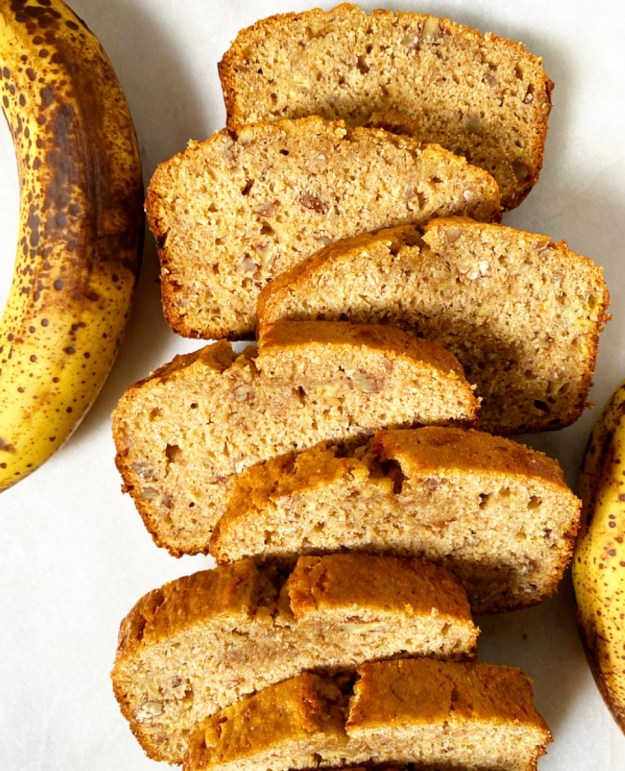


 Happy New Year! I hope your 2016 has been wonderful so far 😊 As I spent the last of 2015 working like crazy (nannying, catering two parties for my friend David, making regular cookie deliveries to a jeweler downtown, figuring out this food blogging thing, etc), traveling to Texas and back, and making dinner for 300 of my closest acquaintances, I hope 2016 brings a lot of naps. And real food. Don’t get me wrong, I love cookies and pie and cake, but since I’ve eaten those things at regular intervals for the last eight weeks, I am finding myself craving vegetables. So this month, I’m going to make a little effort to post some healthier recipes. There will still be plenty of cookies (because cookies), but I plan to post a few whole grain items and savory dishes, just for balance!