About two years ago, an acquaintance called and asked me to make a Coconut Pineapple Cake for his birthday party.
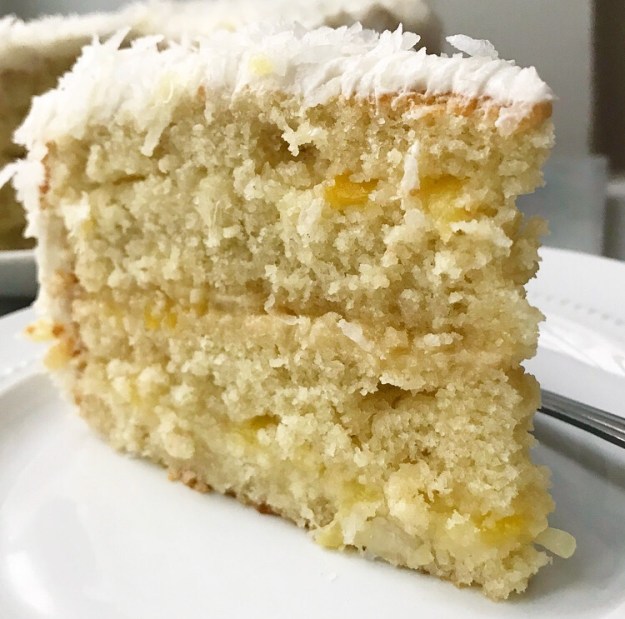
In retrospect, I should have asked more questions. In our brief phone call, there was no mention of whether it should be layered or in a bundt or flipped upside down, just that it should be full of tropical flavor and generally resemble a cake.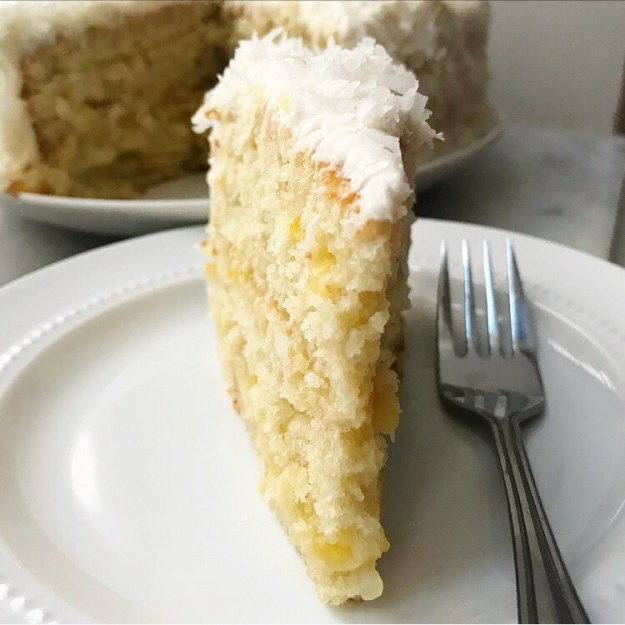
Instead of doing the logical thing and calling to clarify, I just tried to channel my grandmother and go with my gut.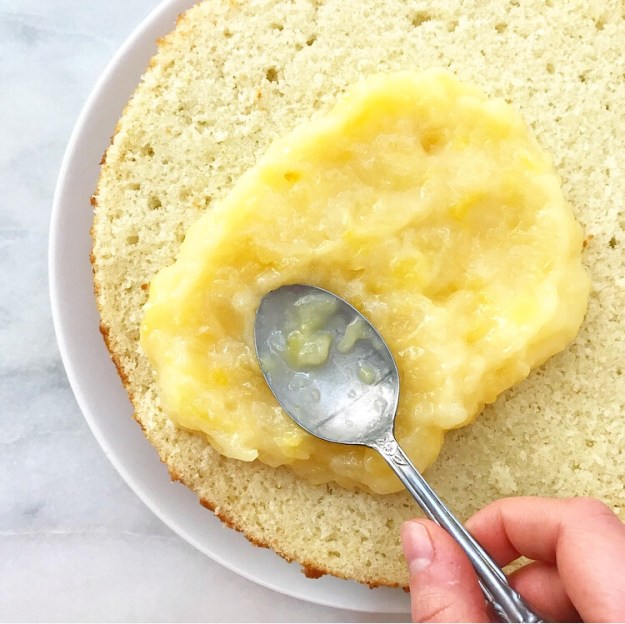

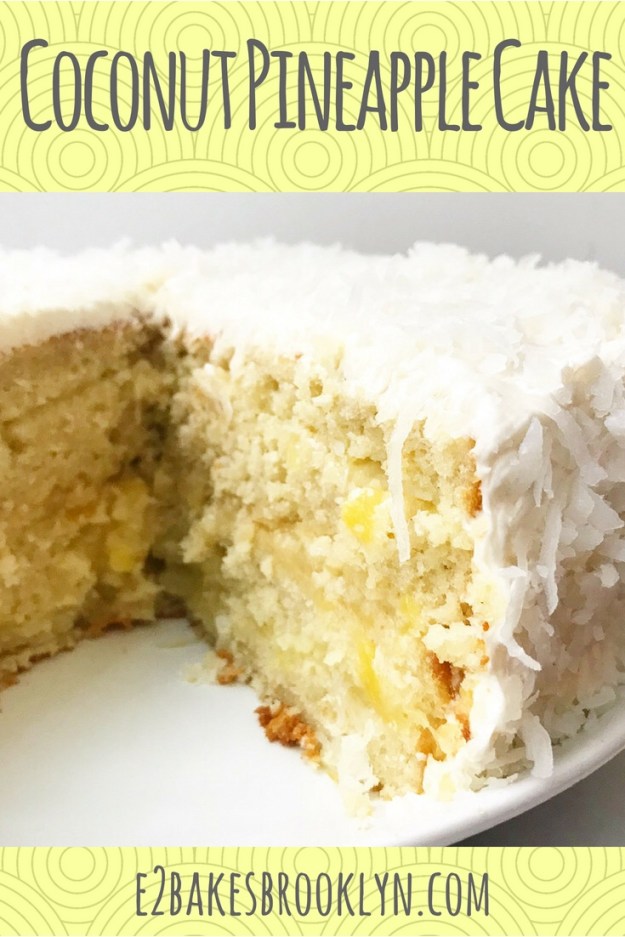
My gut said to flavor my favorite vanilla cake with coconut, layer it with pineapple filling, coat it in coconut buttercream, and decorate the crap out of it with sweetened flaked coconut. And so I did.
To this day, I have no idea if this is what my acquaintance had in mind when he made his initial order. Not a clue.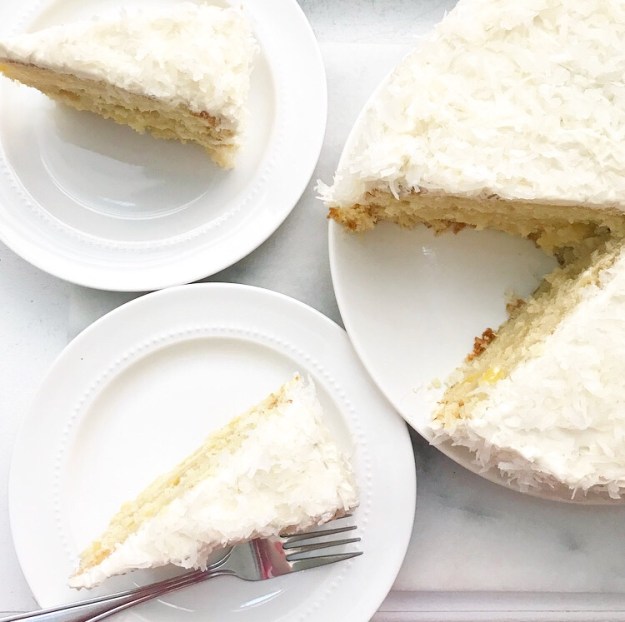
What I do know, though, is that he loved it.
I can say that with confidence because he has consistently ordered a Coconut Pineapple Cake every two months since, just because he has a craving.
That may sound a little ridiculous—ordering a whole layer cake for yourself just to fulfill a craving—but if you try this cake, it might suddenly seem very logical.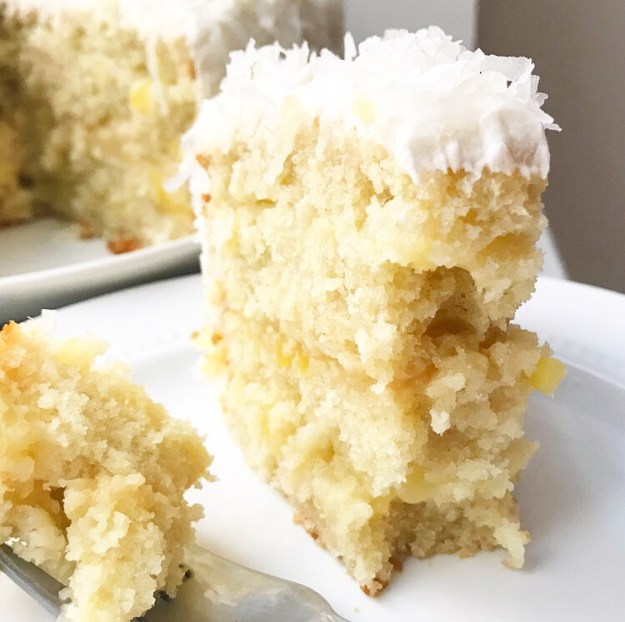
Coconut Pineapple Cake
makes 1 9-inch round layer cake
Cake Batter:
3 cups all-purpose flour
1/4 cup cornstarch
1 teaspoon baking powder
1/2 teaspoon baking soda
1 teaspoon Kosher or sea salt
1 cup (2 sticks) unsalted butter, softened to room temperature
2 cups granulated sugar
4 large eggs, room temperature
1 tablespoon pure vanilla extract
2 teaspoons coconut extract
2 cups buttermilk, room temperature
Pineapple Filling:
16 ounces canned crushed pineapple in juice
1/2 cup granulated sugar
2 tablespoons cornstarch
2 tablespoons unsalted butter
Frosting:
1 cup (2 sticks) unsalted butter, softened to room temperature
1 pound confectioner’s sugar
pinch of Kosher or sea salt
1 tablespoon pure vanilla extract
1 1/2 teaspoons coconut extract
4 tablespoons heavy cream
2 cups sweetened shredded coconut
Cake layers and pineapple filling may be made up to a day in advance.
Preheat the oven to 350F. Grease two 9-inch round cake pans. Line the bottoms with parchment and grease again. Set aside.
Make the cake batter. In a medium mixing bowl, whisk together flour, cornstarch, baking powder, baking soda, and salt. Set aside.
In a large mixing bowl, use an electric mixer to beat butter until light and fluffy. Beat in sugar. Mix in eggs one at a time, followed by vanilla and coconut extracts. Add dry ingredients and buttermilk in two alternating installments, combining completely after each addition.
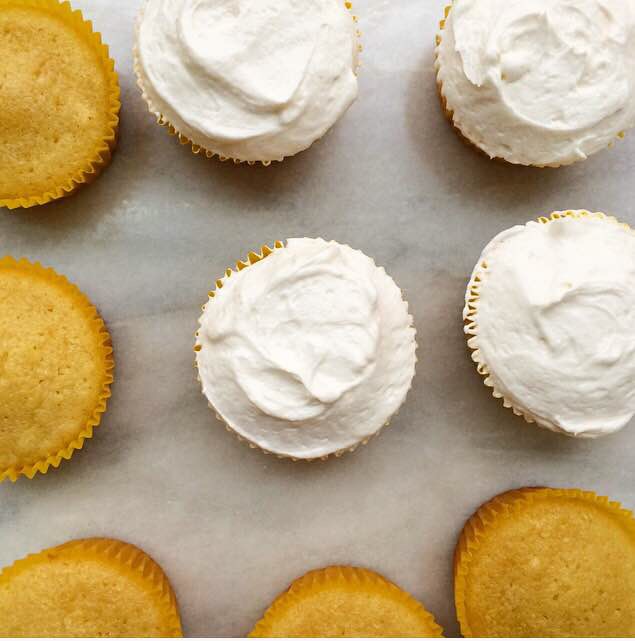
Divide batter among prepared pans. Tap pans on the counter five times to release any large air bubbles. Bake cakes 32-35 minutes, until a toothpick inserted in the centers comes out clean. Let cake layers cool in the pans for fifteen minutes before inverting onto a rack to cool completely.
Make pineapple filling. Combine crushed pineapple in juice, sugar, and cornstarch in a small saucepan over medium heat. Cook, stirring frequently, until juices are clear and mixture thickens slightly, about 5 minutes. Remove from heat and stir in butter. Let cool to room temperature, or place in an airtight container in the refrigerator.
Slice each cake layer in half equatorially (this is called torteing). Place one half-layer on a serving plate and top with about 2/3 cup of pineapple filling. Repeat layering until you have 4 thin layers of cake and 3 layers of pineapple filling. Tent cake with plastic wrap and refrigerate at least 30 minutes.
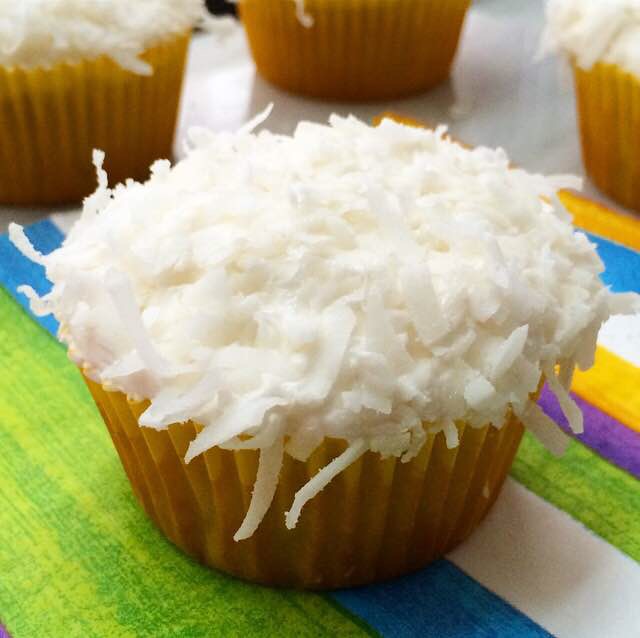
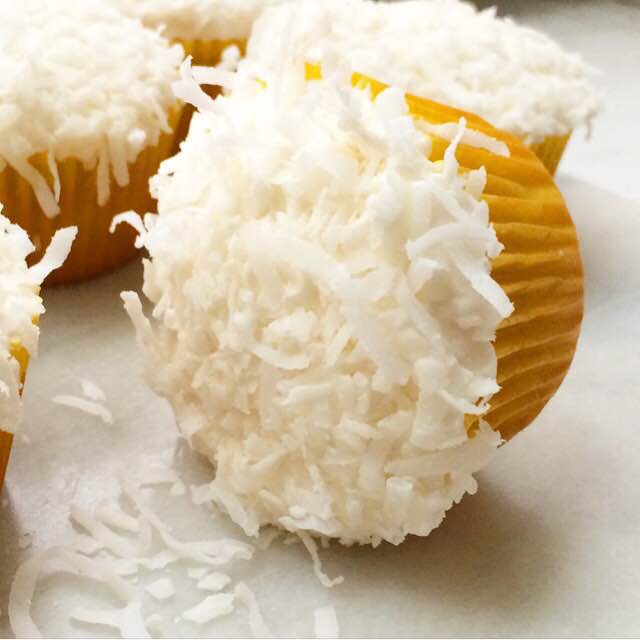
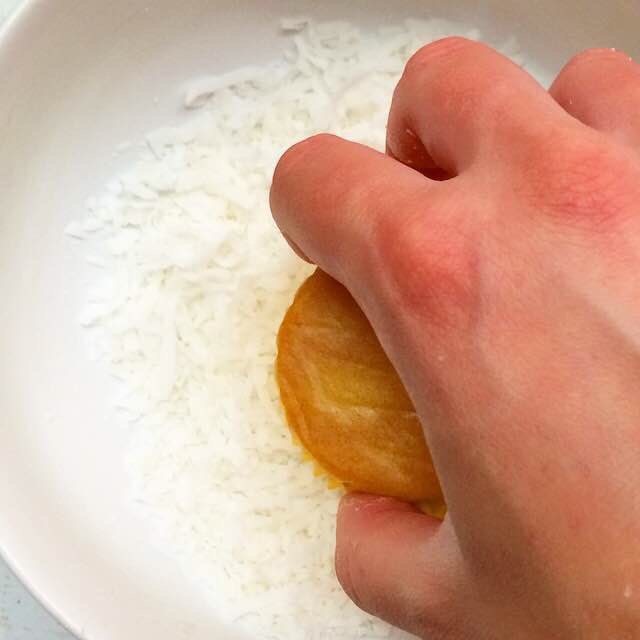
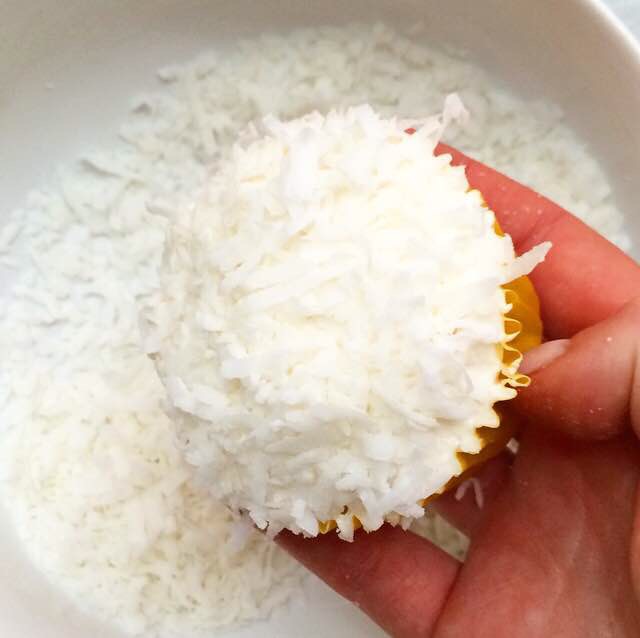
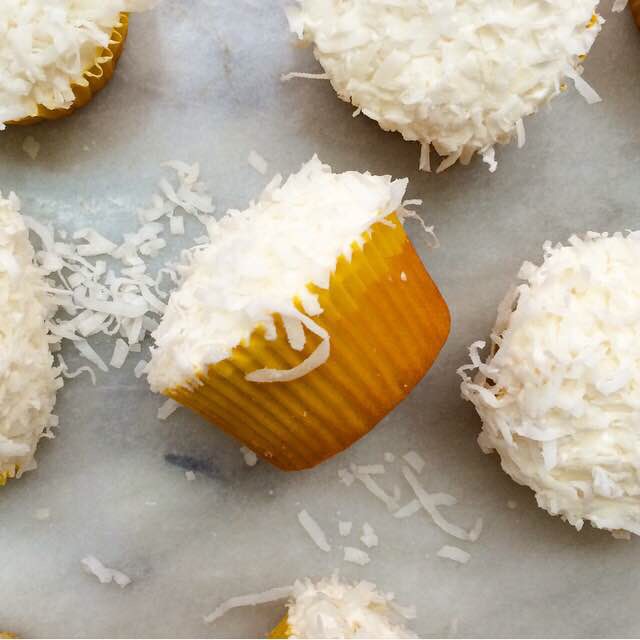
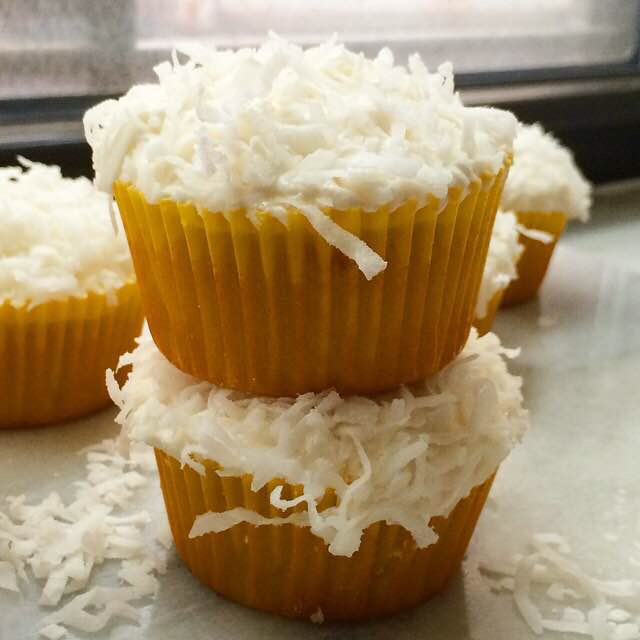
Make the frosting. In a large mixing bowl, use an electric mixer to beat butter until light and fluffy. Mix in confectioner’s sugar and salt, followed by vanilla and coconut extracts. Add heavy cream and beat frosting for one minute, or until fluffy. Use an offset knife to frost cake. Press sweetened flaked coconut onto the frosted surface of the cake.
Serve immediately. Leftover cake will keep covered in the refrigerator for up to five days.
 I don’t want to write about baking today—I want to write about how much I love the Olympics. I’ve watched the coverage every night and had it on in the background while I’ve baked during the day. This isn’t a recent habit—I grew up in a family that gathered to watch the games (summer or winter) every night they were on, and I even once had a wall of my teenage bedroom dedicated to the decorated short track speedskater Apolo Ohno.
 Anyway, this isn’t an Olympics blog. It’s a baking blog. So, let’s talk about baked goods, specifically Almond Joy Shortbread Bars.
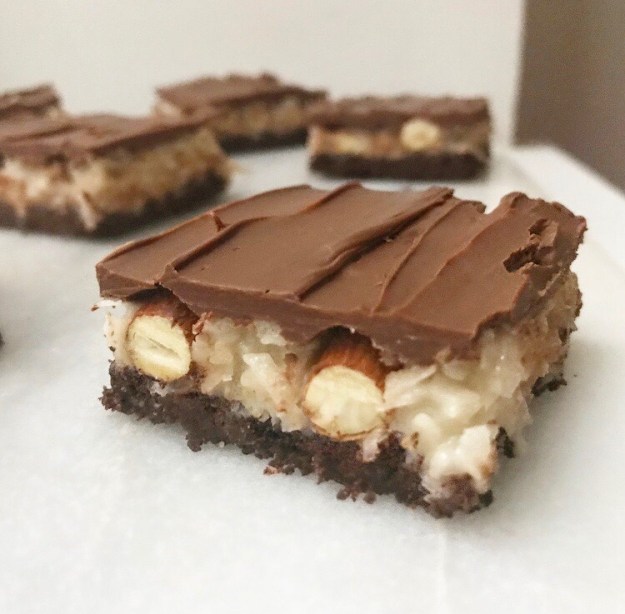
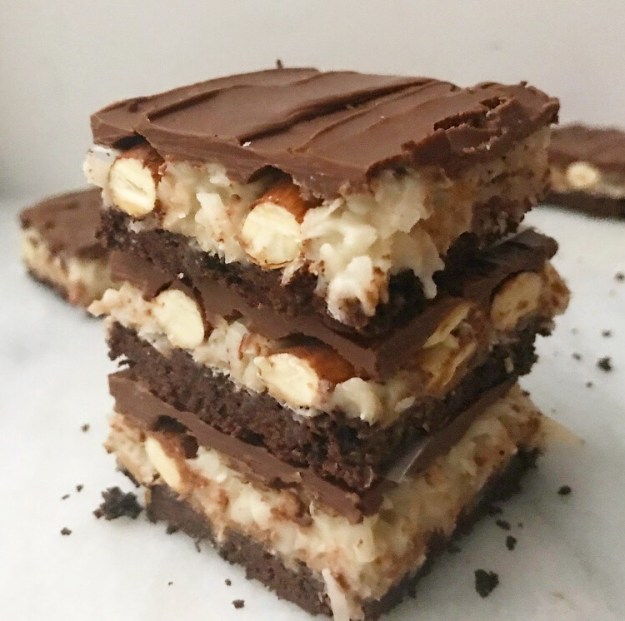
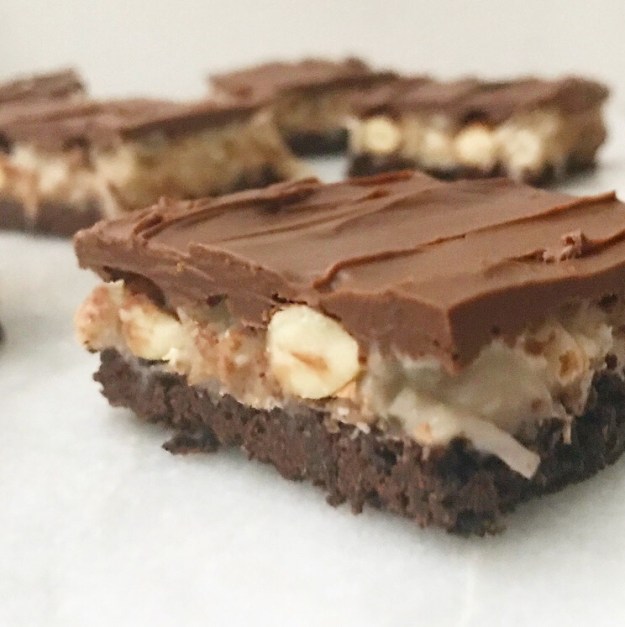 If you’re going to try to improve on the practically perfect combination of chocolate, almonds, and sweet coconut filling, layering it all onto a buttery chocolate shortbread crust is a pretty good way to start.
 All the layers in these bars make them look like they take hours to prepare, but in reality, they take about 90 minutes from start to finish and are nearly no-bake. That easy chocolate shortbread crust is the only layer that has to spend time in the oven.
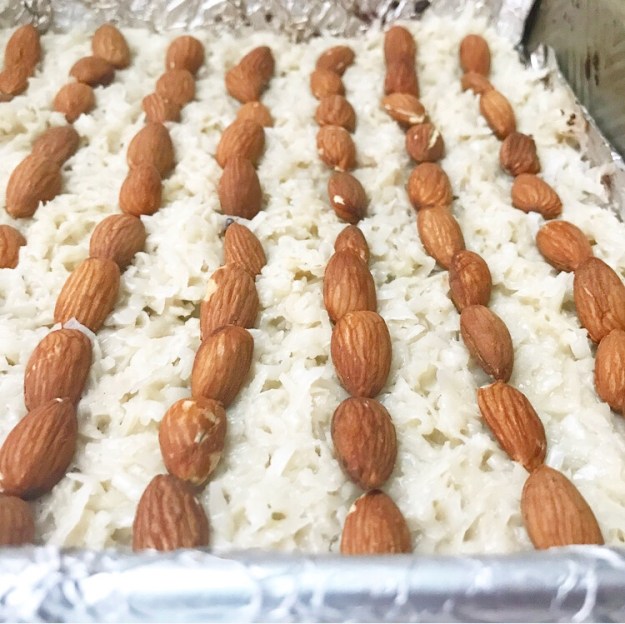
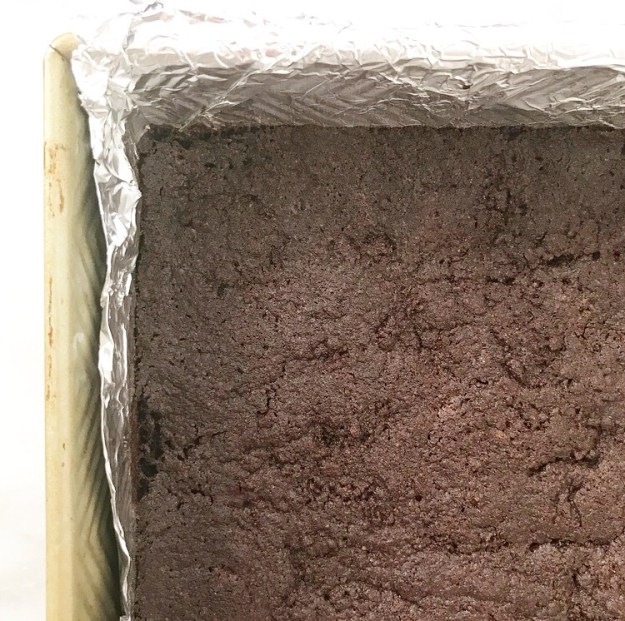 It’s topped with a thick layer of coconut filling and dotted with whole roasted almonds…

 But back to the bars. Slice ‘em up and admire your handiwork. #thoselayerstho
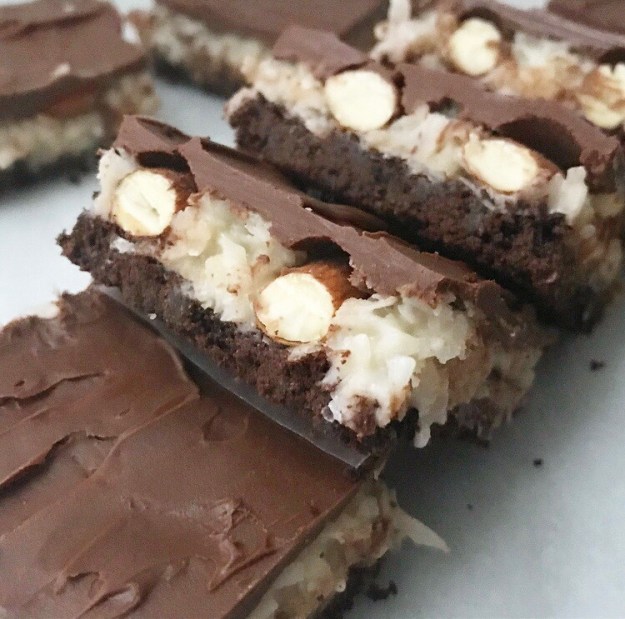 The flavor is everything you love about sweet, chewy, crunchy Almond Joys, but better because they’re homemade. Oh, and because they have a crispy layer of chocolate shortbread offsetting all their sweetness. After sinking your teeth into one of these, you’ll never be able to go back to the mass-produced candy bar.