Monthly Archives: May 2016

My Favorite Chocolate Chip Cookies

 I’ve spent three hours staring at my iPad screen, and I’ve come to a very important realization: there is nothing truly original that I can say about chocolate chip cookies.

They’ve been around since 1938. Everyone’s made them at least once and–with the notable exception of those crazy people who don’t like chocolate–most everyone likes them. I mean, what’s not to like? Sweet caramelly cookies studded with chocolate chips–they’re pretty much perfection in a mouthful.

The great thing about chocolate chip cookies is that there’s no shortage of ways to make them. If you have a preference about texture or flavor, there is a recipe out there for you. Chewy, crispy, crunchy, cakey, thin, thick, more brown sugar, more granulated sugar, chocolate chips, chocolate chunks–whatever you like, there is a recipe out there to suit your needs. <–Thank goodness for the Internet.

I’ve tried a lot of the recipes out there, and while all of them have been delicious (because how couldn’t they be?), none were quite right for me. Over the last two years, I’ve made A LOT of chocolate chip cookies, and I’ve slowly formulated a recipe that I love more than any other. They’re super soft and chewy with tons of brown sugar and chocolate. Here are a few things I’ve learned along the way.

1. Go with softened butter. The air beaten into room temperature butter allows these cookies to be both puffy and chewy. I’ve made many batches with melted butter and while the finished cookies are delicious, they are too thin for my taste, even after a long chill. If thinner cookies are your preference, this recipe will work with 1 cup melted butter. If you go that route, I suggest a three hour chill.

2. Use a ton of dark brown sugar. I like to use an 80/20 ratio of dark brown to granulated sugars. This not only enhances the softness and chew, but gives the finished cookies an amazing caramel flavor. Light brown sugar will work in a pinch, but dark brown really makes these cookies sing. 

3. Vanilla makes it all work. The most significant thing I learned while formulating this recipe is that I have very specific ideas about how much vanilla belongs in chocolate chip cookies. One teaspoon is too little for me, and two teaspoons (which seems to be the standard) is too much. I use 1 1/2 teaspoons of pure vanilla extract, and I think it balances the brown sugar and chocolate flavors perfectly.

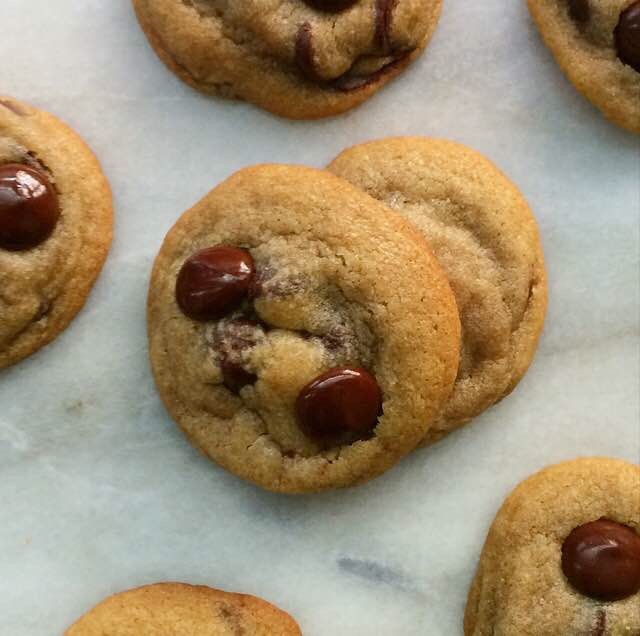
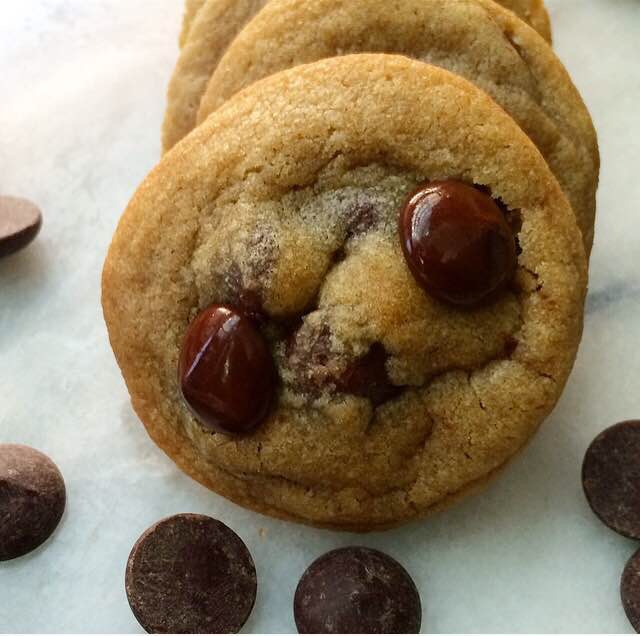
4. Go crazy with the chocolate chips, but not too crazy. This recipe calls for 1 1/4 cups chocolate chips. I used to think this wasn’t enough, so I added more and more, up to two whole cups. Let me say this–the extra chocolate is delicious, but it makes the cookies spread like crazy as it melts. If you want more chocolate chips, I suggest using an extra 1/2 cup or so to dot the tops just after the cookies come out of the oven. These were made with Ghirardelli semisweet morsels because I have 9+ pounds of them right now, but I’ve tried them with many other brands and every single one of them has been fantastic. Use whichever brand you like best.

So here it is, the recipe for my favorite chocolate chip cookies. Make them this weekend (Sunday, May 15th, is National Chocolate Chip Day), and share them with people you love. I hope this recipe will be your favorite, too. 

 Chocolate Chip Cookies
makes about four dozen cookies

2 1/2 cups all-purpose flour
1 tablespoon cornstarch
1 teaspoon baking soda
1 teaspoon Kosher or sea salt
1 cup (2 sticks) unsalted butter, softened to room temperature
1 cup dark brown sugar, packed
1/4 cup granulated sugar
1 large egg + 1 large egg yolk, room temperature
1 1/2 teaspoons pure vanilla extract
1 1/4 cups semisweet chocolate chips

In a large mixing bowl, whisk together flour, cornstarch, baking soda, and salt. Set aside.

In a separate large mixing bowl, use an electric mixer to cream butter until light and fluffy. Beat in dark brown sugar and granulated sugar, followed by egg, yolk, and vanilla extract. Add dry ingredients in three installments, combining completely after each addition. Fold in chocolate chips.

Cover dough with plastic wrap. Chill for at least two hours, or up to three days.

Preheat the oven to 350F. Line two baking sheets with parchment paper. Scoop chilled dough by the tablespoon and roll into balls. Set dough balls at least two inches apart on prepared baking pans. Bake 8-10 minutes, until puffy and starting to turn golden at the edges. Let cool ten minutes on the baking pans before transferring to a rack to cool completely. Repeat scooping, rolling, and baking wth any remaining dough.

Cookies will keep covered at room temperature for up to a week.

Vanilla Bean Sandwich Cookies

 Confession: I’m a vanilla person. Given the choice, I will pick vanilla over chocolate every single time. It’s not that I don’t like chocolate, it’s that I enjoy vanilla just the tiniest bit more. If you think I’ve gone and lost my mind, know that I come by it honestly.

So many people rag on vanilla, saying it’s boring. As far as I’m concerned though, when vanilla is done right, it’s anything but! In fact, my most popular cake order is this Vanilla Layer Cake. It has a little bit of a following! Oh, and these Vanilla Wafers are so good, you’ll never buy the boxed variety again. 

Long story short, I’m out to prove that vanilla is a powerhouse flavor. To make my point, I’m bringing you some fantastic sandwich cookies that are packed to the gills with vanilla bean flavor. Oh yes, these Vanilla Bean Sandwich Cookies are amazing! Soft, chewy vanilla bean cookies sandwiched together with the creamiest, dreamiest vanilla bean filling ever. There’s nothing plain about these little cookies! 

There’s nothing difficult about them either. The cookie dough is simple and straightforward–the hardest part is rolling 120 teaspoon-sized balls of cookie dough! And the filling is basically just a scaled down version of my go-to buttercream frosting. I use shortening in this recipe because I find it makes the filling reminiscent of Oreos, but you may substitute an equal volume of softened butter if you prefer. 

As easy as this recipe is though, there’s one thing that we need to talk about. This recipe contains one specialty ingredient: Nielsen-Massey Vanilla Bean Paste. You see, as much as I love vanilla, I can rarely bring myself to purchase whole vanilla beans. At $4 a pop, I just can’t justify the cost. Vanilla bean paste is my go-to for all recipes that demand the good stuff. It’s full of vanilla bean seeds and high-quality vanilla extract, and a $14 jar lasts forever. Trust me, nobody can tell that I didn’t throw $8 worth of vanilla beans into my recipes! See all those little black specks? If I didn’t tell you directly that I didn’t scrape those from whole vanilla beans, you’d never know the difference. But if you’re feeling fancy, feel free to use the real deal.

Whether you’re into vanilla or chocolate, you’ll love these Vanilla Bean Sandwich Cookies! They’re anything but plain 😊 

 Vanilla Bean Sandwich Cookies
makes about five dozen sandwich cookies

Cookies:
2 1/2 cups all-purpose flour
1 tablespoon cornstarch
1 teaspoon baking powder
1/4 teaspoon baking soda
1 teaspoon Kosher or sea salt
1 cup (2 sticks) unsalted butter, softened to room temperature
1 1/4 cup granulated sugar
1 large egg + 1 large egg yolk, room temperature
1 tablespoon vanilla bean paste*

Filling:
1/2 cup shortening*
2 1/4-2 1/2 cups confectioner’s sugar
pinch of Kosher or sea salt
3 tablespoons heavy cream
2 teaspoons vanilla bean paste*

Make the cookies. In a large mixing bowl, whisk together flour, cornstarch, baking powder, baking soda, and salt. Set aside.

In a separate large mixing bowl, use an electric mixer to beat butter until light and fluffy. Beat in sugar, followed by egg and yolk. Mix in vanilla bean paste. Add flour mixture in two installments, mixing to combine completely. Chill dough for 90 minutes in the refrigerator.*

Preheat oven to 350F. Line two baking sheets with parchment paper.

Scoop chilled dough by the teaspoon, and roll into balls. Set dough balls 1 1/2-inches apart on prepared pans. Bake 6-8 minutes, until no longer raw looking. Let cool on the pans for five minutes before removing to a rack to cool completely.

To make the filling, place the shortening in a large mixing bowl, and beat with a hand mixer on low speed. Once it’s smooth, add in 2 1/4 cups confectioner’s sugar and salt in two installments, until smooth. Beat in heavy cream and vanilla bean paste. If you’d like the filling to be thicker, add an additional 1/4 cup of confectioner’s sugar. If you would like to pipe the filling, place it in a plastic sandwich bag, and snip off a corner.

There are two options for filling:

1. To assemble a sandwich cookie by piping, apply filling by piping a circle in the middle of the underside of one cookie, leaving about 1/4″ around the edge. Top with a second plain cookie, with the underside filling-side-in. Repeat until all cookies have been used.

2. To assemble a sandwich cookie by spreading, use an offset frosting knife to spread 1/2-1 teaspoon on the underside of one cookie. Top with a second plain cookie, with the underside filling-side-in. Repeat until all cookies have been used.

Vanilla Bean Sandwich Cookies keep well in an airtight container at room temperature for up to a week.

Notes:

1. If you do not have or do not want to use vanilla bean paste, you may use the scraped seeds of half a vanilla bean plus two teaspoons of pure vanilla extract. Alternatively, you may use one tablespoon pure vanilla extract.
2. If you do not want to use shortening, you may substitute 1/2 cup (1 stick) room temperature unsalted butter.
3. If you do not have or do not want to use vanilla bean paste, you may use the scraped seeds of half a vanilla bean plus one teaspoon of pure vanilla extract. Alternatively, you may use two teaspoons pure vanilla extract.
4. I have sped up the chilling process by throwing the dough in the freezer for fifteen minutes. The dough may need to spend five minutes at room temperature before scooping.

Raspberry Lemon Sweet Rolls

 After making Blackberry Lime Scones last week, I came up with about fifteen new berry-based recipes to make between now and Labor Day, by which time I’ll be ready to ditch summer fruit for pumpkin. Probably. I dont think I could ever get tired of fresh summer produce.

First on the list? These Raspberry Lemon Sweet Rolls! Soft pastry filled with lemon-scented raspberries and drizzled with a simple lemon glaze. Served warm (with or without a fork), they’re like a ray of sunshine in breakfast form. That may sound a little ridiculous, but make these and you’ll understand. 

These sweet rolls start with a simple yeast dough. Yes, I just said yeast dough was simple. Yes, I meant to do that. For some unknown reason, yeast remains the most intimidating ingredient in American baking. It really shouldn’t be–there’s nothing to be afraid of. The most nerve-wracking part is proofing (waiting to see if it’s alive), and that’s really no trouble at all. But if it’s still intimidating for you, well, this dough might be the place to start.

You see, the dough for this recipe is made with instant yeast, so there is no waiting for anything to prove. As long as your instant yeast isn’t past the expiration date on the package, it should work just fine! Also, there’s only one rise, so these rolls can be made start-to-finish in less than three hours. The yeast is mixed with all-purpose flour, bread flour, sugar, and salt. A mixture of warm water, milk, and butter is stirred into the dry ingredients, followed by an egg. Stir until everything is combined and sticky, and then add flour in small increments until a smooth dough forms. Let it rest for ten minutes. The dough may expand a bit, but won’t really rise at this point. 

Roll the dough out into a large rectangle (or vaguely rectangular oval, if you’re me 😜). Spread that with softened butter, and then cover the whole thing with frozen raspberries that have been tossed with lemon zest, sugar, salt, and a touch of cornstarch. I know it’s tempting to use fresh raspberries this time of year, but they’re far too juicy for this recipe. 

Roll the raspberry-covered dough into a tight cylinder, and slice it into 1-inch rolls. I know it’s easy to eyeball this, but I recommend using a ruler. I keep one in my kitchen, and I use it way more than I ever would have expected. 

 Place the cut rolls in a lightly-greased square baking dish. Tent the pan loosely with foil, and leave it in a warm, draft-free place for 60-90 minutes, until the rolls have doubled in size. I put my rolls in an oven that I’ve preheated to 200F. Once I’ve tented the pan with foil, I turn off the oven and put the pan in there. In about an hour, my rolls are risen. Works every time!
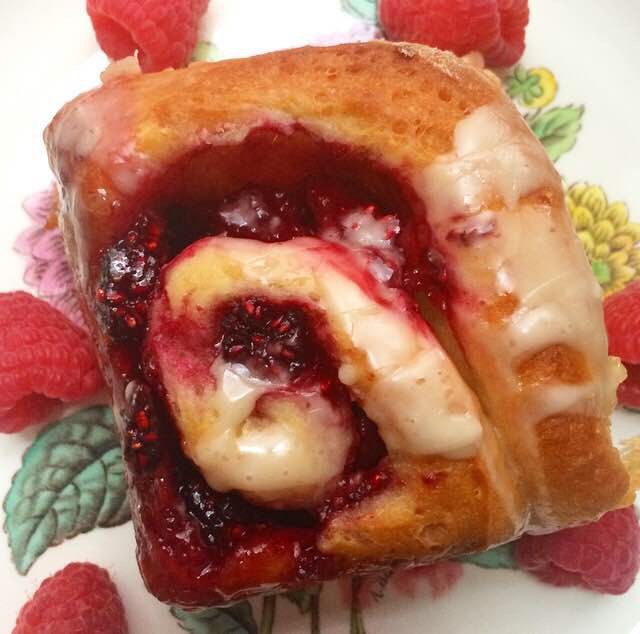
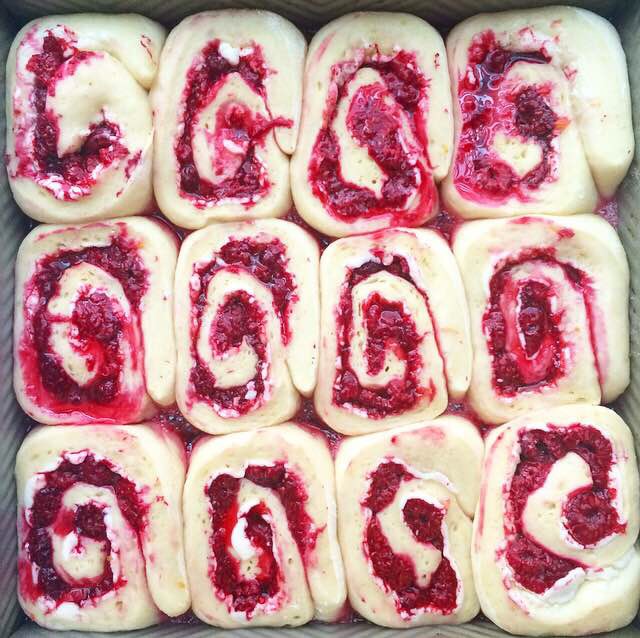
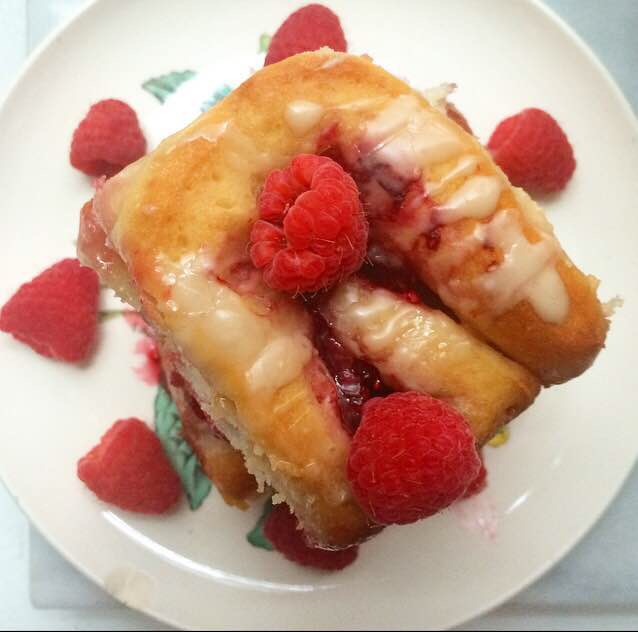
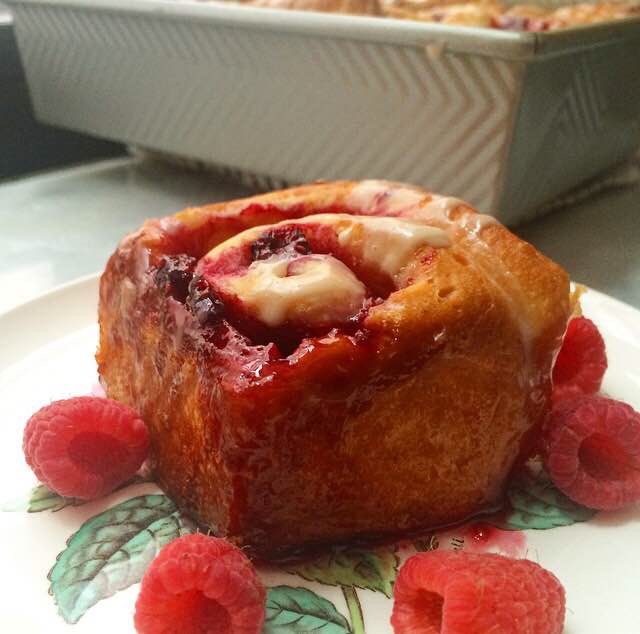
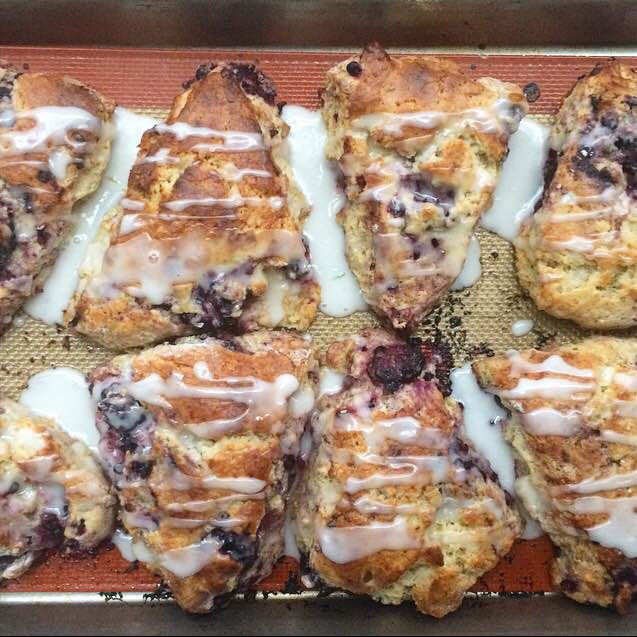
Uncover the risen rolls, and bake in a 375F oven for 25-30 minutes, until puffy and golden. Tent them with foil again if they’re starting to brown too quickly (mine were at the corners). Let the rolls cool for a few minutes while you mix together an easy lemon glaze. Drizzle that over the warm rolls and dig in! 

Raspberry Lemon Sweet Rolls are like summer in breakfast form! They’re perfect for brunch, end-of-school gifts for teachers, or just because you want something more interesting than your usual granola for breakfast. They’d be a fantastic way to start Memorial Day weekend, too! 

 Looking more more sweet rolls? Check out my Mini Biscuit Cinnamon Rolls (no yeast required!) and Apple Pie Cinnamon Rolls!

Looking for more raspberry breakfast recipes? Check out my Overnight Raspberry Cheesecake-Stuffed French Toast Bake!

Raspberry Lemon Sweet Rolls
makes about 12 rolls

Dough:
1 1/4-1 3/4 cups all purpose flour
1 cup bread flour*
3 tablespoons granulated sugar
1 teaspoon Kosher or sea salt
1 packet instant yeast* (2 1/4 teaspoons)
1/2 cup water
1/4 cup milk (I use whole milk)
2 1/2 tablespoons unsalted butter
1 large egg, room temperature

Filling:
5 tablespoons unsalted butter, divided
5 tablespoons granulated sugar
1/4 teaspoon Kosher or sea salt
zest of 1 lemon
2 1/2 cups frozen raspberries* (not thawed)
1 teaspoon cornstarch

Glaze:
1 1/2 cups confectioner’s sugar
pinch of Kosher or sea salt
1-3 tablespoons fresh lemon juice (about 1-2 lemons)
1/2 teaspoon pure vanilla extract

Make the dough. Set aside 1/2 cup of the all purpose flour. In a large mixing bowl, stir together 1 1/4 cup all-purpose flour, bread flour, granulated sugar, salt, and yeast. In a small saucepan*, heat water, milk, and 2 1/2 tablespoons of butter over low heat until the mixture reaches 115F. Remove from heat and stir into the flour mixture. Stir in egg. Add reserved all-purpose flour in 2 tablespoon increments until the dough is smooth and soft*, pulling away from the side of the bowl when stirred. Turn dough out onto a floured surface and knead for 5-6 minutes. Form dough into a ball and place in a lightly greased bowl. Cover with plastic wrap and let rest at room temperature for 10 minutes.

Prepare the filling. Place frozen raspberries and cornstarch in a small mixing bowl. In a separate small bowl, combine sugar, salt, and lemon zest. Use clean fingers to rub the zest into the sugar and salt until it is all well-mixed and fragrant. Add lemon-sugar mixture to raspberries, and toss until everything is combined.

Grease a 9-inch square baking dish. Set aside. Flour a surface and a rolling pin. Roll dough into an 8″x14″ rectangle. Spread softened butter over the entire surface of the dough. Spread raspberry mixture over the softened butter.

Starting at the long edge of the dough furthest from your body, roll the dough tightly toward yourself until you have one long cylinder. Using a large, sharp knife (not serrated) cut 1-inch rolls. Place cut rolls close together in prepared baking dish. Loosely tent with foil. Place rolls in a warm, draft-free place to rise for 60-90 minutes, until they have doubled in size.

Preheat the oven to 375F. Uncover risen rolls. Bake for 25-30 minutes, tenting with foil again at 10 minutes if the tops are getting too brown. Let rolls cool on a rack for ten minutes.

Make the glaze. In a small bowl, combine confectioner’s sugar and salt. Use a fork to whisk in lemon juice and vanilla. Add more confectioner’s sugar or lemon juice until the desired consistency is reached. Drizzle over warm rolls.

Raspberry Lemon Sweet Rolls are best enjoyed the day they are made, but may be kept in an airtight container at room temperature for up to 48 hours.

Notes:

1. If you do not have bread flour, all purpose flour may be substituted. Your rolls may not be as soft and chewy as if you’d used the bread flour, but they will still be delicious.
2. I use Fleischmann’s Rapid Rise Instant Yeast.
3. Do not use fresh raspberries for this recipe. They are too juicy to work well here.
4. I usually need 6 tablespoons of the reserved flour to achieve the desired consistency.

Blackberry Lime Scones

 The calendar may say it’s May, but we New Yorkers are still in coats. After a few glorious warm days, wind and rain have returned with a vengeance. Being from a place where the only seasons are summer and Christmas, I wait all year to be able to wear shorts and sandals and go to picnics in the park. Unfortunately, I’ll probably have to wait another month to spend all my time outside.

But it is starting to feel like summer in one part of New York: my kitchen. The green markets are full of berries and rhubarb, and I just can’t get enough! I can’t wait for sour cherries to hit the stands, but until then, I’m going to eat Blackberry Lime Scones with my black iced coffees and daydream about going the beach. 

These buttery, lime-scented scones are bursting with blackberries. Literally. Each one is studded with sweet, juicy fresh blackberries that burst when you take a bite. <–Yum!

The outsides are golden brown and just the slightest bit crunchy, while the insides are super soft and moist. Oh, and they’re drizzled with an easy lime glaze that brings these already fantastic little breakfast treats over the top! 

 Blackberry Lime Scones can be on your table in under an hour, which means they’re perfect for a casual Mothers’ Day breakfast. The dough takes just ten minutes to come together, and the scones only need to bake for 15 minutes or so. 

Let them cool just a few minutes while you whisk together the lime glaze. Drizzle that over the golden brown tops, and let it set for ten minutes. All that’s left to do is grab your favorite iced coffee and dig in! 

 Blackberry Lime Scones
makes 8 scones

2/3 cup half-and-half + more for brushing, very cold
2 tablespoons honey
zest of 1 lime
2 tablespoons granulated sugar
2 cups all-purpose flour
2 teaspoons baking powder
1/2 teaspoon Kosher or sea salt
1/2 cup (1 stick) unsalted butter, very cold, cut into pieces
6 ounces fresh blackberries

Glaze:
1/2-3/4 cup confectioner’s sugar
pinch of Kosher or sea salt
1-2 tablespoons fresh lime juice (about one lime)

Preheat oven to 425F. Line a baking sheet with parchment or a silicone baking mat. Set aside.

In a liquid measuring cup, stir together half-and-half and honey. Refrigerate to keep cold.

In a small bowl, combine lime zest and sugar. Use clean fingertips to rub the zest into the sugar until combined.

In a large mixing bowl, whisk together flour, lime-sugar, baking powder, and salt. Use a pastry blender (or two forks) to cut in cold butter until the largest chunks are the size of small peas. Use a silicone spatula or wooden spoon to stir in milk-honey mixture and blackberries until a shaggy dough forms.

Turn dough onto a well-floured surface and form into a 1-inch thick circle. Cut circle in eight wedges. Transfer the wedges to prepared pan, setting them at least 1.5 inches apart. Brush the tops with additional half-and-half. Bake 15-18 minutes, until golden. Let cool ten minutes.

Make the glaze. In a small bowl, combine confectioner’s sugar and salt. Whisk in lime juice until a thin icing forms. Add more confectioner’s sugar or lime juice to alter consistency. Drizzle glaze over warm scones. Glaze will set after ten minutes.

Scones are best the day they are made, but will keep in an airtight container at room temperature for up to 48 hours.

Roasted Tomatillo Salsa

New York City is not the place to move if you’re a salsa snob.

I should know. I’ve lived here almost nine years and have yet to find a Mexican restaurant whose salsa is not obviously from a jar. The worst experiences have been one that was mostly ketchup and Tabasco, and another that contained basil.*

*Note to Mexican restaurants everywhere: salsa and marinara are not interchangeable.

Luckily for me, I love to cook, so I have not been doomed to only eat subpar salsa for my tenure in NYC. I’ve learned to make several different varieties–my red Restaurant-Style Salsa is the favorite among my friends. I could definitely make that and some tostadas for Cinco de Mayo and have a perfectly good dinner. But lately, I’ve been seeing gorgeous green tomatillos at my favorite vegetable market, and they are just begging to be made into salsa. Being a total salsa fiend, I am happy to oblige.

This Roasted Tomatillo Salsa is my favorite salsa ever. It’s a little sour from the tomatillos (but not overly so) with pops of freshness from the cilantro and lime, and has a rich, smooth texture. Thick and chunky salsa is not my style.

Roasted Tomatillo Salsa takes slightly more work than the Restaurant-Style Salsa, but it’s still a breeze. Most of the 35 minute prep time is just waiting for everything to roast and cool, so it really is a snap.

  Slice some fresh tomatillos in half and place them on a baking sheet with half an onion, two fresh jalapeños, and a couple of cloves of unpeeled fresh garlic. Drizzle everything with olive oil and roast it in a 425F oven for about twenty minutes. Let the vegetables cool for ten minutes, squeeze the soft garlic from its peels, and blitz everything in a food processor (or high-powered blender) with some fresh cilantro, lime juice, and salt. That’s it! This salsa is hardly any work at all, and is infinitely better than any prepared salsa you can imagine.

  Serve Roasted Tomatillo Salsa with nachos, quesadillas, tacos, tostadas, or tortilla chips. Use it as the base for an amazing chicken soup! Pour it over chicken enchiladas before they go in the oven. Spoon it over eggs scrambled with tortillas and cheese and have migas for breakfast <– did that yesterday. Highly recommend.

Any way you serve it, this Roasted Tomatillo Salsa will be a new favorite.

 Roasted Tomatillo Salsa
makes about 2 cups

1 1/2 pounds fresh tomatillos,* husked and rinsed
1-2 fresh jalapeño peppers, stems removed
1/2 medium white onion, peeled
2 cloves garlic, not peeled
olive oil, for drizzling
1/3-1/2 cup fresh cilantro, washed
juice of 1 lime
1/2-3/4 teaspoon Kosher or sea salt

Preheat oven to 425F. Line a baking sheet with parchment paper. Set aside.

Slice tomatillos in half. Slice jalapeños in half, and seed if desired. Place on baking sheet along with onion and garlic. Drizzle all vegetables with olive oil. Roast for 15-20 minutes, until starting to brown. Let cool ten minutes.

Squeeze garlic out of its skins. Place roasted vegetables in the bowl of a food processor or high-powered blender. Add cilantro, lime, and salt. Purée until smooth.

Serve immediately, or refrigerate in an airtight container for up to five days.

Note:

Tomatillos and green tomatoes are not interchangeable.

Roasted Tomatillo Salsa