Category Archives: Breakfast

Mini Biscuit Cinnamon Rolls

 Cinnamon rolls are amazing. (Duh.) Gooey cinnamon filling rolled into soft pastry and covered in frosting–what’s not to love?!

Well…the time commitment. Even supposedly “quick and easy” recipes take three hours. The problem is the yeast. It takes a while. Like multiple-long-rises a while. Add to that the fact that working with yeast strikes fear into the hearts of many casual bakers. I’ve learned that yeast is nothing to fear, but still. When I want cinnamon rolls, I want them *now.* Not in three or six or eight hours–NOW.

I clearly have some pretty serious breakfast pastry needs. 

What if I told you that you could have some seriously good cinnamon rolls on your table in less than 90 minutes? And that you didn’t have to proof any yeast or let anything rise? Would you be interested?

Yeah, I thought so.

Enter Mini Biscuit Cinnamon Rolls. All the sweet cinnamon goodness of classic cinnamon rolls, wrapped up in a delightfully easy cream biscuit dough and positively smothered in cream cheese frosting. Oh my word, are these good. And they’re miniature, because tiny food just tastes better somehow. 

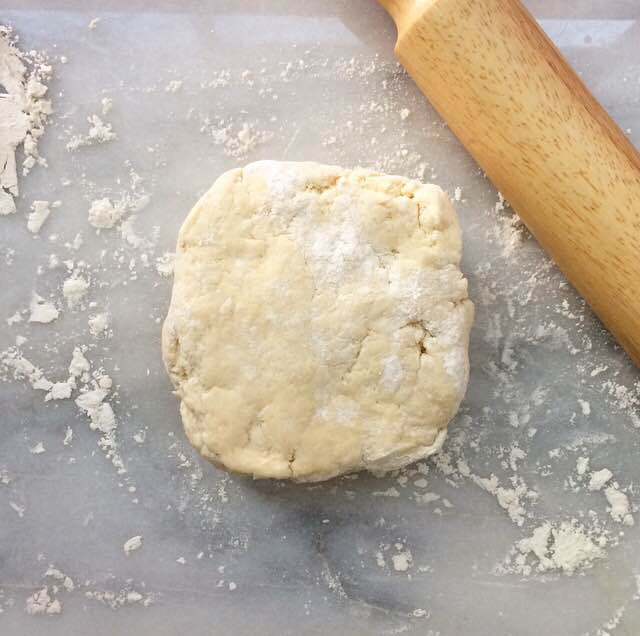
The dough base is the same as the one I used in my Scratch Biscuit Monkey Bread. It’s super easy: mix together flour, sugar, salt, and baking powder, and stir in 2 cups of cream (I said quick and easy, not healthy). That’s it. Seriously easy. I do not recommend using a regular buttermilk biscuit dough here–the butter in that dough must be kept cold, or your results will be bricks. No, thank you. This simple cream biscuit dough has no butter, so it doesn’t need to be kept absolutely frigid to bake up properly. Using this base, you can roll and flip and handle the dough as much as you want! 

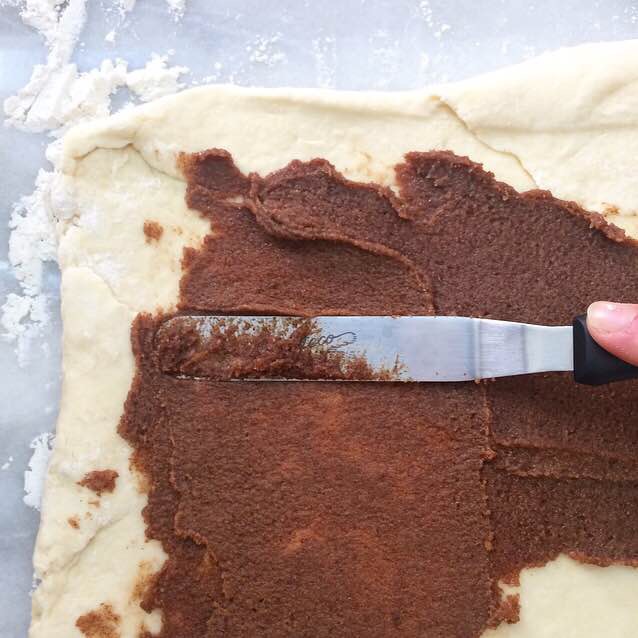
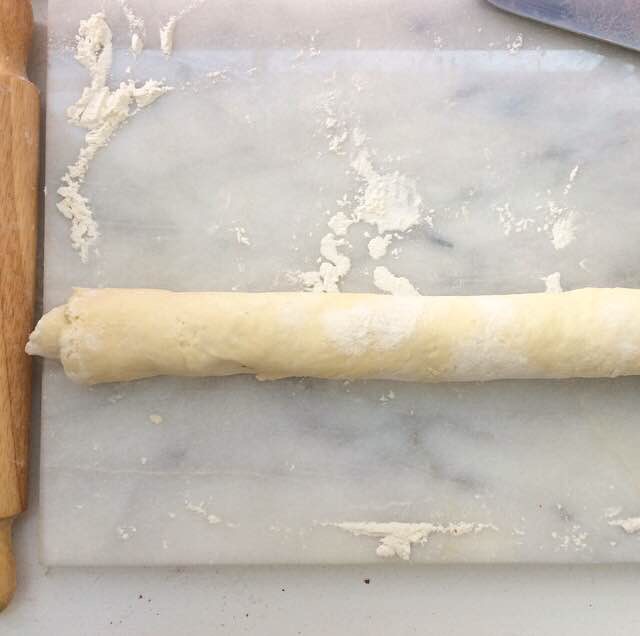
    Once the dough is made, divide it in half. Take one half and roll it into a large rectangle on a floured surface. Then, take some butter that’s been spiked with granulated sugar, dark brown sugar, cinnamon, and salt, and spread it over the whole thing, leaving only a thin border. Gently roll the long edge of the dough toward your body until you have a tight cylinder. 

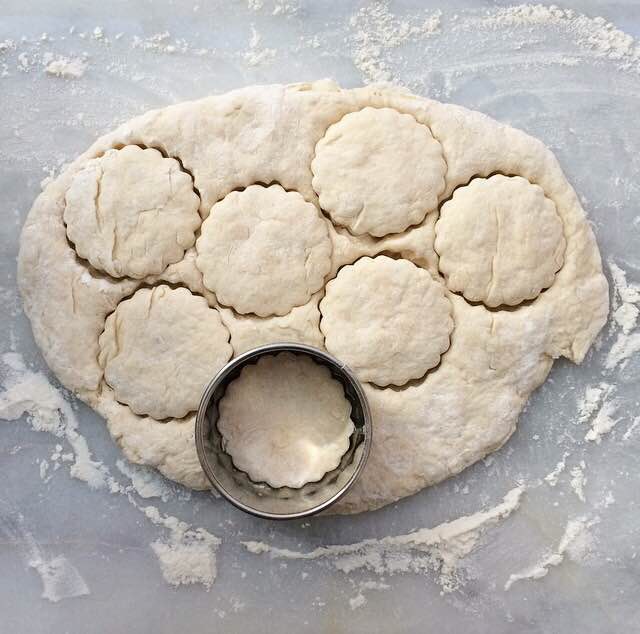
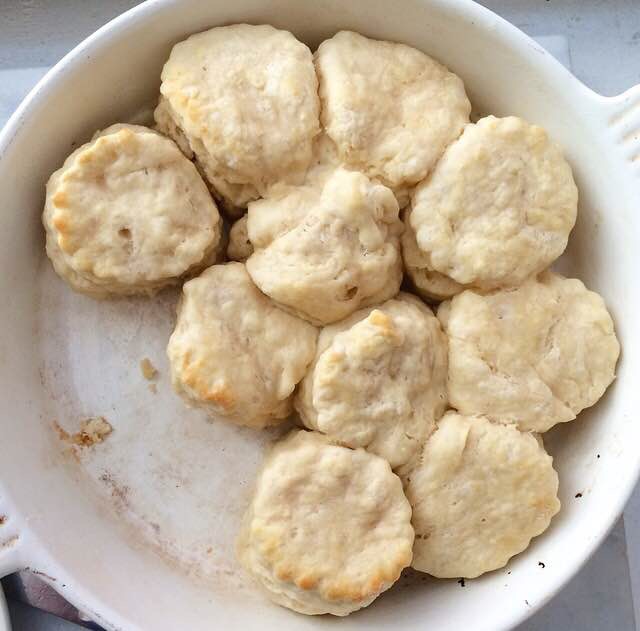
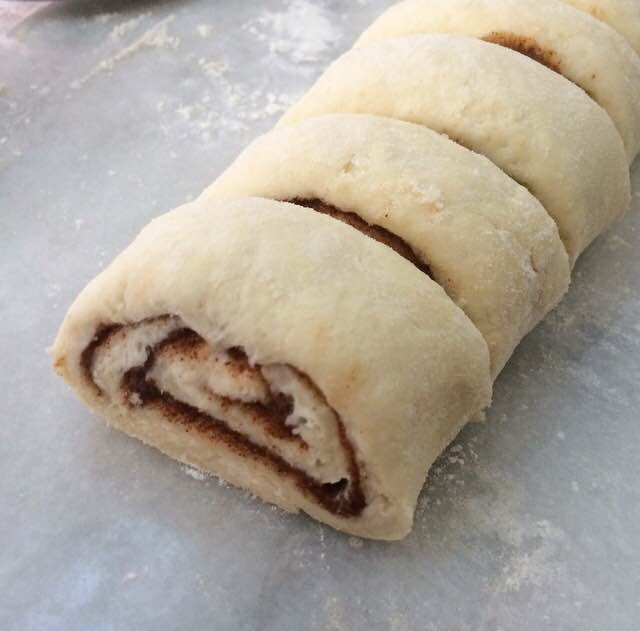
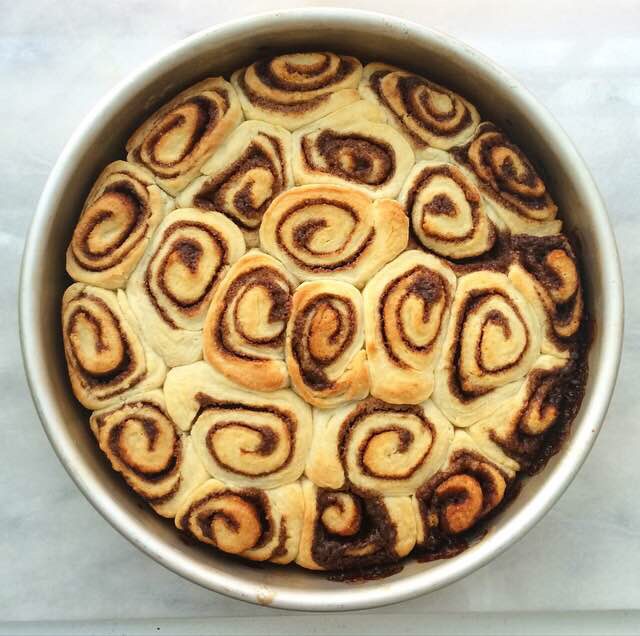
 Cut the rolled dough into 1-inch rolls and place them close together in a buttered pan. Repeat that process with the other half of the dough, and then bake the rolls for 15-20 minutes at 400F.  
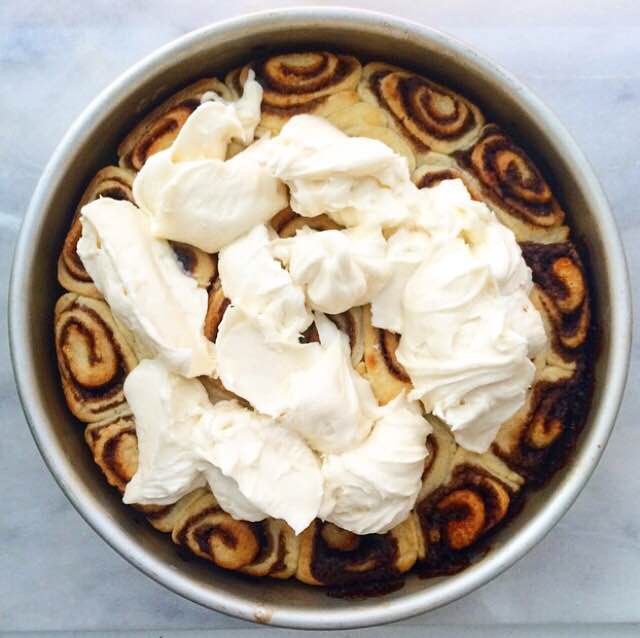
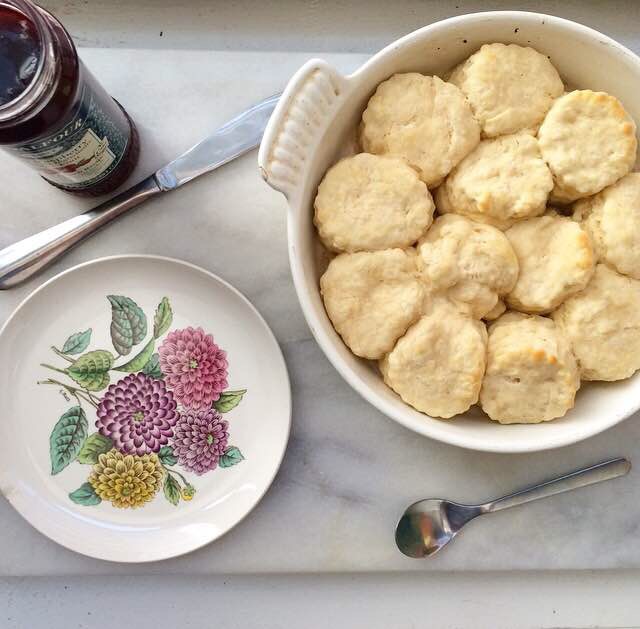
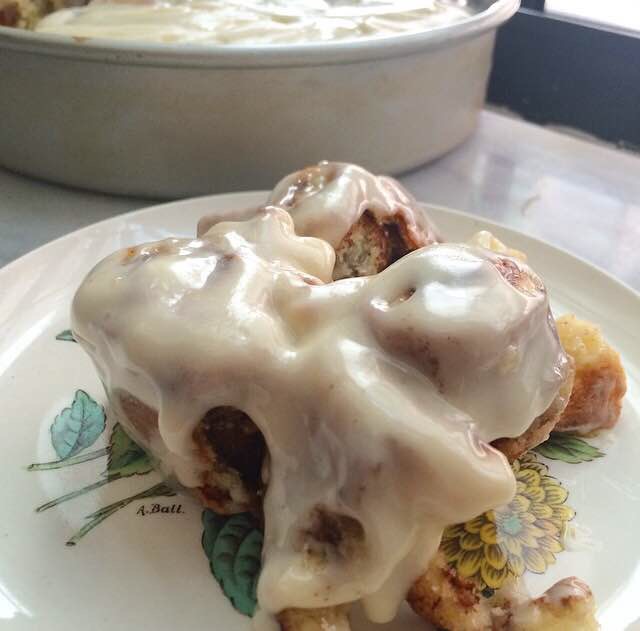
 Make a half-batch of my cream cheese frosting, and spread it over the warm rolls. Yes, this is a lot of frosting, but that’s how I roll. <–Ha! Roll. 

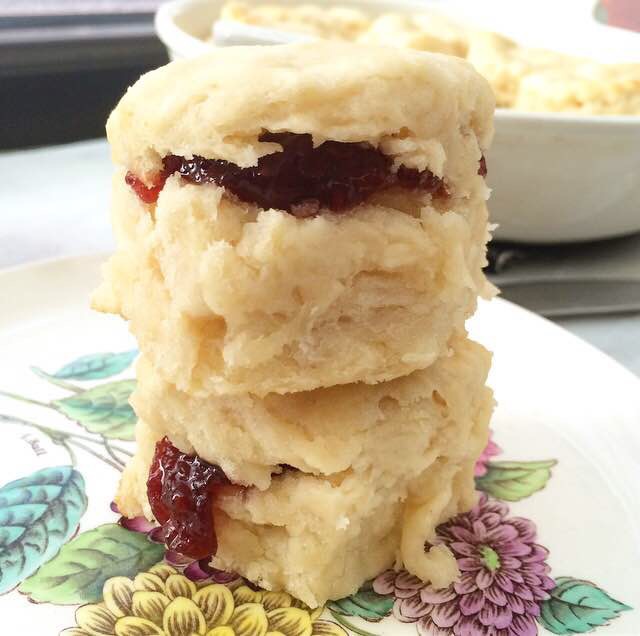
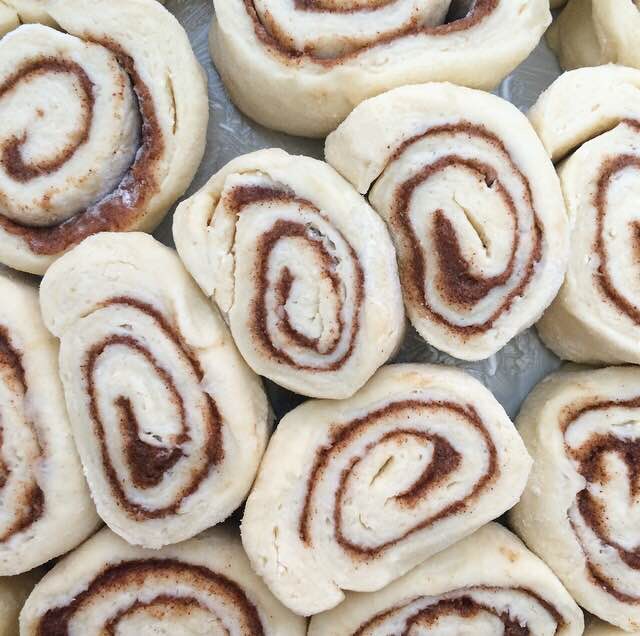
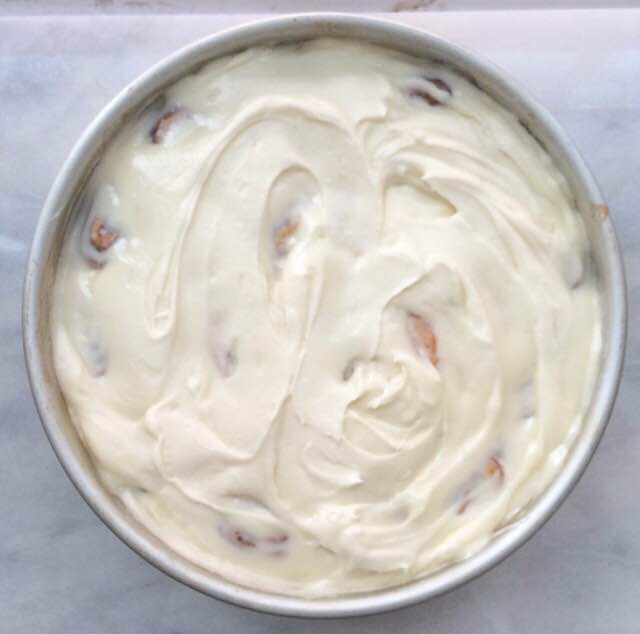
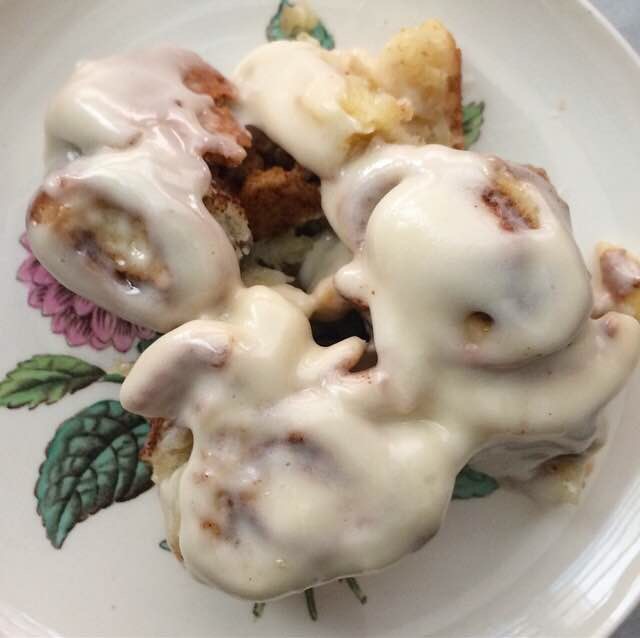
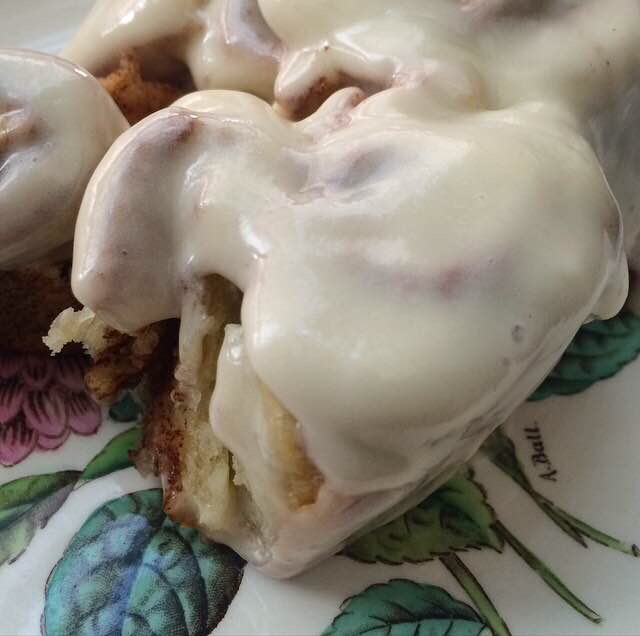
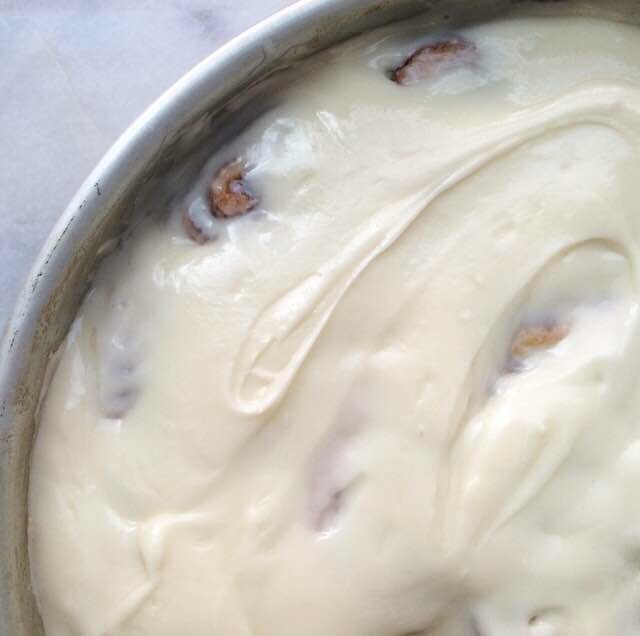
Seriously, look at that.

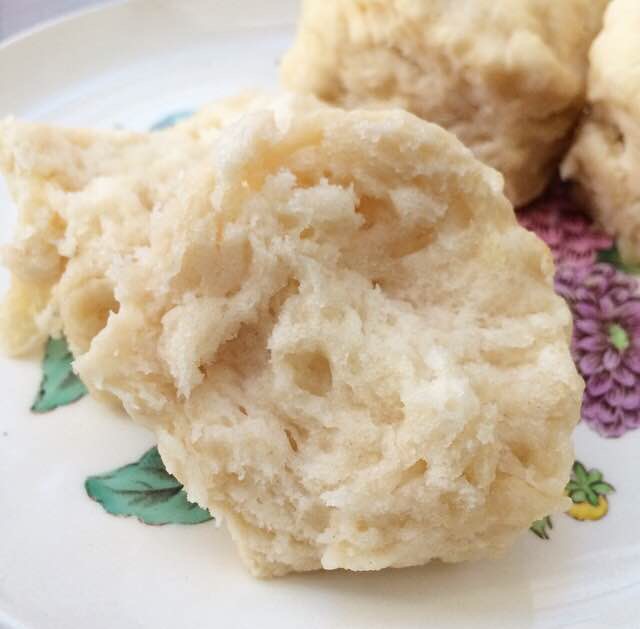
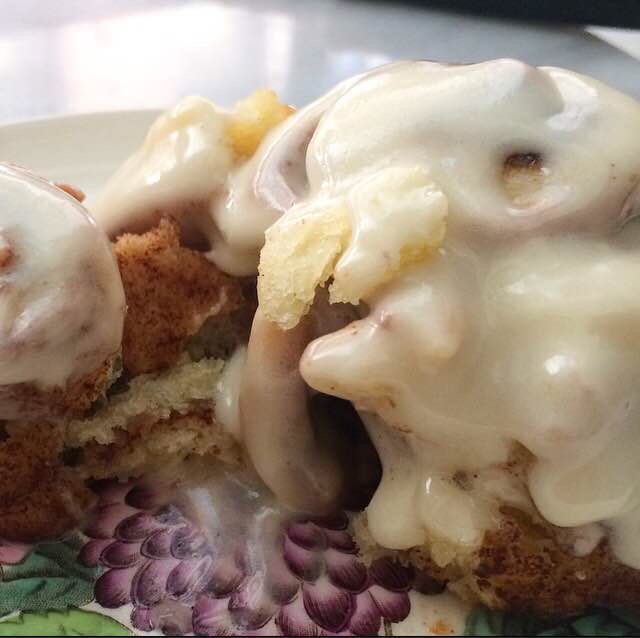
If a metric ton of frosting isn’t your thing, you may halve the recipe. The frosting will melt into every nook and cranny of the cinnamon rolls and make everything super gooey and delicious. In fact, the frosting is so thick, I had a hard time seeing while cutting out individual rolls–but when they’re this good, I don’t care if they’re totally gorgeous. The tang of the frosting with the fluffy biscuit base and sweet cinnamon filling is just…everything. 

So, the next time you have a craving for cinnamon rolls, make these Mini Biscuit Cinnamon Rolls. In less than 90 minutes, you’ll be tucking into a full pan of amazingness, and you won’t have fretted over yeast or waited an eternity! These are perfect for any weekend morning or brunch party. Nobody can resist these sweet little rolls 😊 

 Mini Biscuit Cinnamon Rolls
makes about two dozen miniature rolls

Filling:
6 tablespoons unsalted butter, softened to room temperature
1/4 cup granulated sugar
1/4 cup dark brown sugar, packed
2 tablespoons ground cinnamon
1/2 teaspoon Kosher or sea salt

Biscuits:
3 cups all-purpose flour
2 tablespoons granulated sugar
1 teaspoon Kosher or sea salt
1 tablespoon baking powder
1 pint (2 cups) heavy cream, cold

Frosting:
4-ounces (1/2 brick) full-fat cream cheese, softened to room temperature
1/2 cup (1 stick) unsalted butter, softened to room temperature
2 cups confectioner’s sugar
pinch of Kosher or sea salt
1 teaspoon pure vanilla extract

Preheat oven to 400F. Grease a 9-inch round cake pan with butter. Set aside.

Make the filling. In a small mixing bowl, use a fork to mash together softened unsalted butter, granulated sugar, dark brown sugar, cinnamon, and salt, until it’s completely combined. Set aside.

Make the biscuit dough. In a large mixing bowl, whisk together flour, granulated sugar, salt, and baking powder. Use a silicone spatula or wooden spoon to fold in heavy cream, making sure to scrape the sides and bottom of the bowl. Dough will be shaggy. Divide dough in halves.

On a floured surface, roll half the dough into a 14×8-inch rectangle. Use an offset knife (or butter knife) to spread half the filling onto the rectangle, leaving a 1-inch border at the edge. Starting at the long edge furthest away from your body, tightly roll the dough toward you until you have one large cylinder. Slice into 1-inch pieces, and place close together in the prepared pan. Repeat process with the second half of the dough.

Bake rolls for 15-20 minutes, until light golden and fully cooked. Let cool ten minutes while you make the frosting.

In a large mixing bowl, use an electric mixer to beat cream cheese and butter until light and fluffy. Beat in confectioner’s sugar and salt, followed by vanilla. Scrape down the sides of the bowl as necessary. Drop frosting in dollops over the top of the warm rolls. Spread with an offset knife to cover the entire top of the rolls. Let set for ten minutes before serving.

Mini Biscuit Cinnamon Rolls are best served the day they are made, but may be kept covered at room temperature for up to three days.

Coconut Oil Biscuits

 I know what you’re thinking. “Coconut oil in biscuits? This girl’s lost her mind!”

But hear me out. Until last week, I felt the same way. Up to that point, every great biscuit I had ever eaten was made with butter and buttermilk, or occasionally, heavy cream. But while surfing Pinterest one morning, I came across a recipe for Coconut Oil Biscuits. At first, I was horrified. Coconut oil? In biscuits? No way. And they were vegan? I love experimenting with vegan recipes, but biscuits were sacred. 

I kept scrolling. But the evil geniuses who designed the Pinterest algorithm had other ideas. The recipe kept showing up! I closed the app and went about my day.

But that Pin kept popping up in my mind. And the more I thought about it, the more I welcomed the idea. Biscuits made with coconut oil and coconut milk? I like coconut. I love biscuits. Was it so wrong to put them together? I gave in and decided to try it myself. I figured that if they were a real disaster, I could toss them and go back to my buttermilk biscuit-only mentality. 

 Very long story short, I shouldn’t have worried. Coconut Oil Biscuits rise high and are super soft and fluffy. And they don’t need any of the chilling, rolling, folding, or thwacking that my buttermilk biscuits require. None of those things are difficult or take much time, but there’s something really awesome about being able to make scratch biscuits in 25 minutes start-to-finish. Yes, if you turn the oven to 425F right now, you are only 25 minutes away from slathering jam onto a warm biscuit! 

 But before you go running to the kitchen, there are a couple of ingredients we need to talk about. First, the coconut oil. In buttermilk biscuits, the butter must be kept cold so that it only melts in the oven–this creates flakiness and layers. If it were at room temperature during the mixing, the resulting biscuits would be dense and dry because the butter “pockets” basically wouldn’t exist. But unlike butter, coconut oil is solid (and kind of hard) at room temperature, so it will cut into the flour easily without becoming gooey. And since the oil doesn’t have butter’s water content, it keeps these biscuits nice and moist. Hello fluffy, flaky magic. 

The other thing we need to talk about is the milk. In buttermilk biscuits, the liquid is buttermilk (duh). Here, you could use regular dairy buttermilk, but why not add an extra dose of flavor (and keep the biscuits vegan!) by using coconut milk?! I use refrigerated coconut milk because of it’s textural similarity to dairy buttermilk. Doctored up with a teaspoon of vinegar, it creates tenderness just like its dairy counterpart. 

 Coconut Oil Biscuits bake up in just 10-12 minutes. They don’t really turn golden, but they definitely rise high. And they are so tender that you can lift the tops right off–perfect for topping with whatever your biscuit-loving heart desires!

For those wondering if these are super coconutty or not, well…they definitely have a coconut flavor, but as there isn’t much sugar, they are decidedly on the savory side. I like them with a little jam (raspberry is my favorite!), but I think a sweeter nut butter, like this one, would do well here. I could also imagine them slathered with some salted butter or made into little breakfast sandwiches.

No matter how you serve them, these Coconut Oil Biscuits are sure to be a new favorite. 

 Coconut Oil Biscuits
adapted from Gimme Some Oven
makes about 12 biscuits

1 teaspoon white or apple cider vinegar
3/4 cup milk of choice*, plus extra for brushing
2 cups all-purpose flour
1 tablespoon granulated sugar
1 tablespoon baking powder
1 teaspoon Kosher or sea salt
1/4 cup coconut oil,* solid

Preheat oven to 425F. Grease a 9″ pie plate with coconut oil. Set aside.

Pour vinegar into a liquid measuring cup. Pour in milk until you have 3/4 cup total liquid, and stir to combine. Place measuring cup in the fridge to chill while you prepare the other ingredients.

In a large bowl, combine flour, sugar, baking powder, and salt. Whisk to combine. Using a pastry blender or two forks, cut coconut oil into the dry ingredients until the largest pieces are the size of small peas. Pour in milk mixture and use a silicone spatula or wooden spoon to fold everything together, scraping the sides and bottom of the bowl as you go.

Turn dough out onto a floured surface. Use floured fingertips to knead a few times, until everything is fully combined. Pat dough to a 1/2-inch thickness. Use a 2-inch round biscuit cutter or sharp knife to cut biscuits. When cutting, press directly down–do not twist or saw. Pat dough out again as necessary.

Place biscuits close together in prepared pan. Brush the tops with additional coconut milk. Bake for 10-12 minutes, until biscuits have risen and are no longer doughy. The tops may not turn golden.

Let cool for a few minutes, and serve warm with your jam of choice.

Notes:

1. I use SO Delicious Unsweetened Vanilla Coconut Milk Beverage. Any non-dairy milk will work, as will whole, 1%, and 2% cow’s milk. Do not use skim or fat-free cow’s milk.

2. I use Trader Joe’s Extra Virgin Coconut Oil.

Friday Favorites

Hello!

How are you? Got any April Fools Day pranks up your sleeves? Any good plans this weekend?

I’ve got a day of work at my day job and then I’m making cake for 300 because I’m insane. Maybe I’ll get a nap next weekend…but probably not since I’m catering a party.

So I’m taking a break from the kitchen today, but that doesn’t mean I’m taking a break from the blog! No way. I spend way too many of my waking hours (and sometimes my sleeping hours…) thinking about making cookies and cupcakes and pie. Also, how to obtain Oreos right now without leaving my apartment.

Anyway, I dug through my archives so you could spend all weekend thinking about frosting, just like me. Thank me later 😜 

Why not start the weekend off with some Glazed Cream Cheese Cake Doughnuts? They’re super tender and the homemade glaze is the stuff of dreams. Mmhmm. Oh, and they’re shockingly easy, too. The batch makes a little more than 1 1/2 dozen, so they’re an excellent excuse to have friends over for a little Saturday morning doughnut party! 

But if frying doughnuts first thing on a Saturday morning sounds like a hazard, why not make a Puff Pancake {Dutch Baby}? It’s my go-to “special” breakfast. The way it puffs up in the oven is really amazing, and the recipe is easily adjustable, so you can make anywhere from 1-4 servings. 

Weekends and homemade cookies just go together. Check out these M&Ms Potato Chip Cookies! I made these for Christmas, but you could use regular M&Ms, or the pastel Easter variety. These sweet and salty little cookies always hit the spot 😊 

Oh, and the Katharine Hepburn Brownies I made this week. They’re grain- and gluten-free without any unusual ingredients! They’re sure to please all the chewy brownie lovers in your life. 

It’s supposed to get cold here this weekend, so soup has to be on the menu! This Spicy Southwestern Chicken Soup totally fits the bill. It’s full of southwestern flavors–it even has salsa in the broth! The best parts? It takes an hour start-to-finish and makes enough for a few lunches next week! 

Are you always rushing on weekday mornings? If you’re anything like me, you never have time to make breakfast. And I am one of those who absolutely *can’t* go without breakfast. My solution? I make a huge batch of granola over the weekend and then eat it with fruit and yogurt all week long. I’m obsessed with this Peanut Butter Granola

And because I said there would be frosting, here’s my favorite Red Velvet Cake. It’s super simple, ridiculously good, and my light and fluffy cream cheese frosting is just…well, make the cake. You’ll see.

Let me know if you have made (or are planning to make ) these or any of my other recipes! Leave me a comment below or find me on Instagram @e2bakesbrooklyn! I’ll be back next week with new recipes 😊 Enjoy your weekend!

Peanut Butter Granola

 It must just be leftovers week here on E2 Bakes Brooklyn.

Yesterday, I posted a baked french toast recipe that came to be because a friend gave me two loaves of day-old artisan bread. Today, I’m bringing you my new favorite granola recipe, all because an out-of-town friend gave me most of a jar of peanut butter that she had as a snack in her hotel room, and another gave me a one-pound bag of honey-roasted peanuts after a party I catered with him. My friends just like to give me food, apparently. And I am happy to take anything they give me and try to make it into something delicious. Today, I succeeded. 

This Peanut Butter Granola is ridiculously good. It’s almost like having peanut butter cookies for breakfast! Except that it’s high in protein and totally whole grain, so it’s actually good for you! And it gets better: this recipe takes 90 minutes from the time you turn on the oven to when you put the cooled granola in an airtight container. On top of all that, it’s simple as can be 😊

Just whisk together equal parts peanut butter, maple syrup, and olive oil, along with some vanilla. This base will keep everything crispy, sweet, and peanut buttery (of course). Next comes a couple of tablespoons of brown sugar. While I would have loved to keep this recipe refined sugar-free, this small amount helps the finished product get extra crunchy. If you don’t want to use brown sugar, you may substitute coconut or Demerara sugars. Add in just a touch of cinnamon and some salt. Neither will have a prominent flavor here–they just allow the peanut butter to shine. Without them, our granola could be overly sweet and a little bland.

How sad is the idea of bland peanut butter anything?! 😭

Once the liquid ingredients are ready to go, it’s time to fold in the oats and honey-roasted peanuts. They are used here in an almost 50/50 ratio. There are slightly more oats, but rest assured that there are plenty of peanuts in every crunchy bite! If that amount of chopped nuts sounds like too much for your taste, feel free to replace some of them with an equal volume of oats. 


After everything is mixed together, spread the granola on a parchment or silicone-lined baking sheet. Bake the granola for 40-45 minutes at 300F, stirring every fifteen minutes. By the time it’s done cooking, your house will smell unbelievable! Let the granola cool in the pan on a cooling rack before transferring it to an airtight container for up to three weeks.

I like to eat this granola with Greek yogurt and fruit, but it’s also great with milk, or just by itself as an afternoon snack. How good would a handful be with some chocolate chips?! Oooh, or peanut butter chips! However you choose to enjoy it, you’ll love this Peanut Butter Granola!

  
Looking for more granola? Check out my easy Maple Pecan Granola!

Peanut Butter Granola
makes about 4.5 cups

1/4 cup natural or creamy peanut butter
1/4 cup maple syrup
1/4 cup olive oil
1 teaspoon pure vanilla extract
2 tablespoons light or dark brown sugar*, packed
1/2 teaspoon ground cinnamon
1/2 teaspoon Kosher or sea salt
2 1/2 cups old-fashioned oats*
2 cups honey roasted peanuts*, roughly chopped

Preheat oven to 300F. Line a rimmed baking sheet with parchment paper or a silicone baking mat. Set aside.

In a large mixing bowl, whisk together peanut butter, maple syrup, olive oil, brown sugar, cinnamon, and salt. Use a silicone spatula or wooden spoon to fold the oats and chopped peanuts into the mixture.

Once everything is coated in the peanut butter mixture, spread it in an even layer on the prepared pan. Bake for 40-45 minutes, stirring every fifteen minutes. Cool granola in the pan on a rack. Store in an airtight container at room temperature for up to three weeks.

Notes:

1. Coconut or Demerara sugars may be substituted.
2. Use certified gluten-free oats for gluten-free granola.
3. If this is too many peanuts for you, replace 1/2 cup of them with an equal volume of old-fashioned oats.

Overnight Raspberry Cheesecake-Stuffed French Toast Bake

There are two kinds of people in the world: those who love leftovers, and those who hate them.

I am the former, though I haven’t always been. I was raised by someone who will eat cold anything out of a Tupperware while checking phone messages, and that grosses me out completely. I am wary of leftover spaghetti to this day. But I love leftovers that can be repurposed: roast chicken or vegetables, a spare slice of cooked bacon, some extra marinara. I can use those to make soup or quiche or lasagna! It’s like hitting the kitchen lottery.

Imagine my surprise when I was gifted two artisan loaves of bread last week, one challah, one a rustic country bread. They were given to me at a ritual Friday night dinner by my friend, Phil, who, ironically, doesn’t eat gluten. He had stopped at a nearby bakery and coffee shop to get a little pick-me-up on the way to dinner. They were about to close for the night and were trying to get rid of any loaves they hadn’t sold that day. Being the great friend he is, he grabbed two and gave them to me 😊

By the time I got home from dinner Friday night, I had already decided to make some baked french toast. It’s a simple, sweet brunch dish that’s absolutely perfect for a crowd. Instead of flipping individual pieces, all the bread is placed in a baking dish and soaked with custard for several hours. All that’s left to do is bake it up, slice, and serve with maple syrup. And while that is great by itself, why not turn up the flavor a little by stuffing it all with a cheesecake filling and raspberries?!

If you’ve ever made baked french toast, you know that day-old bread is the way to go. Since it’s all dried out, it soaks up a ton of custard, and after a good half-day or so, bakes up to be absolutely divine.

This recipe requires one whole loaf of day-old challah. Italian or French bread would work, too; use something that has a tight structure and isn’t too crusty. Don’t go for regular sliced bread though–it will get too soft and goopy from soaking. Slice the bread in 3/4″ slices, and lay half of them in a buttered baking dish. Fill in any gaps by cutting other slices into smaller pieces and squishing them into the empty spaces. The bottom of the dish doesn’t have to be completely covered, but you shouldn’t have any large gaps. Cover that layer of bread with a simple custard mixture of eggs, whole milk, vanilla, granulated and brown sugars, cinnamon, and salt.

 Then comes the best part: the cheesecake filling and raspberries! To make the cheesecake mixture, cream an 8-ounce brick of softened cream cheese with an egg yolk. Mix in a little confectioner’s sugar and vanilla, and you’re ready to spread! Spoon the filling over the top of the soaking bread, and use a silicone spatula or offset knife to spread it all the way to the edges of the dish. Top that with a cup of raspberries–fresh or frozen work just fine. Then top the filling with another layer of bread slices and the rest of the custard. Wrap the pan tightly with plastic wrap and foil, pressing down to encourage the bread to soak up the custard.

Then just stick the pan in the refrigerator for 8-24 hours. The longer it sits, the better it gets. The french toast pictured was refrigerated for 20 hours, and was super smooth and rich 😊 Assemble it the night before you want to serve it, and it’ll be ready to go by morning!

 
 When it’s time to bake, take the pan out of the fridge to warm up a bit. While the oven is preheating, make a quick streusel. Mix together some flour, brown sugar, cinnamon, and salt, and then use a pastry blender or two forks to cut in four tablespoons of cold butter. Sprinkle the streusel over the top of the bread, and put it all in the oven for 30-35 minutes, until it starts to puff and is golden brown. Let it sit ten minutes before serving with maple syrup, a dusting of confectioner’s sugar, and more raspberries!

This Overnight Raspberry Cheesecake-Stuffed French Toast Bake is a divine sweet brunch. The streusel gets golden and crunchy, the french toast itself is super rich and soft, and the center is bursting with raspberries and cheesecake! The tang of the cream cheese and the tartness of the berries contrasts beautifully with the creamy, cinnamon-scented layers of french toast. And best of all, it’s easy! Make this baked french toast for your next big weekend brunch!

 Overnight Raspberry Cheesecake-Stuffed French Toast Bake
makes one 9×9″ pan, 9-12 servings

Cheesecake Filling:
8-ounces full-fat brick-style cream cheese
1 large egg yolk, room temperature
1/4 cup confectioner’s sugar
2 teaspoons pure vanilla extract

French Toast:
butter, for greasing the pan
4 large eggs, room temperature
1 1/2 cups whole milk
1 teaspoon pure vanilla extract
6 tablespoons granulated sugar
2 tablespoons light brown sugar, packed
3/4 teaspoon ground cinnamon
1/2 teaspoon Kosher or sea salt
1 loaf day-old challah, French, or Italian bread, sliced in 3/4″-1″ slices
1 cup fresh or frozen raspberries

Streusel:
1/2 cup all-purpose flour
1/4 cup light or dark brown sugar
1/2 teaspoon ground cinnamon
pinch of Kosher or sea salt
4 tablespoons unsalted butter, very cold

For Serving:
maple syrup
confectioner’s sugar
raspberries

Make the cheesecake filling. In a medium mixing bowl, use an electric mixer to beat cream cheese until fluffy, about one minute. Beat in egg yolk, followed by confectioner’s sugar and vanilla. Set aside.

Grease a 9×9″ inch pan with butter. Set aside.

Make the custard. In a small mixing bowl, whisk the eggs until combined and a bit frothy. Whisk in milk, followed by vanilla. Stir in sugars until well-distributed. Whisk in cinnamon and salt. Set aside.

Place slices of bread in the bottom of the prepared pan. Fill in any gaps by using small pieces. Pour half the custard mixture over the slices, coaxing it with a spoon so there aren’t any large dry spots. Drop spoonfuls of the cheesecake filling over the soaking bread. Spread it to the edges of the pan, covering the bread completely. Scatter raspberries over the cheesecake layer. Top with the rest of the sliced bread, and fill in the gaps accordingly. Pour the remainder of the custard mixture over the top layer of bread, using a spoon to make sure everything is saturated. Press plastic wrap onto the top layer of bread, followed by a layer of aluminum foil. Set an empty pan of the same size (or slightly smaller) on top of the foil. Press down lightly. Place filled, covered pan (with the second pan on top), in the refrigerator for 8-24 hours to chill.

Preheat the oven to 350F. Remove the pan from the refrigerator, and uncover it.

Make the streusel. Stir together the flour, brown sugar, cinnamon, and salt. Use a pastry blender, two forks, or clean, cool fingertips to cut the cold butter into the flour mixture, until the largest pieces are the size of small peas. Scatter the streusel over the top of the French toast. Bake for 30-35 minutes, until golden and starting to puff up.

Let cool for ten minutes before slicing and serving with maple syrup, confectioner’s sugar, and additional raspberries, if desired.

Overnight Cheesecake-Stuffed Raspberry French Toast Bake