I’ve been over here making red velvet on every Oscar weekend for the past twenty years, always with the explanation that it’s “red like the red carpet.” Except I don’t know if you’ve heard, but the Oscars are doing away with the red carpet this year in favor of a champagne motif.
Rest assured, I’m keeping my little tradition alive anyway, not least because I’m sober and won’t bake with champagne. I mean, who even wants champagne cake when you can have a festive bright red cake flavored with cocoa and vanilla and finished with my best-ever cream cheese frosting? Not me.
Red velvet and I have a long history and I’m not going to ruin a good thing when I’ve got one going. I’ve made blondies, cakes, cookies, and cakes that are cookies—I’ve done it all.
While the Oscars are straying from some tradition this year, I’m returning to form…or at least, I’m returning to cake. Specifically, red velvet cake in a loaf pan. It’s every bit and soft and delicious as its layered counterpart, but in an easy, approachable loaf.

The process is delightfully simple—just chuck all the ingredients in a bowl and let your mixer do the work, then bake for about an hour. Once cool, paint it with simple syrup and christen with cream cheese frosting and a few cake crumbs.
And that’s it! She’s simple, but she’s also glitz, glam, and ready for the red, er, champagne carpet. And so am I.
Red Velvet Loaf Cake
makes one 9x5-inch loaf
Cake:
1 cup granulated sugar
1/2 cup (1 stick) unsalted butter, room temperature, cut into 8 pieces
2 large eggs, room temperature
1 1/2 teaspoons pure vanilla extract
1 cup + 6 tablespoons all-purpose flour
2 tablespoons natural unsweetened cocoa powder
3/4 teaspoon baking powder
1/4 teaspoon baking soda
1/4 teaspoon Kosher or sea salt
6 tablespoons milk (preferably whole), room temperature
2 tablespoons full-fat sour cream, not fridge cold
1/2 teaspoon red gel food coloring (1-1 1/2 teaspoons red liquid food coloring)
Simple Syrup:
1/4 cup granulated sugar
2 tablespoons water
Cream Cheese Frosting:
4 ounces (1/2 beick$ full-fat brick-style cream cheese, softened to room temperature
1/2 cup (1 stick) unsalted butter, softened to room temperature
2 cups confectioner's sugar
pinch of Kosher or sea salt
1 teaspoon pure vanilla extract
Place an oven rack in the center position. Preheat oven to 350F. Grease a 9x5-inch loaf pan. Line with parchment, leaving overhang on the two long sides, and grease again. Set aside.
Make the cake. Combine all cake ingredients in a large mixing bowl. Use an electric mixer to mix on low for 30 seconds. Increase speed to medium and mix for 3 minutes. Batter will be thick.
Transfer batter to prepared pan and smooth the top with a silicone spatula or wooden spoon. Tap full pans on the counter five times to release any large air bubbles. Bake 50-60 minutes, or until a toothpick inserted in the center comes out clean.
Let cake cool completely in the pan on a rack. Once cool, slide a thin knife around the edges of the pan, then use the parchment overhang to lift the cake onto a work surface. At this point, you may also wrap it in plastic wrap and store it for up to a day before continuing.
Use a serrated knife to trim off a sliver of the top of the cake. This will be used for garnish. Set aside.
Make the simple syrup. Combine sugar and water in a small saucepan over low heat. Stir constantly until sugar dissolves, about 3-5 minutes. Remove from heat.
Use a pastry brush to paint syrup all over the cake—it will seem like a lot, but should soak in quickly. Let sit 20 minutes while you make the frosting.
Make the cream cheese frosting. In a large mixing bowl, use an electric mixer to beat cream cheese and butter together until light and fluffy. Add confectioner's sugar and salt in two installments, until completely combined. Beat in vanilla. Once combined, beat on high for two additional minutes, until light and fluffy.
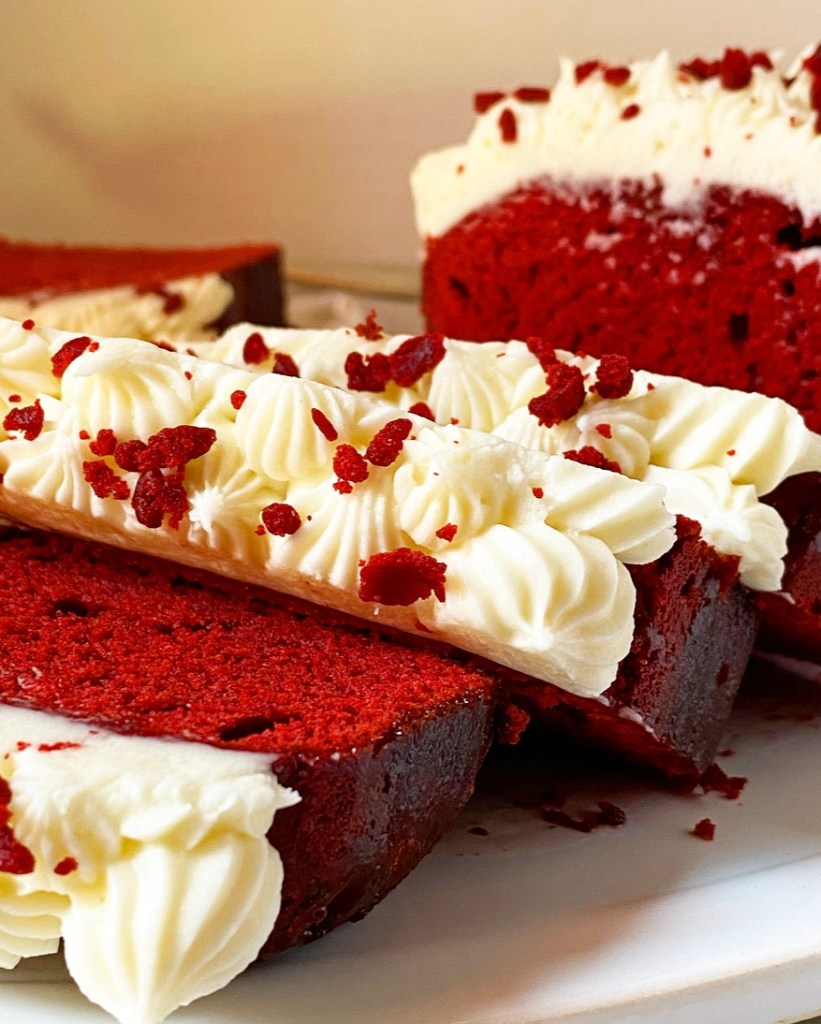
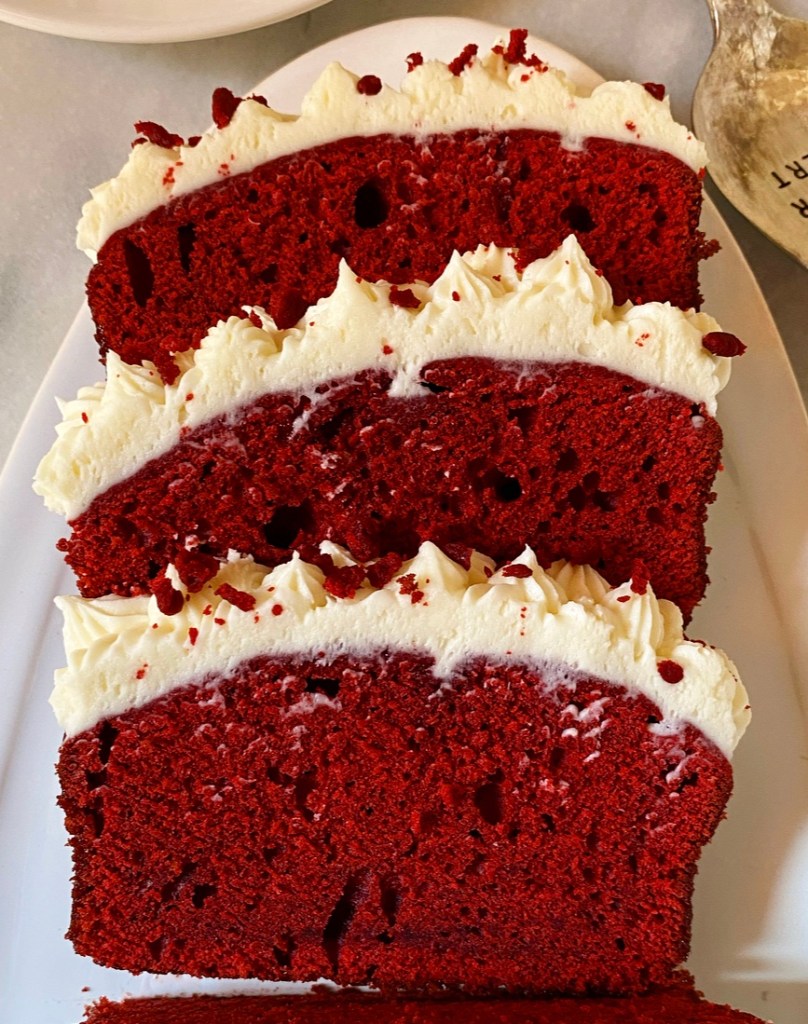
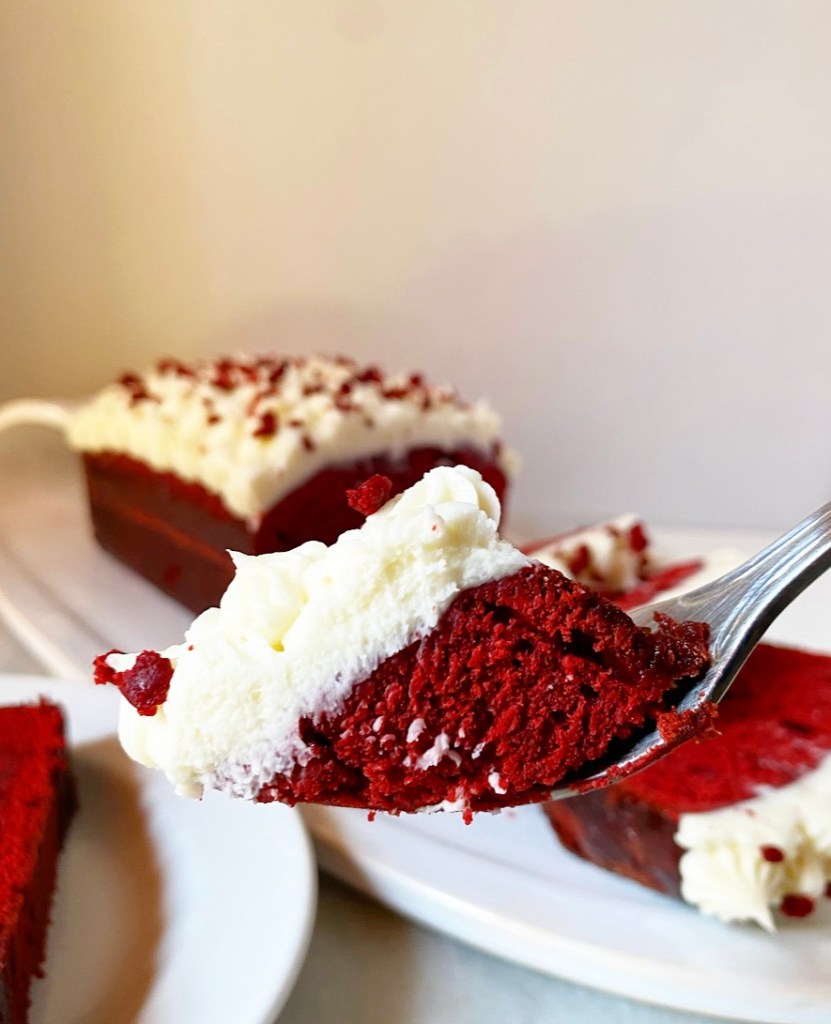
Load frosting into a piping bag fitted with a star tip and coupler. Pipe frosting over the top of the cake as desired. Alternatively, use an offset icing spatula to spread frosting over the top of the cake. Garnish the cake by crumbling the reserved sliver of cake over the top of frosting.
Slice and serve! Leftover cake may be kept covered at room temperature for up to two days or in the refrigerator for up to five.