Over the course of the next twenty days, there will come a moment where you’re glad to have this Easy Peppermint Mocha Fudge recipe in your back pocket.
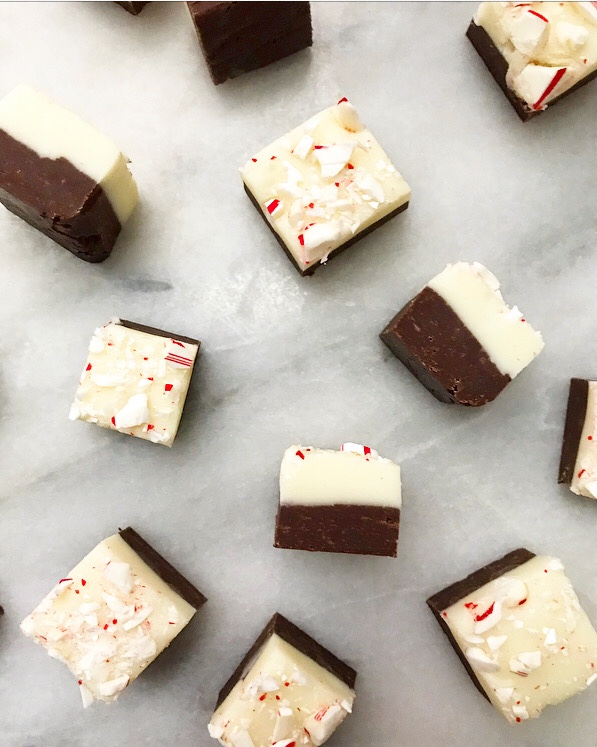 Because it really is easy. Like six ingredients easy.
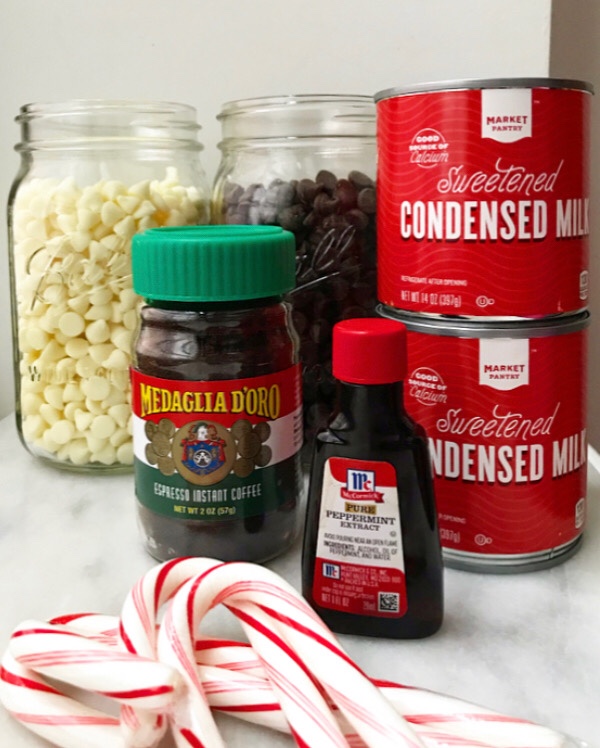 No boiling sugar, no candy thermometer easy.
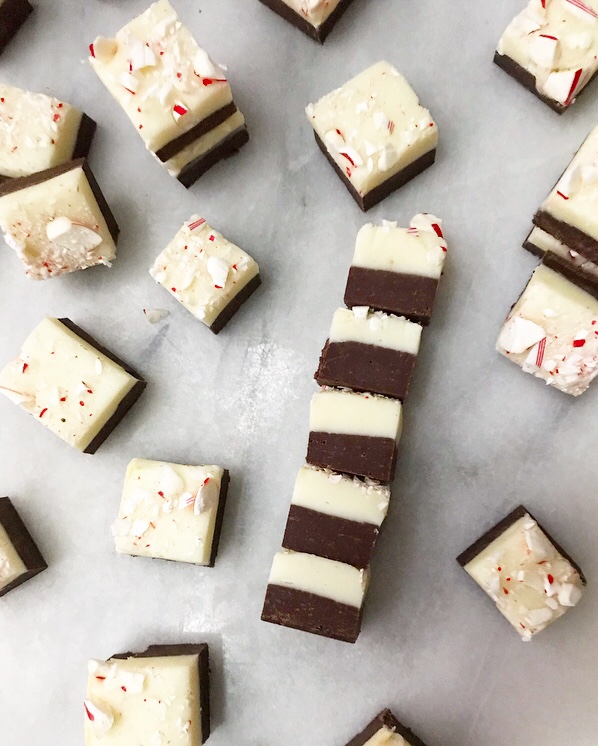 Make it in 20 minutes in a double boiler or—even easier—the microwave…easy.
 But nobody will know that you made these little morsels of holiday magic without having to think too hard, or that the batch makes enough for multiple holiday gifts (just add cute bags or tins), so you didn’t have to overextend yourself.
 And nobody is going to bite into this rich, dense, silky fudge and think “I bet he/she/they made this with sweetened condensed milk and chocolate chips instead of the ‘traditional’ way.” Nope.
 In fact, I guarantee you that all anybody will be thinking is how to get another piece of this double-layer minty coffee confection into their faces as soon as possible.
Looking for more peppermint mocha? Check out these cookies!
Looking for more easy holiday candy? See here and here.
Easy Peppermint Mocha Fudge
makes one 9×13-inch pan
Mocha Layer:
18 ounces (3 cups) semisweet chocolate chips
1 14-ounce can sweetened condensed milk
5 teaspoons espresso granules (I use Medaglia d’Oro)
1/2 teaspoon pure peppermint extract (not mint extract)
Peppermint Layer:
18 ounces (3 cups) white chocolate chips
1 14-ounce can sweetened condensed milk
1/2 teaspoon pure peppermint extract (not mint extract)
Garnish:
4 candy canes or 10 starlight mints, crushed (I prefer starlight mints)
Lightly grease a 9×13-inch pan. Line with parchment, leaving overhang on the two long sides, and grease again. Set aside.
To make on the stove:
Fill a small pot with 1-2 inches of water. Set a heatproof bowl over the top, ensuring that the water does not touch the bottom of the bowl. Remove bowl and bring water to a simmer.
Make the mocha layer. Combine chocolate chips, sweetened condensed milk, and espresso granules in the heatproof bowl. Set the bowl over the simmering water. Use a silicone spatula and/or whisk to stir mixture until chips are melted and fudge is even in color. It will be thick. Remove from heat and stir in peppermint extract. Transfer mixture to prepared pan and press into an even layer all the way to the corners. Freeze full pan while you make the peppermint layer.
Wash the heatproof bowl and dry well. Return pot to a simmer.
Combine white chocolate chips and sweetened condensed milk in heatproof bowl. Set the bowl over the simmering water. Use a silicone spatula and/or whisk to stir mixture until chips almost all are melted and fudge is even in color. It will be thinner than the mocha mixture. Remove from heat. Whisk in peppermint extract and continue until mixture is totally smooth.
Remove pan from the freezer. Spread peppermint mixture over the top of the mocha layer, smoothing it all the way to the edges. Garnish the top with crust candy canes or starlight mints.
To make in the microwave:
Make the mocha layer. Combine chocolate chips, sweetened condensed milk, and espresso granules in a medium microwave safe mixing bowl. Microwave in 30 second increments, stirring in between, until chips are melted and fudge is thick and even in color. Stir in peppermint extract. Transfer mixture to prepared pan and press into an even layer all the way to the corners. Freeze full pan while you make the peppermint layer.
Wash the microwave safe bowl and dry well.
Combine white chocolate chips and sweetened condensed milk in the bowl. Microwave in 30 second increments, stirring/whisking in between, until almost all chips are melted and fudge is even in color. Whisk in peppermint extract and continue until mixture is totally smooth. Mixture will be thinner than the mocha layer.
Remove pan from the freezer. Spread peppermint mixture over the top of the mocha layer, smoothing it all the way to the edges. Garnish the top with crust candy canes or starlight mints.
Both methods:
Refrigerate fudge for at least 1 hour. Run a thin, flexible knife around the edges of the pan. Use parchment overhang to lift fudge onto a cutting board.
Use a greased knife to slice fudge into 1-inch pieces. Wipe the knife clean between cuts.
Fudge is best kept in the refrigerator for up to two weeks, but may be kept at room temperature for up to 5 days. Candy cane/starlight mint garnish will melt over time.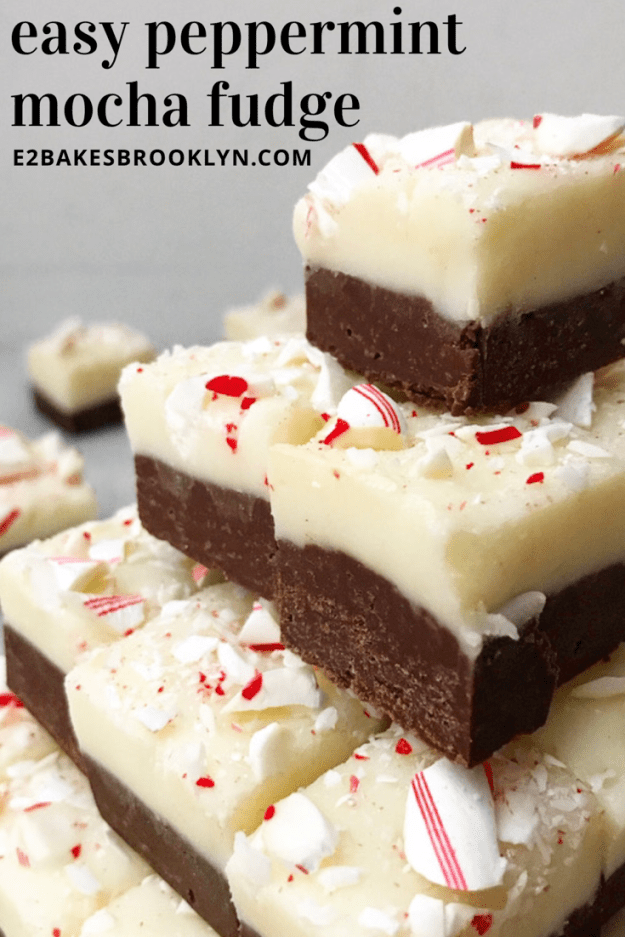


 Hello there! I hope you all had a great Thanksgiving break. I had a wonderful time in Massachusetts and Rhode Island with 2/3 of my immediate family, but am happy to be home for a few weeks to work on all sorts of holiday goodness! I’ve got loads of great posts headed your way before December 25th, but this first cookie recipe of the season, which benefits
  If that organization sounds familiar, it’s because I supported them
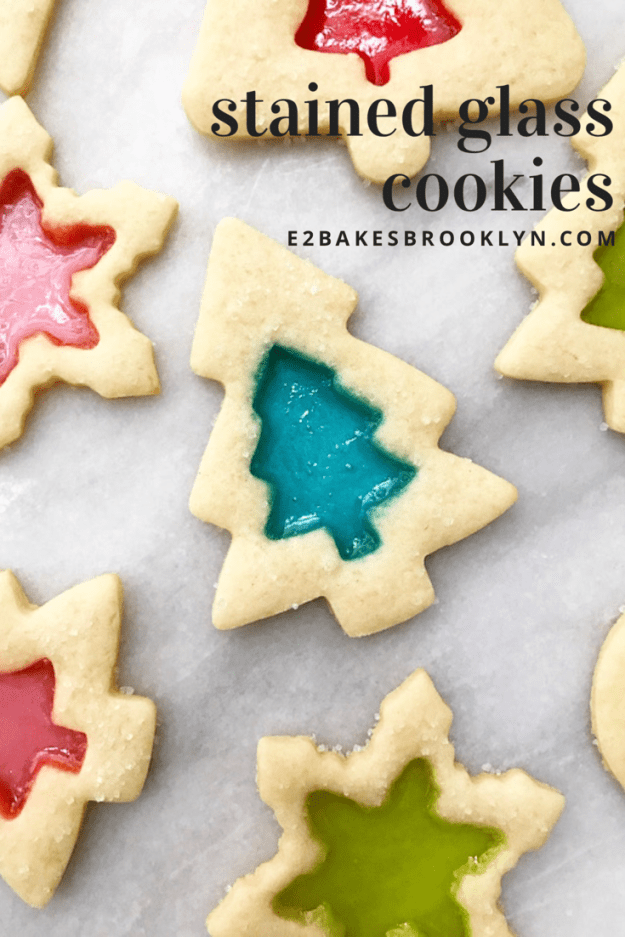
 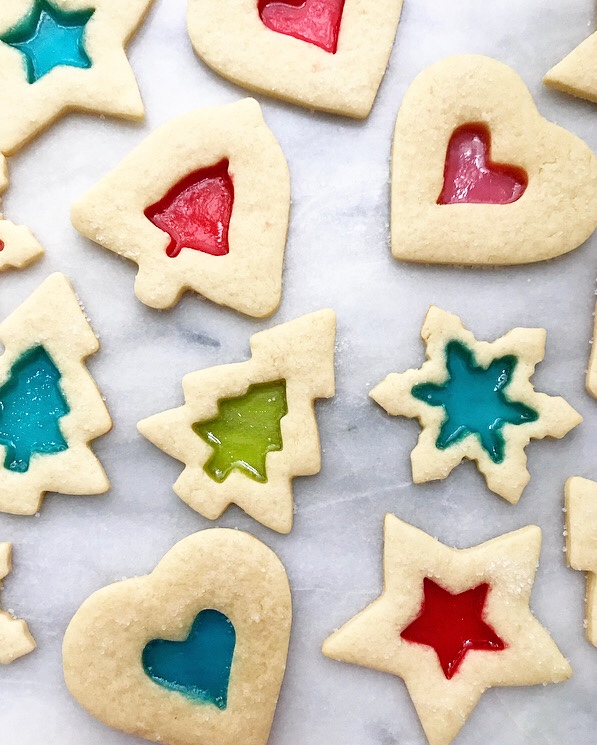 There’s no easy way to transition from writing about pediatric cancer to writing about anything else, so please excuse this clunky attempt. Now that I’ve made my donation to this wonderful organization, it’s time to talk about holiday cookies, namely these stunning Stained Glass Cookies!
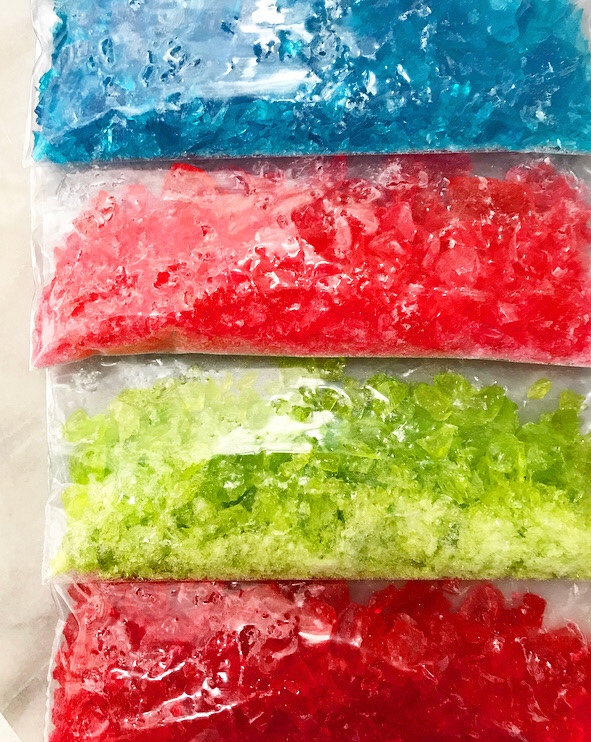
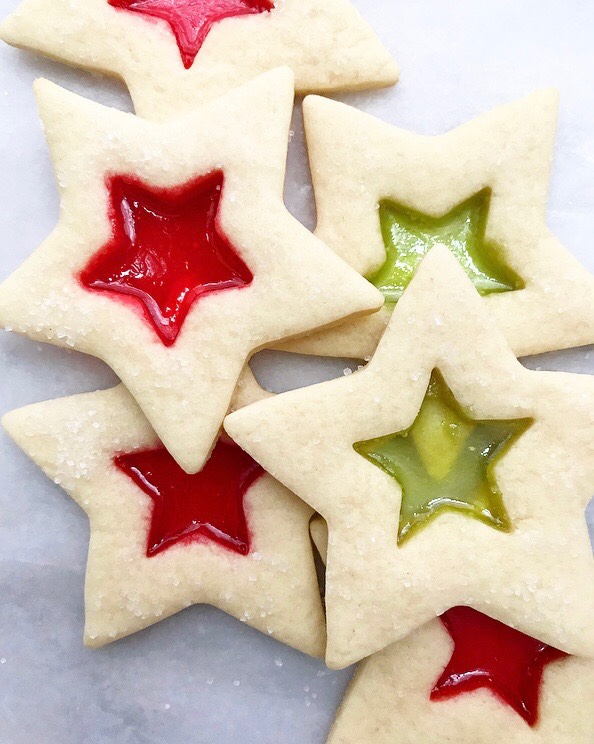 These were one of the first Christmas cookies I ever made. My mother didn’t (and doesn’t) bake, but once when we were little, she dropped my sister and me at a kids’ cooking school for a day of holiday treats. While I don’t remember any other cookies we made that day, I do remember crushing hard candies and watching them transform in the oven into beautiful “stained glass.”
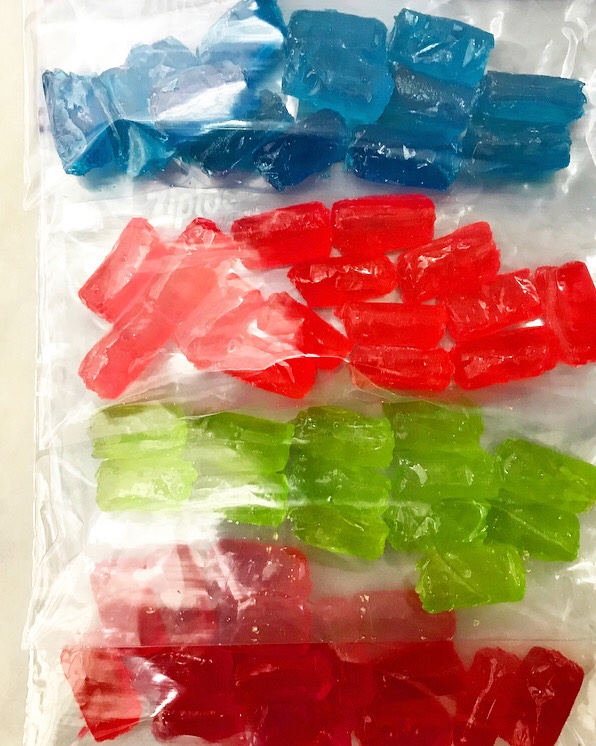
 But I’m getting ahead of myself. If you’ve never heard of Stained Glass Cookies, they’re nothing more than roll-out sugar cookies (in this case, my
 And freaking beautiful, am I right?!
 All that said, I hope you’re as excited for holiday baking as I am! Here’s to a season of sweets, treats, and doing kind things for our fellows…you know, like putting a few dollars toward a good cause ❤ Or making a batch of Stained Glass Cookies for people you love.
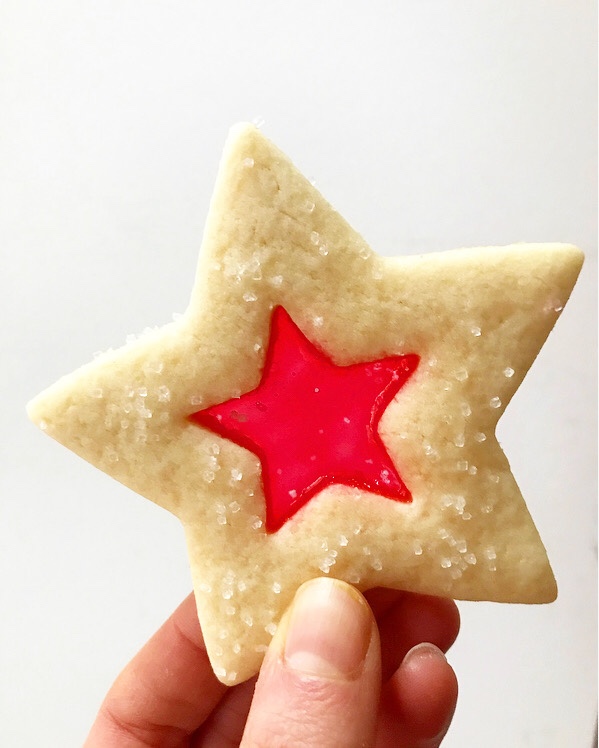


 Remember that huge, ridiculous
  You know what’s still taking up space in my kitchen? This comically large container of M&Ms. It’s made it through two of those cakes, a batch of cookies and lots of late night snacks, and it’s still kickin’.
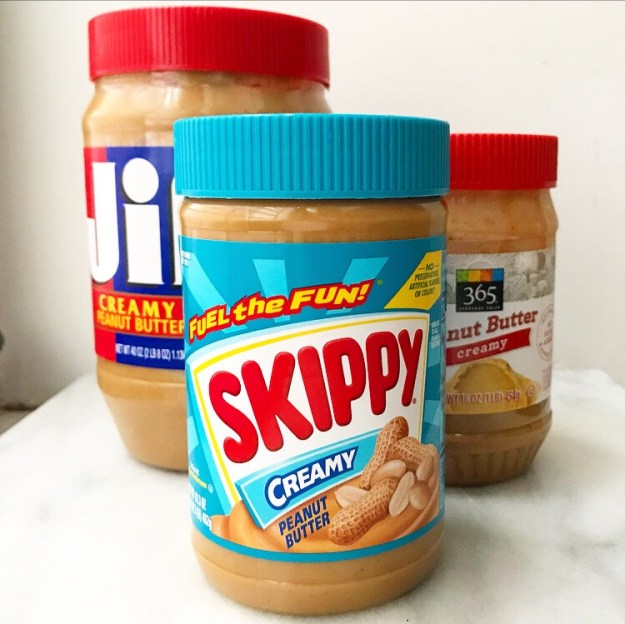 Also taking up space in my kitchen? Three different jars of peanut butter. THREE. And they’re all different brands. Just…what? I really need an Excel spreadsheet to keep track of all my baking supplies so I’m not compelled to pick up peanut butter every time I see it on sale.
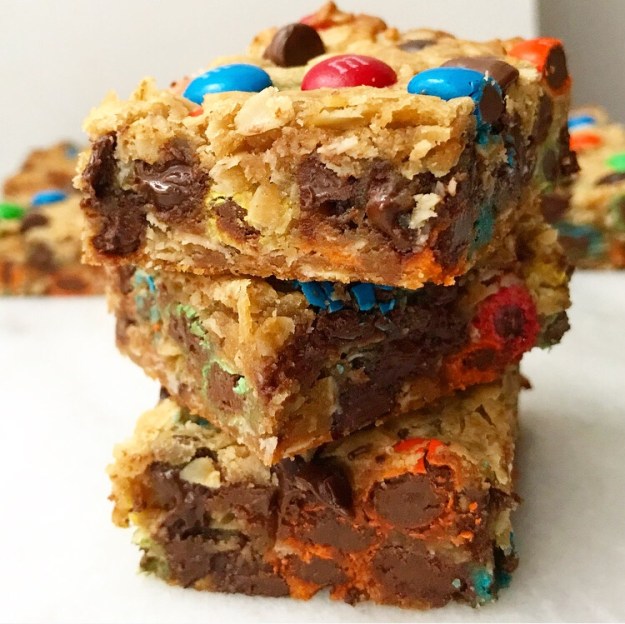
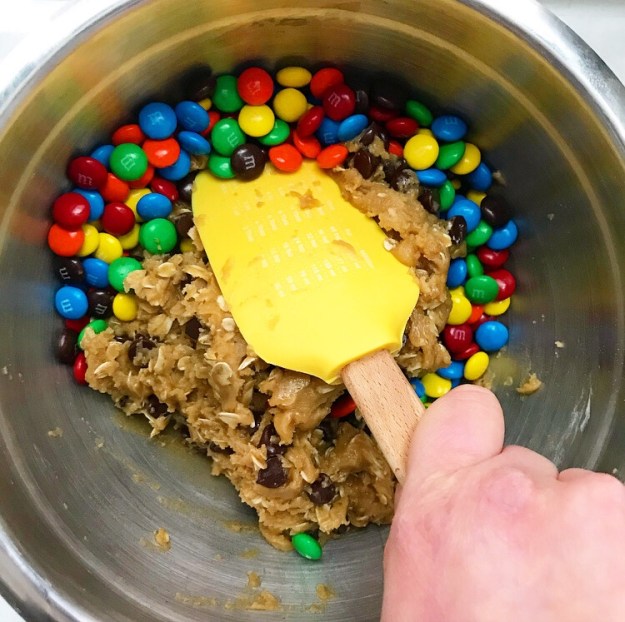
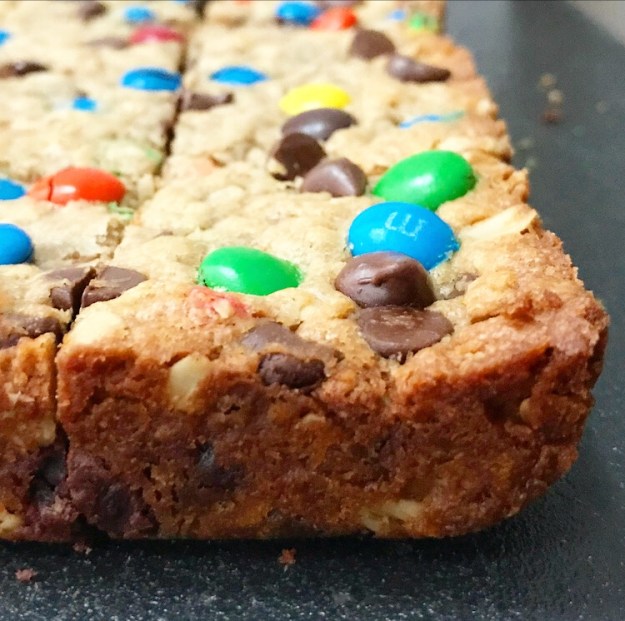
 So, what does one do with all that peanut butter and that huge container of M&Ms? Add some oats and make Monster Blondies, of course!
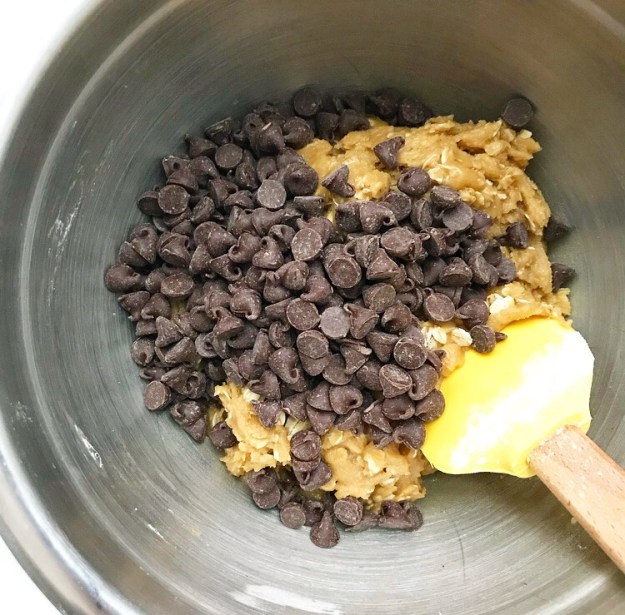
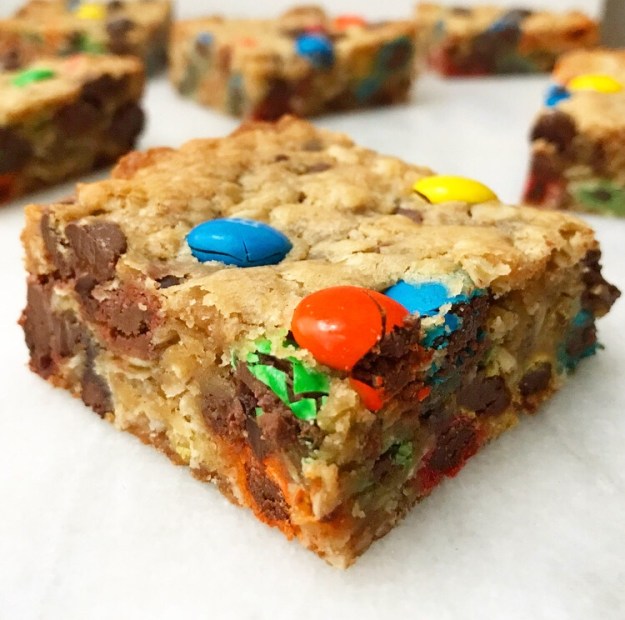 What makes these blondies so…monstrous? Well, they’re a riff on Monster Cookies, a sort of “everything but the kitchen sink” cookie that, at its most basic, contains peanut butter, oats, M&Ms and chocolate chips.
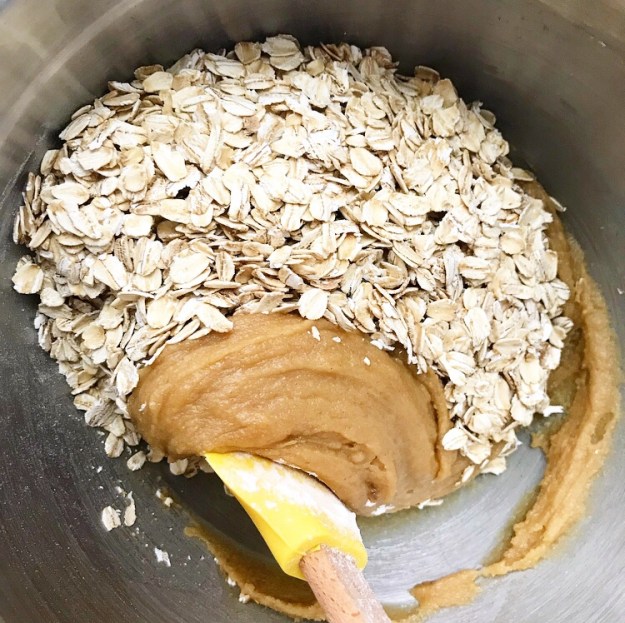
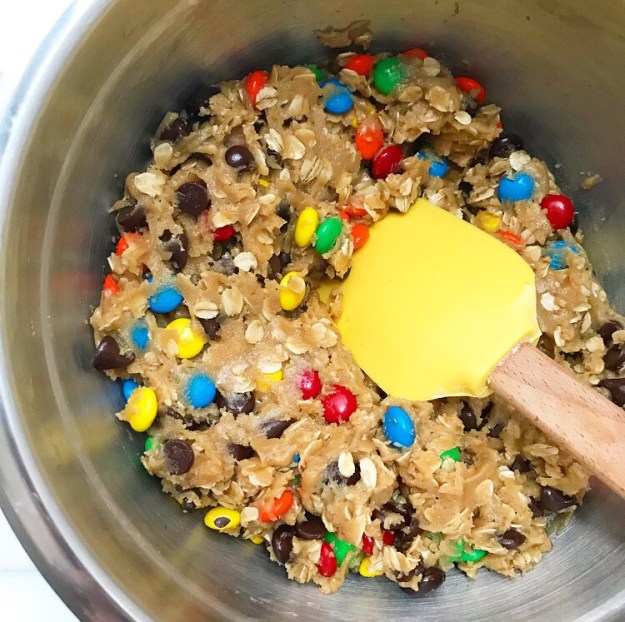
 The original cookies are terrific, but skipping the cookie dough and tossing all those ingredients into blondie batter is absolutely the way to go! The resulting blondies have all the flavors and textures from their namesake recipe, but with an extra thick and chewy
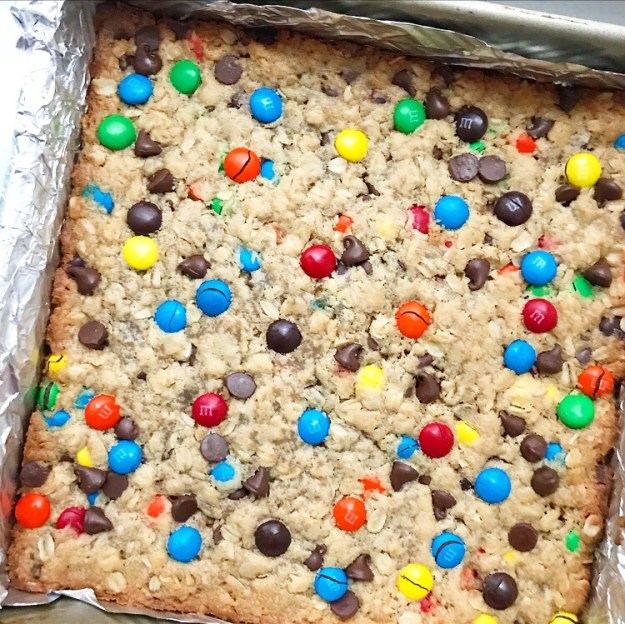
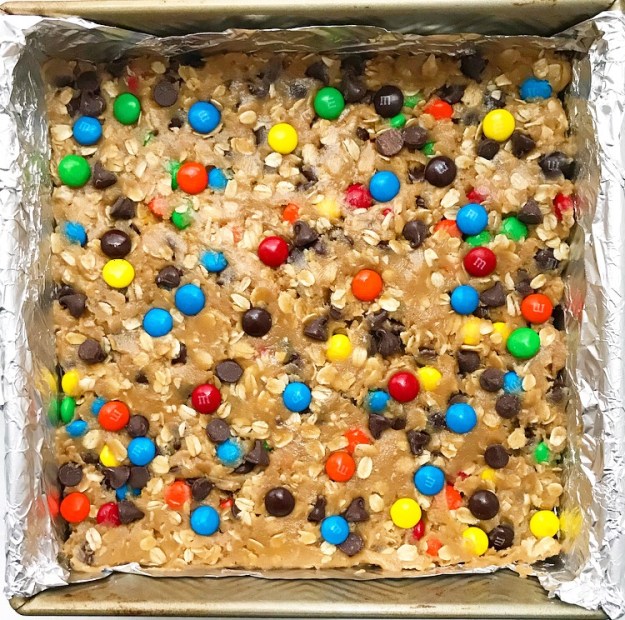
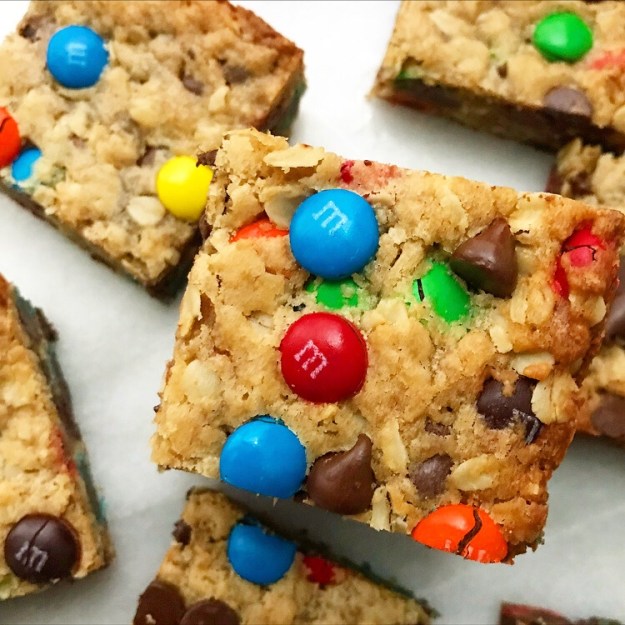 Not only that, but blondies are way easier to make than cookies—this recipe comes together with just one bowl and a silicone spatula! And, of course, they don’t require baking in batches. Monster Blondies are ready to come out of the oven just 40 minutes after you start making the batter!
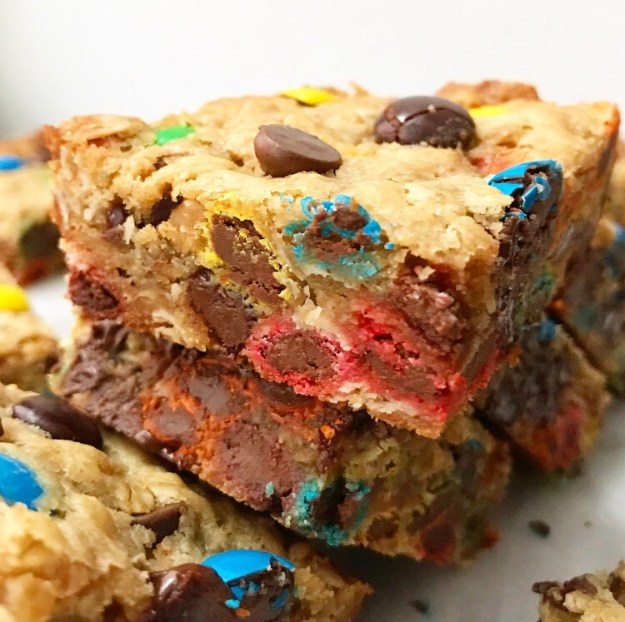 Once the blondies have cooled slice them up and dig in! You’ll love the soft & chewy blondie base, the slight saltiness from the peanut butter, the texture from the oats and crackly candy coating, and tons of chocolate. As far as I’m concerned, they’re the very best kind of mid-week pick-me-up ❤
 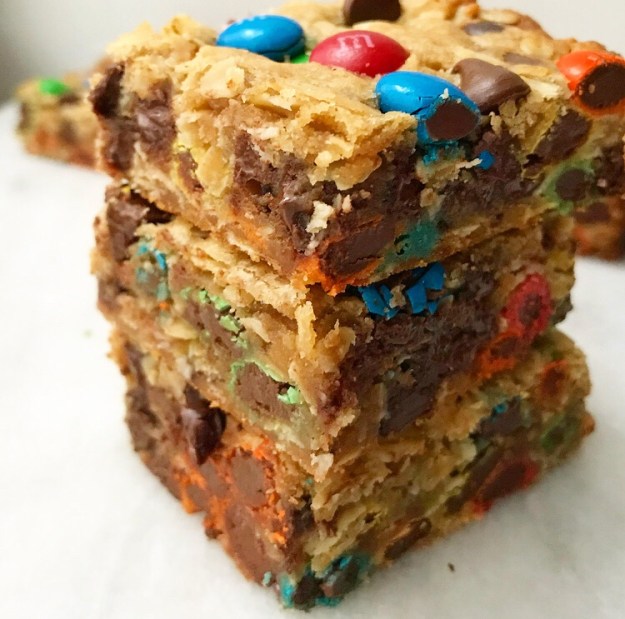 Monster Blondies
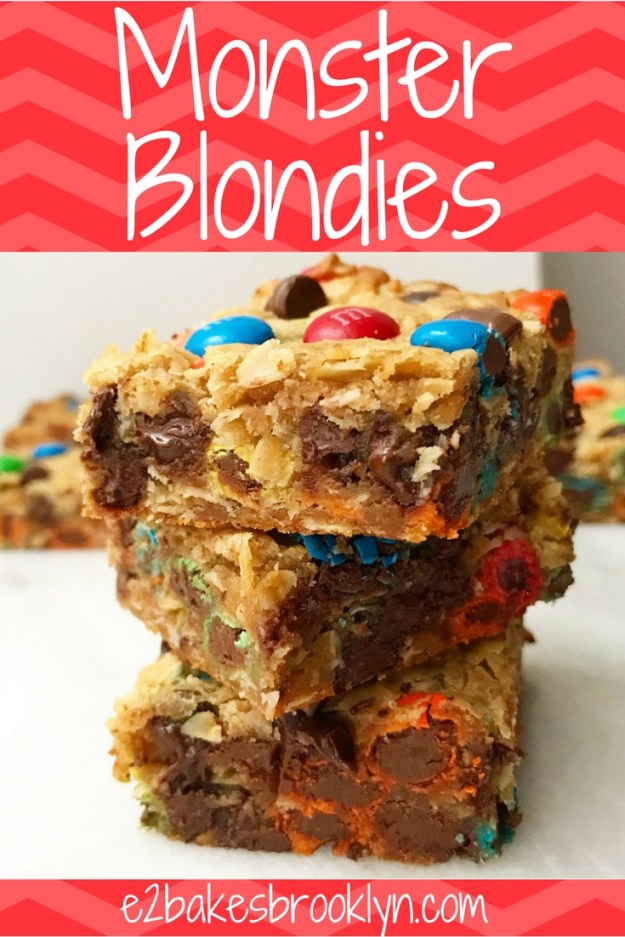
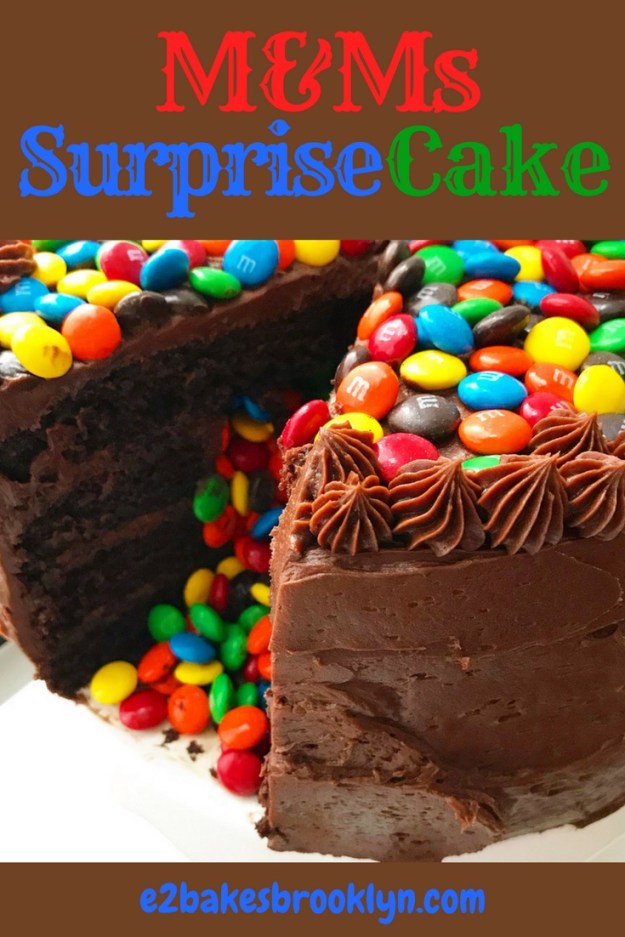
 I posted pictures of a big M&Ms-stuffed chocolate cake on my
 I get it—chocolate cake + buttercream + M&Ms inside + more M&Ms on top = MAGIC.
 That original cake was for a friend and not intended for the blog, but given the response, I thought you might like to know how to make your own!
 First things first. You’re going to need four 9-inch round layers of chocolate cake. This one is a super easy no-mixer recipe that makes four soft, moist, perfect layers. You may recognize this recipe from my my
  Place one of the layers on a serving plate or your favorite of all your cakestands. Spread a little frosting on top.
 Take two of the layers and punch out holes in the centers. I use a 6-inch ring for this, but you can use a wide-mouthed glass or even just a paring knife and a circle of parchment. Layer those on top of that bottom round, frosting between and on top.
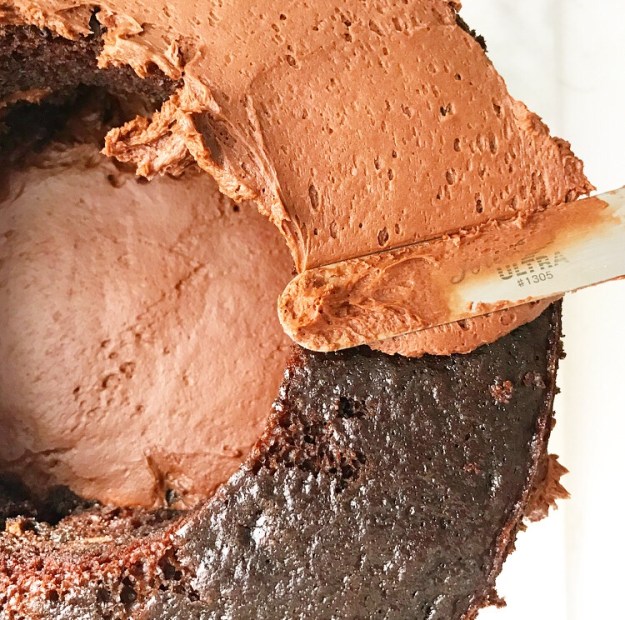 At this point, you’ll have a three layer cake with a hole in it. That’s where the surprise M&Ms are going to go ❤
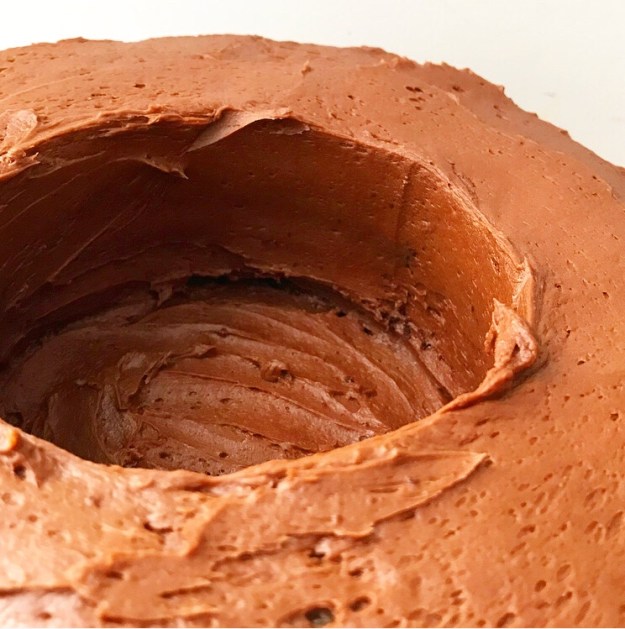 Spread a thin layer of buttercream on the “walls.” This will help keep the moist cake from melting the color off the M&Ms too quickly. And speaking of M&Ms…
 …pour in almost 2 cups of them ❤ ❤ ❤
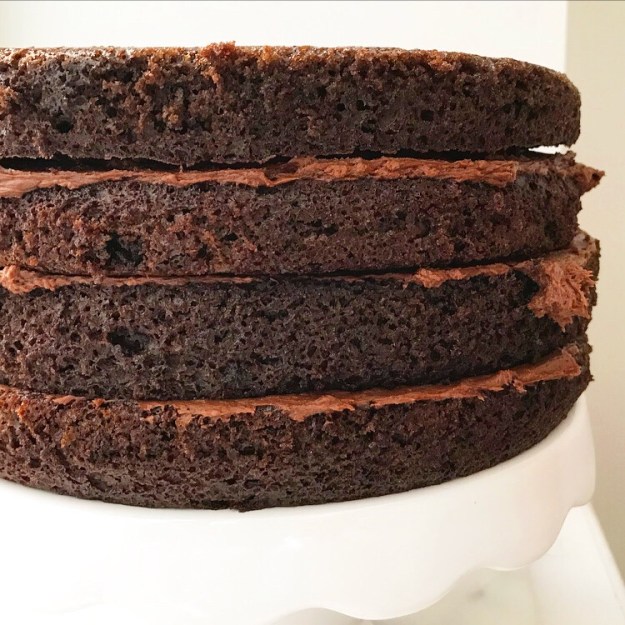
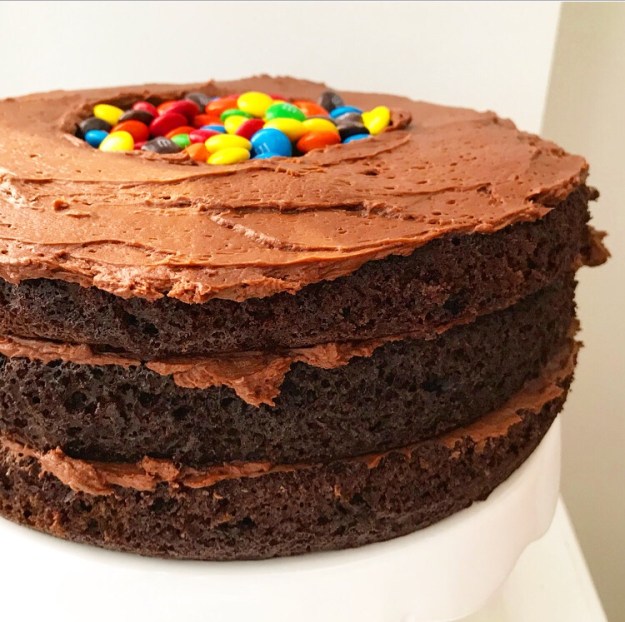
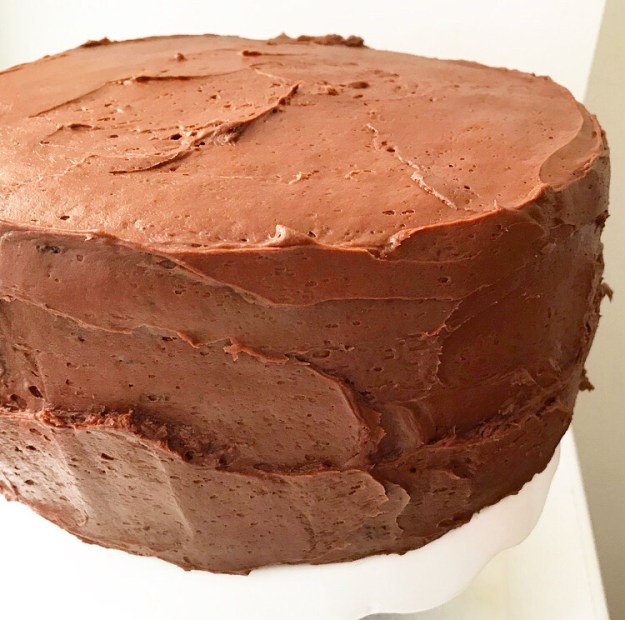 Place your last intact layer of cake on top, effectively hiding all that surprise candy. Frost the cake. For a sort-of photo tutorial on that, see last week’s
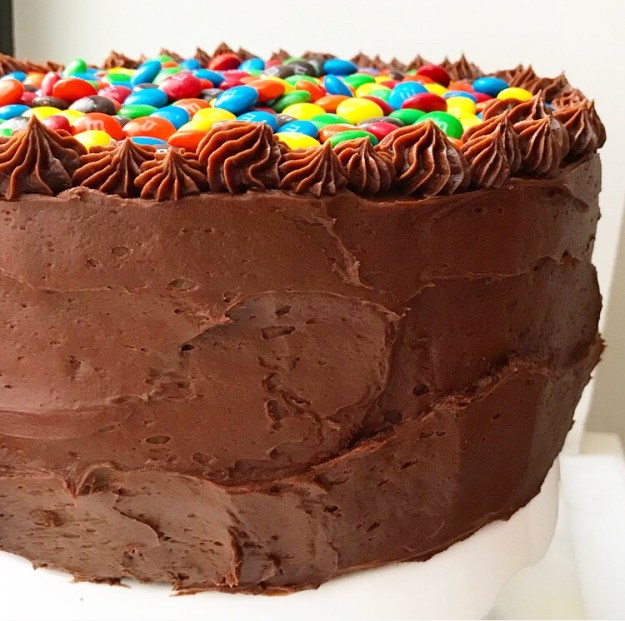
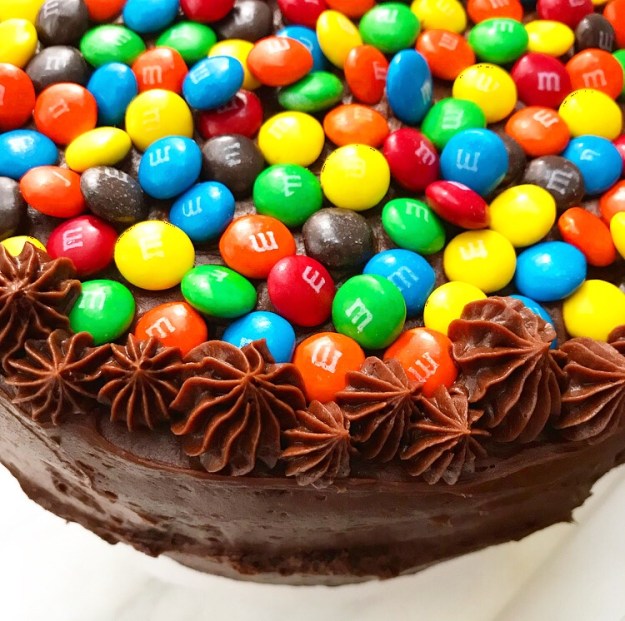 I decorated the top with even more M&Ms and used the last of the frosting to pipe a border. The dollops are all different sizes and I love it!
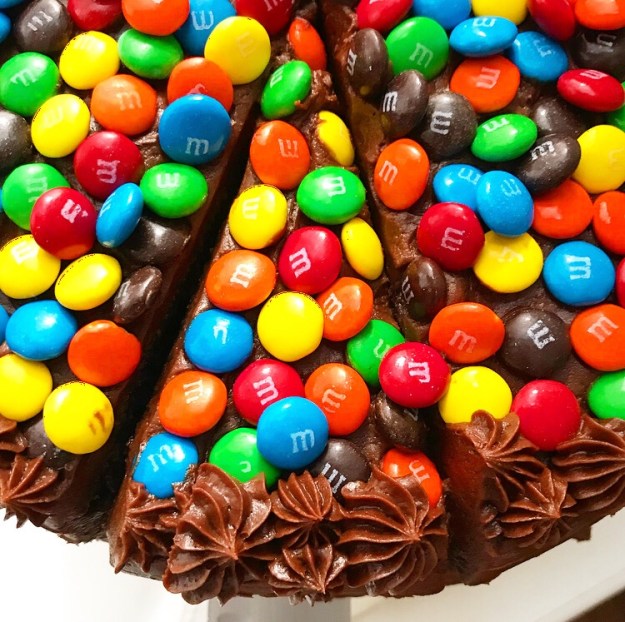


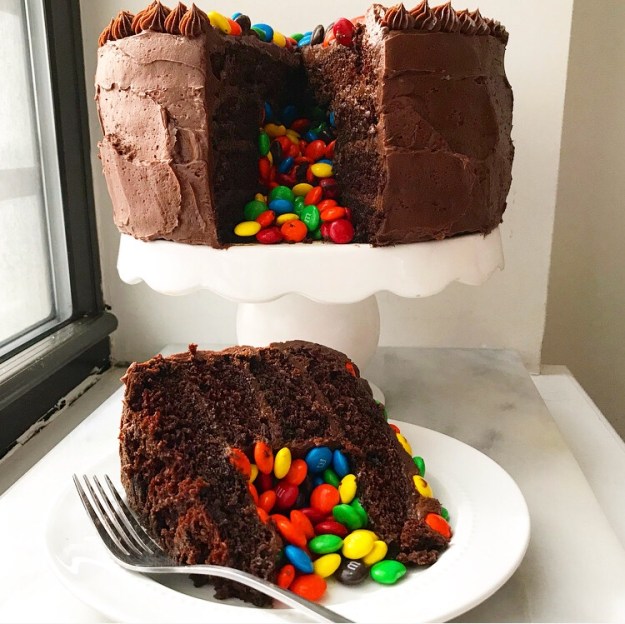
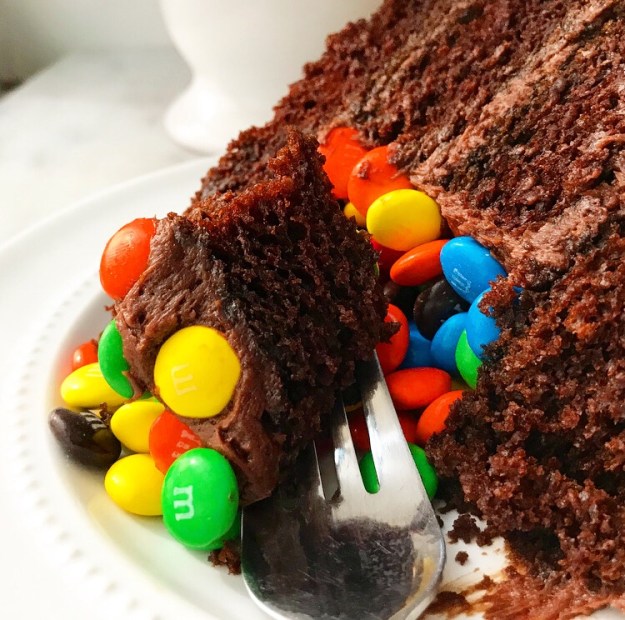 Then again, I was alone when I sliced this sucker open and it was still pretty damn magical. But I also took 200+ photos of it for you, so I suppose you were practically there.
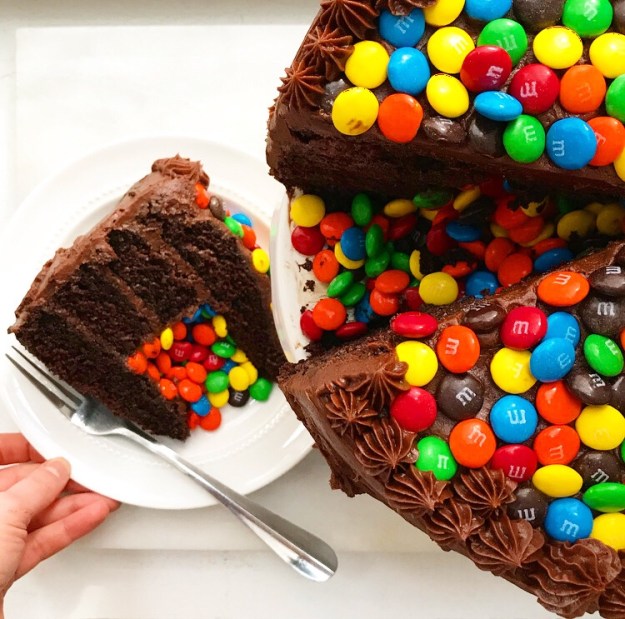
 I don’t want to write about baking today—I want to write about how much I love the Olympics. I’ve watched the coverage every night and had it on in the background while I’ve baked during the day. This isn’t a recent habit—I grew up in a family that gathered to watch the games (summer or winter) every night they were on, and I even once had a wall of my teenage bedroom dedicated to the decorated short track speedskater Apolo Ohno.
 Anyway, this isn’t an Olympics blog. It’s a baking blog. So, let’s talk about baked goods, specifically Almond Joy Shortbread Bars.
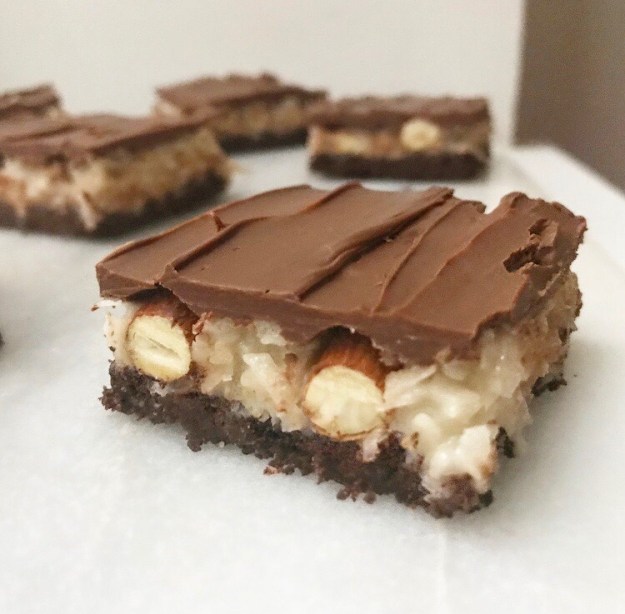
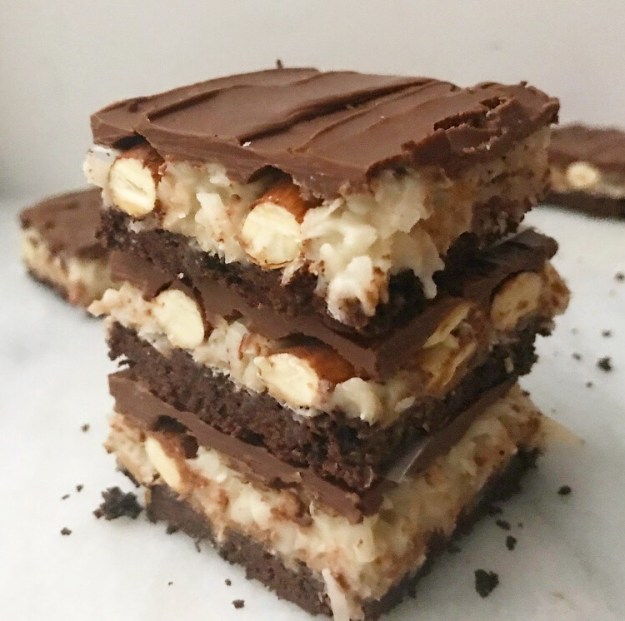
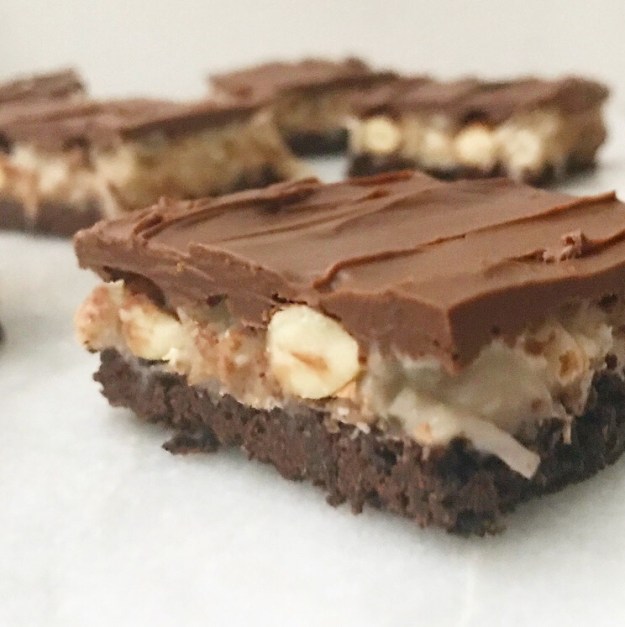 If you’re going to try to improve on the practically perfect combination of chocolate, almonds, and sweet coconut filling, layering it all onto a buttery chocolate shortbread crust is a pretty good way to start.
 All the layers in these bars make them look like they take hours to prepare, but in reality, they take about 90 minutes from start to finish and are nearly no-bake. That easy chocolate shortbread crust is the only layer that has to spend time in the oven.
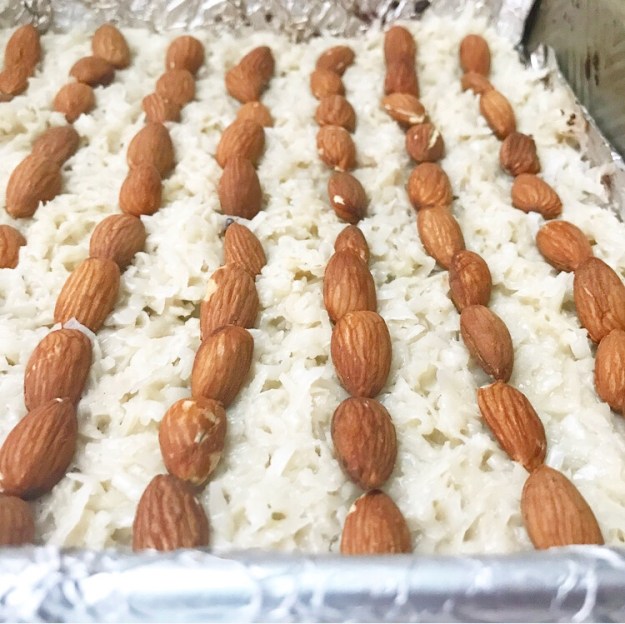
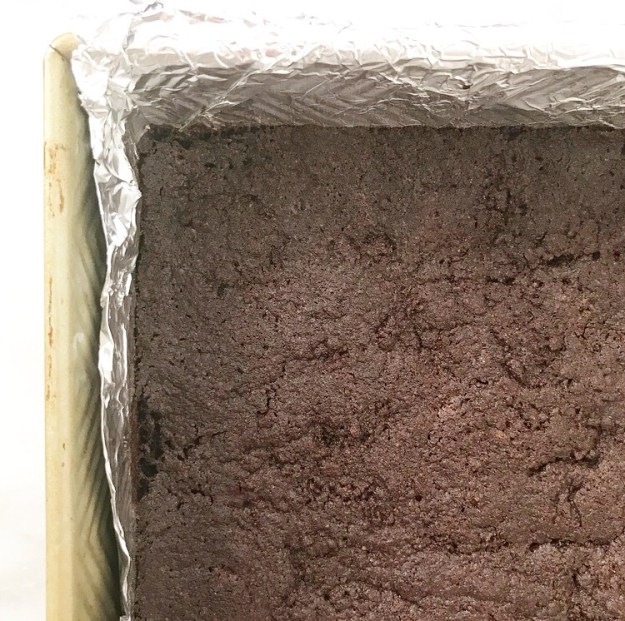 It’s topped with a thick layer of coconut filling and dotted with whole roasted almonds…

 But back to the bars. Slice ‘em up and admire your handiwork. #thoselayerstho
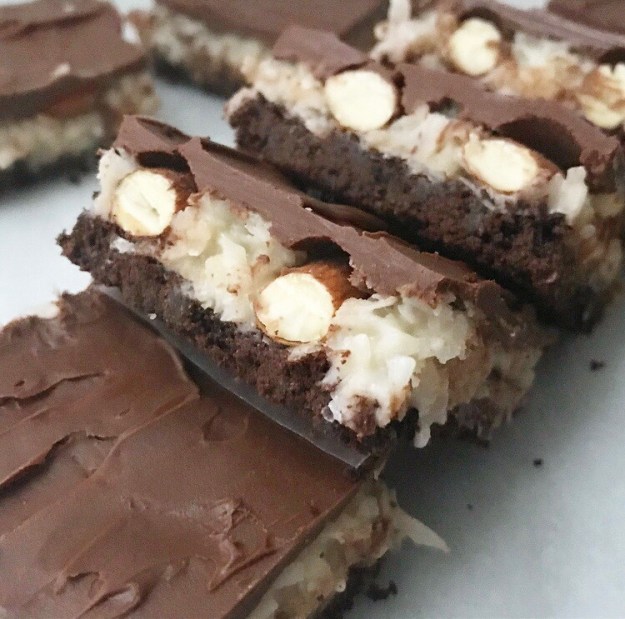 The flavor is everything you love about sweet, chewy, crunchy Almond Joys, but better because they’re homemade. Oh, and because they have a crispy layer of chocolate shortbread offsetting all their sweetness. After sinking your teeth into one of these, you’ll never be able to go back to the mass-produced candy bar.