You could not pay me to drink a glass of eggnog, but I will happily bake with it all Christmas season long. Being made of eggs and dairy, it’s just a thin custard—think melted ice cream—so it’s an easy swap for the liquid in many of my favorite bakes.
I’ve made eggnog sandwich cookies, cakes, scones, and puff pancakes over the last several years, plus a few more treats that I still need to perfect before I pass them your way. These Frosted Eggnog Sugar Cookies though? They couldn’t wait. They’re the seasonal sibling of the Soft Sour Cream Sugar Cookies I posted earlier this year, and they are spectacular.
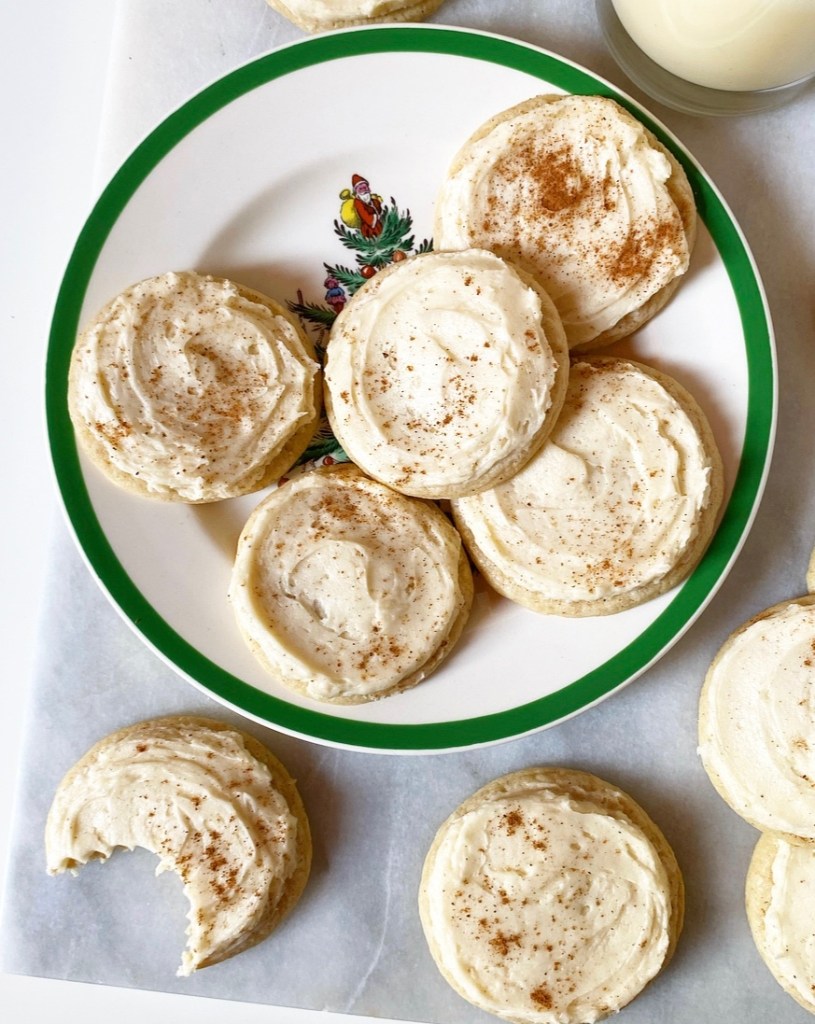
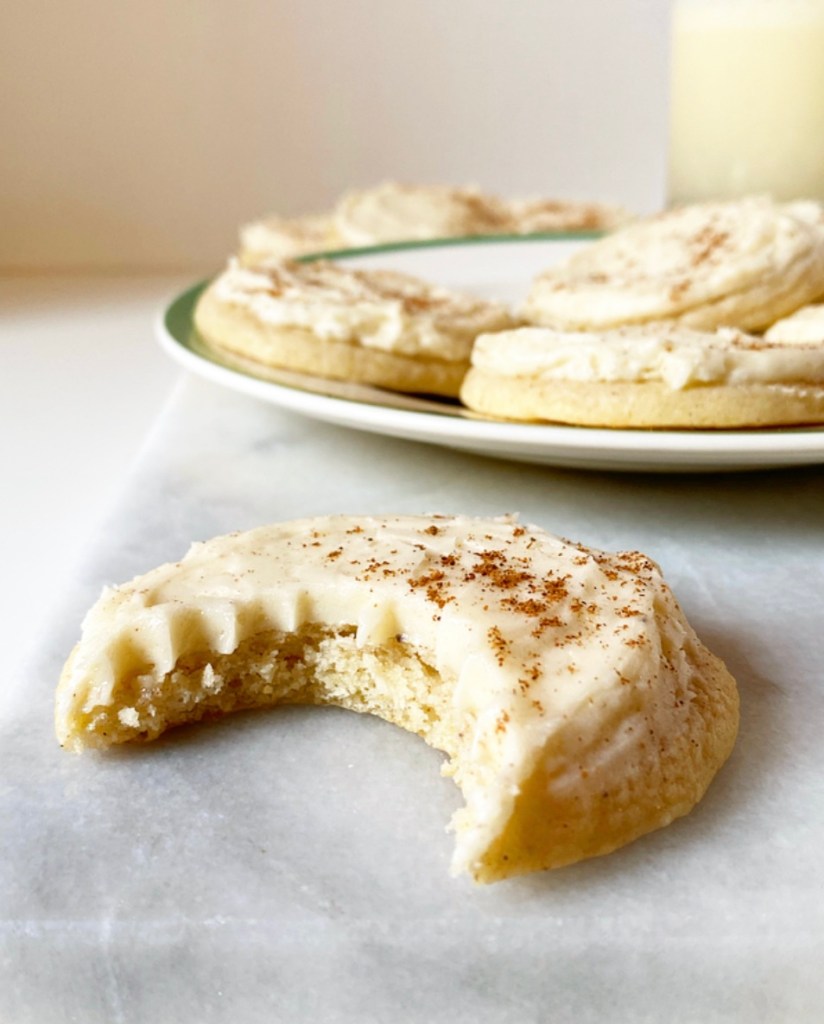
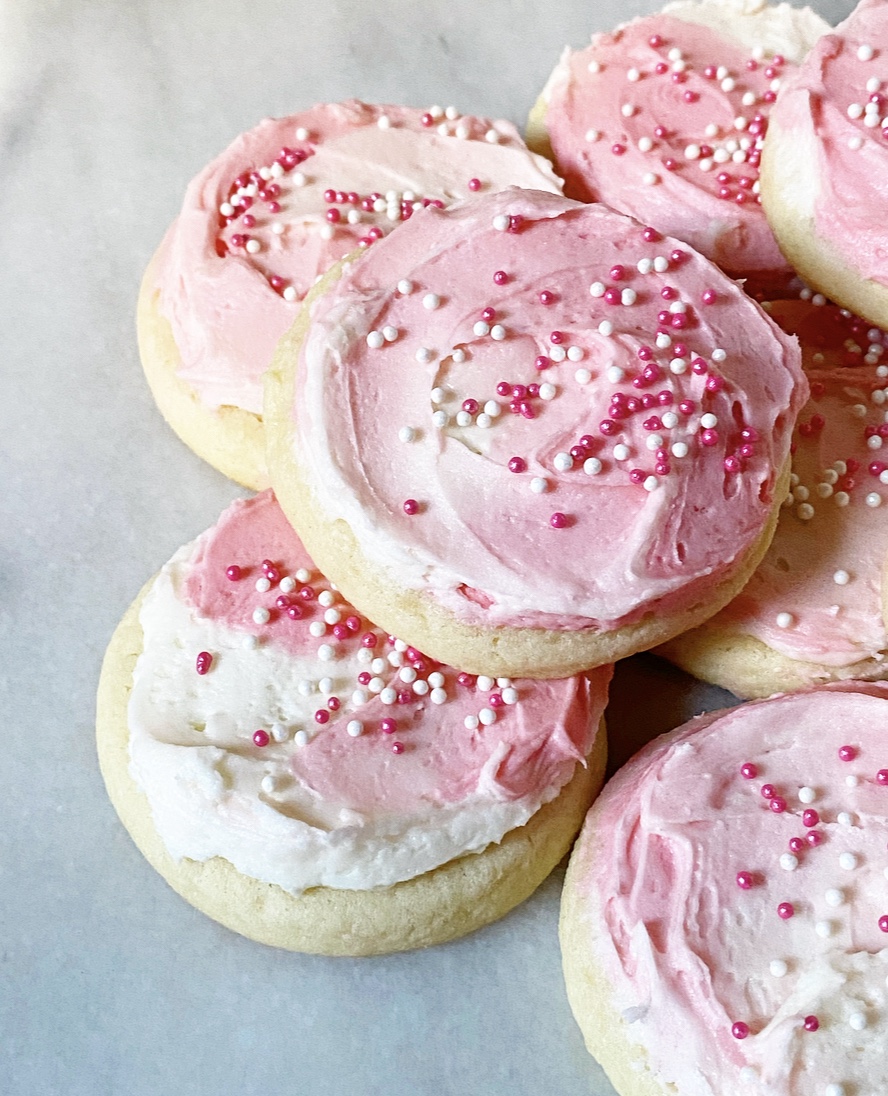
I think of these as a slightly-sophisticated holiday take on the Lofthouse Cookies I loved in college. Made with ingredients like softened butter, sour cream and eggnog, and sweetened with a mix of granulated and confectioner’s sugars, these cookies are super tender and slightly cakey (but in a good way). Their flavor is rounded out with cinnamon and nutmeg; you can add 1/2 teaspoon of rum extract (not straight rum!) too, if that’s your deal.
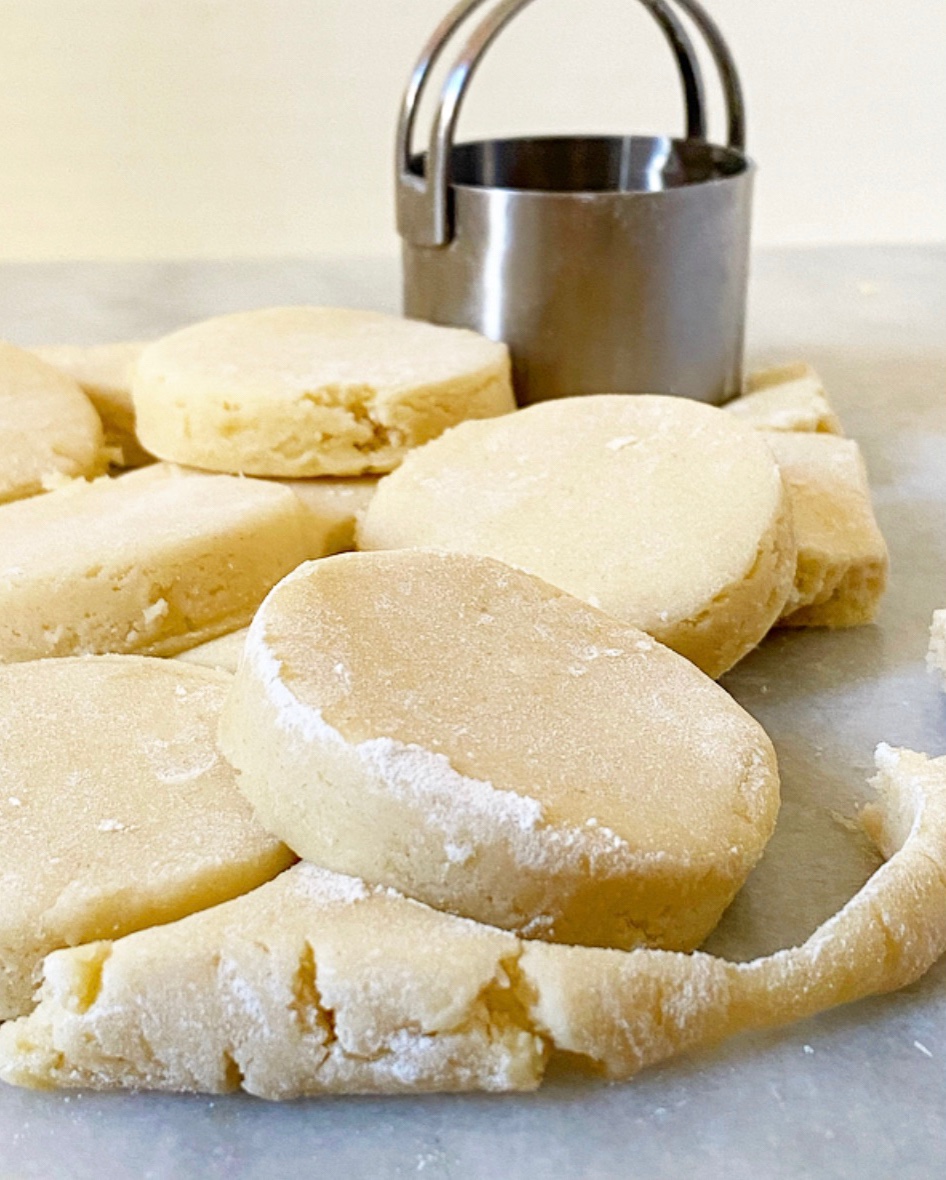
Heads up that this recipe requires a fair amount of inactive prep time. Initially, the dough is super sticky and needs a long chill to be workable. There is no way around this—I tried the freezer, rolling it between parchment, and separating it into quarters before the chill. You need to set aside at least four hours between mixing and baking, or prepare to have sticky hands and be extremely frustrated. No, thanks! Once the dough is cold and the ingredients have had a chance to meld though, it’s smooth sailing.


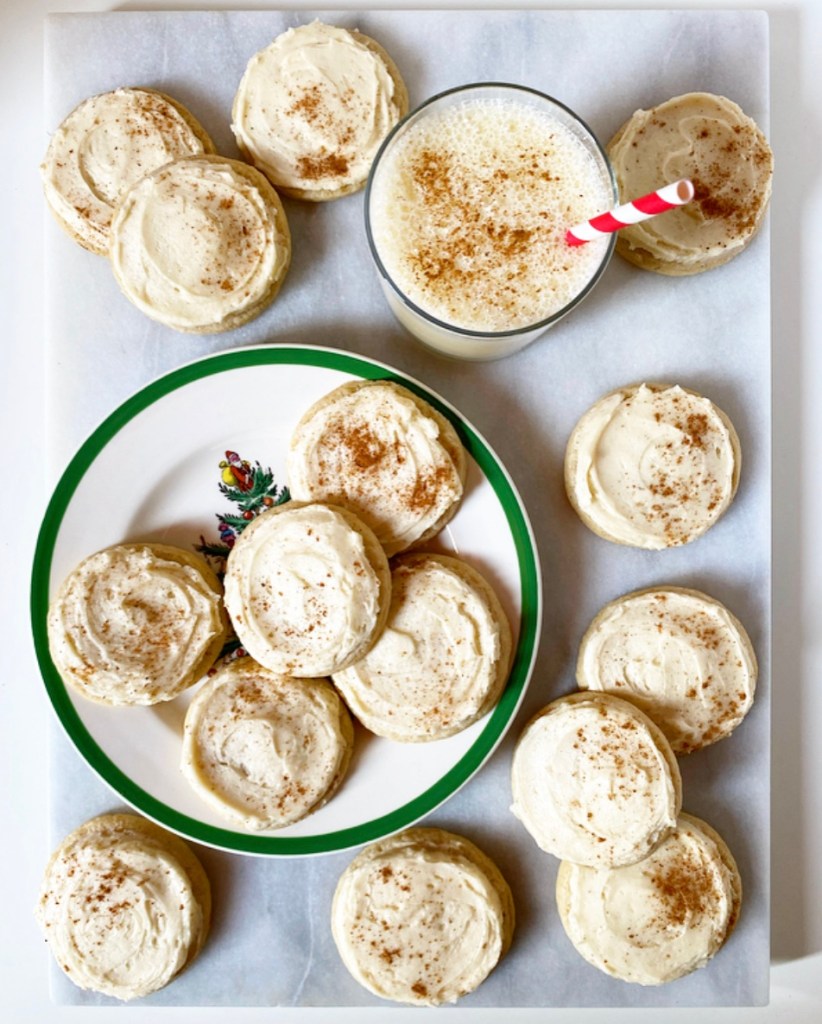
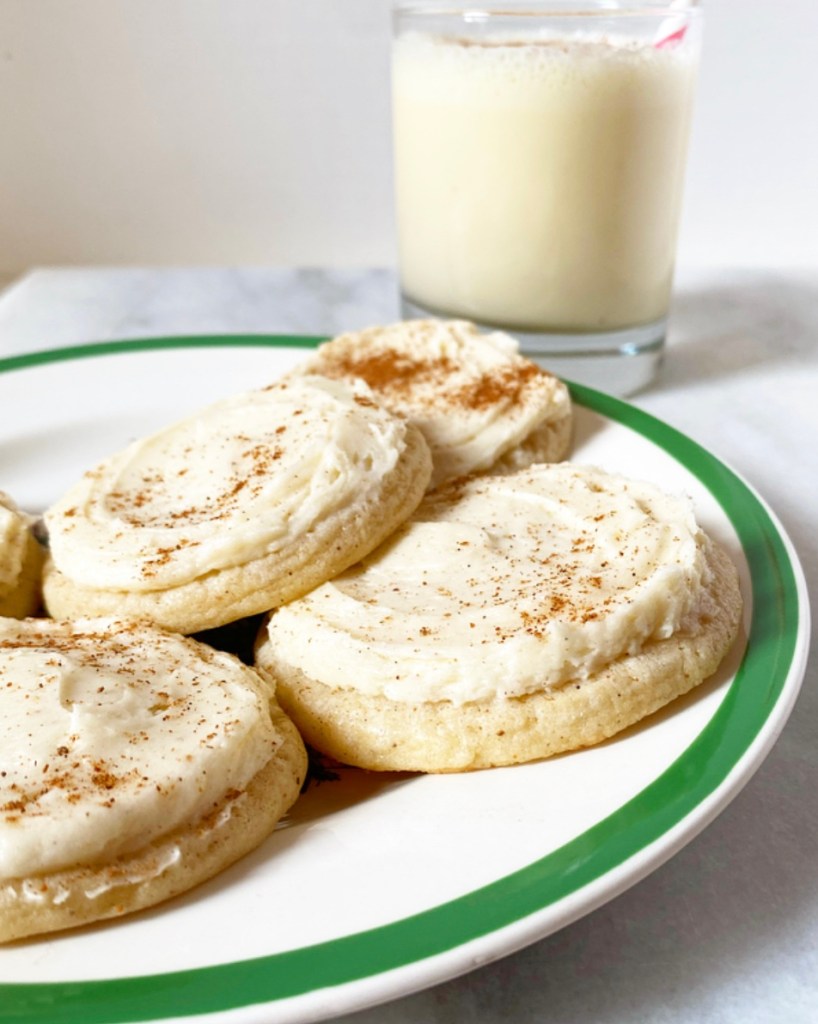
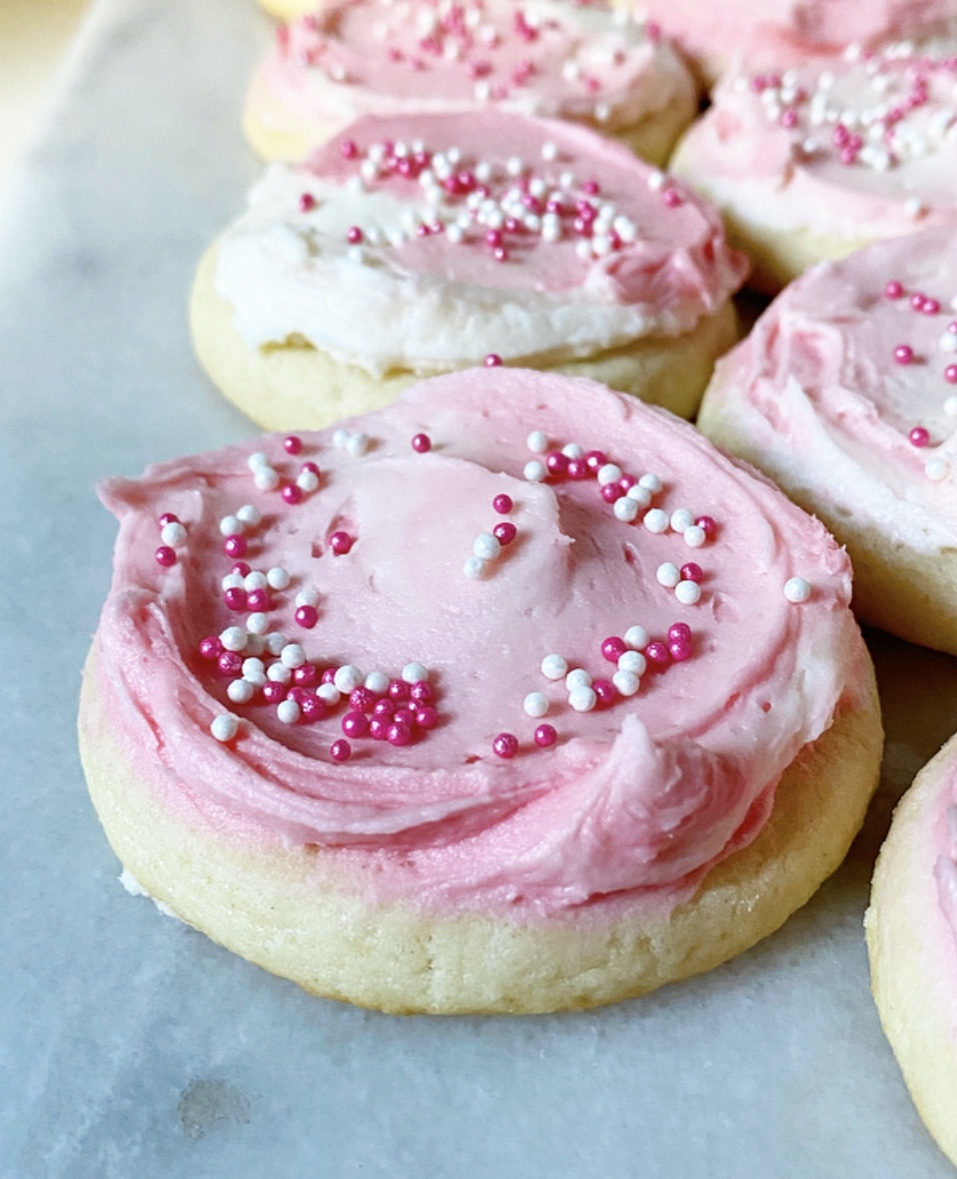
Make sure to roll your cookies out so that they’re super thick. I like them to be 1/2-inch thick before baking, and though they will spread somewhat significantly, they’ll still get some good height. They won’t look particularly enticing coming out of the oven, but that’s because they aren’t done yet. Ohhh no. Each of these ultra-soft sugar cookies is topped with a blanket of buttercream and sprinkled with a mixture of cinnamon and eggnog for maximum holiday cheer.

I know I say this about every recipe, but these are so good, y’all—feather soft with plenty of eggnog flavor and a little tang from the sour cream. The combination of tender cookie and hearty schmear of buttercream is akin to eating the top a cupcake. If that’s not the ideal way to consume eggnog this holiday season, I don’t know what is.
Frosted Eggnog Sugar Cookies
makes about 3 dozen
2 1/3 cups all-purpose flour
3/4 cup confectioner’s sugar
3/4 teaspoon ground cinnamon
3/4 teaspoon ground nutmeg
1 1/4 teaspoons baking powder
1/2 teaspoon Kosher or sea salt
1 cup unsalted butter, softened to room temperature
3/4 cup granulated sugar, packed
1 large egg, room temperature
1/4 cup sour cream (not fridge-cold)
1/4 cup eggnog (not fridge-cold)
2 teaspoons pure vanilla extract
Eggnog Buttercream:
1/2 cup (1 stick) unsalted butter, softened to room temperature
2 cups confectioner's sugar
pinch of ground cinnamon
pinch of ground nutmeg
pinch of Kosher or sea salt
1 teaspoon pure vanilla extract
3 tablespoons eggnog
Special Equipment:
a 2-inch round cookie cutter
offset icing spatula
Make the cookie dough. In a small bowl, whisk together flour, confectioner’s sugar, cinnamon, nutmeg, baking powder and salt. Set aside.
In a medium-large mixing bowl, use an electric mixer to beat butter until light and fluffy, about 2 minutes. Beat in sugar until creamy. Mix in egg, followed by sour cream, eggnog and vanilla. Add dry ingredients in 2 installments, beating until combined. Dough will be a bit sticky.
Divide dough into halves and wrap each in plastic wrap. Chill for at least 4 hours or up to 3 days.
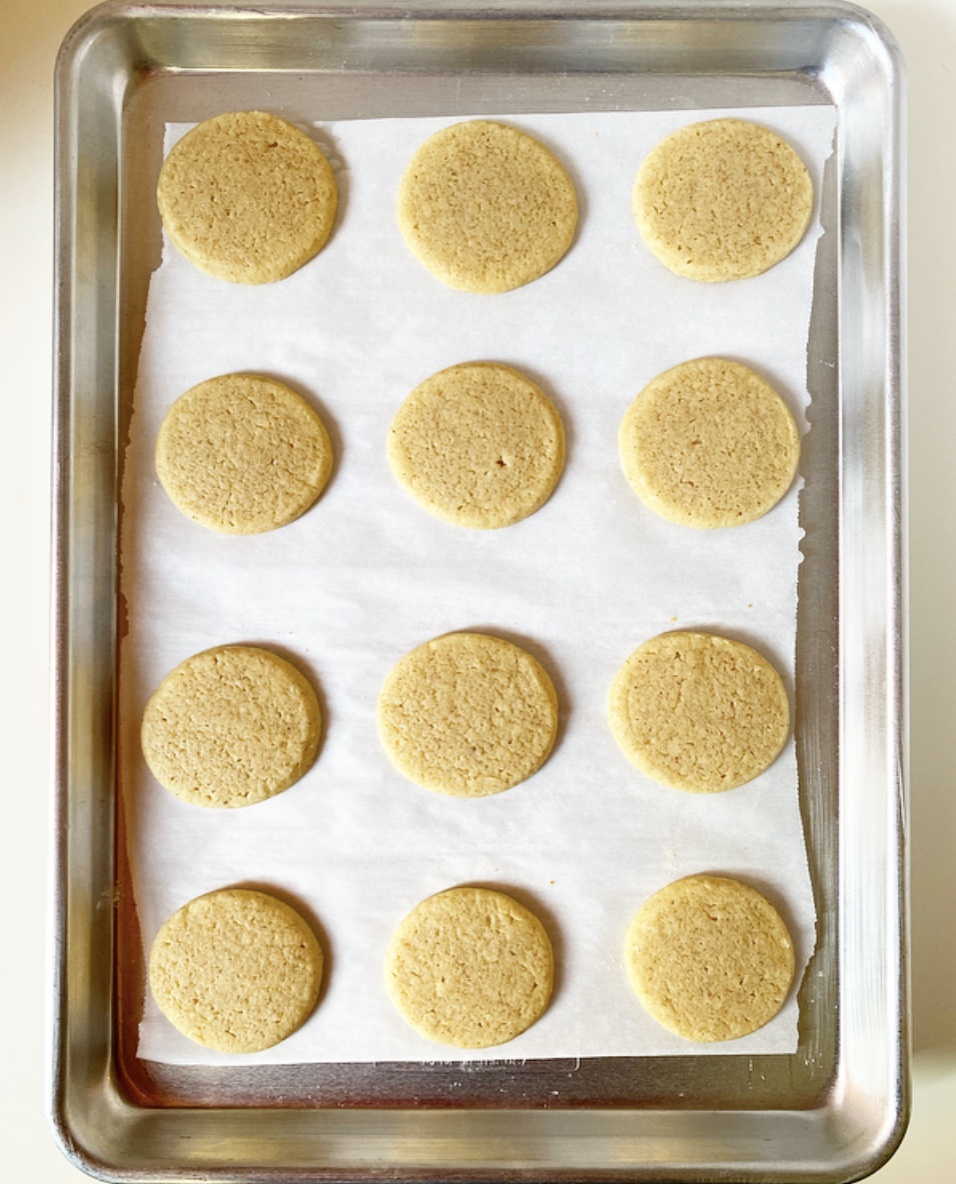
Place oven racks in central positions. Preheat oven to 350F. Line 2 rimmed sheet pans with parchment paper. Set aside.
Generously flour a surface and rolling pin. Unwrap one half of the dough. Roll the dough to 1/2-inch thickness, lifting and turning the dough frequently so that it doesn’t stick to your surface. Use a 2-inch round cutter to cut cookies. Cut directly down. Do not twist.
Place cookies 2 inches apart on prepared pans. Bake 10-11 minutes, rotating top-to-bottom and back-to-front at the 5 minute mark. Cookies are done when puffed and no-longer raw-looking. They should be mostly pale, but there may be some golden coloring at the bottom edges. Let cookies cool on the pans for 8-10 minutes before removing to a rack to cool completely. Let sheet pans come to room temperature before proceeding with the next batch.
Repeat rolling, cutting and baking with remaining half of dough. Re-roll scraps as desired, refrigerating if anything gets too sticky.
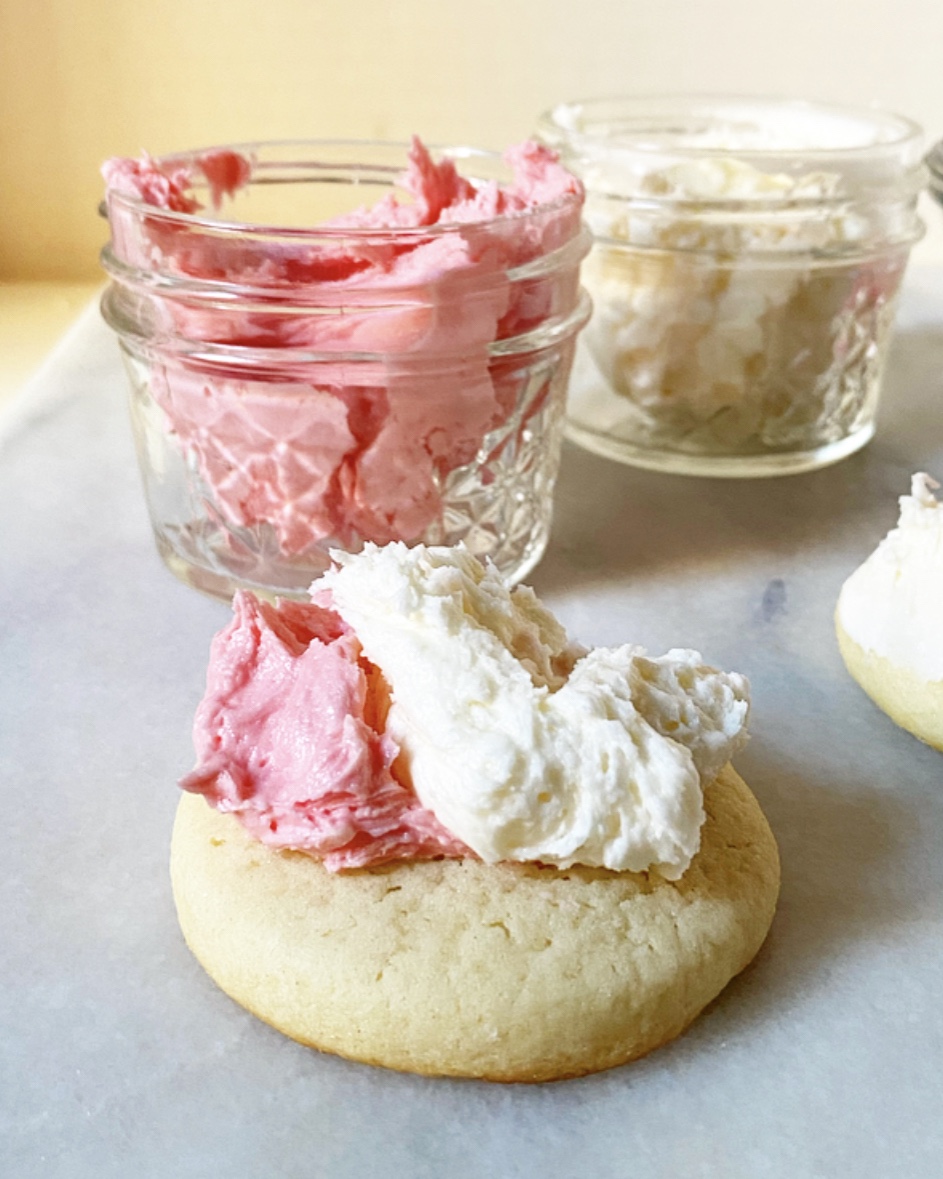
Make Eggnog Buttercream. In a large mixing bowl, use an electric mixer to beat butter until light and fluffy, about 2 minutes. Beat in confectioner's sugar in two installments, scraping down the bowl as necessary. Beat in cinnamon, nutmeg, salt and vanilla. Add eggnog and beat until combined.
After cookies have cooled completely, use an offset icing spatula to frost each one with about 1 tablespoon of Eggnog Buttercream. Garnish with pinches cinnamon and nutmeg immediately after frosting. Buttercream will crust after an hour or so. You may serve the cookies immediately after frosting, but they are softest the next day.
After they’ve crusted, leftovers may be layered with wax or parchment paper and kept in an airtight container. They will keep at room temperature for a couple of days or in the refrigerator for up to a week.


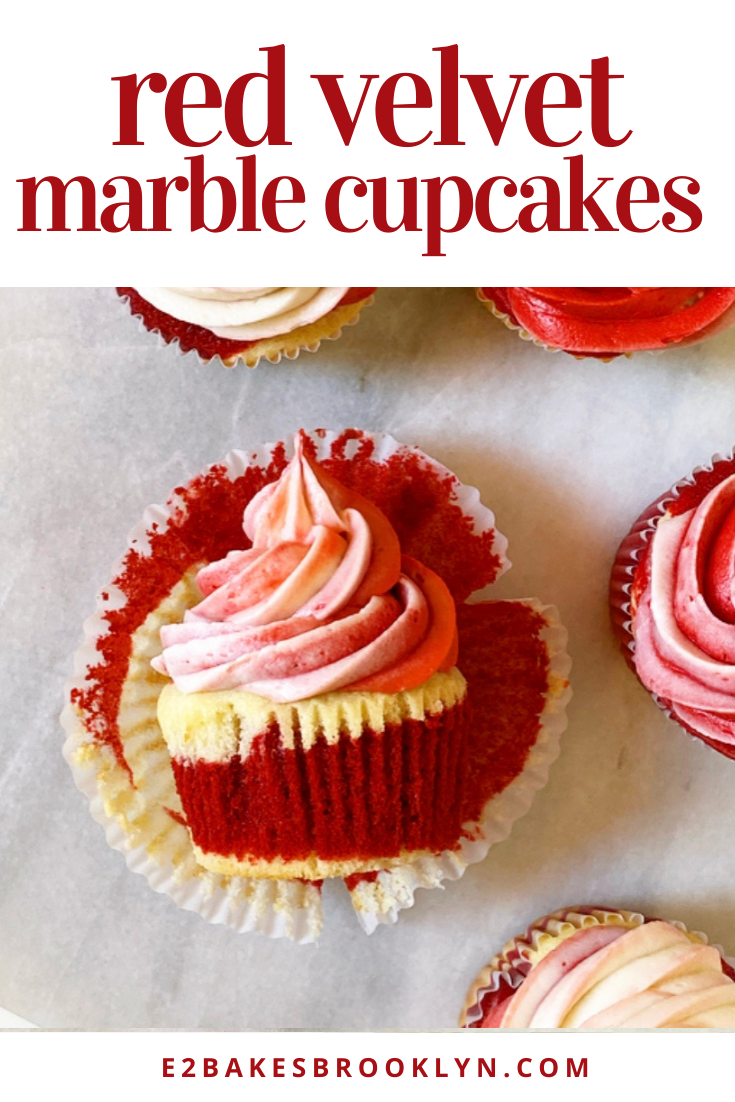
 This marks the first time I’ve posted a new cupcake recipe on here in more than
  Before I get to how these cupcakes get their marble, let’s discuss red velvet on its own. This southern flavor is divisive; some love it, some hate it, and some love to hate it. I obviously love it, as evidenced by years of red velvet treats for
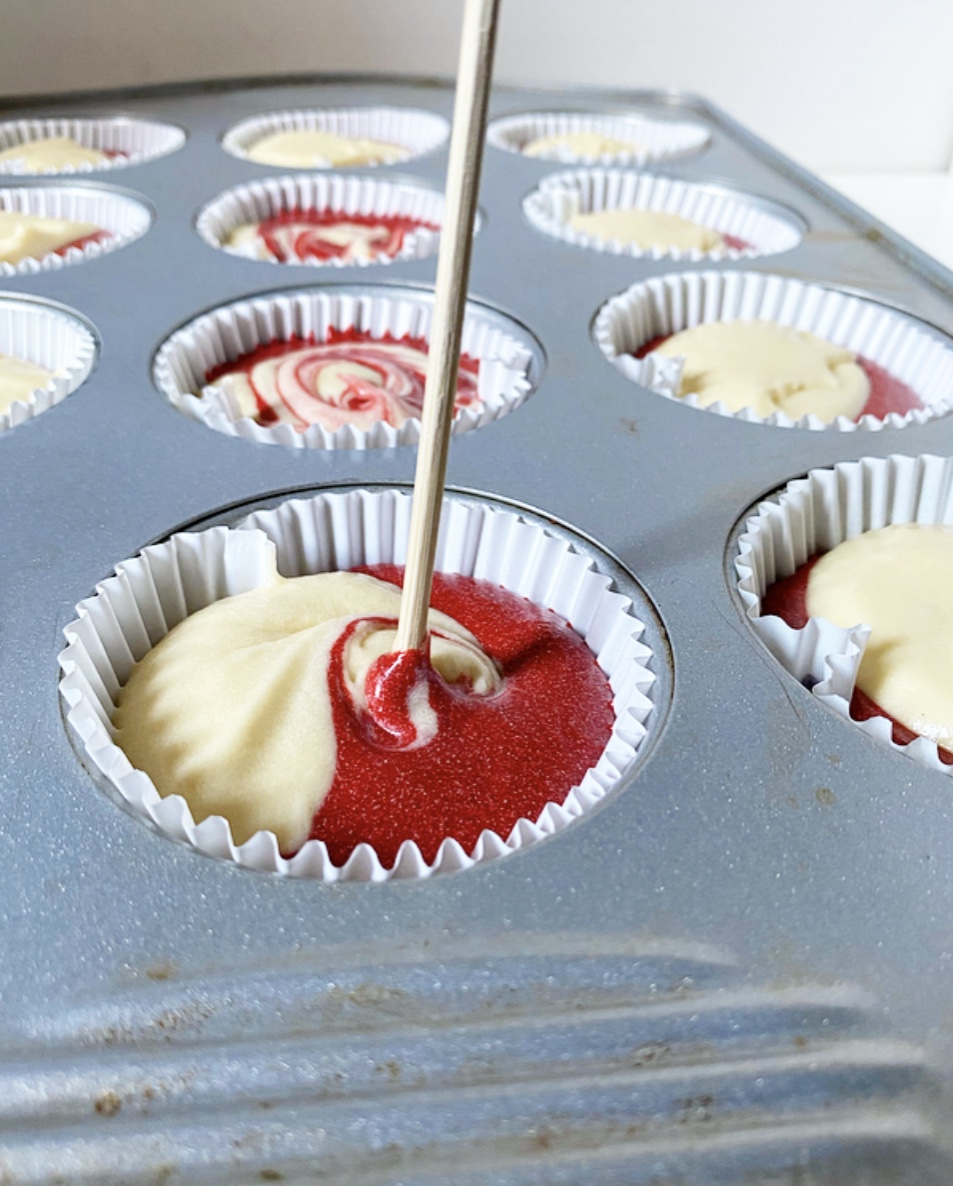
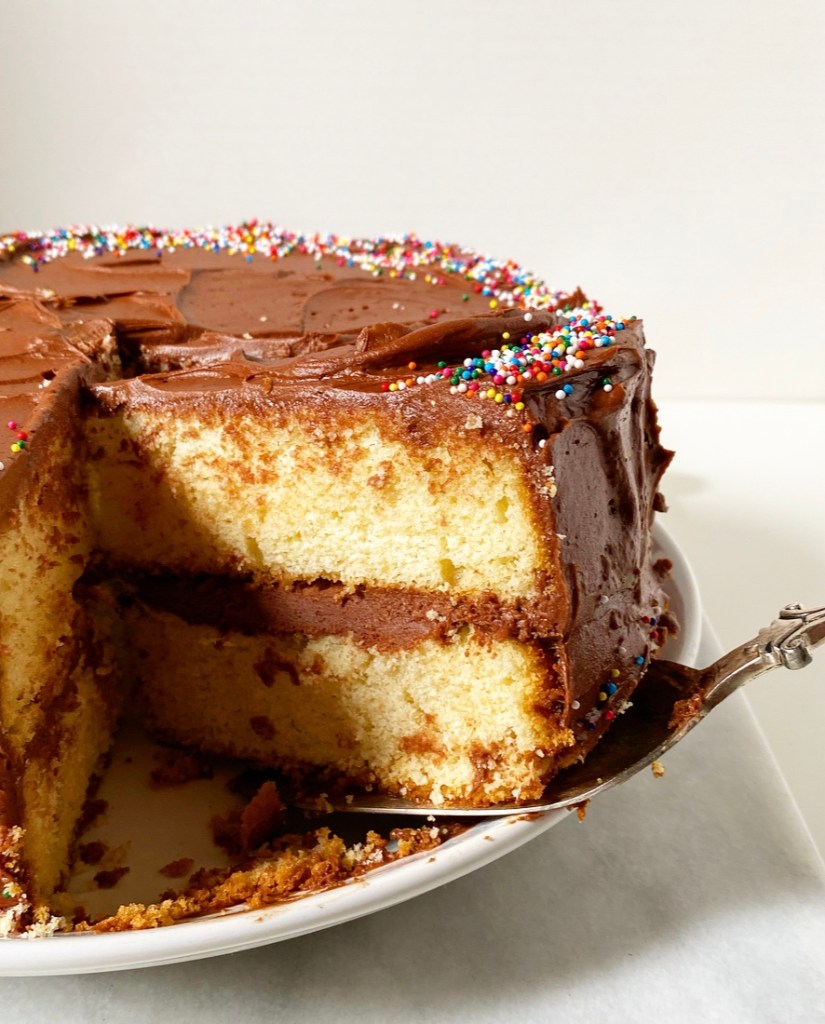
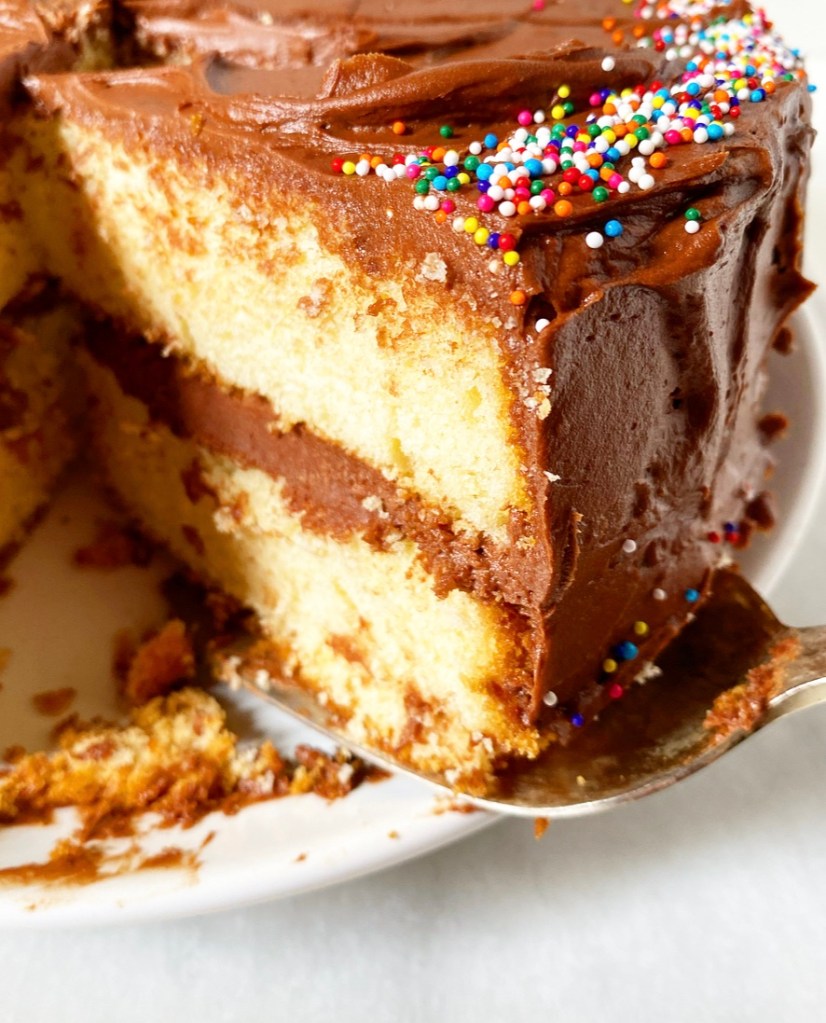
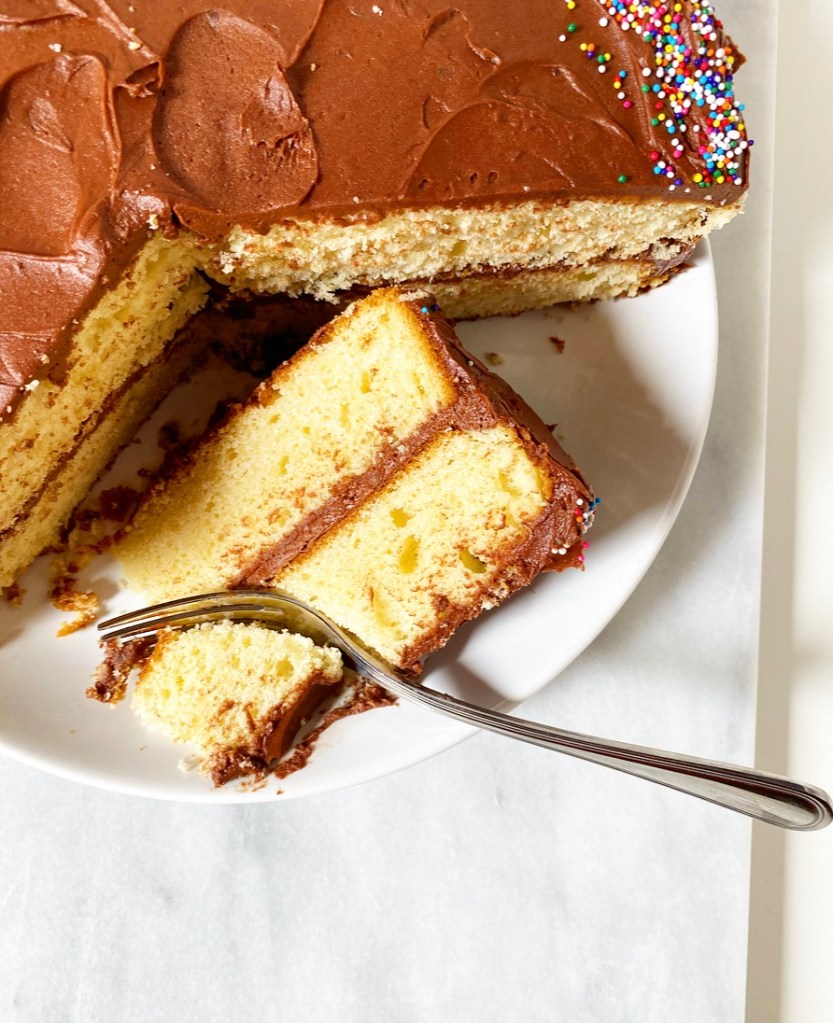
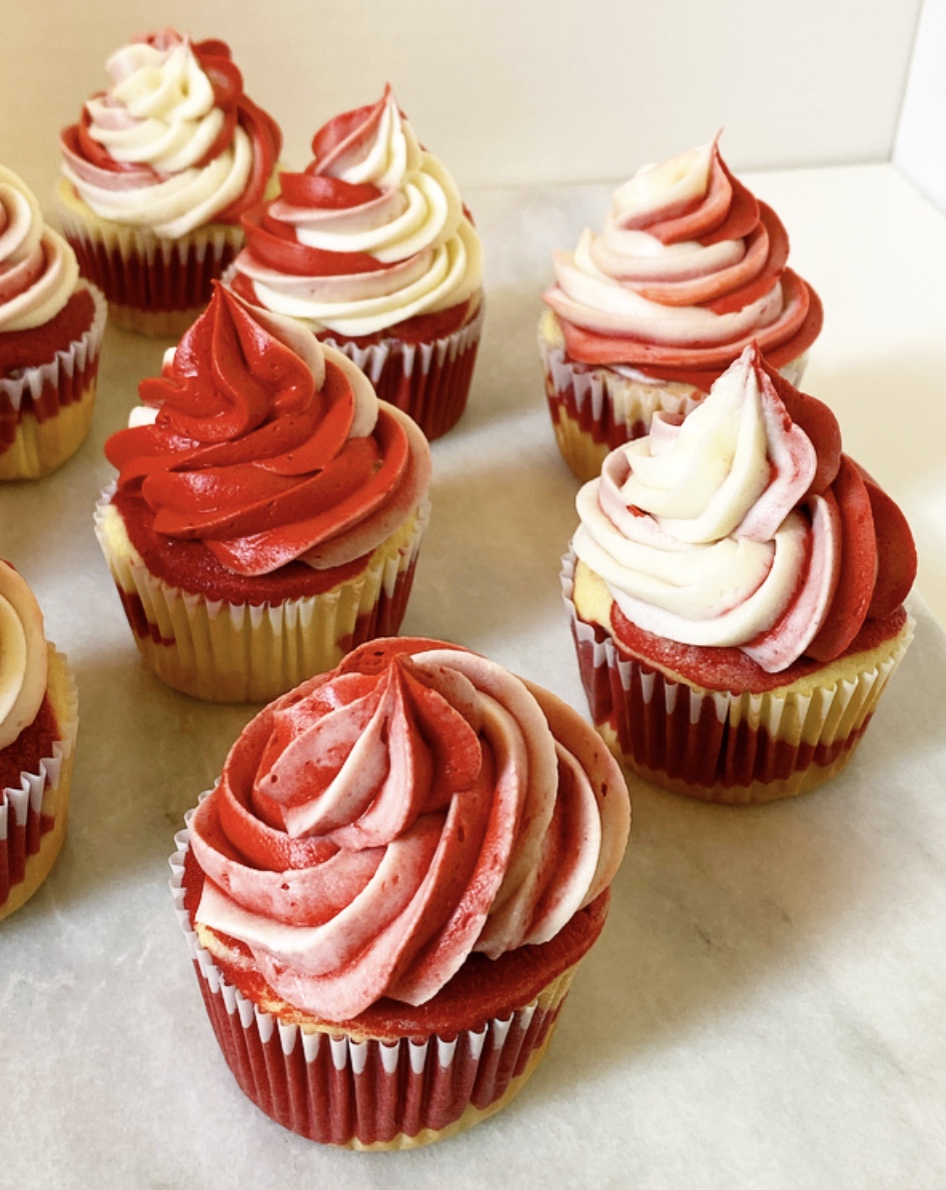
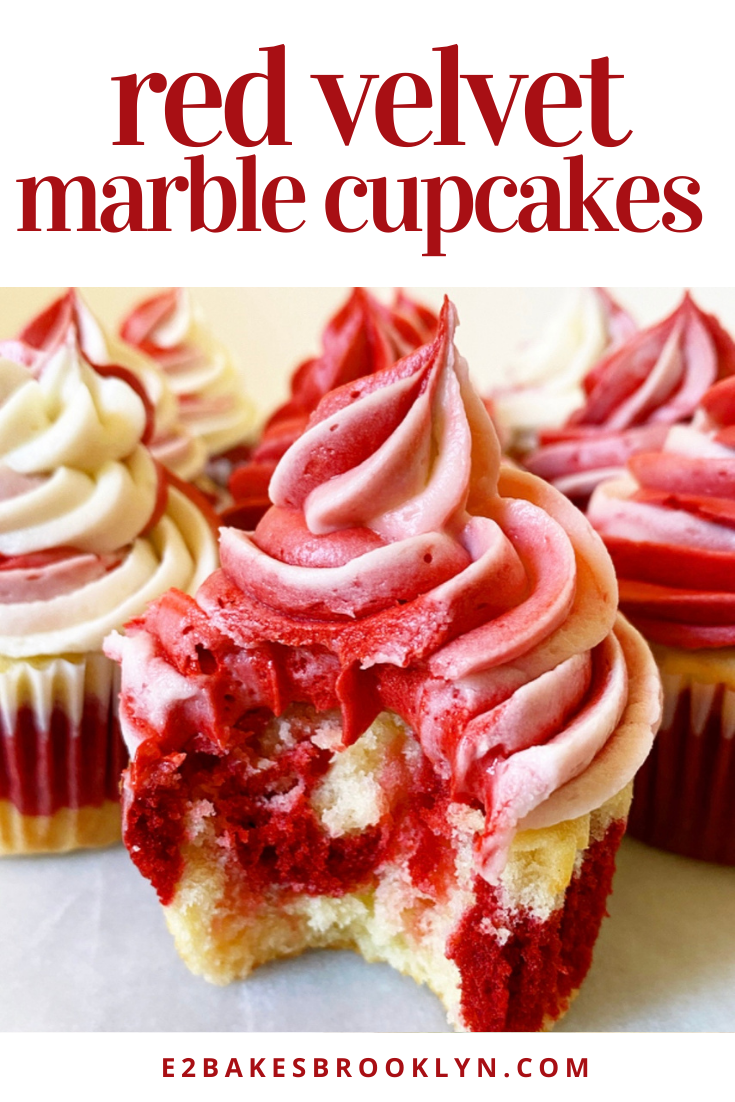
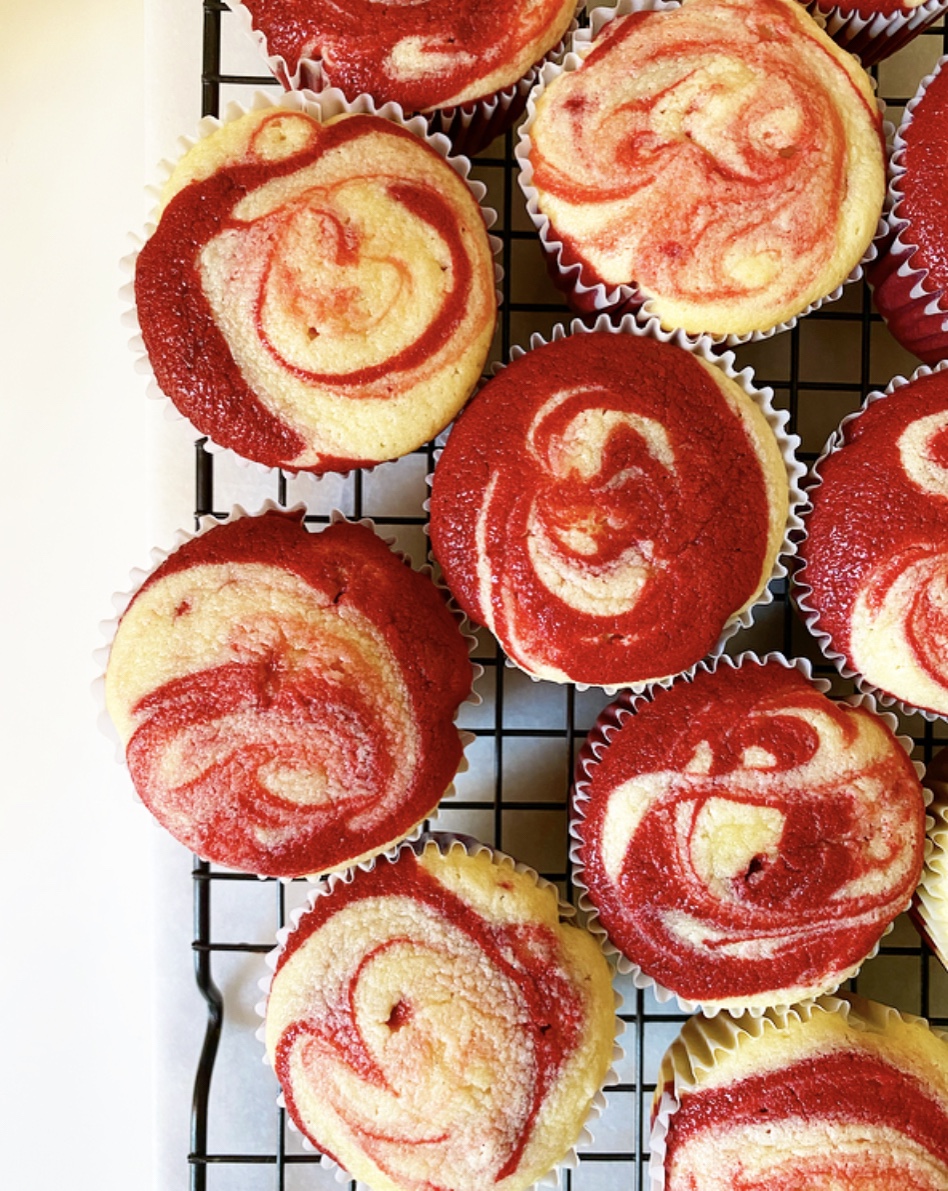 Now for the marbling! Here, red velvet cake batter is swirled into delicious vanilla sour cream cupcakes. These little cakes are moist and springy and out-of-this-world good. They are assembled from just one batter—the red velvet is made by stirring cocoa powder, a tablespoon of milk and red food coloring into a small portion of the vanilla mixture. Both colors are scooped into the cupcake pans, then swirled together before baking.
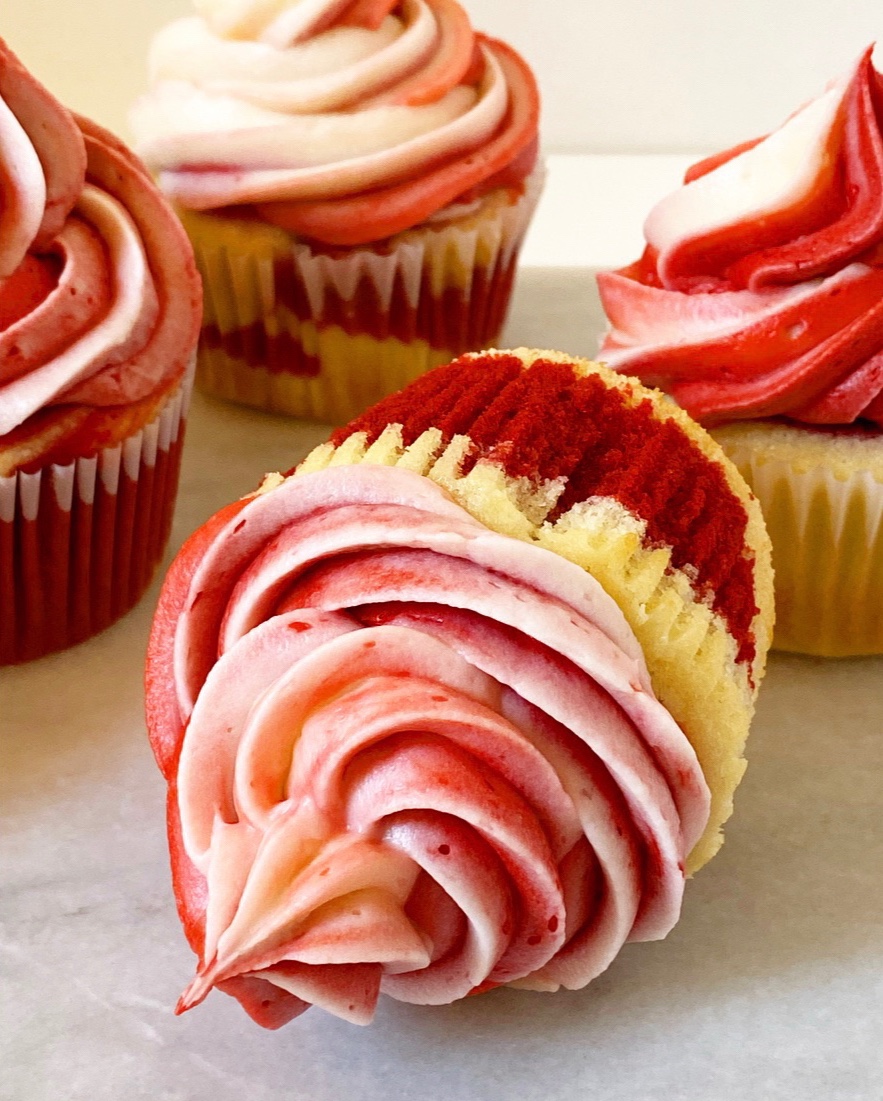 As for the cream cheese frosting, I had originally planned to keep it completely traditional, but ultimately decided to continue the marble motif, dying half the frosting red and flavoring it with a hint of cocoa for maximum red velvet realness.
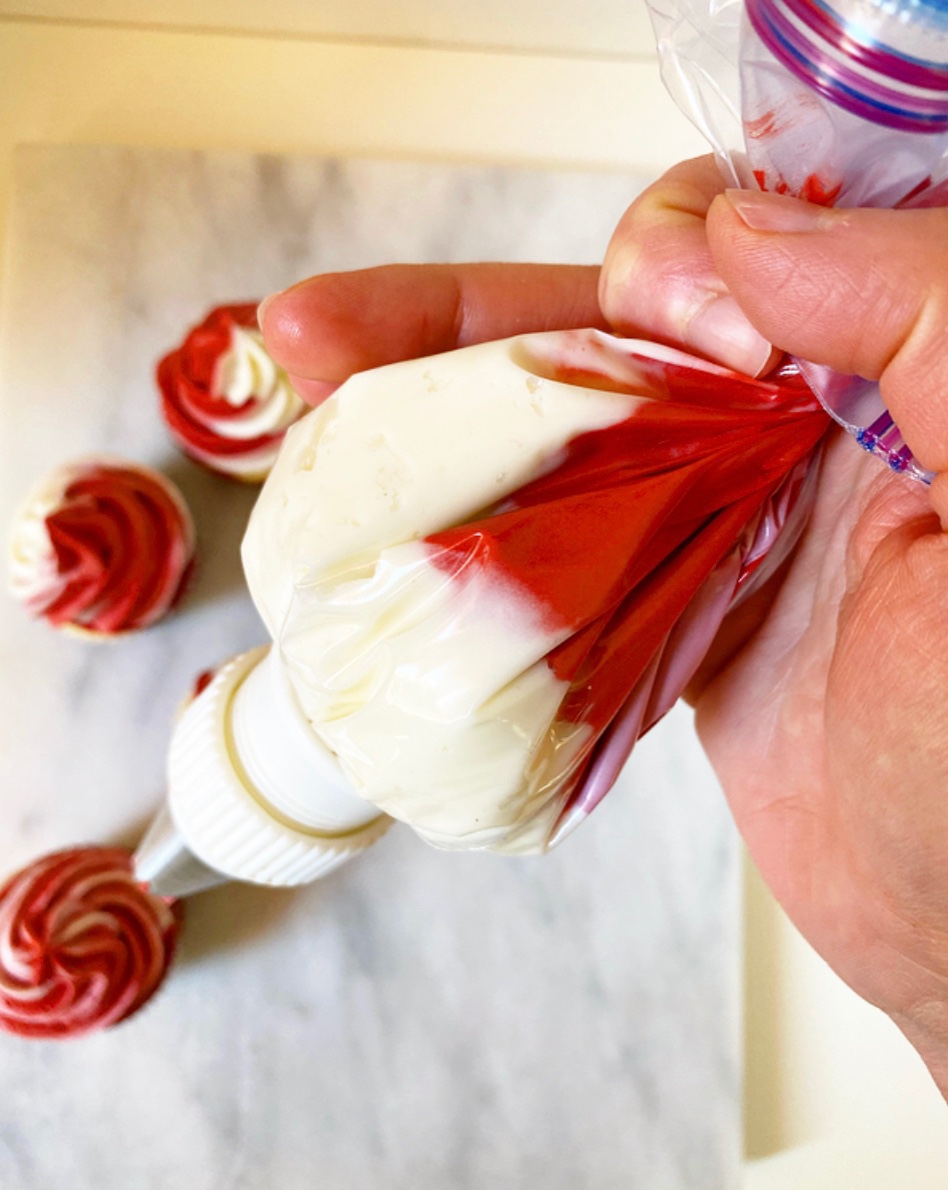
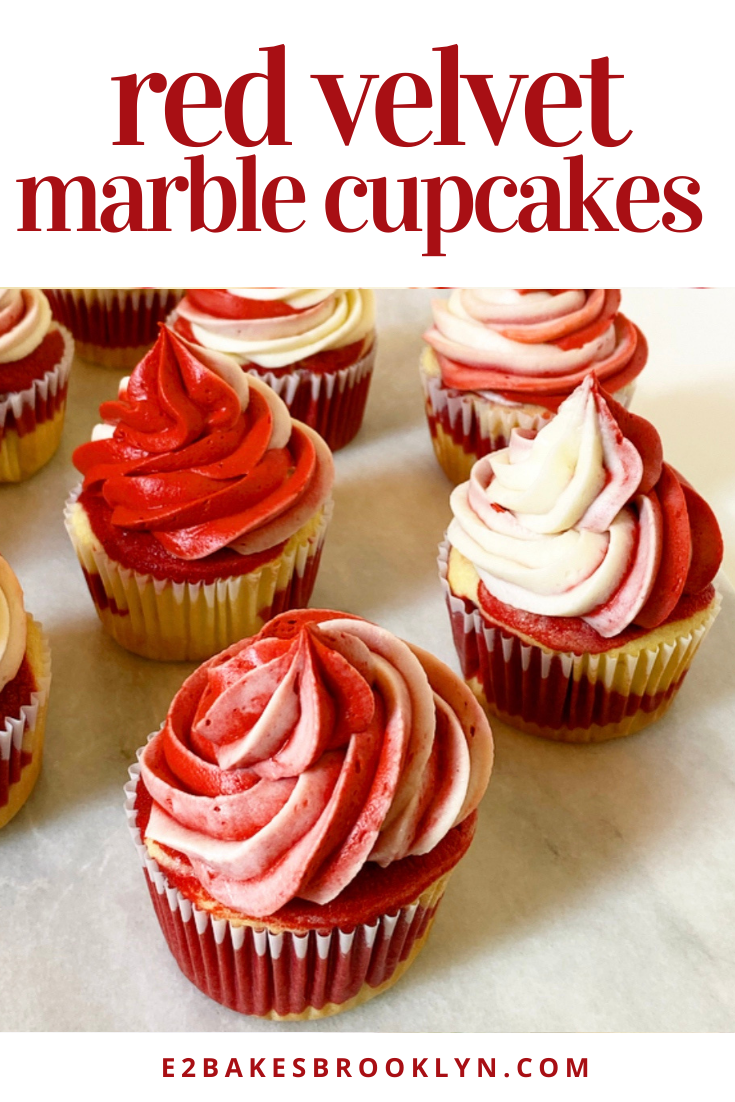
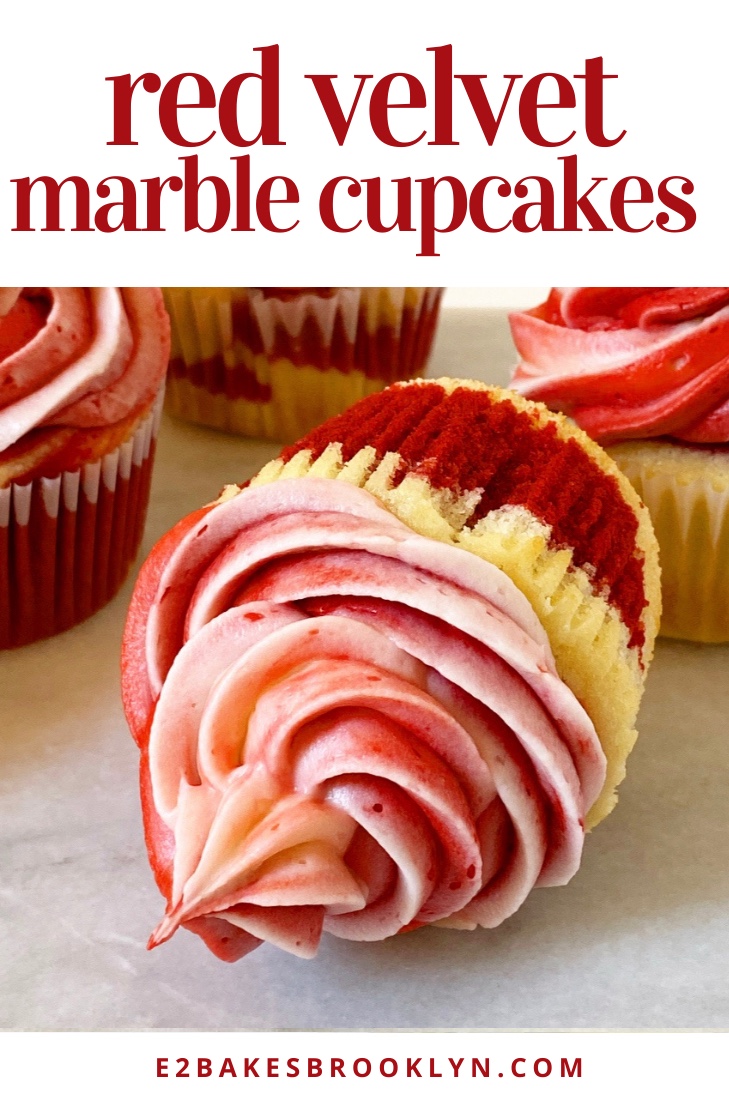
 To achieve a marbled/swirled frosting effect, I loaded both colors into the same piping bag, doing my best to keep them on separate sides. You can purchase specialty piping bags for this, or use two smaller bags in a larger bag, but I took the easy way out and also tried to let go of the outcome. Baking is much more fun when you let go of the outcome. I totally love how they all turned out a bit differently!
 These cupcakes, y’all! If you or your valentine(s) are into red velvet, you’re going to love them. The vanilla portion is delicious, but that chocolate-vanilla hint of red velvet really takes the (cup)cake!
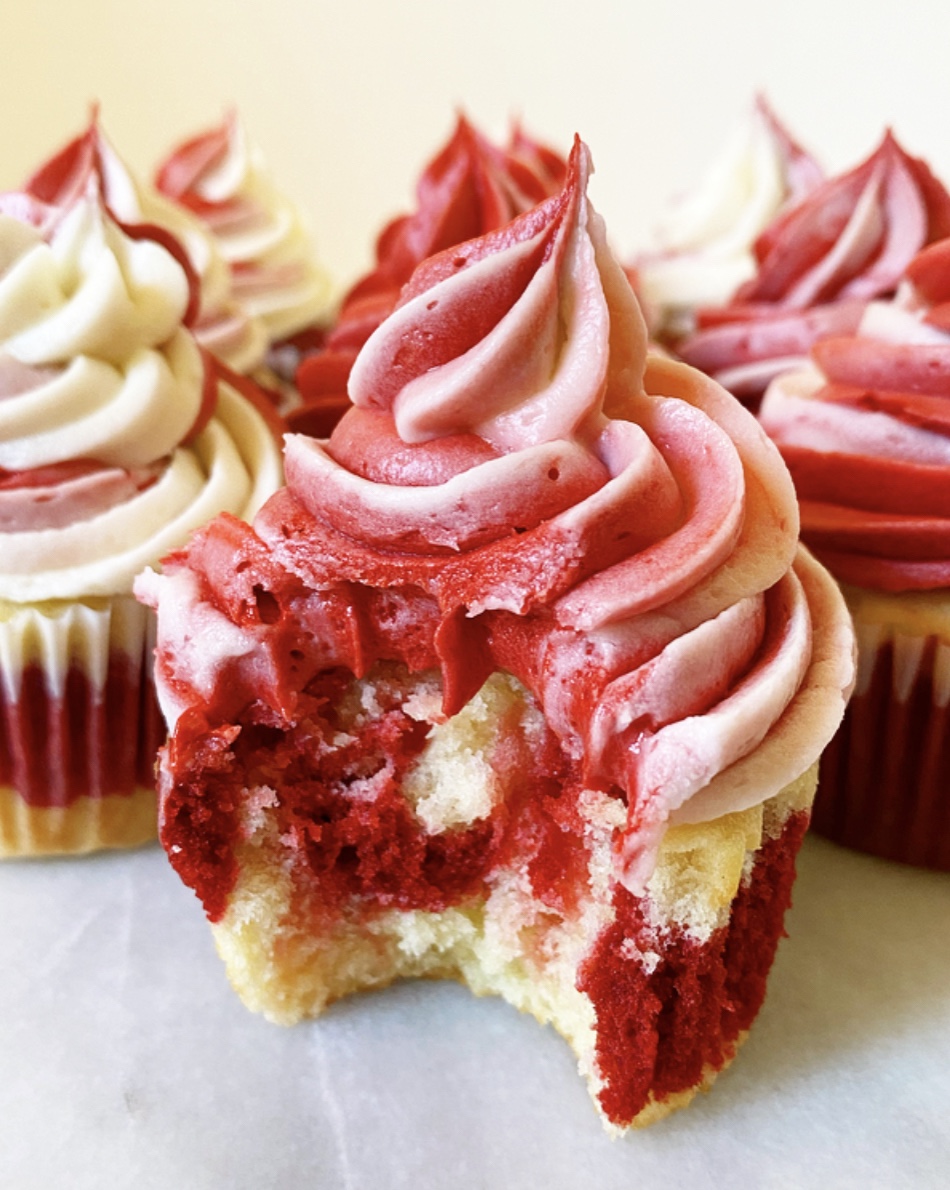
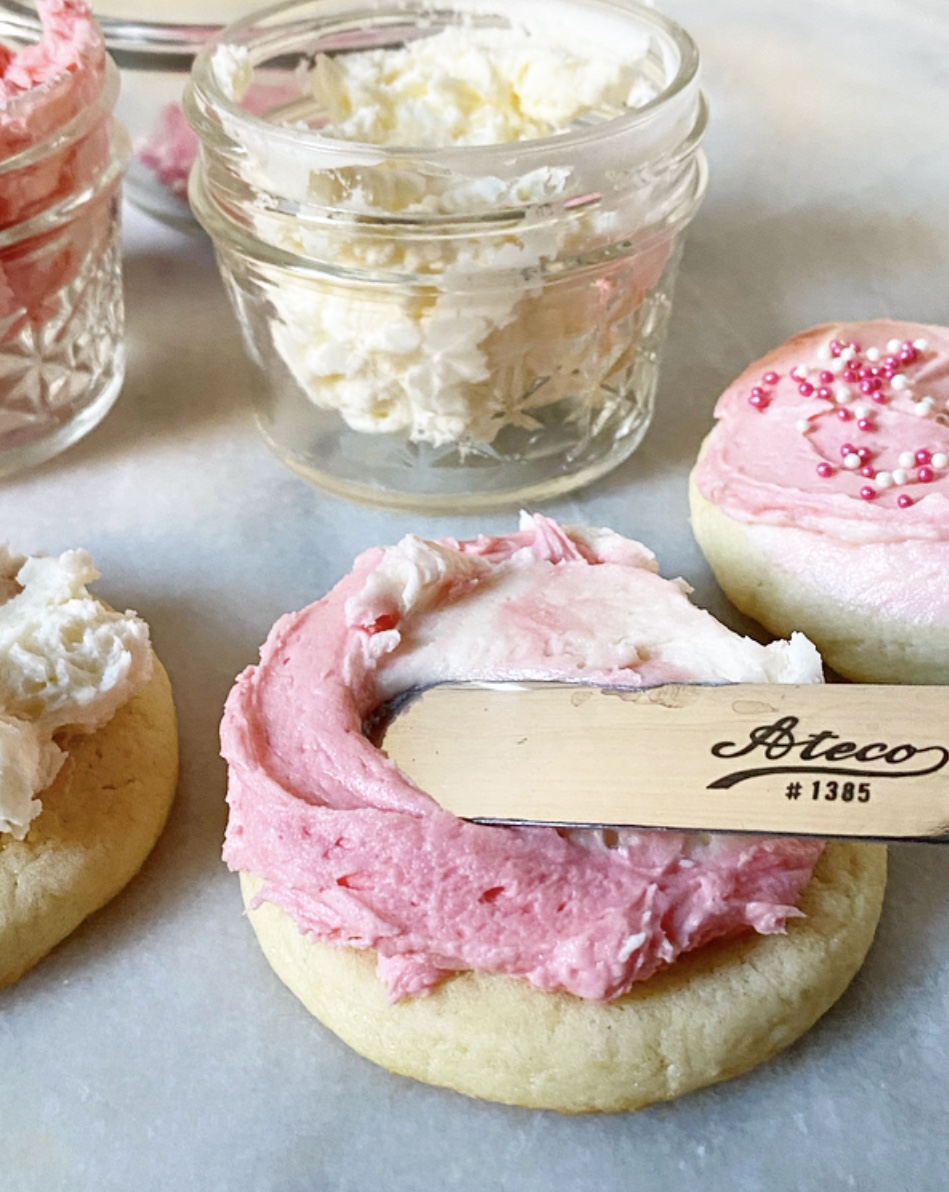
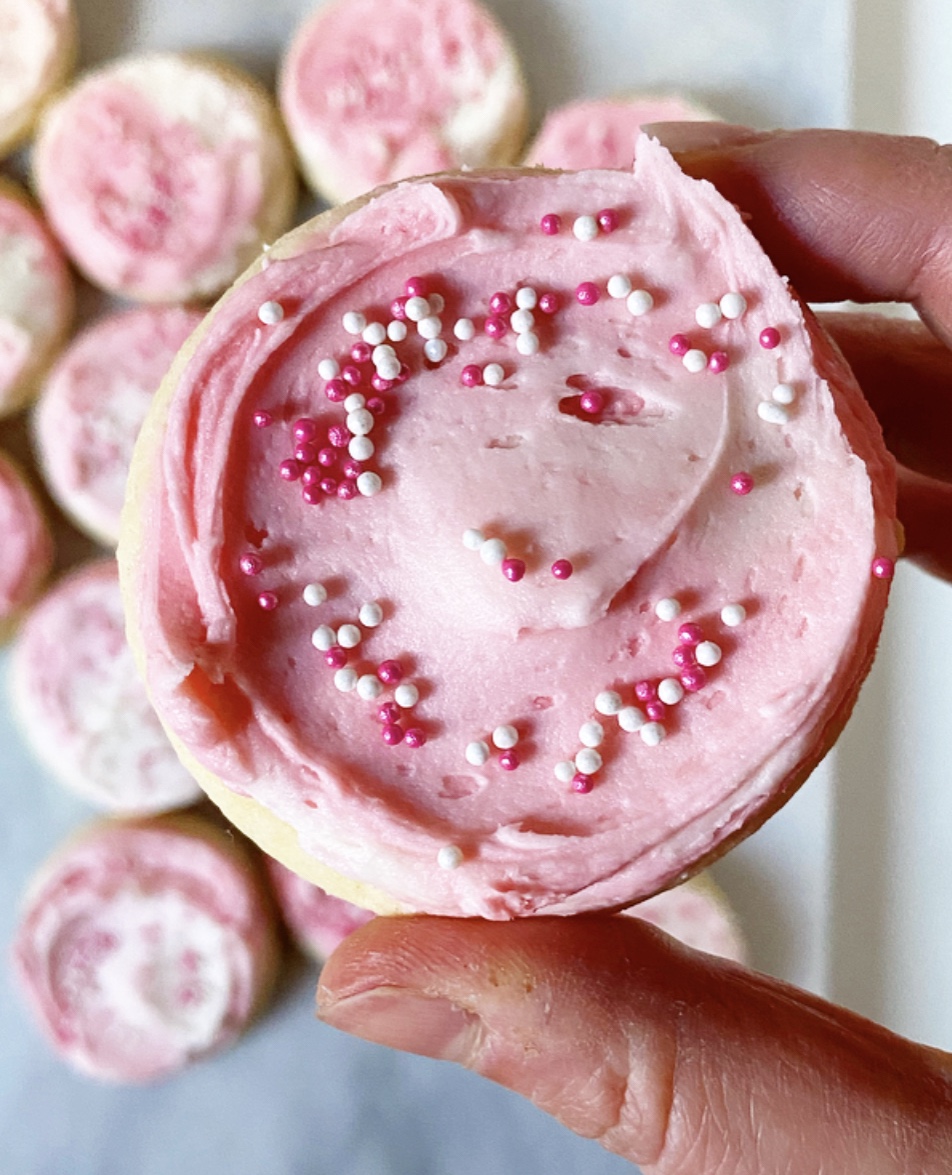
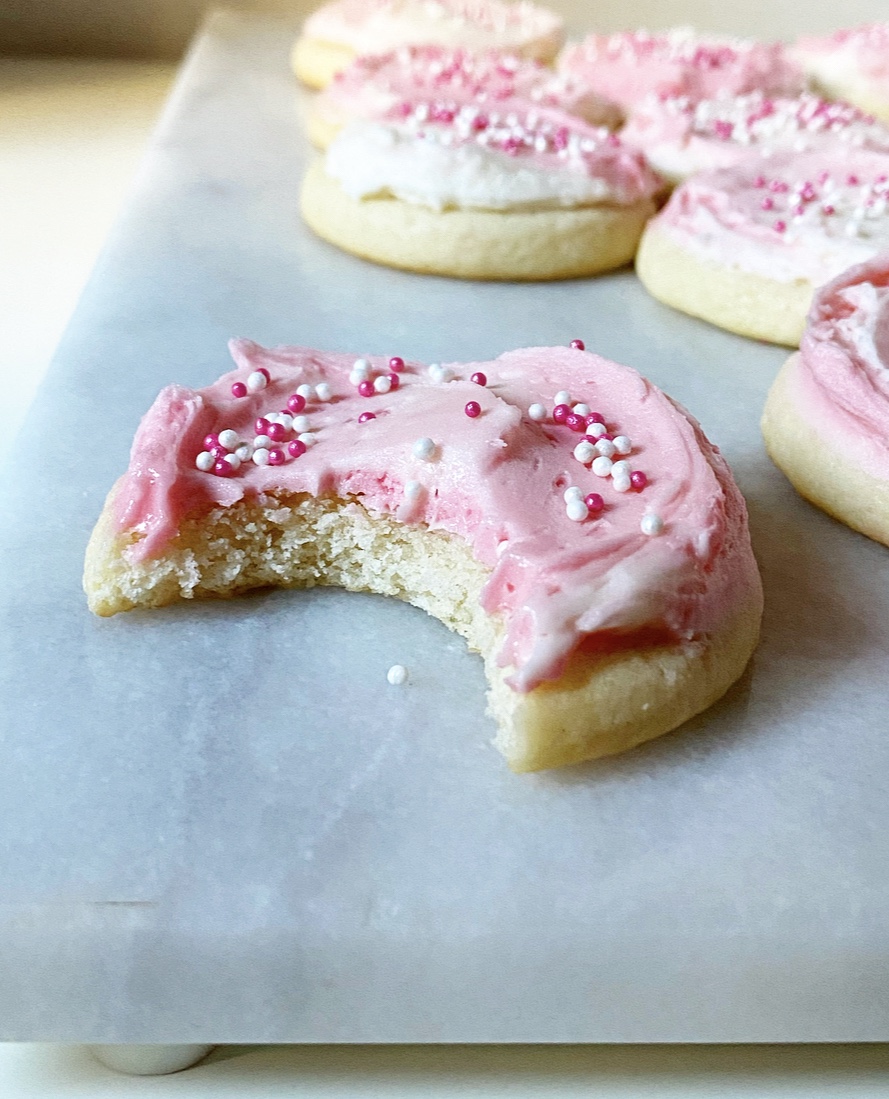
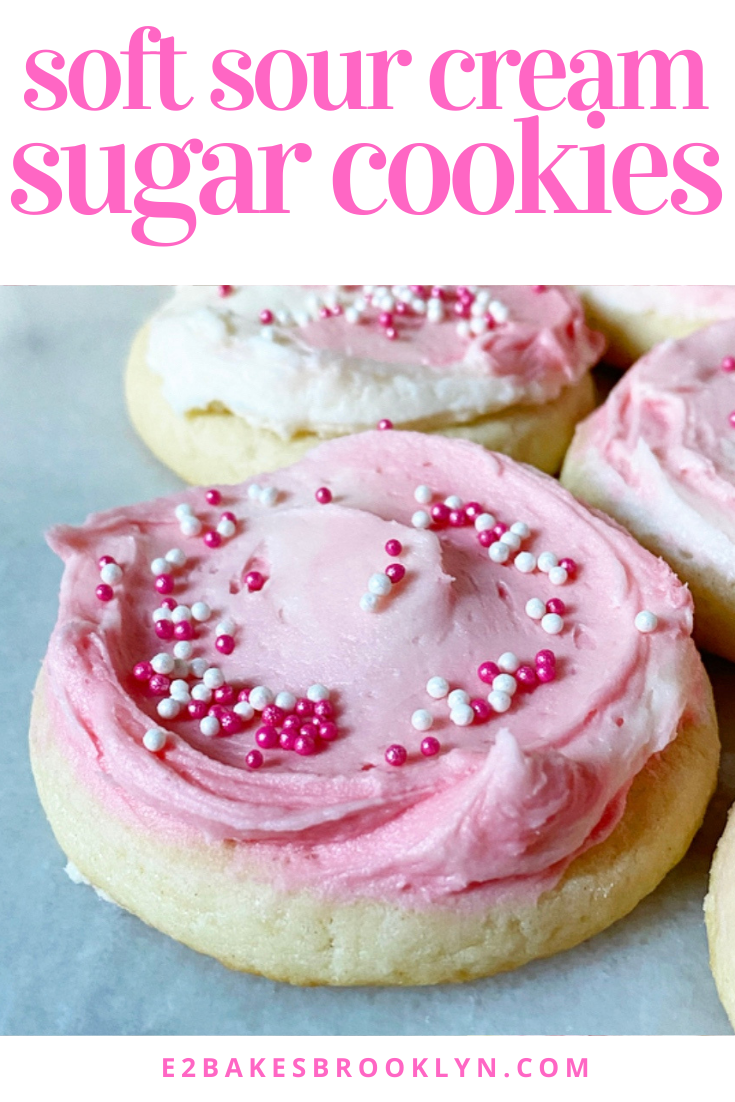
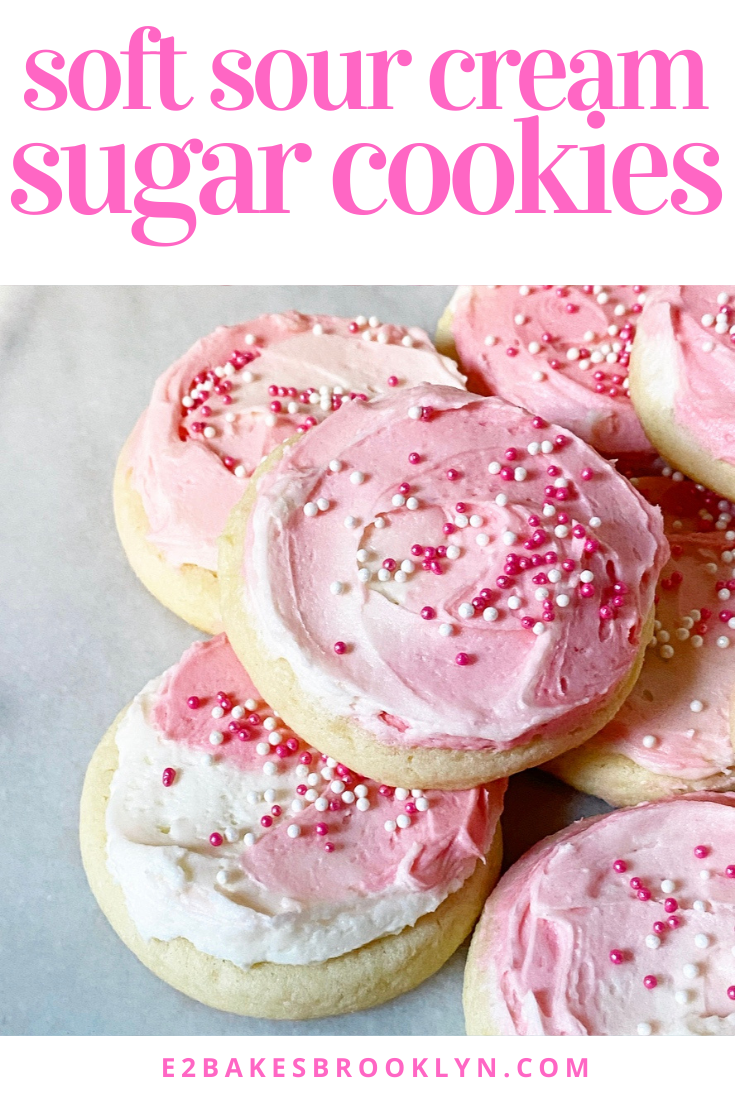
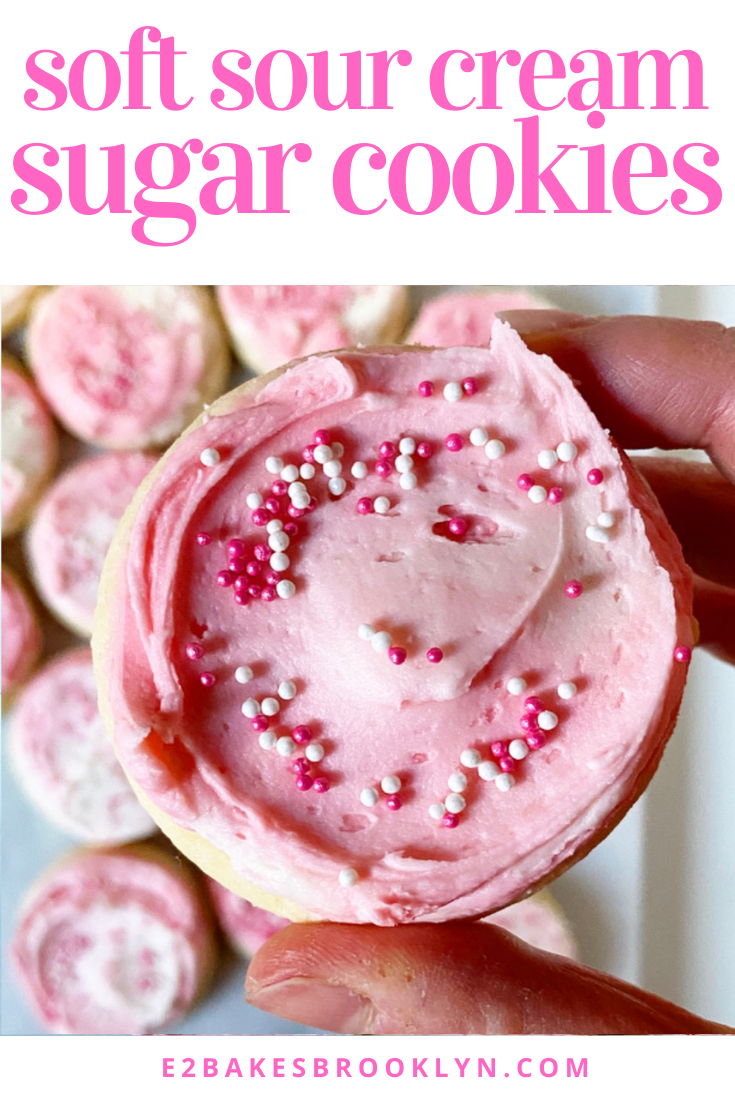
 Soft Sour Cream Sugar Cookies. Try saying that five times fast. Or, you know, skip the silliness and just make ‘em.

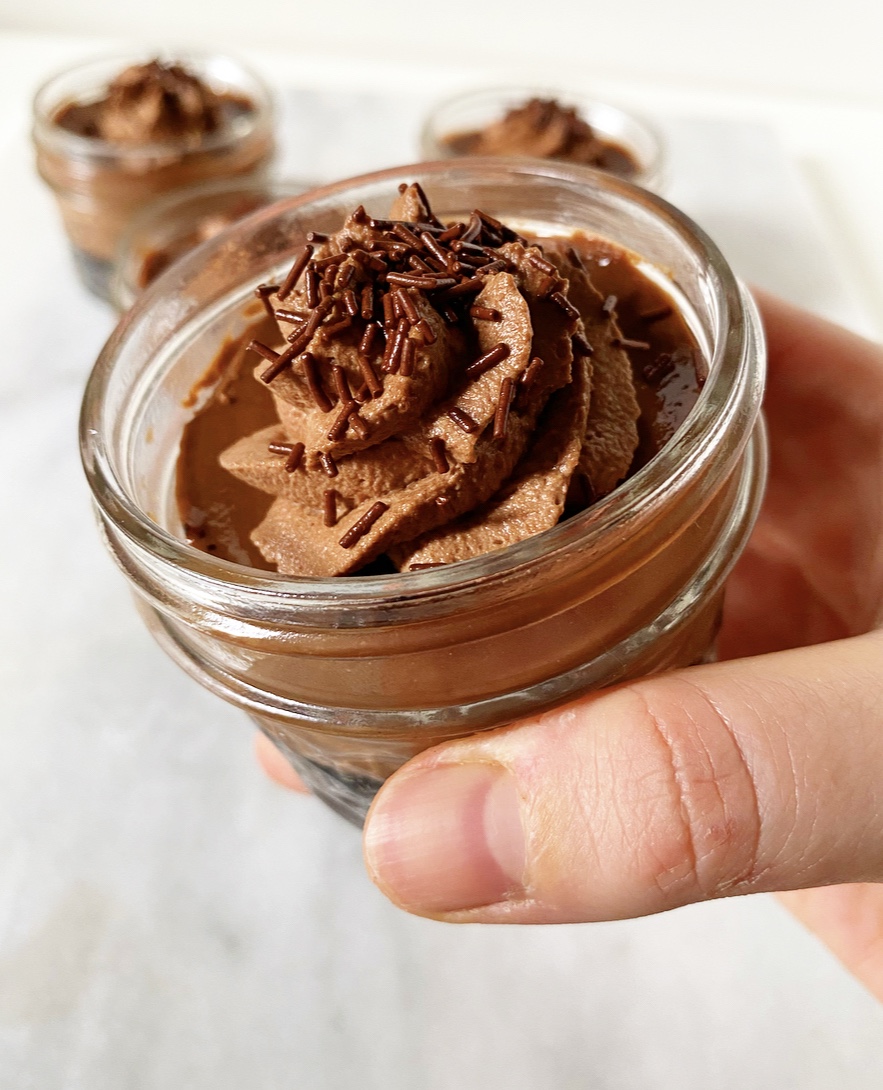
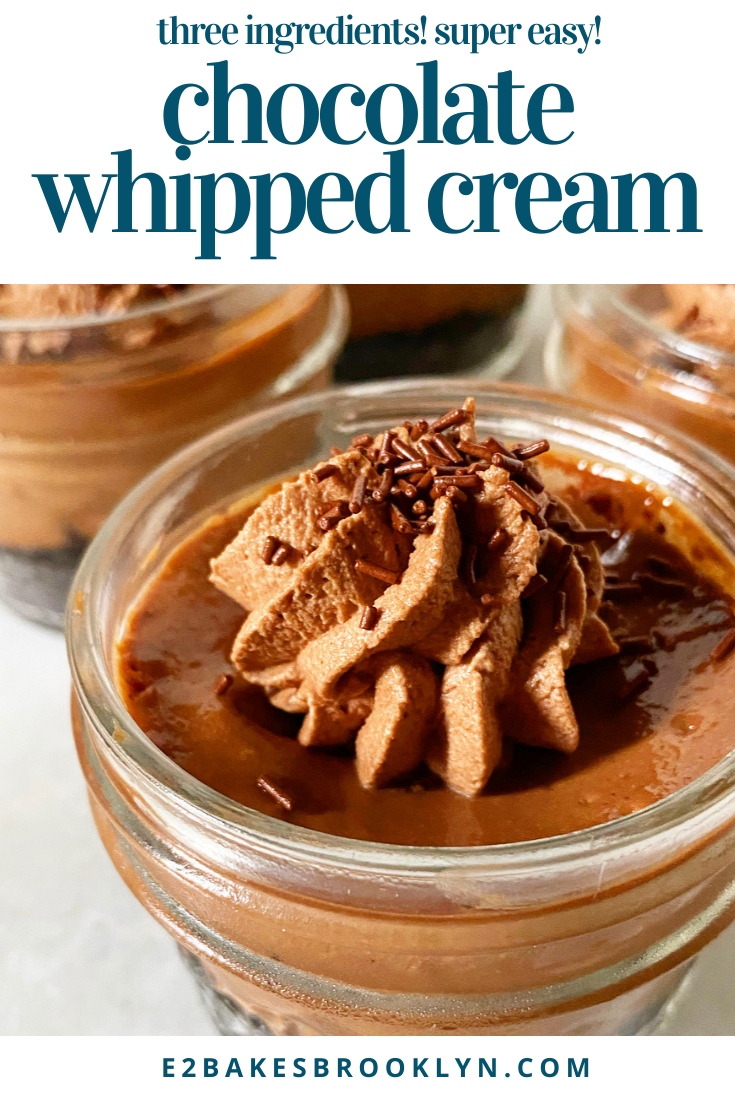
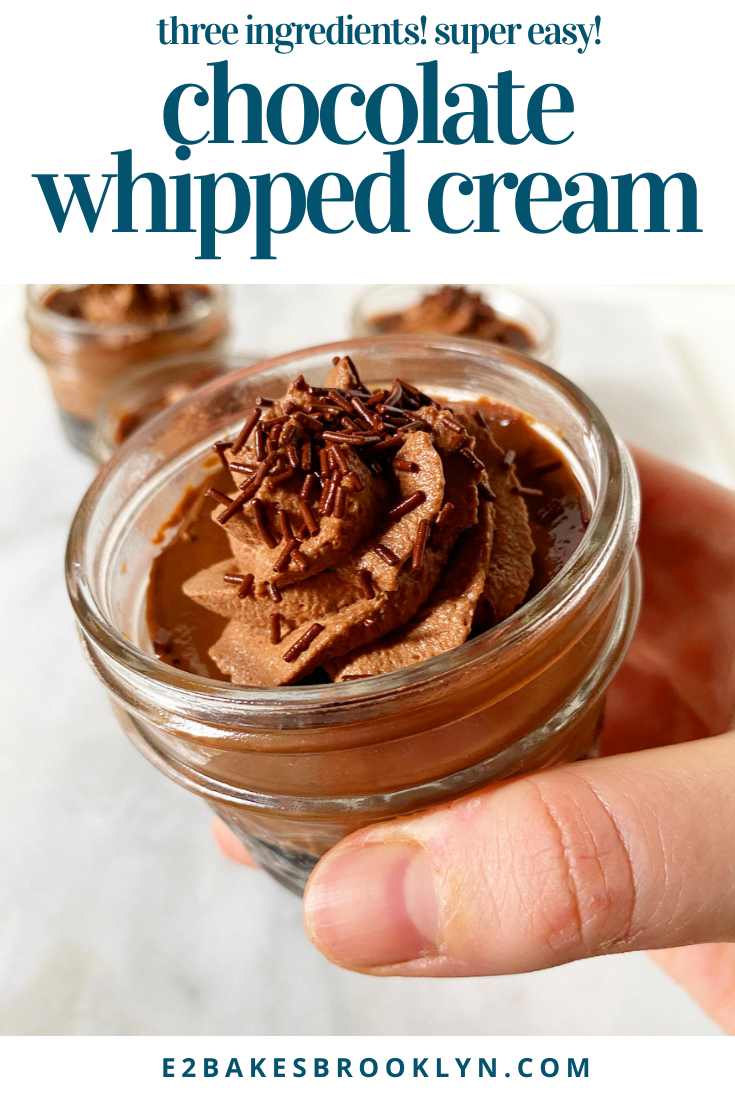
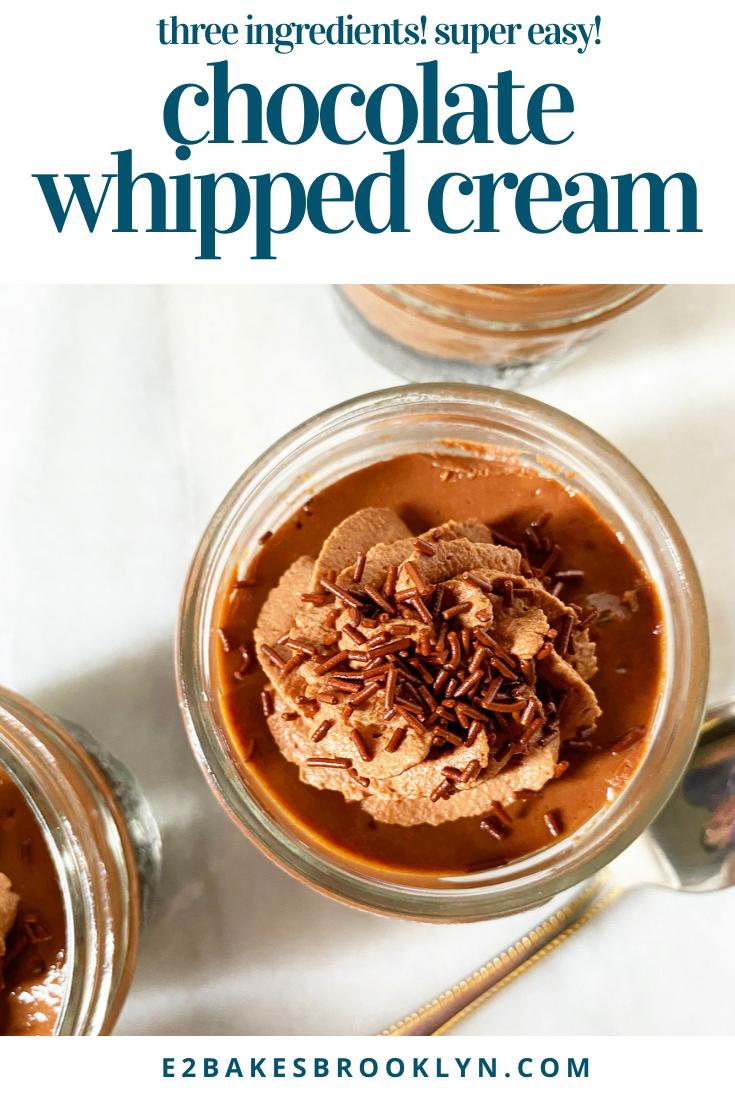
 For most of my 35 years, I’ve been under the impression that whipped cream is a perfect food. At it’s simplest, it’s just cream and air, and it goes on pretty much everything. Truly, it’s a one ingredient recipe (or two if you add sugar, or three with vanilla) to rule them all. I literally cannot think of a dessert that isn’t improved by the addition of whipped cream. It’s as perfect as a garnish gets…
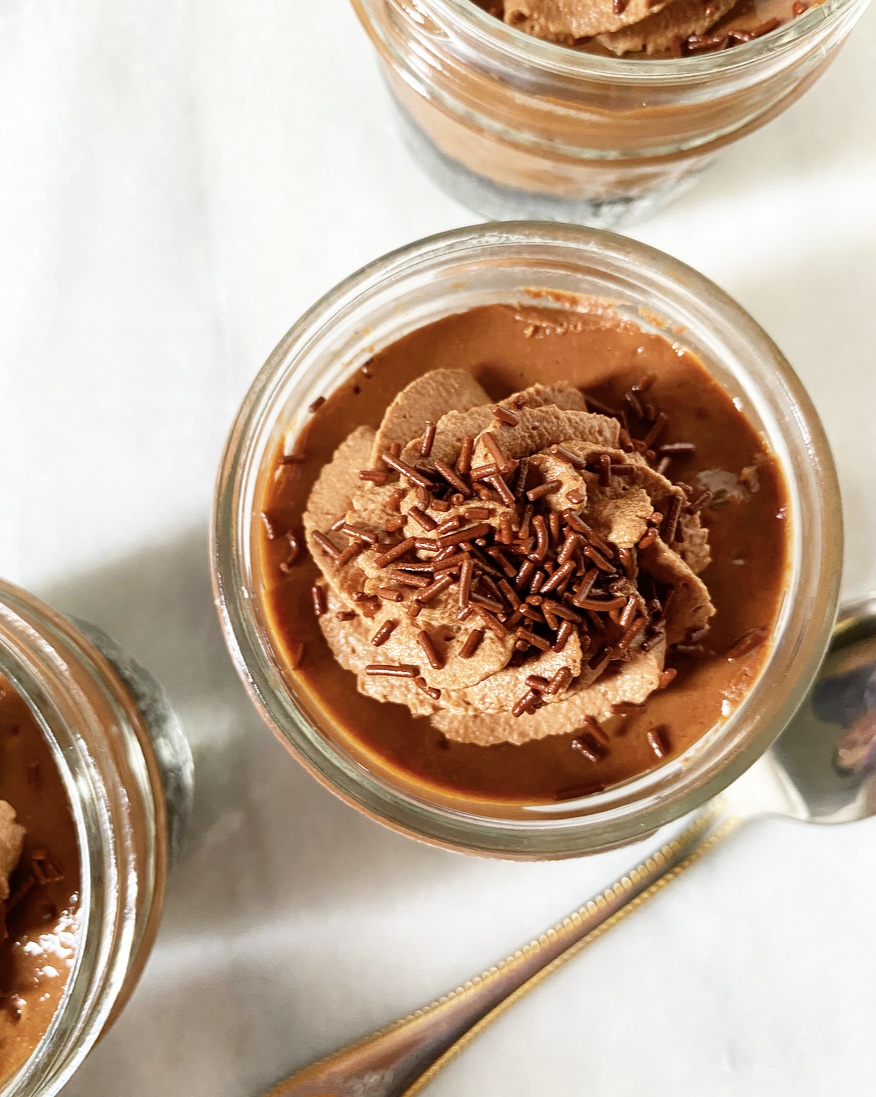 …or so I thought before I whipped cocoa powder into it. Chocolate Whipped Cream is a more perfect food. Beyond perfect, really. And I say this as an outspoken vanilla person. *clutches pearls*
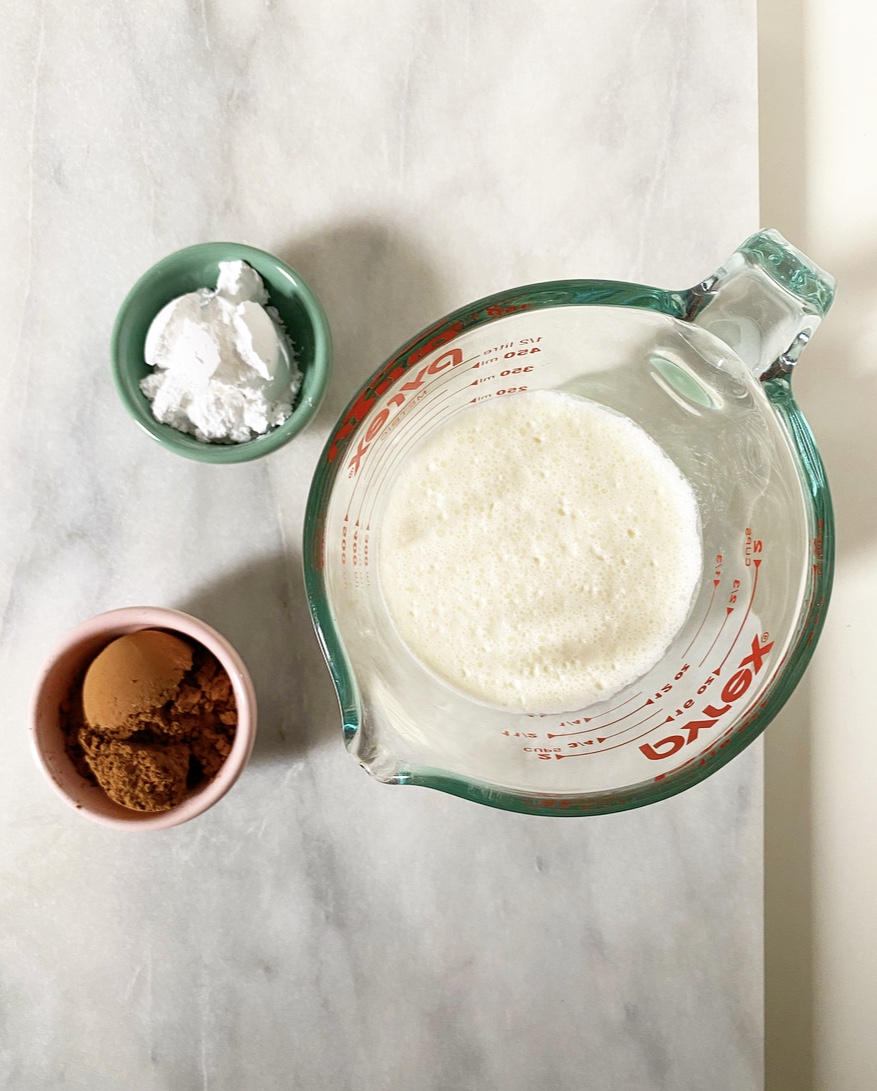
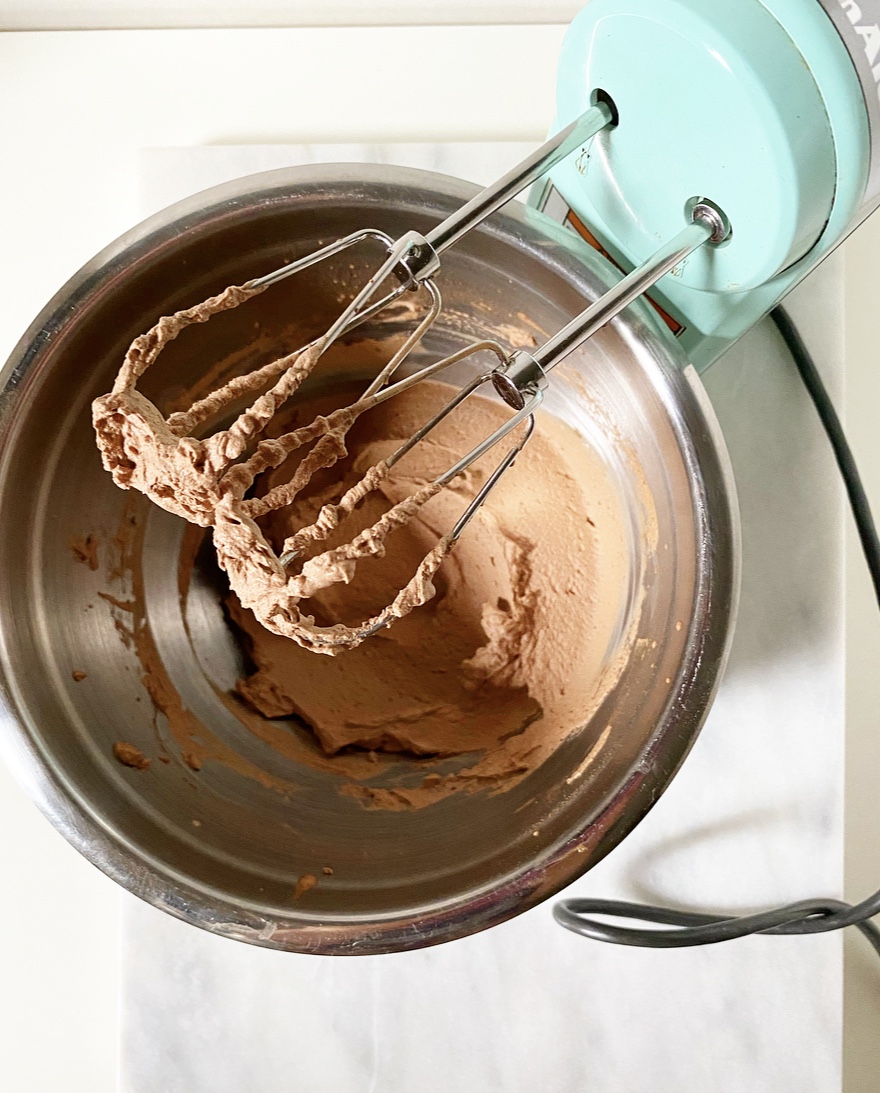 Like classic whipped cream, Chocolate Whipped Cream is a snap to make. Simply whip cold heavy cream, confectioner’s sugar and cocoa powder in a bowl until stiff peaks form. Alternatively, small batches take well to my beloved
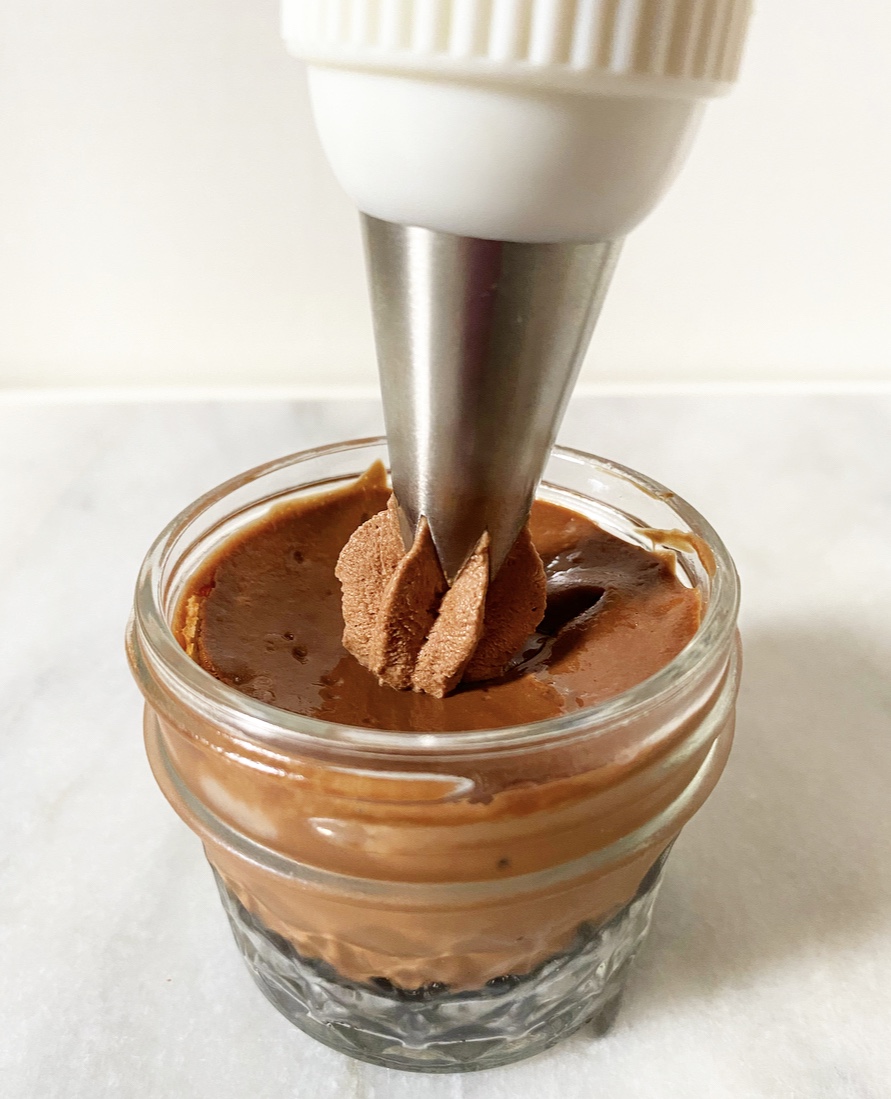
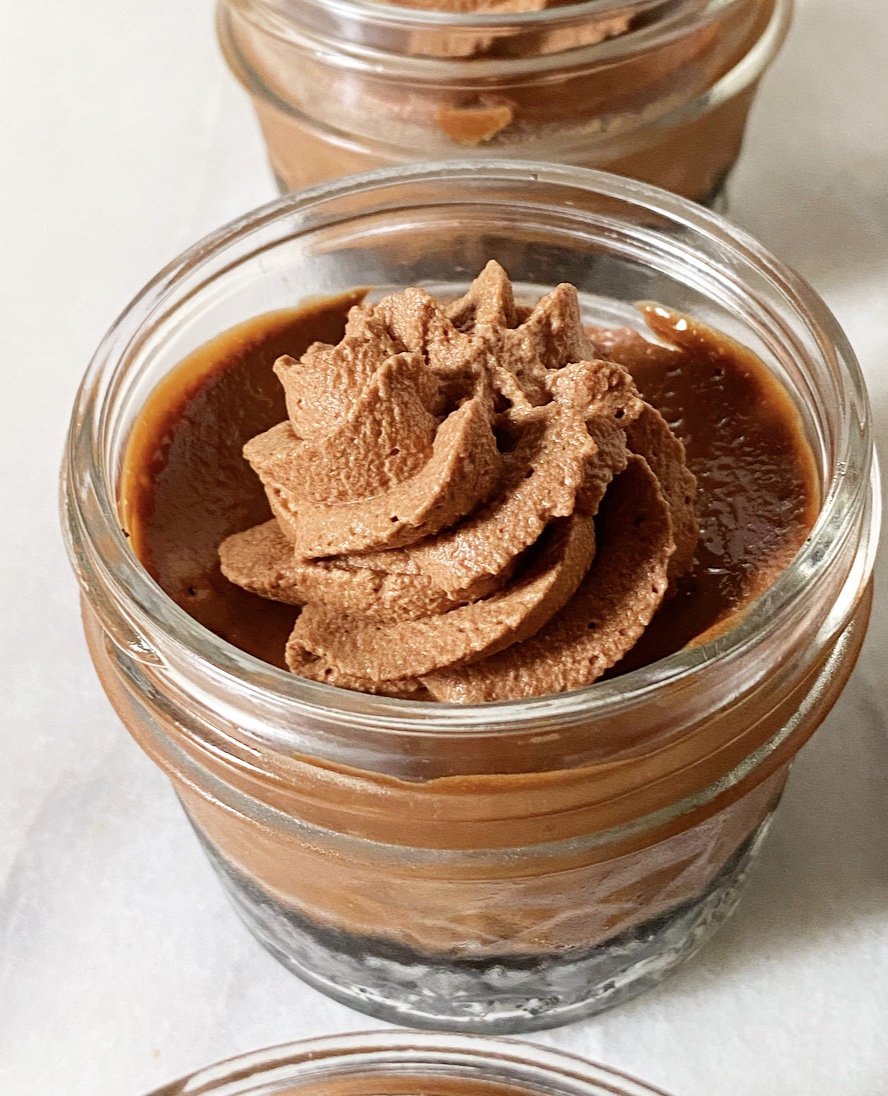 Chocolate Whipped Cream is every bit as airy and smooth as it’s classic counterpart, and has a deep chocolate flavor to boot. I prefer mine on the bittersweet side, but feel free to bump up the confectioner’s sugar if you prefer yours sweeter. Oh, and if you don’t have confectioner’s sugar on hand, the granulated stuff will work just as well, although your final product may not be quite as stable.
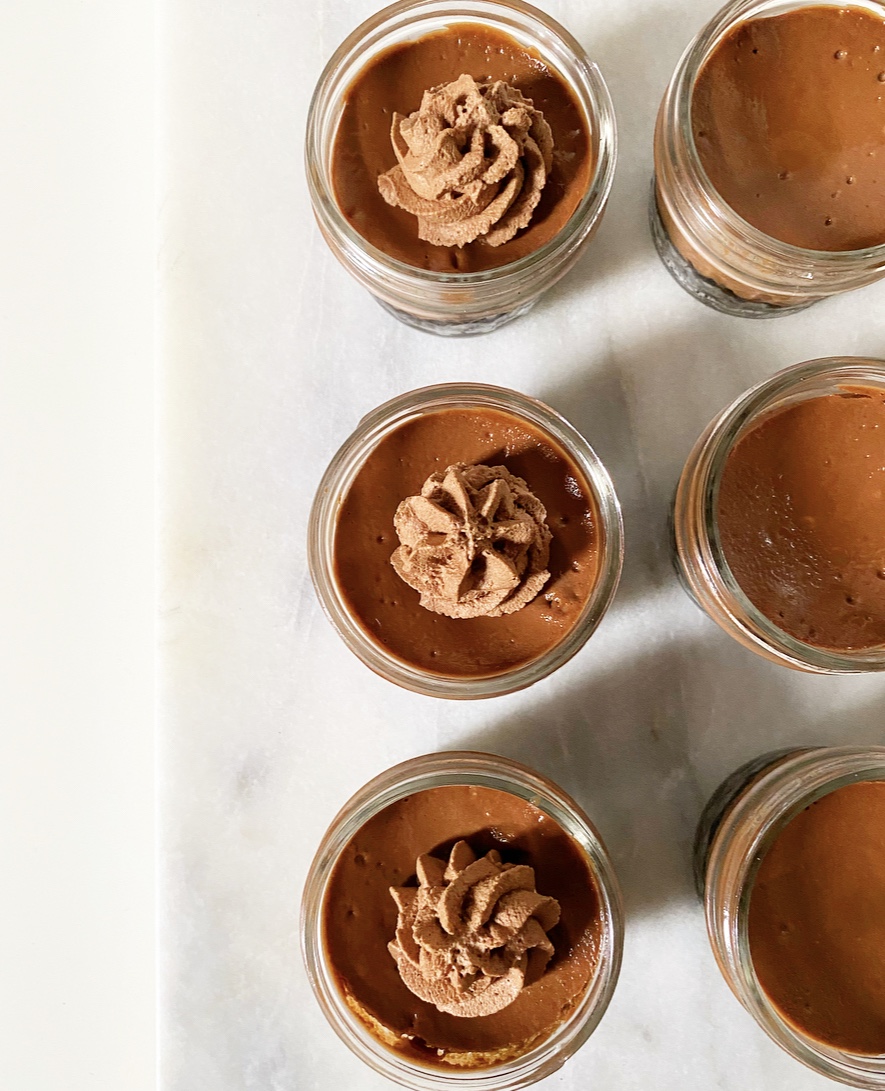 As for ways to use Chocolate Whipped Cream, follow your dessert-loving little heart. Use it as a fruit dip or as a topper on