Tag Archives: buttercream

Mint Chip Buttercream Bars

Mint Chip​ Buttercream Bars

It seems impossible, but we’ve reached the last recipe of the year.

With three days to go until Christmas, I wanted this one to be easy enough that you could add it to your menu at the last second, but not so in-your-face Christmasy that you couldn’t make it for New Year’s Eve or any other time. These Mint Chip Buttercream Bars certainly fit that bill. With just ten minutes of actual baking, a flavor that’s universally beloved, and a high yield, they’re exactly the sort of recipe you want to have in your back pocket during the holidays.

Mint Chip​ Buttercream Bars

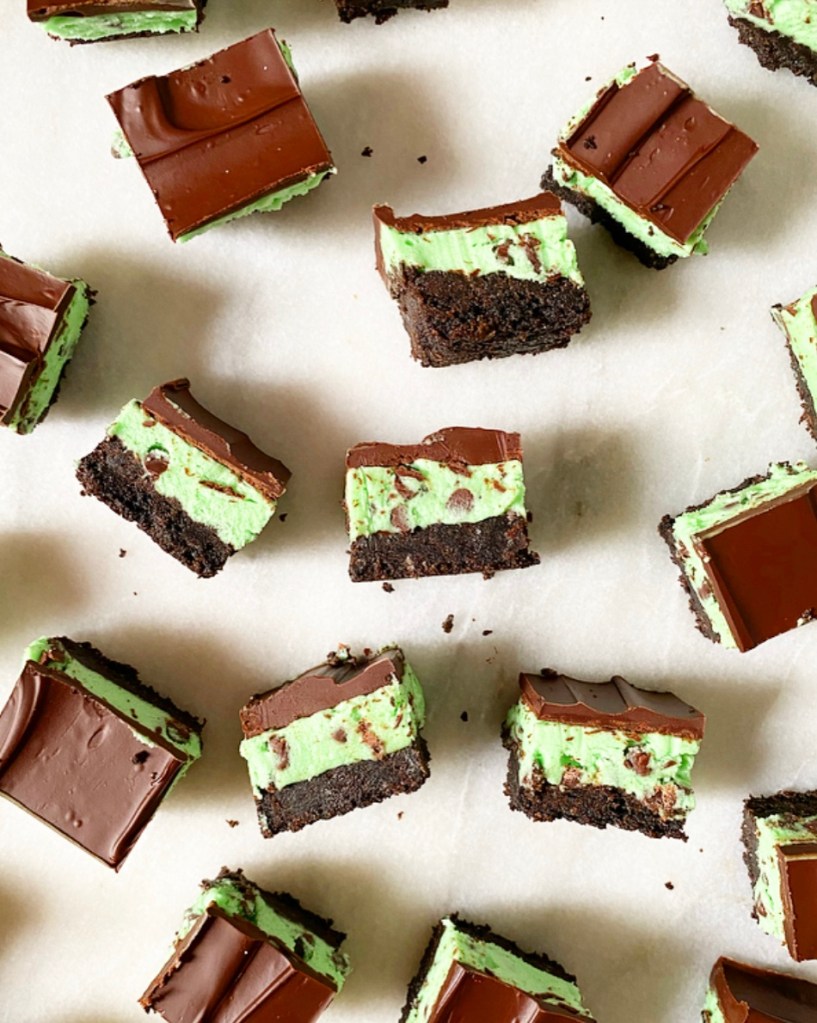
Oh, they look fancy with their three layer presentation, but they’re dead easy. The thick Oreo crust is the only thing that requires baking; the creamy mint chip buttercream and chocolate topping are simply whipped up and layered on.

Mint Chip​ Buttercream Bars

You can make these all in one go or do them in steps, making the crust one day and applying the other layers a day or two later. Once assembled, put them in the fridge for a couple of hours for optimal sliceability, and that’s it!

Mint Chip​ Buttercream Bars

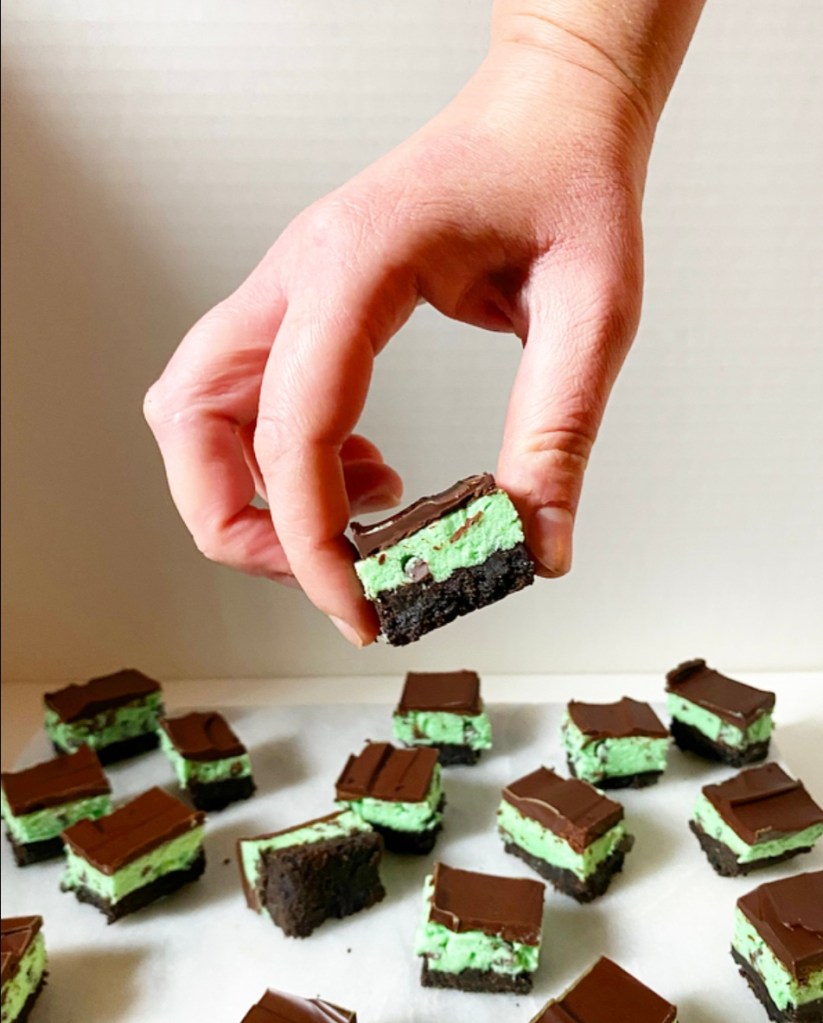
I like to cut these really small, because they pack a wallop. With layers of crumbly Oreo crust, chocolate chip studded mint buttercream and glossy chocolate, they’ve got texture and flavor all over the place. I only need a bite or two to be satisfied—that doesn’t stop me from going back for more though!

Mint Chip​ Buttercream Bars

Happy Holidays! Merry Christmas to those who celebrate! I am taking Christmas Eve off, but will be back next week with some end of year wrap up stuff.

Mint Chip Buttercream Bars
makes 2-2.5 dozen depending how small you cut them

Oreo Crust:
24 Oreos
4 tablespoons unsalted butter, melted

Mint Chip Buttercream:
1/2 cup (1 sticks) unsalted butter, softened to room temperature
2 cups confectioner's sugar
pinch of Kosher or sea salt
1 teaspoon pure vanilla extrac
1/4-1/2 teaspoon peppermint extract
2-3 tablespoons heavy cream
2-3 drops green food coloring (I used gel)
6 tablespoons mini chocolate chips

Chocolate Topping:
6 ounces dark chocolate, chopped
2 tablespoons unsalted butter, cut into pieces

Preheat oven to 350F. Grease an 8- or 9-inch square pan with butter. Line with parchment, leaving overhang on two sides for removal. Grease again. Set aside.

Make the crust. Place Oreos in the bowl of a food processor and blitz until they are crumbs. Add melted butter and pulse until the mixture can be pinched together. Press it into the bottom of the prepared pan. Bake 10 minutes to set. Let cool completely. At this point, the pan and crust may be wrapped with plastic wrap and stored for a day at room temperature.

Make the mint chip buttercream. In a large mixing bowl, use an electric mixer to beat butter until light and fluffy, about 2 minutes. Beat in confectioner's sugar in two installments, scraping down the bowl as necessary. Beat in salt, vanilla and 1/4 teaspoon peppermint extract. Add in heavy cream until desired consistency is reached. Add 1-2 drops gel food coloring (or a few drops of liquid) and use your electric mixer to beat until combined. Adjust color as necessary. Fold in mini chocolate chips.

Spread mint chip buttercream over the crust, smoothing into an even layer. Refrigerate at least 30 minutes.


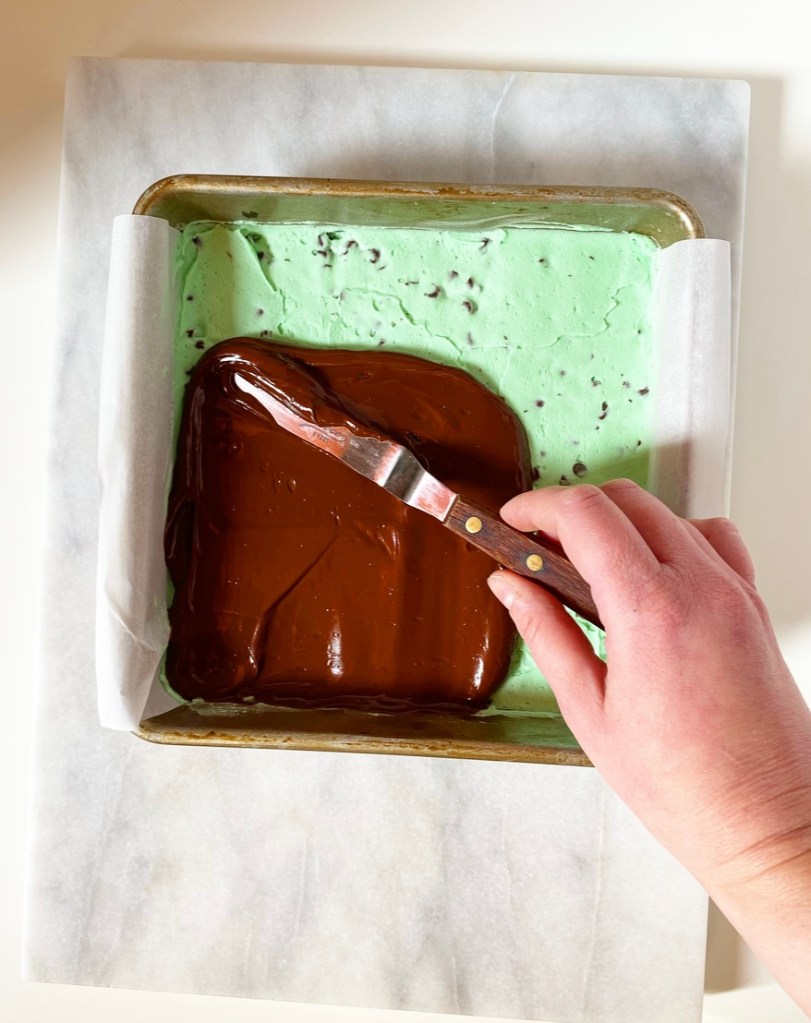
Make the chocolate topping. Combine chopped chocolate and butter in a small microwave-safe bowl. Microwave in 15 second increments, stirring in between, just until melted. Drop chocolate over filling one spoonful at a time. Use a small offset icing knife (or a silicone spatula) to carefully spread it over a section of the filling. Continue dropping and spreading chocolate until it’s all used. Freeze until chocolate has hardened, about 15 minutes.

Use parchment overhang to remove bars to a cutting board. Carefully peel off and discard parchment. Use a lightly-greased sharp chef’s knife to slice bars (mine are 1x1 1/2-inch). pieces).

Bars may be kept in an airtight container in the refrigerator for up to a week (check the date on your heavy cream). Layer them with parchment if they are to be stacked.
Advertisement

Chocolate Cupcakes {Six Year Anniversary!}

Chocolate Cupcakes

E2 Bakes turned six years old yesterday. While some things have stayed consistent over the last 634 posts—namely that I keep on posting—one of bigger changes in the last year is that I have finally started to appreciate the art of the cupcake.

Oh, I had cupcake recipes before this year—of course I did—but not many. Making cupcakes takes more time than making layer cakes (the dividing of batter alone…) and, contrary to popular belief, they’re not as simple as divvying up a layer cake recipe into a lot of little bits. Really great cupcakes are a bit more nuanced than that. But nuance doesn’t equal difficulty, and my best ever Chocolate Cupcakes are proof positive of that.

One surefire way to have great cupcakes every time? Don’t overfill the pans. Just don’t. Bigger is not better here—if you want bigger cake, make a layer cake. Lest I need to say it again: cupcakes are their own thing. Once your batter is prepared, fill each well 1/2-2/3 full and absolutely no more. You’ll think “this isn’t enough batter,” but it absolutely is. You can thank me when you pull 20+ soft, tender, perfectly domed little cakes from the oven. None with flat, spread-out tops for me, thanks!

The batter is a simple whisking situation, but there is a secret to getting the most chocolate flavor out of your ingredients: blooming the cocoa powder! Blooming is simply combining cocoa with a warm liquid ingredient to bring out its natural depth. I have bloomed cocoa many times on this blog, including my first post ever, wherein I melted butter, cocoa and sugar together for perfect chewy Cocoa Brownies. I’ve also done it by adding hot coffee to layer cakes and warming the butter and cocoa in my chocolate cookies. Here, the cocoa is stirred into warmed (not hot!) oil before being combined with dry ingredients and buttermilk.

Chocolate Cupcakes

While the recipe will still produce cupcakes if you skip the blooming, they will be oddly unremarkable. Not bad—nothing with a giant plume of chocolate buttercream on top could ever be bad. They just won’t be great. And I don’t know about you, but after six years of baking on here, I think we all deserve great cupcakes.

Chocolate Cupcakes
Chocolate Cupcakes 
makes 20-22 cupcakes

1/2 cup vegetable oil
2/3 cup natural unsweetened cocoa powder
1 1/3 cups all-purpose flour
1 teaspoon espresso granules (optional)
3/4 teaspoon baking powder
3/4 teaspoon baking soda
1/2 teaspoon Kosher or sea salt
2/3 cup granulated sugar
2/3 cup light brown sugar, packed
2 large eggs, room temperature
2 teaspoons pure vanilla extract
1 cup buttermilk, room temperature

For decorating:
Chocolate Buttercream (recipe below)
chocolate sprinkles (optional)

Preheat oven to 350F. Line 20-22 cups in muffin/cupcake pans with liners. Set aside.

Bloom the cocoa. Pour oil into a small microwave safe bowl. Microwave 20-25 seconds or until warm (but not hot). This step may also be done in a pot on the stove.

Add cocoa to oil and whisk with a fork to combine. Let sit while you prepare the other ingredients.

In a medium mixing bowl, whisk together flour, espresso granules, baking powder, baking soda, salt, sugar and brown sugar. In a liquid measuring cup or small bowl, whisk together vanilla and buttermilk.

Whisk half the bloomed cocoa into the dry ingredients, followed by half the buttermilk. Add the remaining bloomed cocoa followed by the remaining buttermilk.

Divide batter among the liners, ensuring that they are only 1/2-2/3 full. Tap full pans on the counter 5 times to release large air bubbles, then bake cupcakes 18-19 minutes, or until slightly domed. A toothpick inserted in the center should come out clean.

Let cupcakes cool in their pans for 5 minutes before removing to racks to cool completely.

Spread or pipe chocolate buttercream on cooled cupcakes. Finish with sprinkles. Serve.

Leftover cupcakes will keep covered at room temperature for a few days or in the refrigerator for up to a week.


Chocolate Buttercream
makes enough for 1 batch of cupcakes

1 cup (2 sticks) unsalted butter, softened to room temperature
2 1/2 cups confectioners sugar
3/4 cup natural unsweetened cocoa powder
pinch of Kosher or sea salt
2 teaspoons pure vanilla extract
6 tablespoons heavy cream

In a large mixing bowl, use an electric mixer to beat butter until light and fluffy (about two minutes). Beat in confectioner's sugar, followed by cocoa powder and salt, scraping down the bowl as necessary. Add in vanilla and heavy cream. Beat on high for 1-2 minutes, until very fluffy.

Load into a piping bag fitted with a tip (I used a star tip here), or spread with an offset icing knife.

Tie-Dye Cupcakes

Tie-Dye Cupcakes

While all of us were inside last year, tie-dye made a huge comeback. It’s a fun and easy way to augment clothes, towels, bedsheets or anything else that will absorb color. Why not take that same bright & twisty aesthetic and apply it to dessert?! We’re talking colorful little cups of cake and clouds of vanilla buttercream with technicolor details. They’re fun and funky, and summery as all get-out!

You’ve seen these cupcakes on here before, but never like this. The base is my favorite vanilla sour cream cupcake batter which has been everything from yellow with Nutella Buttercream to spiked with honey and finished with candy corn to marbled with a streak of red velvet to dolled up for the Easter bunny. Today’s version might be my favorite variation of all. Tie-Dye Cupcakes are beautiful to look at and incredibly fun to make.

Start by mixing together the batter and dividing it into four bowls. Grab a few of your favorite shades of food coloring and dye each bowl of batter a different color. A word to the wise that gel food coloring makes for richer colors and doesn’t threaten to add too much liquid to your batter. That said, if liquid is what you have on hand, use it!

Once your batter is dyed, spoon the colors into your cupcake pans. There are no hard and fast rules on how to do this, except to get all the colors in each cup and only up to 2/3-3/4 full. I like to give mine a little swirl with a skewer before baking, but this is strictly optional. After you’ve got all your batters in your pans, bake your cupcakes and let them cool.

Tie-Dye Cupcakes

Next up: frosting! These swirly-twirly colorful plumes of buttercream may look intimidating, but they are just regular old vanilla buttercream with a little food coloring. Where most colorful frosting recipes ask you to whip the dye directly into the mix, I take a different approach here.

Before the buttercream is loaded into the piping bag, it’s rolled up in a piece of plastic wrap that has been painted with lines of gel food coloring, then formed into a log. I found it easiest to divide the frosting in half for this step. Once rolled, one end of the log is trimmed off before the whole kit and caboodle is placed in the piping bag and then…well, it’s piping business as usual. You know, except for the part where each cupcake looks different and the edges of the frosting are bright and beautiful!

Tie-Dye Cupcakes

It goes without saying that Tie-Dye Cupcakes are delicious, but let’s be real: these are all about aesthetics. They’re so fun—perfect for summer get-togethers, birthdays, or any occasion that could use a pop (or four) of color and a really spectacular bit of vanilla cake.

Tie-Dye Cupcakes
Tie-Dye Cupcakes
makes 12-14 cupcakes

Cupcakes:
1/2 cup milk, room temperature
1/2 cup sour cream, room temperature
1 1/2 cups all-purpose flour
2 tablespoons cornstarch
1/2 teaspoon baking powder
1/4 teaspoon baking soda
1/2 teaspoon Kosher or sea salt
1/2 cup (1 stick) unsalted butter, softened to room temperature
1 cup granulated sugar
2 large eggs, room temperature
2 teaspoons pure vanilla extract
4 food colorings of choice (I used gel)

Frosting:
3/4 cup (1 1/2 sticks) unsalted butter, softened to room temperature
2 1/2 cups confectioner’s sugar
pinch of Kosher or sea salt
1 1/2 teaspoons pure vanilla extract
3 tablespoons heavy cream
4 food colorings of choice (I used the same gels from the cake)

Special Equipment:
plastic wrap
food-safe paintbrushes
piping bag with a tip and coupler

Make the cupcakes. Preheat oven to 350F. Line a 12-cup standard muffin tin with cupcake liners. Set aside.

Combine milk and sour cream a liquid measuring cup, then use a fork to whisk them together. Set aside.

In a small-medium mixing bowl, whisk together flour, cornstarch, baking powder, baking soda, and salt. Set aside.

In a large mixing bowl, use an electric mixer to beat butter until light and fluffy. Beat in sugar. Add eggs one at a time, combining completely after each addition. Beat in vanilla. Mix in half the dry ingredients, followed by half the milk/sour cream. Add the remaining dry ingredients followed by the remaining milk/sour cream.

Divide batter into four small bowls (about 2/3-3/4 cup batter in each). Add a different food coloring to each one and stir with forks to distribute the color (I used 5 drops each pink, blue, green and yellow gel).

To achieve the tie-dye effect, spoon a heaping 1/2 tablespoon of each color into each liner, adjusting as needed, until each one is 2/3-3/4 full. Tap full pan on the counter five times before baking cupcakes for 18-19 minutes, until a toothpick inserted in the centers comes out clean. Let cupcakes cool in the pan for 10 minutes before removing to a rack to cool completely.

Make the frosting. In a large mixing bowl, use an electric mixer to beat butter until light and fluffy. Add confectioner’s sugar and salt in two installments, combining completely after each addition. Beat in vanilla & heavy cream until combined. Set aside.

Lay 2 14-16-inch long pieces of plastic wrap on a surface. On each one, use paintbrushes to paint parallel 6-inch stripes of each color of food coloring about 1/2-inch apart. The food coloring may bead on the surface of the plastic wrap—this is okay.

Top each set of stripes with half the frosting. Working with one assemblage of frosting/food coloring/ plastic wrap at a time, use the plastic wrap to roll and manipulate the frosting into a log shape with food coloring stripes going down all sides. Twist the ends of the plastic wrap so that the log looks like a piece of old-fashioned candy. Repeat this process with the other assemblage.

Working with one log of frosting at a time, trim one end and place the wrapped log trimmed-end-down in a piping bag fitted with a tip. Twist the piping bag closed and pipe frosting onto the cupcakes. Repeat trimming process with the second log of frosting when needed.

Serve cupcakes. Leftovers will keep covered at room temperature for 2 days or in the refrigerator for up to 4.
Tie-Dye Cupcakes
Tie-Dye Cupcakes

Yellow Cake with Chocolate Frosting

Yellow Cake with Chocolate Frosting​

My birthday is coming up this weekend, so this week is all about birthday cakes!

I have made a lot of birthday cakes—a lot!—and they have all been highly personal. I’ve had requests for everything from mousse cakes to Funfetti to Neapolitan to Flourless Chocolate Hazelnut, but Yellow Cake with Chocolate Frosting is the favorite by far. For whatever reason, it just screams “birthday” to a lot of people. And while I am inclined to rebel against anything that everyone seems to love (hello, I am a Gemini), I can’t say I’d be anything but delighted to blow out candles on a Yellow Cake with Chocolate Frosting.

Yellow Cake with Chocolate Frosting​

I mean, what’s not to love about an egg-yellow vanilla butter cake with rich chocolate frosting? Nothing, that’s what. This cake is a classic for a reason.

Yellow Cake with Chocolate Frosting​

That said, not all yellow cakes are created equal. Yes, they’re all made rich and yellow from lots of eggs, yolks and butter, and they all have some amount of vanilla, but that is frequently where the similarities end. Some are too dense, others too light. Some taste vaguely like cornbread despite containing zero cornmeal (so weird). Even the really good ones vary wildly in terms of flavor and texture. I can say that from experience—I’ve tried a lot of them.

This Yellow Cake though? I like to think it strikes a balance. Yellow, buttery, vanilla-scented, not too dense, and not a hint of cornbread flavor to be found (seriously, it’s a thing). It’s made using the reverse creaming method I use for white cake. You mix the butter into the dry ingredients, then add loads of eggs and a mix of milk and sour cream. It feels wrong, but it’s so simple and produces tender results every time.

Yellow Cake with Chocolate Frosting​

I haven’t even mentioned the Chocolate Frosting, but as you can hopefully tell from the pictures, it’s absurdly good. Made with cocoa, melted dark chocolate and just enough confectioner’s sugar, it’s pure luxury. I like to frost this cake simply for a homemade look with lots of swoops, but feel free to increase the batch size if you want to pipe. Birthday person’s prerogative, you know.

Yellow Cake with Chocolate Frosting​
Yellow Cake with Chocolate Frosting
makes one two-layer 9” round cake

Yellow Cake:
2 1/2 cups all-purpose flour
1/4 cup cornstarch
1 1/2 cups granulated sugar
1/3 cup light brown sugar, packed
2 teaspoon baking powder
1/2 teaspoon baking soda
1/2 teaspoon Kosher or sea salt
1 cup (2 sticks) unsalted butter, softened to room temperature
3 large eggs + 2 large egg yolks, room temperature
1 tablespoon pure vanilla extract
1 cup whole milk
1/3 cup full-fat sour cream

Chocolate Frosting:
3 ounces dark chocolate
1 cup (2 sticks) unsalted butter, softened to room temperature
1 1/2 cups confectioner’s sugar
1/2 cup natural unsweetened cocoa powder
1/4-1/2 teaspoon Kosher or sea salt
1 1/2 teaspoons pure vanilla extract
2 tablespoons heavy cream
rainbow sprinkles, for garnish (optional)

Place an oven rack in the center position. Preheat oven to 350F.

Grease two 9-inch round cake pans. Line with parchment and grease again. Set aside.

Combine flour, cornstarch, granulated sugar, light brown sugar, baking powder, baking soda and salt in a large mixing bowl. Whisk ingredients together (I like to do this by running my mixer on its lowest speed for about a minute).

Add butter to dry ingredients. Gradually turn the mixer from low up to medium, to mix in the butter until there are no large pieces and the texture is sort of rubbly. This will take a few minutes.

With the mixer running, add eggs and yolks one at a time, followed by vanilla. Mix until combined.

In a measuring cup or small mixing bowl, use a fork to whisk together milk and sour cream. Running the mixer on medium, add the milk mixture in two installments and mix until combined. Scrape down the bowl well to ensure even mixing.

Divide batter among prepared pans. Tap each full pan on the counter five times to release any large air bubbles. Bake layers on the center rack for 31-35 minutes, or until a toothpick inserted in the centers comes out clean. Let let layers cool in their pans for 15 minutes. Run a thin knife around the edges of the layer before turning out onto a rack to cool completely.

Make the Chocolate Frosting. Place chopped dark chocolate in a small microwave-safe bowl. Microwave in 15 second increments, stirring just until melted. Cool to room temperature (this can be done quickly by putting it into the fridge for 5-8 minutes, then whisking with a fork).

In a large mixing bowl, use an electric mixer to beat butter until very light and fluffy (about 4-5 minutes). Beat in confectioner's sugar, followed by cocoa powder and salt, scraping down the bowl as necessary. Mix in melted chocolate, followed by vanilla and heavy cream. Beat on high for 1-2 minutes, until very fluffy.

Fill and frost the layers as desired. Garnish with rainbow sprinkles, if desired. Serve.

Layer cake will keep covered at room temperature for up to three days, or in the refrigerator for up to five.
Yellow Cake with Chocolate Frosting

Soft Sour Cream Sugar Cookies

Soft Sour Cream Sugar Cookies
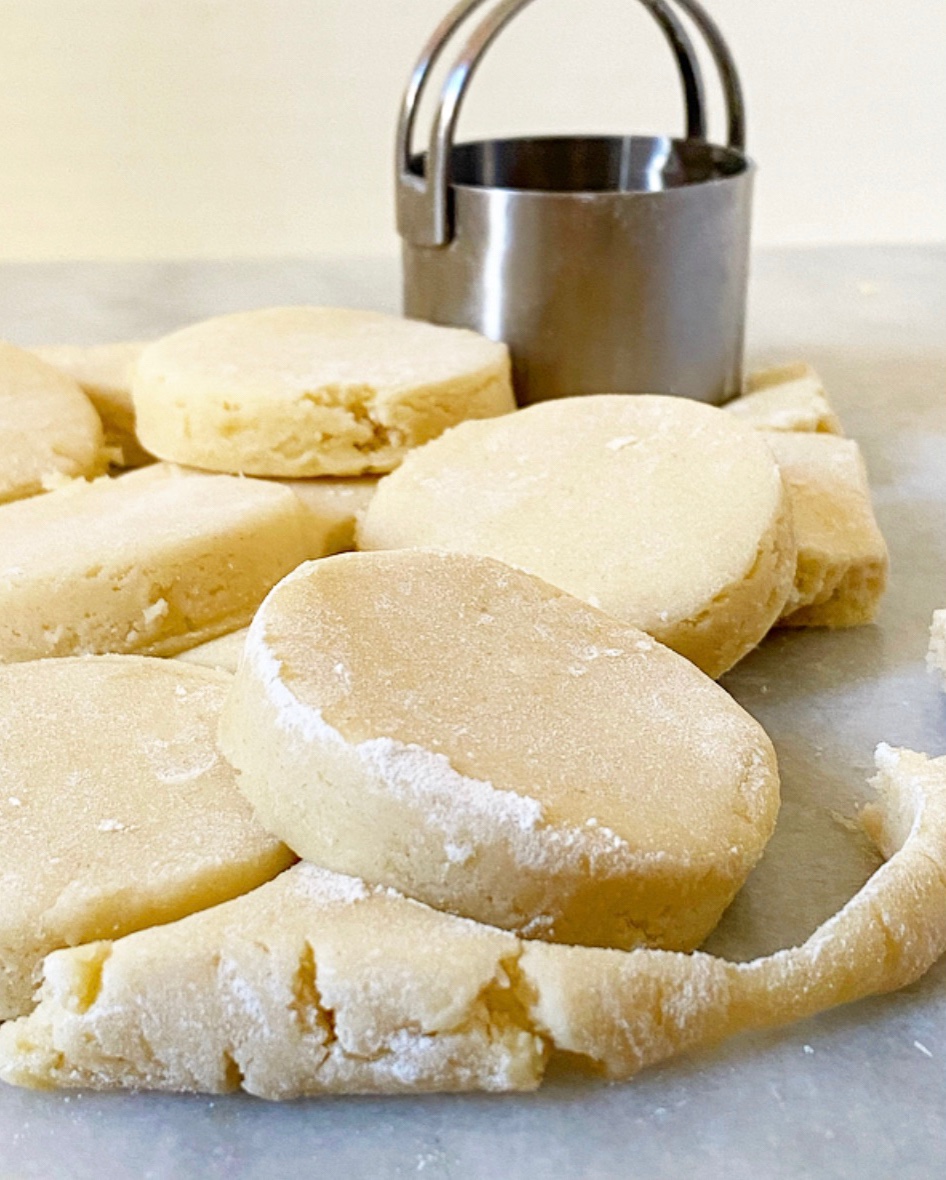
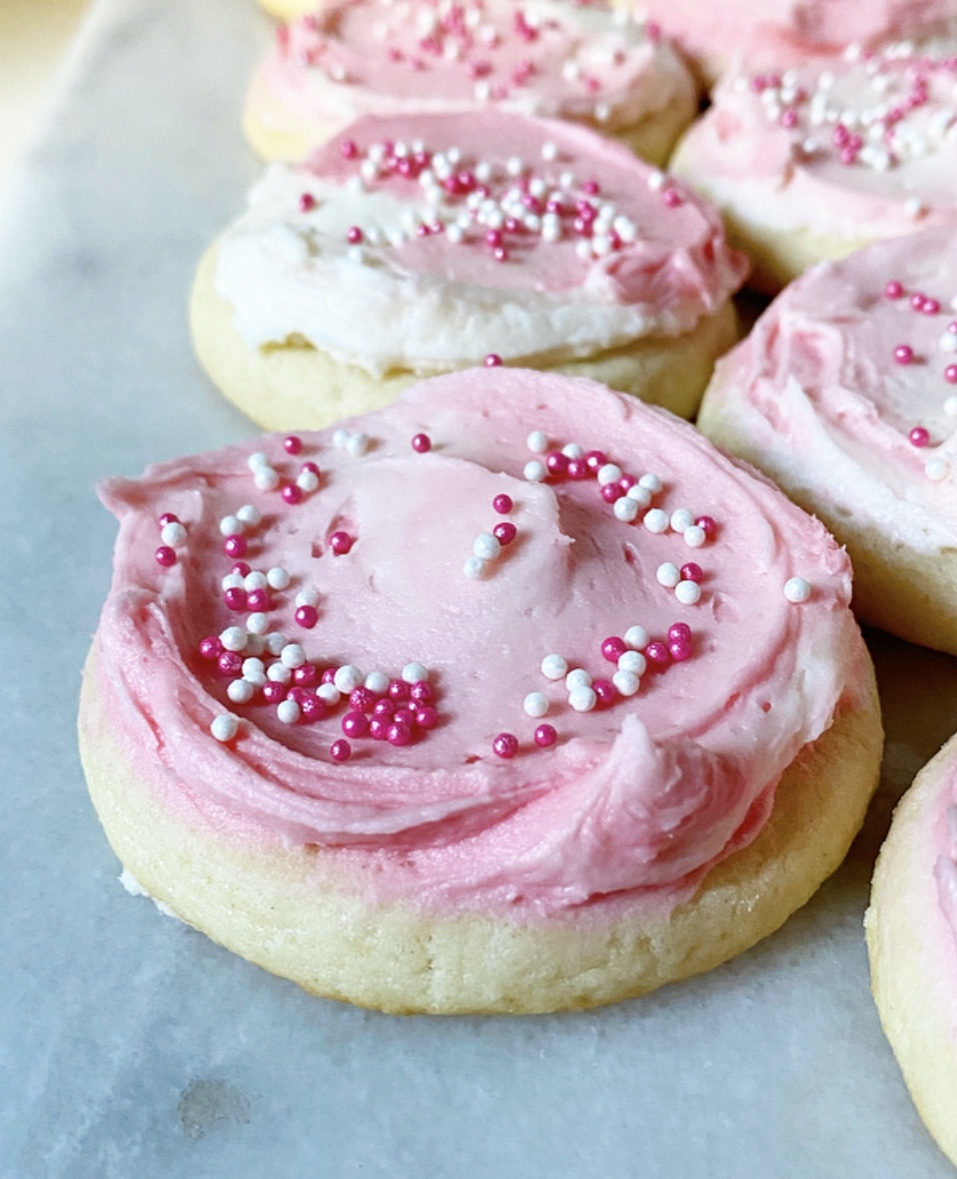
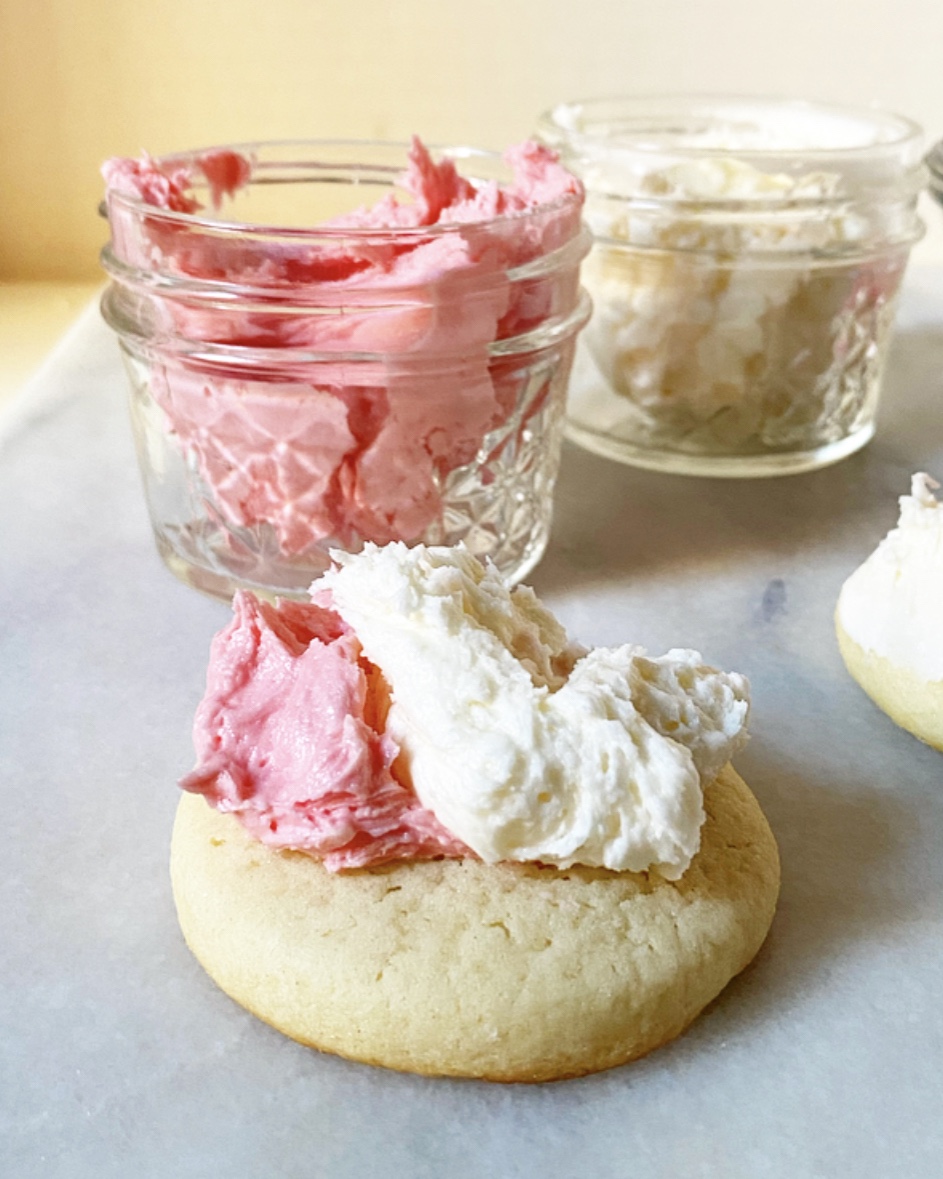
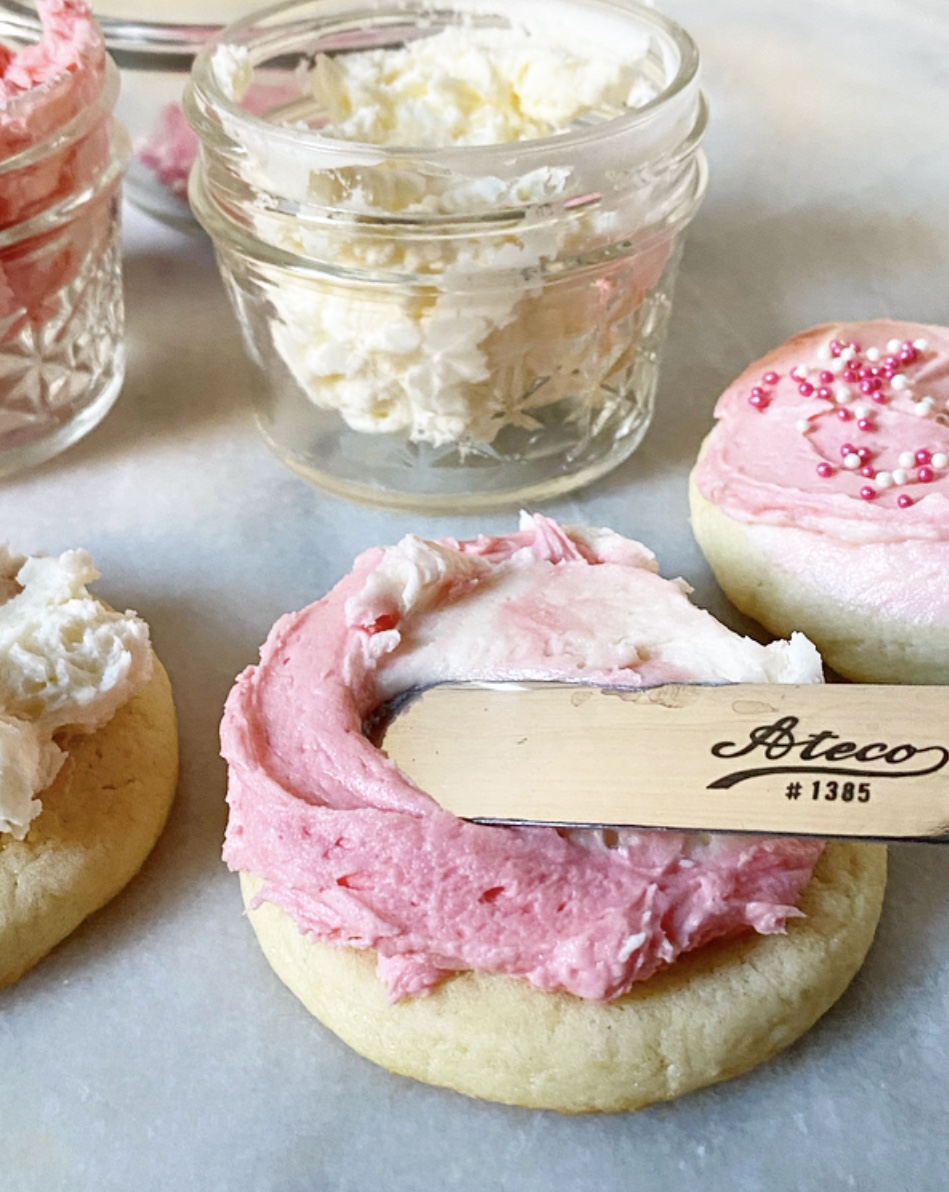
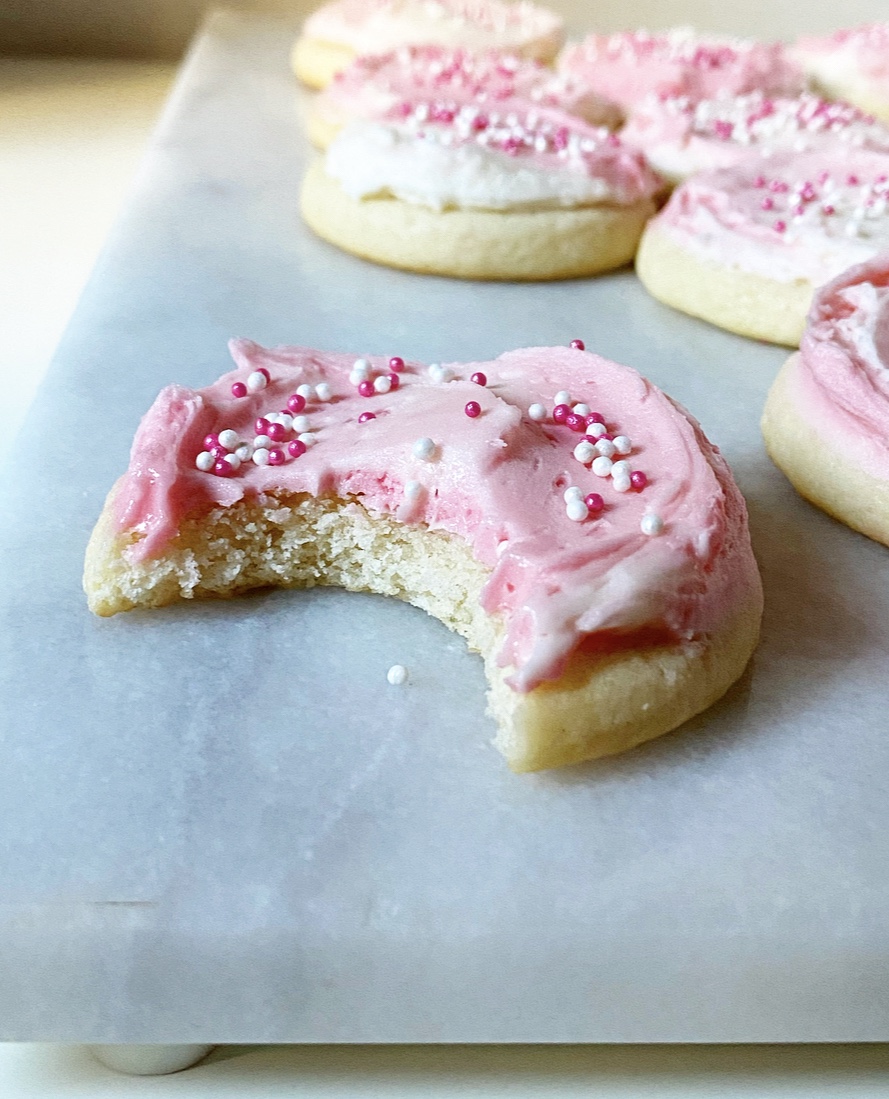
Soft Sour Cream Sugar Cookies. Try saying that five times fast. Or, you know, skip the silliness and just make ‘em.Soft Sour Cream Sugar Cookies

These are a homemade take on the super soft, vibrantly frosted Lofthouse Cookies I loved during my college years. While you won’t find me buying them these days, I think about them more than is probably reasonable. They are like a supermarket birthday cake and some sugar cookies had a baby and I am here for it.Soft Sour Cream Sugar Cookies

Like the cookies that inspired them, these are feather-soft thanks to the sour cream and confectioner’s sugar mixed into the dough. Those ingredients in particular make these puffy sugar cookies super tender and almost cakey. I know I’ve railed against cakey cookies in the past, but I’ll make an exception for these.Soft Sour Cream Sugar CookiesSoft Sour Cream Sugar Cookies

The dough comes together pretty quickly, but is on the sticky side and needs a chill before baking. I roll these cookies super thick (1/2 inch) and cut them with a 2-inch cutter. I tested with bigger cutters, but found that a smaller diameter helps the cookies to bake evenly, reducing the chances of dense centers and crisp edges. While those are usually good things in cookies, these are best when they’re soft all around. In fact, I prefer to eat them the day after they’re baked for maximum softness. So good.

Quick tip: in case you want to take your sugar cookie game to the next level, you could absolutely make these in the shape of a football, heart, Christmas tree or other simple shape. Keep in mind that this dough spreads and puffs a bit, so you won’t want to do anything terribly intricate. But also…go wild.Soft Sour Cream Sugar CookiesSoft Sour Cream Sugar CookiesSoft Sour Cream Sugar Cookies

Soft Sour Cream Sugar Cookies are good unadorned, but a thick smear of vanilla buttercream and smattering of sprinkles take them over the top! I went with a pink marbled motif, dying half my frosting and then spreading both colors together, but feel free to use whatever color(s) of frosting or variety of sprinkles you like here. Get festive with it for holidays, big games, birthdays or any day!Soft Sour Cream Sugar Cookies

Soft Sour Cream Sugar Cookies
makes about 3 dozen medium cookies

Cookie Dough:
2 1/3 cups all-purpose flour
1/2 cup confectioner’s sugar
1 1/4 teaspoons baking powder
1/2 teaspoon Kosher or sea salt
1 cup unsalted butter, softened to room temperature
1 cup granulated sugar, packed
1 large egg
1/2 cup sour cream (not fridge-cold)
2 teaspoons pure vanilla extract

For Decorating:
Vanilla Buttercream (recipe below)
food coloring, if desired
sprinkles of choice

Special Equipment:
a 2-inch round cookie cutter
offset icing spatula

Make the cookie dough. In a small bowl, whisk together flour, confectioner’s sugars, baking powder and salt. Set aside.

In a medium-large mixing bowl, use an electric mixer to beat butter until light and fluffy, about 2 minutes. Beat in sugar, followed by egg, sour cream and vanilla. Add dry ingredients in 2 installments, beating until combined. Dough will be a bit sticky.

Divide dough into halves and wrap each in plastic wrap. Chill for at least 2 hours or up to 3 days.

Place oven racks in central positions. Preheat oven to 350F. Line 2 rimmed sheet pans with parchment paper. Set aside.

Generously flour a surface and rolling pin. Unwrap one half of the dough. Roll the dough to 1/2-inch thickness, lifting and turning the dough frequently so that it doesn’t stick to your surface. Use a 2-inch round cutter to cut cookies. Cut directly down. Do not twist.

Place cookies 2 inches apart on prepared pans. Bake 9-10 minutes, rotating top-to-bottom and back-to-front at the 5 minute mark. Cookies are done when puffed and no-longer raw-looking. They should be mostly pale, but there may be some golden coloring at the bottom edges. Let cookies cool on the pans for 8-10 minutes before removing to a rack to cool completely. Let sheet pans come to room temperature before proceeding with the next batch.

Repeat rolling, cutting and baking with remaining half of dough. Re-roll scraps as desired, refrigerating if anything gets too sticky.

After cookies have cooled completely, use an offset icing spatula to frost each one with about 1 tablespoon of Vanilla Buttercream (I used 1/2 tablespoon each pink and plain white buttercreams). Garnish with sprinkles immediately after frosting. Buttercream will crust after an hour or so. You may serve the cookies immediately after frosting, but they are softest the next day.

After they’ve crusted, leftovers may be layered with wax or parchment paper and kept in an airtight container. They will keep at room temperature for a couple of days or I’m the refrigerator for up to a week.

Vanilla Buttercream

makes enough for 3 dozen cookies (with a little leftover)

1 cup (2 sticks) unsalted butter, softened to room temperature
4 cups confectioner’s sugar
pinch of Kosher or sea salt
1 tablespoon pure vanilla extract
3-5 tablespoons heavy cream
food coloring, if desired

In a large mixing bowl, use an electric mixer to beat butter until light and fluffy, about 2 minutes. Beat in confectioner’s sugar in three installments, scraping down the bowl as necessary. Beat in salt and vanilla. Add in heavy cream until desired consistency is reached.

To dye half of the buttercream, remove half to a smaller bowl. Add a drop of gel food coloring (or a few drops of liquid) and use your electric mixer to beat until combined. Scrape the sides of the bowl as needed.

Use buttercream to frost Soft Sour Cream Sugar Cookies.

Soft Sour Cream Sugar CookiesSoft Sour Cream Sugar CookiesSoft Sour Cream Sugar Cookies