Whipped Cream in a Jar {Entertaining Tip}

 
Sometimes, you just don’t need a ton of whipped cream. Maybe you live alone, or your significant other isn’t much for sweets, or you just don’t want the leftovers tempting you from the fridge. I find myself in the second predicament all. the. time. With all the pie and cookies and cake in our apartment, there are loads of things that would be perfect with a heaping spoonful of whipped cream, but Henry just isn’t into it. And while I love whipped cream, there is no need for me to have a huge mixing bowl of the stuff on hand. A want, sure, but not a need. So instead of breaking out my electric mixer and whipping up far more than I need, I just shake it up.

  
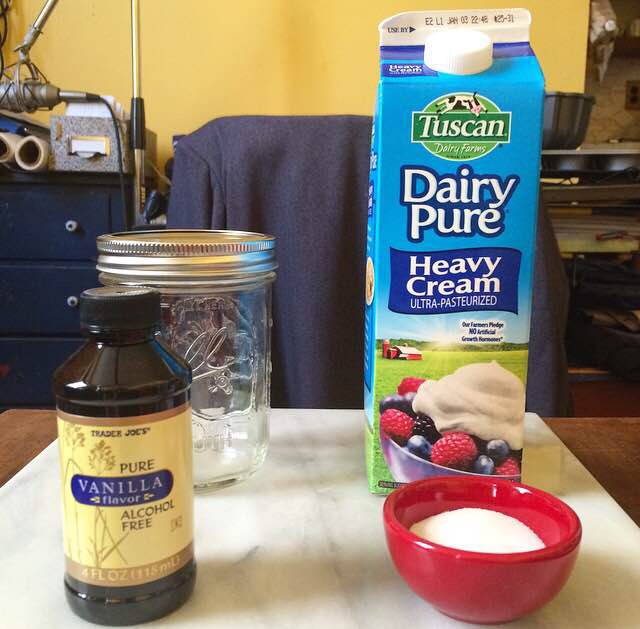
All you need for a small amount of whipped cream are:

-heavy cream
-a teaspoon or tablespoon of granulated sugar (or none, it depends on your preferences)
-a teaspoon of pure vanilla extract
-a mason jar

 
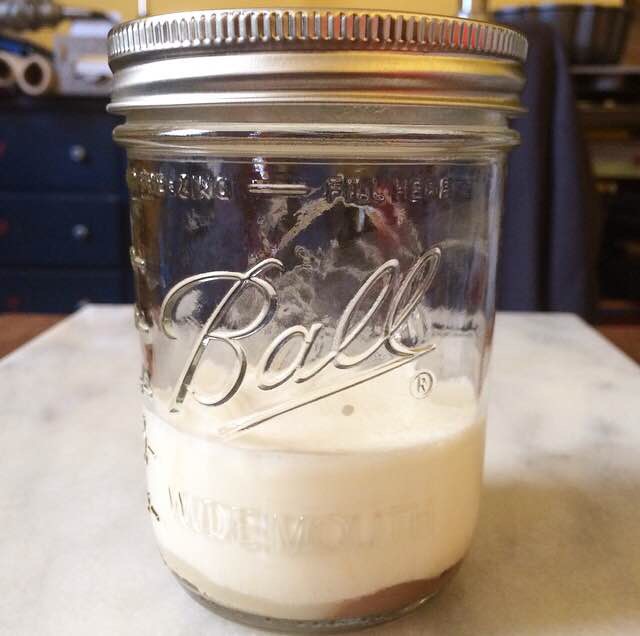
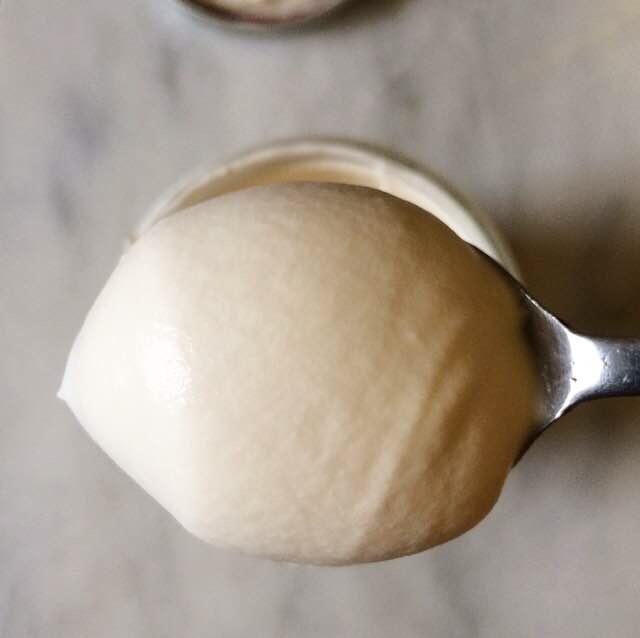
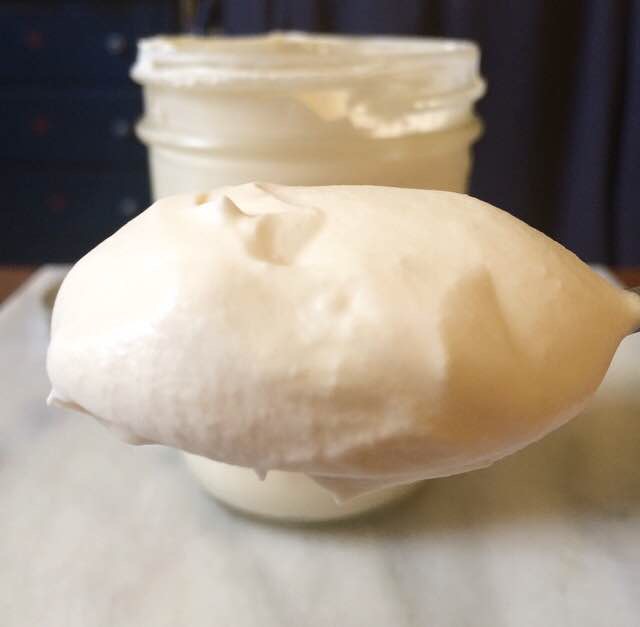
Just fill the mason jar anywhere from 1/4 to 1/3 of the way full, and add your sugar and vanilla. Don’t fill the jar any more than 1/3 of the way, or your cream will take eternity to whip, if it whips at all. Once your ingredients are in the jar, screw on the lid. Then shake the living daylights out of it. Listen to the jar–at first you’ll just hear liquid sloshing around, but as the cream starts to take in air, that sloshing will become more of a soft thud. Once the sloshing sound fades, open the jar every so often to check on the status of your cream. It’s ready when the jar can be held sideways and no cream threatens to dribble out. This usually takes me about five minutes of shaking. If you’re not sure if your cream is whipped enough, you can also take a spoonful out and see if it’s to your desired texture.
  
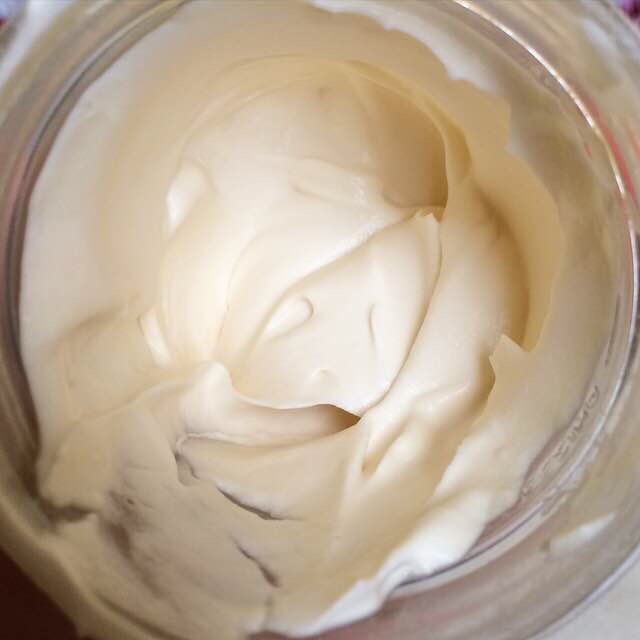
Don’t over-whip! If you shake the jar too much, the cream will bypass the whipped stage and start to become butter. You’ll know this has happened if your whipped cream looks grainy. I love butter (duh), but I don’t want it on top of my pie.

I know many people have large Thanksgiving gatherings where whipping cream in a jar simply isn’t practical, but if your dinner will only have a handful of guests, this is a good way to go. Plus, in a casual setting, serving things out of mason jars is totally adorable. When I bring desserts for dinner parties, it’s not uncommon for me to show up with a jar of cream–it’s way better than the stuff in a can. And plus, it makes you look so crafty.,Also, if you have little helpers that need a job this Turkey Day, put the ingredients in a tupperware with a screw top and let them shake away. Kids love helping in the kitchen, especially when it’s something they know is delicious.

If you have leftover whipped cream, just screw the lid back on the jar and stick it in the fridge. The cream will start to liquefy again as it sits in there, so just give it a little shake when you go back for more.

One last thing–whipped cream is great, but you need something to put it on! I wrote three new pie recipes this month that would be great additions to any Thanksgiving dinner. You just have to have pie on Thanksgiving! It’s the right thing to do. Between my Pumpkin, Black Bottom Pear & Almond, and Cranberry Apple Pies, it’ll be a tough (and delicious) decision determining which one to try! If you do try any of them, or my Cream Cheese Pie Dough, let me know in the comments!


Artichoke Dip

 My family is weird when it comes to Thanksgiving. We have almost no traditions, food or otherwise. We just have never established any of those things.

We’ve tried. Oh, we’ve tried. We have hosted the big family Thanksgiving. We’ve gone to my aunt’s house for dinner. We’ve traveled (England was a highlight). We spent five or six years skiing in Santa Fe, New Mexico, our home away from home. My older sister has hosted a big dinner at her home in Austin, where she serves lamb rather than turkey. All of those Thanksgivings were fun, but none have created long-lasting traditions. Now that my sisters and I are adults, getting together for Turkey Day has become nearly impossible. With significant others, work, and living in different places, it’s hard for all of us to get together, so we usually just try for Christmas. Case in point: this year my older sister is hosting her lamb dinner in Austin, my parents and little sister are going to Marfa (because why not?), and Henry and I are going upstate to spend the holiday with his family. I’m not sure we’ll ever have a traditional Thanksgiving together again, but that’s okay as long as we have good cell phone service and my mom’s Artichoke Dip. 
 
This dip is so, so good. It comes from a handwritten card in my mom’s holiday recipe box–a card so stained that you know the recipe has to be good. Hot, cheesy, creamy goodness that’s perfect for scooping up with tortilla chips and crackers. Plus, it’s so easy, it’s ridiculous. Stir together four ingredients, spread it in a small casserole dish, top with cheese and paprika, and bake until brown and bubbly. That’s it. Easy. It’s great for holidays and parties, and can be made up to two days in advance. You can either mix everything and bake when you’re ready to serve, or bake it, refrigerate, and reheat in the microwave. It’s totally perfect for those hectic holiday afternoons when you’re just trying to get something on the table. I have taken this Artichoke Dip to many Thanksgivings and holiday parties over the years, and people always go crazy for it. Be prepared: you will be bombarded with requests for this recipe.

Ten years ago, when my mom put me to work making this recipe for our holiday parties, I had no idea that it would become my tradition. I didn’t know that I would soon have it committed to memory, or that I would take it to Thanksgivings all over the northeast. Some people have holiday food memories with pie or cookies or Great Grandma’s stuffing, but for me it’s this dip. Making this puts me back in my mom’s Texas kitchen, at least for a second. That’s a good enough tradition for me.

 
Artichoke Dip
recipe from my mom’s holiday recipe box
makes one small casserole dish or pie plate

1 14oz can artichoke hearts in water, drained
1 4oz can chopped green chilies, drained
1 cup mayonnaise (I use Hellmann’s)
1 cup grated Parmesan cheese, plus more for sprinkling
paprika, for dusting

Preheat oven to 350F. Grease a small casserole dish or pie plate. Set aside.

Chop artichoke hearts into small pieces. Place them in a large mixing bowl. Add green chilies, Parmesan cheese, and mayonnaise. Stir to combine. Scrape the mixture into the prepared baking dish. Sprinkle with additional Parmesan and dust with paprika. Bake for 30 minutes, until browned and bubbly. Let cool five minutes before serving with tortilla chips or crackers.

Note:


Artichoke Dip can be made up to two days in advance. You can mix together the mayonnaise, artichoke hearts, chopped green chilies, and cheese, and refrigerate, and then bake immediately before serving. Alternatively, after baking, let the dip cool to room temperature for an hour. Cover with plastic wrap or aluminum foil and refrigerate. When you are ready to serve, reheat in the microwave.

Scratch Biscuit Monkey Bread

 Everybody loves Monkey Bread. Soft pieces of bread coated in cinnamon-sugar? Yes, please. It’s perfect for holiday breakfasts, brunches, snacks, desserts–you name it. Monkey Bread is welcome anytime, anywhere. But the dough involves yeast and a rise of up to 8 HOURS. I love working with yeast, but I straight-up don’t have the time for an 8 hour rise during the holiday season. A popular alternative is to use canned biscuits instead of yeast dough, but canned biscuit are…meh. Don’t get me wrong. I would never turn down a canned biscuit. My mother always kept two tubes in the fridge for weekend breakfasts, and I have no problem putting away three at a time. But we can do better, and also save time. We can use simple scratch biscuit dough. We’re scrappy like that.

The dough we’ll use here is for cream biscuits. Whereas buttermilk biscuits must be kept cold to ensure that the butter stays cool enough for a flaky final product, cream biscuits are more rough-and-tumble. There’s no cutting in of butter, or determining how much buttermilk you need to make the biscuits moist but not goopy. (Sorry for saying “goopy” on a food blog.) This dough is very straightforward, and can handle a warm butter bath. There are only six ingredients: flour, sugar, cinnamon, salt, baking powder, and two cups of heavy cream. Yes, two cups of cream is a lot, but as there is no butter or buttermilk, this dough needs that kind of moisture and fat. This is holiday food, after all. It’s a splurge no matter how you make it. Embrace the cream!    
 
Anyway…stir together the flour, sugar, cinnamon, sea salt, and baking powder. Then, using a silicone spatula, stir in the cream. Make sure to scrape the sides and bottom of the bowl to get any cream and flour that have adhered themselves incorporated into the dough. Turn the dough out onto a floured surface and flour a rolling pin. Roll the dough into a large rectangle that is 1/2-3/4″ thick. Then fold it in half and turn it one quarter-turn. We’ll repeat this folding and rolling until it’s been done four times total. This will give us great layers. Once you have done all the folding and rolling and once again have a 1/2-3/4″ thick rectangle, cut the dough into one-inch squares. To do this, use a sharp knife or bench scraper (my tool of choice) and cut directly down. Do not saw, or you will deflate all those layers you just worked so hard making. Put the squares aside while we make the coating.    Melt 1 1/2 sticks of butter, and put it in a small bowl to cool a bit. It should still be warm, but as we have to touch it directly, the butter shouldn’t be super hot. In another bowl, whisk together light brown sugar, granulated sugar, and four teaspoons of cinnamon. Now, using your hands, take five biscuit squares at a time, dunk them in the butter, coat them in the cinnamon-sugar, then lay them in a pan that is very, very, VERY well-greased with butter. We don’t want our Monkey Bread to stick when we turn it out after baking. Once all your squares have been coated and are in the pan, press down on them lightly to make sure they stick together. Bake the Monkey Bread for 40-45 minutes, until it springs back when pressed with clean fingers. Let it cool for just a few minutes before flipping it onto a platter. Serve it immediately. Everybody will love this soft, sticky, sweet treat.  And there it is! Scratch Monkey Bread made in less than two hours start-to-finish. The pieces that touched the pan will be a little crispy and crunchy, while the ones in the middle will be delightfully soft. Yum. This recipe is great for any holiday parties you’re having or attending, and it’s a wonderful way to get little helpers involved. Give them the biscuit squares, butter, and cinnamon-sugar, and let them do the coating! They’ll be so proud of their finished product! Happy Holidays, indeed.  

Scratch Biscuit Monkey Bread
makes one 12.5 cup capacity bundt or tube pan*

Cream Biscuits:
3 cups all purpose flour
2 tablespoons granulated sugar
1 teaspoon ground cinnamon
1 teaspoon Kosher or sea salt
1 tablespoon baking powder
2 cups heavy cream*

Cinnamon-Sugar Coating:
3/4 cup (1 1/2 sticks) unsalted butter
1 cup light brown sugar, packed
1 cup granulated sugar
4 teaspoons ground cinnamon

Preheat the oven to 350F. Grease a bundt or tube pan very well with butter. Set aside.

Make the biscuit dough. In a large mixing bowl, whisk together flour, sugar, cinnamon, salt, and baking powder. Pour in heavy cream and stir, scraping the bowl, until a dough forms. Turn dough onto a floured surface. With a floured rolling pin, roll dough into a large rectangle that is 1/2-3/4 inch thick. Fold it in half, and turn one quarter-turn. Repeat folding and rolling until you have done it four times total. Using a sharp knife or bench scraper, cut dough into 1-inch squares. Place the squares in a large bowl while you prepare the coating.

Melt the butter in a small saucepan or the microwave. Transfer it to a small bowl to cool enough to be touched. In a separate small bowl, whisk together sugars and cinnamon.

Dip biscuit squares in butter, then coat in cinnamon-sugar. Place coated squares in prepared pan. Once all squares are in the pan, press down on them lightly so that they stick together. Bake for 40-45 minutes, until bread springs back when lightly pressed with your clean finger.

Let monkey bread cool for 5-10 minutes before inverting onto a large plate or platter. Serve immediately.

Monkey Bread is best on the day it’s made, but can be kept covered at room temperature for up to two days. Re-warm before serving.

Notes:

1. This recipe can be halved and baked in a 9″x5″ loaf pan, though I am not sure of the bake time.
2. Heavy cream must be used in this dough. Do not substitute half & half or milk.

Pumpkin Spice Latte Cupcakes

  
Things are about to get really basic up in here. I have taken all the flavors of the beloved pumpkin spice latte and mixed them into light, fluffy cupcakes with vanilla buttercream piled high on top. Pumpkin spice lattes in cupcake form? I might as well just put on the Uggs that have been relegated to the closet the last couple of years because I CAN’T EVEN. Pumpkin spice, espresso, lighter-than-air cupcakes, and dreamy vanilla buttercream? YAAAAAS. YAAAAAAAAAS. Pumpkin spice all the things!

But before we get to the cupcakes, I have a confession to make: I don’t really understand the pumpkin spice latte craze. I mean, I get that cinnamon, cardamom, black pepper, and coffee are good. That’s the entire basis for the chai latte, and I big-pink-puffy-heart love chai lattes. But something about the pumpkin spice latte turns me off. Maybe it’s my confusion over the pumpkinization of America. Or maybe it’s the fact that I’ve never had a pumpkin spice latte that actually tasted “right.” In my experience, it either tastes of artificially flavored syrup with a good dose of bitterness, or a very milky cup of coffee, neither of which are things that I get terribly excited about. I like my pumpkin real and my coffee black. But I also dig cupcakes. So here we are.

These cupcakes have a hefty dose of pure pumpkin purée (a whole cup!), more pumpkin pie spice than cinnamon (because pumpkin should taste like more than just cinnamon), and a noticeable hit of coffee flavor in the form of granulated espresso. Where many pumpkin baked goods are dense and heavy, these cupcakes are a bit on the softer, lighter side thanks to some serious baking chemistry. Yes, chemistry. Don’t panic. I am a C+ chemistry student at best, so if I can figure this out, anyone can.

To achieve a tender crumb, we need a few things: cornstarch, buttermilk, oil, and my favorite ingredient of late, whipped egg whites. Cornstarch is added to the dry ingredients. Cake flour is a mixture of all purpose flour and cornstarch, and it’s slightly lower amount of gluten makes for a velvety texture. If we used all cake flour here, our cupcakes would likely sag in the middle. They’d still be delicious, but we want them puffy. The solution is to add just a touch of cornstarch to the full volume of flour. Buttermilk also helps with tenderness, and activates our leaveners. Oil is used instead of butter. American-style butter is 15-20% water, whereas oil is water-free. Therefore, our cupcakes will stay moist for days, rather than drying out as the water in the butter and pumpkin evaporates.

 
 Airiness, something that is so often lost in pumpkin baked goods, comes in the form of whipped egg whites, just like it does in my Pumpkin Pie. Egg whites are structural powerhouses in baking. Left in their natural state with the increased moisture from the pumpkin purée, buttermilk, and oil, they would weigh these cupcakes down. But when we whip air into them and completely alter their physical form, we bypass dense, heavy cake completely. Light and fluffy cupcakes all the way.  Once the cupcakes are baked, put them on a rack to cool and get to work on the frosting. This vanilla buttercream, you guys. It is SO good. Buttery, fluffy, not-too-sweet vanilla heaven. And it’s so easy, it’s ridiculous. Beat butter until it’s fluffy and light in color, add confectioner’s sugar and salt, then vanilla and heavy cream. The heavy cream whips within the mixture and makes the resulting frosting so fluffy, I could die! (Name that movie.) You could use half & half or whole milk here, but your frosting will not be nearly as rich and fantastic. Once all your mixing is done, stuff the buttercream into a bag with a piping tip and go nuts. If you’re not comfortable with a piping bag, or just don’t have one, spread the vanilla buttercream with an offset knife.

 
Make these cupcakes this weekend or over Thanksgiving, and get your basic on. Or, if being totally basic isn’t your thing, double the batter and make an amazing layer cake! No matter how you feel about Starbucks or Lululemon or selfies, these Pumpkin Spice Latte Cupcakes won’t disappoint.  Pumpkin Spice Latte Cupcakes

adapted from Pumpkin Cupcakes on Sally’s Baking Addiction
makes 14 cupcakes or a one-layer 9″ round cake*

Cupcakes:
1 3/4 cups all purpose flour
2 tablespoons cornstarch
2 1/2 tablespoons espresso granules*
1 1/2 teaspoons pumpkin pie spice
1 teaspoon ground cinnamon
1 teaspoon baking powder
1 teaspoon baking soda
1/2 teaspoon Kosher or sea salt
2 large eggs, separated
1/3 cup light brown sugar, packed
1/3 cup granulated sugar
1 cup pure pumpkin purée
1/2 cup neutral-flavored oil*
1 teaspoon pure vanilla extract
1/3 cup buttermilk

Frosting:
1 cup unsalted butter, softened room temperature
4 cups confectioner’s sugar
pinch of Kosher or sea salt
1 tablespoon pure vanilla extract
2-4 tablespoons heavy cream*

Preheat oven to 350F. Line two muffin pans with cupcake liners. Set aside.

In a large mixing bowl, whisk together flour, cornstarch, espresso granules, pumpkin pie spice, cinnamon, baking powder, baking soda, and salt. Set aside.

In a separate large mixing bowl, whisk together sugars, pumpkin purée, oil, egg yolks, vanilla extract, and buttermilk. Using a silicone spatula, fold in the flour mixture in two installments. 
Place two egg whites in a medium mixing bowl. With an electric mixer or a whisk, whip egg whites until soft peaks form. Gently fold the whipped egg whites into the pumpkin batter, just until combined. Divide batter into prepared pans, filling each cup 2/3 full. Bake for 16-18 minutes, until a toothpick inserted into one of the cupcakes comes out clean. Let the cupcakes cool in the pan for a few minutes before removing to a rack to cool completely.

To make the frosting, beat softened butter with an electric mixer until light and fluffy, about two minutes. With the mixer starting on low, beat in confectioner’s sugar in two installments. Add salt. With the the mixer on high, beat in vanilla and heavy cream, stopping to scrape down the bowl. When the frosting is to the preferred consistency, it’s ready. Pipe or spread frosting onto cooled cupcakes.

Cupcakes will keep covered at room temperature or in the refrigerator for up to three days.

Notes:

1. If you want a layer cake, you may double this recipe and pour it into two greased 9″ round pans. Bake at 350F for 25-27 minutes.
2. I use Medaglia d’Oro.
3. I use canola oil, but vegetable oil will also work.
4. Half & half or whole milk may be used in place of the heavy cream.

Cranberry Apple Pie

Updated 11/14/2020 to add better photos, and adjust the baking temperature and time. The pie was originally made with Cream Cheese Pie Dough, but the current photos are All-Butter Pie Dough. They are both linked in the recipe.Cranberry Apple PieWelcome back to pie season! In the last couple of weeks I’ve posted my go-to Cream Cheese Pie Dough, a Pumpkin Pie that is super light and fluffy thanks to the addition of whipped egg whites, and a showstopper Black Bottom Pear & Almond Pie. Yum! Make sure to check them out while you’re writing your Thanksgiving menu! Today, I’m bringing you a pie that is sweet and tart thanks to a mixture of apples and juicy fresh cranberries. Apples, cranberries, orange, and spices? Sign. me. up.Cranberry Apple Pie
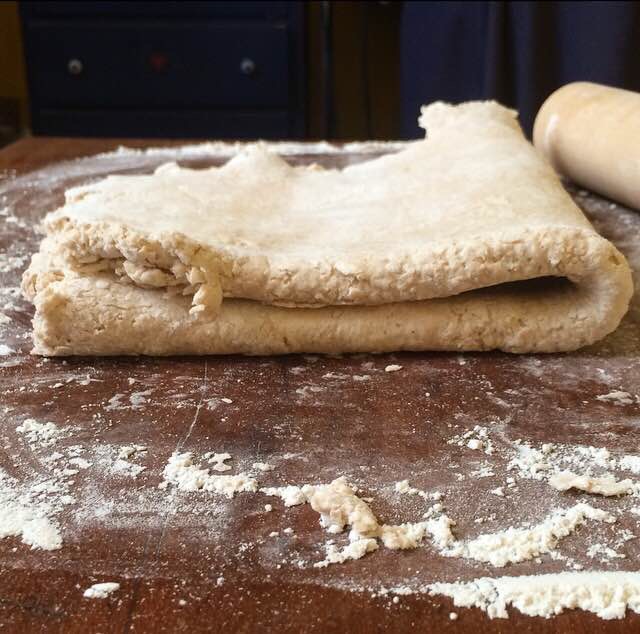
This recipe starts out like most do, by rolling out pie dough. Fit it in a pie plate, and trim the edges to 1-inch. Since this is a double crust pie, we need extra long edges for a good crimp. Put the bottom crust in the fridge to chill while we make the filling.

Peel some apples. In this pie, I used two Granny Smith, two Honey Crisp, and one Golden Delicious. In a regular apple pie, I’d use more tart apples (like Granny Smith), than sweet, but as we’re adding all those tart cranberries, I figured it was better to go sweet. Dice the apples into 1/2-inch pieces and set them in a large mixing bowl. In a traditional apple pie, I would slice the apples, but here I recommend chunking them so that they are similar in size and shape to the cranberries–this promotes even baking. Rinse some fresh cranberries and pick over them to remove any that aren’t in great shape. Place the cranberries in the bowl with the apples. In a small bowl, whisk together sugar, cinnamon, allspice, nutmeg, ginger, salt, and arrowroot powder. I use arrowroot powder as the thickener in my fruit pies, but if you don’t have any, use an equal volume of cornstarch or instant tapioca. Zest and juice an orange. Pour your sugar and spice mixture, orange zest and juice into the bowl with the apples and cranberries. Use your clean hands to toss everything together.Cranberry Apple PieLet the filling sit at room temperature for thirty minutes to release some excess liquid. If we put the filling into the crust without letting some of the liquid drain off, our filling will seep out of the crust while the pie bakes and bake/burn itself onto the bottom of the oven. No thank you! Also, our filling will shrink down below the top crust, leaving a huge gap between the top crust and the bottom. Again, no thank you! So, once the filling has sat for a while, drain off the excess liquid (there will be a lot!) before putting the filling in the prepared bottom crust. Dot the filling with butter (I forgot and had to dot with butter after the top crust was on 😁). Put the filled pie plate back in the refrigerator and roll out the top crust.

Roll out the top crust dough to a 12-inch diameter. From here, you can either place the whole crust over the top of the pie or get a little fancier. For a full top crust, lay the rolled dough over the filling, trim and crimp the edges, and cut a few vents (lest you have an exploding pie) before proceeding. If you want to do something a little more exciting, cut your dough into 1/2-inch strips. Lattice crusts are classic and simple to weave. Deb Perelman has written a great tutorial, if that’s the route you’d like to take.Cranberry Apple PieI have been into braided top crusts lately. To achieve a braided top, take three strips at a time and lay them on a floured surface. Gently (very gently) braid the strips together. Set the finished braids aside while you complete the rest of them (I made five). Lay the braids (or the lattice) on top of the pie and trim the ends.

Remember those extra long edges we left on the bottom crust? Fold them in toward the filling, effectively enveloping the ends of your decorative top crust. Once this is finished, crimp the edges and brush the exposed crust with cream before sprinkling with additional sugar. Put the pie in the fridge while you preheat the oven. Bake the pie for 45 minutes to an hour, until the apples are tender, the cranberries are bursting, and the crust is golden brown. If the crust starts to get too dark during baking, loosely tent it in foil.Cranberry Apple Pie

Let the pie cool for at least four hours before slicing and serving. I know warm pie is tempting, but the pie needs to be room temperature or cold to slice nicely. Each slice can be quickly warmed in the microwave, if you’re not into cold pie. I don’t know about you, but I am into pie at any temperature.Cranberry Apple PieCranberry Apple Pie is fantastic with whipped cream. Or a la mode. Or with caramel sauce. Or with a dusting of confectioner’s sugar. Or plain. Or with yogurt for breakfast the day after Thanksgiving. What?! There’s fruit in there! It’s totally breakfast-appropriate. Trust me.Cranberry Apple Pie

Cranberry Apple Pie
makes one 9″ pie

1 recipe Cream Cheese Pie Dough or All-Butter Pie Dough
2/3 cup granulated sugar, plus extra for sprinkling
1 1/2 teaspoons ground cinnamon
1/2 teaspoon ground allspice
1/2 teaspoon ground nutmeg
1/4 teaspoon ground ginger
pinch of Kosher or sea salt
5 cups peeled, 1/2-inch diced baking apples (about 5 large apples)
1 cup fresh cranberries
juice and zest of one large orange
3-4 tablespoons cornstarch or arrowroot powder*
2 tablespoons unsalted butter, cubed
Cream or milk, for brushing

On a floured surface, roll 1 disc of cream cheese pie dough so that it is 12 inches in diameter. Fit it in a standard pie plate, and trim the overhang to 1 inch. Refrigerate while you prepare the filling.

In a small bowl, whisk together sugar, cinnamon, spices, salt, and arrowroot powder. Set aside.

In a large bowl, combine the sliced apples and fresh cranberries. Toss with sugar/spice mixture and orange juice and zest. Cover the bowl with plastic wrap and let it sit at room temperature for about thirty minutes to release excess liquid. When the time is up, dispose of the excess liquid. Transfer the filling to the bottom pie crust. Dot with butter and refrigerate.

Roll out the second crust to a 12-inch diameter. Slice the dough into 1/2-inch thick strips. Lay them on the top of the pie in a decorative pattern.* Fold the bottom crust overhang over the ends of your strips so that the edges are about 1/2 inch all the way around. Crimp the edges. Brush the exposed crust with milk or cream, and sprinkle with sugar. Refrigerate the pie while the oven preheats.

Place a rimmed baking sheet on the bottom rack of the oven. Preheat the oven to 400F. Place the pie on the top rack and bake for 65-75 minutes, until the cranberries are bursting, the apples are tender, and the crust is cooked. If the top crust starts to get too dark at any point, loosely cover the top of the pie with foil for the remainder of the baking time.

Let pie cool on a rack for at least three hours before slicing and serving. Pie will keep covered at room temperature for up to three days or in the refrigerator for up to four days.

Notes:

1. I prefer my Cream Cheese Pie Dough or All-Butter Pie Dough, but any good pie crust will do.
2. I use a combination of sweet and tart apples, the majority being sweet. I recommend Honey Crisp, Macintosh, or Golden Delicious for the sweet variety, and Granny Smith for the tart. See more information on baking apples here.
3. If you do not have or do not want to use
cornstarch or arrowroot powder, I recommend an equal volume of instant tapioca. Looking for arrowroot in Brooklyn? Take a trip to Sahadi’s.
4. I have linked to a lattice top tutorial in the content above. If you would like to braid your crust, braid three strips at a time and lay them over the filling before proceeding. Cranberry Apple PieCranberry Apple Pie