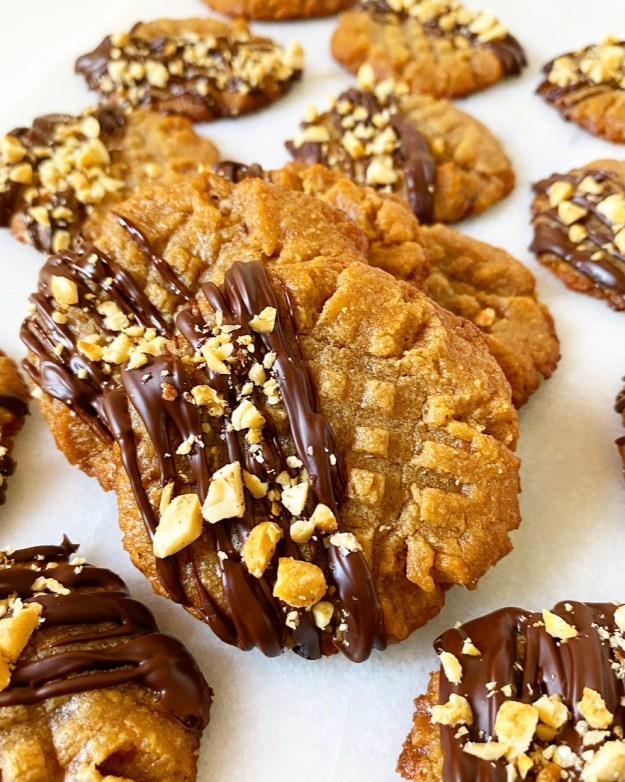
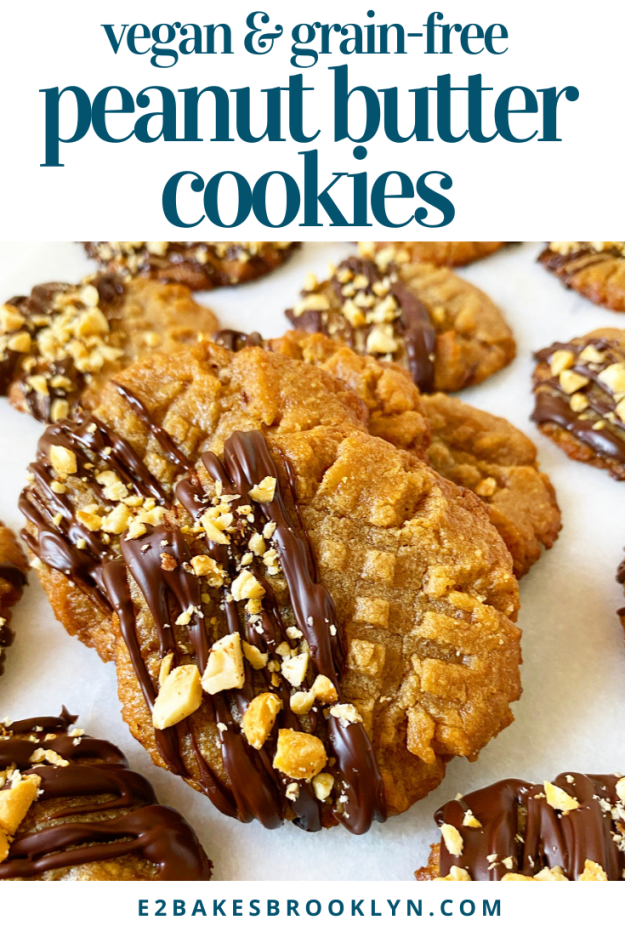
 This is just to let you know that if, on the second night of vacation, you make dinner for your friends, clean up, and still have the urge to make Peanut Butter Cookies…well, that’s an urge you should follow. And if you have the urge to make them again when you return home, just go with it. The dough will only take you a minute—it’s a dump & mix situation—and they’ll hit the spot because of course they will. They’re Peanut Butter Cookies!
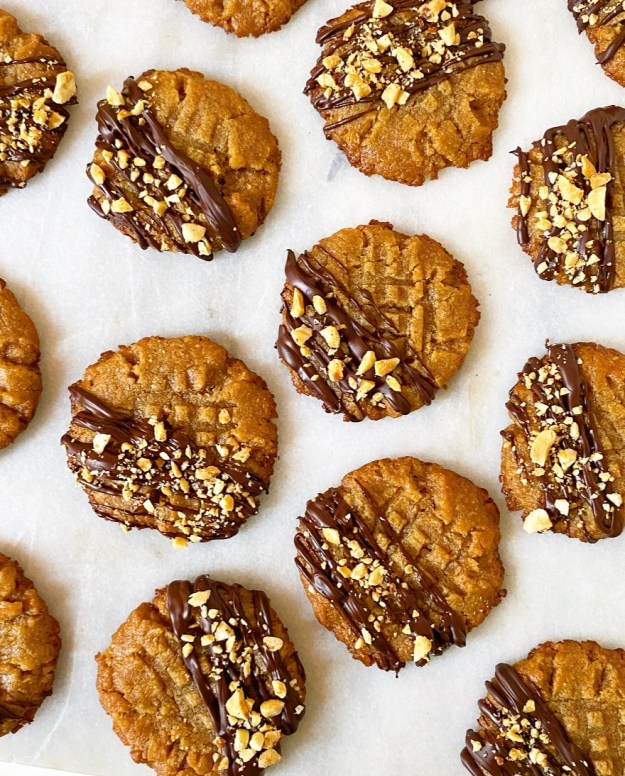 Did I mention that they’re vegan and grain-free? Because they are. This recipe is the lightest twist on the classic three ingredient peanut butter cookie recipe that’s all over the internet. In case you’ve missed it, you can combine 1 cup creamy peanut butter, 1 cup sugar, and 1 large egg, scoop & bake, and get some pretty incredible chewy peanut butter cookies out of the deal. If you haven’t, you should give them a try, or go for any of the many variations I’ve made over the years. Or, you know, make this recipe I’m babbling about.
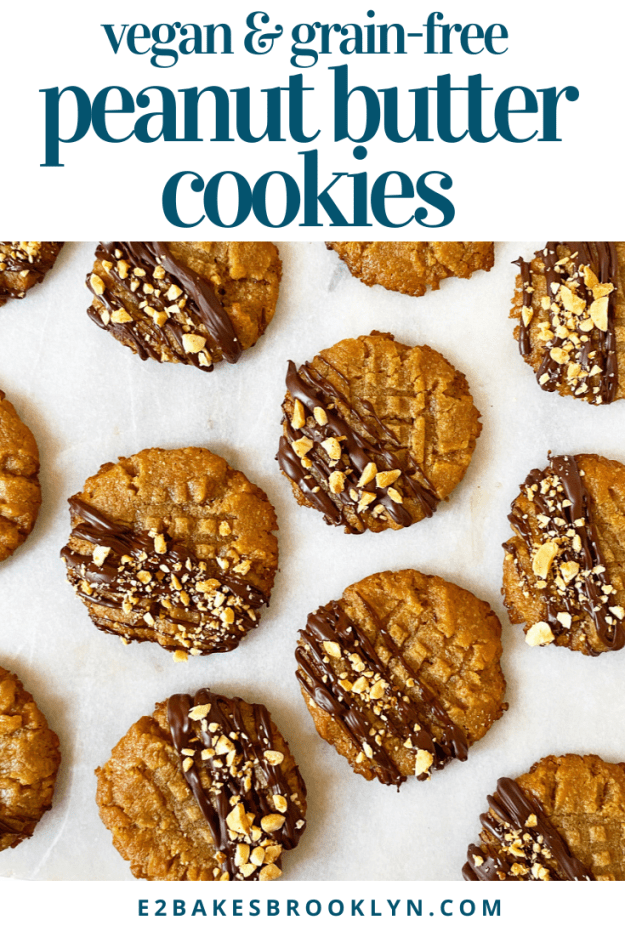
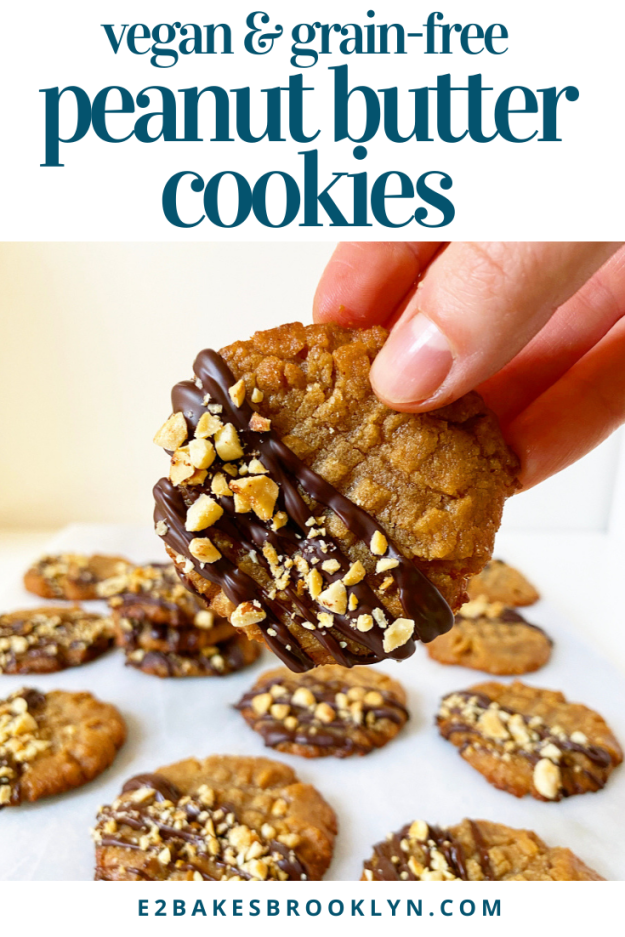
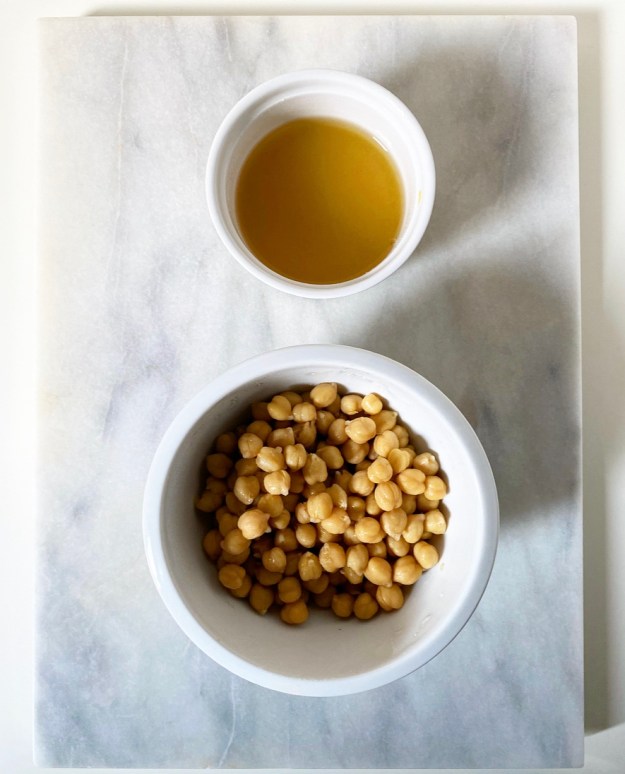
 Here, I’ve kept it pretty traditional. I added a few extra ingredients like brown sugar, a dash of cinnamon, some salt and vanilla, but the dough still comes together in moments. In order to keep the cookies vegan, I swapped the egg for an equal volume of aquafaba, otherwise known as chickpea canning liquid. It’s my egg substitute of choice—no, it won’t make your cookies taste beany—but you can use a flax egg or whatever egg substitute you like or just use an actual egg if you’re not trying to make vegan, gluten-free cookies for your vegan, gluten-free friend.
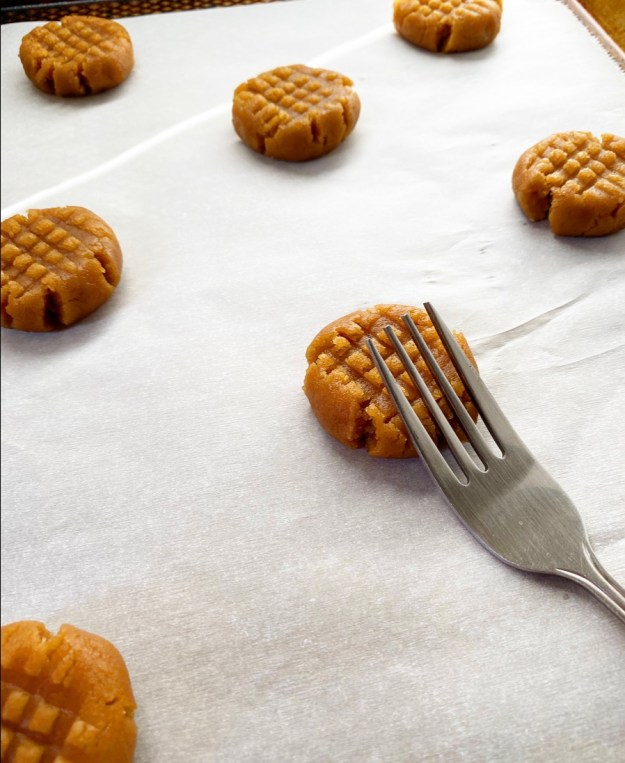
 I’ve also added a short twenty-minute chill to this recipe, but it’s not strictly necessary and your cookies will work without it. They’ll just be a little thinner than mine. Whatever you do, don’t skip crosshatching the tops of your cookies with a fork. I don’t know where this started or why we do this to peanut butter cookies, but I’m pretty sure it’s the law.
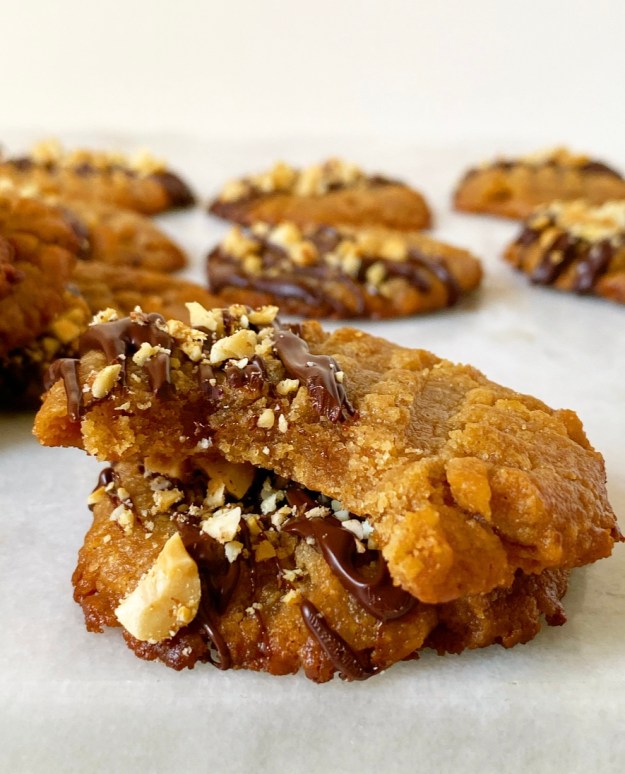
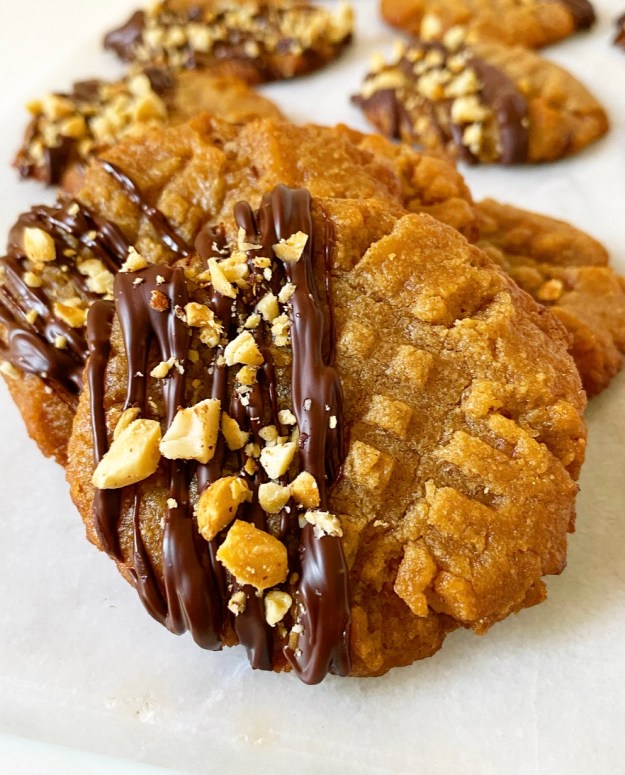 What? I don’t make the rules. I just break ‘em. Like finishing these Peanut Butter Cookies off with the easiest chocolate-peanut butter drizzle and some chopped peanuts. Is this necessary? No. But it’s pretty and freaking delicious. And really, when it comes to Peanut Butter Cookies, the “freaking delicious” part is all that matters.
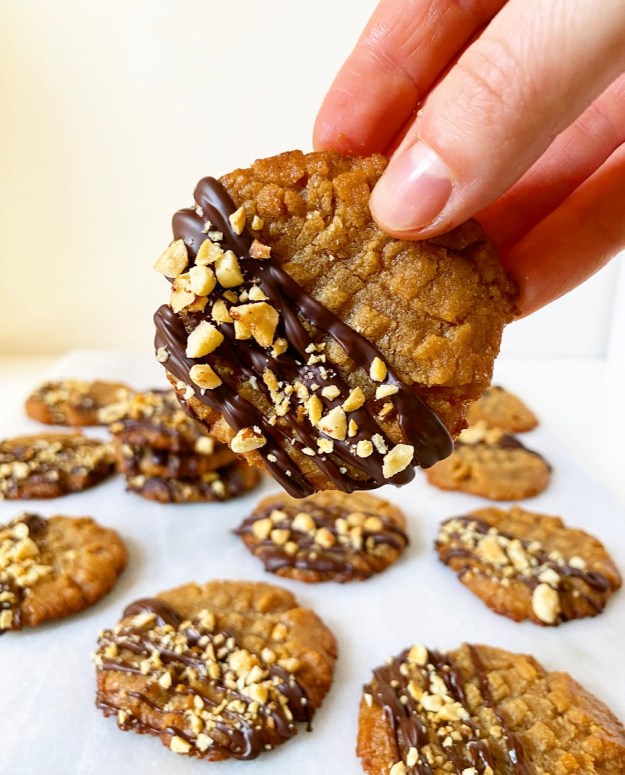
Peanut Butter Cookies {Vegan & Grain-Free}
makes 22-24 cookies
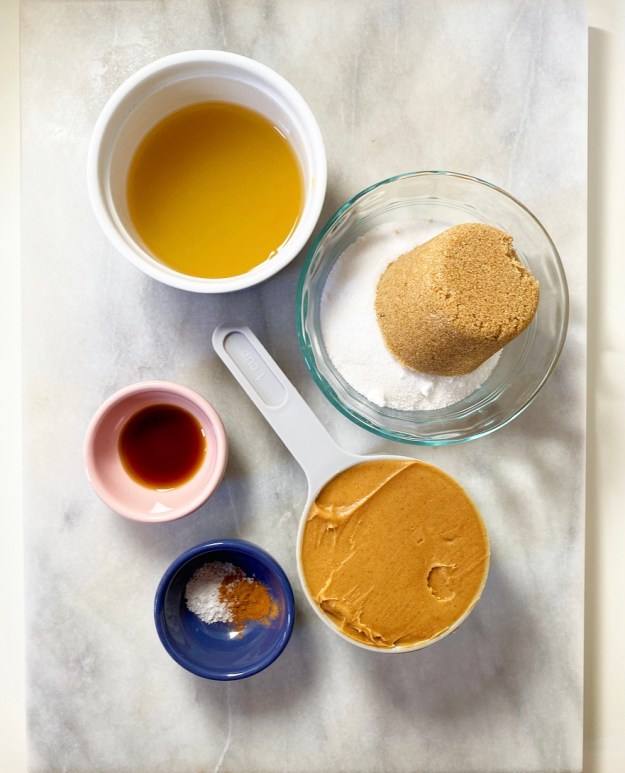
1 cup creamy-style peanut butter (not natural-style)
1/2 cup granulated sugar
1/2 cup light or dark brown sugar, packed
1/4 teaspoon Kosher or sea salt
dash of ground cinnamon
3 tablespoons aquafaba
2 teaspoons pure vanilla extract
For chocolate-peanut butter drizzle & garnish (optional):
3 ounces dark chocolate, chopped
1 1/2 teaspoons creamy-style peanut butter (not natural-style)
2 tablespoons roasted peanuts, finely chopped
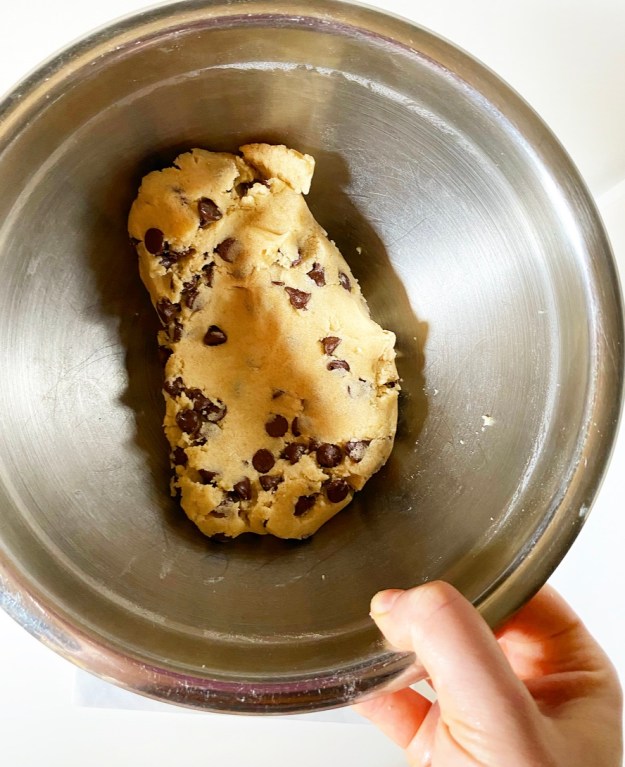
In a medium mixing bowl, combine peanut butter, granulated sugar, brown sugar, salt, cinnamon, aquafaba and vanilla. Use an electric mixer to beat for one minute, until well-combined. Chill cookie dough for 20 minutes.
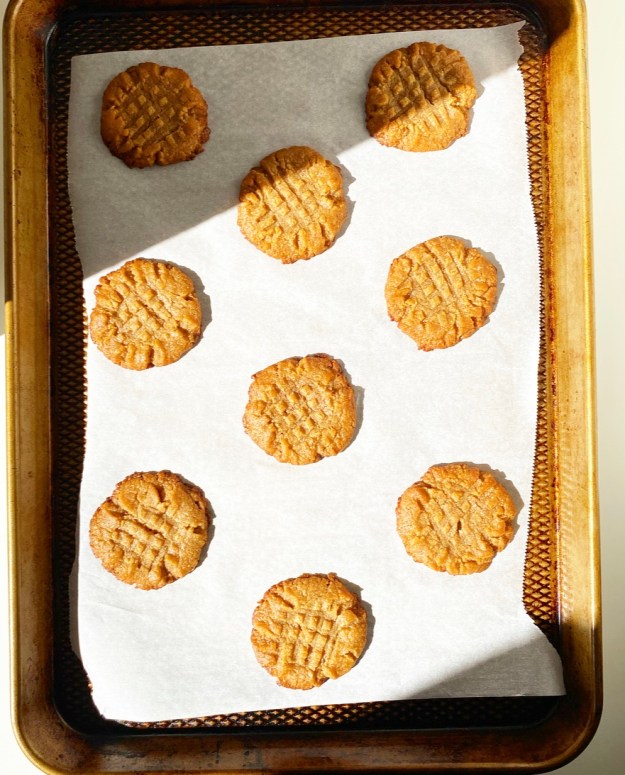
Preheat oven to 350F. Line two rimmed baking sheets with parchment.
Scoop cookie dough in 1 tablespoon increments, roll into balls, and place at least 3 inches apart on prepared pans.
Make the crosshatches. Lightly grease the back of a fork. Press the back of the fork into each dough ball, then turn the fork 90 degrees and press again.
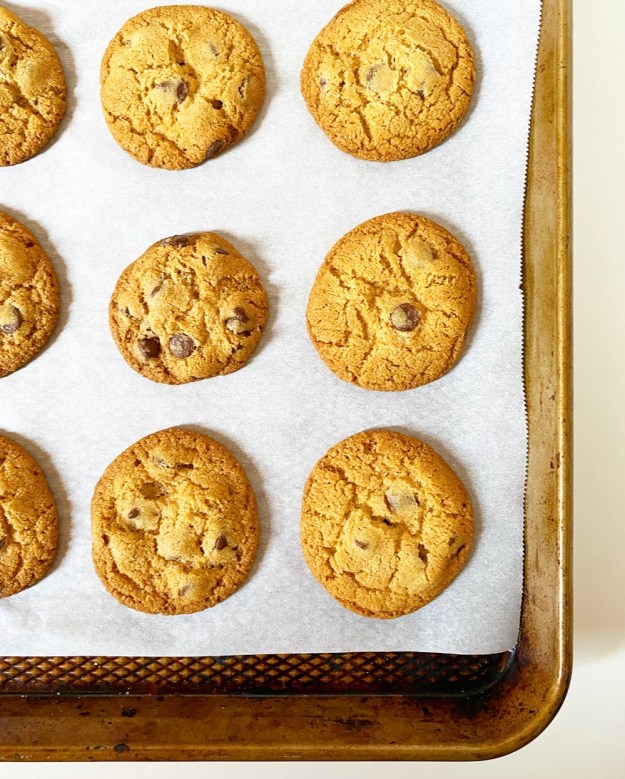
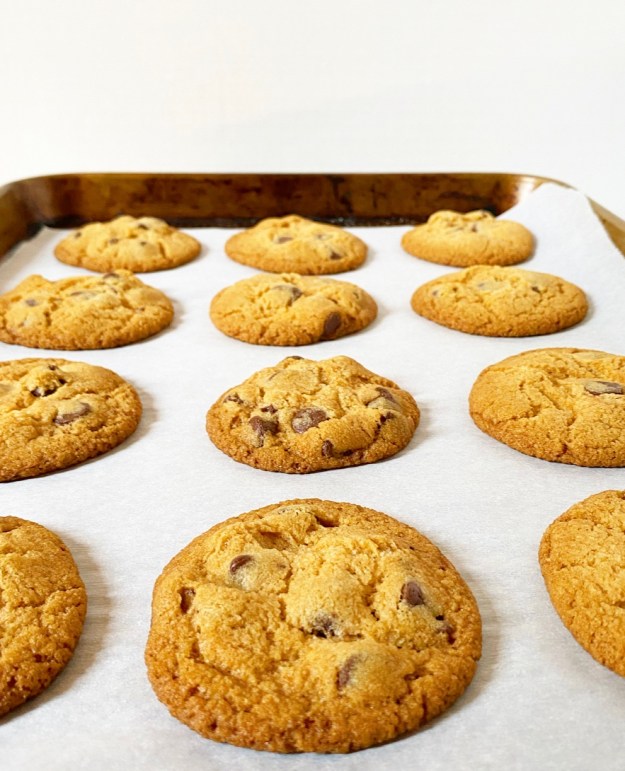
Bake cookies 8-10 minutes, until turning golden at the edges. Let cookies cool on their pans for 7-10 minutes before removing to a rack to cool completely. Repeat rolling and baking process with remaining dough, making sure to let baking sheets return to room temperature between batches.
To make the chocolate-peanut butter drizzle, combine chocolate and peanut butter together in a microwave-safe bowl. Microwave in 15 second increments, stirring in between, until smooth. Drizzle over cookies as desired. Sprinkle with chopped peanuts, if desired. Drizzle will set over time, but this may be expedited by freezing the finished cookies for 10 or so minutes.
Serve. Leftovers will keep in an airtight container at room temperature for up to 4 days. Layer cookies with wax paper or parchment.
 People tell me all the time that they don’t bake because it doesn’t allow for improvising. I’m here to tell you that assumption about baking being all about precision is a big ol’ myth. At least half of the recipes in my archives started from a place of improvisation.
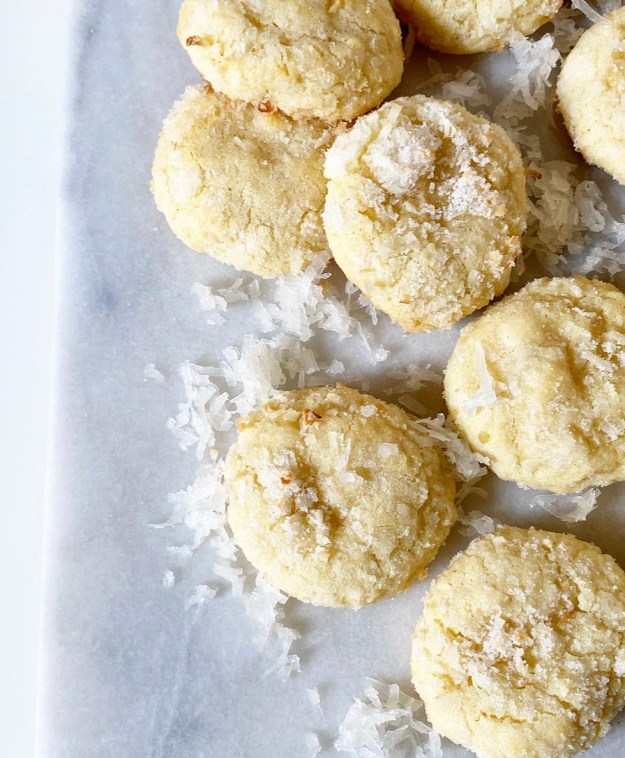
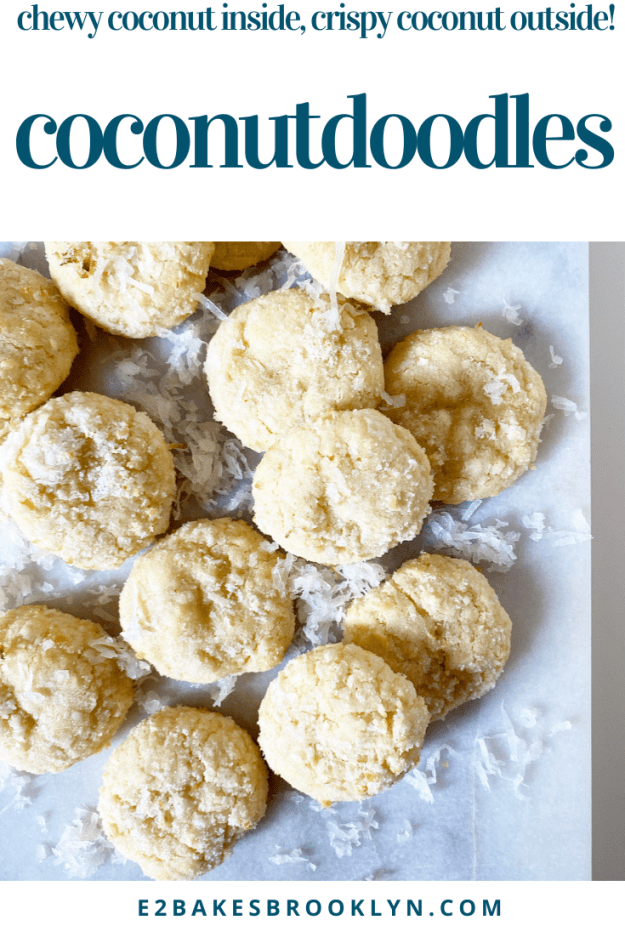
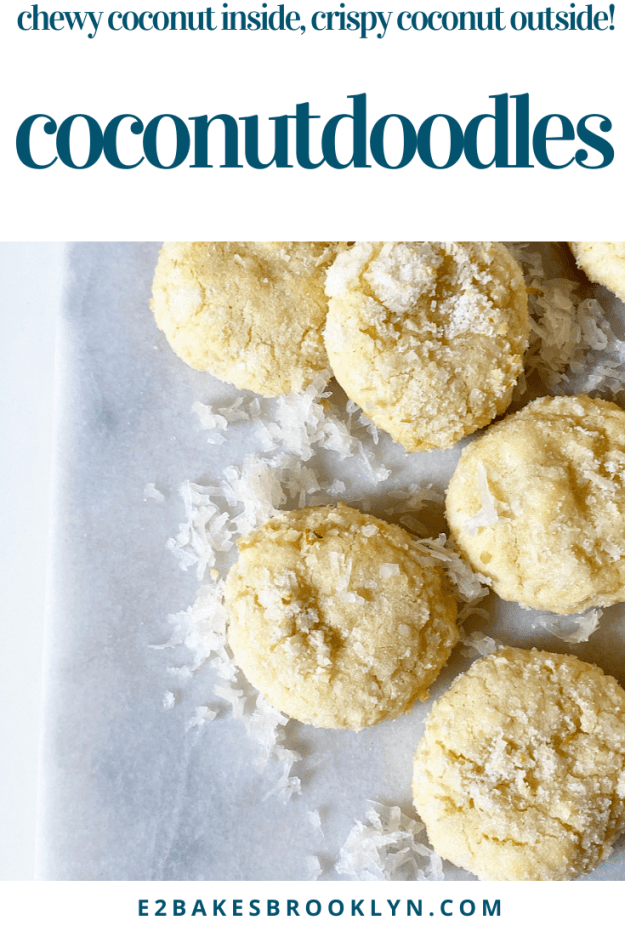
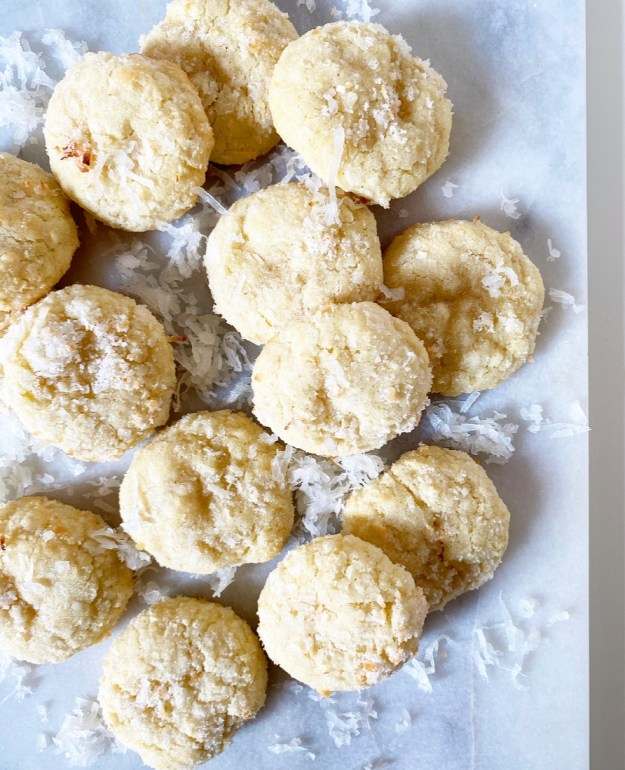 The base recipe for these Coconutdoodles has been on here once already this year. It looks different
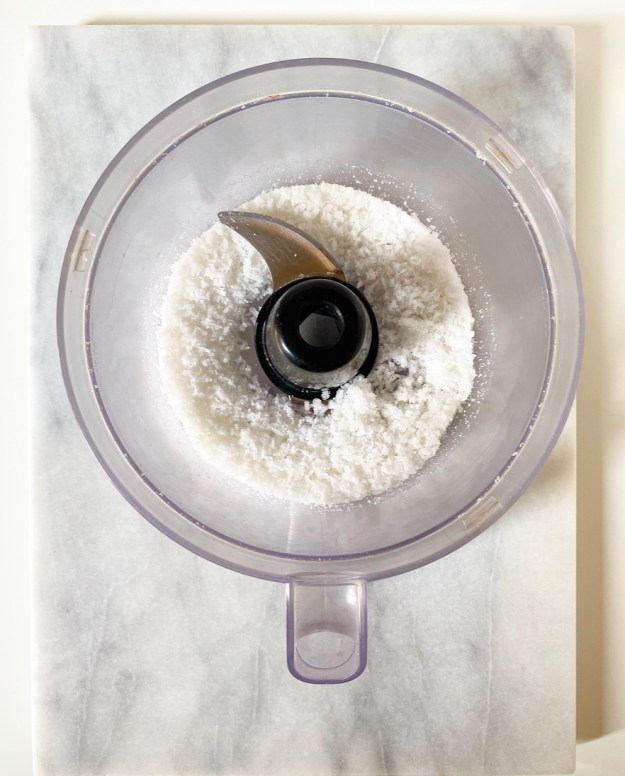


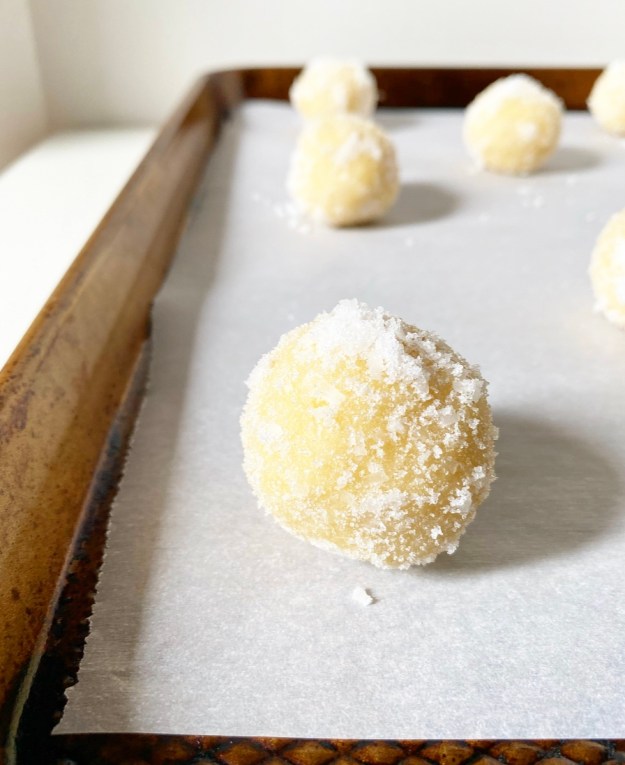 That’s right, a blank slate. A new start. A place to improvise by adding that random half-bag of coconut you have leftover from…well, I don’t remember what, but that’s beside the point. The point (!) is to load up that dough with as much coconut as it can take, then blitz the rest into a powder with some sugar and roll your cookie dough balls in it,
 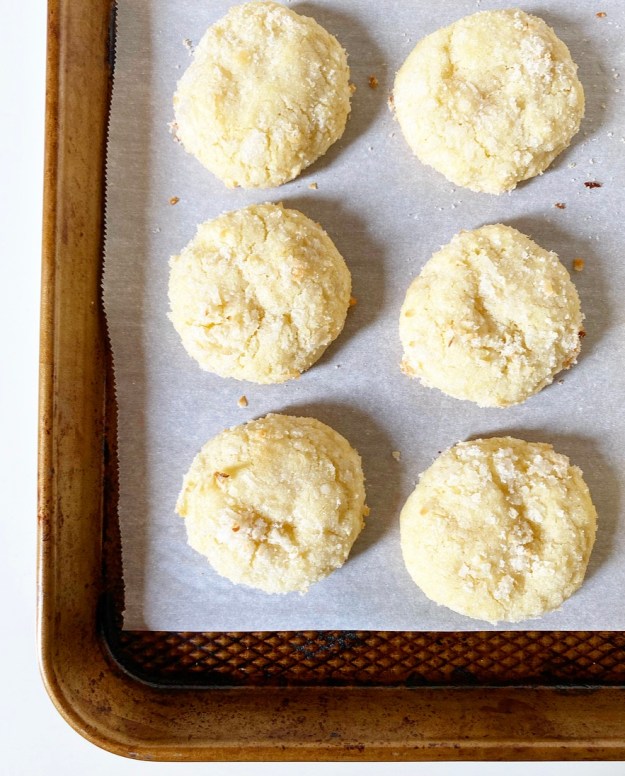 Coconutdoodles bake up super thick and puffy, and while the sugary coconut-crusted exteriors don’t really toast, they do get extra crispy. Oh, and the insides are super chewy and loaded with an obscene amount of coconut. Ob-scene. I really thought it might be too much, or that it might make the cookies crumbly, but it‘s the exact right amount and these cookies stay soft for days. I know because I ate this whole batch myself. That was weeks ago and I’m still sad that they’re gone.
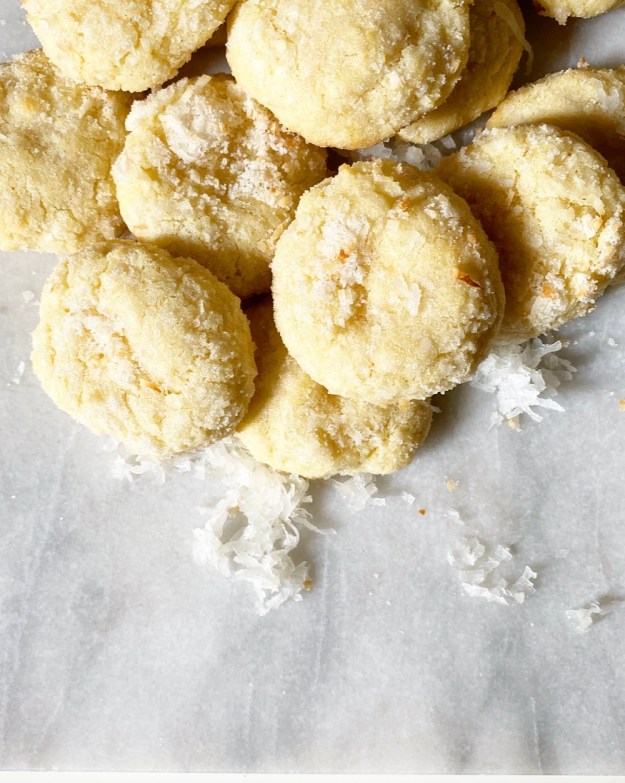 But you know what? I have this blank slate sugar cookie dough, and I’ve got another half-bag of coconut, and heaven knows I’ve got time to make cookies this weekend. I’ll save my crippling fear of failure for next weekend.
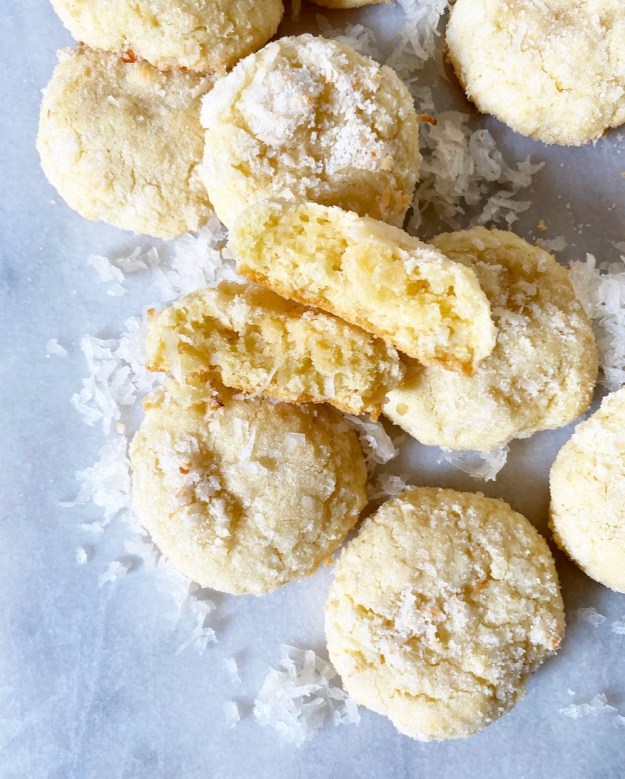
 Two chocolate chip cookie
  Yes, you. I know you’re out there. I see you, wading through a sea of soft, chewy chocolate chip cookie recipes, baking them extra long in hopes that they’ll be something they’re not. I’ve read your emails and direct messages, and I’ve been trying on-and-off for years to make a cookie base just for you.
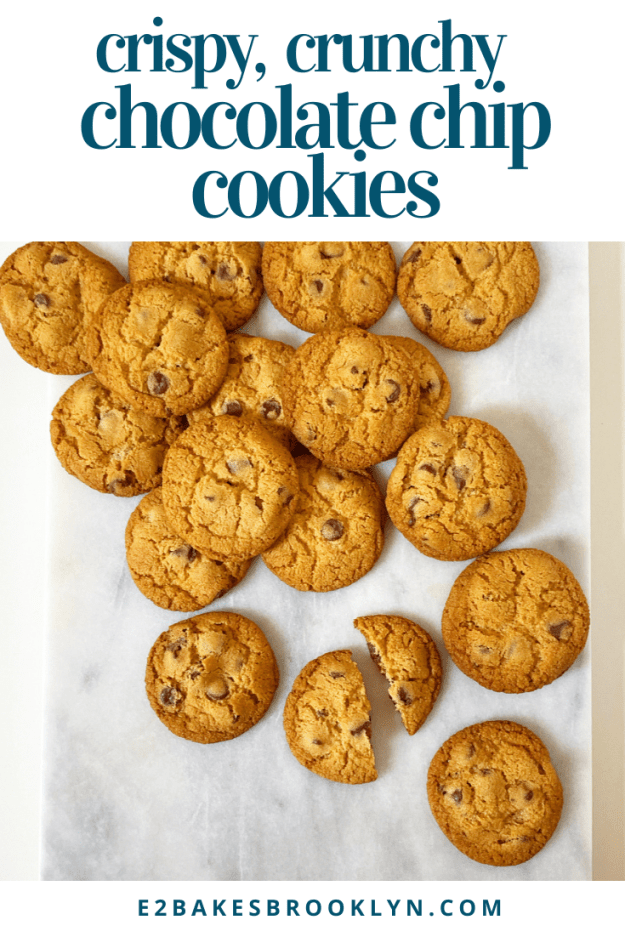
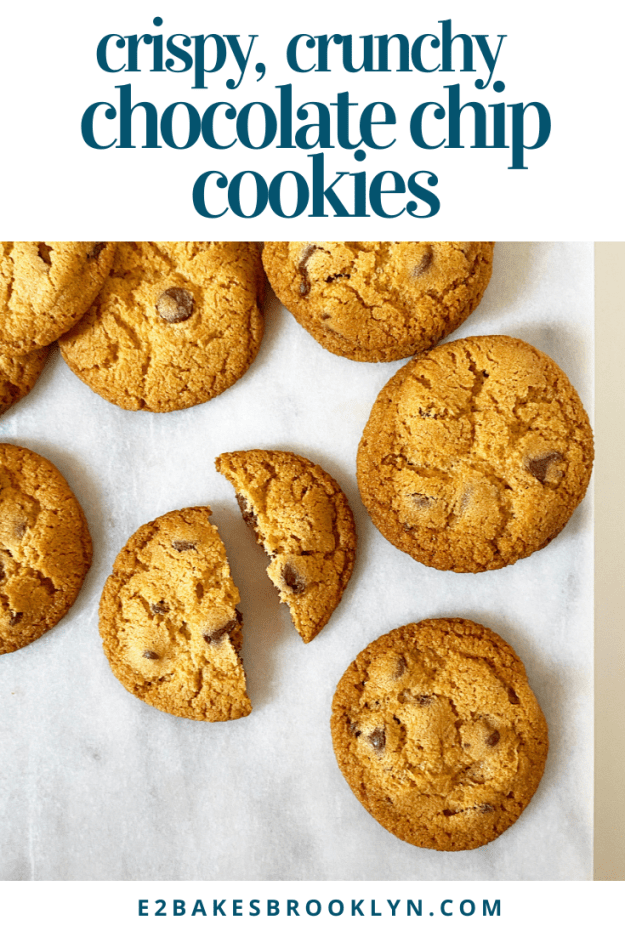
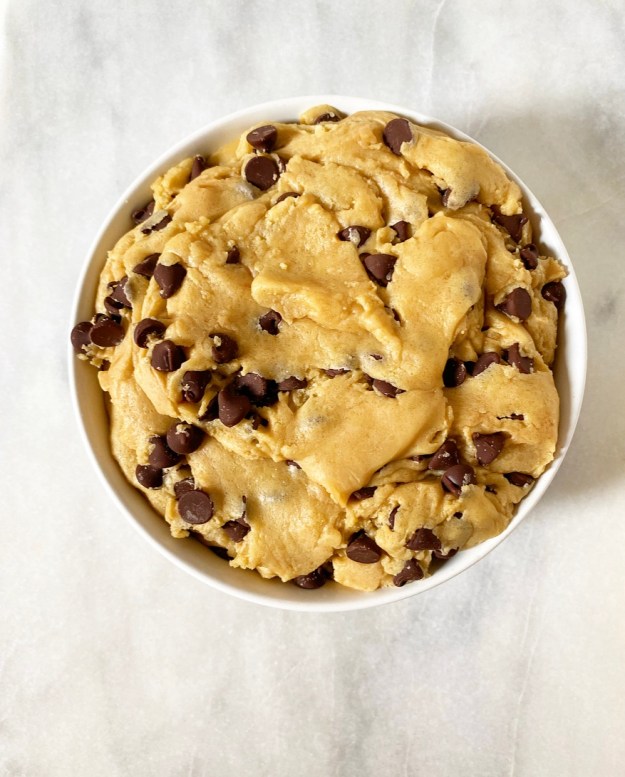
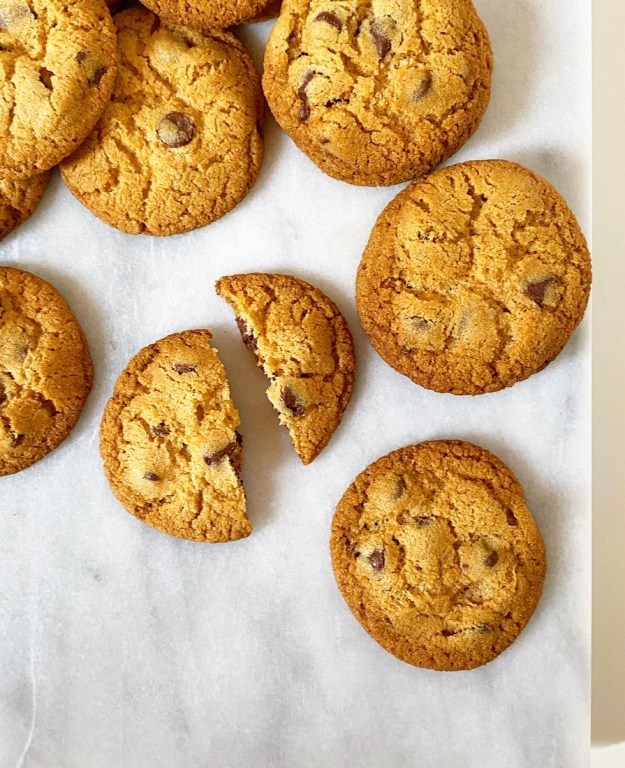 Now, I’m sure if you bake any cookie dough long enough, the results will be crispy, but this one is *specifically formulated* to be that way. It sounds a little pretentious when it’s written out like that, but it’s true. It’s taken at least 30 test batches, if not more, to make the perfect homemade Crispy, Crunchy Chocolate Chip Cookies. I don’t throw the word “perfect” around on here literally ever, so please believe me when I tell you how incredible these are because getting here has been a journey.
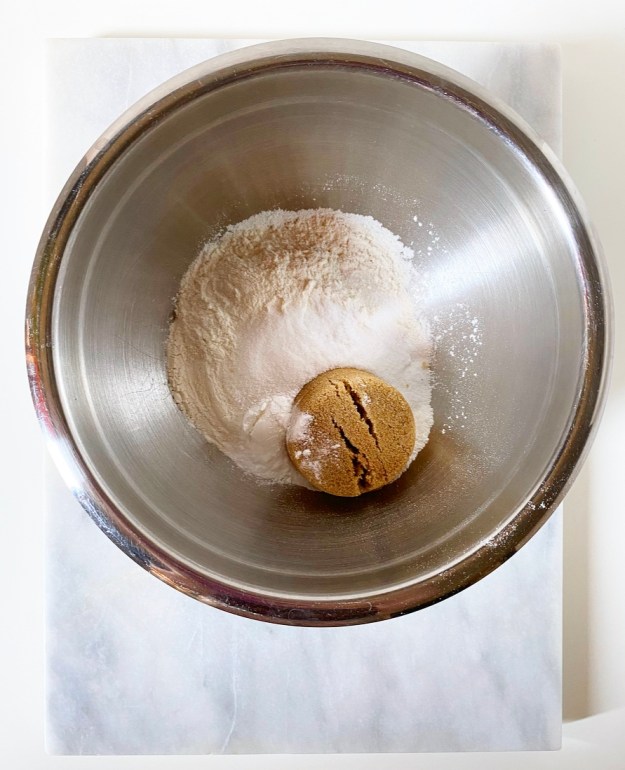 When I started down this particular cookie road (really going with the journey metaphor), I knew I needed to bump up the granulated sugar and reduce the brown sugar for crisper results. It’s basic cookie science. Sugar is hygroscopic, meaning it absorbs moisture from the air. Brown sugar, which is what happens when you whirl molasses into granulated sugar, absorbs more moisture than plain white granulated sugar. Therefore, more brown sugar in a cookie recipe = more chew. I wanted less chew—no chew, even—but still needed that signature brown sugary chocolate chip cookie flavor, so I opted to use equal parts brown and granulated sugar. The results are all the flavor I expect in a chocolate chip cookie and none of the softness.
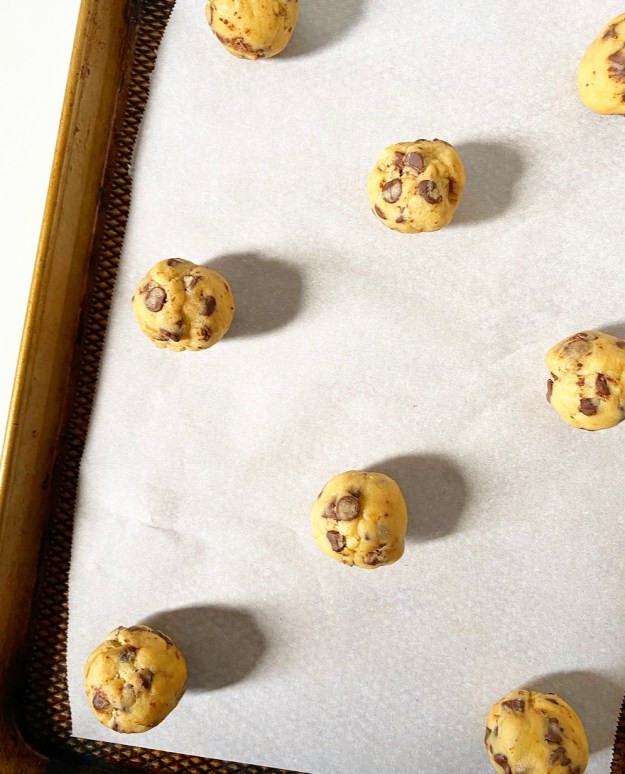
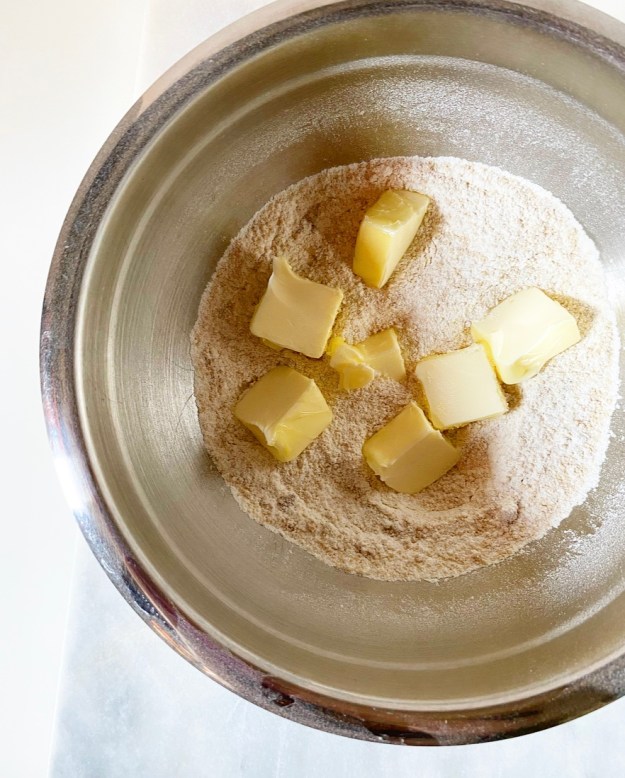 Next, I reduced the flour to cause more spreading during baking. Yes, I wanted this dough to spread—no multi-hour chills here! I also decided to try a reverse creaming method after seeing Stella Parks’s homemade
 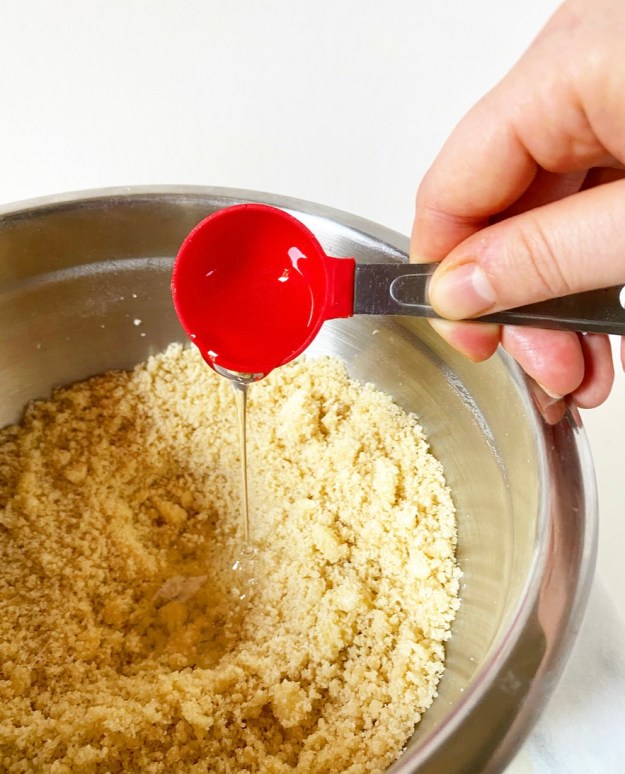 Now, all of that is fine and good and very important in the whole crunchy cookie racket, but the real game changer came a few weeks ago. I was eating
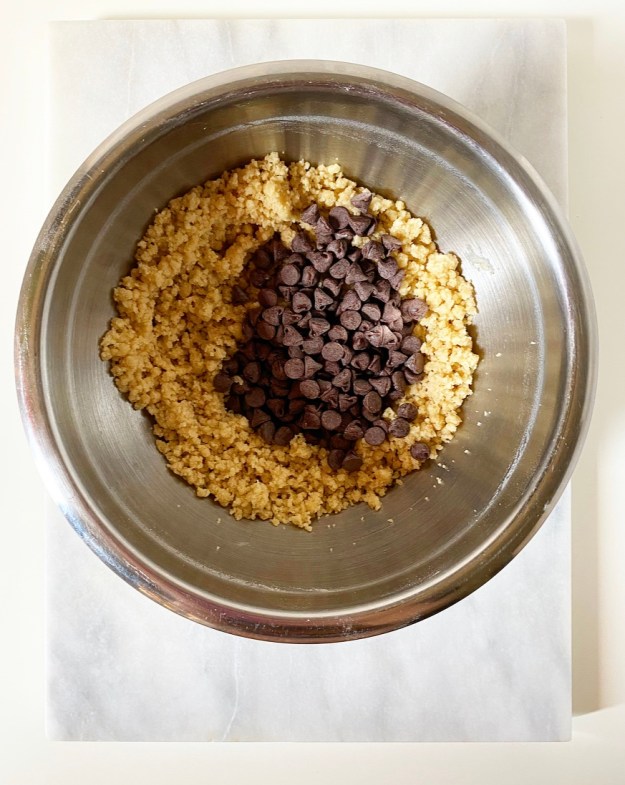
 Now, If you’re scratching your head wondering what WTF golden syrup is, you’re not alone. It’s a cane sugar-based invert sweetener (invert = liquid) that’s popular in the UK, but a bit more niche here. I can find it in some really well-stocked grocery stores and
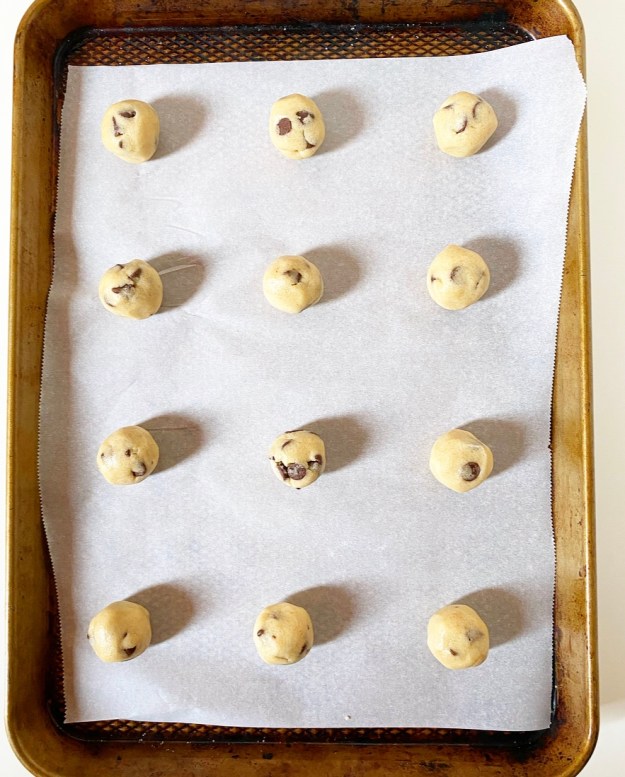
 The syrup is added after the butter is reverse-creamed in, and before the chocolate chips. The dough will hold together as well as any other chocolate chip cookie dough, and rolls easily into 24 tablespoon-sized balls.
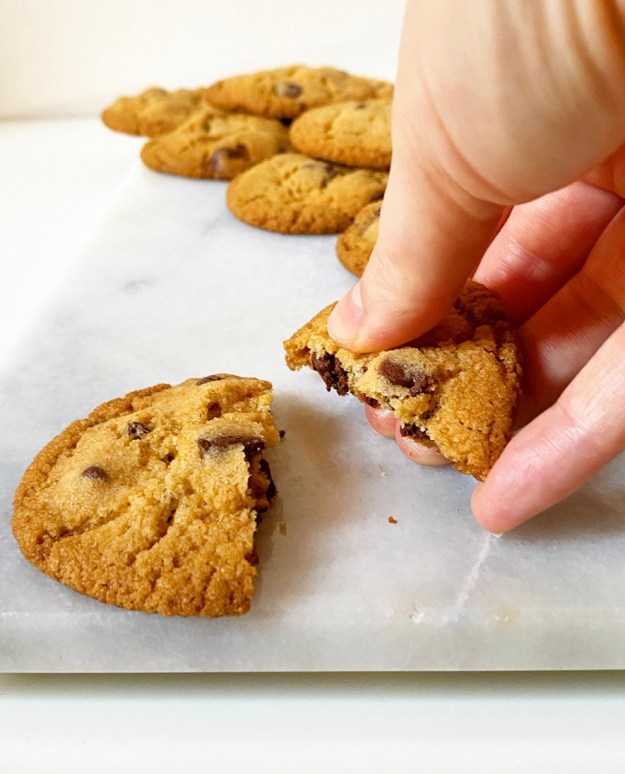
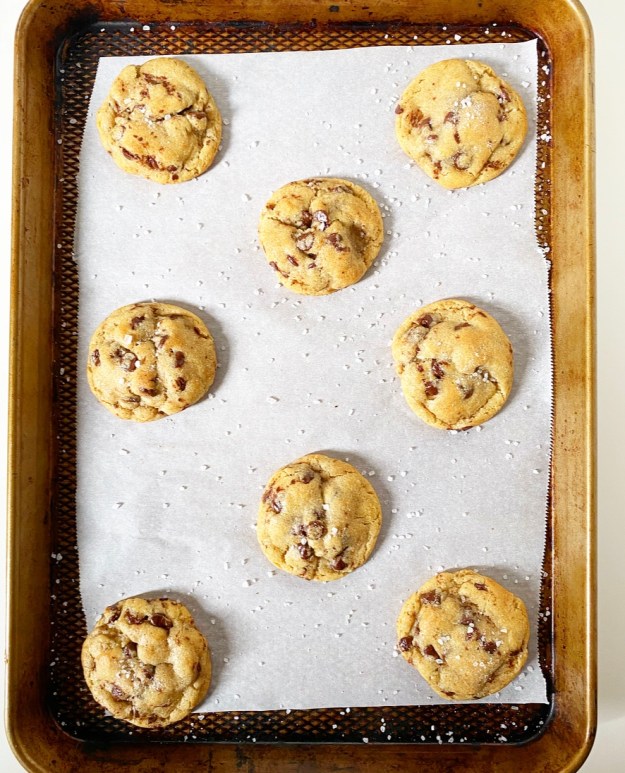
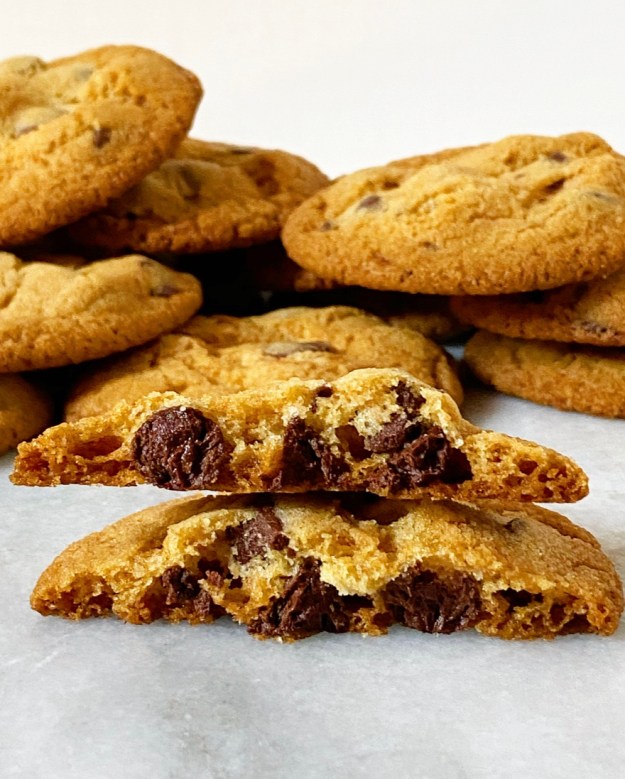 One more reason to get on the crunchy cookie bandwagon? Crispy, Crunchy Chocolate Chip Cookies keep like a dream. A dream, I tell you! I am a huge snob about day-old cookies, so believe me when I tell you that these just get better with time. Where soft cookies get a little stale after a day, these crisp treats retain their texture and their flavors only deepen further. You should keep them covered as sugar’s hygroscopic nature means your cookies can be affected by humidity, but the batch pictured made it through some seriously gnarly NYC weather and were still near perfect. And by near perfect, I mean perfect-perfect.

 You know how sometimes you test
 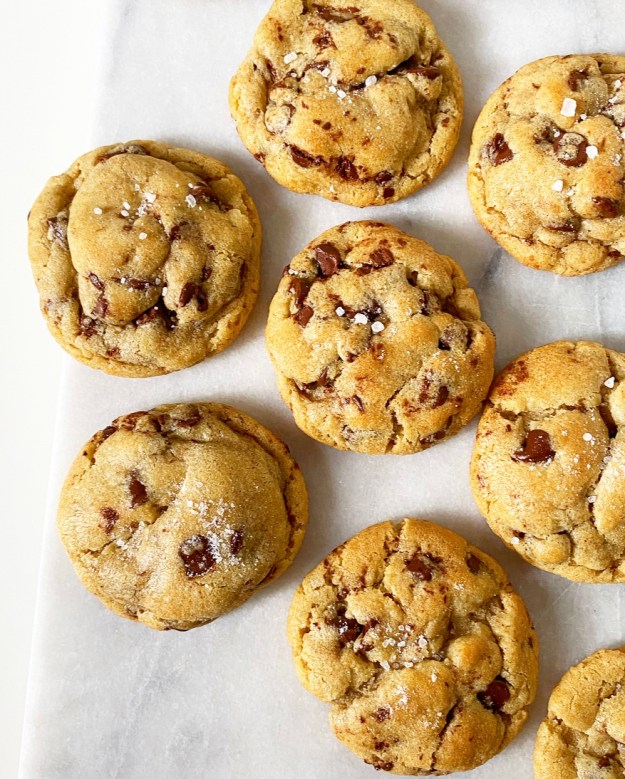 Well, here is something to do with them: “I Got Yolks” Chocolate Chip Cookies!
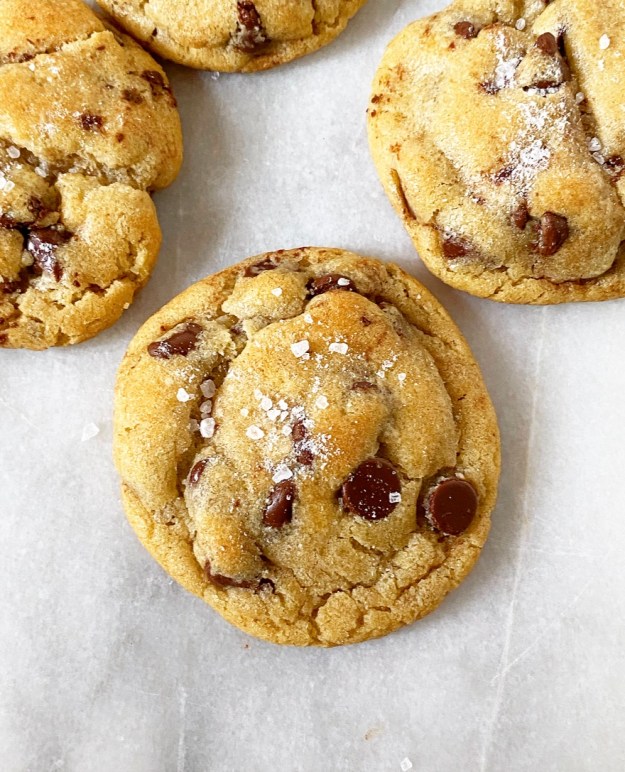 Anyway…this is a recipe born of necessity. Namely, the necessity to not waste good ingredients. Also, the necessity for something that can be eaten immediately or frozen for later or left on your friends’ front steps for a socially distanced surprise. Trust me, they’ll be beyond thrilled with a bag of these.
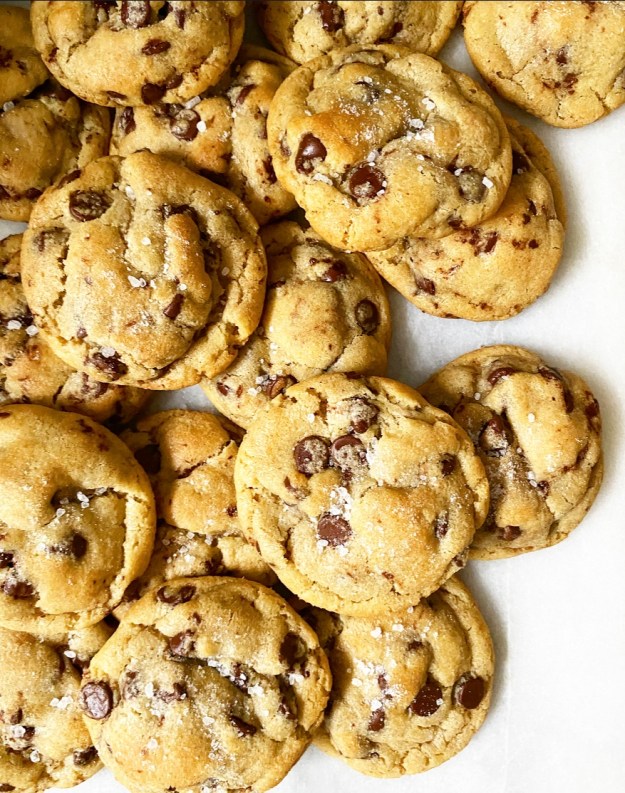
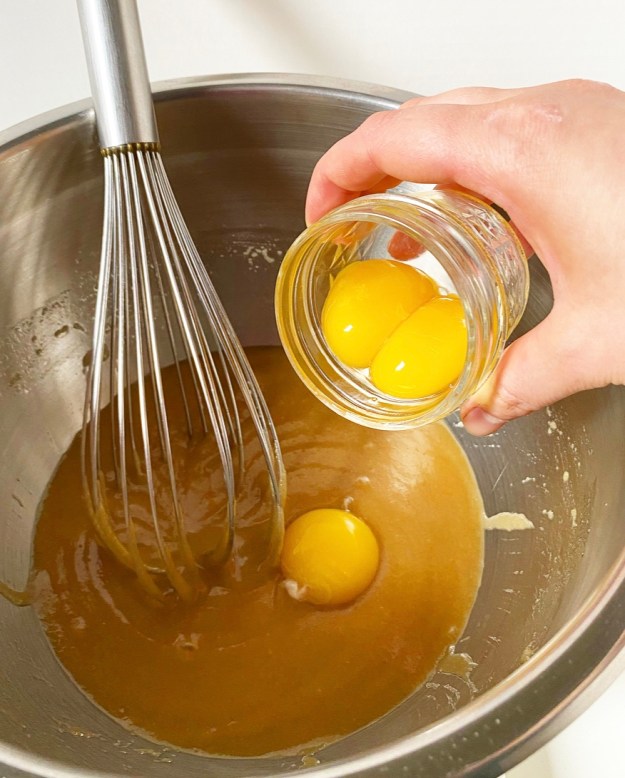
 “I Got Yolks” Chocolate Chip Cookies are, in a word, spectacular. They’re super rich and chewy from three large egg yolks, melted butter, and brown sugar, and incredibly tender thanks to the addition of confectioners sugar. I threw the confectioner’s sugar in the first batch on a whim just to see what would happen and, well, it won’t be the last time. The sweetness, structure and texture it provides are really something—like the
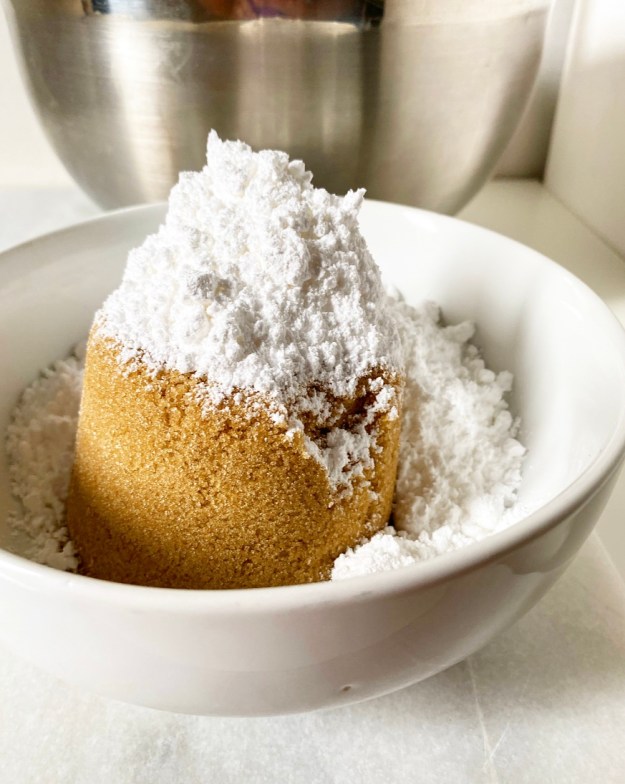
 The cookie dough comes together the same way most
 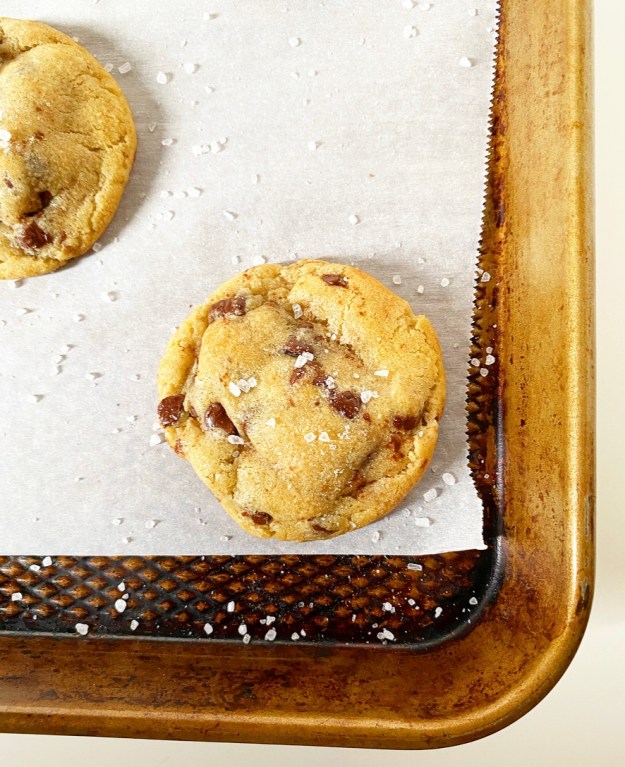 These are not only my current favorite way to use up egg yolks, but also my current favorite chocolate chip cookies. They are nice and thick, with crisp exteriors, soft centers, a rich caramel flavor and the perfect amount of chocolate chips. The confectioner’s sugar in the dough gives them an extra-smooth quality and has the added benefit of keeping them soft for days. That’s saying something—I’m a total diva about day-old cookies.
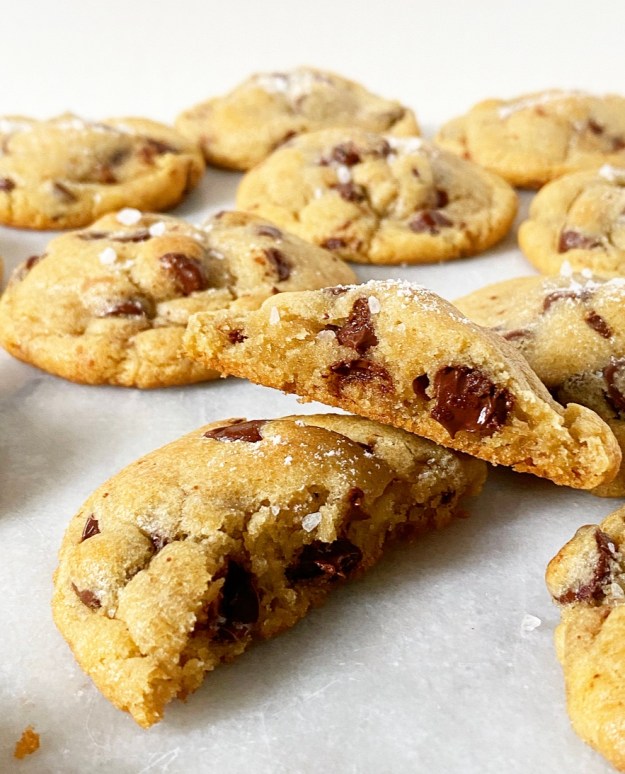 One more great thing about this recipe is that you can age the dough. I suppose you can age any cookie dough, actually, but I rarely have the fridge space. If you’ve never tried it, aging is as simple as keeping the dough in the fridge for up to a week before rolling and baking. By letting it sit for an extended period, you’re allowing the flavors to deepen in a really wonderful way. The exteriors get a light sheen after baking and the brown sugar flavor really sings. Try it. You’ll like it.
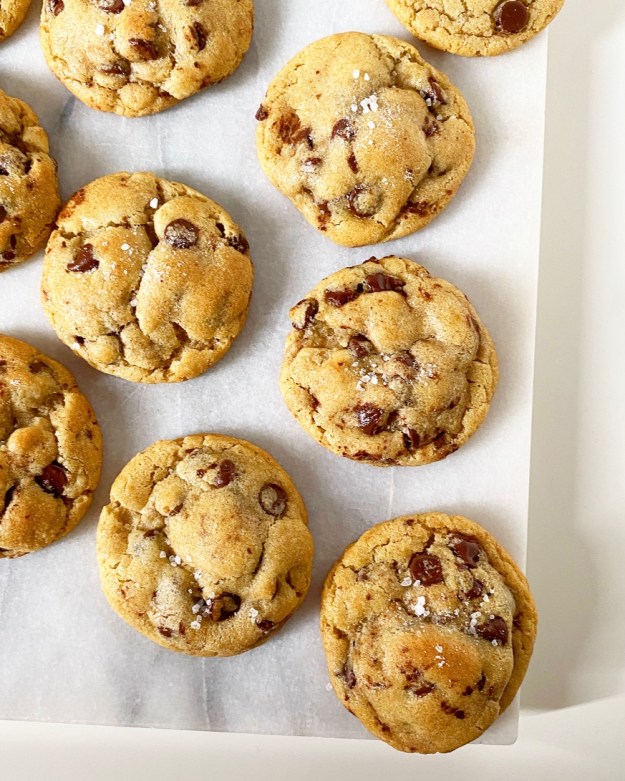

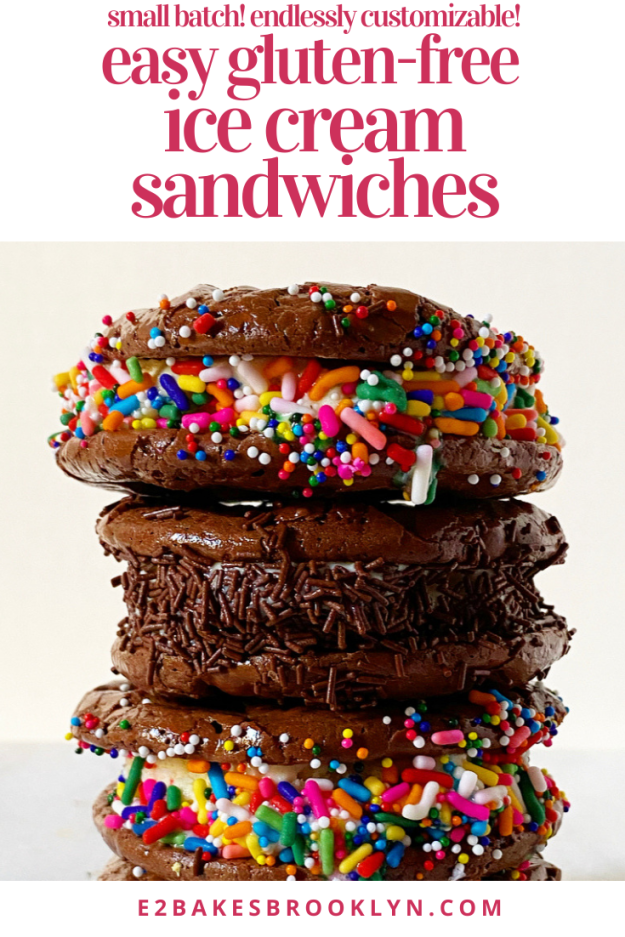
 When I posted
 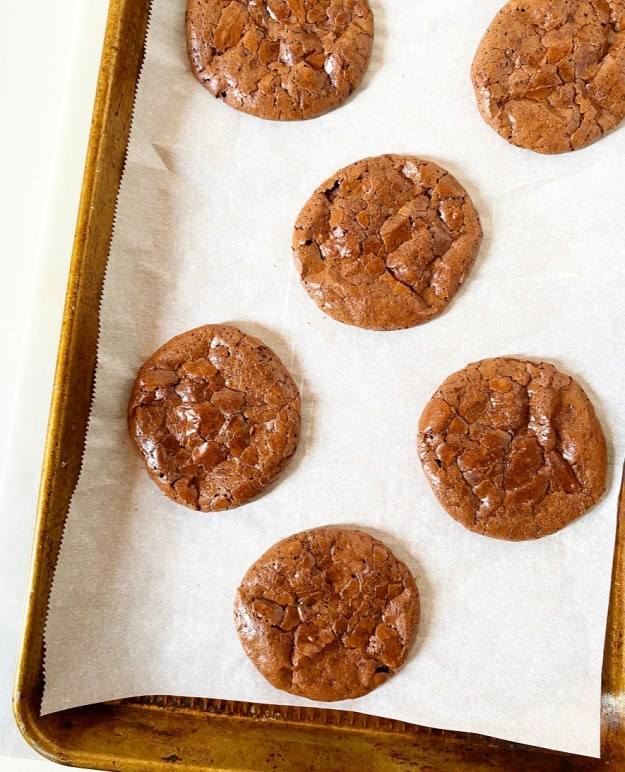 These cookies are on the sweeter side (confectioner’s sugar provides a lot of the structure), so I added a teaspoon of granulated espresso to the recipe to keep them from being cloying with ice cream. I also cut the size of the cookies in half for a dozen medium cookies instead of six large ones.
 Next up, you’ll need to freeze the cookies for about 30 minutes. This helps the ice cream to stay on the solid side and the cookies from getting too soft during assembly. This step is not strictly necessary, but it is good insurance against ice cream sandwich frustration.
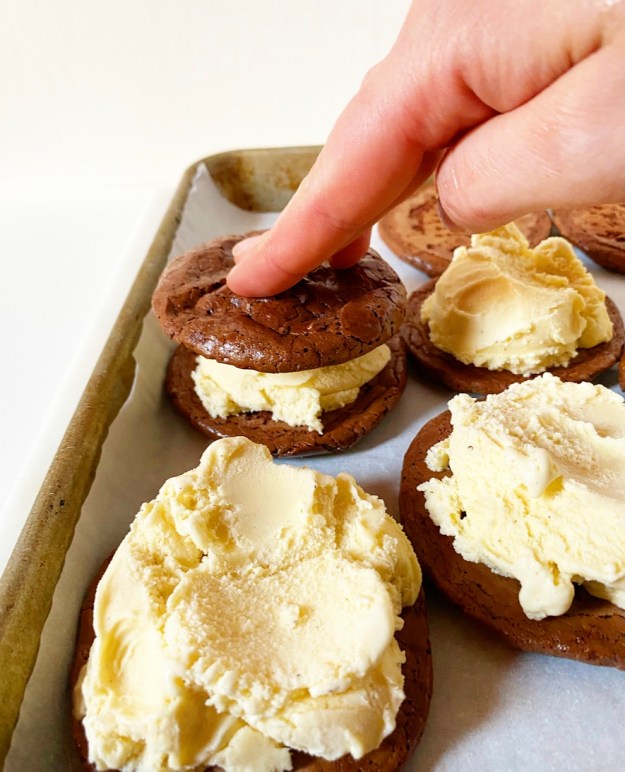 Regarding ice cream, use whatever flavor you want. I went with a mid-level nationwide brand’s vanilla here and it was fine—good, even—but I will go higher quality next time. Oh, and I’ll probably go with mint chocolate chip because it’s my favorite. The point is to use what you love and not settle for less. Cookies are an important part of ice cream sandwiches, but ice cream is the *most* important part.
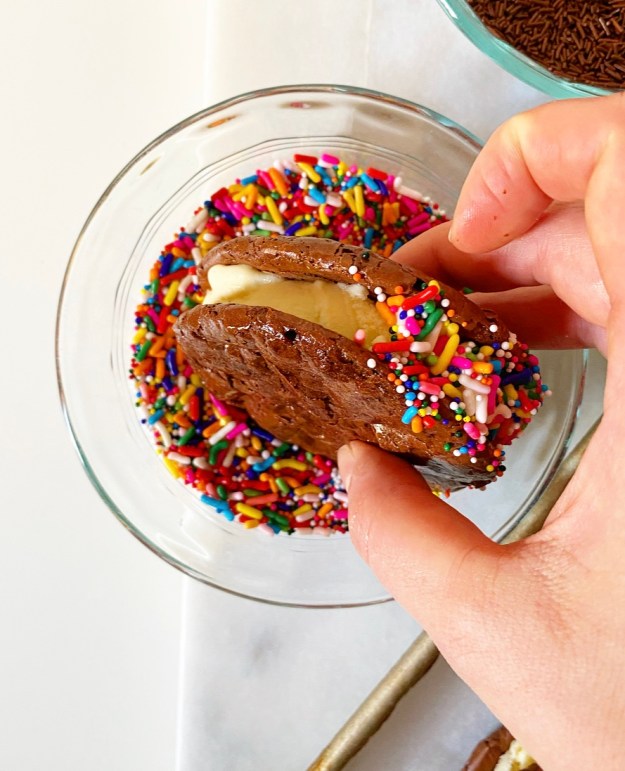
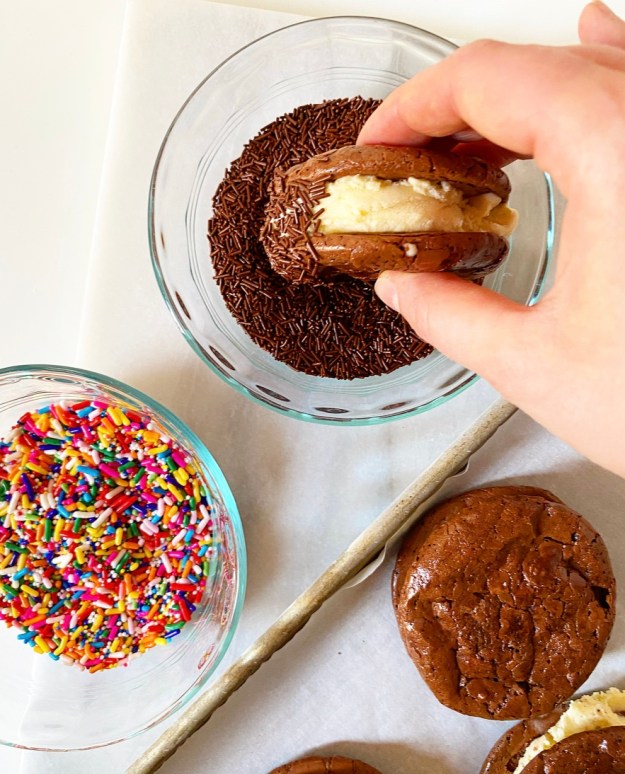 Freeze the sandwiches before rolling them in your sprinkles of choice or chopped nuts or mini chocolate chips or candy bar pieces or crushed Oreos. Again, use what you love and don’t settle for less. <—good life advice?
 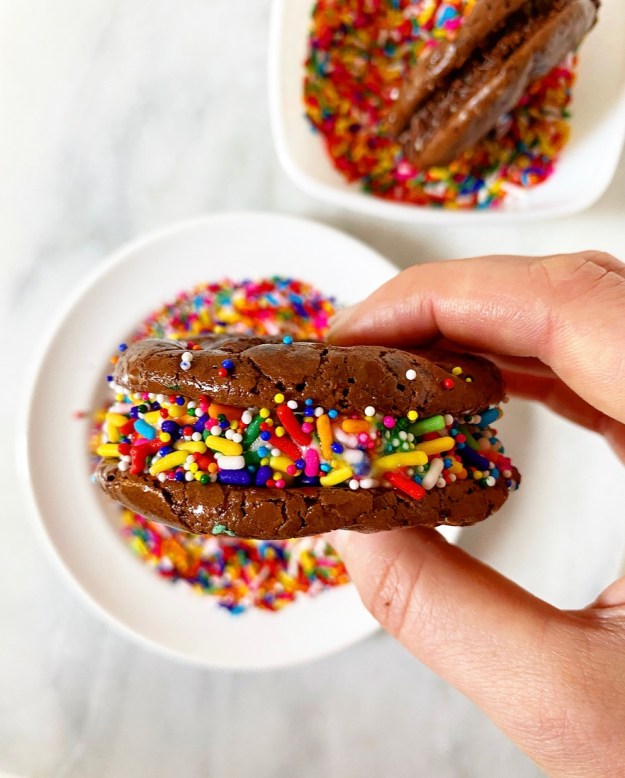 The last step is to freeze your ice cream sandwiches again for several hours or up to a day before digging in. Yes, you can eat them right after assembly, but the ice cream squidges out the sides and then you’re just eating two cookies with a translucent smear of ice cream and a weird smattering of sprinkles and then licking ice cream off a salad plate like a wild animal.
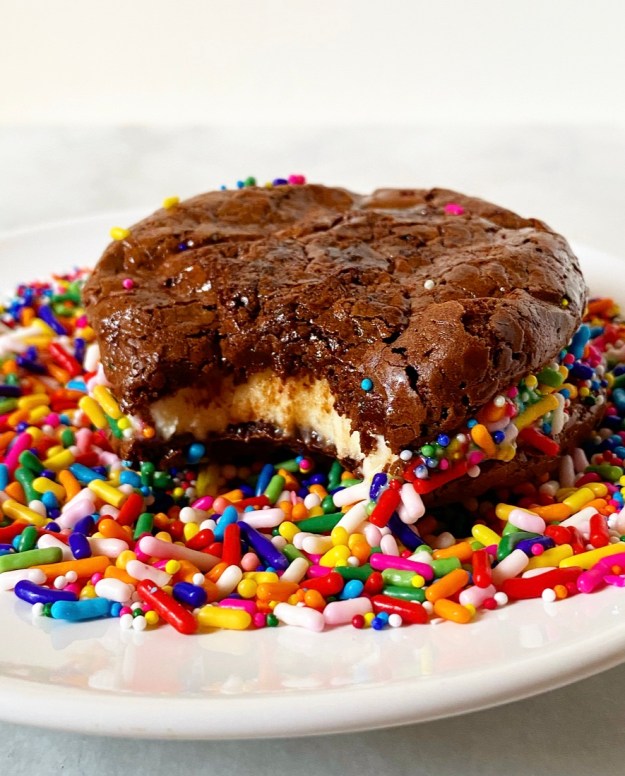 Anyway, freezing the completed ice cream sandwiches for a few hours allows the ice cream to adhere to the cookies so that the sandwiches become single entities. That’s something I really care about with my ice cream sandwiches. Considering how much I loathe the patriarchy, I sure do love to be able to eat things in a ladylike manner.
 I assure you, they’re worth the lengthy freezer time. The cookies never fully freeze, instead softening a tiny bit and getting extra chewy. And then there’s the ice cream and crunchy sprinkles. Like I said, perfect.