Tag Archives: easy recipes

Eggnog Pudding

It may be December 23rd, and I may be writing this post at the airport, but can we take a moment to acknowledge that this is my third blog post in the last five days?

Three blog posts in a week? Who am I?!

Eggnog Pudding​

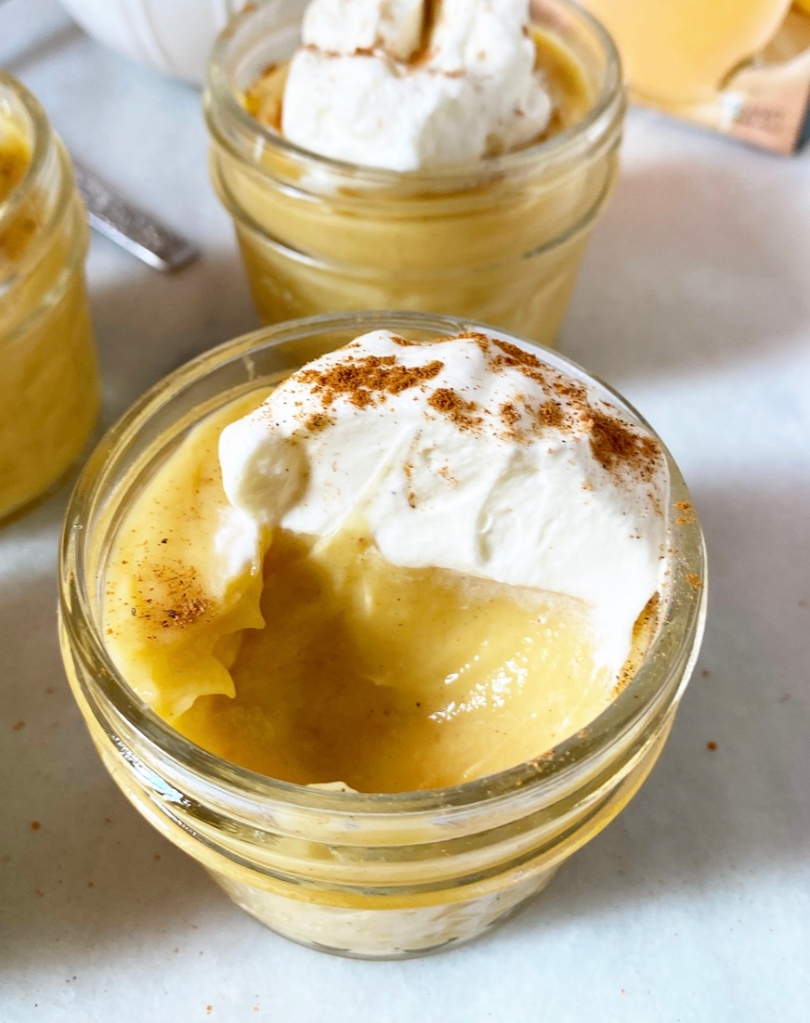
Someone who loves Eggnog Pudding, that’s who. You could not pay me to drink a glass of eggnog (liquid dairy skeeves me out), but thicken it to a spoonable consistency and add a little spice and I’m in.

Eggnog Pudding​

So in, in fact, that I made two batches of this Eggnog Pudding back to back. With only about 15 minutes of actual work, this holiday recipe is an absolute breeze.

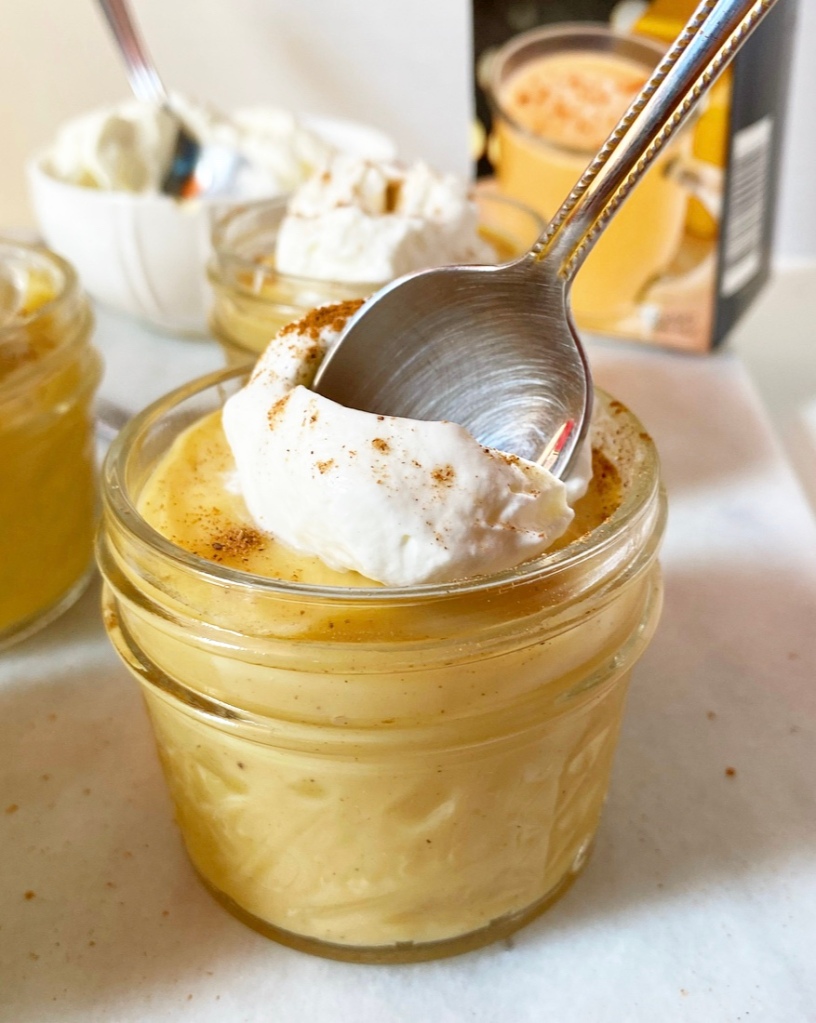
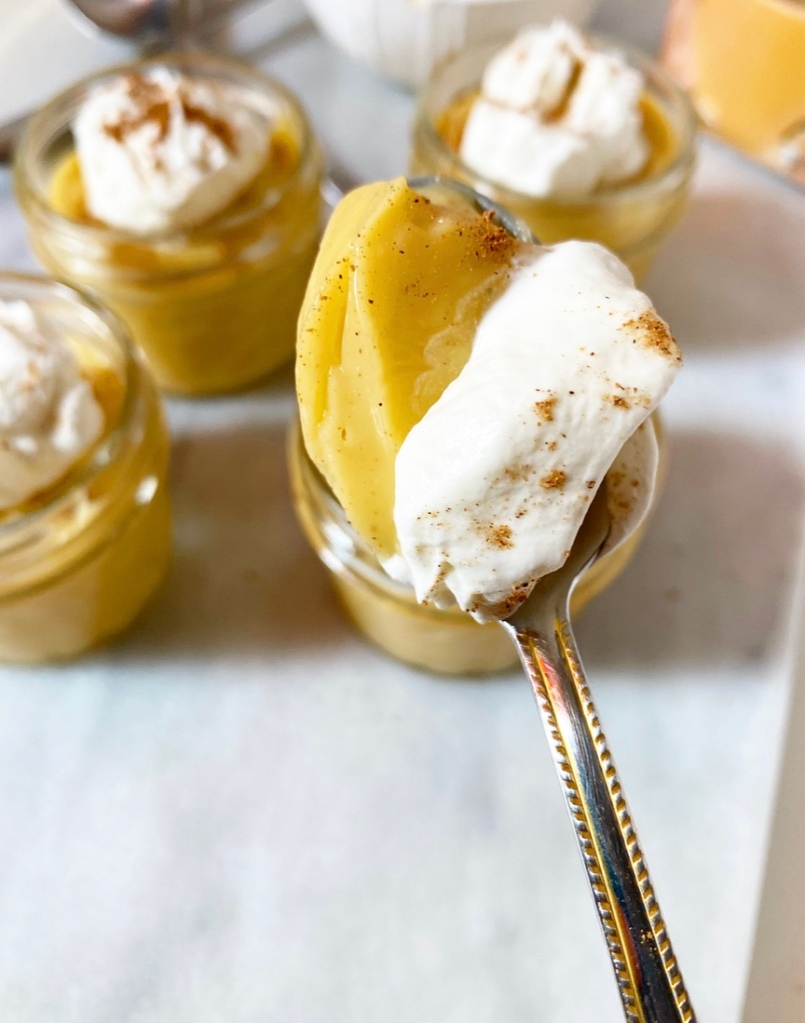
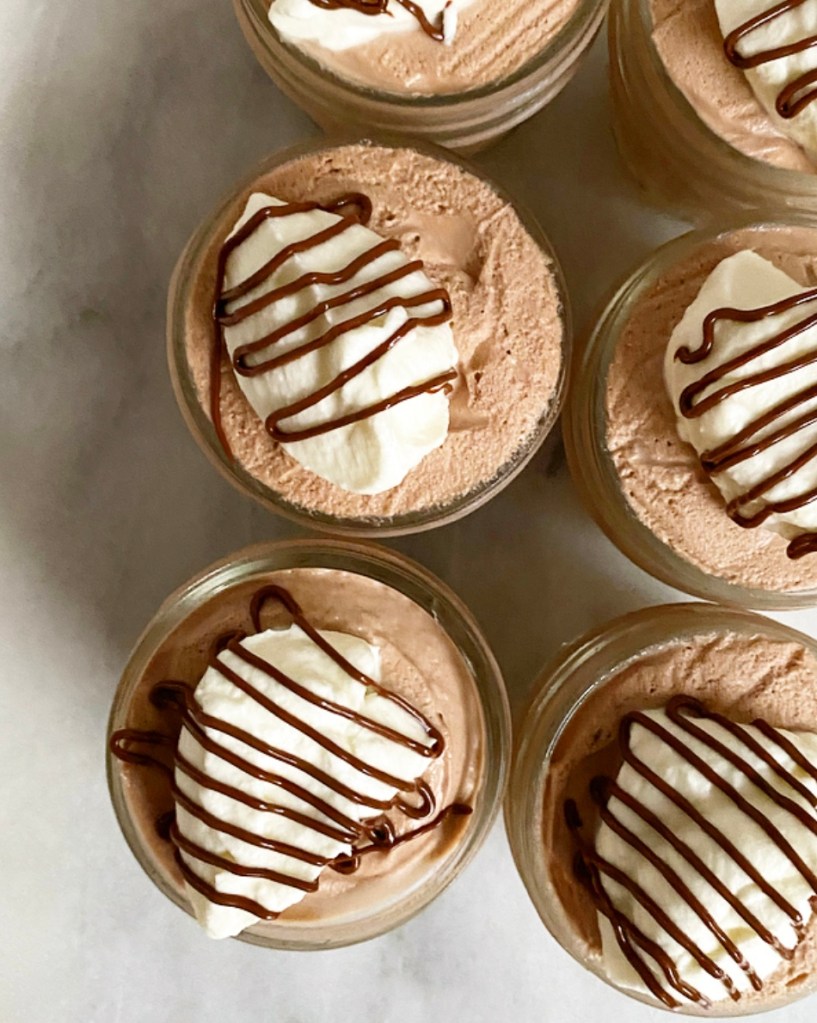
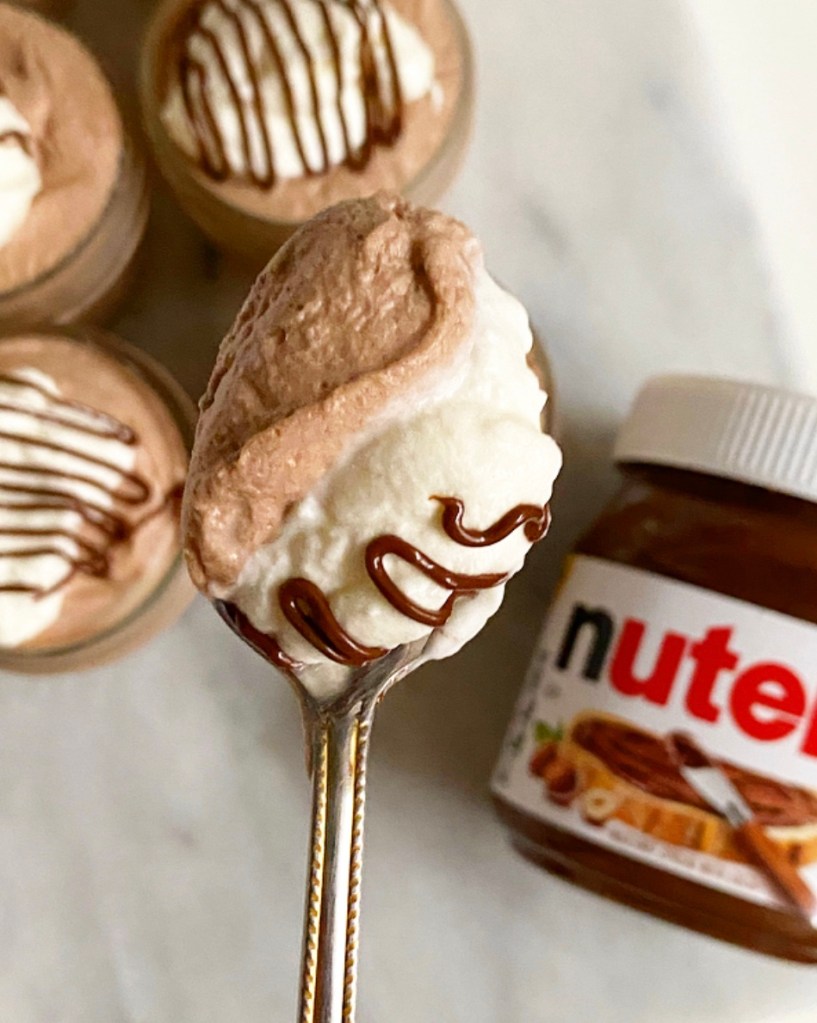
Once cool, Eggnog Pudding is pretty irresistible. Cold, creamy and just set—it has all the best parts of eggnog, but with a spoonable texture.

Oh yeah, and whipped cream. Always whipped cream.

Eggnog Pudding​

Happy holidays! Wishing you and yours a safe and happy end to 2023 and every good thing in 2024.

Eggnog Pudding
makes 4 servings

2 large egg yolks
1/3 cup granulated sugar
2 tablespoons cornstarch
1/8 teaspoon ground cinnamon
1/8 teaspoon ground nutmeg
1/4 teaspoon Kosher or sea salt
1 1/2 cups eggnog
1/4 cup milk of choice (I used whole)
1 1/2 teaspoons vanilla extract
1 tablespoon unsalted butter

For serving (optional):
whipped cream
sprinkle of cinnamon and/or nutmeg

Place a wire mesh sieve over a medium heatproof bowl. Set aside.

Whisk egg yolks together in a small heatproof bowl. Set near the stove.

In a medium heavy-bottomed pot, whisk together sugar, cinnamon, nutmeg, cornstarch, and salt. Whisking constantly, slowly whisk the eggnog into the dry ingredients. Whisk in milk. Place pot over medium heat. Continue to whisk until the mixture boils for 1 minute. Reduce the heat to low.

Remove 1/3 of the warm mixture from the pot. Whisking constantly, slowly pour mixture into the egg yolks until completely combined. Add egg yolk mixture to the pot and turn heat back up to medium. Continue to whisk until mixture boils for 30 seconds. Remove from heat. Whisk in vanilla and butter.

Pour pudding through the wire mesh sieve, using a silicone spatula or wooden spoon to coax it along. Discard anything caught in the sieve (egg bits).

Divide pudding into four small heatproof serving dishes (I used 4 ounce mason jars). Press plastic wrap to the surfaces. Refrigerate for a few hours, until cold.

When ready to serve pudding, peel off and discard plastic wrap. Lightly stir pudding, top with whipped cream, cinnamon and/or nutmeg (if desired) and serve.

Leftover pudding will keep covered in the fridge for 3-4 days.

Pumpkin Spice English Muffin Bread

Pumpkin Spice English Muffin Bread​

One great thing about excellent base recipes is that with a little finesse, you can take them in any direction you like. Blondies are one that I mess with often, as is my cream cheese sugar cookie dough, as are so many other things.

Pumpkin Spice English Muffin Bread​

Take my English Muffin Bread, for instance. It comes together in one bowl and two loaf pans, requires exactly one rise, and bakes up tall in half an hour. When sliced thick and toasted, it’s soft inside and crispy-craggy on the edges, just like a really excellent English muffin. And that’s fantastic—no notes. But sometimes the creative urge overtakes me and I just have to mess with perfection.

Today, we’re starting with that excellent formula and giving it a little autumnal twist. With a hefty scoop of pumpkin purée, pumpkin pie spice, and just enough brown sugar for flavor (not overwhelming sweetness), this Pumpkin Spice English Muffin Bread makes a cozy, delicious breakfast.

Pumpkin Spice English Muffin Bread​

It’s got enough pumpkin flavor to fulfill a seasonal craving without overwhelming whatever is spread over and nestled into all those craggy bits. I kept my toppings classic here with just a little butter, but honestly, Pumpkin Spice English Muffin Bread makes the best Cinnamon Toast. Heck, you could even sub some of the cinnamon sugar for pumpkin pie spice sugar and really drive that autumnal vibe home.

No matter what you do to it though, this bread is fantastic. Like I said: no notes.

Pumpkin Spice English Muffin Bread​
Pumpkin Spice English Muffin Bread
makes 2 loaves

For the pans:
1 tablespoon unsalted butter
3-4 tablespoons cornmeal

Bread Dough:
5 1/2 cups all-purpose flour (or bread flour)
4 tablespoons granulated sugar or packed light brown sugar
4 teaspoons pumpkin pie spice
1/2 teaspoon baking soda
1 1/2 teaspoons Kosher salt
4 1/2 teaspoons (2 packages) instant yeast
2 tablespoons unsalted butter, melted
1/2 cup pure pumpkin purée
1/2 cup whole milk (warm to the touch, not hot)
1 2/3 cups warm water

For proofing:
plastic wrap
oil, butter or cooking spray

For serving:
butter
jam
honey

Grease 2 9x5-inch loaf pans with butter. Add cornmeal and rotate pans so that the entire insides are coated in a thin layer. Tap out and discard excess cornmeal.

In a medium-large mixing bowl, whisk together flour, sugar, pumpkin pie spice, baking soda, salt and instant yeast.

In a large liquid measuring cup (or other vessel) whisk together melted butter, pumpkin purée, warm milk, and warm water. It should be warm to the touch (90-110F) but not hot.

Whisk/stir wet ingredients into dry ingredients in two installments. Stir until a sticky, shaggy dough forms and flour is coated, then stir an additional 30 seconds to make sure things are saturated.

Grease your hands, then divide dough into prepared pans. Grease 2 pieces of plastic wrap. Lay them loosely over the top of each loaf pan.

Place pans in a warm, draft-free environment for 45-60 minutes, or until the dough has risen just above the tops of the pans. While dough is rising, preheat oven to 400F.

When dough is ready, gently peel off and discard plastic wrap. Dough may seem a bit wet and jiggly. Gently place pans in the oven and bake for 25-30 minutes, or until golden all over. The interior temperature should be at least 190F.

Immediately turn bread out onto a rack. Let cool completely so crumb structure can set. Do not slice into bread until it is completely cool.

Slice and toast before serving. Leftovers will keep well-wrapped in the refrigerator for up to a week.

Blueberry Jam

Blueberry Jam

Every once in a while I mention that I spent a good amount of 2010 making jam, but I’ve never once put a recipe for it on here. Thing is, I don’t even like jam that much. But I do like making it, and I’m always surprised by how delicious it is, especially from scratch.

Blueberry Jam

I had a ton of blueberries on my hands and Maine on my mind a few weeks ago, and figured we could all use a little reminder that homemade jam is easier and more delicious than we all remember. There’s a reason people have been making it for centuries.

To make the best Blueberry Jam you’ll eat all year, all you really need are fresh ripe blueberries, sugar, salt, lemon juice, a pot, a warm jar, and about 30 minutes. Stir all the ingredients together in the pot and set it over medium heat. Before you know it, the mix will go from sugared fruit to boiling lava to gelling on a frozen plate (“the plate test”).

Blueberry Jam

Pour it into the warm glass jar (hot things need hot containers), twist the lid finger-tight and let it cool down before storing it in the refrigerator. If you’d like to make several jars or store at room temperature, I can point you to canning resources. That said, I enjoy jam-making far more than water-bath canning, so I like to make my preserves in small batches.

Blueberry Jam

Once your jam cools and settles, slather your dark purple blueberry jam on anything your late summer heart desires—I went for biscuits. Truly though, it will blow your mind on just about anything you put it on. Even if you don’t like jam that much.

Blueberry Jam
makes about 2 cups

3 cups fresh blueberries
1 cup granulated sugar
pinch of Kosher or sea salt
1 tablespoon fresh lemon juice

Place a small plate in the freezer.

Stir/toss all ingredients together in a medium heavy-bottomed pot. Heat over medium heat, stirring frequently, until it comes to a boil. Skim and discard any foam that accumulates on top.

The jam is near-ready when the fruit has softened and burst and the liquid appears to be thickening. To test for doneness, remove the frozen plate from the freezer and dribble a drop jam on it. If, after a few seconds, it wrinkles when nudged with your finger, it’s done. If not, return the plate to the freezer and perform the test after another minute or two of cooking. You can also use a candy thermometer; it’s done when it registers at 220F. When it’s done, remove the jam from the heat.

Use a jar funnel or a spoon to transfer the jam to a warm glass mason jar (I rinse a jar in HOT water as soon as I take the jam off the heat, then dry well). Do not, under any circumstances, put hot jam into a room temperature or cold jar—it can and will shatter. This is not the same as canning and is not meant for long term storage at room temperature.

Place a warm lid on top of the jar, then use the ring to tighten to finger tightness. Let jam cool to room temperature on the counter, then transfer the jar to the refrigerator.

Use jam as desired and store it in the refrigerator.

Three Ingredient Nutella Mousse

Hello from New York, where it is 5000% humidity. Thank whatever benevolent power is out there for air conditioning. I’m trying to keep my oven use to a minimum while we ride out another brutal summer (though I do have some baking on the docket), so I am leaning into no-bake recipes like this easy and divine Three Ingredient Nutella Mousse.

It’s airy and light, just sweet enough, and imbued with the perfect amount of chocolate hazelnut flavor. Truly, it’s little more than a Nutella whipped cream, but when something’s this good, the specificity of the name isn’t terribly important.

Three Ingredient Nutella Mousse​

This easy mousse comes together in under 15 minutes and after a two hour chill in the fridge (or up to three days, if you’re working ahead), it’s ready to be served. I like mine with a dollop of whipped cream and a drizzle of Nutella, but shaved chocolate, a few berries, or a chopped up chocolate hazelnut candy bar would be just as good.

Serve your Three Ingredient Nutella Mousse for dessert at a cookout or summer dinner party, or do as I do and eat it directly in front of your beloved air conditioning unit while running it full blast. It’s a delightful way to ride out the summer, if you ask me.

Three Ingredient Nutella Mousse​
Three Ingredient Nutella Mousse
makes 6 servings

1/3 cup Nutella
1 1/2 cups heavy cream, divided
pinch of Kosher or sea salt

Place Nutella in a medium-large mixing bowl.

Put 1/4 cup heavy cream in a microwave-safe bowl or liquid measuring cup. Please make sure the bowl has some extra room, as cream expands when it’s hot. Microwave cream 50-60 seconds, until bubbling. This step may also be done in a pot on the stove.

Immediately pour hot cream over the Nutella. Let sit 1 minute, then stir until completely combined and smooth. Let cool to room temperature (I like to put it in the refrigerator for a few minutes).

Once your Nutella combination is cool, pour the remaining 1 1/4 cups heavy cream to a separate medium mixing bowl. Add a pinch of salt. Use an electric mixer to whip cream until stiff peaks form.

Using a silicone spatula, stir 1/3 of the whipped cream into the Nutella combination until combined. Then add another 1/3 of the whipped cream to the Nutella combination and gently fold it in until combined. Fold in the remaining 1/3 of the whipped cream just until combined.

Divide the mixture among six small ramekins (these are 4 ounces). Cover with plastic wrap and chill for 2 hours or up to 3 days.

When ready to serve, remove and discard plastic wrap. Top with additional whipped cream and Nutella before serving.

Cinnamon Toast

As a child, Cinnamon Toast was my slumber party breakfast of choice. My mom would make huge pans of it for all my friends and me, and it felt extremely special and luxurious. I mean, what’s not to love about buttered bread with a crackling layer of melted cinnamon-sugar on top?!

Cinnamon Toast

I still think Cinnamon Toast is pretty special and luxurious—it’s still mostly reserved for weekend breakfasts, but I will occasionally have it for dinner on days where nothing goes right. Being able to eat whatever you want for dinner is one of the great advantages of being a single childless adult. But I digress…

Cinnamon Toast

I always assumed Cinnamon Toast was one of those things that everyone knew how to make, like scrambled eggs or grilled cheese. But it turns out that not everyone has/had someone to teach them how to make the simple things, so please allow me.

Cinnamon Toast

Cinnamon Toast is wildly easy to make. Start by laying four slices of bread on a dry baking sheet. You can use whatever bread you have on hand, but I prefer good quality white sandwich bread or the sliced brioche you see here.

Next up, mix some vanilla extract into melted butter and whisk together a tiny batch of cinnamon-sugar. To assemble, brush each slice of bread with what seems like entirely too much vanilla butter and then sprinkle on what seems like entirely too much cinnamon-sugar. Don’t overthink this—Cinnamon Toast is a special treat, not health food.

Once all the slices are assembled, bake them in a 350F oven until the cinnamon-sugar has melted and the underside of the bread is turning golden, then broil it for a minute or so, until it’s the sugar is bubbling and caramelized, but not burnt. I like the edges of the bread to be a little charred, but that’s strictly optional.

Cinnamon Toast

After a couple minutes of cooling, the Cinnamon Toast will be ready to eat. Well-toasted, soft and buttery in the middle, and topped with a shattering layer of melted cinnamon-sugar, this breakfast treat is a classic for a reason. And the fact that it can make a batch as big or small as you need without any huge adjustment in time commitment makes it all the better. I regularly quarter this recipe for myself (read: 1 slice bread, 1 tablespoon butter, 1 tablespoon sugar, 1/4 teaspoon cinnamon), but if I ever need to feed a crowd at the crack of dawn, I know I can multiply it no problem. How luxurious.

Cinnamon Toast
Cinnamon Toast
makes 4 slices

4 slices brioche, challah, white sandwich bread, or similar
1/4 cup granulated sugar
1 teaspoon ground cinnamon
1/4 teaspoon Kosher or sea salt
1/4 cup (1/2 stick) unsalted butter, melted
1/2 teaspoon pure vanilla extract (optional, but recommended)

Preheat oven to 350F. Arrange bread slices on a dry rimmed sheet pan.

Combine sugar, cinnamon and salt in a small bowl; use a fork to whisk them together.

In a separate small bowl, stir together melted butter and vanilla (if using).

Use a pastry brush to spread vanilla-butter evenly over each of the bread slices. Make sure to get it edge-to-edge. Use all the butter, even if it seems like it’s too much.

Use a spoon to sprinkle a thick layer of cinnamon-sugar over each slice of bread. Some will soak in and it may look uneven—this is normal.

Bake bread for 12-14 minutes, until the cinnamon-sugar is melted and the bottom of the bread is beginning to turn golden.

Turn on the broiler. Broil slices 30-90 seconds, until deep brown and bubbly. Watch these very closely, as they can go from brown to burnt in seconds.

Let toast cool on the pan for a 2-3 minutes, until the topping has hardened and you can handle the warm toast. Serve immediately.