Tag Archives: funfetti

Funfetti Cheesecake Platinum Blondies

 How have I made it this far without posting any kind of cheesecake recipe? I love cheesecake. Smooth, rich, creamy, decadent–it’s everything I love in a dessert. And it gets brownie points for being the Golden Girls’ treat of choice. If it’s good enough for Blanche, Dorothy, Rose, and Sophia, it’s good enough for me.

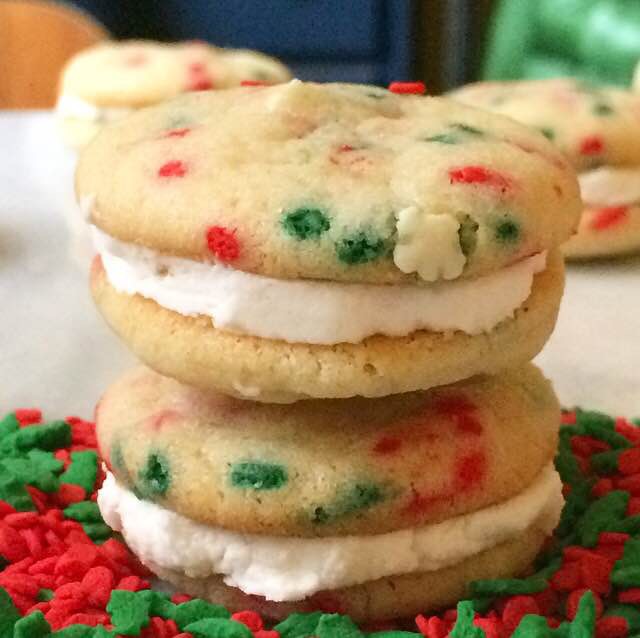
But for all the things I love about cheesecake, it’s speed of preparation is not one of them. If you’re making a cheesecake today, you’re not going to get to enjoy it until tomorrow. Many recipes require a 24 hour chill after baking and cooling at room temperature. Who really has time for that when it’s not for a special occasion? Definitely not me. But I also refuse to live without cheesecake. My solution? Swirl it into some blondie batter, bake it up, chill, and commence eating in hours, not days. 

I also refuse to live without sprinkles, so today I’m bringing you Funfetti Cheesecake Platinum Blondies. The blondie base is similar to the one I used here, and it can take almost anything I throw at it. Most blondie recipes contain brown sugar, but I use all granulated here–the resulting lighter color is what makes these “platinum.” If you’d like to stick to traditional blondies, you may use all light brown sugar here, but I think Funfetti desserts are best with all granulated. It makes the vanilla flavor shine, and the lighter color means the rainbow sprinkles really pop!

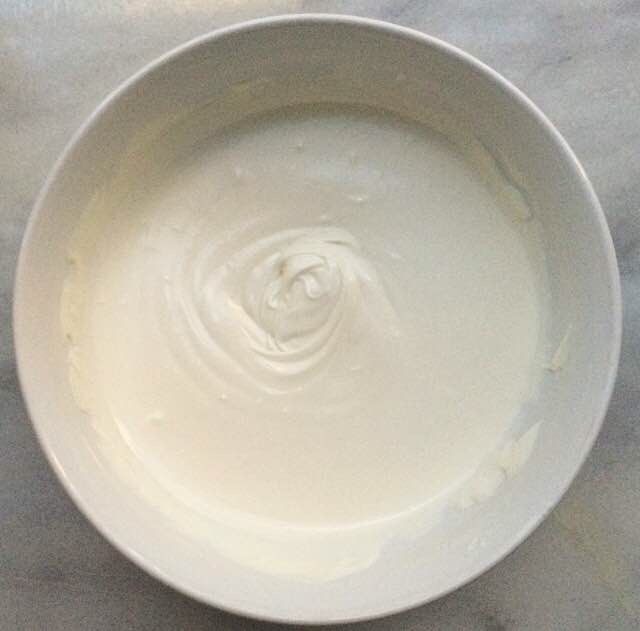
Let’s get to the most important part: the cheesecake. It’s so good here. The creamy, tangy cheesecake is the perfect counter to the sweet, chewy, sugar cookie-like blondie base. The mixture is super simple to make, too. Beat a brick of full-fat cream cheese with an egg yolk and a teaspoon of vanilla. When it’s fluffy, add in two tablespoons of sugar. If you taste this by itself, it won’t seem sweet enough, but trust me–the tanginess will be divine when baked into the sweet blondie batter. 

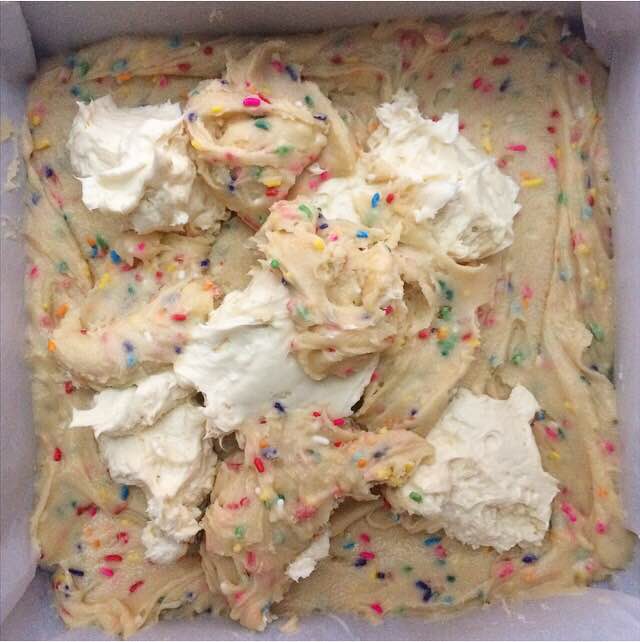
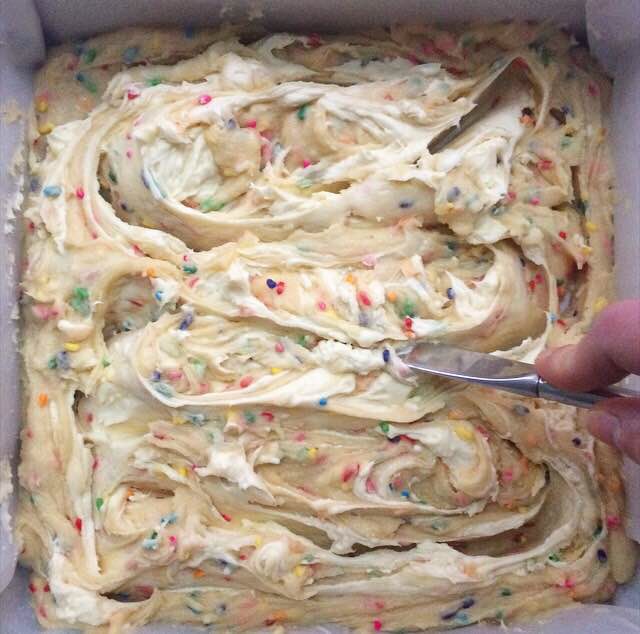
 Once you’ve made the batter and the cheesecake mixture, it’s time to assemble. Set aside 2/3 cup of the blondie batter, and spread the rest into the bottom of a 9×9″ pan. Drop the cheesecake mixture and reserved batter by the spoonful over the top of the batter in the pan. Use a knife to swirl it all together. I swirled mine a lot (some might say too much). If you want more pronounced swirls, just go back and forth with the knife a few times. Tap the pan on the counter to make sure everything is evenly distributed before baking at 350F for 25-30 minutes. I tented mine with foil after ten minutes to keep everything from browning too quickly. 


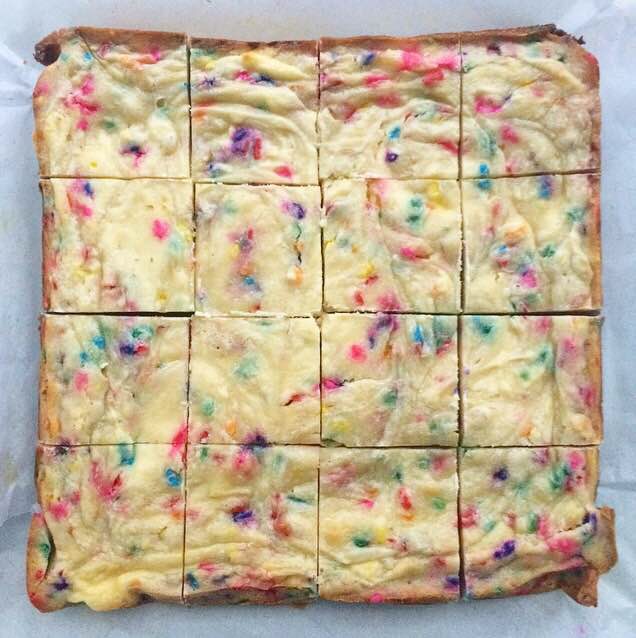
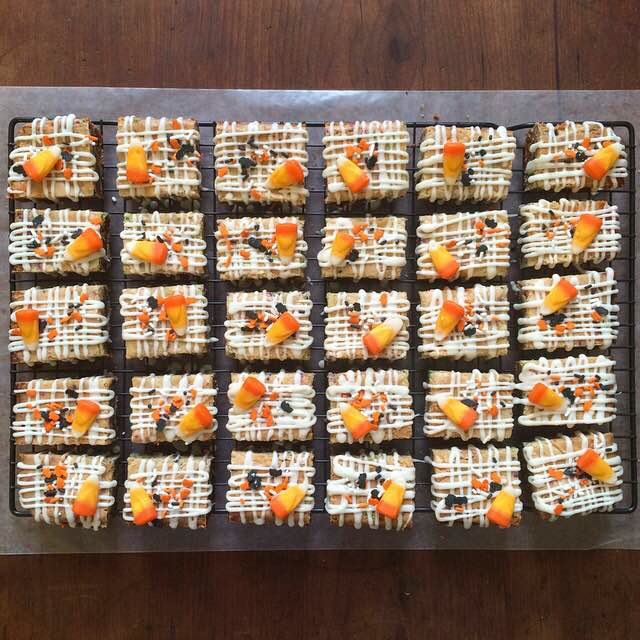
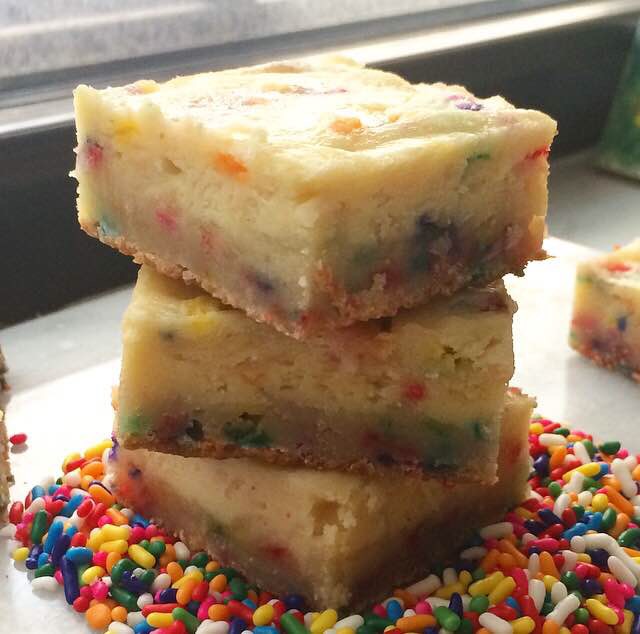
Once the blondies just barely (and I do mean barely) jiggle in the center when the pan is jostled, they’re done. Let them cool on a rack for an hour before chilling for three hours. Yes, three hours seems like eternity, but it’s nothing compared to the 24 hours you’d wait for a traditional cheesecake! Once everything is good and cold, slice it into bars and serve. 

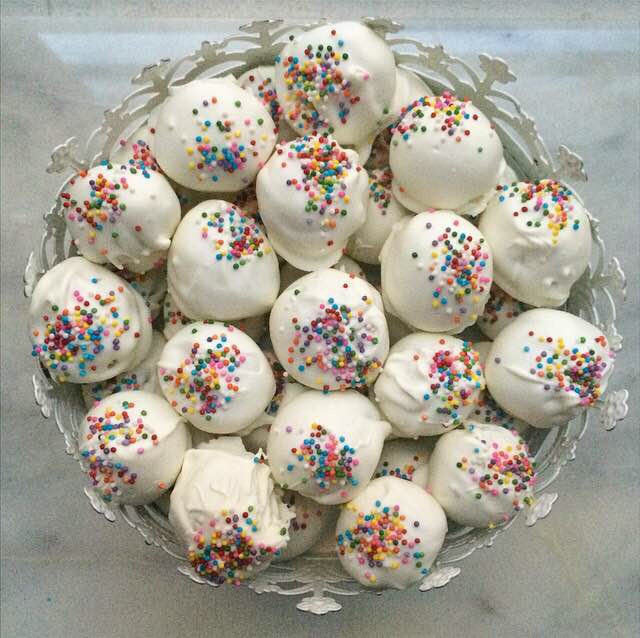
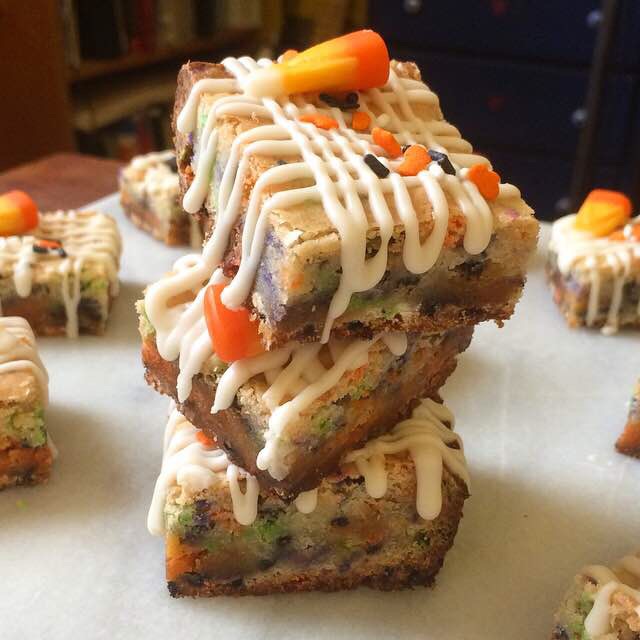
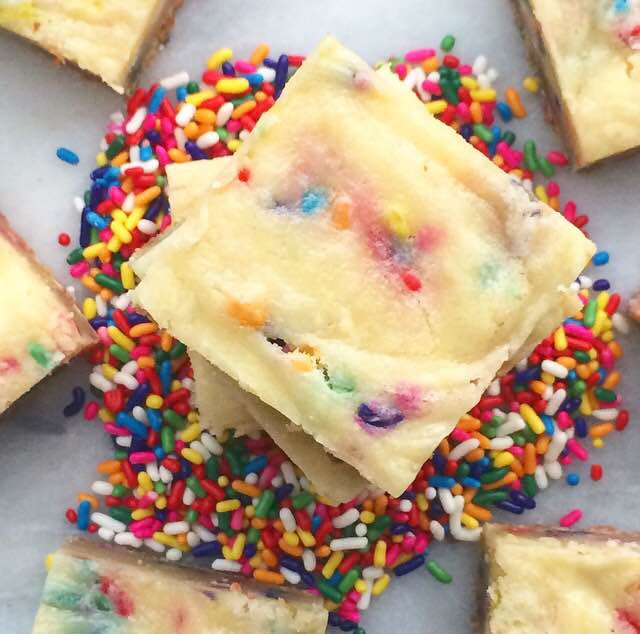
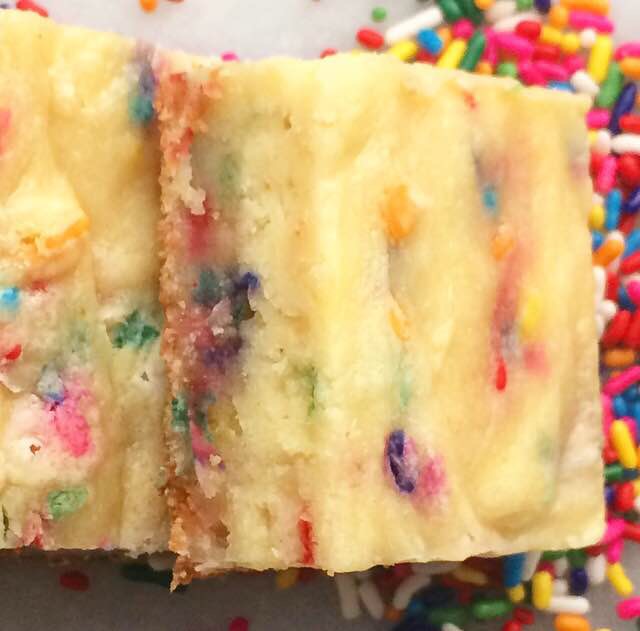
The Funfetti blondie base and cheesecake are a match made in dessert heaven! These bars are sweet, chewy, dense, creamy, tangy, and full of vanilla flavor. Oh, and look how colorful they are! I mean, who can resist a dessert studded with sprinkles and filled with cheesecake? Not many people I know, that’s for sure. 

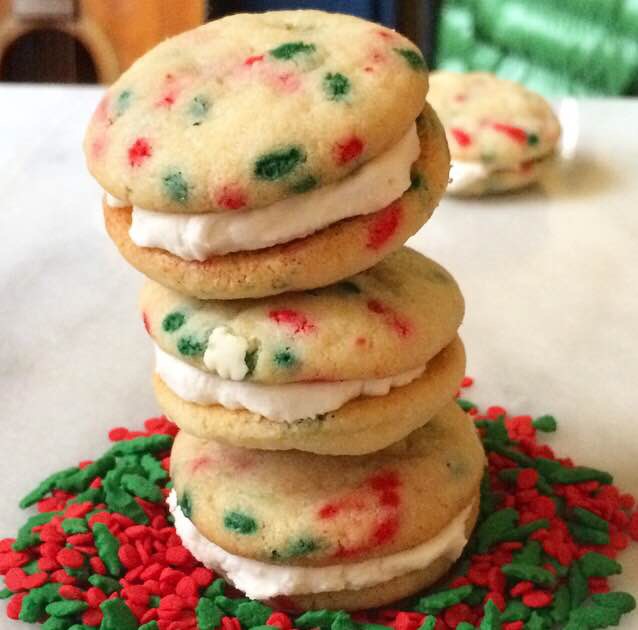
Do you love sprinkles as much as I do? Check out these Funfetti Sandwich Cookies and Funfetti Cookie Dough Truffles!

Funfetti Cheesecake Platinum Blondies
makes one 9×9″ pan,* about 12-16 bars

Cheesecake:
8 ounces brick-style full-fat cream cheese, softened to room temperature
2 tablespoons granulated sugar
1 large egg yolk, room temperature
1 teaspoon pure vanilla extract

Blondies:
3/4 cup (1 1/2 sticks) unsalted butter, melted and cooled slightly
1 1/2 cups granulated sugar
2 large eggs, room temperature
1 tablespoon pure vanilla extract
1/8 teaspoon imitation butter extract (optional)
1 1/2 cups all purpose flour
1/2 teaspoon Kosher or sea salt
1/2 cup rainbow sprinkles (jimmies)*

Preheat oven to 350F. Grease a 9-inch square pan and line with parchment, leaving overhang for bar-removal. Set aside.

Make the cheesecake. In a medium-large mixing bowl, use an electric mixer to beat cream cheese until light and fluffy, about two minutes. Add sugar, and beat to combine. Mix in egg yolk and vanilla. Set aside.

Make the blondie base. In a large mixing bowl, whisk together melted butter and sugar. Mix in eggs, vanilla, and imitation butter extract. Whisk in flour and salt. Use a silicone spatula or wooden spoon to fold in jimmies. Set aside 2/3 cup batter.

Spread the remaining blondie batter in prepared pan. Drop in cheesecake mixture and leftover batter by the spoonful. Use a knife to swirl it all together. Bake 25-30 minutes, tenting with foil if anything starts browning too quickly. Blondies are done when the middle jiggles just barely when the pan is jostled. Let pan cool on a rack at room temperature for one hour. Refrigerate pan for three hours, until cold. Slice into squares and serve.

Funfetti Cheesecake Platinum Blondies will keep covered in the refrigerator for up to five days.

Notes:

1. An 8×8″ square pan may be used here, but it may affect the bake time.
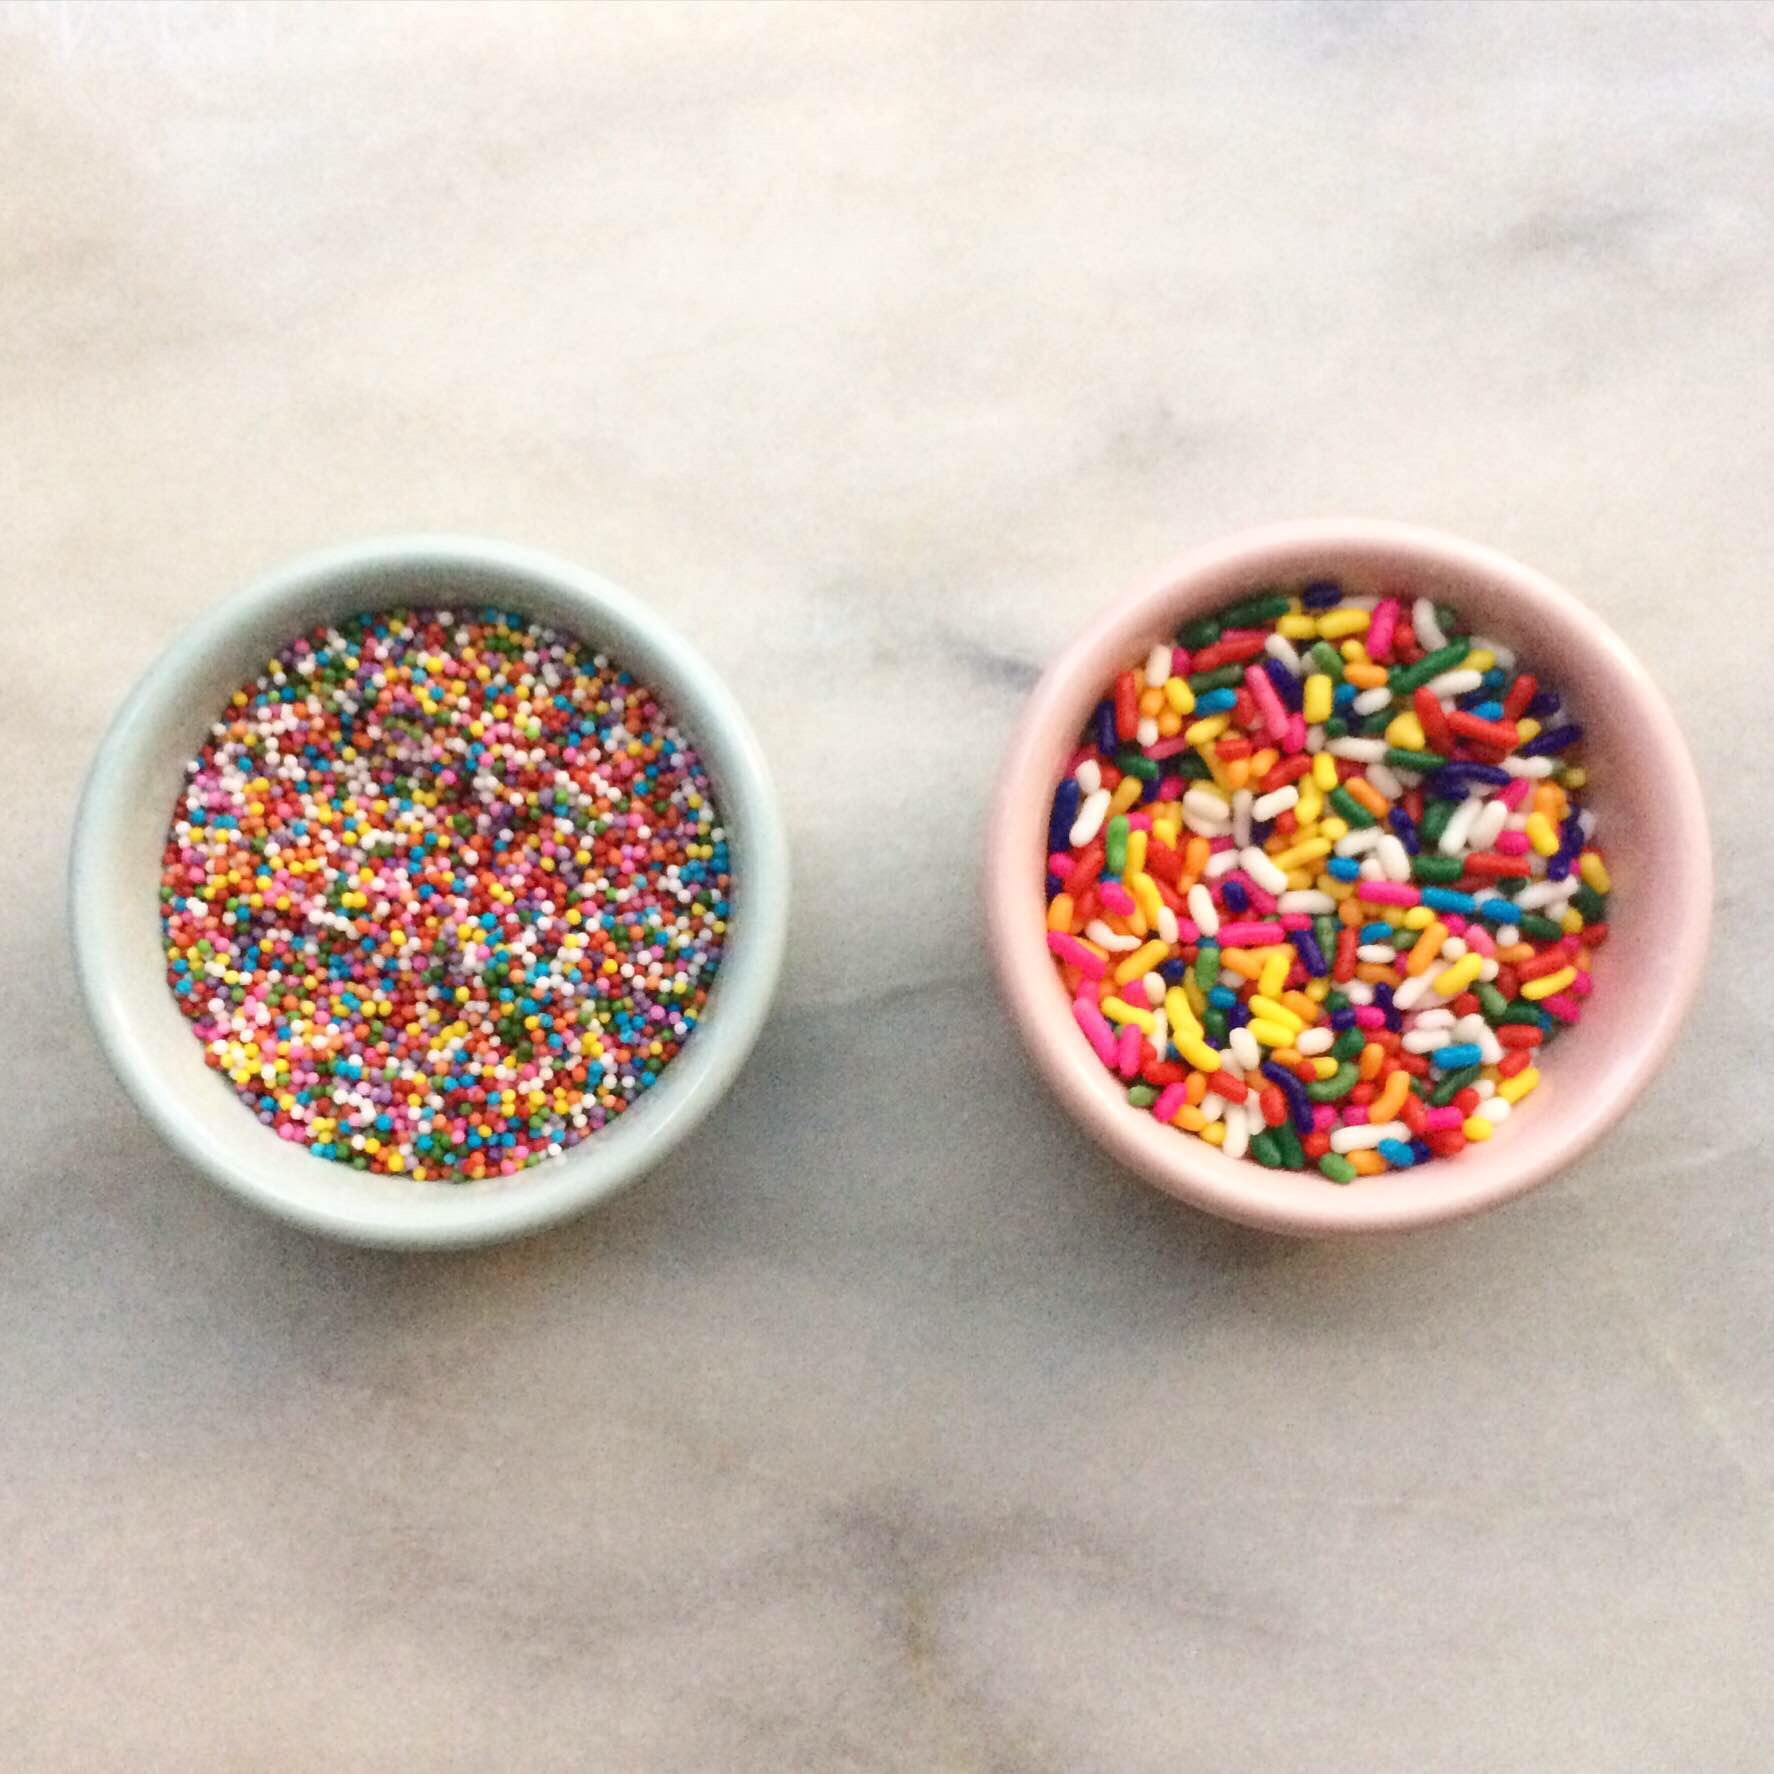
2. Jimmies are the cylindrical sprinkles, and they are ideal for this recipe. Do not use non-pareils (the little ball-shaped sprinkles)–they will bleed their color and give you an unappetizing purplish batter. Have more questions about sprinkles? I go into more detail here.

Funfetti Cookie Dough Truffles

 The only thing better than freshly baked cookies is the dough itself, am I right?!

I’m still making my way through the No-Churn Mint Chocolate Chip Cookie Dough Ice Cream I made last week, and while I love the ice cream itself, it’s the edible mint chocolate chip cookie dough that’s the real star of the show. It’s got me totally obsessed with edible cookie dough! It’s so simple and quick, and it can be made in literally any flavor. I’ve thought of so many variations already! Chocolate chip, peanut butter, ginger spice–the possibilities are endless! It can be a dessert dip, cake filling (<–doing that ASAP), or thrown into ice cream. But my favorite way to eat it at the moment? In truffle form! And Funfetti, because sprinkles. 

These Funfetti Cookie Dough Truffles are a breeze to make. There’s no baking, and the candy coating is melted in the microwave, so you don’t even need to turn on a burner! If you manage your time wisely, these little truffles can be made start-to-finish in less than two hours.

But for all the ease of preparation, there are a few guidelines that make these little rainbow-colored confections both adorable and delicious.

First off, the flavor. How do we get that classic Funfetti cake flavor without using a boxed mix? With a combination of extracts! Here, we use a hefty dose of pure vanilla extract. Some Funfetti recipes use clear imitation vanilla, but to me it just tastes like chemicals. Really sweet chemicals. No, thanks. So use the real stuff. The other extract we use here is imitation butter extract. I know, I know. I just said how clear imitation vanilla tastes artificial to me. But hear me out. Imitation butter extract is used here in a very small dose–1/8 teaspoon. It serves as a background flavor to the vanilla, and gives the finished truffles that classic cake mix flavor. If you don’t have or don’t want to use imitation butter extract, you may leave it out without any negative effect on the flavor. 

Now, for the main event: sprinkles! On the left, you see nonpareils, the little ball-shaped ones. On the right, you see jimmies, the chewier cylindrical variety. Both are super fun, but they are not interchangeable in this recipe (or most Funfetti recipes). Once the eggless cookie dough base is prepared, mix in 1/3 cup of jimmies. These leave the dough speckled with cute pops of color! 

Do not use nonpareils in the dough. If you do, they will bleed their color into the dough, leaving everything a murky purple color. Even if you are really careful folding them in, this will happen. There’s no way around it. So, only use jimmies in the edible cookie dough. Use the nonpareils (or more jimmies) to decorate the coated truffles. 

Love those little clusters of colorπŸ’—πŸ’—πŸ’—

As for the coating, these truffles require candy melts, which can be found at your local kitchen supply or craft store. They look a whole lot like big white chocolate chips, but the two are not interchangeable. If you use white chocolate chips to coat these, you will probably have issues. White chocolate (particularly in chip form) does not melt easily. In a double-boiler it can scorch in a second, leaving behind unattractive brown bits. I’ve done it many times–it’s very disheartening to waste perfectly good ingredients. If you put it in the microwave, it may not melt evenly, and look a little like cottage cheese. I tried it while testing this recipe because I didn’t want to make a trip to the kitchen supply for one thing. While I got the truffles coated, they weren’t smooth and pretty, and the white chocolate seized every time I dipped a ball of cookie dough. 

 So, I am here to tell you to take the special trip to the store. Candy melts do just that–melt. After about a minute and a half in the microwave and a quick stir with a fork, you’ll have smooth, beautiful candy coating ready for dipping.

And speaking of dipping, I tried two methods with these truffles. First, I tried toothpicks. I inserted a toothpick into a ball of dough, dipped it, let the excess coating drain off, and placed the coated truffle on a sheet of parchment. But when I tried to take the toothpick out, I was left with an annoying little hole. I tried to cover it with more candy coating and some sprinkles, but it was just too inefficient.  

  For dipping these truffles, I prefer to use a fork. I drop a cold ball of dough into the candy coating, and then use a fork to flip it around so it’s completely coated. Then I use the fork to lift the coated truffle out of the candy coating, let it drain for five to fifteen seconds (scraping the bottom of the fork on the side of the bowl seems to help), and turn the fork completely upside down to place the truffle on the parchment. As soon as the truffle is released from the fork, top it with additional sprinkles. Don’t wait–the cookie dough centers are cold, and the coating sets quickly as a result. By the time you finish coating and sprinkling all your truffles, the first few you dipped will be ready to eat! If your candy coating is taking a while to set for some reason, set the truffles in the fridge for a few minutes. That should do the trick. 

 These colorful confections are perfect for birthday parties, gifting, or even Easter! You could use pastel-colored candy melts–how adorable would that be?! No matter where you serve them, these Funfetti Cookie Dough Truffles are simple, delicious, and a whole lot of fun…fetti.

Sorry. Had to. 

 Funfetti Cookie Dough Truffles
makes about four dozen truffles

Edible Cookie Dough:
1/2 cup unsalted butter, softened to room temperature
3/4 cup granulated sugar
2 tablespoons milk of choice (dairy or non-dairy)
1 1/2 teaspoons pure vanilla extract
1/8 teaspoon imitation butter extract*,optional
1 1/4 cup all-purpose flour
1/2 teaspoon Kosher or sea salt
1/3 cup rainbow sprinkles (jimmies)

Coating:
2 cups white candy melts, melted
2 tablespoons rainbow sprinkles (jimmies or nonpareils)

Line a rimmed 9×9″ baking pan with wax paper.

In a medium mixing bowl, use an electric mixer to cream butter and granulated sugar together until light and fluffy. Add milk, vanilla, and optional imitation butter extract, and beat until combined. Mix in flour and salt, followed by jimmies. Scoop dough by the 1/2 tablespoon (1 1/2 teaspoons), and roll into balls. Set rolled dough balls on prepared pan. Freeze for 30 minutes.

Line a rimmed baking sheet with parchment paper. Set aside.

Melt candy melts in the microwave in 30 second increments until a stir with a fork yields a smooth coating. Take dough balls out of the freezer. Use a fork to coat frozen dough balls into melted candy melts. Drain briefly. Set on parchment-lined baking sheet. As soon as the freshly-dipped truffle is on the baking sheet, sprinkle with additional sprinkles. Repeat with all dough balls. Candy melts should set quickly at room temperature, but truffles may be refrigerated for 15 minutes to set.

Truffles are best served at cool room temperature. They keep well covered in the refrigerator for up to five days.

Note:

I use J.R. Watkins Imitation Butter Extract. It’s a huge bottle and will last you forever.

Funfetti Sandwich Cookies

 How is it December 22nd already? I have been so deep in the holiday rush that I just barely remembered to get to the airport this morning! Between the work, the parties, the shopping, and the work (did I mention the work?), I am mostly running on cookies and tinsel. But I am rallying with the eleventh recipe of Twelve Days of Cookies! Over the weekend, I looked through all my holiday cookie recipes thus far and realized I hadn’t used any of the five (yes, five!) jars of Christmas sprinkles that I purchased a month ago. When you love sprinkles as much as I do, that’s a travesty! So today, I am bringing you Funfetti Sandwich Cookies 😊 Two little cookies chock-full of sprinkles, sandwiched with a creamy filling. They are adorable, delicious, and simple as can be–just what we need this close to Christmas!

These cookies start with creaming room temperature butter. Now, I know letting butter come to room temperature can be tedious, especially when you’re short on time, but it’s necessary here to give us the softest, puffiest, chewiest cookies possible. So cream the butter, and then add granulated sugar and just a bit of light brown sugar. These cookies will not turn brown from the molasses, but instead have a little more chew and softness. After that, an egg and an egg yolk. The yolk is–you guessed it!–for chew. What can I say? I live for chewy texture. Then, add some vanilla, for chew. Just kidding! It’s for flavor. Now, beat in a mixture of all purpose flour, cornstarch, baking powder, baking soda, and salt. And finally, turn the mixer to low and add 1/2 cup of sprinkles. Just beat the dough long enough for the sprinkles to be evenly dispersed. Then cover the dough and chill it for 90 minutes while you wrap all your presents or make some artichoke dip or take a nap. Insider tip: choose the nap. Once the dough is good and cold, scoop it by the teaspoon, roll it into balls, and bake for 7-8 minutes. They should be cooked through but not golden brown, and so festive, it’s ridiculous.

Once the cookies are cooling, start on the filling. The filling is very simple. It only has five ingredients: shortening, confectioner’s sugar, salt, heavy cream, and vanilla. I know, I know, shortening is bad for us. If you are fundamentally opposed to using it, you may use an equal volume of room temperature butter. Beat together the filling, and then pipe or spread it onto the bottoms of half the cookies, and top with another cookie. Repeat until all your cookies are paired up. These Funfetti Sandwich Cookies keep extremely well covered at room temperature. They will still be soft, chewy and delicious a week after you make them (if they last that long)!

And that’s it! You now have some seriously adorable, festive holiday cookies that your family and friends will love! These will definitely be one of the first desserts to disappear off of your cookie trays–I know from experience 😊

Need more holiday cookie recipes? You’ve come to the right blog! Check out Red Velvet Peppermintdoodles, Eggnog Sandwich Cookies, Whipped Shortbread Snowballs, Apple Cider Snaps, Oreo-Stuffed Andes Peppermint Crunch Cookies, Peppermint Mocha Cookies, Salted Caramel Chocolate-Covered Pecan Cookies, Chocolate Crinkles {Gluten Free}, M&Ms Potato Chip Cookies, and Gingerbread Men with Chocolate Buttons! If you make any of my recipes this holiday season, use the hashtag #e2bakes, or find me on Instagram and Twitter @e2bakesbrooklyn!

Funfetti Sandwich Cookies
makes about five dozen sandwich cookies

Cookies:
2 1/2 cups all-purpose flour
1 tablespoon cornstarch
1 teaspoon baking powder
1/4 teaspoon baking soda
1 teaspoon Kosher or sea salt
1 cup (2 sticks) unsalted butter, softened to room temperature
1 cup granulated sugar
1/4 cup light brown sugar, packed
1 large egg + 1 large egg yolk, room temperature
2 teaspoons pure vanilla extract
1/2 cup sprinkles*

Filling:
1/2 cup shortening*
2 1/4-2 1/2 cups confectioner’s sugar
pinch of Kosher or sea salt
3 tablespoons heavy cream
2 teaspoons pure vanilla extract

In a large mixing bowl, whisk together flour, cornstarch, baking powder, baking soda, and salt. Set aside.

In a separate mixing bowl, beat the butter with a hand mixer until light and fluffy. Beat in granulated and light brown sugars until completely combined. Add egg and egg yolk, followed by vanilla. Turn the hand mixer to low, add in the flour mixture in two installments. Mix in sprinkles. Cover the dough with plastic wrap and chill for 90 minutes or up to three days.

Preheat the oven to 350F. Line two cookie sheets with parchment paper.

Scoop the dough in one teaspoon increments. Roll dough into balls, and set them two inches apart on your prepared pans. Bake cookies for 7-8 minutes, until the tops no longer look doughy. Let cool on the baking sheets for 7-10 minutes before transferring to a rack to cool completely. Repeat process until all dough has been used.

To make the filling, place the shortening in a large mixing bowl, and beat with a hand mixer on low speed. Once it’s smooth, add in 2 1/4 cups confectioner’s sugar and salt in two installments, until smooth. Beat in heavy cream and vanilla. If you’d like the filling to be thicker, add an additional 1/4 cup of confectioner’s sugar. If you would like to pipe the filling, place it in a plastic sandwich bag, and snip off a corner.

There are two options for filling.

1. To assemble a sandwich cookie by piping, apply filling by pipe a circle in the middle of the underside of one cookie, leaving about 1/4″ around the edge. Top with a second plain cookie, with the underside filling-side-in. Repeat until all cookies have been used.
2. To assemble a sandwich cookie by spreading, use an offset frosting knife to spread 1/2-1 teaspoon on the underside of one cookie. Top with a second plain cookie, with the underside filling-side-in. Repeat until all cookies have been used.
Notes:

1. Make sure to use jimmies (the cylindrical sprinkles). Do not use non-pareils (the little ball sprinkles), or they will bleed their color all through the cookie dough.
2. If you do not want to use shortening, you may use 1/2 cup room temperature butter.

Funfetti Sandwich Cookies

Halloween Candy Corn Platinum Blondies

Halloween Candy Corn Platinum Blondies

Confession: I am one of those adults who positively loathes Halloween. This Saturday night, you will not see me at any costume parties or roaming the crowds of the West Village Halloween Parade. And as there are no children in our building, I won’t be handing out any candy either. As a nanny though, I’ve had to learn to feign interest for the sake of some sweet little friends of mine. For the last four years, I’ve helped squeeze tiny people into itchy costumes, stood in line to get professional photos taken to commemorate that year they dressed up as turtles and cried for six hours straight, and even once taken them trick-or-treating…and that’s all before the sugar-induced meltdowns. Needless to say, I’m a little relieved that Halloween falls on a Saturday this year so I can stay home with Henry, who feels the same way. But for all the grimacing I do on those days, I have to remember that I loved Halloween when I was little. I dressed up as two Disney Princesses, Queen Guinevere (in a vintage purple velvet bridesmaid’s dress that once belonged to my Aunt Jerry Beth), and Mother Teresa. Yes, when I was thirteen, I trick-or-treated as a nun. My mother worked at a church, so my little sister and I had to come up with costumes based on what we could find in the acolyte room. My childhood friend, Christina, went as Dolly Parton that year–we were quite the pair.

All that is to say that I love candy. I have no problem going through someone else’s haul to steal all of the Twix bars and Reese’s Cups. I especially dig candy corn and those little mallow creme pumpkins. I’ve scoured the shelves of the Target Halloween aisle four times in four weeks, and have eaten more sugar than I care to admit. And I’ve finally found a way to get even candy corn-haters to enjoy the stuff–baking it into what I call “platinum” blondies. I’ve figured out that it’s the texture of candy corn that grosses out so many people. And it makes sense–it’s chalky, chewy, and overly sweet, gets stuck in your teeth, and tastes nothing like the “real honey” advertised on the bag. By baking it though, it melts and mellows, ceases to be chalky and gets extra chewy. Combine that with a soft and chewy sugar-cookie-meets-brownie bar, some sprinkles (because sprinkles!) and a vanilla glaze, and you’ve got the perfect no-mixer-needed treat for your Halloween celebration.

image

image

These platinum blondies are so, so simple. They start with melting butter and combining it with regular granulated sugar. Whereas most blondie recipes use brown sugar and are therefore a golden brown color, these remain a pale yellow–platinum, if you will. Next come two large eggs, plus a yolk. The extra egg yolk is needed to make up for the moisture lost by not using brown sugar. Then comes a hefty amount of vanilla and just a touch of imitation butter extract. Yes, imitation butter extract sounds gnarly, but it gives these bars a Funfetti cake mix flavor without actually having to use cake mix. If you don’t have any, or just aren’t into it, you can leave it out without the final product suffering. Next we fold in the flour and salt, followed by the candy corn and sprinkles. Then we spread the batter in a prepared pan and bake at 350F for half an hour. The cooled blondies are sliced and drizzled with a simple vanilla glaze, then topped with more sprinkles (because more sprinkles!) and candy corn. Yum!

Halloween Candy Corn Platinum Blondies are the perfect dessert for your Halloween celebration this year. Whether you are attending a party, wandering your neighborhood with your children, or ignoring all of it at home with your favorite person and your Netflix account, you’ll love these blondies! Happy Halloween, indeed.

Halloween Candy Corn Platinum Blondies

Halloween Candy Corn Platinum Blondies
makes one 9×13″ pan, about 30 blondies

Platinum Blondies:
1 cup unsalted butter
2 cups granulated sugar
2 large eggs + 1 large egg yolk, room temperature
1 tablespoon pure vanilla extract
1 teaspoon imitation butter extract, optional
2 cups all purpose flour, divided
1 1/2 teaspoons Kosher or sea salt
1 cup candy corn
1/2 cup sprinkles (jimmies, not nonpareils)*

Vanilla Glaze:
5-6 tablespoons heavy cream
1 teaspoon pure vanilla extract
1 1/2 cups confectioner’s sugar
pinch of Kosher or sea salt
additional sprinkles, for decorating*
additional candy corn, for decorating

Preheat oven to 350F. Line a 9×13″ pan with aluminum foil, leaving overhand on the short ends of the pan. Grease the aluminum foil. Set prepared pan aside.

Melt butter on the stove or in the microwave. Let cool slightly.

Pour sugar in a large mixing bowl. Add melted butter and whisk until combined. Add in eggs and egg yolk one at a time, incorporating completely after each addition. Whisk in vanilla and optional imitation butter extract.

Using a wooden spoon or rubber spatula, fold the all purpose flour and salt into the butter & sugar mixture. Gently fold in the candy corn and sprinkles. Spread batter into prepared pan. Tap full pan on the counter three or four times to remove air bubbles. Bake for 30-35 minutes, or until a toothpick inserted in the middle comes out clean. Let blondies cool in the pan for thirty minutes, then use the foil overhang to remove them to a rack to cool completely (about an hour). Once they are cool, peel off the foil and cut into 30 pieces.

Place cooling rack over a piece of wax paper to collect drips. Place blondies back on the rack.

In a small bowl, whisk together heavy cream and vanilla. Whisk in confectioner’s sugar and salt until smooth. Using a squeeze bottle or a fork, drizzle glaze over blondies. Decorate with additional sprinkles and candy corn. Let glaze dry for an hour or two, until it is no longer shiny and is a little bit hardened, before packing into an airtight container for storage. These keep well covered at room temperature for up to three days.

Notes:

  1. Please use jimmies here. Non-pareils (the little round ball sprinkles) are not recommended for the batter as they will bleed their color.
  2. Non-pareils or jimmies are a good choice here.