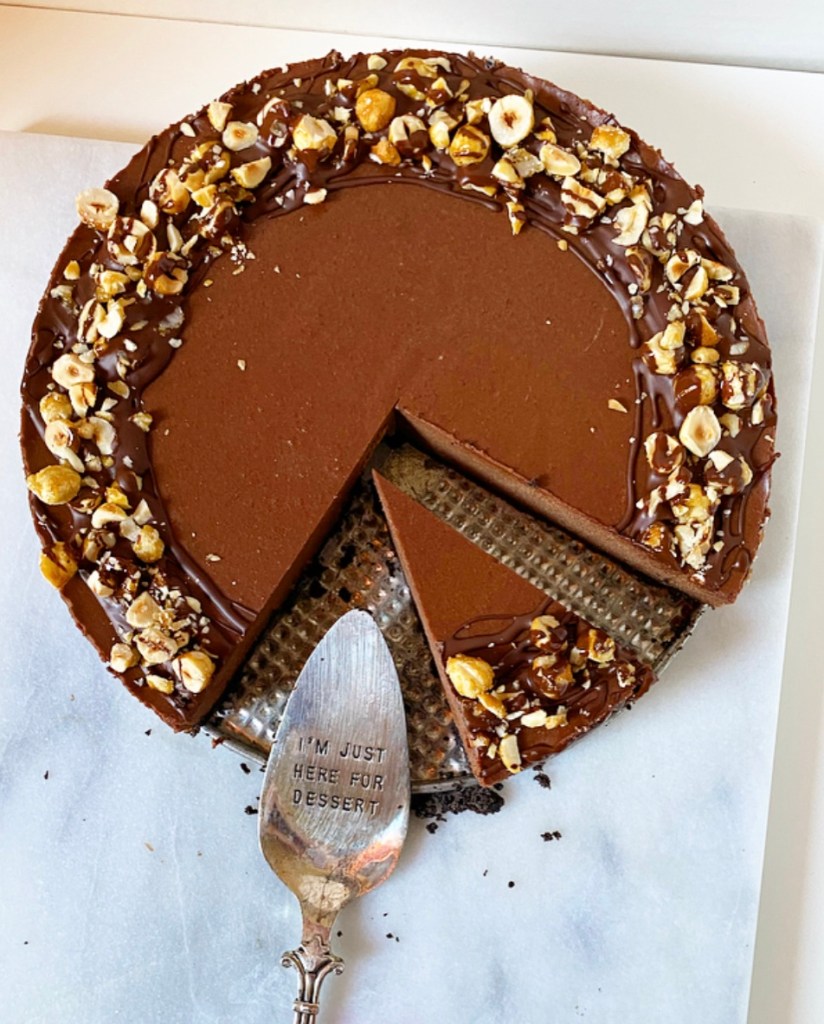
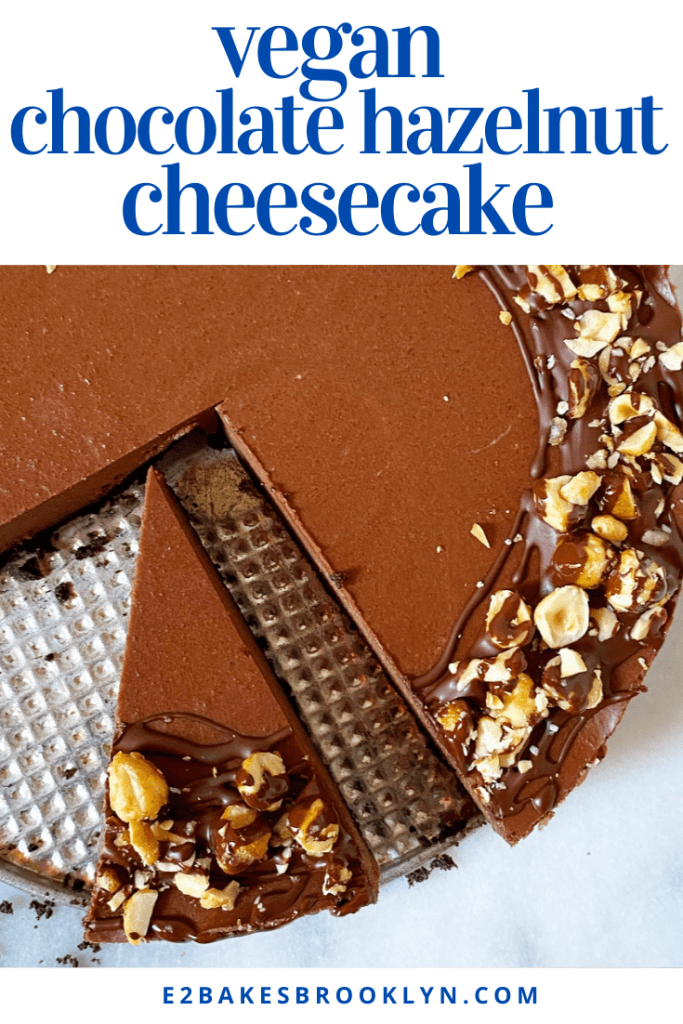
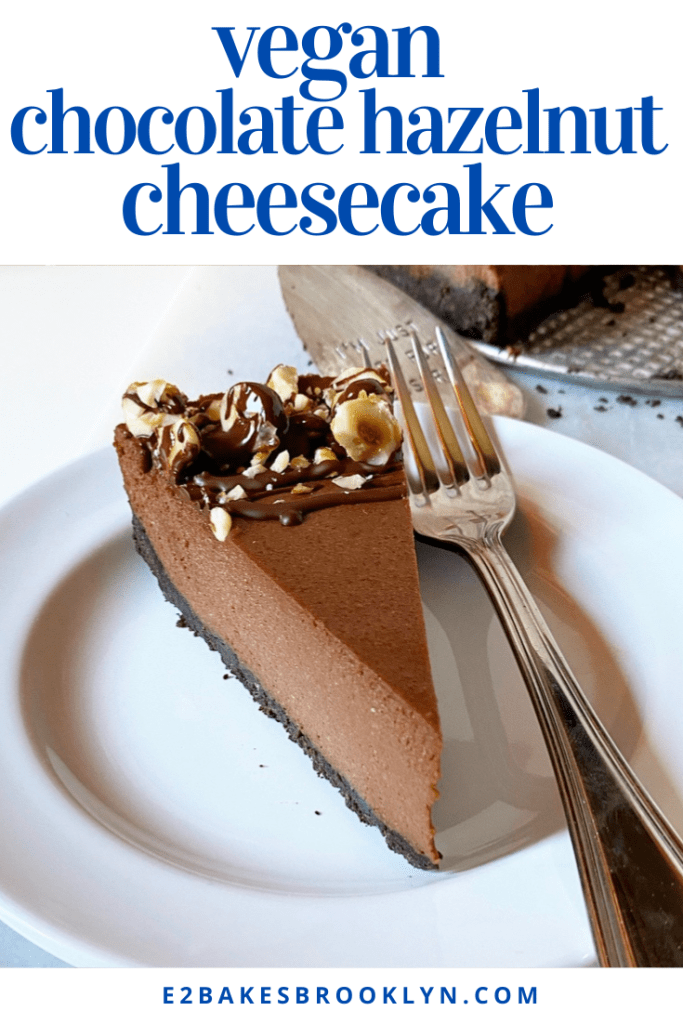
It is far too hot to bake today, but that’s okay because Vegan Chocolate Hazelnut Cheesecake requires no baking at all.

We’re talking all the rich, creamy, irresistible texture of a classic cheesecake with none of the dairy and exactly zero reasons to crank your oven. Oh, and more deep dark chocolate-hazelnut flavor than you can shake a stick at. (What does that even mean?)

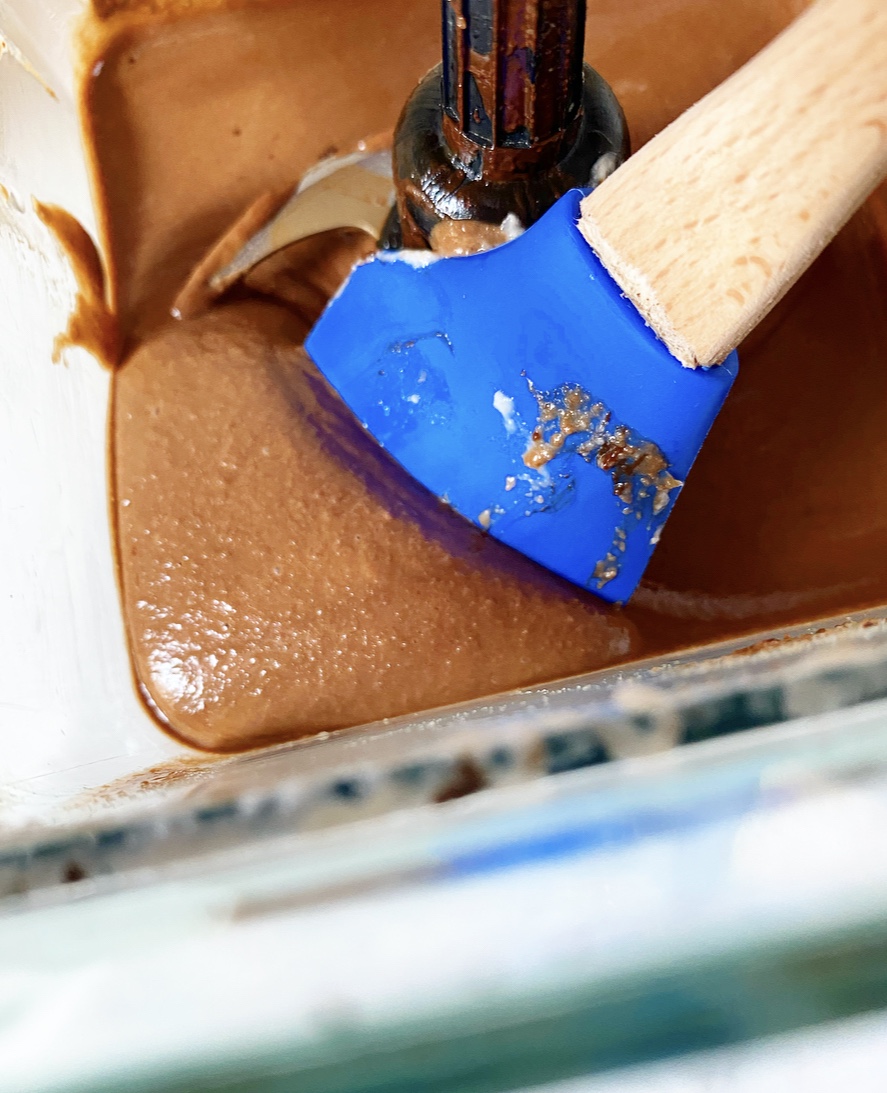
This take on vegan cheesecake is made with toasted hazelnuts for flavor and raw cashews for creamy texture. They’re soaked together overnight for maximum tenderness, then combined in a blender with coconut cream, coconut oil, maple syrup, vanilla extract, salt, and—oh yeah—half a pound of melted dark chocolate. Put on the lid and then blitz-blitz-blitz until smooth.

This is the part where I get on my soapbox:
Please get yourself a good blender. You deserve a good blender. Good doesn’t necessarily mean expensive—it means a blender that actually blends things until smooth. Whether that’s a fifty year-old Oster (my parents’ amazing blender) or a Vitamix, a solid blender is crucial to vegan cheesecake success, and a million other things. I have a Ninja that I bought for $100 five years ago and it rules. Get a good blender!!!
*steps off soapbox*

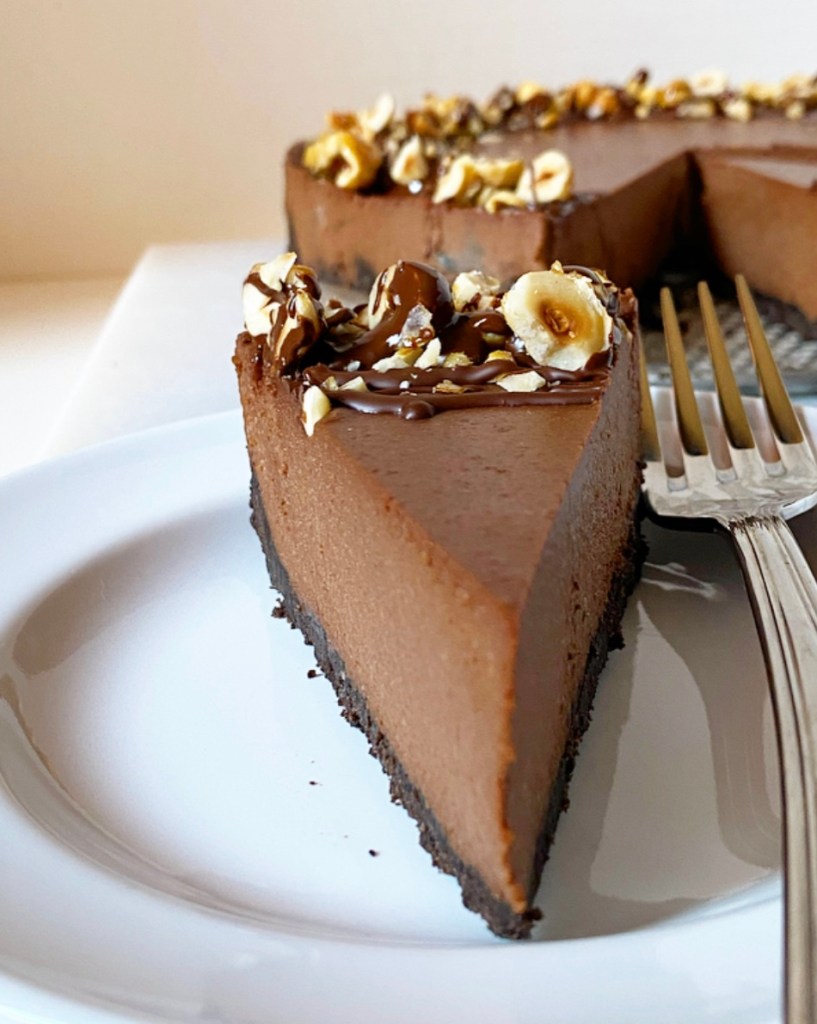
Ahem…the batter is then poured over an Oreo crust—yes, Oreos are vegan!—and chilled until firm. Then it’s released from the springform and finished off with some Homemade Chocolate Shell and easy candied hazelnuts before being sliced and served. You can use a plate and fork if you’re fancy (or taking pictures) or just eat ice cold slices with your fingers like a wild animal, as I did.
I’m pretty sure that’s what hot girl summer is all about.

Vegan Chocolate Hazelnut Cheesecake
makes one 9-inch cheesecake
Filling:
1 cup whole raw hazelnuts
1 cup whole raw cashews
1 14-ounce can coconut cream (not cream of coconut)
4 tablespoons maple syrup
1 1/2 teaspoons pure vanilla extract
1/4 teaspoon Kosher or sea salt
6 tablespoons coconut oil (preferably refined), melted and cooled
8 ounces dark chocolate, melted
Crust:
24 Oreos (or other chocolate sandwich cookies)
5 tablespoons coconut oil or melted vegan butter
Candied Hazelnut Garnish:
1/3 cup whole raw hazelnuts
3 teaspoons granulated sugar
Homemade Chocolate Shell
The night before you want to make the cheesecake, toast and peel the hazelnuts. Place hazelnuts in a dry skillet over medium heat. Stir frequently until fragrant, 7-10 minutes. Immediately transfer hazelnuts to a clean, dry hand towel. Fold towel around the hazelnuts and then rub the towel with the palm of your hand. This will allow the hazelnut skins to loosen. This step does not have to be done perfectly.
Place peeled hazelnuts in a 3-4 cup container that has a lid. Add cashews. Cover with water. Refrigerate for 4-12 hours.
Lightly grease a 9-inch springform pan with coconut oil.
Make the crust. Place Oreos in a high-powered blender and blitz until they are crumbs. Add coconut oil or melted vegan butter, and pulse until the mixture can be pinched together. Transfer crust mixture to prepared pan, and press it to the edges to form an even layer. Refrigerate for 15 minutes to set.
Very carefully wipe it out the blender with a paper towel.
Make the filling. Drain soaked hazelnuts and cashews and place them in the blender. Add half of the coconut cream (~2/3 cup), maple syrup, vanilla, and salt. Process until the mixture is smooth. Add remaining coconut cream & coconut oil, followed by melted chocolate. Continue processing until everything is fully combined and smooth.
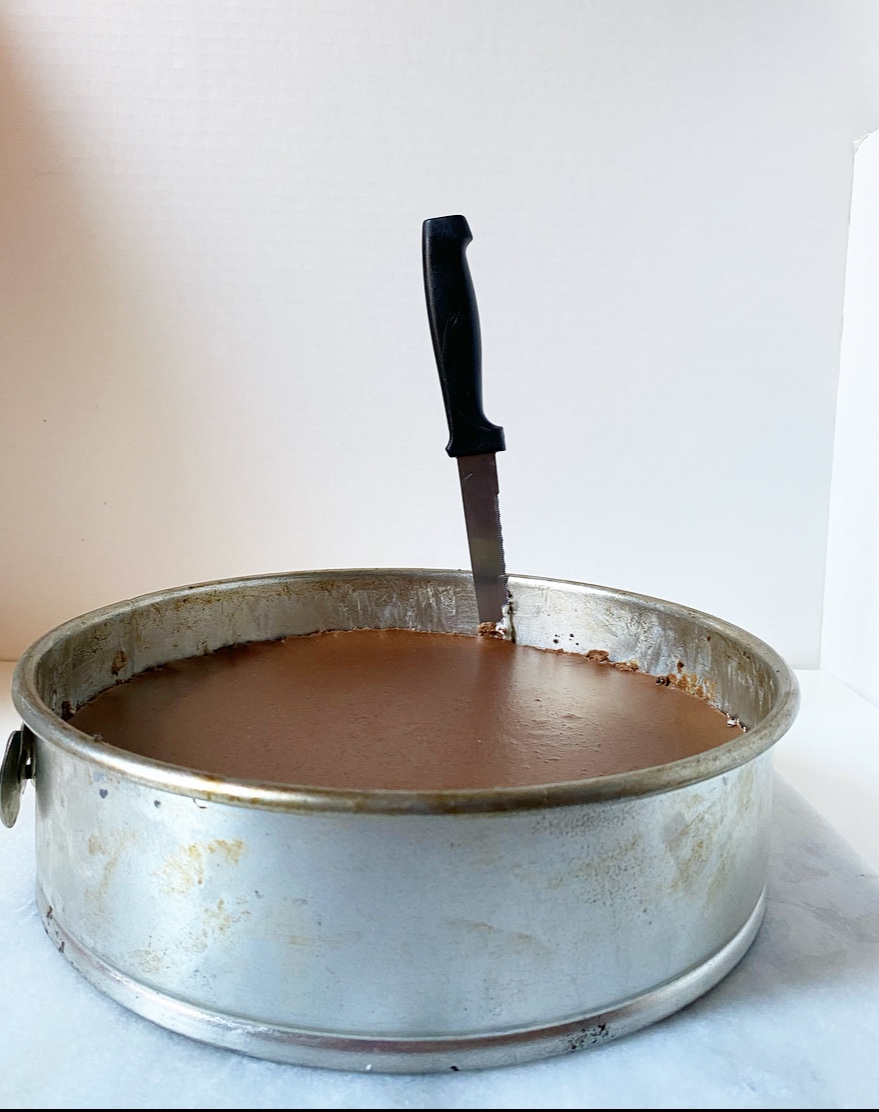
Pour filling mixture over crust and smooth with an offset spatula. Refrigerate for at least 3 hours (or freeze for 1 hour).
Make the candied hazelnut garnish. Line a plate with parchment and set aside. Place hazelnuts in a dry skillet over medium-low heat. Toast for 2-3 minutes, stirring frequently, until fragrant and shiny. Add sugar by the teaspoon, stirring until it dissolves (it may smoke up a bit). When all sugar has dissolved, remove hazelnuts to prepared plate. Let cool completely. Place on a cutting board and give them a rough chop with a large, sharp chef’s knife.
Run a thin, flexible knife around the edge of the pan. Release the cheesecake from the springform pan, and allow it to sit at room temperature for 10 minutes. Drizzle with chocolate shell, then immediately scatter on the candied hazelnuts. Slice with a large, sharp chef’s knife, wiping the blade clean between cuts. Serve.
Leftovers will keep covered in the refrigerator for a few days. Filling may slump slightly in very hot weather.


 Christmas in a pandemic is so strange. I mean, I’ve spent Christmas away from my immediate family before, but it’s always been with (ex-)boyfriends or friends. But this year, traveling and gathering don’t seem like great plans and I am deeply single, so Christmas alone it is.
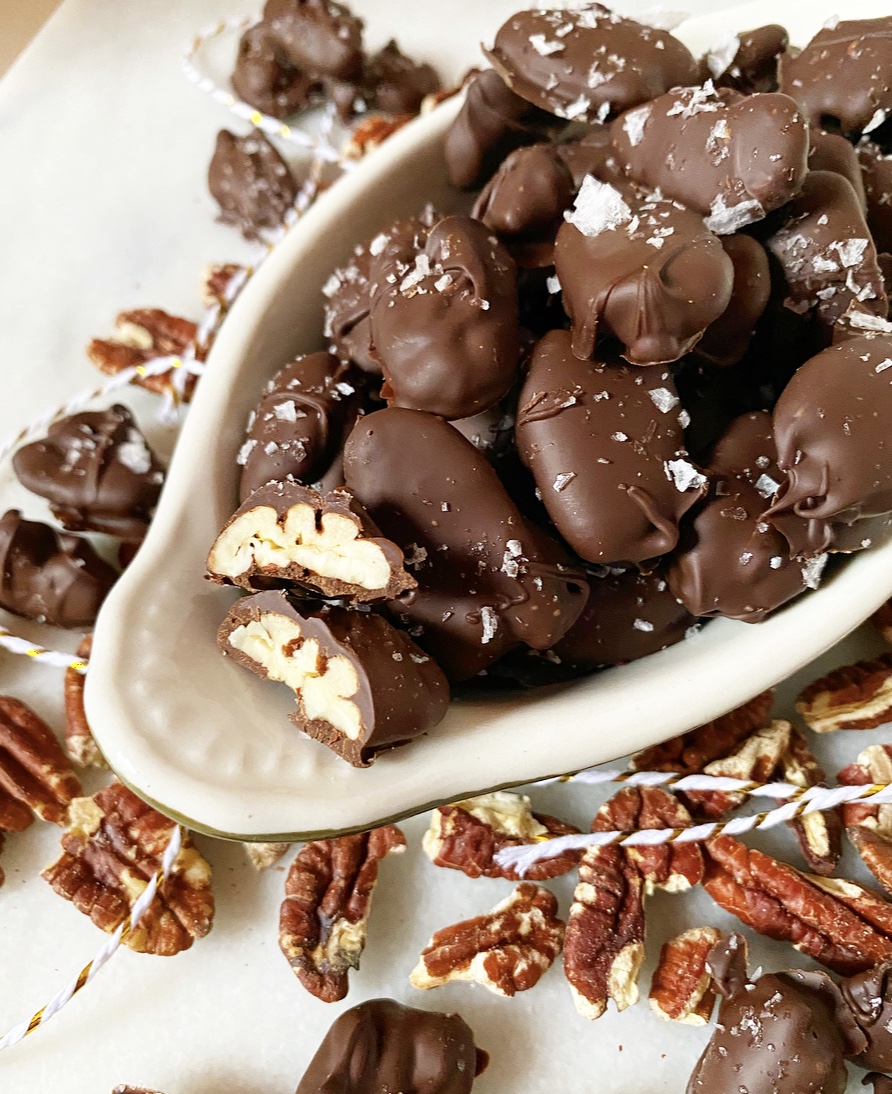
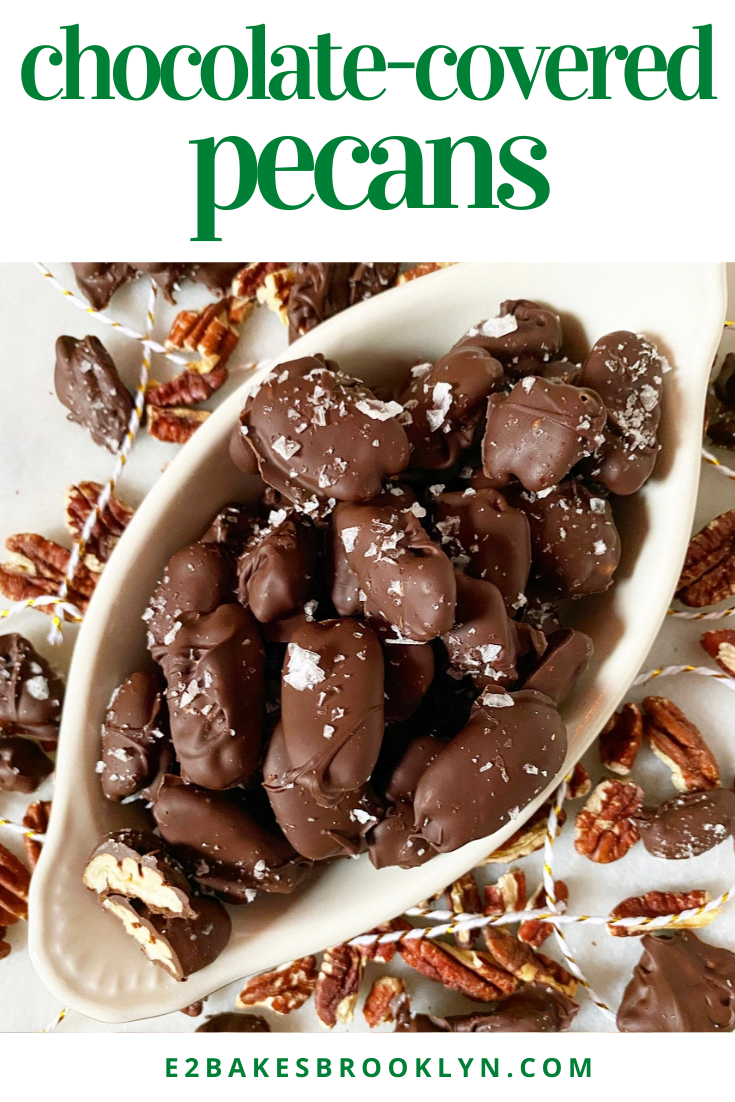
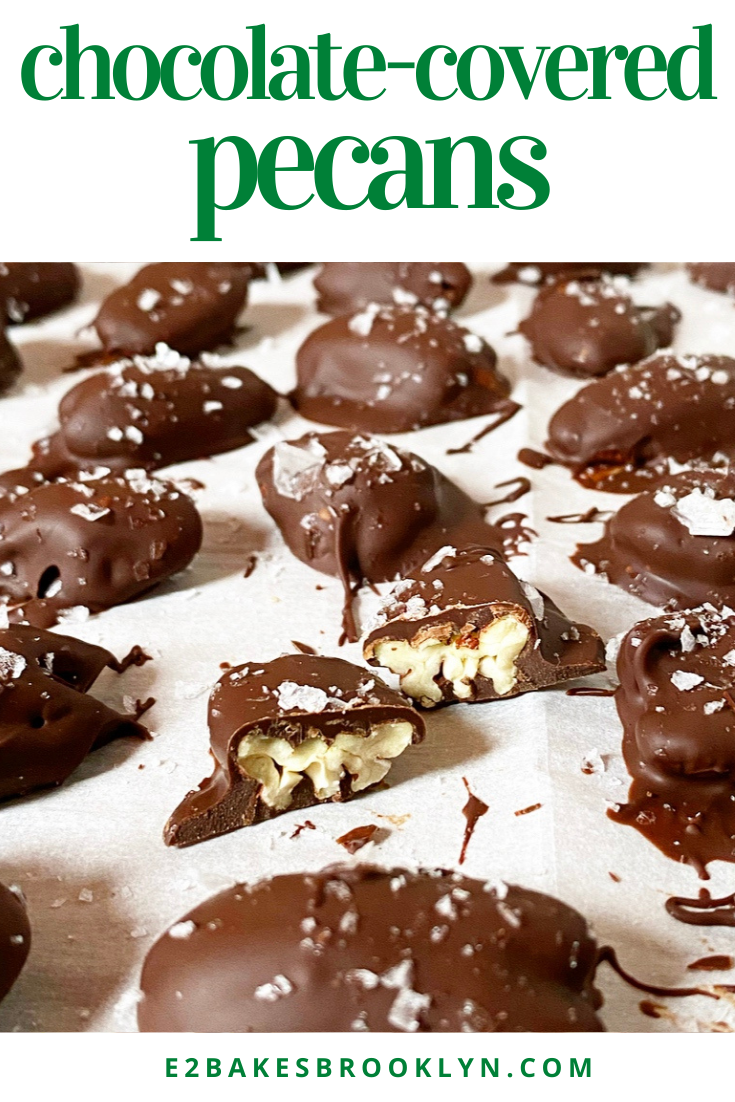
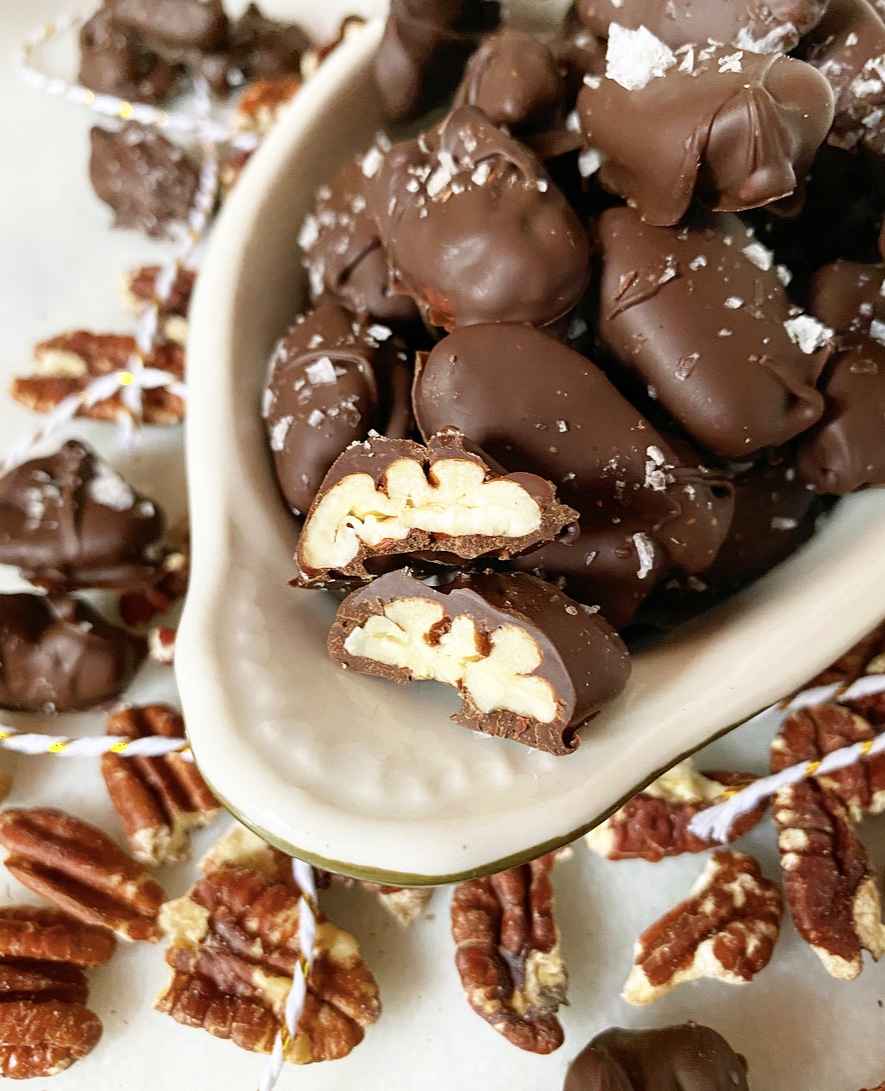 I’ve already had my pre-Christmas anticipatory-loneliness gloom and doom, and have now moved on to determining what will make this Christmas feel like…Christmas. Like, when I FaceTime my family, I’m going to wear my Christmas pajamas that match my sisters. And I’m going to take a walk. Maybe watch Love Actually for the 374th time. Perhaps make a pot roast. And I’m going to eat chocolate-covered pecans by the handful. It’s the Davenport way.
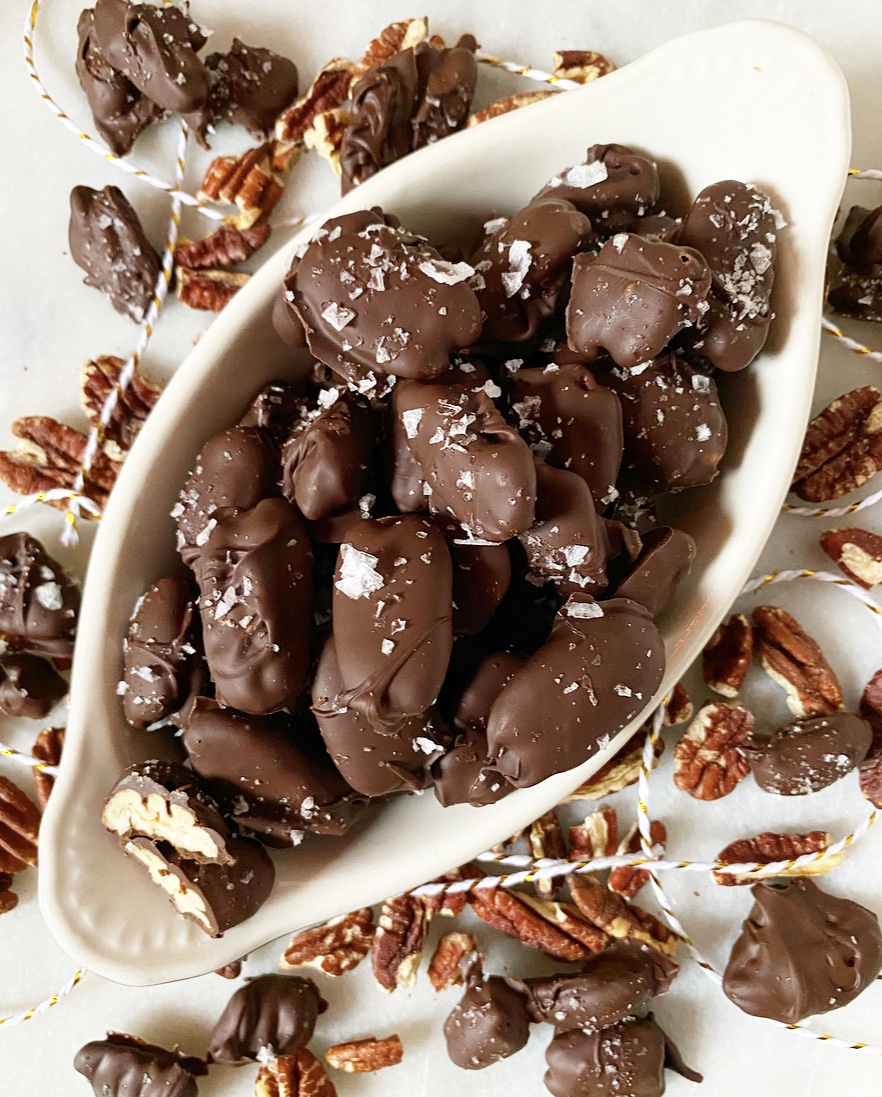 Chocolate-Covered Pecans have a
  Since my sisters and I all moved away, we’ve each been added to my dad’s chocolate-covered pecan Christmas list. It’s something I look forward to every year—my tin showing up a week or two before I fly home for the holiday break. Except, of course, that I’m not flying home this year. And for a brief moment, thanks to the notorious difficulties with shipping right now, I thought that my dad might have decided not to send chocolate-covered pecans in 2020.
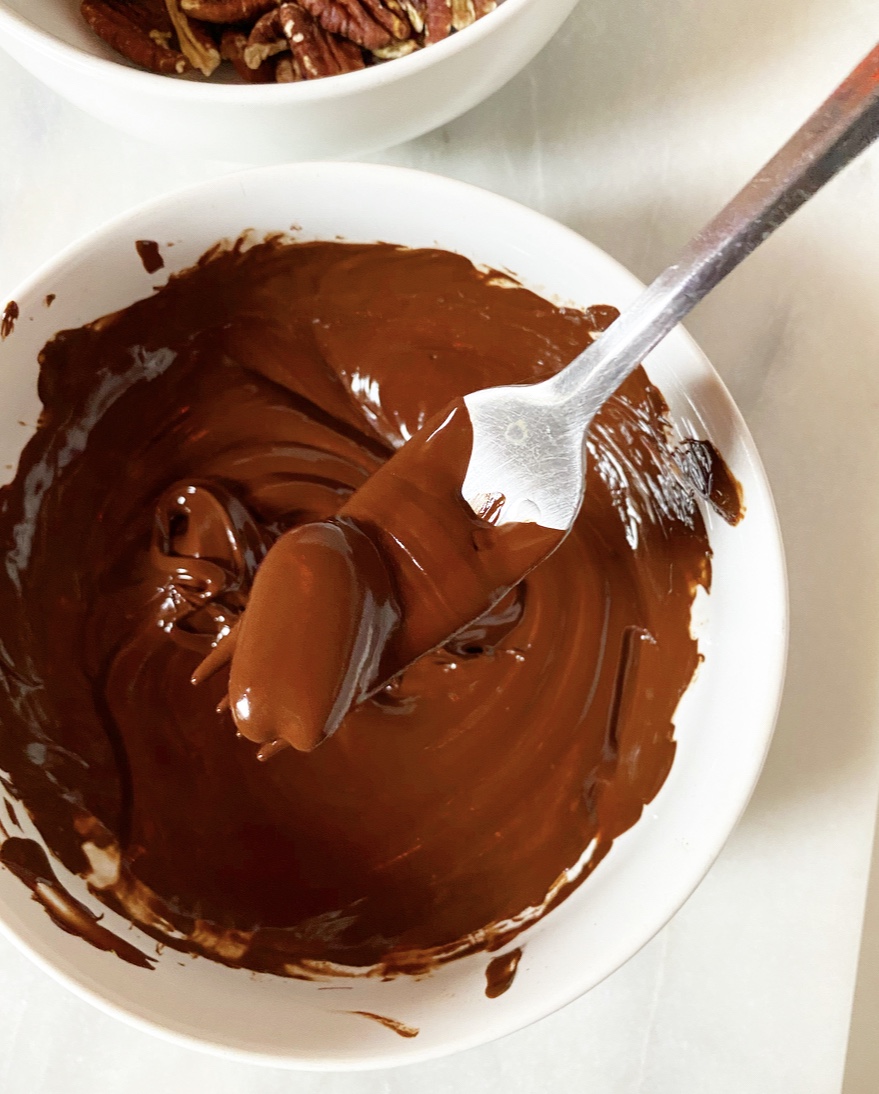 Thankfully that is not the case and my tin arrived on December 16th, but in that moment where I thought this tradition might be another casualty of 2020, I took the time to create my own recipe for Chocolate-Covered Pecans. I certainly wasn’t going to go without them. No way.
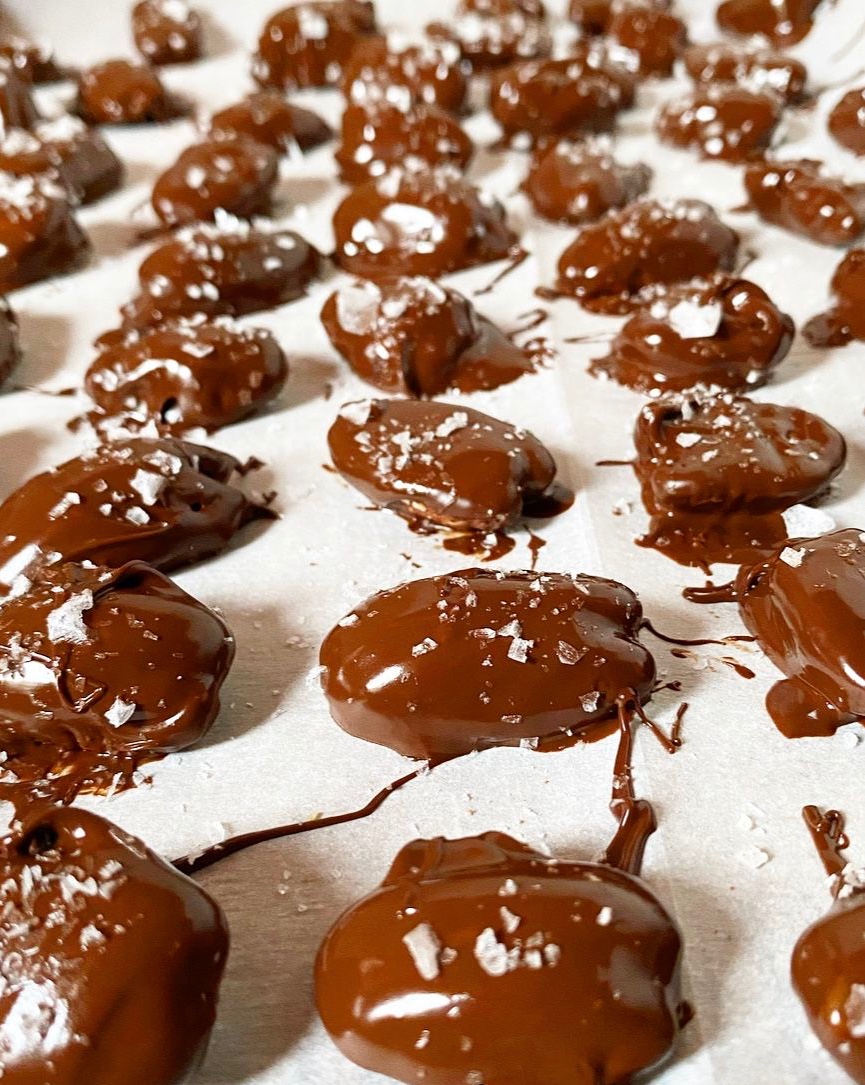 My Chocolate-Covered Pecans are the tiniest spin on my
  Merry Christmas! Happy Holidays! Whatever you do or don’t celebrate, I hope you find a way to enjoy the end of this challenging year. I’m taking Friday off for Christmas, but will be back next week with year-end round ups. Stay cozy, everyone.
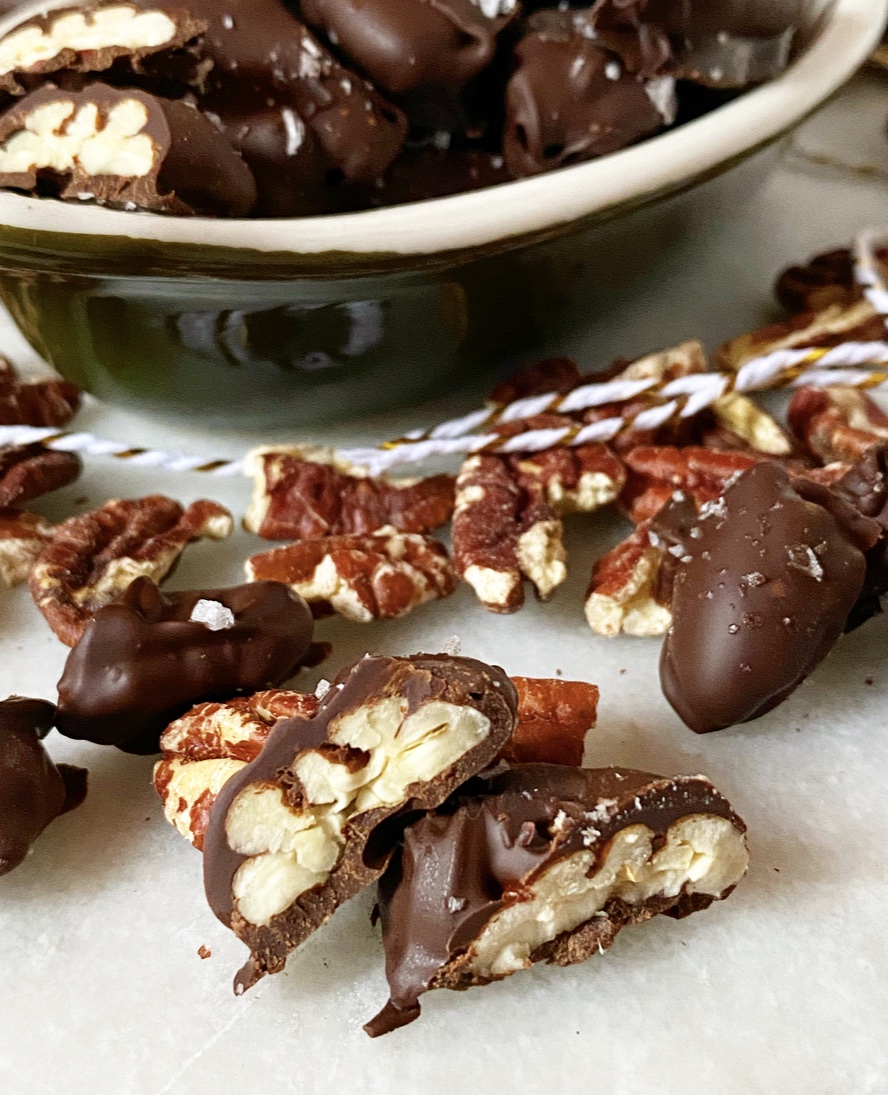

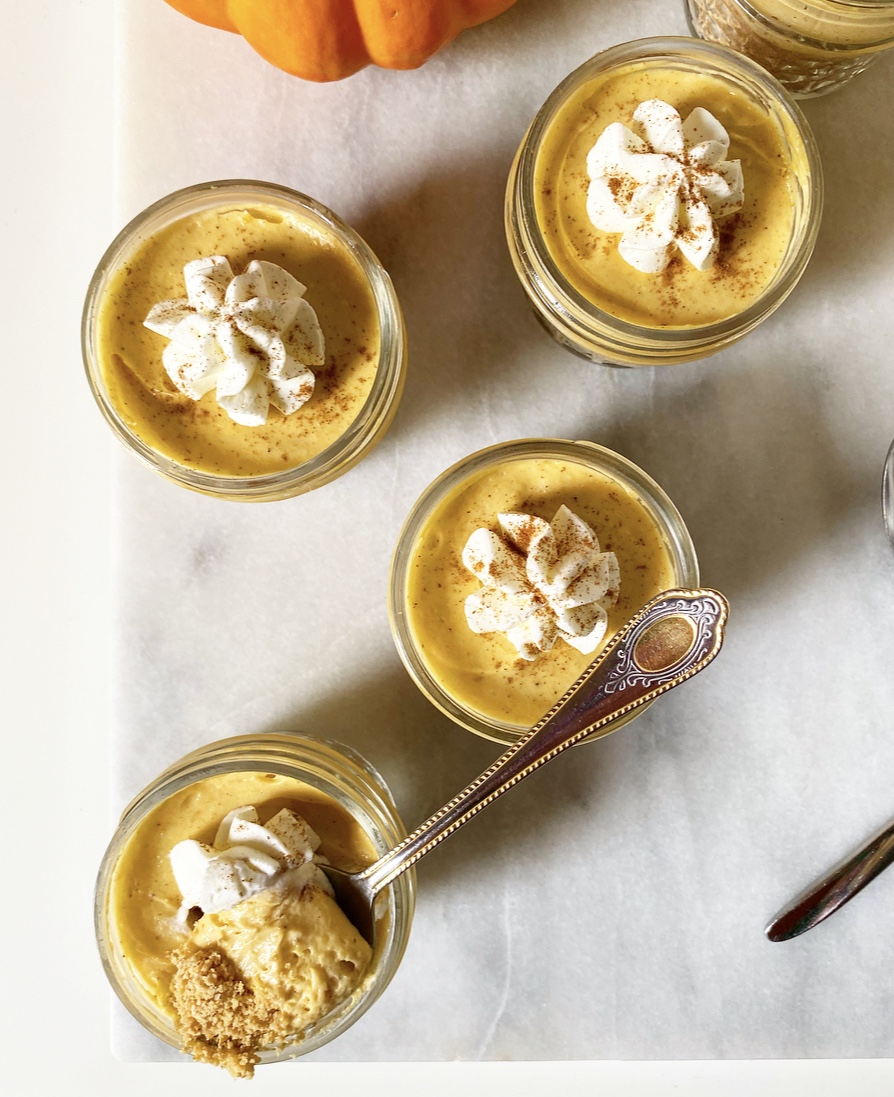
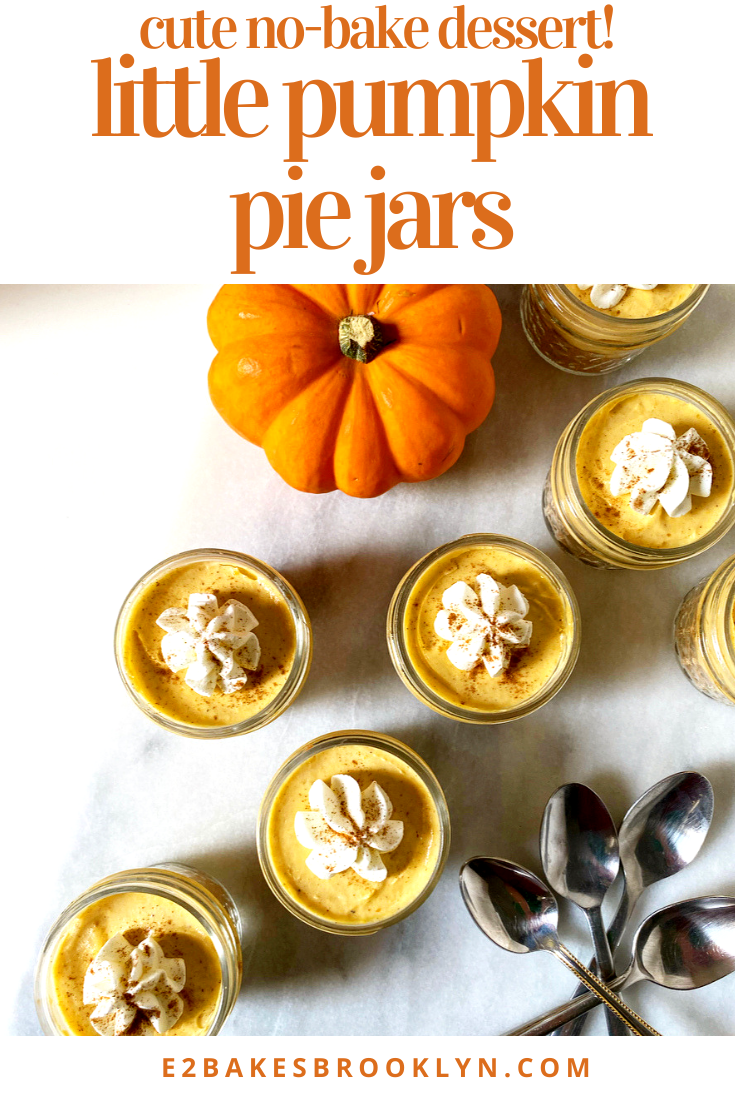
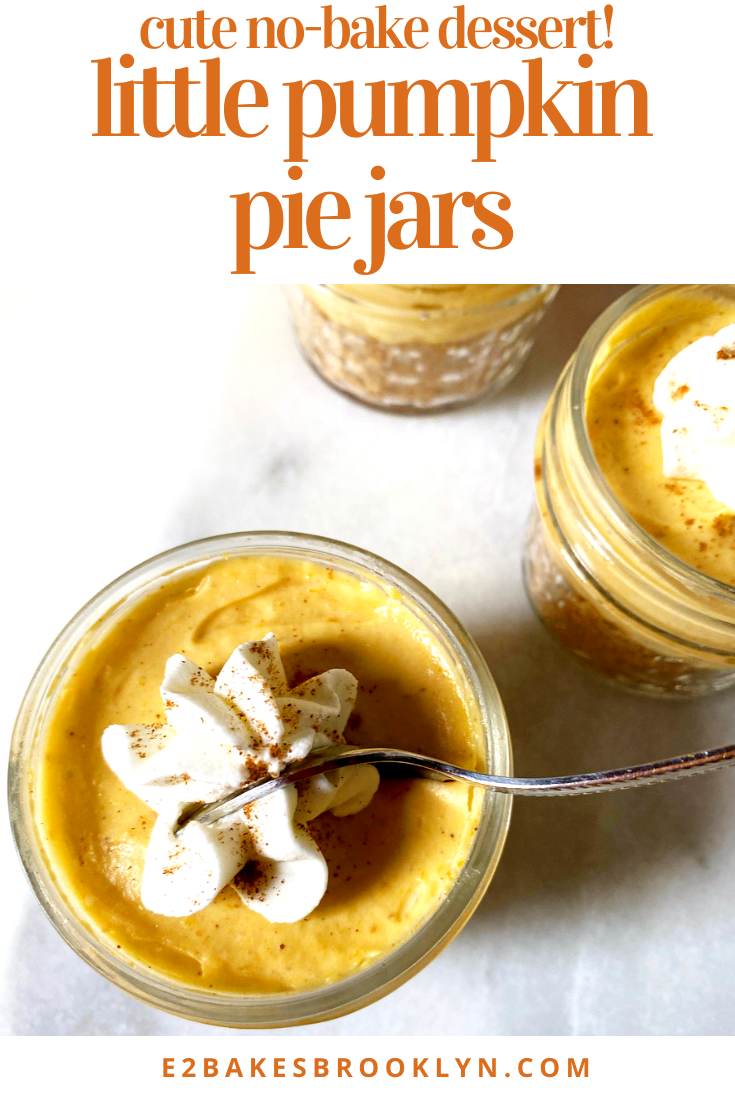
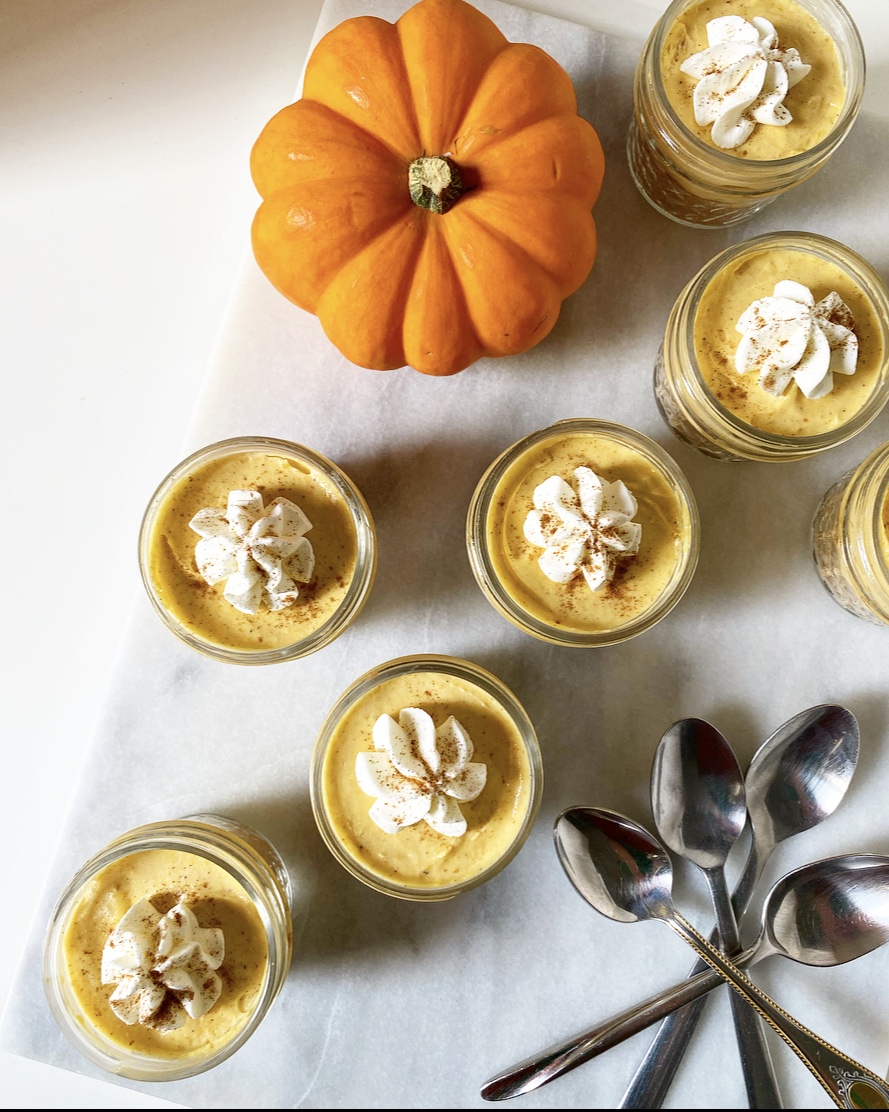 I questioned my sanity while making these Little Pumpkin Pie Jars earlier this week—do we need a
 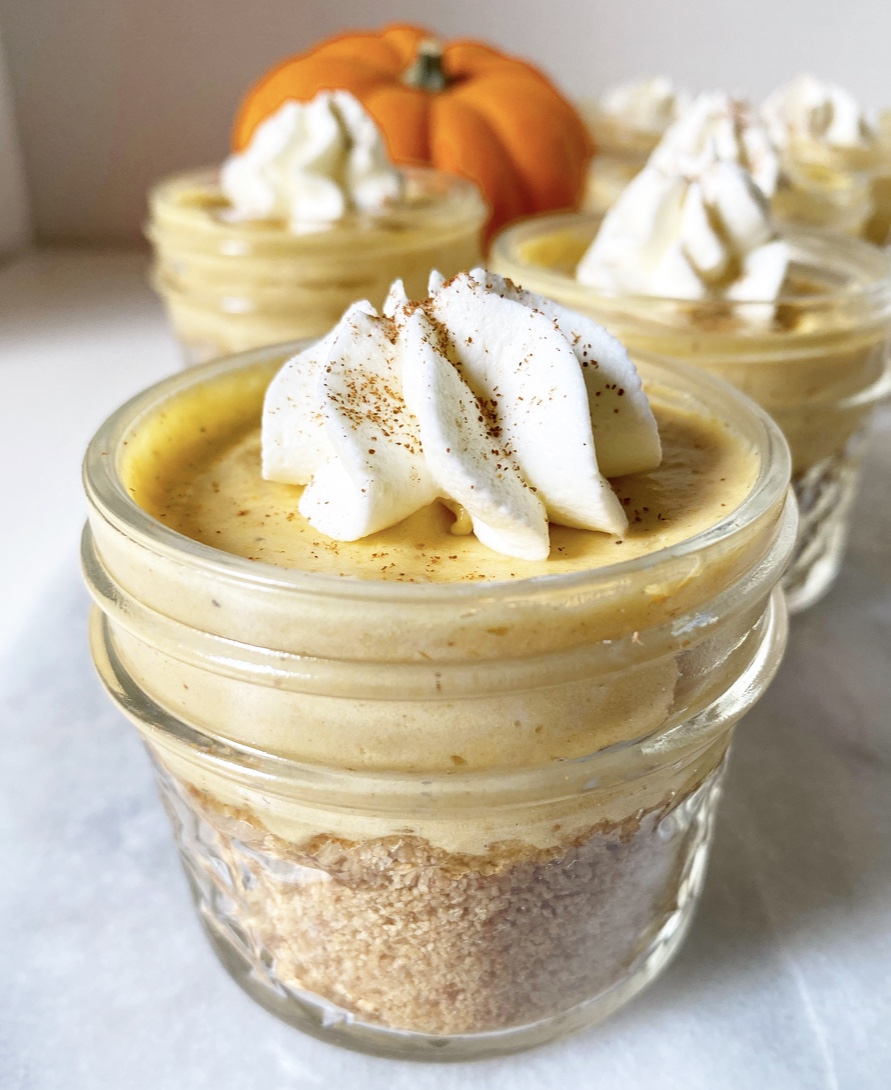 That said, we might need eight pies, but little ones in mason jars that require no baking—perfect for a Thanksgiving with all the trimmings and all the COVID precautions. Little Pumpkin Pie Jars are just the ticket.
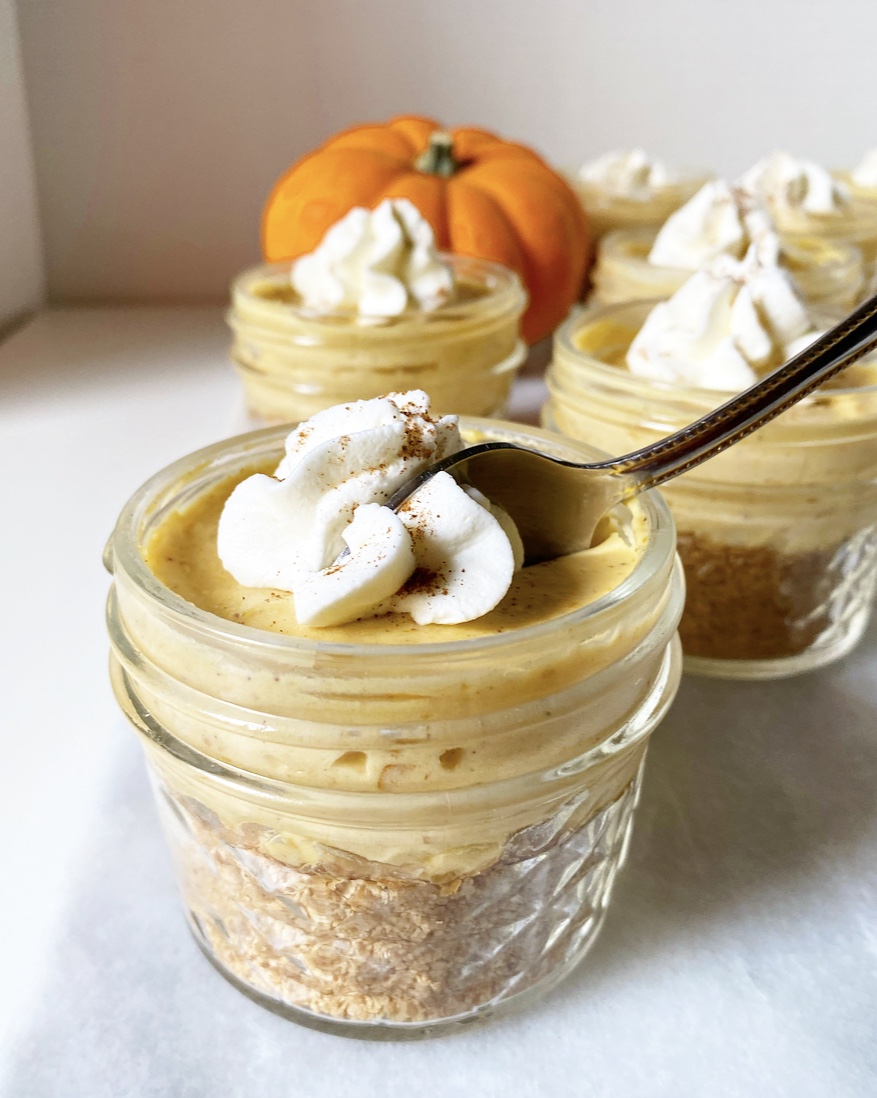 This recipe is nearly a carbon copy of the
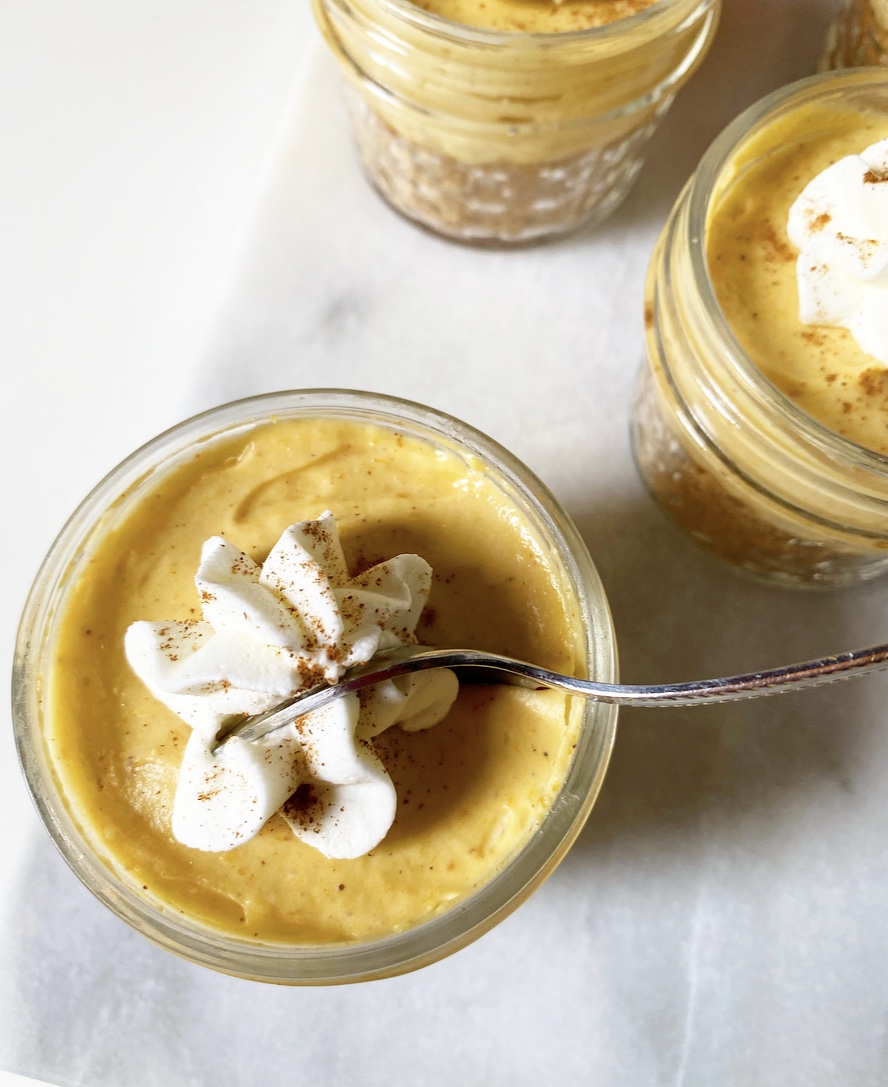
 Little Pumpkin Pie Jars get their autumnal flavor from the
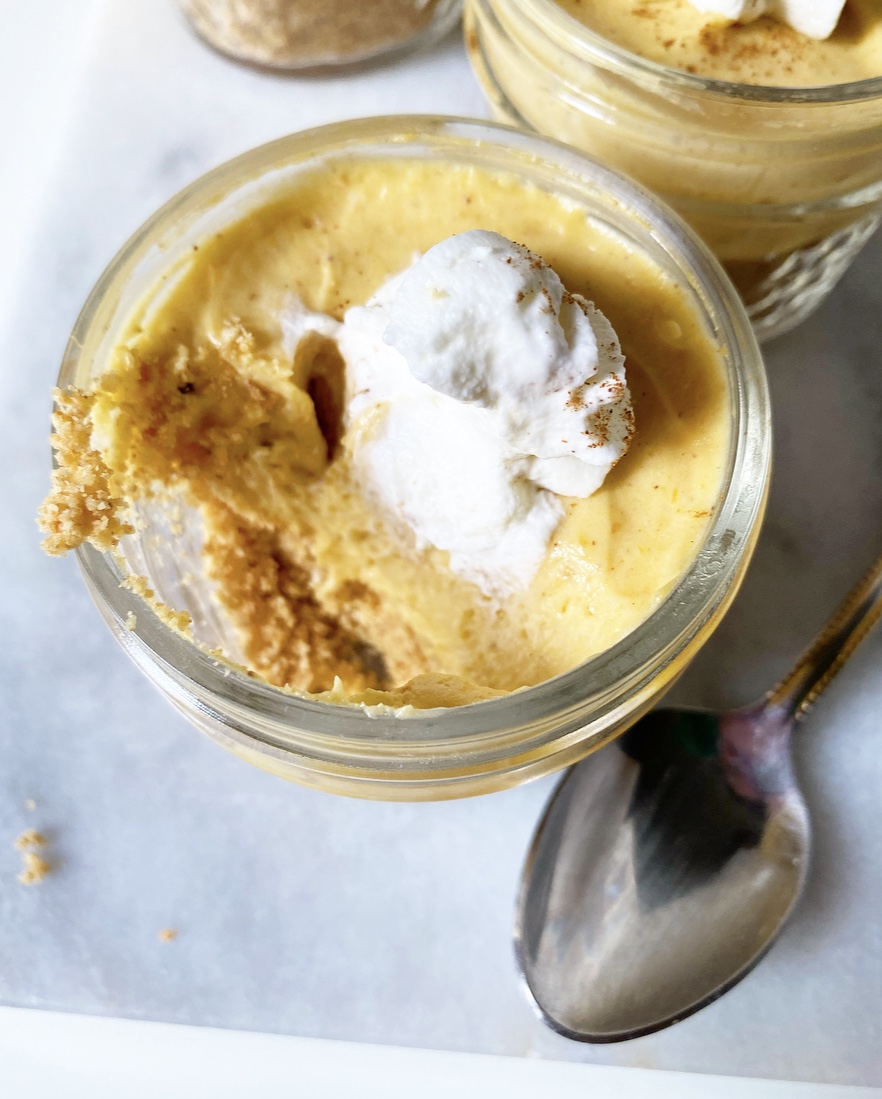
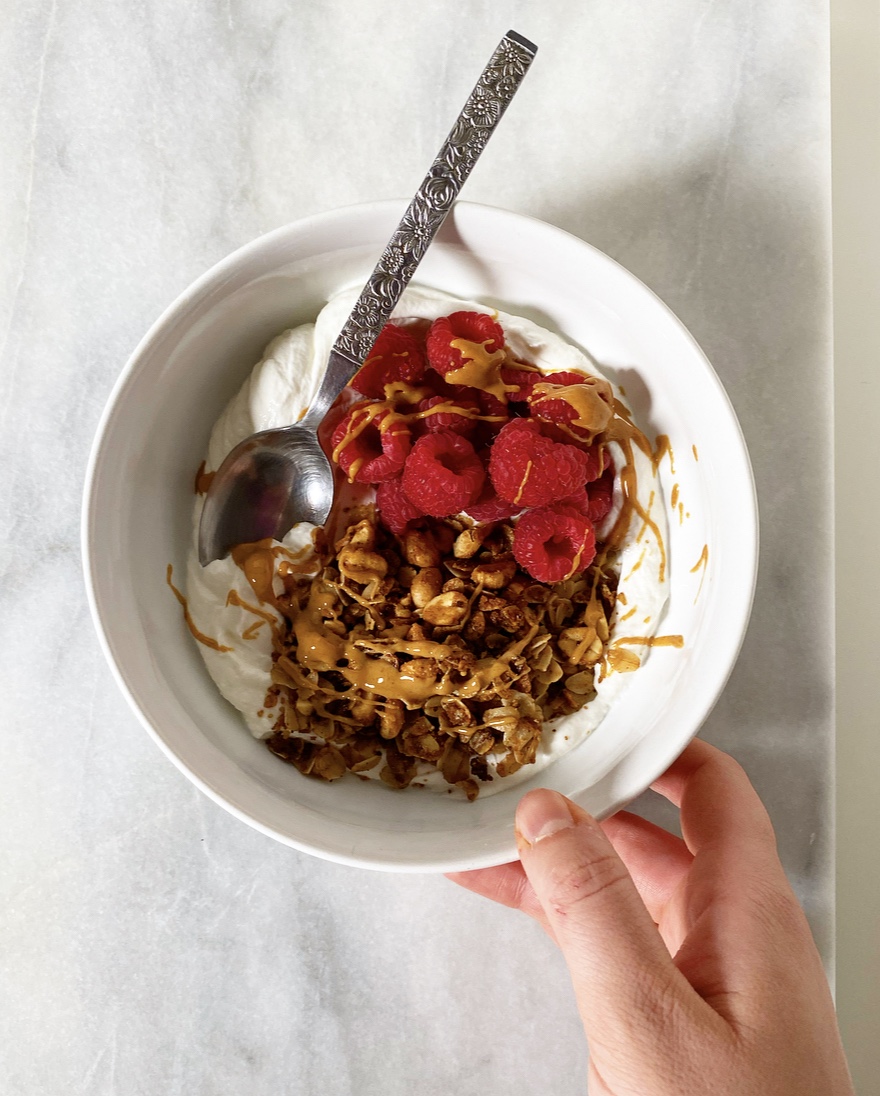
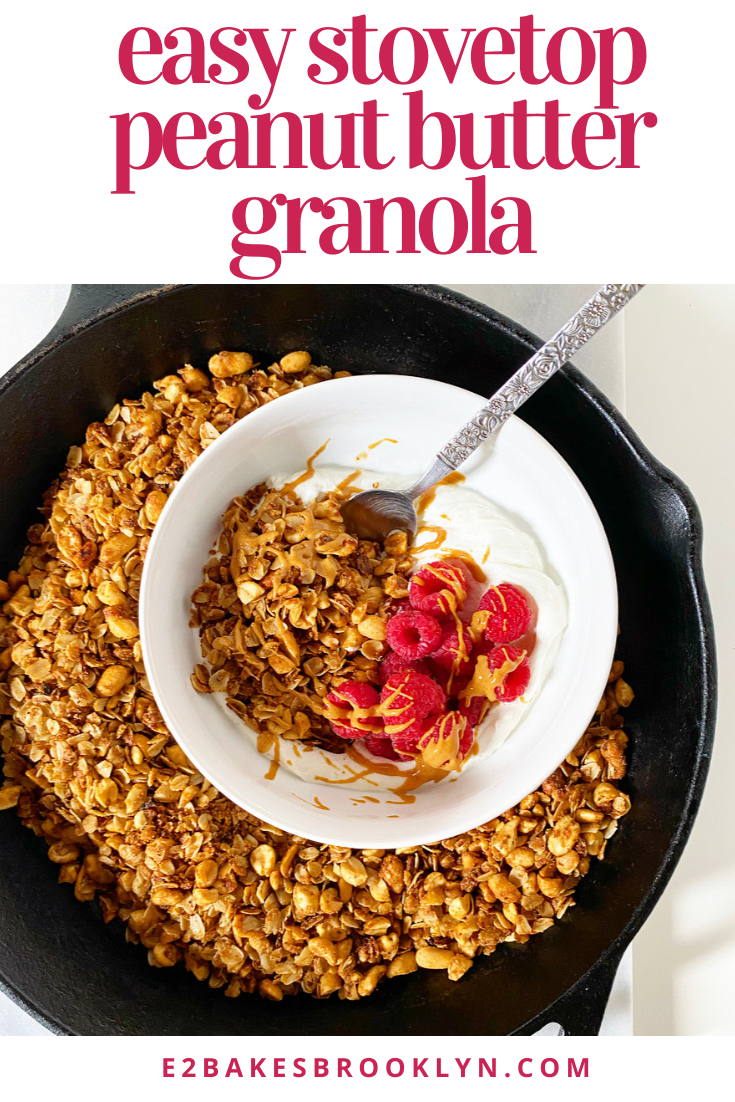
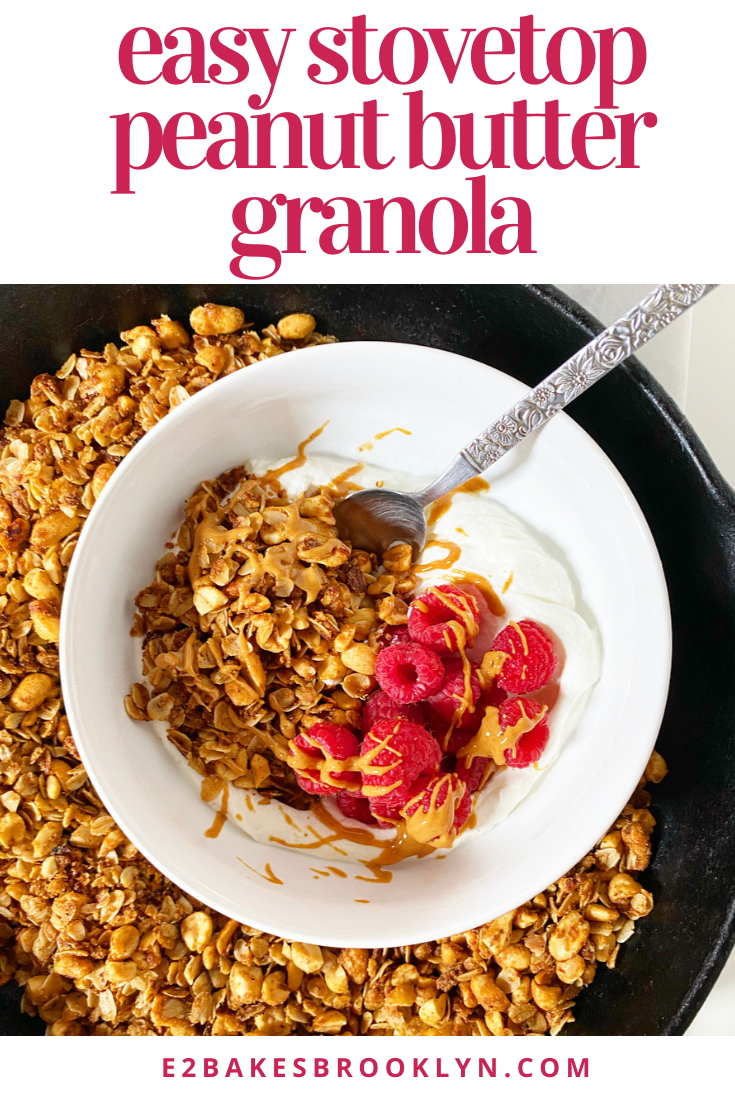
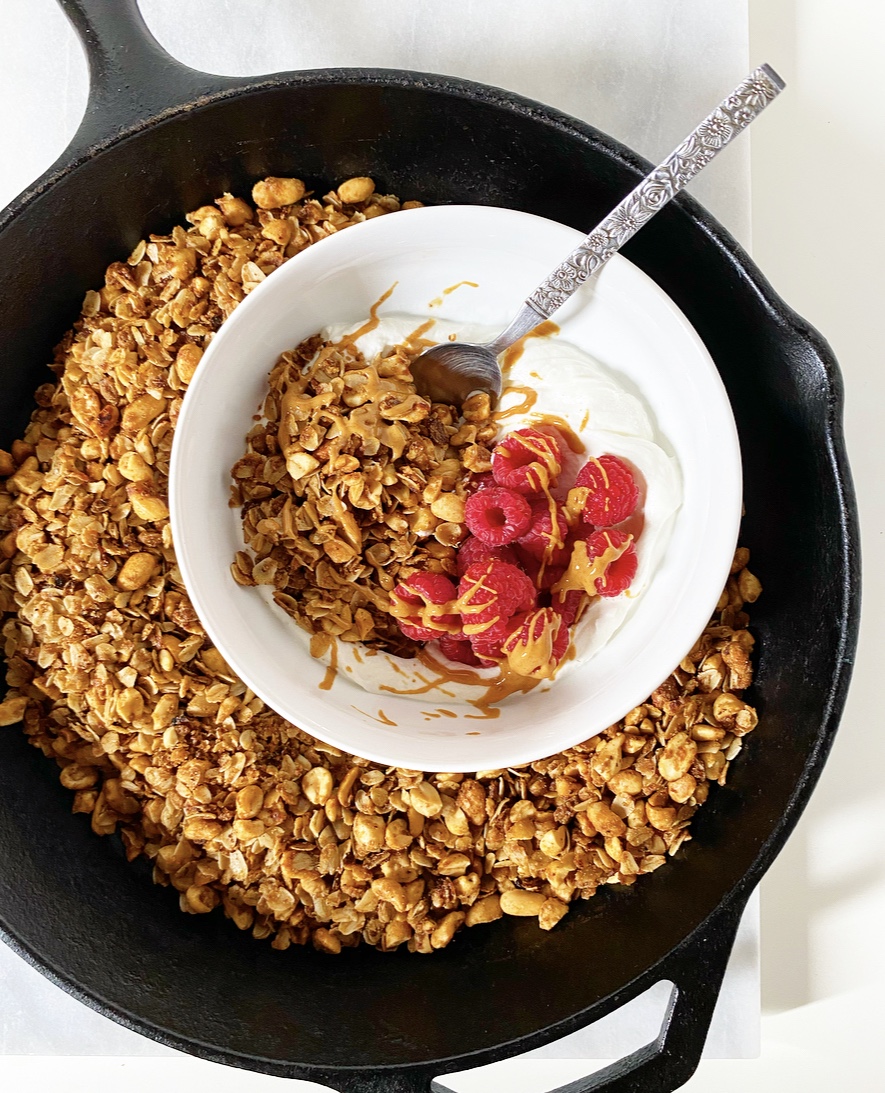 But you know what is happy—er, what is making me happy? This Easy Stovetop Peanut Butter Granola. It’s super crisp, crunchy and peanut buttery, and took fifteen whole minutes to make. That’s the magic of stovetop granola. When you skip the oven, it takes 1/3 of the time! Oh, and it only makes a quart. Add this to the list of
 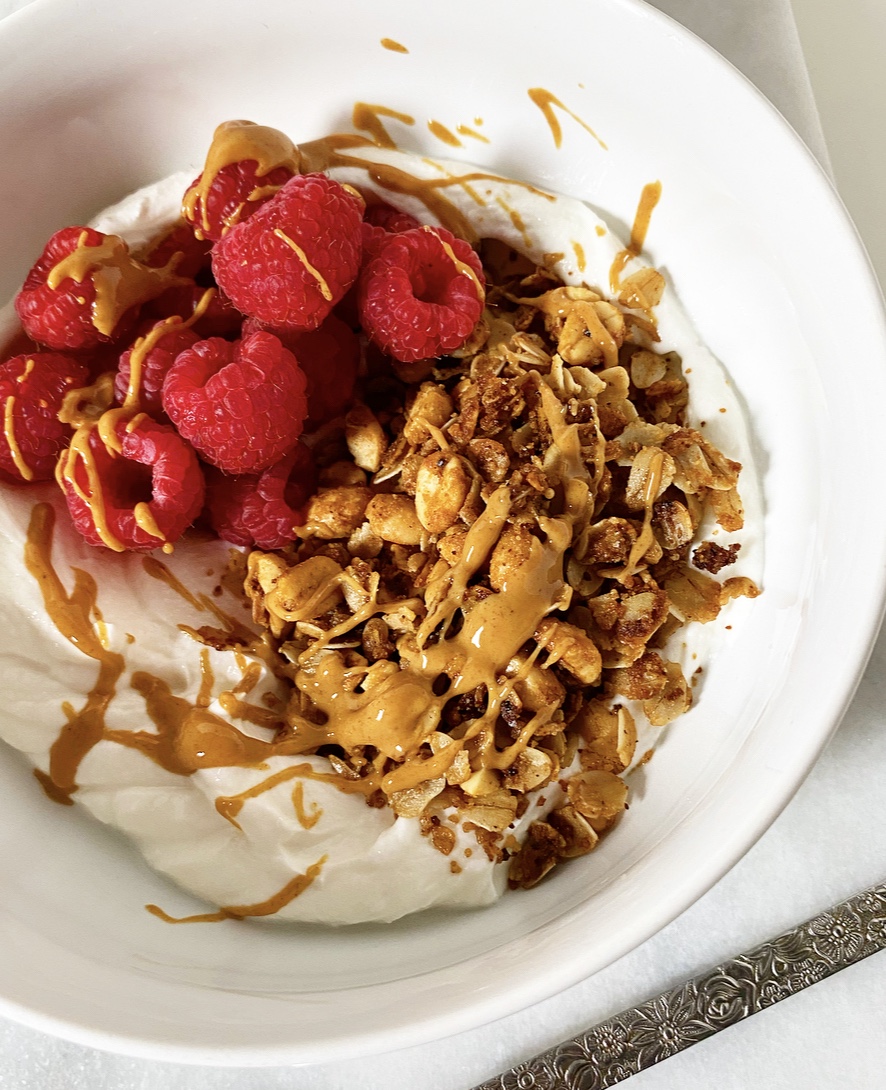 This isn’t my first go-round with
 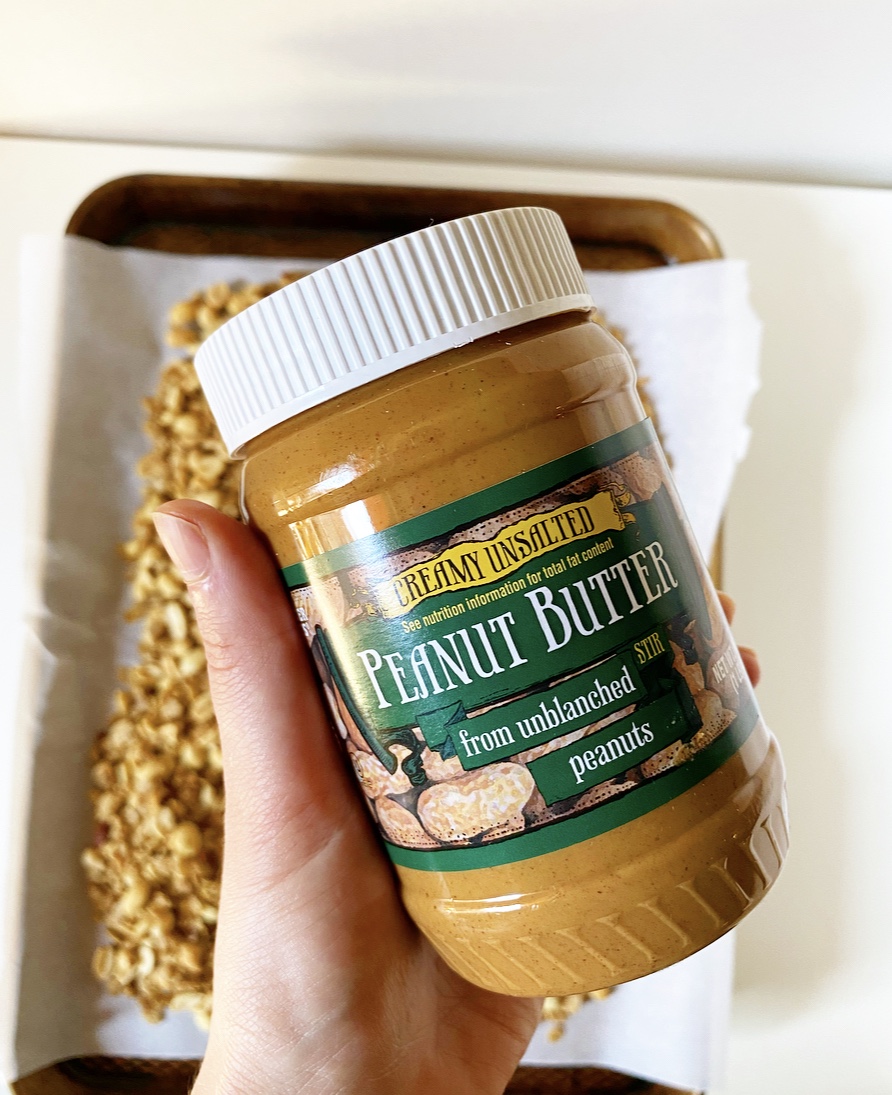 Combine the wet ingredients. Whisk your oil, brown sugar, maple syrup, natural peanut butter, vanilla, cinnamon and salt together in a measuring cup. This provides the majority of the flavor in your granola and help it get good and crispy.
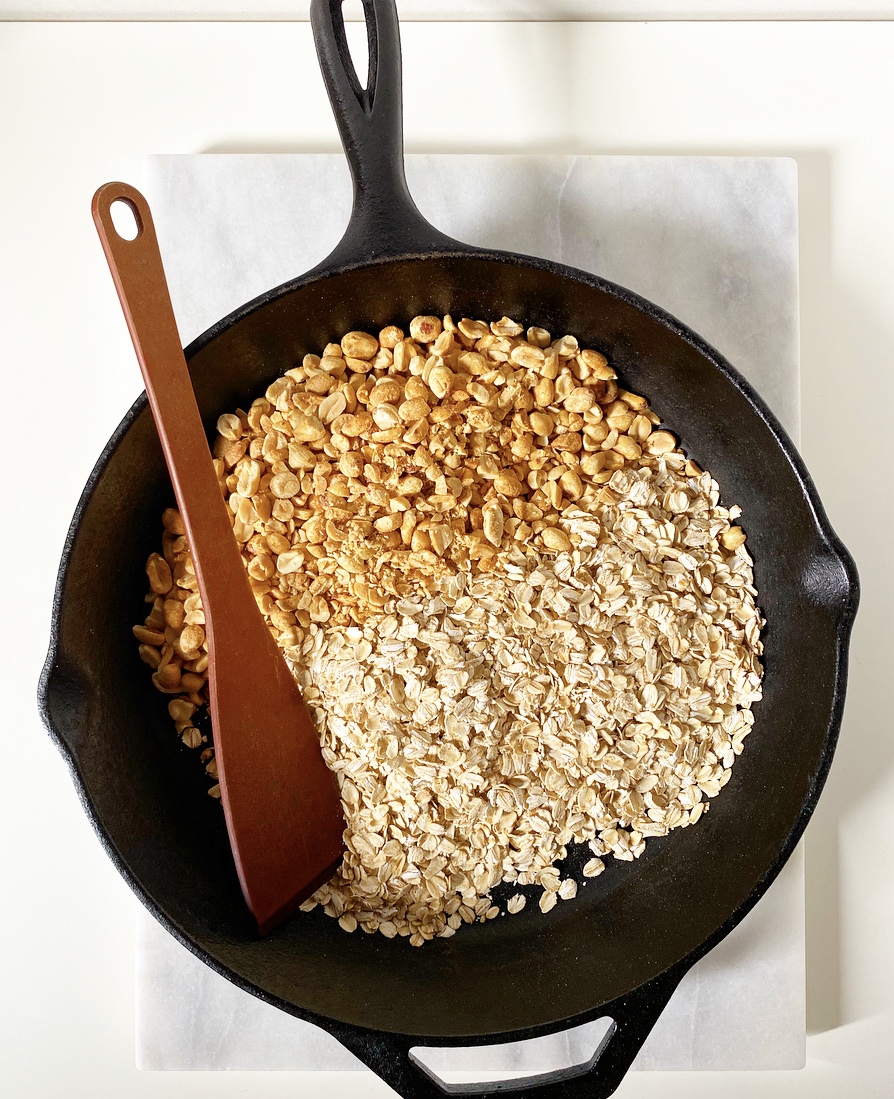 Toast the dry ingredients. Combine your oats and chopped peanuts in a heavy pan over medium heat. Stir them around for about 10 minutes, until fragrant and a little darker in color. Don’t burn ‘em.
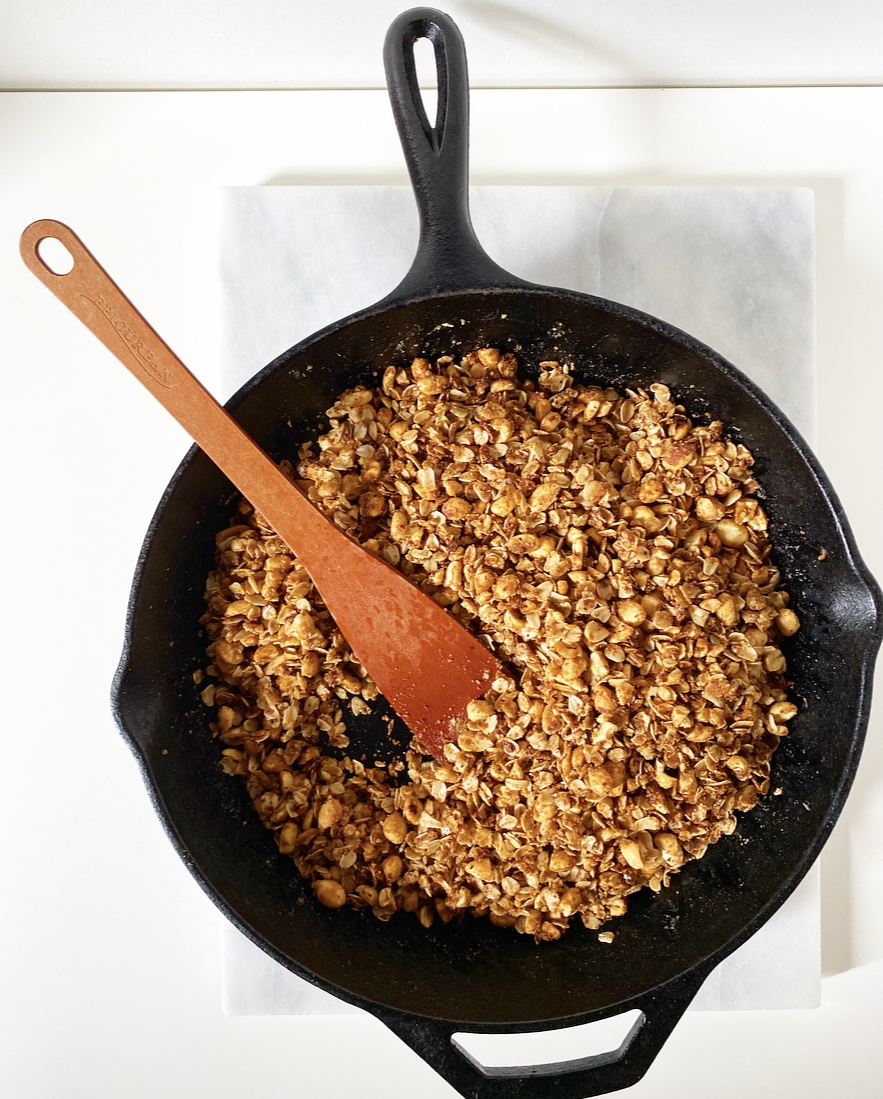 Add the wet ingredients to the dry. Pour your peanut butter/maple/brown sugar/oil mixture into the oats and peanuts.
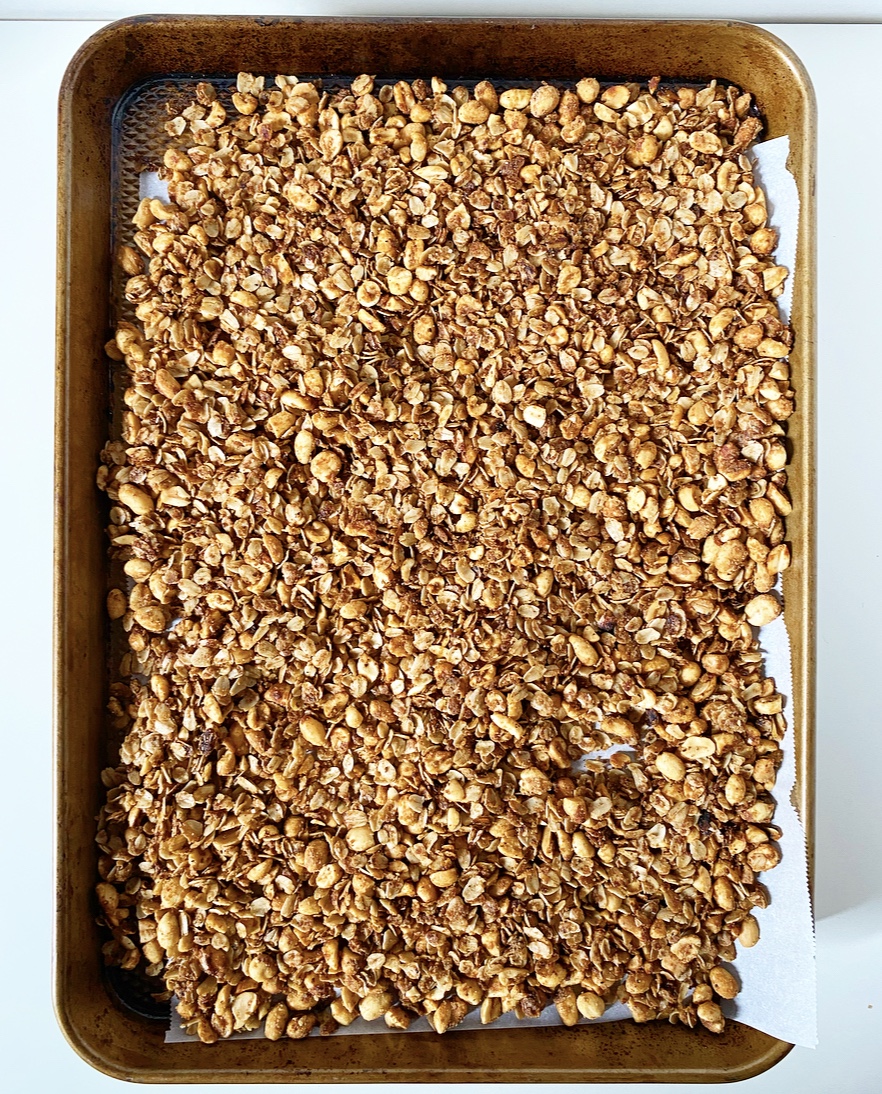 Cool. Scatter your granola on a rimmed baking sheet on a rack and let it come to room temperature. This is the part where your granola gets real good and crispy while you decide how you want to serve it. I highly recommend yogurt, raspberries and an artful drizzle of peanut butter.
 You may notice that Easy Stovetop Peanut Butter Granola isn’t particularly cluster-prone. This doesn’t bother me in the slightest, but if you are a cluster person, you can reduce the oats and peanuts down to three cups total volume and keep everything else the same. Alternatively, swap the maple syrup for a thicker sweetener like honey or brown rice syrup, and maybe bump it up to 5-6 tablespoons. Either of those should work some clustering magic.