Category Archives: Candy

Malted Whoppers Cookies

Malted Whoppers CookiesIt feels good to be making cookies again. I haven’t baked much since the holidays ended–I had eaten so much sugar that it simply didn’t appeal. I made a few cakes for orders, but other than those (and a batch of granola), January was all savory. It was nice to change it up, but…I just really love making cookies.

Malted Whoppers CookiesY’all know I have a thing for chocolate malts. I already have a recipe for the classic fountain treat and a really delicious Malted Chocolate Buttercream on here. If I had it my way, there would be malted milk powder in pretty much everything I make, but since an all-malt-all-the-time blog might get a little tedious, I’ve tried to space it out.

If you are as in love with malted milk powder as I am, today’s your lucky day. These Malted Whoppers Cookies have a double dose of the good stuff: 1/2 cup in the dough and crushed Whoppers candies strewn throughout! Oh yes, these are a malt lover’s dream cookie.

Malted Whoppers CookiesOne thing before we get to the recipe. I have gone on and on about how I prefer my cookies to be puffy rather than flat. Malted milk powder contains sugar which, combined with the sugar in this recipe, causes the cookies to spread. Normally, this would drive me insane, but somehow these thinner cookies don’t bother me in the slightest. Maybe it’s the chewy centers and crispy edges. Or maybe it’s all that malt.

It’s probably the malt.Malted Whoppers Cookies

Malted Whoppers Cookies
makes about 3 dozen cookies

2 1/2 cups all-purpose flour
1/2 cup malted milk powder
1 teaspoon baking powder
1/4 teaspoon baking soda
1 teaspoon Kosher or sea salt
1 cup (2 sticks) unsalted butter, softened to room temperature
3/4 cup granulated sugar
1/2 cup dark brown sugar, packed
2 large eggs
2 teaspoons pure vanilla extract
2 cups Whoppers candies, crushed (most of a 12-ounce box)

In a medium-large mixing bowl, whisk together flour, malted milk powder, baking powder, baking soda, and salt. Set aside.

In a large mixing bowl, use an electric mixer to beat butter until light and fluffy. Add granulated and dark brown sugar and beat until combined. Mix in eggs one by one, followed by vanilla. Add dry ingredients in two installments, combining completely after each addition. Add crushed Whoppers and mix just until dispersed. Cover dough with plastic and refrigerate for at least 2 hours, or up to 3 days.

Preheat oven to 350F. Line two baking sheets with parchment.

Scoop chilled dough in 2 tablespoon increments and roll into balls (I use a medium cookie scoop). Place dough balls at least 3 inches apart on prepared pans. Bake 9-11 minutes, or until the edges are turning golden and the tops are still a bit shiny. Let cookies cool on the baking sheets for 10 minutes before removing to a rack to cool completely. Repeat with any remaining dough.

Cookies will keep in an airtight container at room temperature for up to a week.

Malted Whoppers Cookies

Five-Ingredient Salted Marzipan Truffles {Accidentally Vegan & Gluten-Free}

Five-Ingredient Salted Marzipan Truffles {Accidentally Vegan & Gluten-Free}Christmas is just nine days away, y’all, and the spirit is real. We have a HUGE real tree in the living room, I have a six-foot fake tree in my bedroom, and my workspace has been adorned with a garland and my beloved Snoopy lights ❤️💚🎄💚❤️

It is freezing cold and I still have tons to do before I hop a flight to Texas on Tuesday, but I am totally loving every minute. Even the all-nighter I pulled earlier this month. (I subsequently learned that 31 is waaaaay too old to pull an all-nighter.)

On Wednesday, I posted an Iced Sugar Cookie recipe that is super time-consuming. Totally worth the effort, but still. The time I allocated for long, intricate recipes has now officially come and gone. So today, let’s take it easy. Not that easy means plain or boring. Oh, no. Today, it means a no-bake, five-ingredient, accidentally vegan, gluten-free recipe that is still classy, decadent, and perfect for gifting and entertaining. I’m talking about Salted Marzipan Truffles, y’all!

Five-Ingredient Salted Marzipan Truffles {Accidentally Vegan & Gluten-Free}I’m no chocolatier, but I have to say that these truffles kind of make me look like one. Packaged marzipan (in the baking aisle) is scooped by the 1/2 tablespoon, rolled into balls, dipped in chocolate, and sprinkled with finishing salt. When you bite into one of these truffles, the flavor comes in three waves:

  1. Deep, dark chocolate flavor.
  2. A salty punch.
  3. Sweet, almond-y marzipan. Yes.

Five-Ingredient Salted Marzipan Truffles {Accidentally Vegan & Gluten-Free}If, like me, you are not much of a candy-maker, working with melted chocolate can be intimidating. I have never successfully tempered chocolate (or even tried, really). Nine days before Christmas is *not* the time for me to try to master a new skill. Nope.

So, I take a little shortcut. I melt chopped dark chocolate in the microwave and stir in two secret ingredients. First, 1/2 teaspoon of coconut oil. Since coconut oil solidifies at 76F, this will allow our chocolate to harden more easily than if it were left to its own devices. If you don’t like coconut, don’t worry! This tiny amount of oil does not change the flavor of the chocolate. If you really don’t want to use it, feel free to sub non-hydrogenated shortening.

The second secret ingredient? Corn syrup. Just 1 teaspoon adds gloss to our chocolate, leaving just a bit of sheen on the matte surface of the finished truffles. The corn syrup you see in stores is NOT the same as high-fructose corn syrup, but if you don’t wish to use it, you may sub in 1 teaspoon of Lyle’s Golden Syrup or mild honey (if you’re not vegan).

Five-Ingredient Salted Marzipan Truffles {Accidentally Vegan & Gluten-Free}Five-Ingredient Salted Marzipan Truffles {Accidentally Vegan & Gluten-Free}Five-Ingredient Salted Marzipan Truffles {Accidentally Vegan & Gluten-Free}The dipping chocolate will be shiny, smooth, and luxurious. Working with one ball of marzipan at a time, drop it into the melted chocolate. Move it around with a fork to coat. Briefly drain it by scraping the tines of the fork on the edge of the bowl, and gently roll it onto the wax paper. Then, sprinkle on a pinch of finishing salt. That’s the whole process. Repeat it approximately 23-24 more times before freezing all the truffles for fifteen minutes.

That is literally the entire recipe. If you’re a fast roller and dipper, you can go from ingredients to truffles in 45 minutes or less. I have every intention of putting these out at a holiday party I’m catering tonight, but I also think they’d make adorable gifts packed into decorative Chinese takeout boxes.Five-Ingredient Salted Marzipan Truffles {Accidentally Vegan & Gluten-Free}

Five-Ingredient Salted Marzipan Truffles {Accidentally Vegan & Gluten-Free}
makes about 2.5 dozen truffles

12-ounces plain marzipan*
8 ounces dark chocolate, chopped*
1/2 teaspoon coconut oil
1 teaspoon corn syrup
1 1/2 teaspoons large-flake finishing salt (I use Trader Joe’s Cypriot Pyramid Salt)

Special Equipment:
microwave-safe bowl (or double boiler)
wax paper
baking sheet or plate (must fit in freezer)

Line a baking sheet with wax paper.

Scoop marzipan by the 1/2 tablespoon (1 1/2 teaspoons), roll into balls, and set on prepared pan.

Place chopped dark chocolate in a microwave-safe bowl. Microwave for 1 minute. Stir with a fork. Add coconut oil. Continue to microwave in 30 second increments, stirring in between, until smooth. Stir in corn syrup.

To dip, drop one ball of marzipan into the melted chocolate. Use a fork to coat marzipan in chocolate. Drain briefly by scraping the tines of the fork on the edge of the bowl. Use the fork to gently lay the truffle on the prepared pan. Immediately top with a pinch of finishing salt. Continue this process until all truffles are coated and salted.

Place baking sheet in the freezer for 15 minutes, until chocolate has solidified. Serve.

Truffles will keep in an airtight container in the refrigerator for up to a week. Re-salt as necessary by lightly moistening the tops with water and sprinkling with salt. Allow to dry before serving.

Notes:

1. If you are vegan, make sure the ingredients on the marzipan do not include egg whites.
2. If you are vegan, make sure your chocolate is certified vegan.

Five Ingredient Salted Marzipan Truffles

Lindor Truffle Peanut Butter Blossoms

Lindor Truffle Peanut Butter BlossomsI spent this past weekend working on a huge tea party. I made vegetarian Cornish pasties, three kinds of pie (including this one), and two flavors of scones for 100 guests. I’ve done parties for 300+, but this event was my Everest. Note to bakers everywhere: if you’re making pastry for 100, spring for a sous chef. It’s been three full days since that party, and I still haven’t fully recovered.

Since I’m all pastried out, I’m keeping it simple today with these Lindor Truffle Peanut Butter Blossoms. That’s right, classic Peanut Butter Blossoms are dressed up with milk chocolate Lindt Lindor Truffles!

Lindor Truffle Peanut Butter BlossomsThe cookie base is rich, chewy, and chock-full of peanut butter flavor. And did I mention that it just happens to be gluten-free? That’s right–there’s no wheat flour in these little cookies 😊 The structure comes from a combination of creamy peanut butter, eggs, and cornstarch. Add a little baking powder, and the resulting cookies come out super soft and puffy.

Oh, I almost forgot the best part–these peanut butter cookies come together in less than half an hour and don’t require a chill!

Lindor Truffle Peanut Butter BlossomsLindor Truffle Peanut Butter BlossomsWhile you could certainly serve the peanut butter cookies by their lonesome, it’s the holidays, so they are just screaming for a little something extra! Peanut Butter Blossoms are traditionally made with Hershey’s Kisses–and you may certainly go that route here–but why not try something a little more decadent? Lindt Lindor Truffles are everywhere this time of year. I’m not a huge candy person, but I can’t resist their chocolate shells and creamy ganache centers. Here, they’re pressed into the tops of our warm peanut butter cookies, making every bite creamy and luxurious. I prefer the milk chocolate variety, but you may use dark chocolate or any other flavor you like. A warning, however, that Lindor Truffles do contain gluten (a fact which I somehow overlooked until right before I hit publish today). If you or one of your guests must be gluten-free, I suggest using the traditional Hershey’s Kisses or any other gluten-free chocolate you enjoy.

Seriously, y’all. These little cookies are so good–perfect for all your holiday parties and cookie swaps. Lindor Truffle Peanut Butter Blossoms are guaranteed holiday crowd pleaser ❤️💚Lindor Truffle Peanut Butter Blossoms

Lindor Truffle Peanut Butter Blossoms
makes about 2 dozen cookies

1 1/2 cups creamy-style peanut butter* (almost an entire 16.3 ounce jar; I used Skippy)
1 1/2 cups light brown sugar
1 large egg + 1 large egg yolk, room temperature
1 teaspoon pure vanilla extract
2 tablespoons cornstarch
3/8 teaspoon baking powder
24-25 Lindt Lindor Truffles (I use the Milk Chocolate variety), unwrapped

Preheat oven to 350F. Line two baking sheets with parchment. Set aside.

In a large mixing bowl, use an electric mixer to beat peanut butter and light brown sugar until combined. Mix in egg and yolk, followed by vanilla. Beat in cornstarch and baking powder.

Scoop dough in 2 tablespoon increments and roll into balls. Place dough balls at least 2 inches apart on prepared pans. Bake 8-9 minutes, until no longer shiny. Let cool five minutes on the pans before pressing one Lindt Lindor Truffle into the top of each cookie. Let cool and additional ten minutes before removing to a rack or serving plate.

Truffles will re-solidify after several hours at room temperature. They are best eaten with a napkin handy to catch any drips from the ganache centers. Cookies will keep in an airtight container at room temperature for up to a week.

Note:

Do not use natural peanut butter here. These cookies need the homogenous texture of creamy-style peanut butter.

Lindor Truffle Peanut Butter Blossoms

Candy Corn Cupcakes

Updated 10/27/2020 to add better photos and slightly alter the amount of frosting.Candy Corn CupcakesCake week, y’all. It gets me every time. The last week of every month is full of cake orders, and between those and my day job, this blog always seems to get shoved to the side. Perhaps one day I’ll be more organized. Or be able to afford an assistant.

Fortunately, the cake madness is done just in time for me to post a Halloween treat! I am not actually a fan of Halloween, but I cannot get enough candy corn. I know half of you think the stuff is disgusting, and I totally get it–it’s too sweet, a bit chalky, and gets stuck in your teeth. But I love it. I have three huge bags of the stuff in my kitchen, so I’m set on candy corn for at least a month.Candy Corn Cupcakes
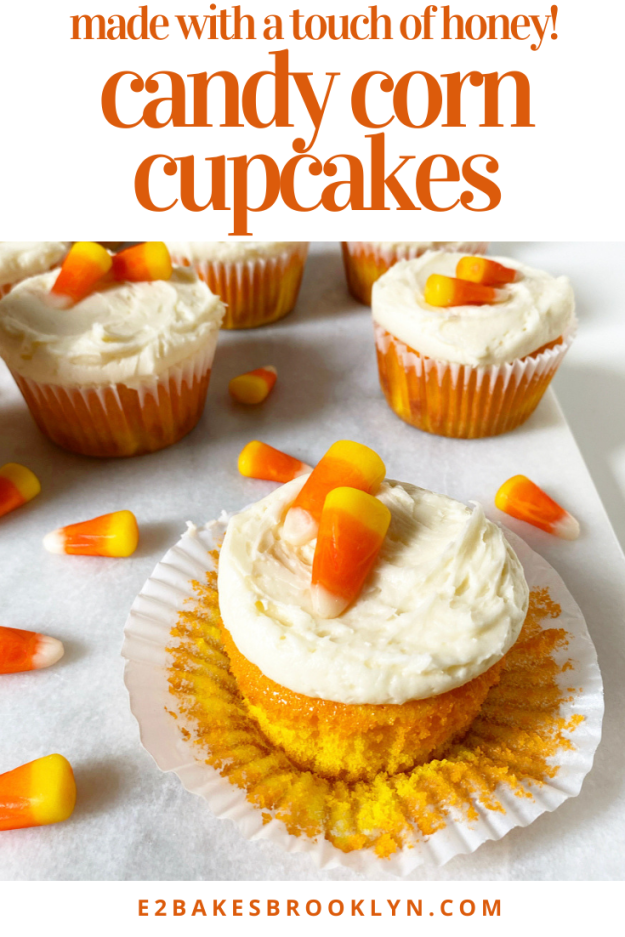
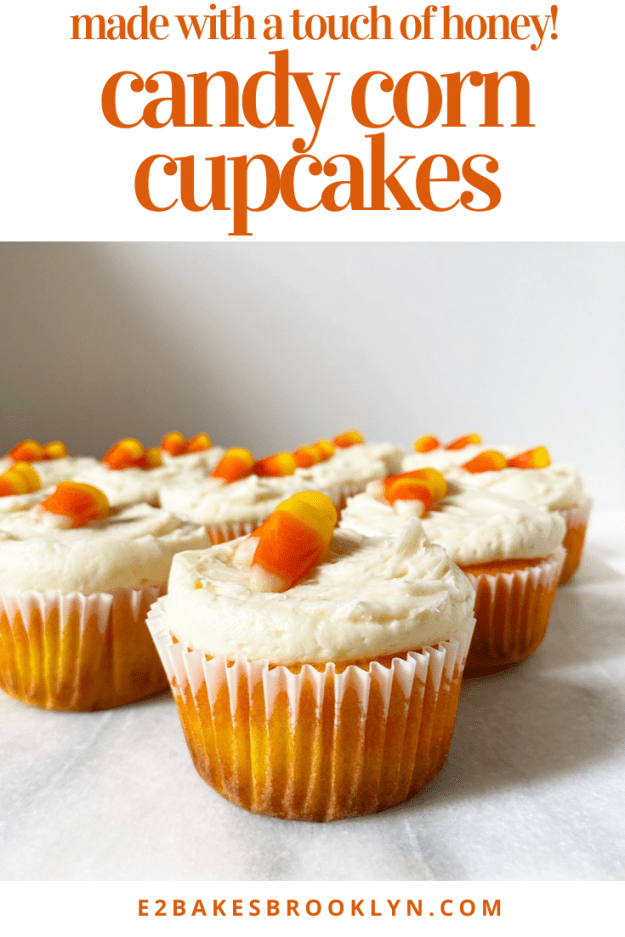
Surely by now you’ve seen candy corn cupcakes on Pinterest and other social media. The gist is that vanilla cake batter is dyed orange and yellow, baked into cupcakes, and topped with white vanilla buttercream. Sure, the cupcakes are cute and festive, but for a candy corn aficionado like myself, they leave something to be desired. Namely, the very distinct flavor of candy corn.Candy Corn Cupcakes
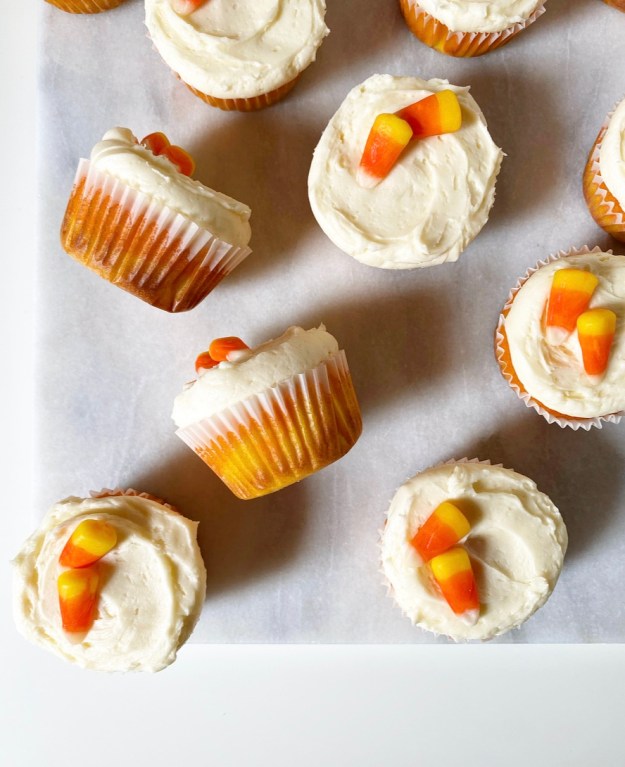
What does candy corn taste like? Well, mostly it’s just sweet–so sweet, in fact, that it’s hard to detect any real flavor. Many brands of the stuff boast that they are made with “real honey” (as opposed to all that fake honey). Armed with this information, I figured a honey-vanilla cake batter was a good place to start. However, when I tasted the batter before baking, I found the flavor to be lacking a little. My vanilla cake batter is good, as is the addition of honey, but this batter tasted nothing like candy corn.

Enter my secret ingredient: imitation butter extract. It sounds super gross, but it’s really not. It has this uncanny ability to give baked goods that sort of nostalgic quality that’s found in the boxed mixes of our youths. It makes sugar cookie dough with sprinkles taste like Funfetti cake mix, and here, it makes these honey-vanilla cupcakes taste a little more like candy corn. There’s only 1/4 teaspoon of the stuff in the entire recipe; just enough to make the final products taste a little like candy corn without making them taste completely artificial. If imitation butter extract is not for you, feel free to leave it out. Your honey-vanilla cupcakes will still be festive and delicious.Candy Corn Cupcakes
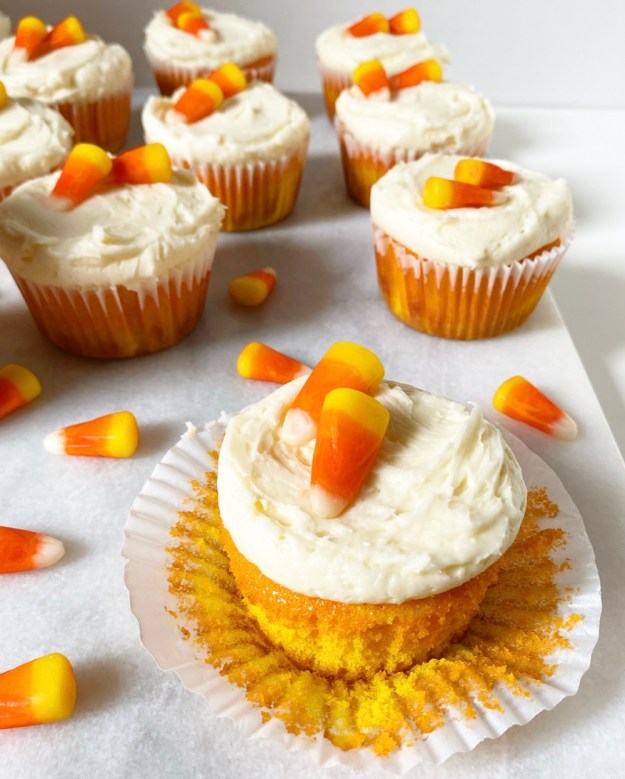
The frosting is just my vanilla buttercream doctored up with a little honey (and the extract). It’s luxuriously light and fluffy, and oh, how I wish my cake decorating skills could make it look as delicious as it is. You’ll just have to take my word for it (or better–make it!). Although it does look pretty good sort of drooping over the tops of these cupcakes.

Happy Halloween, y’all! Let me know if you make these Candy Corn Cupcakes this weekend 😊 Candy Corn Cupcakes

Candy Corn Cupcakes
makes 12-14 cupcakes

Cupcakes:
1 1/2 cups all-purpose flour
2 tablespoons cornstarch
1/2 teaspoon baking powder
1/4 teaspoon baking soda
1/2 teaspoon Kosher or sea salt
1/2 cup (1 stick) unsalted butter, softened to room temperature
2 large eggs, room temperature
1 cup granulated sugar
2 tablespoons honey
2 teaspoons pure vanilla extract
1/8 teaspoon imitation butter extract (optional)
1 cup buttermilk, room temperature
yellow food coloring
orange or red food coloring

Frosting:
3/4 cup (1 1/2 sticks) unsalted butter, softened to room temperature
2 1/2 cups confectioner’s sugar
pinch of Kosher or sea salt
2 tablespoons honey
2 teaspoons pure vanilla extract
1/8 teaspoon imitation butter extract (optional)
3 tablespoons heavy cream
candy corn, for garnish

Preheat oven to 350F. Line a 12-cup standard muffin tin with cupcake liners. Set aside.

In a small-medium mixing bowl, whisk together flour, cornstarch, baking powder, baking soda, and salt. Set aside.

In a large mixing bowl, use an electric mixer to beat butter until light and fluffy. Beat in sugar, followed by honey. Add eggs one at a time, combining completely after each addition. Beat in vanilla, imitation butter extract, and buttermilk.

Divide batter into two bowls, about 1 1/2 cups each. Add yellow food coloring to one bowl, stirring as you go, until the desired color is reached (I used 3 drops yellow gel food coloring). Add orange food coloring to the other bowl, and stir until evenly distributed (I used 3 drops orange gel food coloring). If you don’t have orange food coloring, add yellow to the second bowl, then add red a drop at a time until the color is reached.

Add 2 tablespoons of yellow batter to each cupcake liner. Top each with 2 tablespoons of orange batter. Liners should be 1/2-2/3 full. Tap full pan on the counter five times before baking for 16-18 minutes, or until a toothpick inserted in the middle comes out clean. Let cupcakes cool in the pan for 5-10 minutes before removing to a rack to cool completely.

Make the frosting. In a large mixing bowl, use an electric mixer to beat butter until light and fluffy. Add confectioner’s sugar and salt in two installments, combining completely after each addition. Beat in honey, vanilla, and optional imitation butter extract. Mix in heavy cream until combined. Frost cupcakes as desired. Garnish with candy corn.

Cupcakes will keep covered at room temperature for up to three days, or in the refrigerator for up to five.Candy Corn CupcakesCandy Corn CupcakesCandy Corn Cupcakes

Caramel Apple Puff Pancake {Dutch Baby}

Caramel Apple Puff Pancake {Dutch Baby}I must have pancakes on the brain. Last week, I posted this single-serving pancake recipe, and thanks to the response I got, I have spent the last week working on another. If I ever get the banana version to quit sticking to the pan, I’ll put it on here.

Until then, let’s talk about this Caramel Apple Puff Pancake. Oh, y’all. It is good. Goooood. Like apple pie meets caramel meets the best weekend breakfast there is. You’re going to want to make it for every weekend and holiday brunch you have for the rest of the season because it. is. ridiculous.

Caramel Apple Puff Pancake {Dutch Baby}It all starts with a classic Puff Pancake {Dutch Baby} batter. Puff Pancakes are a family favorite. They’re super easy to make and very impressive. The batter comes together in a food processor (or blender) before being poured into a screaming hot pan. Then, it’s baked for about twenty minutes until it puffs up. When it comes out of the oven, it quickly deflates, leaving behind a beautifully browned pancake with a soft custard-like center and chewy edges. It’s a thing to behold and is perfect with some confectioner’s sugar and maple syrup (or lemon juice). It really doesn’t need to be messed with. But we all know that’s not really my style.

Caramel Apple Puff Pancake {Dutch Baby}Caramel Apple Puff Pancake {Dutch Baby}Here, the traditional batter is poured into the pan and then sprinkled with sliced apples that have been tossed with sugar and pie spices–basically pie filling without a thickener. As the pancake bakes, it envelops the sliced apples. When it comes out of the oven, it’s basically the most autumnal thing ever. A drizzle of caramel sauce is all it needs to bring it over the top.

Caramel Apple Puff Pancake {Dutch Baby}Now, of course you may use store-bought caramel sauce (I hear Trader Joe’s has a good one), but I am here to convince you to make your own. It’s quick, easy, involves minimal ingredients, and is SO much better than anything you could get near the ice cream toppings. I swear. All you do is melt some sugar over medium-high heat, stirring until it becomes a dark copper color (but doesn’t burn). Then, whisk in a bunch of butter. Take the pan off the heat and whisk in some cream. It’ll bubble up violently, but just keep whisking and it’ll calm down and become a smooth, luxurious sauce. Whisk in some vanilla and salt, and then pour it on everything.

Caramel Apple Puff Pancake {Dutch Baby}The best pieces of advice I can give you for making homemade caramel?

  • Use a silver or white saucepan so you can see the sugar changing color.
  • Wear an oven mit. Molten caramel burns a lot more than boiling water.
  • Don’t step away from the caramel, even for a second. It can burn in the blink of an eye.

If I haven’t scared you away, please try this caramel sauce. It comes together in a matter of minutes and really is worth the (minimal) effort…especially when it’s drizzled over this perfectly spiced apple puff pancake.Caramel Apple Puff Pancake {Dutch Baby}

Caramel Apple Puff Pancake {Dutch Baby}
makes 4-6 servings*

Apples:
2 large baking apples,* peeled, 1/4-inch slices
1 tablespoon apple cider vinegar
2 tablespoons granulated sugar
1 teaspoon ground cinnamon
1/8 teaspoon ground allspice
1/8 teaspoon ground nutmeg
pinch of Kosher or sea salt

Puff Pancake Batter:
4 large eggs
1 cup milk (not skim or fat free)
2 teaspoons pure vanilla extract
1 cup all-purpose flour
3-4 tablespoons granulated sugar
1/2 teaspoon Kosher or sea salt
3 tablespoons butter (unsalted or salted)

Caramel Sauce:
1 cup granulated sugar
6 tablespoons unsalted butter
1/2 cup heavy cream
1 teaspoon pure vanilla extract
1/4 teaspoon Kosher or sea salt

Place a large ovenproof cast iron or stainless steel pan in a cold oven. Preheat oven to 400F.

Prepare the apples. In a medium mixing bowl, use your hands to toss apple slices and vinegar together. Sprinkle sugar, spices, and salt over the top and toss to combine. Set aside.

Prepare the pancake batter. In the bowl of a food processor or high-powered blender*, combine eggs, milk, vanilla, flour, sugar, and salt. Process 30 seconds, or until no lumps remain. Let batter rest five minutes.

Once oven has reached 400F, remove the hot pan and add butter. Place pan back in the oven for 60-90 seconds, until butter has melted. Remove pan from the oven, and swirl the butter so it coats the pan. Pour in batter. Scatter apples over the top, leaving any excess liquid in the bowl. Bake 19-20 minutes, until puffed and golden. Do NOT open the oven door during baking.

While the pancake is baking, make the caramel sauce. Place sugar in a 2-3 quart saucepan over medium-high heat. Whisk sugar until the sugar melts and turns a deep copper color. Whisk in butter until completely incorporated. Remove the pan from the heat and stir in heavy cream. Caramel will bubble violently, but will quickly relax into a smooth sauce. Whisk in vanilla and salt. Transfer sauce to a jar.

Let pancake cool 2-5 minutes before slicing. Drizzle individual portions with caramel sauce and serve immediately.

Caramel sauce will keep in an airtight container in the refrigerator for up to two weeks.

Notes:

1. If you’d like to make a 3-4 serving puff, use 3 large eggs, 3/4 cup milk, 1 1/2 teaspoons vanilla, 3/4 cup all-purpose flour, 2-3 tablespoons granulated sugar, 1/4 teaspoon salt, and 2 tablespoons butter. Use the same amount of apples. Follow all instructions as written, changing the baking time to 18-19 minutes.
2. I used one tart apple (Granny Smith) and one sweet apple (McIntosh).
3. If you do not have a food processor or blender, you may whisk all of the ingredients together and then push them through a wire mesh sieve to remove any lumps of flour. Let batter rest five minutes before proceeding as written.

Caramel Apple Puff Pancake {Dutch Baby}