 There is just something about bundt cakes. They’re one of my absolute favorite things to bake—they’re low-maintenance crowd pleasers *and* I get to feel like the queen of the universe every time I get one to release cleanly from the pan. That kind of glory is hard to come by these days.
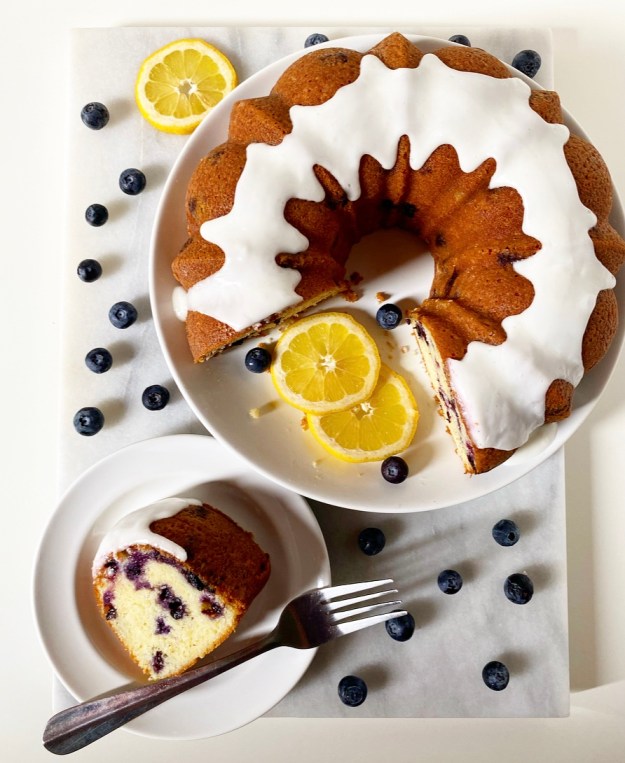
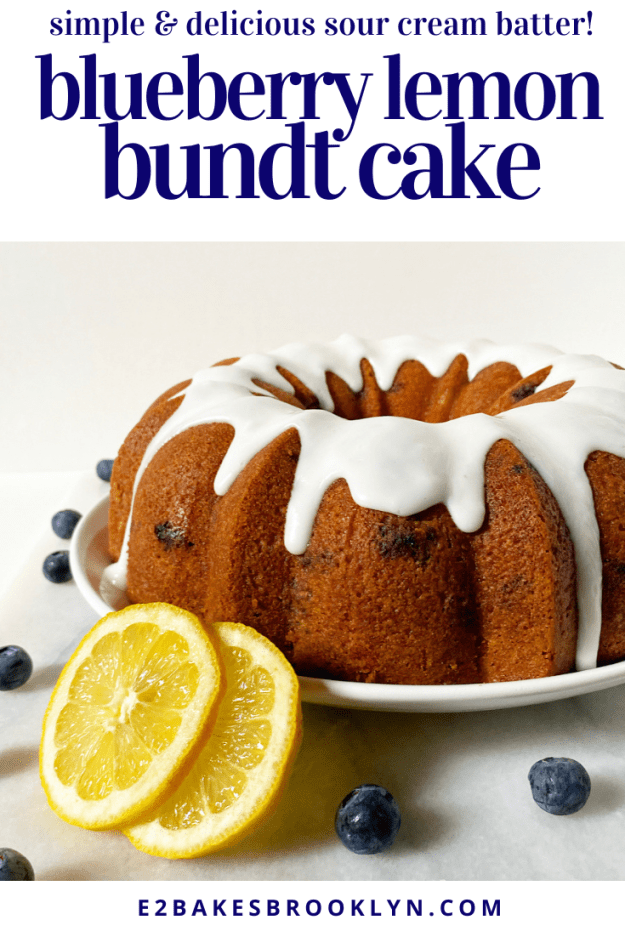
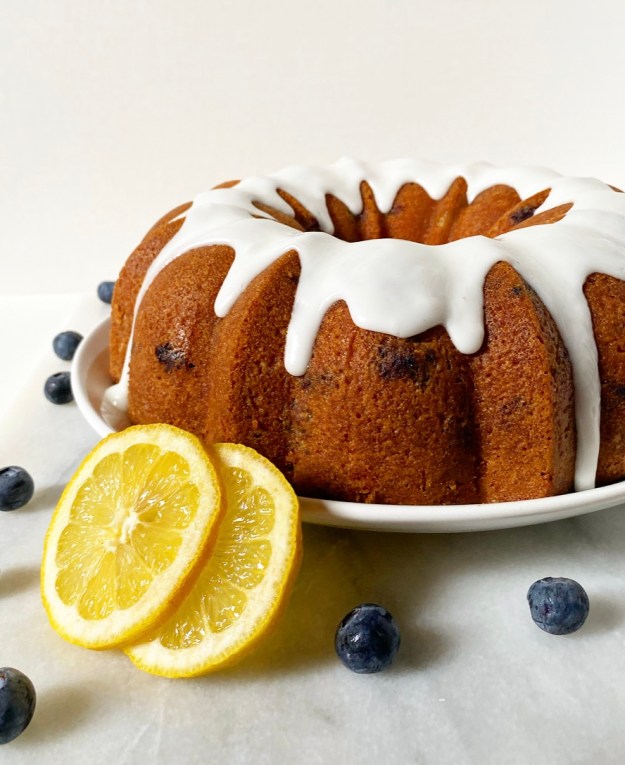 This Blueberry Lemon Bundt Cake is utterly spectacular, if I do say so myself. Lemon-scented and studded with a bevy of blueberries, it’s the perfect summertime cake. Oh, and it’s gorgeous too.
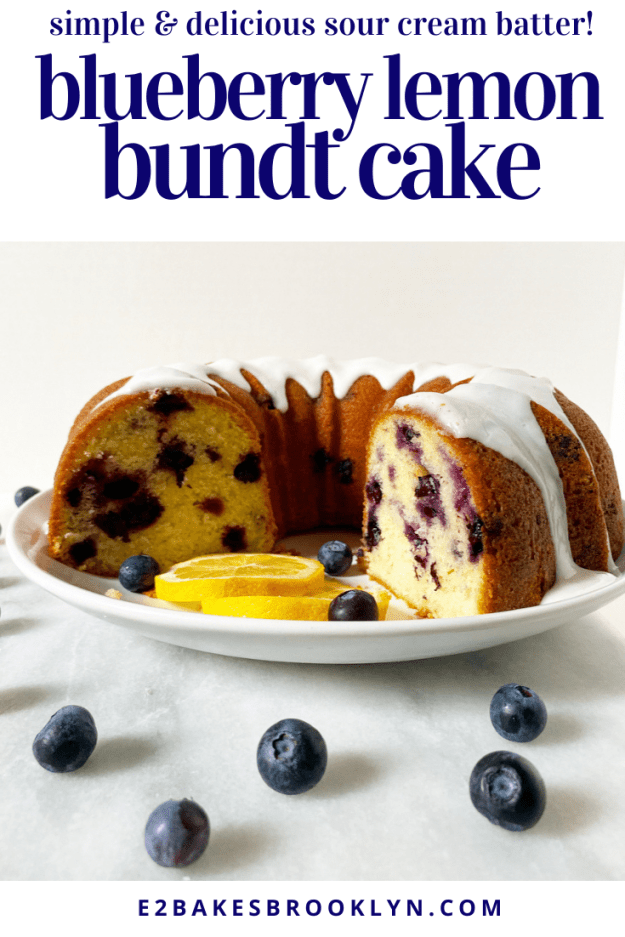
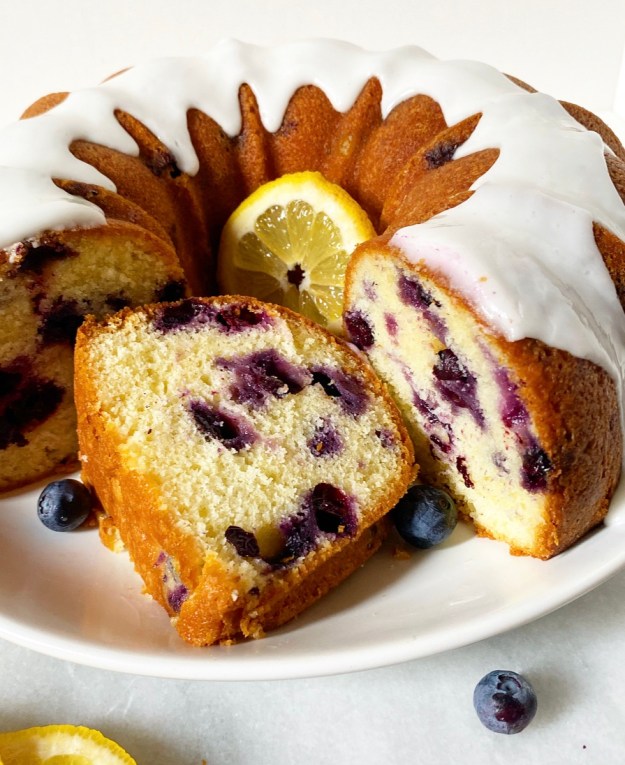 The base is a sour cream spin on my favorite bundt cake formula. While that cake batter is rich and delicious, it’s not quite thick enough to suspend whole blueberries, leaving them all to sink to the bottom of the pan/top of the baked cake. The final product still tastes right, but if you’re going to make a blueberry cake, you want the blueberries strewn throughout, ya know?
By swapping the usual milk for sour cream, the batter becomes just thick enough to support the blueberries, and you also get a super velvety crumb out of the deal. #score The blueberries are also given support via a light dusting of dry ingredients before being folded into the batter. This “trick” allows a little bit of the leavener to react directly against the blueberries, helping them to stay buoyant instead of sinking.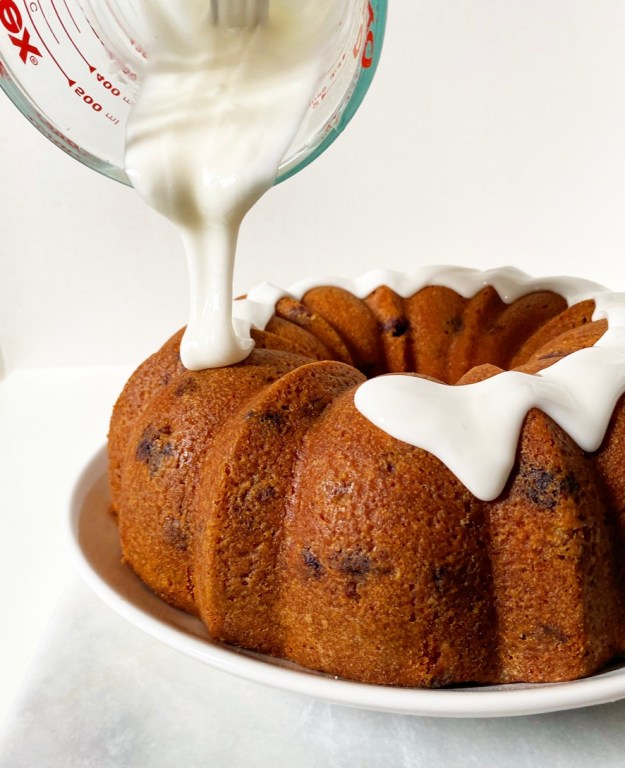 As for the lemon portion of this Blueberry Lemon Bundt Cake, it’s as simple as rubbing zest into sugar to release those good lemony oils and finishing the cake with a simple lemon icing. Easy peasy.
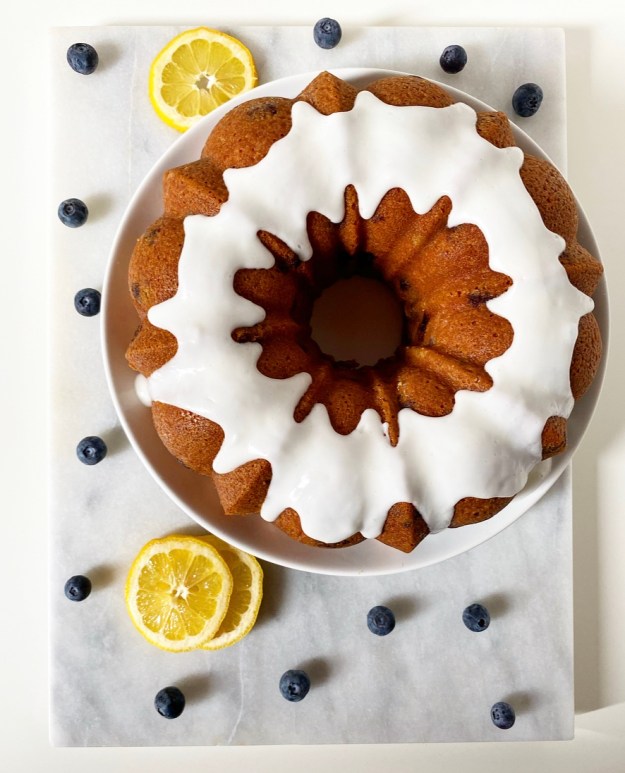 Blueberry Lemon Bundt Cake is perfect for any summer occasion, including the Fourth of July. There’s no melting frosting or chocolate to worry about, and just about everyone loves the combination of blueberries and lemon.
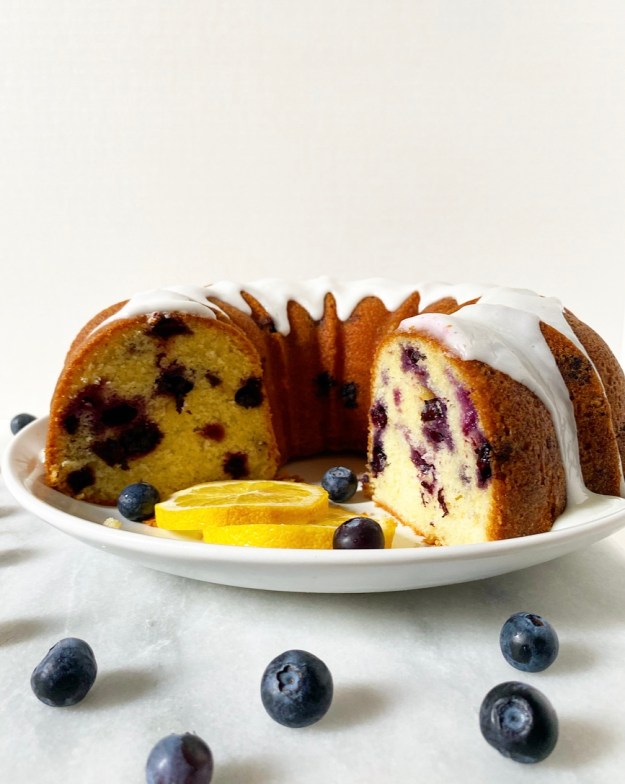 I know a lot of us aren’t having or attending gatherings large enough to finish this cake in one go, so feel free to halve it and put it in a loaf pan. I, however, have never seen leftover cake as a problem.
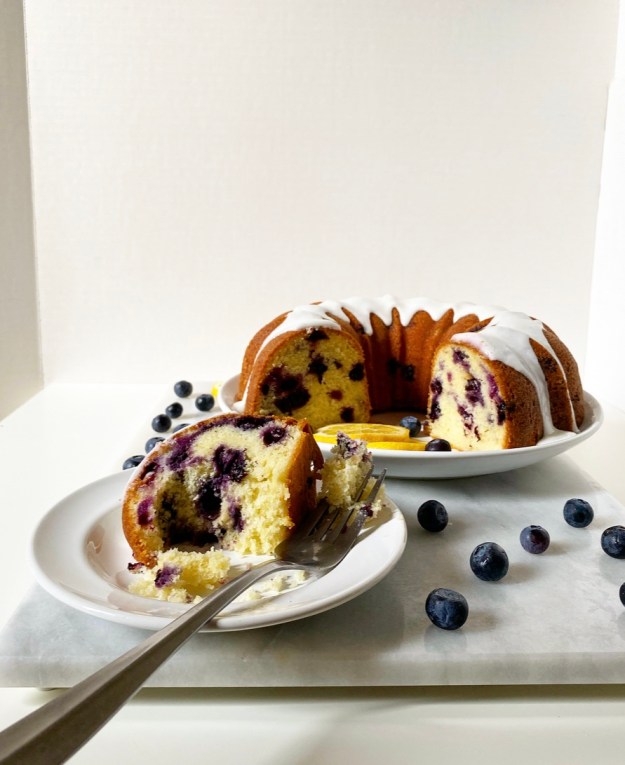
Blueberry Lemon Bundt Cake
makes one 10-cup capacity bundt
Cake:
2 cups granulated sugar
zest of 1 medium lemon
2 3/4 cups all-purpose flour
2 teaspoons baking powder
1/2 teaspoon Kosher or sea salt
1 pint fresh blueberries (about 12 ounces)
1 cup (2 sticks) unsalted butter, room temperature, cut into 16 pieces
4 large eggs, room temperature
2 teaspoons pure vanilla extract
1 cup full-fat sour cream, room temperature
Icing:
1 cups confectioner’s sugar
2 tablespoons fresh lemon juice
pinch of Kosher or sea salt
Place an oven rack in the center position. Preheat oven to 325F. Heavily grease a bundt pan with softened butter (or shortening) and dust with flour. Set aside.
Make the cake. Combine sugar and lemon zest in a small bowl and use your fingertips to rub them together. Set aside.
Combine flour, baking powder and salt in a large mixing bowl. Use an electric mixer to mix on the lowest setting for 20 seconds.
Remove 1/4 cup of the flour mixture to a small mixing bowl. Add blueberries and toss together. Set aside.
Add butter, eggs, vanilla and sour cream to the flour mixture. Use an electric mixer to mix on low for 30 seconds. Increase speed to medium and mix for 3 minutes. Batter will be thick.
Use a silicone spatula or wooden spoon to fold floured blueberries (including any unincorporated flour) into batter.
Transfer batter to prepared pan and smooth the top with a silicone spatula or wooden spoon. Tap full pan on the counter five times to release any large air bubbles. Bake 65-75 minutes, or until a toothpick inserted in several places comes out clean.
Let cake cool in the pan for 15 minutes. Run a thin, flexible knife around all exposed edges. Invert cake onto a cooling rack and let cake cool completely. Cake may be made up to a day in advance; it will keep double-wrapped in plastic wrap.
Make the icing. In a small bowl, use a fork to whisk together confectioners sugar, lemon juice and salt. Mixture should be very thick, but pourable. If it’s too thick, add more lemon juice by the teaspoon up to 3 teaspoons (1 tablespoon); if it’s too thin, add more confectioners sugar in 2 tablespoon increments. Pour over cake. Let sit for 20 minutes to set. Move cake to a serving plate before slicing and serving.
Leftover cake will keep covered at room temperature for up to two days or in the refrigerator for up to five.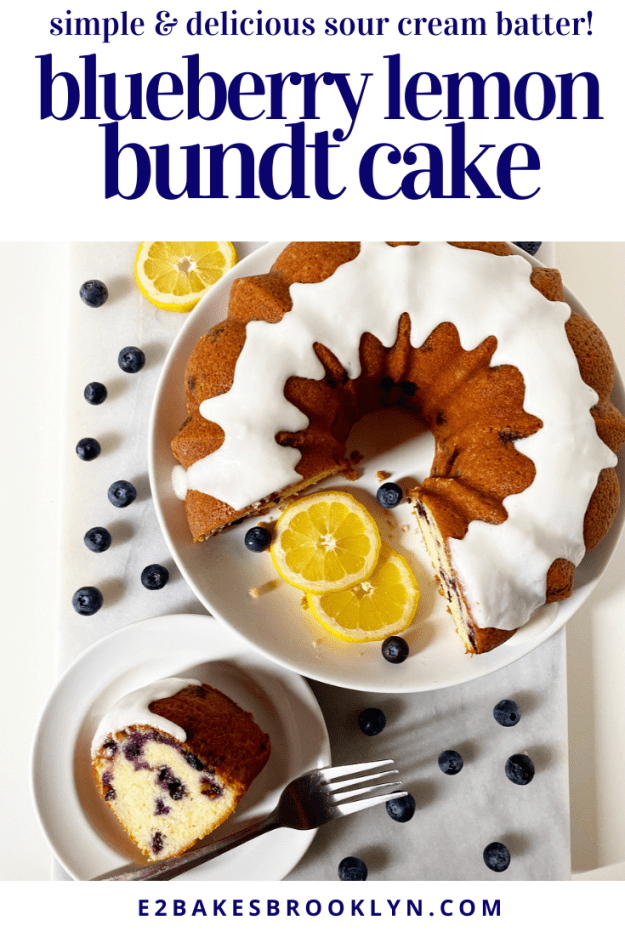
 Remember those
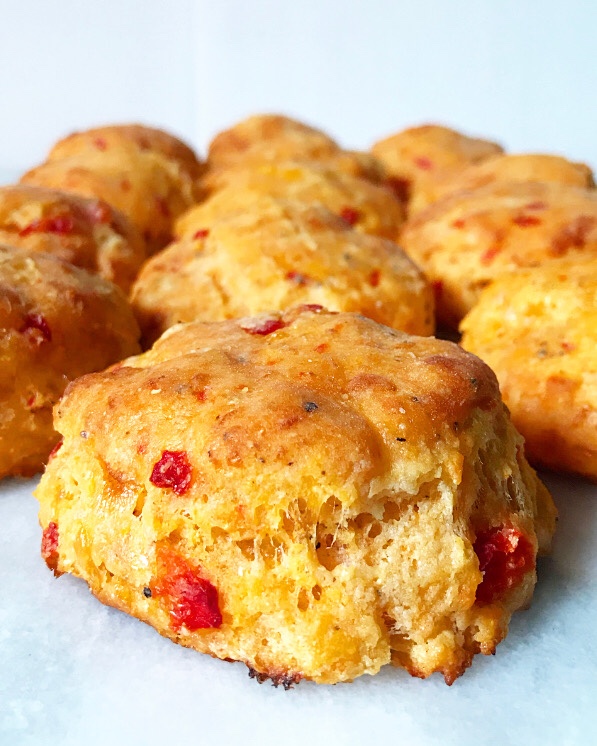
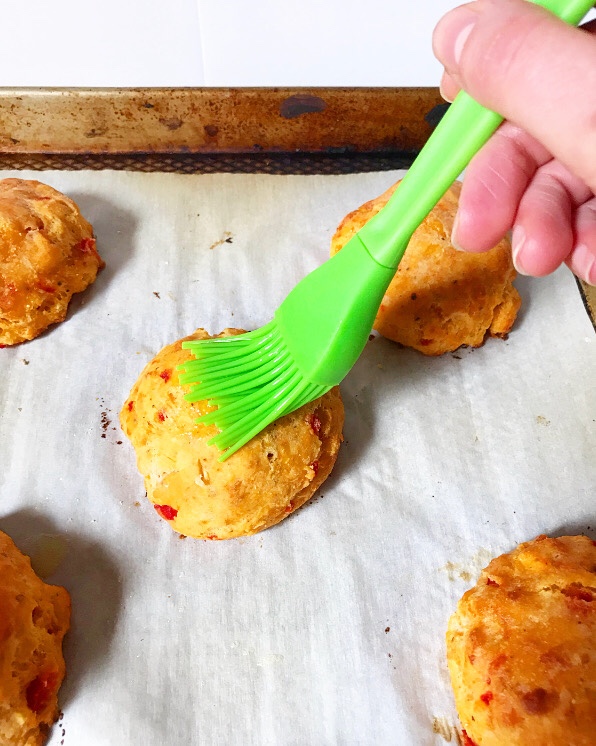
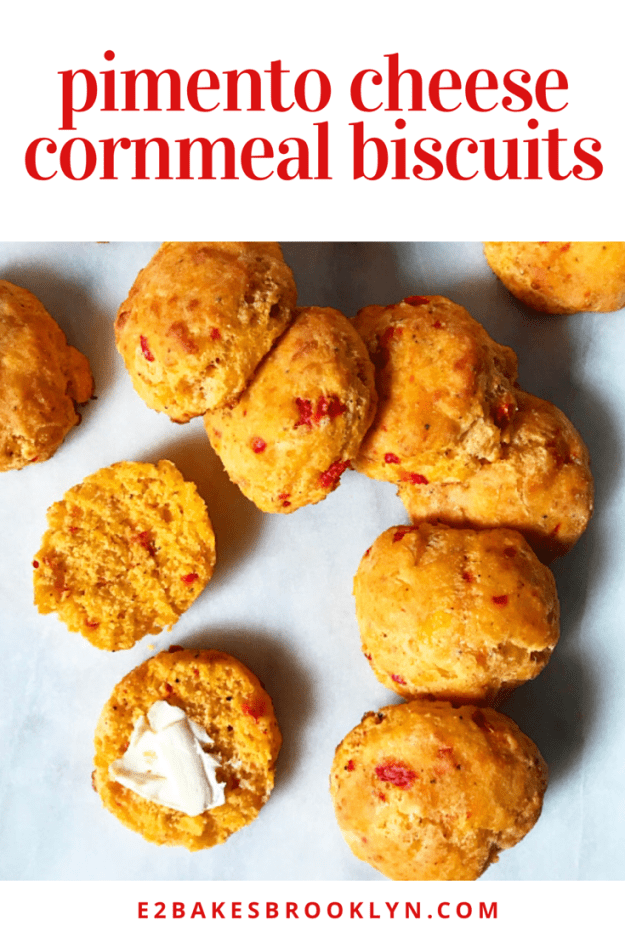
 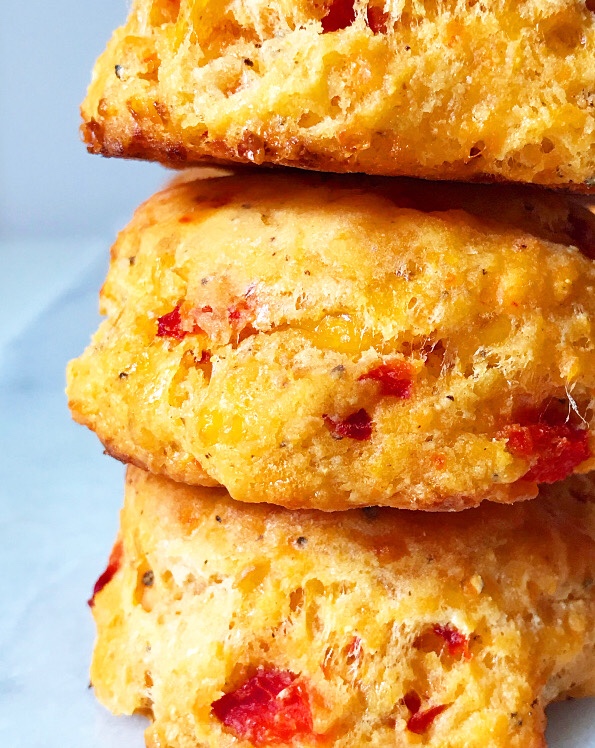 For those of you wondering what the heck pimento cheese is, it’s a creamy spread made of shredded cheddar, mayonnaise, sweet pimento peppers, and freshly-cracked black pepper. It’s incredibly popular in the southern U.S.—you’ll see it at every baby shower, cookout and picnic. You can buy the stuff in tubs in the grocery stores down there, but it’s next to impossible to find here, so I
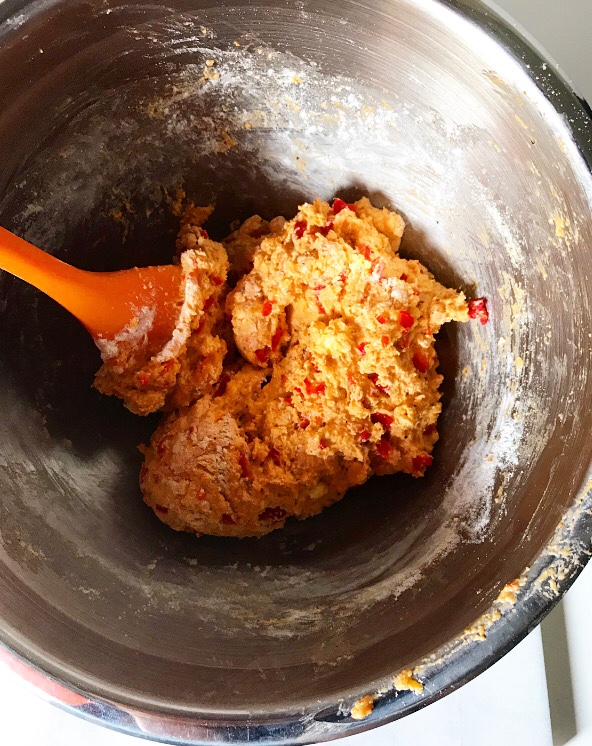
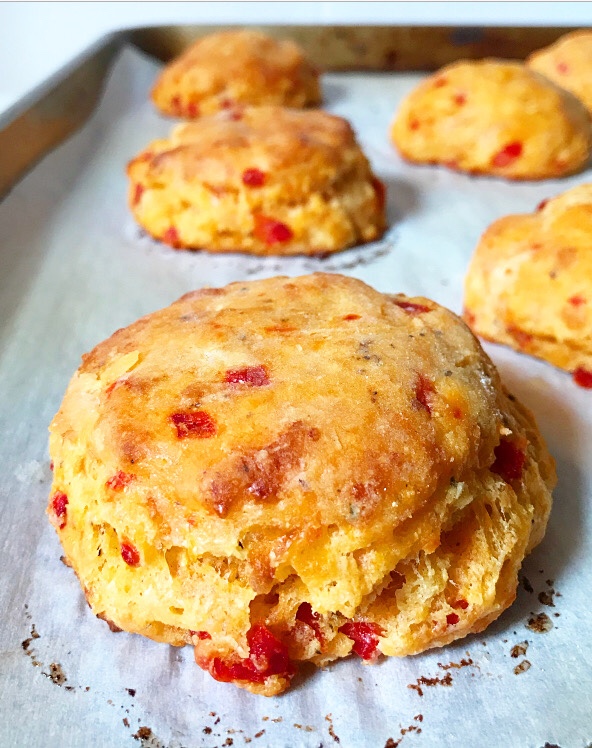
 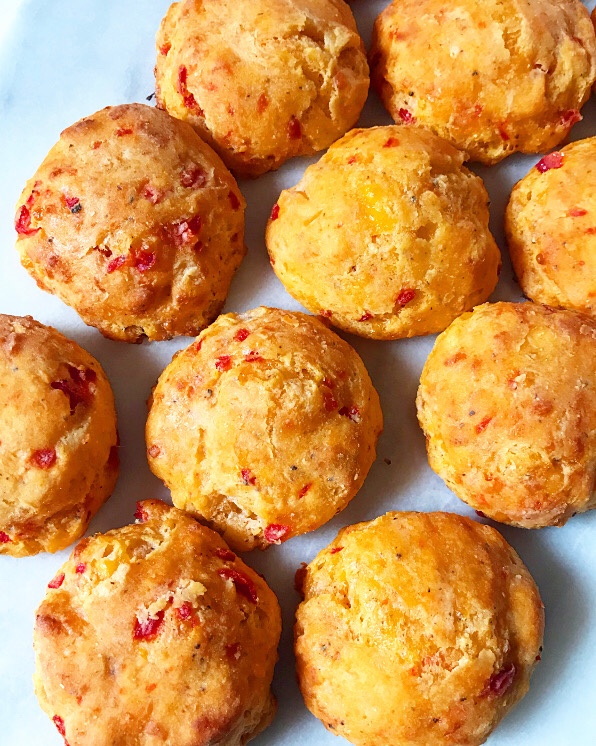 Here, I’ve taken the basic ingredients of that southern staple (minus the mayo) and folded them into a batch of cornmeal biscuit dough. The results are cheesy, spicy, sweet-pepper studded magic!
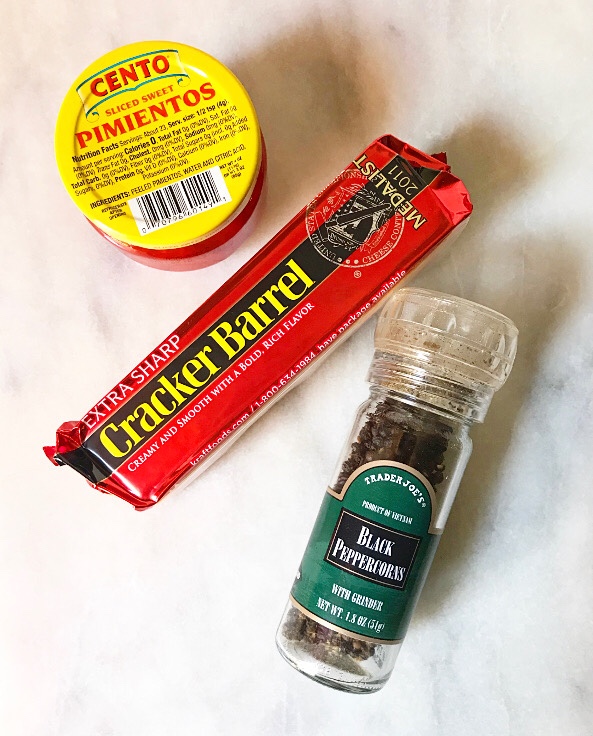
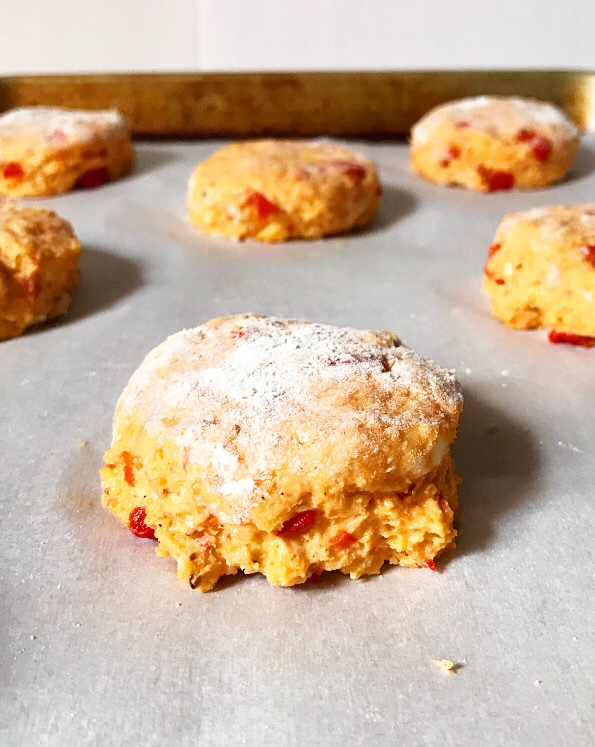
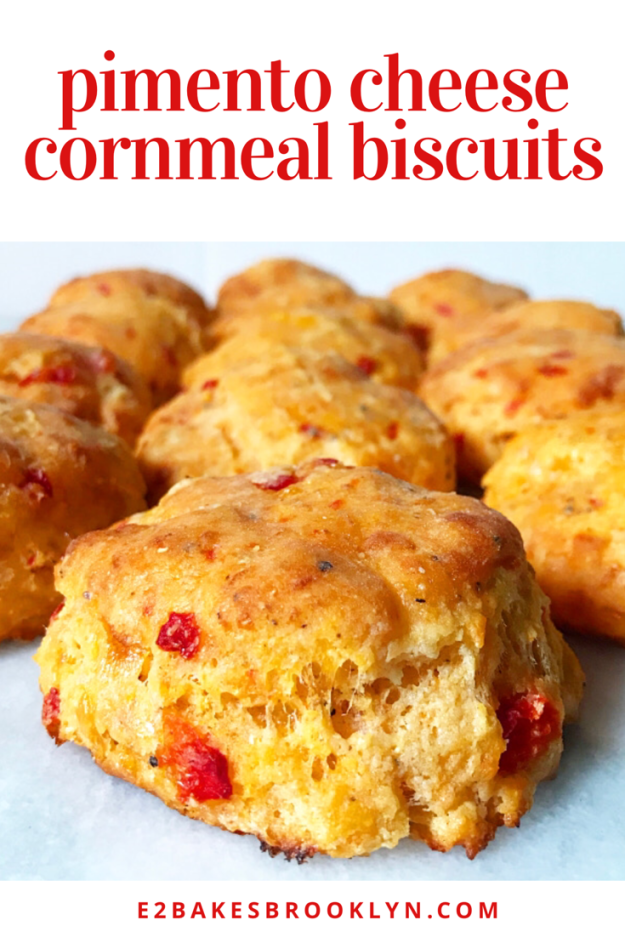
 These are the cheese biscuits of my summertime dreams, and soon, yours. And those of your family and friends too, permitting you take a batch to your Fourth of July festivities tomorrow. You can serve them plain or with butter…
 …but maybe crisp up some bacon and grab some tomatoes and arugula because these happen to make the best BLT on the planet.
 CAN. NOT. BE. BEAT.
 Oh, and these aren’t pictured, but if you dice your leftover biscuits and sauté them in butter and olive oil, you’ll get some insane croutons. I ate these on salads for five days after I took these photos and I still want more.
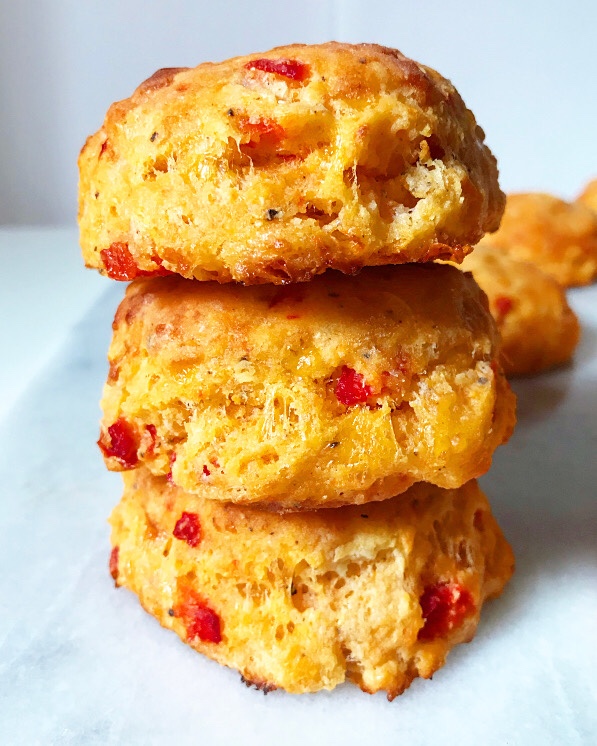 Happy Fourth of July, y’all! If you’re looking for cookout appropriate beverages, see
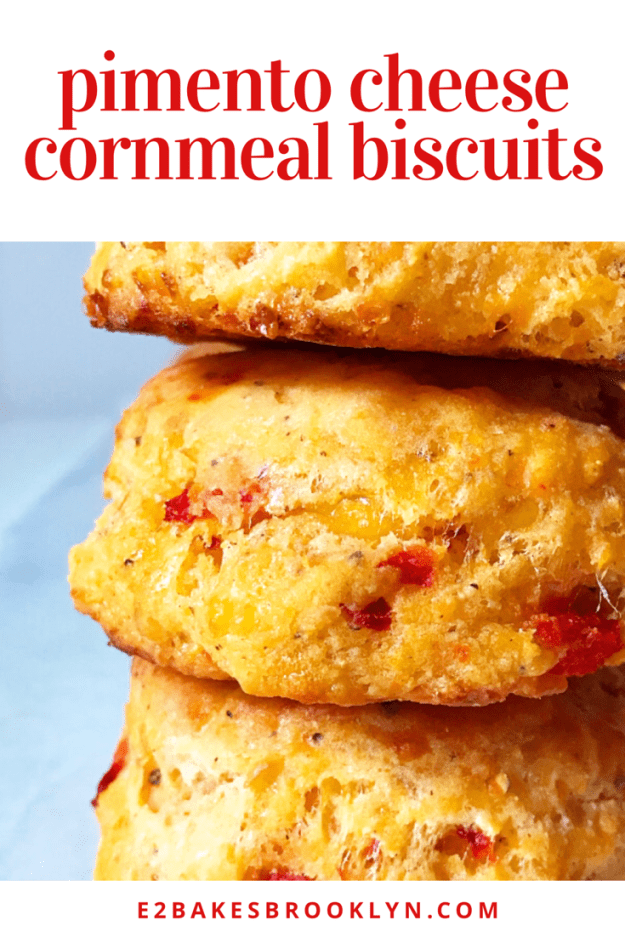
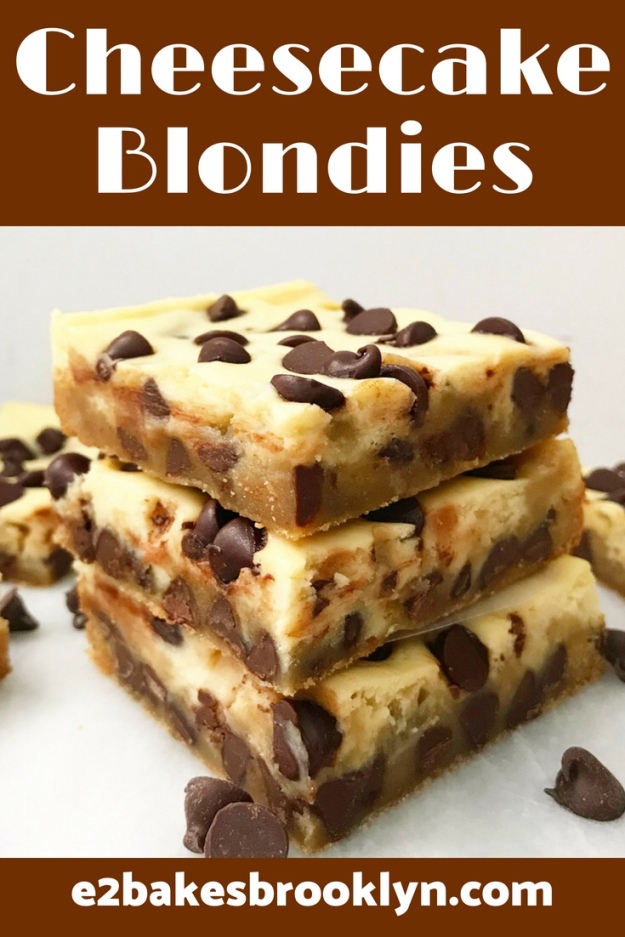
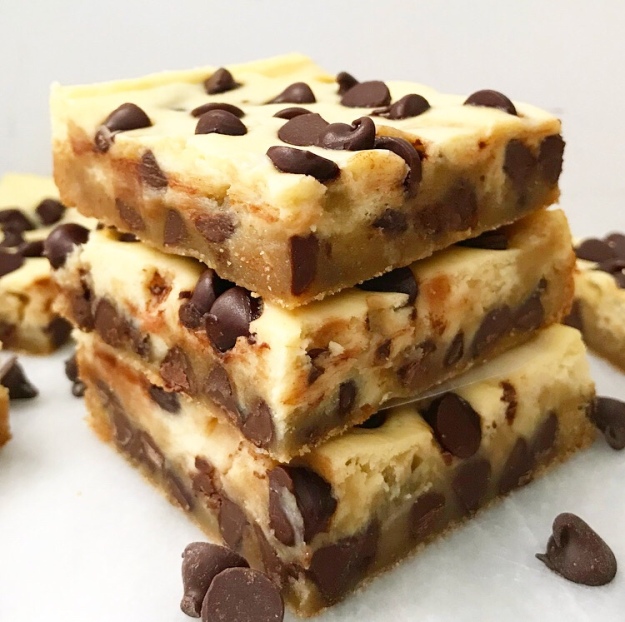 I have been debating for three days whether or not I should post these Cheesecake Blondies or use Independence Day as a “free pass” to take a rare blog day off.
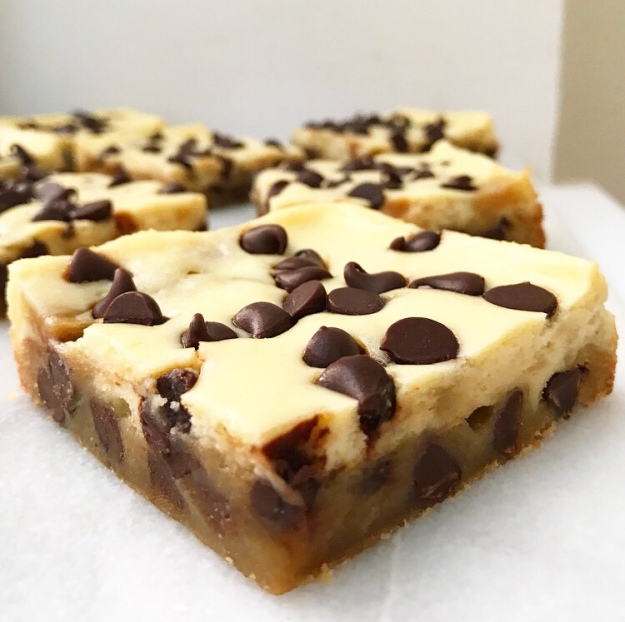 Cheesecake Blondies won out though, because they are the perfect treat to sink your teeth into while you watch the fireworks. Creamy cheesecake and chewy
 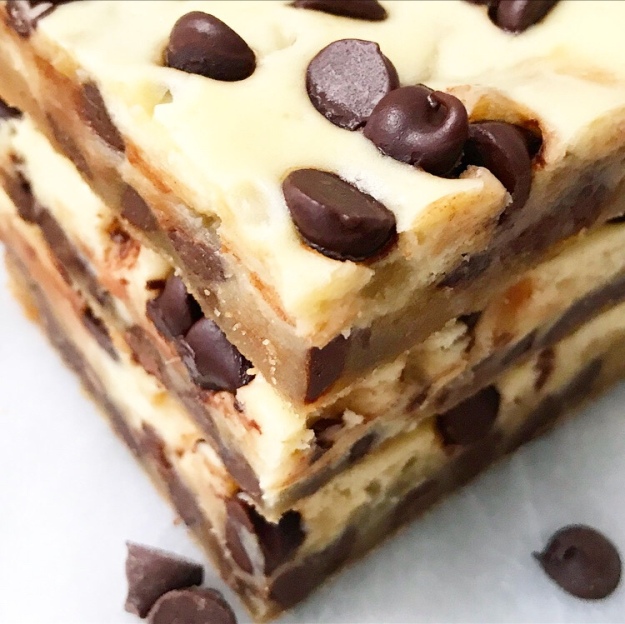 Another great thing about these blondies? They are super easy to make and bake up in just 25 minutes!
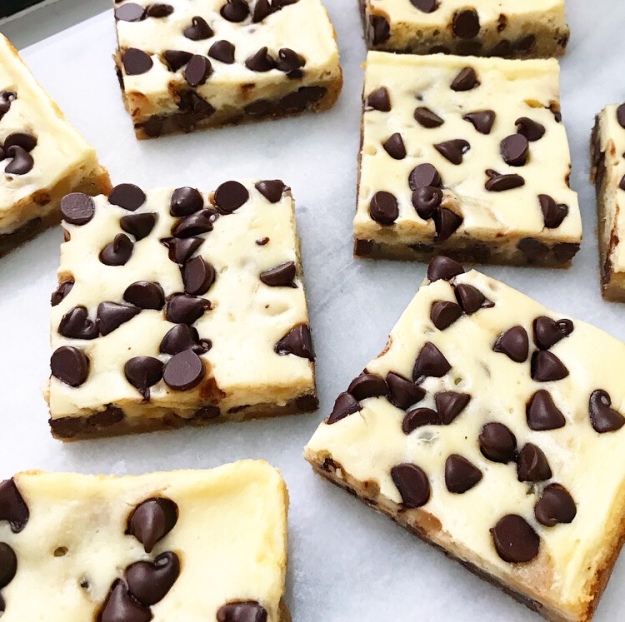 The most difficult part of making Cheesecake Blondies is waiting for them to chill. Those three hours can seem eternal, but they are completely necessary—nobody likes warm cheesecake.
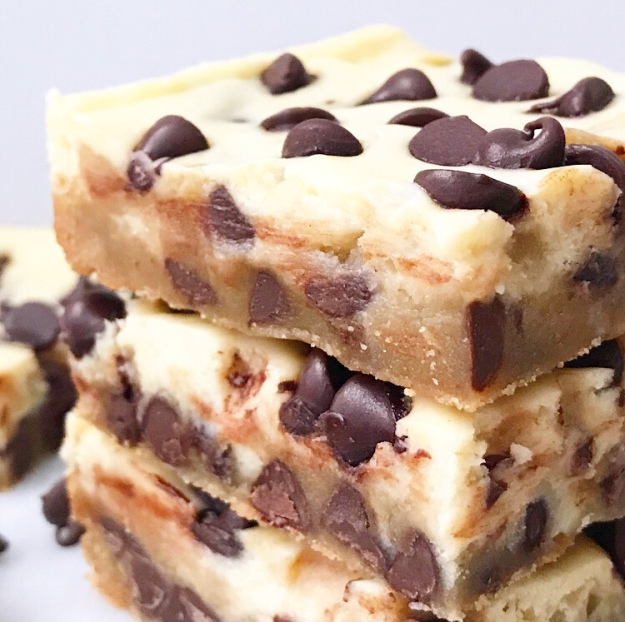 Once the chill time is up, slice up the blondies and revel in their cuteness. Chocolate chips have a way of making things more adorable, don’t they?
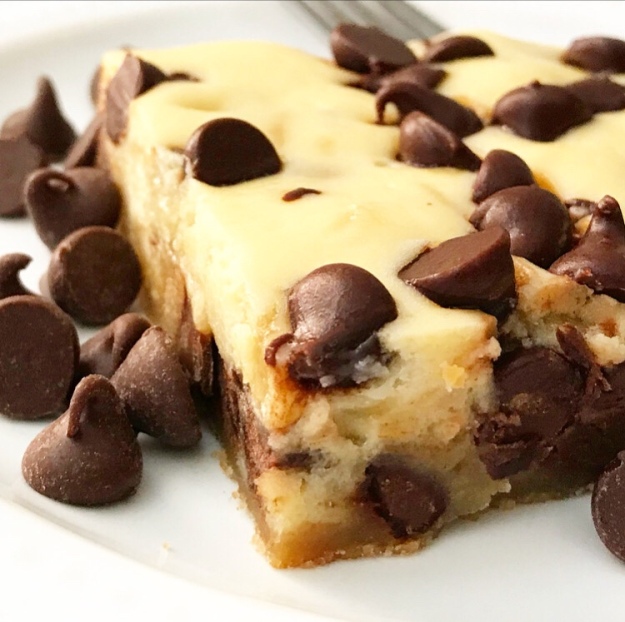 Make a batch of Cheesecake Blondies for your holiday cookout or pack a box into a cooler and take them on the go! You and your friends and family will love the combination of tangy cheesecake and sweet, brown buttery blondie ❤
 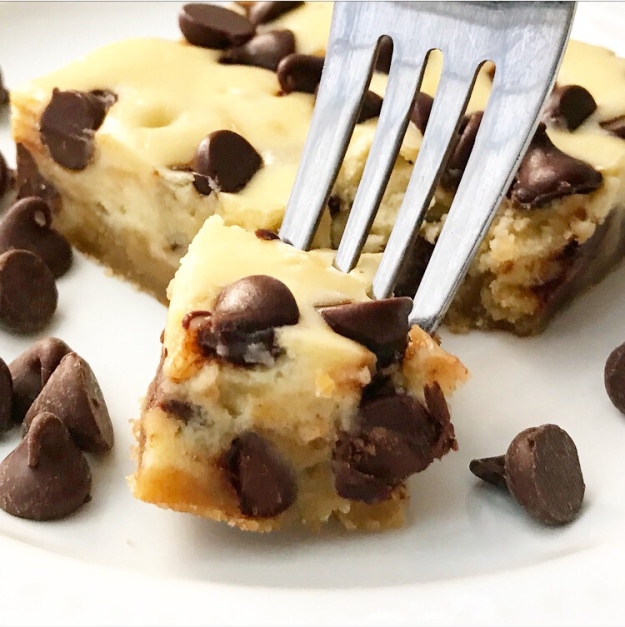 Happy Fourth of July!
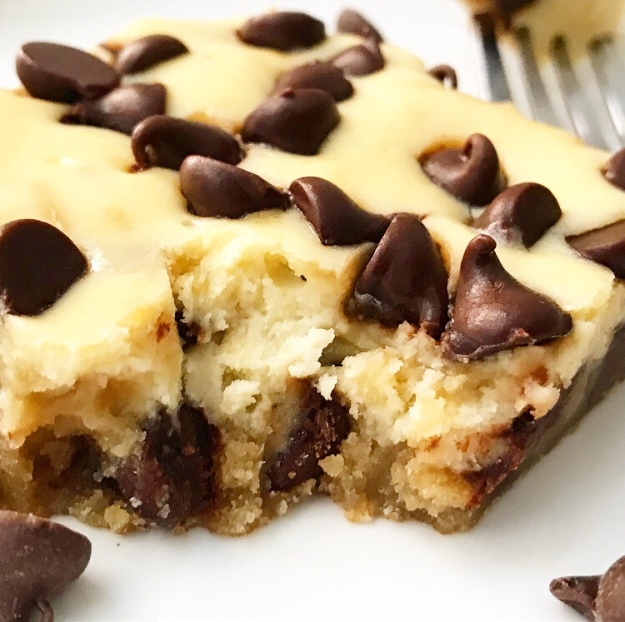


