 You may not be able to tell from the bevy of desserts I post every week, but I am a huge proponent of eating your greens. Almost every meal I make for myself involves a huge bed of arugula. Yes, for real.
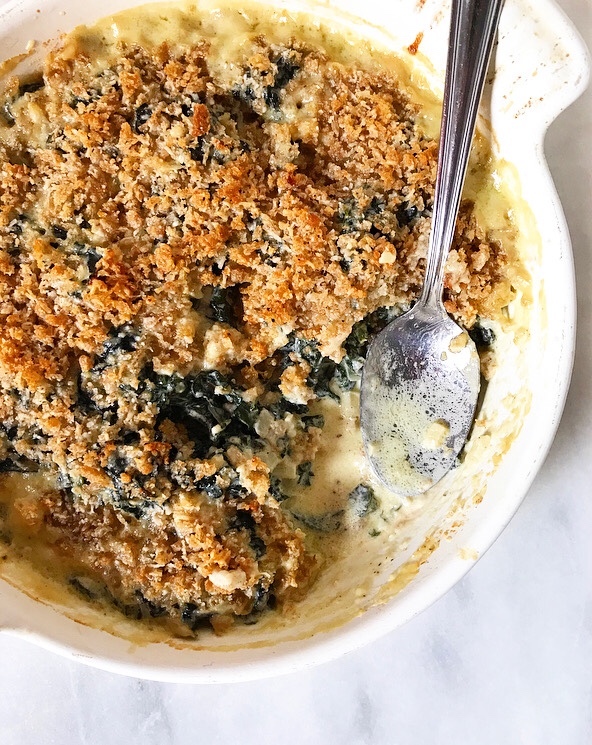
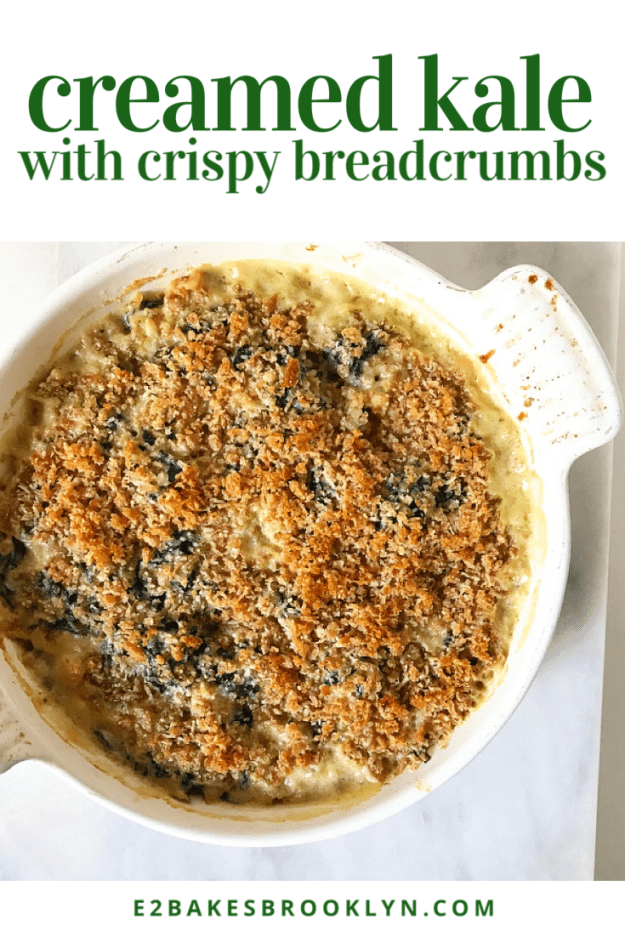
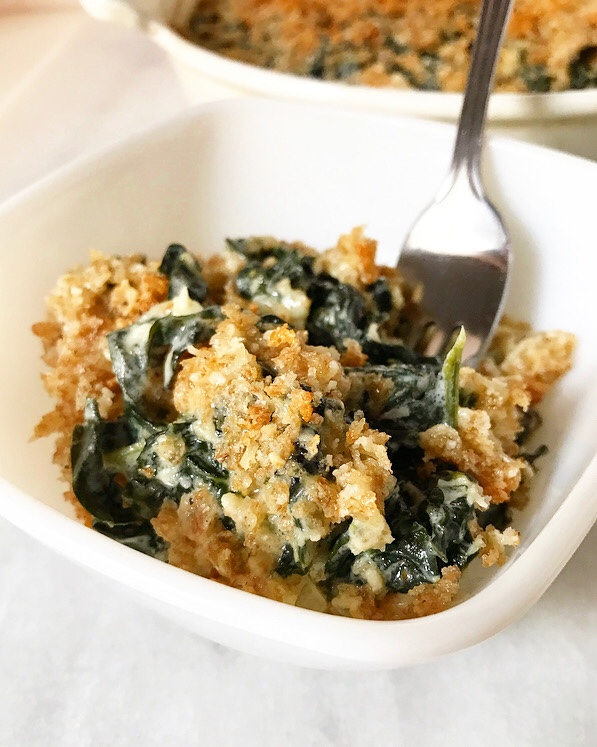 That said, on Thanksgiving, there are so many sides that leafy greens can get lost in the mix or left out entirely. To that, I counter this: Creamed Kale with Crispy Breadcrumbs. It’s the sort of “eat your greens” situation that is absolutely welcome sidled up to cornbread stuffing, cranberry sauce, and Fluffy Dinner Rolls.
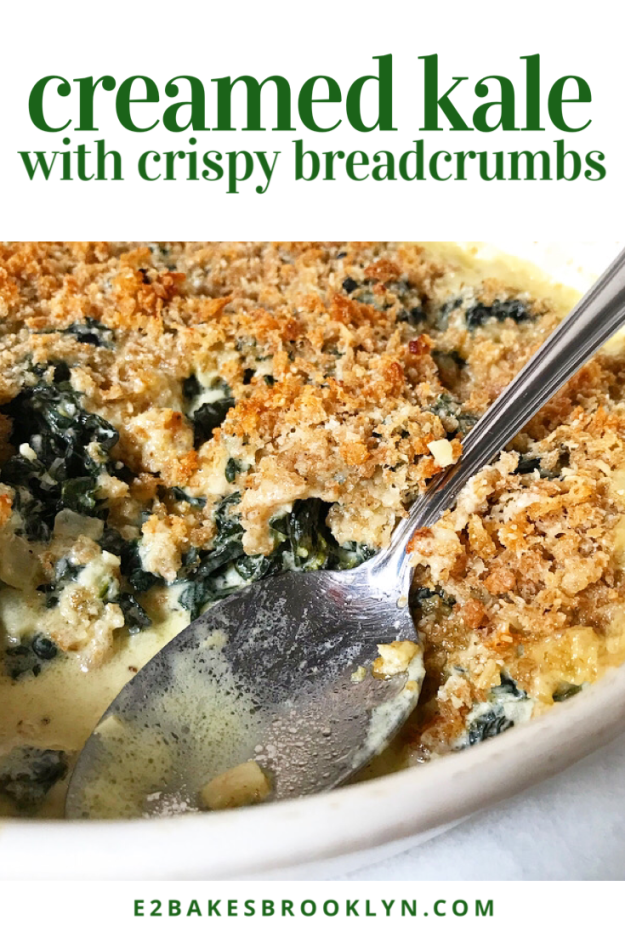
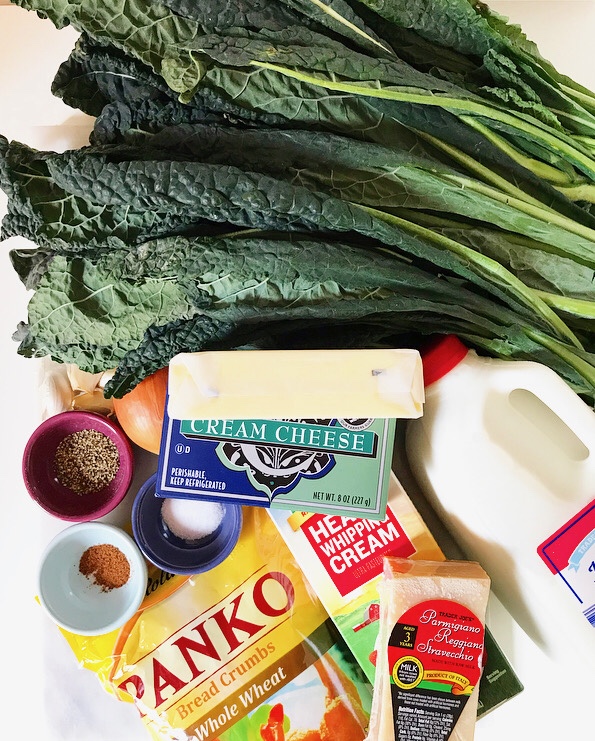
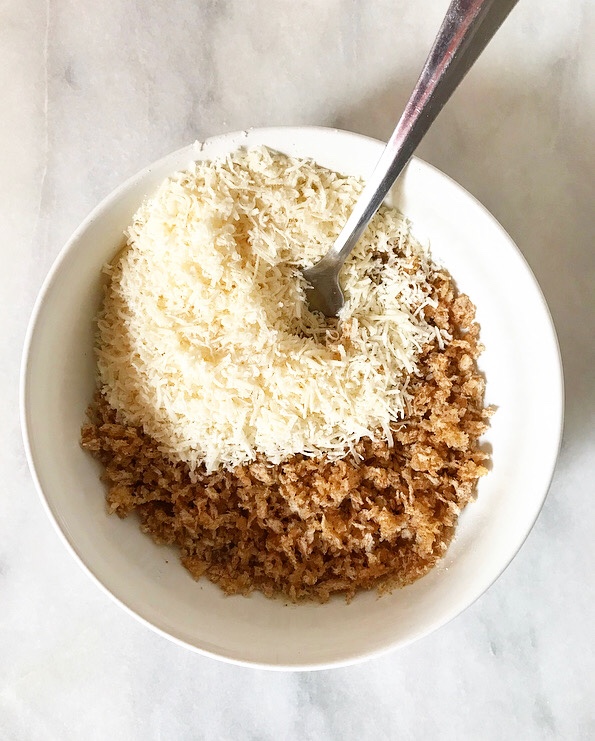
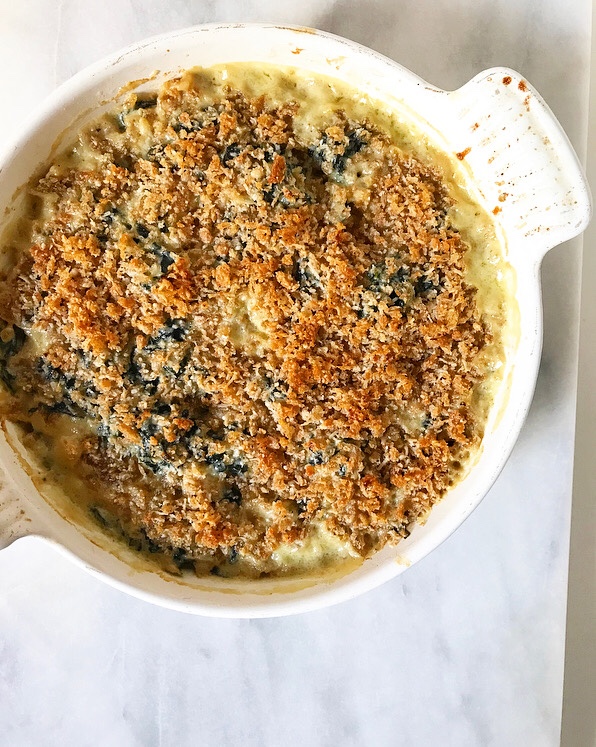
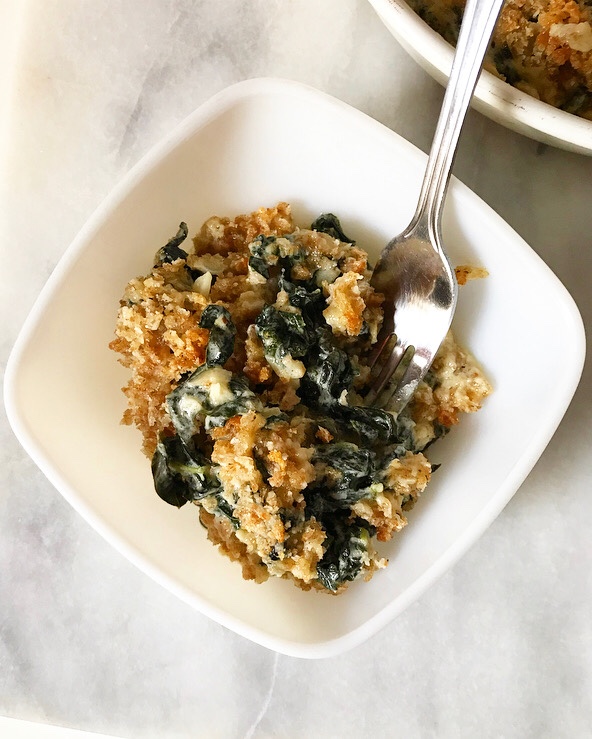
 This is a vegetable side dish that stretches the meaning of the word “vegetable.” Yes, there is kale in there—a lot of it—but it’s coated in a sauce of butter, heavy cream, milk, cream cheese and parmesan, and topped with buttery breadcrumbs. Dietetic, this is not. On Thanksgiving, though, who cares? If there were ever a day for eating a creamy, cheesy, crispy-topped side and calling it a serving of vegetables, this is the one.
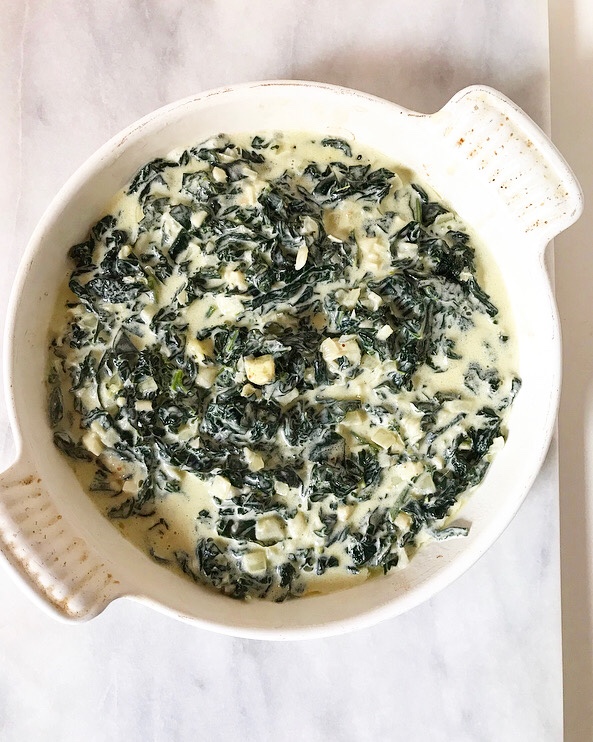
 If you’re wondering why I used kale here instead of going for classic creamed spinach, the answer is simple: kale’s texture holds up. Even after the blanching, shocking, sautéing, saucing, and baking, it still has texture. It contrasts perfectly with the crispy breadcrumbs instead of getting lost in the cheesy sauce. And it’s pretty. And I just *like* kale.
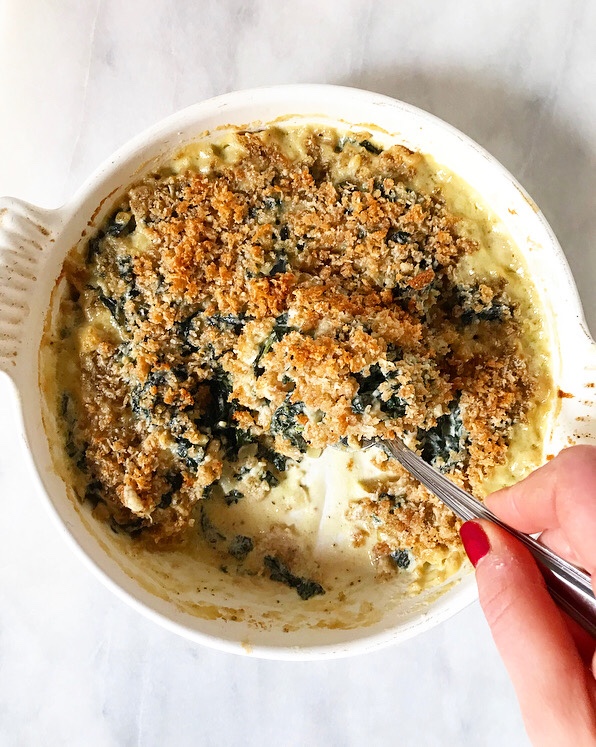
 Now, I know that adding one more thing to your Thanksgiving menu is never something to be taken lightly. Time and energy are at a premium at the holidays! Luckily, Creamed Kale with Crispy Breadcrumbs is perfect for making ahead. You can stir together the creamed kale part of the equation a day or two ahead of time and refrigerate it. When you’re ready to serve, top it off with the breadcrumb mixture and bake until brown, bubbly, and so creamy and wonderful that even I—a person who has written repeatedly about loathing cream sauce—can’t resist.
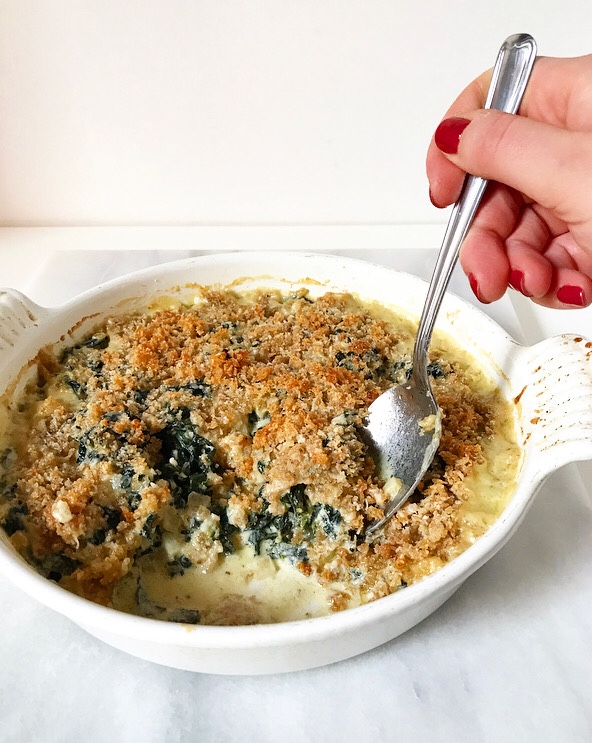 Looking for something a little lighter? Try my Caramelized Brussels Sprouts!
Creamed Kale with Crispy Breadcrumbs
makes 6-8 servings
Creamed Kale:
2 lbs lacinato kale (curly kale works too)
1/4 cup (1/2 stick) unsalted butter
4 cloves garlic, minced
1 small onion, finely diced
1/8 teaspoon ground nutmeg
1/2-3/4 teaspoon fine sea salt
1/2 teaspoon freshly-cracked black pepper
3/4 cup heavy cream
1/2 cup whole milk
2 ounces full-fat brick-style cream cheese
1 cup (4 ounces) grated Parmesan cheese
Breadcrumb Topping:
1/2 cup panko breadcrumbs (or other plain breadcrumbs)
1/4 teaspoon fine sea salt
1/4 teaspoon black pepper
2 tablespoon unsalted butter, melted
1/2 cup (~1 1/2 ounces) grated Parmesan cheese
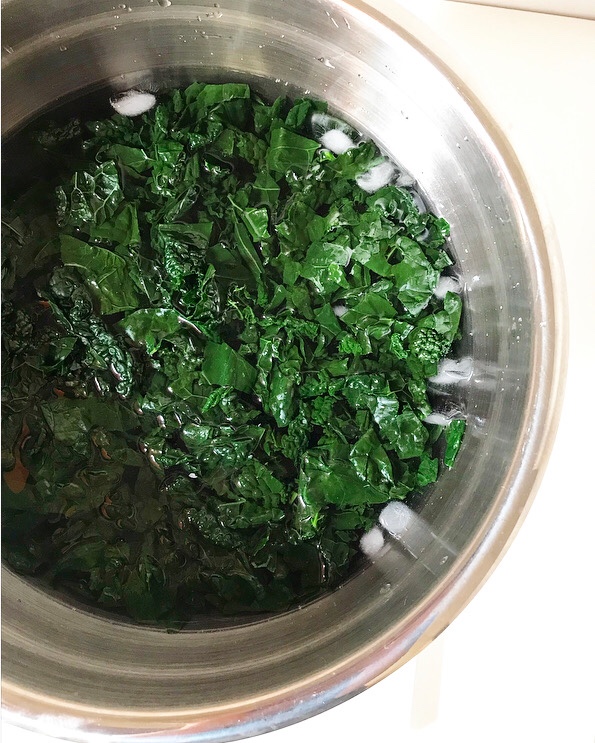
Preheat oven to 400F. Bring a large (6 quart) pot of water to a boil over high heat.
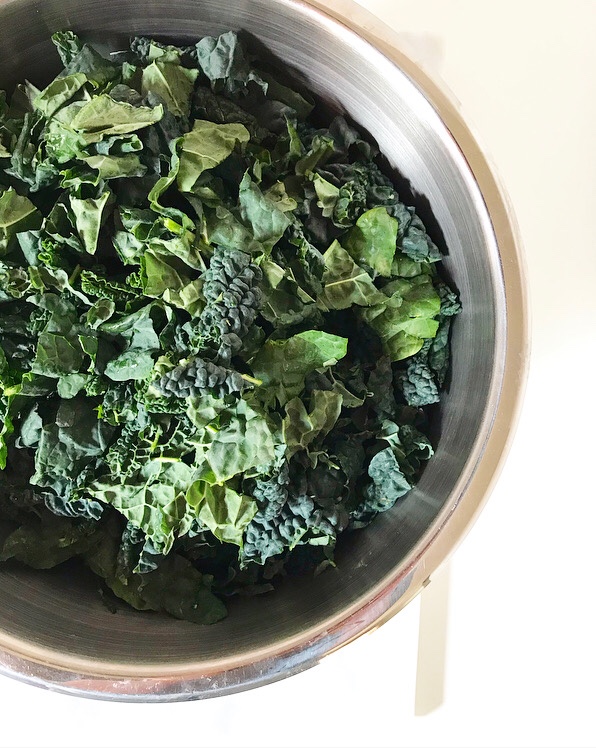
Wash and dry kale. Remove and discard the ribs. Use a large, sharp chef’s knife to slice kale into 1/2-inch ribbons.
Fill a large bowl with ice water.
When the pot of water comes to a boil, salt it liberally. Add kale and let cook about 1 minute (until bright green). Remove kale and plunge it directly into the ice water. This method is called blanching & shocking.
Line a sheet pan (or a few plates) with paper towels. Once kale is cool (a few minutes), remove it from the water and place on paper towel-lined pan. Blot with more paper towels to remove excess water.
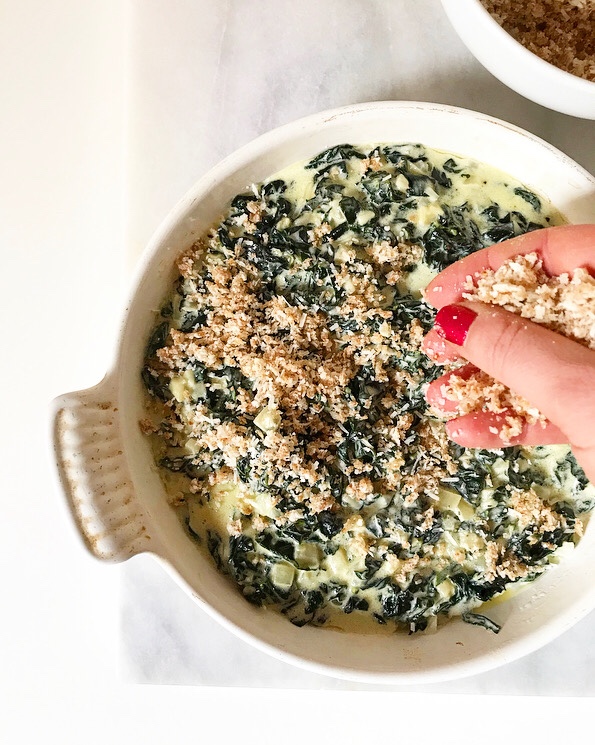
Heat a large, heavy-bottomed pot (I used the same one I used for the kale) over medium heat. Add butter and allow to melt. Sauté onion 5-7 minutes, or until translucent. Add garlic and cook until fragrant, about 1 minute. Stir in kale, followed by nutmeg, salt & pepper. Stir in heavy cream, milk, and cream cheese. Turn heat up to medium-high and let cook, stirring occasionally, for 5-7 minutes, or until cream cheese has melted and sauce has thickened slightly. Remove from heat and stir in Parmesan. Taste and adjust for seasoning.
Grease an 8-inch casserole dish. Fill with creamed kale.
Make breadcrumbs. In a small bowl, use a fork to whisk together breadcrumbs, salt, pepper, and melted butter. Add Parmesan. Scatter mixture over the top of the kale. Bake for 12-15 minutes, or until brown and bubbly.
Serve warm. This is best the day it is made, but may be kept covered in the refrigerator for up to three days. Breadcrumbs will soften over time, but may be re-crisped in the oven.
To make ahead: after transferring creamed kale to a casserole dish, press plastic wrap to the surface and refrigerate for up to 2 days. When ready to bake, make breadcrumb mixture and scatter it over the top. Bake at 400F until bubbly and golden, about 30 minutes.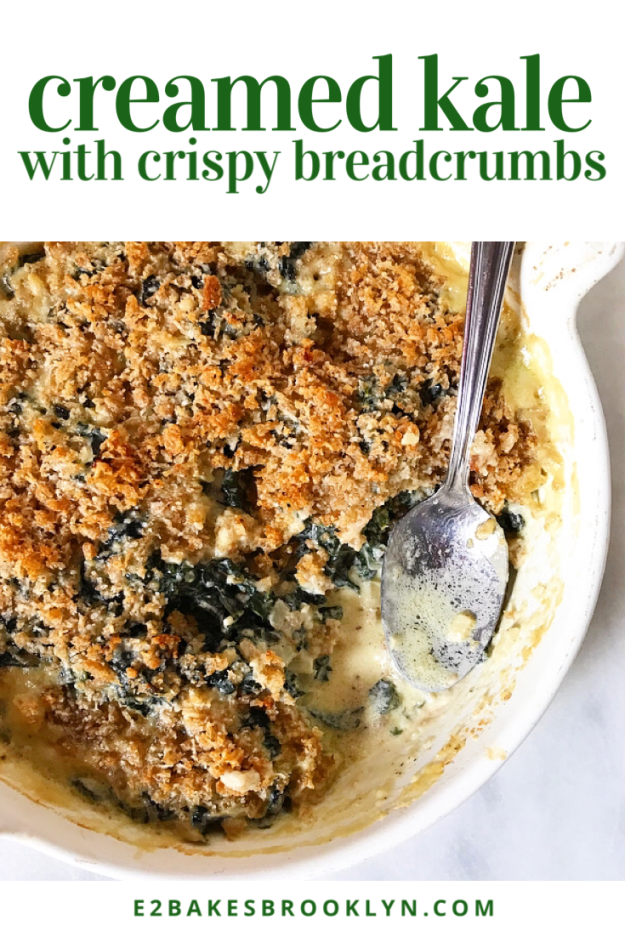
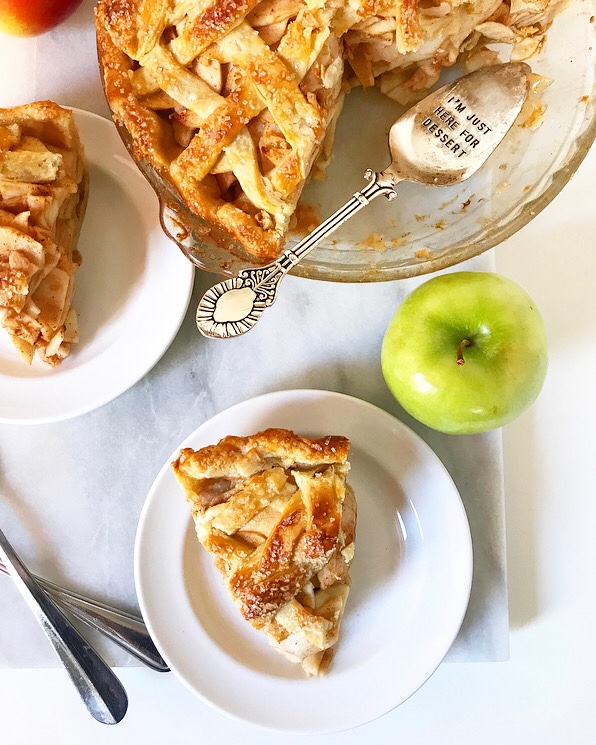
 I’ve somehow blogged my way through five Thanksgivings without ever posting an apple pie. There was one
 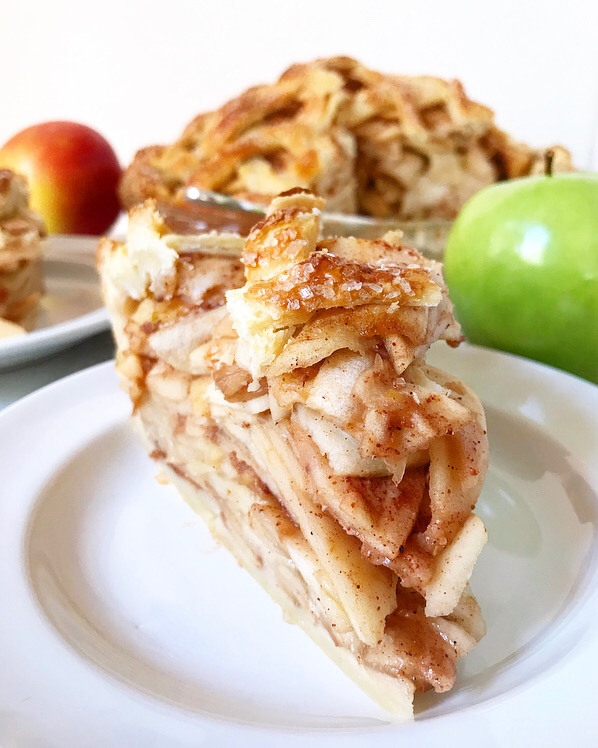 I kind of feel like I should preface this recipe by saying that I know there are a million and a half apple pie recipes and that this is nothing revolutionary, but
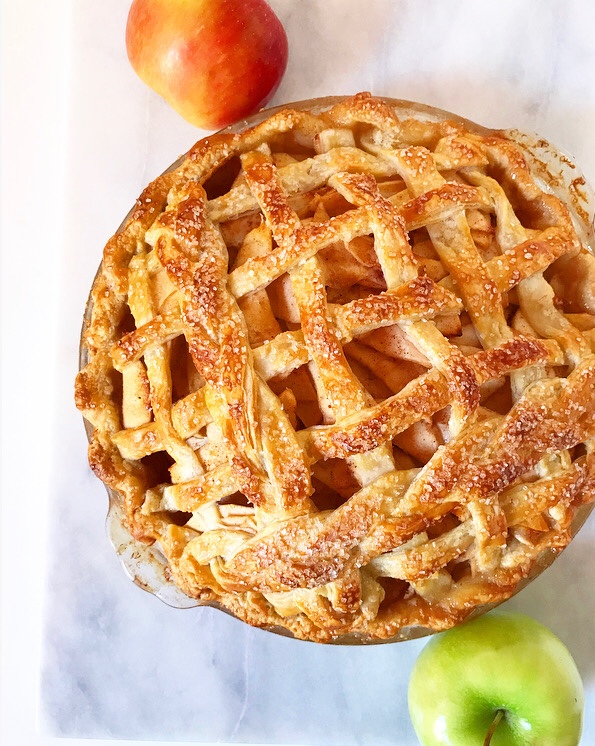
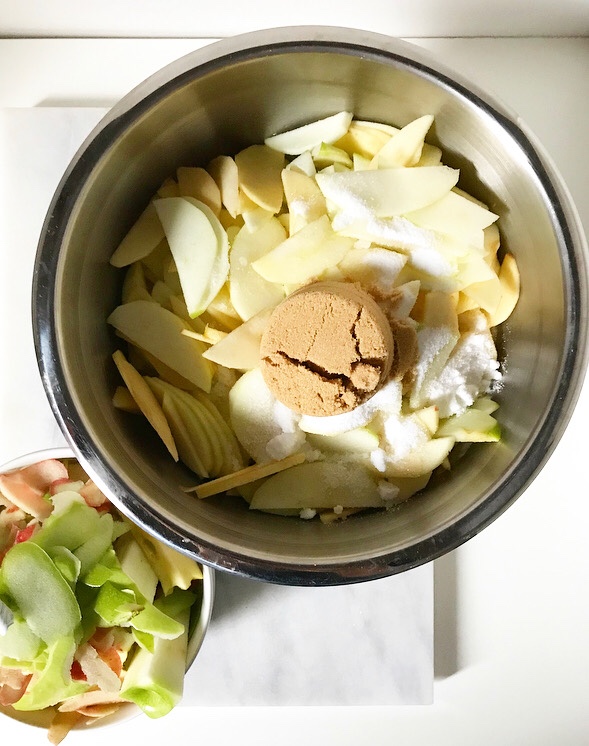
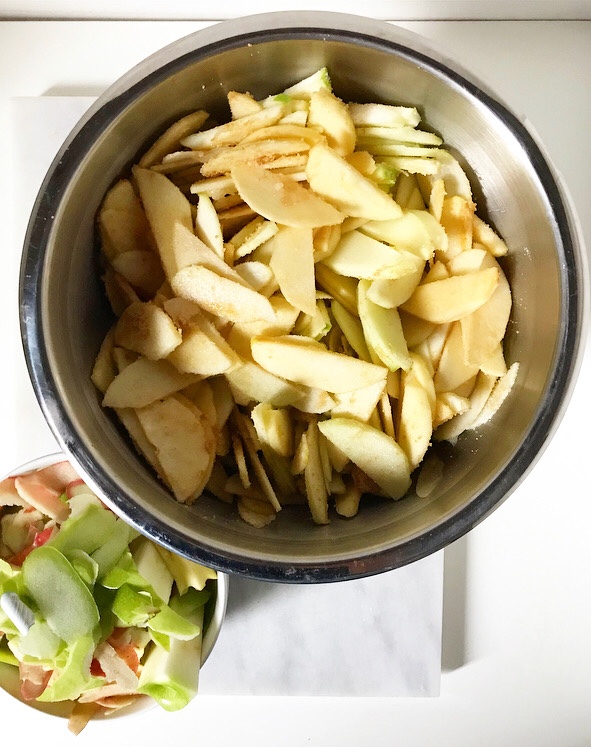 In terms of flavoring, there’s all sorts of good stuff in here. The apples are tossed in a mixture of granulated sugar, light brown sugar, and apple cider vinegar before being left to macerate (sit and release liquid) for an hour. After that, a mixture of ground cinnamon, ginger, nutmeg and cloves is stirred in, along with some cornstarch for thickening and salt for balance. Mmhmm.
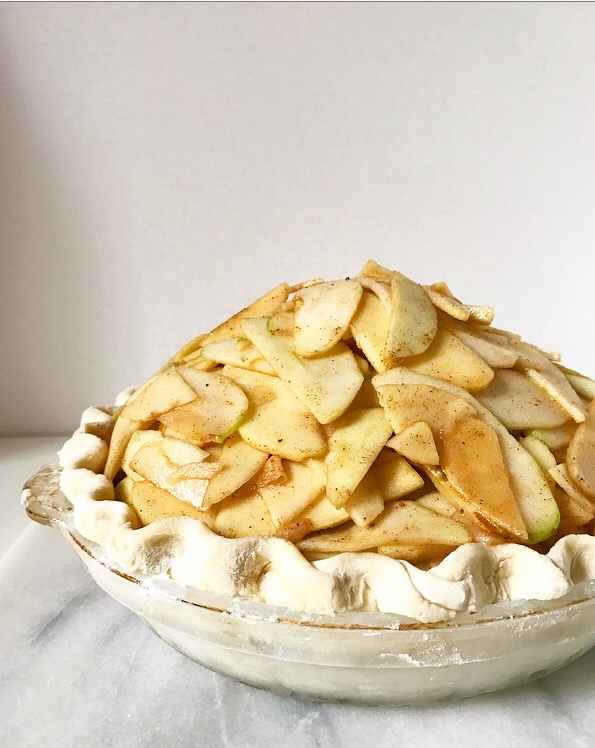
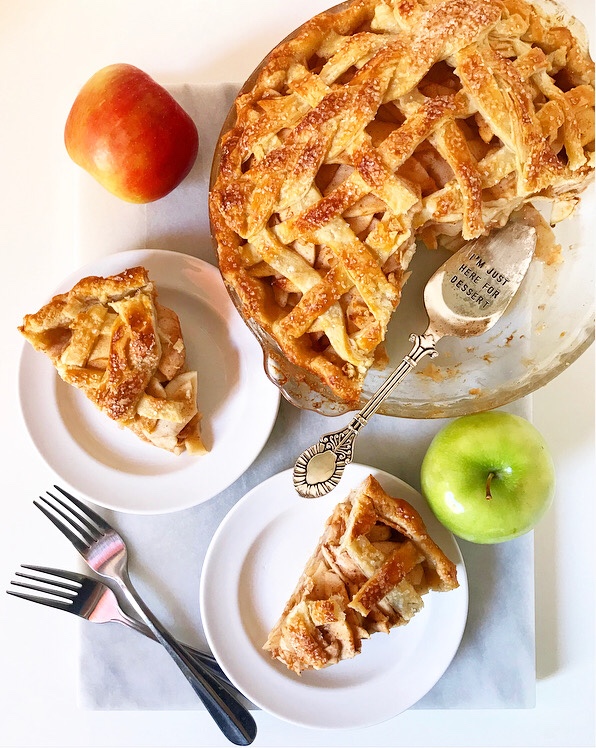
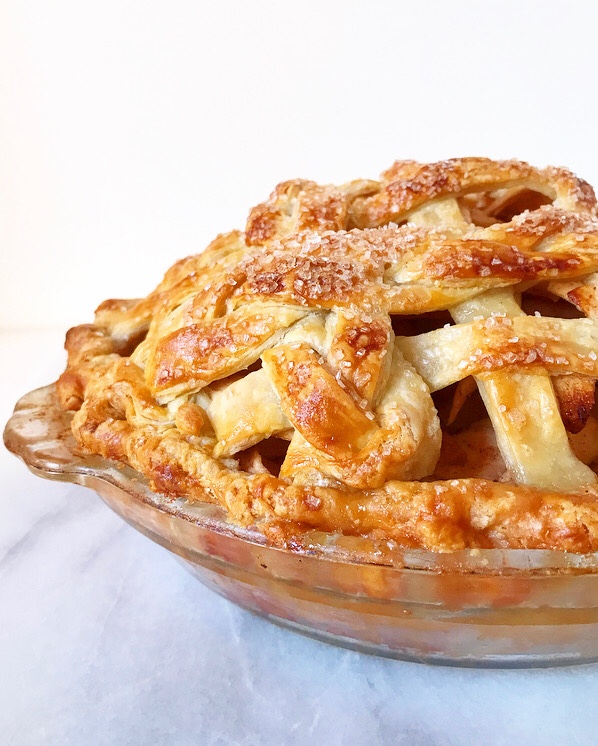
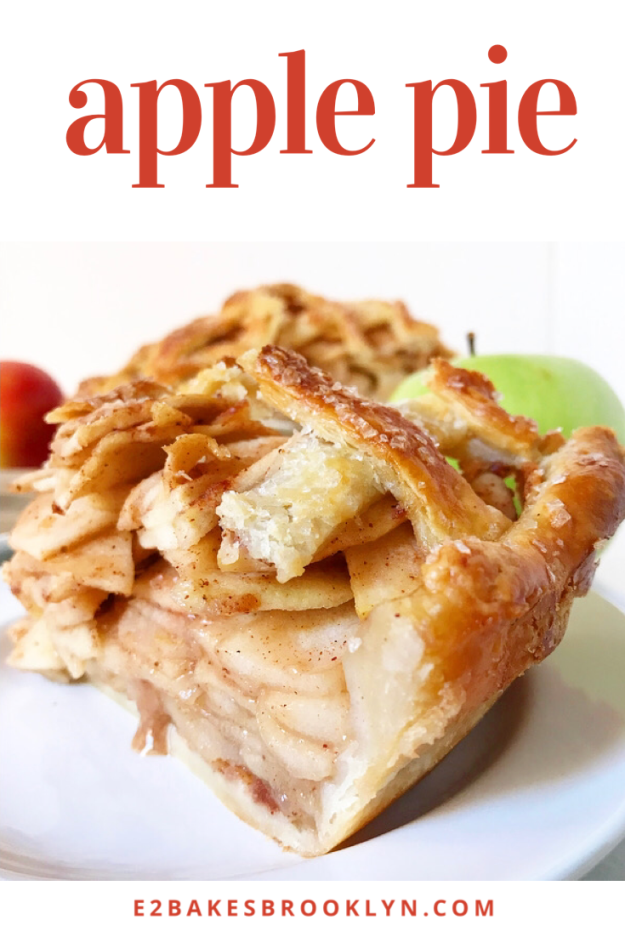
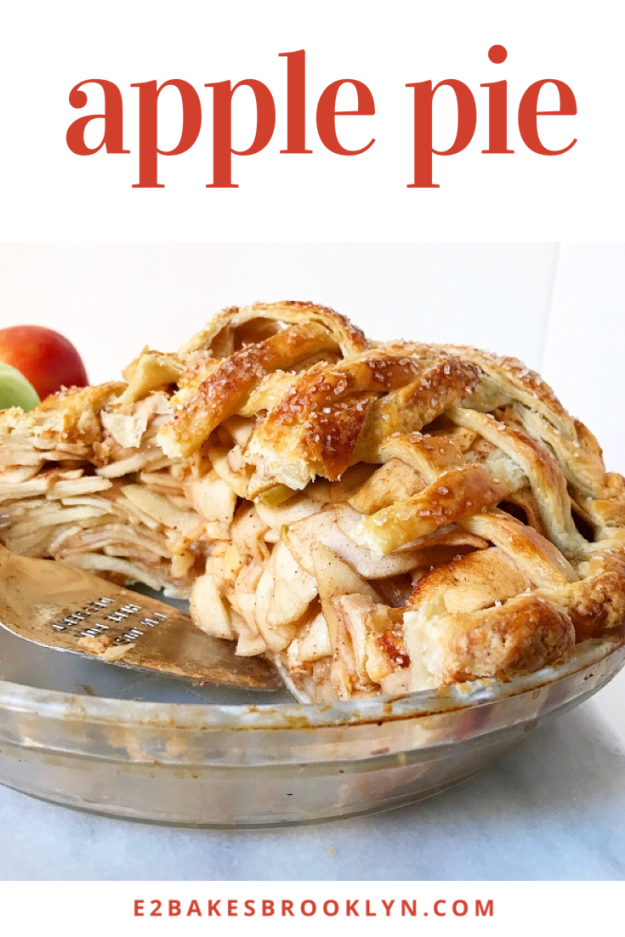
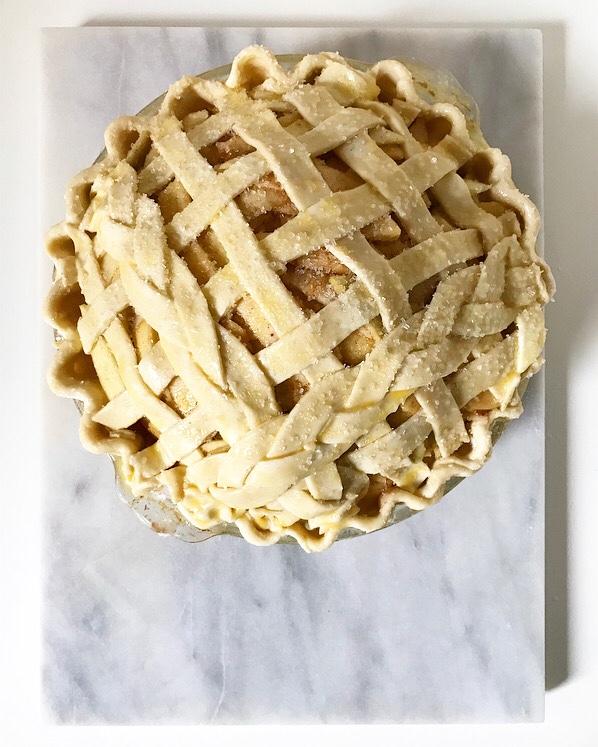 The filling—accumulated liquid and all—is piled high into a pie crust before being topped with another crust. I went for a classic lattice and a couple of braids here, but feel free to do a whole top crust (make sure to cut some vents!) or whatever makes you happy. Then brush that thing with egg wash, sprinkle it with coarse sugar and bake the crap out of it.
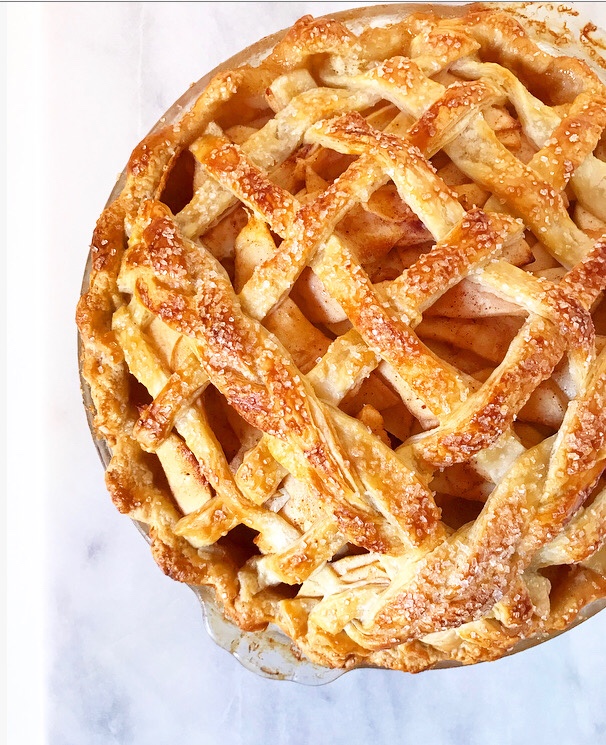
 When you read through this recipe, you’ll notice that there are a lot of pauses and chills and that this pie bakes for more than an hour. Pie takes time, y’all. There’s no way around it. If I wrote a chill in there, it’s because I think it’s important. I don’t want to put anymore time between you (or me!) and that first slice than absolutely necessary.
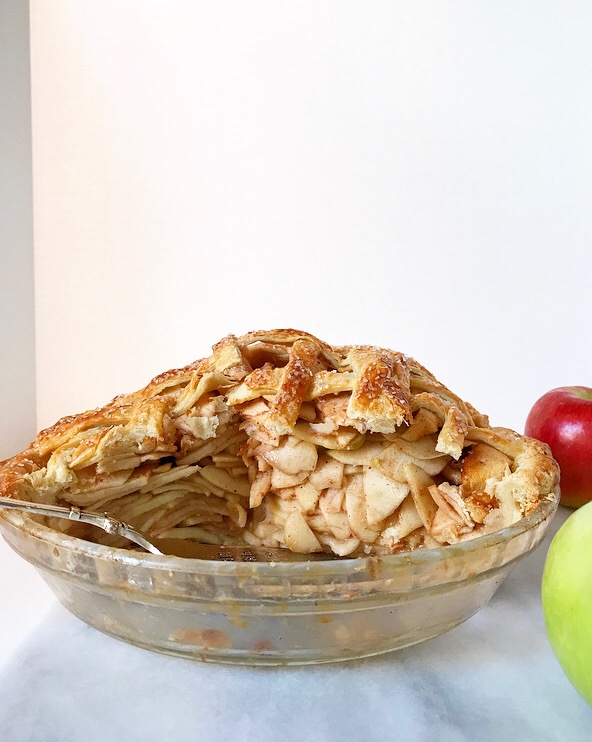 As for baking, this pie is a bit of a diva, but aren’t they all?! In apple pie’s case, you’ll need to preheat a rimmed baking sheet when you heat the oven. This serves two purposes: protecting your oven floor from overflow and helping ensure that the bottom crust doesn’t wind up completely raw. Also, this pie starts baking at 400F for fifteen minutes and finishes at 375F for 50-60 more. It’s a long time, but this is a big pie! Try to be patient, and don’t forget to tent with foil as necessary. You want that golden top!
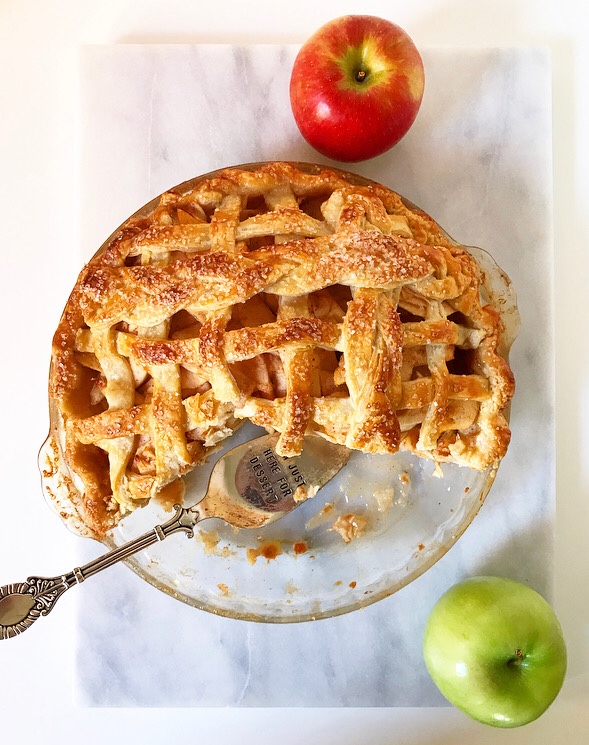
 I promise all this work will be worth it when you slice this thing up. Homemade apple pie always is.
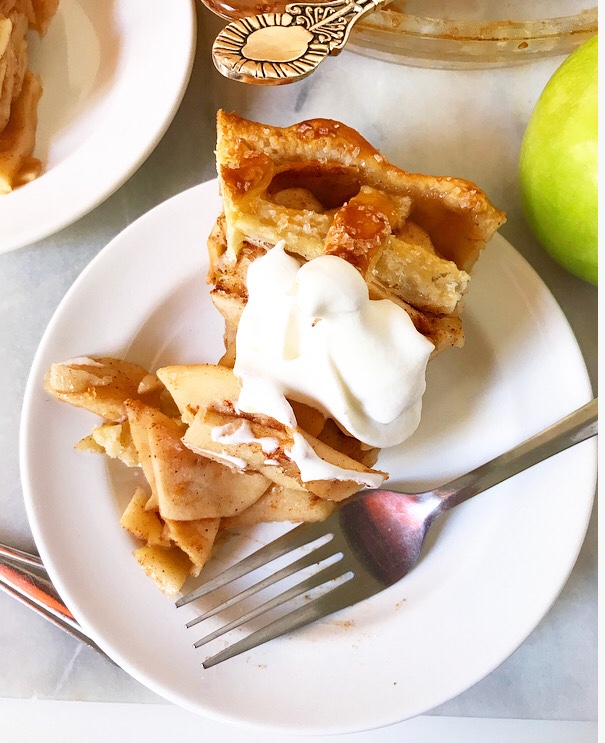

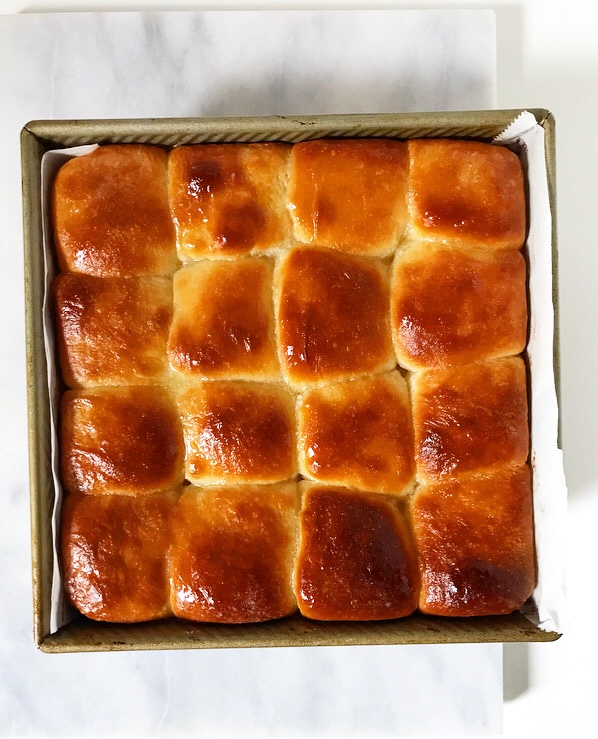
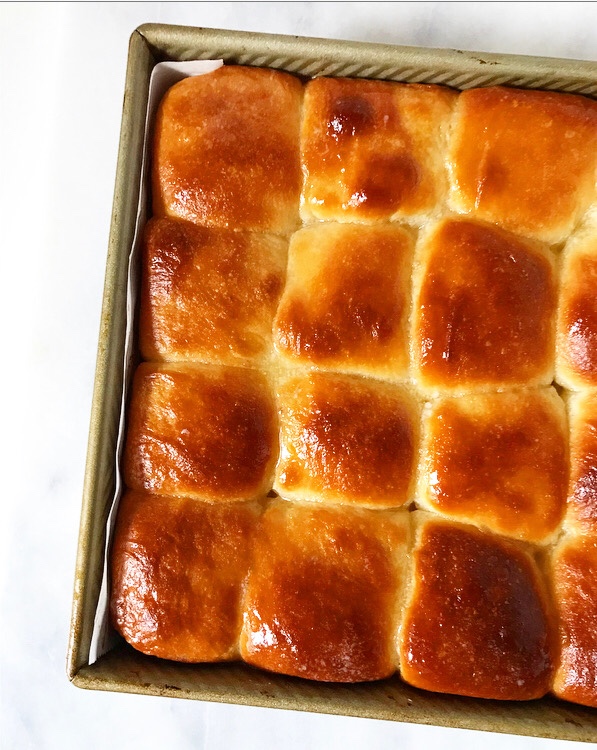 Until recently, I’ve eaten (baked) frozen dinner rolls at every holiday dinner of my life and had exactly zero idea that I was missing anything. Warm bread is warm bread, right?
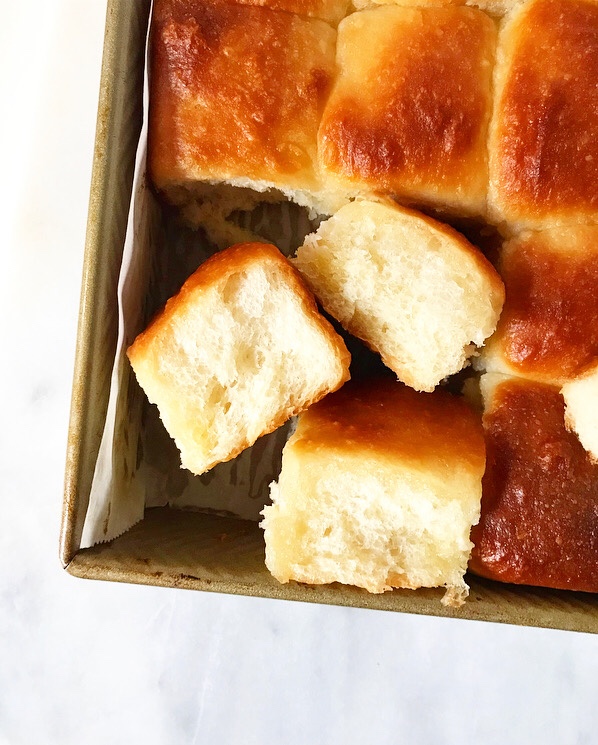 I mean, I’m sure I will eat a (baked) frozen dinner roll in the future because warm bread, but now I know the magic and ease of buttery, homemade Fluffy Dinner Rolls and I can never fully go back. In the story of my life, time will be defined as “Before Fluffy Dinner Rolls” and “After Fluffy Dinner Rolls.”
 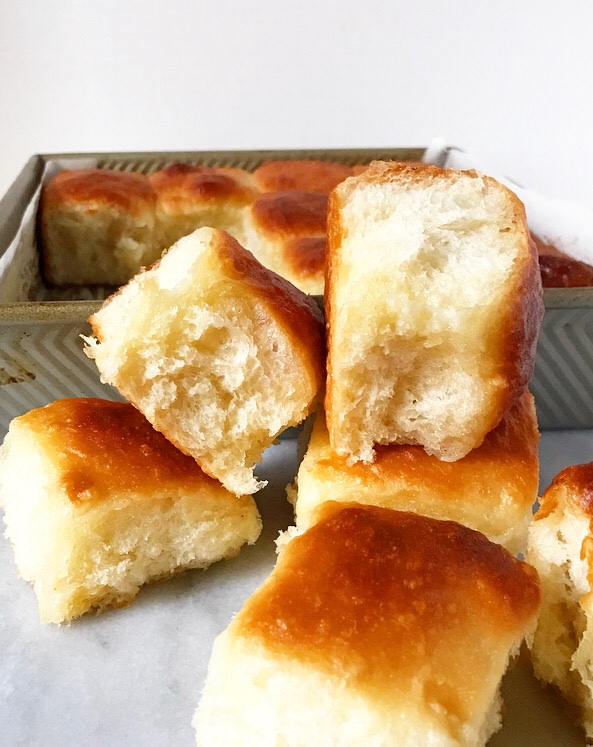 Okay, maybe not. But I am changed, and I have a sneaking suspicion that some of you are in the same boat I once was—out there living your lives, blissfully unconcerned that your holiday table is missing something or that you have been denied anything—and I am here to mess all that up by giving you an easy six-ingredient dinner roll recipe that will blow your freaking minds with its buttery, golden wonderfulness and ruin freezer aisle rolls for you forever. #sorrynotsorry
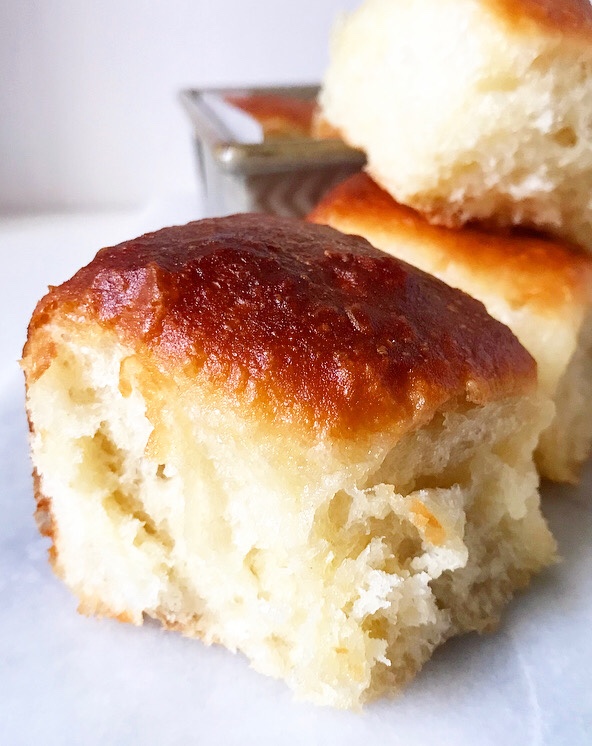 These Fluffy Dinner Rolls, y’all. They are fluffy. So fluffy. And they are slightly sweet and buttery as all get-out (whatever that means). There’s butter in the dough, and more is brushed on both before and after baking!
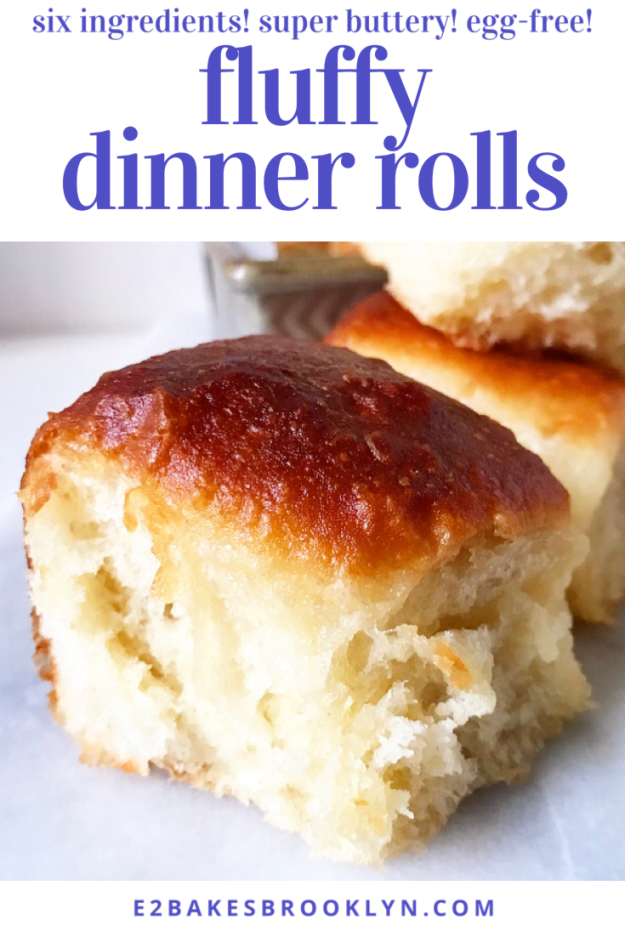
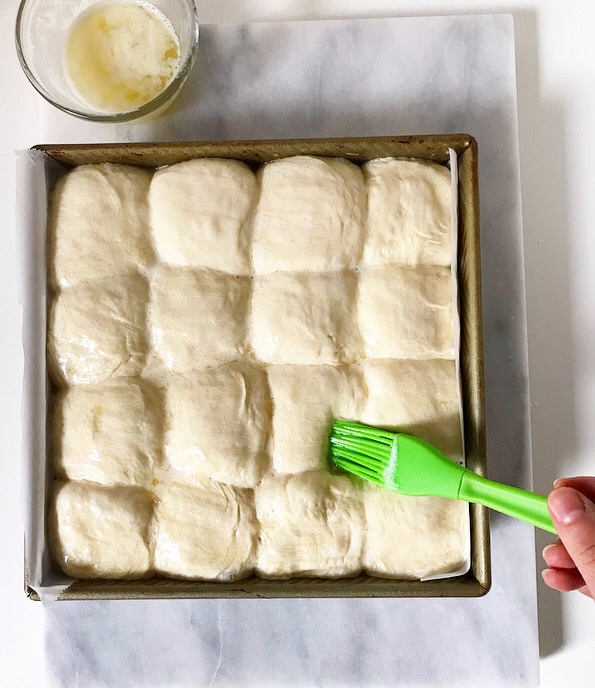
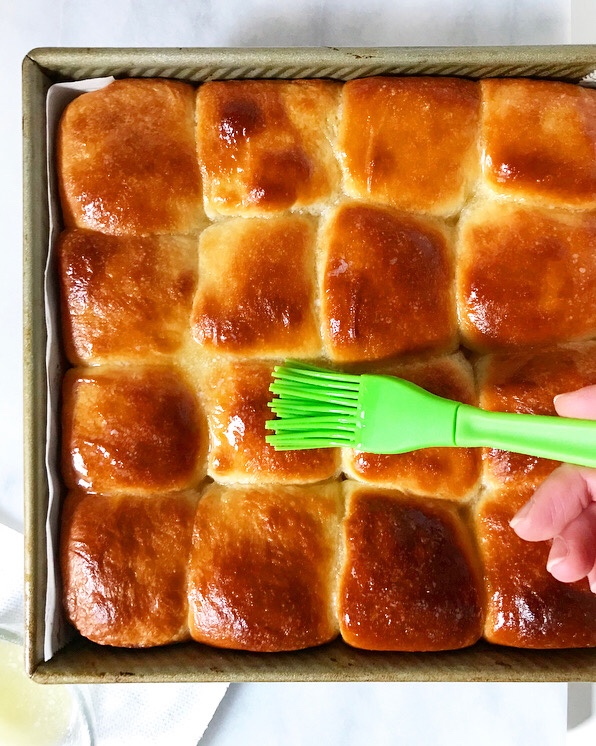 Did I mention their softness? When I was testing this recipe, I spent a lot of time poking the golden tops of these rolls and watching them bounce back, just because I could. So soft! So dang fluffy!
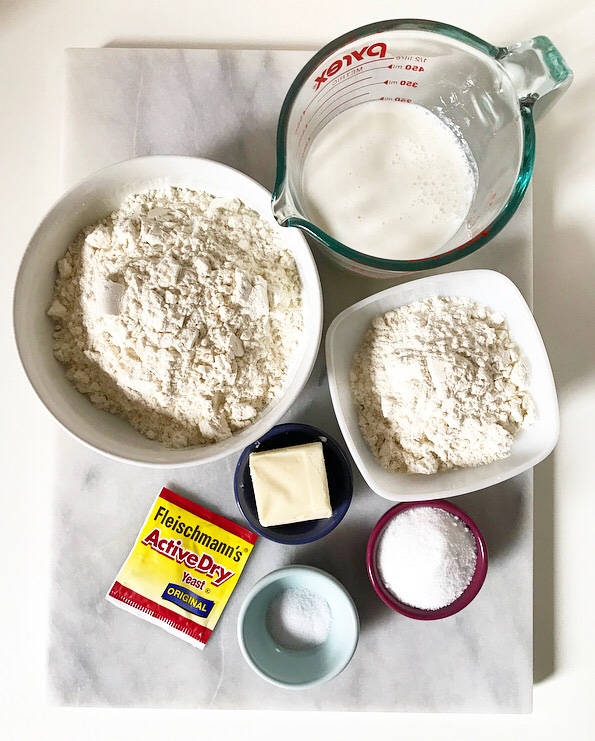
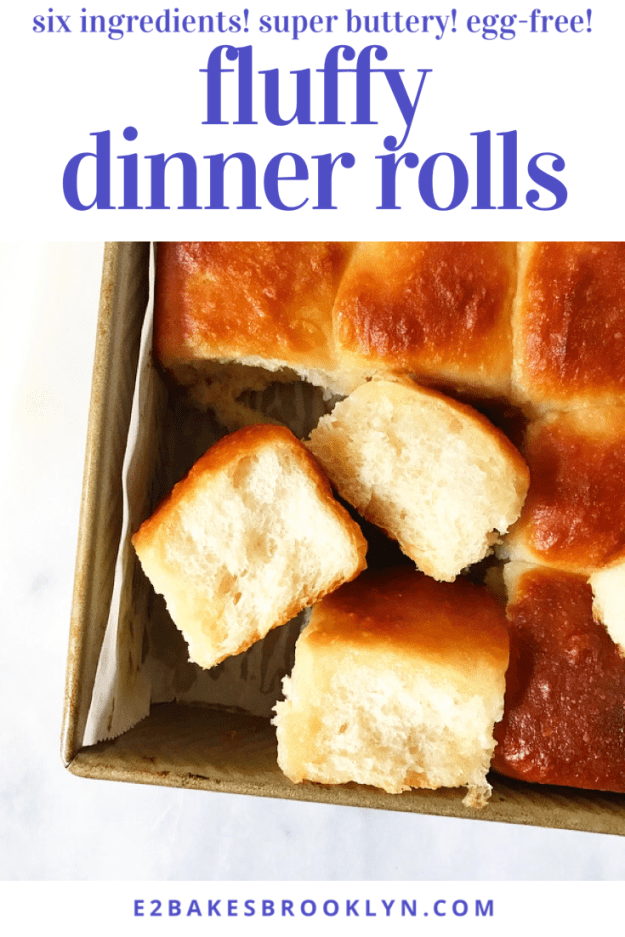
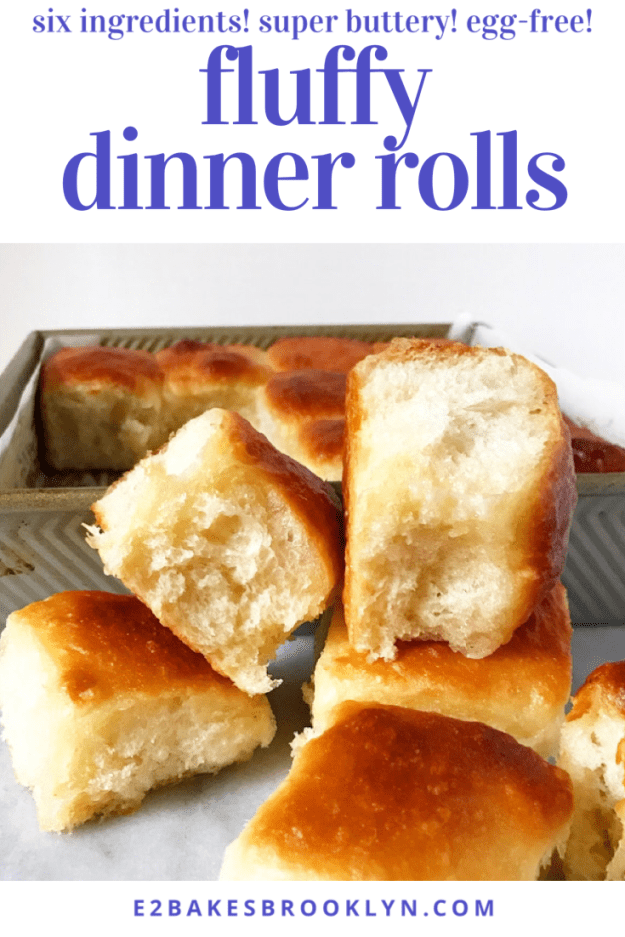
 As I said, these beautiful dinner rolls require just six ingredients: flour, yeast, sugar, salt, butter and buttermilk. These rolls are egg-free, but lack nothing in the flavor or texture departments.
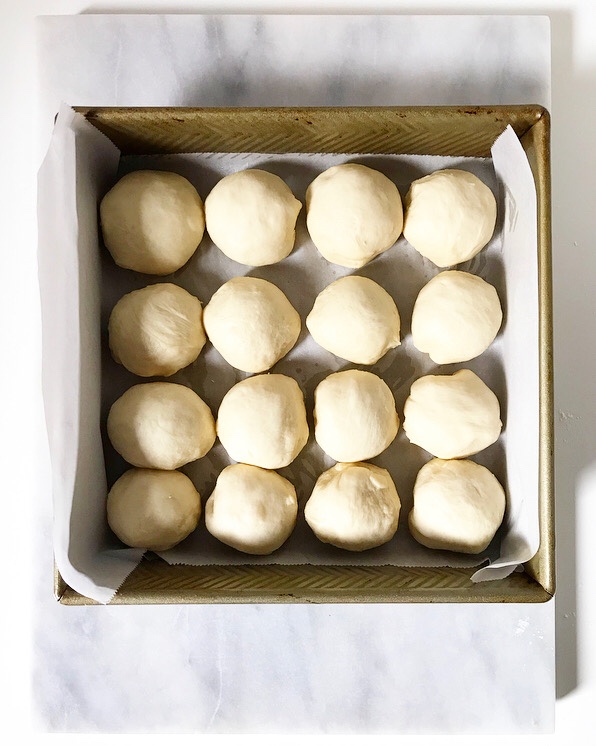
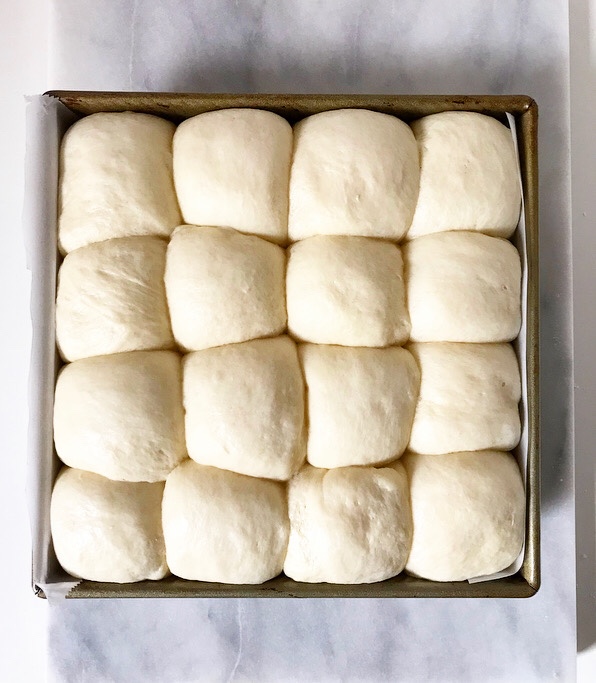
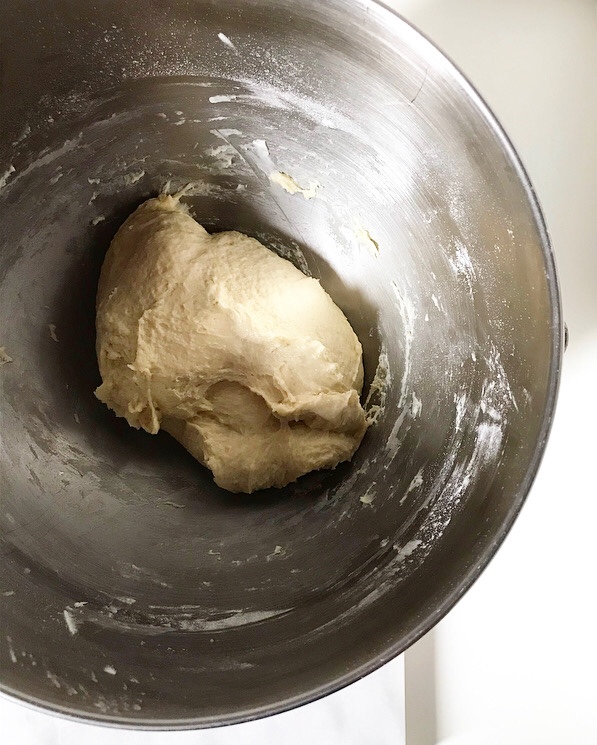
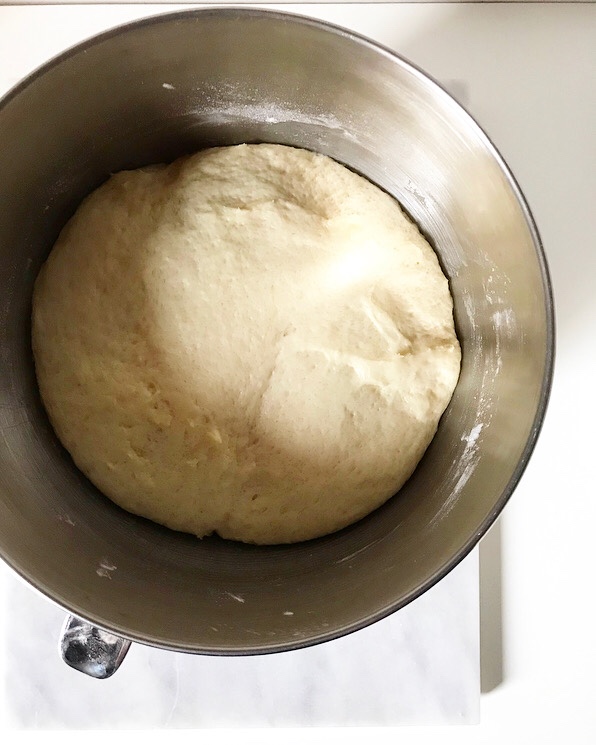
 They are super simple to make, too. Don’t let the length of the recipe fool you—I just wanted to ensure that you have all the information you need for Fluffy Dinner Roll success. I’ve included instructions for a stand mixer and mixing by hand, and for using both active dry and instant yeasts. I tried my best to describe how to shape them, but it’s surprisingly difficult to explain with words alone, so here are some pictures of what I did:
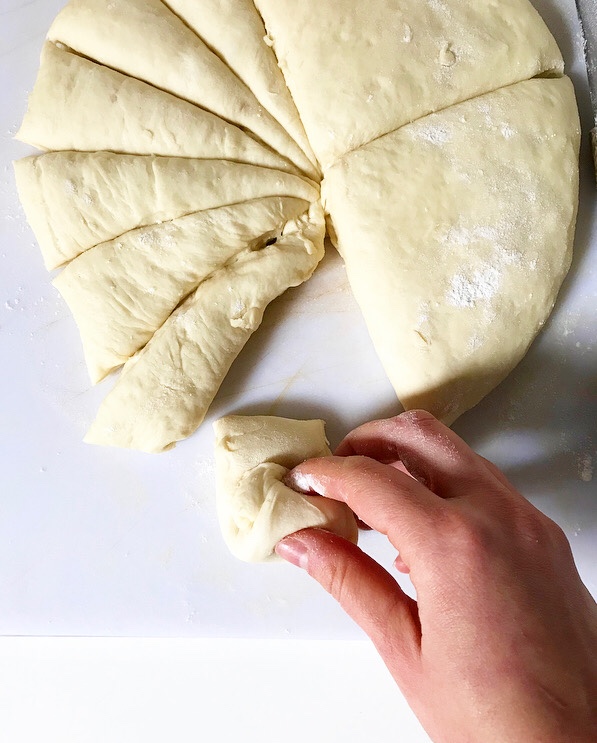
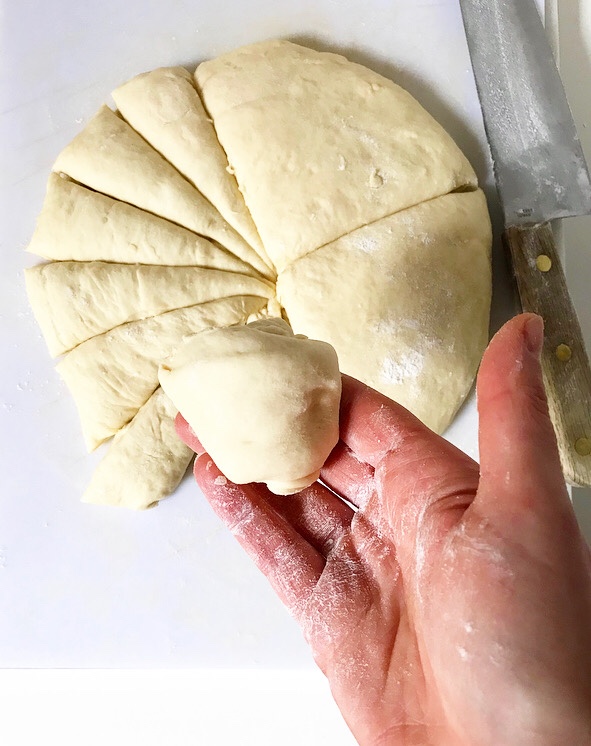
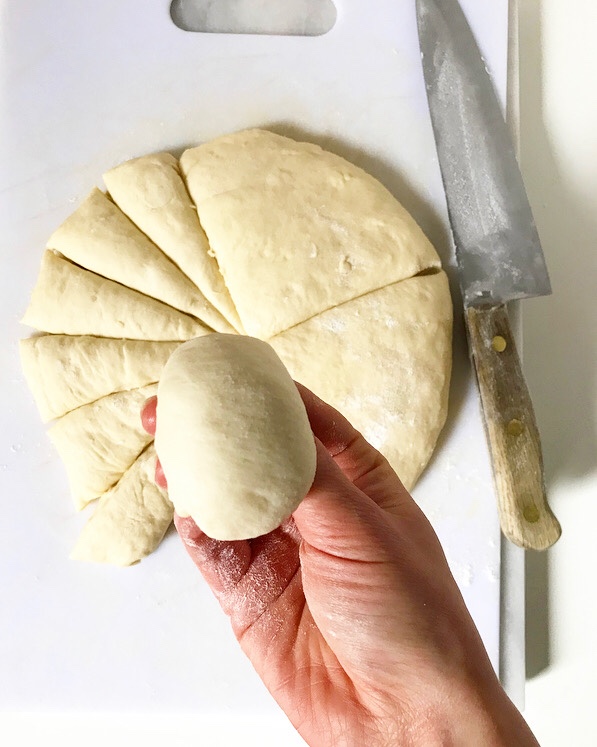
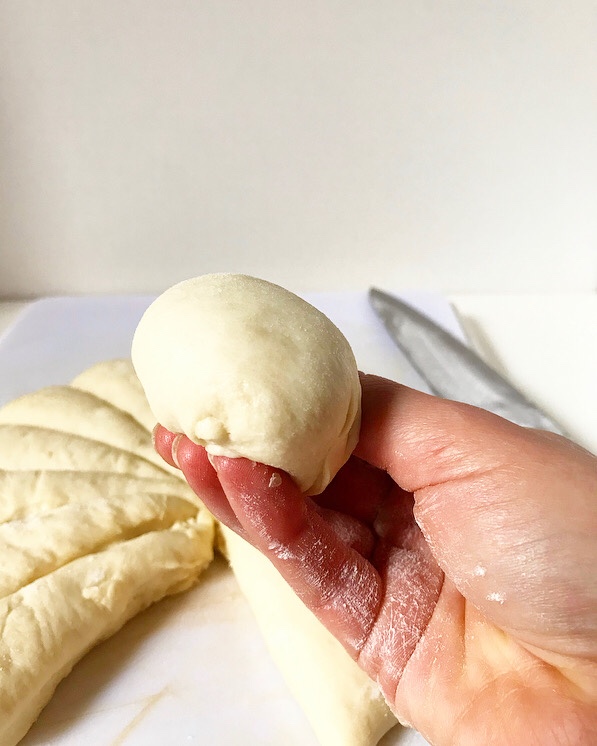 Don’t worry, they don’t have to be shaped perfectly to be delicious. It took me three batches to get a consistent shaping method. Those other four batches? They were for quality control. Or maybe just making up for lost time.
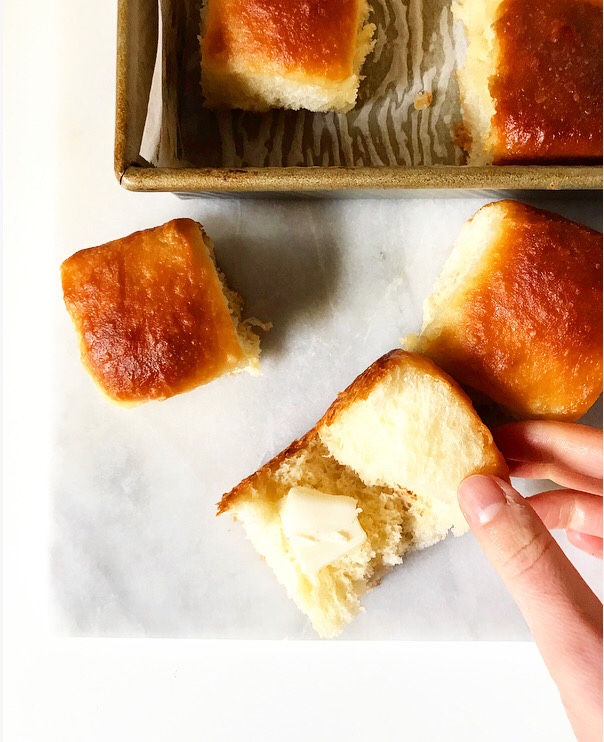
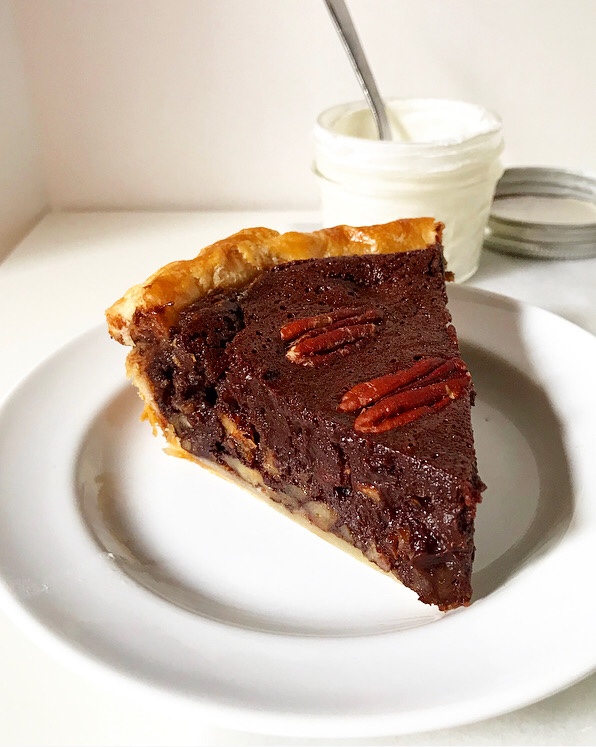
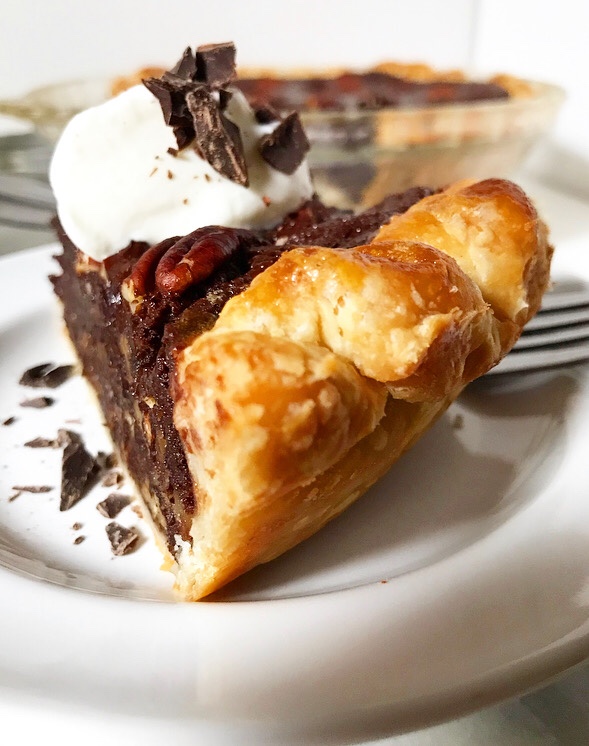
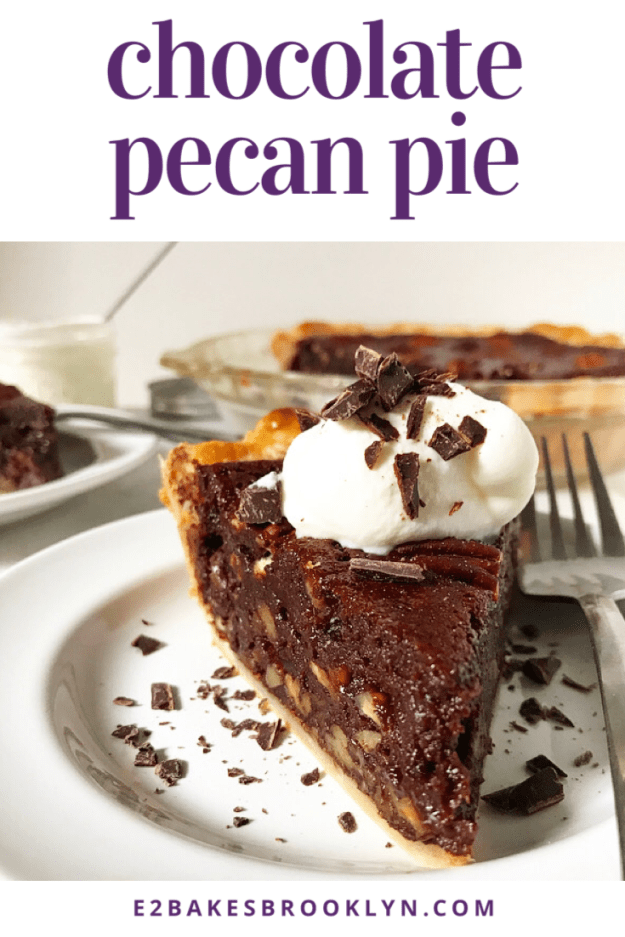
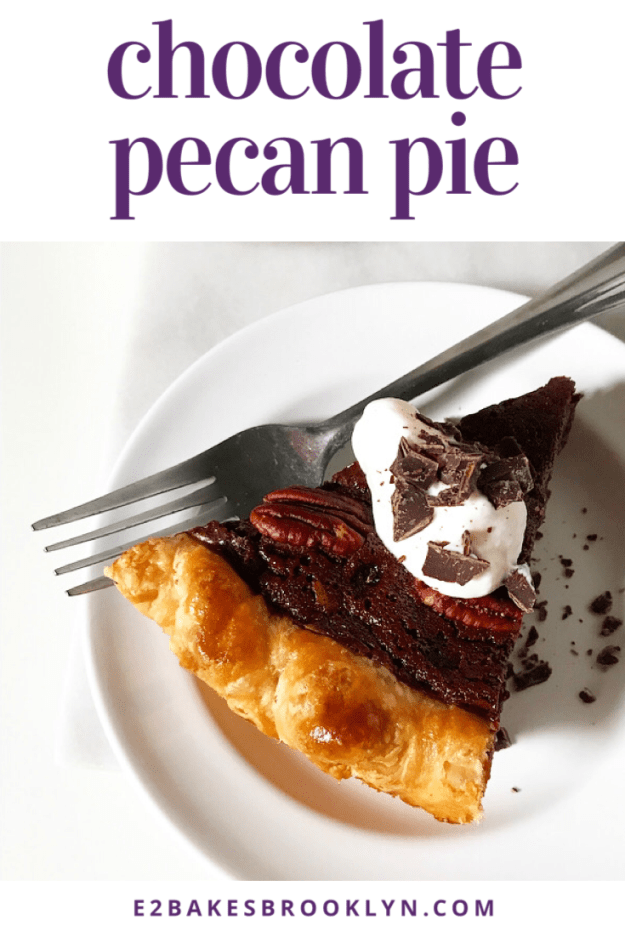
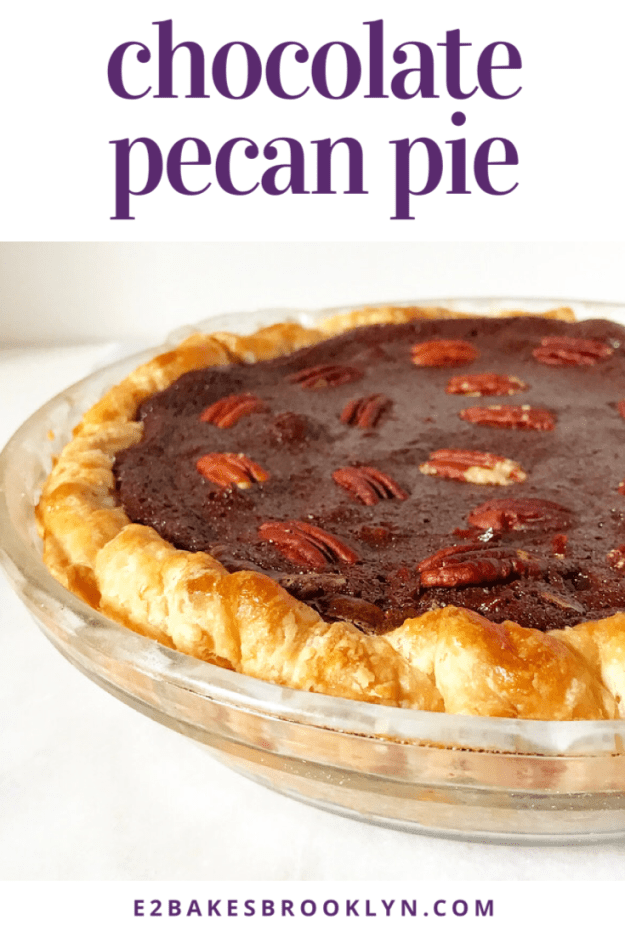
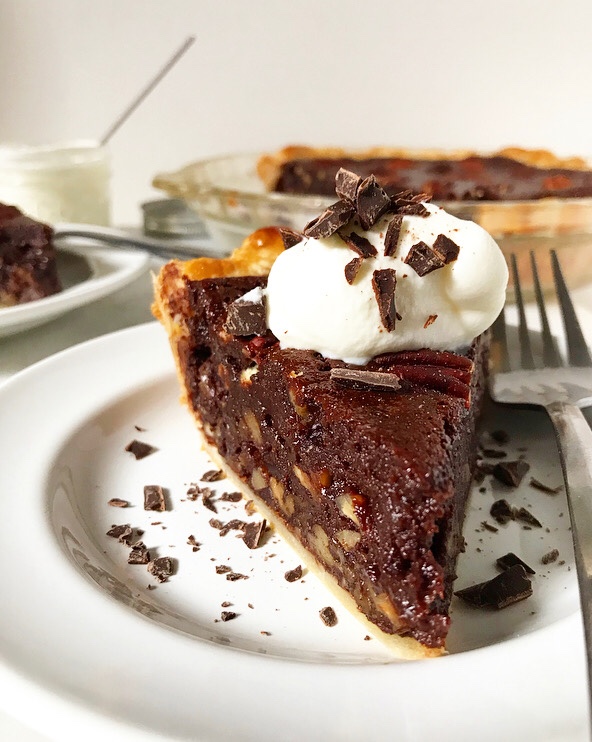 I am all about this Chocolate Pecan Pie right now. I am into it. So into it, in fact, that I thought about it for a year and a half before I actually made it, and then I made it six times. Six times!
 Some recipes take two or three tries. Some I even get on the first go. Both of this week’s took six rounds. What does that say about me? I don’t know, except that there has been A LOT of pie in my apartment lately.
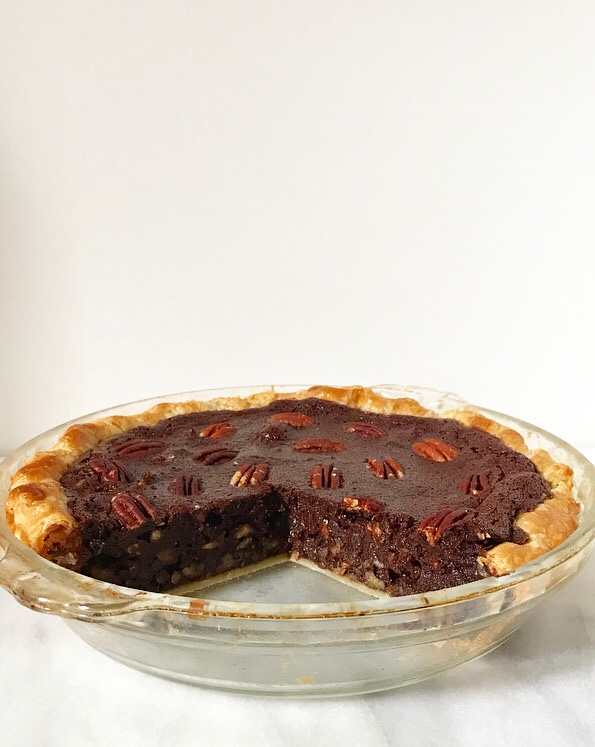 Chocolate Pecan Pie, y’all. It’s rich and fudgy and studded with toasted pecans—the sort of dessert that haunts my dreams. But the good kind of haunting. The kind where I get to eat pie.
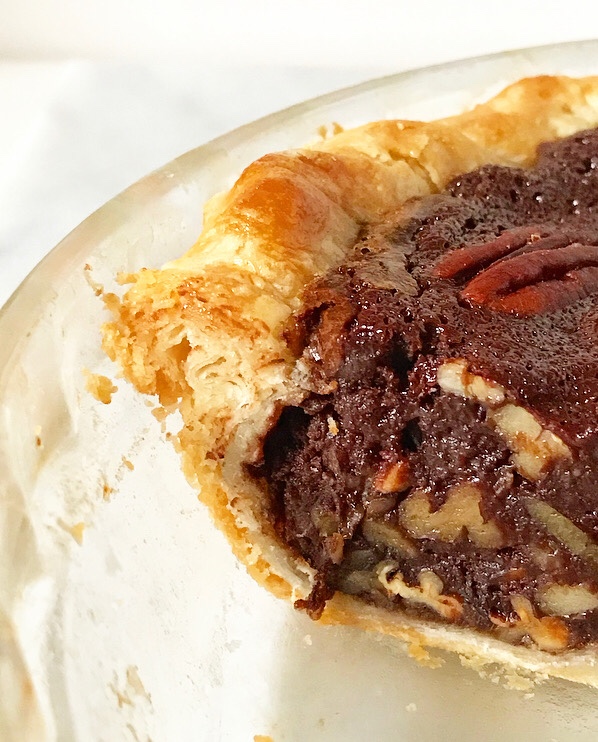
 But I digress. The filling here is somewhere between traditional
 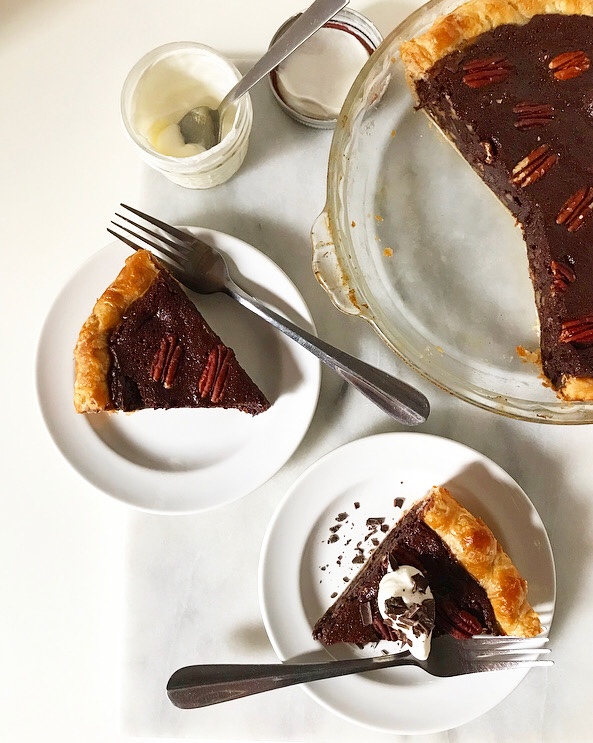 I cannot overstate how delicious this is, with or without whipped cream and shaved chocolate. It’s a guaranteed Turkey Day slam dunk! I mean, it’s also a slam dunk when you’re hovering over it at 1am on a random Tuesday, evening out edges and eating it with your fingers like a wild animal, but I somehow think your guests will prefer the former.
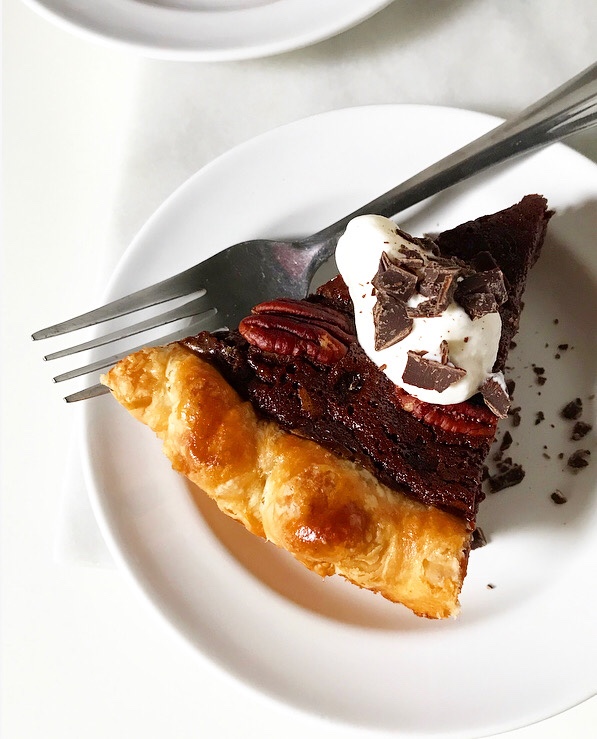
 It’s almost time for pie. Almost.
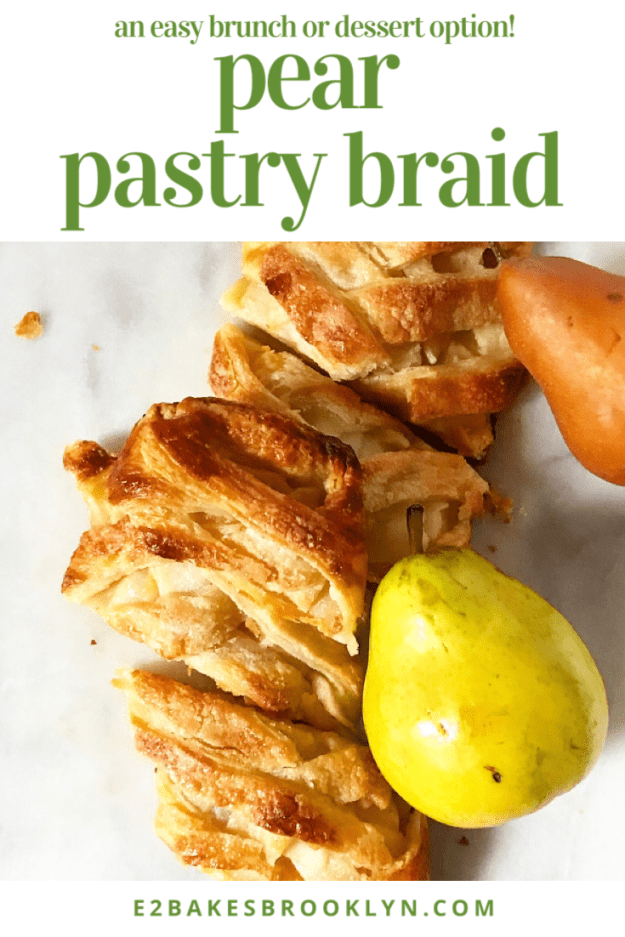
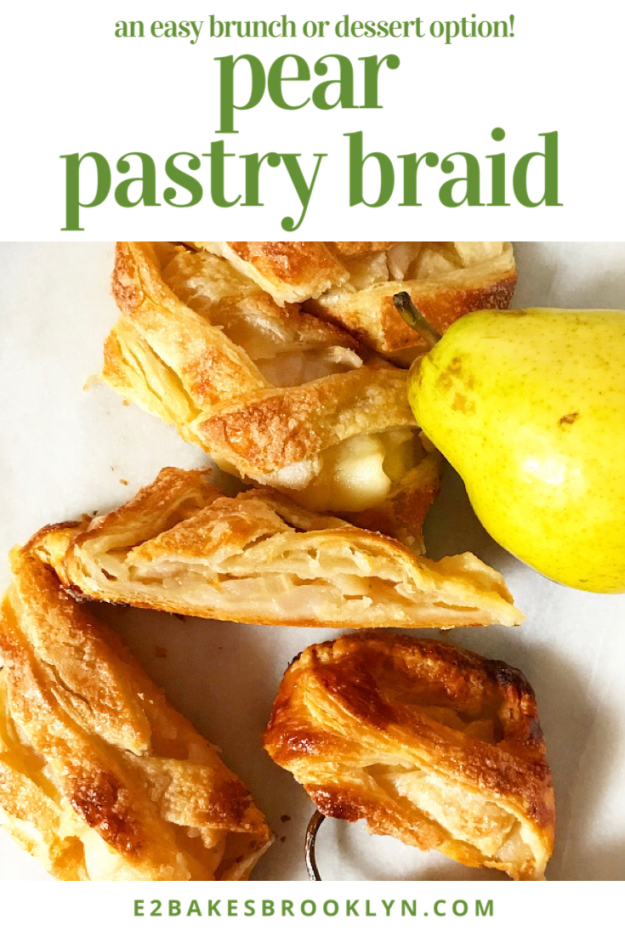
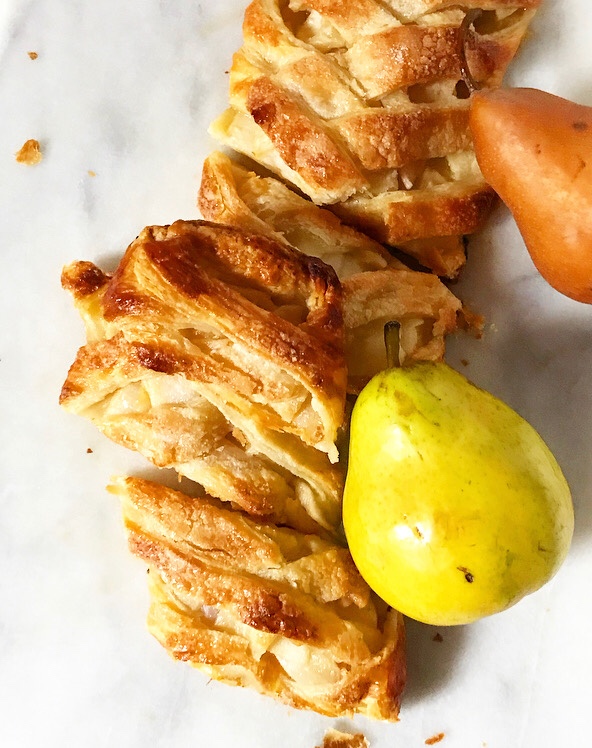
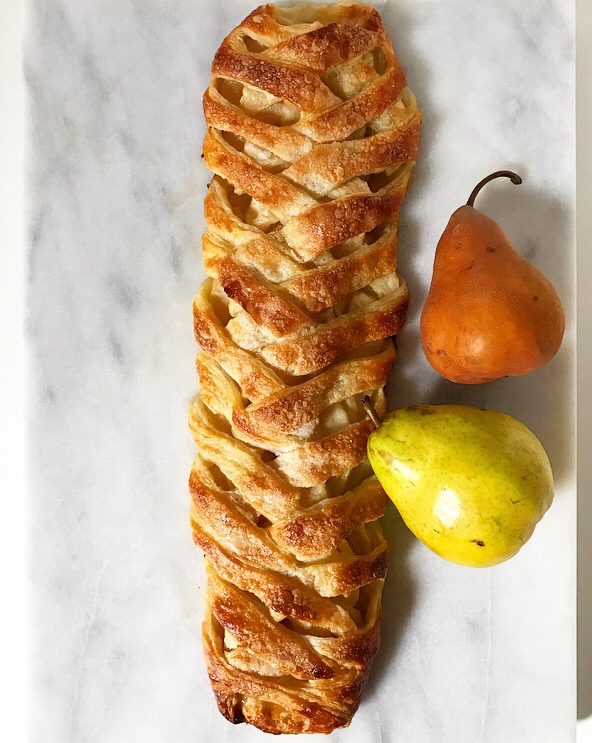 I mean, do you see this beautiful thing? Is it brunch food? Is it dessert? I don’t know. I don’t make the rules. I just make the pastry.
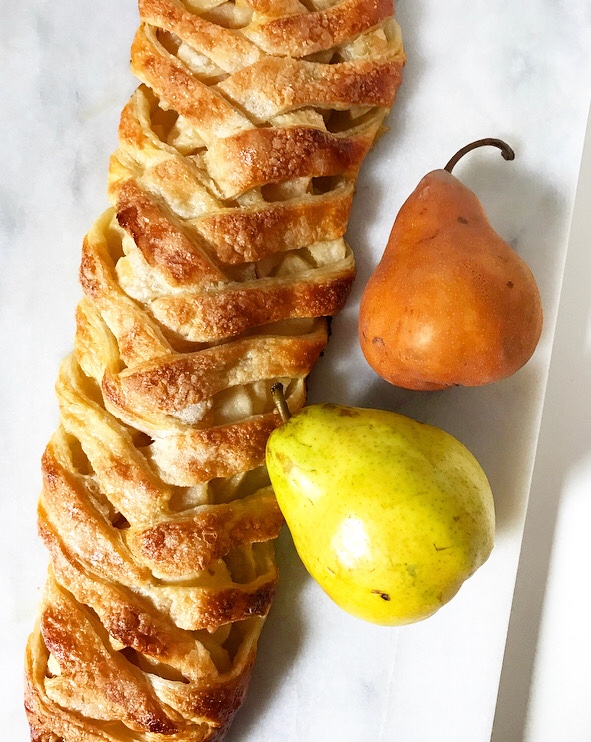 And oh, is this a good one. Pear Pastry Braid is super buttery and filled with tender pears that have been tossed with ginger, lemon, and a few tablespoons of sugar. Yum!
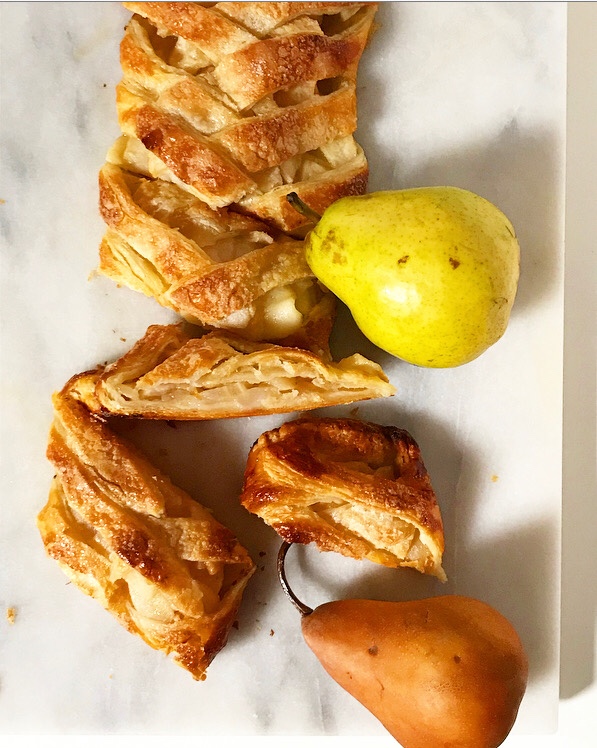 Don’t let these glamour shots deceive you–it’s surprisingly easy to make. Simply roll out a sheet of rough puff pastry (or the frozen thawed all-butter stuff), make a bunch of diagonal cuts down both long sides and fill the center with sliced pear filling.
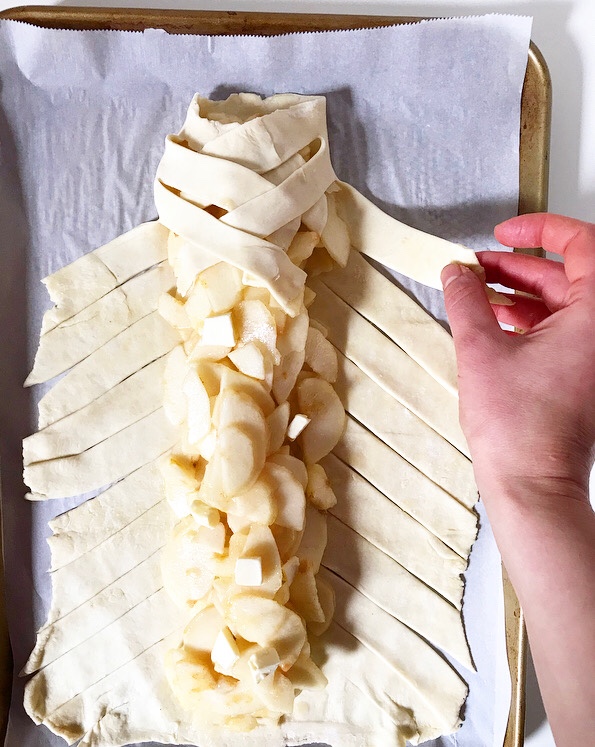
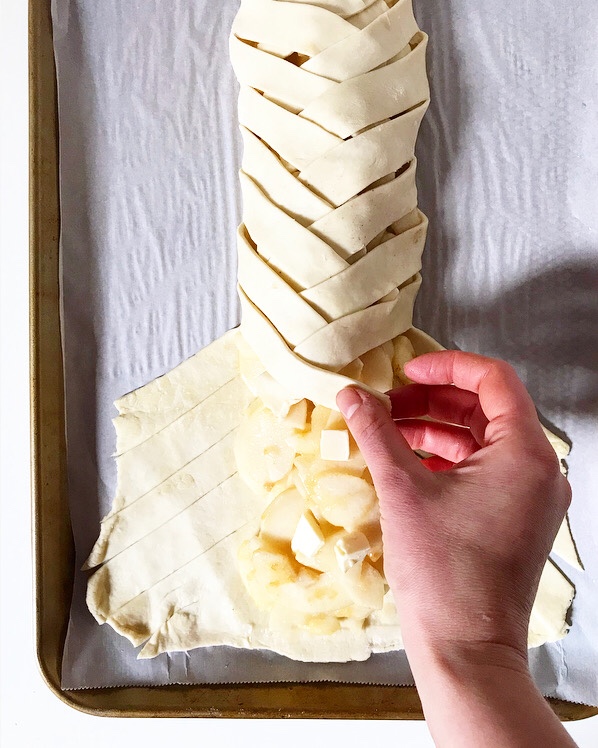 Alternating sides, carefully cover the filling with overlapping strips of dough, producing a braid-like appearance. Give it a brush of egg wash and a sprinkle of sugar, and then let it bake til golden.
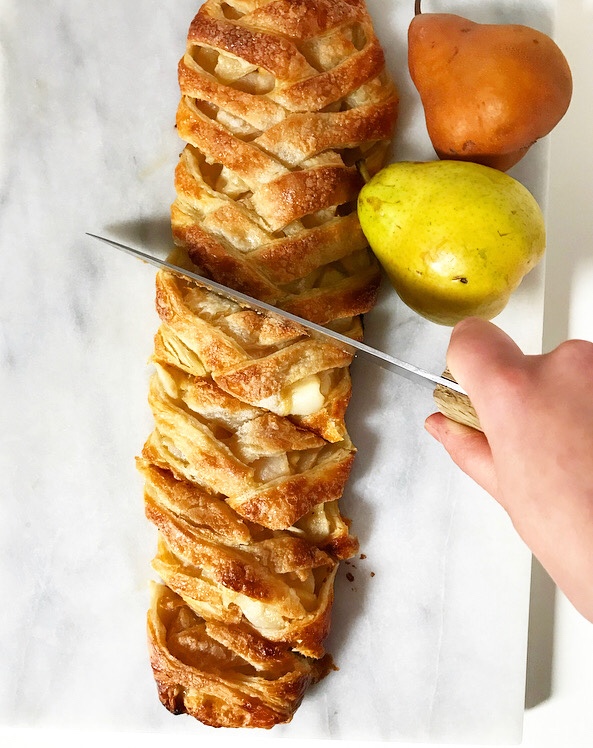 Sounds like a lot, but the time from when you start peeling pears to when you pull the finished pastry out of the oven is less than an hour. It can be sliced and served warm too, meaning that you don’t have to plan crazy far in advance (especially if you already have the pastry dough in the fridge). There’s so much planning around food this time of year that it’s kind of nice to have something you can make when the mood strikes or when someone says they’re going to pop by.
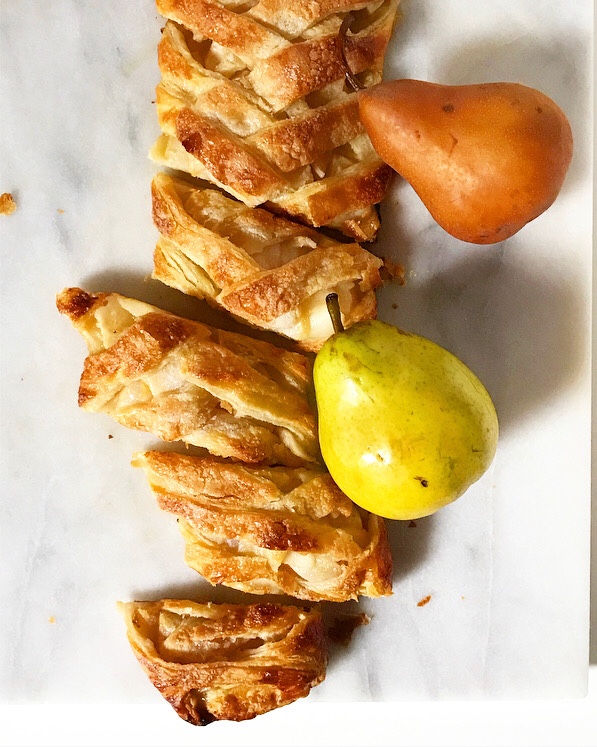 You know what else is nice? Eating a slice of sweet, flaky Pear Pastry Braid in your pajamas on a Saturday morning. Or a Saturday night. Or both.