 I have never been a particularly picky eater, but I have spent the majority of my 35+ years hating beets. Hating them. My mom used to serve pickled beets at least once a week, which meant I had to choke down (and I do mean “choke”) one or two with some regularity until I grew up, moved out, and lived a blissfully beetless existence until three years ago. I’d still be beet-free today if it weren’t for a request for them for a birthday dinner.
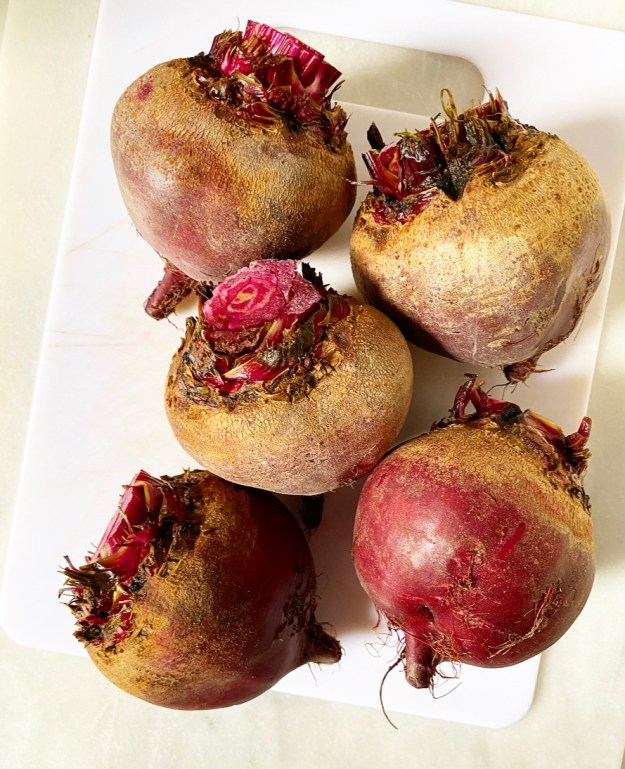
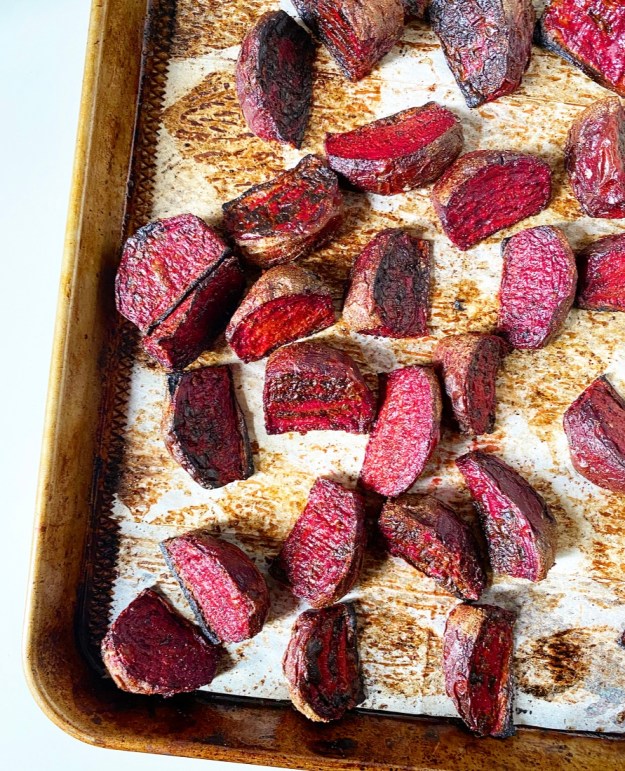 As I prepared for this party (remember parties?), I looked online for beet roasting methods and mostly saw the same one: wrap beets in foil, roast them whole, let them cool, rub off the skins with your hands, and slice. It seemed like a lot of time and work for something I couldn’t stand. Instead, I took a gamble and did things the easy way: giving my beets a really good scrub, lopping off the root and tip, slicing them into thick wedges, and roasting them with olive oil, cumin and salt until caramelized.
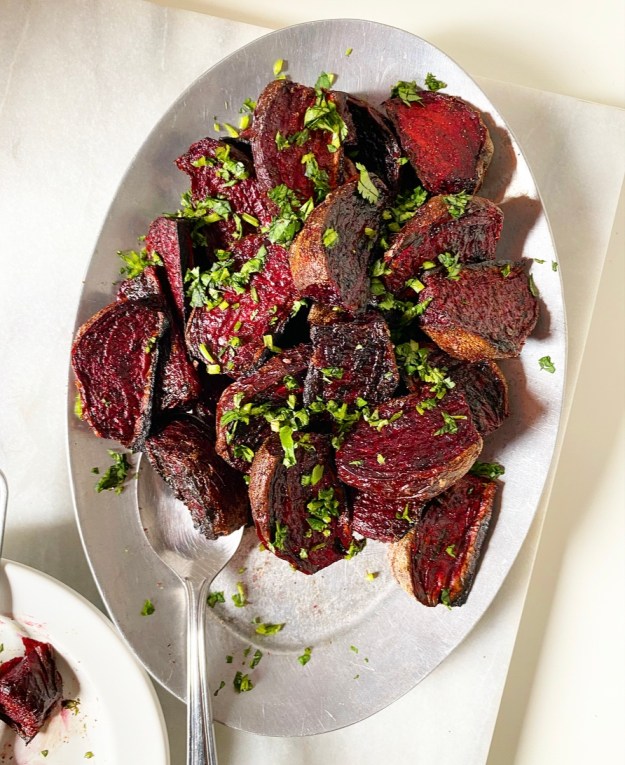
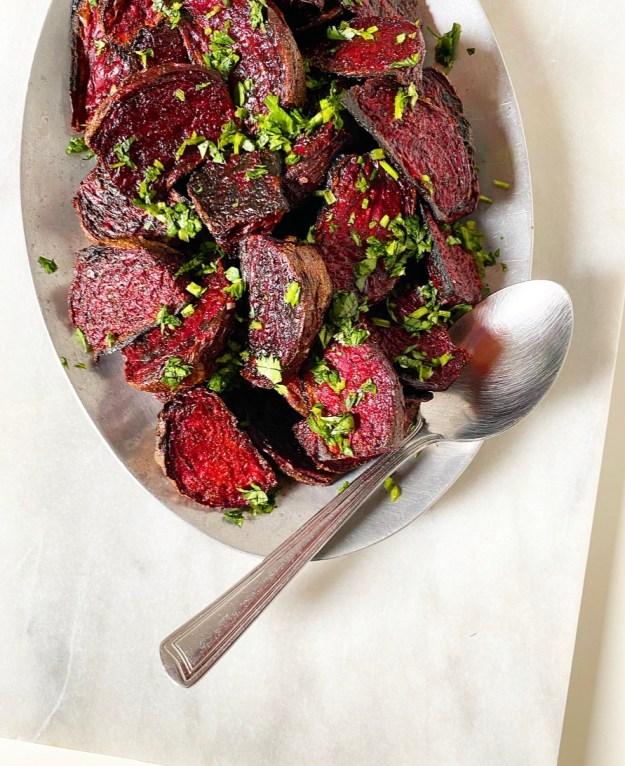 Being a careful cook, I had to taste the finished beets for seasoning regardless of personal preference, so I scrunched my nose, closed my eyes (?), took a tiny bite and…they were delicious. Earthy and sweet, yes, but also salty, smoky and crisp-edged. I couldn’t believe it—one of my top five all-time least favorite foods! Delicious! Sometimes it just takes the right preparation to change someone’s life (er, palate).
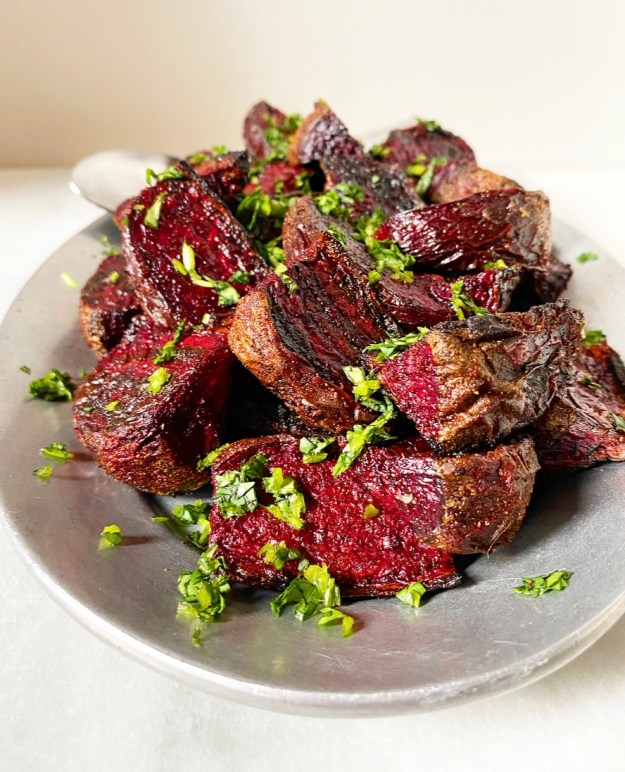 Now, I don’t know if I’ve actually changed—you won’t find me eating pickled beets out of the jar anytime soon. But these? I’ve made them at least once a week for the last three years and I freaking love them. They’re so easy and so good, the perfect low-maintenance side dish. I’ll throw a pan of Easy Cumin Roasted Beets in the oven alongside a chicken, serve them with fresh hummus on a casual night in, or pair them with feta and greens for a killer beet salad.
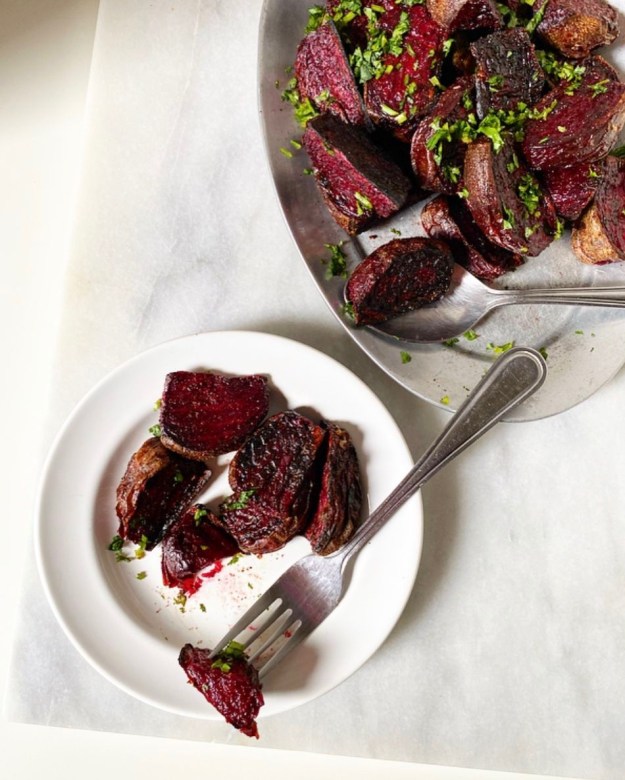 Did I just say “killer beet salad”? Maybe I’ve changed after all.
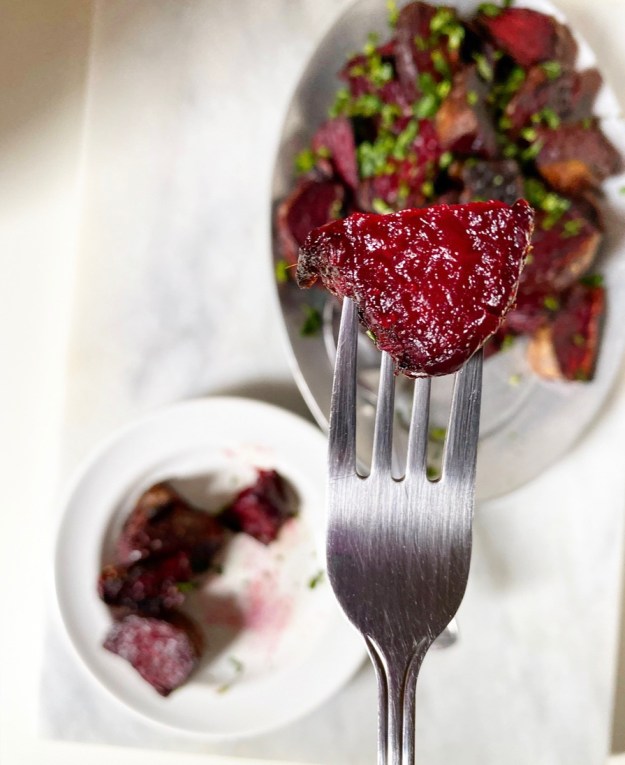
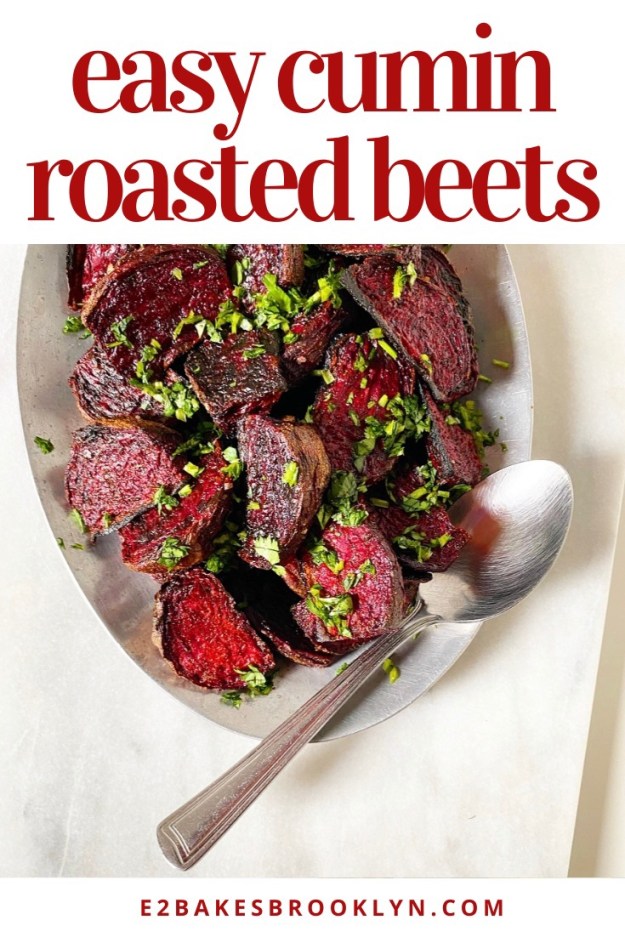
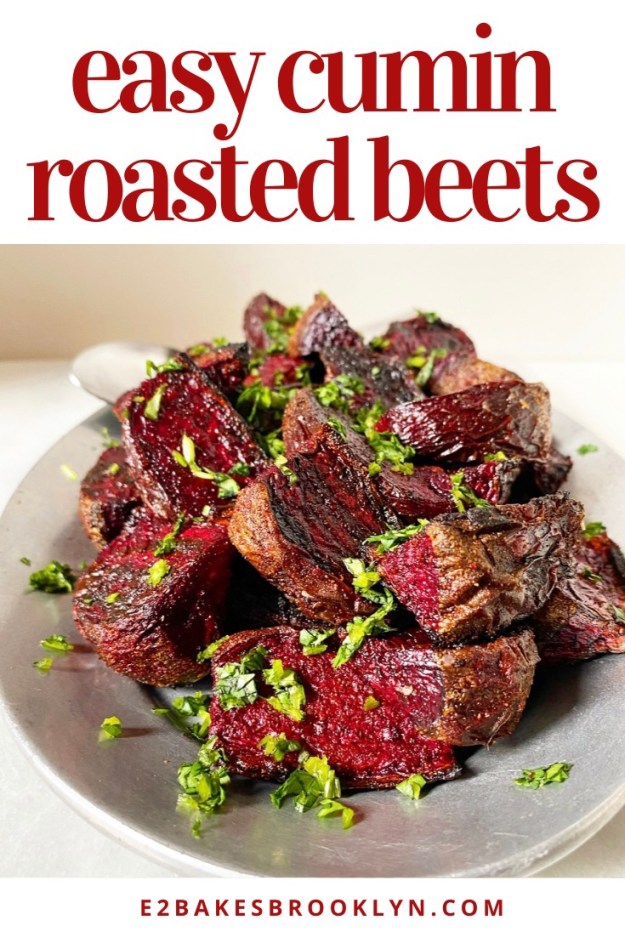
Easy Cumin Roasted Beets
makes 6 or so servings
4-5 large beets or 6-7 small-medium beets
2 tablespoons olive oil
1 1/2 teaspoons ground cumin
1/2-1 teaspoon Kosher or sea salt, or to taste
chopped cilantro or parsley, for garnish
Preheat oven to 425F. Line a rimmed baking sheet with parchment paper.
Scrub beets and dry. Some may have a matte brown portion of their skin–wiping them dry with paper towel or lighter-colored towel is best for differentiating between this and remaining dirt. Do not peel.
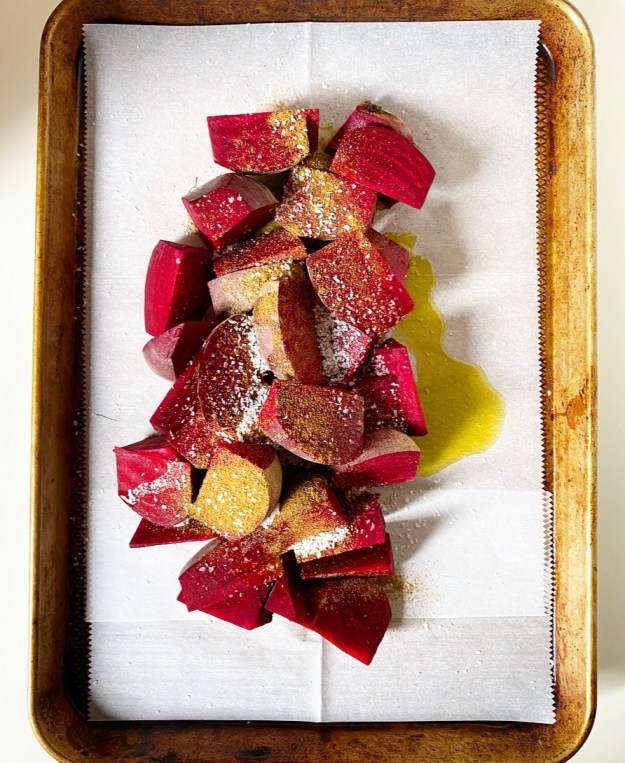
Use a large, sharp chef’s knife to trim off the roots and tips. Slice them into wedges (I did 8 each on large beets). Pile on a prepared pan and top with olive oil, cumin and salt. Toss with your hands until everything is evenly coated, then scatter them evenly across the pan, taking care to keep them apart. Wash your hands.
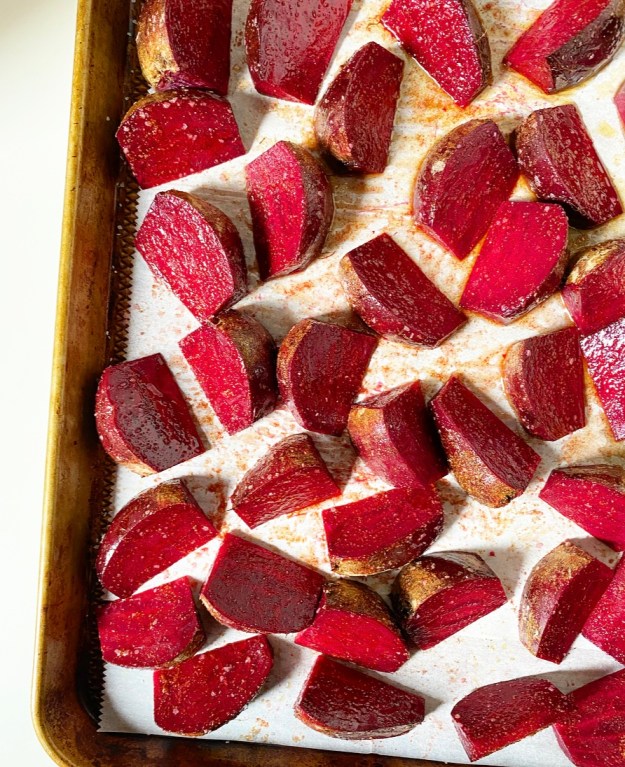
Roast 20 minutes. Use a thin spatula to flip the beets over before roasting for 20-25 minutes more. Remove them to a serving dish. Garnish with chopped cilantro or parsley, if desired. Serve.
Leftovers will keep in an airtight container in the refrigerator for a few days.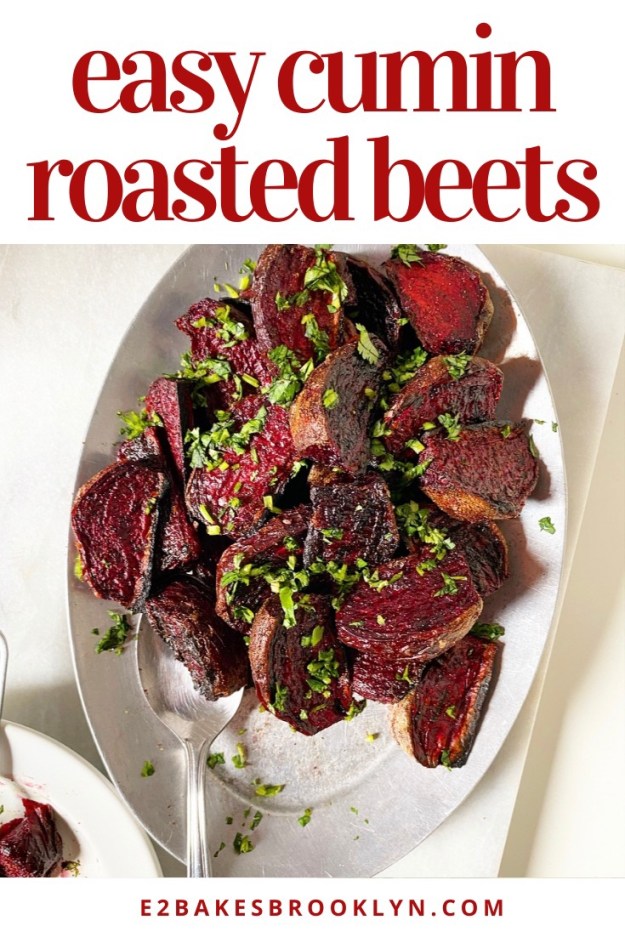
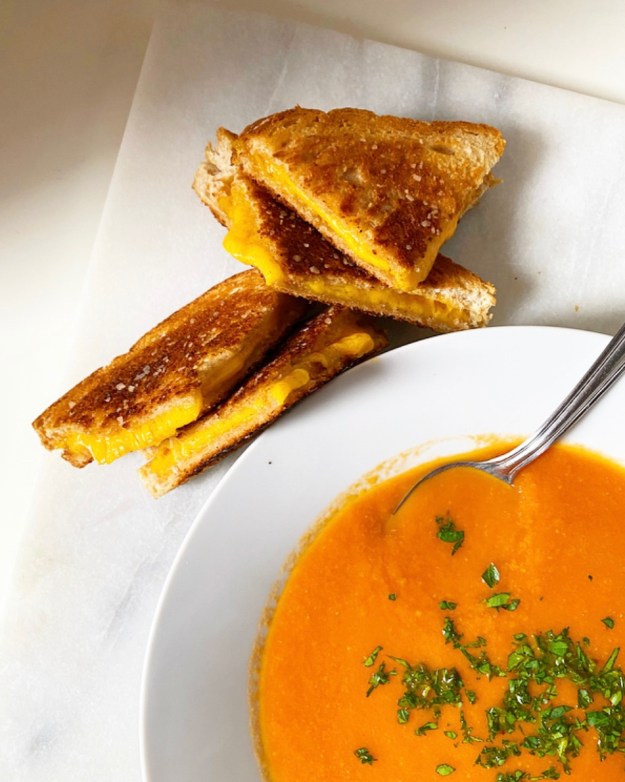 Over the past couple of years, I’ve learned that a shocking number of people I know and love don’t know how to make one of the simplest recipes in the wide world: Grilled Cheese. It’s not because they’re incapable in the kitchen—it’s just that nobody ever taught them how to make it so that the bread cooks and the cheese melts at similar rates, and the butter doesn’t blacken and smoke up the house.
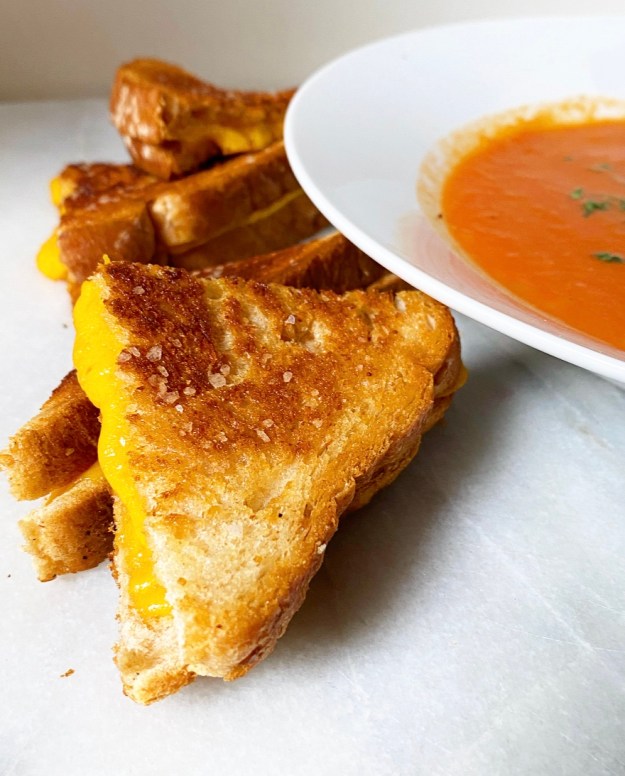 Luckily (maybe?), they’re friends with me, a person who will make them a grilled cheese in the moment and then spend four months dwelling on the (non-)event until the middle of January when she decides to write a blog post about the whole (inconsequential) thing. And that’s how we got here. Luckily. Maybe.
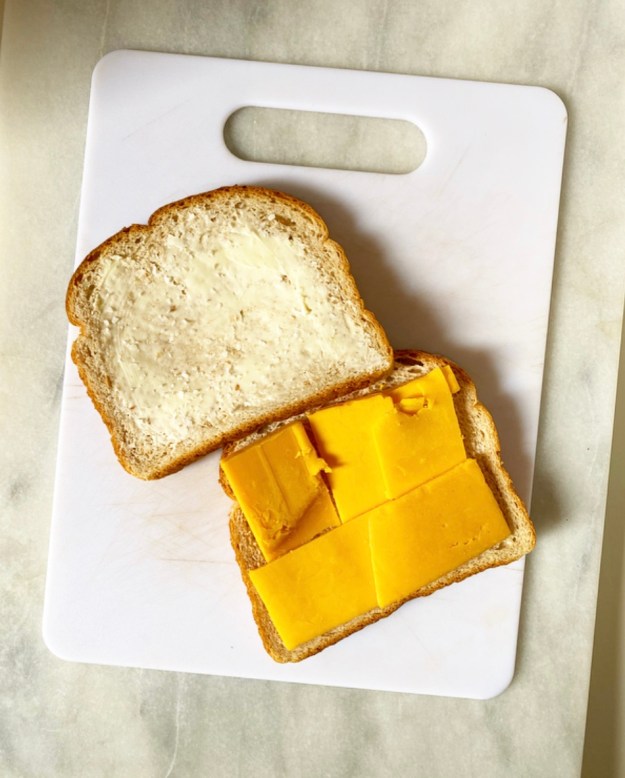 I make Grilled Cheese for dinner at least once a week because a) it’s easy and I don’t have to think about it too hard, and b) I always have sandwich bread, butter and some sort of melting cheese (usually extra sharp cheddar). It only takes a couple of minutes to butter two pieces of bread and layer cheese in the middle. You’ll notice I don’t use sliced cheese here—that’s simply because I prefer to buy the brick and slice it myself. Do whatever works for you, with the exception of pre-shredded cheese because it’s coated in an anti-caking agent that prevents proper melting. You do not want to impede proper melting on a Grilled Cheese!
 As far as cooking goes, I think it’s a pretty human thing to want to cook crispy foods over the highest heat for a couple of minutes, but when it comes to Grilled Cheese (and so many other things), it’s best to ignore that thought, turn down the flame and take your time. Whereas 3-4 minutes over high will yield cold cheese between burnt slices of bread, 7-8 over medium-low will give you perfect melted cheese and buttery, golden edges every time. Those extra four minutes make all the difference in the world.
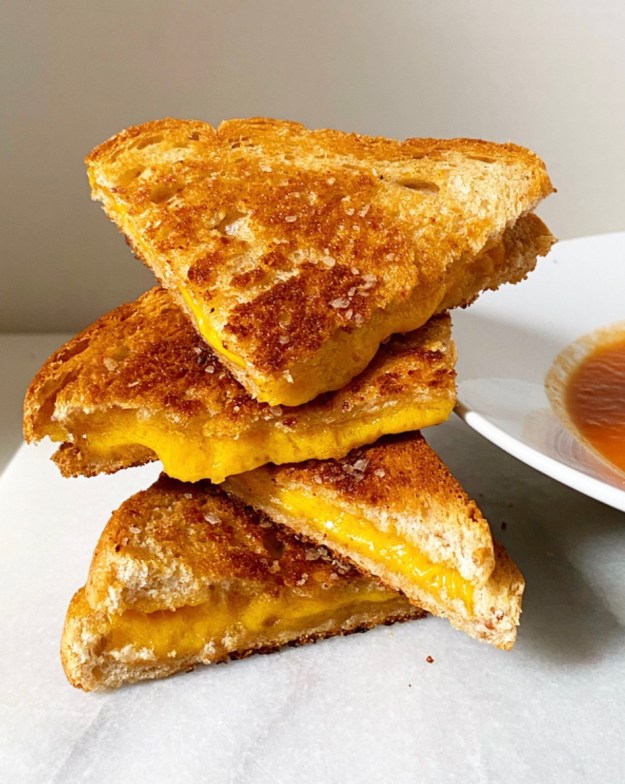 Boom! That’s all you need to know to make a basic Grilled Cheese. You can change up the cheese and bread depending on your mood, but as long as you butter the outsides of the bread instead of melting butter in the skillet and cook things low and slow, you will always have perfect Grilled Cheese.
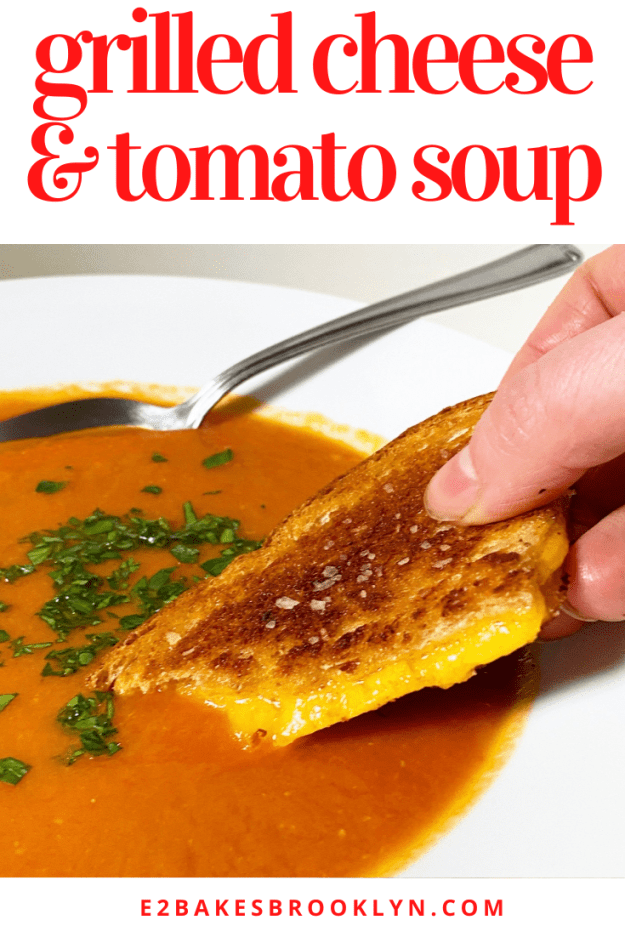
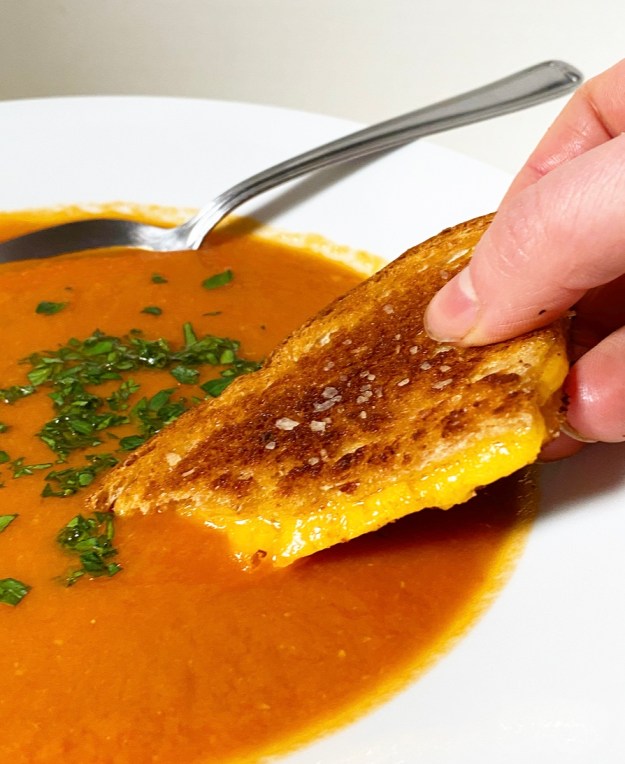 And what’s Grilled Cheese without Tomato Soup? This combination is a classic for a reason—the tang of tomato pairs perfectly with the rich, cheesy, crispy sandwich, making for a simple, satisfying meal.
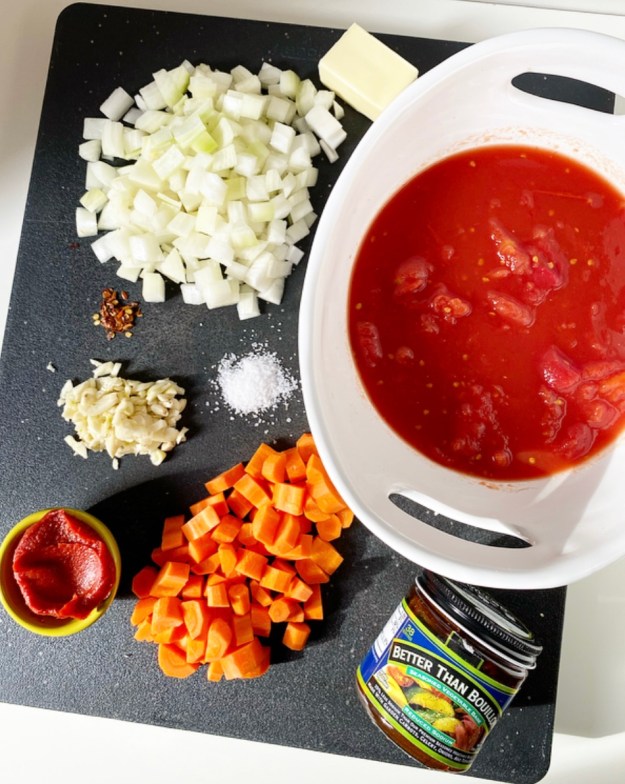 As with Grilled Cheese, my go-to Tomato Soup recipe is easy as can be. Whole peeled tomatoes are crushed by hand, then simmered in vegetable stock with carrots, onion, garlic, tomato paste and spices before being puréed until velvety smooth. Easy peasy.
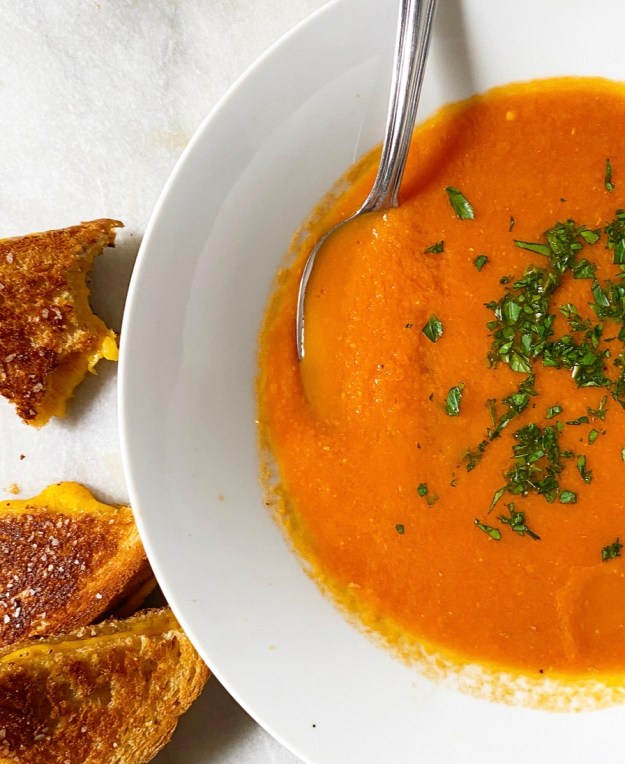 Two things to note:
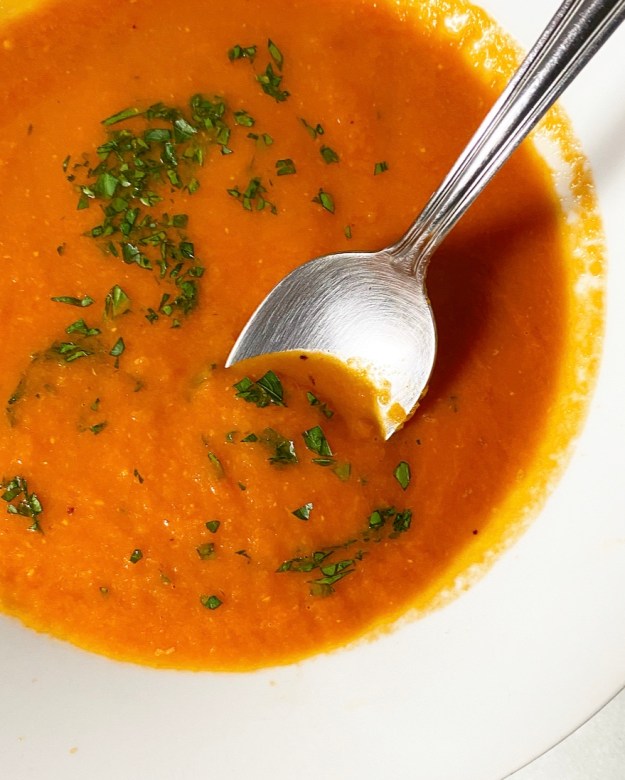 So there you have it—one of the simplest meals in the world, explained. Maybe you knew all this or maybe you didn’t. Either way, I hope you treat yourself this weekend. I know we could all use some comfort. No “maybe” about it.
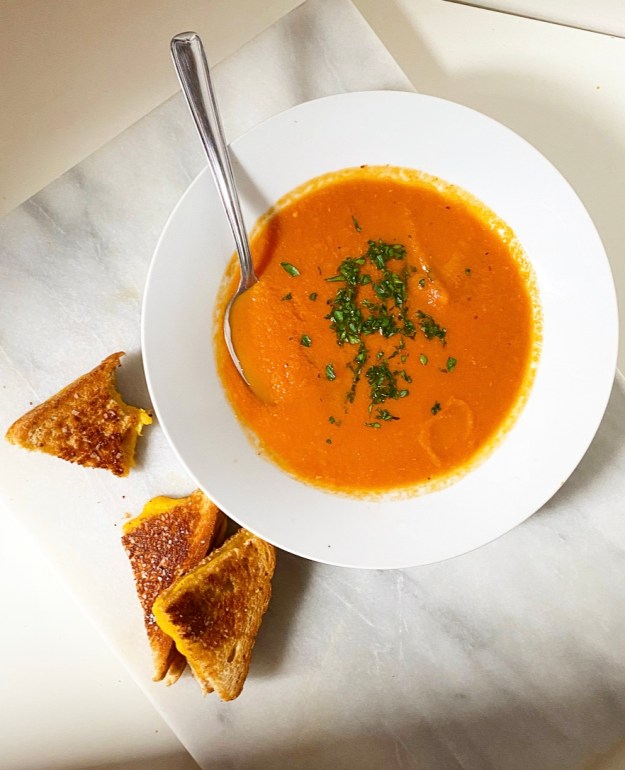


 As with so many of the weeknight meals that show up on this site, I’ve been making these Spicy Turkey Tacos for years. They became a part of my repertoire when I started my
  These are a simple & saucy DIY taco seasoning, ground turkey and tomato paste situation that remind me—for better or worse—of the Old El Paso Tex-Mex taco kits my mom made when we were little. But, you know, a little classier because there’s nothing from a packet.
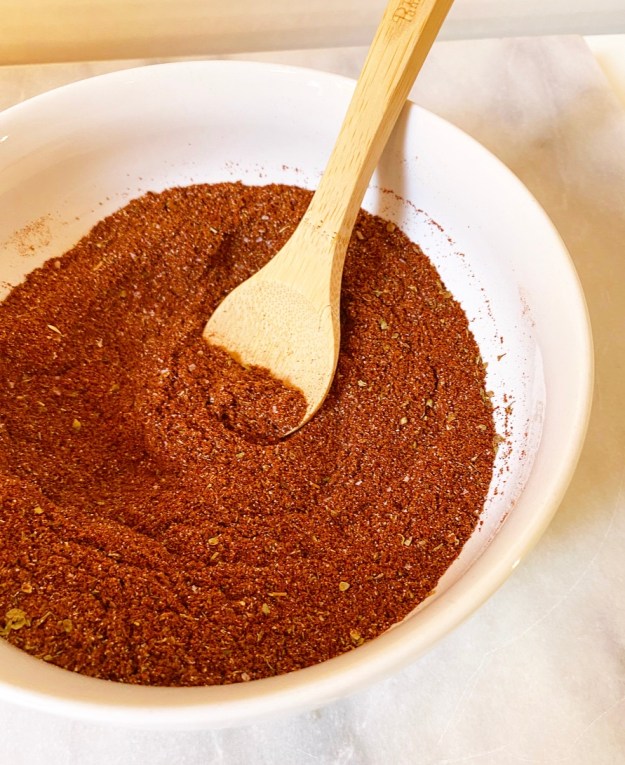 The key to this recipe is the homemade taco seasoning. It’s a simple blend of chipotle chile powder, cumin, paprika, garlic powder, onion powder, dried oregano, cayenne and salt, and it is responsible for the majority of the flavor here. The recipe below makes enough for about four pounds of meat, meaning that you can make the seasoning once and then throw Spicy Turkey Tacos together in no time with no notice on a future busy weeknight. Score!
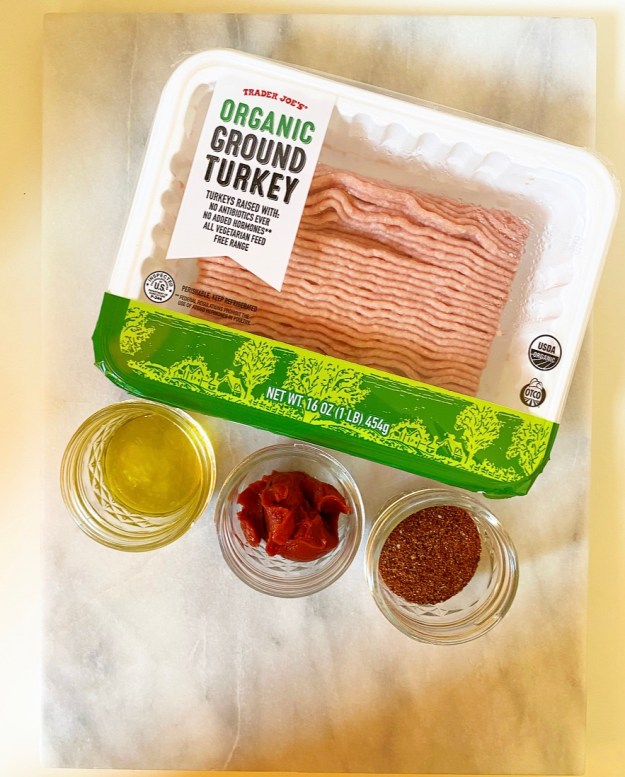
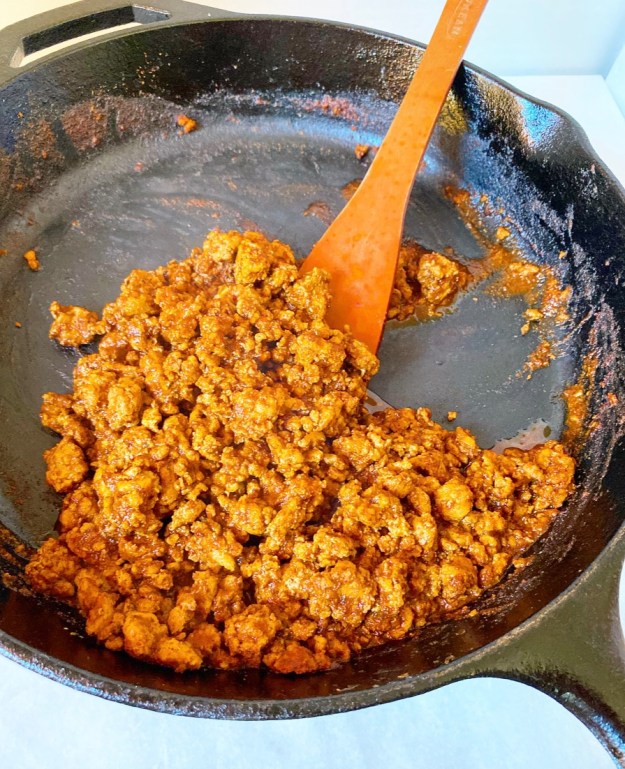 To make Spicy Turkey Tacos, begin by browning a pound of ground turkey. Stir in 2 tablespoons each of your taco seasoning and tomato paste until everything is coated. Then add some water and let your taco meat simmer until thickened to your liking. I usually let mine go until the sauce is reduced by half or two-thirds, until it’s thick but still decidedly saucy.
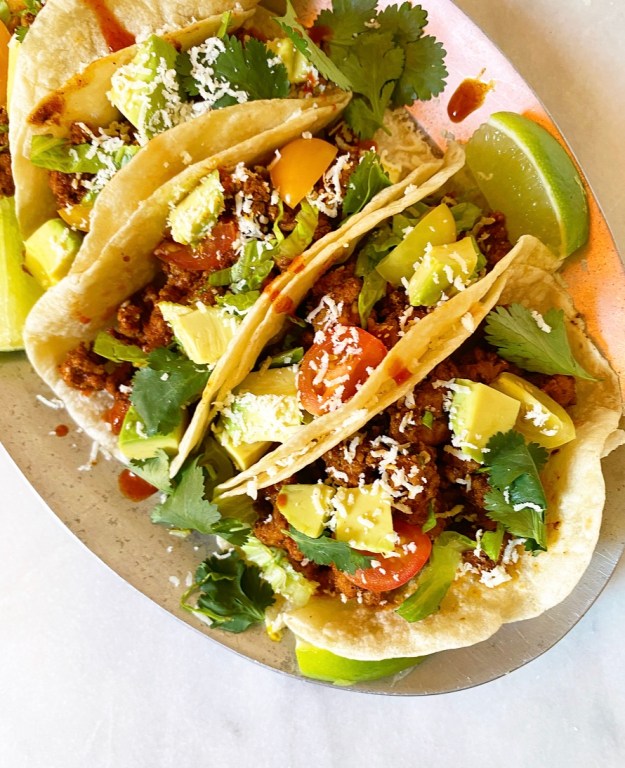 As for serving, spoon this Spicy Turkey Taco meat into warmed flour or corn tortillas (or make a taco salad!), and pile on whatever toppings make you happy. I threw cherry tomatoes, diced avocado, romaine lettuce, cilantro, lime, grated cotija and hot sauce on these, but you could go with
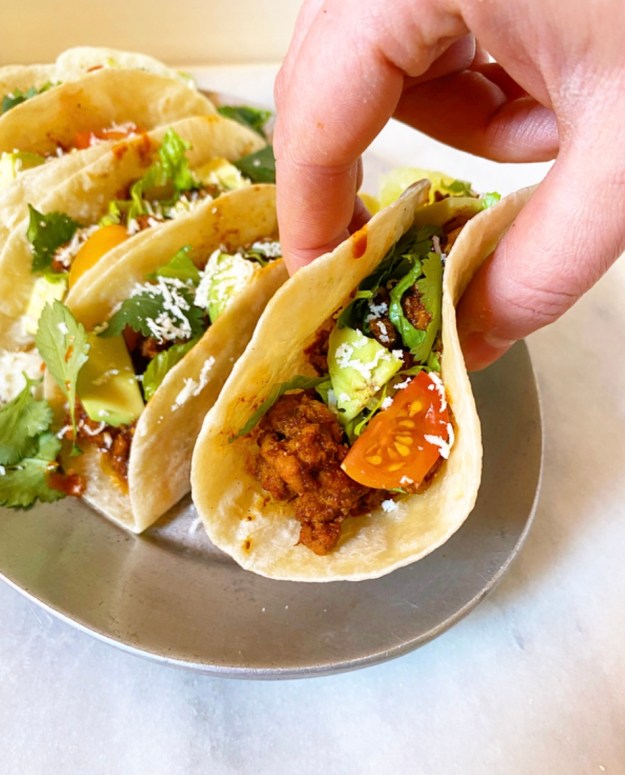


 Southern-style
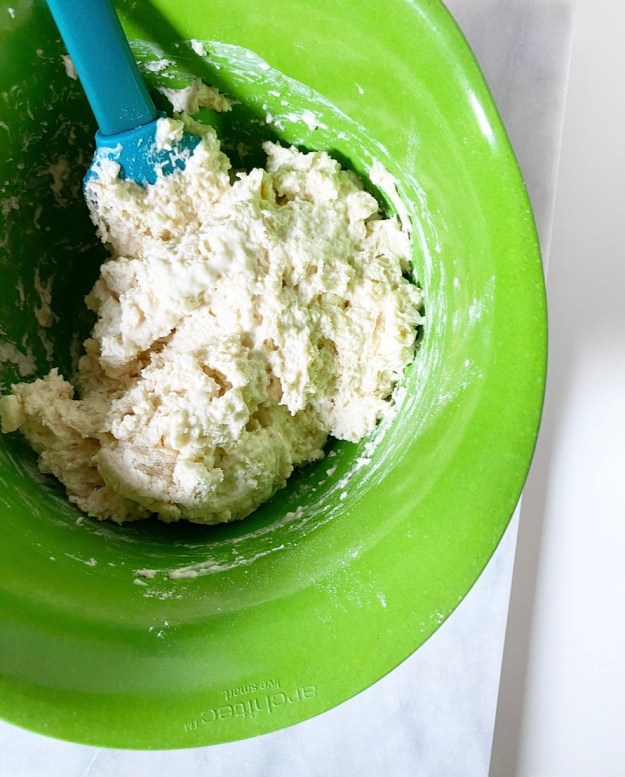
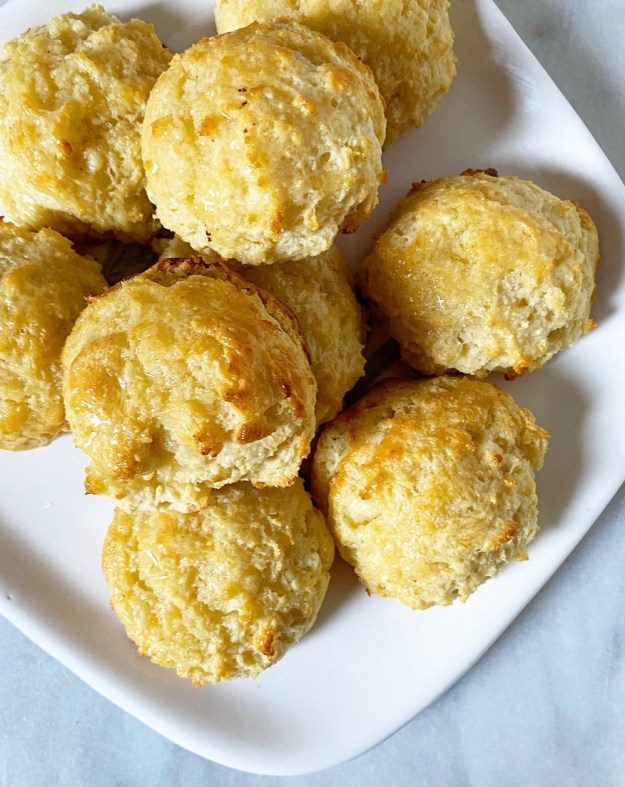
 All that said, I’ve never really gotten on the drop biscuit train. I guess I thought they were cheating or something—the ingredients and mixing methods are nearly identical, but you don’t have to pat and cut anything, instead scooping the sticky dough directly onto a pan before baking. I suppose that without dirtying a surface or doing extra work I assumed that they were a slightly-less-good version of the “real deal.” But I was wrong. So, so wrong.
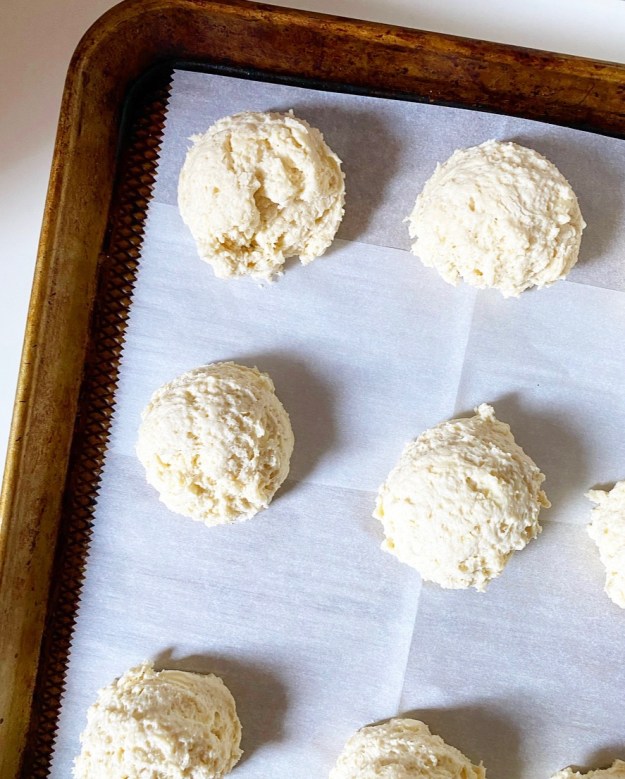
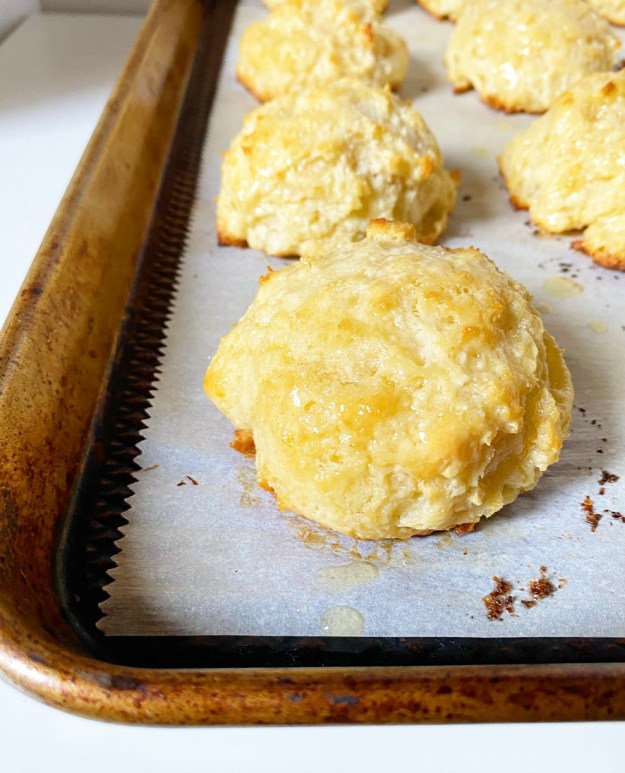
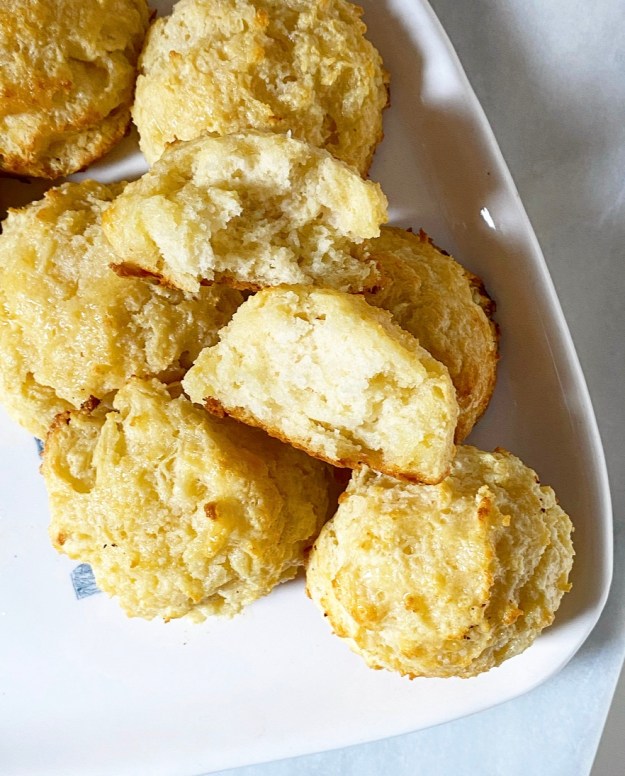 Turns out, drop biscuits are their own thing entirely. They’re fluffy and tender instead of flaky and layered, and they have these extra crispy-crunchy exteriors with which I am now fully obsessed. And the recipe works with both whole milk and buttermilk, and (!) I don’t have to scrape an invisible layer of butter and flour off of my countertop every time I make a batch. Drop biscuits, where have you been all my life???
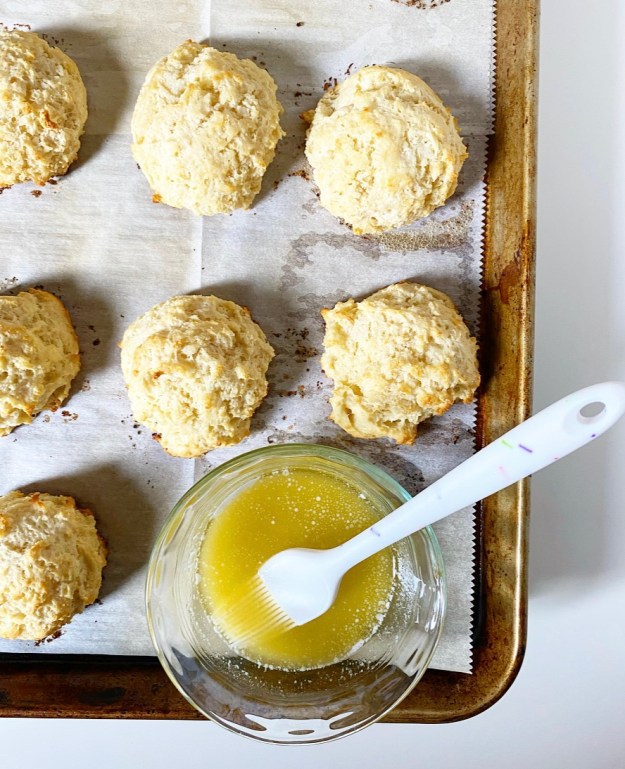
 I won’t lie to you: drop biscuits are not a traditionally beautiful food. They’re scraggly, craggy and have slightly wonky shapes, regardless of whether you use a cookie scoop, a spoon or your hands to dole out dough. They’re super delicious, just a little ugly. Or at least they are until you give them a glossy coat of salty-sweet honey butter.
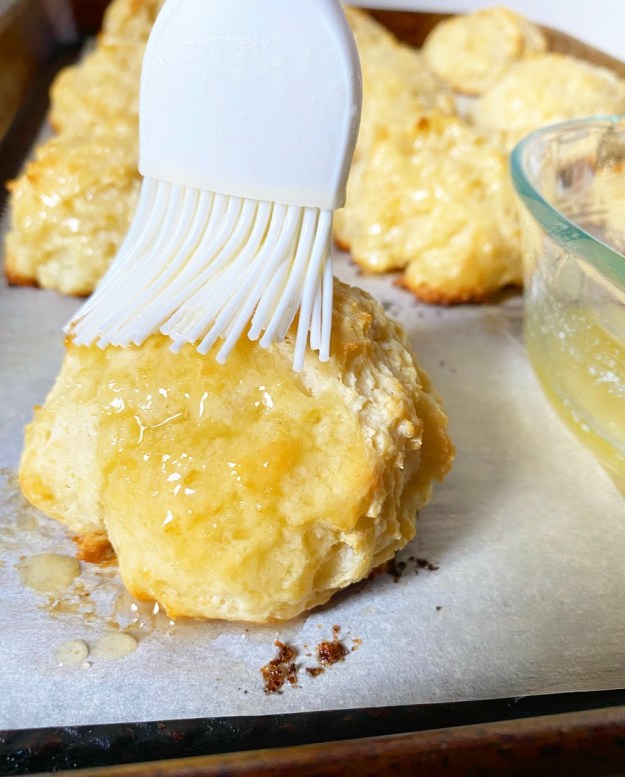
 Ohhh yes.


 Although I have never publicized it this way, I have privately referred to this time of my blogging year as “Savory January” for some time now. You see, every January since starting this site, I (mostly) switch focus from sweets to weeknight meals, sides and other savory pursuits. It’s not for weight loss, “cleansing” or any reason beyond keeping things interesting—I cook as much as I bake, and those recipes deserve their moment in the blogging sun, too. Is switching up my blog POV for one month a year weird? Sure. But I like variety, and also this is my website and I can do what I want.
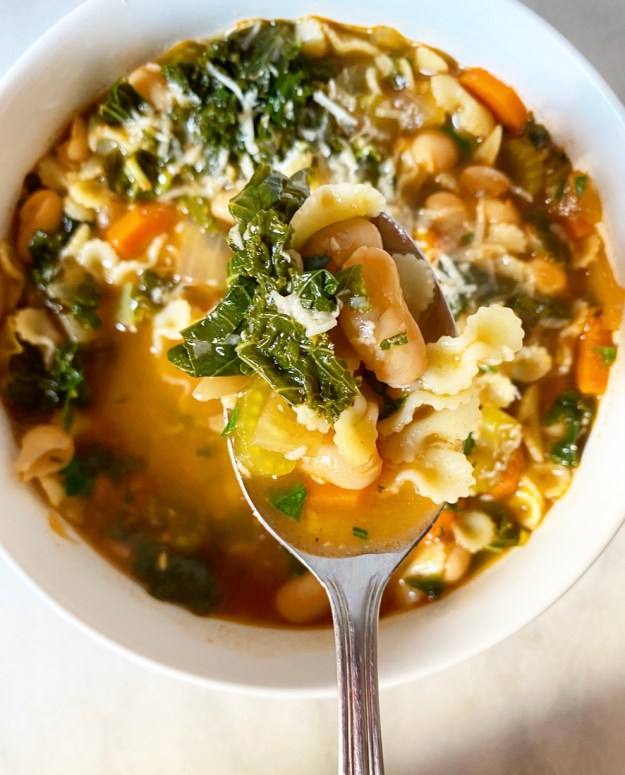
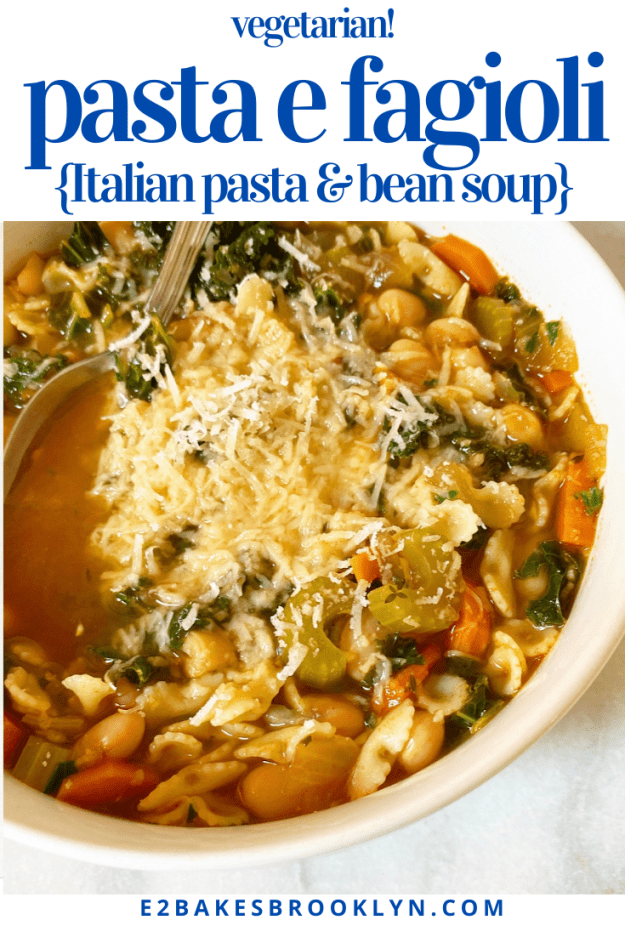
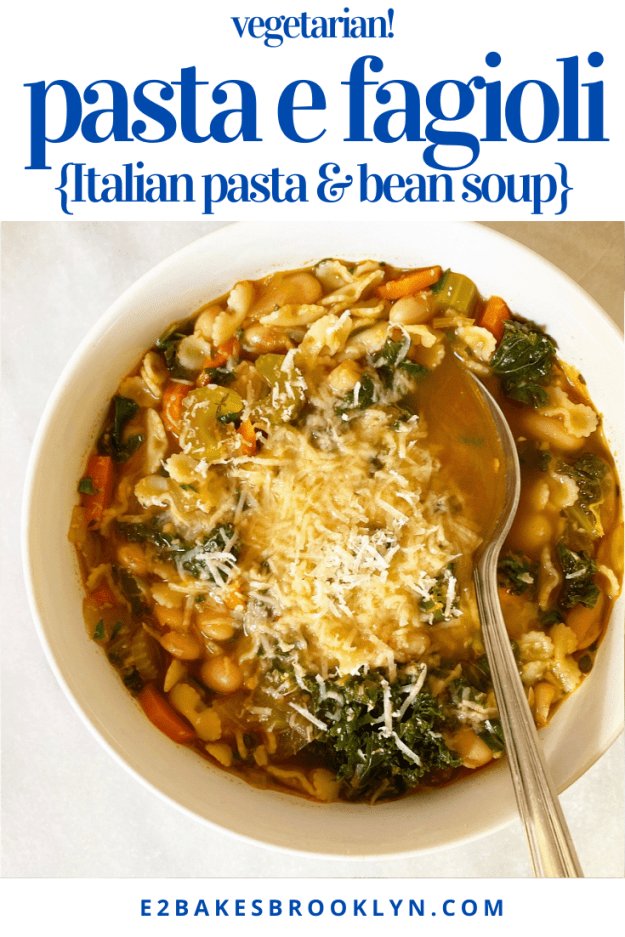
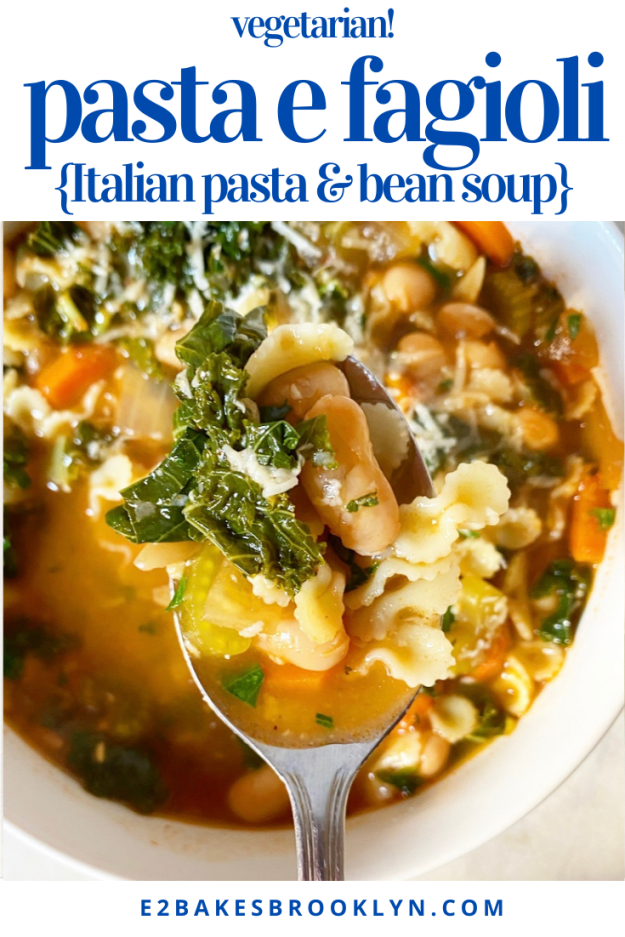
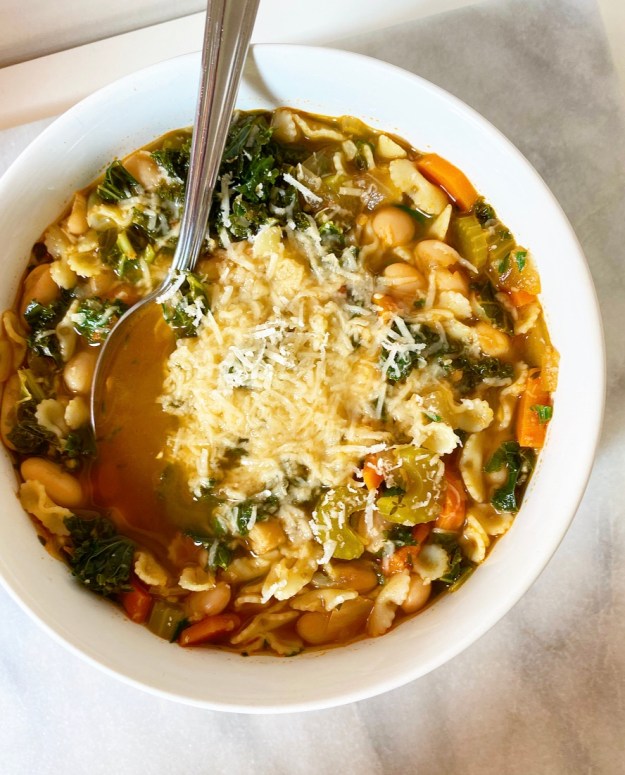
 Pasta e Fagioli has been one of my favorite recipes for years and years. At its most basic, it’s a vegetable soup with pasta and beans, but it’s so much more! It’s easy, it’s cheap, it’s hearty, and it’s dang delicious. Oh, and it’s vegetarian—vegan without the cheese, gluten-free depending what kind of pasta you use. Yesssss.
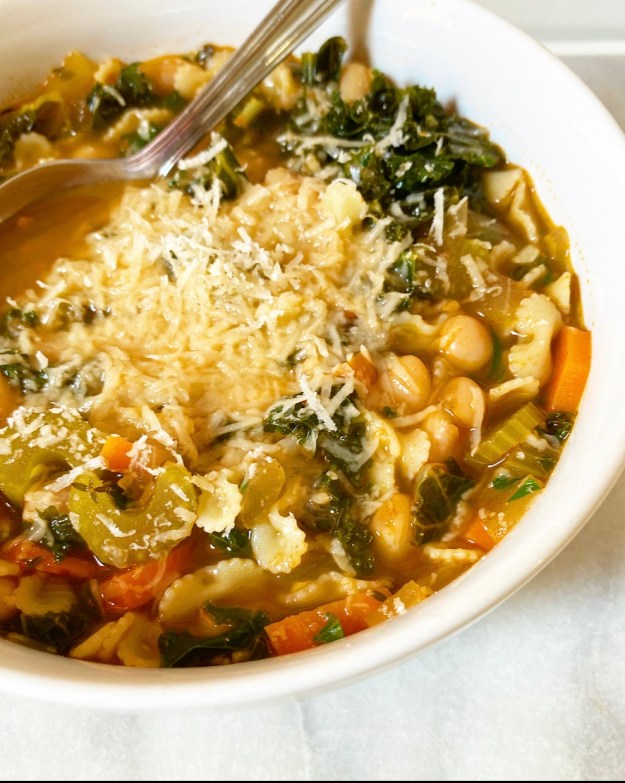 I made this Italian staple all the time when I first moved to NYC, but moved on to other things because that’s just how cooking goes for me. I make something regularly for a few weeks/months/years and then I completely forget about it for a few more weeks/months/years. In this case, I remembered Pasta e Fagioli on the last night of our Maine trip this past October. We had some produce to use up, and we had some tomato paste, beans (aka fagioli), pasta and cheese ends lingering…and well, when life gives you lemons, you know.
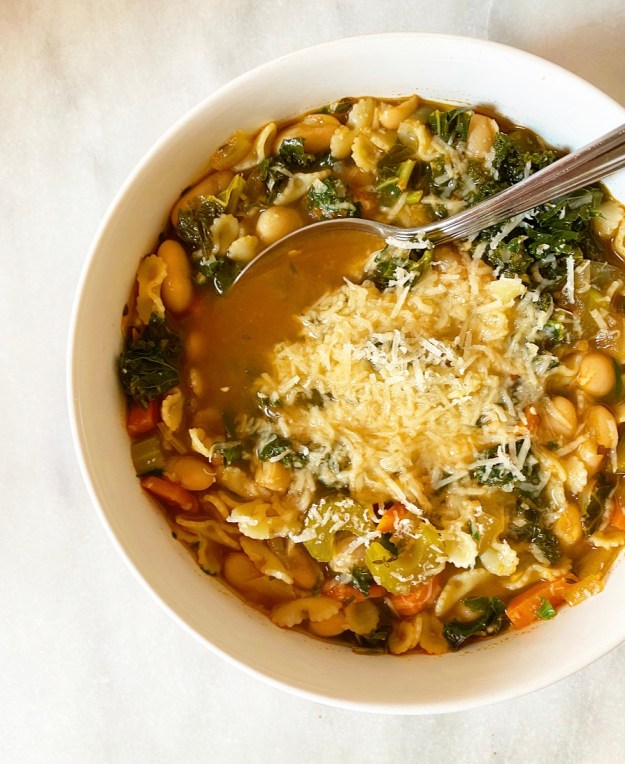 Making Pasta e Fagioli is super simple and you probably have most of the ingredients already. The method is nearly identical fo the way I make
 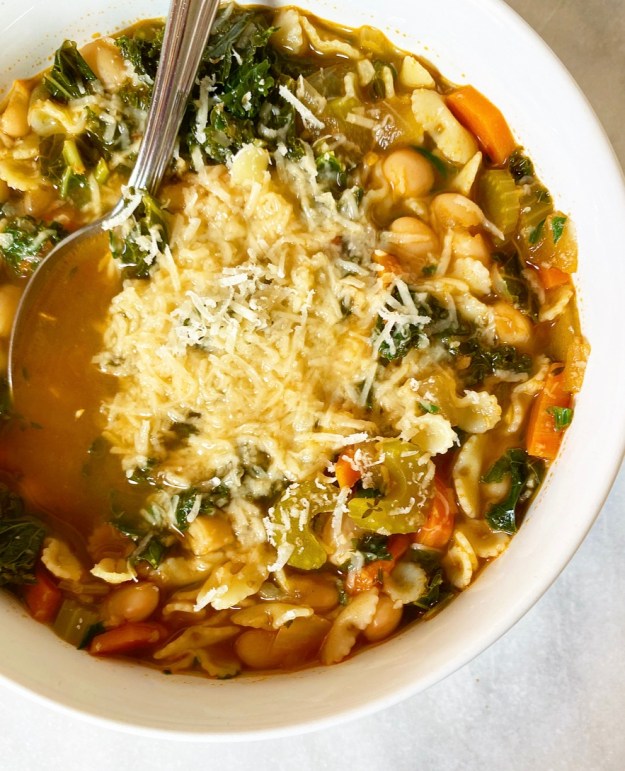 If you’re wondering why I cook the pasta separately from the rest of the soup, it’s because I’m a single lady who eats a lot of leftovers and hates mushy pasta. I do this with chicken noodle soup as well—by keeping the two components separate, the pasta doesn’t overcook or get waterlogged and sad. If you have a group to feed or will otherwise not have leftovers (or maybe like your pasta really soft?), feel free to toss it in the pot with the beans and kale.