When I posted Flourless Chocolate Cookies a couple months ago, my first thought was “these would be perfect for ice cream sandwiches.” Short story shorter, I was right.
Like all the best ice cream sandwich cookies, Flourless Chocolate Cookies are fairly flat and aren’t too hard or too soft. They also have this lovely, crinkly brownie-like quality, and are super easy to make and naturally gluten-free. Like I said, perfect.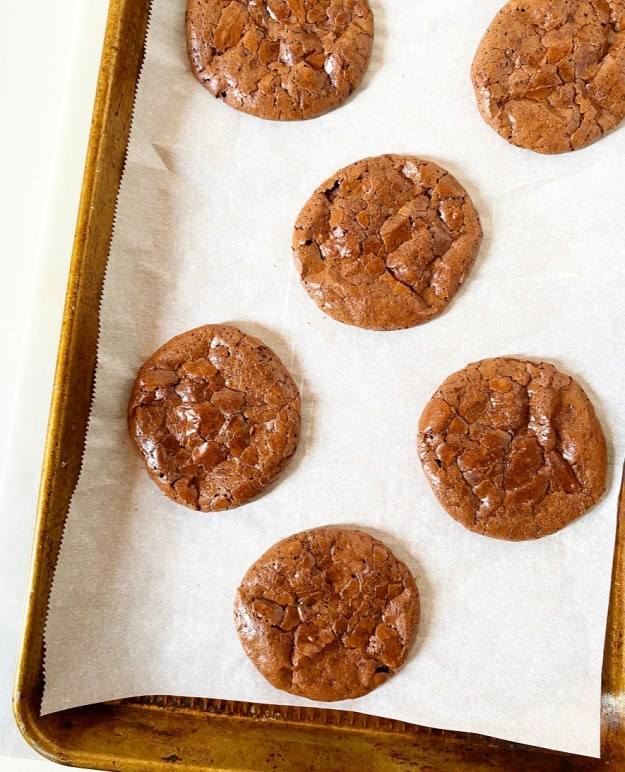 These cookies are on the sweeter side (confectioner’s sugar provides a lot of the structure), so I added a teaspoon of granulated espresso to the recipe to keep them from being cloying with ice cream. I also cut the size of the cookies in half for a dozen medium cookies instead of six large ones.
The assembly process begins by matching cookies, meaning determining which are the most compatible shapes. Mine all turned out fairly round, but there are always a couple that are a little oblong.  Next up, you’ll need to freeze the cookies for about 30 minutes. This helps the ice cream to stay on the solid side and the cookies from getting too soft during assembly. This step is not strictly necessary, but it is good insurance against ice cream sandwich frustration.
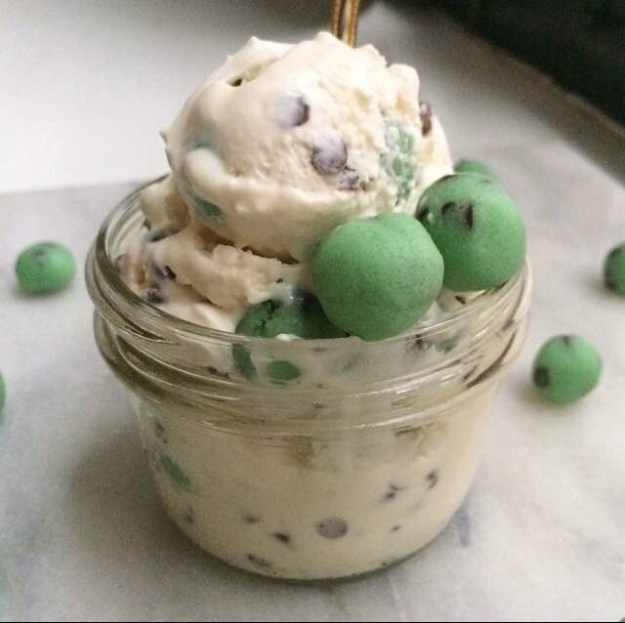
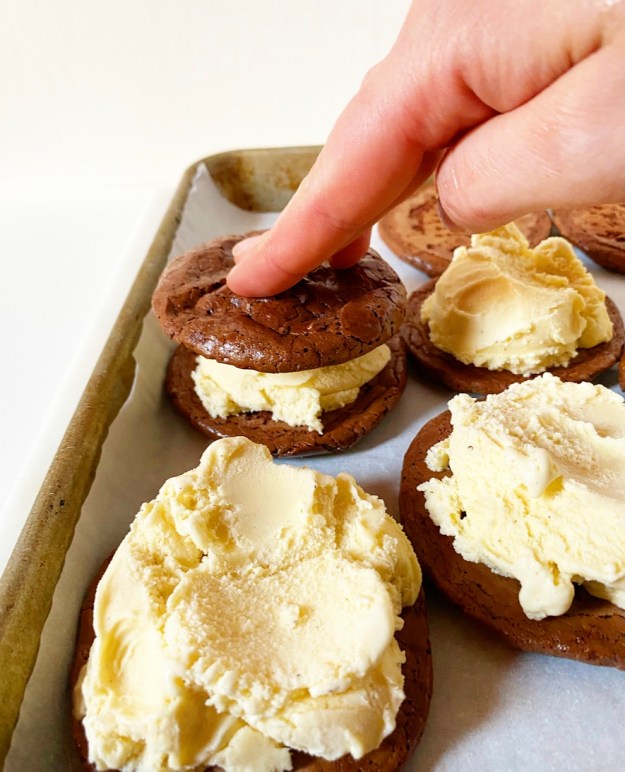 Regarding ice cream, use whatever flavor you want. I went with a mid-level nationwide brand’s vanilla here and it was fine—good, even—but I will go higher quality next time. Oh, and I’ll probably go with mint chocolate chip because it’s my favorite. The point is to use what you love and not settle for less. Cookies are an important part of ice cream sandwiches, but ice cream is the *most* important part.
There are many ways of getting ice cream into ice cream sandwiches—slicing it, pressing it into molds, etc.—but I like to use the very easy and imprecise method of measuring out roughly 1/4 cup (1 small scoop) and lightly smashing it on a cookie.
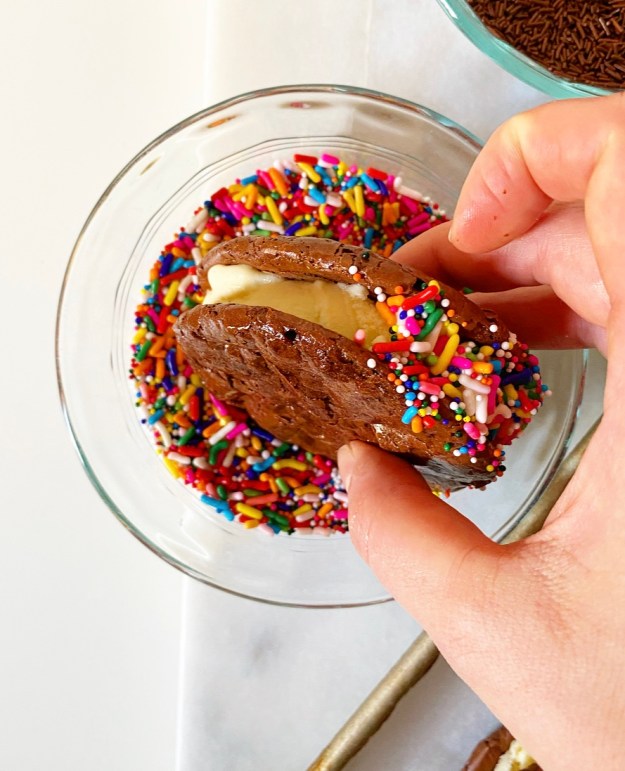
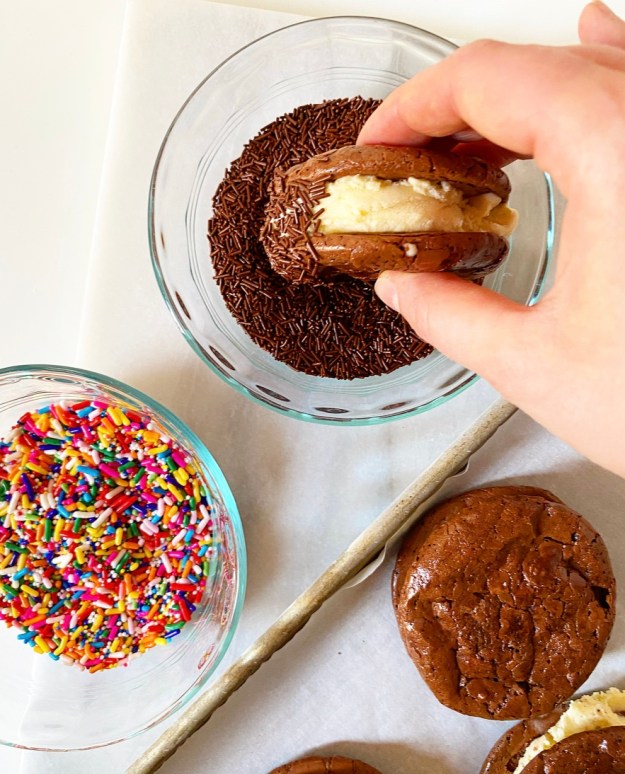 Freeze the sandwiches before rolling them in your sprinkles of choice or chopped nuts or mini chocolate chips or candy bar pieces or crushed Oreos. Again, use what you love and don’t settle for less. <—good life advice?
 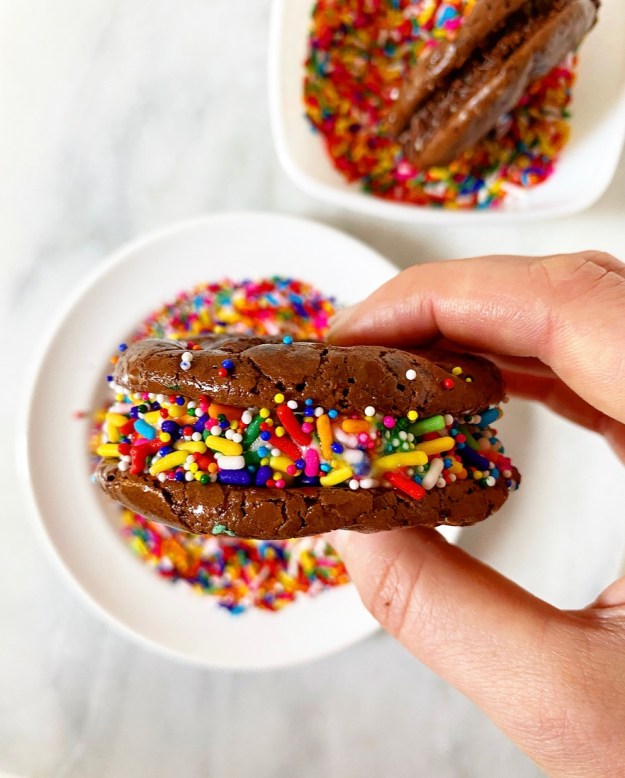 The last step is to freeze your ice cream sandwiches again for several hours or up to a day before digging in. Yes, you can eat them right after assembly, but the ice cream squidges out the sides and then you’re just eating two cookies with a translucent smear of ice cream and a weird smattering of sprinkles and then licking ice cream off a salad plate like a wild animal.
Maybe that’s just me.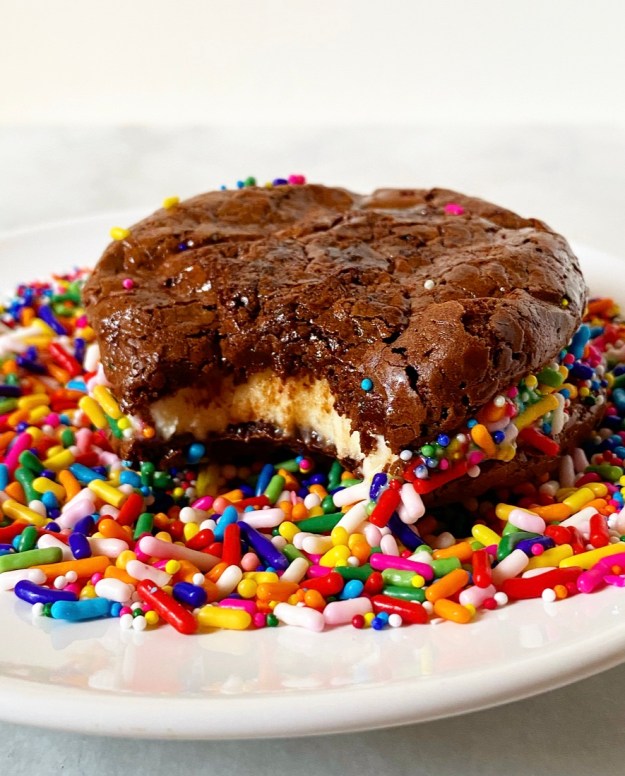 Anyway, freezing the completed ice cream sandwiches for a few hours allows the ice cream to adhere to the cookies so that the sandwiches become single entities. That’s something I really care about with my ice cream sandwiches. Considering how much I loathe the patriarchy, I sure do love to be able to eat things in a ladylike manner.
 I assure you, they’re worth the lengthy freezer time. The cookies never fully freeze, instead softening a tiny bit and getting extra chewy. And then there’s the ice cream and crunchy sprinkles. Like I said, perfect.
Easy Gluten-Free Ice Cream Sandwiches
makes 6 medium-large ice cream sandwiches
For cookies:
1 1/4 cups confectioners sugar
6 tablespoons cocoa powder (natural or dutch processed)
1 teaspoon granulated espresso
1/2 teaspoon Kosher or sea salt
2 large egg whites, room temperature
For assembly:
1 1/2-2 cups (about a pint) ice cream of choice
sprinkles of choice, optional
chopped nuts, optional
chopped candy bars, optional
crushed cookies, optional
miniature chocolate chips, optional
Preheat oven to 325F. Line a rimmed baking sheet with parchment. Set aside.
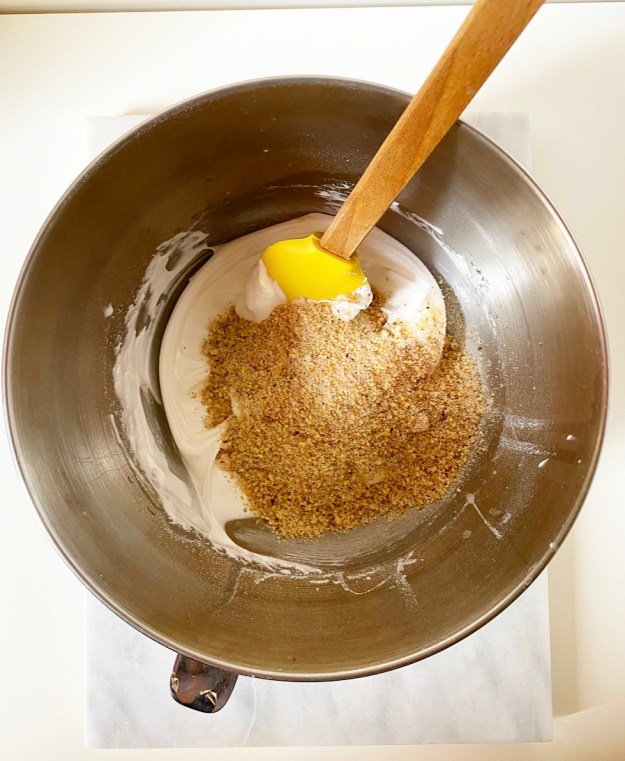
In a medium mixing bowl, whisk together confectioners sugar, cocoa powder, espresso granules and salt. Add egg whites and whisk until smooth, glossy and a bit thick. If it seems dry during mixing, just keep going—it will get smooth. Let batter rest for 10 minutes–it will thicken slightly.
Drop batter in 1 tablespoon increments on the prepared baking sheet, making sure to leave them at least 3 inches apart. Bake 11-12 minutes, until puffed and crackly.
Let cool completely on their pan on a rack. Carefully peel parchment away from each cookie to release.
Line a rimmed baking sheet with parchment. Place cooled cookies on the prepared pan and freeze for 30 minutes.
Assemble the ice cream sandwiches. Match cookies by shape and size so that you have six pairs. Turn 6 cookies upside down. Place 1/4-1/3 cup ice cream (roughly 1 small scoop) on each upside down cookie and use the back of the scoop to lightly smash it so that there’s a small perimeter (1/4-1/2 inch) of bare cookie all the way around. Top with one of the bare cookies. Smash down lightly with the heel of your hand to adhere. Freeze for 1 hour.
Place sprinkles (or other toppings of choice) in a shallow bowl(s). Working with one ice cream sandwich at a time, dip the edge into the sprinkles and carefully rotate the sandwich until the entire perimeter is covered. Use a clean finger to brush off any toppings stuck to the cookies. Repeat with remaining sandwiches.
Ice cream sandwiches may be enjoyed immediately, but will not stay intact. For the most “stable” results, freeze for 4 hours before serving. For longer storage, double-wrap each ice cream sandwich in plastic wrap and store in the freezer for up to a month.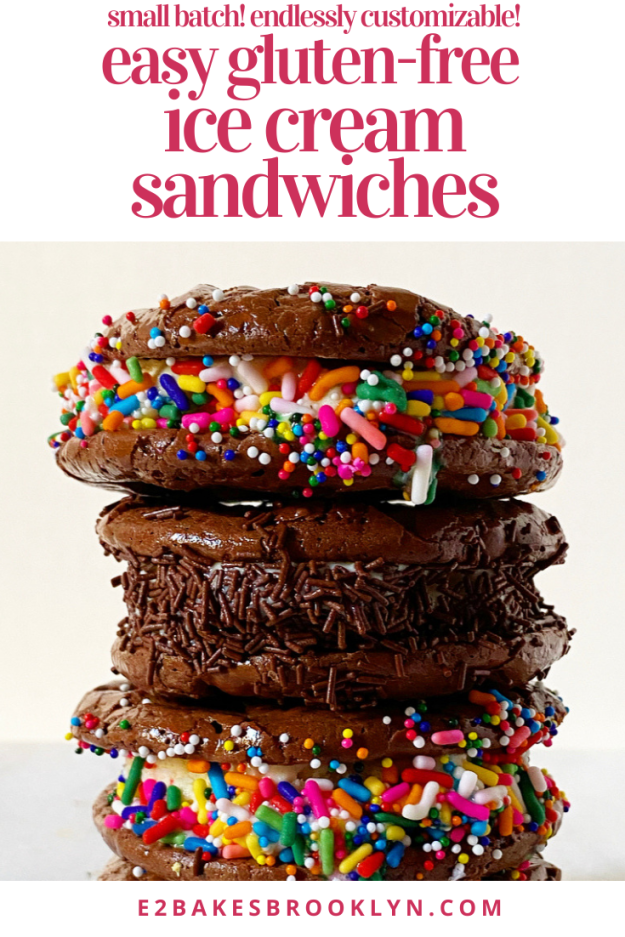


 It feels weird to be posting Fourth of July recipes because of literally everything, but I’m doing it anyway. I mean, none of them are red, white and blue…
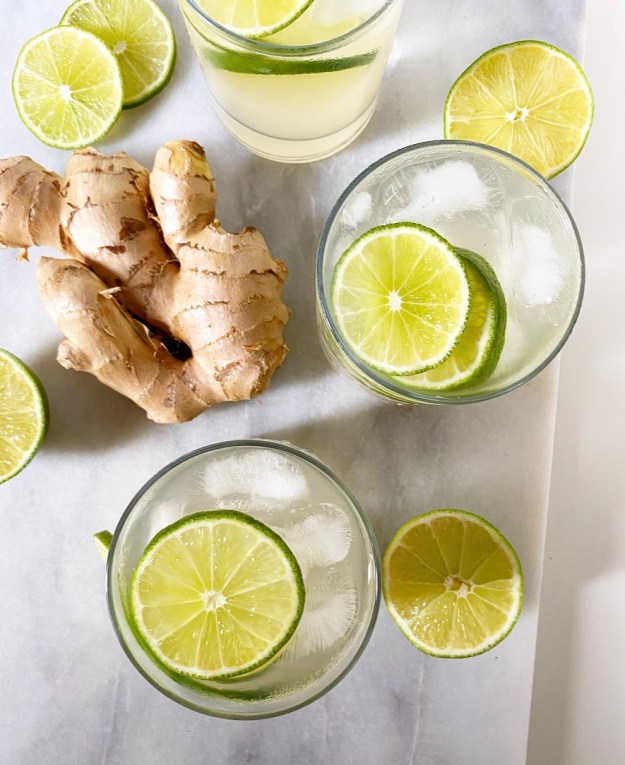
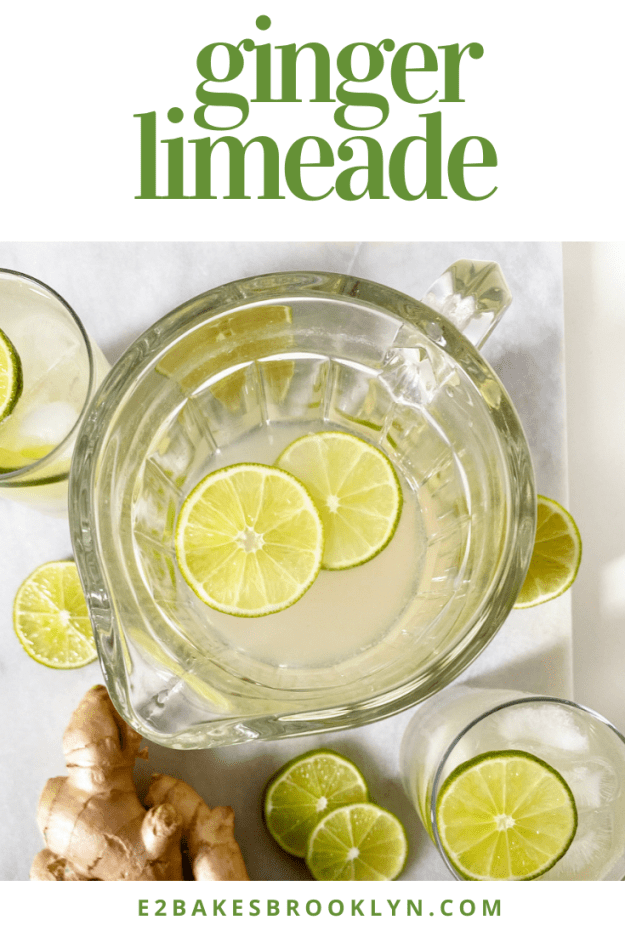
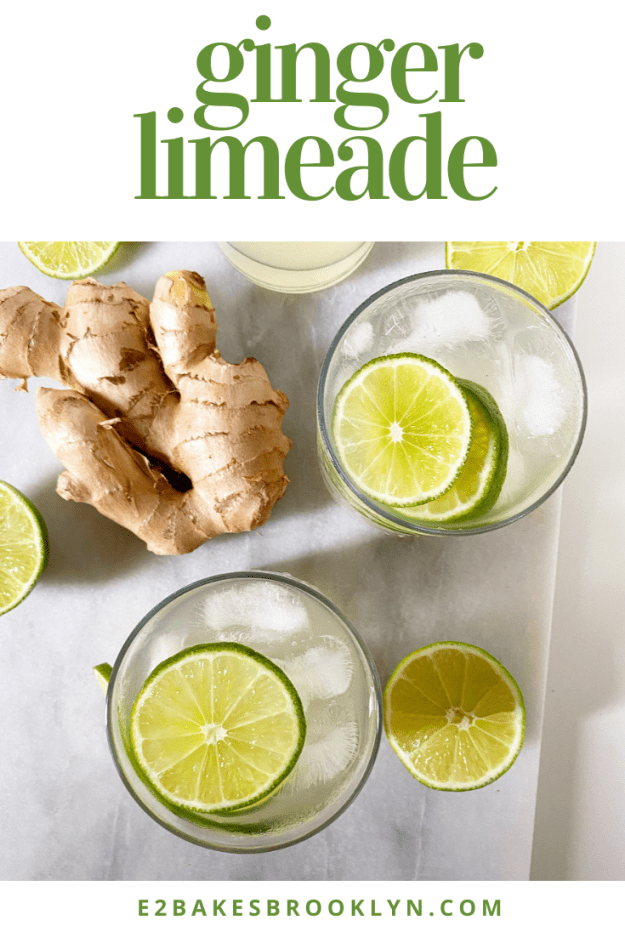
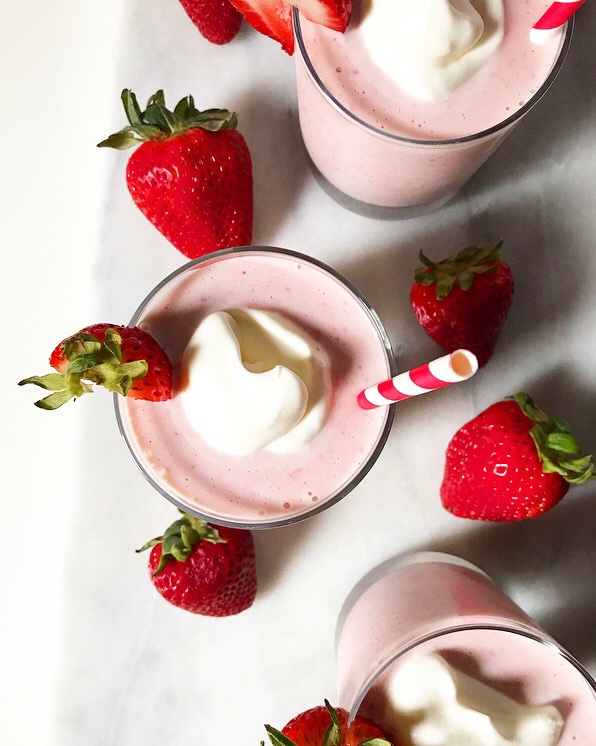
 Ginger Limeade is a perfect summery option for this weekend or any weekend. Crisp and light with a zippy ginger finish, Ginger Limeade would be a great addition to your (socially distanced) Fourth of July. It’s simple to make and a bit more sophisticated than your average non-alcoholic summertime beverage. I love a
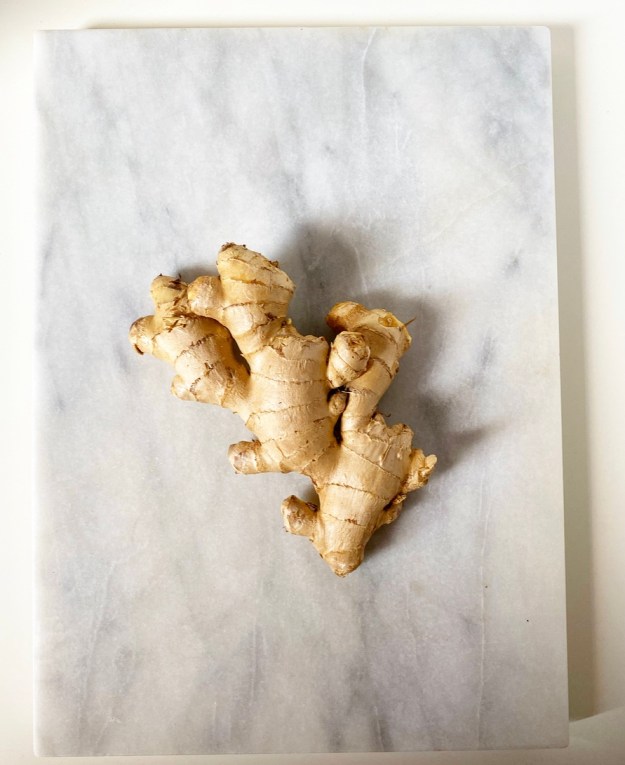
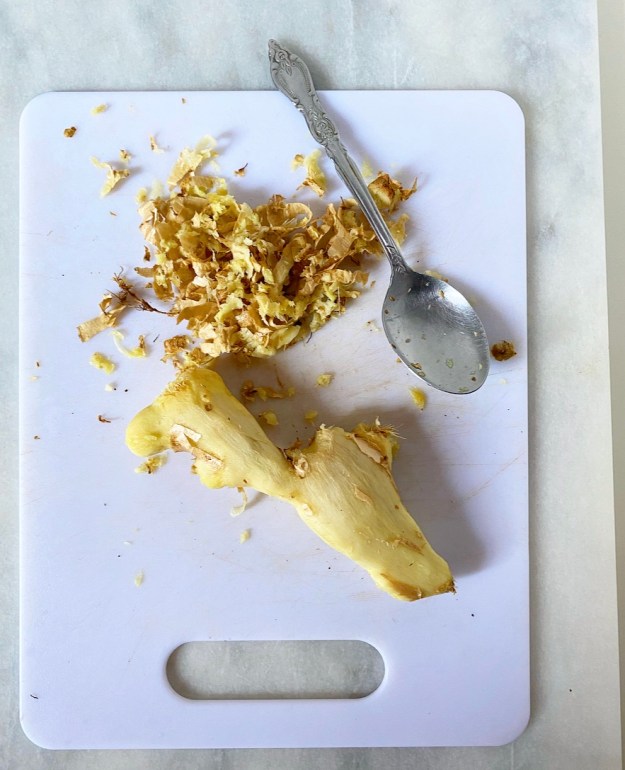

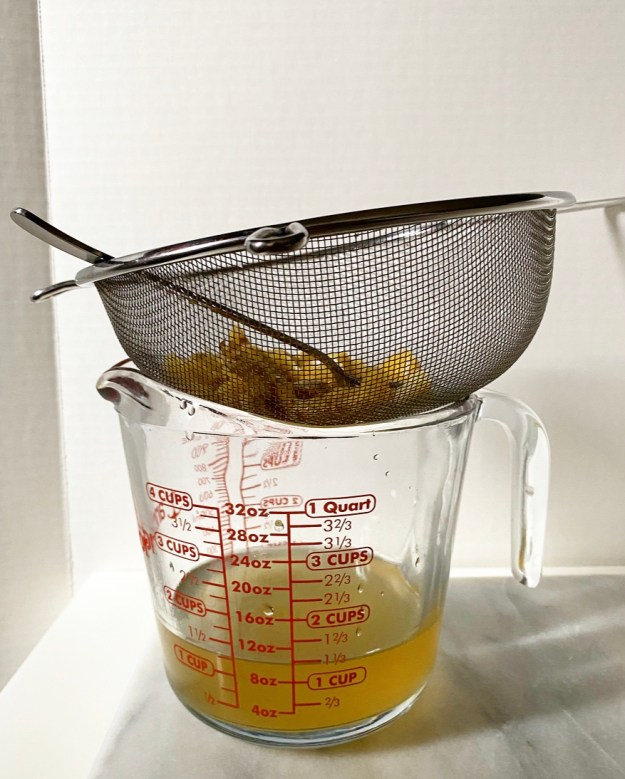 Ginger Limeade starts with a homemade ginger simple syrup. It’s as easy as combining sugar, water and sliced fresh ginger in a 1:1:1 ratio, simmering it and letting it steep until completely cool. You can use this syrup to make homemade ginger sodas, put it in milkshakes, or liven up some iced tea.
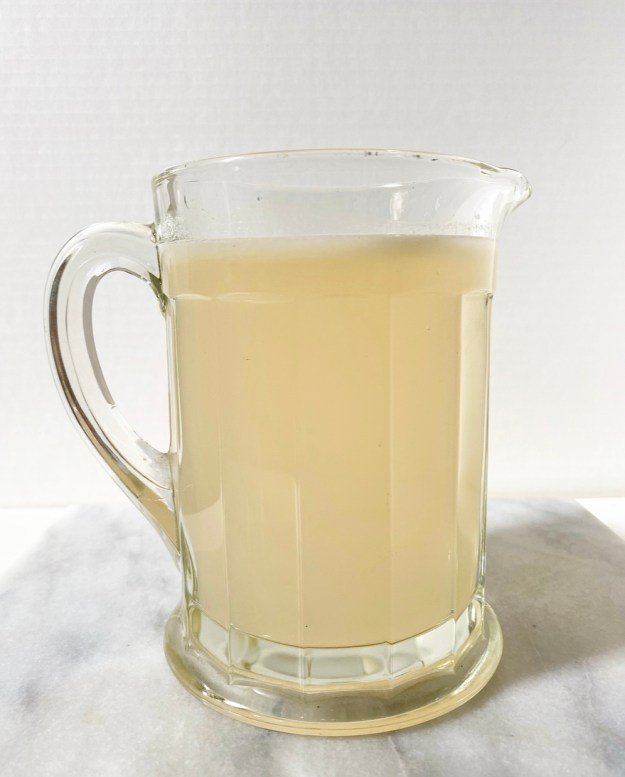
 Today we’re combining the syrup with an equal part (1 1/3 cup) of fresh lime juice and a few cups of cold water, then pouring it over ice and floating lime slices on top. Yum!
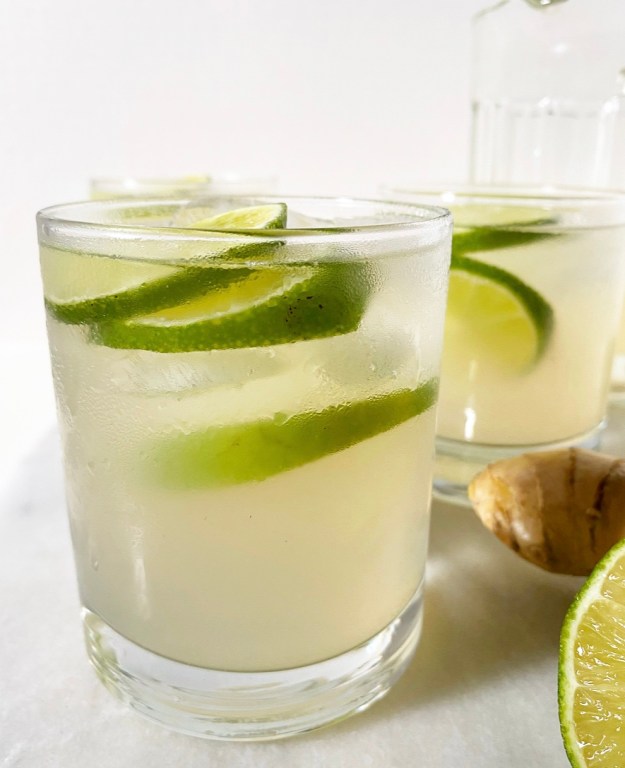 As with most beverages, Ginger Limeade is easily customizable. I think the 1:1 ginger syrup to lime juice ratio allows both to shine, but feel free to adjust them up or down to your preference. If you want to jazz it up, use sparkling water instead of still.
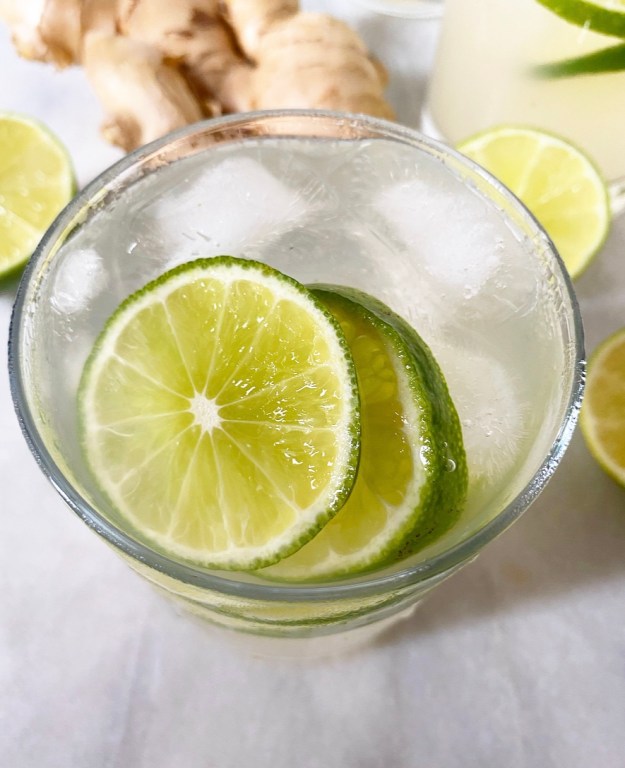 Ginger Limeade is the sort of thing you can sip during a cocktail hour, have by the pool, or pour into a large mason jar and take to the beach. Not to be Debbie Downer, but keep in mind that lime juice can burn your skin when exposed to sun. Yes, really.
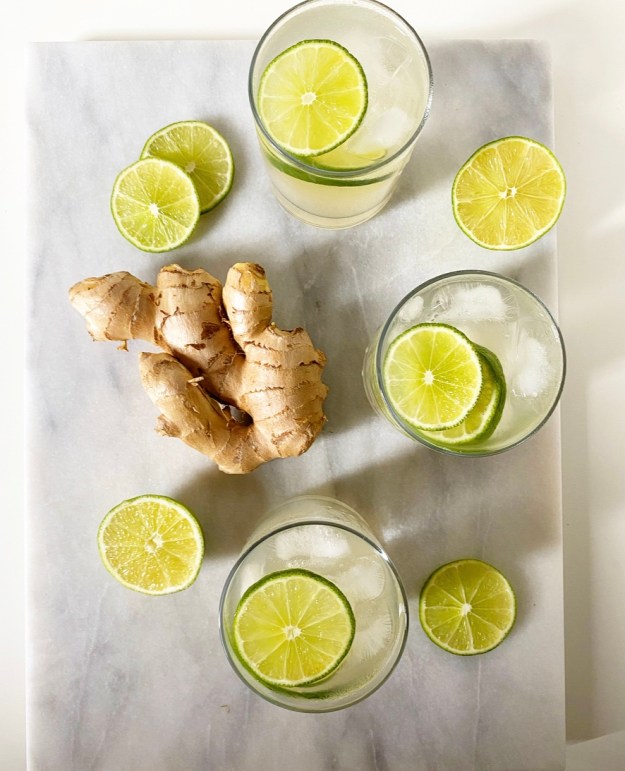


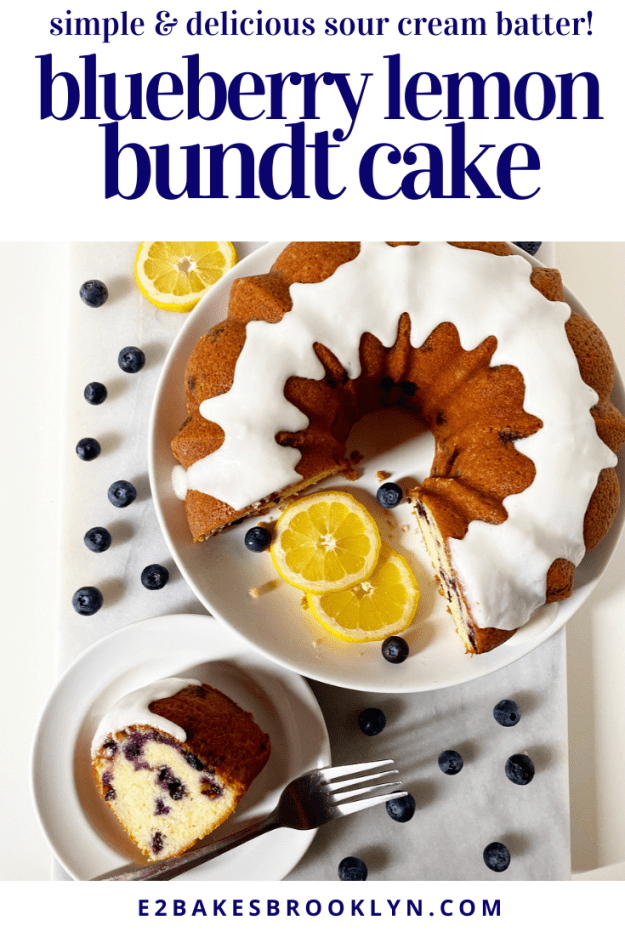
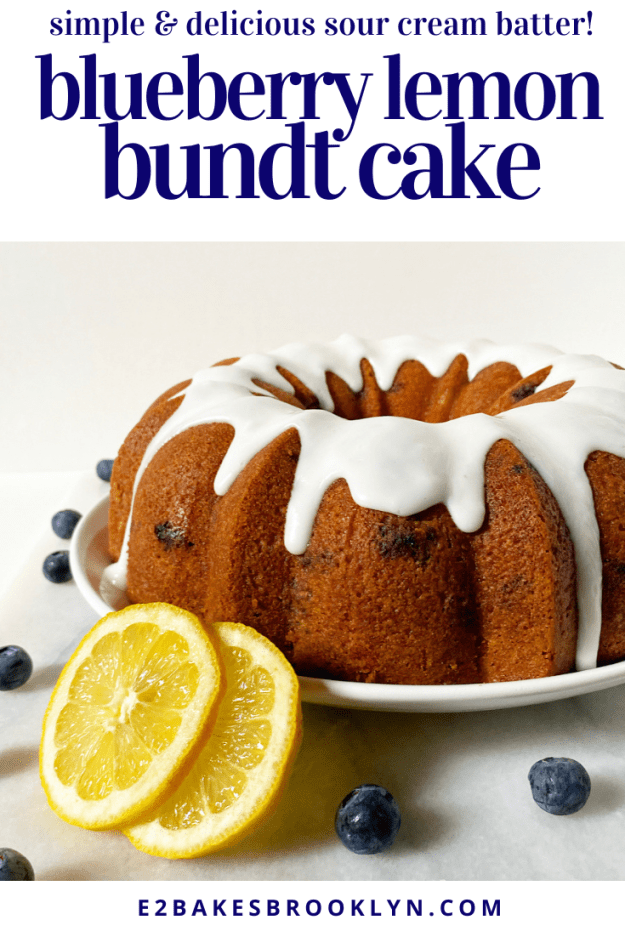
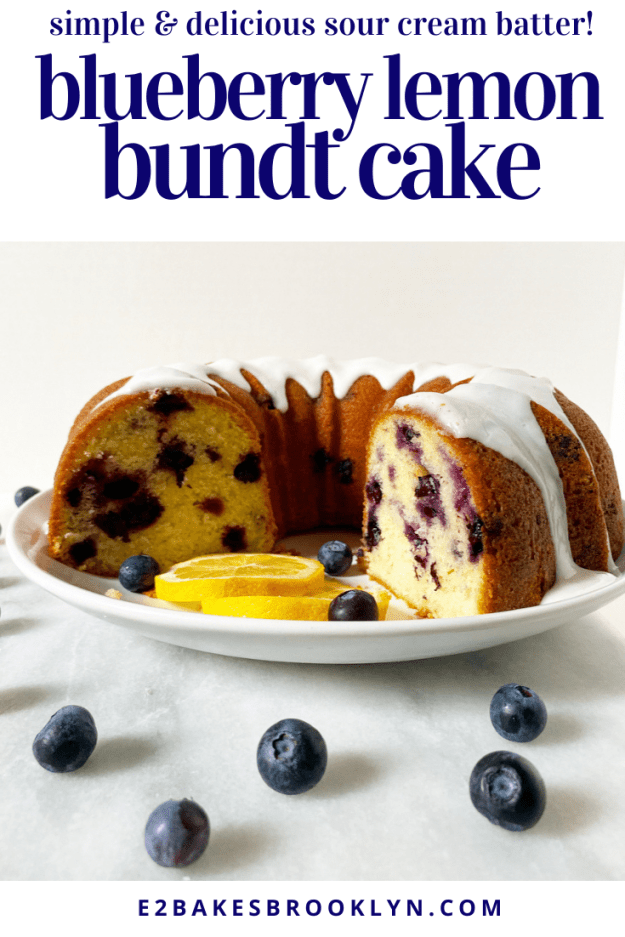
 There is just something about bundt cakes. They’re one of my absolute favorite things to bake—they’re low-maintenance crowd pleasers *and* I get to feel like the queen of the universe every time I get one to release cleanly from the pan. That kind of glory is hard to come by these days.
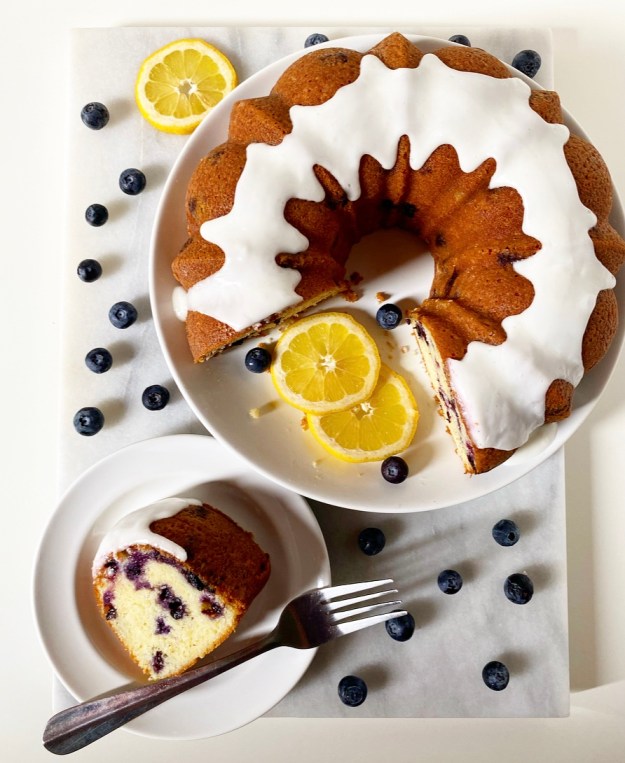
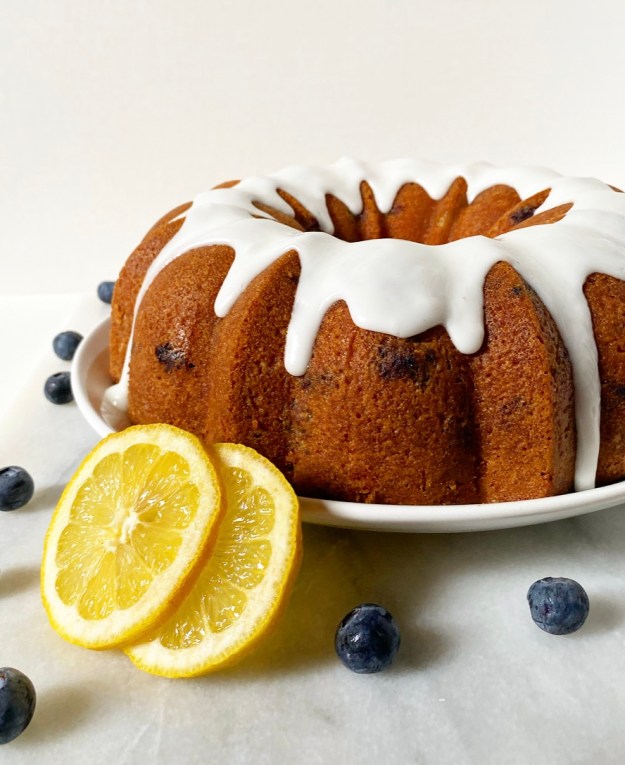 This Blueberry Lemon Bundt Cake is utterly spectacular, if I do say so myself. Lemon-scented and studded with a bevy of blueberries, it’s the perfect summertime cake. Oh, and it’s gorgeous too.
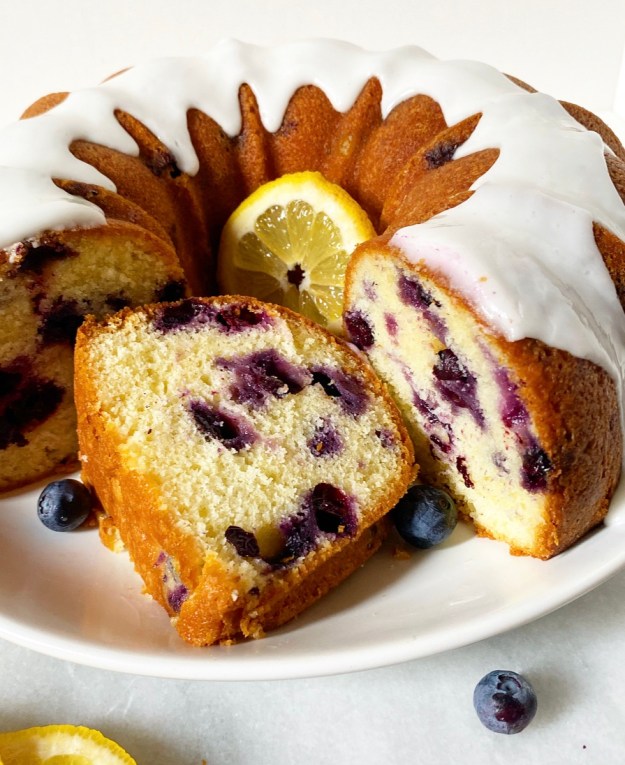 The base is a sour cream spin on my favorite
 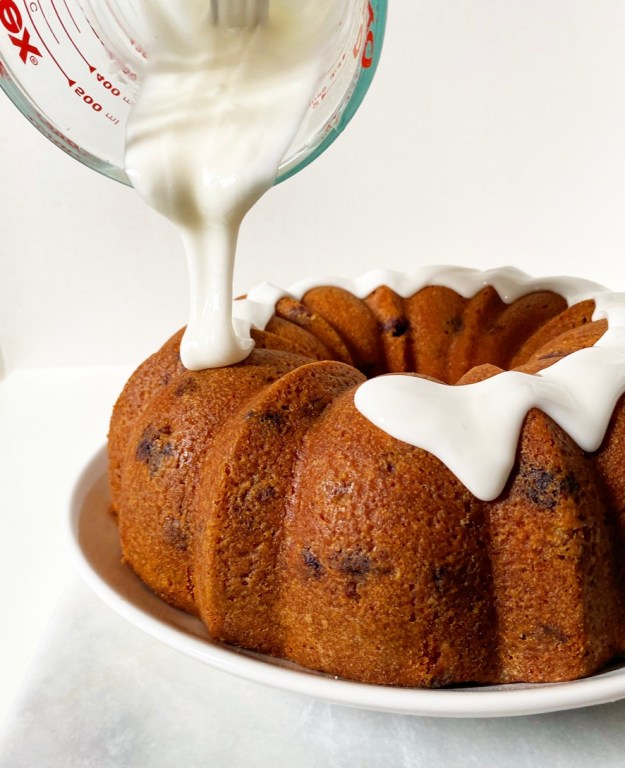 As for the lemon portion of this Blueberry Lemon Bundt Cake, it’s as simple as rubbing zest into sugar to release those good lemony oils and finishing the cake with a simple lemon icing. Easy peasy.
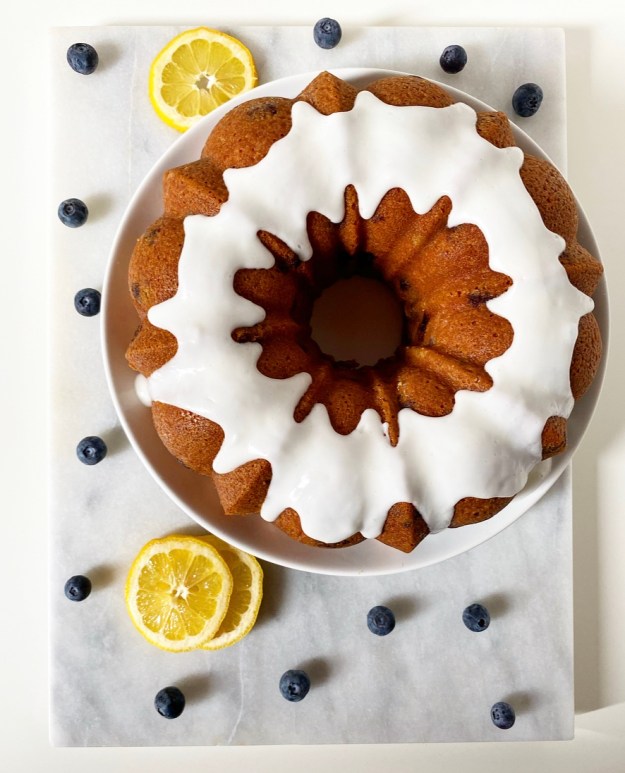 Blueberry Lemon Bundt Cake is perfect for any summer occasion, including the Fourth of July. There’s no melting frosting or chocolate to worry about, and just about everyone loves the combination of blueberries and lemon.
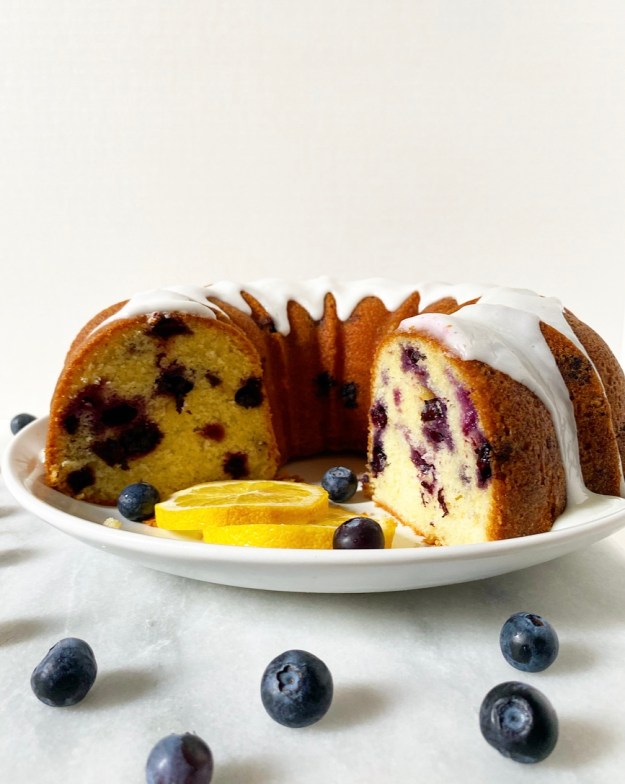 I know a lot of us aren’t having or attending gatherings large enough to finish this cake in one go, so feel free to halve it and put it
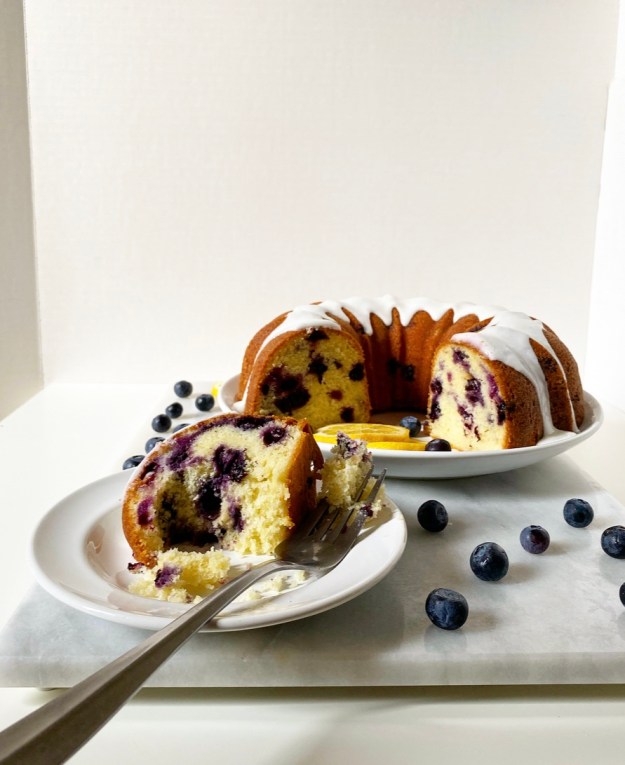
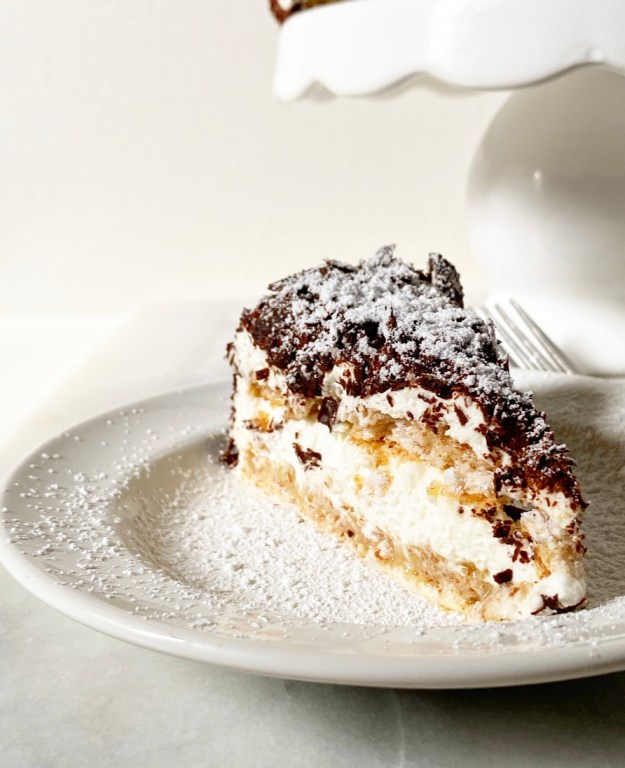
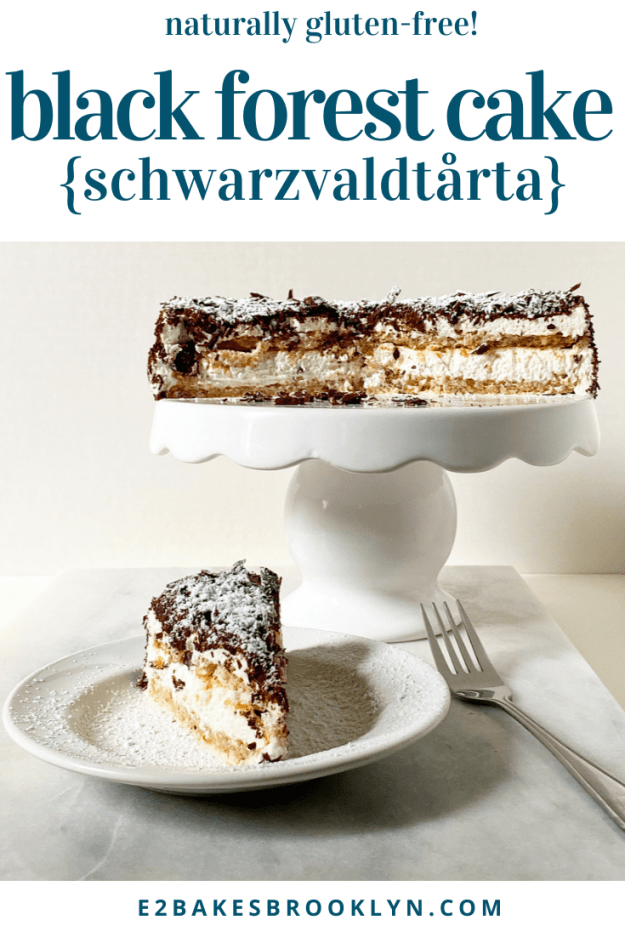
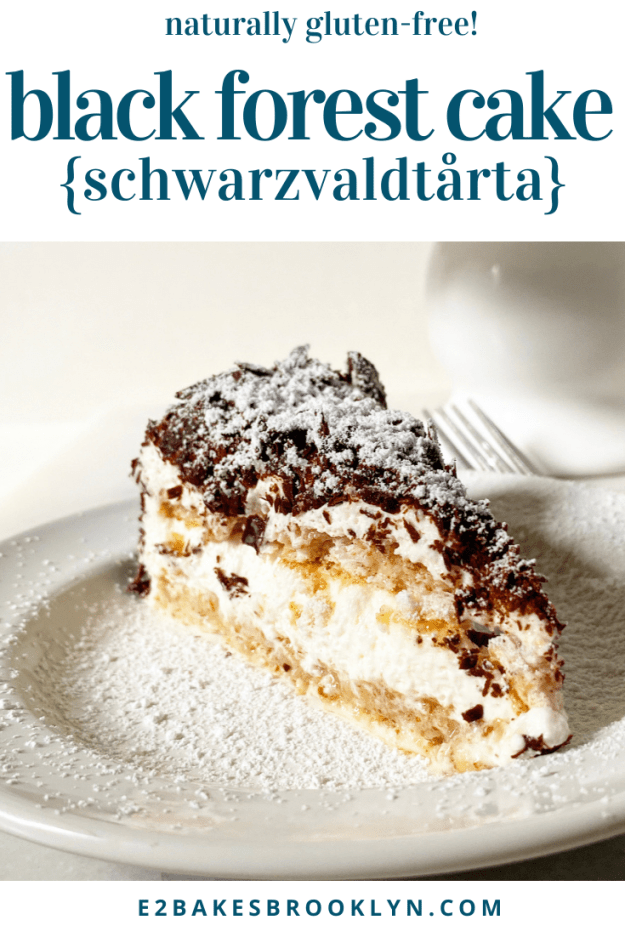
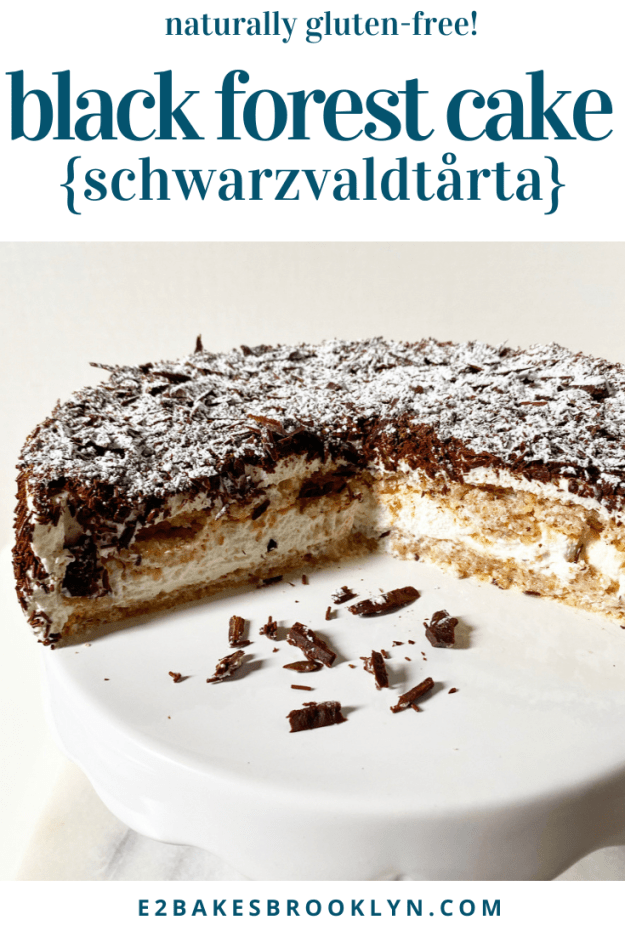
 If you’re wondering where the cherries and chocolate cake are in this Black Forest Cake, well, this isn’t your average Black Forest Cake.
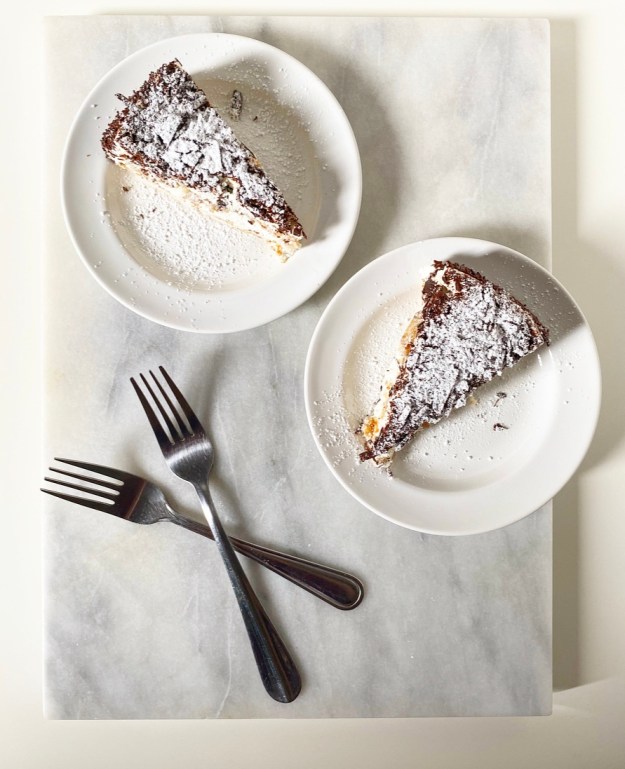 Ohhh no. This is my take on a hometown favorite: Black Forest Cake from
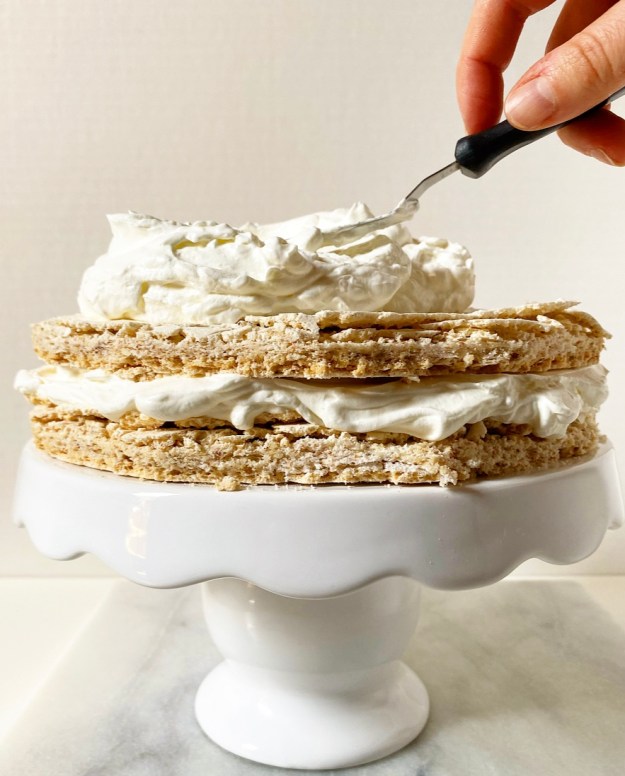
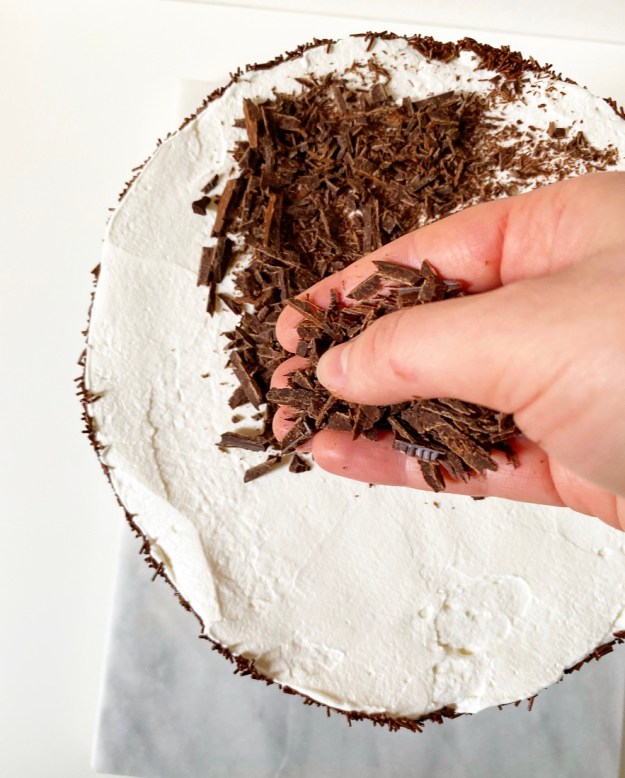
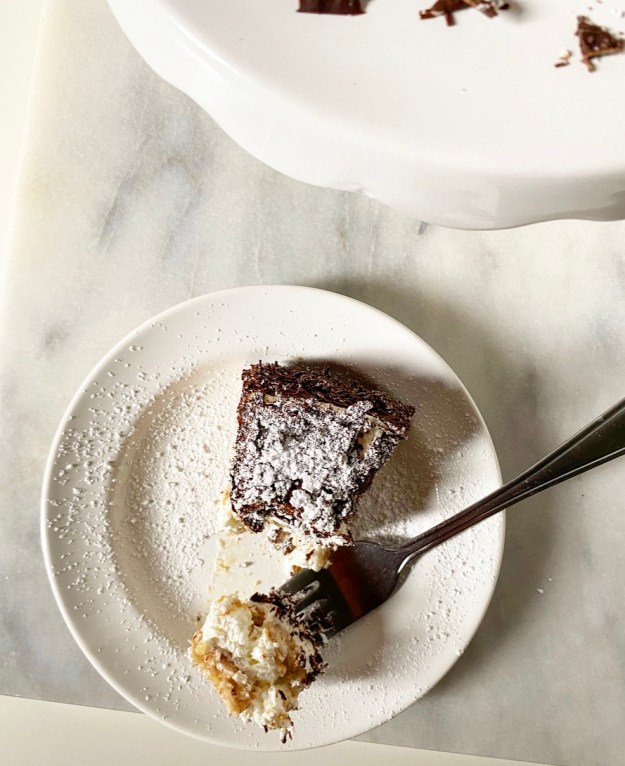
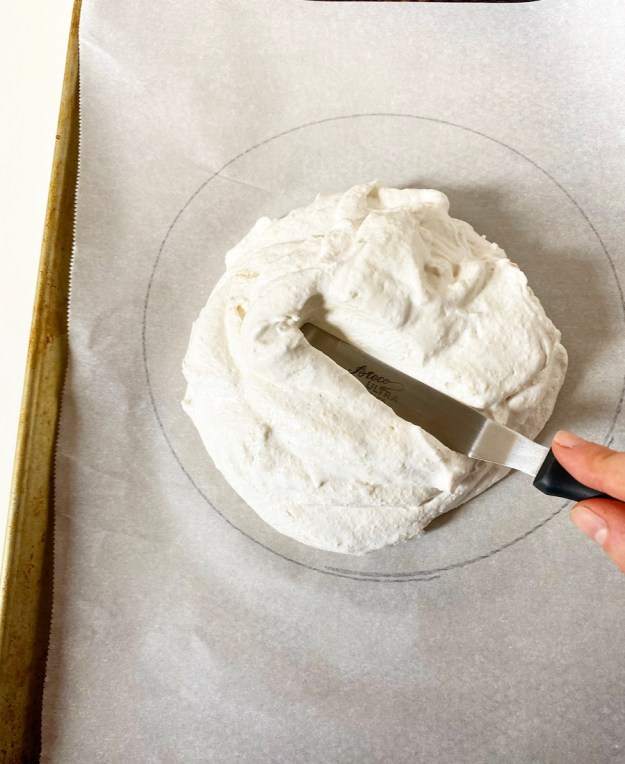
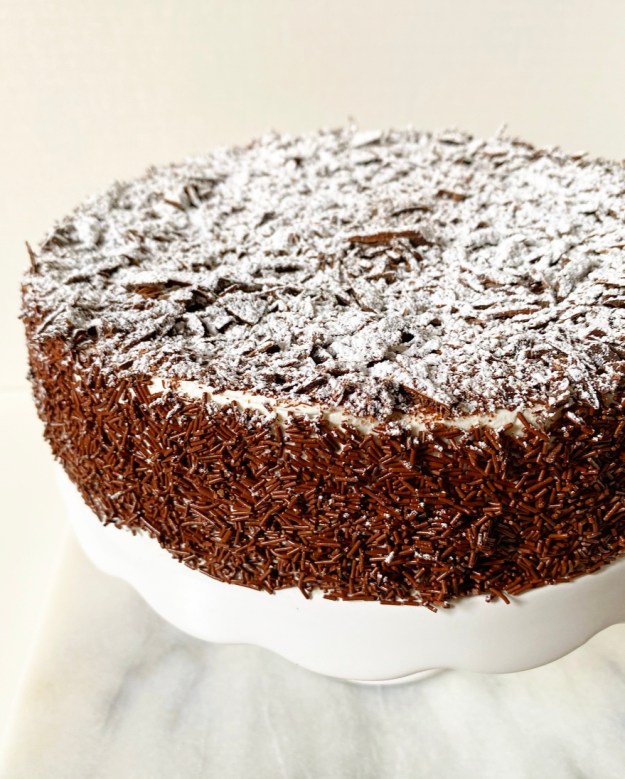 There’s a reason the citizens of Fort Worth are so in love with this cake—it’s absurdly good, and unique for that part of the world. Made by layering crisp almond dacquoise (meringue with nuts) and whipped cream, and coated with thin chocolate sprinkles and shaved dark chocolate, this cake is hardly a cake at all. It’s pure bliss! Cold, crisp, super-light, creamy, nutty, chocolaty, naturally gluten-free bliss.
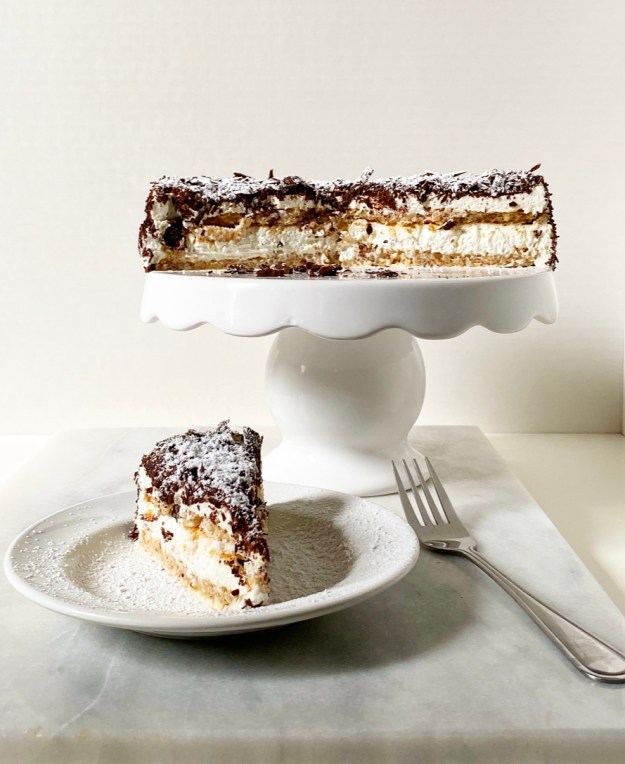 I’ve thought for years that Swiss Pastry Shop’s Black Forest Cake was unique to them—I mean, I’ve never seen or heard of it anywhere else. Turns out, it’s actually a Swedish cake and unrelated to the cherry-chocolate version, only sharing a name (Schwarzvaldtårta). Who knew?!
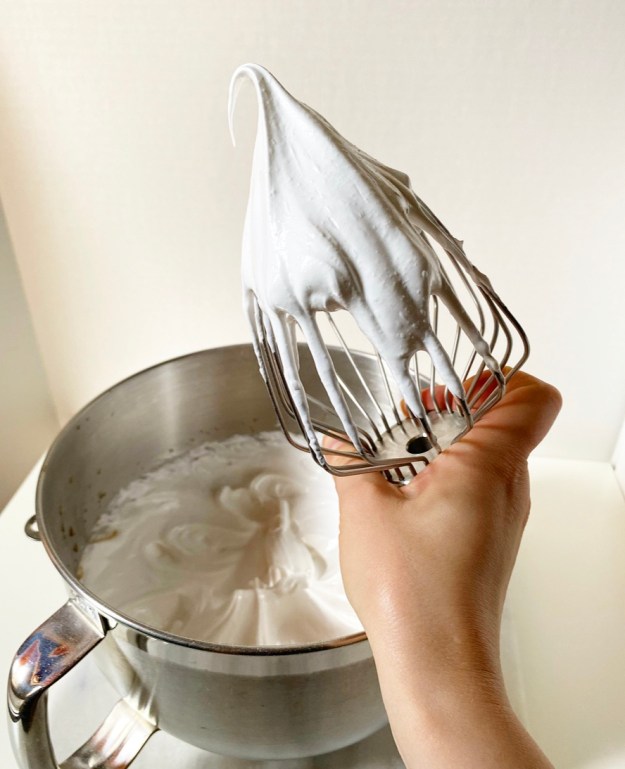
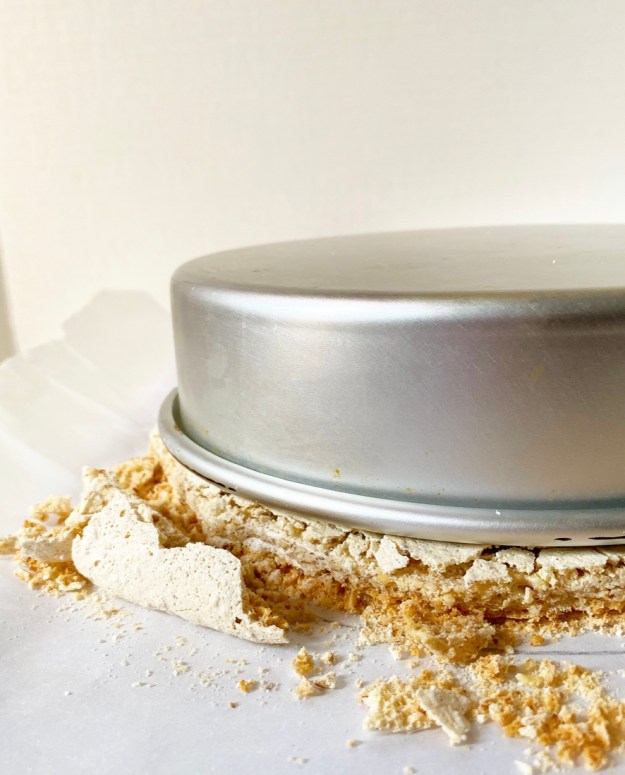 Now, I’m not going to pretend that this is a carbon copy of Swiss Pastry Shop’s cake—I cannot figure out how they get their dacquoise so thick!—but it tastes *exactly* right and hit the spot on my birthday a couple weeks ago. I made a teeny-tiny version on a whim, because if I had to turn 35 in a pandemic, there was *going* to be excellent cake. And, well, it just doesn’t get much more excellent than Black Forest Cake.
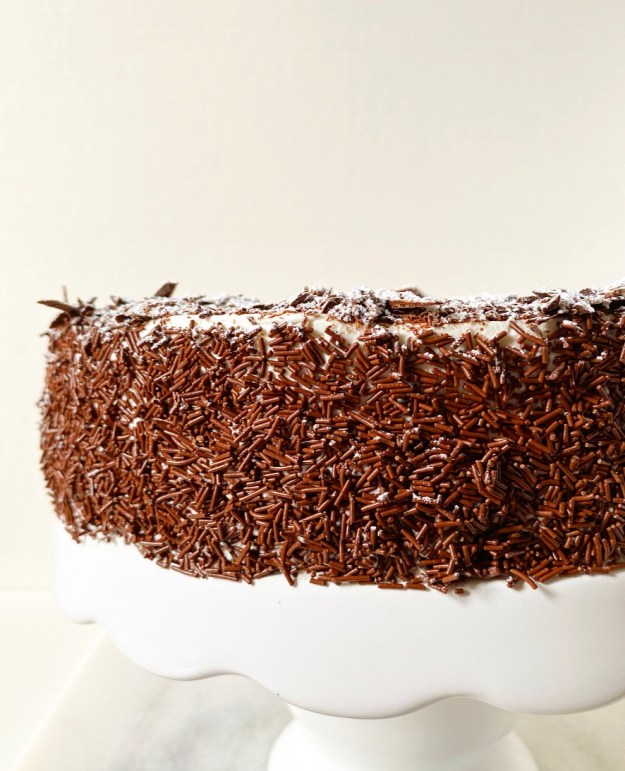 I had no plans to put it on the blog (
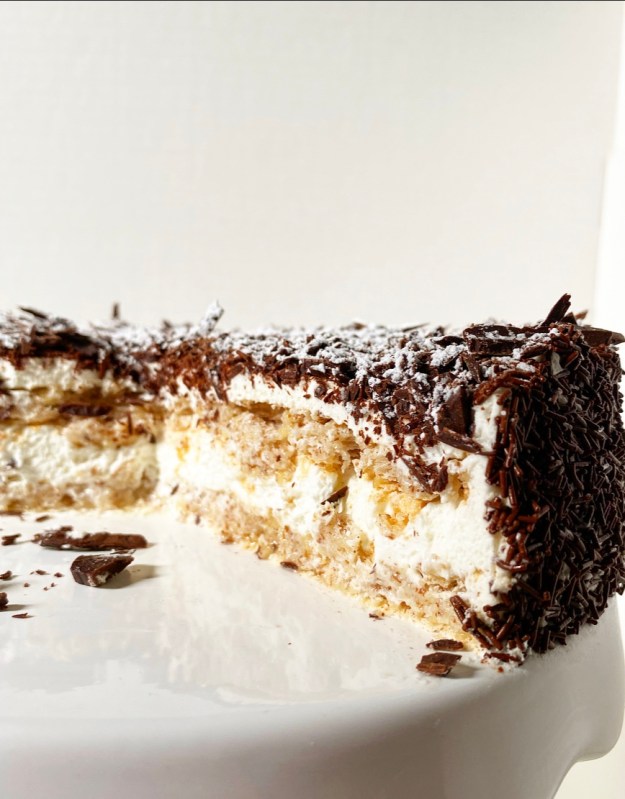 Black Forest Cake requires some skill and a time commitment, but is not actually difficult to make. Here are some tips for success.
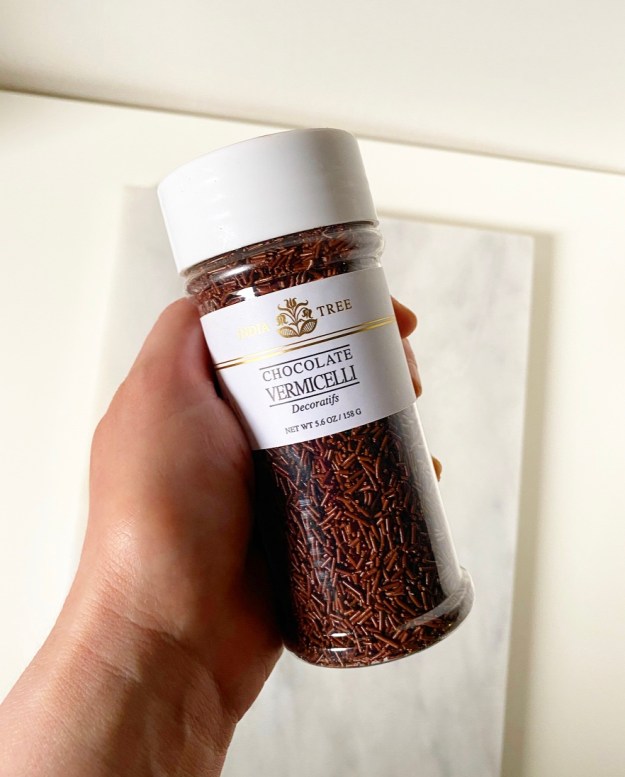
 Whew! Okay, I think that’s all. This one was a labor of love, y’all. Not for yours or mine, but for the love of cake. Really excellent cake.