Today I’m taking this blog into new territory: bread! You won’t find me feeding any sourdough starters or anything, but I have taken a chance on a few bread recipes over the last year because…well, I had some time on my hands. English Muffin Bread is my favorite by a long shot. It’s got all the craggy structure of English muffins, toasts like a dream, and is so delicious it’s kind of ridiculous.
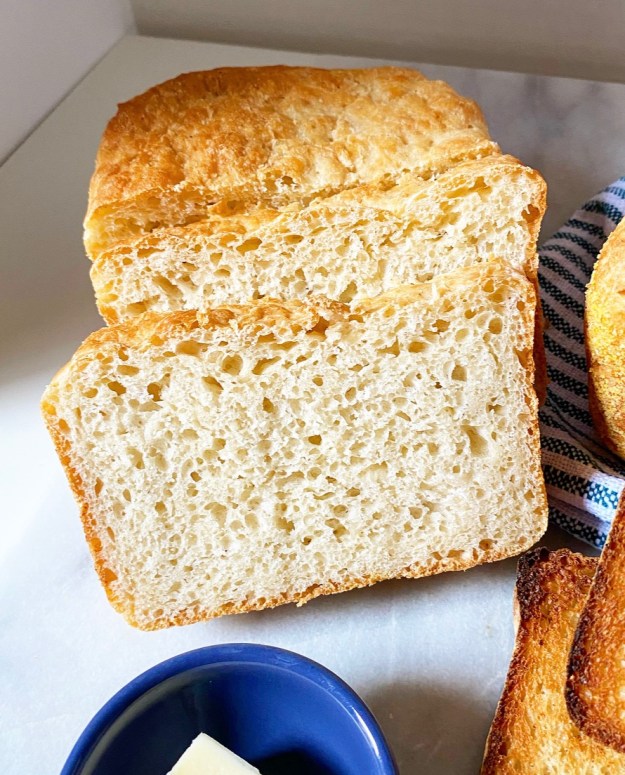 I first heard about English Muffin Bread when Rebecca posted her recipe a few years ago, and then crossed paths with it again recently while Instagramming my way through the Southern Living 1985 Annual Recipes cookbook. It looked so easy to make that I couldn’t resist giving it a go!
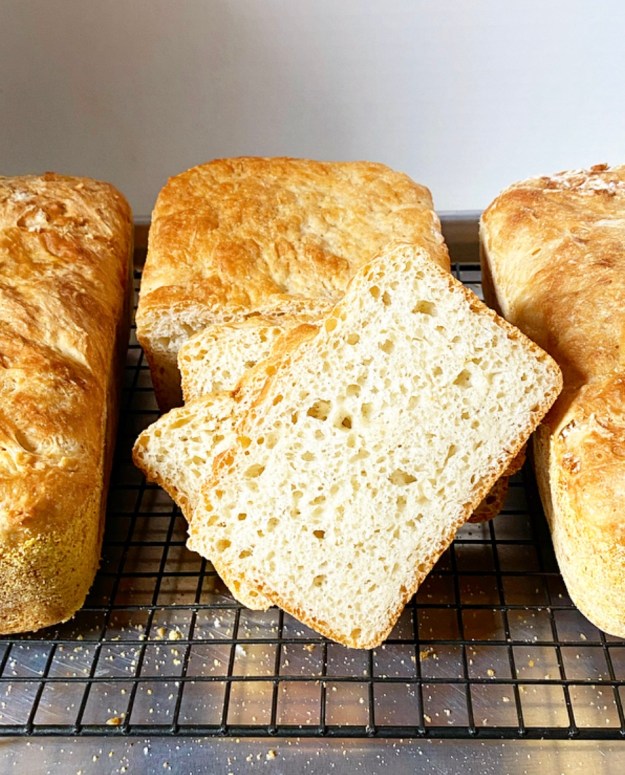
While my initial try was a bit dense, it was still tasty (as nearly all homemade bread is), and I soon found myself making eight more batches in an effort to nail down the perfect balance of English muffin texture, rich flavor and ease of preparation. I’m here to tell you that I succeeded.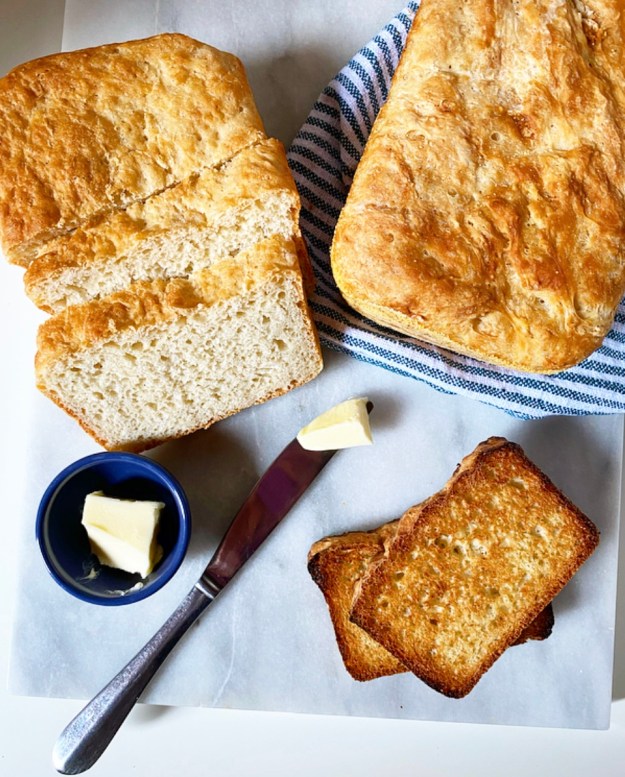 My English Muffin Bread is a one bowl, no-knead, single rise situation. By giving this dough just a few minutes of your time and then a bit of patience, you’ll be rewarded with all the craggy texture you love in English muffins, but in a sliceable, toastable loaf. Two of them, actually.
That may sound like more bread than you need, but if you’re anything like me, you won’t have a problem getting through it. However, if you have more self-control than I do, you could freeze or gift a loaf, or just halve the recipe. Oh, and for what it’s worth, making two loaves of this bread is way less expensive than purchasing store-bought English muffins. You know, if you care about that sort of thing.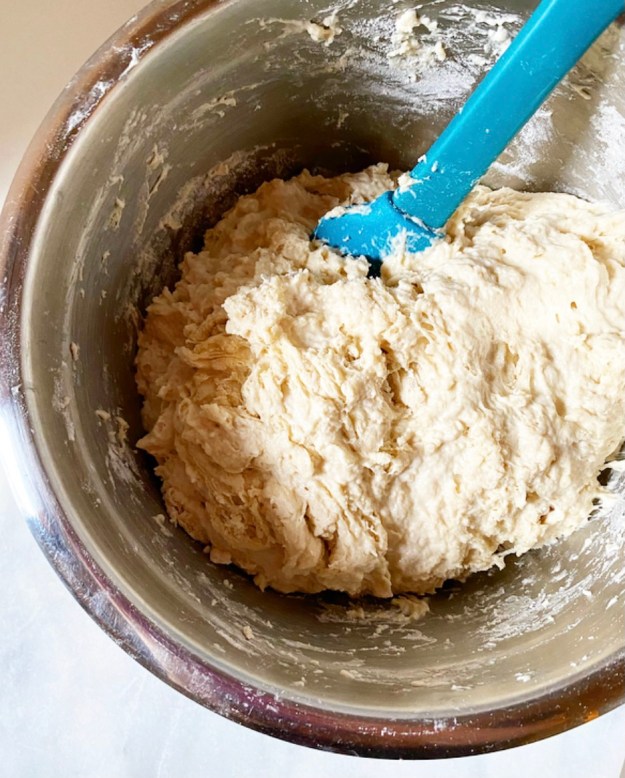 English Muffin Bread couldn’t be easier to make. Simply whisk together flour, a touch of sugar, kosher salt, instant yeast and a little baking soda, then stir in water and melted butter until a shaggy dough forms. Divide your dough in two, then put it in two cornmeal-dusted loaf pans. No, you didn’t miss a kneading step—thanks to the high volume of liquid and the desired texture, there’s no need to knead! <—see what I did there?!
 Let your dough rise for about an hour, just until it peaks over the tops of your pans. The combination of yeast and baking soda along with the single rise mean that the oven-ready dough will be very airy and a little delicate. It should be a bit wet looking and a little jiggly—be gentle with the pans so you don’t knock out any of the holey, craggy structure.
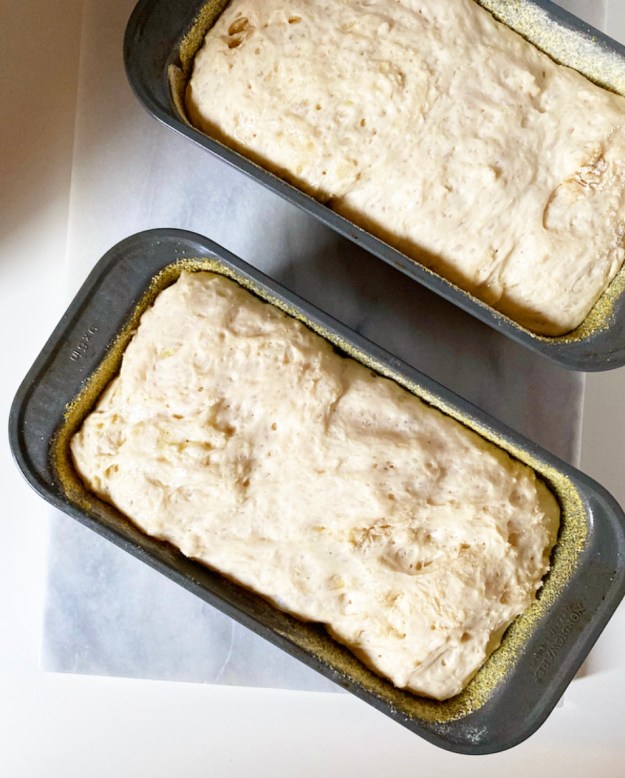 Bake your loaves for 25-30 minutes as 400F, until golden all over and hollow-sounding when tapped. If you’re worried about under-baking, a food thermometer should register 190F when the bread is done.
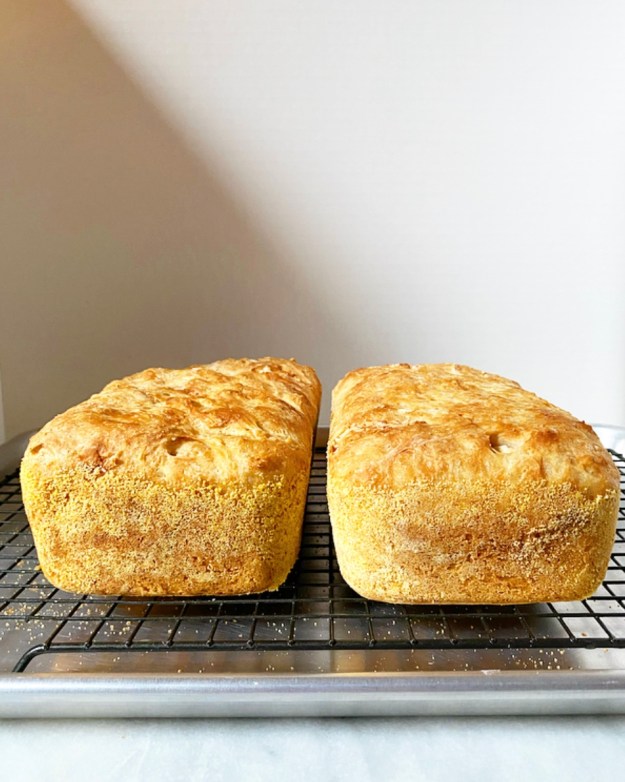
 Turn your loaves out onto a rack as soon as they come out of the oven, then let them cool completely. This is supremely important. Do not let the intoxicating smell of fresh-baked bread tempt you to rip into this while it’s cooling or you will find a gross, gummy mess. The hole structure needs to cool completely for maximum English muffin goodness. I find that cooling takes 2-3 hours, but that’s a small price to pay for the quality of toast you are about to consume.
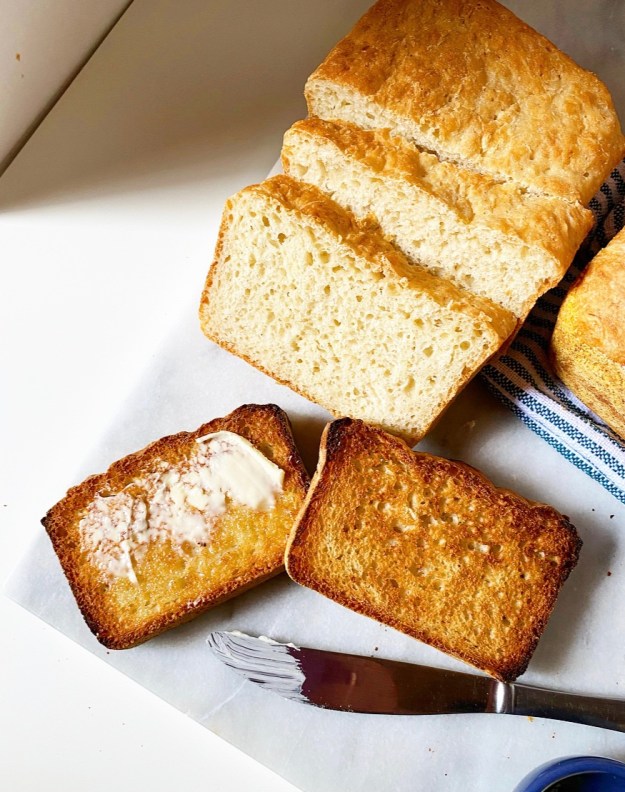 While you can absolutely enjoy a slice of English Muffin Bread without doing anything to it, an extra crispy, golden brown, toasty finish really makes each slice sing. The holes and crags are emphasized, the cornmeal on the edge gets extra crunchy, the minuscule amount of butter in the dough gives it just enough richness. Like a perfectly toasted English muffin, it’s perfect with a smear of soft butter. Or honey. Or jam. Or Nutella. Or peanut butter. Or avocado. Or fried into French toast. Or made into a grilled cheese.
I’ve tried it all those ways. Quality control, y’all.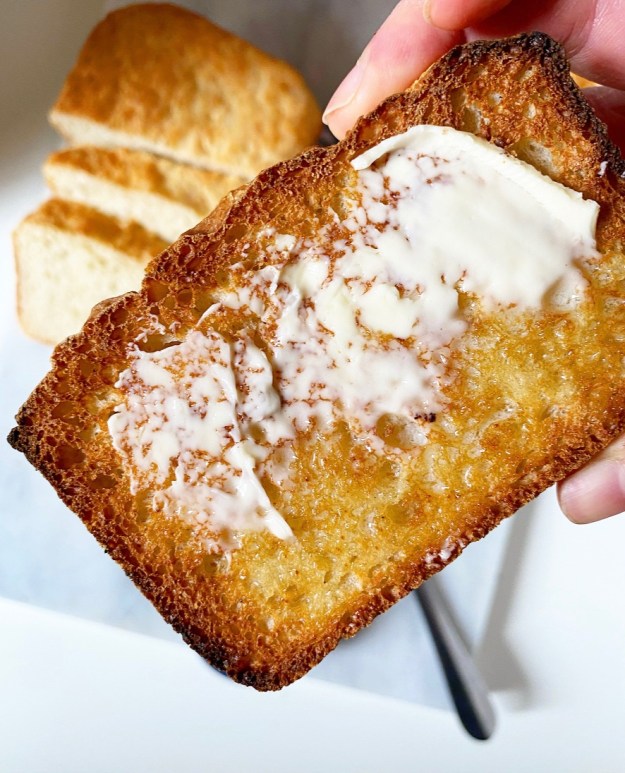
English Muffin Bread
heavily adapted from Julie L. York of Asheville, NC, via Southern Living magazine
makes 2 loaves
For the pans:
1 tablespoon unsalted butter
3-4 tablespoons cornmeal
Bread Dough:
5 1/2 cups all-purpose flour
2 tablespoons granulated sugar
1/4 teaspoon baking soda
1 1/2 teaspoons Kosher salt
4 1/2 teaspoons (2 packages) instant yeast
2 tablespoons unsalted butter, melted
2 2/3 cups warm water
For proofing:
plastic wrap
oil, butter or cooking spray
For serving:
butter
jam
honey
Grease 2 9×5-inch loaf pans with butter. Add cornmeal and rotate pans so that the entire insides are coated in a thin layer. Tap out and discard excess cornmeal.
In a medium-large mixing bowl, whisk together flour, sugar, baking soda, salt and instant yeast.
In a large liquid measuring cup (or other vessel) whisk together melted butter and warm water. It should be warm to the touch (90-110F) but not hot.
Whisk/stir wet ingredients into dry ingredients in two installments. Stir until a sticky, shaggy dough forms and flour is coated, then stir an additional 30 seconds to make sure things are saturated.
Grease your hands, then divide dough into prepared pans. Even dough out so that no portion is too much taller than any other. Grease 2 pieces of plastic wrap with oil, butter or cooking spray. Lay them loosely over the top of each loaf pan.
Place pans in a warm, draft-free environment for 45-60 minutes, or until the dough has risen just above the tops of the pans. While dough is rising, preheat oven to 400F.
When dough is ready, gently peel off and discard plastic wrap. Dough may seem a bit wet and jiggly. Gently place pans in the oven and bake for 25-30 minutes, or until golden all over. The interior temperature should be at least 190F.
Immediately turn bread out onto a rack. Let cool completely so crumb structure can set. Do not slice into bread until it is completely cool.
Slice and toast before serving with desired condiments. Leftovers will keep well-wrapped in the refrigerator for up to a week.
 When I was a kid, I had a friend whose mom hated to cook except for Saturday breakfast. A lot of the meals I ate with this family were takeout, but come the weekend, there were eggs and bacon, orange juice, blueberry muffins, and cinnamon rolls from one of those cans you have to thwack against the edge of your countertop. Little me thought it was the best ever (Puff Pancakes obviously excepted).
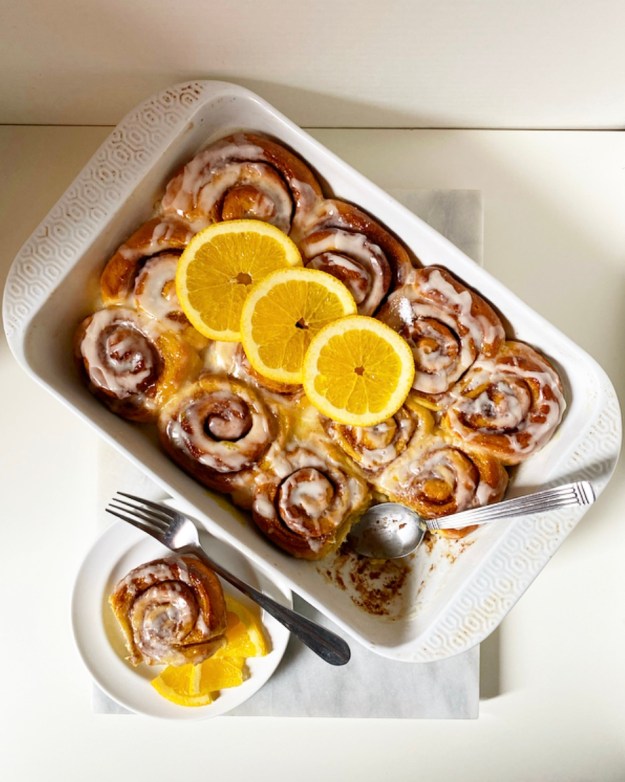 I had one complaint though, because of course I did. Every once in a while the cinnamon rolls would be the orange kind, and while everyone in that family loved them, I deeply did not. I kept my mouth shut—#manners—but I hated them. In fact, I still do, but only because I hate fake orange flavoring.
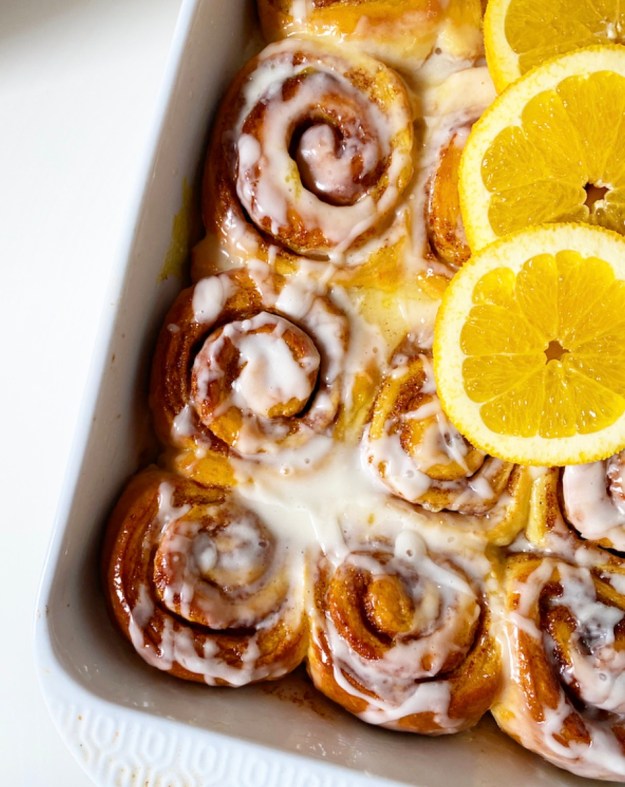
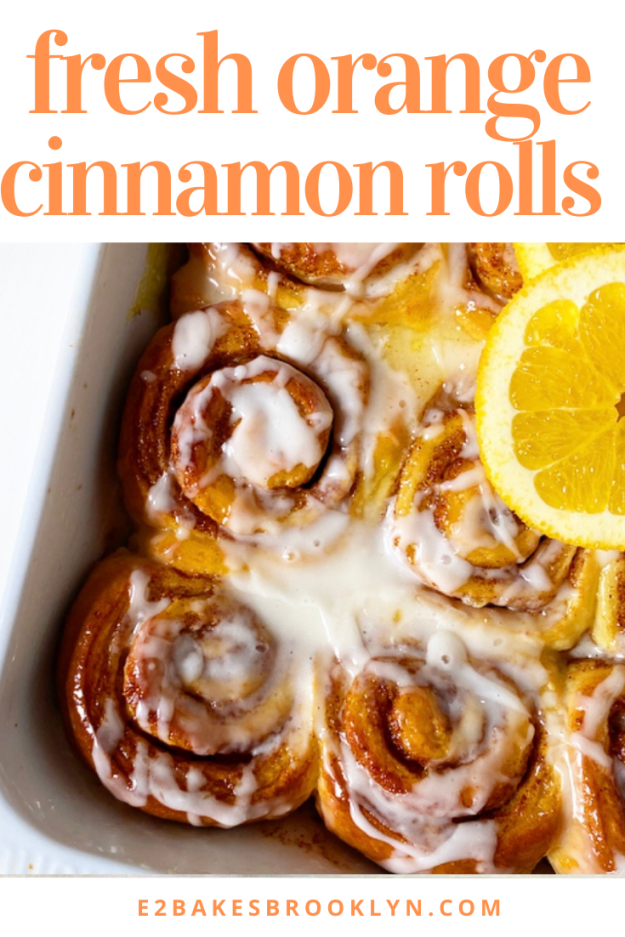
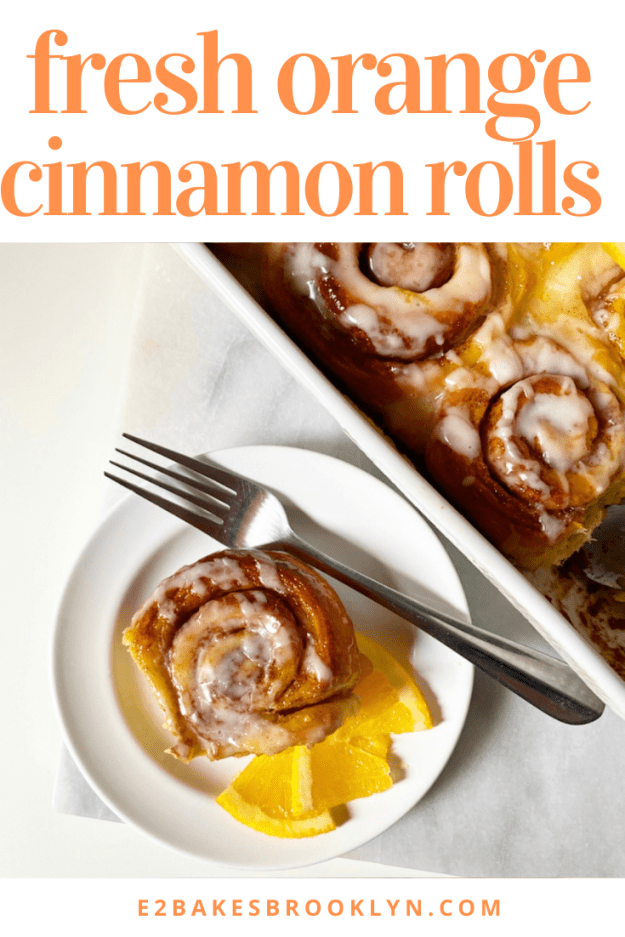
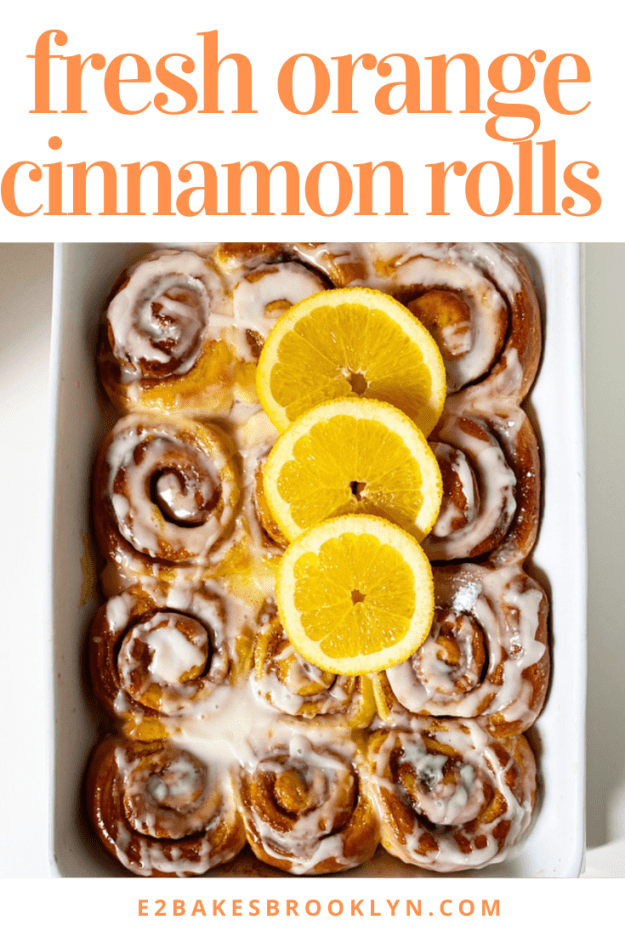
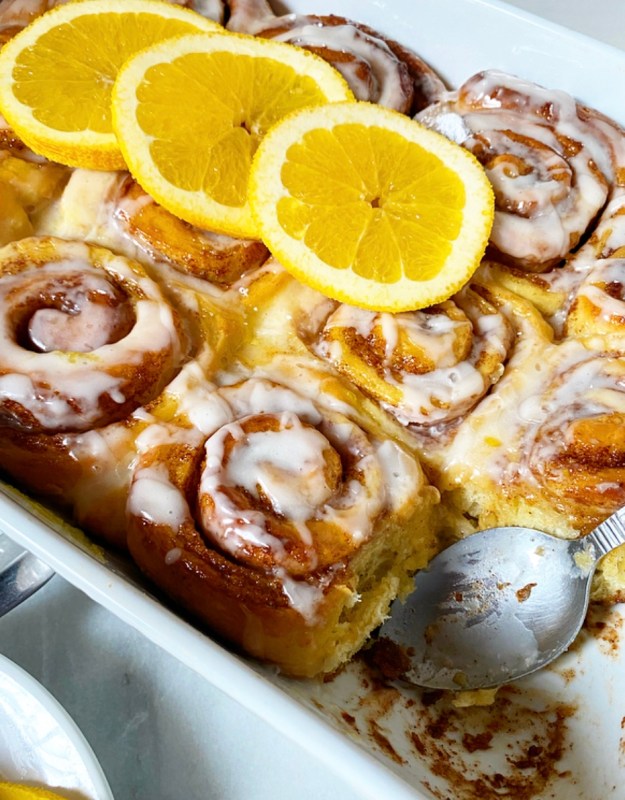 Turns out, I love Orange Cinnamon Rolls made with real fresh oranges. Like really, really love them. I mean, what’s not to love about fluffy, buttery, orangey cinnamon rolls?!
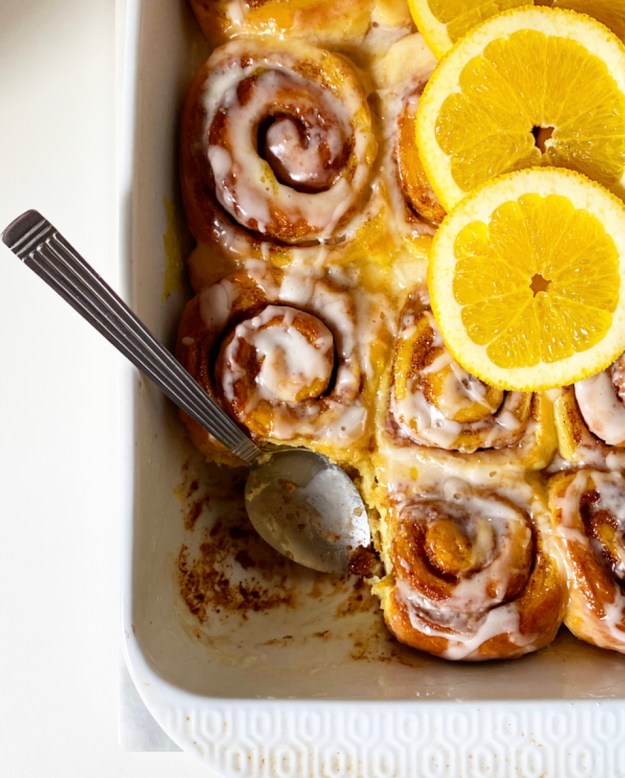
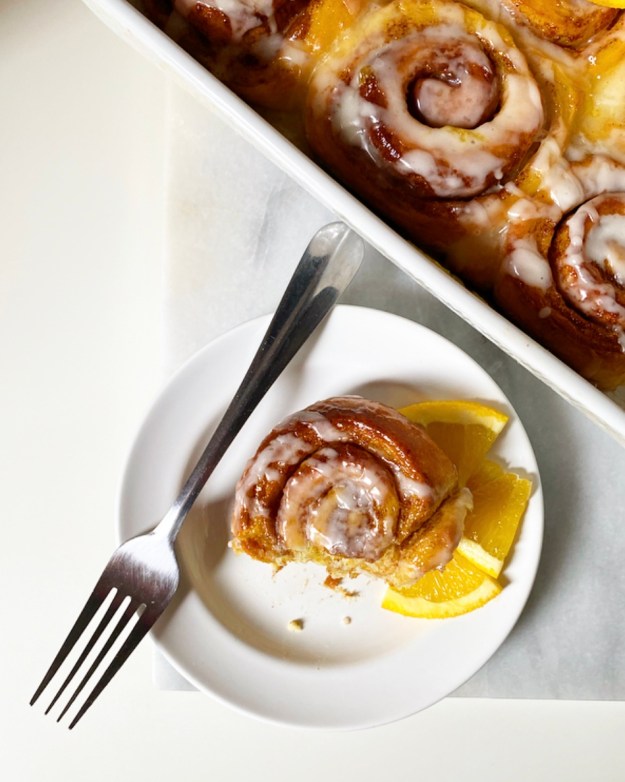 I’m over the moon for these, y’all. There’s orange zest in the dough and cinnamon filling, and orange juice in the glaze and the icing! Yes, you read that correctly, these babies have a glaze *and* an icing! I did this on last year’s
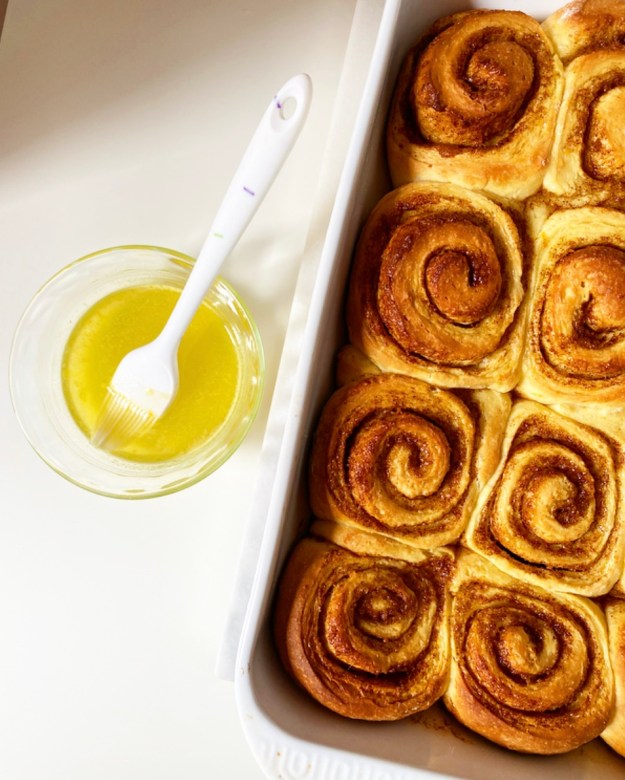
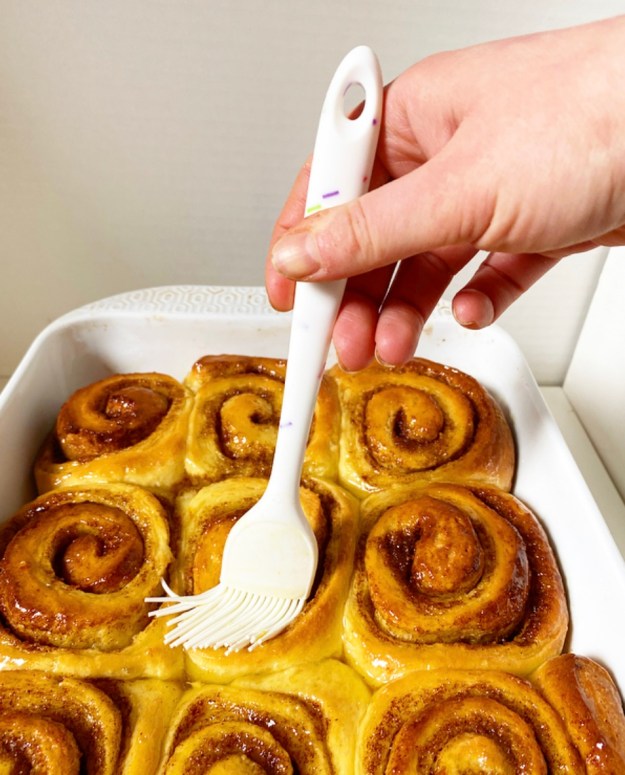
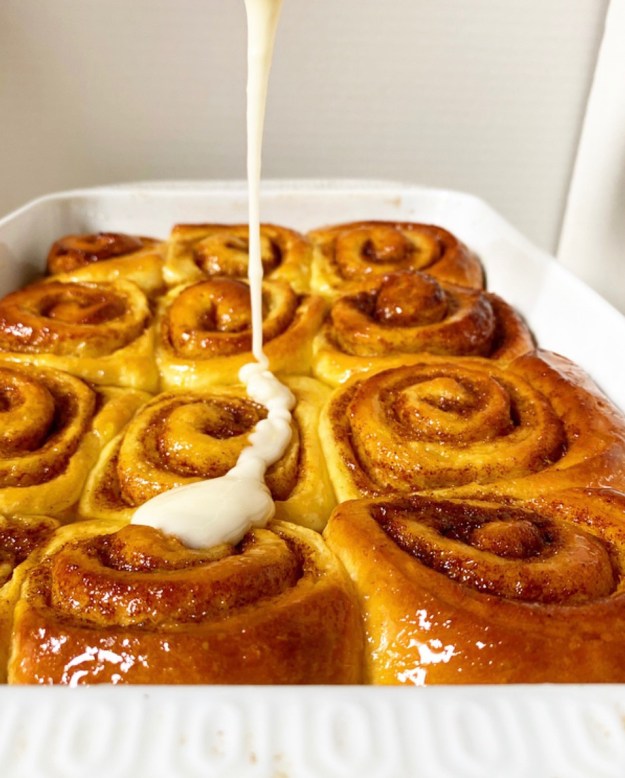
 Just after you pull your rolls from the oven, paint them with the orange glaze so they get glossy and soak up all that sticky orange flavor. Let that absorb for a few minutes and then hit them with a simple orange icing. This goes without saying, but yes, you can double it.
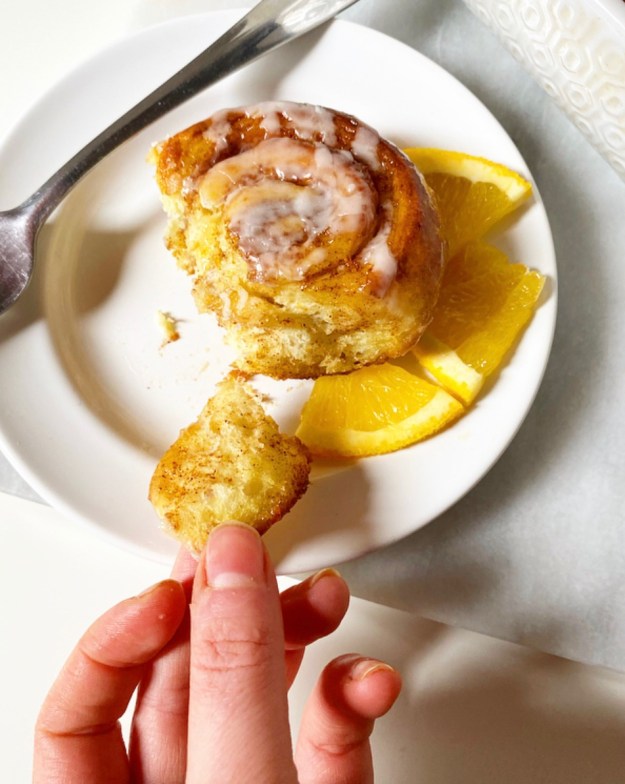 And then, well, you know what to do.
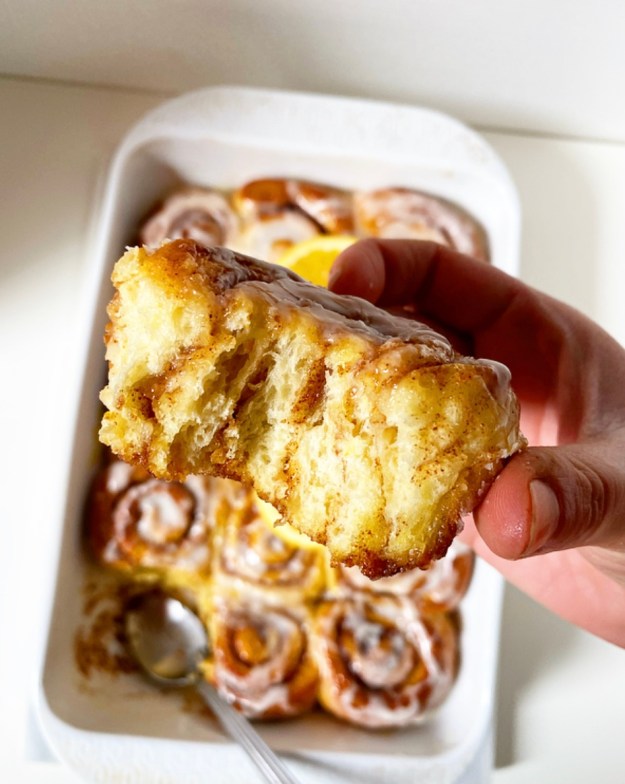
 Southern-style
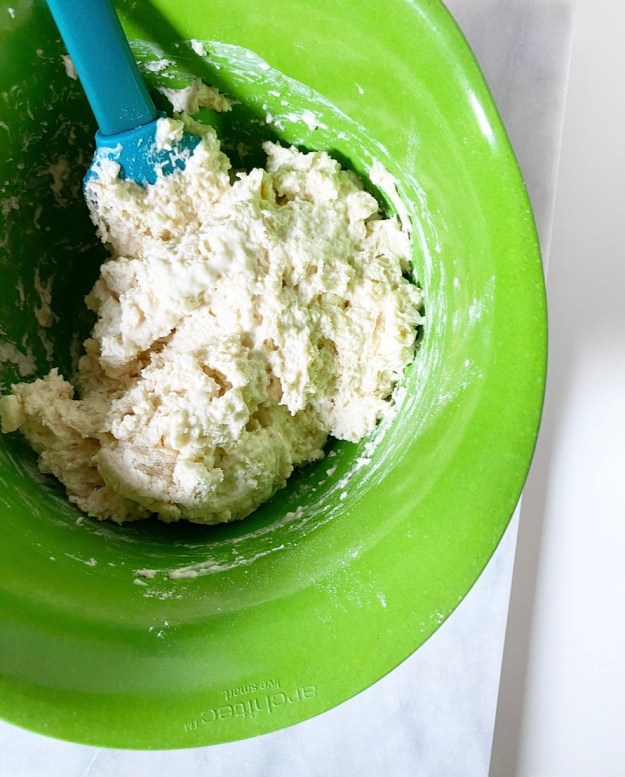
 All that said, I’ve never really gotten on the drop biscuit train. I guess I thought they were cheating or something—the ingredients and mixing methods are nearly identical, but you don’t have to pat and cut anything, instead scooping the sticky dough directly onto a pan before baking. I suppose that without dirtying a surface or doing extra work I assumed that they were a slightly-less-good version of the “real deal.” But I was wrong. So, so wrong.
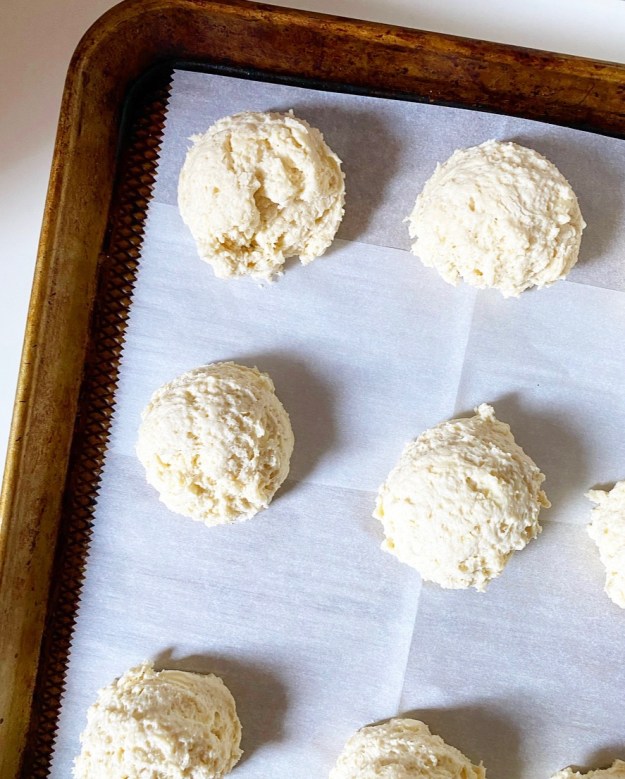
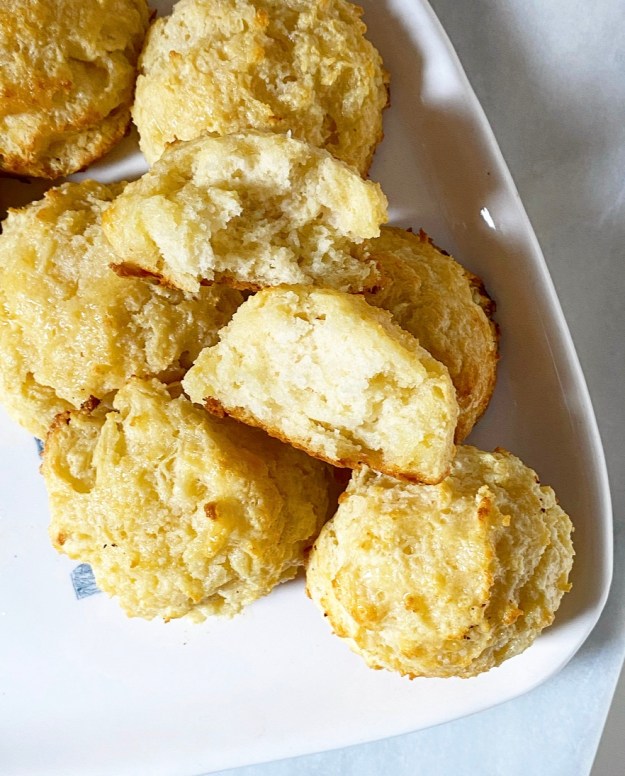 Turns out, drop biscuits are their own thing entirely. They’re fluffy and tender instead of flaky and layered, and they have these extra crispy-crunchy exteriors with which I am now fully obsessed. And the recipe works with both whole milk and buttermilk, and (!) I don’t have to scrape an invisible layer of butter and flour off of my countertop every time I make a batch. Drop biscuits, where have you been all my life???
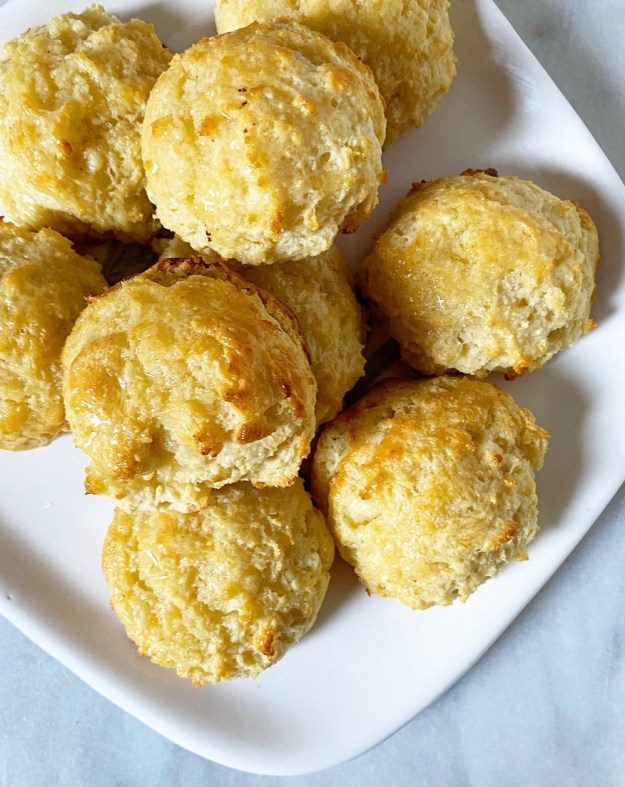
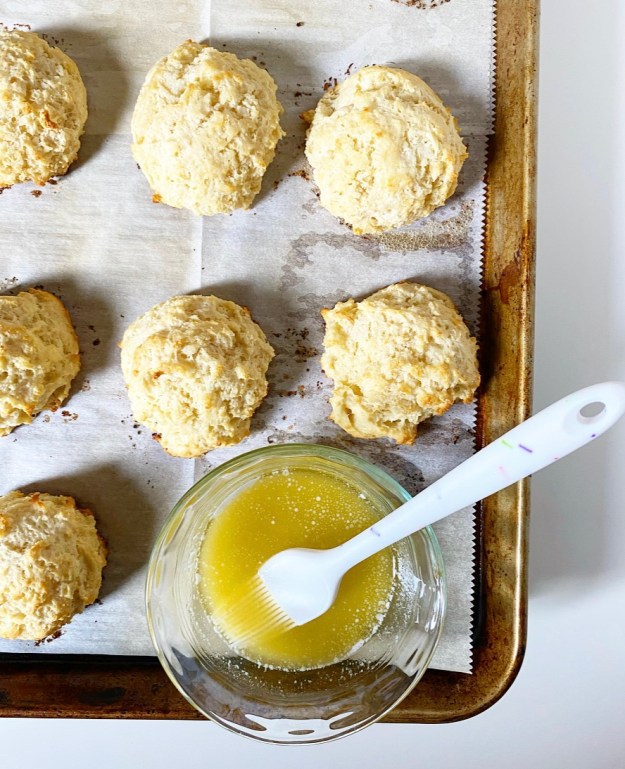
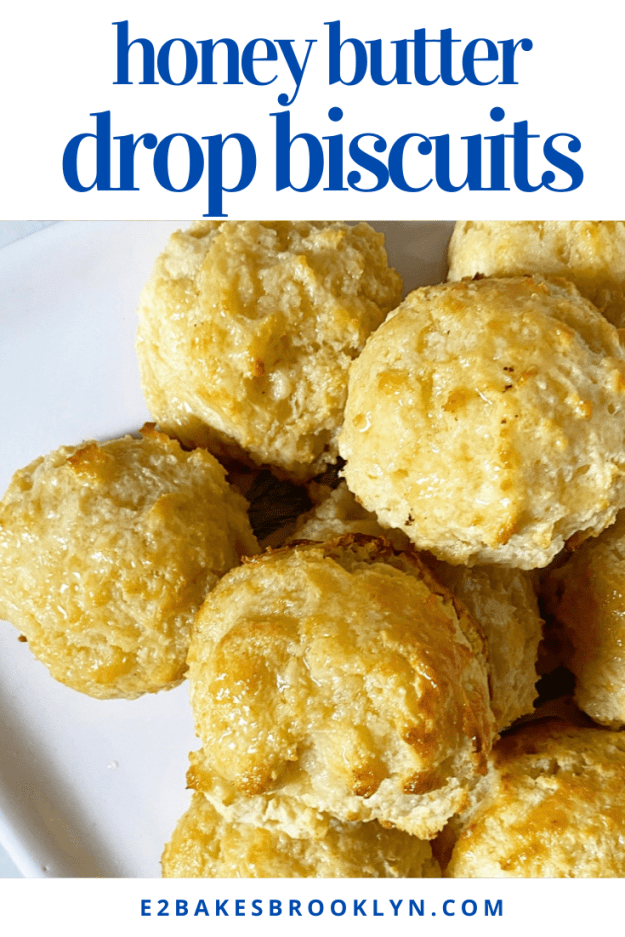
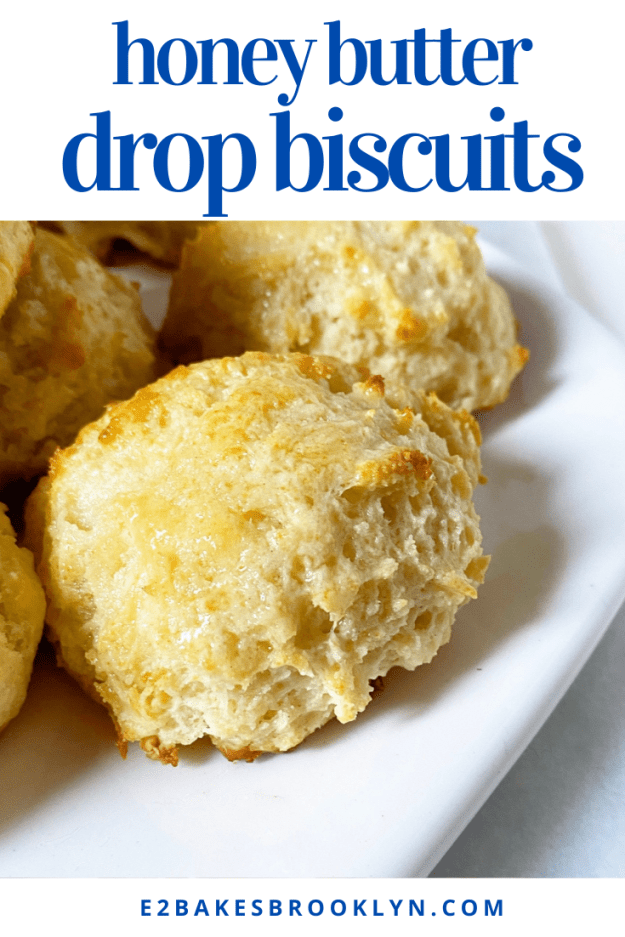
 I won’t lie to you: drop biscuits are not a traditionally beautiful food. They’re scraggly, craggy and have slightly wonky shapes, regardless of whether you use a cookie scoop, a spoon or your hands to dole out dough. They’re super delicious, just a little ugly. Or at least they are until you give them a glossy coat of salty-sweet honey butter.
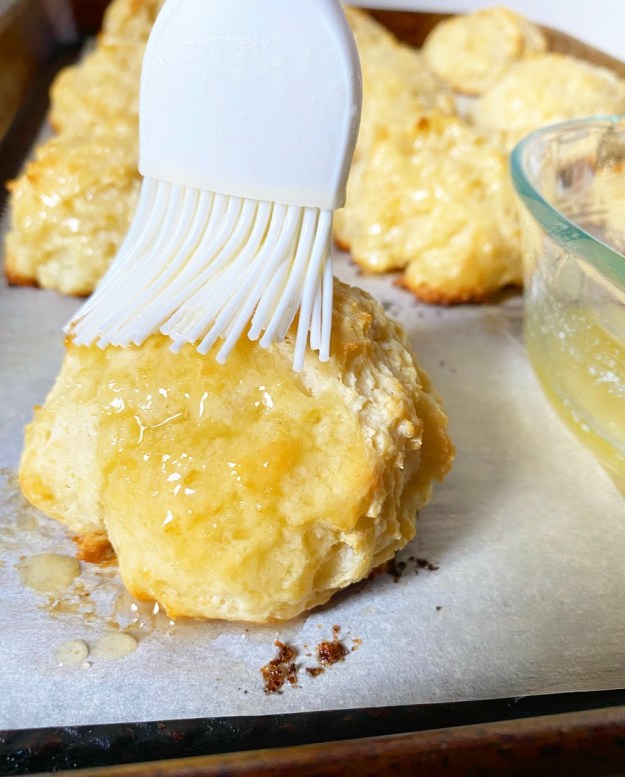
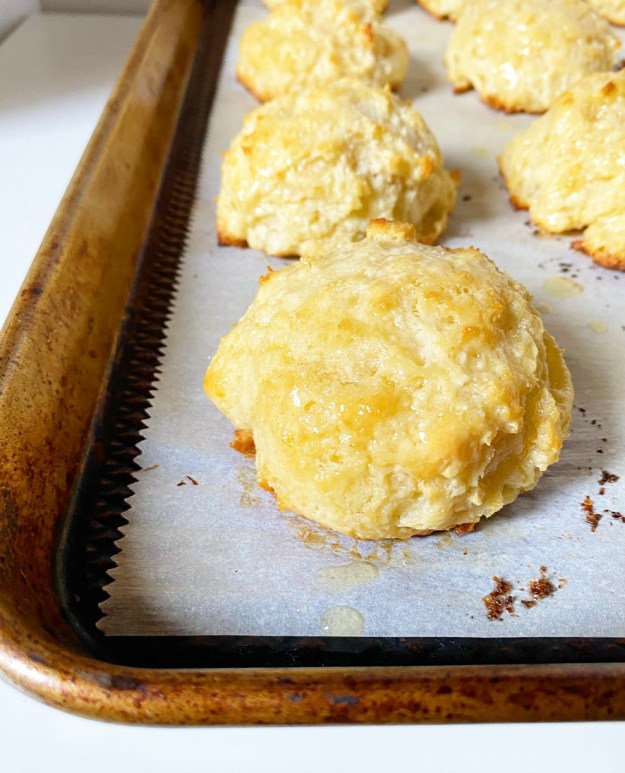 Ohhh yes.
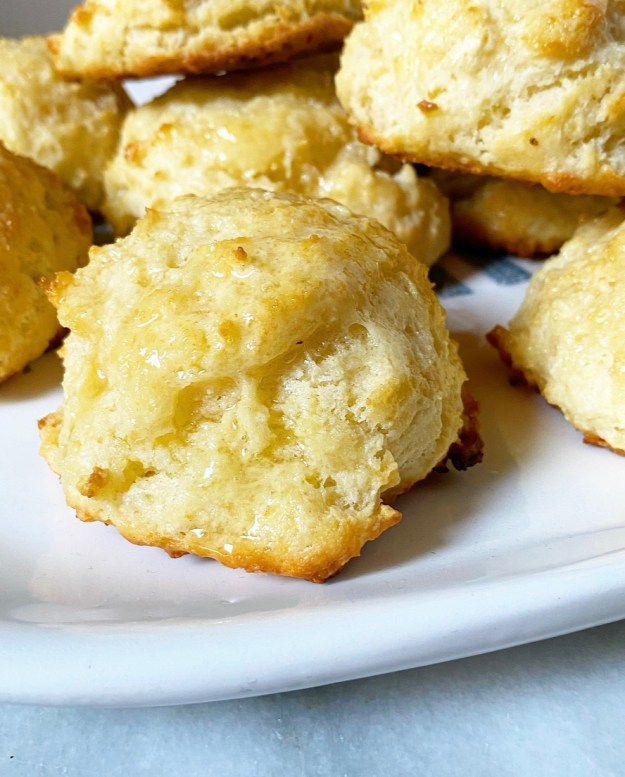
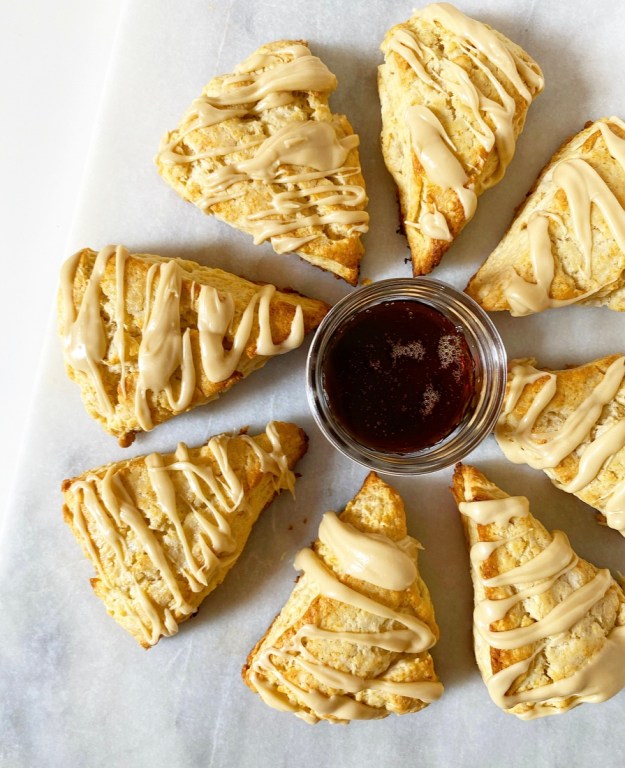 Maple Scones are one of my favorite things. They’re so simple and good, and every time I have one, I get nostalgic for the days when I was learning beginner
 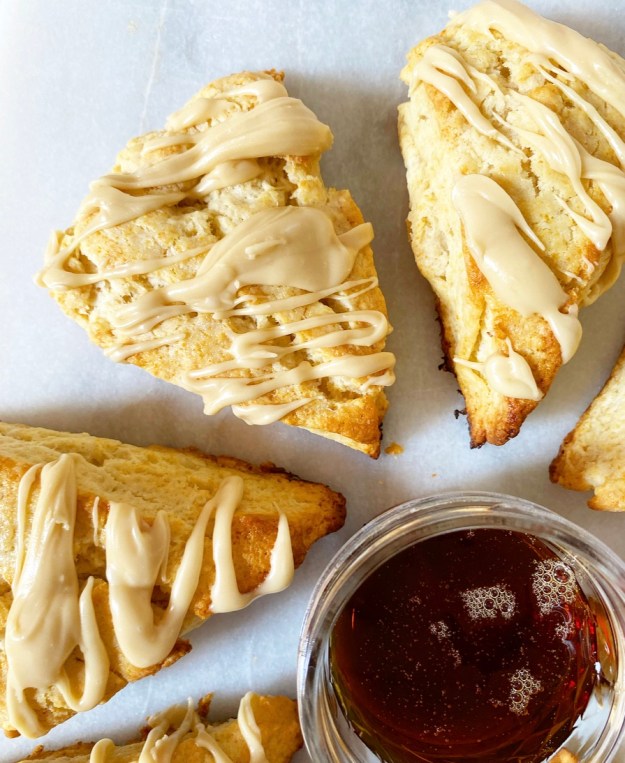 A lot has changed in seven years, and also very little. I moved into a larger apartment. I got over the boyfriend (finally, and to my great relief). I have a much larger kitchen now. In fact, it’s so big that my work station is in the living room/dining area, and my (second) pantry and a dedicated dairy fridge are in my bedroom. I have a great
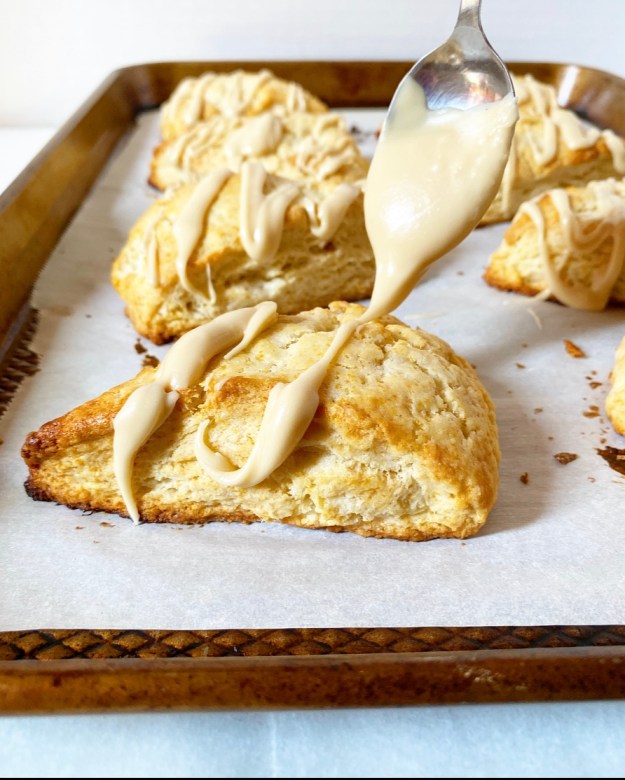
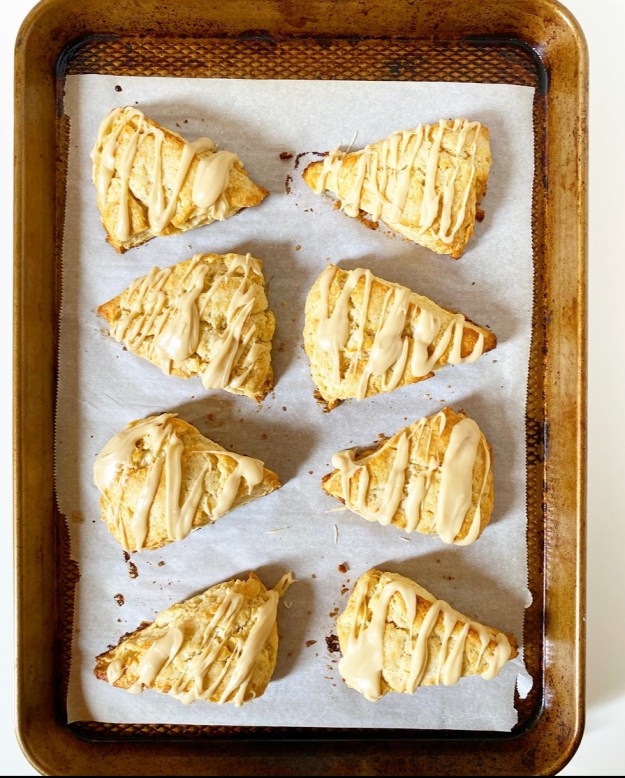 The first scones I ever made were the very good Maple Scones from
 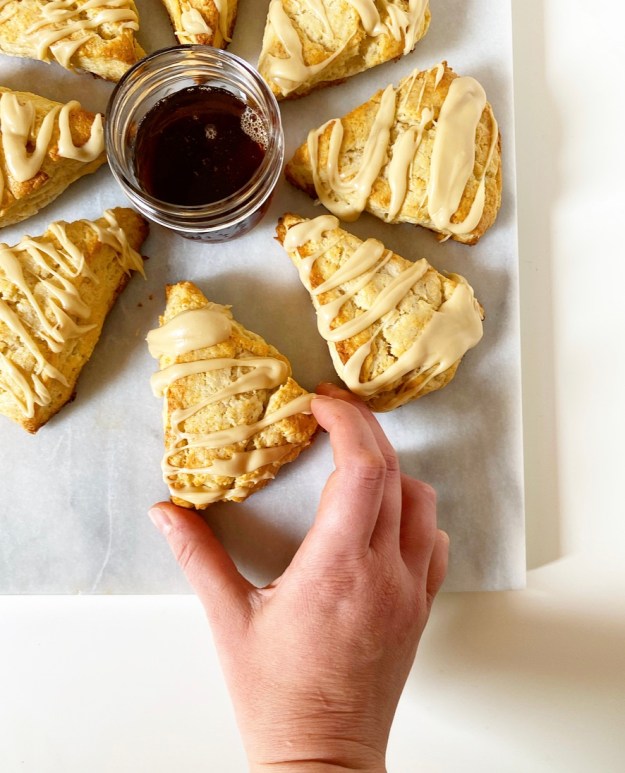 What I’m saying is that I make a hell of a maple scone. And now, seven years into baking and
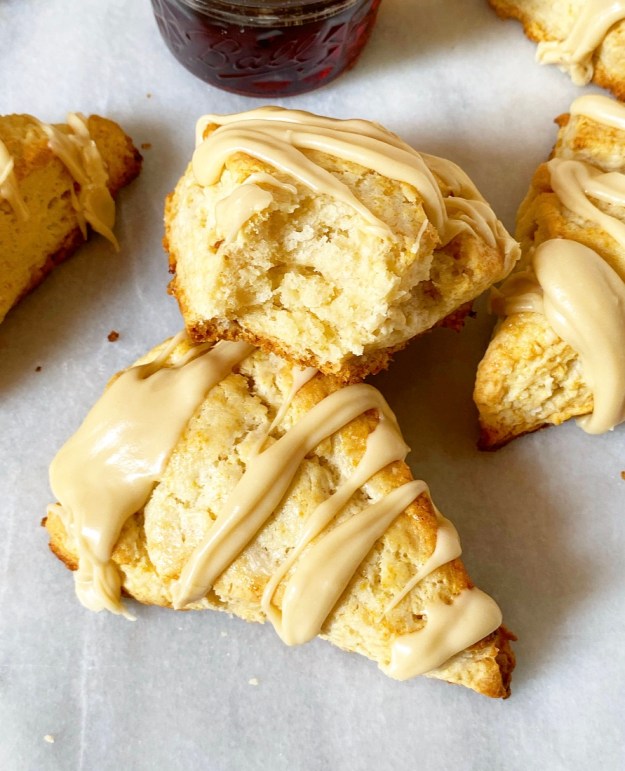


 Did you know you can make a
 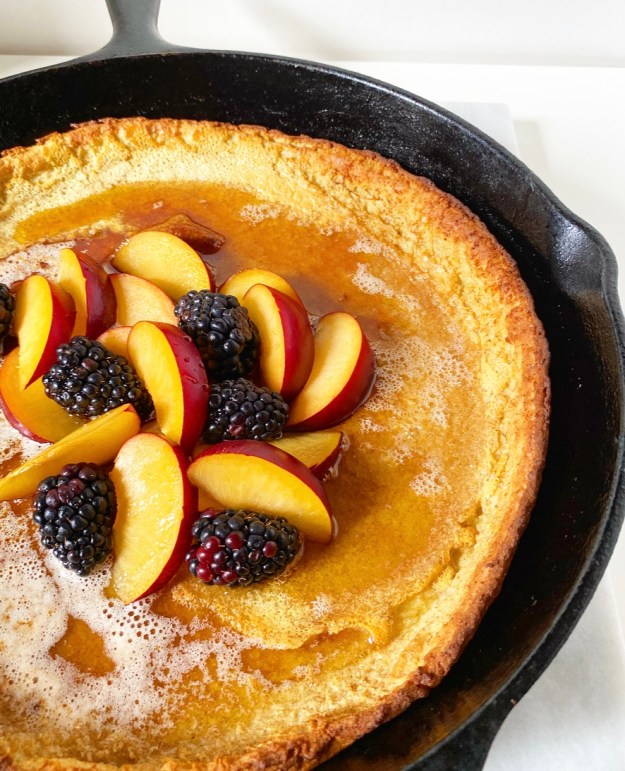 Well, I didn’t. It hadn’t even occurred to me until I made
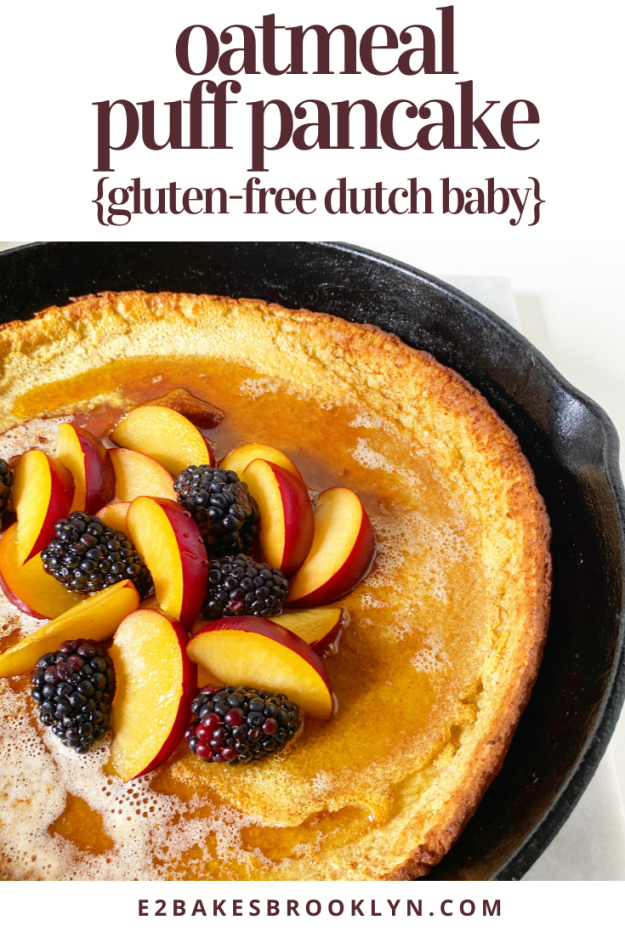
 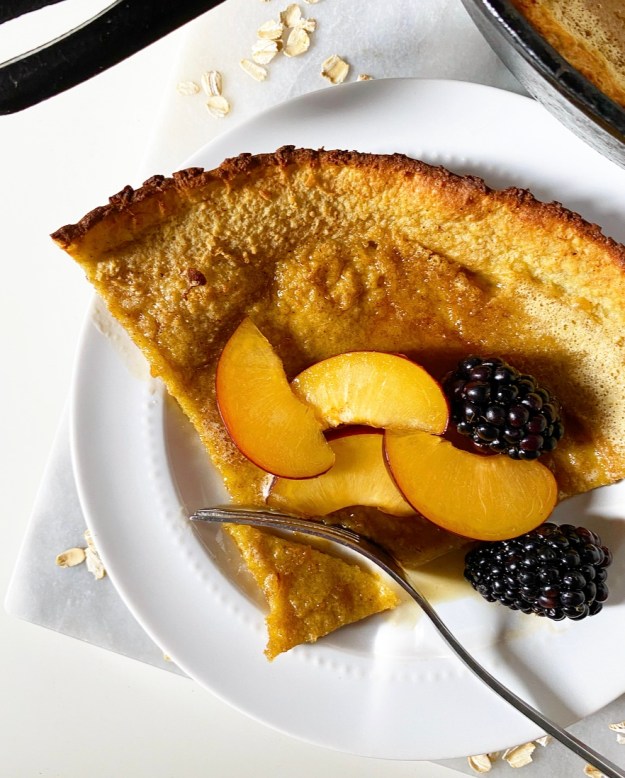 Not only is this oven pancake completely whole grain, it’s also naturally gluten-free! If you or a fellow breakfast guest needs to be gluten-free, make sure your oats are certified gluten-free.
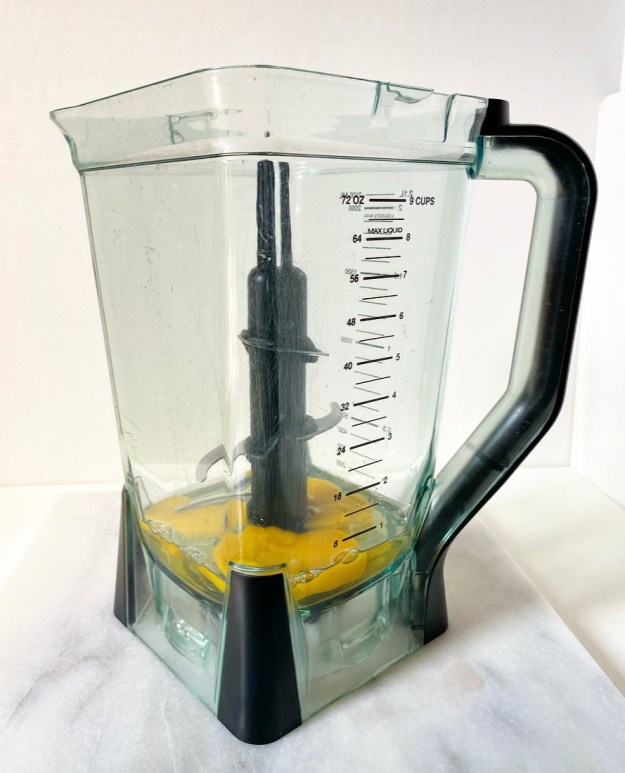
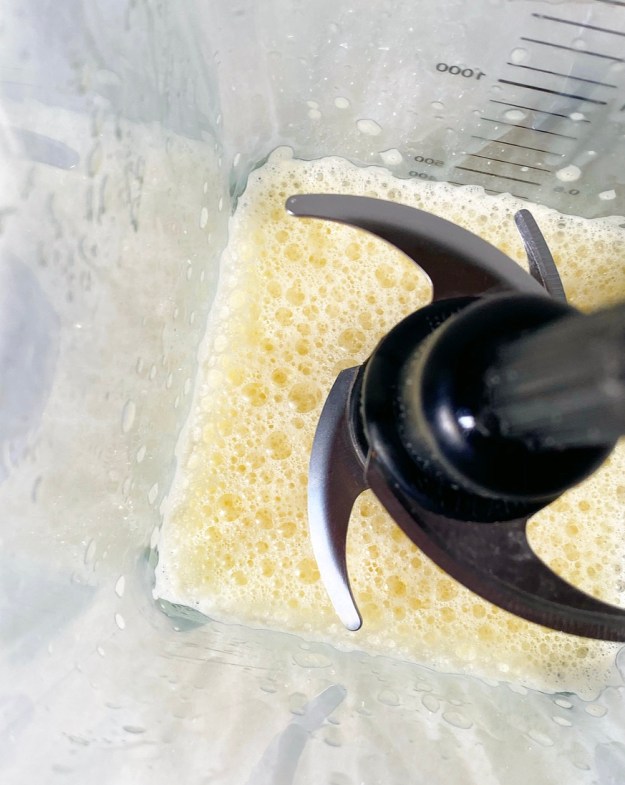
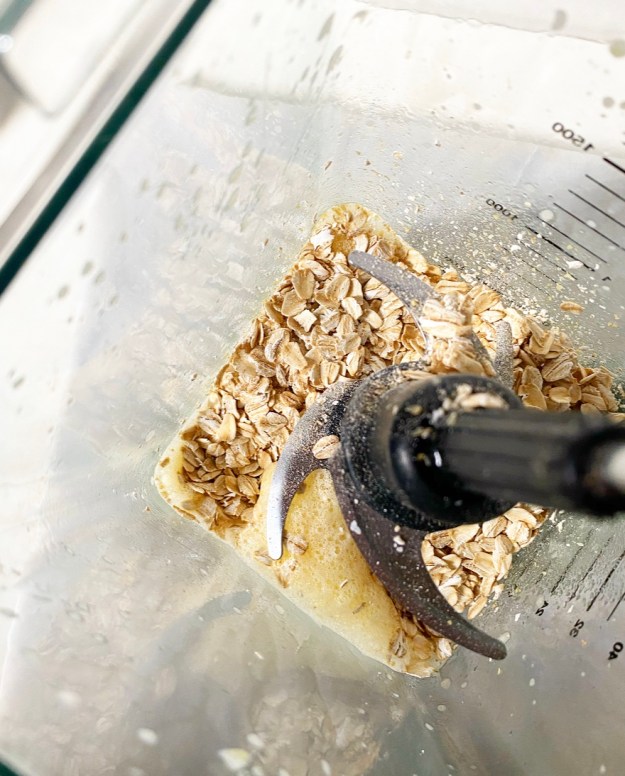
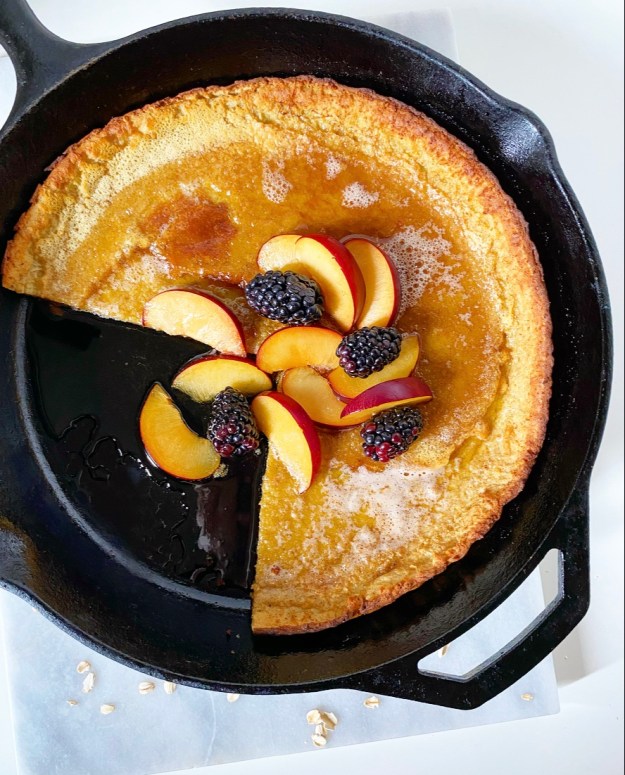
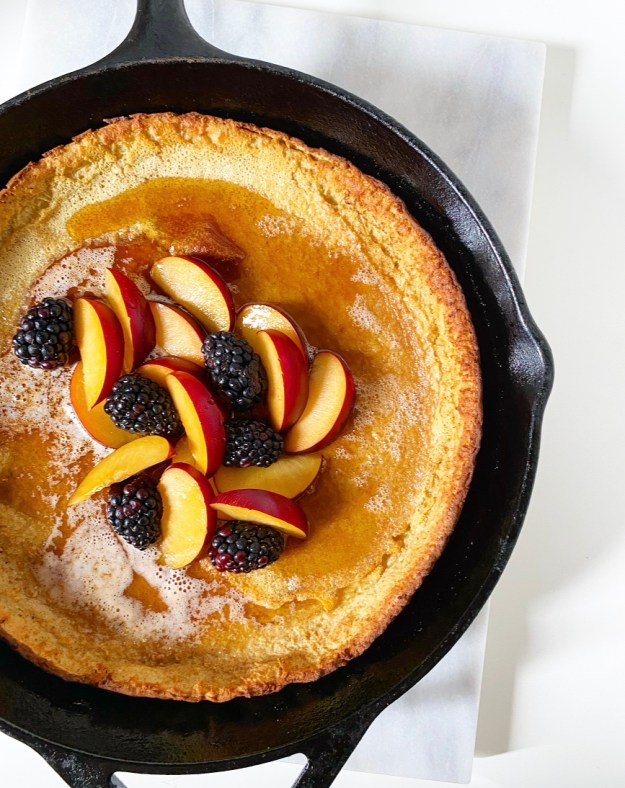
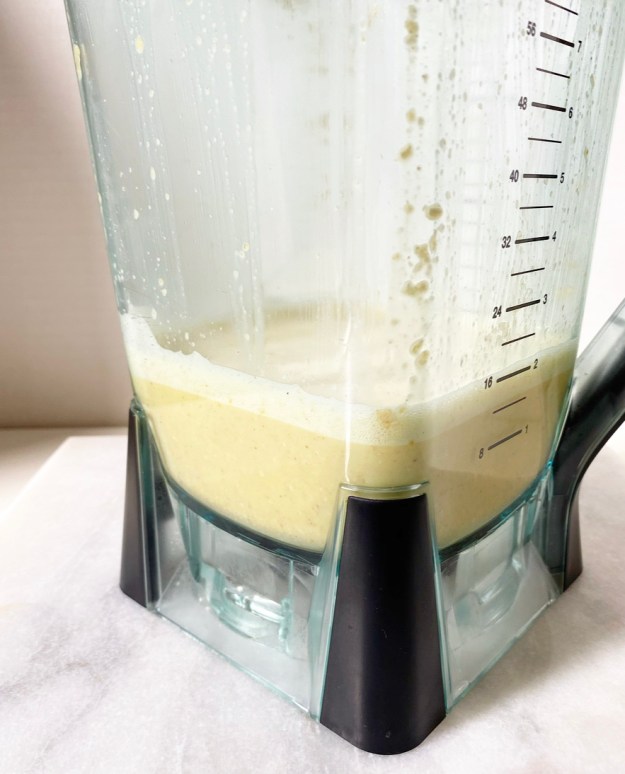 If you’re wondering if this Oatmeal Puff Pancake is more work than the traditional version, the answer is “no.” Just like its gluten-full counterpart, the batter comes together in under 90 seconds in a blender, then goes directly into a super hot, buttery pan, then into the oven for 18 minutes.
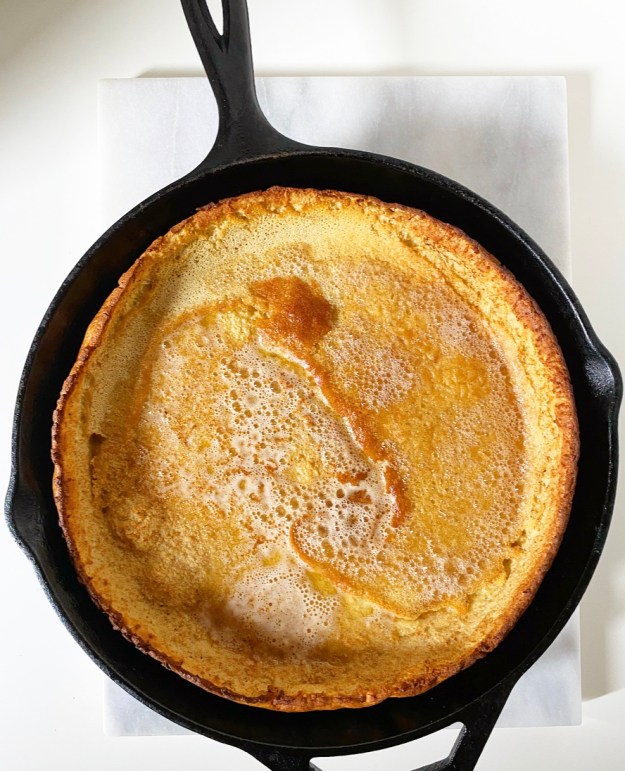 The pancake is ready when the edges are golden brown and the center is beginning to take on color. It will also likely (but not always) have a few large bubbles, which will quickly disappear as the puff relaxes into a smoother bowl shape at room temperature.
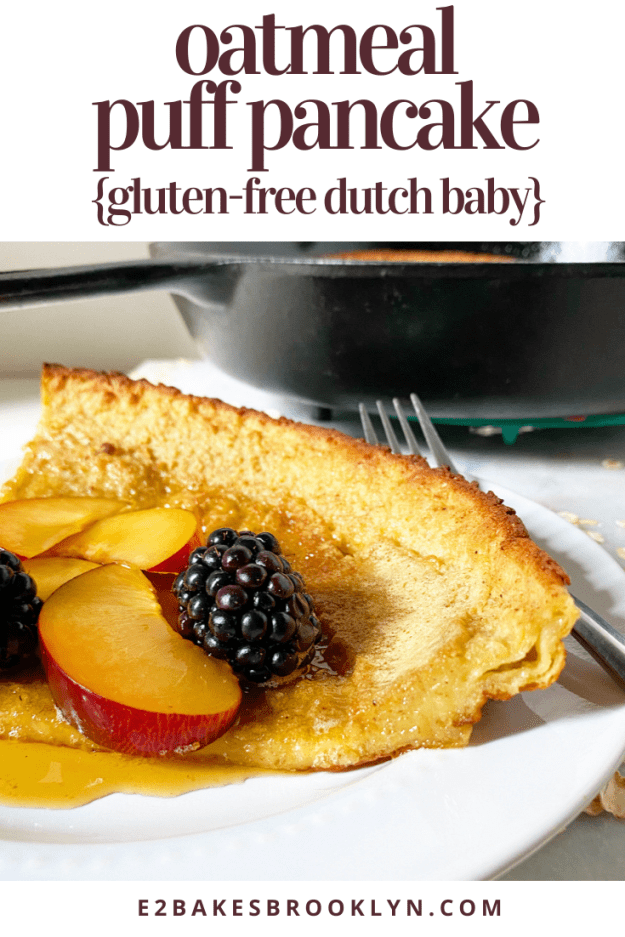
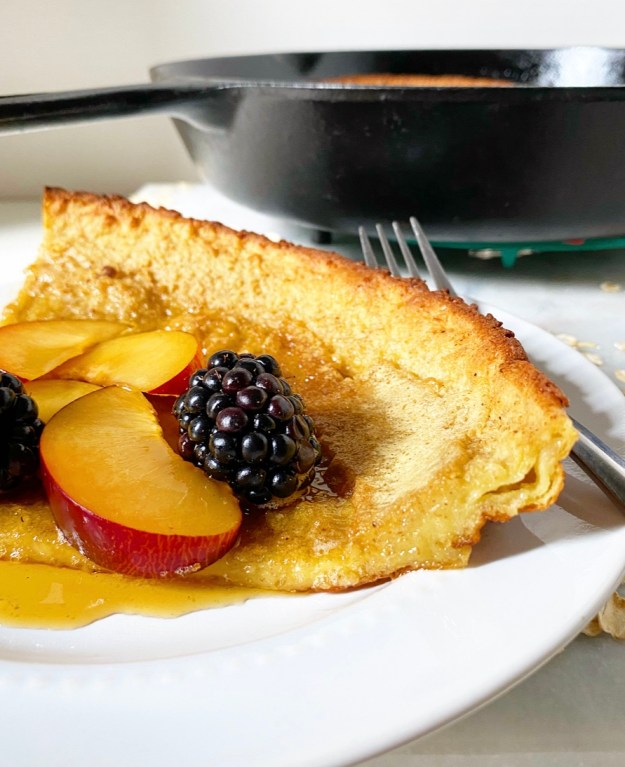
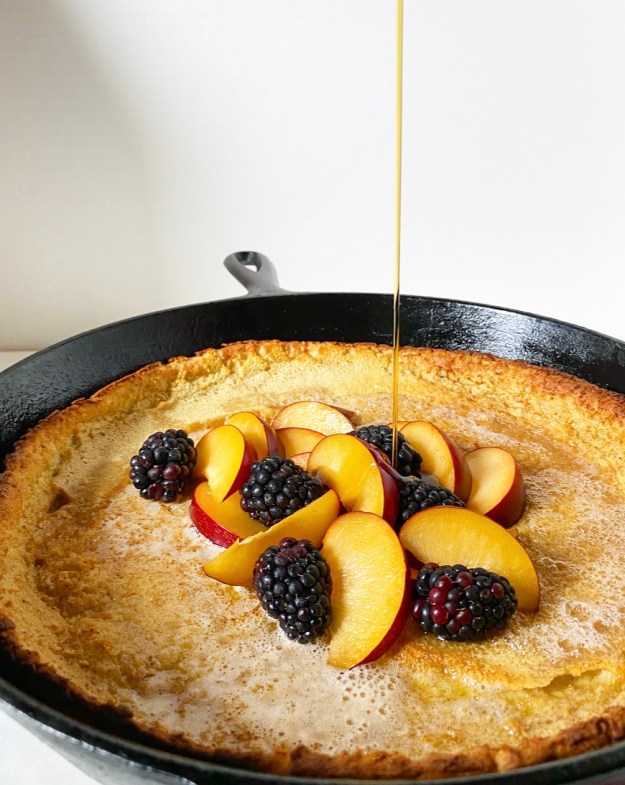 Once it’s deflated, fill your Oatmeal Puff Pancake with your favorite seasonal fruit (I went with the last of the plums and blackberries) and drizzle with maple syrup, or go more traditional with lemon and confectioner’s sugar. Then slice into this custard-centered beauty and behold its crisp-chewy edges.
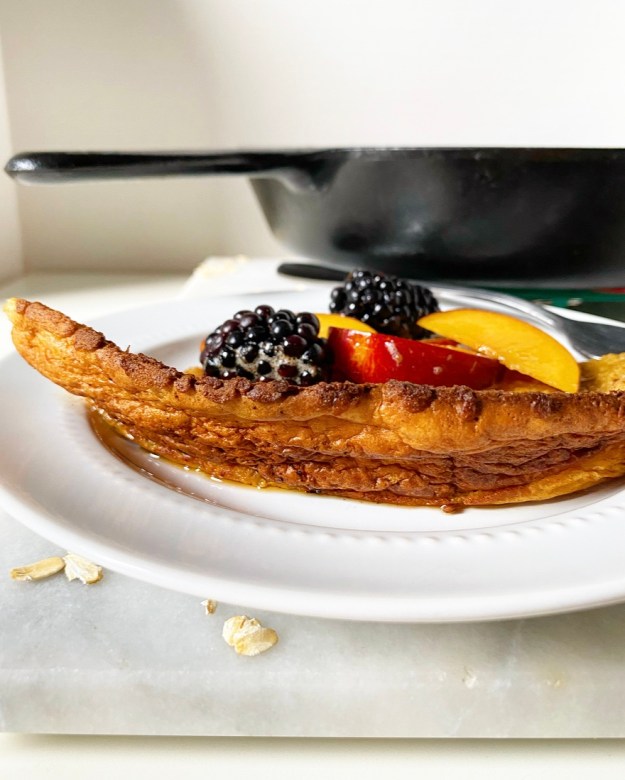
 Like other Dutch Baby recipes, this Oatmeal Puff Pancake can be scaled up or down depending on the size of your pan and how many servings you need. I’ve included times and proportions for four different yields in the recipe notes to make sure that there’s plenty to go around.