Coming from a Christmas morning breakfast casserole family, I’ve never really understood why so many people make cinnamon rolls on that day of all days.
I mean, have you made cinnamon rolls from scratch? They are not a quick recipe, clocking in at a minimum of three hours start-to-finish (slightly less if you do the rise overnight). My family is all adults so we start our Christmas morning at a leisurely 9am, eat around 10, then get to the gifts around noon. If we wanted cinnamon rolls for breakfast, that would require the baker (me!) to be up and functioning at 7am. Big no thank you. And if you have kids or people who get up for gifts at 6am or earlier…3am? Earlier? Forget it!
But what if I told you that you could have warm, fluffy, homemade cinnamon rolls on your table on Christmas morning in under an hour? Yes, it’s possible, thanks to a little technique called par-baking.
You’ve definitely heard the term “par-baking” on here before in association with pie crust. It means to partially bake, which is exactly what we’re going to do to these rolls: partially bake them ahead of time, then finish the baking on Christmas. This method will work with any yeast-raised cinnamon roll recipe you love. I wouldn’t recommend this method for any rolls with fruit in the filling (i.e. not these) as it might degrade during thawing, but I think nuts would be okay.
Now, this isn’t a magic trick. You do have to plan ahead to do about 2.5 hours of mixing/kneading/rolling/rising at some point to make this work. But (but!) the bulk of the work can be done anytime between now and Christmas (or whenever you want cinnamon rolls).
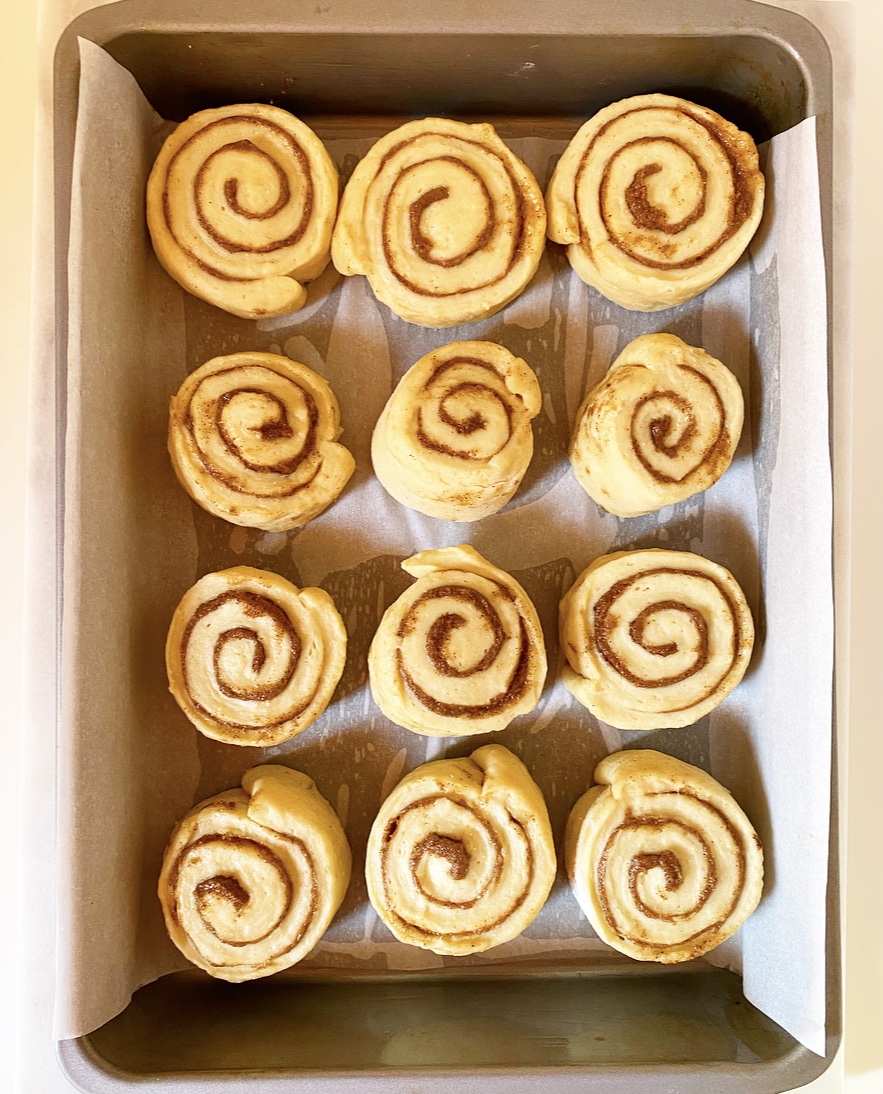
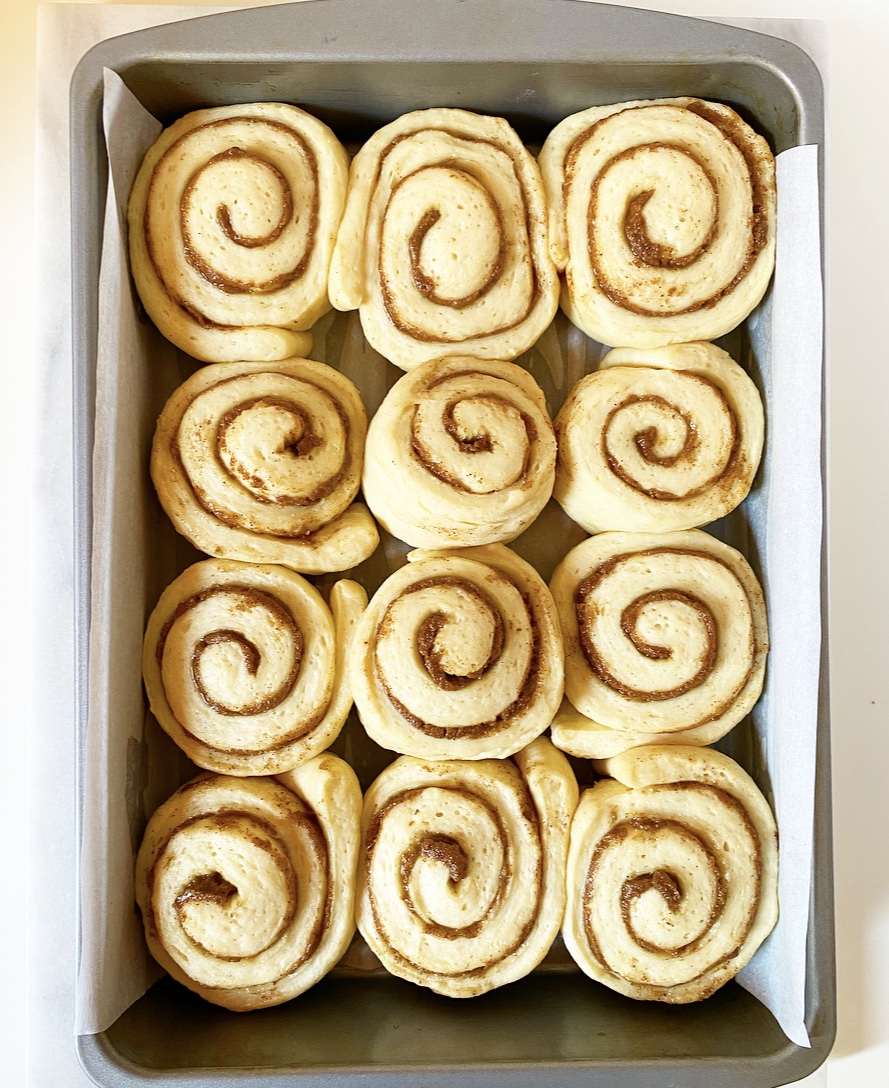
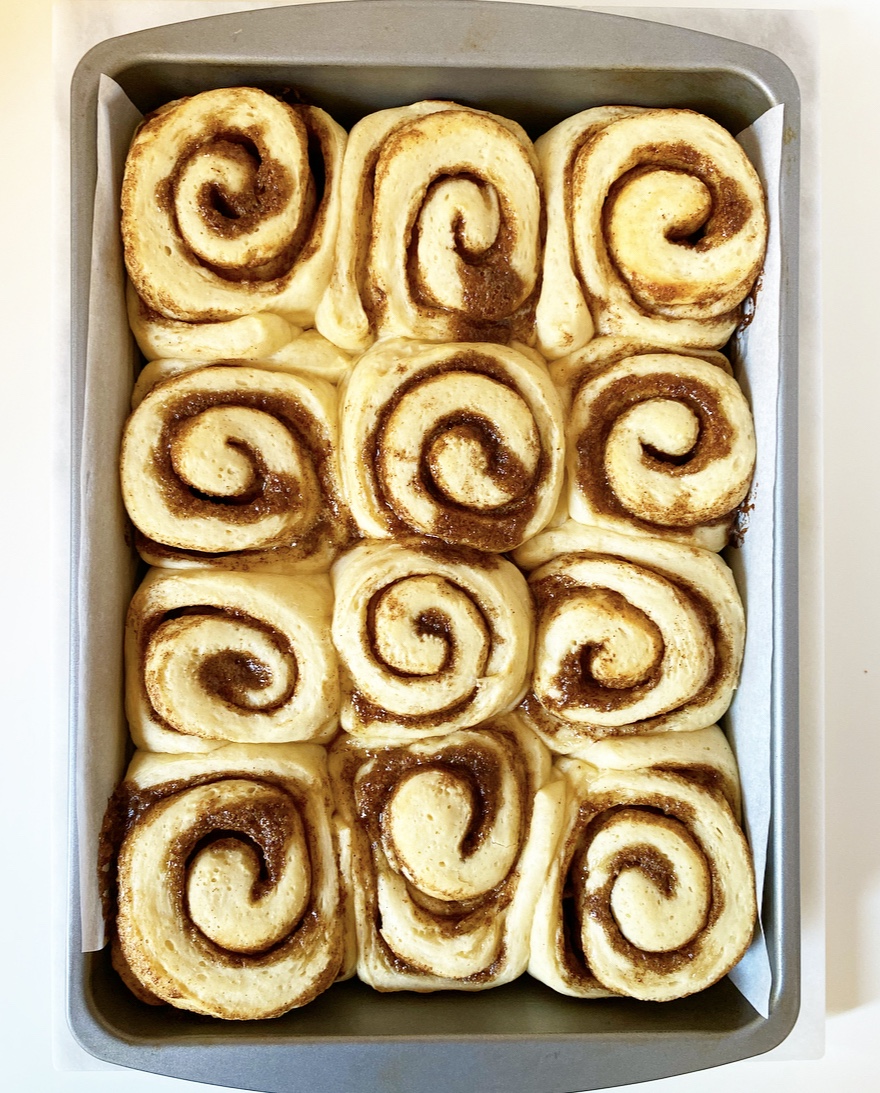
The process is simple. Make your cinnamon roll recipe up to the baking step, then bake for about half the baking time (15 minutes). At this point, your rolls should be risen, puffed and pale. Where you would normally continue baking them until brown, resist that urge and remove them from the oven.
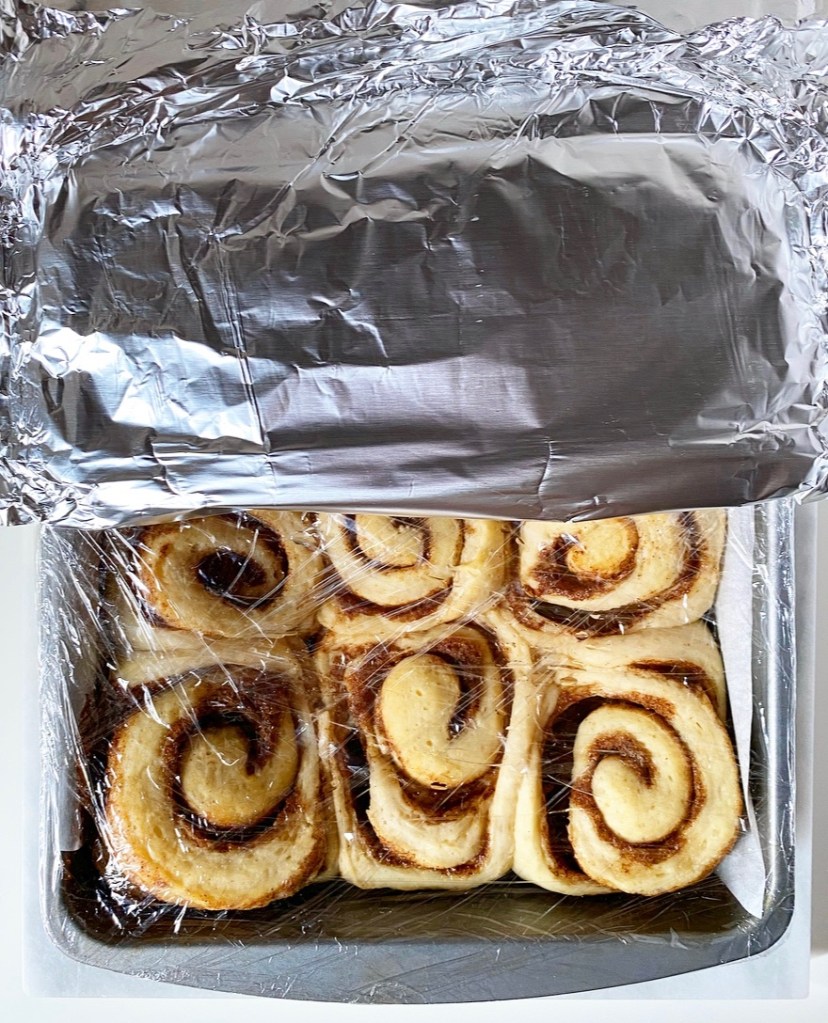
Let your rolls cool to room temperature and then triple wrap in plastic, cover in foil and freeze until the night before you need them. If you don’t want to have your 9×13” pan out of commission for any length of time, you can bake in a disposable aluminum baking pan, then tuck it into your freezer for up to six weeks.
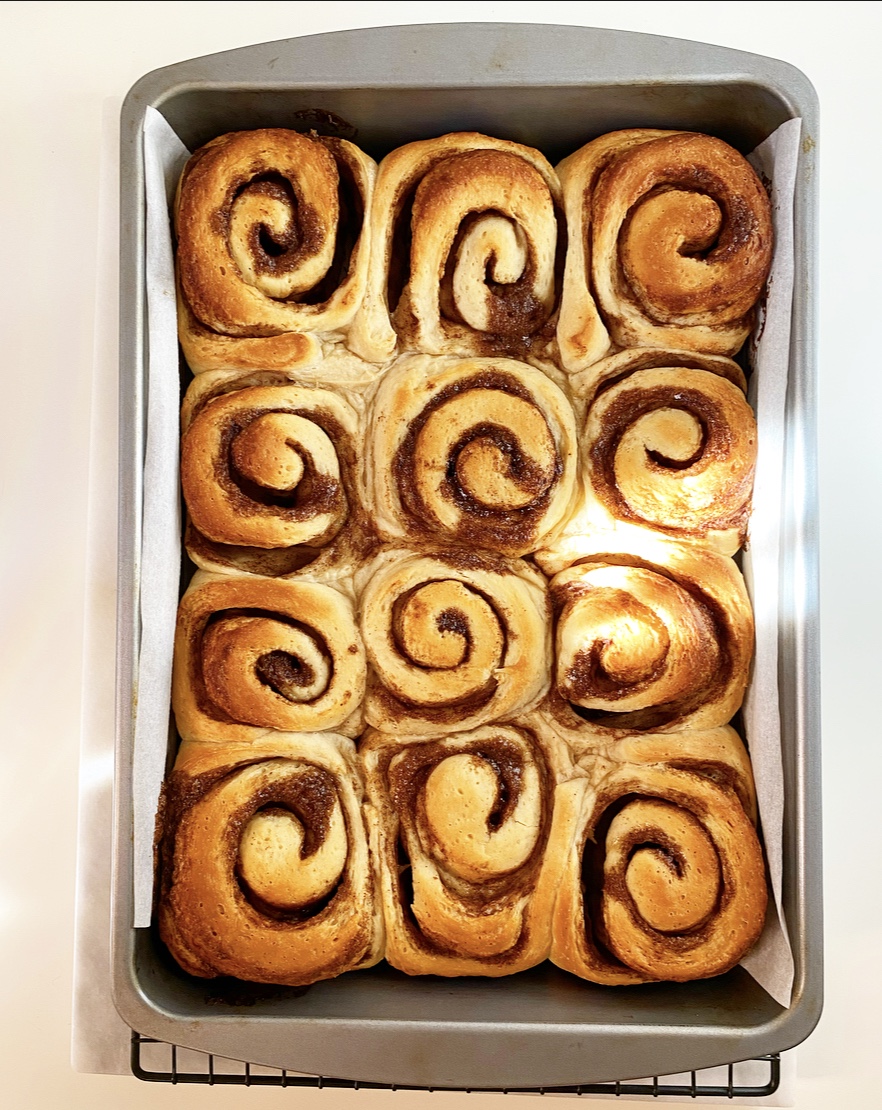
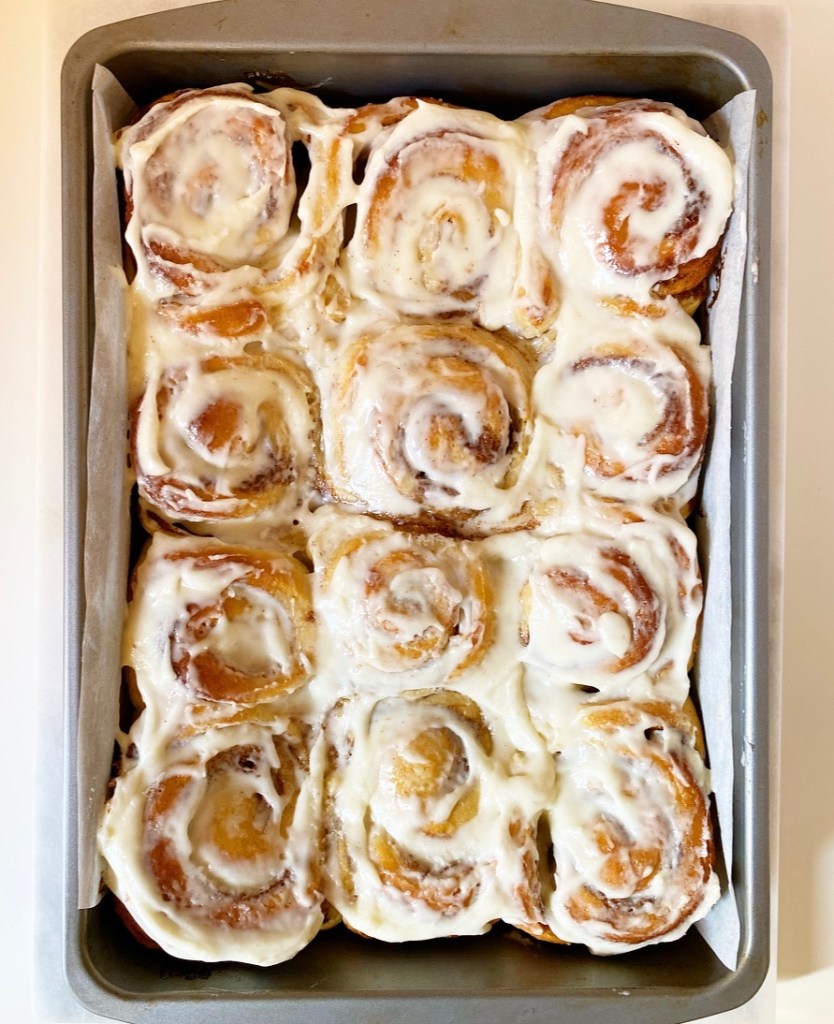
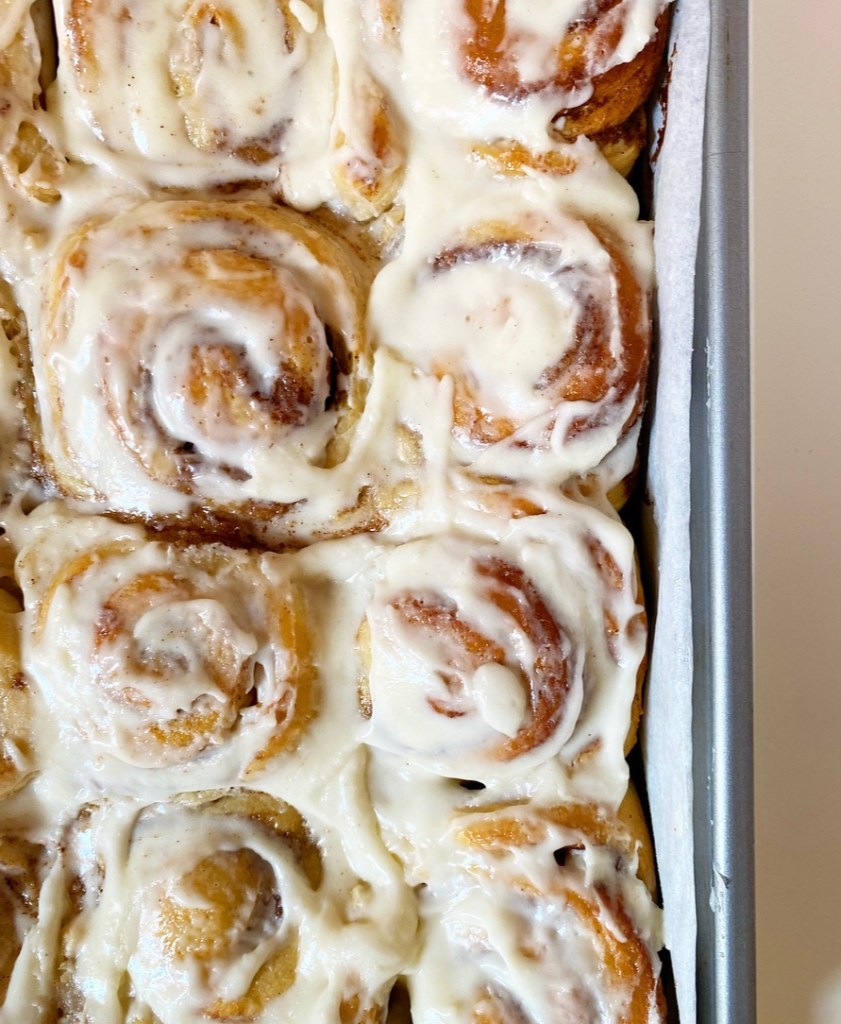
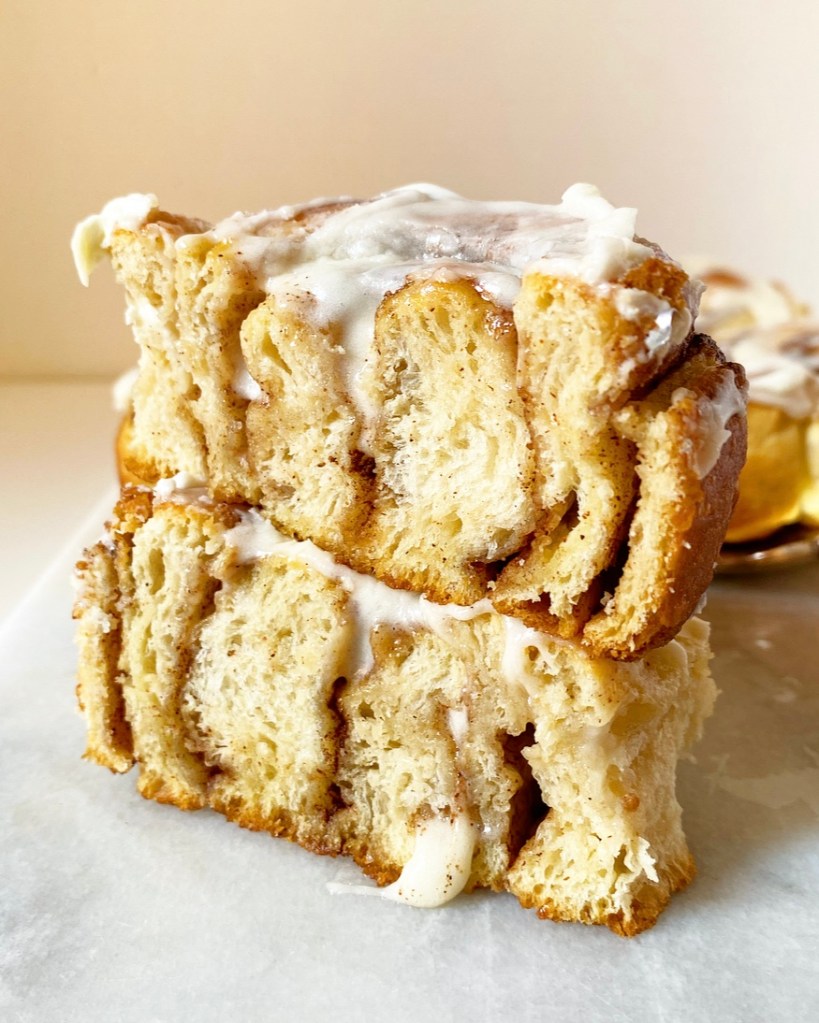
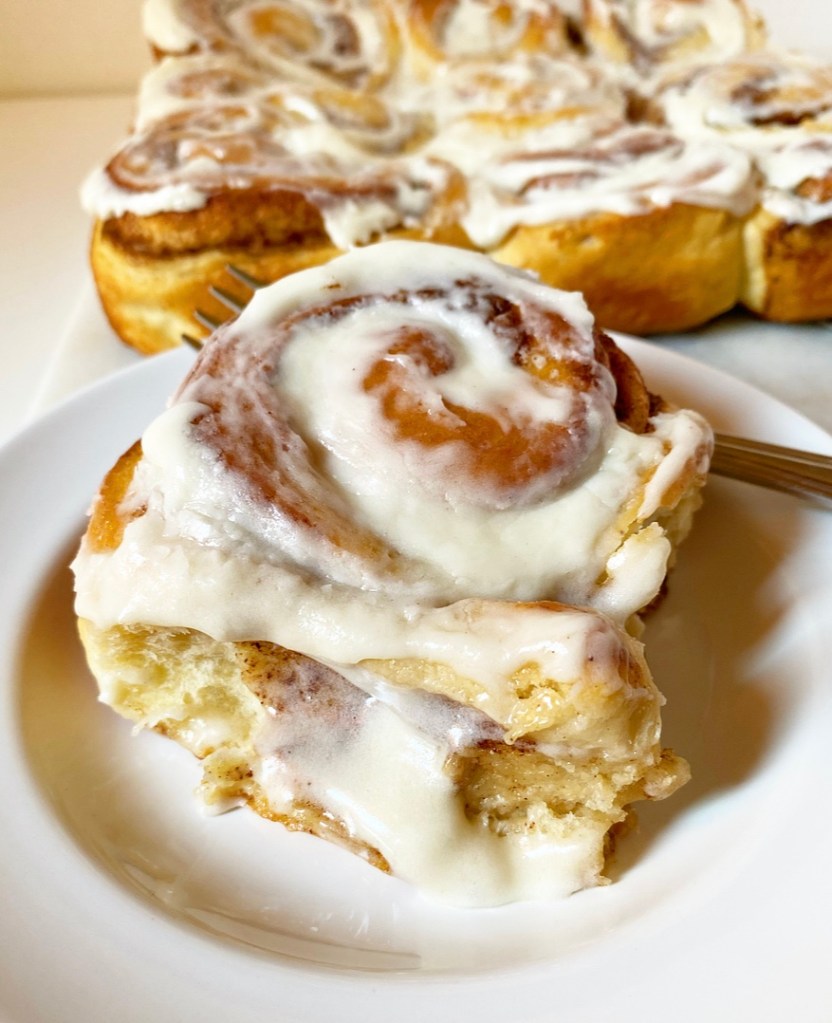
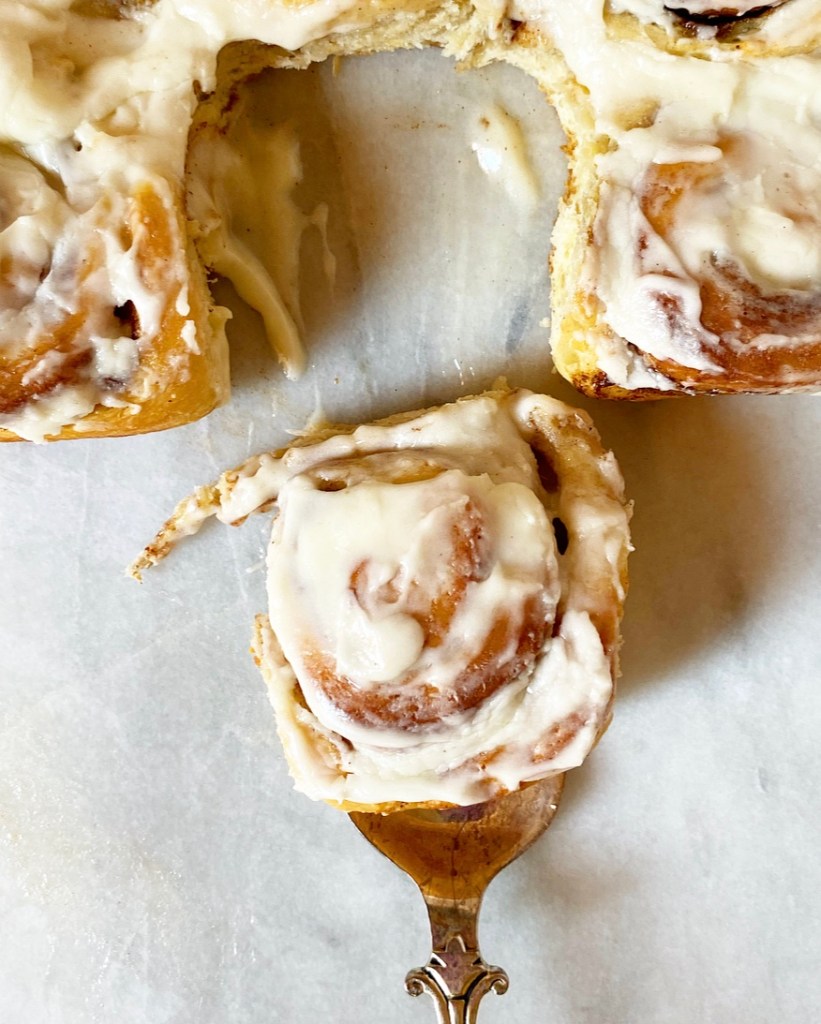
The night before you want cinnamon rolls, move the par-baked rolls from your freezer to your fridge to thaw out. In the morning, simply uncover and bake your rolls for the remaining 15 minutes, until golden. Finish with cream cheese frosting and voila! Fresh homemade cinnamon rolls on your table in under an hour, and you didn’t have to sacrifice sleep to make it happen.
Call it Christmas magic. Call it whatever you want. Just call me for breakfast.
Par-baked Cinnamon Rolls
adapted from Dana Velden

cinnamon roll recipe of choice
9x13-inch baking pan (disposable aluminum, if desired)

Follow your yeast-raised cinnamon roll recipe up to the baking step.

Preheat your oven to 375F. Bake cinnamon rolls for 10-15 minutes, until risen, puffed and pale.

Remove cinnamon rolls from the oven and allow to cool completely in their pan on a rack. Triple wrap the pan in plastic wrap, then wrap in foil. Freeze for up to 6 weeks.

The night before you want cinnamon rolls, move the pan of frozen rolls to the refrigerator. Let thaw 8-12 hours.

Preheat oven to 375F. Unwrap rolls; discard foil and plastic wrap.

Bake rolls for 10-15 minutes, until golden brown. Top with cream cheese frosting (or whatever your recipe says) and serve warm.


 Christmas in a pandemic is so strange. I mean, I’ve spent Christmas away from my immediate family before, but it’s always been with (ex-)boyfriends or friends. But this year, traveling and gathering don’t seem like great plans and I am deeply single, so Christmas alone it is.
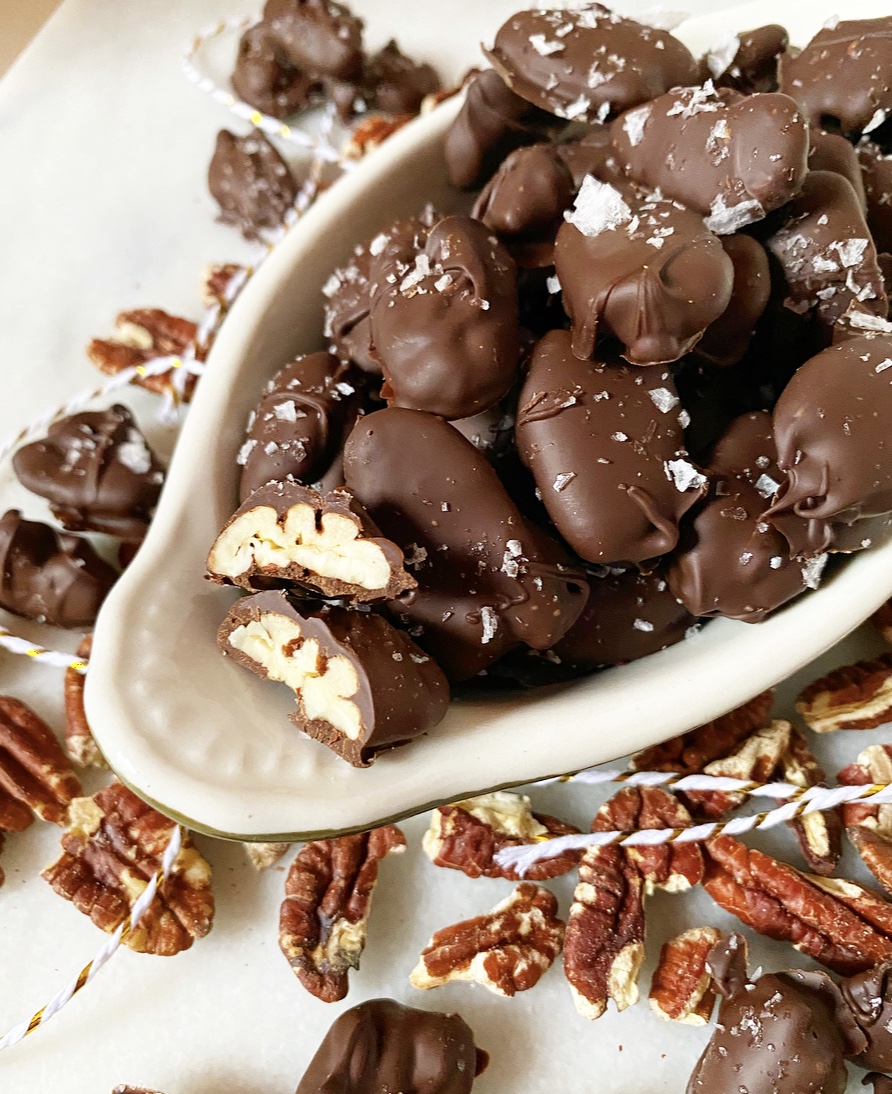
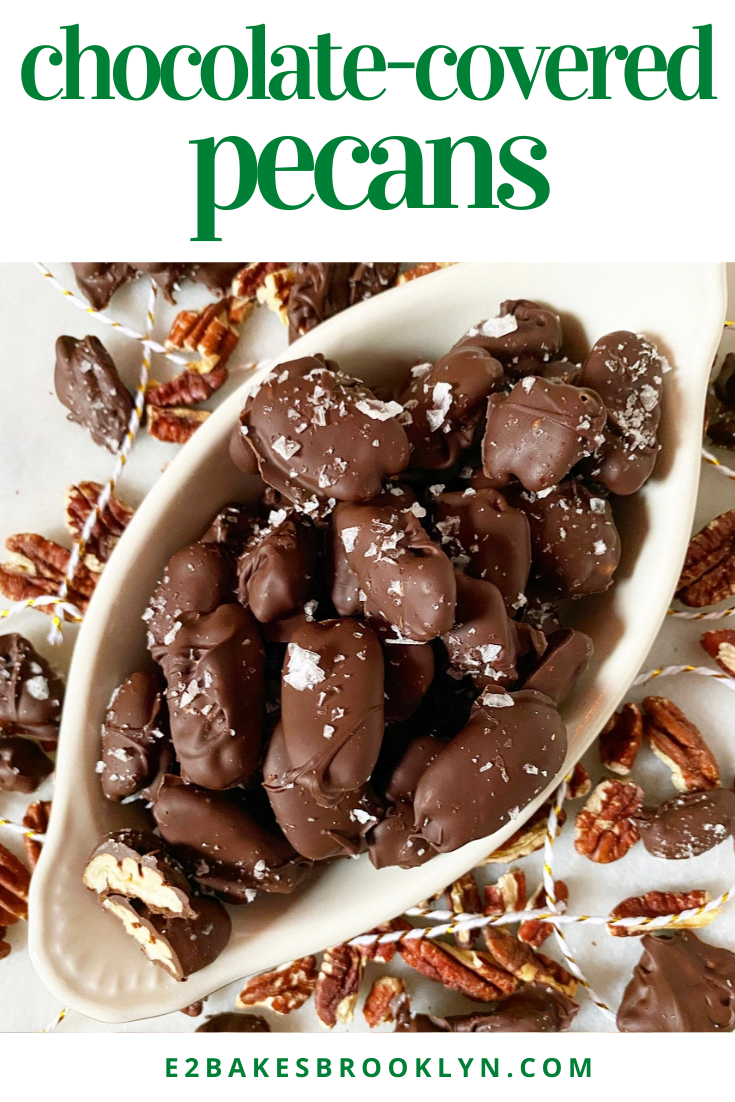
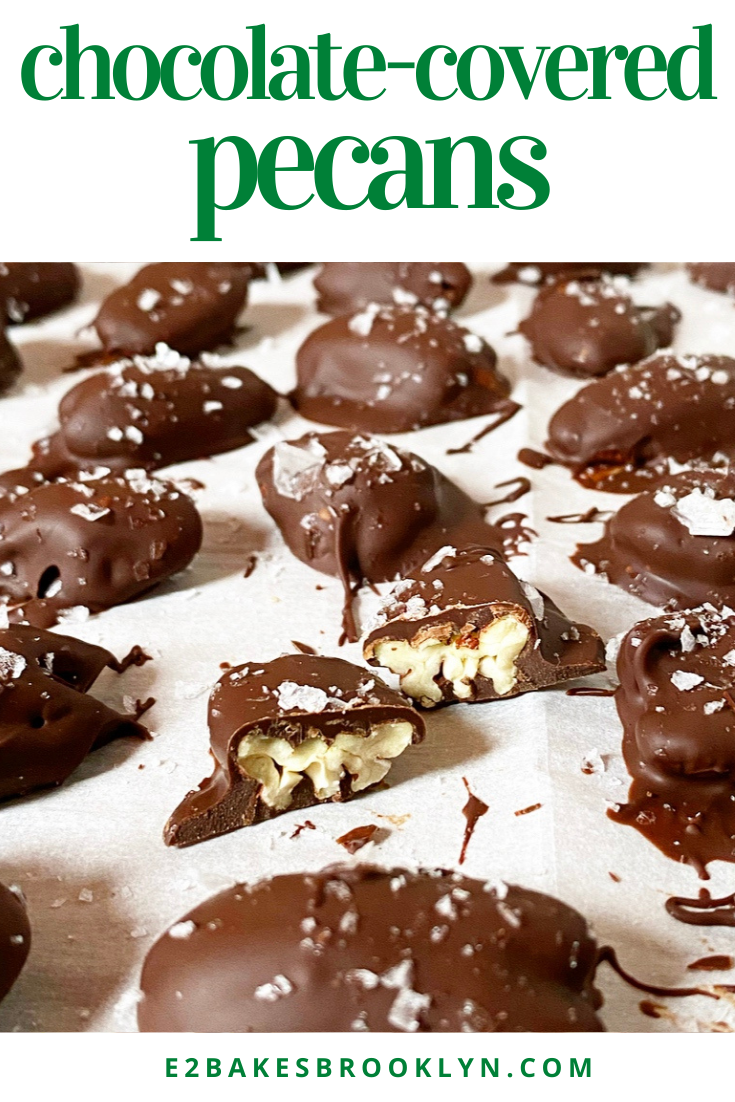
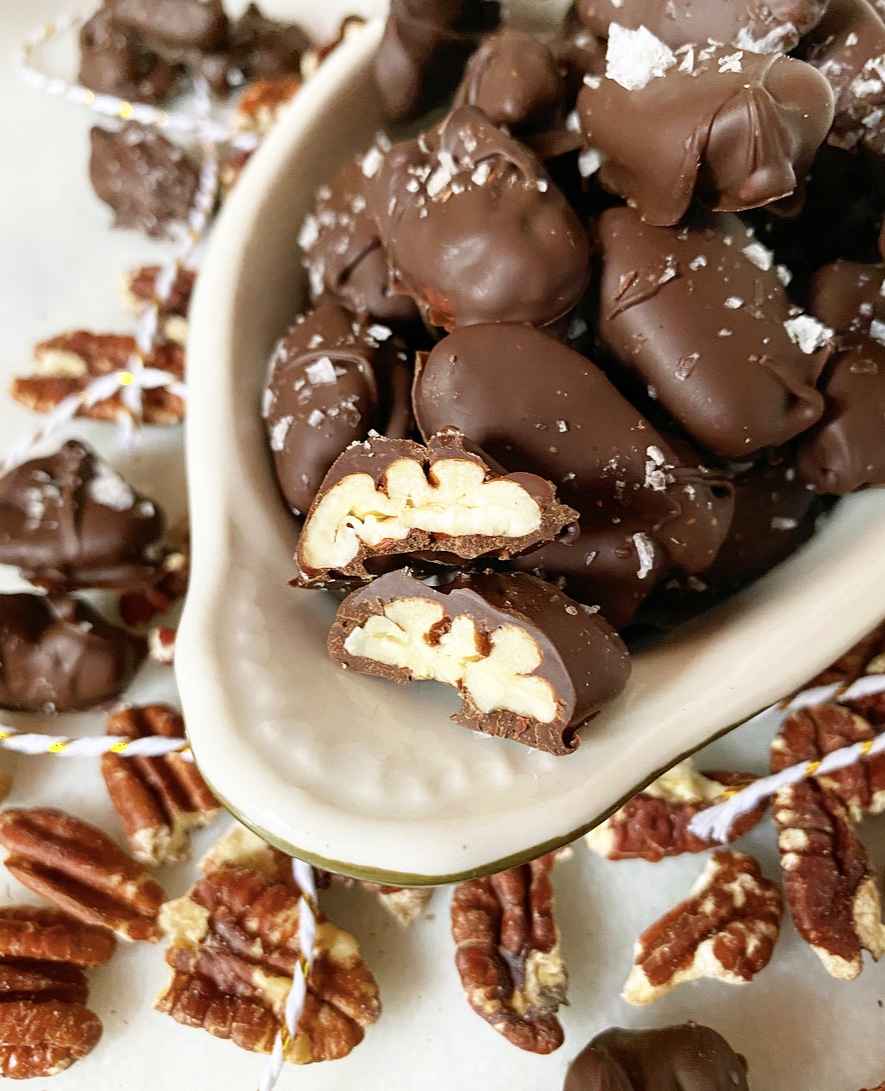 I’ve already had my pre-Christmas anticipatory-loneliness gloom and doom, and have now moved on to determining what will make this Christmas feel like…Christmas. Like, when I FaceTime my family, I’m going to wear my Christmas pajamas that match my sisters. And I’m going to take a walk. Maybe watch Love Actually for the 374th time. Perhaps make a pot roast. And I’m going to eat chocolate-covered pecans by the handful. It’s the Davenport way.
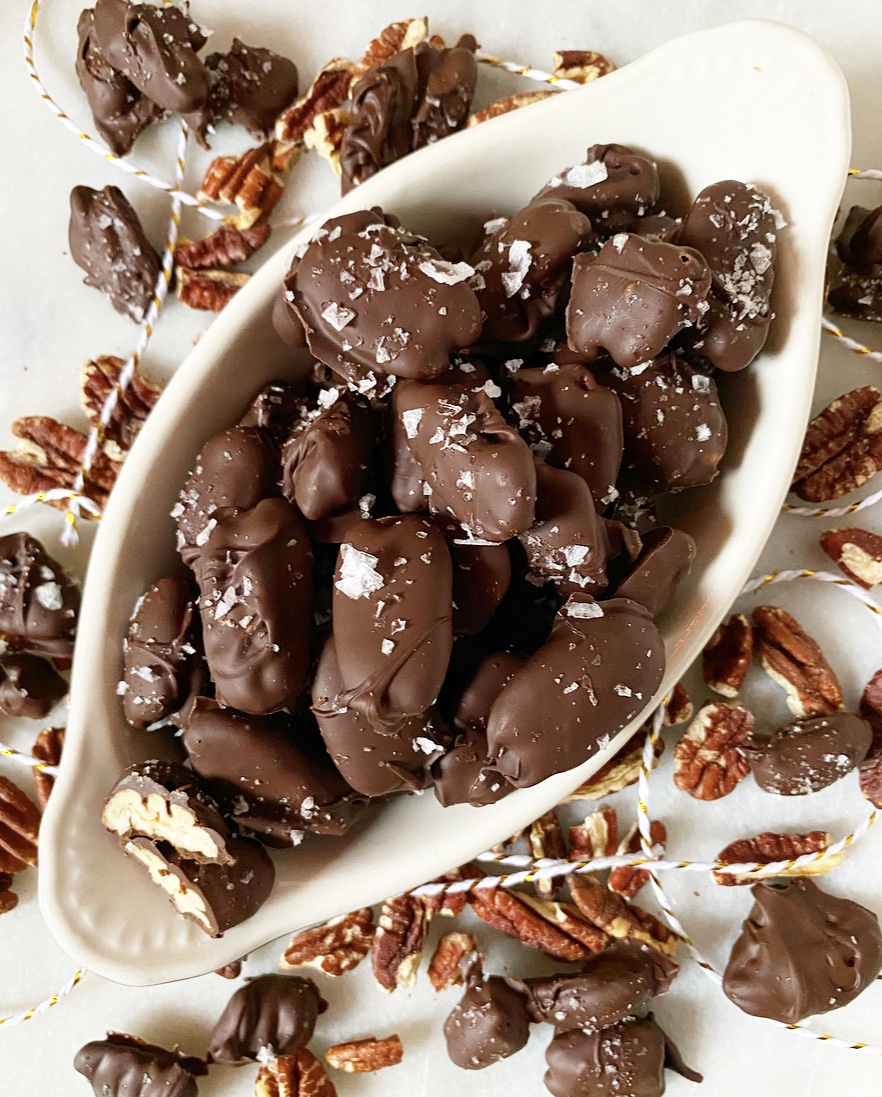 Chocolate-Covered Pecans have a
  Since my sisters and I all moved away, we’ve each been added to my dad’s chocolate-covered pecan Christmas list. It’s something I look forward to every year—my tin showing up a week or two before I fly home for the holiday break. Except, of course, that I’m not flying home this year. And for a brief moment, thanks to the notorious difficulties with shipping right now, I thought that my dad might have decided not to send chocolate-covered pecans in 2020.
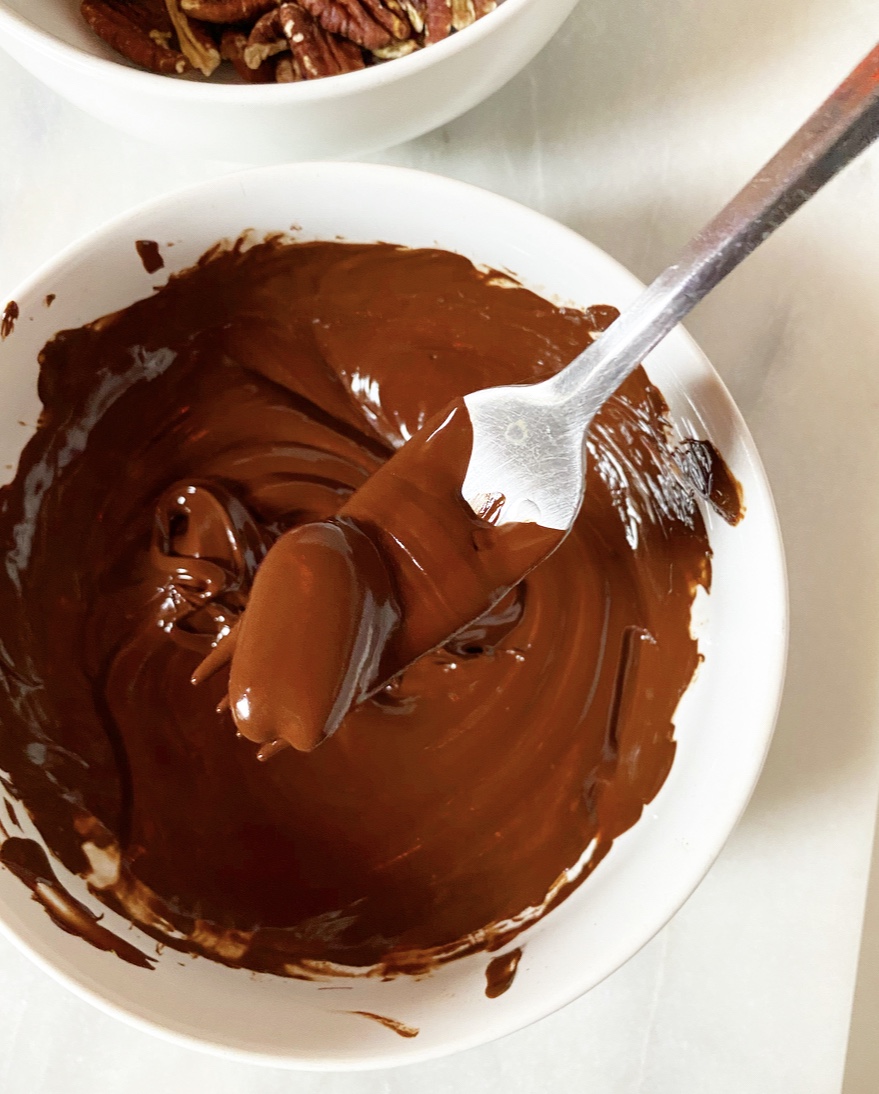 Thankfully that is not the case and my tin arrived on December 16th, but in that moment where I thought this tradition might be another casualty of 2020, I took the time to create my own recipe for Chocolate-Covered Pecans. I certainly wasn’t going to go without them. No way.
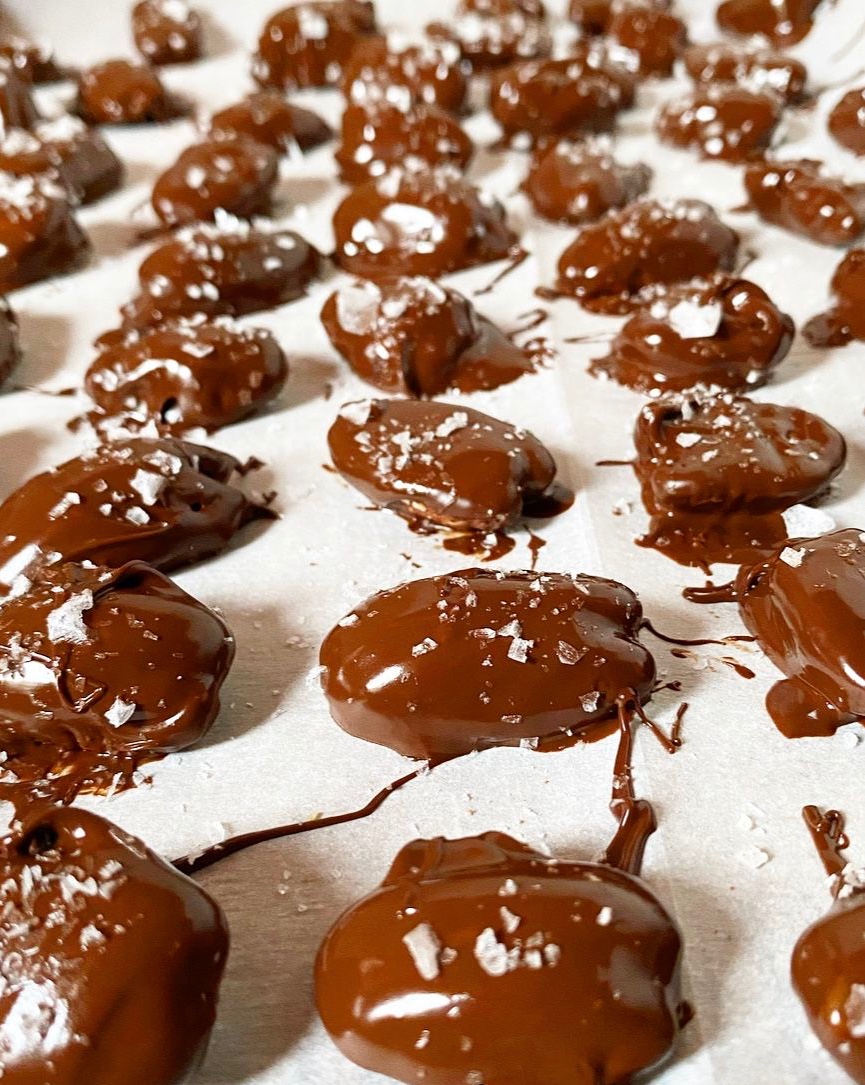 My Chocolate-Covered Pecans are the tiniest spin on my
  Merry Christmas! Happy Holidays! Whatever you do or don’t celebrate, I hope you find a way to enjoy the end of this challenging year. I’m taking Friday off for Christmas, but will be back next week with year-end round ups. Stay cozy, everyone.
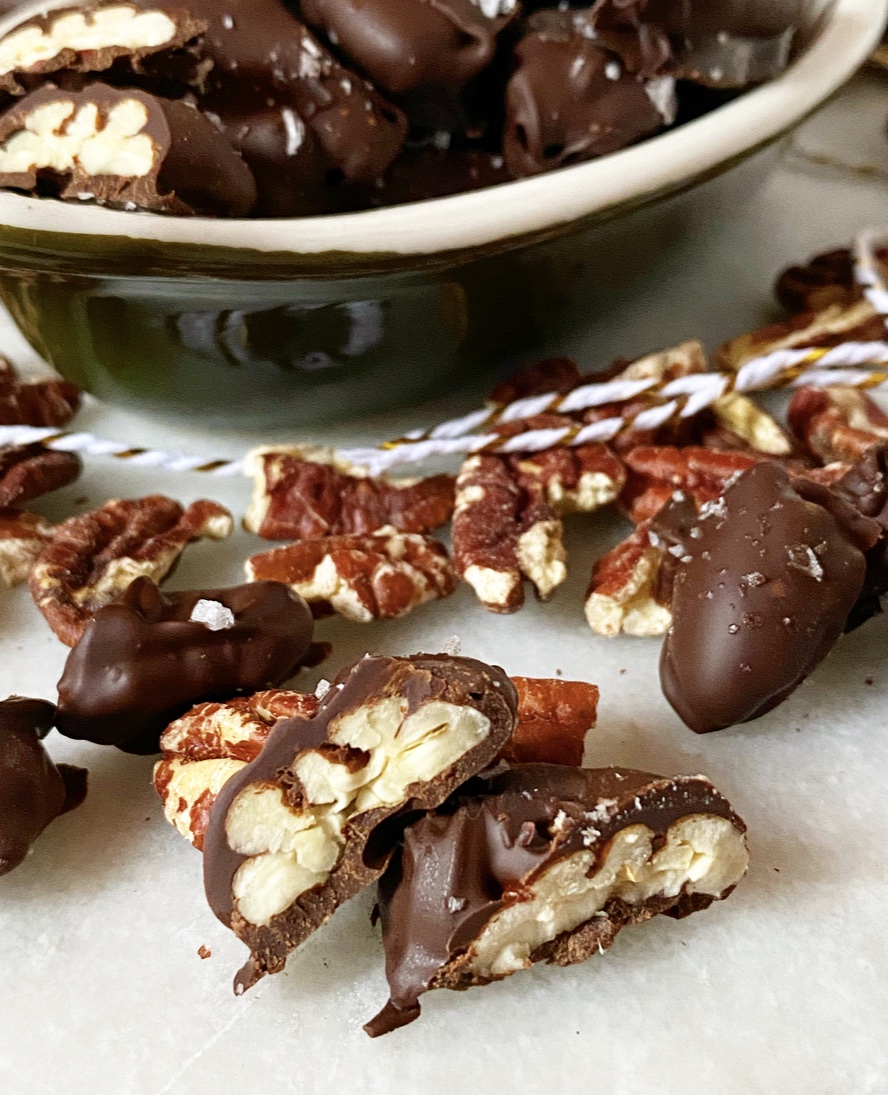

 Happy Christmas week! Happy Solstice! Happy almost the end of 2020!
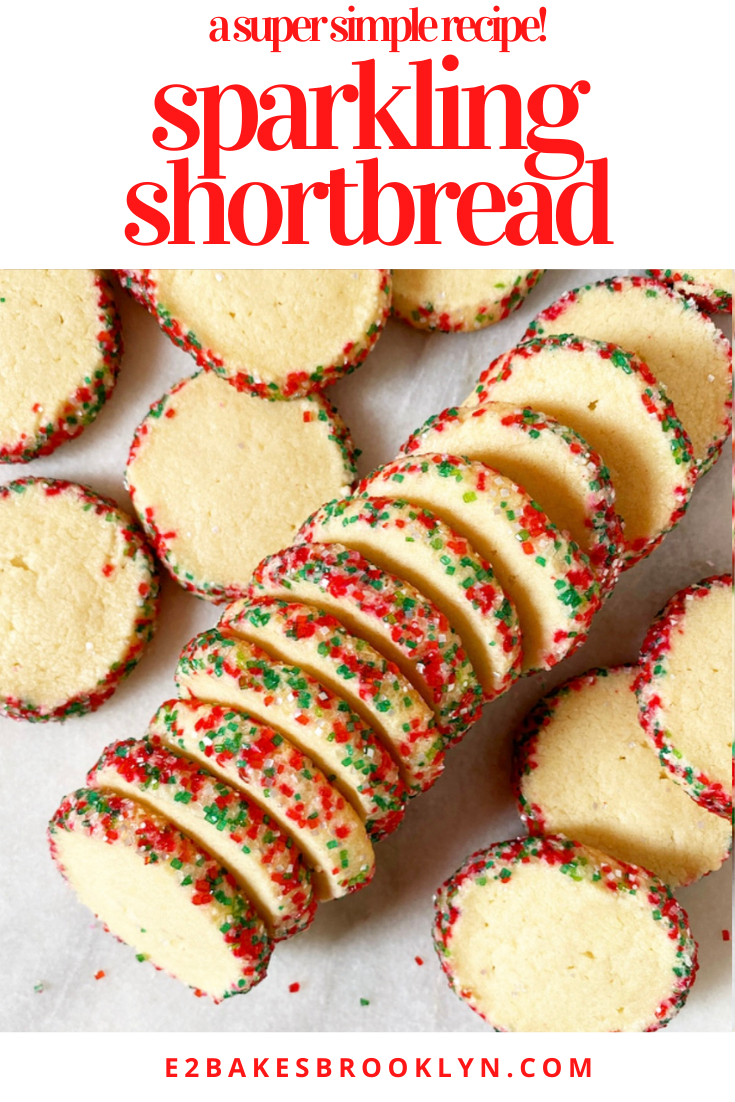
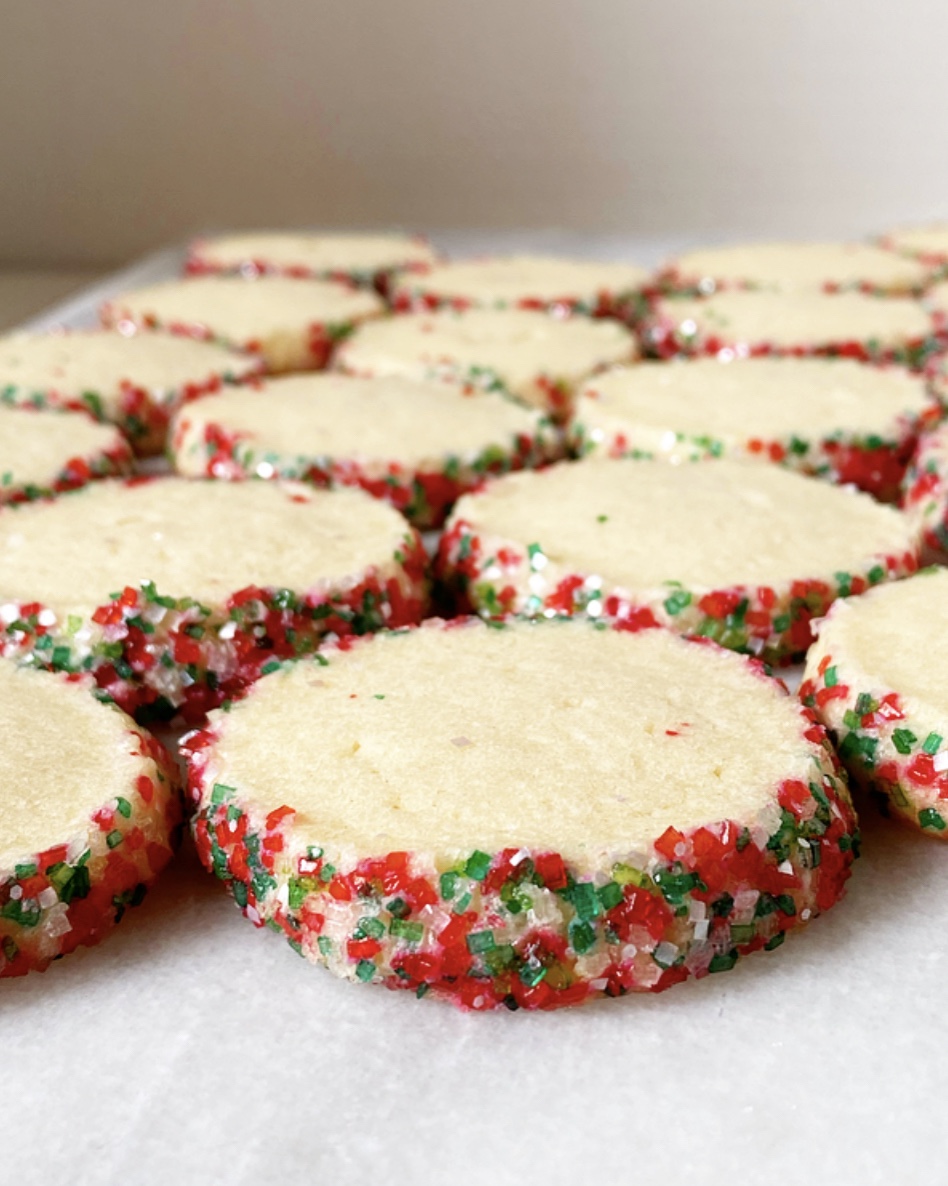
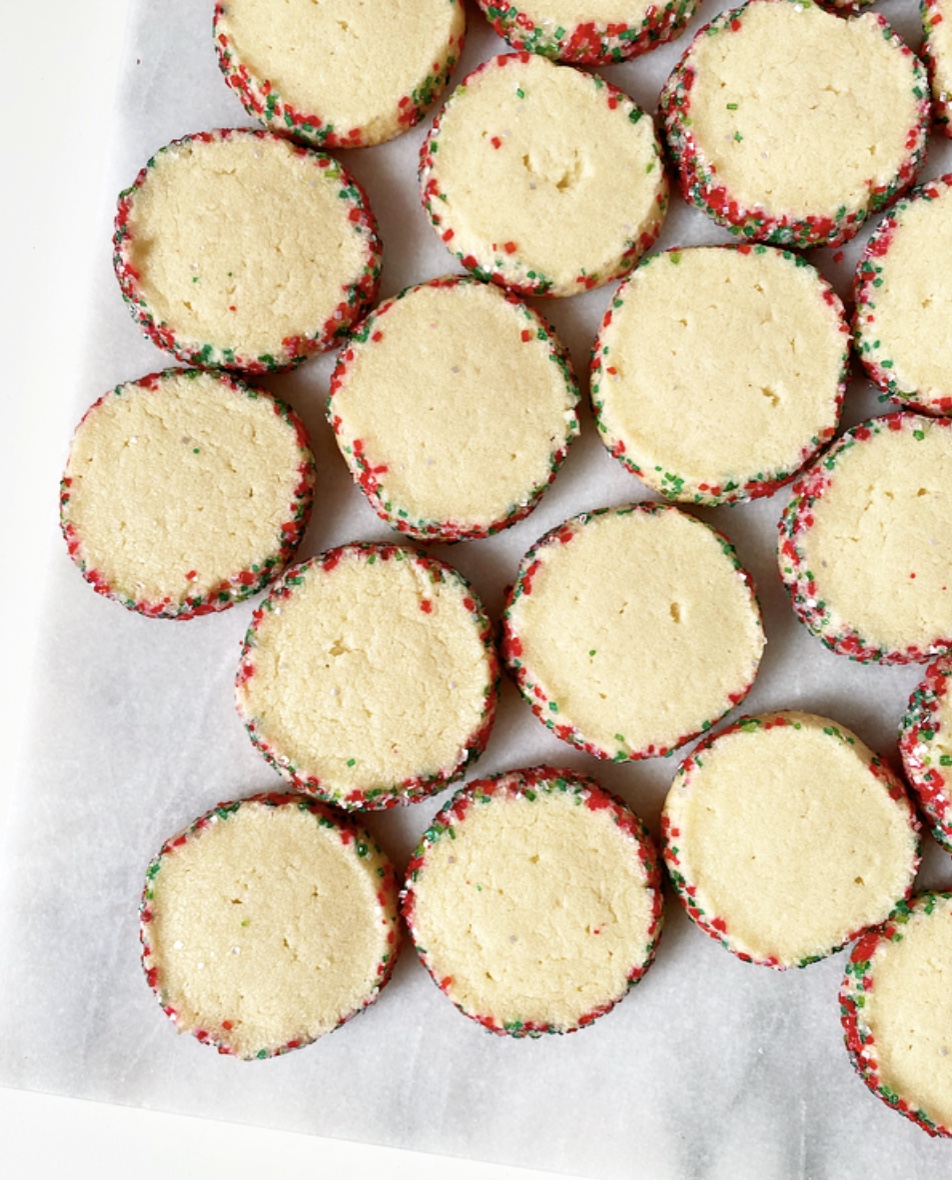 I’m coming at you on this winter Monday to give you one last cookie recipe before Christmas. Don’t worry, it’s super easy—just a slice & bake shortbread that’s been rolled in sparkling sugar so it looks *fancy.* And it is. But it’s also stupendously easy. I don’t know about you, but when it’s four days before Christmas, I only have time for things that are stupendously easy.
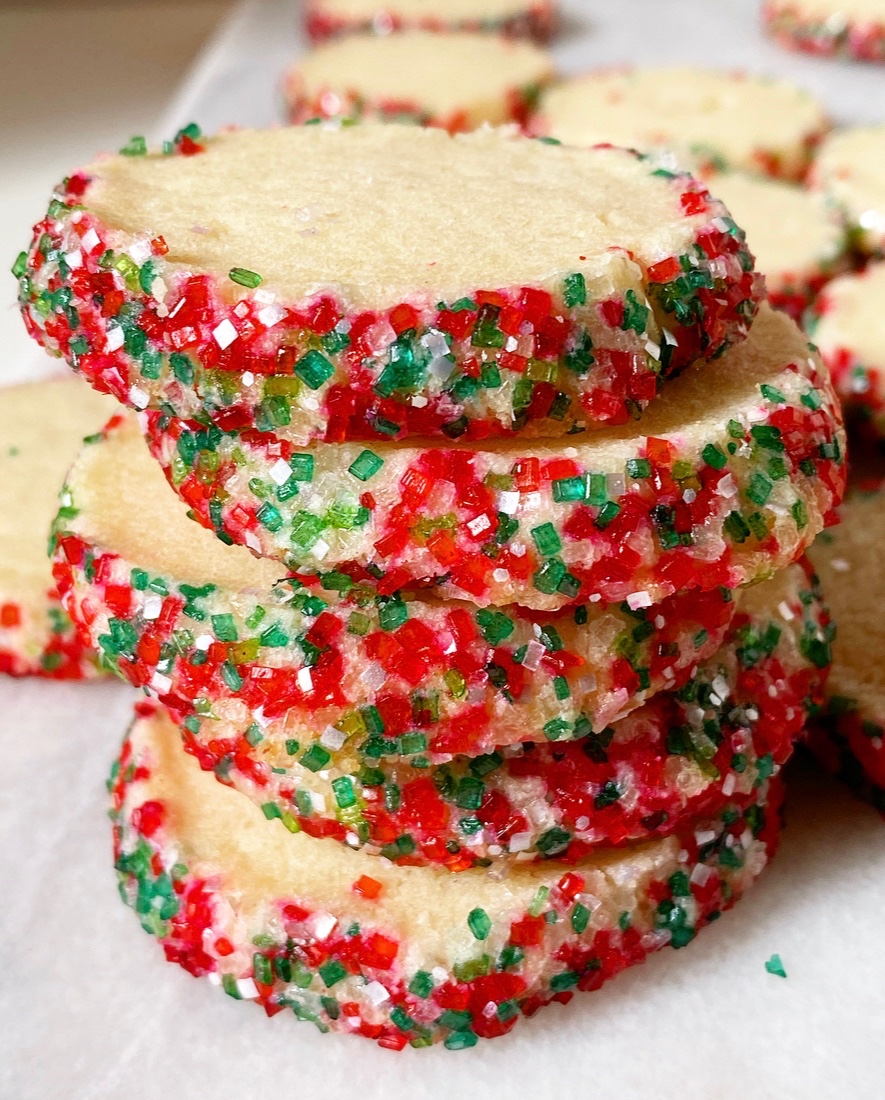 This dough is super rich and buttery, and comes together in 15 minutes. Once mixed, divide it in two and shape each half into a log. Don’t worry about perfect round shaping—you can fix flaws after an hour-long chill. It’s much easier to form smooth shapes when the dough isn’t so pliable.
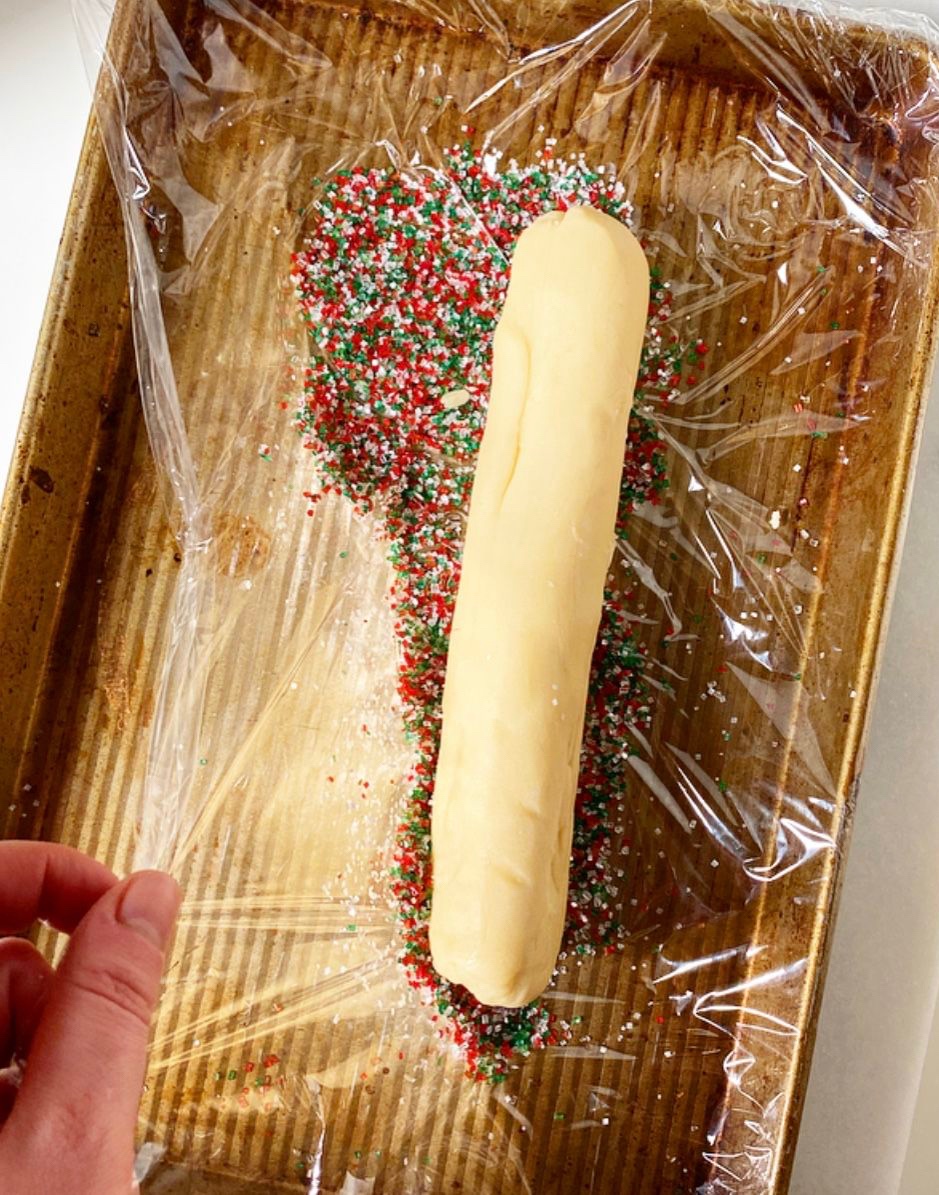
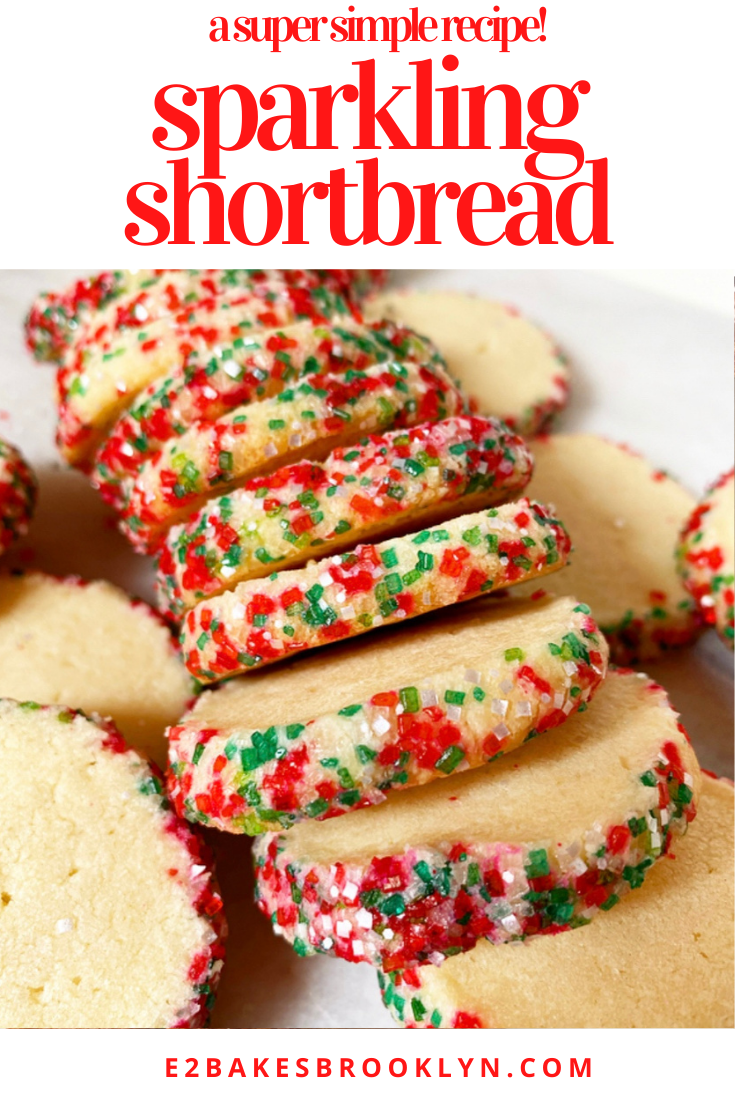
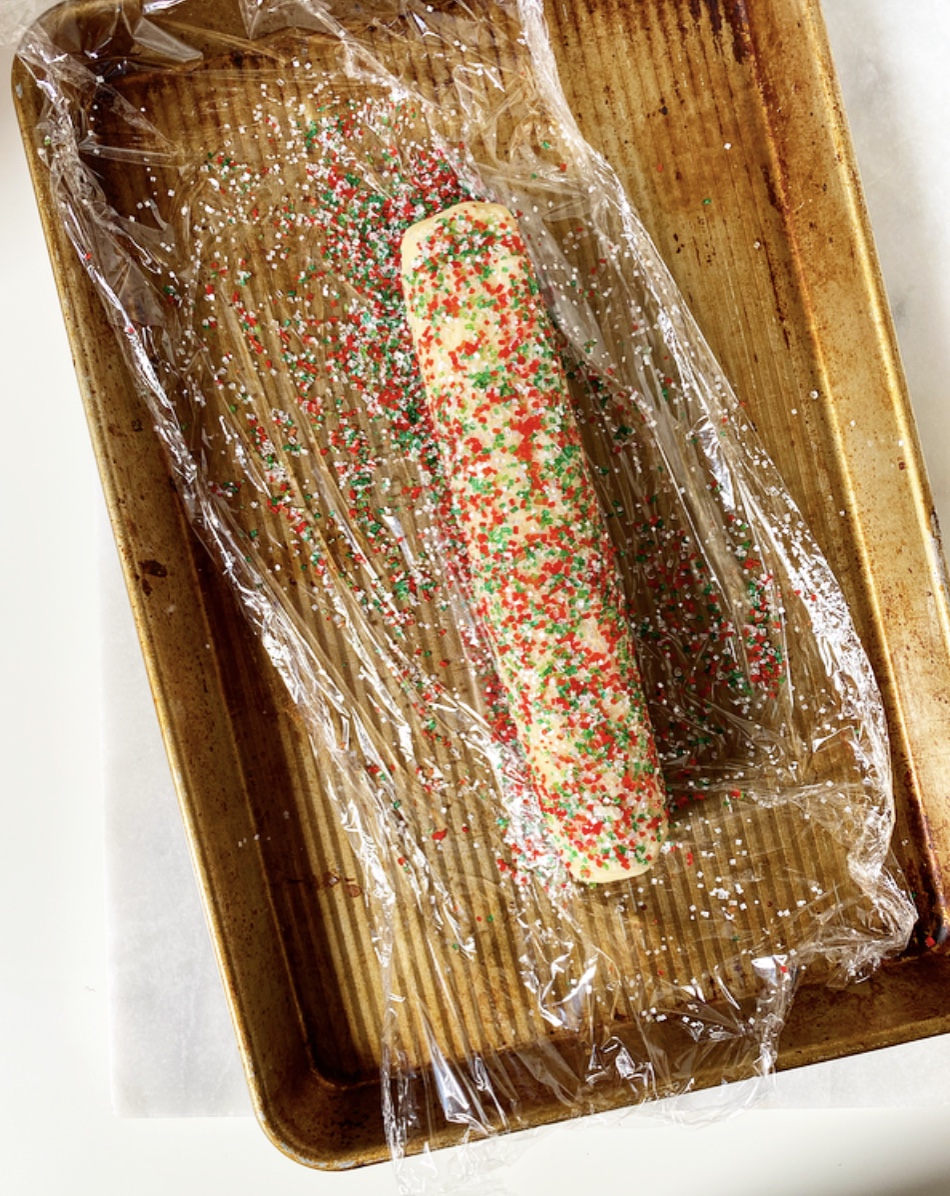 Next up, coat your shortbread in sparkling sugar! Working with one log at a time, give your shortbread a few rolls to even out any odd shaping. Then, roll them in a few tablespoons of festive sparkling sugar (this is the Mistletoe Blend from
 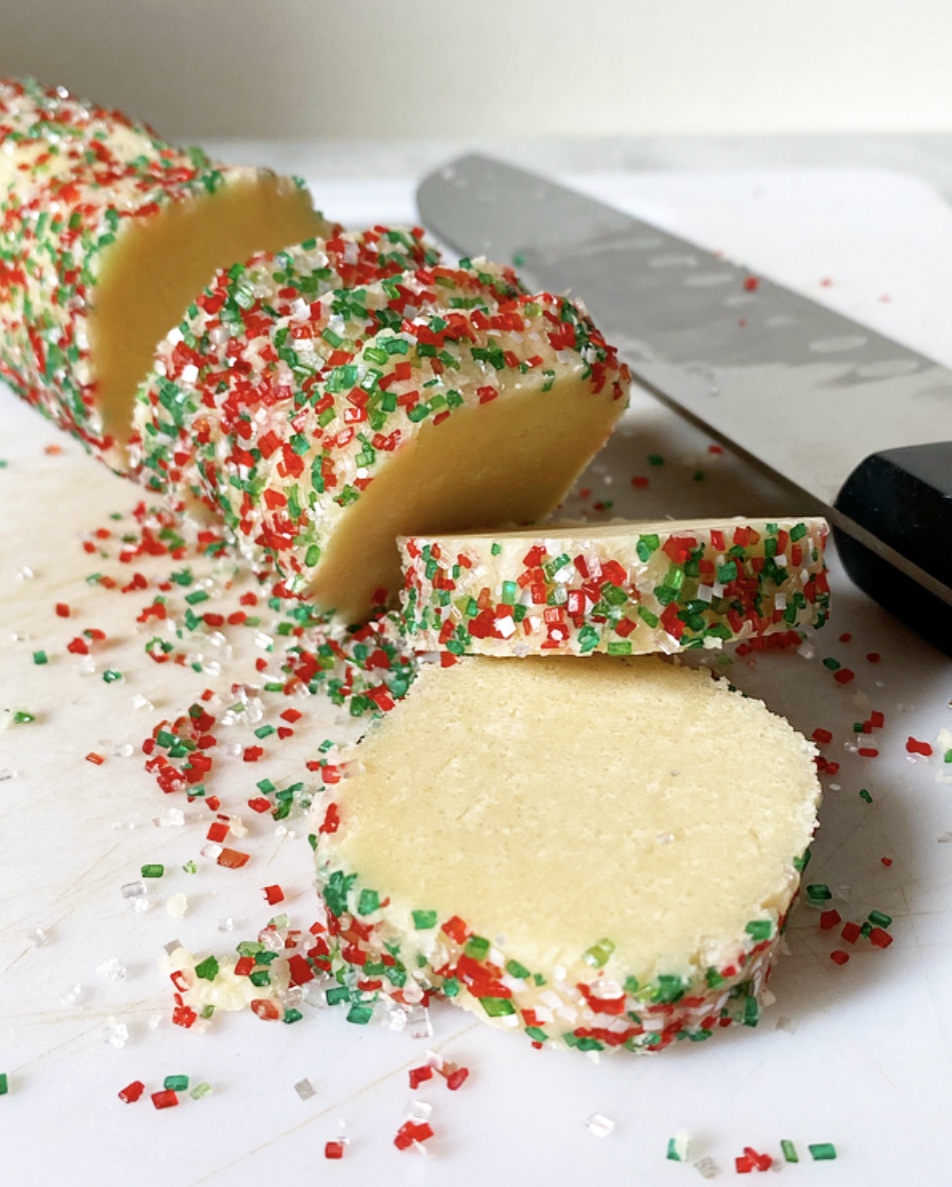 After coating, the shortbread will need another hour chill. I know—I know!—two chills are too many, but they are easily the most annoying part of this recipe. One upside, however, is that this means you can make the Sparkling Shortbread dough days in advance and then slice & bake when you have time.
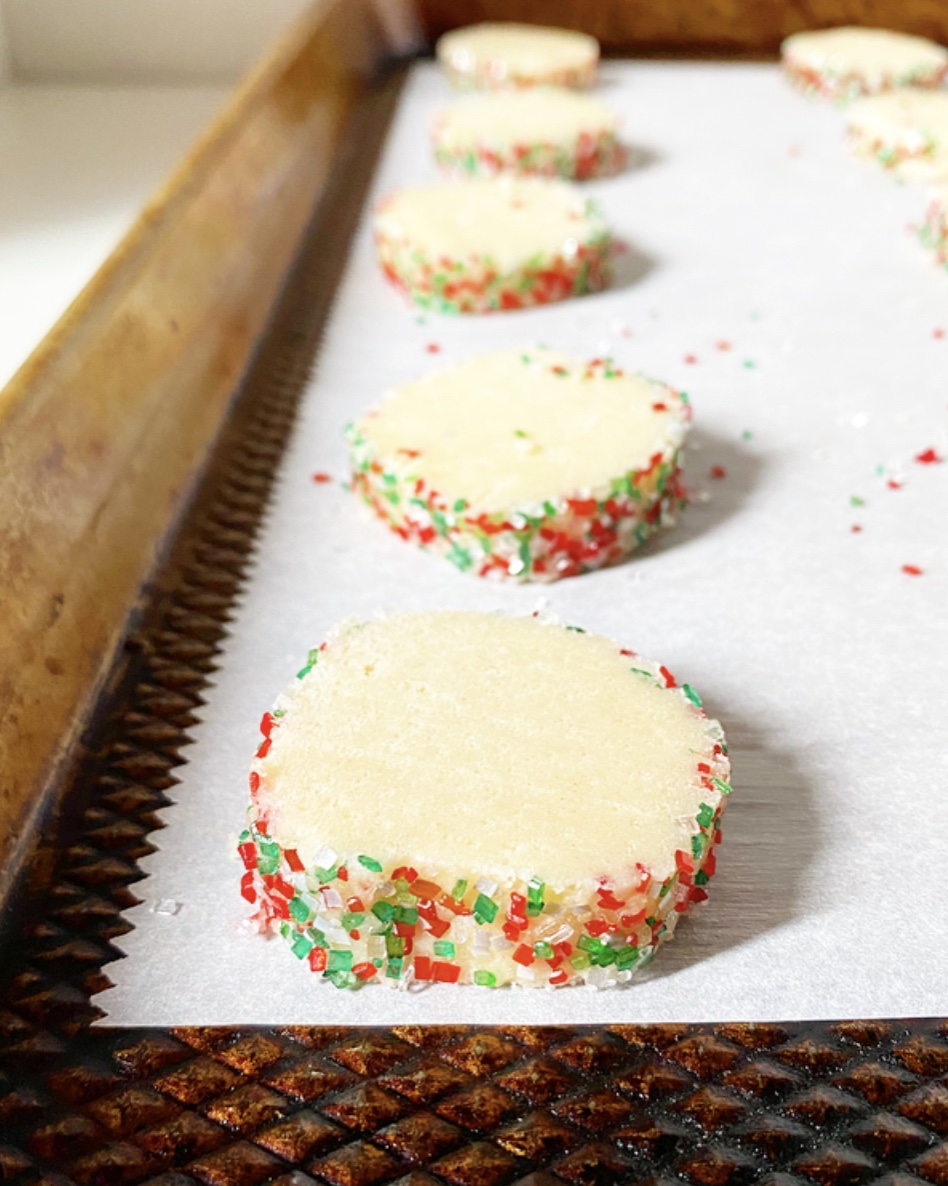
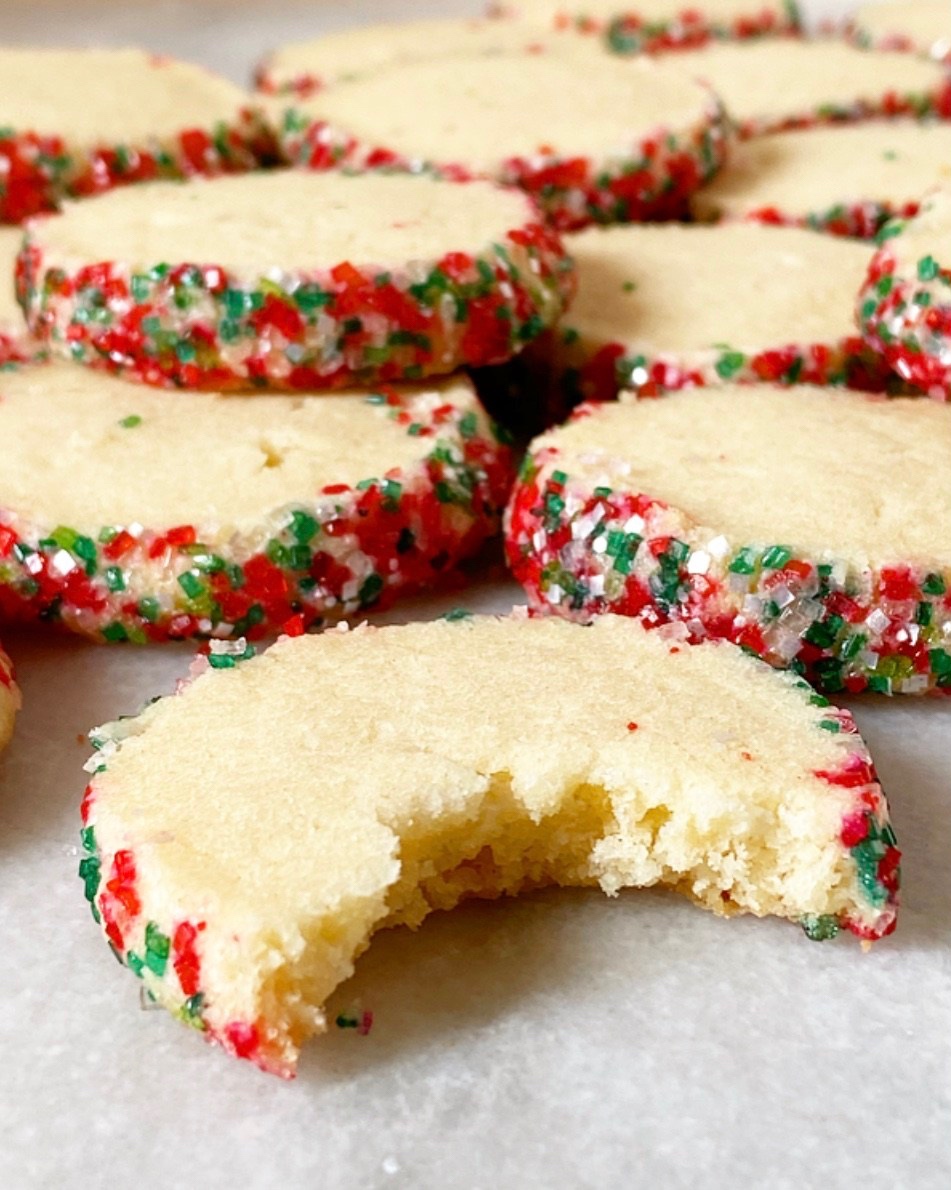
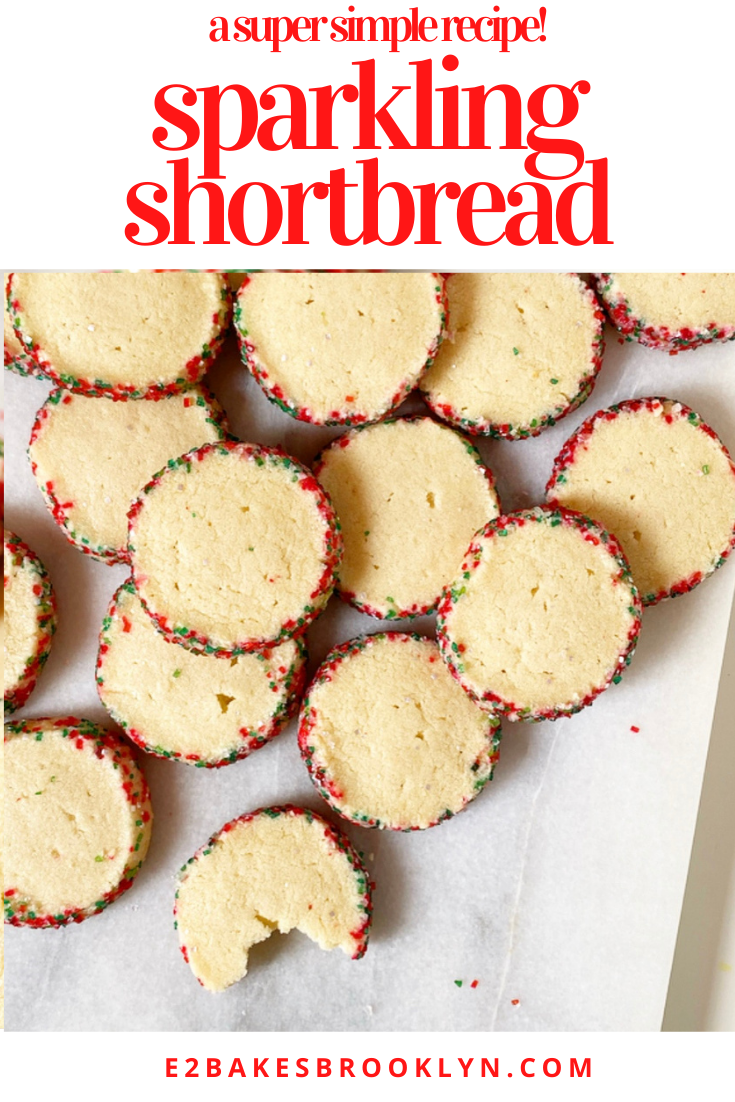
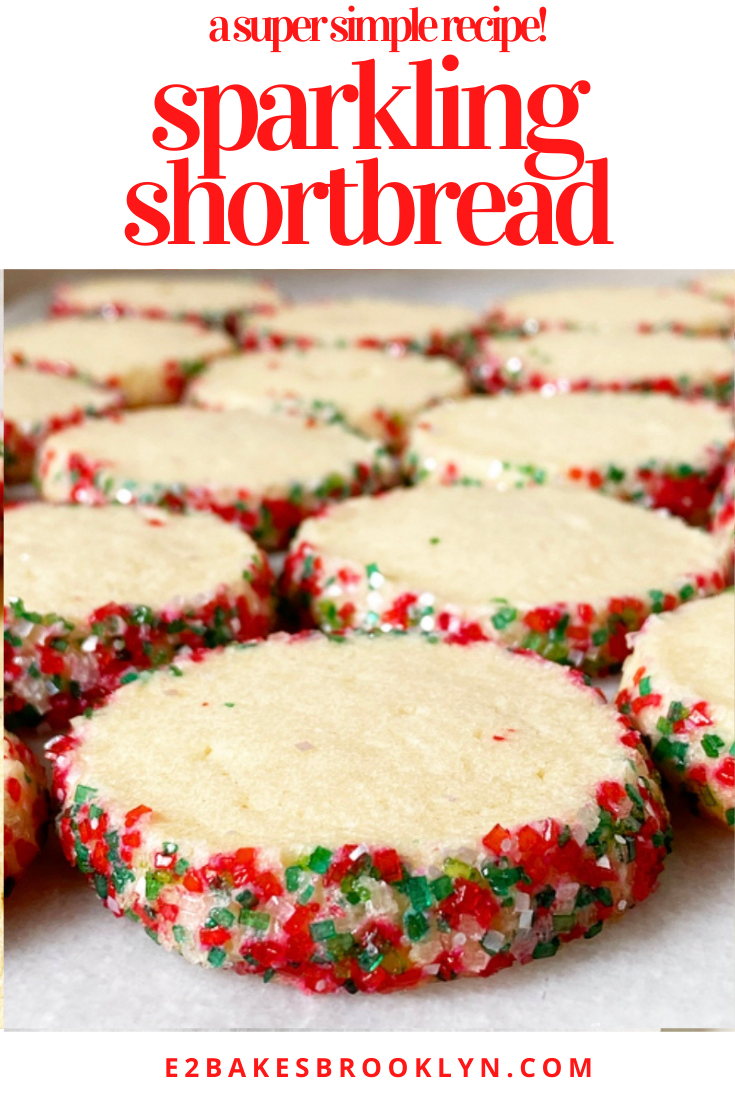
 When it’s time to bake, slice the dough in 1/4-inch rounds and bake for 20 minutes at 300F, so they’re fully done but not brown. Despite not containing any leaveners, these cookies will puff and spread (but not too much).
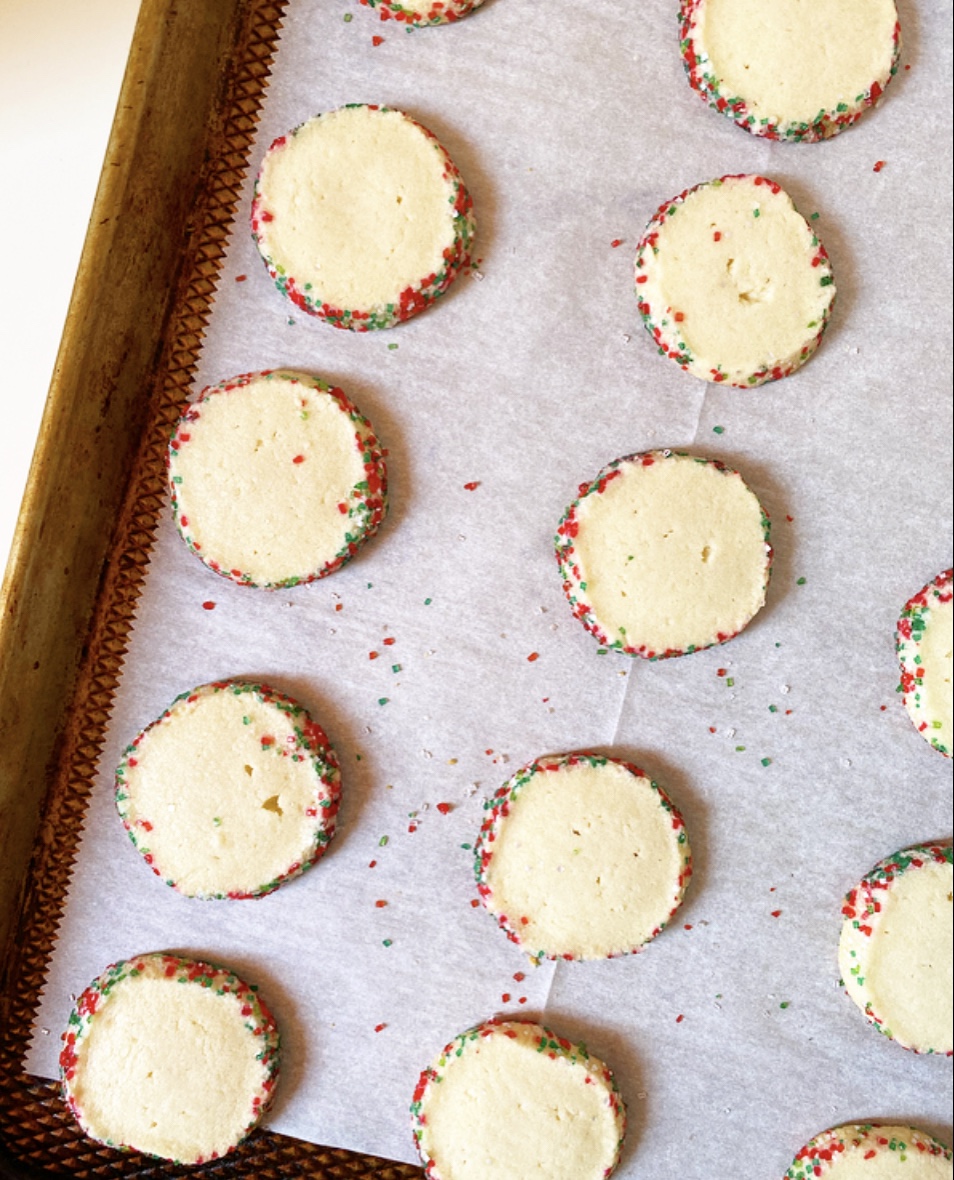
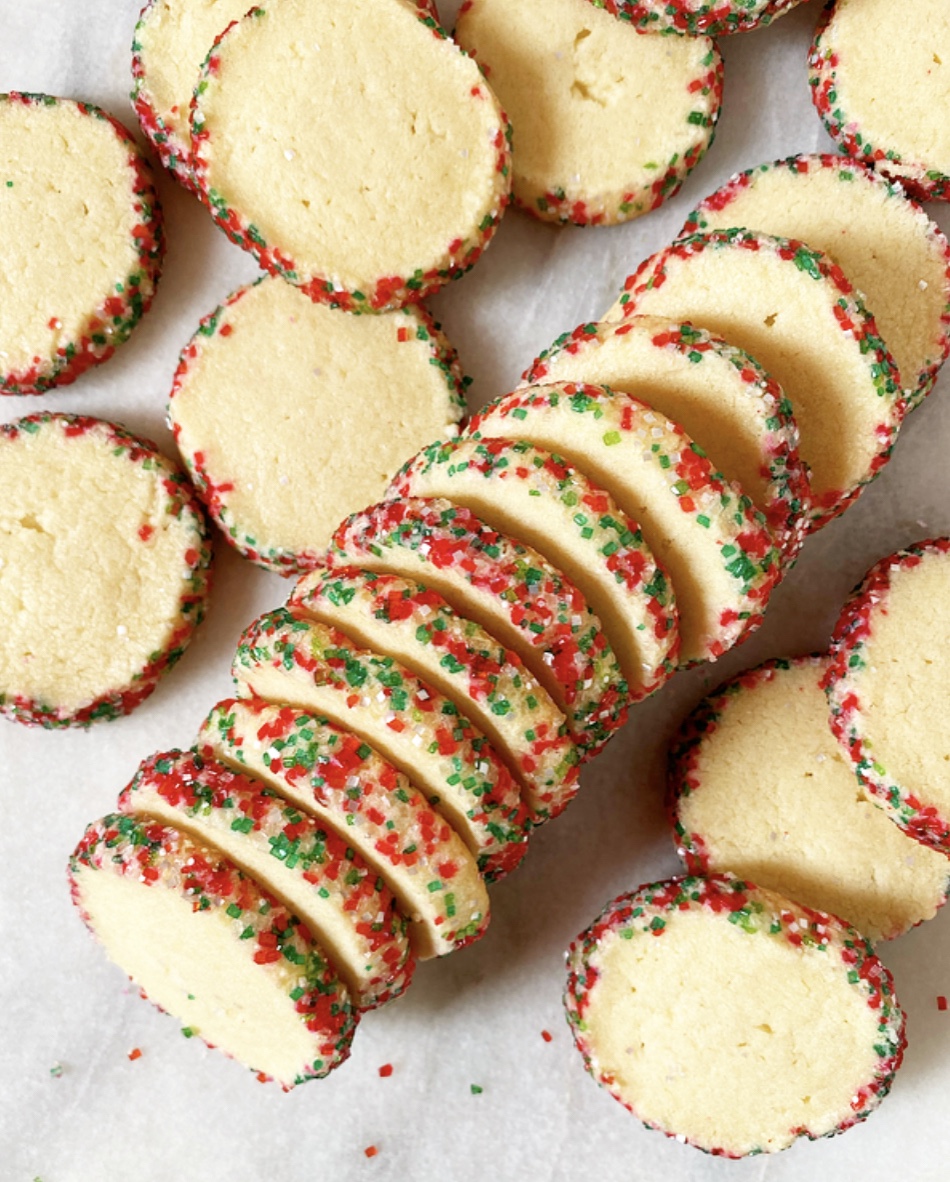 Once the shortbread are baked and cooled…well, that’s it! Time to eat. Sparkling Shortbread are crisp and buttery with a little extra crunch and zazz from their sugared edges. Truly, they’re so simple and stunning that I don’t know why you’d bother to make any other cookies this close to Christmas. Keep a few for yourself, drop a few off with a friend and leave a few for Santa. Everybody needs a little sparkle right now.
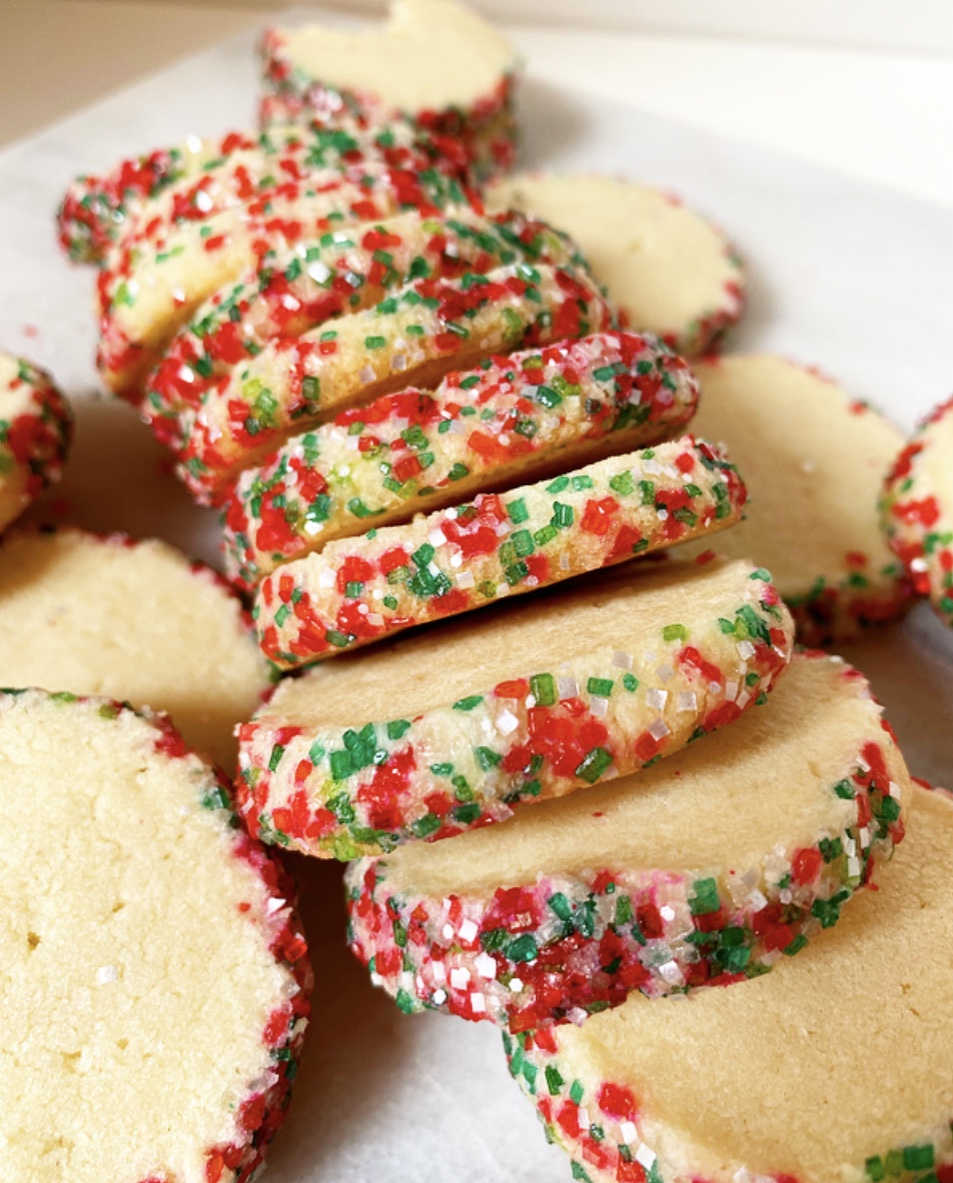 There’s only one more E2 Bakes recipe left this year, and it’s coming up Wednesday! Any guesses???