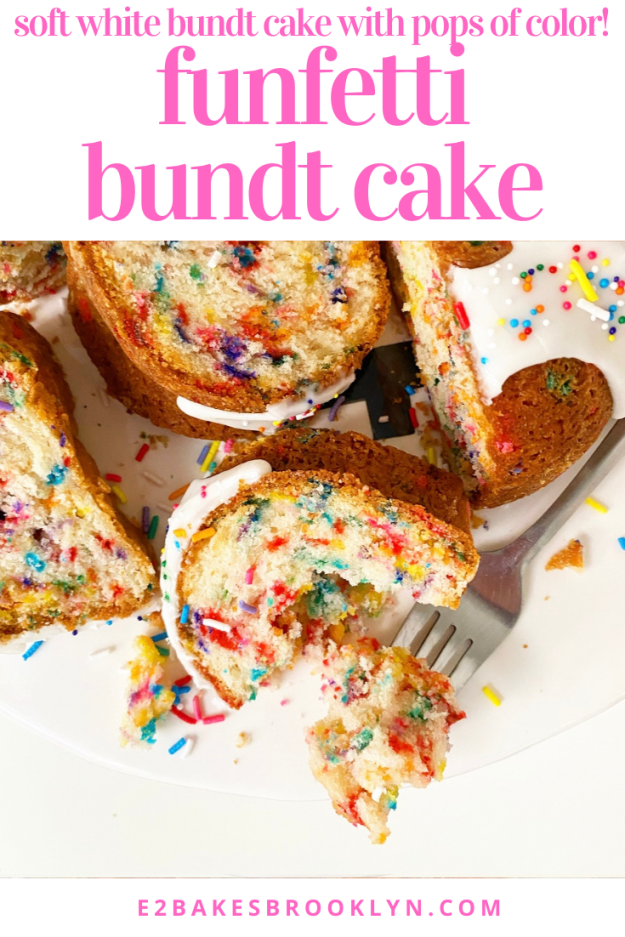
Funfetti, confetti, whatever you want to call it, white cake dotted with rainbow sprinkles is one of my favorite things on earth. Like, I logically know that sprinkles don’t qualify as a flavor, but that won’t keep me from saying that sprinkles are my favorite flavor. Seriously, add sprinkles to pretty much anything and I’ll love it. Those little pops of color are just so…happy. Is happiness a flavor?
 I haven’t made many layer cakes in the last year—it’s hard to believe I used to make 10-20 a month!—but that doesn’t mean I haven’t fed my craving for rainbow sprinkles. Last summer’s Funfetti Cookie Cupcakes are one of my favorite recipes in a long time, as is this Funfetti Bundt Cake.
 Like the traditional layer cake, this is a moist sour cream white cake positively loaded with rainbow sprinkles. Unlike the traditional cake, this batter takes exactly four minutes to mix; just dump everything in a bowl and let your electric mixer have at it until it’s impossibly smooth, thick and voluminous, then stir in 3/4 cup of rainbow sprinkles before baking.
Like most bundt cakes, this one takes its sweet time to bake and cool, but I promise your patience will be rewarded. Once your cake hits room temperature, pour on a glaze, scatter on some more sprinkles and slice it up! Funfetti Bundt Cake would be great for birthdays, picnics, holidays or any old time.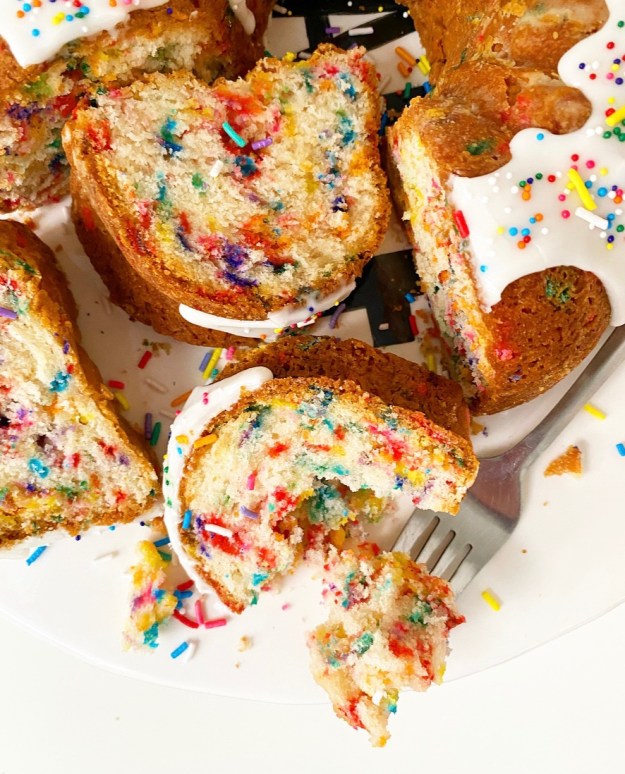 I know that restrictions are starting to loosen as vaccines becomes more available, but if you’re not attending gatherings that require a cake of this size, don’t worry, I’m not either. What that means is that I happen to know that this recipe halves well and can be baked in a loaf pan for your immediate pod or just yourself. I don’t know about you, but dipping into my own personal Funfetti cake over the course of a week sounds a lot like happiness to me.
Funfetti Bundt Cake
makes one 10-cup capacity bundt*
Cake:
2 3/4 cups all-purpose flour
2 cups granulated sugar
2 1/2 teaspoons baking powder
1/2 teaspoon Kosher or sea salt
1 cup (2 sticks) unsalted butter, room temperature, cut into 16 pieces
4 large egg whites, room temperature
1 tablespoon pure vanilla extract
1/4 teaspoon pure almond extract or imitation butter extract (optional)
3/4 cup full-fat sour cream, room temperature
1/4 cup whole milk, room temperature
3/4 cup rainbow sprinkles (jimmies, not nonpareils)
Icing & Garnish:
1 1/2 cups confectioner’s sugar
2 tablespoons whole milk
1/2 teaspoon pure vanilla extract
pinch of Kosher or sea salt
rainbow sprinkles (jimmies or nonpareils)
Place an oven rack in the center position. Preheat oven to 325F. Heavily grease a bundt pan with softened butter (or shortening) and dust well with flour. Set aside.
Make the cake. Combine flour, sugar, baking powder, salt, butter, egg whites, vanilla, almond extract, sour cream and milk in a large mixing bowl. Use an electric mixer to mix on low for 30 seconds. Increase speed to medium and mix for 3 minutes. Batter will be thick. Use a silicone spatula or wooden spoon to fold rainbow sprinkles into batter.
Transfer batter to prepared pan and smooth the top with a silicone spatula or wooden spoon. Tap full pan on the counter five times to release any large air bubbles. Bake 65-75 minutes, or until a toothpick inserted in several places comes out clean.
Let cake cool in the pan for 15 minutes. Run a thin, flexible knife around all exposed edges. Invert cake onto a cooling rack and let cake cool completely. Cake may be made up to a day in advance; it will keep double-wrapped in plastic wrap.
Make the icing. In a small bowl, use a fork to whisk together confectioners sugar, milk, vanilla and salt. Mixture should be very thick, but pourable. If it’s too thick, add more milk by the teaspoon up to 3 teaspoons (1 tablespoon); if it’s too thin, add more confectioners sugar in 2 tablespoon increments. Pour over cake. Scatter rainbow sprinkles on immediately. Let sit for 20 minutes to set. Move cake to a serving plate before slicing and serving.
Leftover cake will keep covered at room temperature for up to two days or in the refrigerator for up to five.
Note:
This recipe may be halved and baked in a parchment-lined 9×5-inch loaf pan. Start checking the cake for doneness at the 55 minute mark.

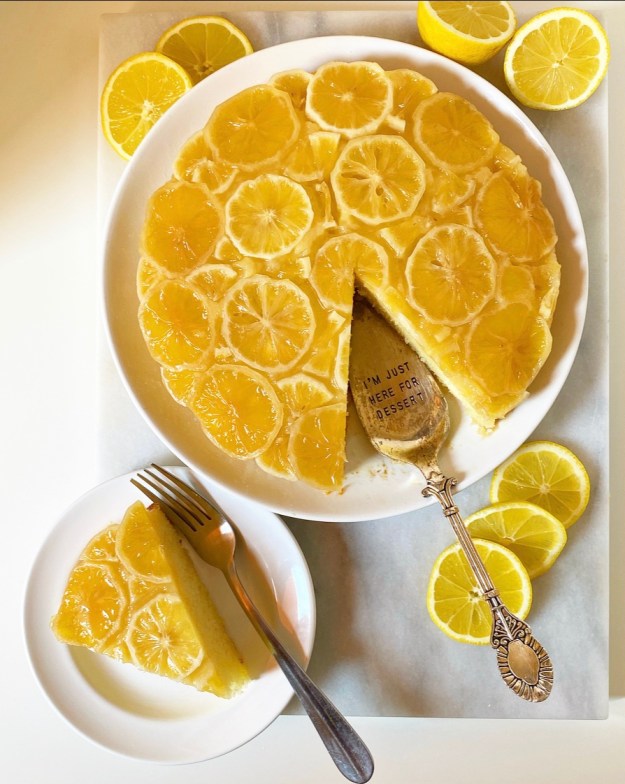 If you love a real mouth-puckering punch of lemon, this Sunny Lemon Upside-Down Cake is for you. We’re talking buttery lemon cake topped with a sticky mosaic of sliced lemons—all the lemon flavor you could ever want. It’s sunny and happy-looking enough to drive any late-winter blues away, at least for the two minutes it takes to eat a slice!
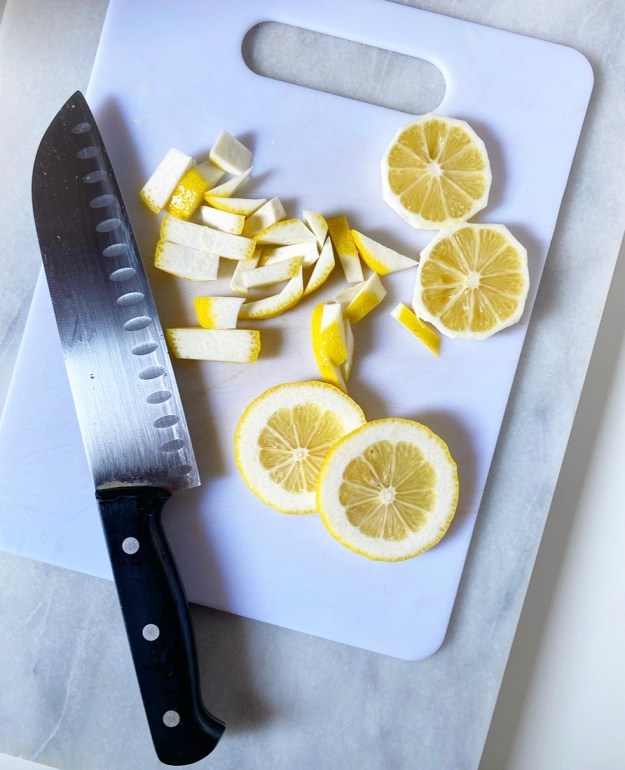
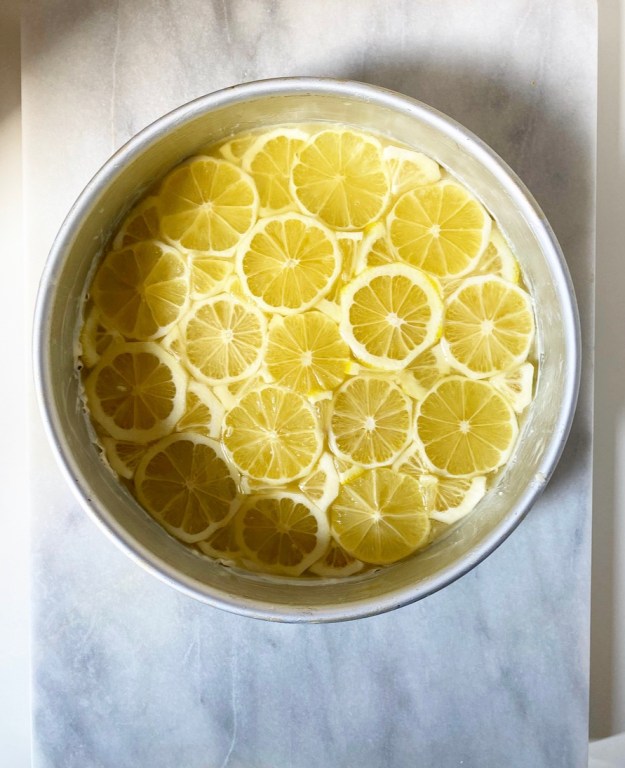 All my previous
  Once your lemon mosaic is assembled, bury it in thick lemon cake batter; this recipe is my go-to vanilla cake with some lemony flair. The cake will need nearly an hour to bake. Don’t be alarmed when when you pull it from the oven and it looks like a nightmare—there’s a reason this cake is served upside down!
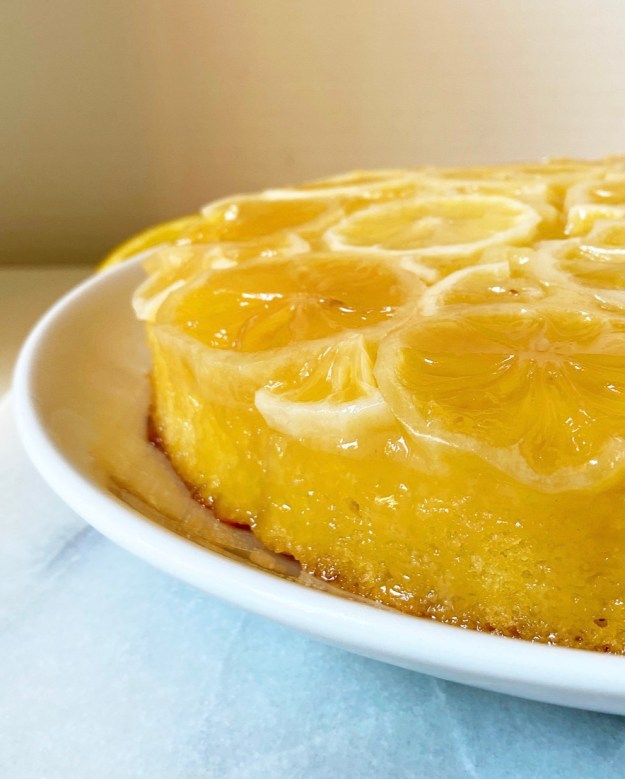 Another way this cake is different from my other
 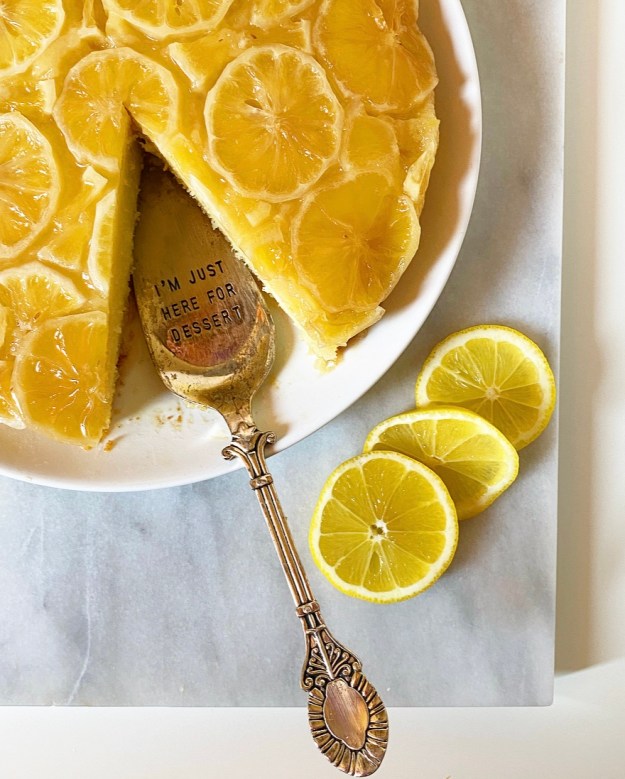 Once your cake is on a plate, all that’s left to do is slice through the top with a serrated knife, grab a fork and enjoy this dessert which, like it’s name suggests, both looks and tastes like a ray of sunshine. I, for one, can’t see or taste it without smiling.
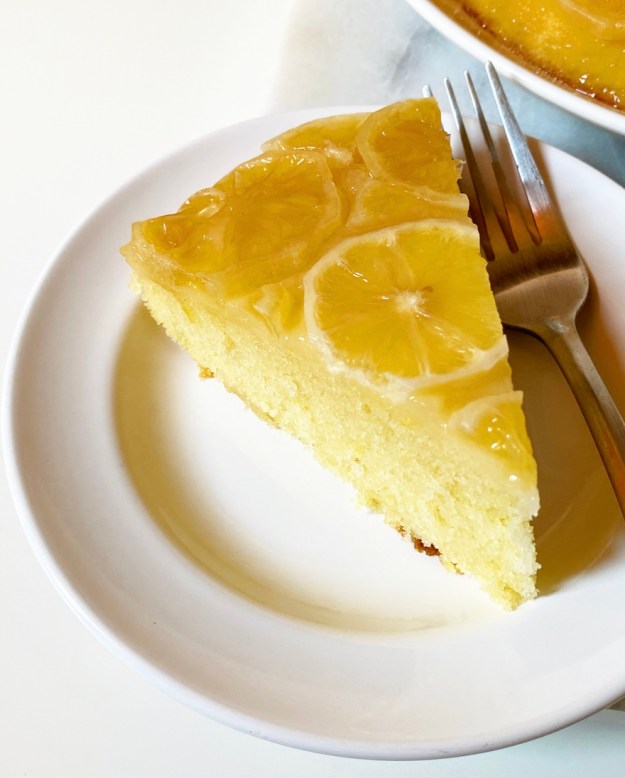
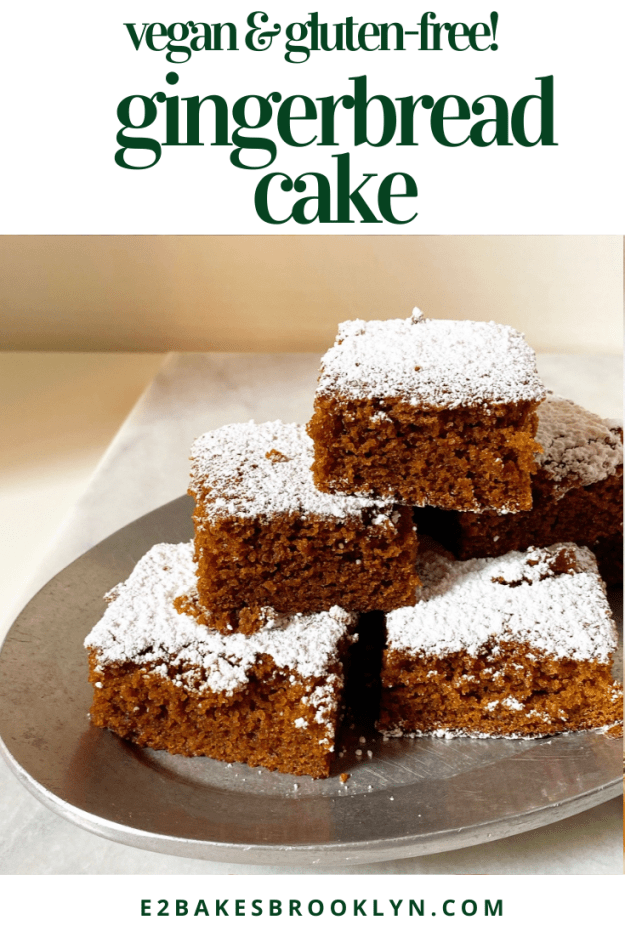
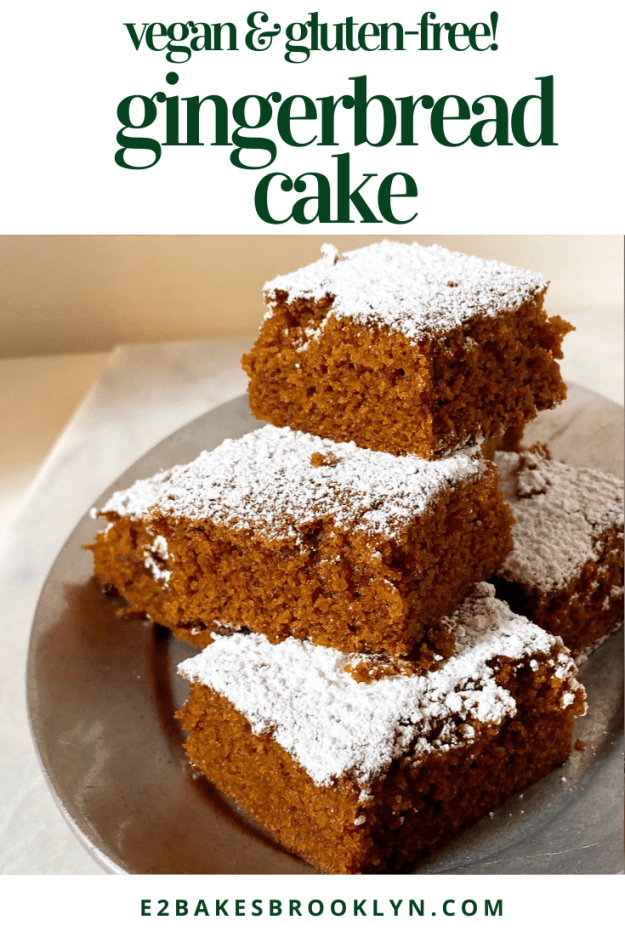
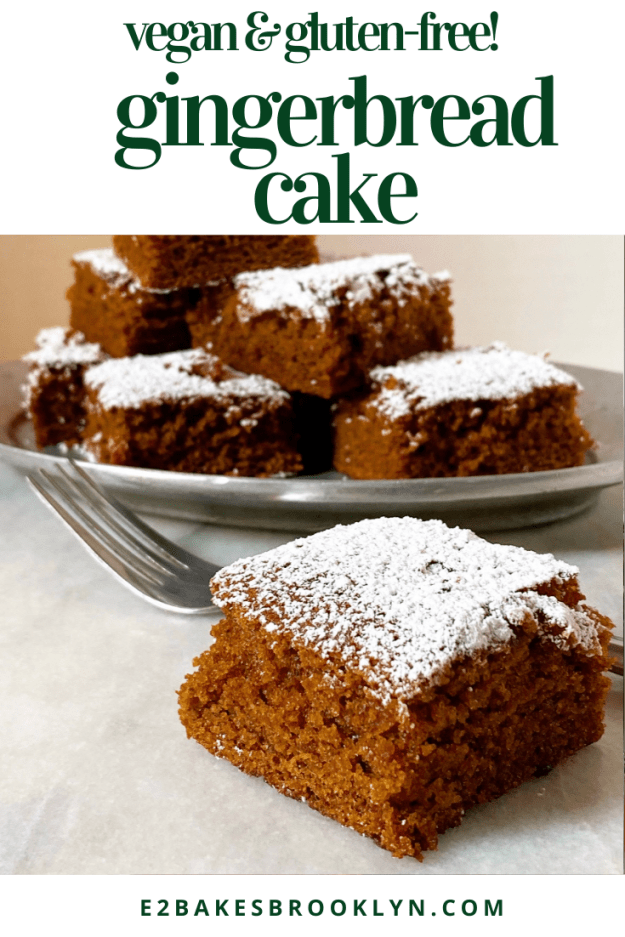
 My friend, VJ, loves gingerbread. Loves it. She speaks often about how before she had to stop eating gluten and went vegan, her grandma used to serve hers with canned peaches and whipped cream. While I am not much for canned peaches, the
  Over the years, VJ has asked me to make gingerbread cakes for various milestones and occasions, but I have mostly failed. I even failed this past Thanksgiving! Too greasy, too dry, vaguely tarry, completely flavorless—I’ve made all the gingerbread cake failures under the sun. Let’s not discuss the occasion on which she had to serve store-bought ice cream cakes (that she couldn’t even eat!) at her own party because my attempt at this cake was so vile.
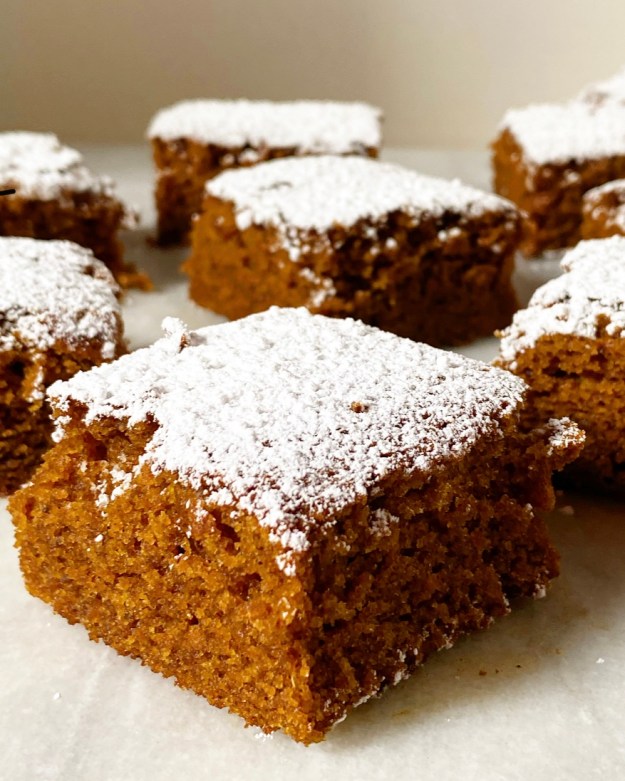 It’s not just because I like to have a gluten-free vegan item on my holiday line-up every year (which I do). It’s that VJ’s 40th birthday is next week—you know I can’t let my favorite gluten-free vegan’s milestone birthday pass without cake. No way. Not rain, nor sleet, nor masked and distanced delivery will stop me from getting this cake to her on December 23rd.
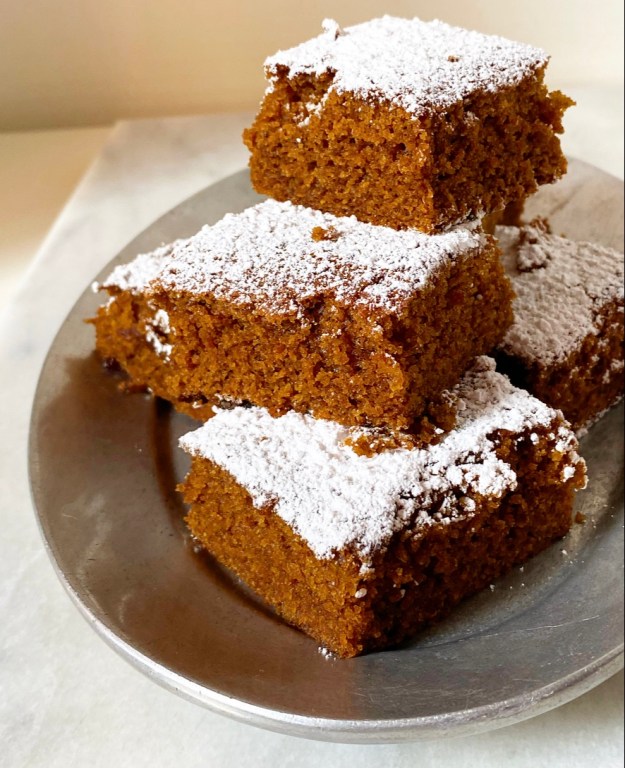 Holy crap, y’all, this is good. Super moist with nothing to distract from its deep dark flavor, it’s better than most traditional flour, egg and dairy-based gingerbreads I’ve had. It’s definitely not better than VJ’s grandma’s though, because nothing is ever better than grandma’s. Believe me, I’ve tried to out-do grandmas and it never goes well. But anyway…
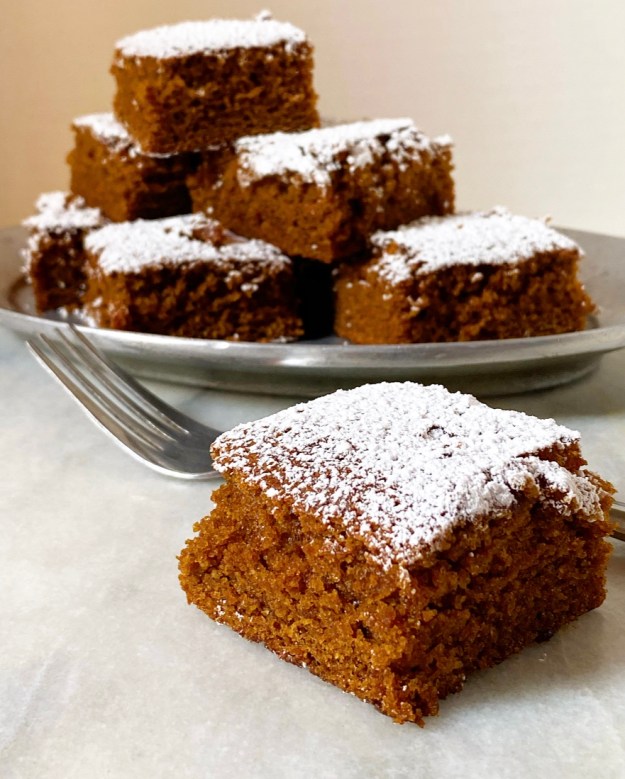
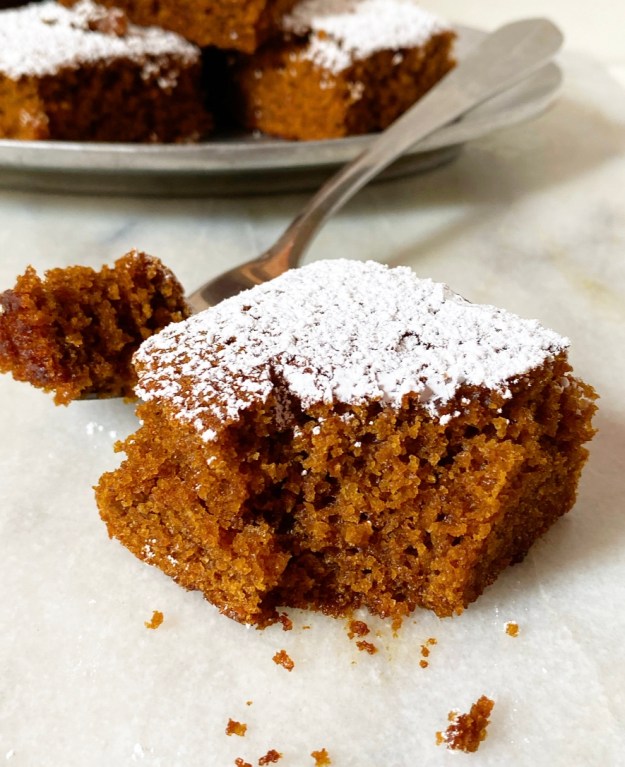 This Gingerbread Cake tows the line somewhere between holiday dessert and wintry everyday cake. It doesn’t need a blanket of frosting (although I think a little vegan
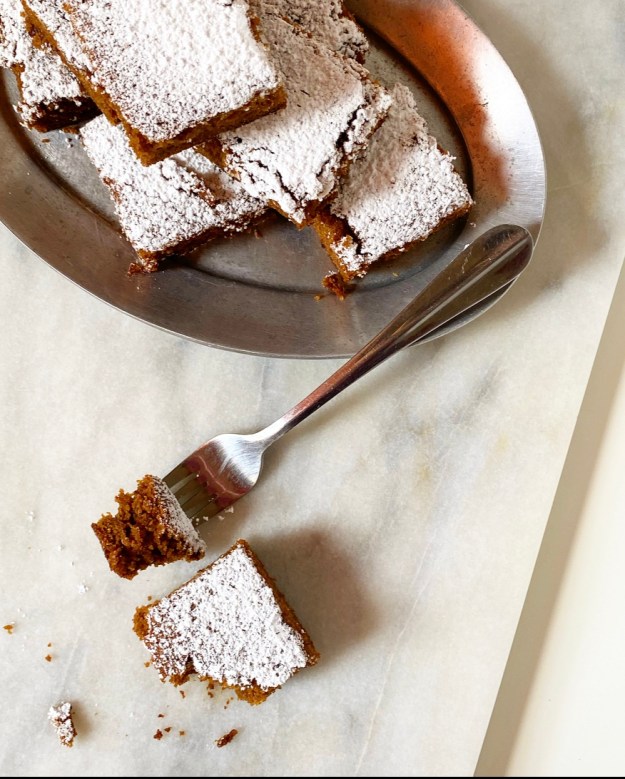
 I have a long history of hating
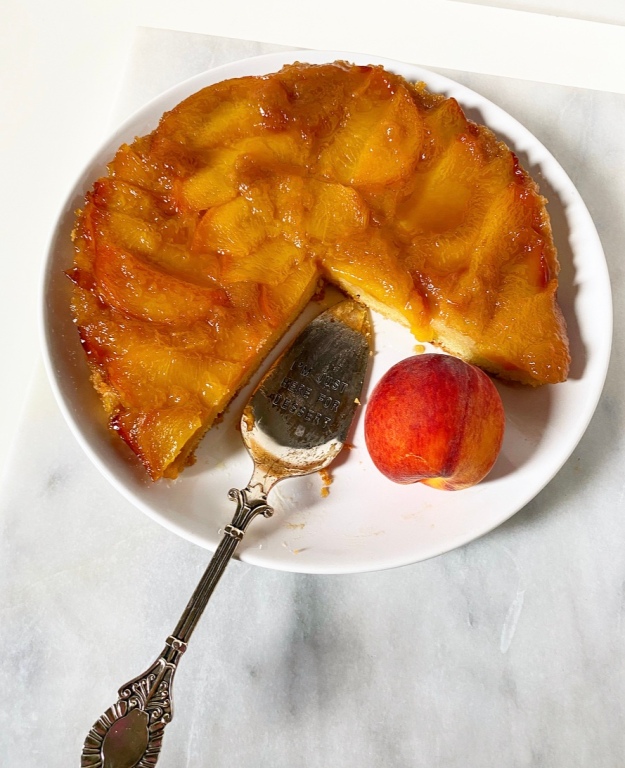
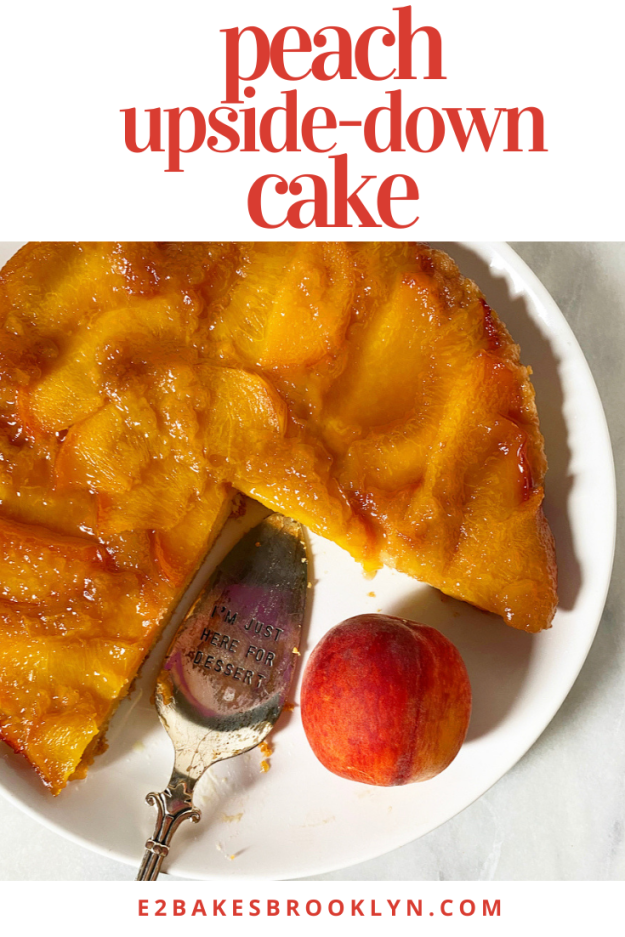
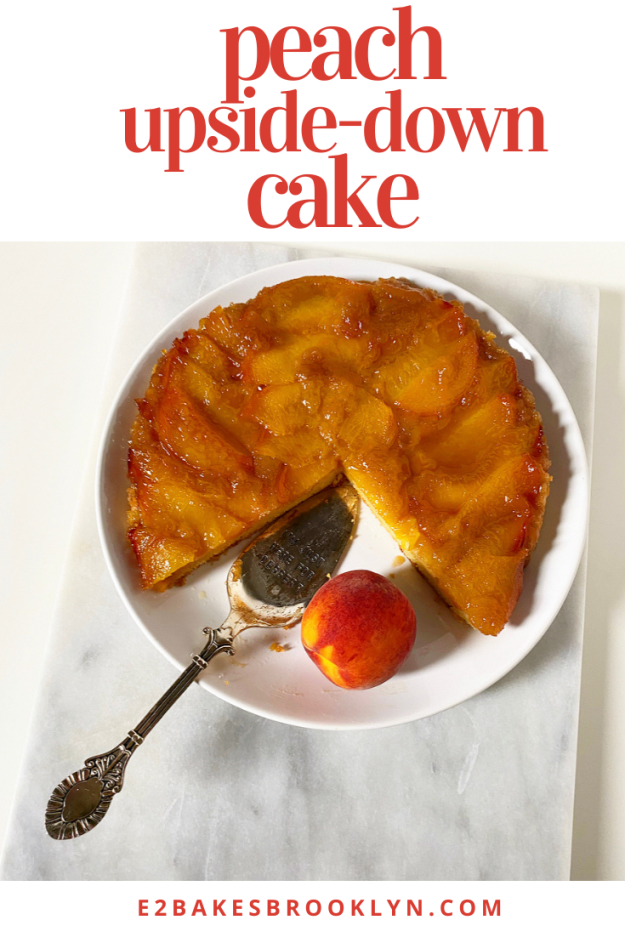
 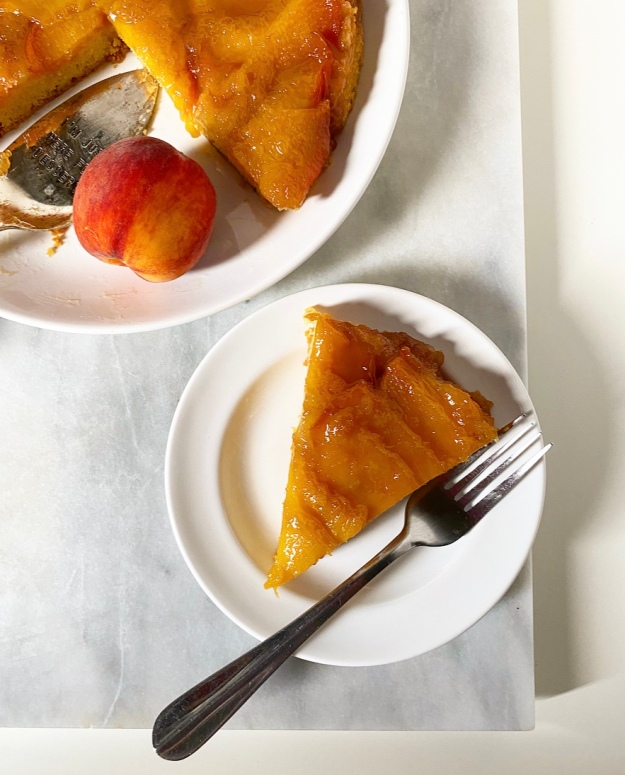 One peach dessert that I am crazy about? This Peach Upside-Down Cake. Not only is it very delicious and very peachy, but it couldn’t be easier to make.
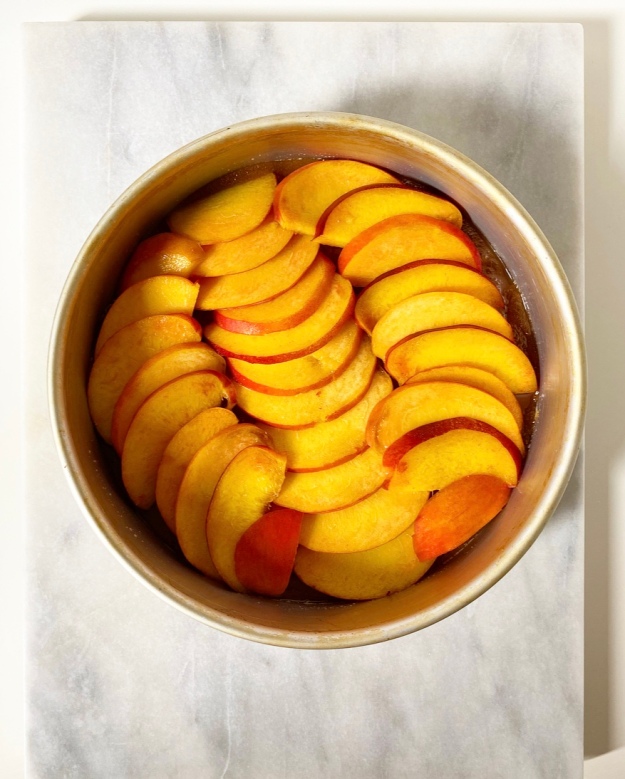 Melt some butter and brown sugar together and lay some thin slices of peach on top in any design you like. I overlapped mine slightly because I didn’t want much “plain” cake peeking through. There’s no need to get too fussy with it, as the peaches release quite a bit of liquid during baking and lose some definition.
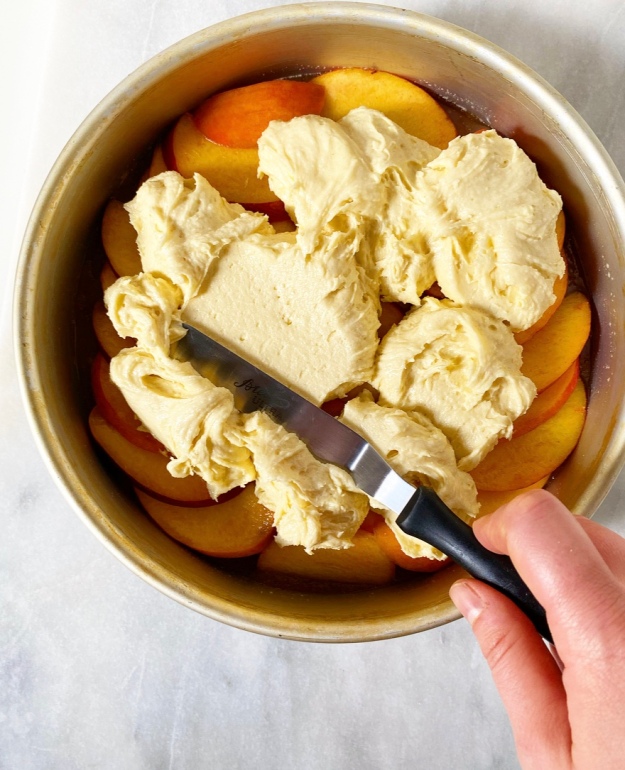 Next up, spoon some cake batter over the top of your peaches. I’ve used a brown sugary version of my
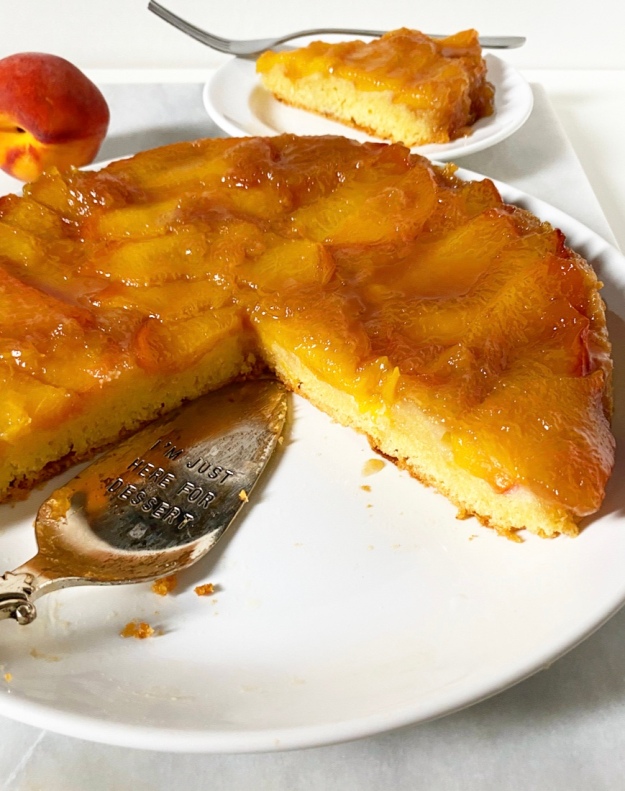
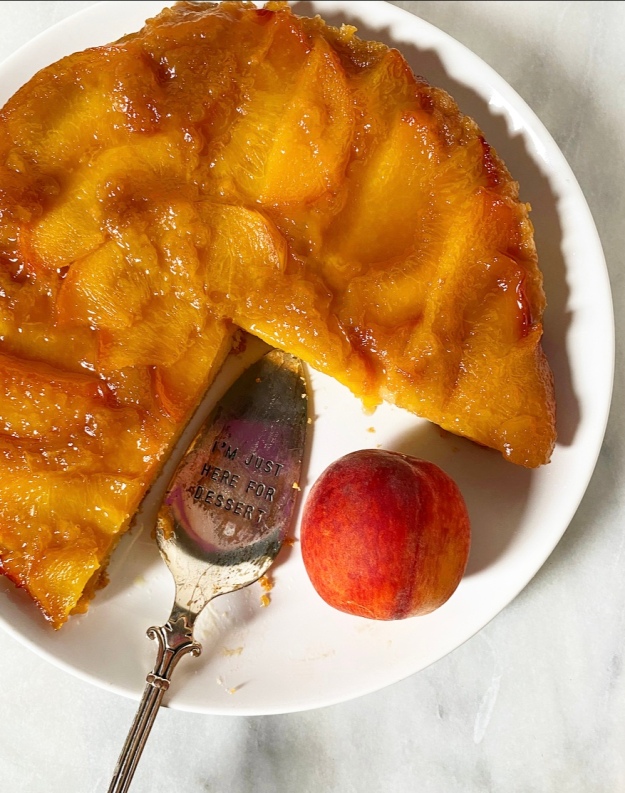 This cake bakes up in about 50 minutes and only needs to rest for fifteen before it’s flipped onto a serving plate. Again, don’t worry if your peach slices aren’t perfectly defined—mine certainly weren’t but they were still gorgeous and dang delicious.
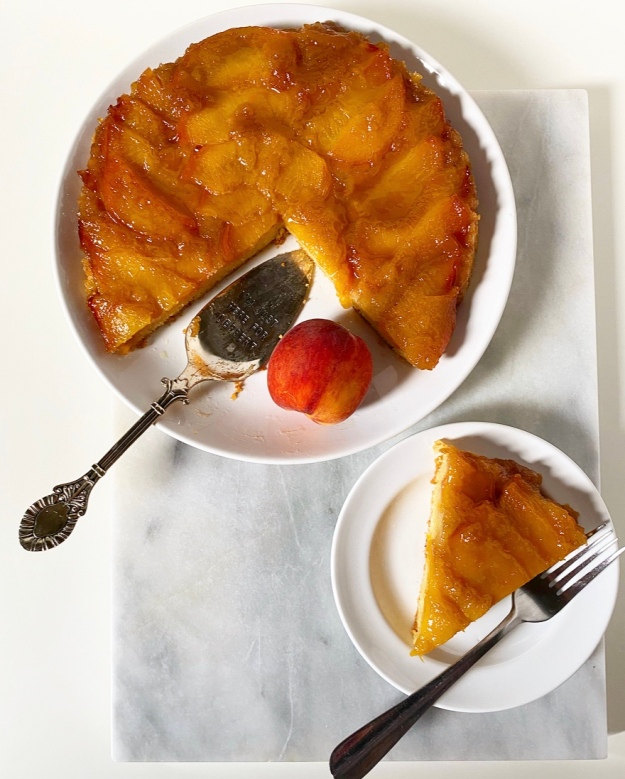 Once your cake is out of the pan, it’s up to you whether you want to enjoy it warm, room temperature or cold. I personally like a warm room temperature slice, so that the cake slices cleanly and the brown sugar topping is pleasantly gooey. Whatever you do though, don’t skip the ice cream or whipped cream. I mean, I forgot them here and everything was still good, but there’s something about cold creamy anything and peach cake that is simply not to be missed.
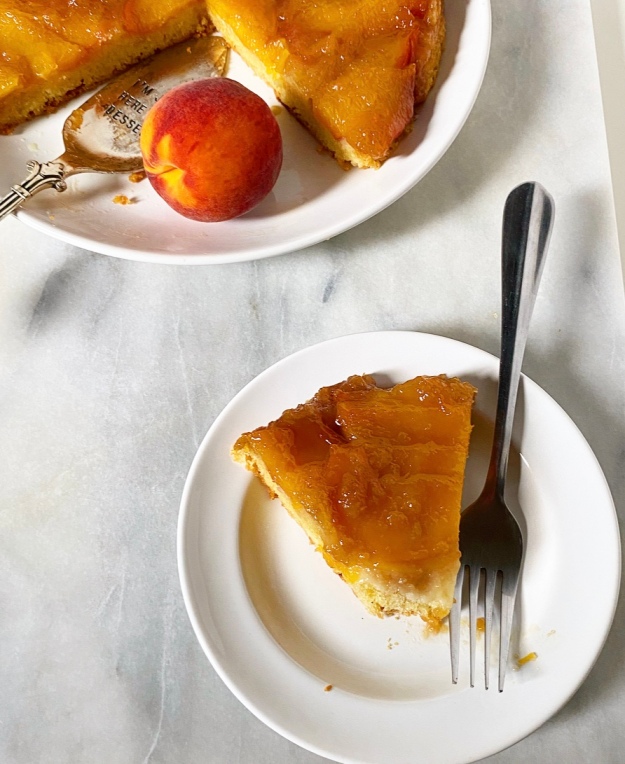
 I had the idea for this Chocolate Chip Cookie Crumb Cake after making
 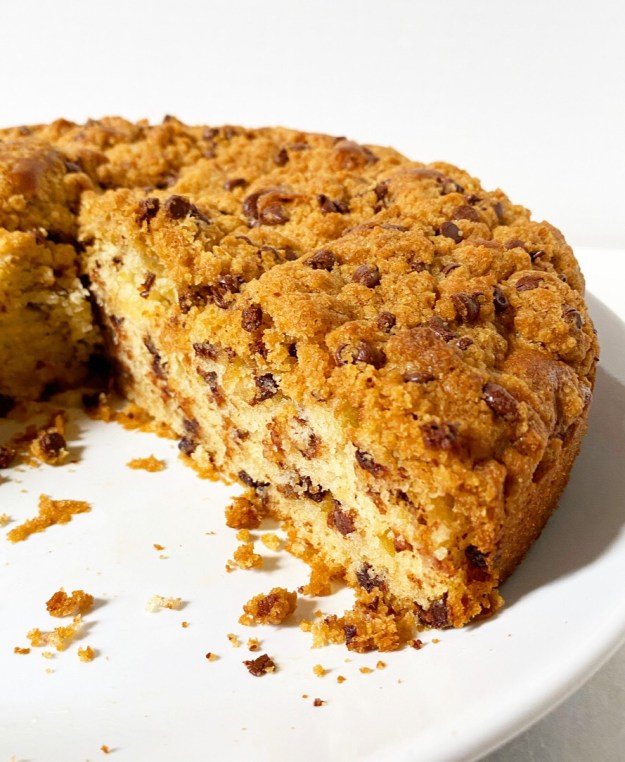 Generally speaking, I’m not a big celebrator of food holidays, but I seem to always remember
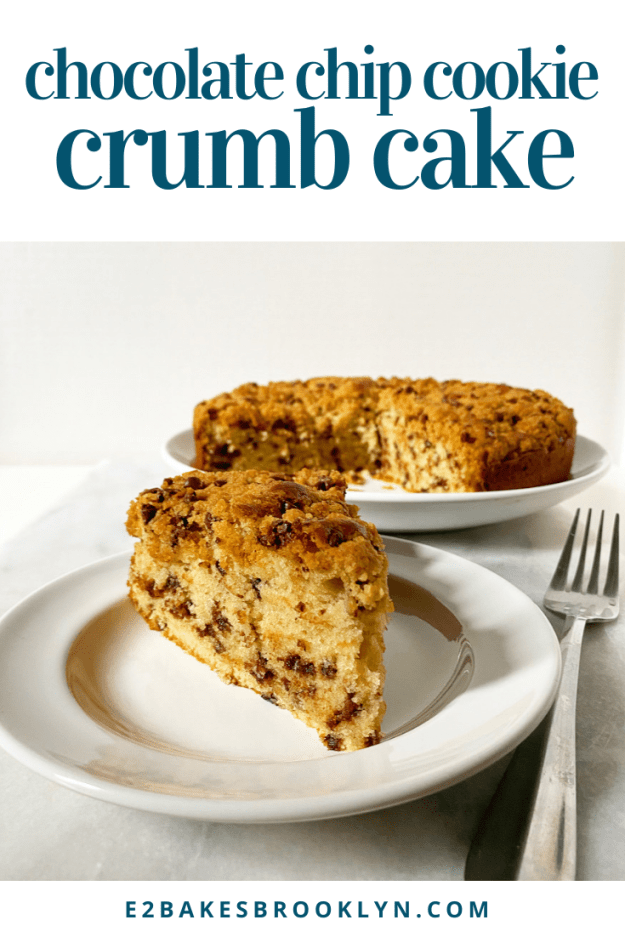
  I mean, look at that pillowy soft chocolate chip cake! It’s buttery, tight-crumbed, and super moist thanks to half a cup of sour cream. It’s almost enough to restore my hope for the future.
 Oh, and speaking of restoring hope in things, let’s discuss the crispy chocolate chip cookie crumb topping! It’s the real star of this show. Think streusel, but instead of cinnamon there’s a bunch of brown sugar and chocolate chips in the mix—it’s actual perfection.
 If you want perfectly clean slices and have slightly more patience than I do, you can wait til the cake has cooled completely before divvying it up. I ceased having extra patience 42 days ago, so the pictured slice is a little scraggly…but as a perk, the chocolate chips are still soft. I will choose melty chocolate over aesthetics any day, anytime. But, like, especially today and right now. The future can wait while I finish my slice of cake.
 Happy Chocolate Chip Day, dear readers.