In keeping with social distancing, baking with what I have, considering what you might have, thinking up swaps, and trying to make something Easter-appropriate, I present to you this Almond Poppy Seed Coffee Cake. It’s made with the last of a container of sour cream I found in my fridge, poppy seeds leftover from Lemon Poppy Seed Muffins, and sliced almonds from Almond Boterkoek. The rest of the ingredients are baking basics/things I normally have around. Oh, and it only requires one egg—score!
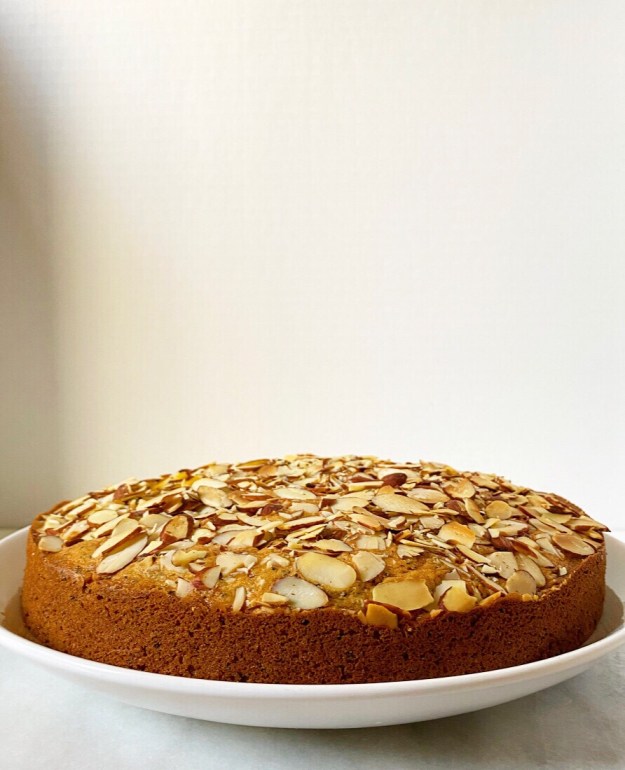 As far as Easter goes, this is not my norm. This cake is not pastel or coconut or coated in my nemesis, poured fondant, but it feels decidedly springlike anyway. I mean, I know we eat almond things at other times of year, but doesn’t Almond Poppy Seed Coffee Cake scream springtime Sunday morning?
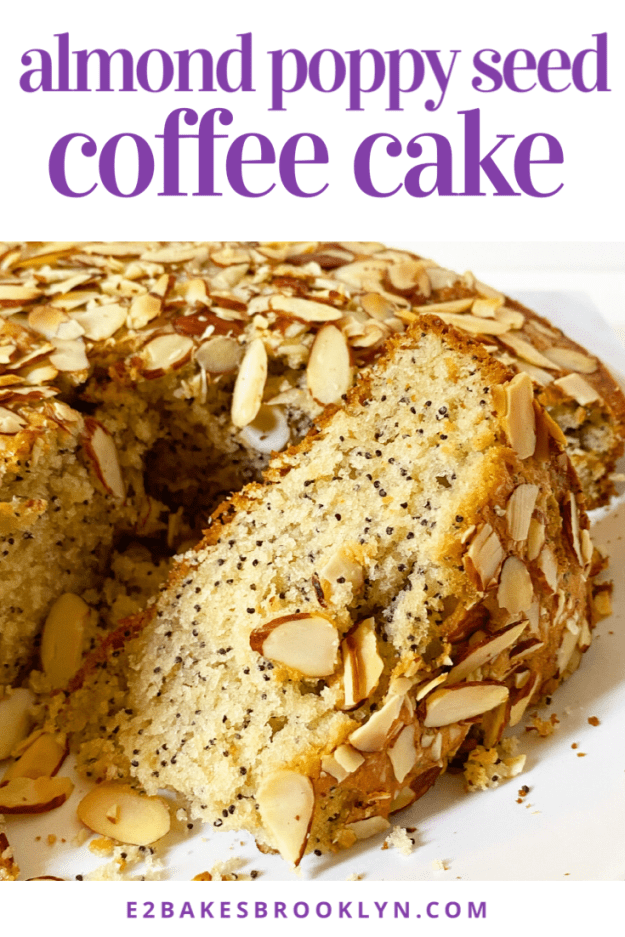
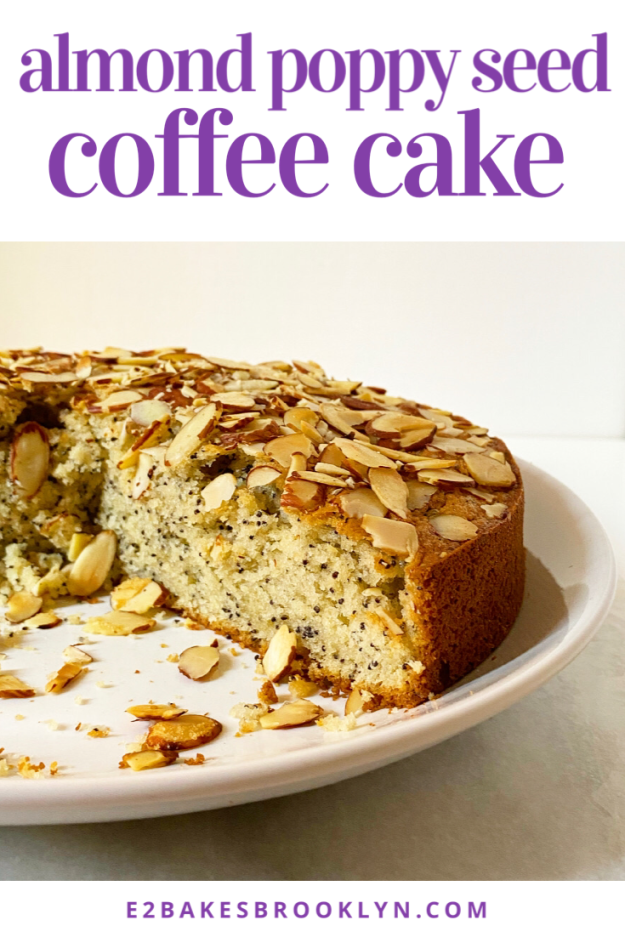
 The cake is just my usual coffee/crumb cake base, but perfumed with almond extract and studding with crunchy poppy seeds. It’s super moist and tender thanks to sour cream, milk and softened butter.
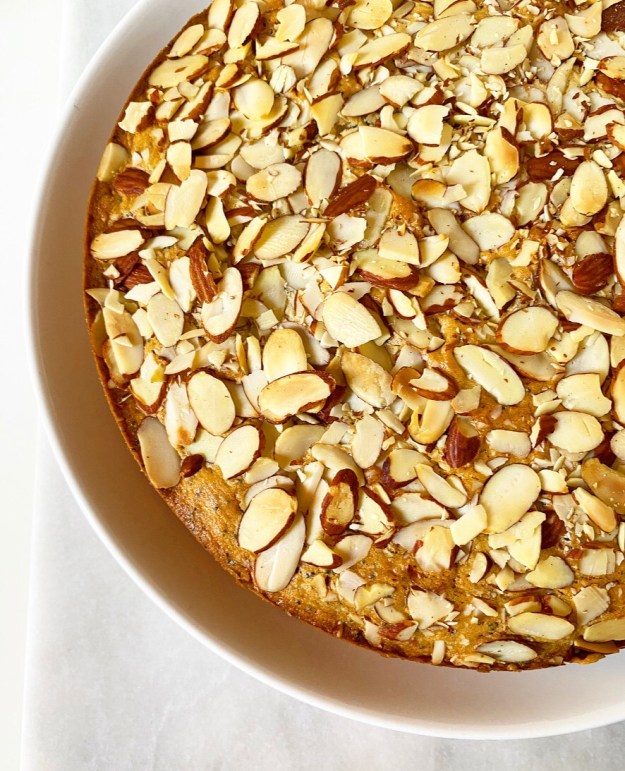 I skipped the traditional coffee cake crumble here because I felt like it was competing with the poppy seeds—too much crunch, ya know? Instead, I’ve taken the easy way out and topped this sucker with sliced almonds, put it in the oven and called it a day.
You might think you’ll miss the crumble, but once this cake is baked and golden, I promise you’ll be like “Crumble who?” Or, more likely, you’ll be too busy eating soft almond poppy seed cake to care.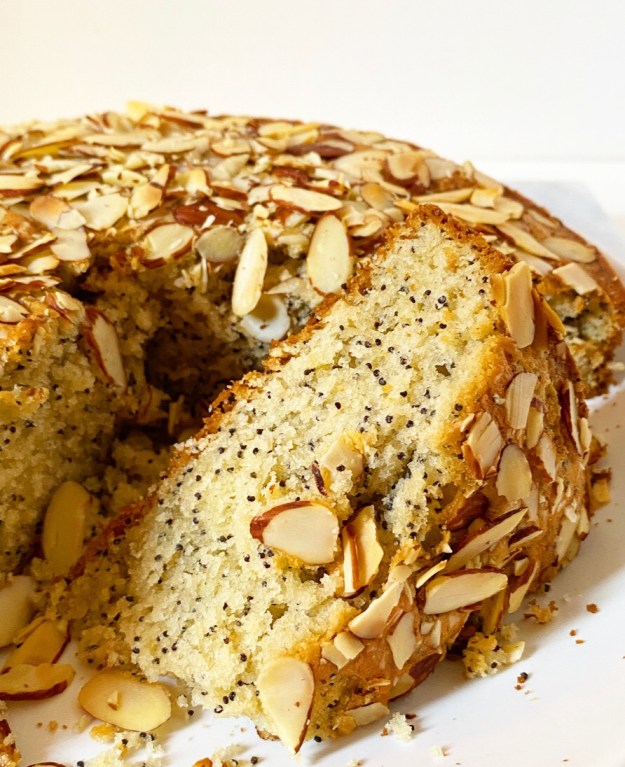 As with every recipe I’m posting right now, Almond Poppy Seed Coffee Cake has plenty of room for substitutions and swaps.
-don’t have poppy seeds? Leave them out. You won’t have same crispy, crunchy texture, but your coffee cake will still be delicious.
-if you don’t have a round cake pan, use a square pan. I haven’t tried it, but I have a sneaking suspicion this will work in a loaf pan too, though you may want to let it bake for more like 50-60 minutes.
-don’t have both granulated and brown sugars? You can use all of one or the other. This will change the color and flavor of the cake a little in either direction, but not in a bad way.
-no almond extract? Well, your cake won’t be Almond Poppy Seed without it, but it also will be fine. If you have citrus at home, feel free to zest a lemon (or whatever) into the sugar. If you leave it plain though, I promise it will still be good.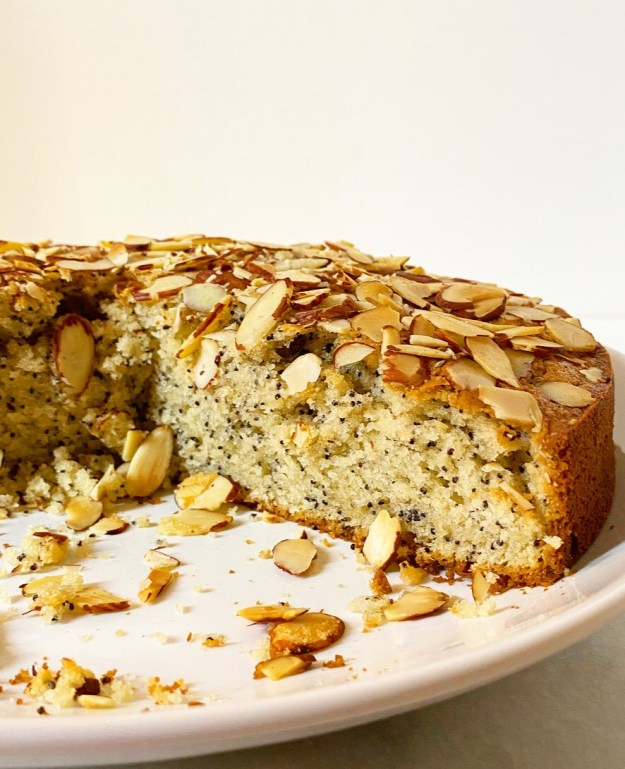
-no vanilla? Not ideal, of course, but it can be left out.
-our of sour cream? Use yogurt. No yogurt? Swap all the sour cream & milk in the recipe for 1 1/4 cup buttermilk. For DIY buttermilk, see here.
-I bake almost exclusively with whole milk, but feel free to sub whatever you have. With the quantity of sour cream in this recipe, plant-based milks should work without issue.
-if you don’t have sliced almonds for the top, use slivered or chopped almonds, or leave them off entirely. If you feel like your cake needs more adornment, make a glaze or sift confectioners sugar over the top.
That’s every substitution I can think of, but feel free to ask questions in the comments if you think of another. “Make it work” is the name of the game this Easter.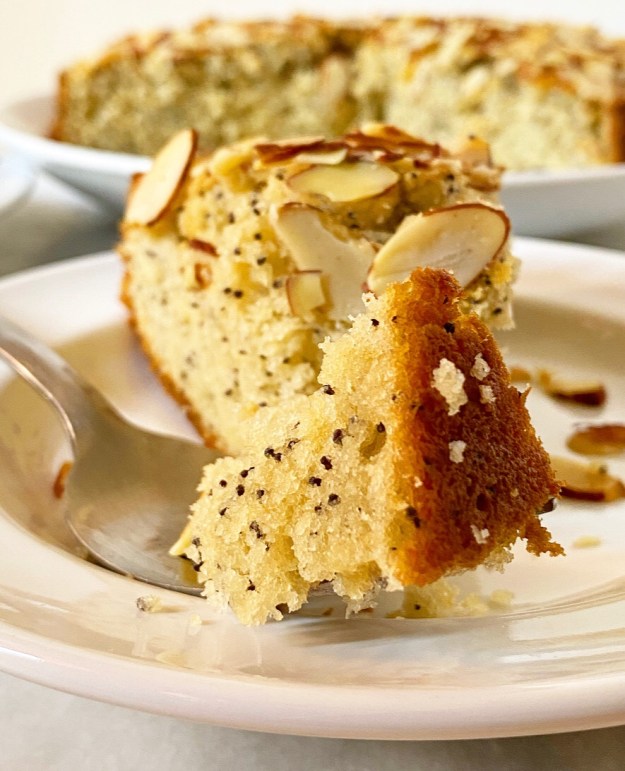
Almond Poppy Seed Coffee Cake
makes one 9-inch round cake, about 10 servings
2 cups all-purpose flour
3 tablespoons poppy seeds
1/2 cup light brown sugar, packed
1/4 cup granulated sugar
1 1/2 teaspoons baking powder
1/4 teaspoon baking soda
1/2 teaspoon Kosher or sea salt
1/2 cup unsalted butter, softened to room temperature
1 large egg, room temperature
1/2 cup full-fat sour cream, room temperature
2/3 cup whole milk, room temperature
1 teaspoon pure vanilla extract
1 teaspoon pure almond extract
1/2 cup sliced almonds
Preheat oven to 350F. Grease a 9-inch round cake pan. Line with parchment and grease again. Set aside.
In a medium mixing bowl, whisk together flour, poppy seeds, brown sugar, granulated sugar, baking powder, baking soda, and salt. Set aside.
In a large mixing bowl, use an electric mixer to beat butter until fluffy. Mix in egg, sour cream, vanilla and almond extracts; mixture will be a bit lumpy. Mix in half the dry ingredients followed by half the milk. Add remaining dry ingredients, followed by remaining milk.
Transfer the batter into the prepared pan and spread it evenly. Use your fingers to scatter sliced almonds over the top. Tap full pan a few times on the countertop to release any large air bubbles. Bake cake for 40-45 minutes, until a toothpick inserted in the center comes out clean.
Let cool 20 minutes in the pan on a rack. Run a thin, flexible knife around the edge of the pan before inverting onto a plate to release. Revert cake onto a serving plate. Cake may be served warm or room temperature. Serve.
Leftover cake will keep well at room temperature for up to two days, or in the refrigerator for up to five.
 Until a few weeks
 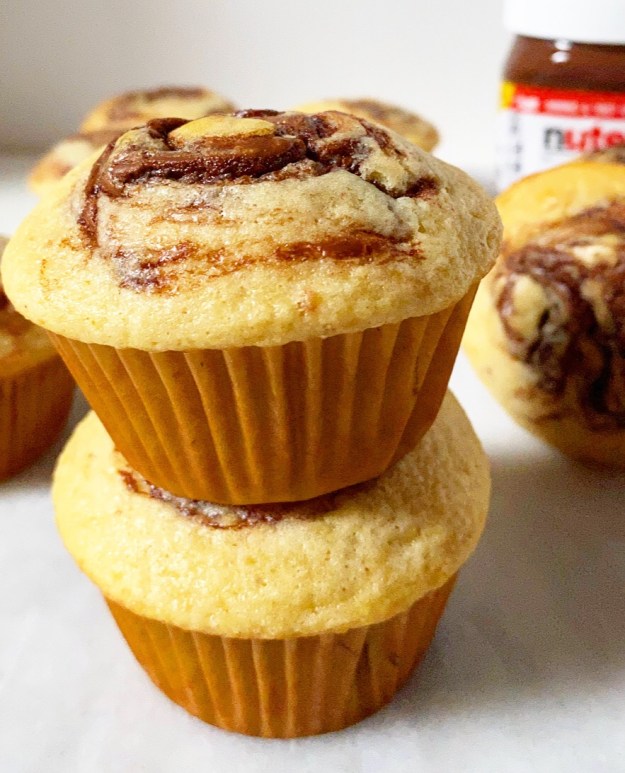 And while muffin/cupcake liners are the obvious solution to that problem, there was another to contend with: I was not terribly confident in my base muffin recipe. But then I went and tested the crap out of my
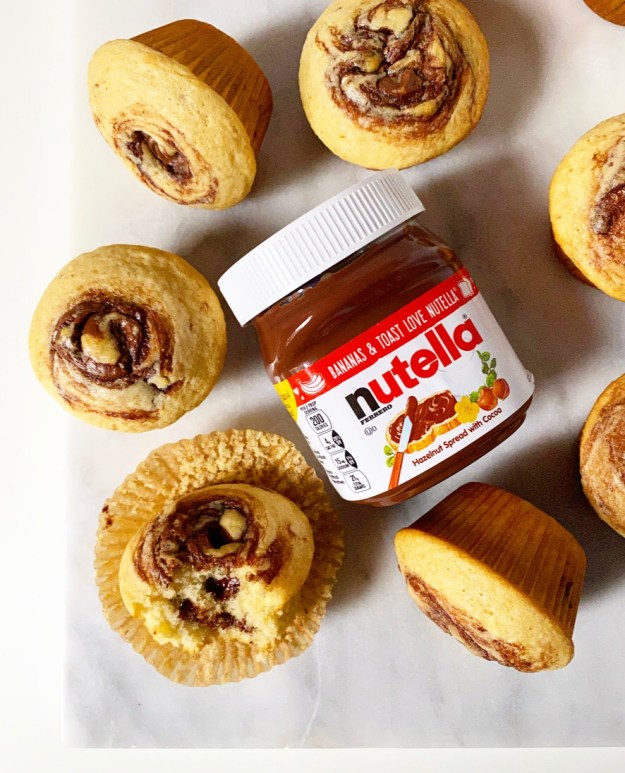
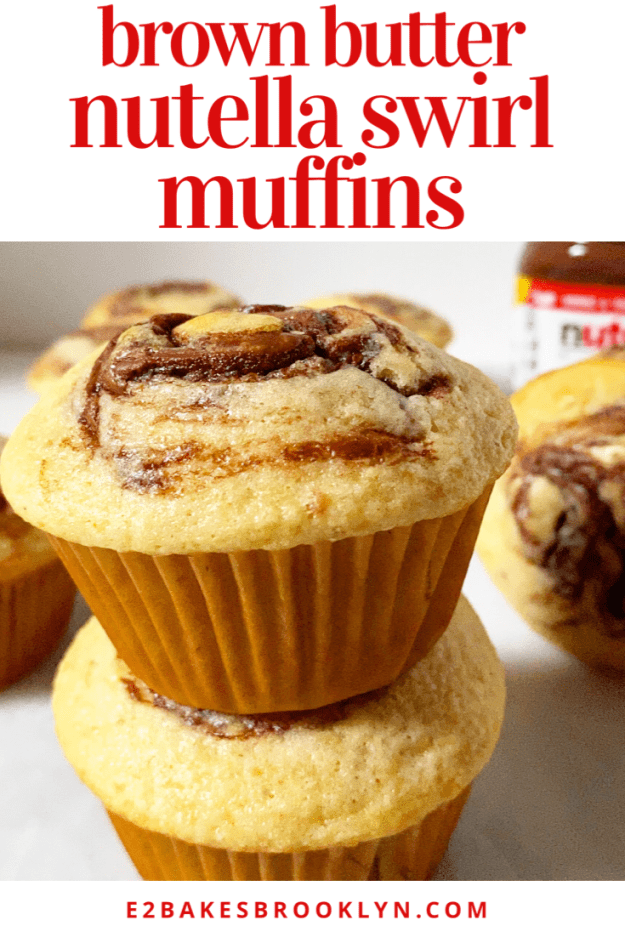
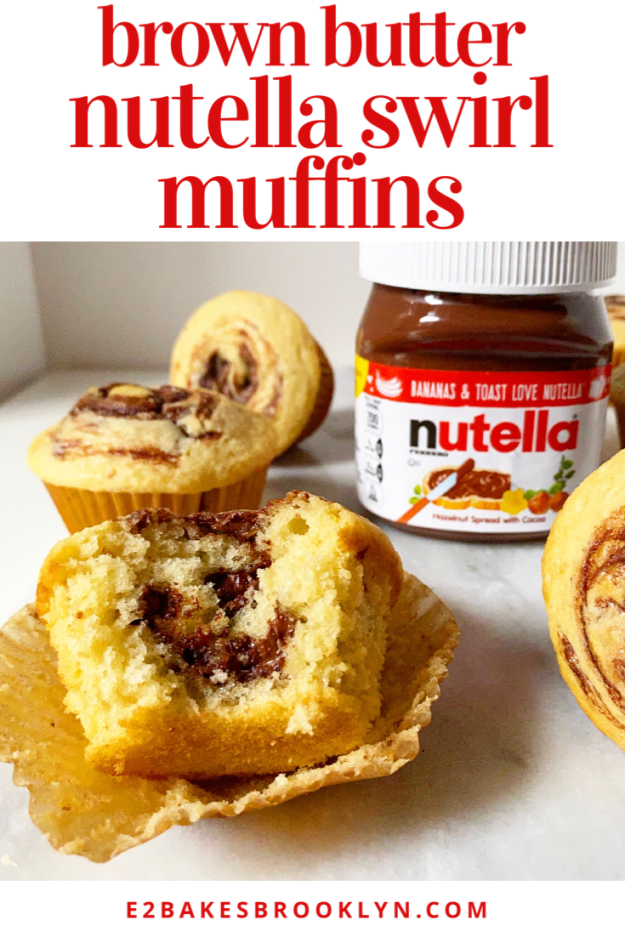
 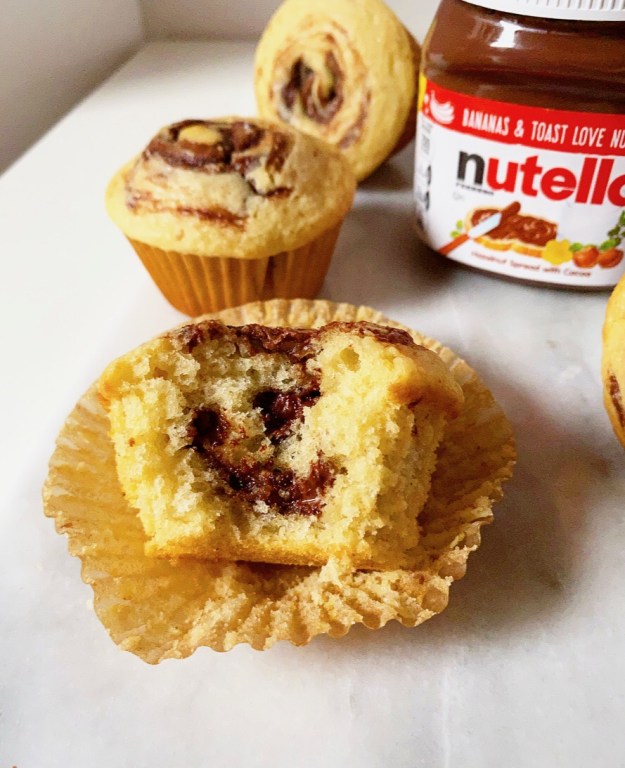 You read that right: Brown Butter. Nutella Swirl. Muffins. Basically every good thing in the world in a handheld treat that is somehow suitable for consumption at breakfast.
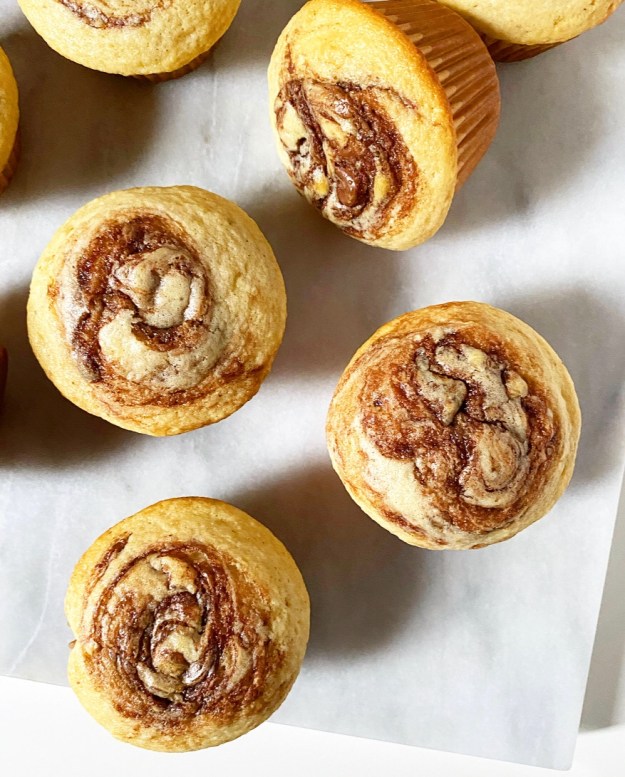 The recipe for these muffins has a few adjustments from the Lemon Poppy Seed version, but not many. Besides the obvious flavor difference, there’s a little more flour and I swapped some of the milk for sour cream, making the batter a little thicker so the Nutella swirls don’t sink.
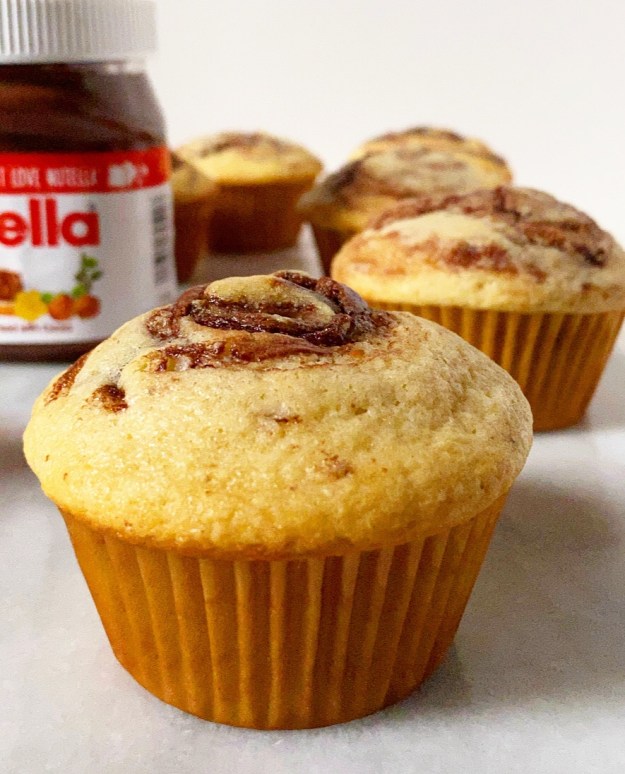 And speaking of Nutella swirls, they are applied in two phases. Basically, you add half the batter to the muffin cups, then swirl in some Nutella, then top with the remaining batter and swirl in remaining Nutella.
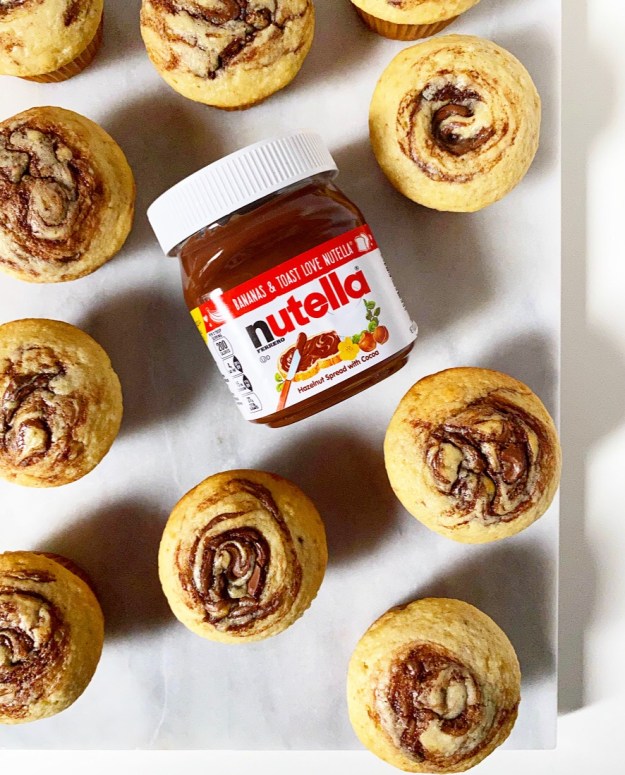 Y’all, these are so good. The interiors are feather soft and the Nutella swirls make every bite extra decadent, as all things with Nutella should be. Also, there’s a little variance in each bite—you could have a little Nutella or you could have a lot! The brown butter is subtle, as it is in my

 One of the great things about yeast doughs—aside from the fact that they’re way easier than they’re made out to be—is that they all seem to have multiple uses. My
 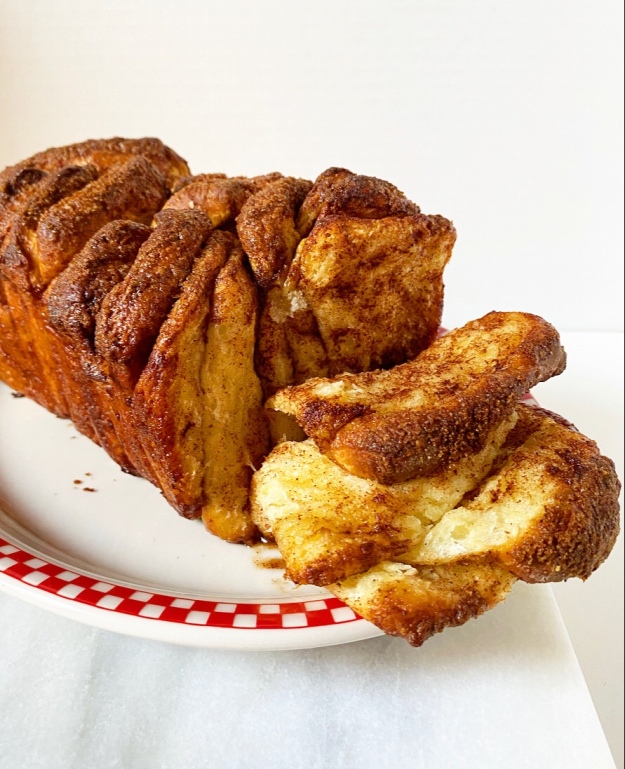 Love a multitasker ❤ ❤ ❤
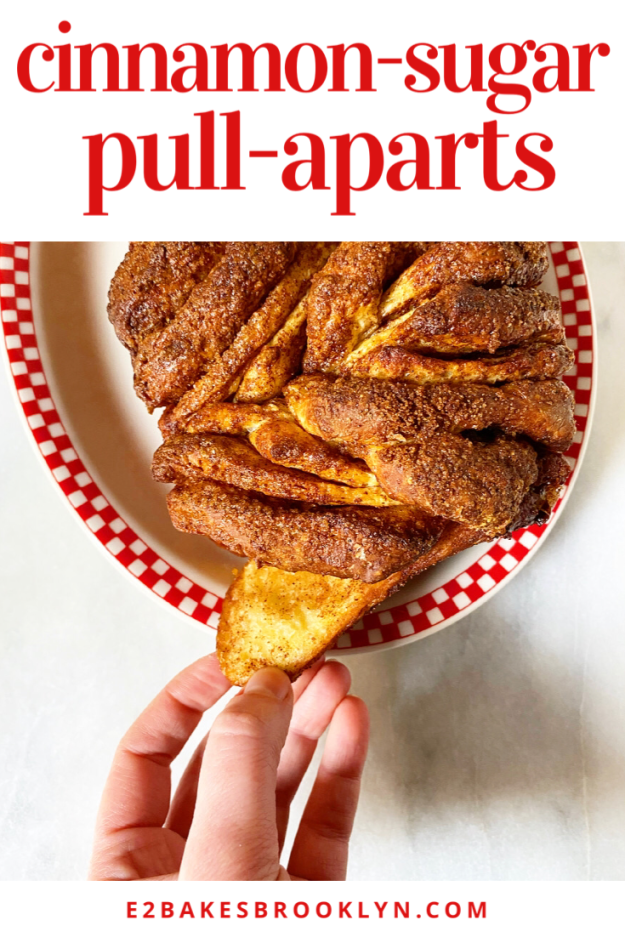
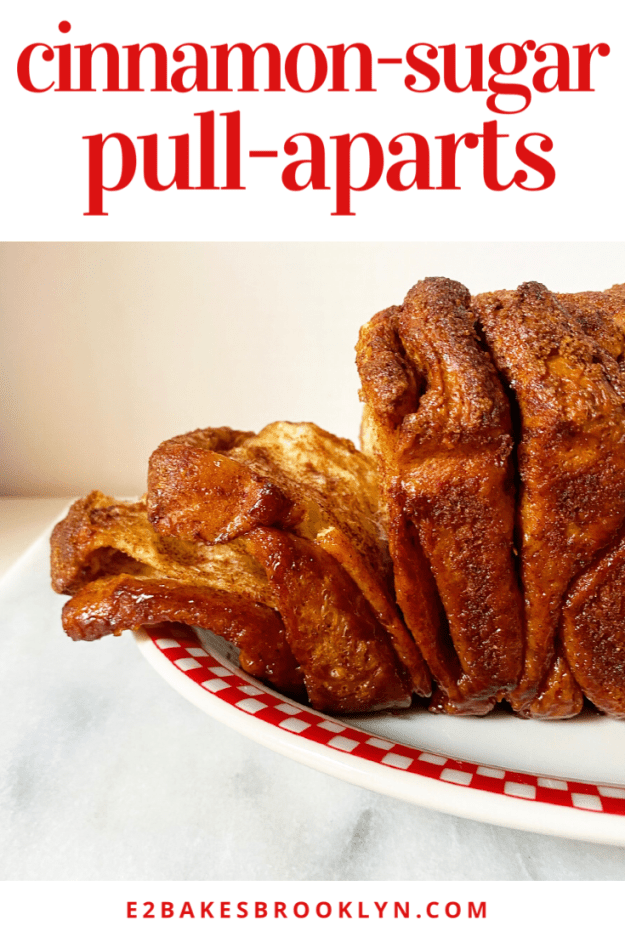
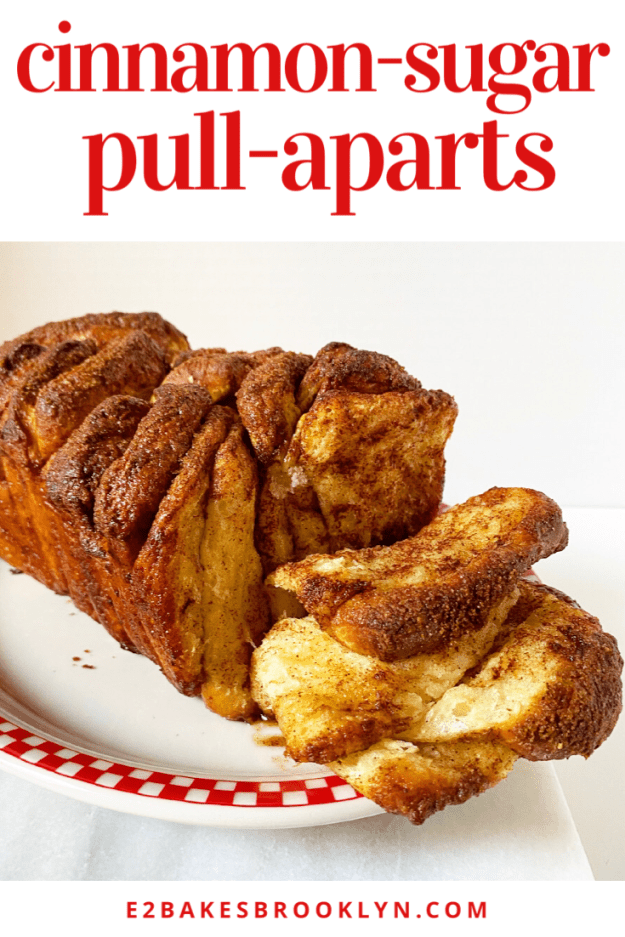
 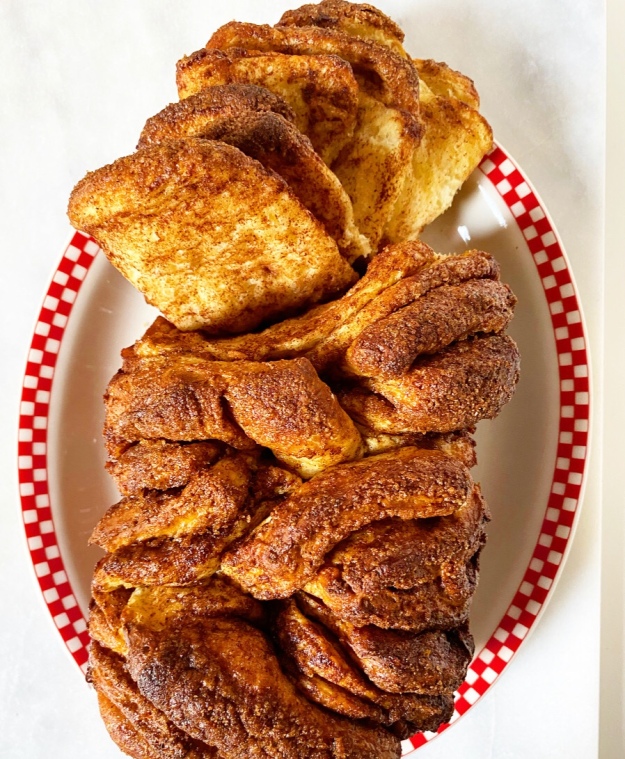 If you’ve never heard of pull-aparts, they’re basically a loaf of bread made of individual pieces layered with a filling (sweet or savory) and baked so that the whole can be pulled apart with your fingers instead of sliced with a knife.
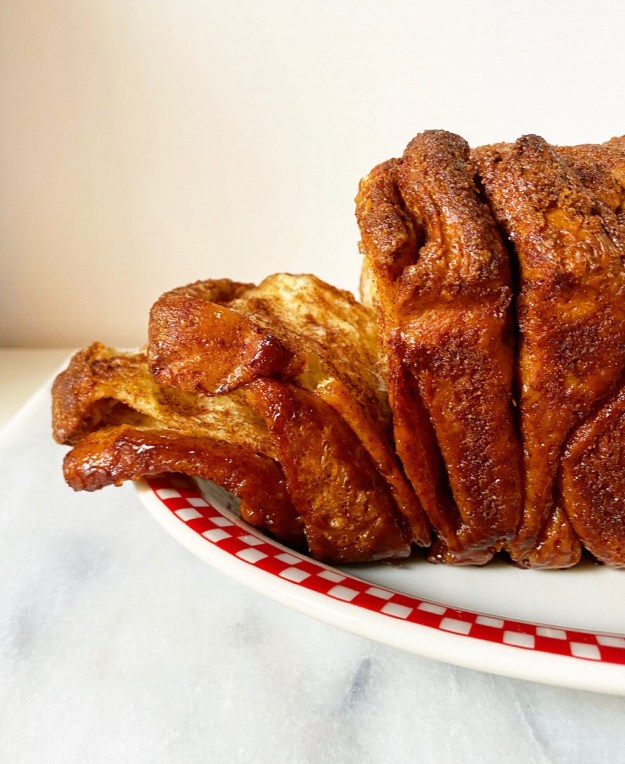 Achieving this is really simple. The process begins like you’re going to make cinnamon rolls. Make a dough, make a cinnamon-brown sugar filling. Roll that dough out and top it with the filling. Nothing you haven’t (probably) done before.
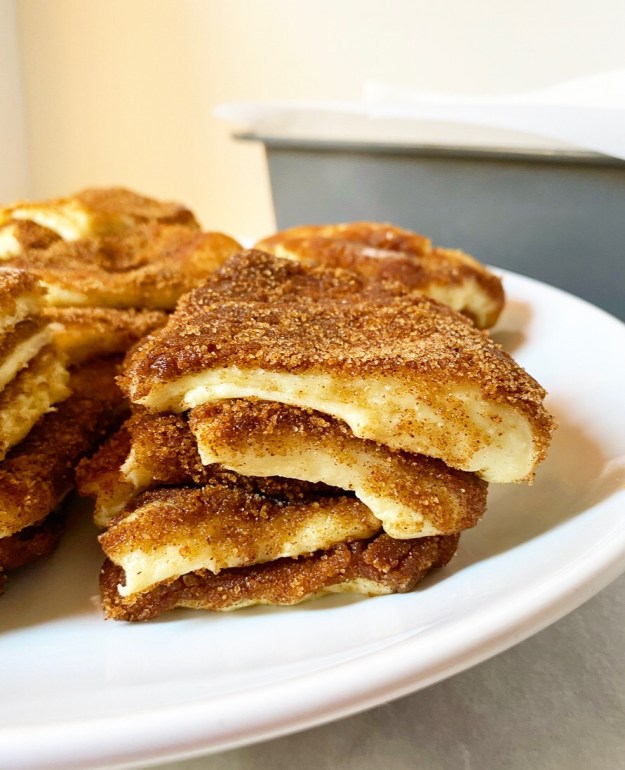
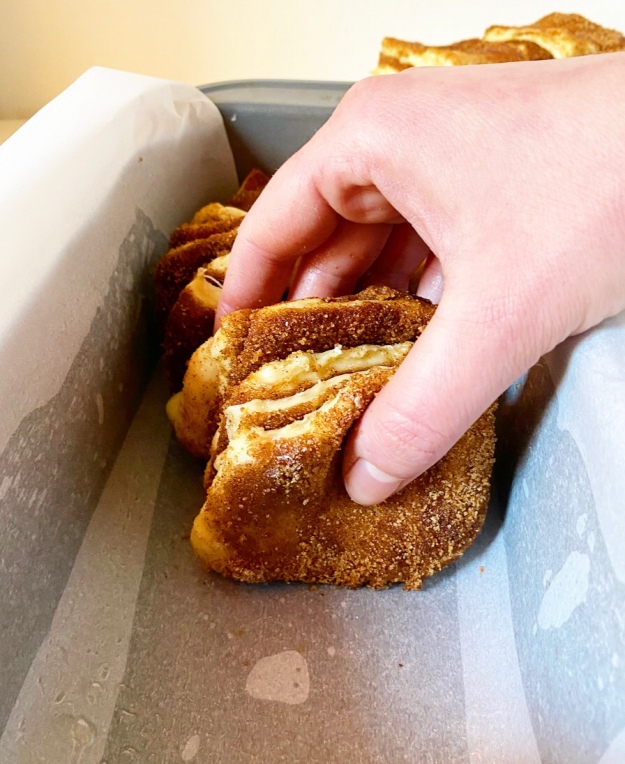
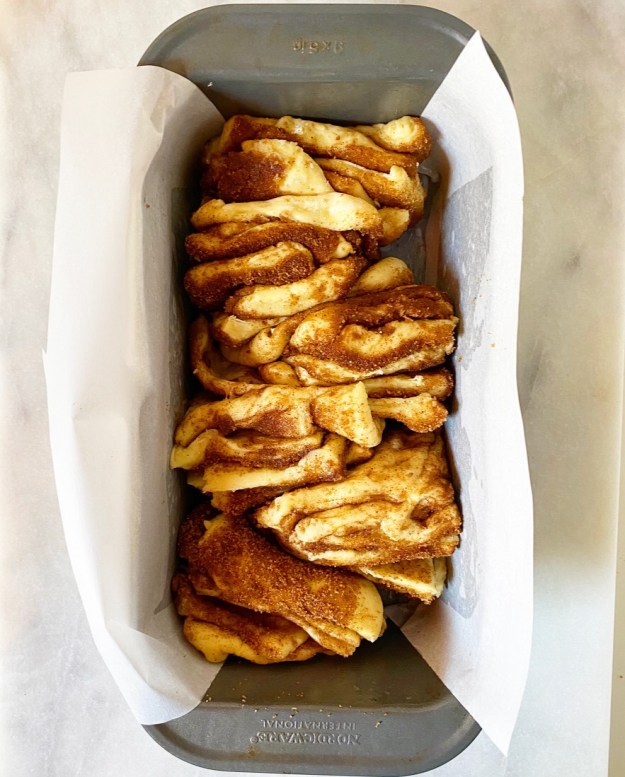
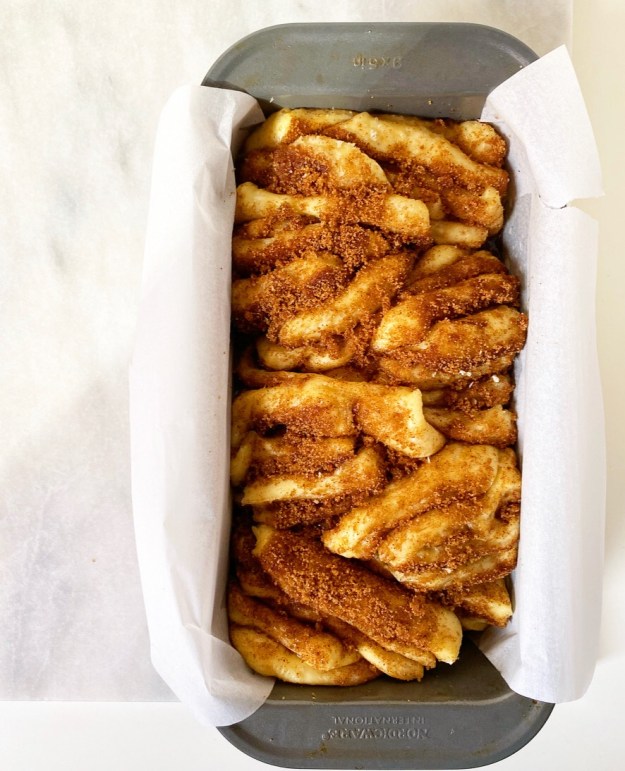
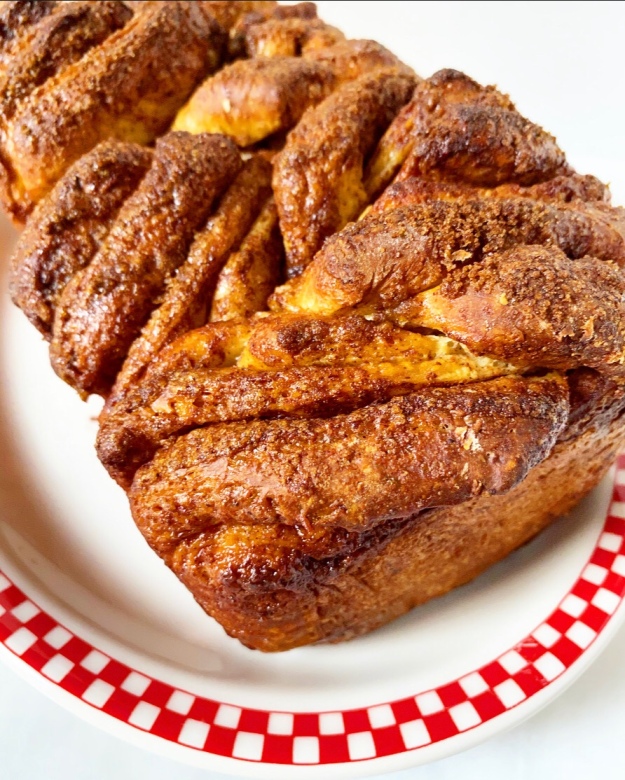
 Then, though, things get a little wacky. Instead of rolling the filled dough into a cylinder, it’s sliced into 36 squares, which are then piled into six stacks of six and arranged in a line(-ish thing) down the center of a loaf pan. The assembled loaf is allowed to rise for about an hour and then baked for 40 minutes, until deeply browned on top and cooked through in the center.
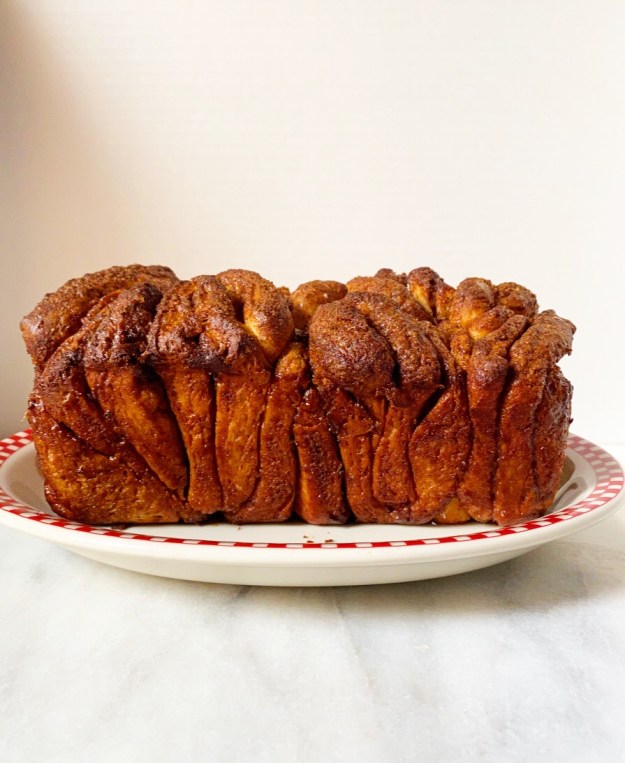
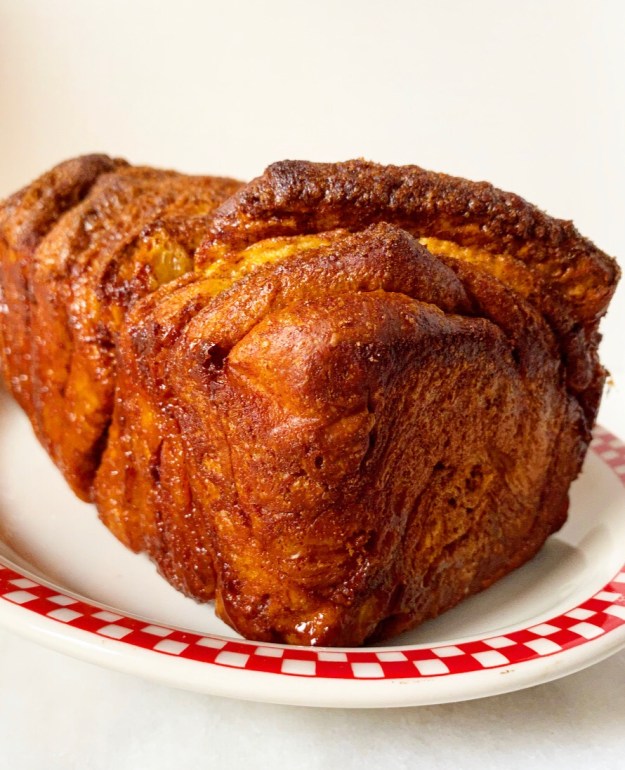
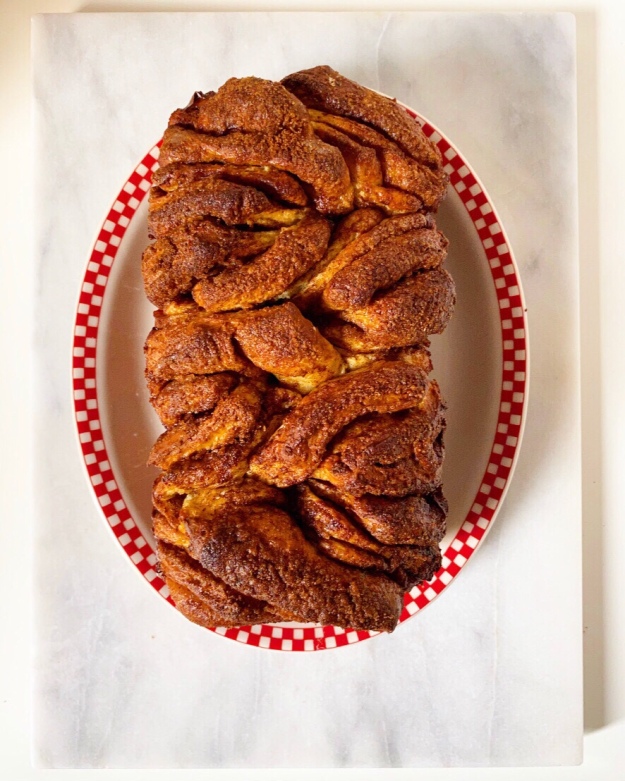
 Let your pull-aparts cool for 20 minutes or so before removing them from the pan. Put the loaf on a serving platter and then blow it a kiss goodbye because it’s going to be quite literally pulled apart in front of your eyes. And it will be glooooorious.
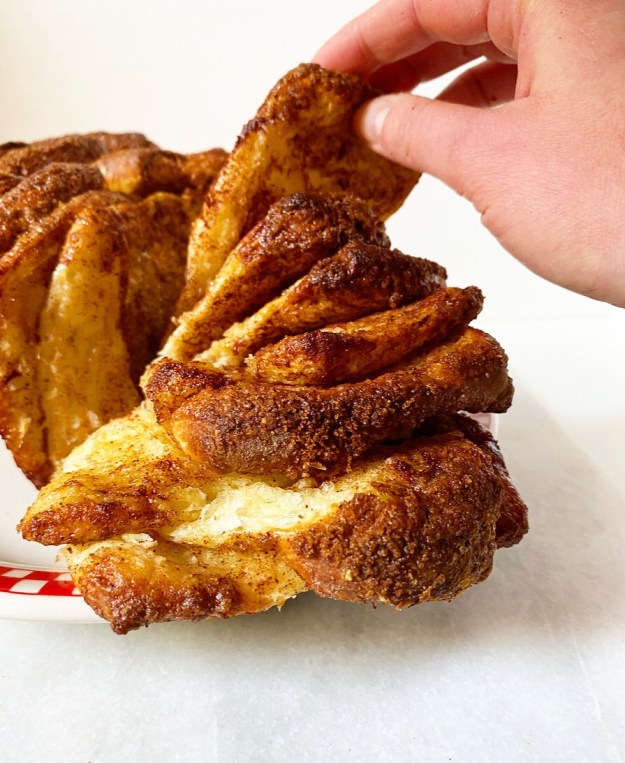 I mean, it’s basically the center of a cinnamon roll’s swirl cut into squares and baked into a loaf shape so that it’s soft and gooey on the inside and crisp and brown on the outside and how could that be anything but glooooorious?
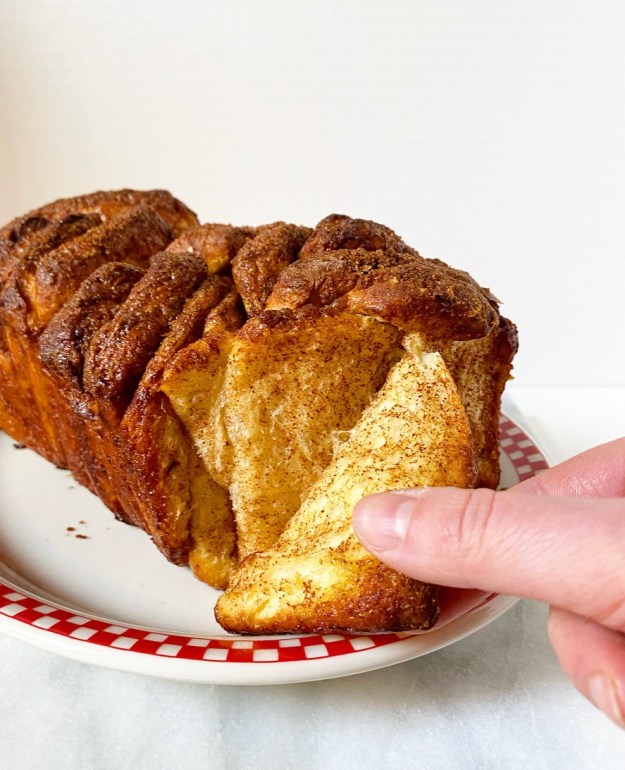
 When I was allowed to take the reins on planning Christmas dinner last month, I knew immediately what I wanted to make: Porchetta. For those of you who have no idea what I’m talking about, Porchetta is a slow-roasted Italian herbed pork dish that is traditionally made with whole pigs, but most home cooks use a center-cut pork loin wrapped in a sheet of pork belly.
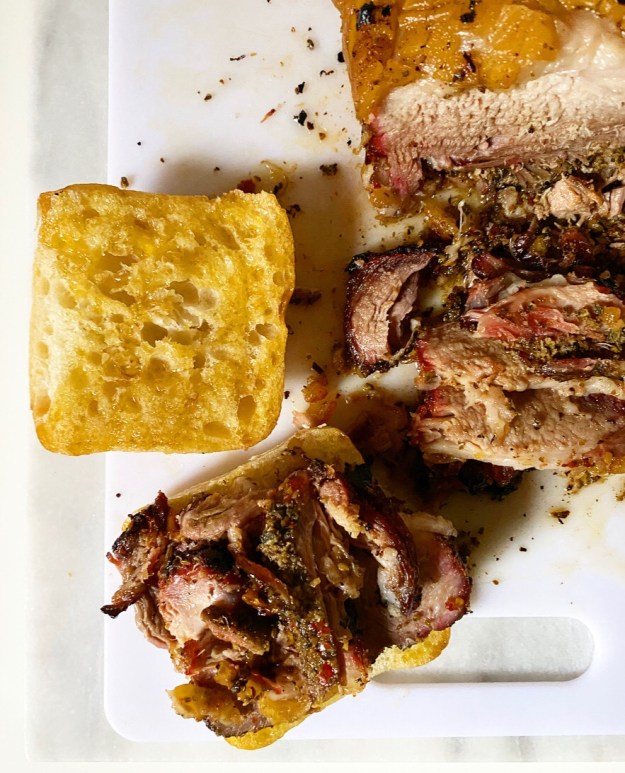
 I spent weeks planning this meal, going so far as to make a 1/4-sized tester in the days before Christmas. After that, I called
 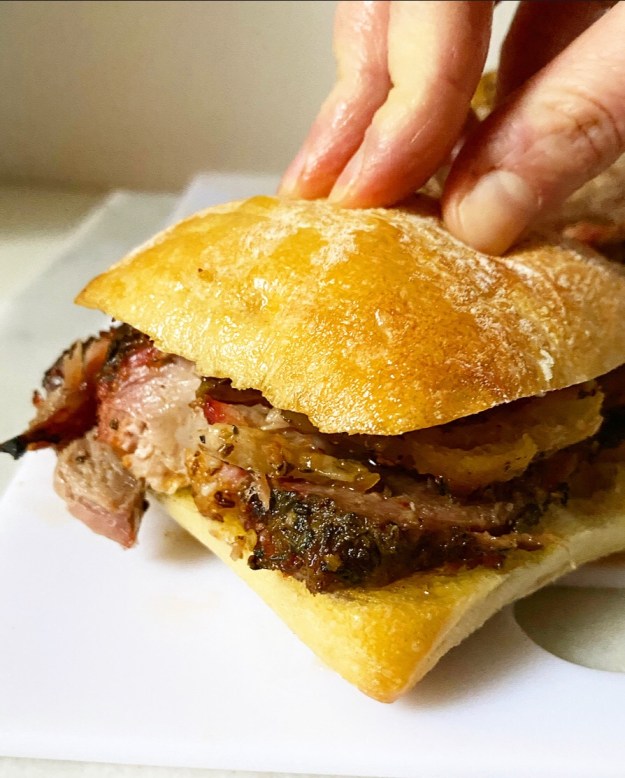 Over the next several days, my mom, sister and I obtained the special-ordered pork and made a great fuss over preparing it…except that it wasn’t actually that much fuss. Once the herb mix was prepared, I butterflied the center-cut pork loin and scattered it over the top. Then I rolled it up jelly-roll-style, rolled that in the sheet of pork belly and tied it all up with trussing string. Afterward, I let it sit uncovered in the refrigerator (“dry brining”) until Christmas Day, on which it was brought to room temperature and then roasted until golden and crisp and pretty irresistible.
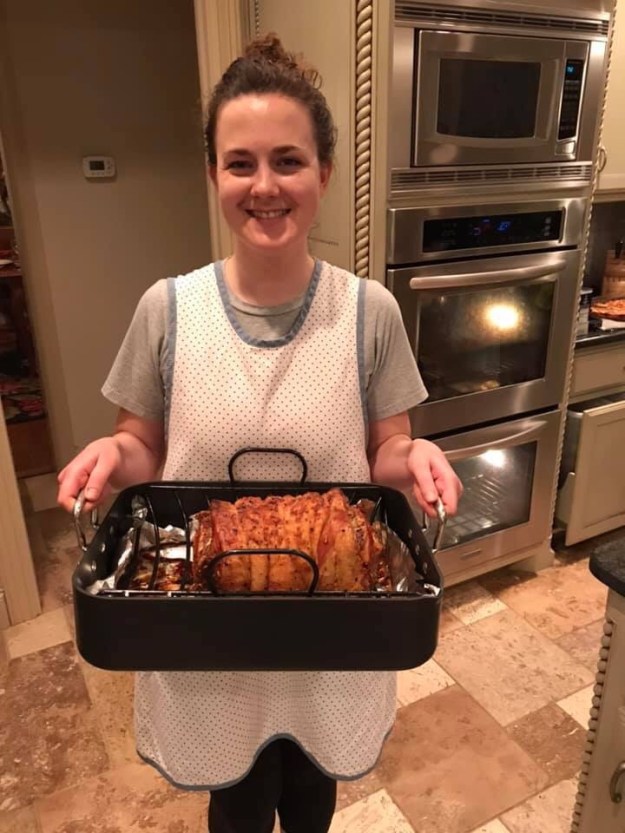
 I was (am) very proud of myself and posted it to all my social media outlets, where I was promptly asked when I’d be posting a recipe. This was something I hadn’t even considered because while the Porchetta I made for Christmas is not particularly difficult to put together, but it *is* pricey.
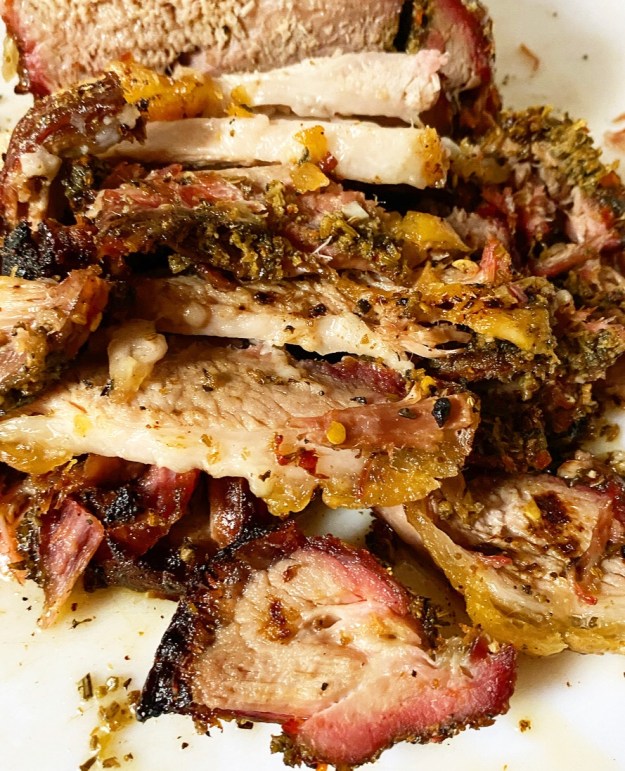 The meat had to be special-ordered for quantity and quality—a 5 pound sheet of skin-on pork belly is not an easy find—and came out to about $60. That’s $60 in Texas, so I’d guess it’s more like $80-$100 in New York, and that’s before the herbs. I love y’all, but not quite enough to spend hundreds testing one lone recipe.
 But. But! I had it in my head that I could give my beloved
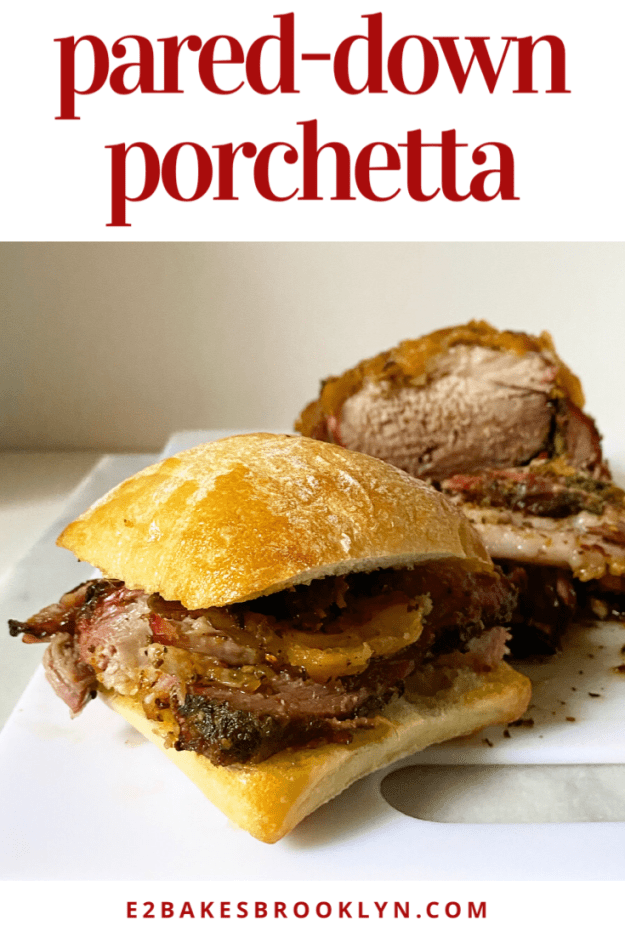
 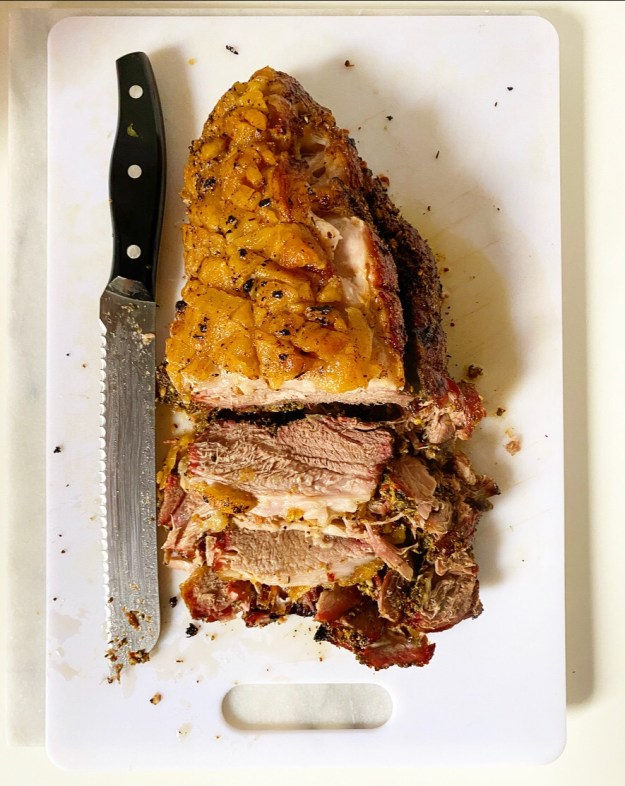 Yes, it still has to sit in your fridge for a day or two, but it is made from just one piece of meat (a boneless pork butt AKA pork shoulder), is mostly hands-off, and won’t cost you an obscene-ish amount of money.
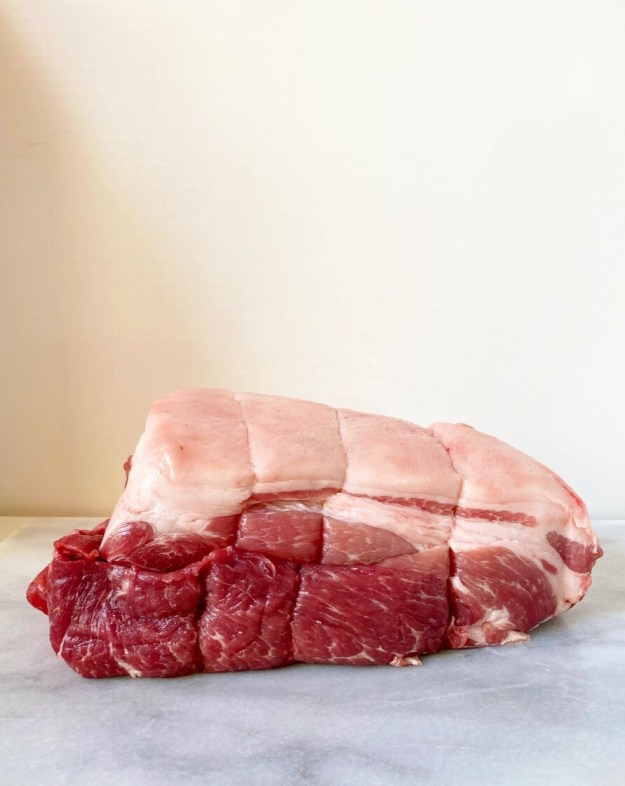
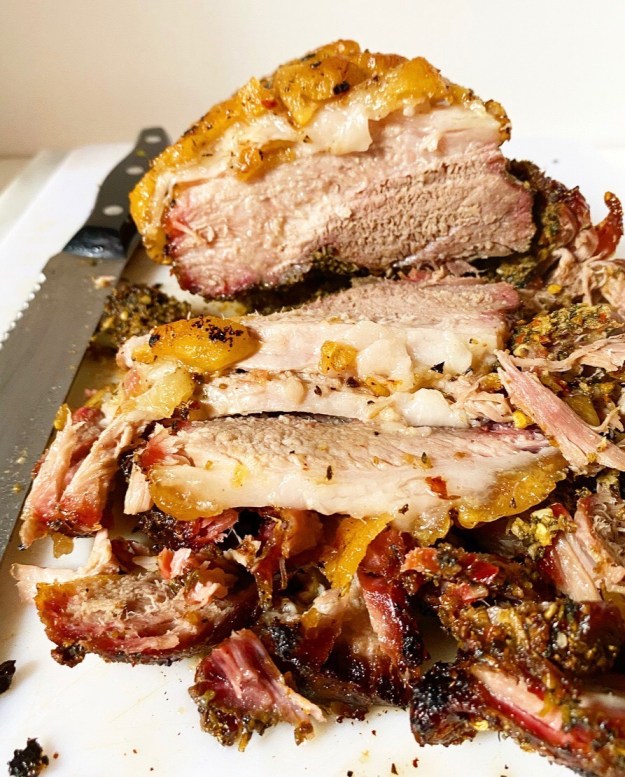
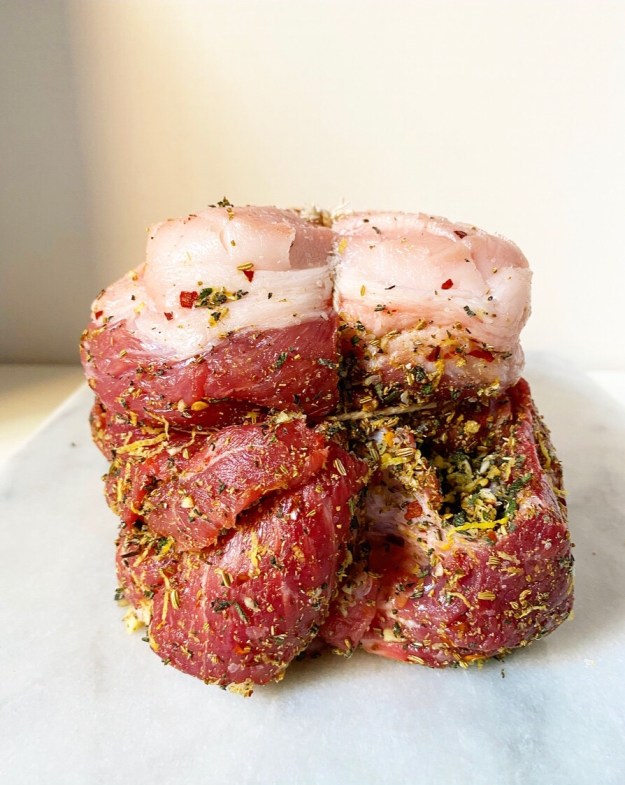
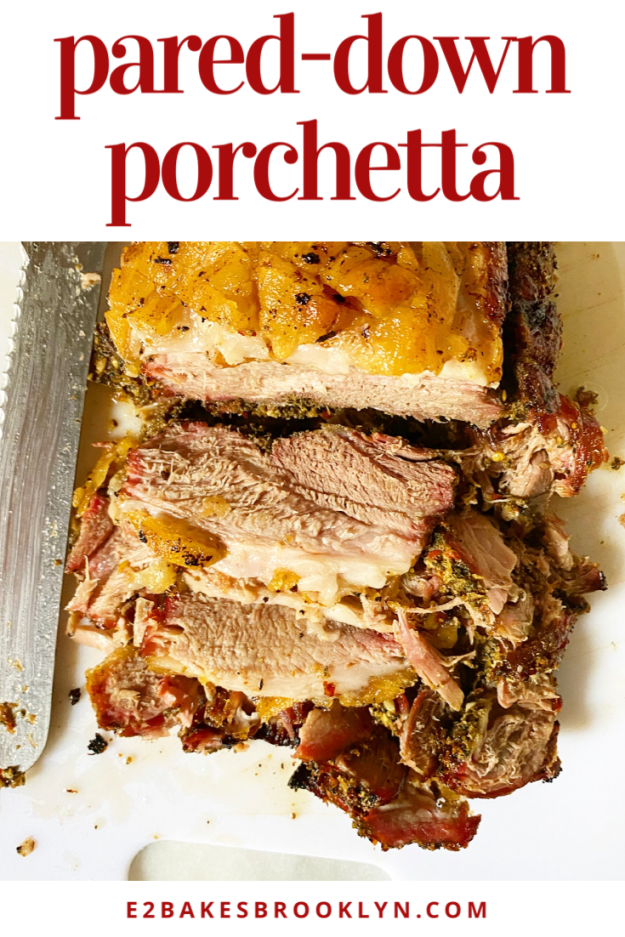
 Let’s start with the meat. This pork butt? It weighed in at 4.5 pounds and cost a cool $14–pretty reasonable compared to $60+! You’ll want it to have a layer of skin or a good, thick fat cap (pictured here) for both flavor and texture. If you can’t find a pork butt that fits either of those descriptions, you can purchase a piece of pork belly or pork skin and tie it onto the butt with trussing string. You want that fatty lid so it can keep the meat moist during roasting and then get crispy at the end. Cracklings are life, am I right?!
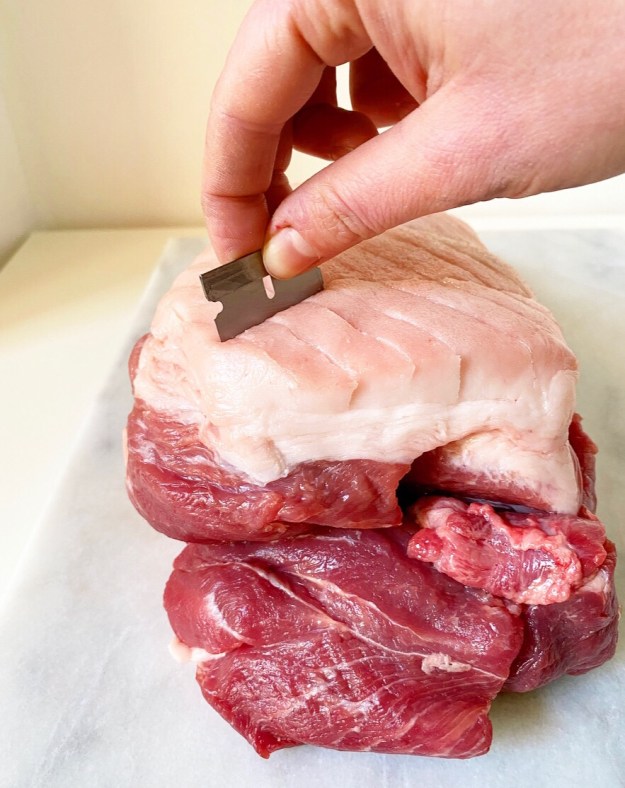
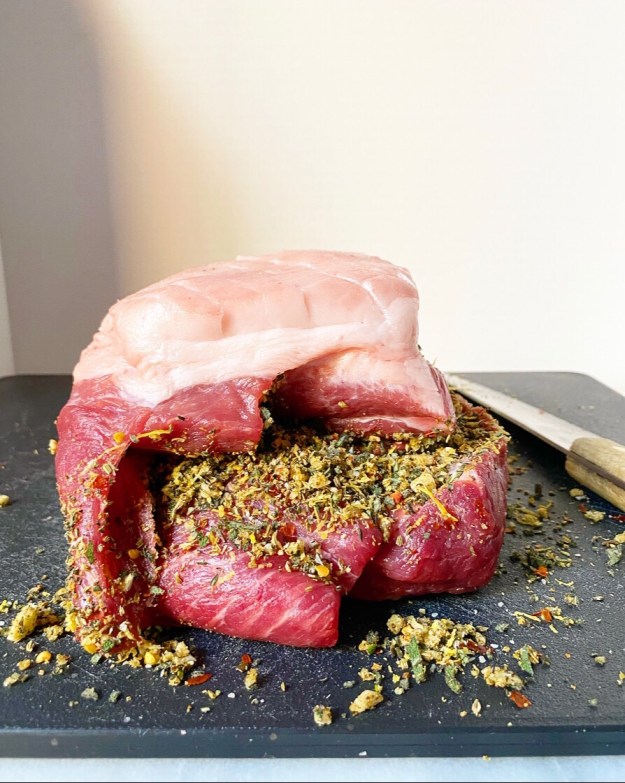
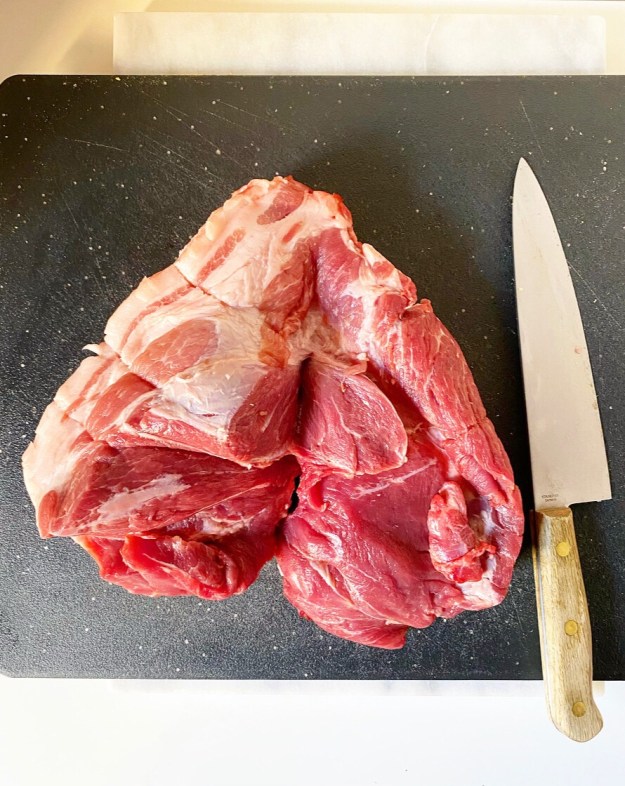 Your pork butt is unlikely to be in one seamless piece due to its heavy marbling and having had a bone cut out of it. This spot (or cavity or whatever you want to call it)? This is where the herb mixture will go. I used my knife to extend that opening down the length of the roast, while making sure to keep one edge intact.
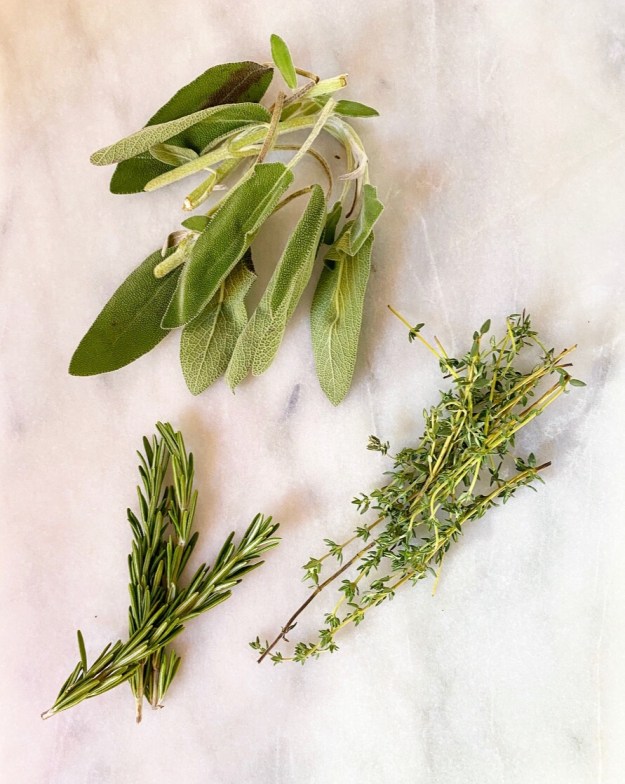
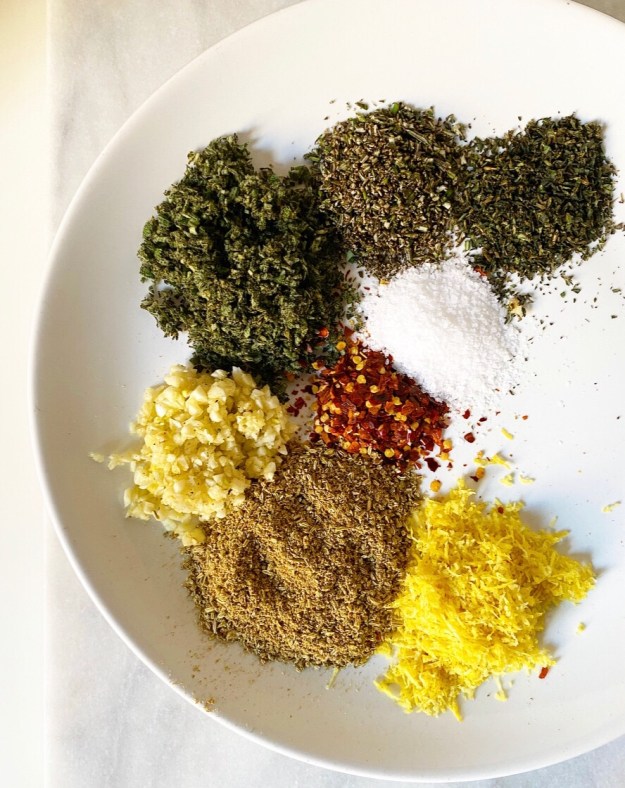
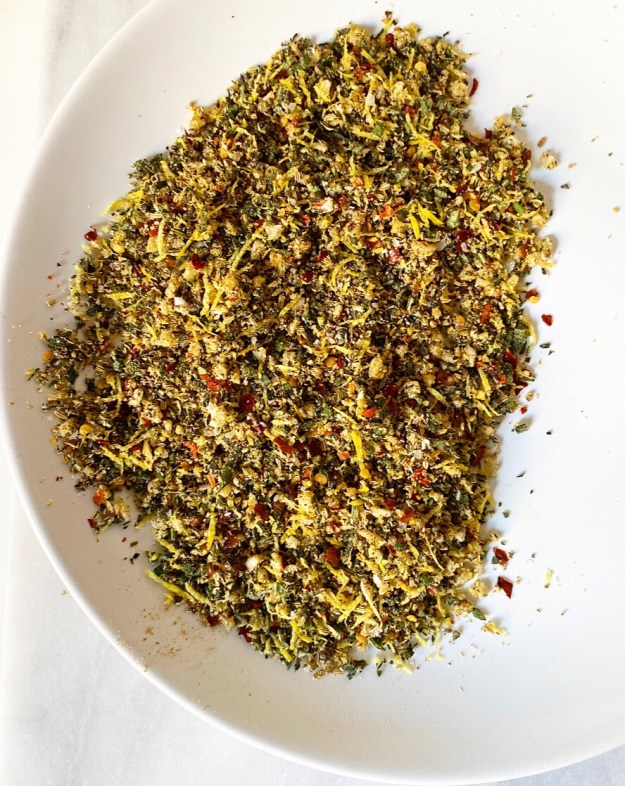
 Another thing you want? Kosher salt—about 1/2 teaspoon per pound. Don’t be tempted to skimp, or all the days of dry brining and the herbs and the money you spent will be for nothing. Salt is critical for both flavor and texture (it draws out moisture), and if used in proper amounts, will not leave your meat particularly salty, just flavorful. You’ll blitz most of it with toasted fennel seeds, sage, rosemary, thyme, garlic, lemon zest and crushed red pepper flakes to make the herb mixture. The rest will be rubbed into the crosshatched skin/fat cap.
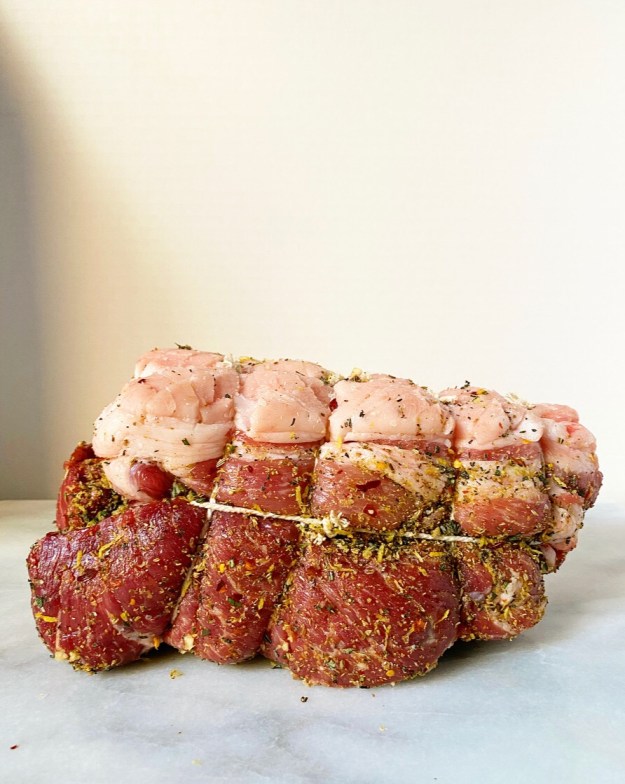
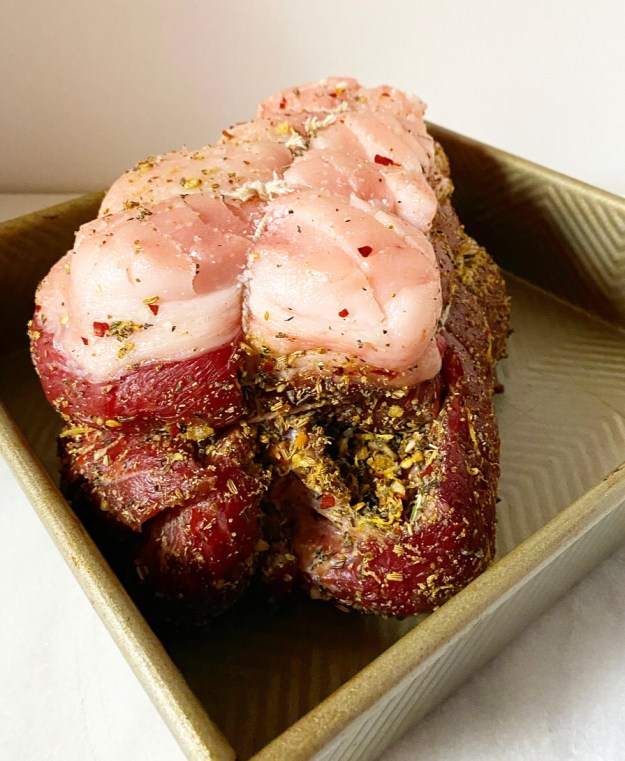 You will have to truss your pork butt, which is really no trouble. Just tie it at short intervals and then anywhere else it isn’t holding together as one cohesive unit. You want all those good herbs to stay put! Then stick the whole thing in a dish and put in the refrigerator and forget about it for 24-48 hours until it’s dry to the touch and the color has changed.
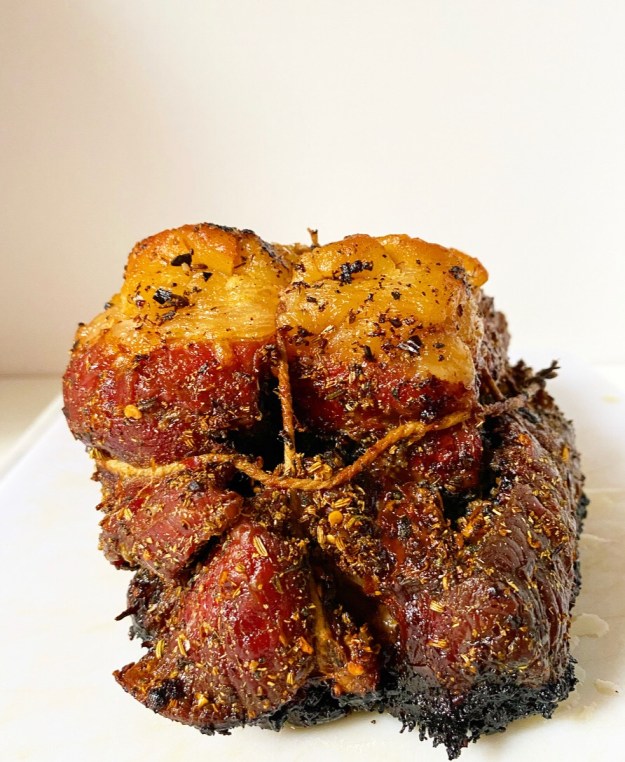
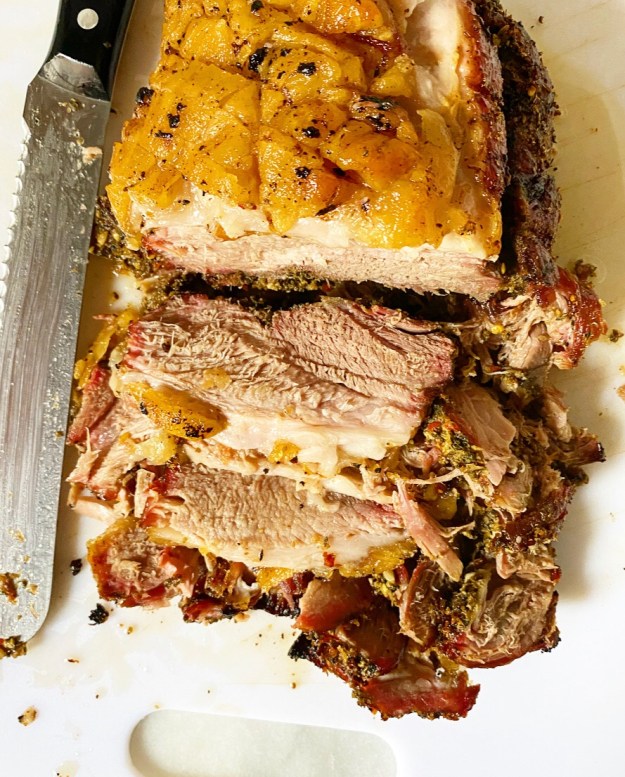
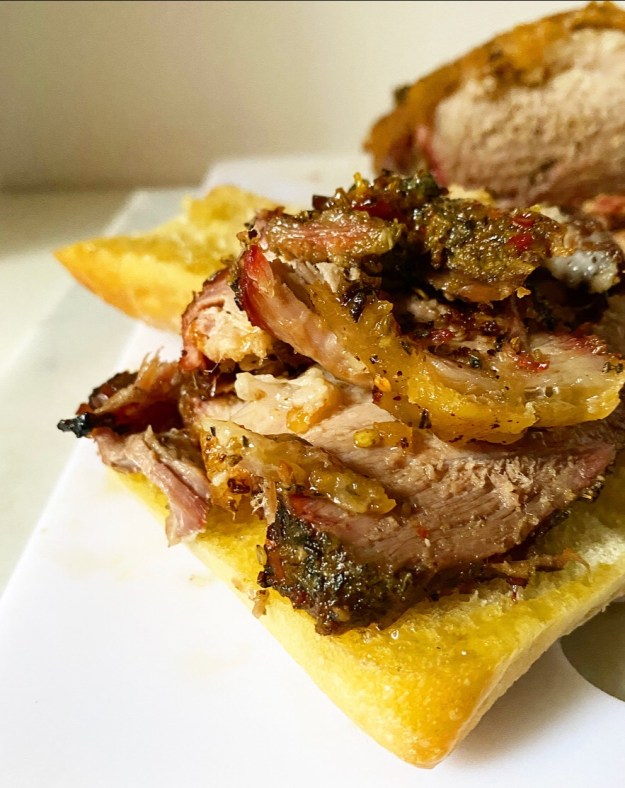
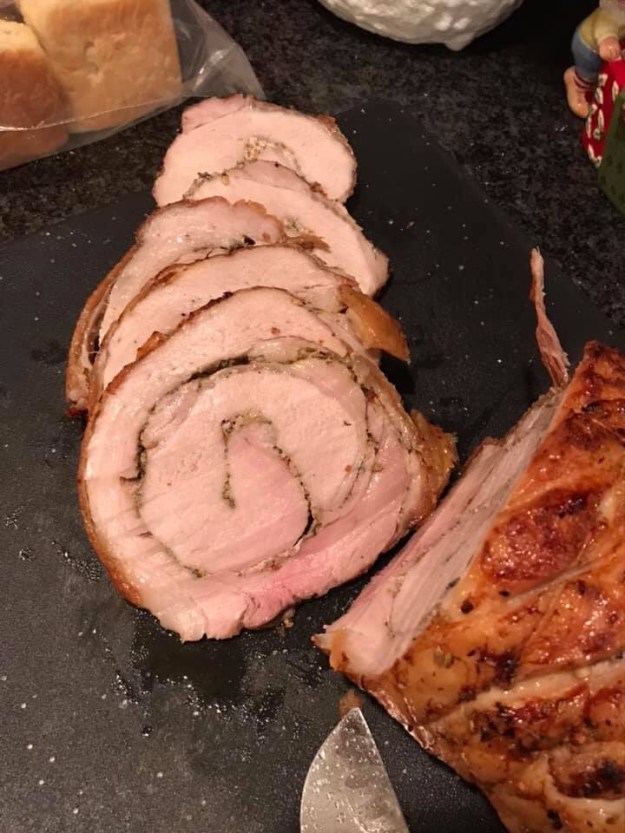
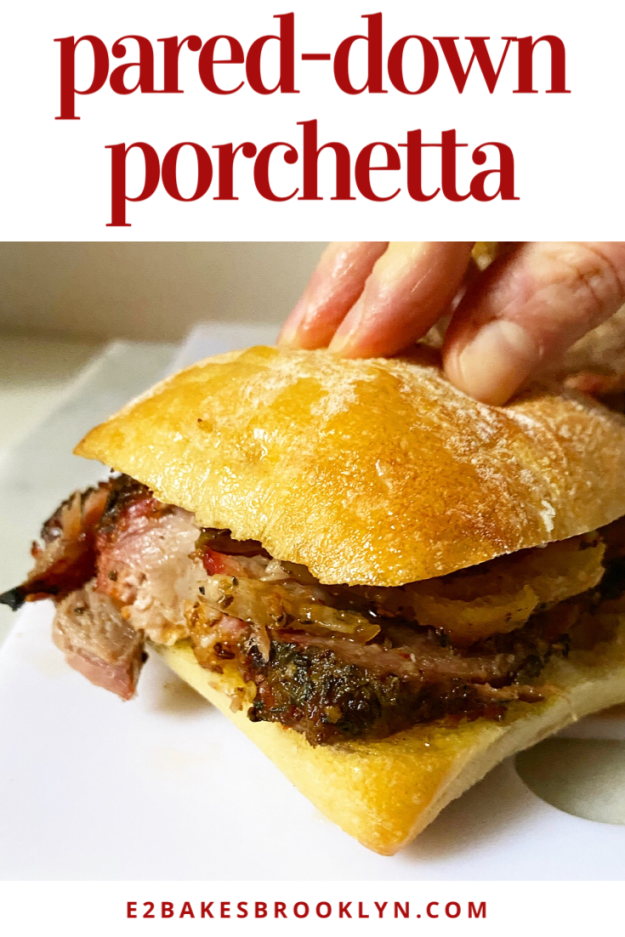
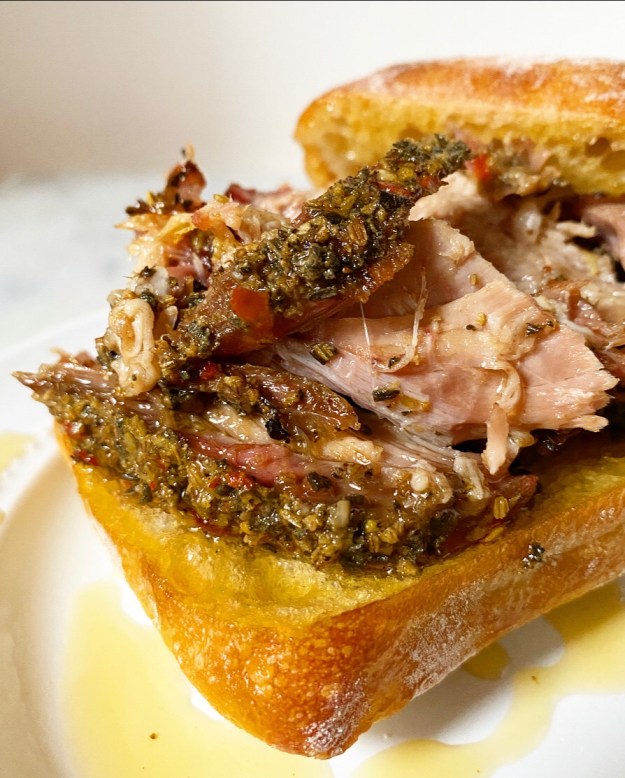 And then roast it looooow and slooooow before crisping up that fat cap, and slicing and serving it on rolls or crusty bread that you’ve given the slightest dip in the rendered fat. You can also serve it alongside garlicky greens or roasted vegetables. Really, you can’t go wrong.
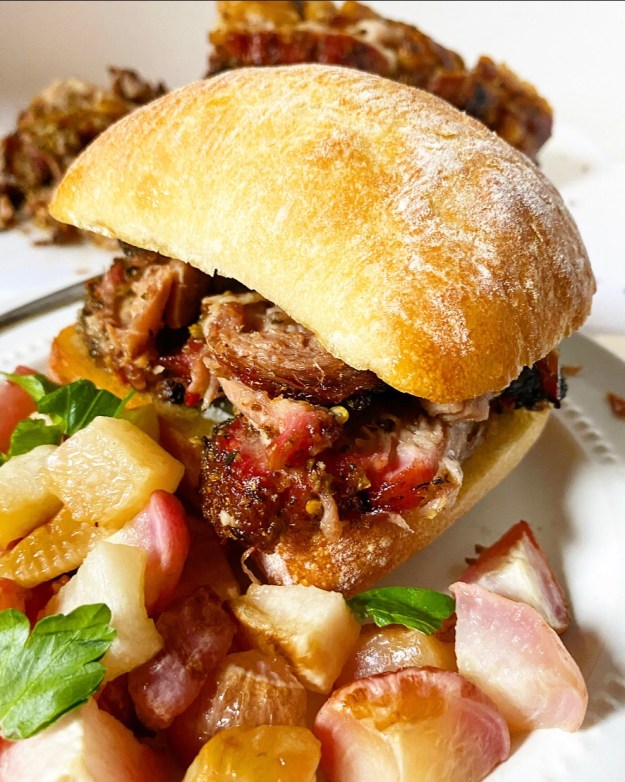 I feel like this Pared-Down Porchetta would be a wonderful main for Super Bowl Sunday, Oscar Night, Easter, or any old night. I mean, you could certainly hold onto this recipe until next Christmas, but that seems like an awfully long time from now, don’t you think?
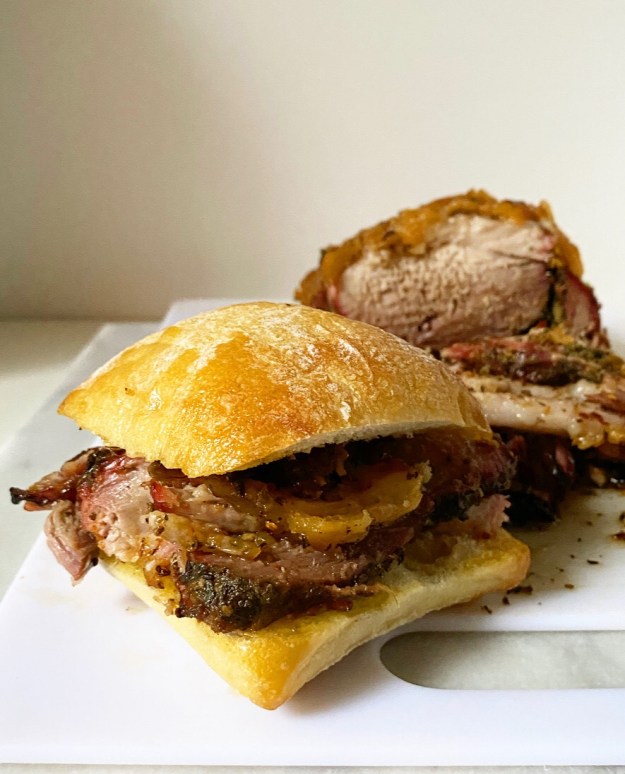
 Hello, it’s me, your completely exhausted food blogger friend!
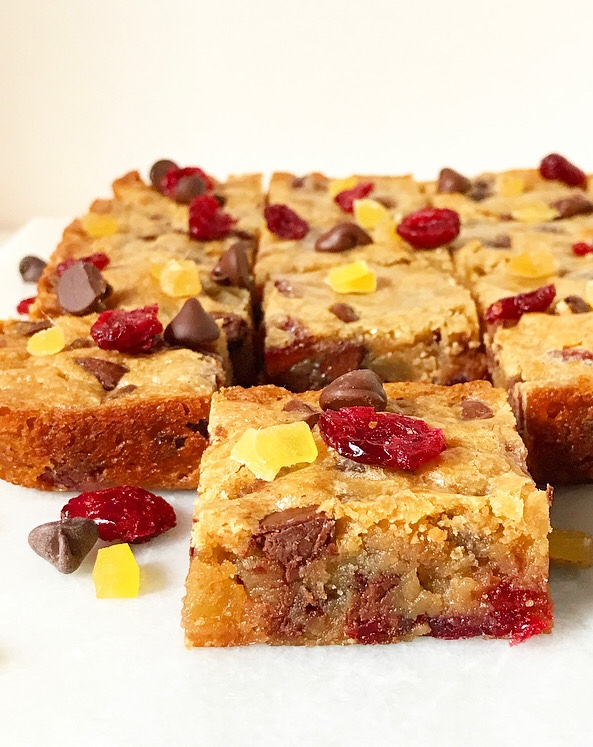 It’s been determined that our Christmas dinner dessert will be a
  The
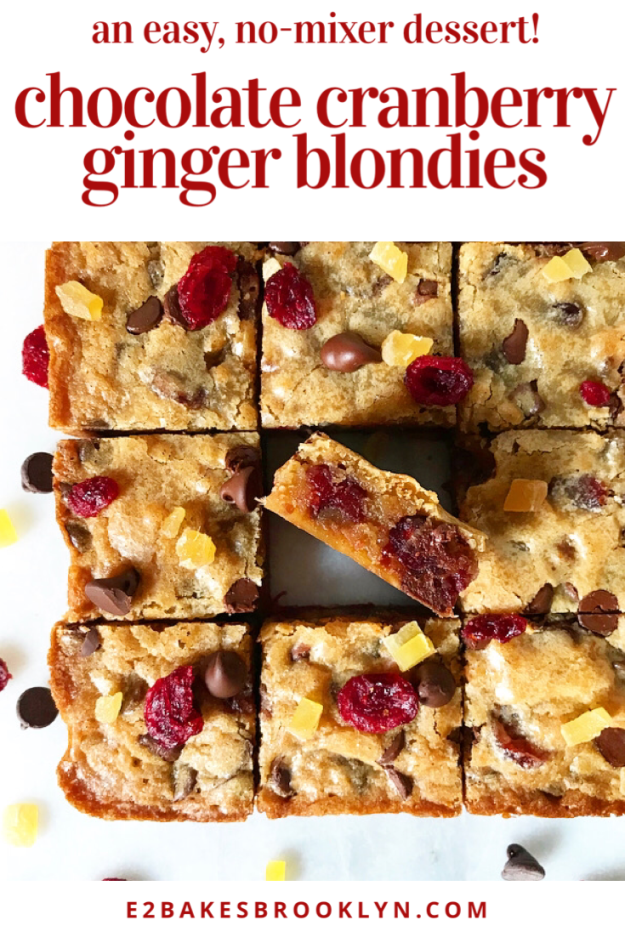
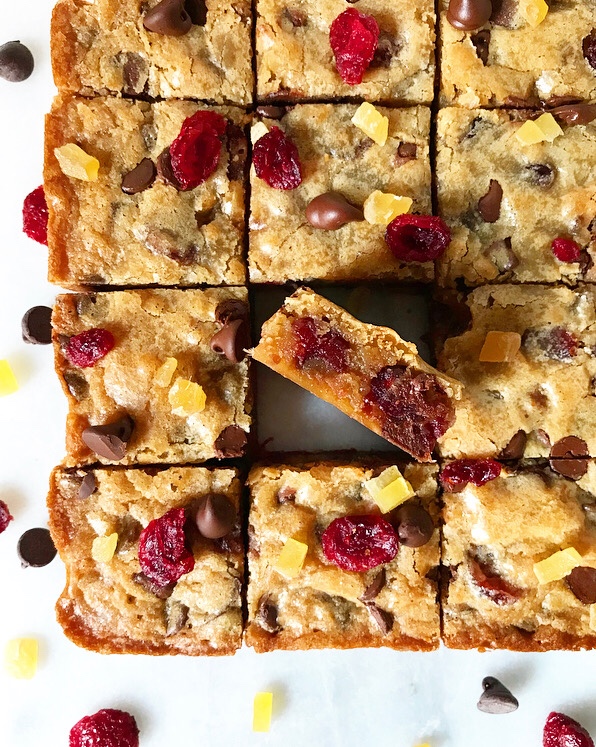
The 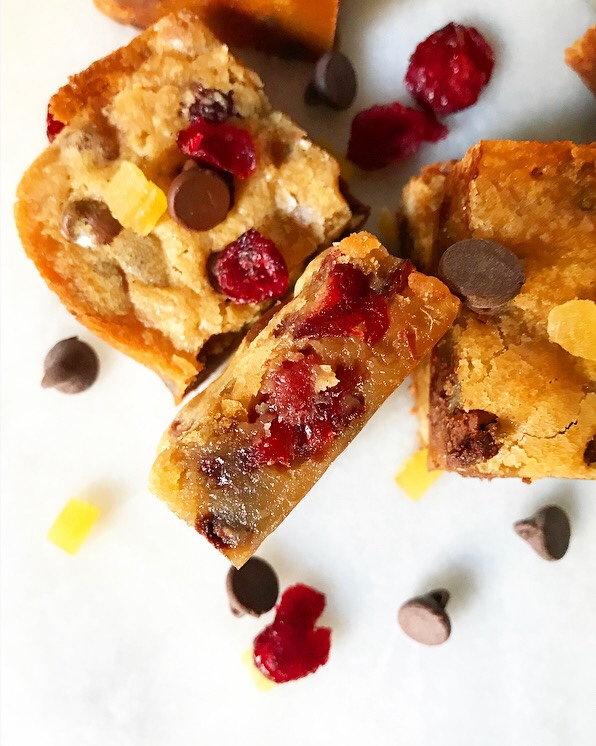 You could put 1 1/4 cup of any mix-in you like in this blondie batter and it’d bake up beautifully. I went with chocolate chips, dried cranberries and candied ginger because I had a little of all of those in my cookie mix-in cabinet—it’s as simple as that. It helps, of course, that chocolate, cranberries and candies ginger are both beautiful *and* sweet, tangy, delicious holiday fare. I mean, are these calling your name like they are mine?
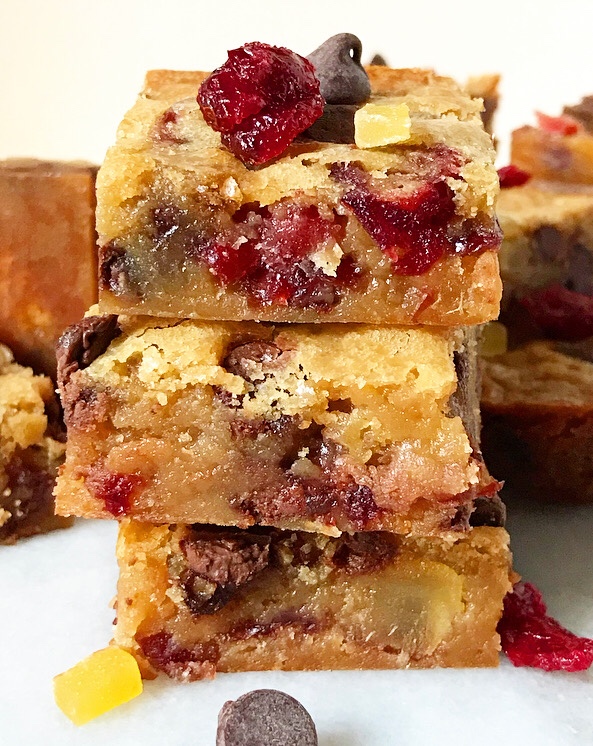 I’ll be taking this Wednesday off posting because it’s Christmas (duh). I hope you have a wonderful holiday filled with good food and people you love. I’ll be back Friday with my last recipe of 2019 and probably some dog pictures.