 Do you think Nancy Meyers knows how many lives she changed when she wrote peanut butter and Oreos into the 1998 remake of The Parent Trap? Mine, for one, and probably millions more. Certainly more than when she had Meryl Streep make croissants in It’s Complicated (and in an absurdly short period of time, I might add). Probably way less than when Steve Martin had a meltdown over the quantity disparity between packages of hot dogs and hot dog buns in Father of the Bride. That one still hasn’t been resolved.
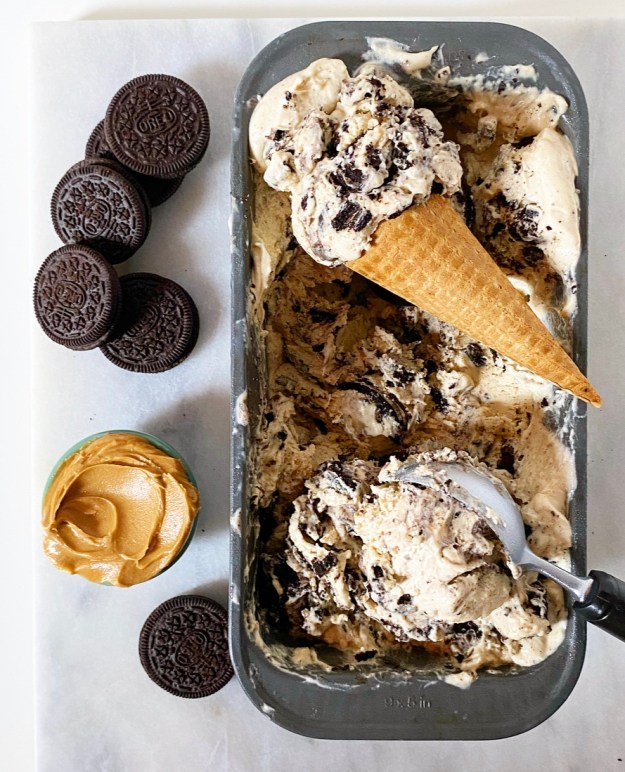
Hi, I guess I am a Nancy Meyers completist. Anyway, since I started baking, I’ve thrown peanut butter and Oreos into many recipes because they just *work.* This salty, creamy, bittersweet combination is one of the easiest ways to take a dessert from fine to fabulous.
Exhibit A: my most popular recipe of last year (and all time), Peanut Butter Oreo Magic Bars. Regular magic bars are good. Oreo-Peanut Butter Magic Bars though? Ho-ly crap. Seriously, I’ve never once made a peanut butter and Oreo recipe and regretted it. Not once. They are a perfect pair. Period. End of story. Sorry friends with peanut allergies, I’ll get you next time.
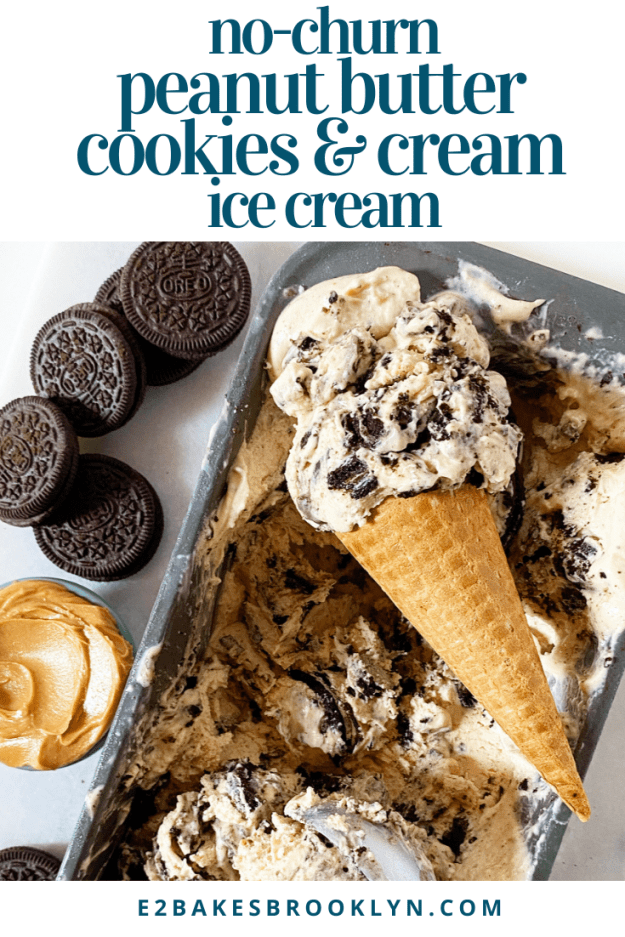
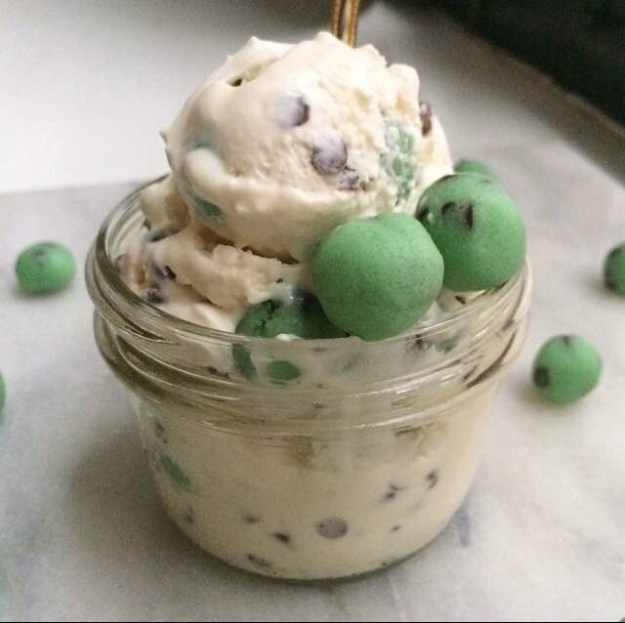
*gets off soap box Costco-sized box of Oreos*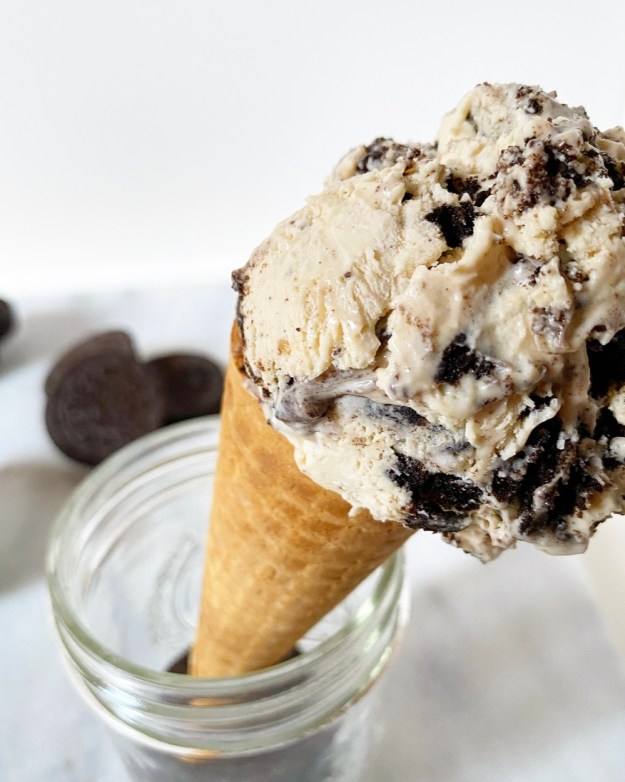 Today’s offering is one you probably saw coming from a mile away: No-Churn Peanut Butter Cookies & Cream Ice Cream! Of course—of course!—I was going to combine them in an ice cream someday. And by someday, I mean today, which just so happens to be National Ice Cream Day. I swear I didn’t plan it like that.
The base of No-Churn Peanut Butter Cookies & Cream Ice Cream is rich, peanut buttery and incredibly easy to make. It’s made from just two ingredients: sweetened condensed milk and whipped heavy cream. Together they make for a thick, rich, airy and decidedly not-icy ice cream, no machine required. Here, I added a touch of salt, some vanilla and 1/3 cup of creamy peanut butter to the sweetened condensed milk before folding in the whipped cream. Just a warning that this is very difficult not to eat right out of the mixing bowl, but patience is a virtue and you should (mostly) hold off because Oreos.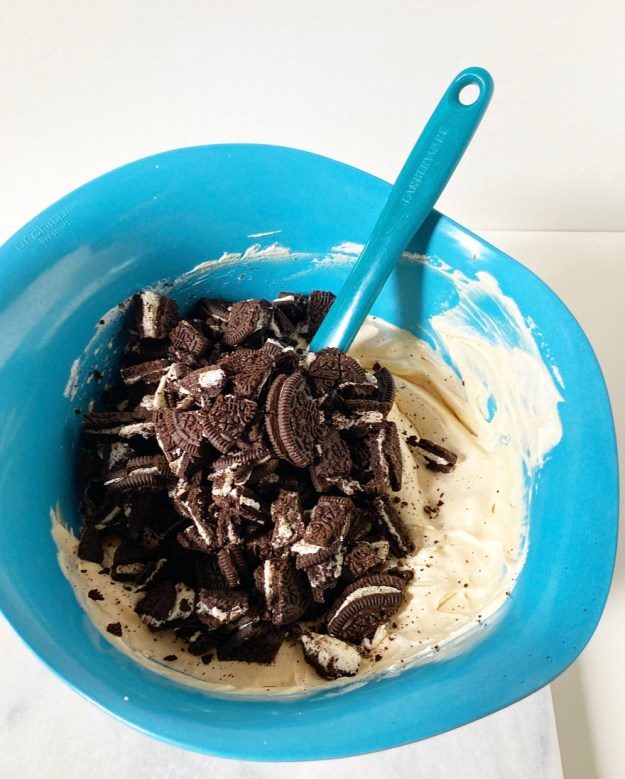 Oh yes, it’s the big chunks of Oreo cookie that are the real magic here. That’s one thing I have a lot of feelings about: big chunks of cookie instead of cookie crumbs in my cookies & cream. It’s not called crumbs & cream, am I right?!
The “secret” (not a secret) to getting big chunks of cookie in your scoops? Quartering the Oreos before folding them into the base. The pieces will seem too big, but I promise they’re not. They’ll soften slightly while the ice cream freezes so that, when scooped, each portion gets some big pieces and some little, which is absolute heaven for a texture person like myself.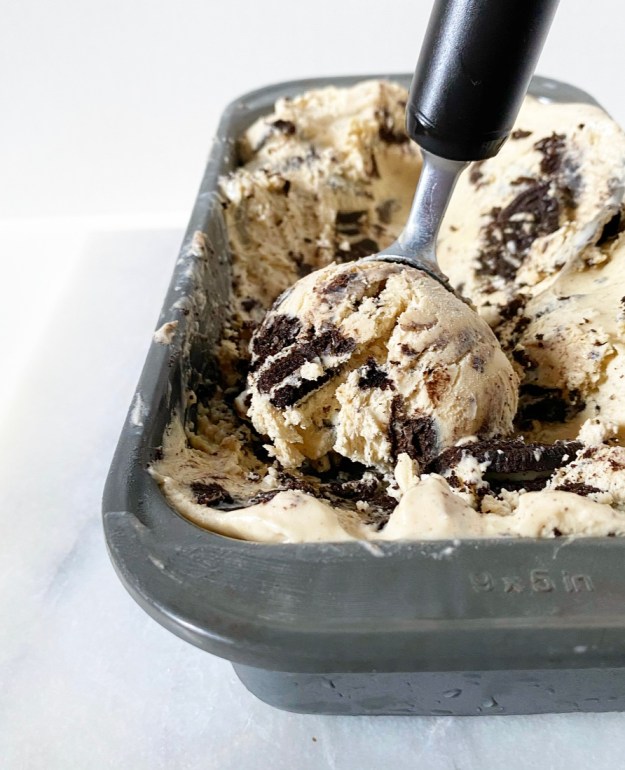 Actually, this whole situation is heaven. Cold, creamy, sweet & salty, Oreo-studded heaven piled in a cone.
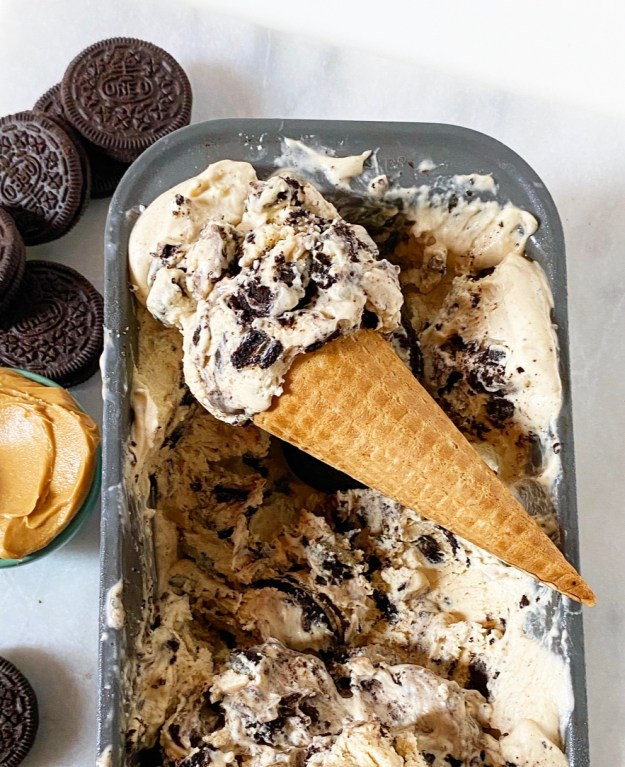
No-Churn Peanut Butter Cookies & Cream Ice Cream
makes about 8 cups
1 14-ounce can sweetened condensed milk
1/3 cup creamy-style peanut butter (not natural)
pinch of Kosher or sea salt
2 teaspoons pure vanilla extract
2 cups heavy whipping cream, very cold
24 Oreo cookies, cut into quarters
In a large mixing bowl, whisk together sweetened condensed milk, peanut butter, salt and vanilla.
In a separate medium-large mixing bowl, use an electric mixer to whip heavy cream to stiff peaks. Stir 1/3 of the whipped cream into sweetened condensed milk mixture just until combined. Gently fold in the another 1/3 of the whipped cream, followed by the last 1/3. Carefully fold in quartered Oreos.
Transfer ice cream into a 9×5″ loaf pan, or other 8 cup vessel. Press plastic wrap onto the surface of the ice cream. Cover plastic wrap with aluminum foil. Freeze ice cream for 6 hours or overnight, until completely frozen. Scoop and enjoy!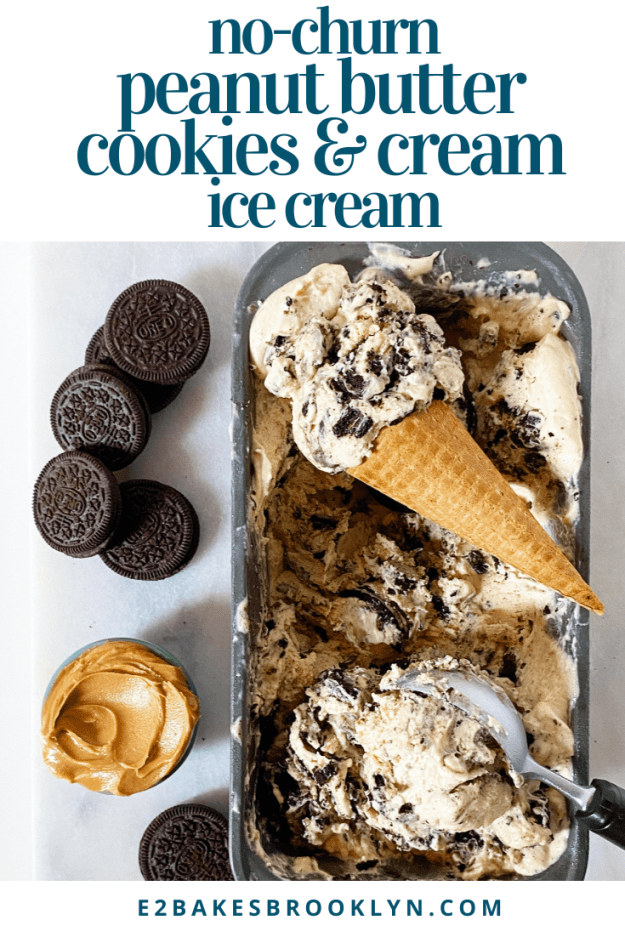

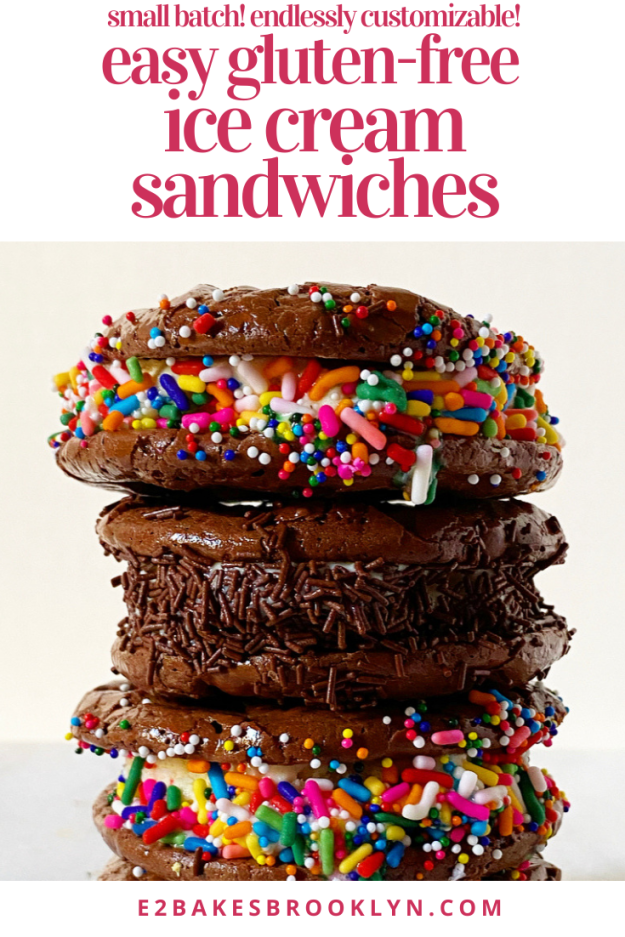
 When I posted
 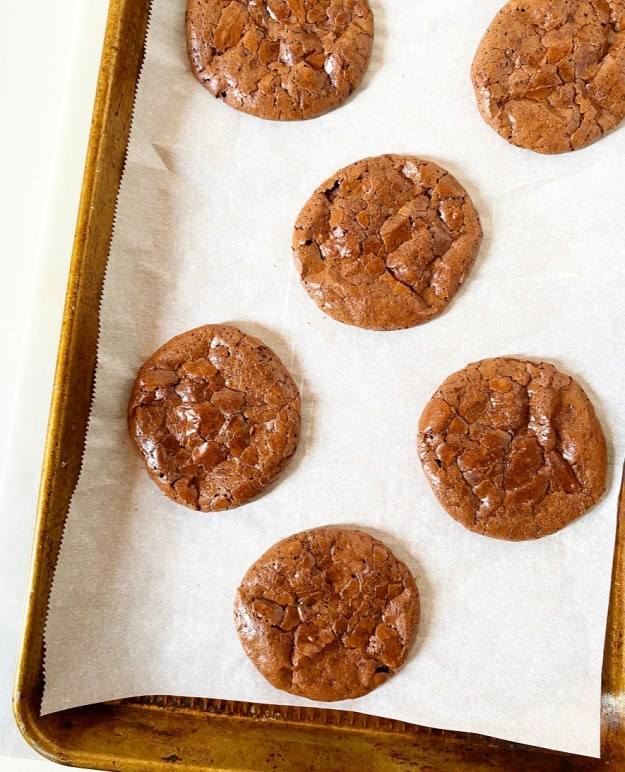 These cookies are on the sweeter side (confectioner’s sugar provides a lot of the structure), so I added a teaspoon of granulated espresso to the recipe to keep them from being cloying with ice cream. I also cut the size of the cookies in half for a dozen medium cookies instead of six large ones.
 Next up, you’ll need to freeze the cookies for about 30 minutes. This helps the ice cream to stay on the solid side and the cookies from getting too soft during assembly. This step is not strictly necessary, but it is good insurance against ice cream sandwich frustration.
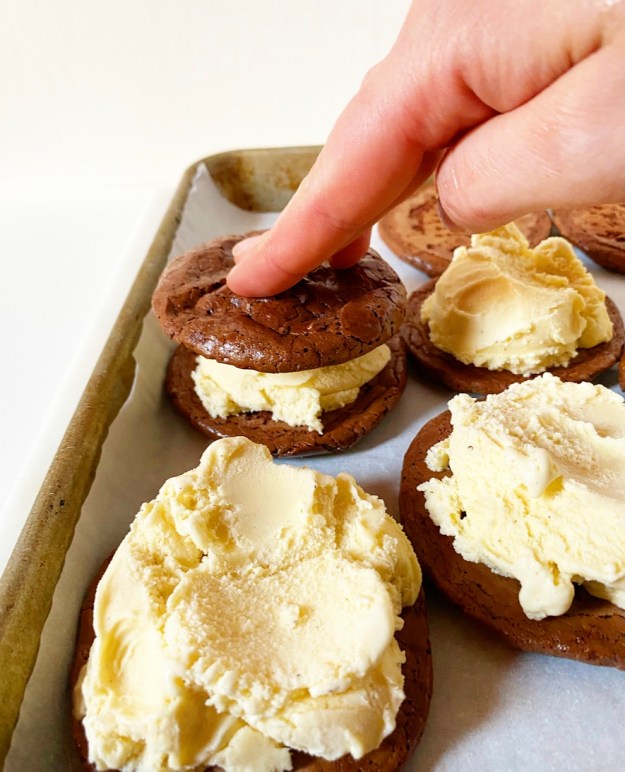 Regarding ice cream, use whatever flavor you want. I went with a mid-level nationwide brand’s vanilla here and it was fine—good, even—but I will go higher quality next time. Oh, and I’ll probably go with mint chocolate chip because it’s my favorite. The point is to use what you love and not settle for less. Cookies are an important part of ice cream sandwiches, but ice cream is the *most* important part.
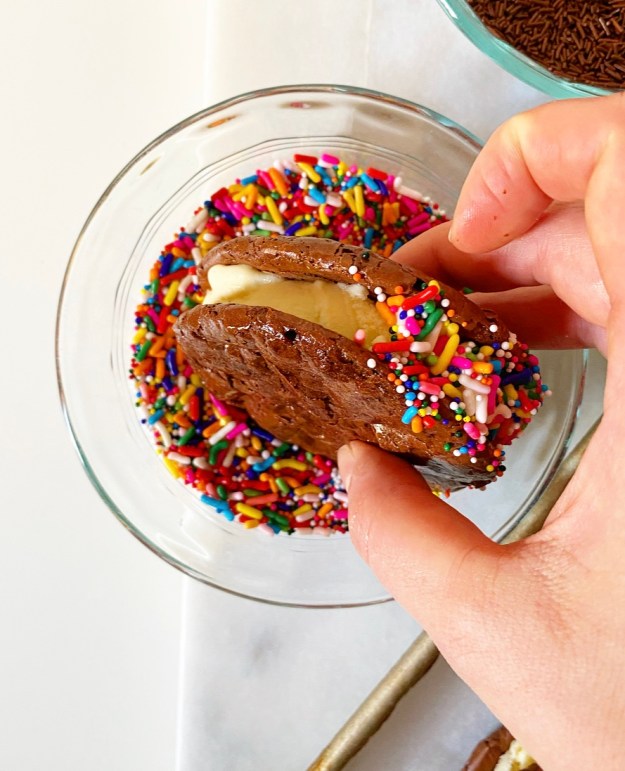
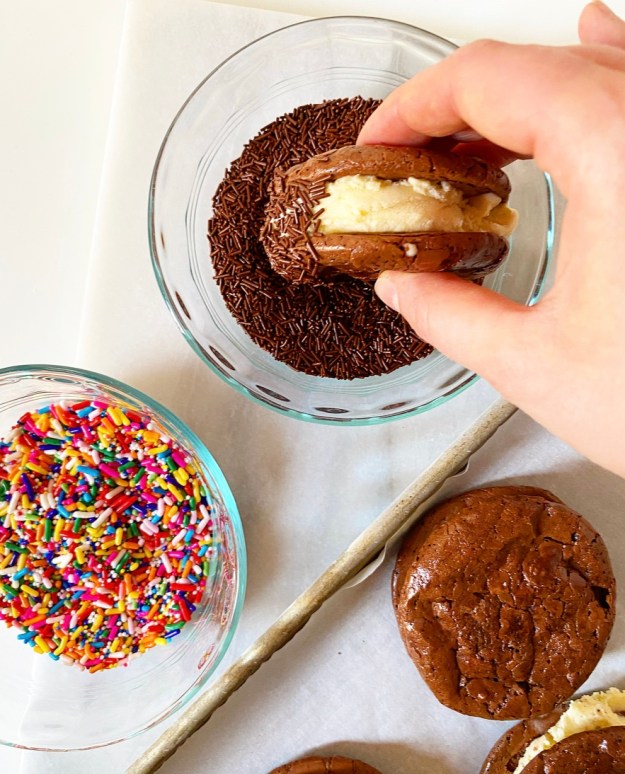 Freeze the sandwiches before rolling them in your sprinkles of choice or chopped nuts or mini chocolate chips or candy bar pieces or crushed Oreos. Again, use what you love and don’t settle for less. <—good life advice?
 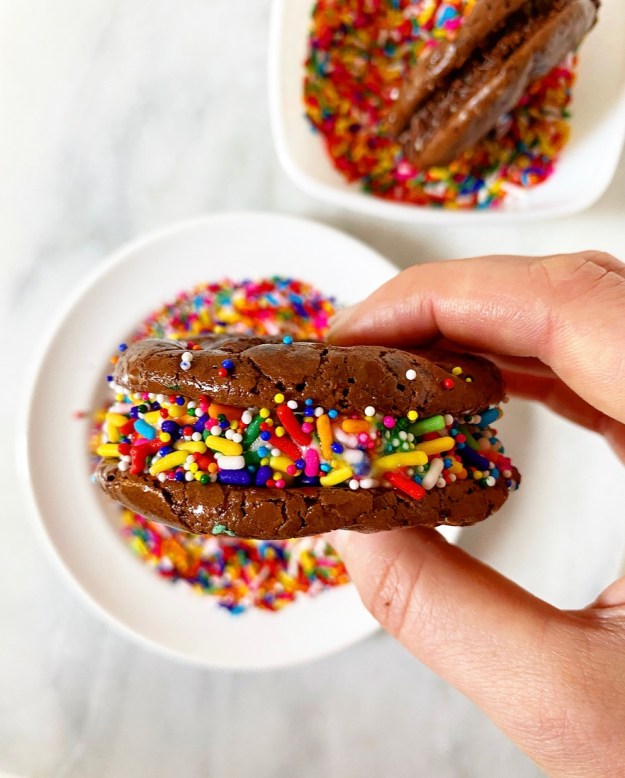 The last step is to freeze your ice cream sandwiches again for several hours or up to a day before digging in. Yes, you can eat them right after assembly, but the ice cream squidges out the sides and then you’re just eating two cookies with a translucent smear of ice cream and a weird smattering of sprinkles and then licking ice cream off a salad plate like a wild animal.
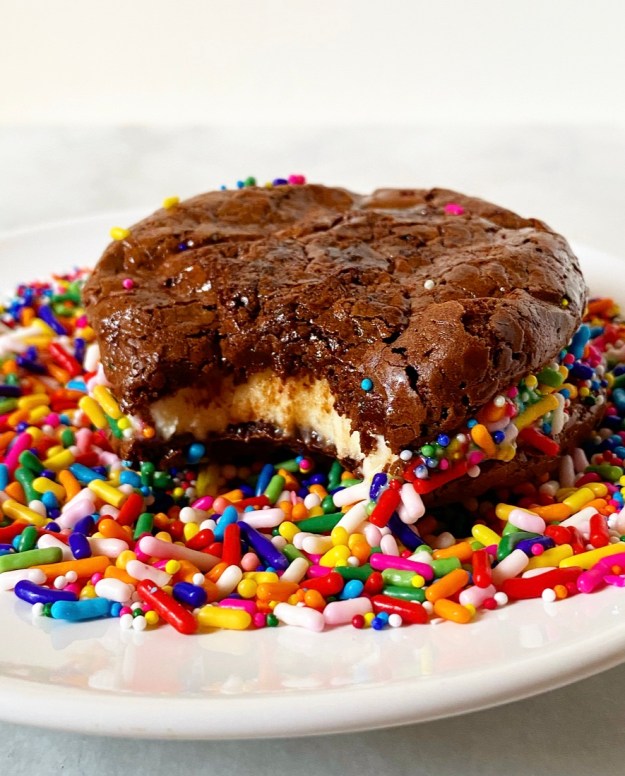 Anyway, freezing the completed ice cream sandwiches for a few hours allows the ice cream to adhere to the cookies so that the sandwiches become single entities. That’s something I really care about with my ice cream sandwiches. Considering how much I loathe the patriarchy, I sure do love to be able to eat things in a ladylike manner.
 I assure you, they’re worth the lengthy freezer time. The cookies never fully freeze, instead softening a tiny bit and getting extra chewy. And then there’s the ice cream and crunchy sprinkles. Like I said, perfect.


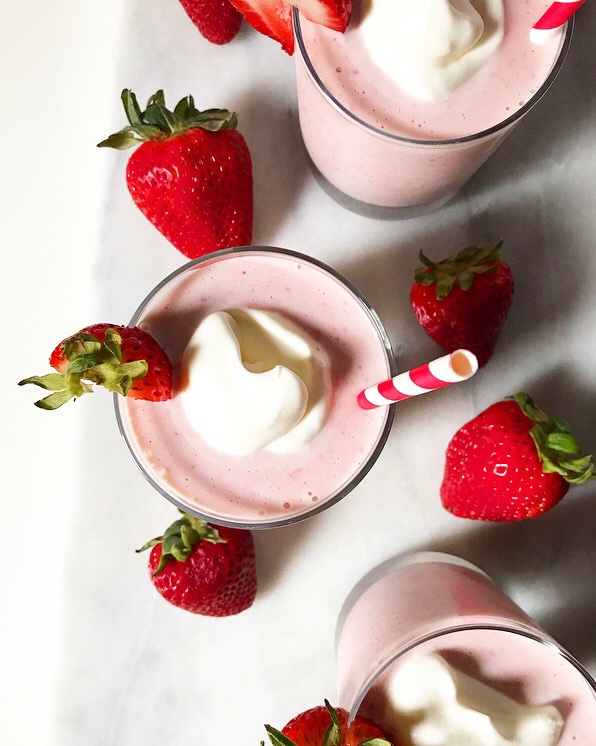

 Remember three months ago when everyone was making
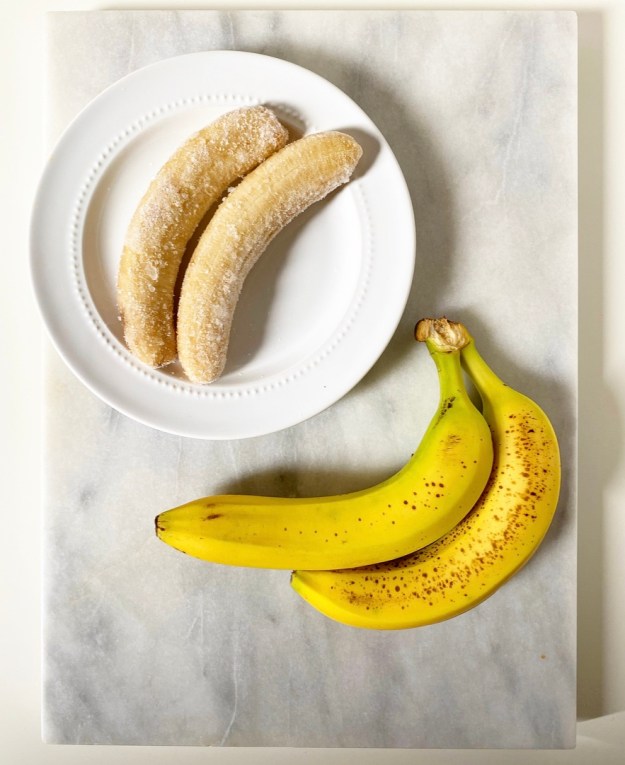
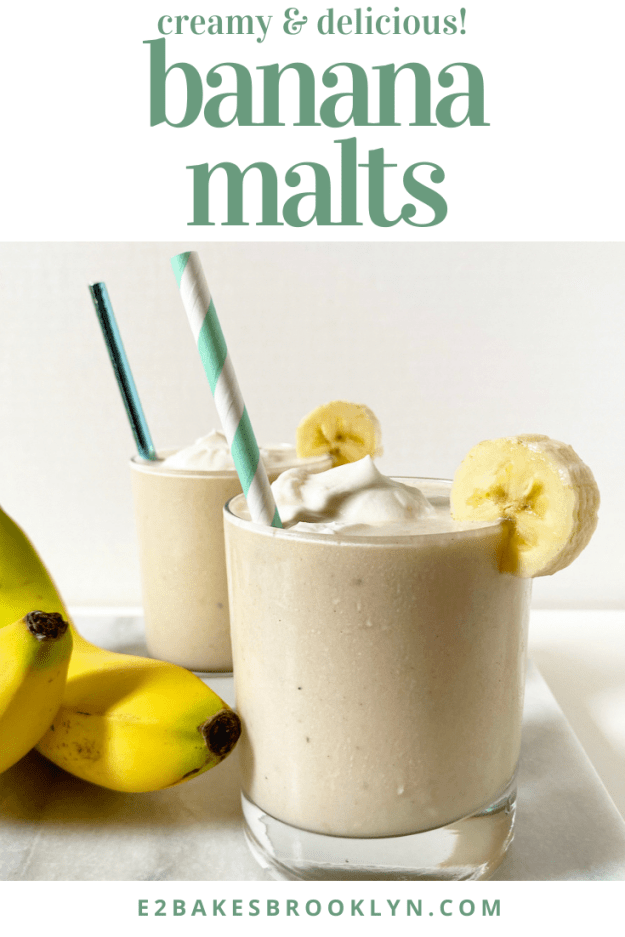
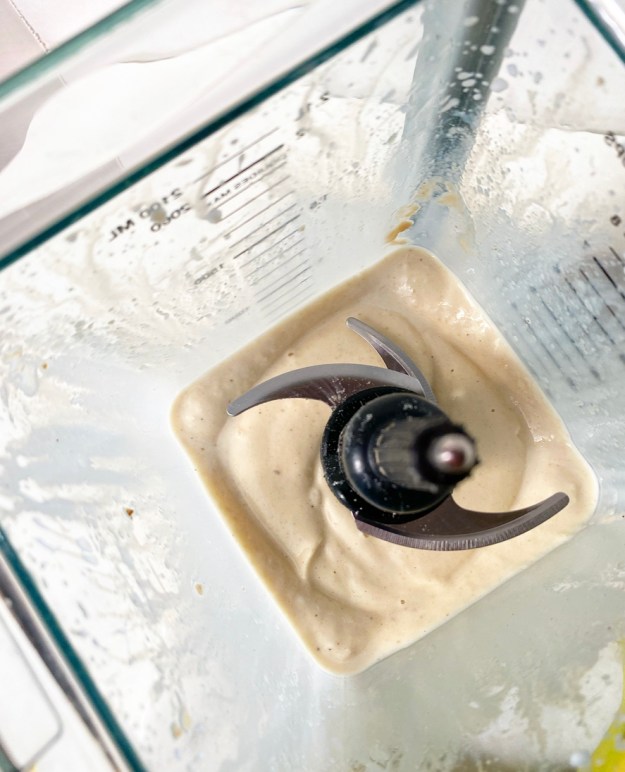 Well, here’s something to do with those frozen bananas. Throw ‘em in a blender with a couple big scoops of vanilla ice cream, a hefty dose of malted milk powder and some milk and blitz until super thick and banana-y and malty and luxurious.
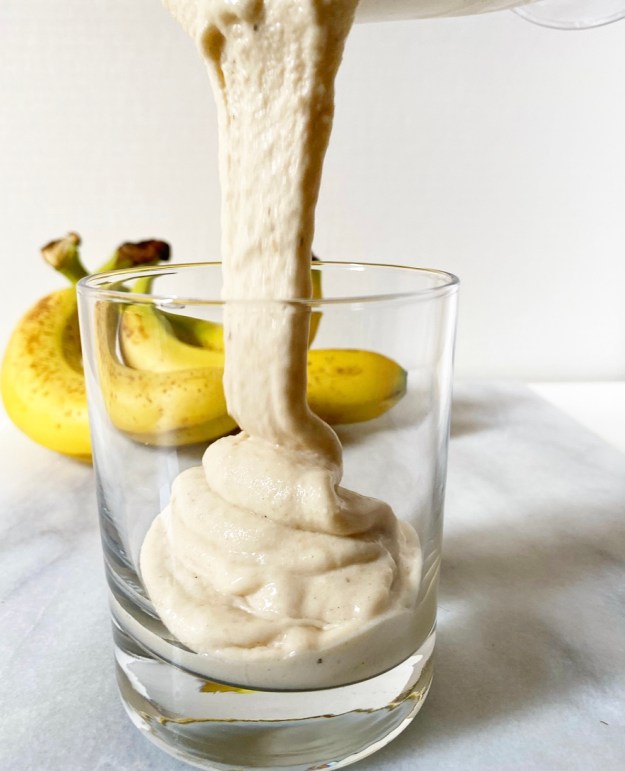 Yes, luxurious–what else would you call something this rich and smooth? The creamy banana-vanilla flavor is only deepened by the addition of malted milk powder. So good.
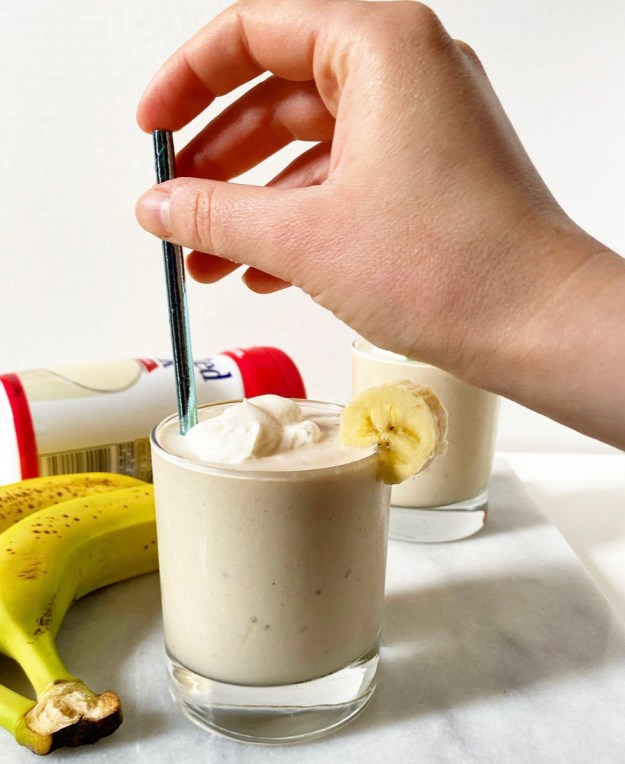
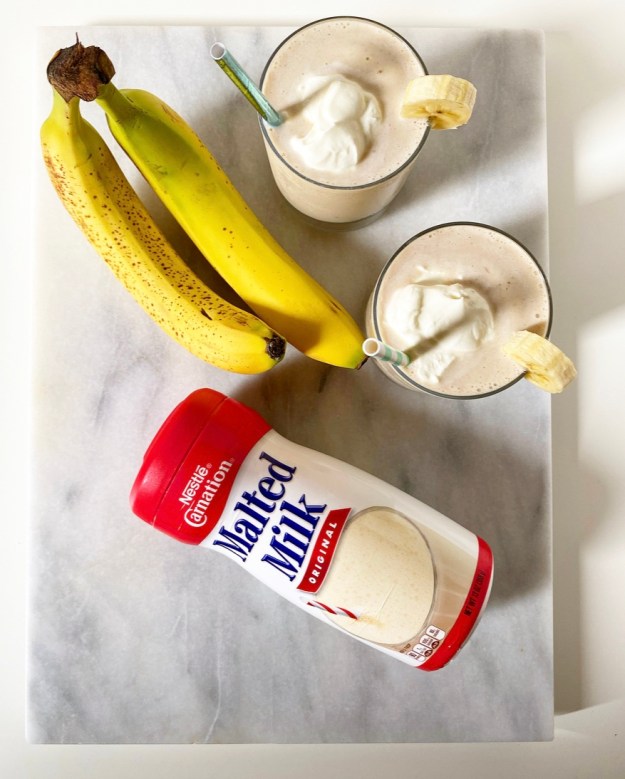 Now, I know not everyone loves malted milk powder, but
 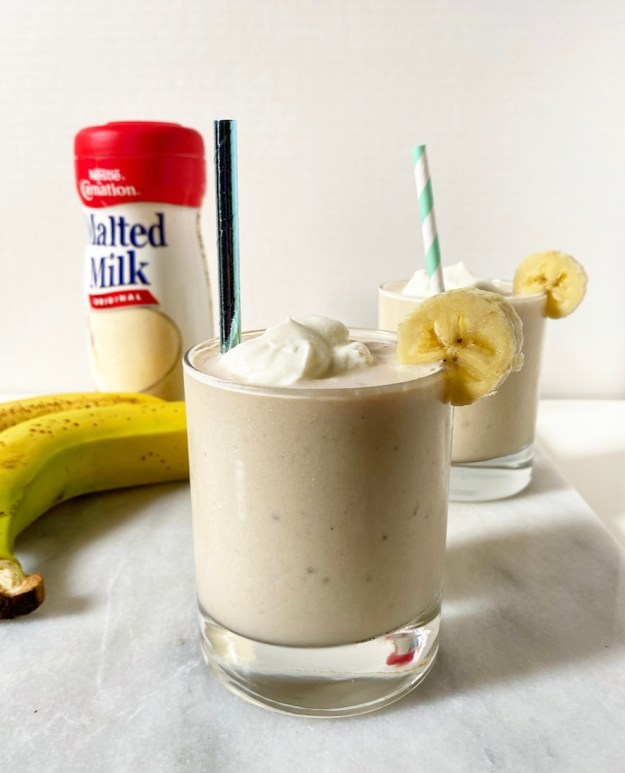 Either way, don’t forget the
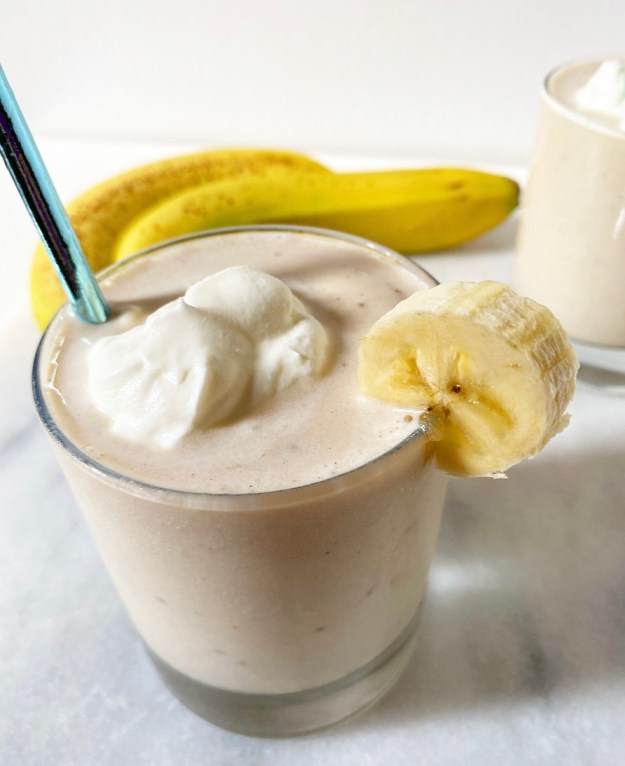


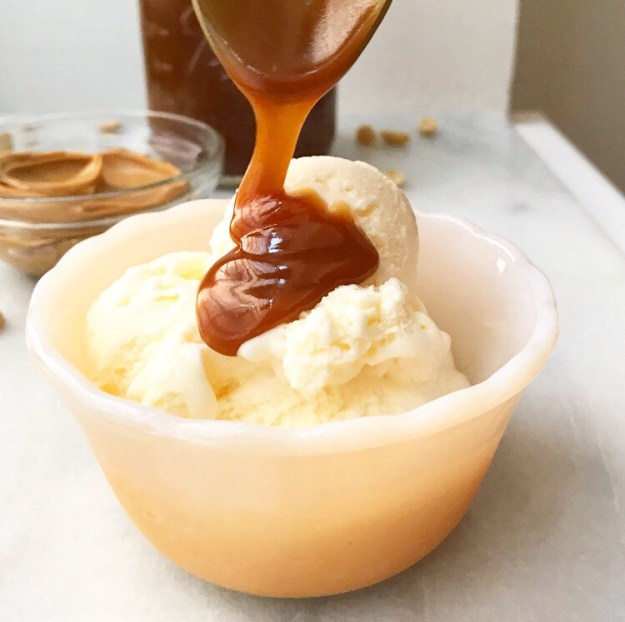
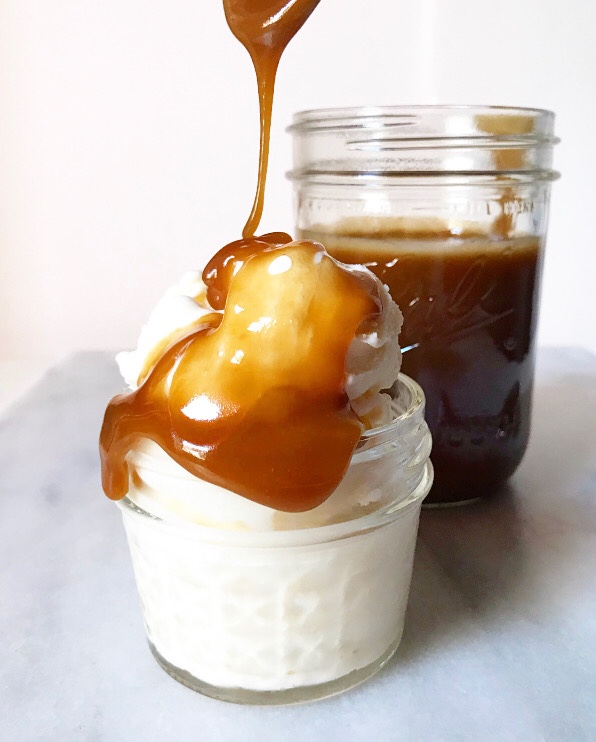
 My
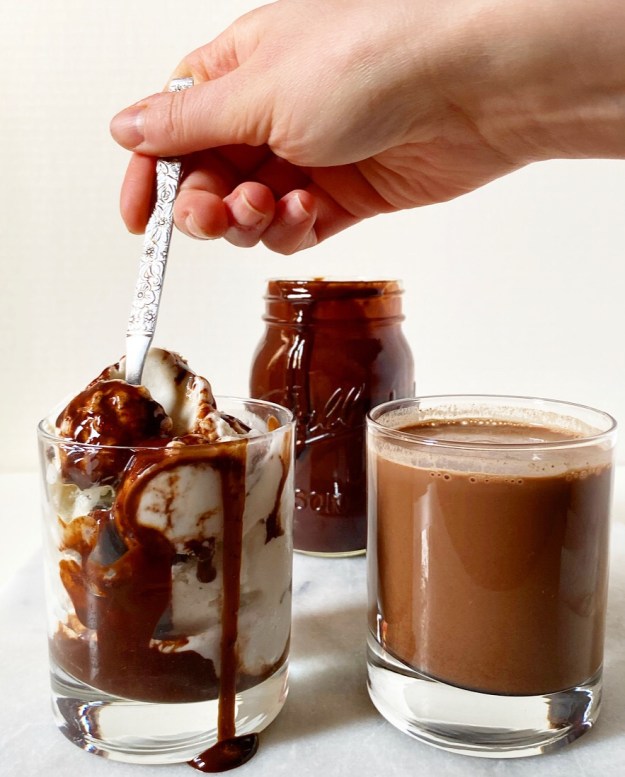
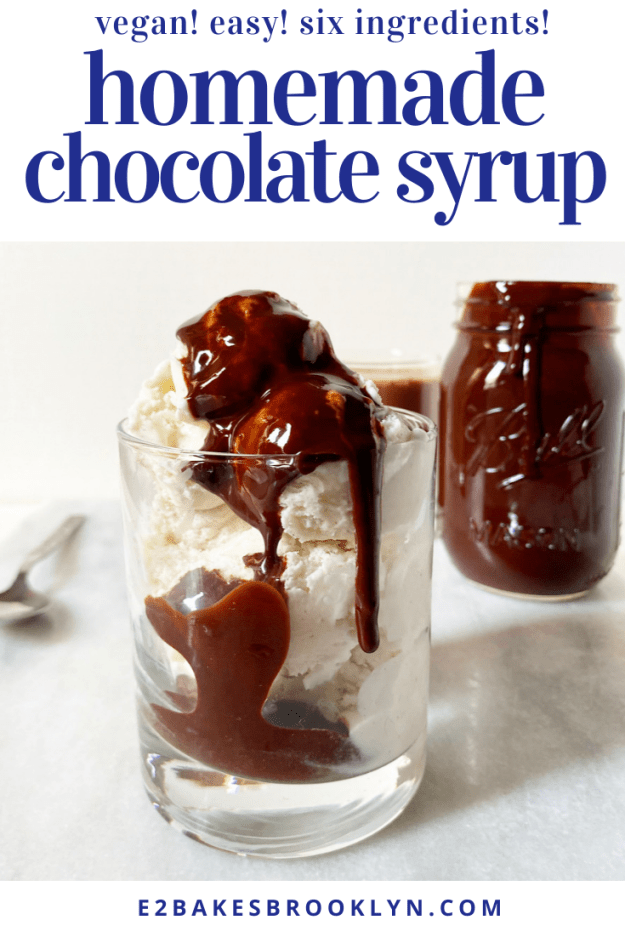
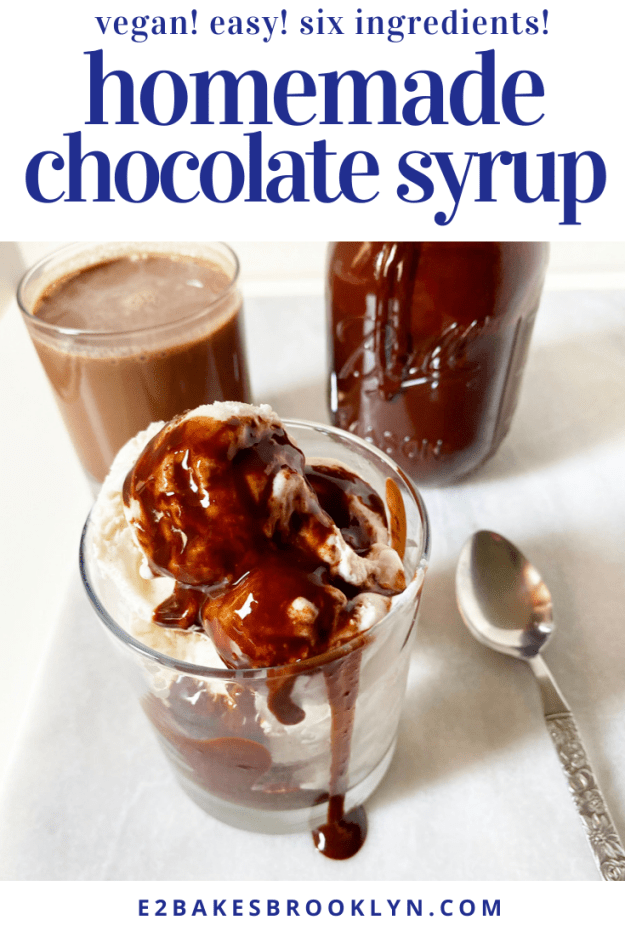
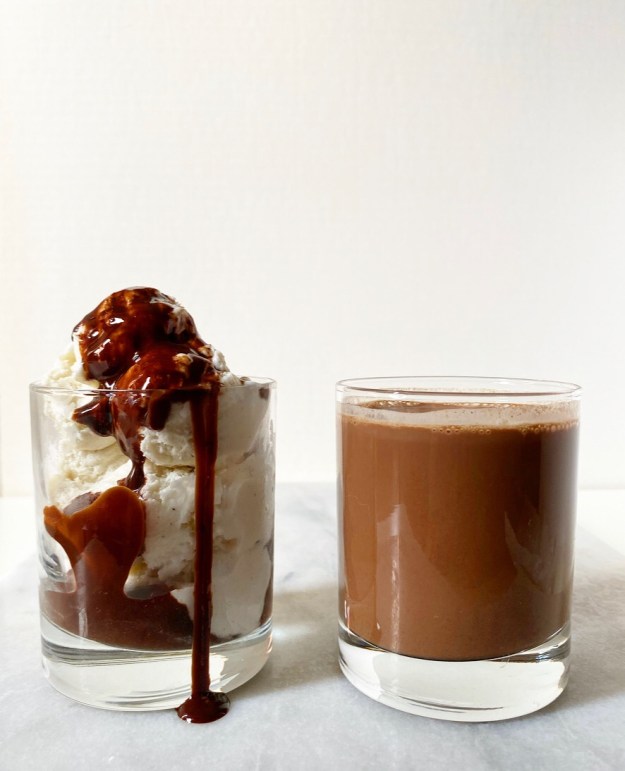
My 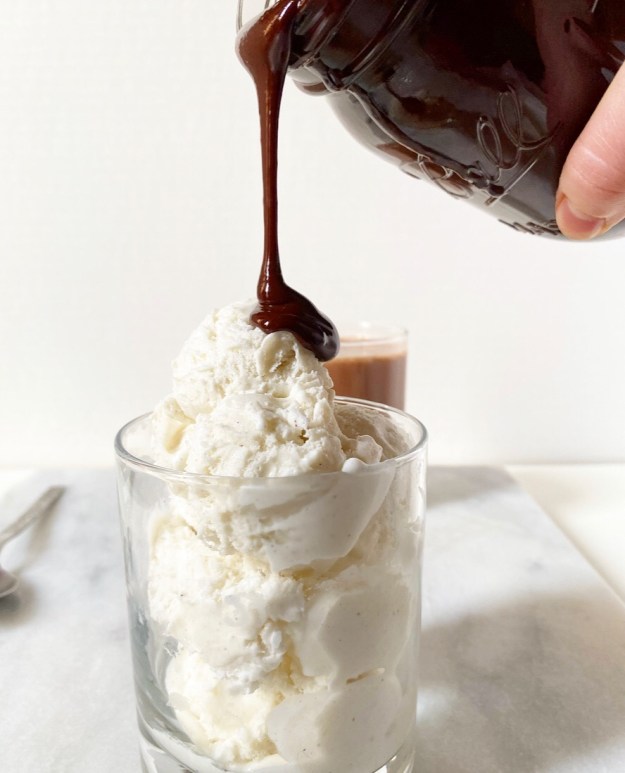 Fast forward fifteen-ish years to me living the professional home baker life in New York in the middle of a pandemic. I can pretty much make whatever dessert I want, and maybe it’s because the weather is warming up or I’m feeling nostalgic or a little homesick, but all I really want right now is vanilla ice cream and chocolate syrup.
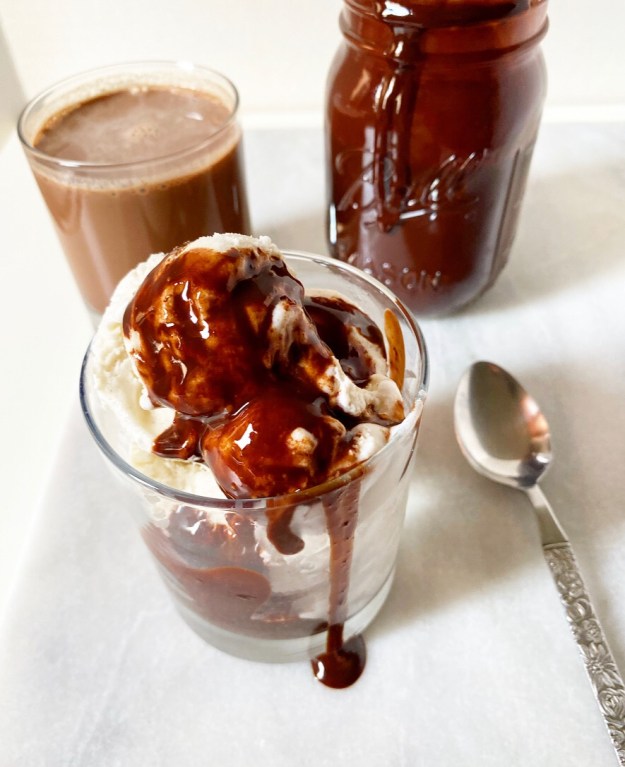 Now, I do not have much desire to begin making my own vanilla ice cream, but Homemade Chocolate Syrup? That, I need. Like many of us, I grew up with Hershey’s Syrup in the fridge, but now that I’ve started making my own chocolate syrup, I’m ruined for storebought forever. Deeply chocolaty, a little tangy, just thick enough, pourable even when it’s fridge-cold—this is the stuff my ice cream dreams are made of.
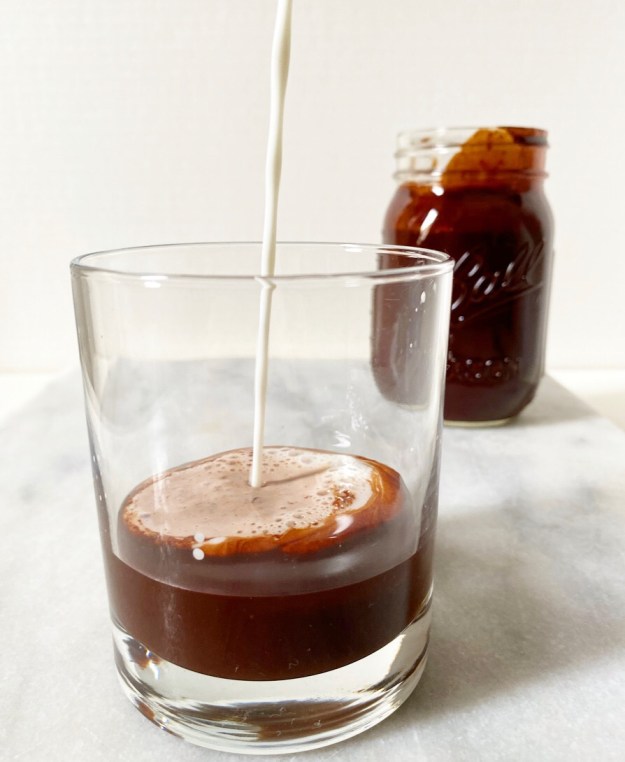
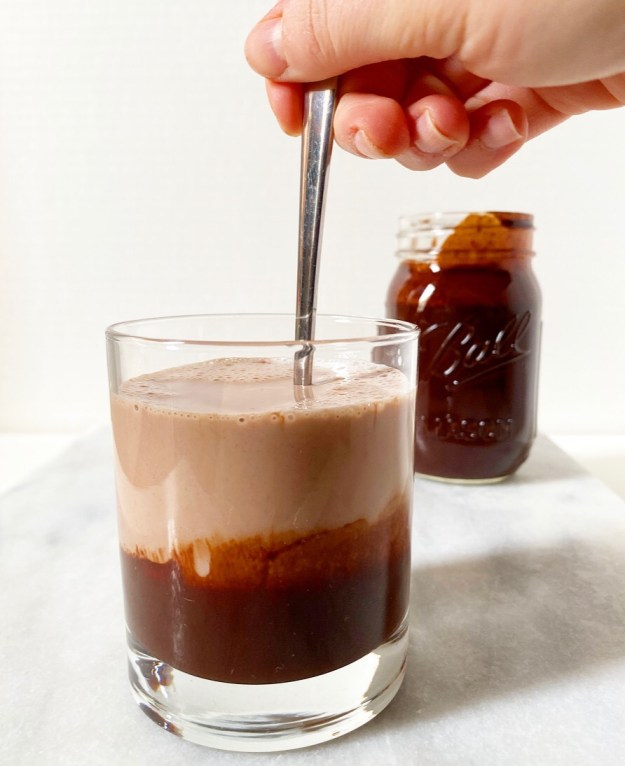
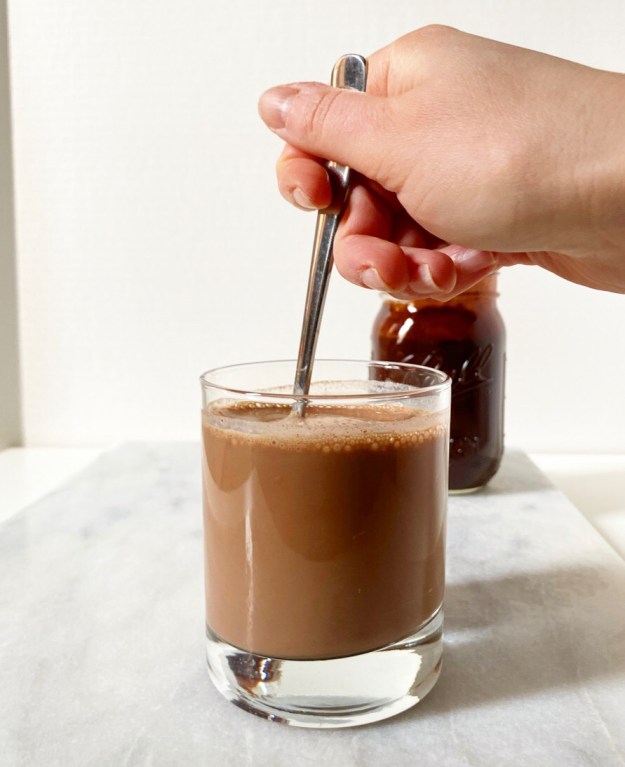
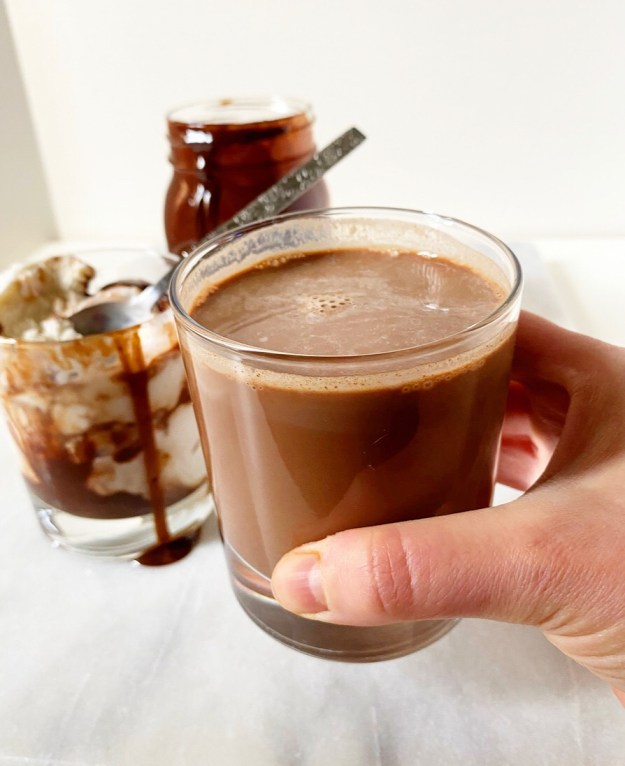 Also, my chocolate milk dreams. I generally cannot abide liquid dairy, but put some chocolate syrup in a glass of whole milk and I. am. interested.
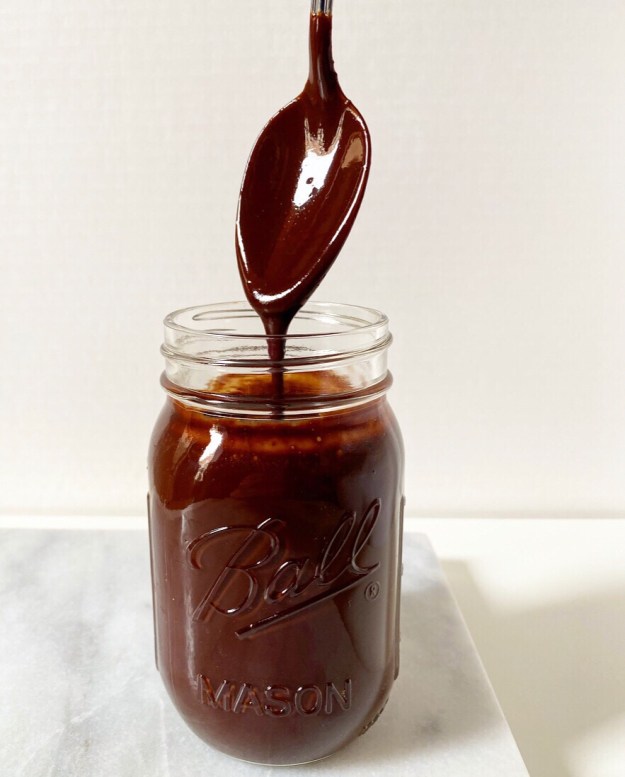 Homemade Chocolate Syrup beats the pants off of every storebought version I’ve ever had. Don’t get me wrong, I wouldn’t turn up my nose if someone offered me a scoop of ice cream with a drizzle of Hershey’s Syrup on top—I’m not a monster!—but it simply can’t compete with this stuff. Where the syrups you’ll find on shelves are cloyingly sweet, lacking in chocolate flavor and full of ingredients none of us can pronounce, this one is super chocolaty from cocoa powder and bittersweet chocolate, has a little depth from brown sugar, and requires six ingredients that you very well may have in your pantry right now. Oh, and it’s vegan.
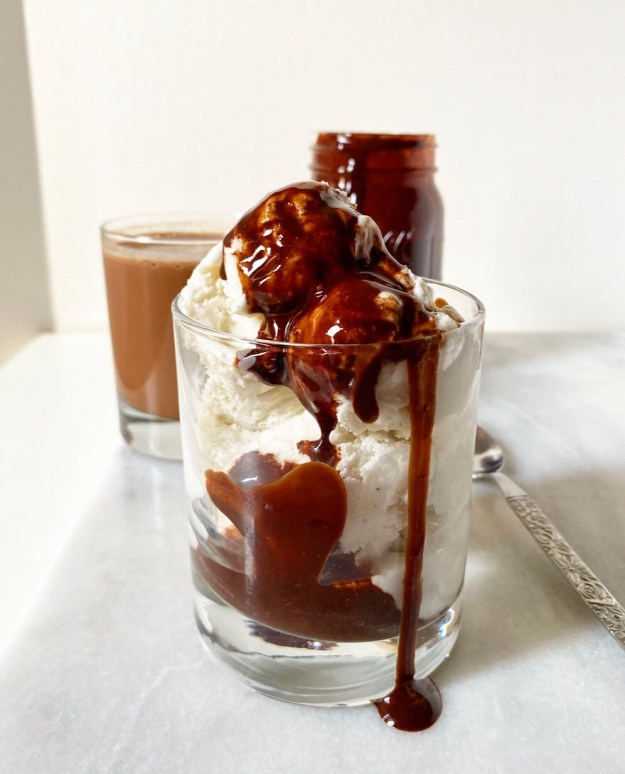 With that, I rest my case…and also tiptoe into my kitchen at 2am for some ice cream and Homemade Chocolate Syrup.