 After declaring that I was going to tackle my fear of cheesecakes (more accurately, the water bath/bain marie) last summer…well, I didn’t do that. I made you a bunch of other stuff though, so I’m not that sorry about it.
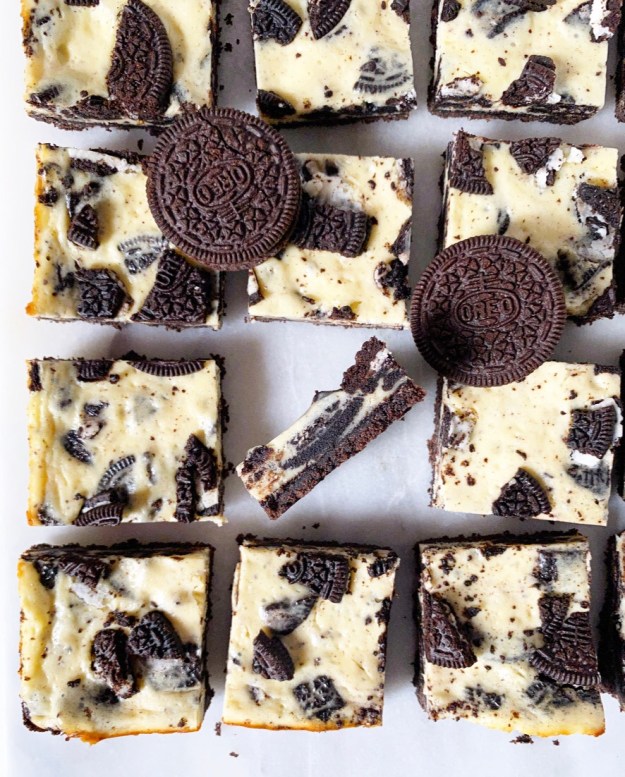
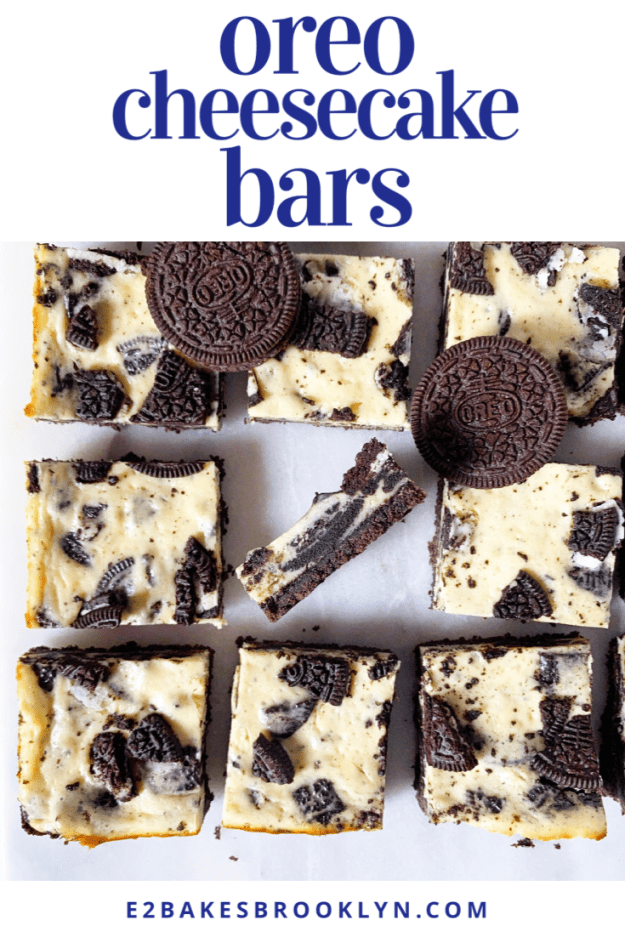
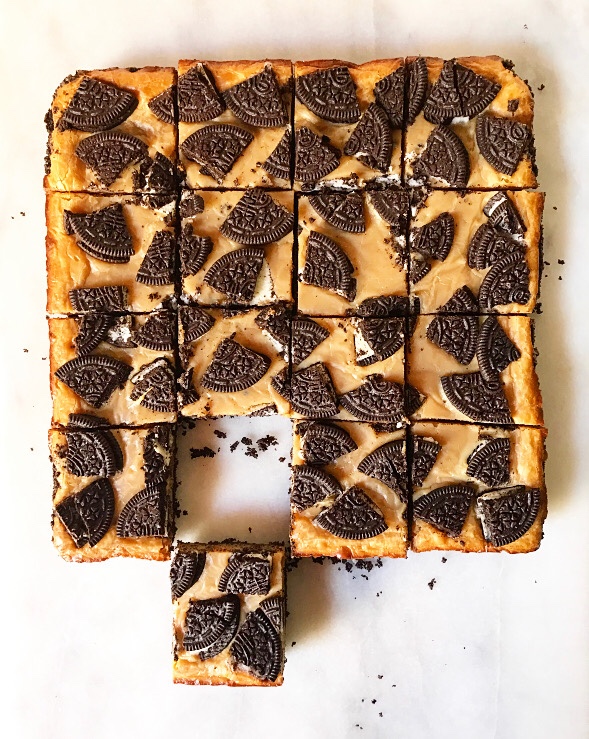
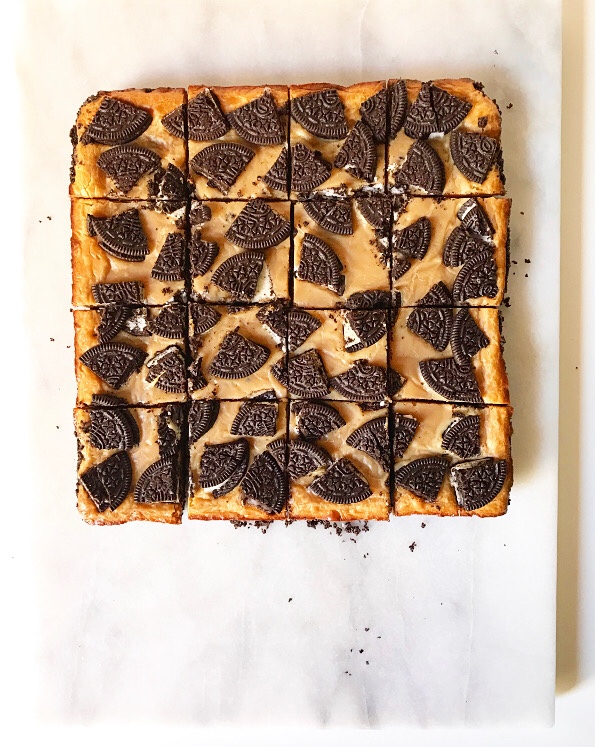
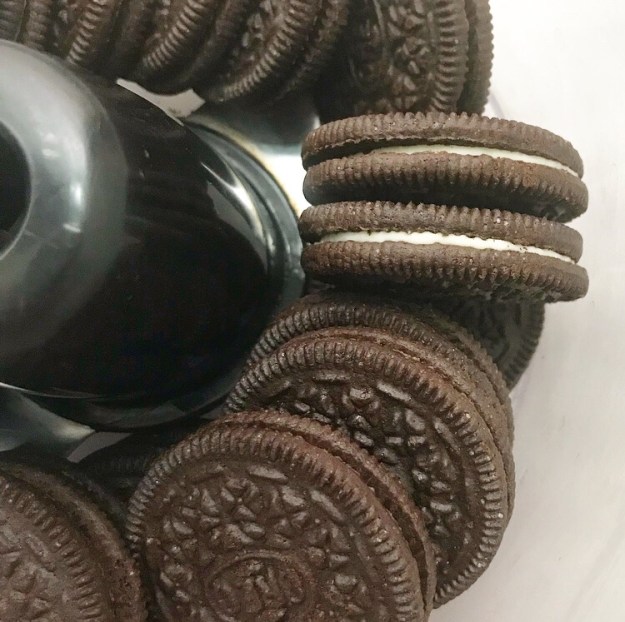
Perhaps this will be the year I make a real, mile-high, baked in a water bath, dreamy, creamy, wonderful cheesecake. But perhaps not. I’m going get my cheesecake fix either way though with these Oreo Cheesecake Bars.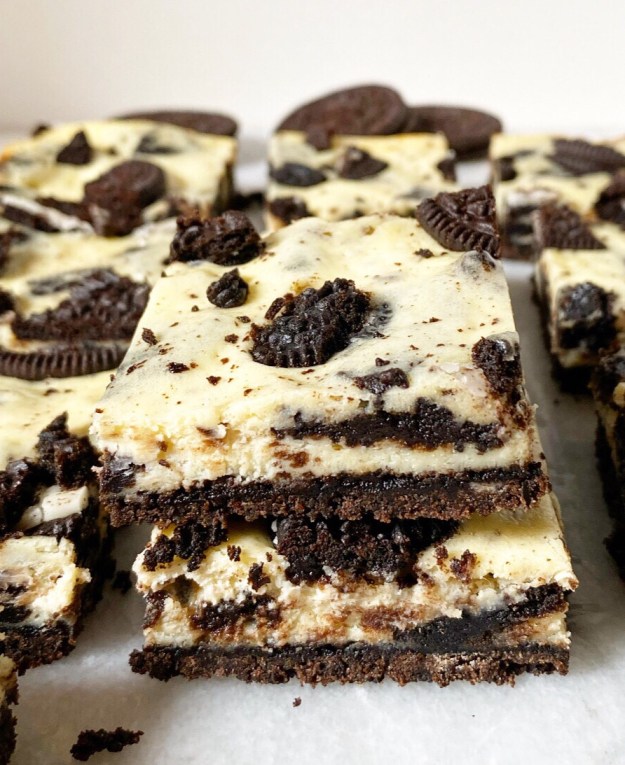 Not only are they freaking delicious—Oreos + cheesecake, duh—but they are waaaaay easier to make than a traditional cheesecake. They bake in just 30 minutes and cool in 3 hours (seems like nothing when you remember that most cheesecakes require 8-24!) and require exactly seven ingredients. That’s right, all you need to make a batch of these of these bars are Oreos, melted butter, cream cheese, sugar, an egg, sour cream, and vanilla. And time. And a functioning oven. And a refrigerator.
But like, ten things isn’t much to ask when cheesecake is involved.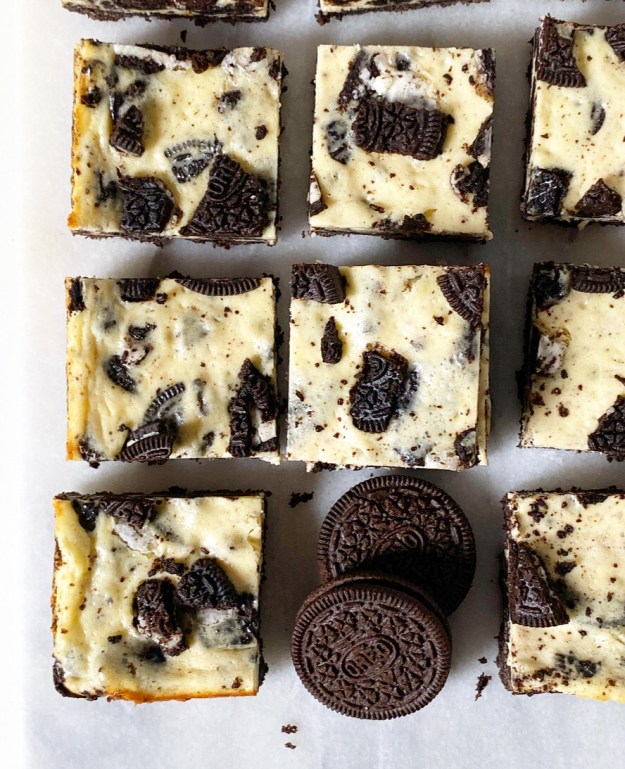 These are incredibly simple to make and they’re the perfect treat to have in the fridge all weekend. Crumbly Oreo crust and a thin layer of tangy cheesecake studded with more Oreos and you didn’t have to use a water bath? Is this real life?!
Yes. Yes, it is. And it is delicious.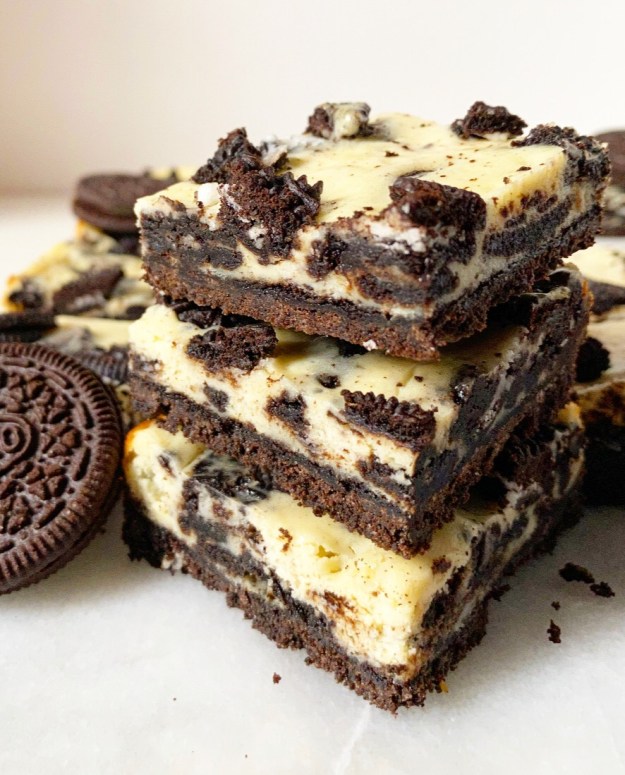
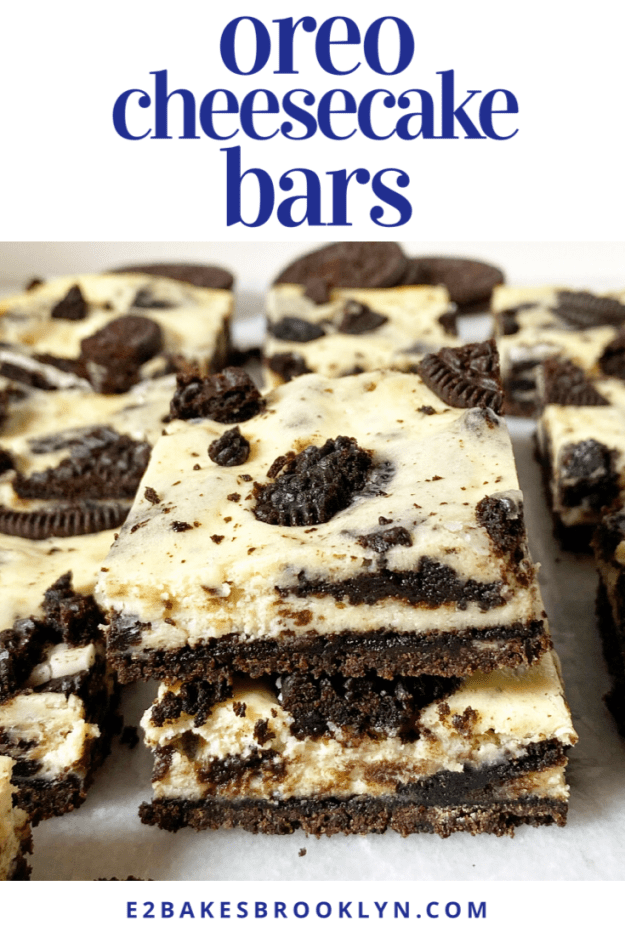
Oreo Cheesecake Bars
makes 1 8- or 9-inch pan, about 16 bars
Crust:
24 whole Oreos
4 tablespoons unsalted butter, melted
Cheesecake:
8 ounces (1 brick) full-fat brick-style cream cheese, room temperature
1/4 cup granulated sugar
1 large egg, room temperature
1/4 cup full-fat sour cream, room temperature
1 teaspoon pure vanilla extract
12 whole Oreos, cut/broken into shards
This recipe requires a 3 hour chill after baking. Plan accordingly.
Preheat oven to 350F. Line an 8- or 9-inch square pan with foil. Grease well. Set aside.
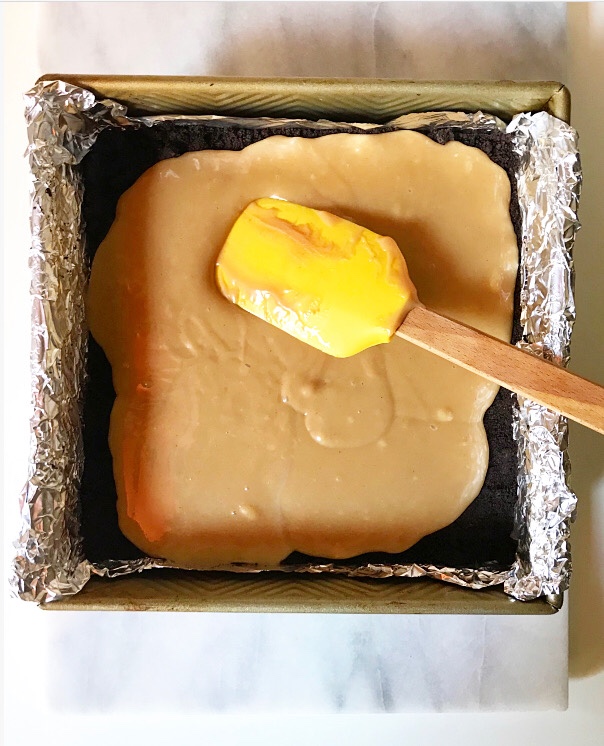
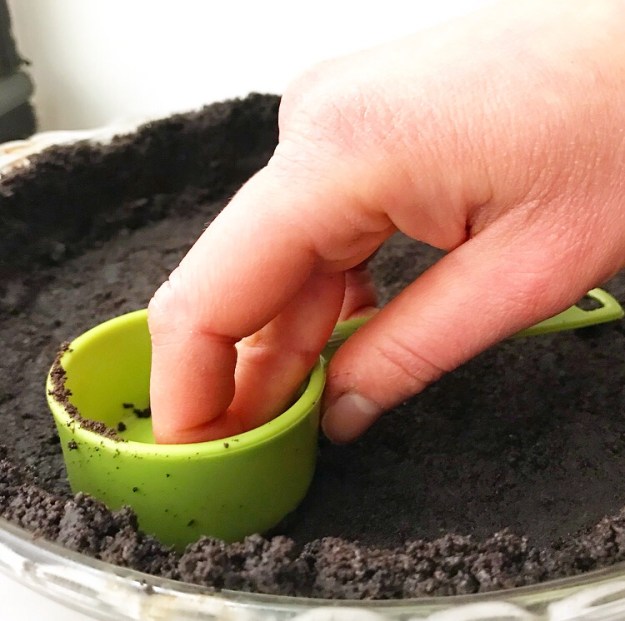
Make the crust. Place Oreos in the bowl of a food processor and blitz until they are crumbs. Add melted butter and pulse until the mixture can be pinched together. Press it into in even layer on the bottom of the prepared pan. Bake 10 minutes to set. Let cool a few minutes while you prepare the cheesecake.
Make cheesecake. In a medium mixing bowl, use an electric mixer to beat cream cheese until fluffy. Mix in sugar, followed by egg, sour cream, and vanilla, until mixture is smooth. Use a silicone spatula or wooden spoon to fold in Oreo pieces, holding back a few for the top, if desired.
Spoon cheesecake mixture over the crust and carefully spread to the edges of the pan. Dot the top with reserved Oreo pieces, if desired. Tap full pan on the counter 5 times to release any large air bubbles. Bake 18-20 minutes, or until the center just barely jiggles when the pan is jostled.
Let bars cool to room temperature on a rack. Chill for at least 3 hours in the refrigerator before slicing and serving. For cleanest slices, wipe your knife’s blade clean between cuts.
Leftovers will keep in an airtight container in the refrigerator for up to 4 days. For best storage, layer bars with sheets of wax paper. They may also be frozen for up to a month. Thaw overnight in the refrigerator before serving.
 Sometimes it takes years of thinking and testing and cursing and problem-solving—or, to be brief, “general creative agony”—to formulate a recipe. Other times, the recipe comes up and metaphorically slaps you in your dessert-obsessed face.
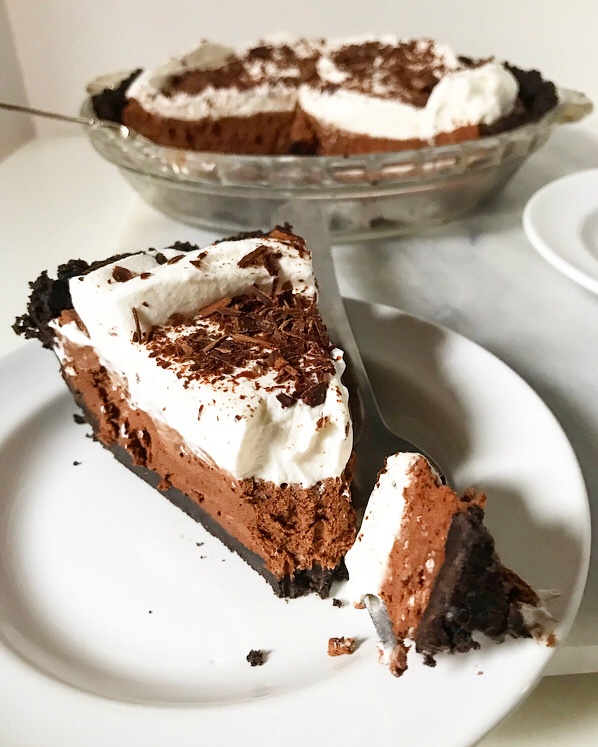
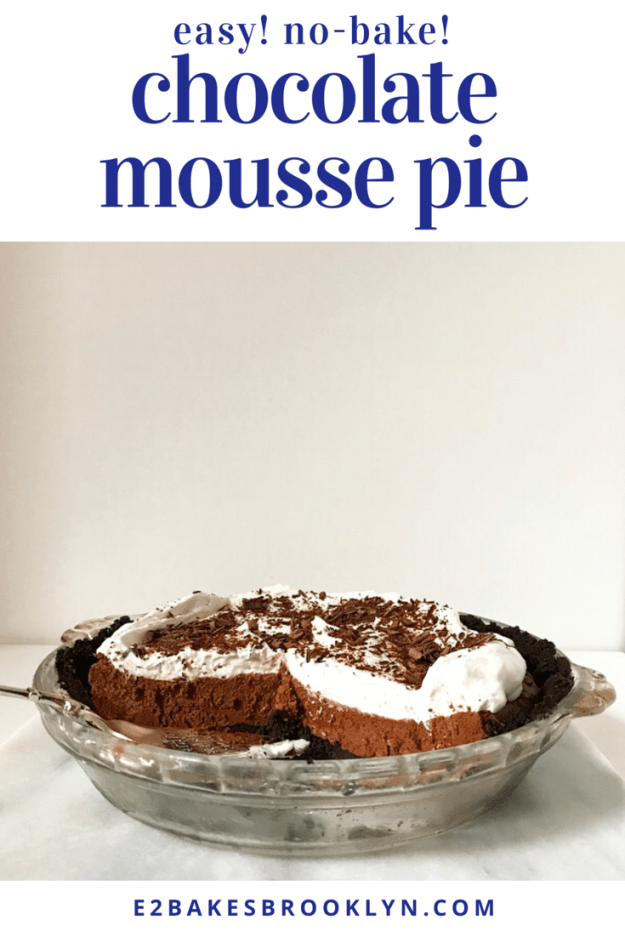
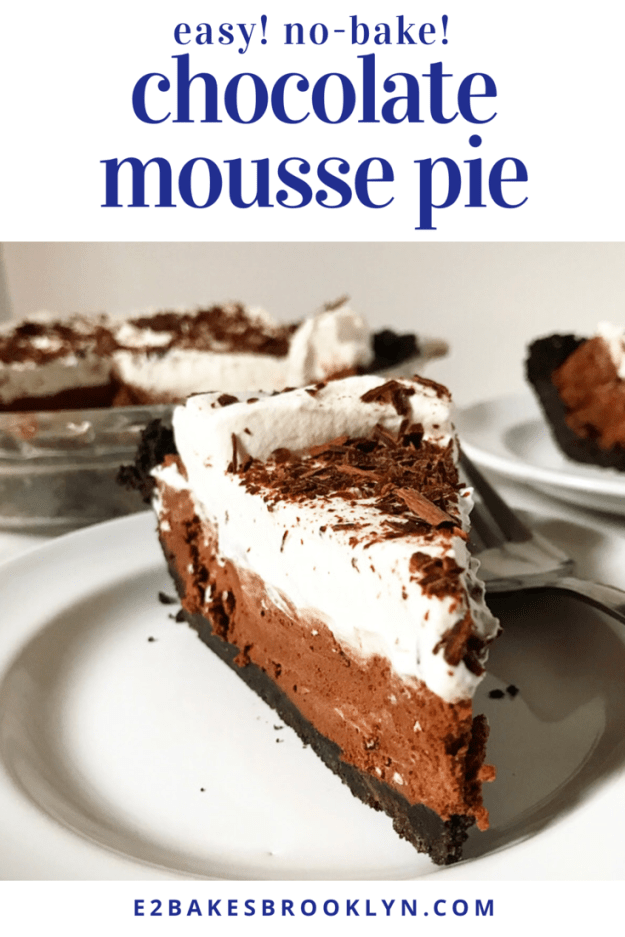
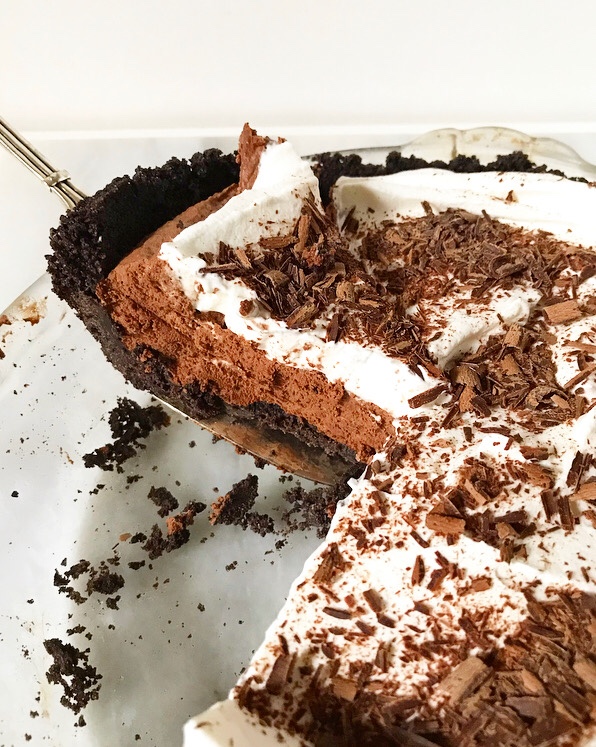 You can guess which sort of recipe this Chocolate Mousse Pie is.
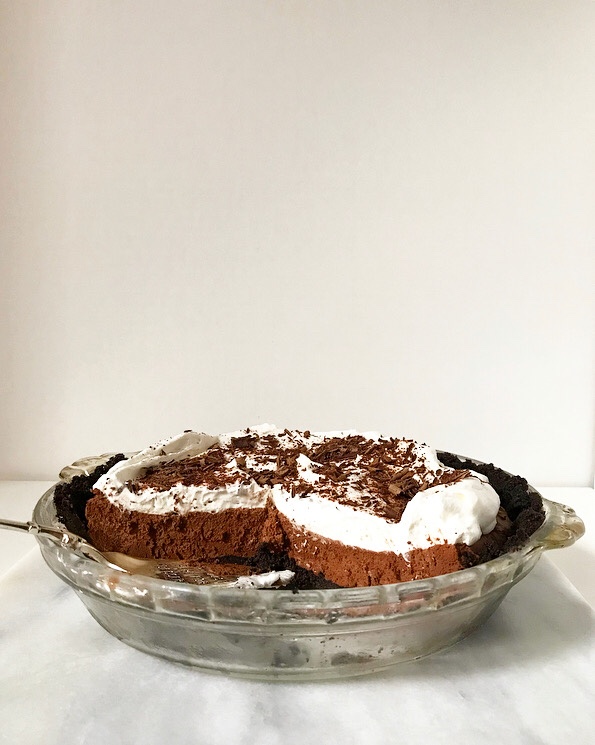 Y’all! How did I not make a Chocolate Mousse Pie sooner? How did it never cross my mind? I’ve had a magnificent
  This is exactly the sort of recipe I love to have in my back pocket. It’s super simple to make and a universal crowd-pleaser. Who can resist fluffy homemade chocolate mousse, whipped cream, and Oreo crumb crust? Not this baker.
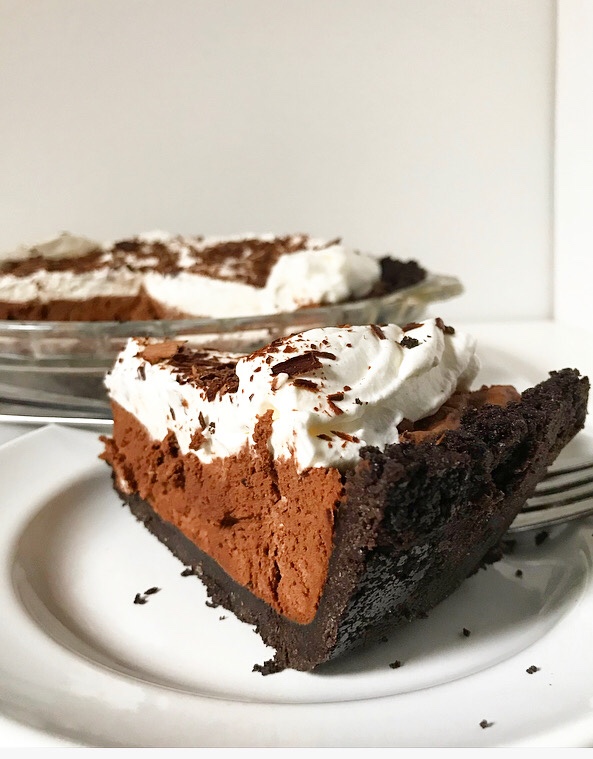 …or should I say “no”-baker? This is a no-bake pie, after all! There are a couple of chilling steps in the recipe, but no need to crank up your oven. I’ve got a few
  But! But. It’s not even
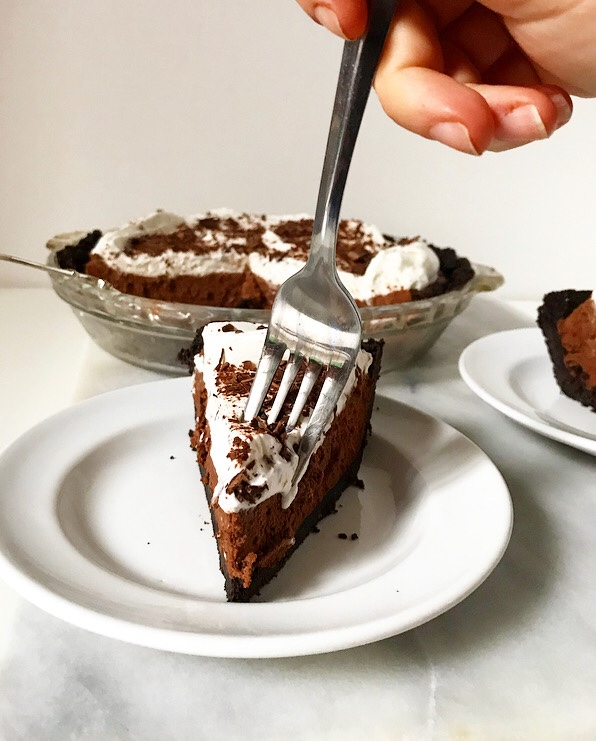

 Let me take this moment to express gratitude for the 1998 remake of
 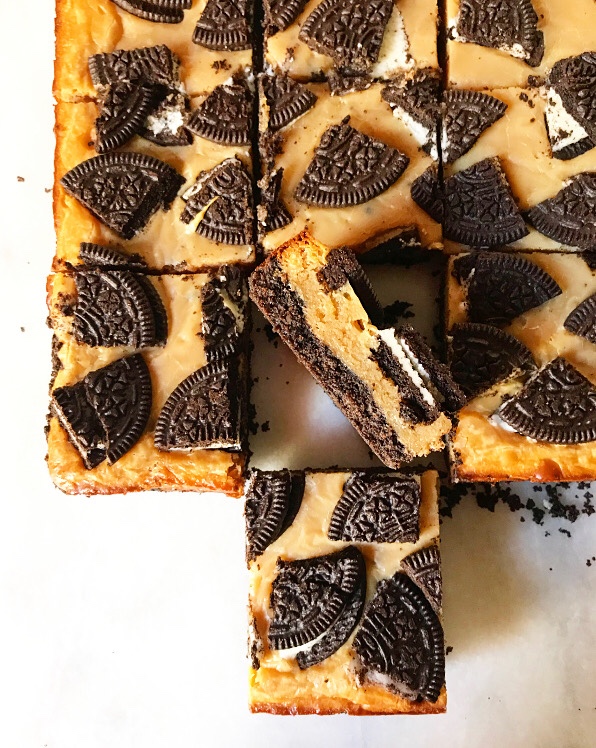 Besides the obvious dipping of Oreos directly into peanut butter, I’ve paired the two in

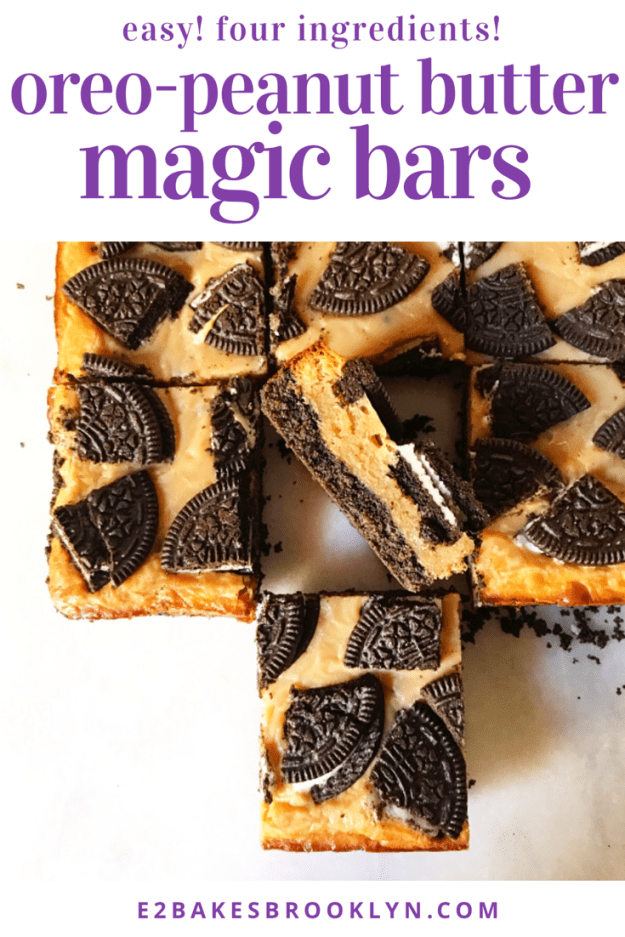
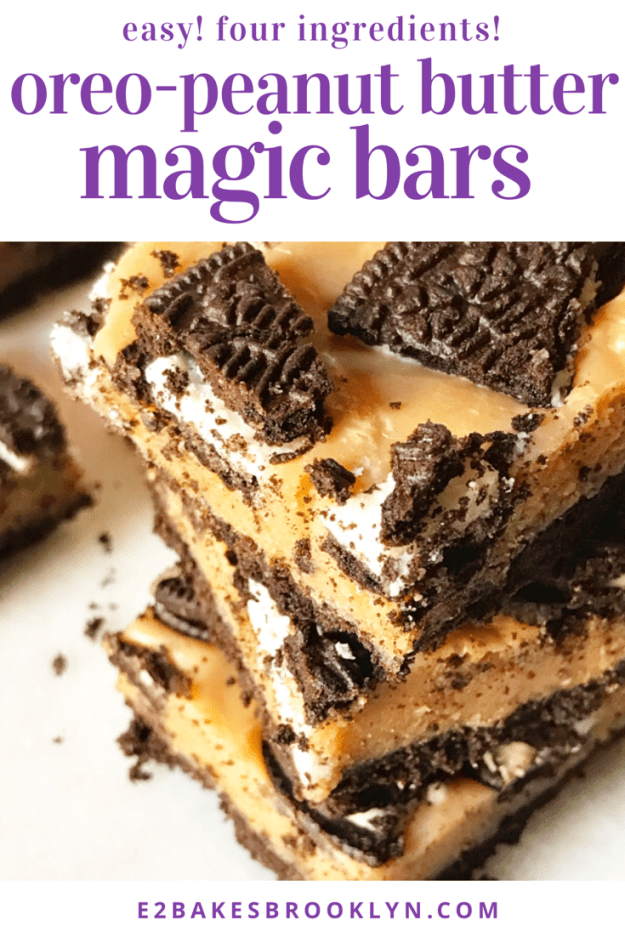
 They have just four ingredients–Oreos, peanut butter, butter & sweetened condensed milk–and come together in less than 45 minutes. Oh, and they’re ridiculously easy and far more delicious than any baked good with four (!) ingredients should be.
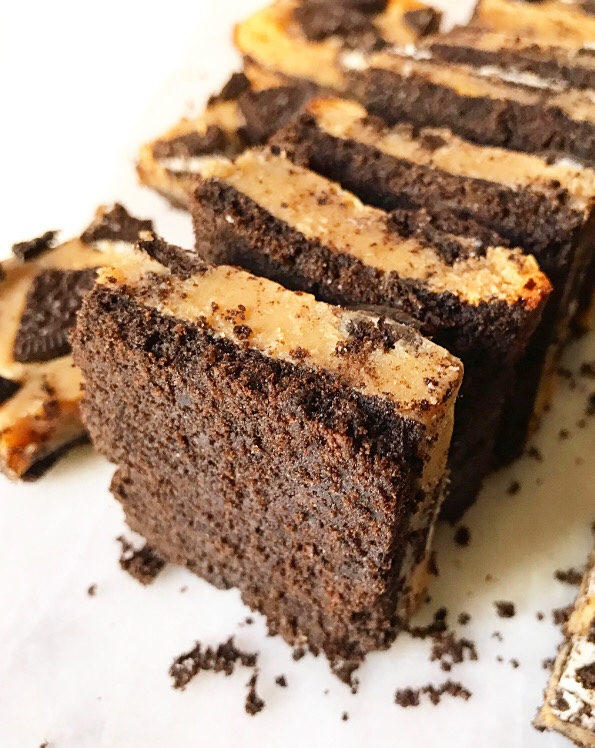 We’re talking soft, chewy peanut butter filling and buttery Oreo crust here, people!
 Those are two of my very favorite things. One of the great duos, if you will.
 In my short but very intense baking career, I’ve come to think that whoever coined “Easy as pie,” was making a very cruel joke.
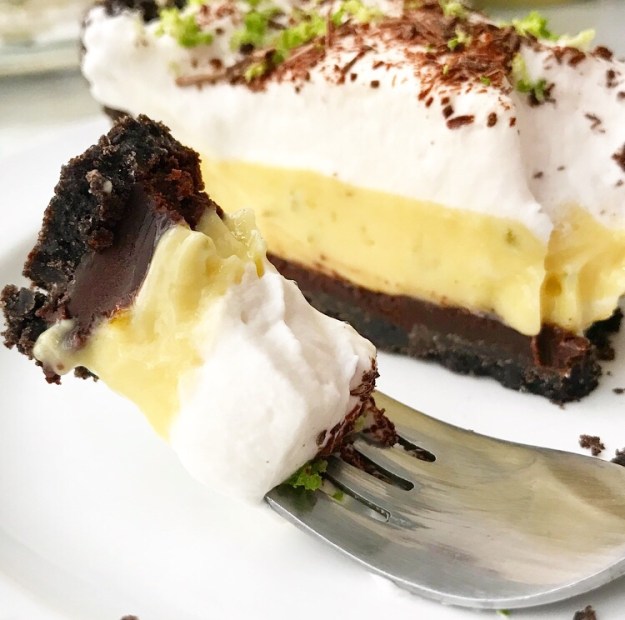
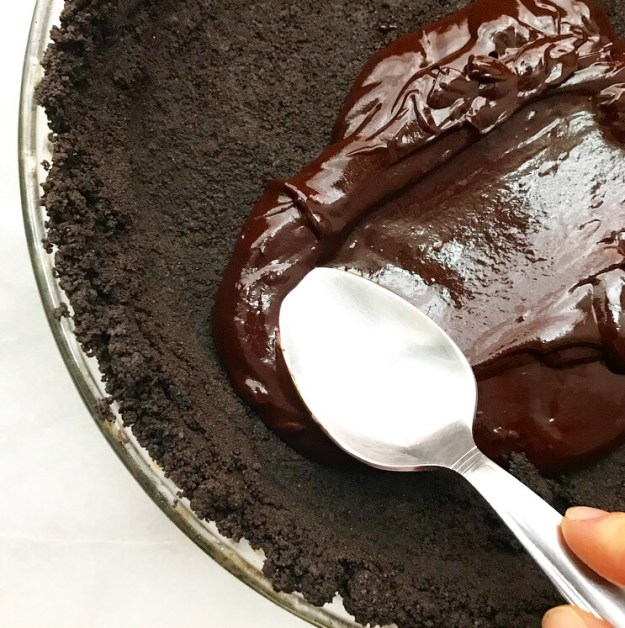
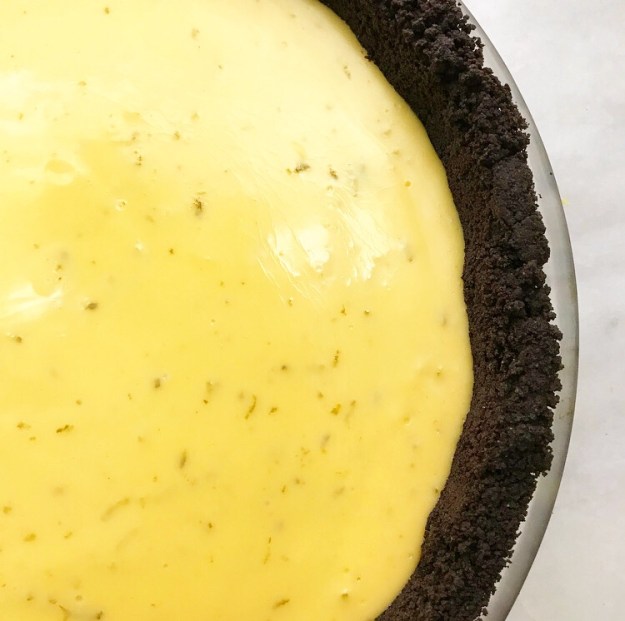
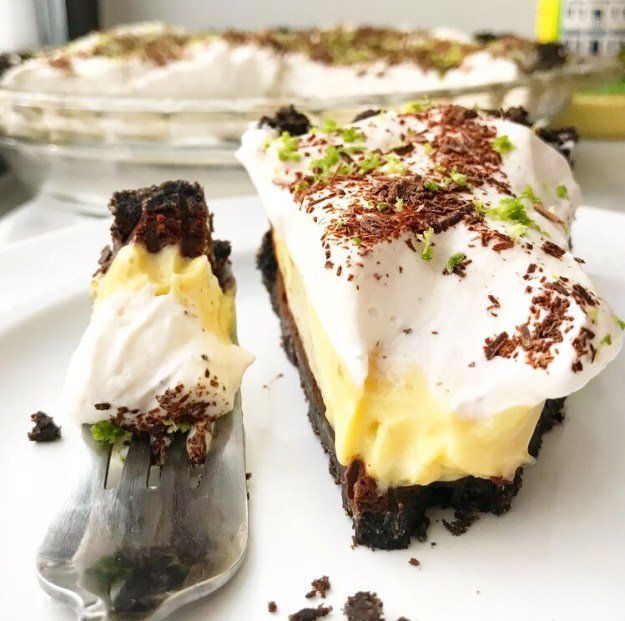
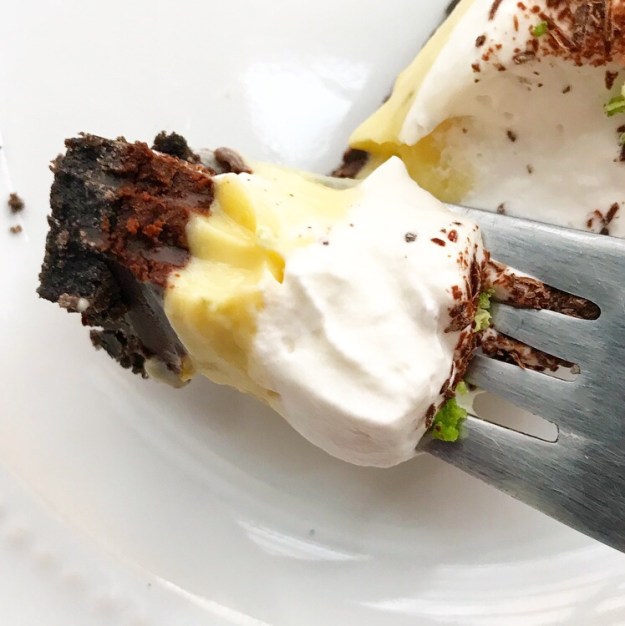
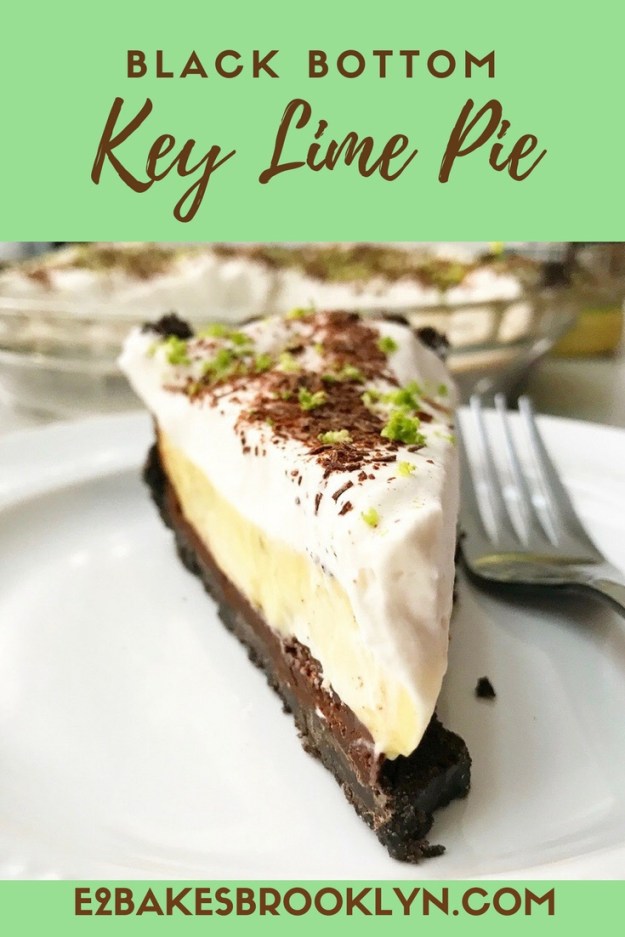
 If you want to make one of these magnificent pies for yourself, start by blitzing Oreos and butter together until they are sandy. Press the mixture into a pie plate to make a crust. Bake that for 8 minutes, just to set.
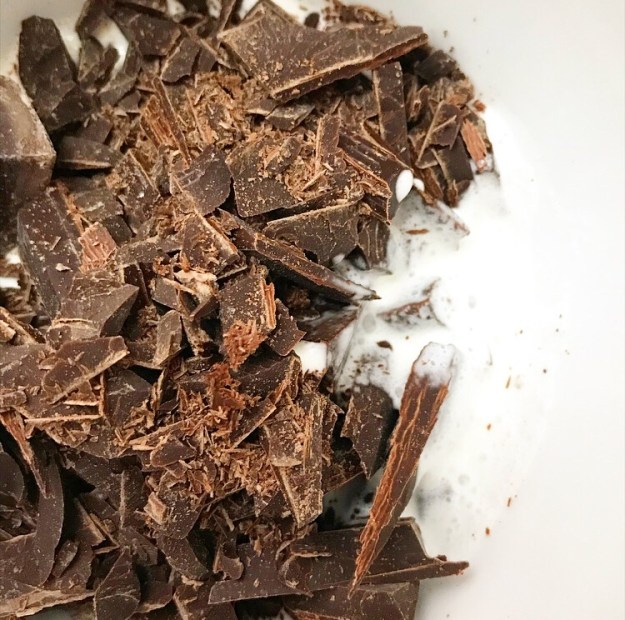
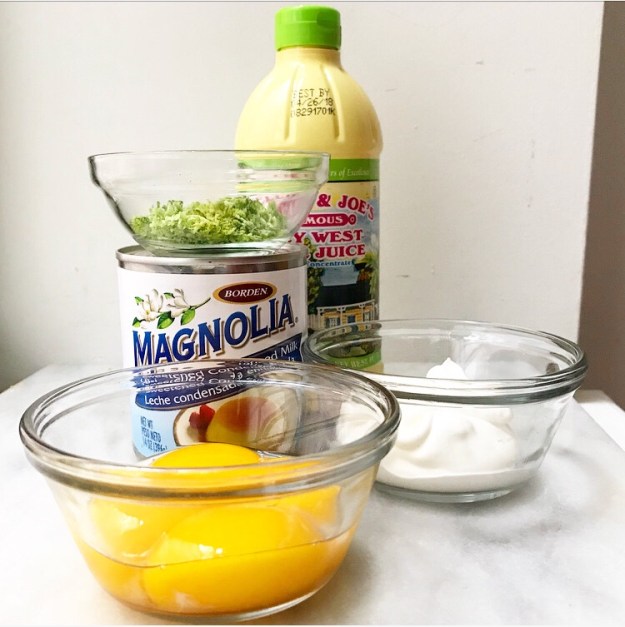
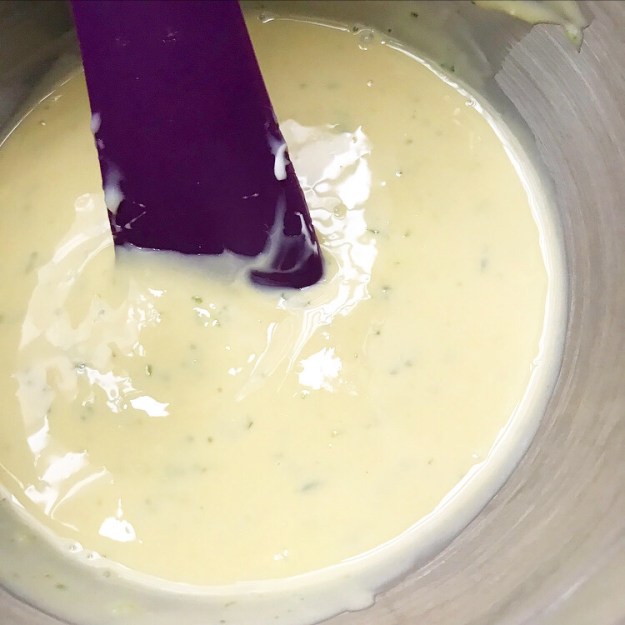 Whisk together the key lime filling. This iconic pie filling is one of the easiest to make. Just whisk together a can of sweetened condensed milk, some egg yolks, some lime zest and key lime juice. I like to add 1/4 cup of sour cream, just to keep everything extra dreamy. If you’re a key lime pie purist, you can leave it out.

 If you scroll back through my
 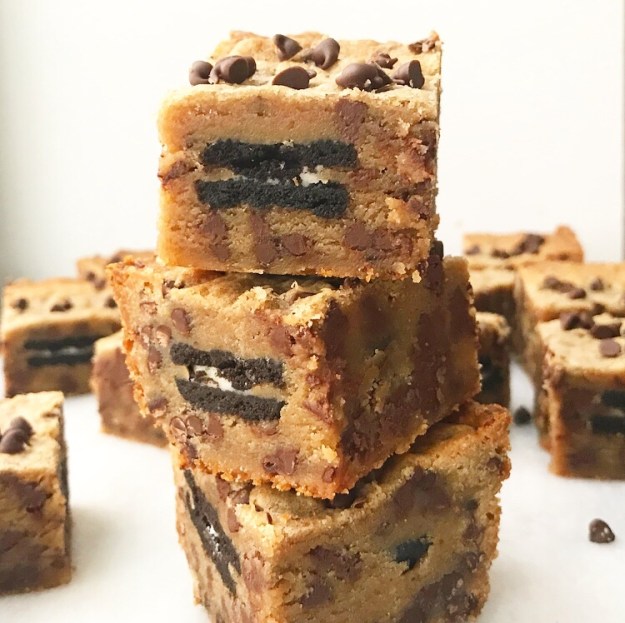 There were a few repeats and many variations (so. many. scones.), but I feel like that year was crucial to my development into the baker I was when I first hit
 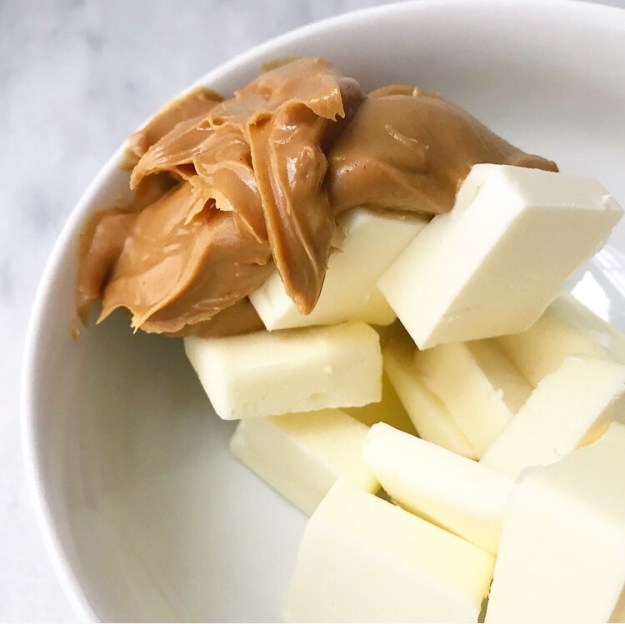 In turn, all the recipes and photos I’ve posted since that first day as a blogger have helped me evolve into the baker I am right now. These days, I’m very excited about
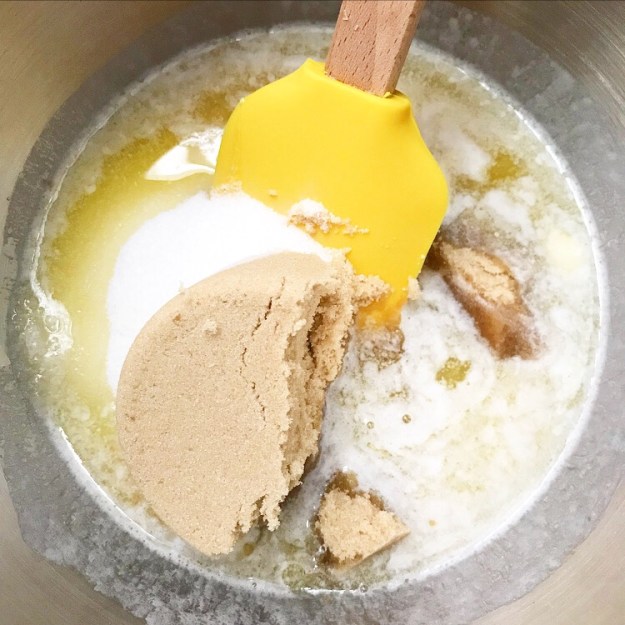

 That’s all well and good, but sometimes I can’t decide what to blog about or I’m testing a recipe that’s more complicated than I anticipated. Those are the moments when I am very glad I have that year of photos to serve as inspiration and remind me of what I was really excited to bake when I was just getting started, before I learned new skills and started complicating things.
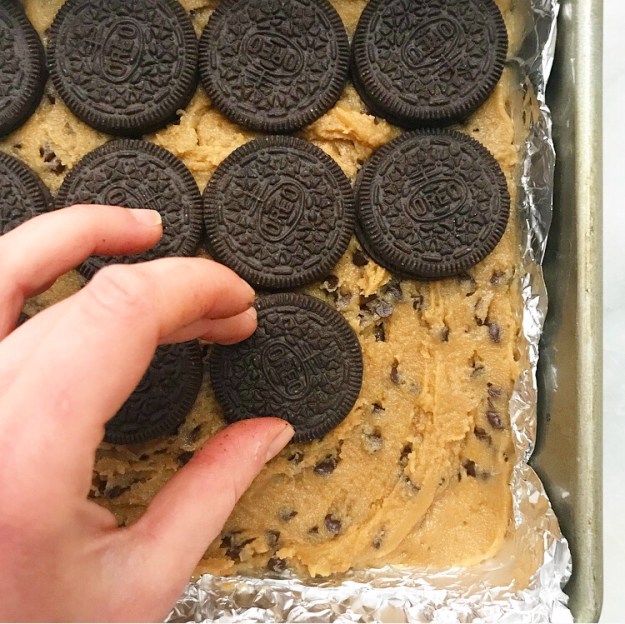
 I rarely look at that old section of my Instagram these days, but it’s full of simple, solid recipes that I was once totally jazzed about. Luckily, I was smart enough to write down almost all of them (even the ones that didn’t work) so that Future Me would know where to start when I revisited them.
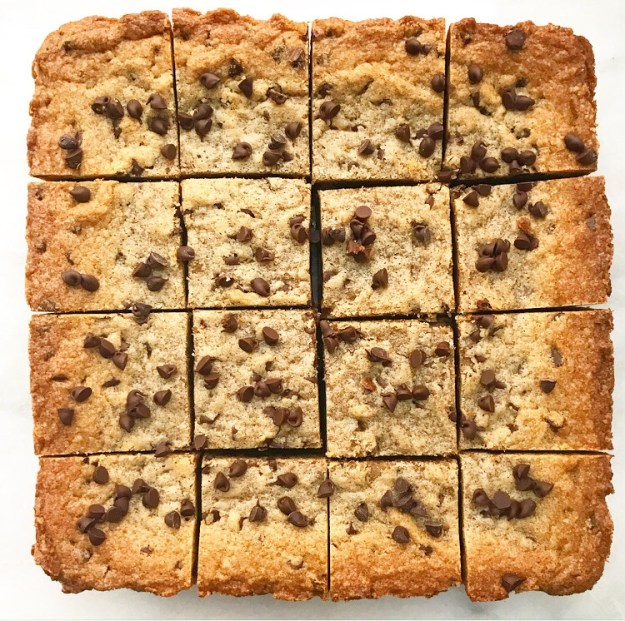
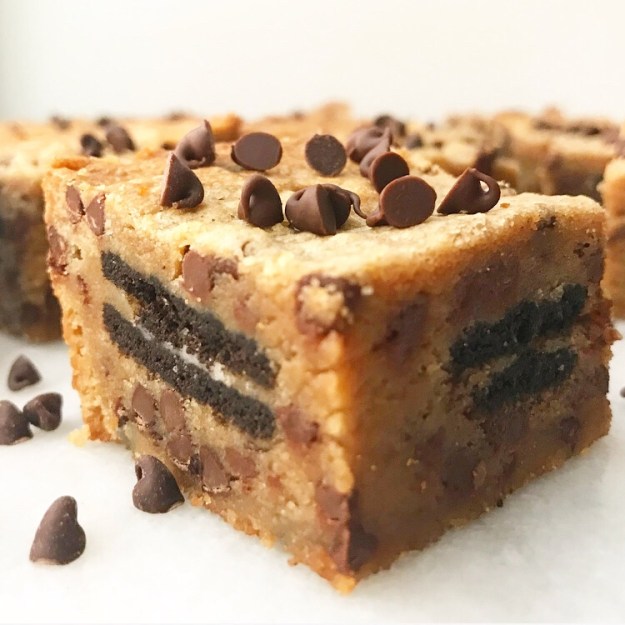
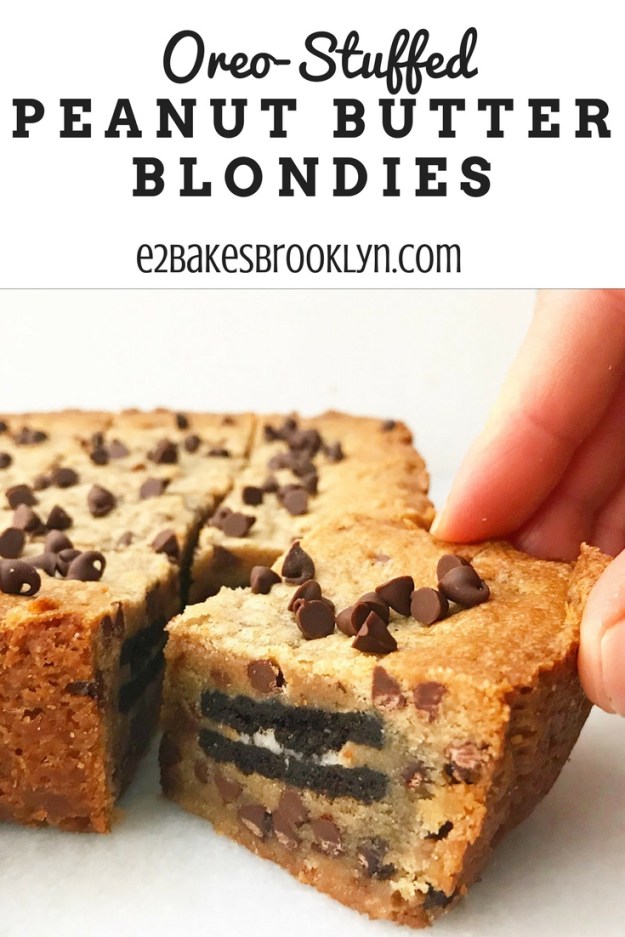
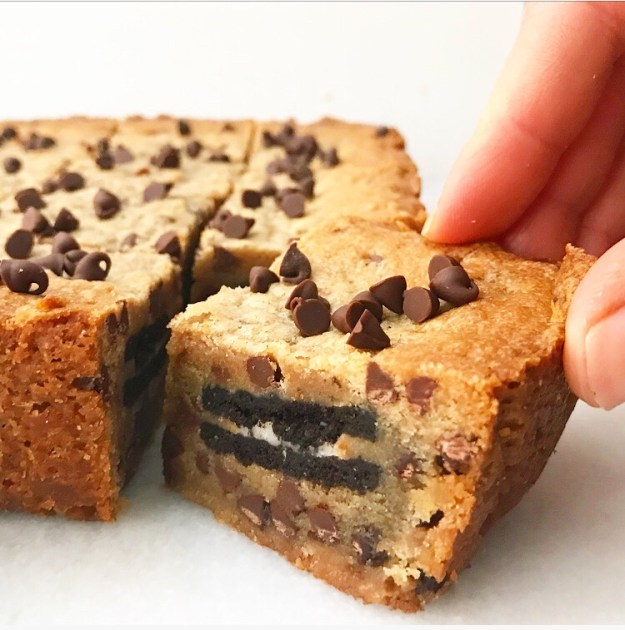
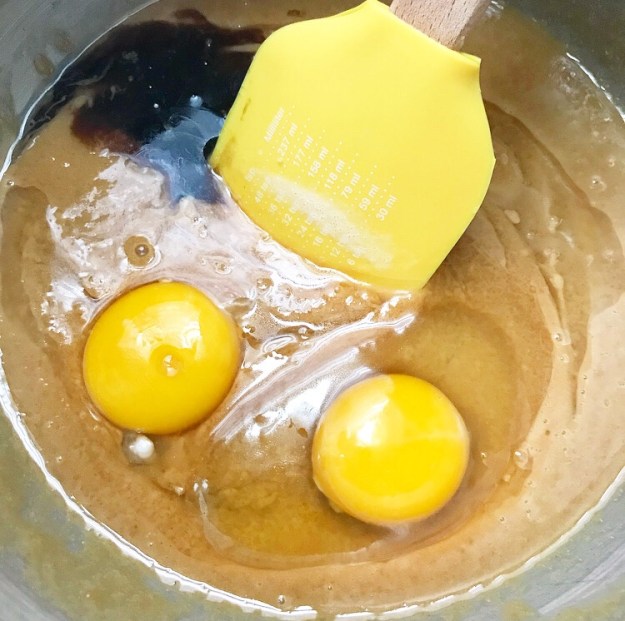
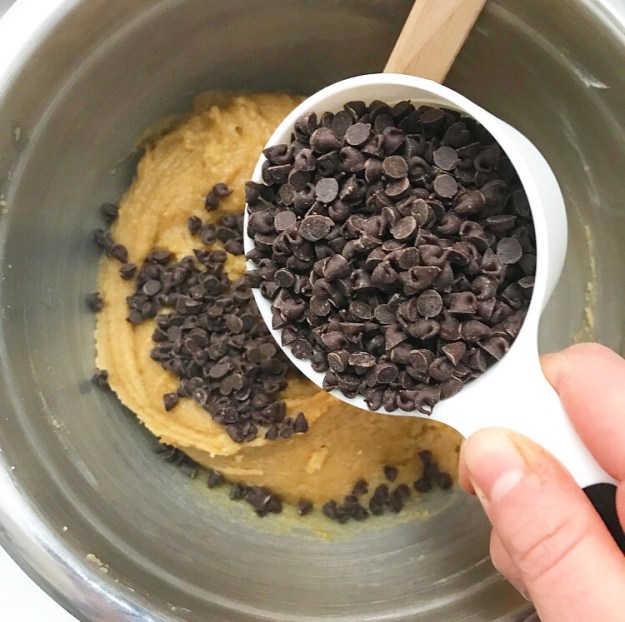
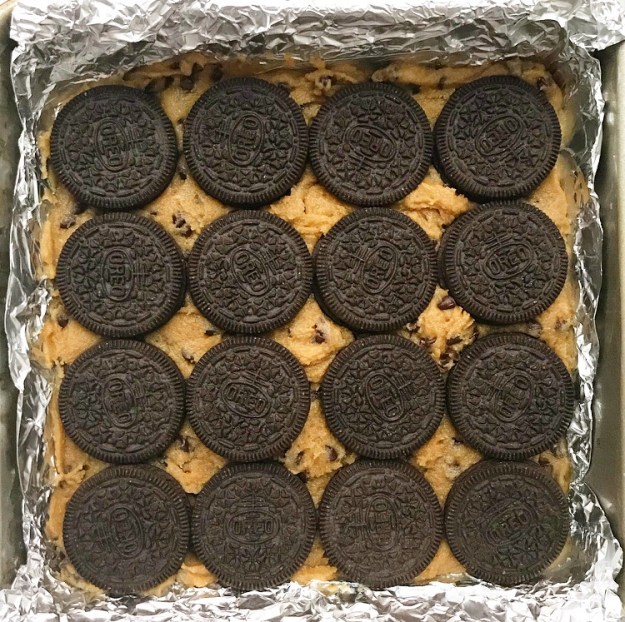
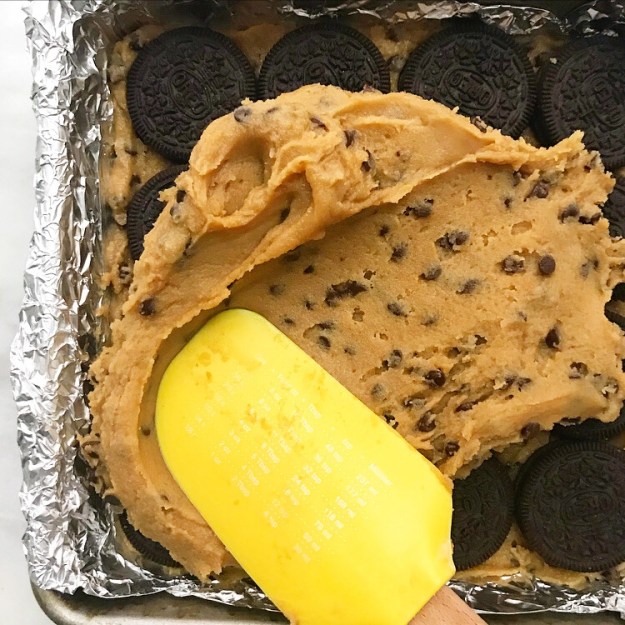
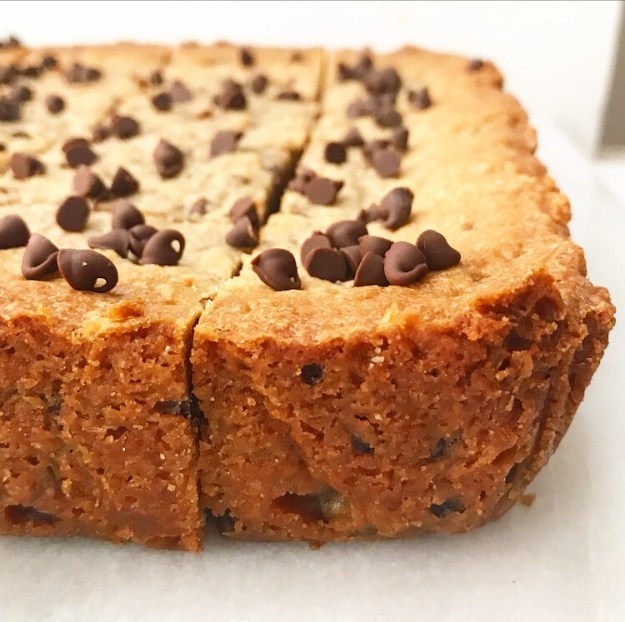 Let’s all give a quick shout-out to Past Me for filing away the recipe for these Oreo-Stuffed Peanut Butter Blondies. The version I posted to Insta three years ago was damn good, but with all the experience I’ve gained, it’s even better now. I didn’t even know it was possible to improve upon the combination of
 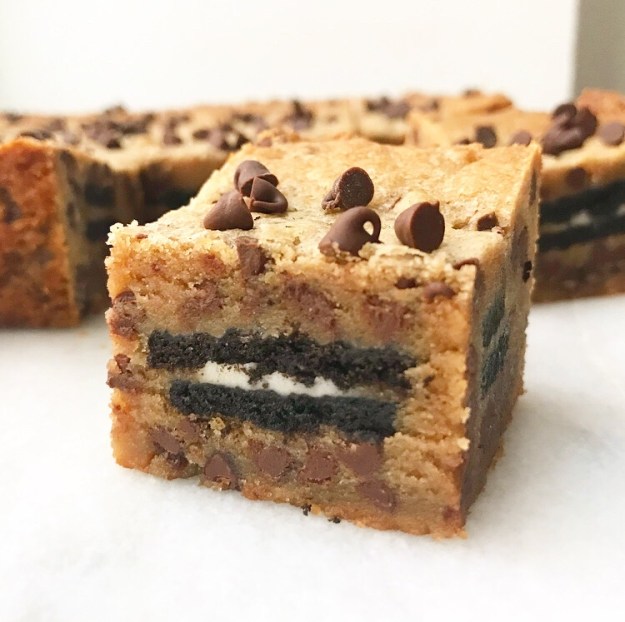 This easy, no-mixer recipe comes together in under an hour and is far more than the sum of its parts. The peanut butter blondie base is soft, chewy, and studded with melty mini chocolate chips. Oh, and it’s stuffed with a layer of Oreo cookies. I’m totally obsessed with the cross-sections of cookie on the sides of every blondie ❤
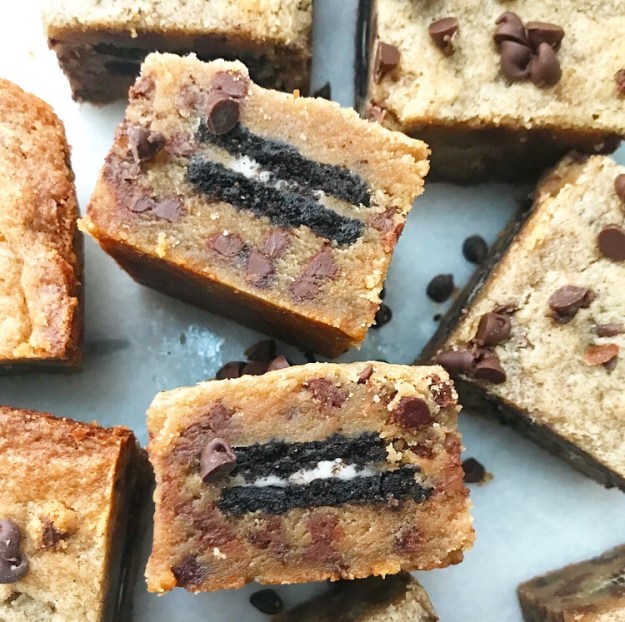 Yeah, I was pretty psyched about these when I posted them to Instagram on