 Hello from Swan’s Island, Maine! I’m here with friends, enjoying the ocean views and crunchy leaves and I would never like to leave, thank you very much. We’ve been keeping busy doing as much or as little as we want—hiking, going to the beach, thrifting, watching TikTok, playing with my ring light, crafting…
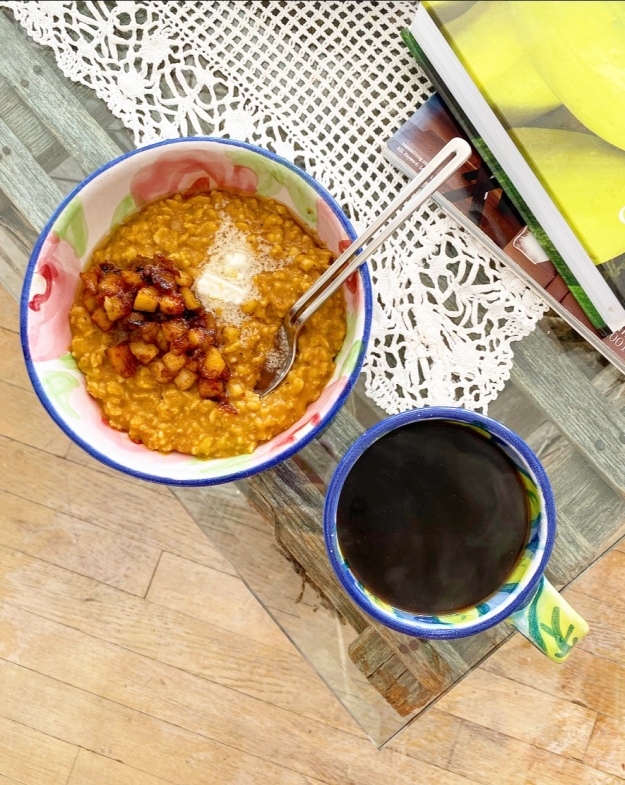 As usual, I have kind of taken over the kitchen. It’s just what I do, I suppose. I’ve made a couple of blog recipes (Everyday Cassoulet, Oatmeal Blender Pancakes) and still have one planned to make while I’m here. Today’s Easy Pumpkin Oatmeal, however, was improvised. It was thrown together on the fly on a lazy Monday morning with perfect light and a harbor bell ringing in the background–in a perfect world, it’s the way all my breakfasts would materialize.
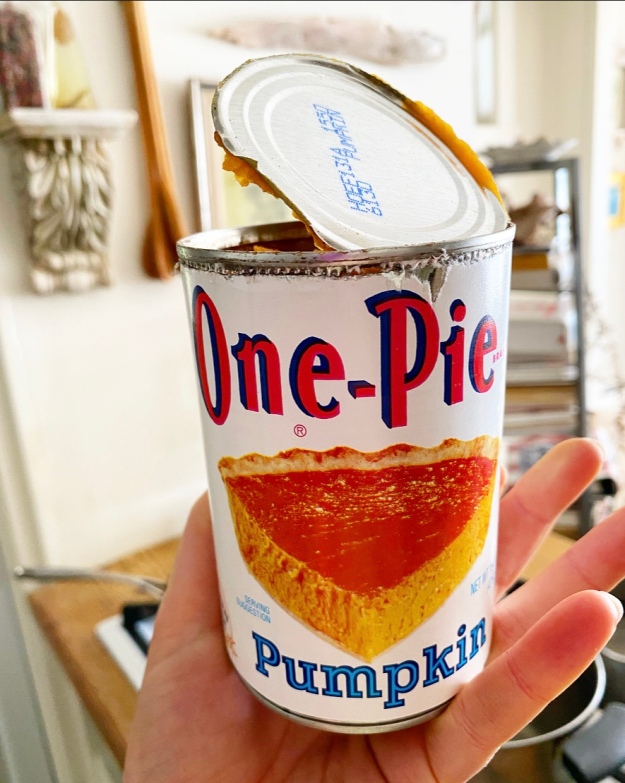
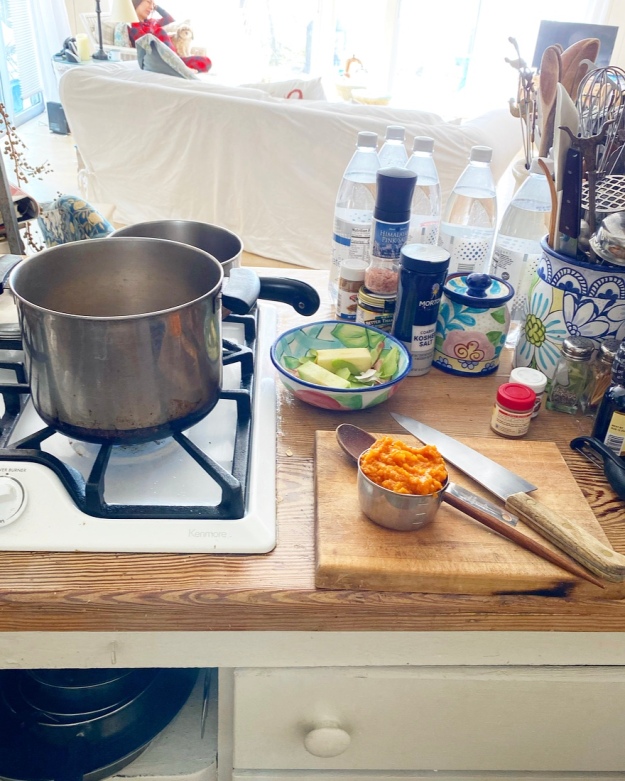
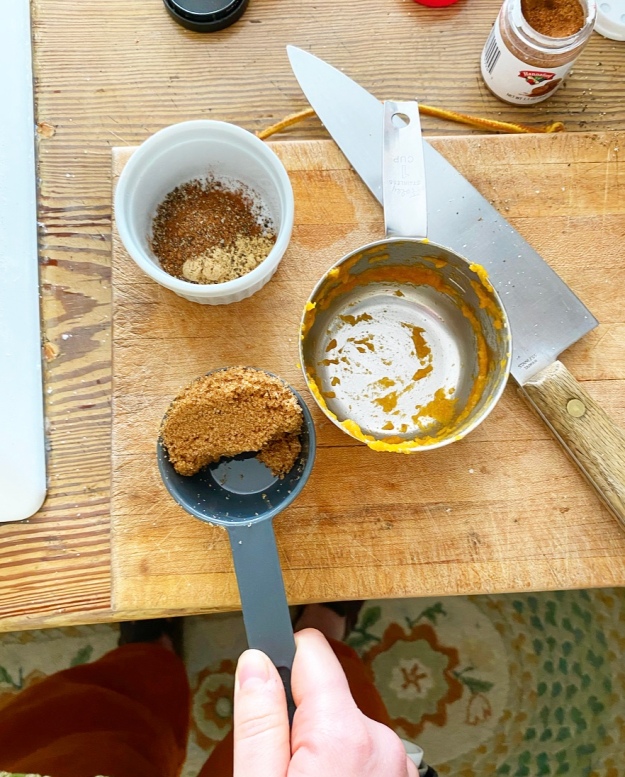
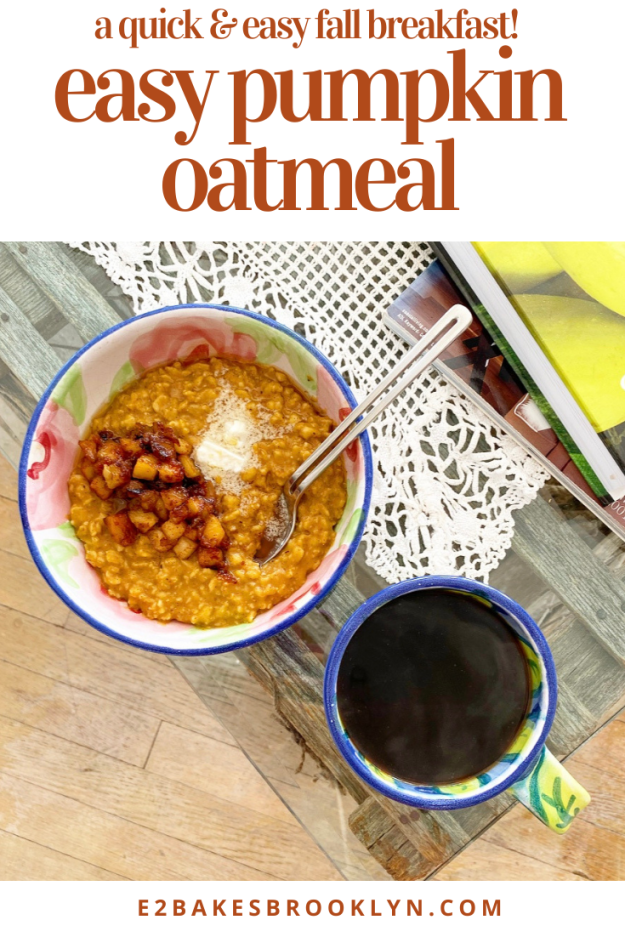
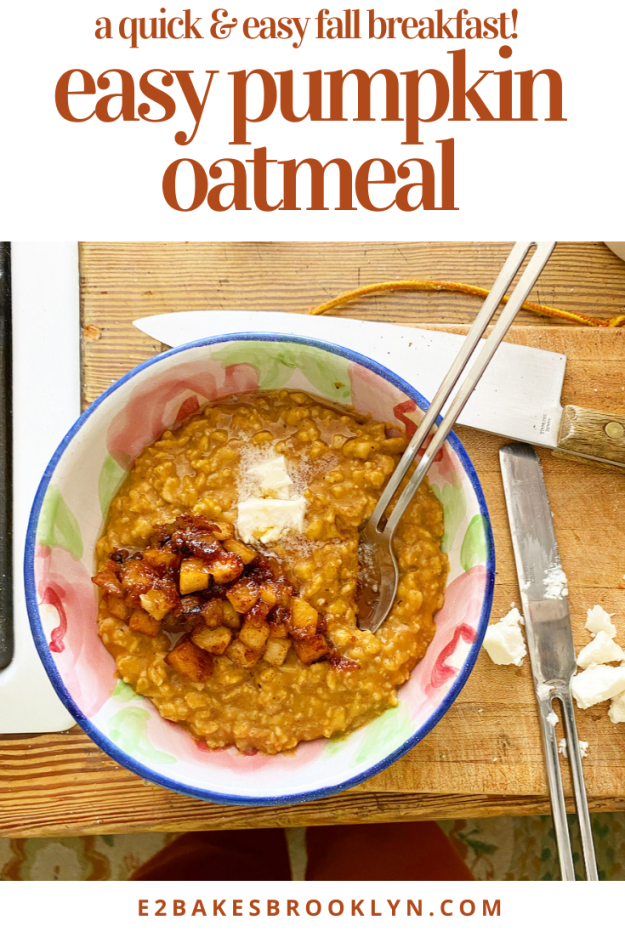
 Easy Pumpkin Oatmeal takes ten whole minutes and is hardly even a recipe. Just toast some oats and then add some water and milk (I used almond). Bring it to a simmer and cook, stirring constantly, for about five minutes or until creamy. Finish it off with some pure pumpkin purée, pumpkin pie spice, brown sugar and butter (the vegan stuff). Easy peasy pumpkin…squeezy?
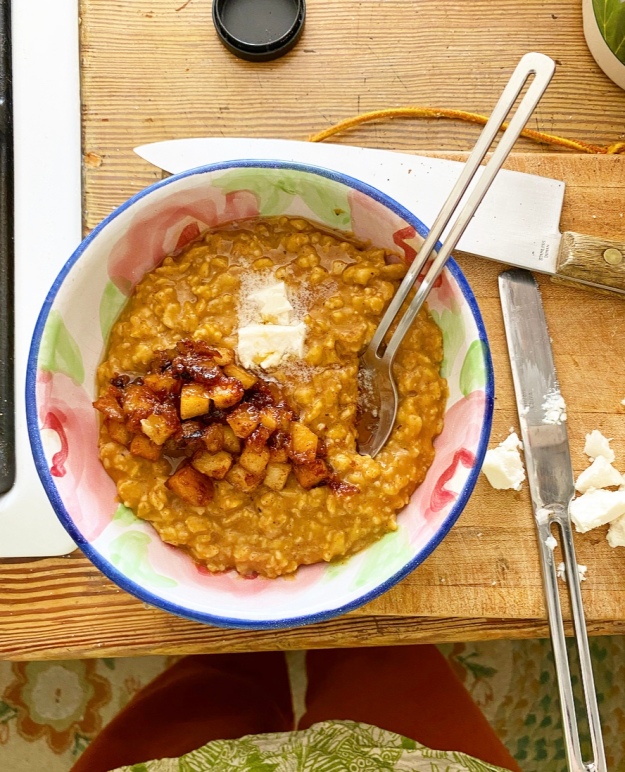 I dished this up with cinnamon apples, vegan butter and maple syrup. I highly recommend eating it in your pajamas in a living room overlooking a lobstering wharf on a fall morning, but if you’re not currently situated on an island in Maine, any dining table will do.
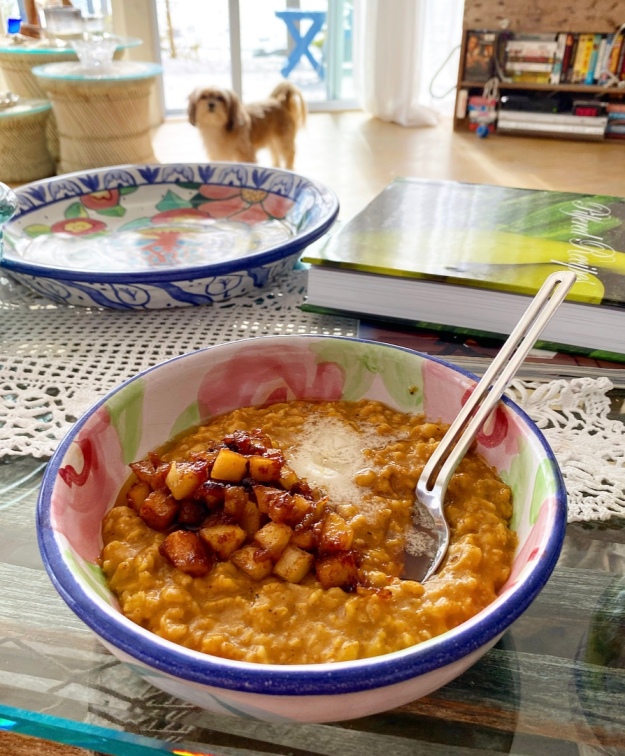 Heads up that I’m going to take this Friday off of posting so I can enjoy my vacation, but I’m posting all our Maine meals over on Instagram, and I’ll have a full report and new recipes up next week!
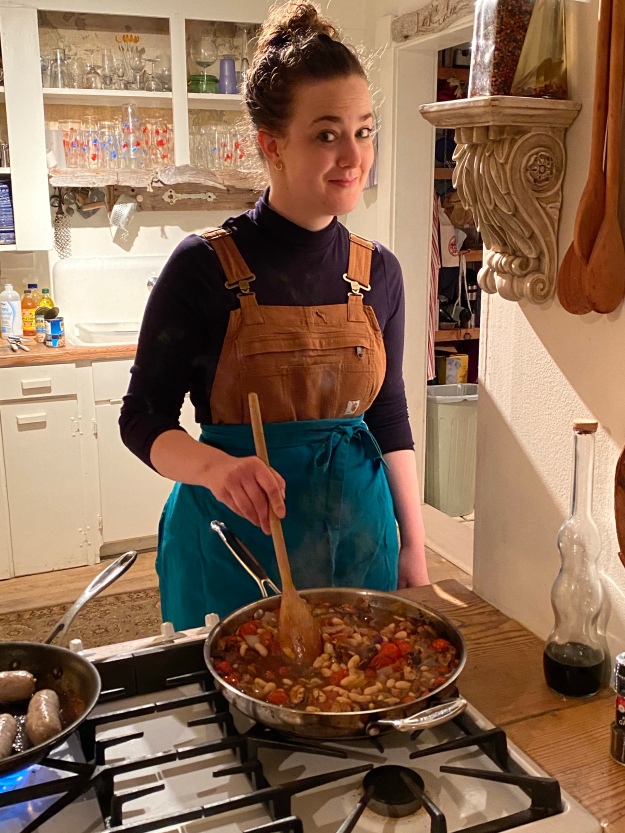
Easy Pumpkin Oatmeal
makes 4-6 servings
3 tablespoons butter (regular or vegan), divided
3 cups old-fashioned oats
3 cups water
3 cups milk of choice (I used almond)
1/4-1/2 teaspoon Kosher or sea salt
1 cup pure pumpkin purée
1/3-1/2 cup light or dark brown sugar, packed (depending on preference)
1 tablespoon pumpkin pie spice
For serving (optional):
cinnamon apples (the filling in this, basically)
toasted chopped nuts
maple syrup
cream
butter (regular or vegan)
Melt 1 tablespoon butter in a medium pot over medium heat. Add oats and toast, stirring constantly, until fragrant (1-2 minutes). Add water, milk and salt, and turn heat up to medium-high. Stir frequently until it comes to a simmer, then stir constantly for 5 minutes or until thickened.
Stir in pumpkin purée, pumpkin pie spice, and brown sugar. Cook 1 more minute. Remove from heat and stir in remaining 2 tablespoons butter.
Serve immediately with desired toppings.
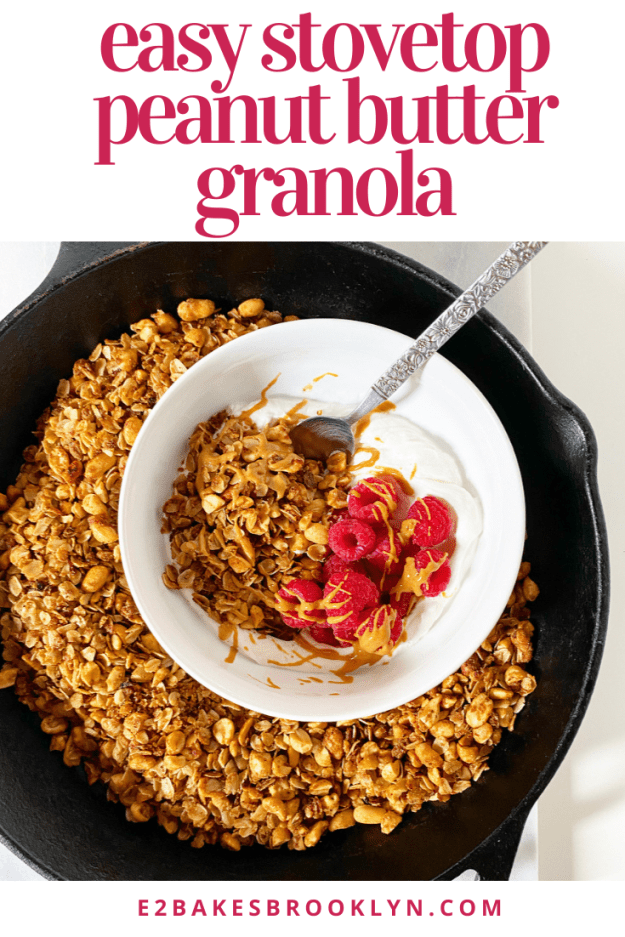
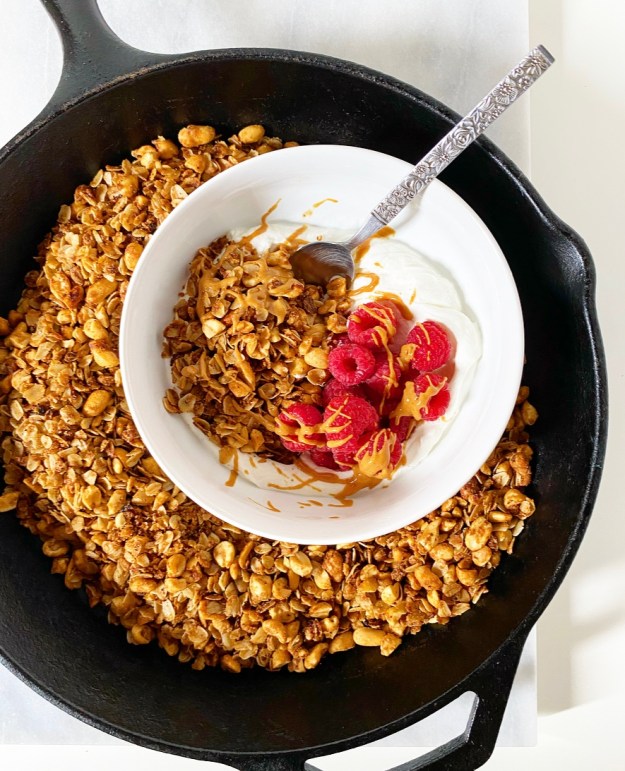 But you know what is happy—er, what is making me happy? This Easy Stovetop Peanut Butter Granola. It’s super crisp, crunchy and peanut buttery, and took fifteen whole minutes to make. That’s the magic of stovetop granola. When you skip the oven, it takes 1/3 of the time! Oh, and it only makes a quart. Add this to the list of
 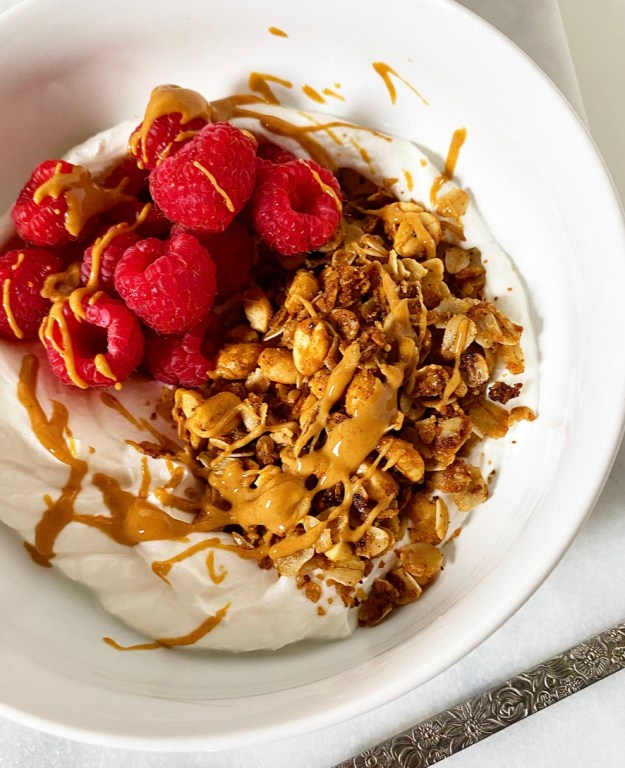 This isn’t my first go-round with
 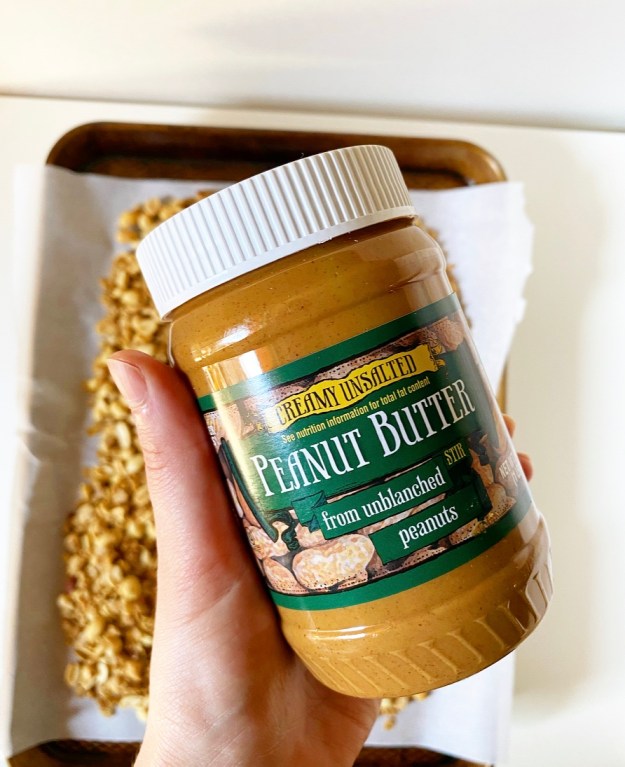 Combine the wet ingredients. Whisk your oil, brown sugar, maple syrup, natural peanut butter, vanilla, cinnamon and salt together in a measuring cup. This provides the majority of the flavor in your granola and help it get good and crispy.
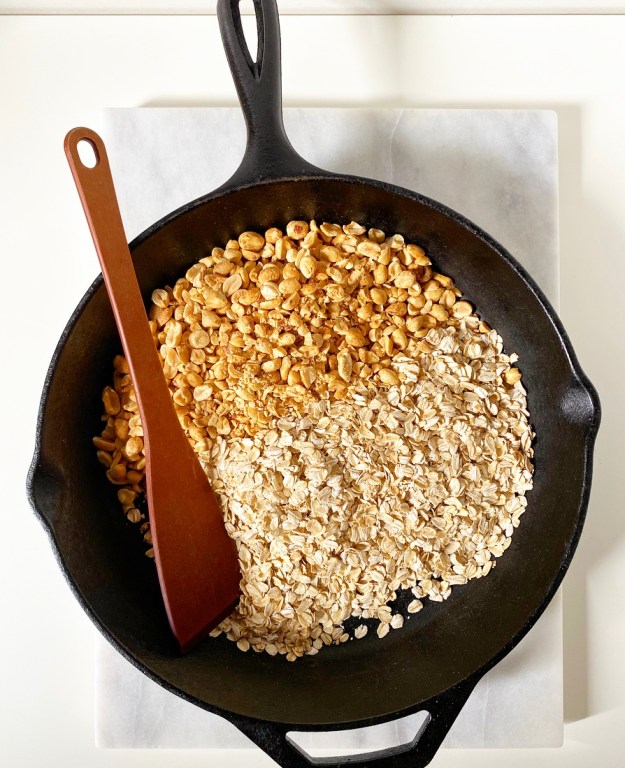 Toast the dry ingredients. Combine your oats and chopped peanuts in a heavy pan over medium heat. Stir them around for about 10 minutes, until fragrant and a little darker in color. Don’t burn ‘em.
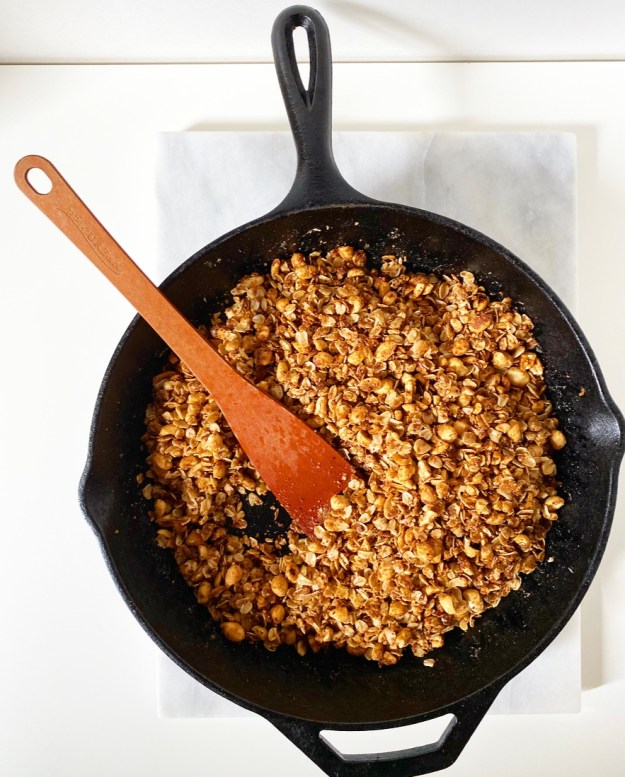 Add the wet ingredients to the dry. Pour your peanut butter/maple/brown sugar/oil mixture into the oats and peanuts.
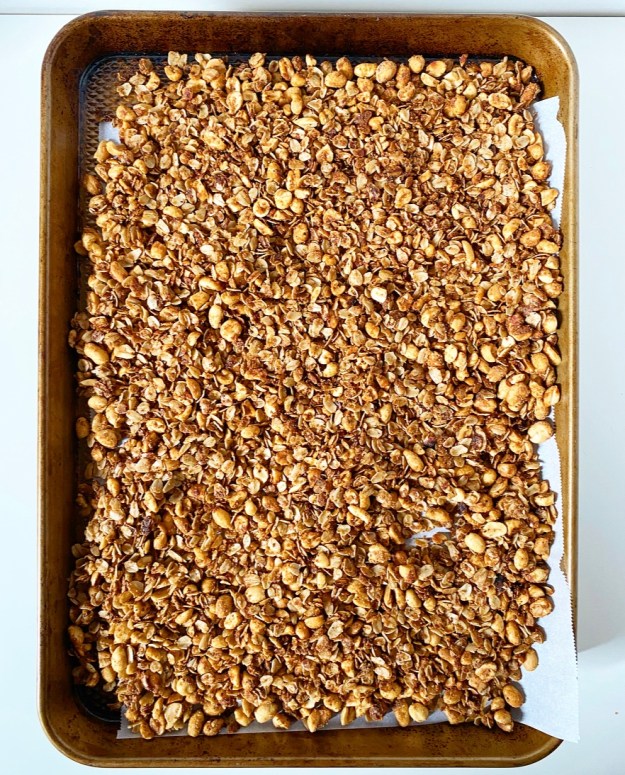 Cool. Scatter your granola on a rimmed baking sheet on a rack and let it come to room temperature. This is the part where your granola gets real good and crispy while you decide how you want to serve it. I highly recommend yogurt, raspberries and an artful drizzle of peanut butter.
 You may notice that Easy Stovetop Peanut Butter Granola isn’t particularly cluster-prone. This doesn’t bother me in the slightest, but if you are a cluster person, you can reduce the oats and peanuts down to three cups total volume and keep everything else the same. Alternatively, swap the maple syrup for a thicker sweetener like honey or brown rice syrup, and maybe bump it up to 5-6 tablespoons. Either of those should work some clustering magic.
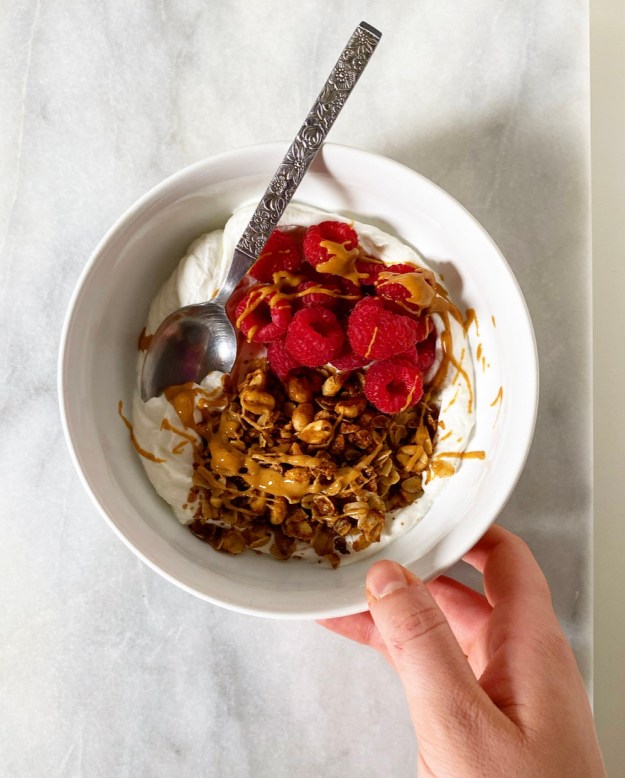
 Homemade Chocolate Shell has appeared on here a few times over the years, but always as a part of another recipe. I’ve used it to finish an
 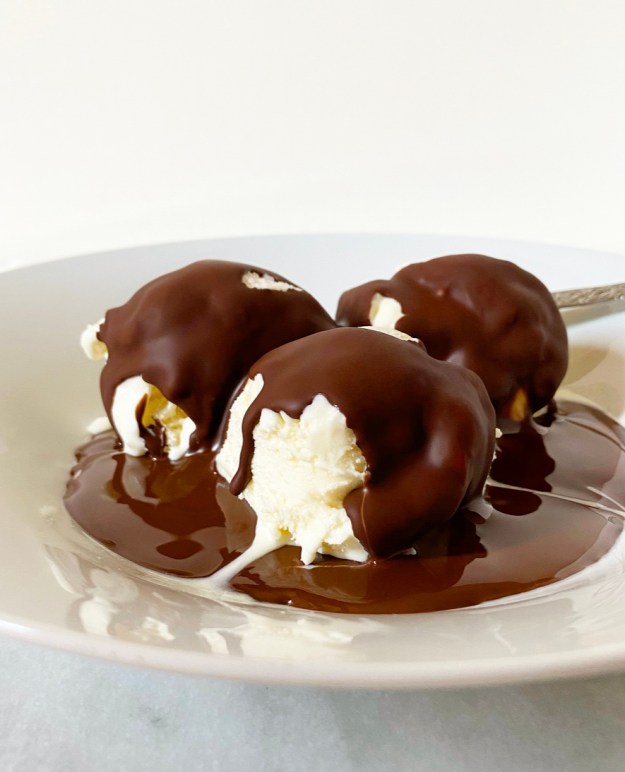 Chocolate shell is both entertainment and dessert. It goes on ice cream (or anything cold) like
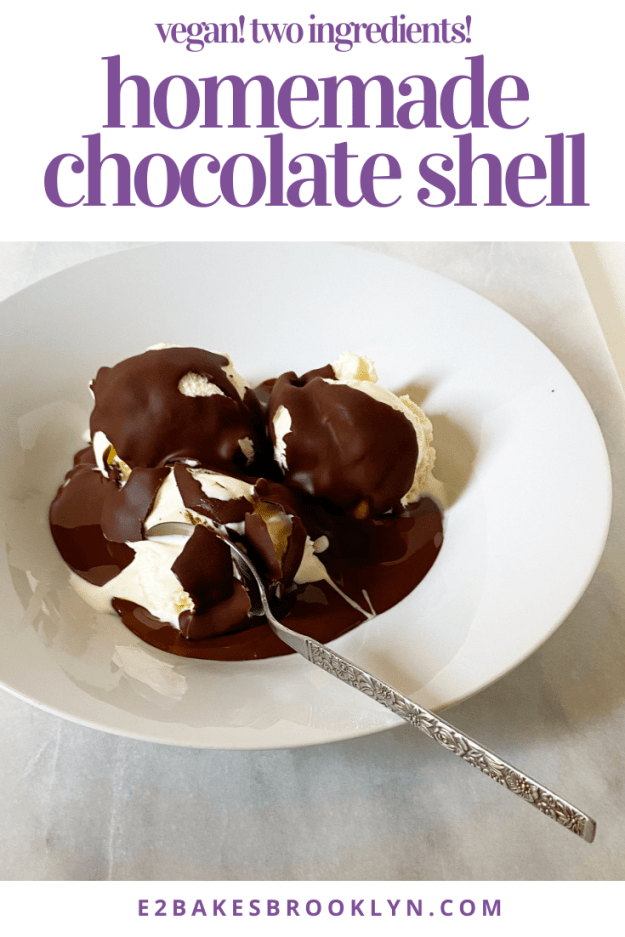
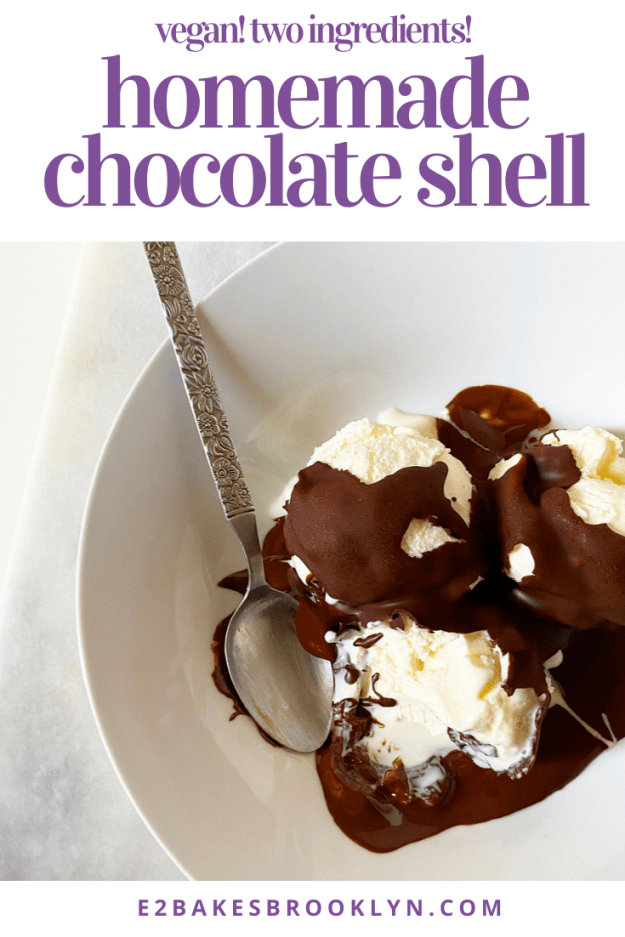
 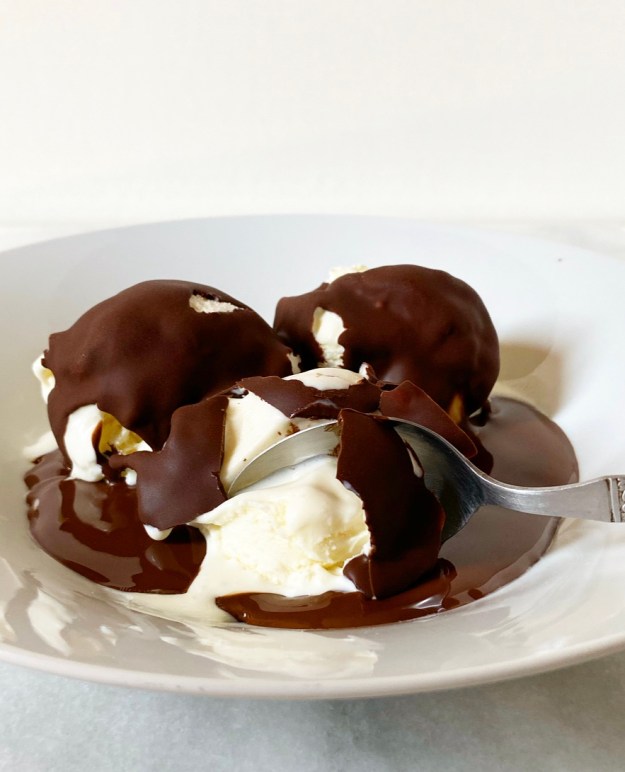 The “magic” of chocolate shell was a mystery to me for years—how did they do that?! Turns out, mostly with ingredients and preservatives that I’d rather not ingest whenever I get a hankering for a bowl of ice cream with a snappy chocolate topping. Imagine my utter delight when I discovered Homemade Chocolate Shell could be made with just two easy-to-find, vegan ingredients!
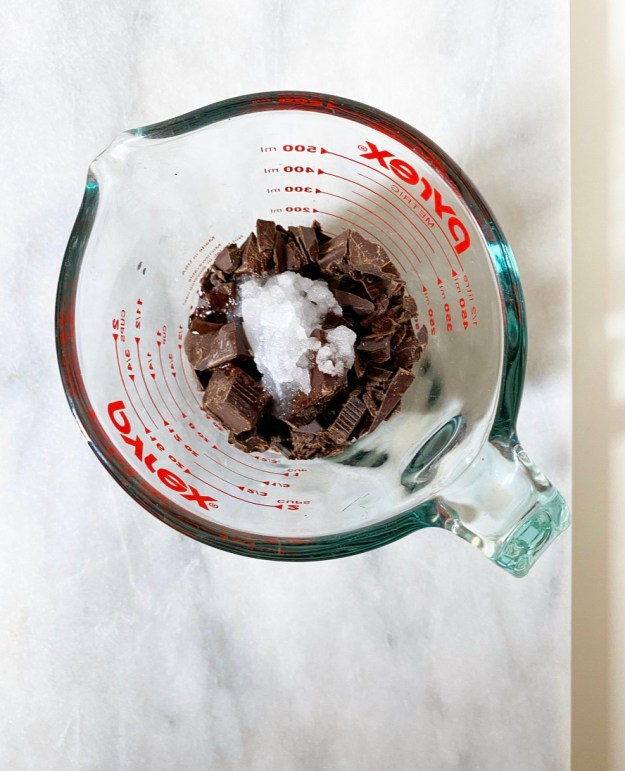
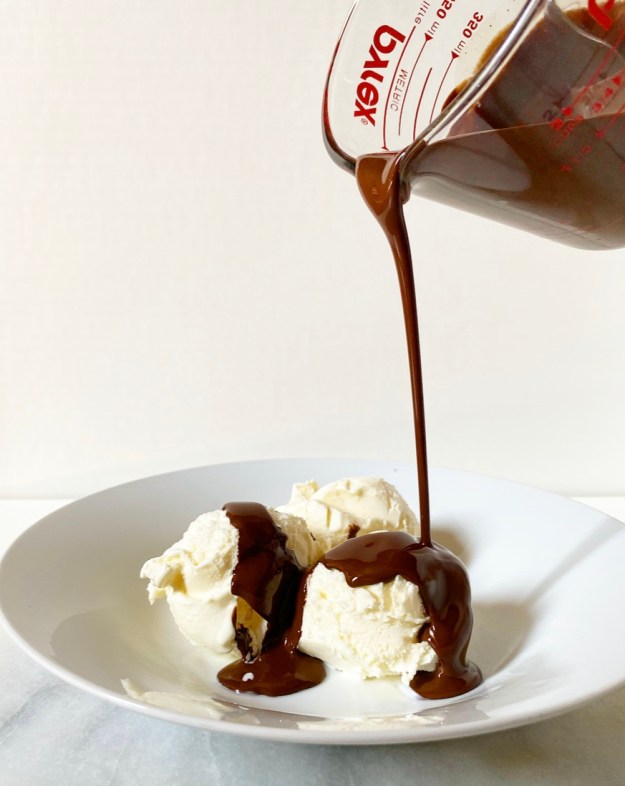 Yes, all you need to make Homemade Chocolate Shell are four ounces of bittersweet chocolate and two tablespoons of coconut oil. Melt them together, stir until smooth, and then drizzle—or let’s be real, pour—it over a scoop (or three) of ice cream. Then watch as the glossy sauce magically turns into a matte shell in a matter of seconds! It works because coconut oil solidifies at 76F, but that’s way less fun than calling it magic.
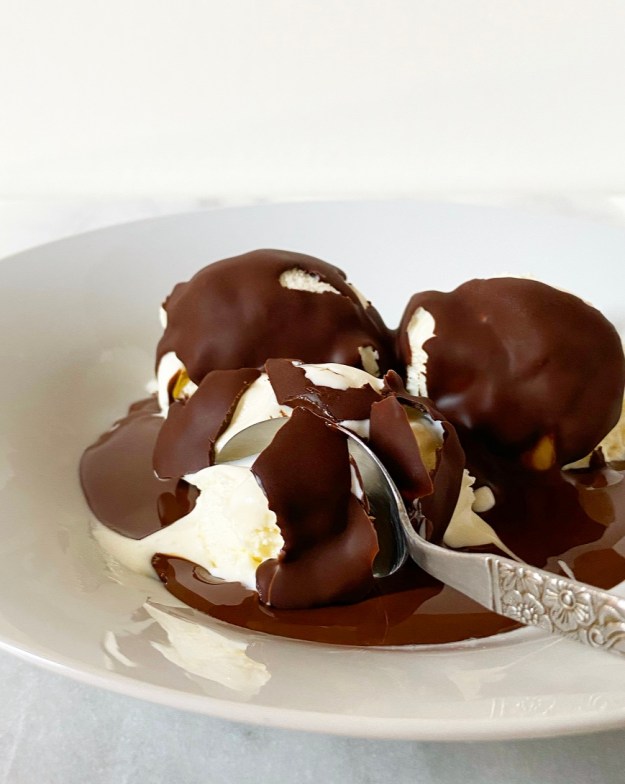 Not only is Homemade Chocolate Shell made of less-terrifying ingredients than the store bought stuff, it’s more delicious, too. You control the quality of ingredients here, and that goes double since there are only two of them. This batch was made with Trader Joe’s Pound Plus Dark Chocolate and refined coconut oil because those are things that I like and keep on hand.
 Hands down, my second favorite part of eating Homemade Chocolate Shell is thwacking through it with the side of a spoon. There’s nothing quite like that satisfying snap and the shards of cold chocolate that melt in your mouth.
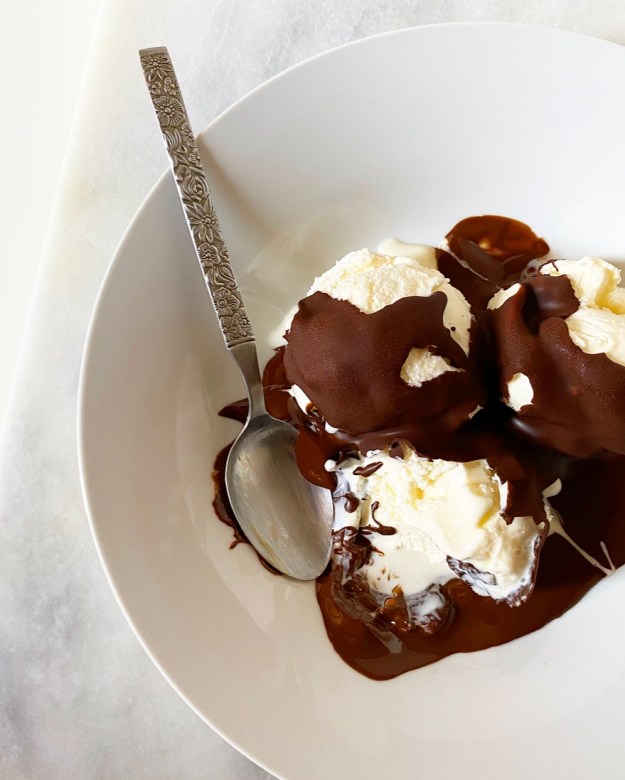

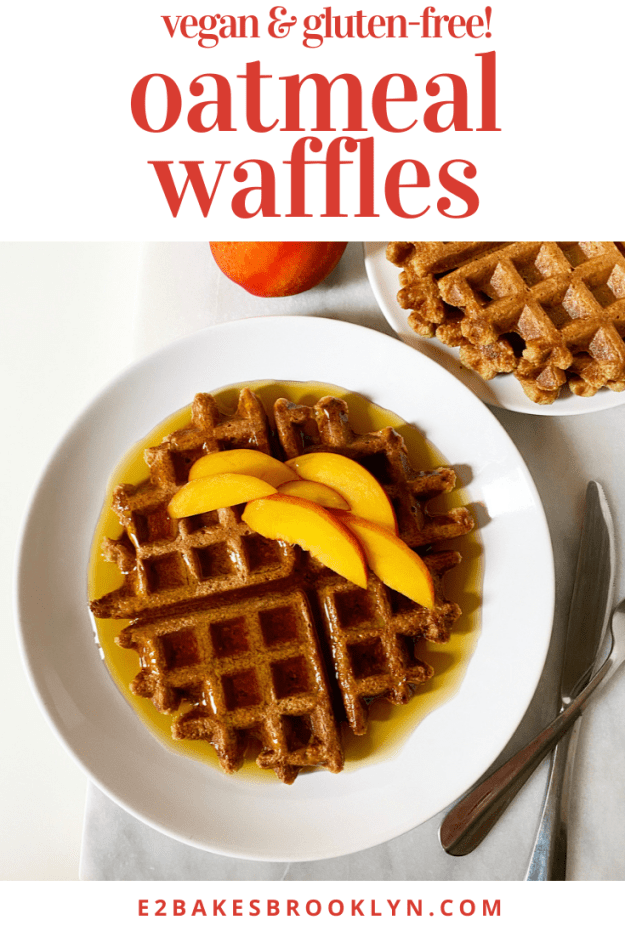
 It seems like every July my mind goes to Maine while my body stays in New York and bakes in preparation to join it…in
 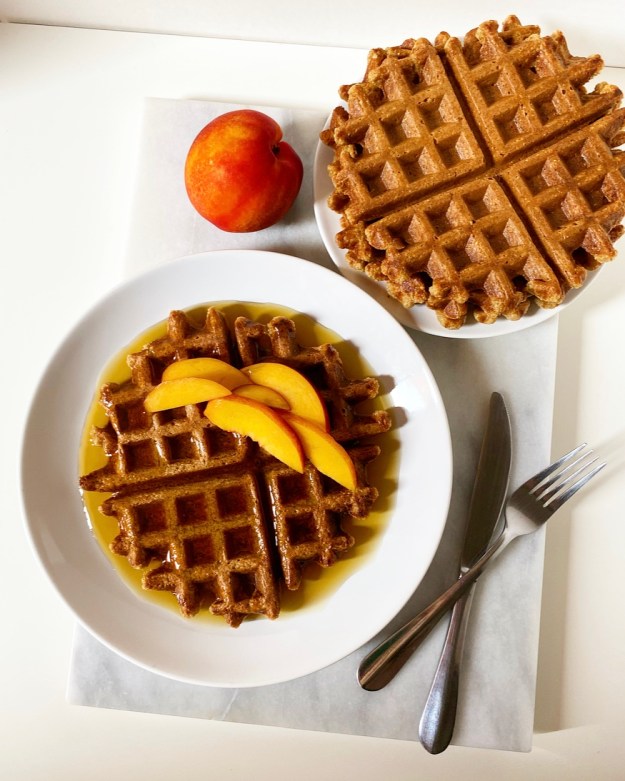 I’m not saying I manifested a Maine trip, but I’m not saying I didn’t (with a lot of VJ’s help and a big check). What I am saying is that when I started testing these gluten-free, vegan Oatmeal Waffles a few weeks ago, I could only daydream about making them on a sunny
 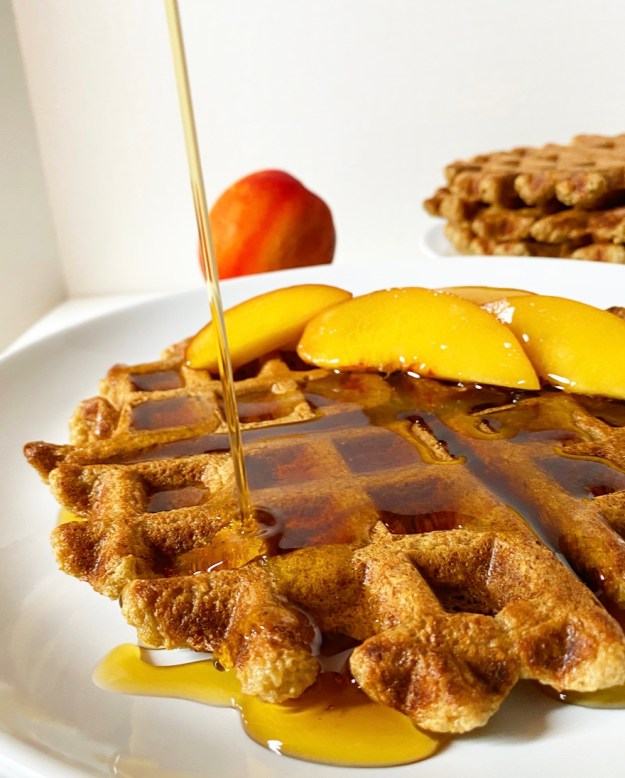 Until then, these Oatmeal Waffles are my current weekend breakfast obsession. They’re fairly quick and easy to make, and have a slightly sweet whole grain flavor—no cardboard here, I promise. These are real, delicious, syrup-in-every-divot, Saturday morning-worthy
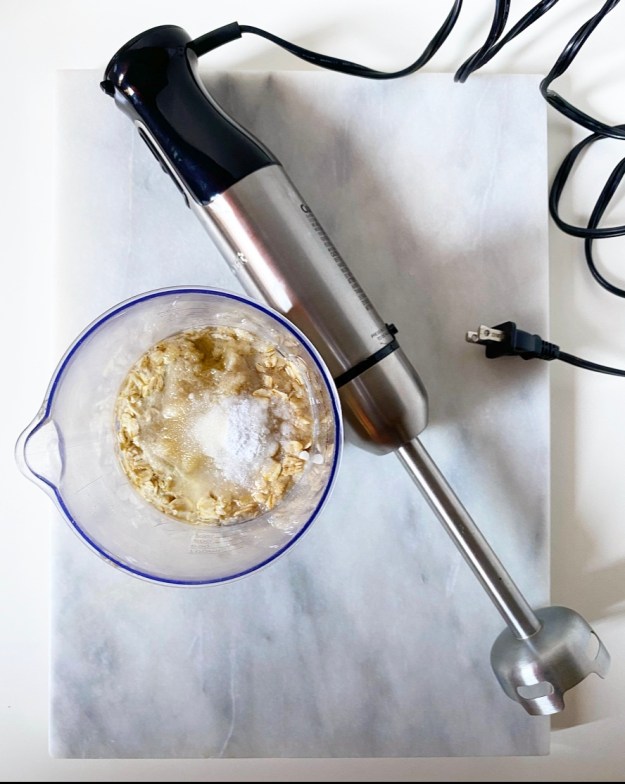

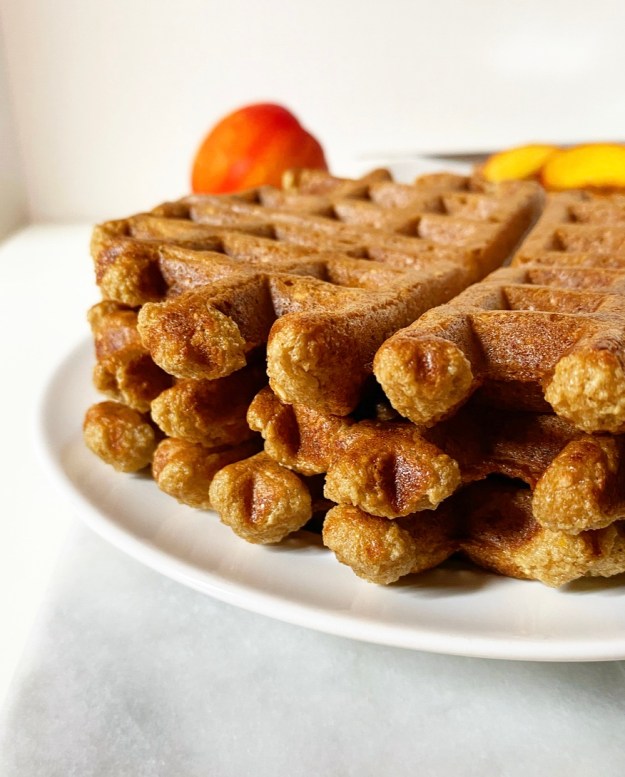
 The batter is made with eight ingredients: gluten-free old-fashioned oats, non-dairy milk, applesauce, touches of oil and sugar, baking powder, baking soda and salt. It comes together in the blender and, after resting for ten minutes, makes four burnished, crispy-edged, fluffy-centered waffles—enough for two or four people, or eating one now and freezing three for when a craving hits. And oh, it will hit.
 For those who don’t need or want their waffles to be
 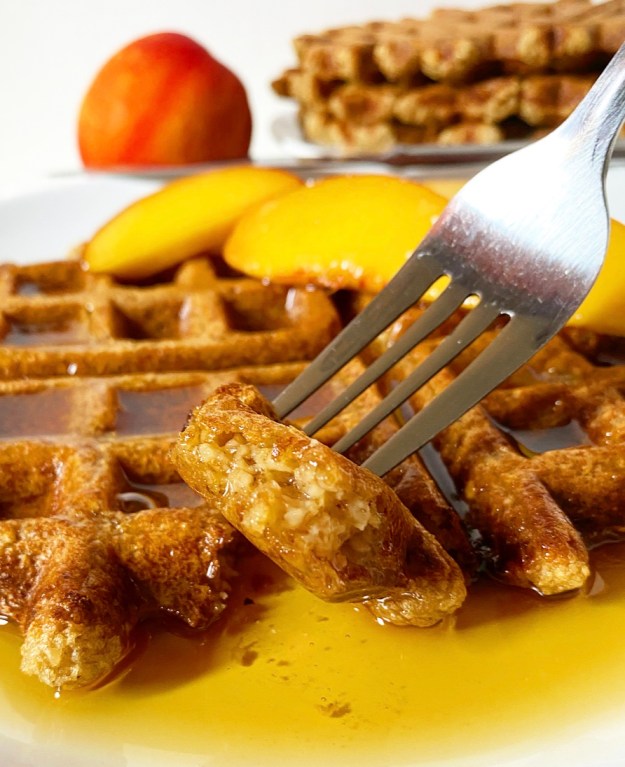 Again, I’m not saying I manifested a trip to Maine, but if you put intention—in this case, waffles and a dream—out into the world (and write a check and ask VJ to send a series of emails to the powers that be), sometimes good things happen. Like vacation and a freezer-full of Oatmeal Waffles.


 I posted
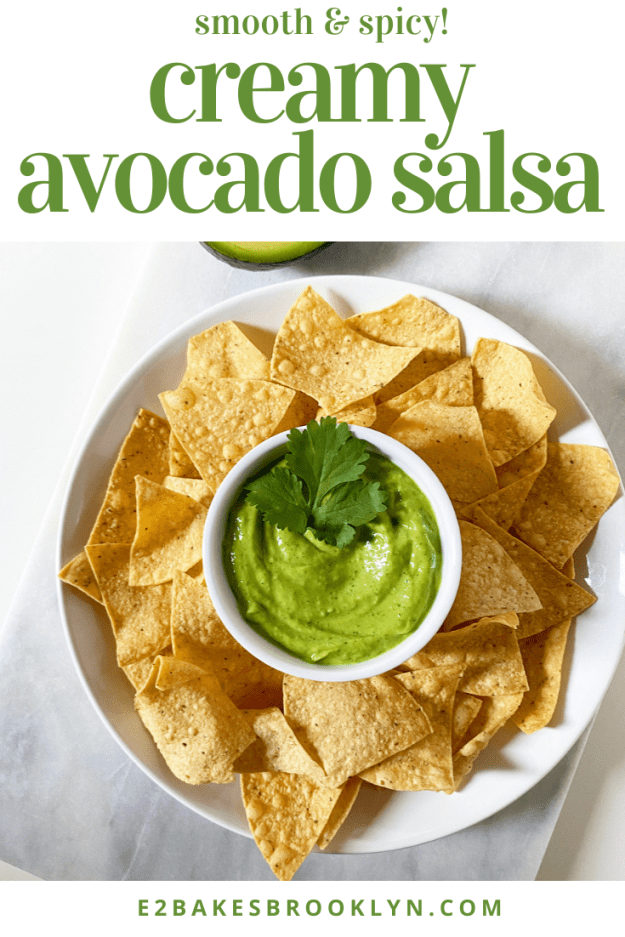
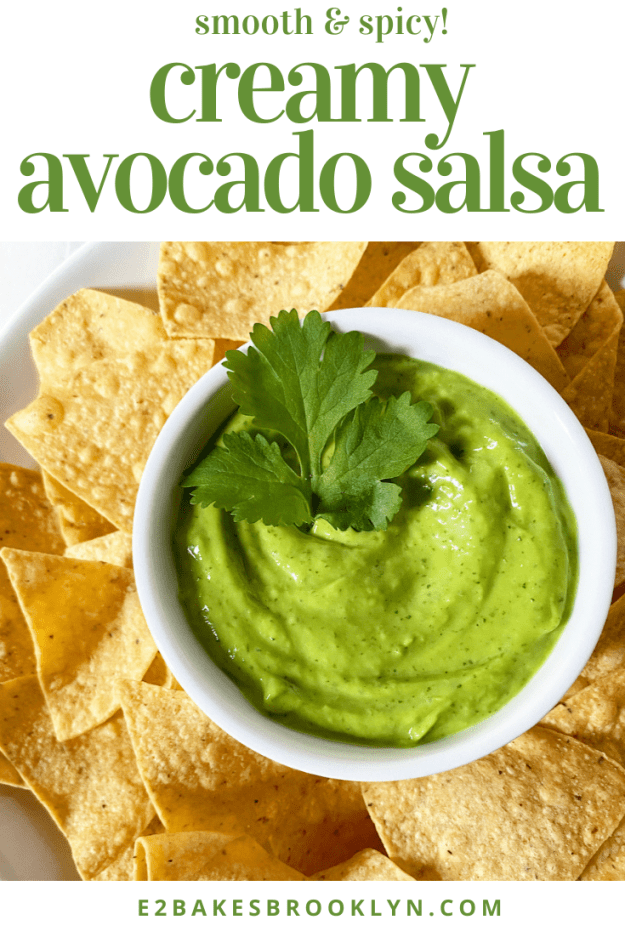
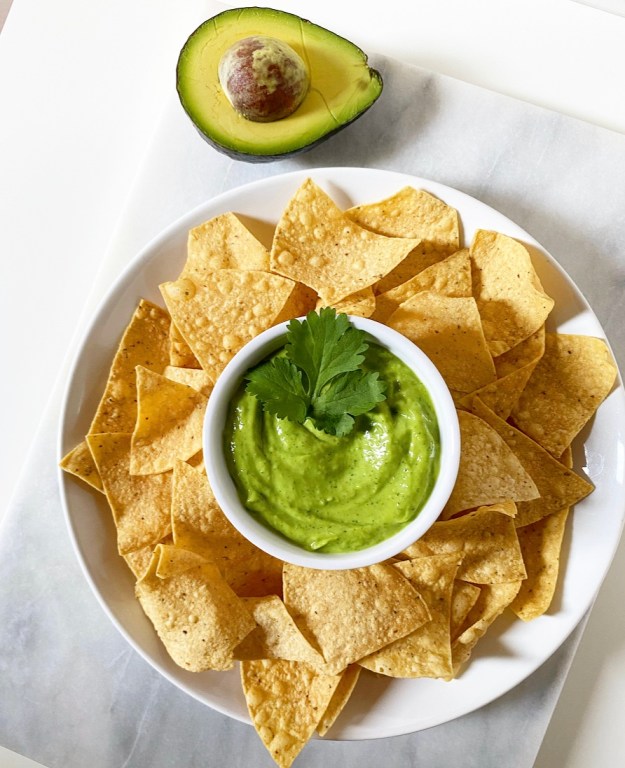
  Creamy Avocado Salsa is a relatively new addition to my repertoire. I began tinkering with it a couple of years ago in an effort to match one of the offerings at a local taqueria, and it’s been a favorite ever since. Creamy Avocado Salsa is creamy, refreshing and delicious–we’re talking all the flavors of guacamole with a smooth, dippable consistency. Yum! If you’re going to try one new salsa recipe this summer, let this be the one.
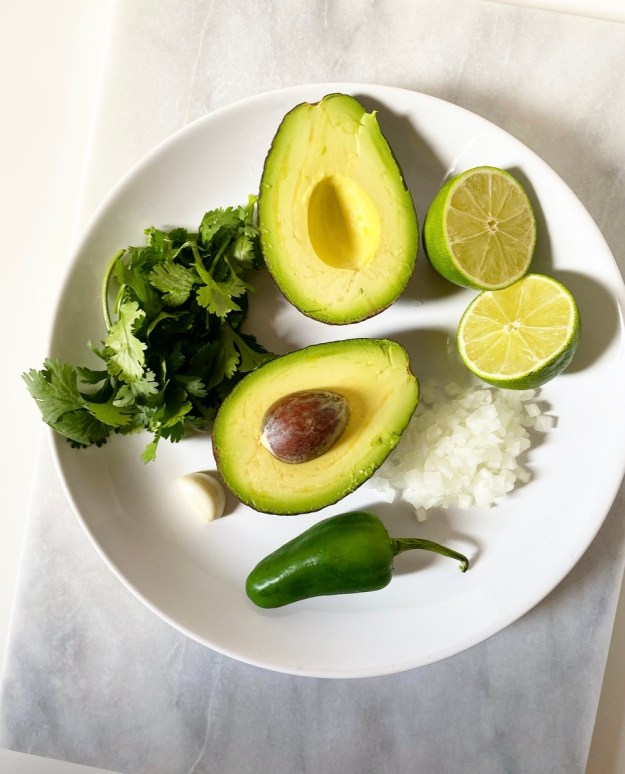 This recipe is a snap to make. Simply pile an avocado, a tiny bit of onion, some garlic, half a jalapeño, fresh cilantro and lime juice into a blender with some salt and cold water, and let it rip. After about a minute, you’ll have a super smooth, bright green salsa. It’s pairs well with tortilla chips, of course, but may I also recommend trying it with cheesy scrambled eggs or sautéed shrimp or with zucchini noodles? Because it’s good with all those things.
 As with all my salsas, guacamole and other dips, this one is made with my own flavor preferences in mind. I love it the way it is, but I recommend that you taste and adjust as you go, adding more salt, jalapeño or lime until it’s exactly how you like it. You’ll notice that there’s a lot of wiggle room in the amount of water you can use in the recipe. The pictured batch was made with a large avocado and seven tablespoons of water to achieve the texture of a thick, creamy dressing, but you may like yours thinner or thicker. Start with a little water and adjust as needed until it’s to your preference.
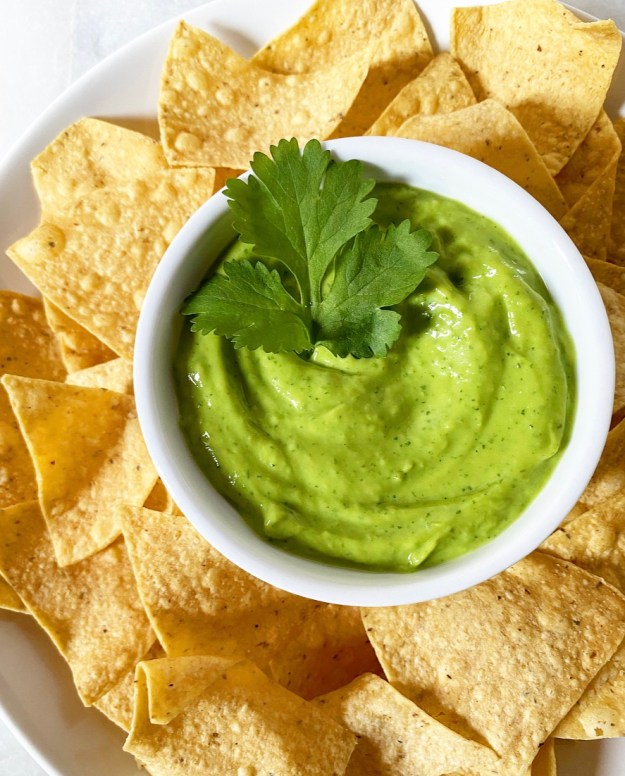 Creamy Avocado Salsa keeps shockingly well considering the usual trajectory of avocado-based treats. It’ll stay good in the fridge for a couple of days, but if you’re anything like me, it won’t last that long.