Category Archives: Breads

Friday Favorites

I love anniversaries. Yes, I’m one of those people. If something happened once and warrants commemorating for any reason, I’m the one planning the party.

April 22nd is a big day for me. Today is my parents’ 33rd wedding anniversary, and I have another anniversary going on, too. It’s Earth Day. Heck, it’s my dog’s half-birthday 😜

All of that is great, but I’m writing today because this little blog began exactly six months ago!

Yes, I know six months does not technically constitute an anniversary, but for me, it means a lot. I talked about starting a food blog for six years before actually clicking “Publish.” Since October 22, 2015, I’ve posted 75 recipes. SEVENTY FIVE. Just…how?

I so appreciate all of you who have taken the time to read my posts, leave comments, follow me on social media, and make the recipes! Every time someone tells me they made something from my blog and enjoyed it, it brings me immeasurable joy. The idea that anyone would ever make and like a recipe that I created blows my mind. So, thank you.

And now that I’m done being sappy, let’s celebrate! Here are six of my favorite recipes from the archives to bring you into Spring! 

Chocolate Chip Shortbread Cookies are crunchy, buttery little cookies with all the flavors of a great chocolate chip cookie. They are super simple to make, and absolutely perfect with coffee or tea. I highly recommend using them for ice cream sandwiches 😊 

Spring is here, and that means we have four months of fantastic seasonal fruit ahead of us. More importantly, it means there will be pie! Make sure to use my Cream Cheese Pie Dough–it couldn’t be easier, and it makes the flakiest crust I’ve ever had. 

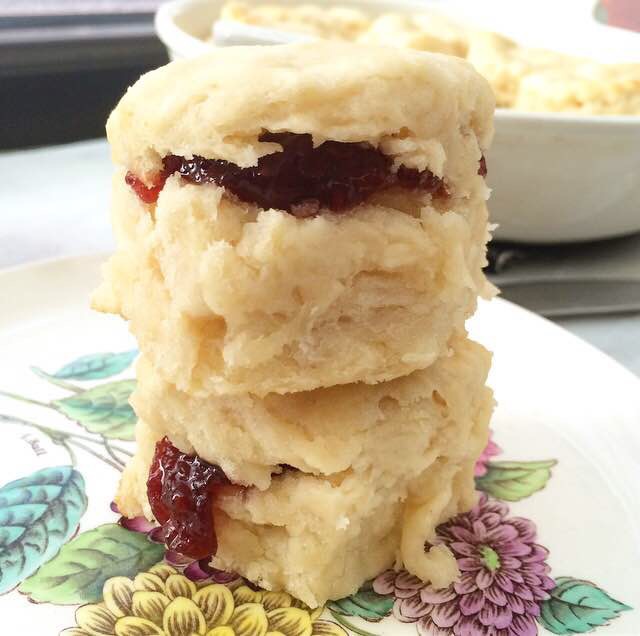
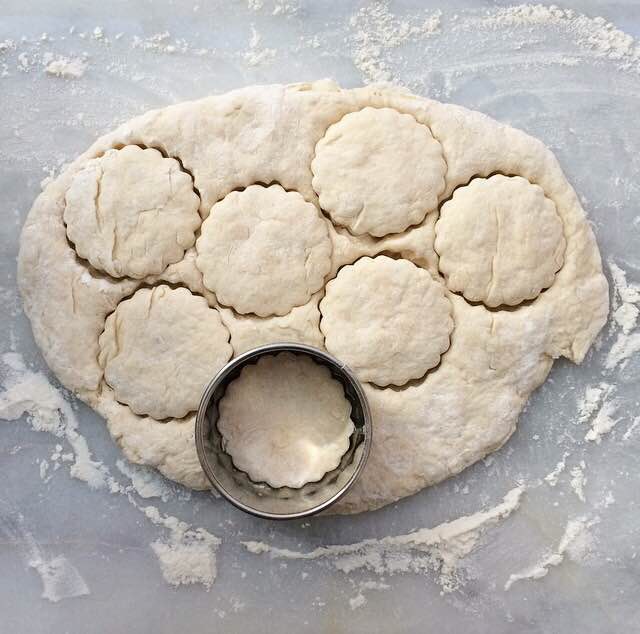
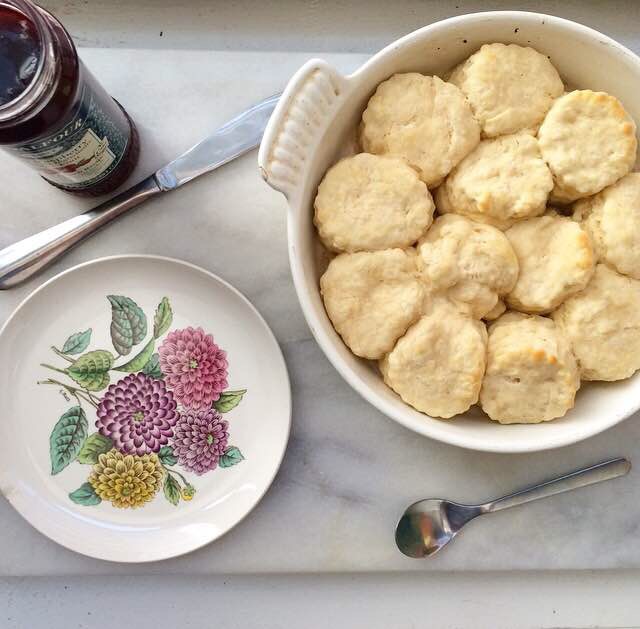
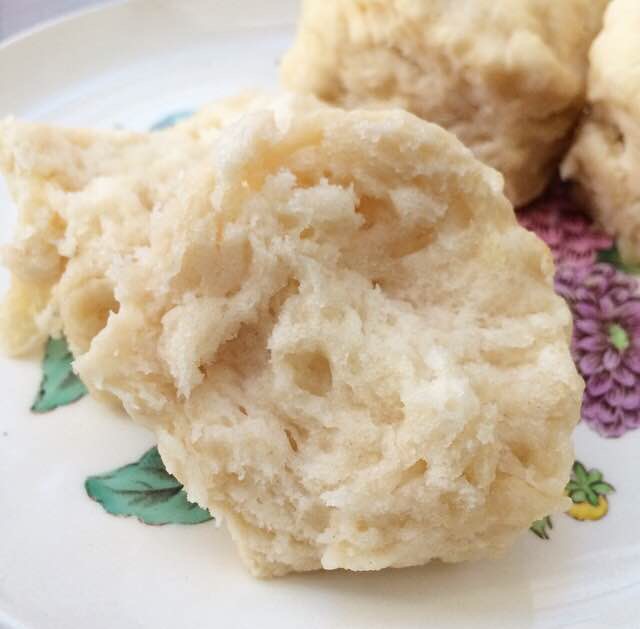
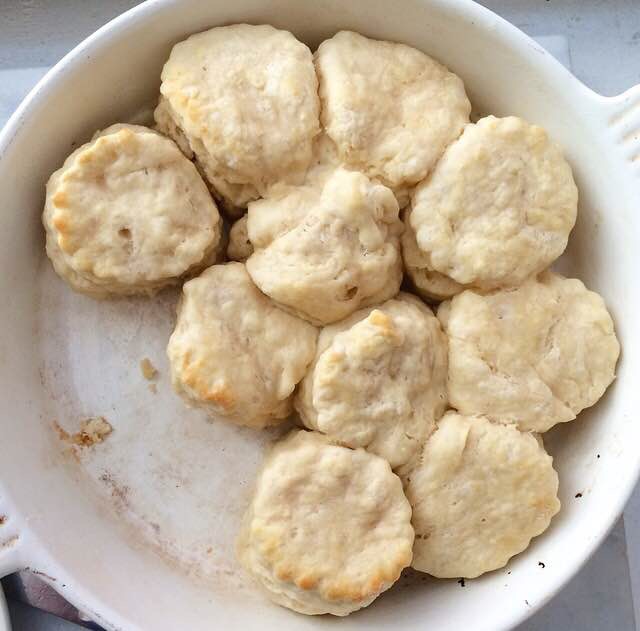
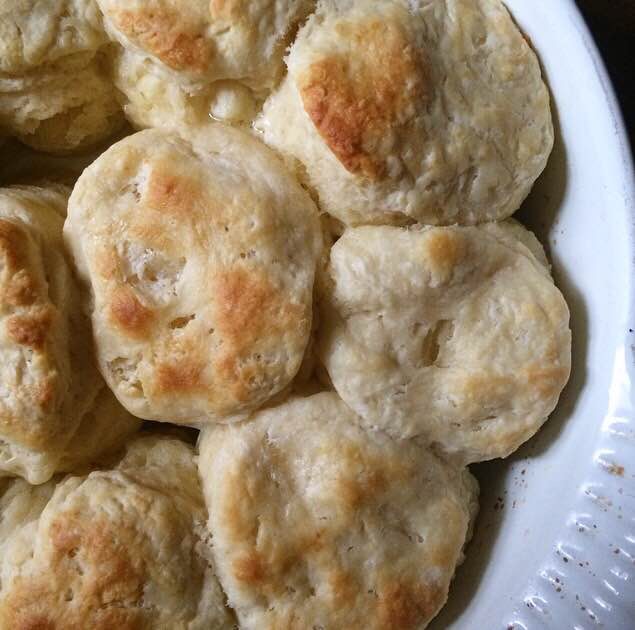
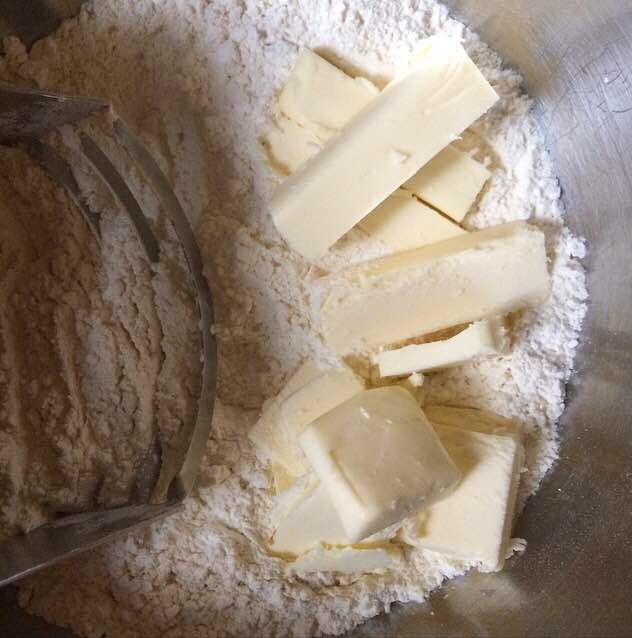
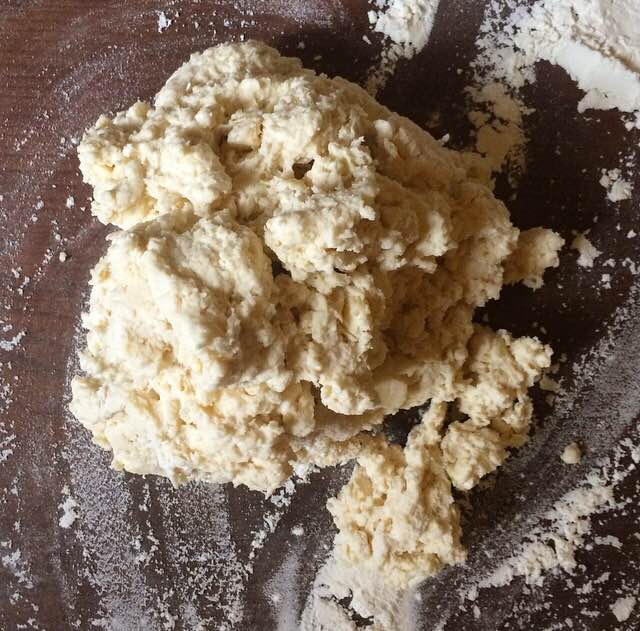
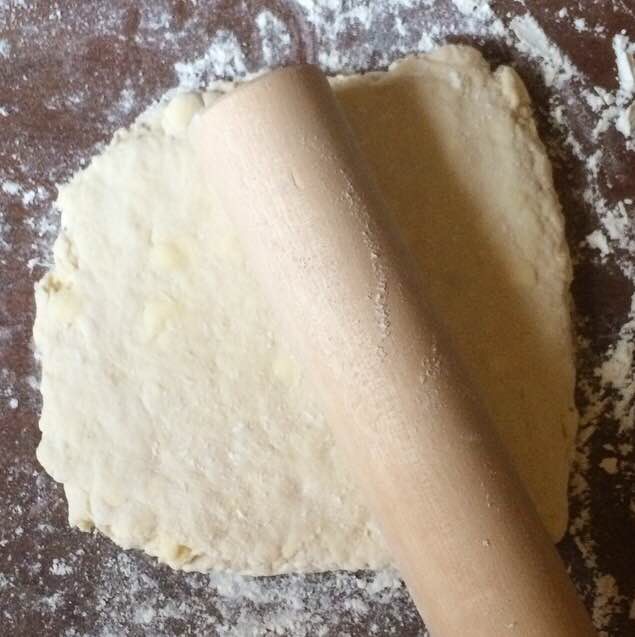
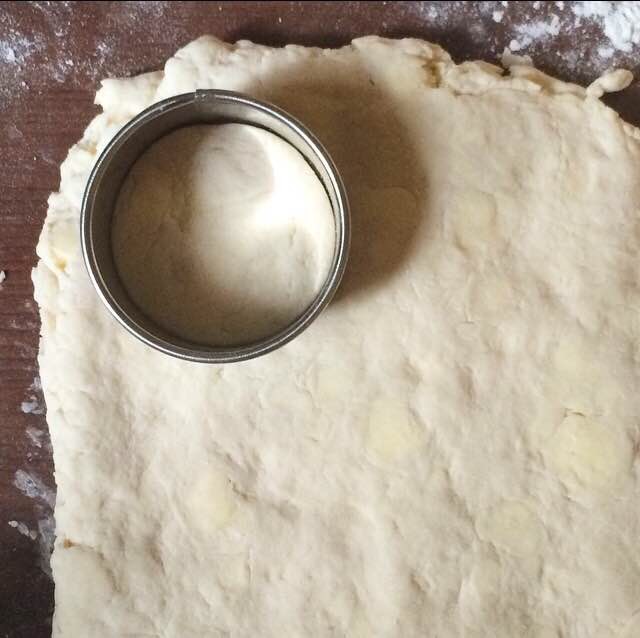
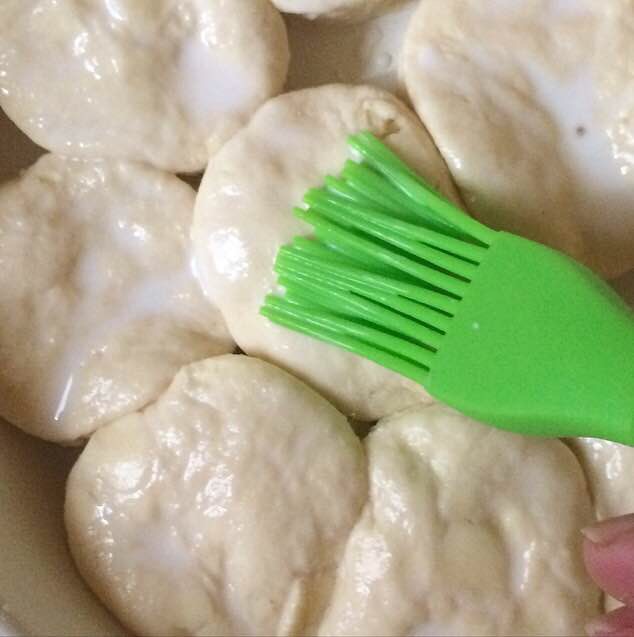
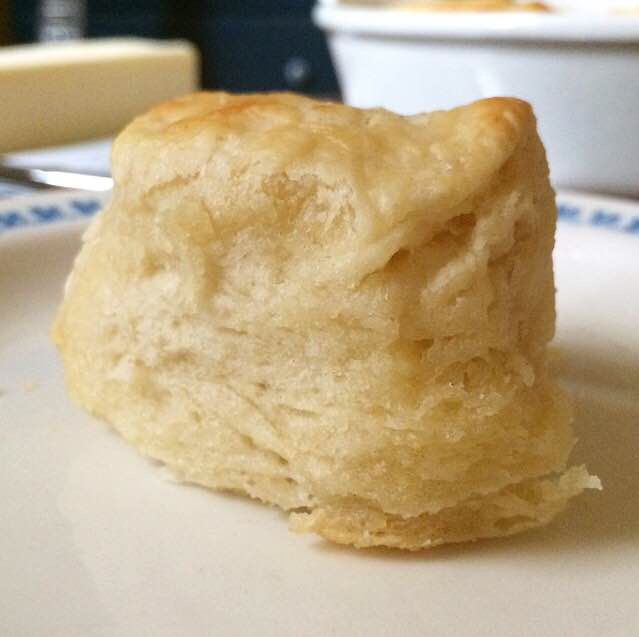
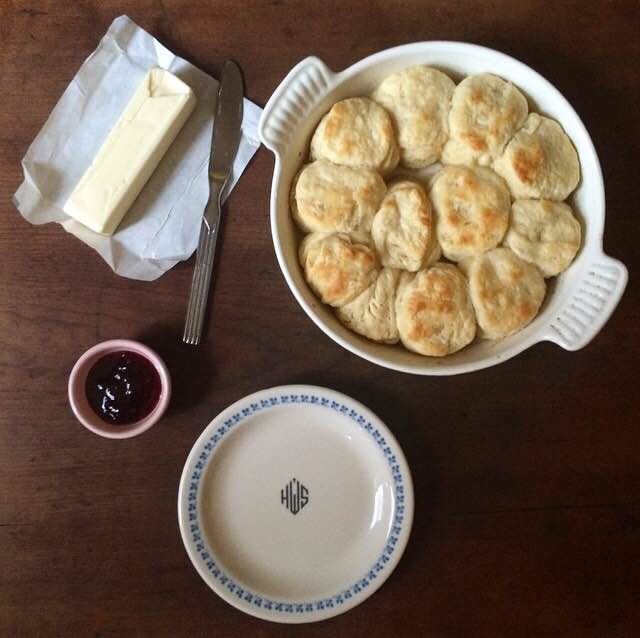
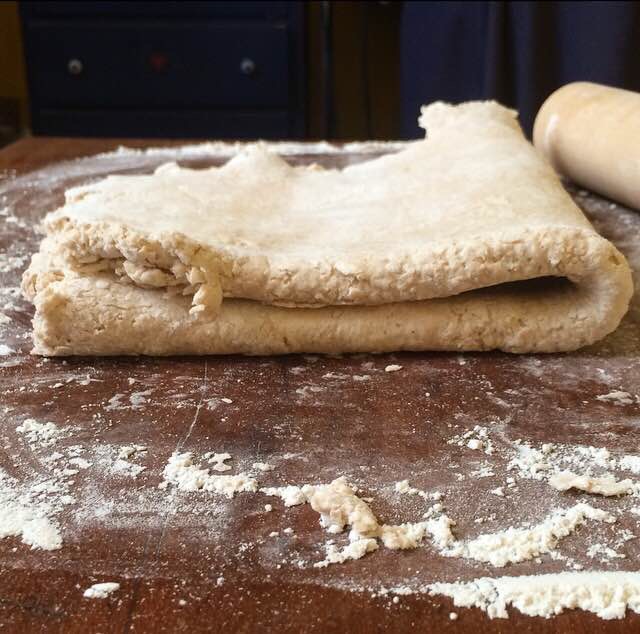
My grandmother’s Buttermilk Biscuits are one of my best memories of my childhood. Her recipe went with her when she passed many years ago, but I know she’d love mine. These biscuits are the perfect easy breakfast, and they are wonderful with a bowl of soup at dinner. 

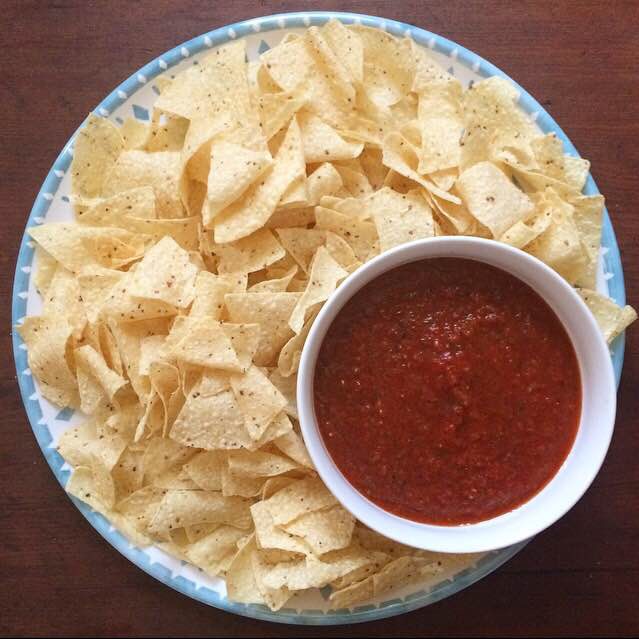
It’s the beginning of picnic season, so you’ll need food that’s easy to make, transport, and share with your friends and family. My favorite thing to bring to an outdoor get-together? My Restaurant-Style Salsa! It takes just five minutes to whip up, and it puts prepared salsas to shame. 

And what’s warm weather without ice cream? No-Churn Mint Chocolate Chip Cookie Dough Ice Cream doesn’t require an ice cream maker, and is the creamiest, dreamiest ice cream I’ve made so far! And those little bits of edible cookie dough are everything. 

Springtime just demands carrot cake. But taking the time to make a whole layer cake when the weather is just begging for you to go outside is torture! Save yourself some time and make these Carrot Cake Blondies! They’re every bit as good as traditional carrot cake, and half the work!

Have you made any of these recipes? Let me know in the comments section below, or on Instagram @e2bakesbrooklyn!

Enjoy your weekend 😊

Mini Biscuit Cinnamon Rolls

 Cinnamon rolls are amazing. (Duh.) Gooey cinnamon filling rolled into soft pastry and covered in frosting–what’s not to love?!

Well…the time commitment. Even supposedly “quick and easy” recipes take three hours. The problem is the yeast. It takes a while. Like multiple-long-rises a while. Add to that the fact that working with yeast strikes fear into the hearts of many casual bakers. I’ve learned that yeast is nothing to fear, but still. When I want cinnamon rolls, I want them *now.* Not in three or six or eight hours–NOW.

I clearly have some pretty serious breakfast pastry needs. 

What if I told you that you could have some seriously good cinnamon rolls on your table in less than 90 minutes? And that you didn’t have to proof any yeast or let anything rise? Would you be interested?

Yeah, I thought so.

Enter Mini Biscuit Cinnamon Rolls. All the sweet cinnamon goodness of classic cinnamon rolls, wrapped up in a delightfully easy cream biscuit dough and positively smothered in cream cheese frosting. Oh my word, are these good. And they’re miniature, because tiny food just tastes better somehow. 

The dough base is the same as the one I used in my Scratch Biscuit Monkey Bread. It’s super easy: mix together flour, sugar, salt, and baking powder, and stir in 2 cups of cream (I said quick and easy, not healthy). That’s it. Seriously easy. I do not recommend using a regular buttermilk biscuit dough here–the butter in that dough must be kept cold, or your results will be bricks. No, thank you. This simple cream biscuit dough has no butter, so it doesn’t need to be kept absolutely frigid to bake up properly. Using this base, you can roll and flip and handle the dough as much as you want! 

    Once the dough is made, divide it in half. Take one half and roll it into a large rectangle on a floured surface. Then, take some butter that’s been spiked with granulated sugar, dark brown sugar, cinnamon, and salt, and spread it over the whole thing, leaving only a thin border. Gently roll the long edge of the dough toward your body until you have a tight cylinder. 

 Cut the rolled dough into 1-inch rolls and place them close together in a buttered pan. Repeat that process with the other half of the dough, and then bake the rolls for 15-20 minutes at 400F.  
 Make a half-batch of my cream cheese frosting, and spread it over the warm rolls. Yes, this is a lot of frosting, but that’s how I roll. <–Ha! Roll. 

Seriously, look at that.

If a metric ton of frosting isn’t your thing, you may halve the recipe. The frosting will melt into every nook and cranny of the cinnamon rolls and make everything super gooey and delicious. In fact, the frosting is so thick, I had a hard time seeing while cutting out individual rolls–but when they’re this good, I don’t care if they’re totally gorgeous. The tang of the frosting with the fluffy biscuit base and sweet cinnamon filling is just…everything. 

So, the next time you have a craving for cinnamon rolls, make these Mini Biscuit Cinnamon Rolls. In less than 90 minutes, you’ll be tucking into a full pan of amazingness, and you won’t have fretted over yeast or waited an eternity! These are perfect for any weekend morning or brunch party. Nobody can resist these sweet little rolls 😊 

 Mini Biscuit Cinnamon Rolls
makes about two dozen miniature rolls

Filling:
6 tablespoons unsalted butter, softened to room temperature
1/4 cup granulated sugar
1/4 cup dark brown sugar, packed
2 tablespoons ground cinnamon
1/2 teaspoon Kosher or sea salt

Biscuits:
3 cups all-purpose flour
2 tablespoons granulated sugar
1 teaspoon Kosher or sea salt
1 tablespoon baking powder
1 pint (2 cups) heavy cream, cold

Frosting:
4-ounces (1/2 brick) full-fat cream cheese, softened to room temperature
1/2 cup (1 stick) unsalted butter, softened to room temperature
2 cups confectioner’s sugar
pinch of Kosher or sea salt
1 teaspoon pure vanilla extract

Preheat oven to 400F. Grease a 9-inch round cake pan with butter. Set aside.

Make the filling. In a small mixing bowl, use a fork to mash together softened unsalted butter, granulated sugar, dark brown sugar, cinnamon, and salt, until it’s completely combined. Set aside.

Make the biscuit dough. In a large mixing bowl, whisk together flour, granulated sugar, salt, and baking powder. Use a silicone spatula or wooden spoon to fold in heavy cream, making sure to scrape the sides and bottom of the bowl. Dough will be shaggy. Divide dough in halves.

On a floured surface, roll half the dough into a 14×8-inch rectangle. Use an offset knife (or butter knife) to spread half the filling onto the rectangle, leaving a 1-inch border at the edge. Starting at the long edge furthest away from your body, tightly roll the dough toward you until you have one large cylinder. Slice into 1-inch pieces, and place close together in the prepared pan. Repeat process with the second half of the dough.

Bake rolls for 15-20 minutes, until light golden and fully cooked. Let cool ten minutes while you make the frosting.

In a large mixing bowl, use an electric mixer to beat cream cheese and butter until light and fluffy. Beat in confectioner’s sugar and salt, followed by vanilla. Scrape down the sides of the bowl as necessary. Drop frosting in dollops over the top of the warm rolls. Spread with an offset knife to cover the entire top of the rolls. Let set for ten minutes before serving.

Mini Biscuit Cinnamon Rolls are best served the day they are made, but may be kept covered at room temperature for up to three days.

Coconut Oil Biscuits

 I know what you’re thinking. “Coconut oil in biscuits? This girl’s lost her mind!”

But hear me out. Until last week, I felt the same way. Up to that point, every great biscuit I had ever eaten was made with butter and buttermilk, or occasionally, heavy cream. But while surfing Pinterest one morning, I came across a recipe for Coconut Oil Biscuits. At first, I was horrified. Coconut oil? In biscuits? No way. And they were vegan? I love experimenting with vegan recipes, but biscuits were sacred. 

I kept scrolling. But the evil geniuses who designed the Pinterest algorithm had other ideas. The recipe kept showing up! I closed the app and went about my day.

But that Pin kept popping up in my mind. And the more I thought about it, the more I welcomed the idea. Biscuits made with coconut oil and coconut milk? I like coconut. I love biscuits. Was it so wrong to put them together? I gave in and decided to try it myself. I figured that if they were a real disaster, I could toss them and go back to my buttermilk biscuit-only mentality. 

 Very long story short, I shouldn’t have worried. Coconut Oil Biscuits rise high and are super soft and fluffy. And they don’t need any of the chilling, rolling, folding, or thwacking that my buttermilk biscuits require. None of those things are difficult or take much time, but there’s something really awesome about being able to make scratch biscuits in 25 minutes start-to-finish. Yes, if you turn the oven to 425F right now, you are only 25 minutes away from slathering jam onto a warm biscuit! 

 But before you go running to the kitchen, there are a couple of ingredients we need to talk about. First, the coconut oil. In buttermilk biscuits, the butter must be kept cold so that it only melts in the oven–this creates flakiness and layers. If it were at room temperature during the mixing, the resulting biscuits would be dense and dry because the butter “pockets” basically wouldn’t exist. But unlike butter, coconut oil is solid (and kind of hard) at room temperature, so it will cut into the flour easily without becoming gooey. And since the oil doesn’t have butter’s water content, it keeps these biscuits nice and moist. Hello fluffy, flaky magic. 

The other thing we need to talk about is the milk. In buttermilk biscuits, the liquid is buttermilk (duh). Here, you could use regular dairy buttermilk, but why not add an extra dose of flavor (and keep the biscuits vegan!) by using coconut milk?! I use refrigerated coconut milk because of it’s textural similarity to dairy buttermilk. Doctored up with a teaspoon of vinegar, it creates tenderness just like its dairy counterpart. 

 Coconut Oil Biscuits bake up in just 10-12 minutes. They don’t really turn golden, but they definitely rise high. And they are so tender that you can lift the tops right off–perfect for topping with whatever your biscuit-loving heart desires!

For those wondering if these are super coconutty or not, well…they definitely have a coconut flavor, but as there isn’t much sugar, they are decidedly on the savory side. I like them with a little jam (raspberry is my favorite!), but I think a sweeter nut butter, like this one, would do well here. I could also imagine them slathered with some salted butter or made into little breakfast sandwiches.

No matter how you serve them, these Coconut Oil Biscuits are sure to be a new favorite. 

 Coconut Oil Biscuits
adapted from Gimme Some Oven
makes about 12 biscuits

1 teaspoon white or apple cider vinegar
3/4 cup milk of choice*, plus extra for brushing
2 cups all-purpose flour
1 tablespoon granulated sugar
1 tablespoon baking powder
1 teaspoon Kosher or sea salt
1/4 cup coconut oil,* solid

Preheat oven to 425F. Grease a 9″ pie plate with coconut oil. Set aside.

Pour vinegar into a liquid measuring cup. Pour in milk until you have 3/4 cup total liquid, and stir to combine. Place measuring cup in the fridge to chill while you prepare the other ingredients.

In a large bowl, combine flour, sugar, baking powder, and salt. Whisk to combine. Using a pastry blender or two forks, cut coconut oil into the dry ingredients until the largest pieces are the size of small peas. Pour in milk mixture and use a silicone spatula or wooden spoon to fold everything together, scraping the sides and bottom of the bowl as you go.

Turn dough out onto a floured surface. Use floured fingertips to knead a few times, until everything is fully combined. Pat dough to a 1/2-inch thickness. Use a 2-inch round biscuit cutter or sharp knife to cut biscuits. When cutting, press directly down–do not twist or saw. Pat dough out again as necessary.

Place biscuits close together in prepared pan. Brush the tops with additional coconut milk. Bake for 10-12 minutes, until biscuits have risen and are no longer doughy. The tops may not turn golden.

Let cool for a few minutes, and serve warm with your jam of choice.

Notes:

1. I use SO Delicious Unsweetened Vanilla Coconut Milk Beverage. Any non-dairy milk will work, as will whole, 1%, and 2% cow’s milk. Do not use skim or fat-free cow’s milk.

2. I use Trader Joe’s Extra Virgin Coconut Oil.

Buttermilk Biscuits

 My grandmother (“Nonnie”) was a great woman. She had bright red hair. She was just as sweet as she could be, unless someone crossed her. And you didn’t cross her because she was scrappy–she kept a paddle on her kitchen wall. The woman had gumption, my absolute favorite quality in a human. She loved without ceasing. When she was very old and living in a nursing home, she would play Bingo for Almond Joys and then save all of them for my sisters and me. We would go visit her, and she would have a shoebox-full after a week!

Every Sunday morning, my mom, little sister, and I would go to church, while my dad went over to Nonnie’s house for breakfast. My sister and I were always very jealous. Nonnie may have let us have popcorn and Ovaltine for dinner (true story), but breakfast was sacred. There were eggs fried in bacon grease, Owens sausage patties, sliced tomatoes, and then, there were the biscuits. Nonnie made the best biscuits in the world, as far as my family were concerned. And if you showed up for breakfast and she had made chocolate gravy to go along with them, you knew you were special. She started making biscuits in her teens (if not earlier), and made them until she literally could not anymore. She never measured anything–she had made them so many times that she didn’t need to. It was all a pinch (pronounced “peench”) of this and a pinch of that. My mom tried to get her recipe, but as the pinch is not an accurate unit of measurement, it was impossible. When Nonnie passed in 2001, her biscuit recipe went with her. There were many biscuit-less years after she died. When I started baking a few years ago, I spent more than a year trying to replicate her recipe. That’s impossible, of course. No matter how good my biscuits are, I’m not a southern grandma. But all that effort paid off because I make a hell of a biscuit. Today would have been Nonnie’s 97th birthday, and since I can’t share her recipe with you, I’ll share mine.  
 Buttermilk Biscuits start with whisking together flour, baking powder, sugar, and salt. The sugar won’t make these sweet–it just balances out the saltiness. Next, take one stick of cold butter and slice it in half (two 4 tablespoon pieces). Take one half and cut it into four sticks. Cut the other half into thin pats. Cutting the butter into different shapes means that the butter in the biscuit dough won’t be in uniform pieces–this ensures flakiness. Use a pastry blender or two forks to cut the butter into the flour mixture until the pieces are the size of peas. Work quickly so the butter stays cold. Next, pour in 2/3 cup of cold buttermilk. Stir with a wooden spoon or silicone spatula until it is incorporated and a shaggy dough forms. Does the dough look dry? Mine usually does at this point. Continue adding cold buttermilk by the tablespoon until the dough no longer looks dry. I usually end up using 3/4 cup of buttermilk total. Flour a surface and your fingertips. Don’t flour your palms–they radiate heat, while your fingertips stay cooler. Turn the dough onto the surface, and use your fingertips to pat it into a rectangle that is 1/2 to 3/4-inch thick. Fold it in half, and turn it one quarter turn. Pat it back into a 1/2 to 3/4-inch thick rectangle. Fold and turn it again. Repeat the folding and turning until you have done it four to six times–this is how we build layers! 

Now, flour a rolling pin. Use it to give the rectangle of dough three or four good thwacks (technical term). Flip the rectangle over, and thwack it again. Do this twice on each side. Why are we beating up our dough? We are knocking air into the layers. Have you ever heard of beaten biscuits? During the Depression, baking powder was rationed, but people still needed to make biscuits. Biscuit dough was “beaten” to encourage a good rise. Even though we have access to baking powder nowadays, beating the biscuit dough still helps to ensure that we have tall, flaky biscuits. 

  Use a 2 1/2-inch round biscuit cutter or sharp knife (not serrated) to cut the biscuits. Cut directly down. If you twist or saw, you’ll deflate all those layers that you just created. Place the biscuits close together in a buttered pie plate. Baking them all together encourages them to rise up, rather than out. Brush the tops with additional buttermilk, if you’d like. Bake the biscuits for 12-14 minutes at 400F, until they are golden brown and delicious-looking. Let them cool for five or ten minutes before serving with cold butter, jam, and/or honey.  

 That recipe is a bit long, but it really takes no time at all. There are a lot of steps, but none of them are difficult or time consuming–they just help ensure beautiful, tall, flaky biscuits. If you start making them now, you’ll have biscuits on your table in about thirty minutes!

Buttermilk Biscuits are very near and dear to my heart, just like the woman who introduced me to them. These may not be Nonnie’s biscuits, but I hope she would have enjoyed them. 

 Buttermilk Biscuits
makes 12-14 biscuits

2 cups all-purpose flour
1 tablespoon baking powder
1 tablespoon granulated sugar
1/2 teaspoon Kosher or sea salt
1/2 cup unsalted butter, very cold
2/3-3/4 cup buttermilk, very cold*

Preheat oven to 400F and grease a pie plate with butter.

In a large mixing bowl, whisk together flour, baking powder, sugar, and salt. Set aside.

Cut your stick of butter into two 4 Tbsp pieces. Cut one piece into four sticks, and cut the other into very thin pats. Place all pieces into the bowl with the flour mixture. Using a pastry blender,* cut cold butter into the flour mixture until it is roughly the size of peas.

Pour in 2/3 cup cold buttermilk. Stir with a rubber spatula or wooden spoon until a shaggy dough forms. If it seems dry, add more buttermilk by the tablespoon, up to 3/4 cup total.

Turn dough out onto a floured surface. Flour your fingertips and pat the dough into a 1/2 to 3/4-inch thick rectangle. Fold dough in half, and turn one quarter turn. Pat out until it is 1/2 to 3/4-inch thick again. Repeat folding/quarter-turning/patting out until you have done it four times total. Re-flour your surface as necessary.

Flour a rolling pin. Smack dough four or five times. Flip dough, and smack another four or five times. Flip and smack again until you have done this twice on each side.

Cut dough with a biscuit cutter or sharp knife (not serrated). Cut directly down. Place biscuits close together in your prepared pan. Pat biscuit dough scraps into a cohesive piece, and cut until you have used all your dough.

Brush biscuits with extra buttermilk. Bake biscuits for 12-14 minutes, until they have risen and are light golden brown. Let cool 5-10 minutes. Serve with butter and jam, honey, or gravy.

Buttermilk Biscuits will keep in an airtight container at room temperature for up to 48 hours. 

Notes:

1. If you don’t have buttermilk, you may stir 1 teaspoon of lemon juice or vinegar into 3/4 cup of cow’s milk (not skim).
2. If you don’t have a pastry blender, use two forks.

Scratch Biscuit Monkey Bread

 Everybody loves Monkey Bread. Soft pieces of bread coated in cinnamon-sugar? Yes, please. It’s perfect for holiday breakfasts, brunches, snacks, desserts–you name it. Monkey Bread is welcome anytime, anywhere. But the dough involves yeast and a rise of up to 8 HOURS. I love working with yeast, but I straight-up don’t have the time for an 8 hour rise during the holiday season. A popular alternative is to use canned biscuits instead of yeast dough, but canned biscuit are…meh. Don’t get me wrong. I would never turn down a canned biscuit. My mother always kept two tubes in the fridge for weekend breakfasts, and I have no problem putting away three at a time. But we can do better, and also save time. We can use simple scratch biscuit dough. We’re scrappy like that.

The dough we’ll use here is for cream biscuits. Whereas buttermilk biscuits must be kept cold to ensure that the butter stays cool enough for a flaky final product, cream biscuits are more rough-and-tumble. There’s no cutting in of butter, or determining how much buttermilk you need to make the biscuits moist but not goopy. (Sorry for saying “goopy” on a food blog.) This dough is very straightforward, and can handle a warm butter bath. There are only six ingredients: flour, sugar, cinnamon, salt, baking powder, and two cups of heavy cream. Yes, two cups of cream is a lot, but as there is no butter or buttermilk, this dough needs that kind of moisture and fat. This is holiday food, after all. It’s a splurge no matter how you make it. Embrace the cream!    
 
Anyway…stir together the flour, sugar, cinnamon, sea salt, and baking powder. Then, using a silicone spatula, stir in the cream. Make sure to scrape the sides and bottom of the bowl to get any cream and flour that have adhered themselves incorporated into the dough. Turn the dough out onto a floured surface and flour a rolling pin. Roll the dough into a large rectangle that is 1/2-3/4″ thick. Then fold it in half and turn it one quarter-turn. We’ll repeat this folding and rolling until it’s been done four times total. This will give us great layers. Once you have done all the folding and rolling and once again have a 1/2-3/4″ thick rectangle, cut the dough into one-inch squares. To do this, use a sharp knife or bench scraper (my tool of choice) and cut directly down. Do not saw, or you will deflate all those layers you just worked so hard making. Put the squares aside while we make the coating.    Melt 1 1/2 sticks of butter, and put it in a small bowl to cool a bit. It should still be warm, but as we have to touch it directly, the butter shouldn’t be super hot. In another bowl, whisk together light brown sugar, granulated sugar, and four teaspoons of cinnamon. Now, using your hands, take five biscuit squares at a time, dunk them in the butter, coat them in the cinnamon-sugar, then lay them in a pan that is very, very, VERY well-greased with butter. We don’t want our Monkey Bread to stick when we turn it out after baking. Once all your squares have been coated and are in the pan, press down on them lightly to make sure they stick together. Bake the Monkey Bread for 40-45 minutes, until it springs back when pressed with clean fingers. Let it cool for just a few minutes before flipping it onto a platter. Serve it immediately. Everybody will love this soft, sticky, sweet treat.  And there it is! Scratch Monkey Bread made in less than two hours start-to-finish. The pieces that touched the pan will be a little crispy and crunchy, while the ones in the middle will be delightfully soft. Yum. This recipe is great for any holiday parties you’re having or attending, and it’s a wonderful way to get little helpers involved. Give them the biscuit squares, butter, and cinnamon-sugar, and let them do the coating! They’ll be so proud of their finished product! Happy Holidays, indeed.  

Scratch Biscuit Monkey Bread
makes one 12.5 cup capacity bundt or tube pan*

Cream Biscuits:
3 cups all purpose flour
2 tablespoons granulated sugar
1 teaspoon ground cinnamon
1 teaspoon Kosher or sea salt
1 tablespoon baking powder
2 cups heavy cream*

Cinnamon-Sugar Coating:
3/4 cup (1 1/2 sticks) unsalted butter
1 cup light brown sugar, packed
1 cup granulated sugar
4 teaspoons ground cinnamon

Preheat the oven to 350F. Grease a bundt or tube pan very well with butter. Set aside.

Make the biscuit dough. In a large mixing bowl, whisk together flour, sugar, cinnamon, salt, and baking powder. Pour in heavy cream and stir, scraping the bowl, until a dough forms. Turn dough onto a floured surface. With a floured rolling pin, roll dough into a large rectangle that is 1/2-3/4 inch thick. Fold it in half, and turn one quarter-turn. Repeat folding and rolling until you have done it four times total. Using a sharp knife or bench scraper, cut dough into 1-inch squares. Place the squares in a large bowl while you prepare the coating.

Melt the butter in a small saucepan or the microwave. Transfer it to a small bowl to cool enough to be touched. In a separate small bowl, whisk together sugars and cinnamon.

Dip biscuit squares in butter, then coat in cinnamon-sugar. Place coated squares in prepared pan. Once all squares are in the pan, press down on them lightly so that they stick together. Bake for 40-45 minutes, until bread springs back when lightly pressed with your clean finger.

Let monkey bread cool for 5-10 minutes before inverting onto a large plate or platter. Serve immediately.

Monkey Bread is best on the day it’s made, but can be kept covered at room temperature for up to two days. Re-warm before serving.

Notes:

1. This recipe can be halved and baked in a 9″x5″ loaf pan, though I am not sure of the bake time.
2. Heavy cream must be used in this dough. Do not substitute half & half or milk.