It has been documented on here that I fear making cheesecakes, but that’s not exactly true. I don’t fear cheesecake, I fear a leaking springform pan in a water bath (bain marie). Yes, I know you are supposed to wrap it in foil, but I’ve never seen anyone explain in exacting, painstaking, borderline-dull detail how you should do that so that there is absolutely no risk of leakage. And so, I have still (!!!) never made a traditional baked-in-a-springform cheesecake.
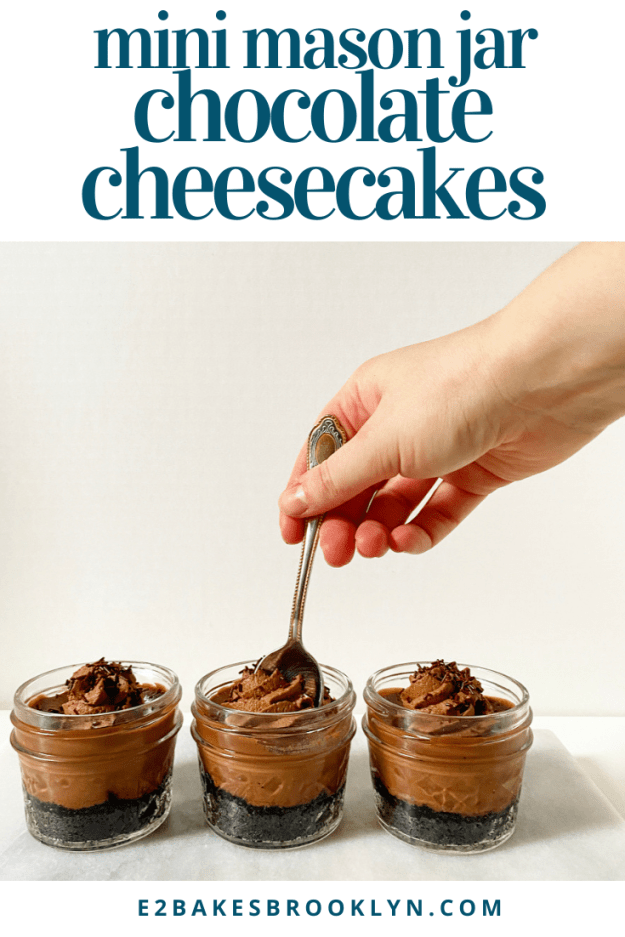
I have, however, made cheescake bars, cheesecake thumbprints, cheesecake brownies, cheesecake blondies, vegan cheesecakes, and now two different kinds of Mini Mason Jar Cheesecakes, because while I may not be super brave, I am nothing if not a problem solver. These Mini Mason Jar Chocolate Cheesecakes are SO good, y’all. So. Good. And they come in very cute, water tight, social distancing-approved serving vessels. Super rich, chocolaty filling, Oreo crust *and* no fiddling with a springform pan? Sign me up!
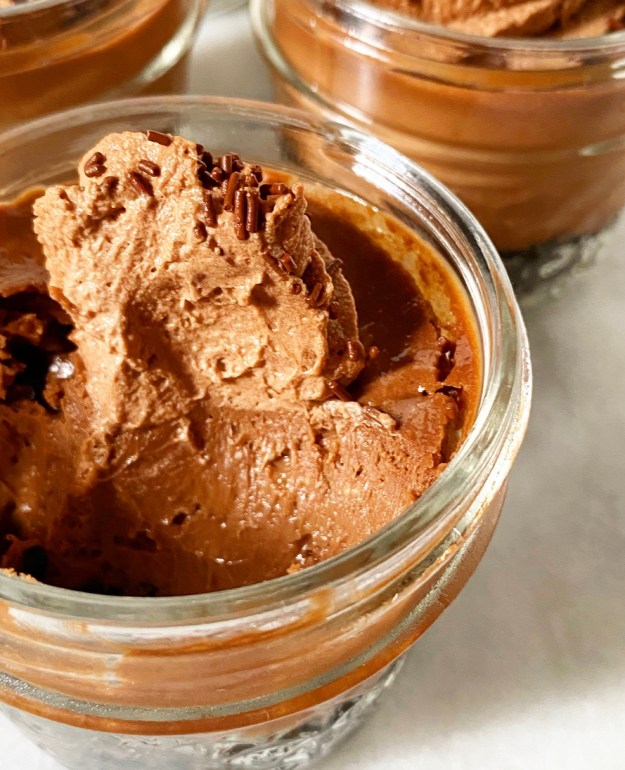 The crusts for these little cheesecakes are just Oreos and melted butter blitzed together in a food processor. Spoon a couple tablespoons into each of your mason jars and give them a few minutes in the oven before adding your filling.
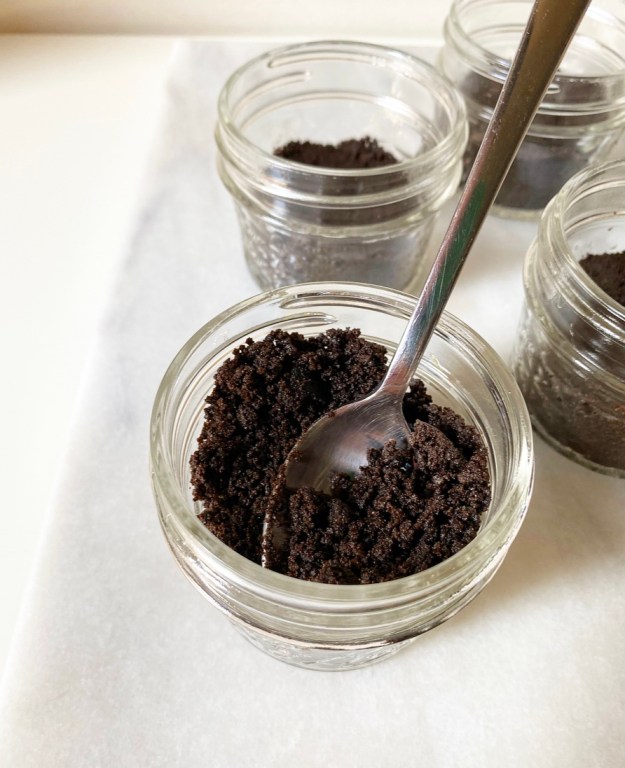 This chocolate cheesecake filling is super chocolaty from melted dark chocolate and cocoa powder, and has a little extra depth from light brown sugar (though granulated works too). The rest of the ingredients are standard cheesecake fare: cream cheese, sour cream, vanilla and an egg.
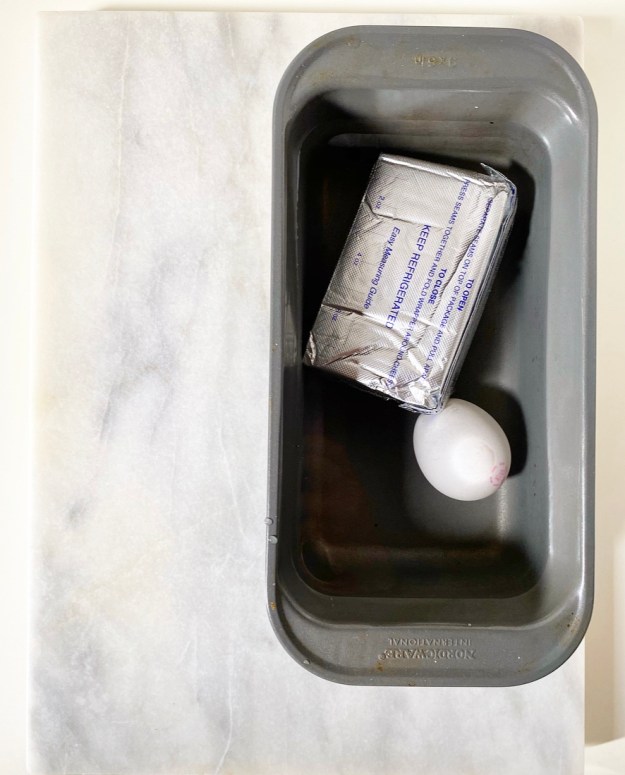 By far, the most important advice I can give you about making cheesecake is to make absolutely sure that your ingredients are at room temperature. If you’re more organized than I am, you can set your cream cheese out the night before. If you’re like me, just let it hang out (in its packaging) in a bowl of lukewarm tap water for 15 minutes. Throw your egg in there for maximum efficiency.
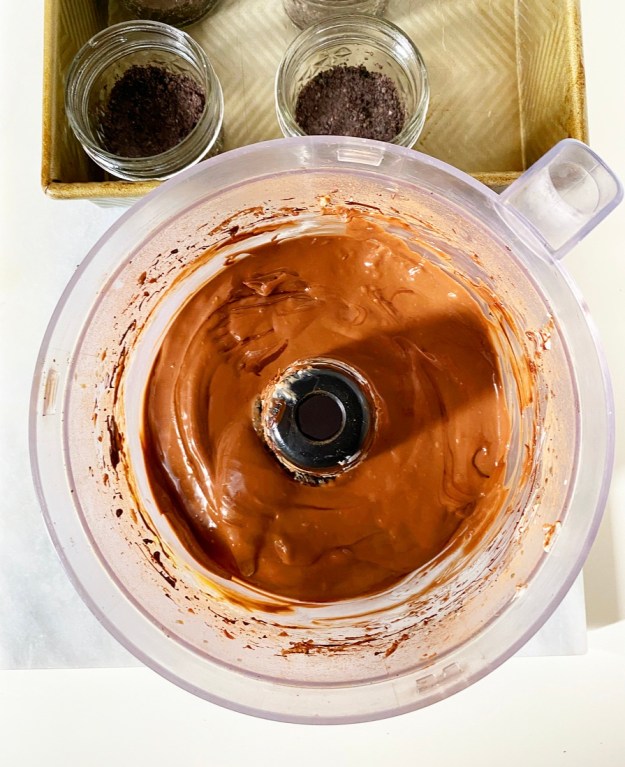
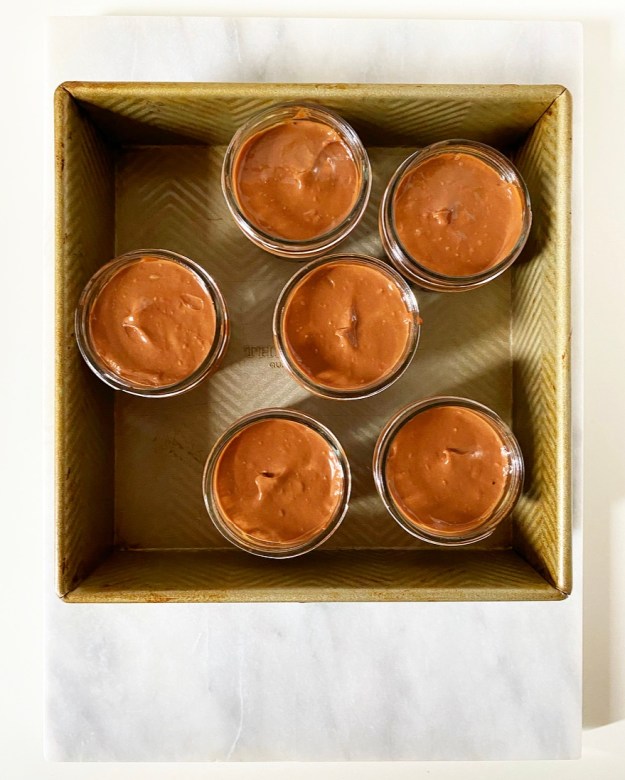 You can make the filling in your food processor (just wipe it out) or use a mixer. Either way, make sure to give the bowl some taps on the counter and let it rest a few minutes to release any large air bubbles before baking. Then spoon it onto your crusts and bake for about 25 minutes. Let the baked cheesecakes hang out in their water bath for five more minutes before transferring them to a rack to cool completely. This brief step helps them transition from the hot oven to your cooler counters more seamlessly. Cheesecakes are divas, in case you couldn’t already tell.
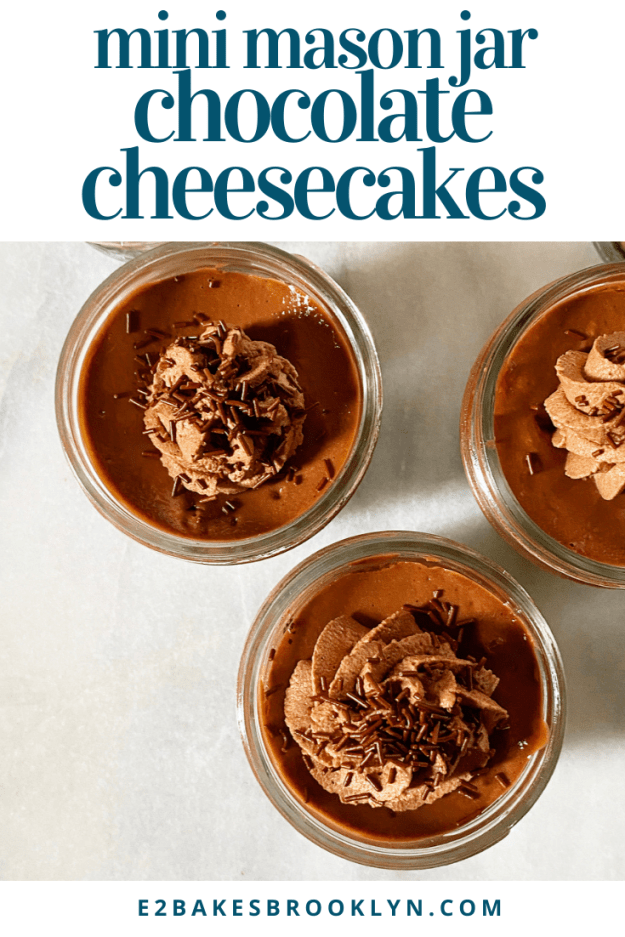
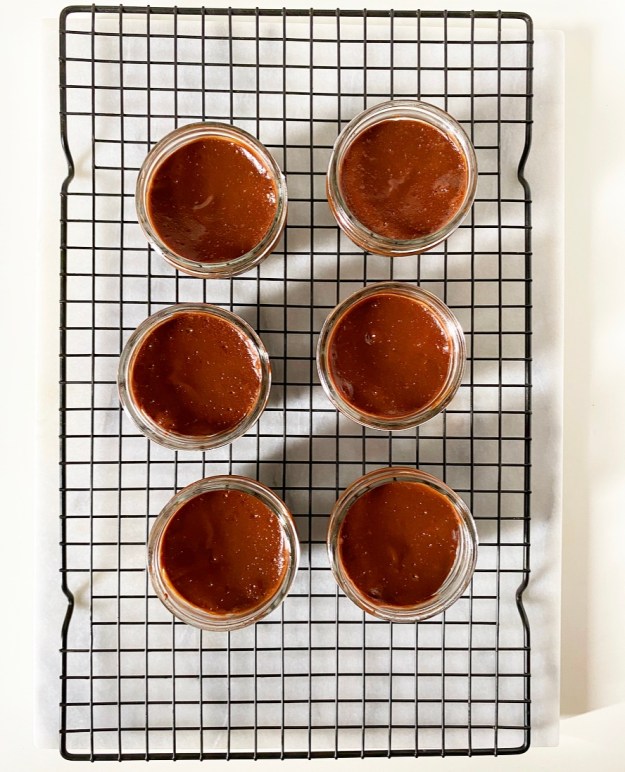 Once your chocolate cheesecakes hit room temperature, throw them in the fridge for a few hours to get nice and cold. This will seem endless, but will give you plenty of time to dream up toppings. I went for my new favorite Chocolate Whipped Cream and chocolate sprinkles, but you could do chocolate shell, chopped candy bars, fresh fruit or anything else your heart desires.
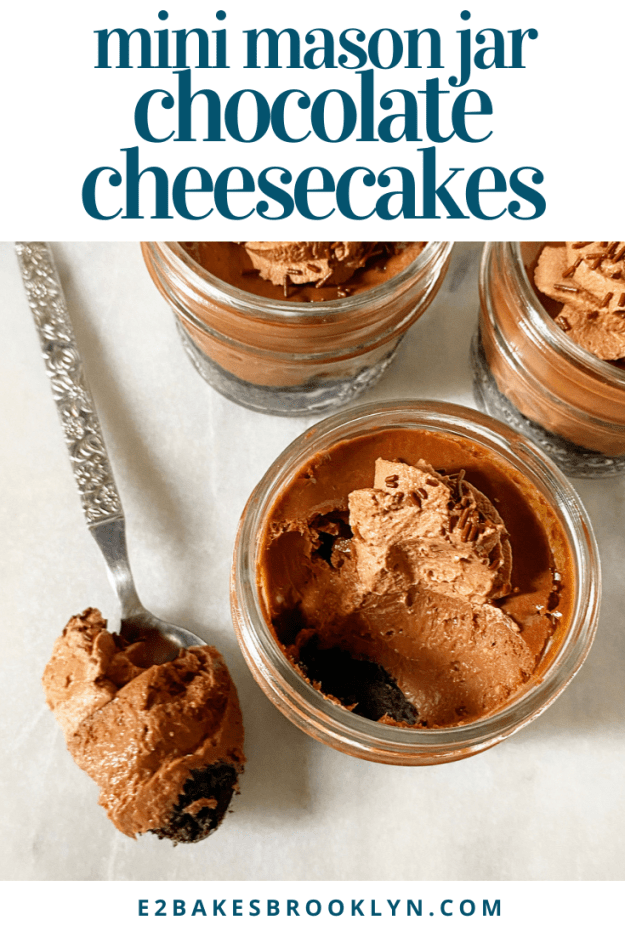
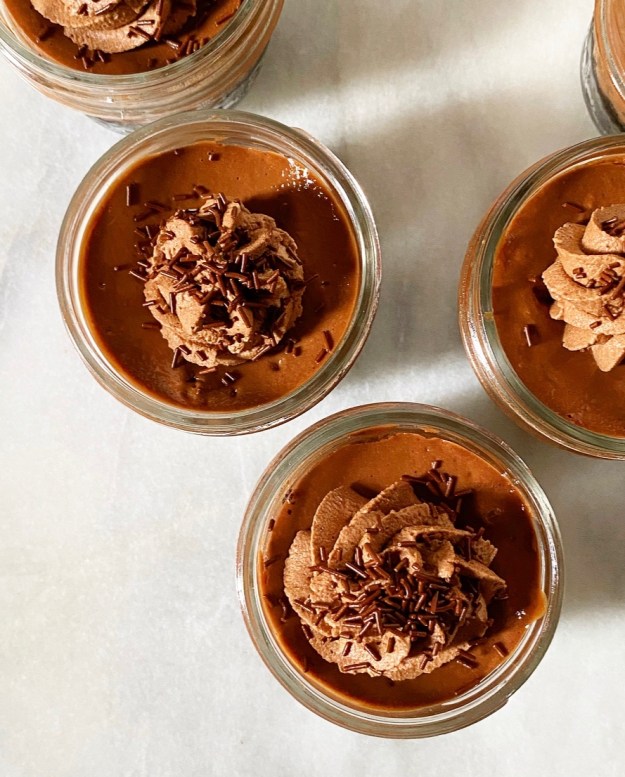 I won’t lie to you, Mini Mason Jar Chocolate Cheesecakes are a commitment, but take one bite and I promise you’ll agree that theyre entirely worth the effort. They’re super smooth and tangy with a big hit of chocolate, and that Oreo crust…well, I think we can all agree that Oreo crust should probably run for president.
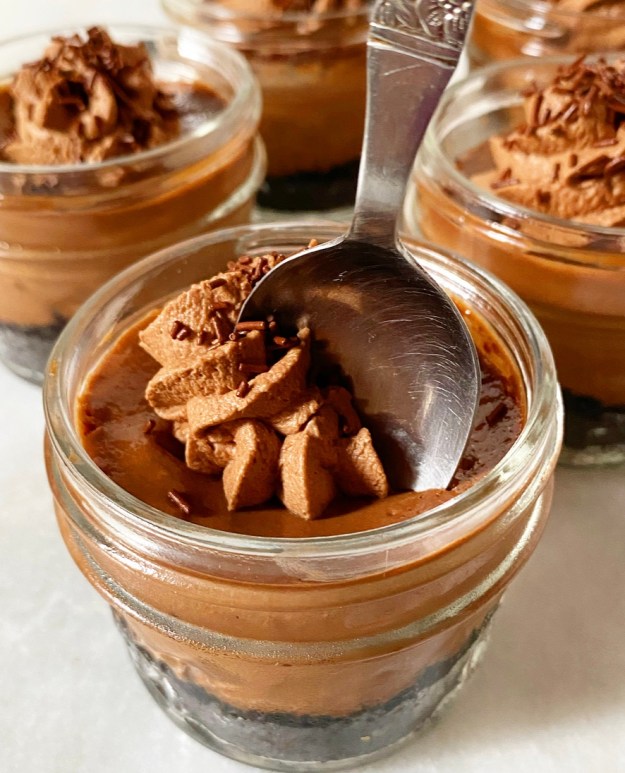 And on that note, enjoy this unofficial last weird weekend of this extremely weird summer. It’ll be two more weeks before I break out the pumpkin, and while that seems like eternity, I hope these chocolate cheesecakes soften the blow.
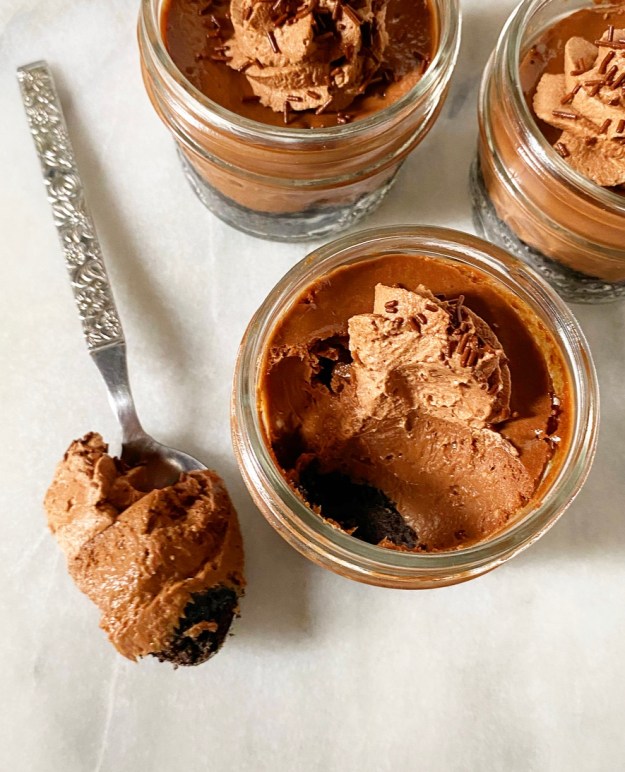
Mini Mason Jar Chocolate Cheesecakes
makes 6 small cheesecakes
Crust:
12 Oreos
2 tablespoon unsalted butter, melted
Cheesecake Filling:
1 8 ounce brick full-fat cream cheese, room temperature
1/4 cup light brown sugar, packed
1 1/2 teaspoons natural unsweetened cocoa powder
1/4 cup full-fat sour cream (or Greek yogurt), room temperature
1 teaspoon pure vanilla extract
2.5 ounces dark chocolate, melted and cooled
1 large egg, room temperature
For Garnish:
Chocolate Whipped Cream
chocolate sprinkles (hagelslag)
Homemade Chocolate Shell
Preheat oven to 325F. Grease 6 4-ounce mason jars.
Make the crust. Place Oreos and melted butter in the bowl of a food processor and process until the mixture resembles wet sand, scraping down the sides of the bowl as necessary.
Spoon 2 tablespoons of the crust mixture into eat prepared mason jar. Press down to form a crust. Place mason jar crusts in a high-rimmed dish. Bake crust for 10 minutes. Cool on a rack while you prepare the filling.
Make cheesecake filling. You have two options:
If using a food processor: Wipe out any errant crust pieces. Add cream cheese, brown sugar and cocoa powder to the bowl of the food processor and process until smooth, stopping and scraping down the sides as necessary. Add sour cream and vanilla and process until smooth. Whirl in melted chocolate. Add egg and process just until combined. Tap bowl on the counter 10 times and let batter rest 10 minutes.
If using a mixer: In a medium mixing bowl, use an electric mixer to beat cream cheese until fluffy. Mix in brown sugar and cocoa powder, followed by sour cream and vanilla, until mixture is smooth. Mix in chocolate. Add egg and mix just until combined. Tap bowl on the counter 10 times and let batter rest 10 minutes.
Once your batter is rested, divide the cheesecake mixture into the mason jars, about 1/4 cup each. Use the back of a spoon to lightly smooth out the tops, then tap each one on the counter a few times to release any air bubbles. Return jars to the high-rimmed pan, and place the pan on a counter near the oven.
Bring a small pot of water to a boil. Remove from heat. Carefully pour water into the baking pan until it is halfway up the sides of the cheesecakes. Do not get water in the mason jars. Carefully move pan into the oven. Bake 25 minutes, or until puffed and *barely* jiggly in the centers. Let cheesecakes stay in their water bath for 5 more minutes.
Use tongs to carefully remove mason jar cheesecakes to a rack. Do not get water in the mason jars.
Let cheesecakes cool completely on a rack; the centers will collapse a bit. Transfer to the refrigerator for at least 3 hours, or until thoroughly chilled. If not serving immediately, cover with plastic wrap. Garnish with chocolate whipped cream, chocolate sprinkles, homemade chocolate shell, or other desired topping before serving.
Store leftover cheesecakes in the refrigerator for up to 4 days. To freeze, press plastic wrap to the surfaces of the cheesecakes and screw on mason jar lids. Freeze for up to one month. Thaw in the refrigerator overnight or in a dish of lukewarm water at room temperature for an hour.
 I have been thinking a lot lately about what it means to celebrate this year. Does it feel like the world is crashing down around us and everything is at least vaguely scary? Sure. Is there still stuff to celebrate? You know it.
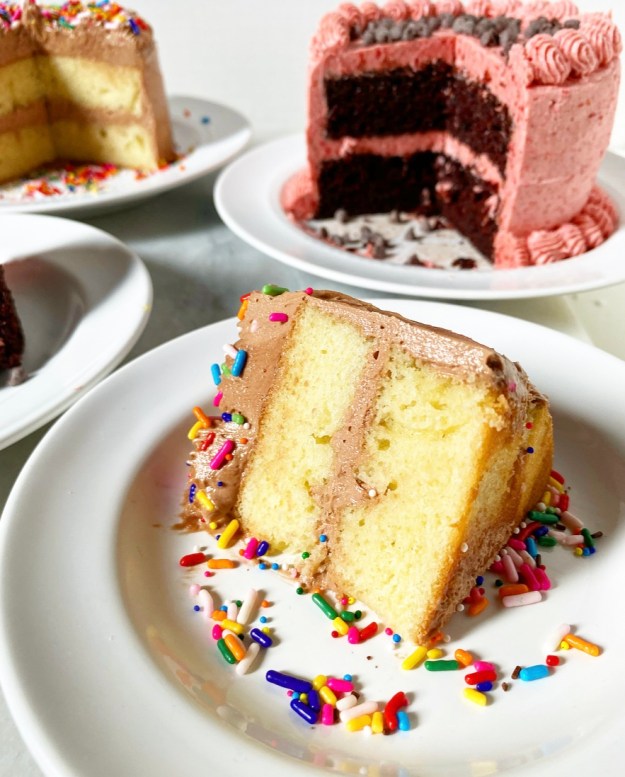
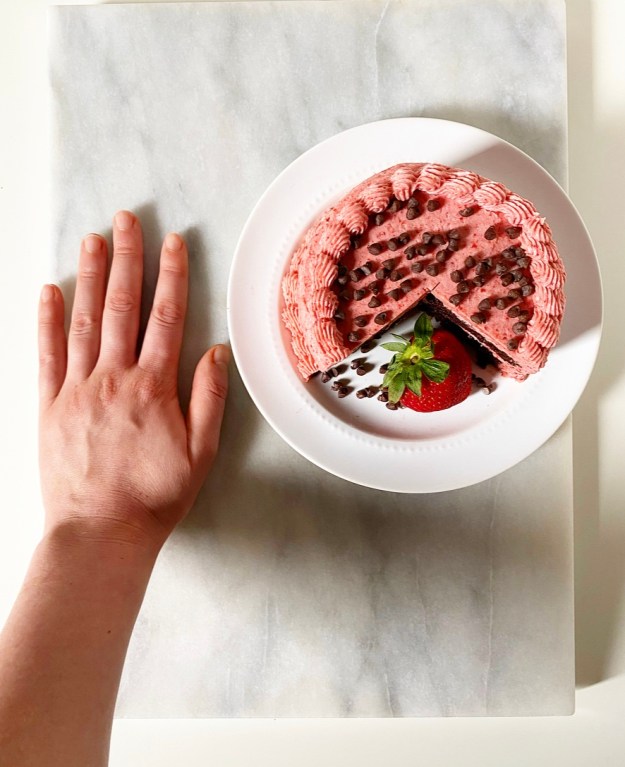
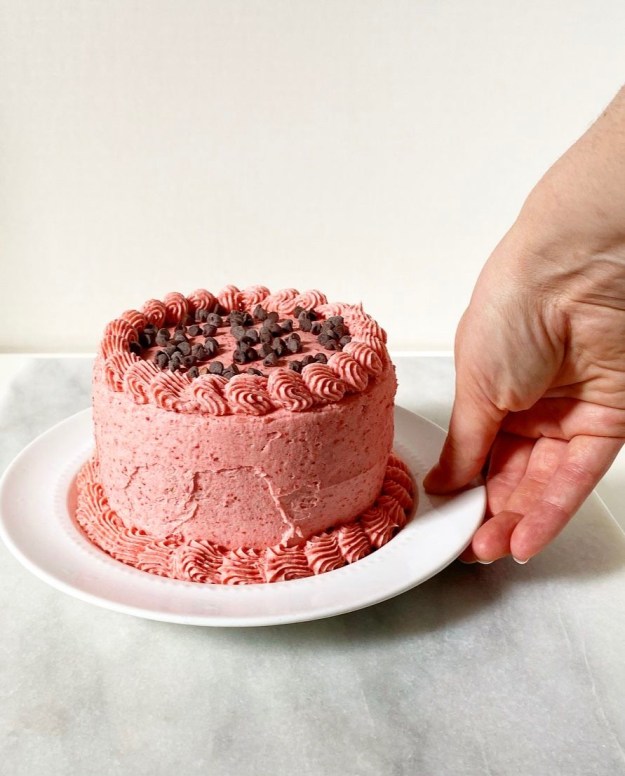
 In that spirit, today’s post is not actually a recipe, but instead is all about how to make a layer cake fit for a pandemic…er, small group. Sure, you could make a single layer of cake for any occasion you have coming up, but some things require a cake that’s stacked up tall, even if it’s on the miniature side. I’ve been making Mini Layer Cakes for years, for everything from birthdays to baby showers to


 The major specialty item here is a
  Start by using your cutter to cut two small layers out of your larger layer. Make sure that the cutter is as close to the edge of the larger layer as possible, so as to make room for a complete second layer. <—This is important.
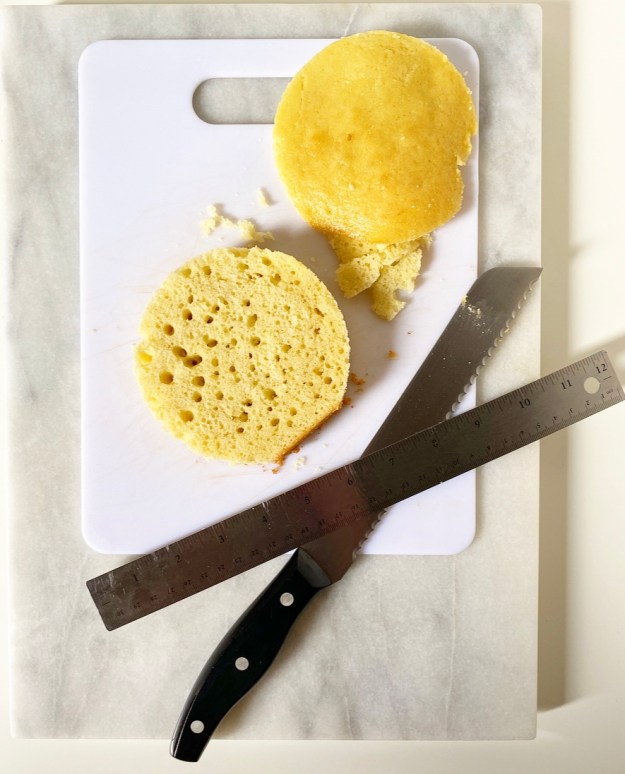 Use your ruler to measure your layers for height. There is a good chance your layers will have an incline, as cakes tend to dome a bit as they bake. Grab your serrated knife and even out the top of one layer. Make sure it’s even (or very close) and measure it again—this how tall you want your other layer to be. Repeat that process to even out that second layer, until they’re identical in height (or very close). Mine are all about an inch tall.
 Next up, stacking. Swipe a tiny bit of buttercream on your plate or cardboard round, then place one of your layers on top. If you’re a messy froster like me, tuck bits of parchment under the cake all the way around for clean edges. Frost the top of your layer, then stack the second layer on top and press down lightly to adhere.
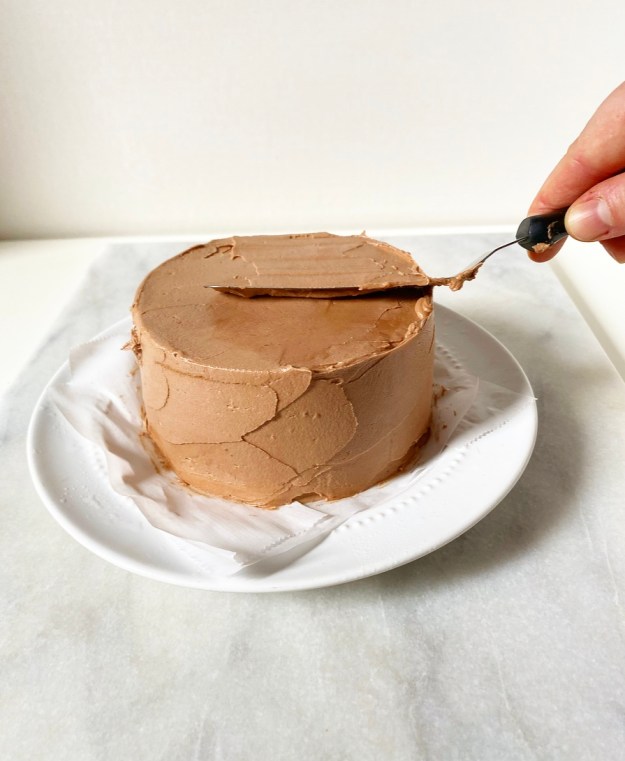
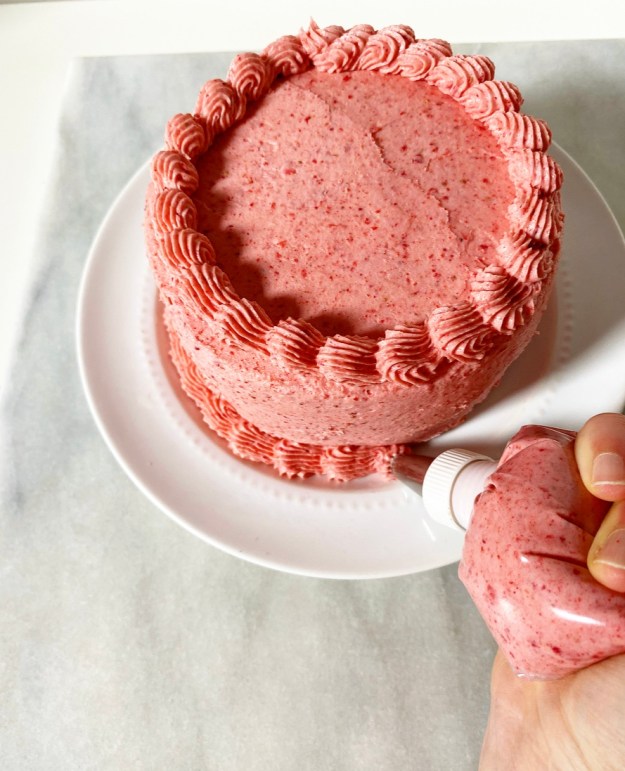 From here, frost as normal. For me, that means a very light crumb coat (thin layer of buttercream), a 20 minute chill, then a thicker layer of buttercream, piping and decor.
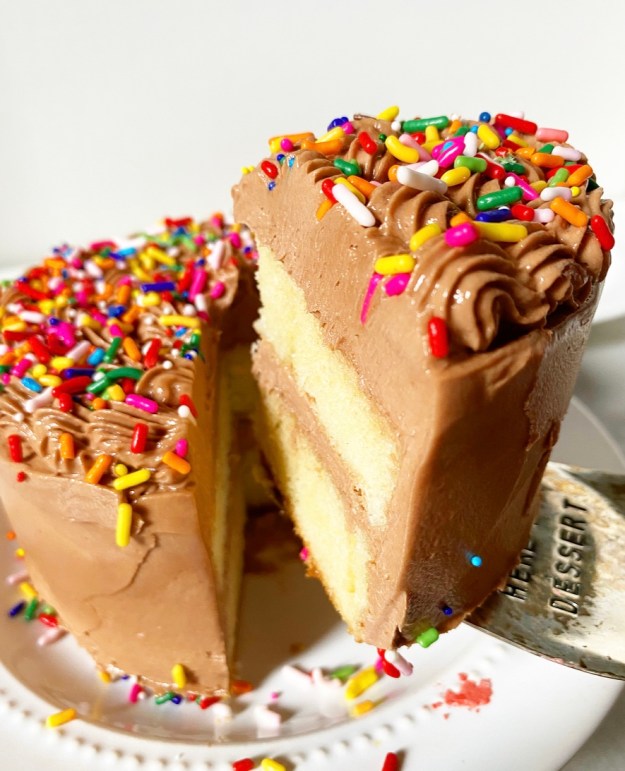
 At this point you can serve your cake. I, however, like to let mine sit for an hour or two ahead of serving, just to let everything adhere nicely. This isn’t strictly necessary, but I find it makes slicing easier and prettier. If you’re refrigerating your cake, make sure to let it sit at room temperature for 20-30 minutes before serving.
 Other important things? Keep your box as level as possible. I’ve gotten pretty good at keeping them level while walking and riding in cars and on the subway. It’s just a matter of remembering that pretty much everything (your body, a car seat, etc.) has a natural slope, and then carrying/positioning your box in a way to counterbalance that. Also, remember that cold cakes are easier to transport. When delivering cakes, I refrigerate them as soon as I’m done assembling, and then let them come back to room temp while en route to wherever I’m going.


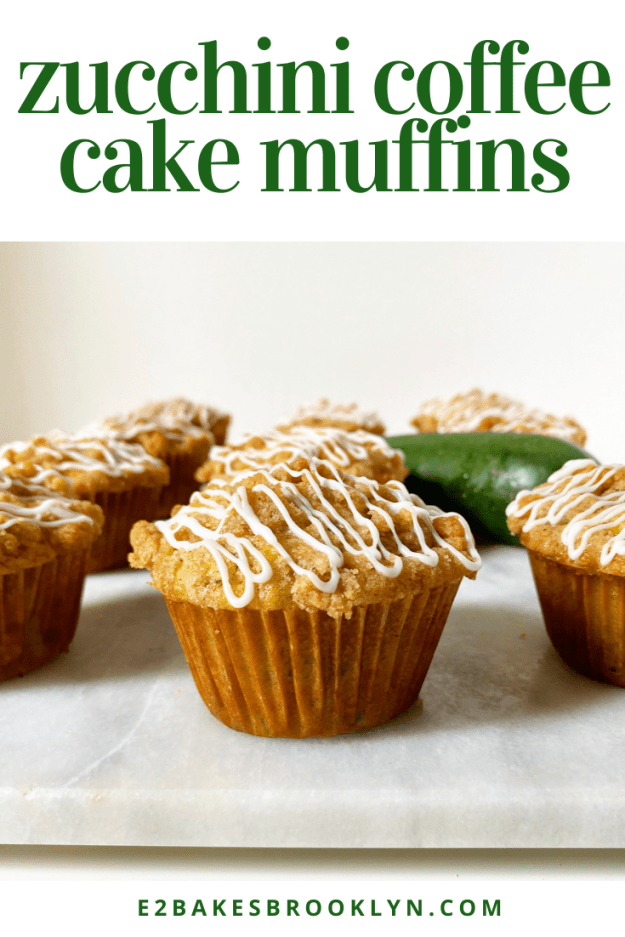
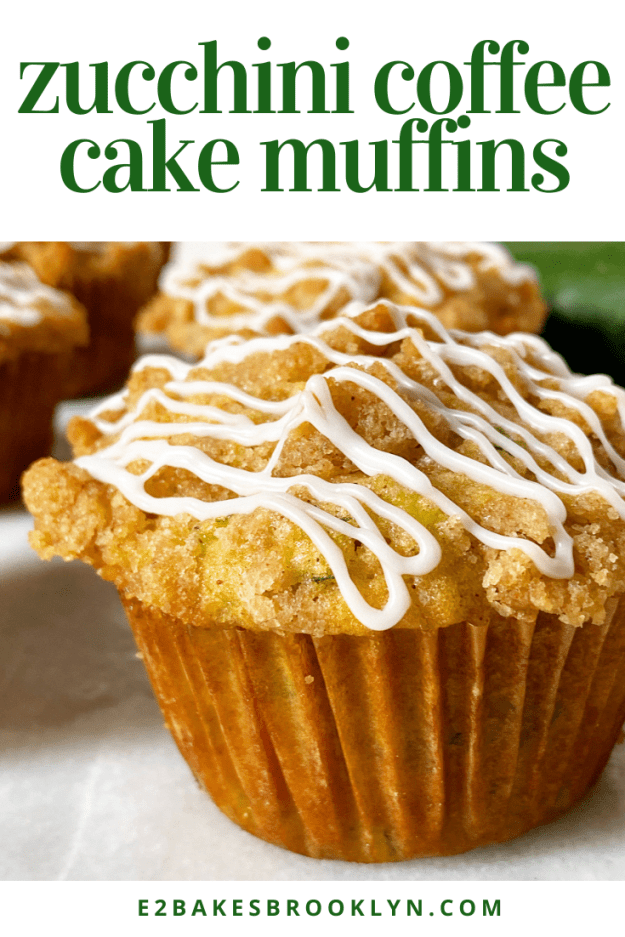
 Does anybody else have a fridge full of zucchini right now? I can barely close the my crisper drawer! Between
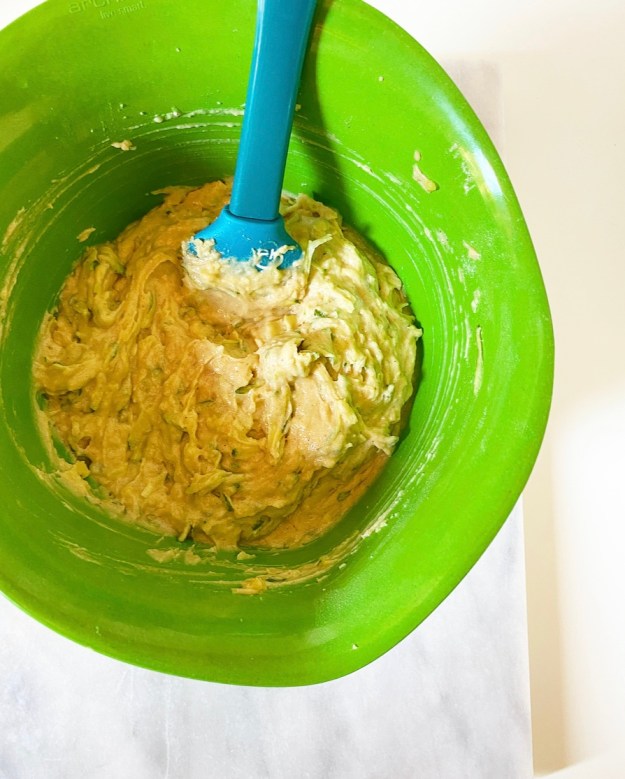
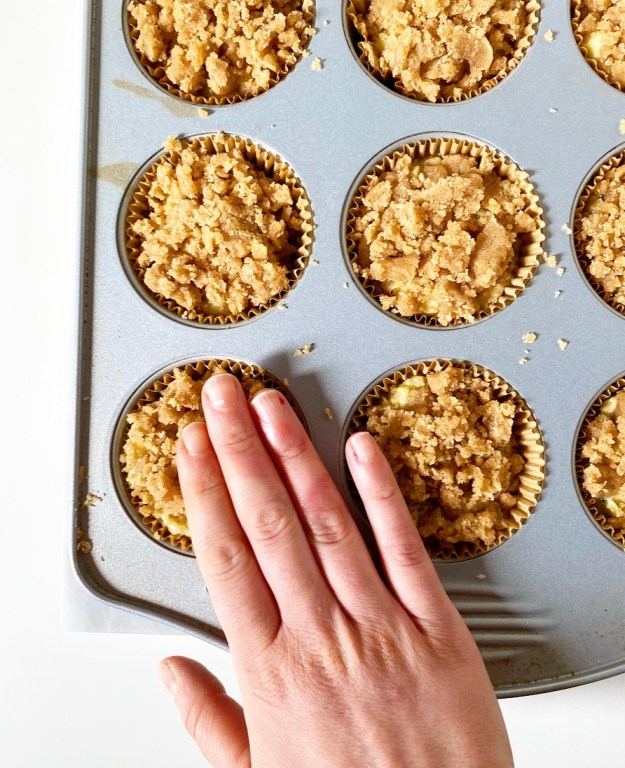
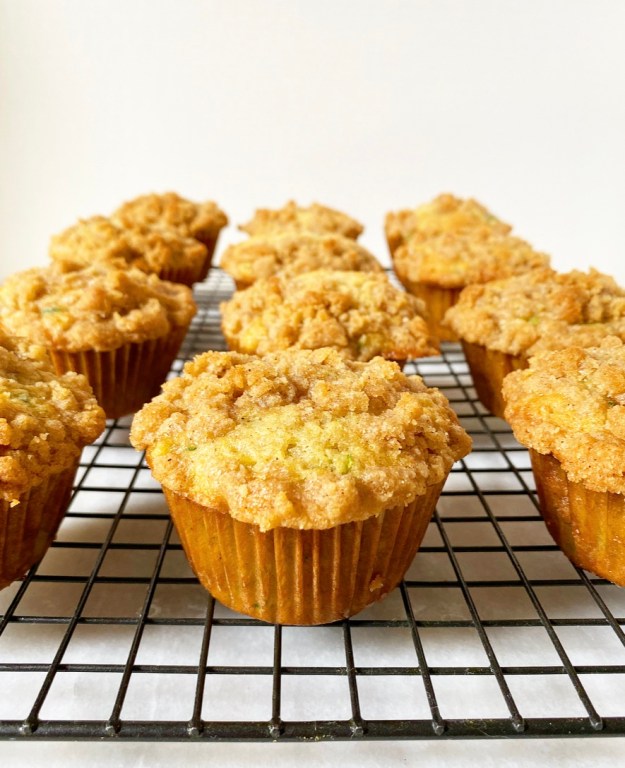
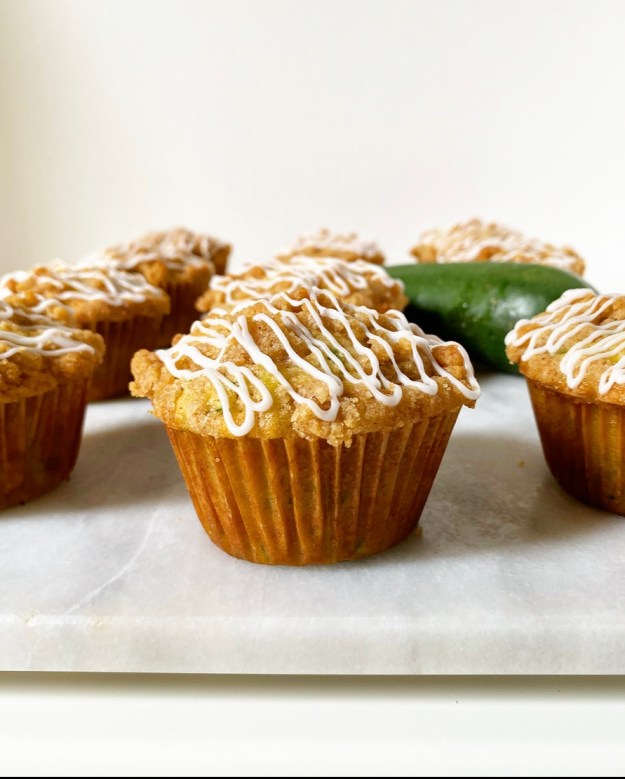
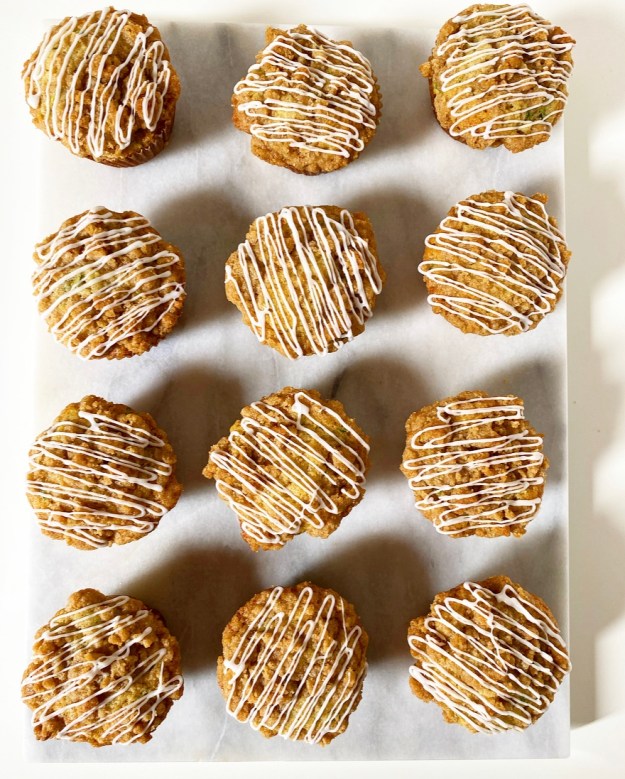 Zucchini Coffee Cake Muffins are what happens when you take all the good things about
 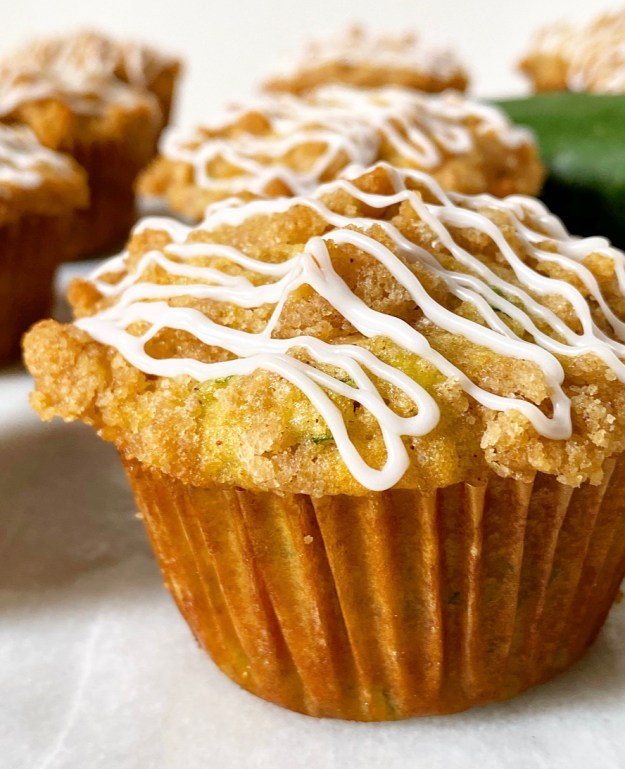 Here, zucchini serves as a replacement for the usual liquid ingredients in our batter, like milk and sour cream. While I usually suggest wringing the shredded squash in a towel to remove excess moisture, this is one of those rare zucchini recipes where you can bypass the wringing and throw it directly into the batter. You need all the moisture you it can offer—when you first add the squash to the batter, it’ll be super dry, but after sitting a few minutes, it’ll be thick, rich and ready for the oven!
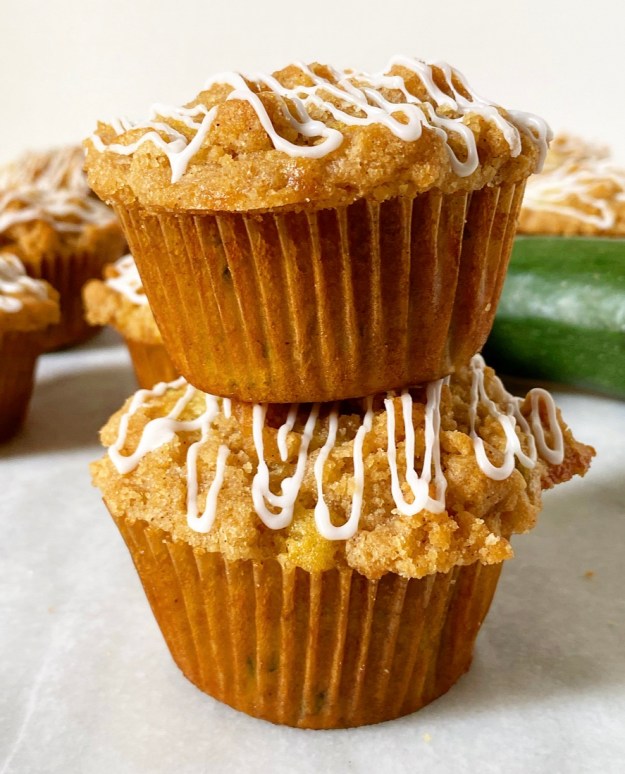 The rest of the recipe is standard muffin and coffee cake fare, all the way down to the crunchy crumb and glaze. That said, I won’t tell anybody if you eat one and call it a serving of vegetables.
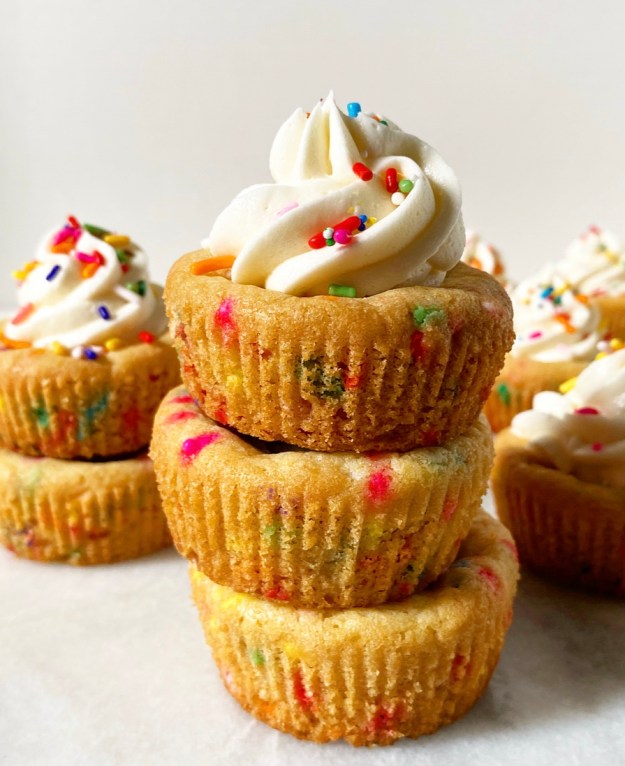 Full disclosure, I am tired. Like in-my-bones tired. It’s been a long week and I haven’t been sleeping well and I just can’t seem to get my brain to concentrate on this blog post. I would say I’m trying my best, but I am actually trying as much as I absolutely have to and not the tiniest bit more. It’s that sort of day.
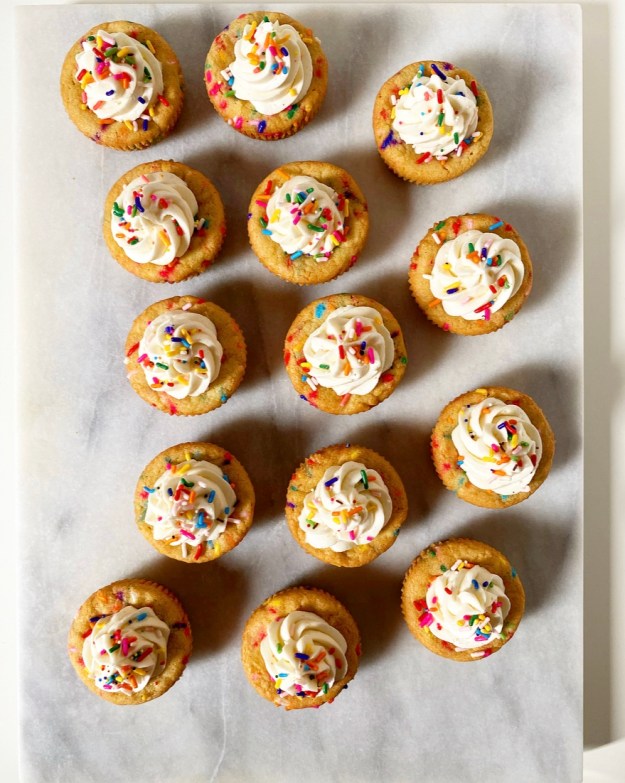
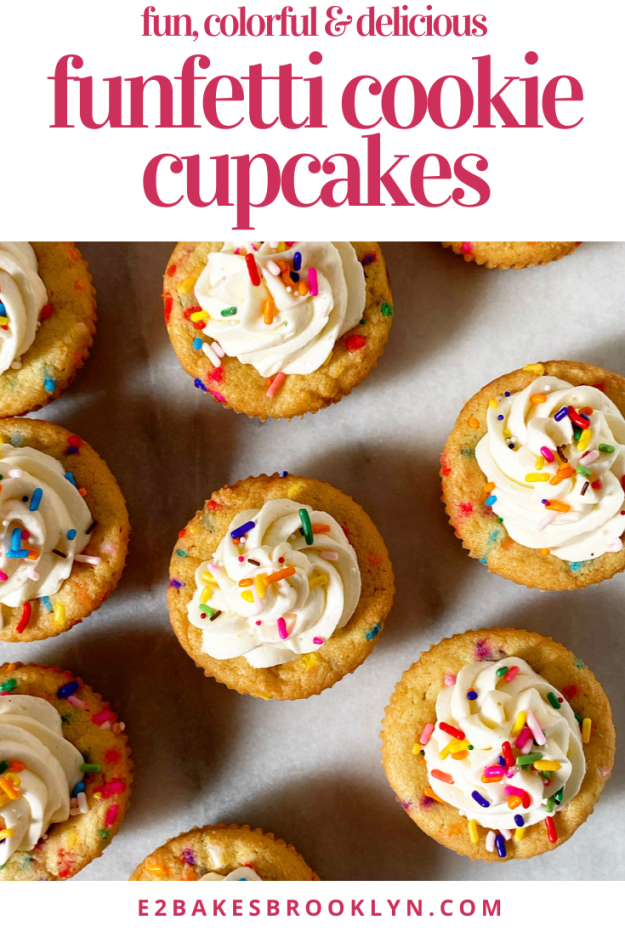
 I usually take pride in writing a “real” blog post, but was tempted today to just leave it at “Um, hi. I took cookie cake and threw sprinkles in there and made it smaller. Oh, and there’s a plume of vanilla buttercream on each one. Funfetti Cookie Cupcakes, y’all!” …and leave it at that. I mean, that about sums it up, right?
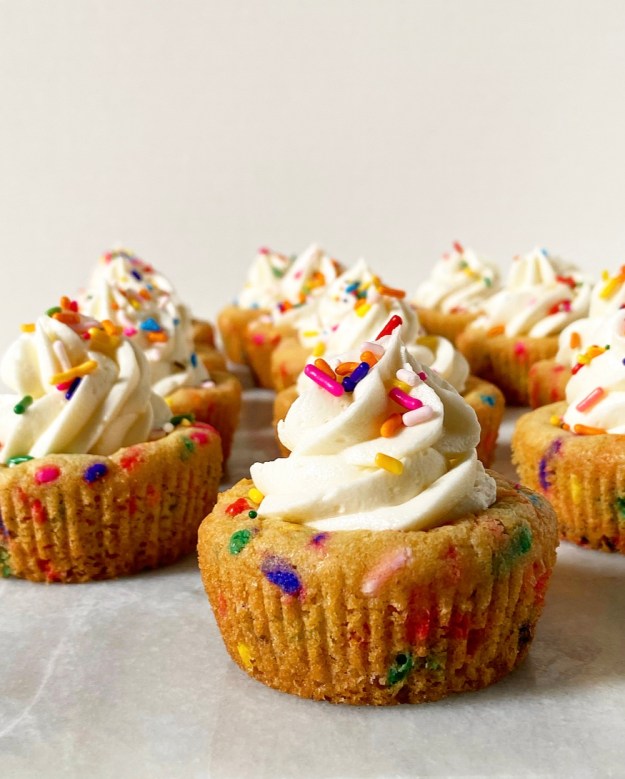 Well, almost. It doesn’t tell you that these Funfetti Cookie Cupcakes were born because I deeply miss baking for groups. I really wanted to make a cookie cake for weeks, but resisted because who would I share it with?
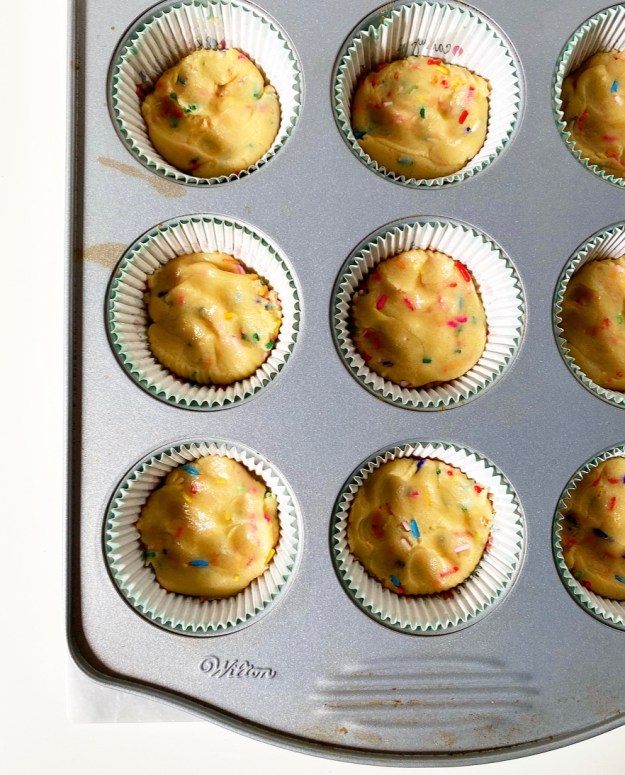
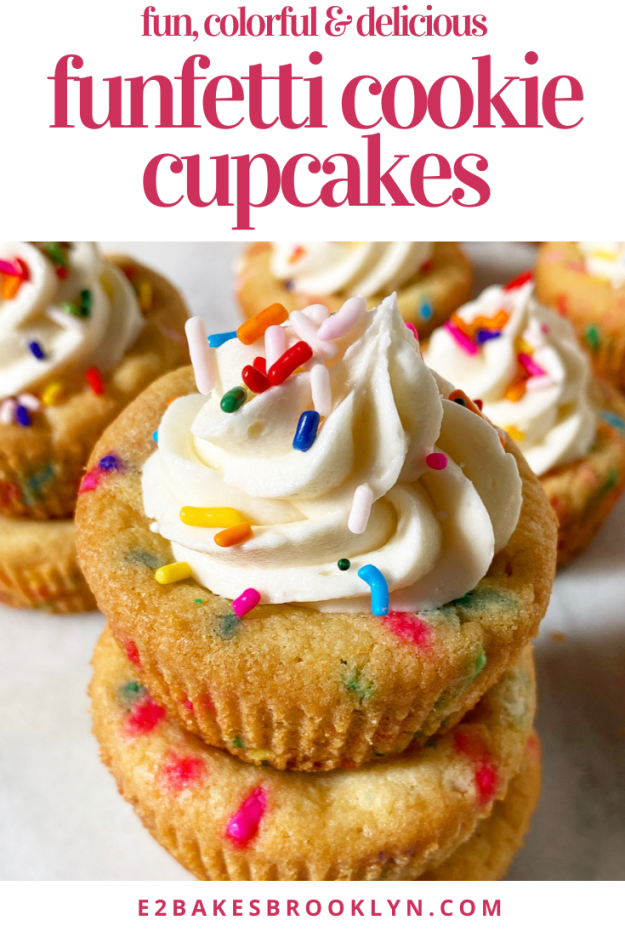
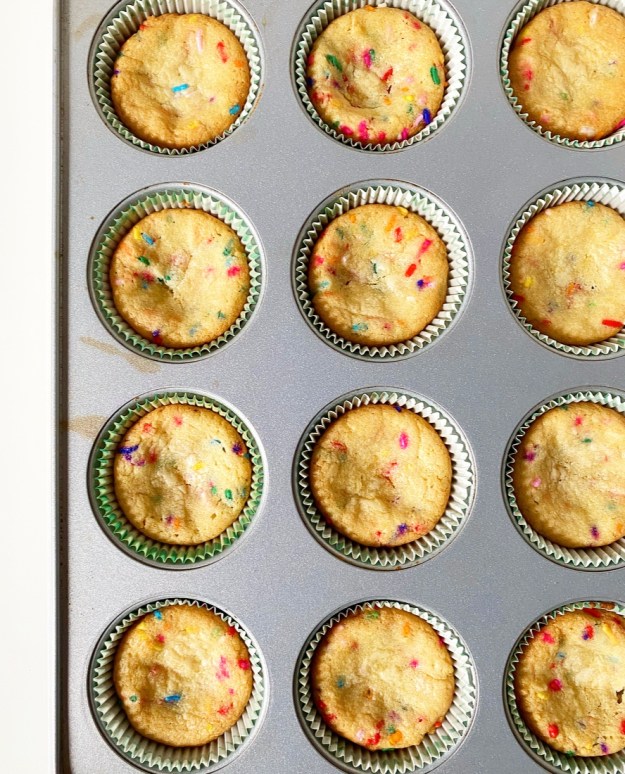 That rambling, incoherent, grammatically incorrect blurb says nothing of how the exteriors of these little cookie cakes crackle ever-so-slightly against your teeth when you first bite in, or how the centers are a tad underbaked and chewy like
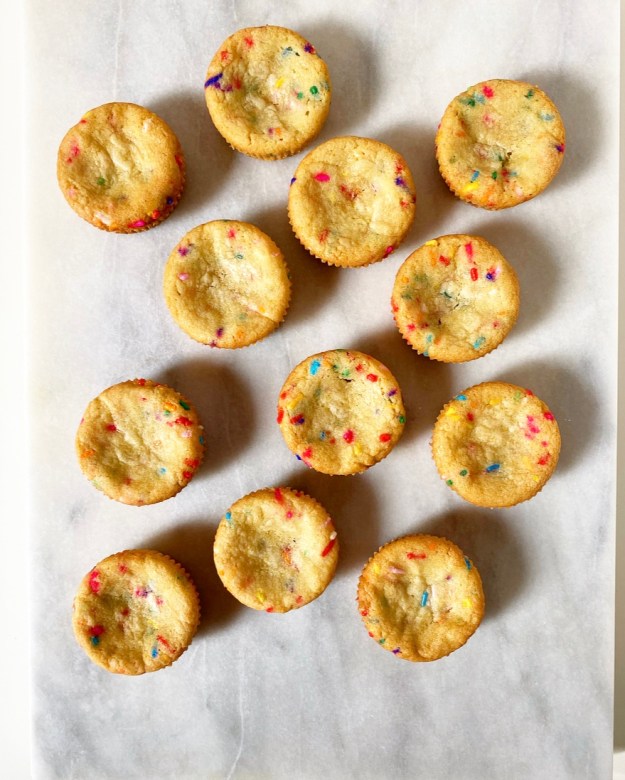
 There’s no mention of how much I absolutely love
 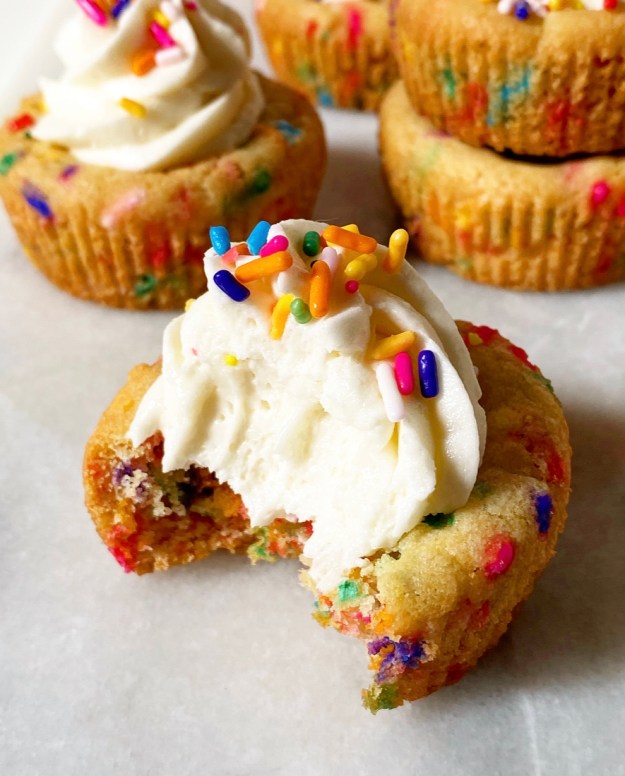 And speaking of single servings, that half-assed blog “post” I wanted to write has one more gross oversight. These are perfect for socially-distanced celebrating or for delivering to someone you love and can’t really see right now. It doesn’t tell you that even though you bake all the time, even when you are tired and feel uninspired, making these will feel nothing like work and completely like joy. And how even when you’re a completely depleted puddle of a human who needs a weekend so badly it’s ridiculous, you’ll find a way to find the words to say it all.
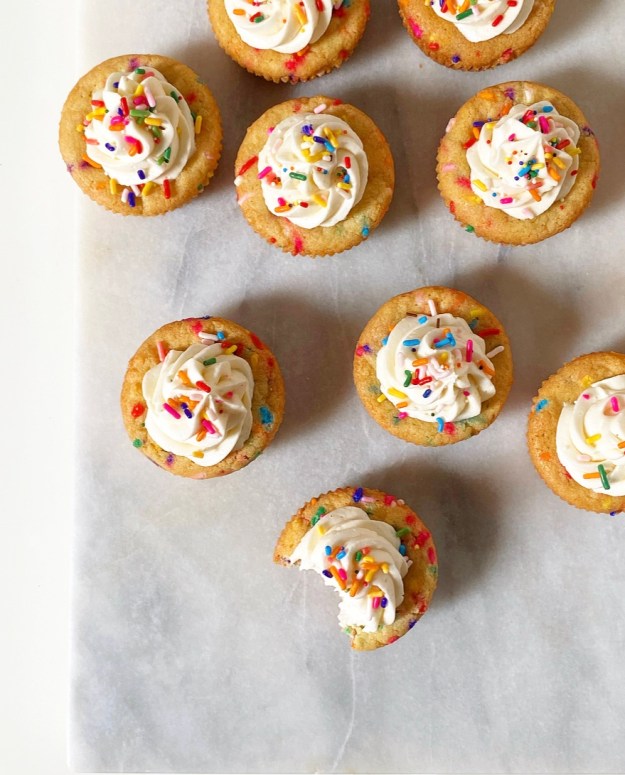
 I have a long history of hating
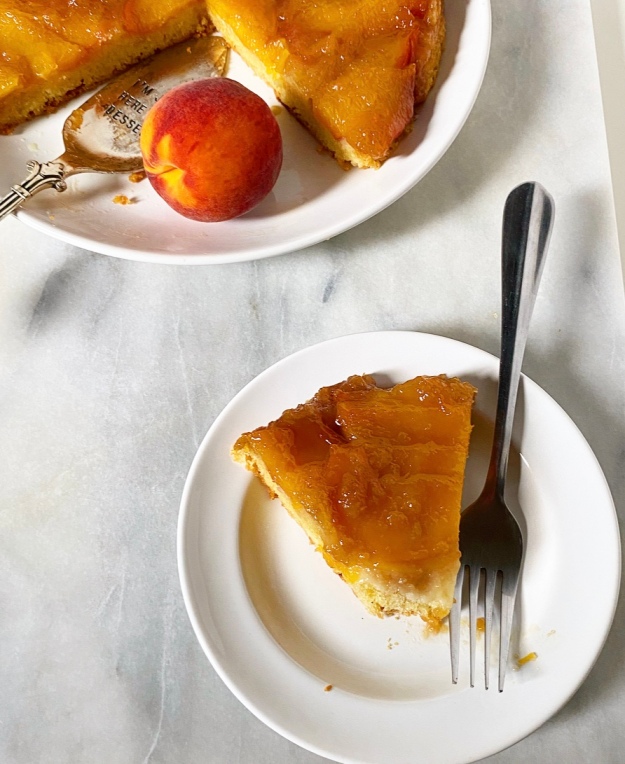
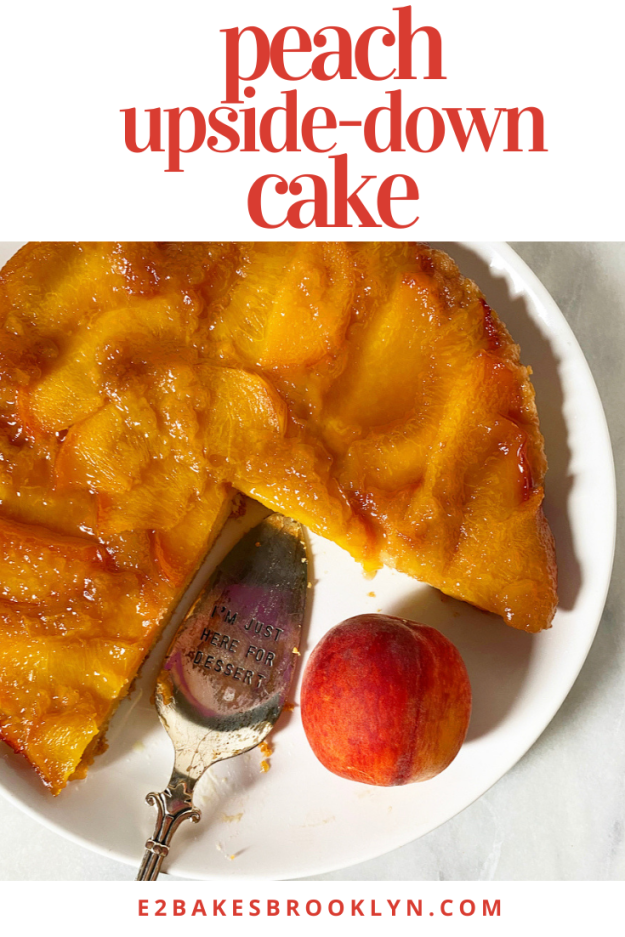
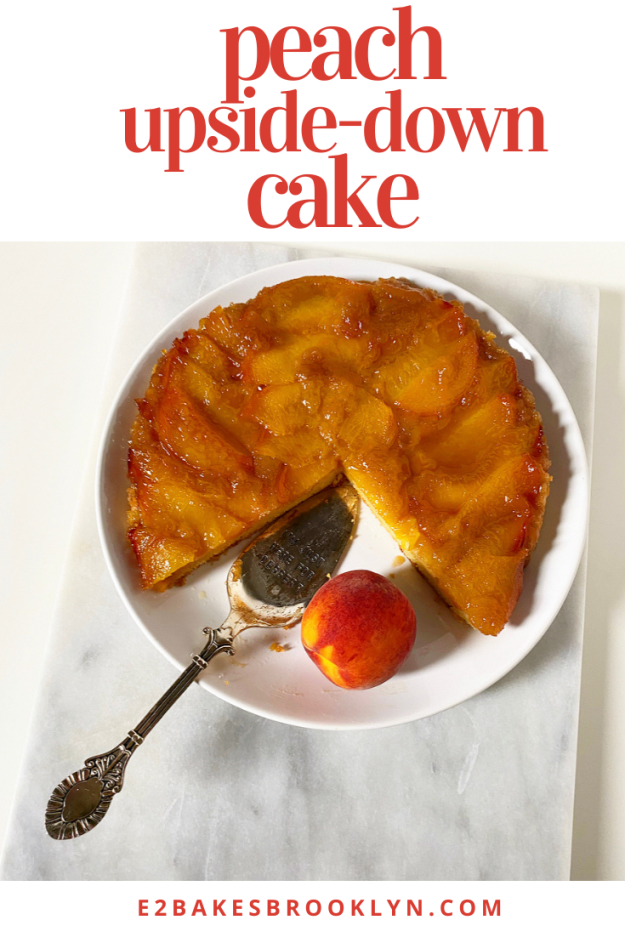
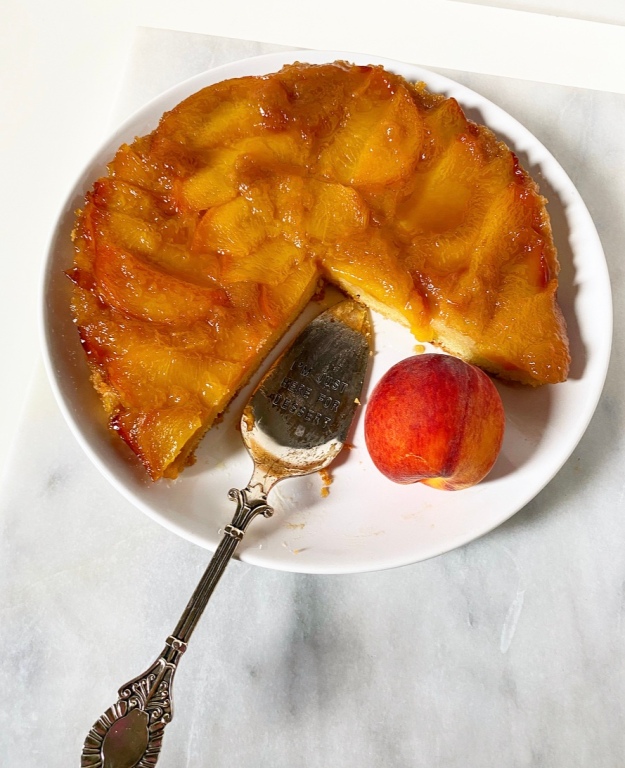
 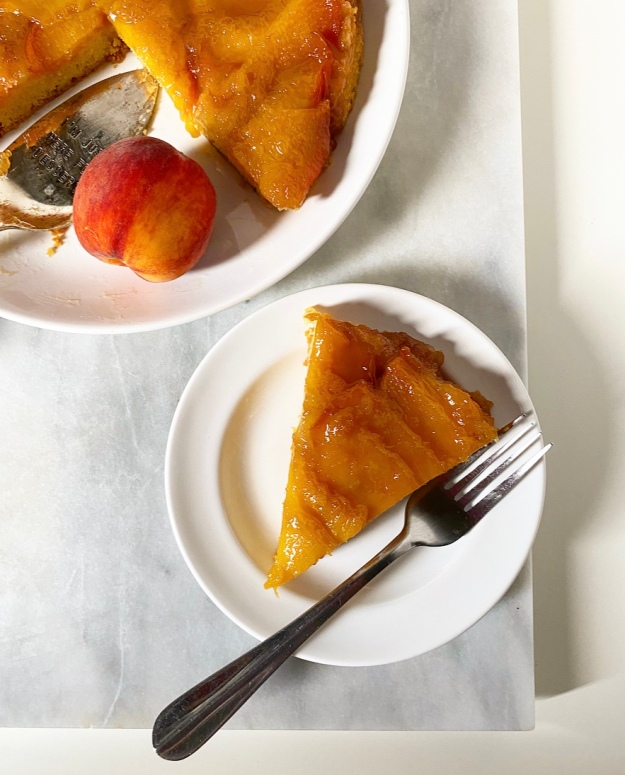 One peach dessert that I am crazy about? This Peach Upside-Down Cake. Not only is it very delicious and very peachy, but it couldn’t be easier to make.
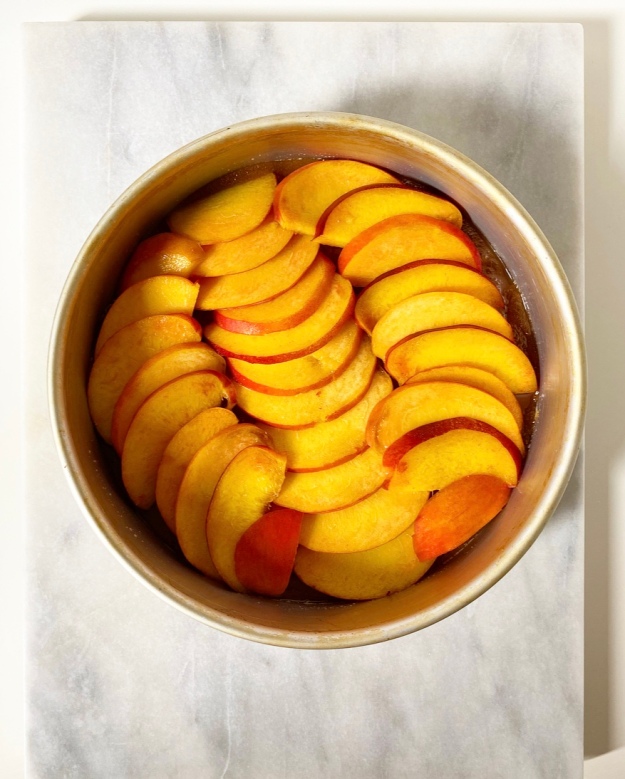 Melt some butter and brown sugar together and lay some thin slices of peach on top in any design you like. I overlapped mine slightly because I didn’t want much “plain” cake peeking through. There’s no need to get too fussy with it, as the peaches release quite a bit of liquid during baking and lose some definition.
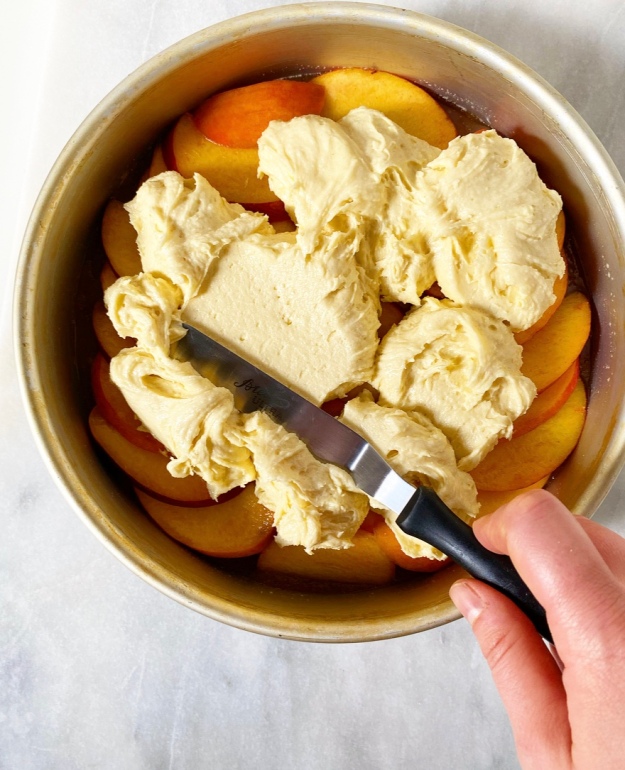 Next up, spoon some cake batter over the top of your peaches. I’ve used a brown sugary version of my
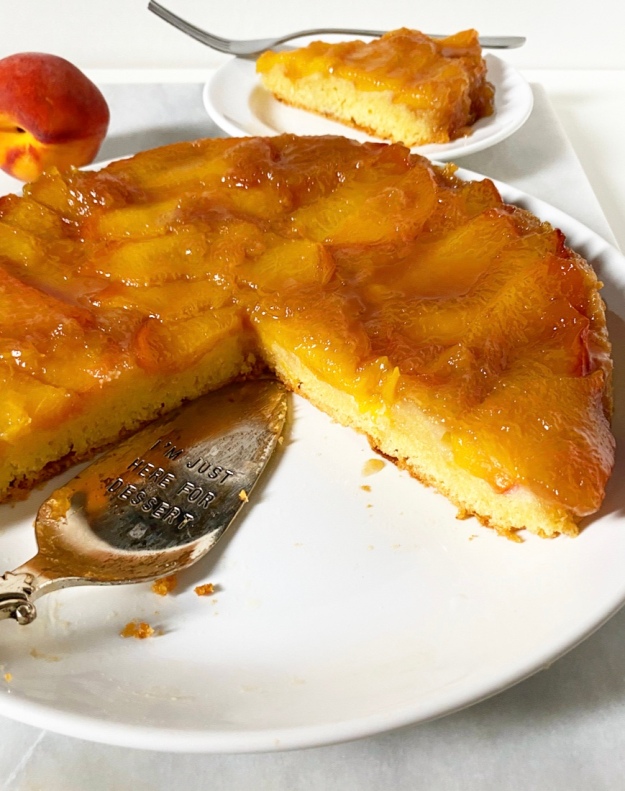
 This cake bakes up in about 50 minutes and only needs to rest for fifteen before it’s flipped onto a serving plate. Again, don’t worry if your peach slices aren’t perfectly defined—mine certainly weren’t but they were still gorgeous and dang delicious.
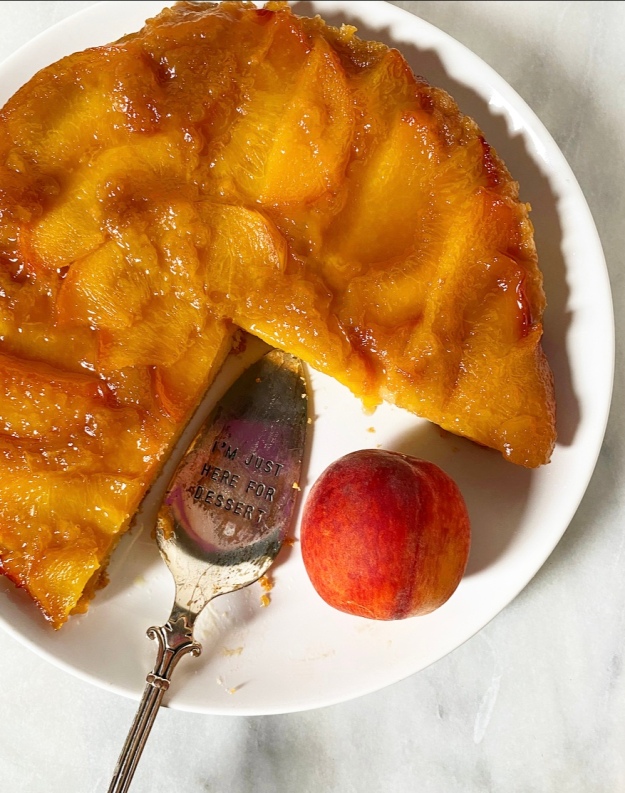
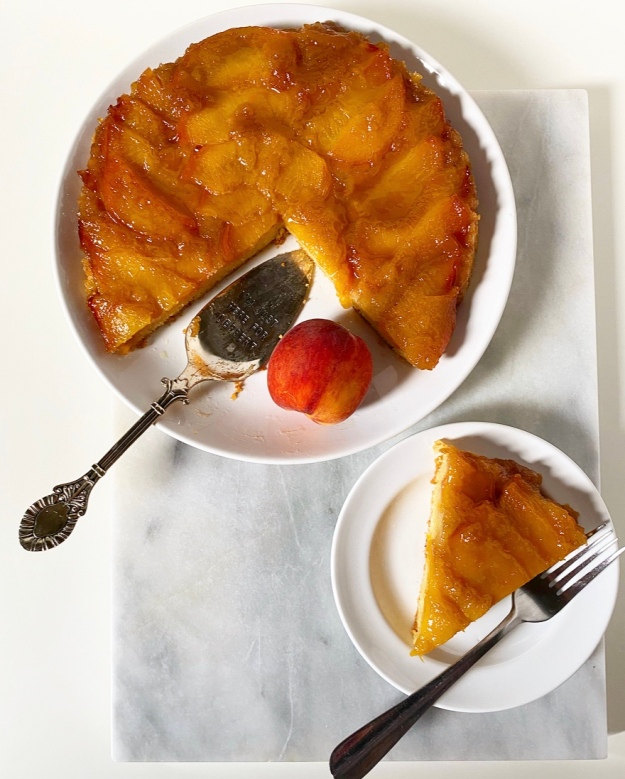 Once your cake is out of the pan, it’s up to you whether you want to enjoy it warm, room temperature or cold. I personally like a warm room temperature slice, so that the cake slices cleanly and the brown sugar topping is pleasantly gooey. Whatever you do though, don’t skip the ice cream or whipped cream. I mean, I forgot them here and everything was still good, but there’s something about cold creamy anything and peach cake that is simply not to be missed.