As far as summer fruit goes, I don’t think anything beats fresh cherries. Not even mango.
When cherries start showing up at the greenmarket, I get a flood of new ideas. Pairing them with rhubarb in pie, making syrup for homemade sodas, rolling them into sweet rolls. There are a million possibilities for every bag! Sometimes though, it’s fun to go with a classic like cherry cheesecake. But my kitchen is a sauna this time of year, and working with a water bath and a full springform pan sounds less than appealing. Plus, there’s the 24 hour chill–who has time for that?!
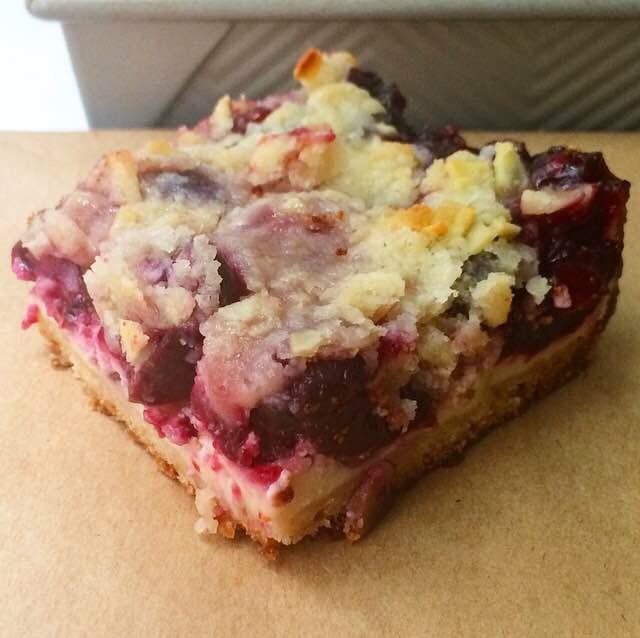
Enter these Sweet Cherry Cheesecake Bars: shortbread crust layered with tangy cheesecake and sweet cherry pie filling, topped with a simple almond streusel. They have all the flavor of the classic cheesecake, no water bath or seemingly-eternal wait required! They still take a little time (they have to chill, after all), but they are far less of a production than a traditional cheesecake–simple enough for a weekend treat, but perfect for parties, too!
 These bars have four layers, but none of them are difficult or time consuming to make. Start by making the shortbread crust. Mix together flour, sugar, and salt before cutting in a cold stick of butter. The mixture will be very dry and seem like it won’t bake up to much, but it will. Pour the mixture into a parchment-lined pan, spread it out to cover the entire bottom of the pan, and then press it down with your fingers until it is one even layer. It will still be powdery-looking, but it will pack down easily and hold together. Bake that for ten minutes–it won’t be fully cooked in that time, but this little step will prevent the crust from getting soggy from the cheesecake and cherry layers.
Once you put the shortbread crust in the oven, use the same bowl you used for the crust to make the streusel topping. No need to wash the bowl–the streusel has all the same ingredients as the crust, plus almonds. Mix together flour, sugar, salt, and sliced almonds, then cut in a stick of butter. Refrigerate the mixture to keep the butter cold while you prepare the cherries and cheesecake.
Remove the crust from the oven and set the pan on a rack to cool while you make the cherry layer. I basically use my favorite cherry pie filling recipe, but cut the quantity in half. Many cherry cheesecake recipes ask for canned cherry pie filling, but this is way better than anything you’ll find in the grocery store. Simply mix three cups of halved, pitted fresh sweet cherries with 1/2 cup of sugar, three tablespoons of cornstarch, a touch of nutmeg, and some salt. The cherries will release some liquid while you make the cheesecake layer.
The cheesecake comes together in less than five minutes. Beat some cream cheese with a bit of sugar. Mix in an egg, followed by a teaspoon of lemon juice and some vanilla. That’s it. It will be smooth, creamy, and absolutely gorgeous!
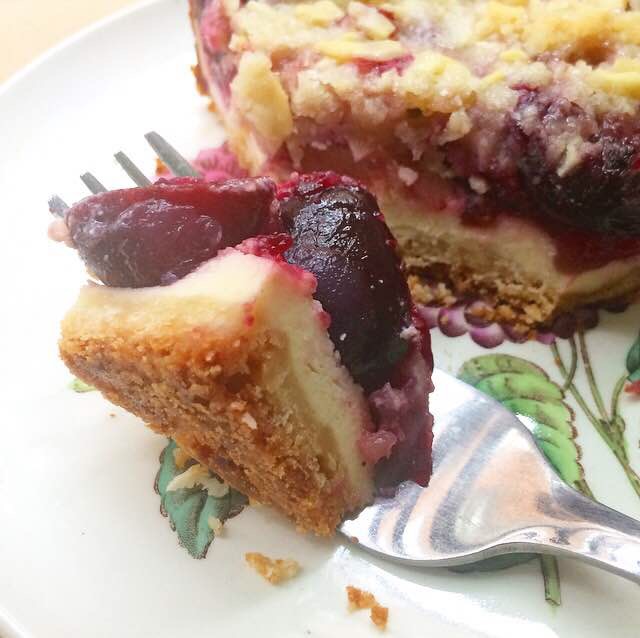
 By the time the cheesecake is ready, the shortbread crust should be at room temperature and ready for layering. Spread the cheesecake mixture over the crust, and tap the pan on the counter a few times to release any air bubbles. Scatter the cherries over the top of the cheesecake, leaving behind any liquid that has collected in the bottom of the bowl. Press down lightly to sort of nestle the cherries into the cheesecake. Remove the streusel from the refrigerator and sprinkle that over the cherries. Put the full pan in the oven to bake for about 45 minutes.
The last part is the most difficult by far. Let the full pan cool to room temperature, and then refrigerate it for at least four hours. Yes, it’s a long time, but you want that cheesecake layer to be nice and cold when you finally bite in! Room temperature cheesecake? No, thanks! I like to make these bars the night before I need them. That way, they’re thoroughly chilled when I get up, and all that’s left to do is slice them up and grab a fork!
 Look at all those gorgeous layers! The sweet cherries, tangy cheesecake, buttery shortbread crust, and crispy almond streusel are amazing together–the combination of cherries and cheesecake are a classic for a reason. These Sweet Cherry Cheesecake Bars are wonderful the way they are, but if you’re looking for a red, white, and blue dessert for Independence Day, you could swap fresh blueberries for one cup of the cherries. I don’t know about you, but watching fireworks while snacking on patriotic cheesecake bars is right up my alley.
 Sweet Cherry Cheesecake Bars
makes one 8×8″ pan, about 9-16 bars
Shortbread Crust:
1 cup all-purpose flour
1/4 cup granulated sugar
pinch of Kosher or sea salt
1/2 cup (1 stick) unsalted butter, cold
Streusel:
1/2 cup all-purpose flour
1/4 cup granulated sugar
pinch of Kosher or sea salt
1/4 cup sliced almonds
1/4 cup unsalted butter, cold
Cherry Layer:
3 cups pitted, halved sweet cherries
1/2 cup granulated sugar
1/8 teaspoon ground nutmeg
3 tablespoons cornstarch
pinch of Kosher or sea salt
Cheesecake:
12 ounces (1 1/2 bricks) full-fat brick-style cream cheese
3 tablespoons granulated sugar
1 large egg, room temperature
1 teaspoon fresh lemon juice
2 teaspoons pure vanilla extract
Preheat oven to 375F. Grease a 9-inch square pan, line it with parchment, and grease again.
Make the shortbread crust. In a medium mixing bowl, whisk together flour, sugar, and salt. Use a pastry blender or two forks to cut butter into flour mixture until the largest pieces are the size of small peas. Mixture will be dry and crumbly with big pieces of butter, not a cohesive dough. Pour mixture into prepared pan and use clean dry fingers to press it into the pan. Bake ten minutes and then let cool completely.
While the crust is cooling, make the streusel. In a medium mixing bowl, whisk together flour, sugar, salt, and almonds. Use a pastry blender or two forks to cut butter into dry ingredients until the largest pieces are the size of small peas. Set in the refrigerator to chill.
Prepare the cherry layer. Place pitted, halved cherries in a large mixing bowl. Stir in sugar, nutmeg, cornstarch, and salt. Set aside.
Make the cheesecake. In a large mixing bowl, use an electric mixer to beat cream cheese until light and fluffy, about two minutes. Beat in sugar, followed by egg, lemon juice, and vanilla. Spread mixture over the cooled crust. Tap the full pan on the counter five times to release any air bubbles.
Scatter cherries on top of cheesecake layer, leaving any excess liquid in the bowl. Press down lightly to nestle the cherries into the cheesecake. Sprinkle chilled streusel mixture over the top of the cherries. Bake full pan at 375F for 40-45 minutes, tenting with foil at the 25 minute mark.
Let bars cool in the pan on a rack until they reach room temperature. Refrigerate the full pan for at least four hours. Use the parchment to lift the bars out of the pan and onto a cutting board. Use a chef’s knife to slice them.
Serve immediately, or keep the bars covered in the refrigerator for up to four days.
 Sometimes I make a recipe and like it enough to post it, but then, when I go to make it again, I am disappointed. I feel that way about a few recipes on this site and will be posting better alternatives as we move into 2017.
 So, how am I going to fix that recipe? Like I do most cookies: I’ll add cornstarch. I love cornstarch. It keeps chewy cookies soft, gives my cakes a tender crumb, and it makes my Chocolate Cream Pie nice and sliceable. Here, it adds just enough structure to these cookies to keep them from crumbling without fundamentally altering the crispy, melty texture. Cornstarch is magic, I tell you. If you want to make a better, sturdier version of my Whipped Shortbread Snowballs, add 1/4 cup of cornstarch when you add the confectioner’s sugar, then follow the recipe as written. Voilà! They’ll still melt in your mouth, but they won’t crumble all over your floors.

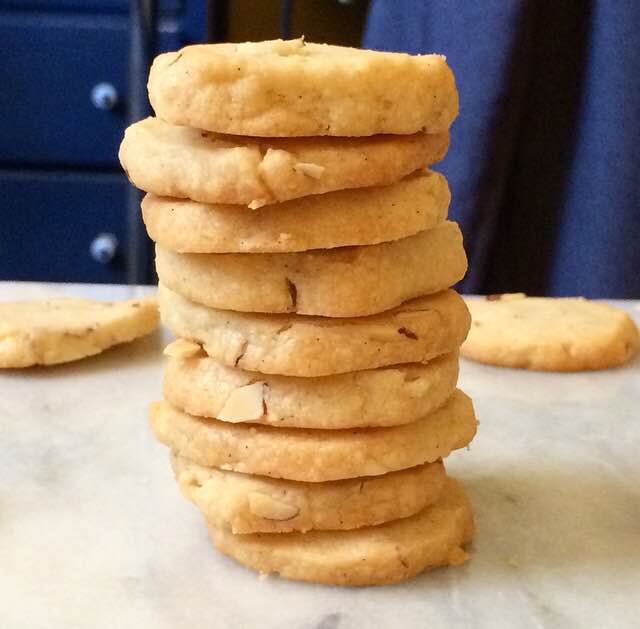
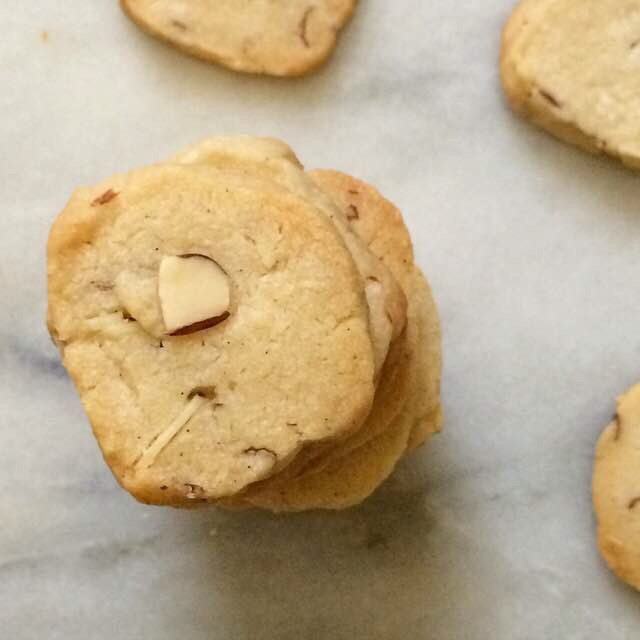
 I could leave it at that, basically posting the same recipe twice in a year, but that’s not really my style. Today’s shortbread take that classic recipe and turn it up a bit with the addition of chai. Black tea leaves, cinnamon, cardamom, ginger, and black pepper (yes, black pepper!) are blitzed into the flour before its mixed with the whipped butter, confectioner’s sugar, and cornstarch. The resulting cookies have all the flavors of your favorite chai tea latte. Coat them in more confectioner’s sugar for that signature holiday cookie look and watch them disappear at your next holiday party!