Pumpkin Pie

imageWith pie season now in full swing, we’ve spent a lot of time talking about pie this week. On Monday, we made pie dough. On Tuesday, we mixed together pumpkin pie spice. Today, we make pumpkin pie! If you are celebrating Thanksgiving in the United States, there’s a pretty solid chance that there will be a pumpkin pie on your table. Some may be lovingly homemade, some may be store-bought, but all of them will get eaten. As one of my favorite food bloggers, Julie Van Rosendaal says, “The very best kind of pie is the kind on your dinner table.” She’s right–store-bought pie is better than no pie at all (especially if there’s whipped cream involved). But homemade pie is always better than store-bought. Sara Lee is fine and all, but we can do better.

image

image

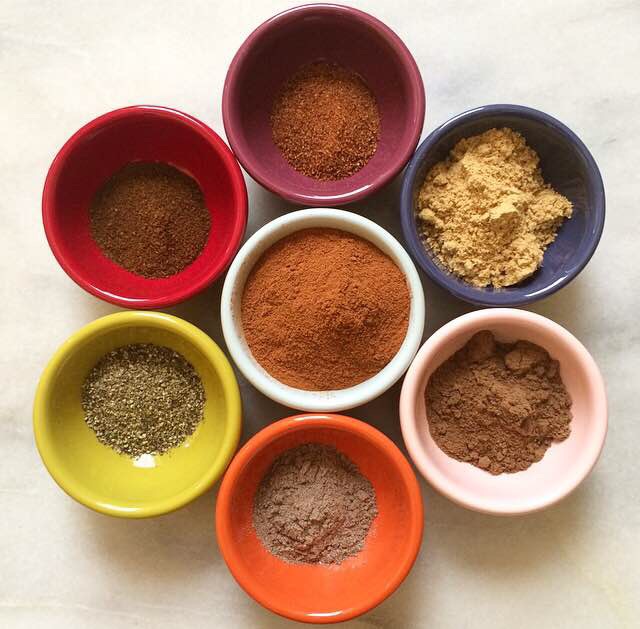
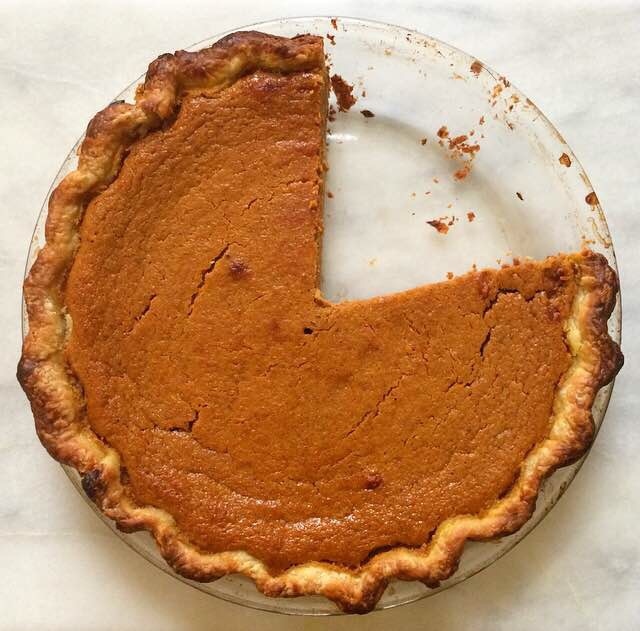
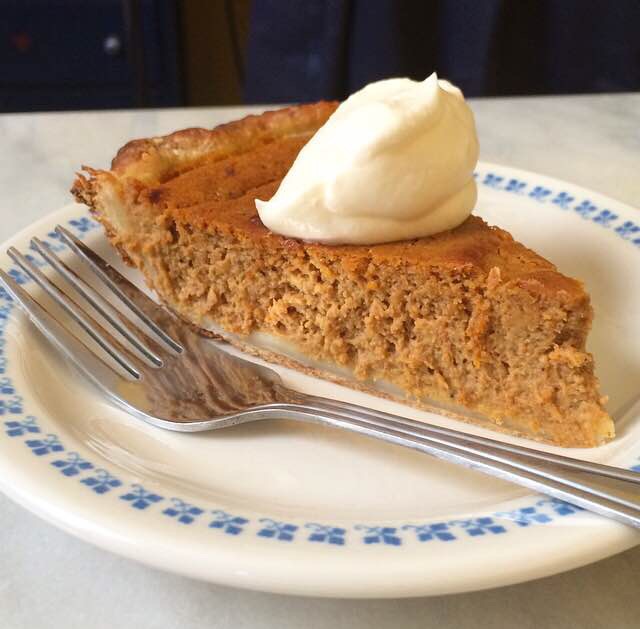
We can make a light and fluffy pumpkin pie. Where traditional pumpkin pie is a little on the dense side, given the very wet combination of pumpkin purée, eggs, sugar, and dairy, ours will be a little airier thanks to whipped egg whites. Three egg yolks will go into the filling as-is; they’ll make our pie rich and delicious. The two egg whites, however, will be whipped until they are foamy and hold soft peaks, then gently folded into the filling right before it’s poured into the crust. Egg whites help with structure in baked goods. By whipping air into them before adding them to the filling, we are ensuring a lighter, airier texture. As the pie bakes, the filling will puff up. This happens with a traditional pumpkin pie too, but it deflates as it cools. Ours will stay a bit puffy even after it reaches room temperature. The egg whites will also give us a very large volume of filling. If you are using a standard pie plate, you’ll probably have some filling leftover; if you use all the filling in a standard pan, it will overflow in your oven. I don’t know about you, but pretty much the only thing I don’t love to do in the kitchen is clean the oven. If you use a deep dish pie plate, you should be able to use all of the filling. I don’t have a deep dish pan, but if you try this recipe in yours, leave me a comment to let me know how it turns out!

image

image

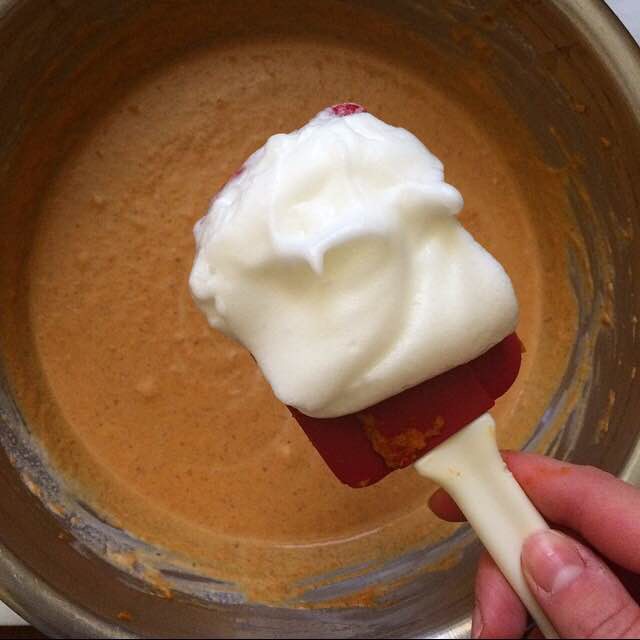
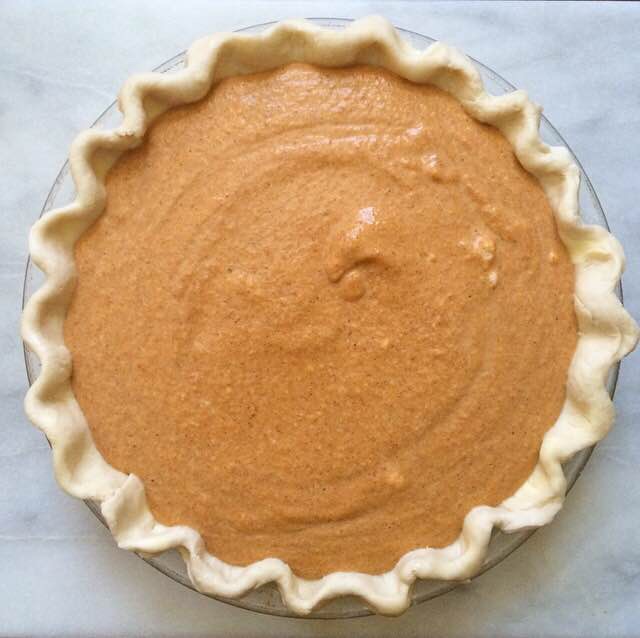
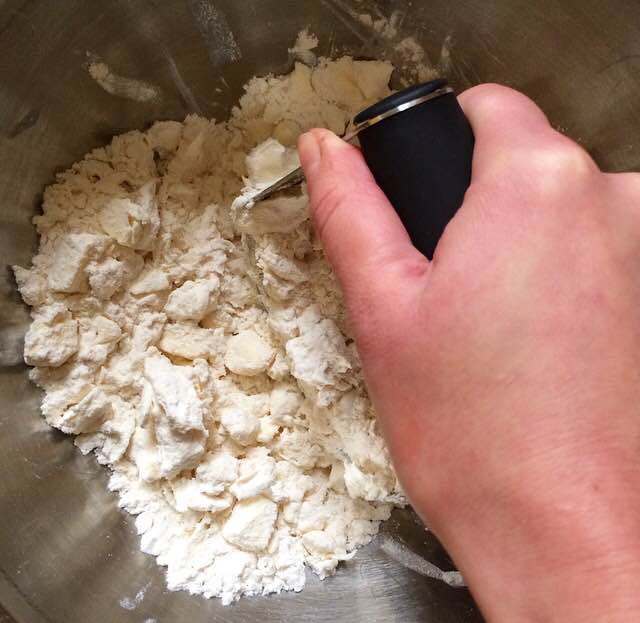
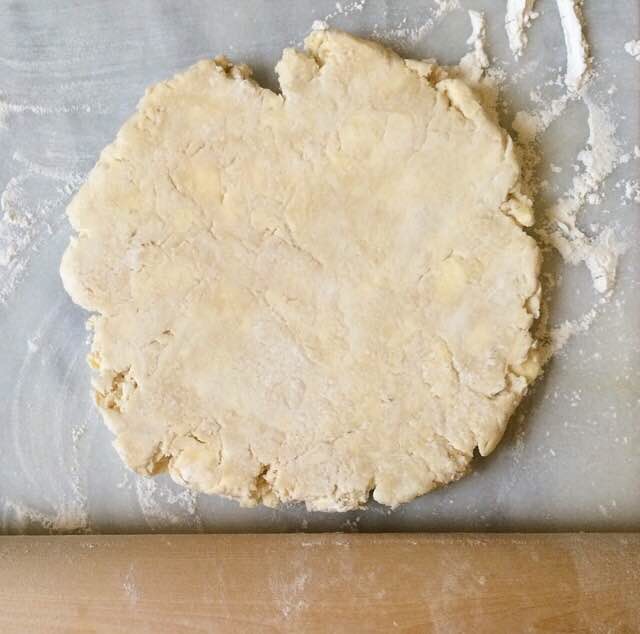
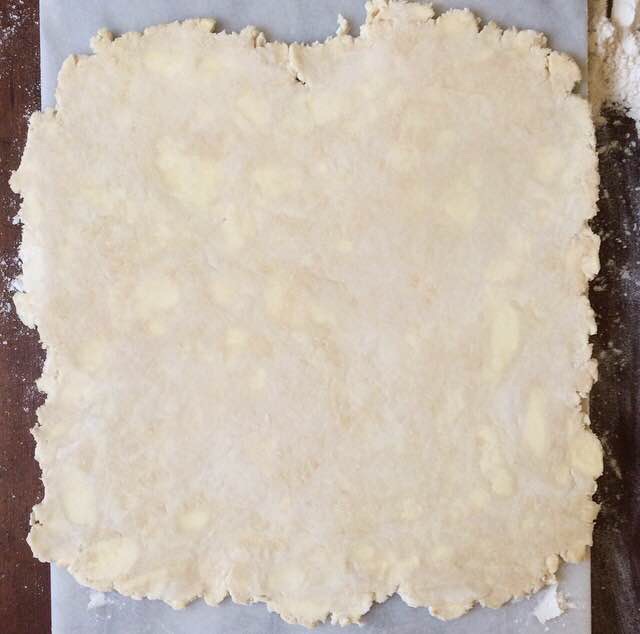
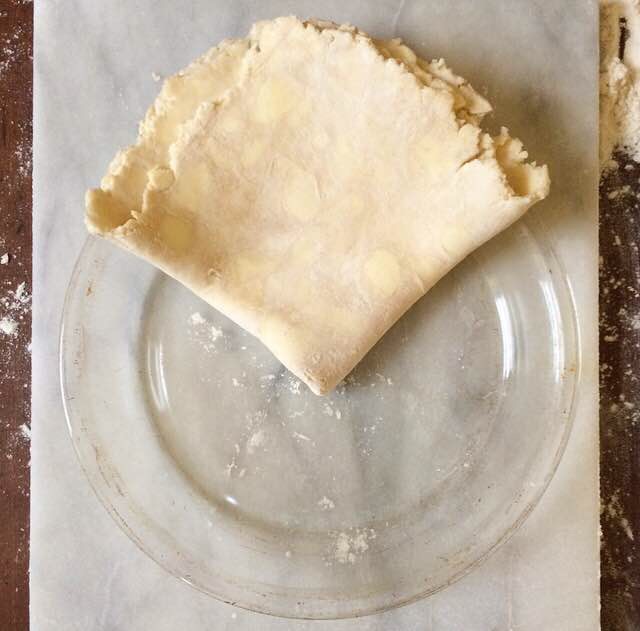
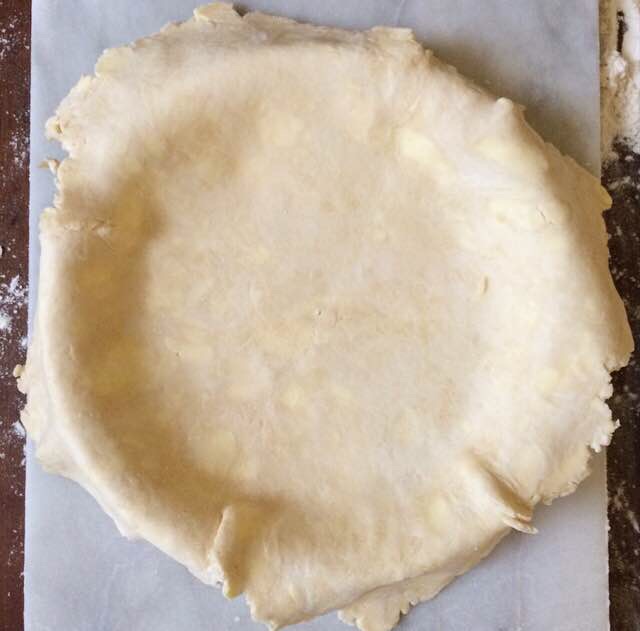
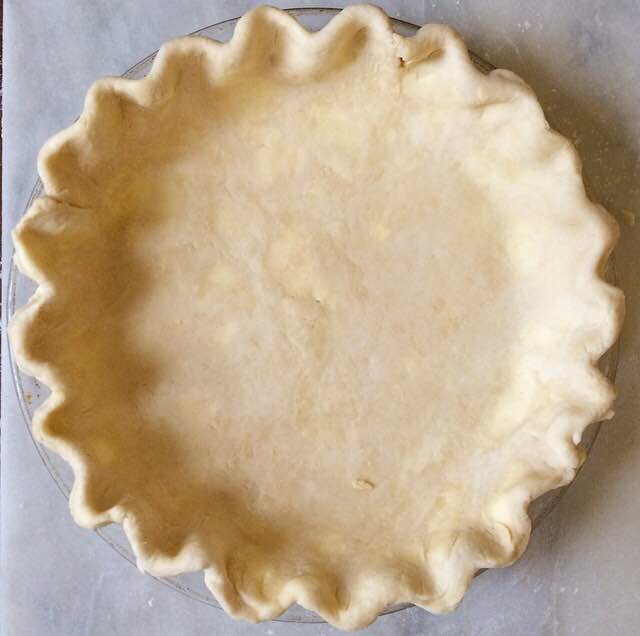
This pie starts with a single crust of cream cheese pie dough. We roll it out, fit it into the pie plate, trim and crimp the edges, and chill it while we make the filling. In a large mixing bowl, we combine pumpkin purée, light brown sugar and granulated sugar. Then, we have to separate some eggs. Separate two eggs, reserving the egg whites in a separate bowl. Separate a third egg, but discard the white. Mix the three egg yolks into the pumpkin mixture. Then stir in cinnamon, pumpkin pie spice, and salt, followed by heavy cream. Now, go grab those two reserved egg whites and your electric mixer (hand- and stand-mixers are both fine). Whip the egg whites until soft peaks form. Then, with a silicone spatula, gently fold them into the pumpkin mixture. Pour the filling into the prepared pie crust, brush the crust with some additional cream, and chill it again while you preheat the oven. Bake the pie for 15 minutes at 425F, before turning the oven down to 350F for 35-45 minutes, until a toothpick inserted in the middle comes out clean. If the crust looks too brown, cover it with foil or a pie protector for the remainder of the cook time. I use a 9-inch hoop that I made out of foil, and it works like a charm.

This pie will definitely be one of the best things on your Thanksgiving table. Traditional Pumpkin Pie is a classic for a reason, but I think this light and fluffy version gives it a run for it’s money!

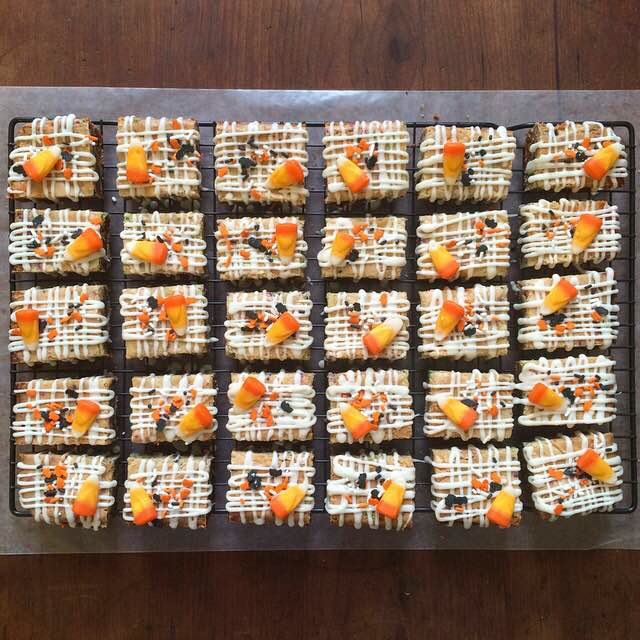
Make sure to check back in the weeks leading up to Thanksgiving for two more pie recipes!

image

Pumpkin Pie
heavily adapted from Old Fashioned Pumpkin Pie on Simply Recipes
makes one 9″ pie (deep dish or standard)

1/2 recipe Cream Cheese Pie Dough
2 cups pure pumpkin purée (1 15-ounce can)
1/3 cup light brown sugar, packed
1/4 cup granulated sugar
2 large eggs (separated) + 1 large egg yolk, room temperature
1 teaspoon ground cinnamon
1 1/2 teaspoons pumpkin pie spice
1/2 teaspoon Kosher or sea salt
1 1/2 cups heavy cream + extra for brushing

On a floured surface, roll out pie dough to a 12″ diameter. Fit into a 9″ pie plate and trim the overhang to 1/2-inch. Crimp the edges and chill the crust while you prepare the filling.

In a large mixing bowl, mix together pumpkin purée, brown sugar, and granulated sugar. Whisk in three egg yolks, and reserve the two egg whites. Stir in cinnamon, pumpkin pie spice, and salt. Add in heavy cream. Set aside.

Pour the egg whites into a separate mixing bowl. With an electric mixer, whip the egg whites until soft peaks form, 3-4 minutes. With a silicone spatula, gently fold the whipped egg whites into the pumpkin mixture. Pour pie filling into prepared crust.* Brush the crust with a little heavy cream. Chill prepared pie while oven is heating.

Preheat the oven to 425F. When it reaches temperature, bake the pie for 15 minutes. Then, turn the oven temperature to 350F and bake for an additional 32-45 minutes,* covering the crust with foil if it starts to get too brown. The pie is ready when the filling no longer jiggles, or when a toothpick inserted in the middle comes out clean.

Cool pie on a rack for at least two hours before slicing and serving. Pie will keep covered in the refrigerator for up to three days.

Notes:

  1. If you are using a regular pie plate, you will have roughly 1/2-3/4 cup of leftover filling. If you are using a deep dish pie plate, you should be able to use all the filling.
  2. Thirteen minutes is a huge gap in doneness time, but ovens and pies are all different. Mine (made in a standard pie plate) are done at exactly 35 minutes.

Pumpkin Pie

Pumpkin Pie Spice

imageWhen did pumpkin spice become so popular? I don’t recall pumpkin season being a thing back in 1995, but I was ten, so what do I know?! We had pumpkin pie, of course, but I don’t remember pumpkin bread or pumpkin chocolate chip cookies or a multitude of pumpkin coffee beverages. Don’t get me wrong, I love all of those things, but I simply have no idea when or why they became so commonplace. No matter! I am fully on board with pumpkin spicing all the things.

In honor of the pumpkinization of America and the afore-mentioned pie season, here is my favorite pumpkin pie spice. Yes, you can buy pumpkin pie spice everywhere this time of year, but it’s so easy (and much less expensive) to make it at home! Plus, you can customize it to your taste–add more cinnamon, cut out the allspice, throw in some orange zest. The possibilities are endless!

image

My favorite blend has the usual suspects–cinnamon, ginger, allspice, cloves, nutmeg–but also a couple more unusual ingredients. I’ve thrown in cardamom simply because I love it. LOVE it. The second odd-man-out might be a little harder to comprehend. You guys, I put black pepper in my pumpkin pie spice. It sounds ridiculous and a little gross, I know. I know. When I first saw it on Sally’s blog, I thought she had lost her mind. But she knew exactly what she was doing. The black pepper doesn’t bring much heat to the spice blend–instead it adds a floral note that really rounds out the pumpkin flavor. It’ll surprise you in the best possible way. Don’t knock it before you try it! But if it doesn’t belong in your personal pumpkin pie spice, leave it out. Take my favorite blend and customize it to be your favorite!

Mix up some pumpkin pie spice tonight, and then come back tomorrow for the first of my three pie recipes this month! As you might have guessed, it’s pumpkin 😊

image

Pumpkin Pie Spice
makes 5 tablespoons

2 tablespoons ground cinnamon
1 tablespoon ground ginger
2 teaspoons ground allspice
1 teaspoons ground cardamom
1 teaspoons ground cloves
1 teaspoons ground nutmeg
1 teaspoons ground black pepper

In a small mixing bowl, whisk together all ingredients. Keep in an airtight container at room temperature for up to one year.

Cream Cheese Pie Dough

imageThis was a big weekend in New York City. It was Halloween, which is always a production (I skipped it). It was the weekend of the New York City Marathon. And most importantly (to me anyway), it was the beginning of pie season! I celebrated by making three apple pies with my friends, Liz and Kat, and watching the final game of the World Series while eating too much pizza. But back to pie season–it’s wonderful time of year when we make and eat pie for two months straight and don’t care who knows it! The holidays demand pie, and I am happy to oblige. Between now and Thanksgiving, I’m going to post three pie recipes! Make sure to check back each week–you may just find your new favorite holiday dessert. But before we get to the pies themselves, we have to talk about crust.

image

Pie crust is notoriously intimidating. If you let it get even the slightest bit warm before it goes in the oven, it loses flakiness. If you don’t add enough liquid, it’s crumbly. If you add too much liquid, it’s a sticky mess. Even if you get the dough right, there’s the rolling, transferring to the pie plate, and crimping. And there are so many options! Butter, shortening, ice water, buttermilk, vodka, vinegar, sugar, no sugar–it’s enough to make your head spin before you’ve ever turned on the oven! All that said, the method is very simple: cut cold fat into dry ingredients, stir in cold liquid, knead and chill, roll and bake. That’s it. Simple. But not easy.

For years, I’ve used Deb Perelman’s All Butter, Really Flaky Pie Dough. It’s an excellent recipe, and her accompanying pie tutorials simply cannot be beat. But I am one of those people who can’t leave perfection alone, so last April I threw some cream cheese in there, just to see what would happen. It was a good decision. The combination of cream cheese and butter guarantees a rich, flaky crust–it never turns out dry. The cream cheese also allows for easy rolling. It helps prevent tears–this dough can be flipped and turned and rolled and cut every which-way, and it almost always remains intact. If you do get a tear, just patch it back together with your fingertips–no problem! Instead of using ice water in my dough, I am partial to cold buttermilk. While ice water would do, it adds no flavor and makes this particular crust a little tougher than I’d like. We need acid to make things tender, and if we’re going to use one, it should add a little flavor. Buttermilk is the answer (isn’t it always?). And there is no question as to how much liquid we’ll need in this crust–it’s 1/4 cup every single time. There is no guess-work here!

imageimageWe have to talk about one more thing: the food processor. So many people love to mix up their dough by pulsing everything until it comes together, but it’s never worked for me. I either get a crumbly crust, or a tough, over-worked mess. I use a pastry blender (pictured above). It allows you to get a feel for the dough while you are putting it together, rather than having to guess while looking at your ingredients through a wall of plastic. It takes the guess-work out of the mixing. Pastry blenders are roughly $5, and they can be used for lots of things: pie (obviously), biscuits, even guacamole and mashed potatoes! Get one–you’ll love it.

image

imageimageimageThe dough begins with mixing together flour, sugar, and salt. Then, using your pastry blender, cut 8 ounces of butter and 8 ounces of cream cheese into the flour mixture. Next, stir in 1/4 cup of cold buttermilk, knead it all together for a minute or two, wrap it in plastic, stick it in the fridge, and you’re done…for an hour. Once the chilling time is over, place one disc of dough on a well floured surface. With a floured rolling pin, press down on the dough, rolling in one direction a few times. Turn the dough 90 degrees, and roll again. Repeat this until your dough is at least twelve inches in diameter. If it starts to stick to your surface or your rolling pin, dust with more flour. If it gets warm, chill it for ten minutes before starting where you left off. To transfer it to your pie plate, gently fold it into quarters, and place it in the pan with the scraggly edges hanging over the edge. Unfold the dough, and voila! The crust is in the pan. Trim the edges to 1/2 inch of overhang. Then fill with your favorite filling. If it’s a single crust pie, you can crimp the edges and put the pie in the oven. If you want a double crust pie, put the filled crust in the fridge while you roll out the second crust just like you did the first one. Cut it into strips if you want a lattice (more on that very soon!), or leave it whole if you want the whole thing covered. Trim the excess to 1/2 inch, crimp the edges, cut a few vents (if it’s fully covered), and it’s ready for the oven. Preheat the oven only AFTER you have finished assembling the pie. Now, you are roughly one hour from a hot homemade pie coming out of your oven!

Check back later this week for the first of my three pie recipes this month!

image

Cream Cheese Pie Dough
makes two crusts, enough for one double-crust or two single-crust 9″ pies

2 1/2 cups all purpose flour
2 tablespoons granulated sugar
1/2 teaspoon Kosher or sea salt
1 cup (8 ounces) unsalted butter, very cold, cut into cubes
1 cup (8 ounces) full-fat cream cheese, very cold, cut into cubes
1/4 cup buttermilk, very cold

In a large mixing bowl, whisk together flour, sugar, and salt. Add cold butter and cream cheese into the bowl. With your pastry blender, cut the ingredients together until the largest bits of butter and cream cheese are the size of small peas. Add the buttermilk, and give it a quick stir to distribute. Put your hands* in the bowl to knead the mixture until it comes together.* Form the dough into two discs, and wrap them individually in plastic wrap. Chill for one hour, or up to two days.

Flour a surface and a rolling pin. Take one disc of dough out of the refrigerator, unwrap it, and place it on the surface. Press the dough with the rolling pin. Roll it in one direction 3-4 times, and then turn it 90 degrees. Roll in one direction 3-4 times. Repeat rolling and turning until dough is at least 12 inches in diameter, dusting with more flour as necessary to prevent sticking.

Fold dough in quarters, and place in a pie plate with the scraggly edges hanging over the outside of the pan. Unfold the dough to fill the pan. Trim the excess to 1/2 inch. Fill crust with filling and chill for at least 15 minutes. From here, there are two options.

  1. For a single crust pie, crimp the edges, and brush them with additional buttermilk. Chill for 30 minutes while you preheat the oven to 375F.* Bake for 45 minutes to one hour, covering the crust with foil halfway through. Let cool at least three hours.
  2. For a double crust pie, roll out the top crust the same way that you did the bottom crust. Cut into strips for a lattice,* or leave whole to cover the whole pie. Trim the excess to 1/2 inch. Crimp the edges and brush the crust with additional buttermilk. Chill for 30 minutes while you preheat the oven to 375F. Cut vents if the top crust is whole. Bake for 45 minutes to one hour. Let cool for at least three hours.

Notes:

  1. If your hands are warm, run them under cold water for thirty seconds (and then dry them) before kneading.
  2. There may be a tablespoon or two of unincorporated ingredients. Just pat them onto the discs before wrapping them in plastic wrap. They will incorporate during rolling.
  3. Do not preheat your oven until after your pie is completely assembled. This is very important!

Cream Cheese Pie Dough

Halloween Candy Corn Platinum Blondies

Halloween Candy Corn Platinum Blondies

Confession: I am one of those adults who positively loathes Halloween. This Saturday night, you will not see me at any costume parties or roaming the crowds of the West Village Halloween Parade. And as there are no children in our building, I won’t be handing out any candy either. As a nanny though, I’ve had to learn to feign interest for the sake of some sweet little friends of mine. For the last four years, I’ve helped squeeze tiny people into itchy costumes, stood in line to get professional photos taken to commemorate that year they dressed up as turtles and cried for six hours straight, and even once taken them trick-or-treating…and that’s all before the sugar-induced meltdowns. Needless to say, I’m a little relieved that Halloween falls on a Saturday this year so I can stay home with Henry, who feels the same way. But for all the grimacing I do on those days, I have to remember that I loved Halloween when I was little. I dressed up as two Disney Princesses, Queen Guinevere (in a vintage purple velvet bridesmaid’s dress that once belonged to my Aunt Jerry Beth), and Mother Teresa. Yes, when I was thirteen, I trick-or-treated as a nun. My mother worked at a church, so my little sister and I had to come up with costumes based on what we could find in the acolyte room. My childhood friend, Christina, went as Dolly Parton that year–we were quite the pair.

All that is to say that I love candy. I have no problem going through someone else’s haul to steal all of the Twix bars and Reese’s Cups. I especially dig candy corn and those little mallow creme pumpkins. I’ve scoured the shelves of the Target Halloween aisle four times in four weeks, and have eaten more sugar than I care to admit. And I’ve finally found a way to get even candy corn-haters to enjoy the stuff–baking it into what I call “platinum” blondies. I’ve figured out that it’s the texture of candy corn that grosses out so many people. And it makes sense–it’s chalky, chewy, and overly sweet, gets stuck in your teeth, and tastes nothing like the “real honey” advertised on the bag. By baking it though, it melts and mellows, ceases to be chalky and gets extra chewy. Combine that with a soft and chewy sugar-cookie-meets-brownie bar, some sprinkles (because sprinkles!) and a vanilla glaze, and you’ve got the perfect no-mixer-needed treat for your Halloween celebration.

image

image

These platinum blondies are so, so simple. They start with melting butter and combining it with regular granulated sugar. Whereas most blondie recipes use brown sugar and are therefore a golden brown color, these remain a pale yellow–platinum, if you will. Next come two large eggs, plus a yolk. The extra egg yolk is needed to make up for the moisture lost by not using brown sugar. Then comes a hefty amount of vanilla and just a touch of imitation butter extract. Yes, imitation butter extract sounds gnarly, but it gives these bars a Funfetti cake mix flavor without actually having to use cake mix. If you don’t have any, or just aren’t into it, you can leave it out without the final product suffering. Next we fold in the flour and salt, followed by the candy corn and sprinkles. Then we spread the batter in a prepared pan and bake at 350F for half an hour. The cooled blondies are sliced and drizzled with a simple vanilla glaze, then topped with more sprinkles (because more sprinkles!) and candy corn. Yum!

Halloween Candy Corn Platinum Blondies are the perfect dessert for your Halloween celebration this year. Whether you are attending a party, wandering your neighborhood with your children, or ignoring all of it at home with your favorite person and your Netflix account, you’ll love these blondies! Happy Halloween, indeed.

Halloween Candy Corn Platinum Blondies

Halloween Candy Corn Platinum Blondies
makes one 9×13″ pan, about 30 blondies

Platinum Blondies:
1 cup unsalted butter
2 cups granulated sugar
2 large eggs + 1 large egg yolk, room temperature
1 tablespoon pure vanilla extract
1 teaspoon imitation butter extract, optional
2 cups all purpose flour, divided
1 1/2 teaspoons Kosher or sea salt
1 cup candy corn
1/2 cup sprinkles (jimmies, not nonpareils)*

Vanilla Glaze:
5-6 tablespoons heavy cream
1 teaspoon pure vanilla extract
1 1/2 cups confectioner’s sugar
pinch of Kosher or sea salt
additional sprinkles, for decorating*
additional candy corn, for decorating

Preheat oven to 350F. Line a 9×13″ pan with aluminum foil, leaving overhand on the short ends of the pan. Grease the aluminum foil. Set prepared pan aside.

Melt butter on the stove or in the microwave. Let cool slightly.

Pour sugar in a large mixing bowl. Add melted butter and whisk until combined. Add in eggs and egg yolk one at a time, incorporating completely after each addition. Whisk in vanilla and optional imitation butter extract.

Using a wooden spoon or rubber spatula, fold the all purpose flour and salt into the butter & sugar mixture. Gently fold in the candy corn and sprinkles. Spread batter into prepared pan. Tap full pan on the counter three or four times to remove air bubbles. Bake for 30-35 minutes, or until a toothpick inserted in the middle comes out clean. Let blondies cool in the pan for thirty minutes, then use the foil overhang to remove them to a rack to cool completely (about an hour). Once they are cool, peel off the foil and cut into 30 pieces.

Place cooling rack over a piece of wax paper to collect drips. Place blondies back on the rack.

In a small bowl, whisk together heavy cream and vanilla. Whisk in confectioner’s sugar and salt until smooth. Using a squeeze bottle or a fork, drizzle glaze over blondies. Decorate with additional sprinkles and candy corn. Let glaze dry for an hour or two, until it is no longer shiny and is a little bit hardened, before packing into an airtight container for storage. These keep well covered at room temperature for up to three days.

Notes:

  1. Please use jimmies here. Non-pareils (the little round ball sprinkles) are not recommended for the batter as they will bleed their color.
  2. Non-pareils or jimmies are a good choice here.

Chocolate Chip Shortbread Cookies

image

While I don’t often work in the mornings, I make a point to get up by 8am on weekdays. I have a sort of pattern that I follow nearly religiously, which goes as follows. Every weekday morning, I make a trip to my local bodega to get a coffee. I’m one of those that would love to make coffee, but has to be caffeinated to do so, lest I break the French press. I’ve gone to the same place for so long that the owner, Mr. Moon, no longer has to ask for my order; the only question is “Hot or cold?” Then I head home, turn the radio to BBC World Service News Hour (nerd alert!), and eat a bowl of granola with Icelandic yogurt, fruit, and a drizzle of maple syrup. I make granola in three-quart batches every few weeks, and go through it 1/2 cup at a time. But on the rare day that we don’t have a jar-full on top of the fridge, I make a trip to Bien Cuit for a coffee and a pastry.

Bien Cuit is a fantastic bakery on Smith Street in Boerum Hill. They make beautiful breads and pastries that change with the seasons; I am partial to the Tebirke (a flaky pastry filled with almond paste and rolled in poppyseeds) and Apple Cardamom Danish, but I’ve enjoyed nearly everything in the pastry case. And if that’s not enough to convince you to find a reason to go there right this minute, the baristas make one hell of a cappuccino. By the cashier, you’ll find a few cookie jars. They all look wonderful–and with flavors like Almond Sable and Malted Muesli, how couldn’t they be?–but the jar that always catches my eye is Diamond Chocolate Chip Shortbread. While I notice them every time I go to pay for my breakfast, I’ve never gotten one. Instead, I just dream about them while I go about my day. There are worse things to daydream about than crunchy, buttery cookies chock-full of miniature chocolate chips.

When Henry and I were invited to dinner at our friend David’s last week, I was asked to bring something simple to go with after-dinner tea. The first thing to come to mind was that jar of chocolate chip shortbread. I got to work making my own version. The result was just what he asked for: simple little cookies with the flavor of a chocolate chip cookie and a crunchy texture perfect for dunking in tea or coffee.

image

These really are the simplest cookies. They start with creaming room temperature butter, dark brown sugar, and granulated sugar. We use 3 parts brown sugar to 1 part granulated to ensure the rich caramel flavor of a great chocolate chip cookie. Then, we add in a little vanilla to round out the flavor of the cookie itself. The next step is adding flour and salt in two installments, followed by folding in miniature chocolate chips. The dough will seem very crumbly, but should hold together when you pinch some together. Then we divide the dough in half and roll each half into a log, wrap it in plastic, and let chill for 45 minutes to solidify the butter and meld the flavors. When that time is up, unwrap the dough, and slice into 1/4″-thick rounds. Bake for 15-17 minutes, or until the tops are no longer doughy and the edges are starting to brown. Then make yourself a pot of coffee or tea, and dunk away!

Chocolate Chip Shortbread Cookies keep well covered at room temperature for at least a week. They are a perfect casual dessert or afternoon treat for these colder months, and I think a little bag of them would be a great holiday gift with a pound of coffee and a cute ribbon! They would also make fantastic little ice cream sandwiches. Actually, that’s a great idea. I think I’ll go have one right now…

image

Chocolate Chip Shortbread Cookies
makes about six dozen

1 3/4 cups all purpose flour
1/2 teaspoon Kosher or sea salt
3/4 cup unsalted butter, softened to room temperature
6 tablespoons dark brown sugar, packed*
2 tablespoons granulated sugar
3/4 teaspoon pure vanilla extract
1/2 cup + 2 tablespoons mini chocolate chips*

In a medium mixing bowl, whisk together flour and salt. Set aside.

With a hand mixer in a large mixing bowl, beat butter until it is light and fluffy (about two minutes). Add dark brown and granulated sugars followed by vanilla, and beat until they are completely incorporated. With the mixer running on low, incorporate flour mixture in two installments, making sure to scrape down the sides of the bowl. Mix in mini chocolate chips.

Divide dough in half. Take one half and lay it on a piece of plastic wrap. Using the plastic wrap and clean hands, form the dough into a 9″ long x 1.5″ thick log. Wrap tightly in the plastic wrap. Repeat with the other half of the dough. Refrigerate wrapped dough for at least 45 minutes, or up to three days.

Preheat the oven to 325F. Line two cookie sheets with parchment paper, and set aside.

Unwrap one log of dough. Using a large, sharp chef’s knife, slice the dough in 1/4″ installments and lay them on the prepared pans one inch apart. Bake for 15-17 minutes, or until the tops no longer look doughy and the edges are starting to brown. Let cool on the pans for for 10 minutes before removing to a rack to cool completely. Repeat slicing and baking with remaining dough.

These keep well in an airtight container at room temperature for at least a week.

Notes:

  1. Light brown sugar may be substituted.
  2. Regular-sized chocolate chips are not recommended.