 I would have been content to make and eat only one Boterkoek for the rest of my life, but then my friend, David, had to go and one-up himself on New Year’s Eve by adding a bunch of almond paste.
 I don’t make traditional New Year’s resolutions, but that night I absolutely resolved to make Almond Boterkoek happen on this blog. It took exactly eight weeks.
Me: 1
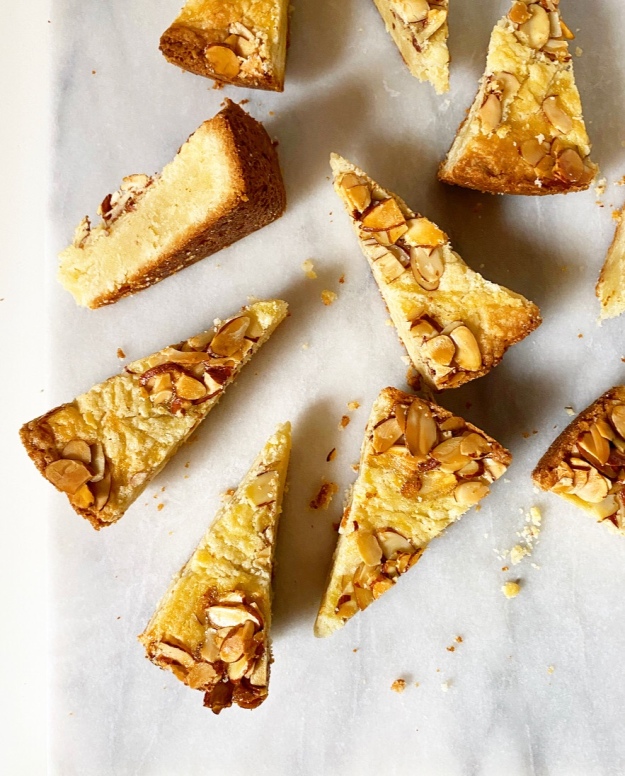
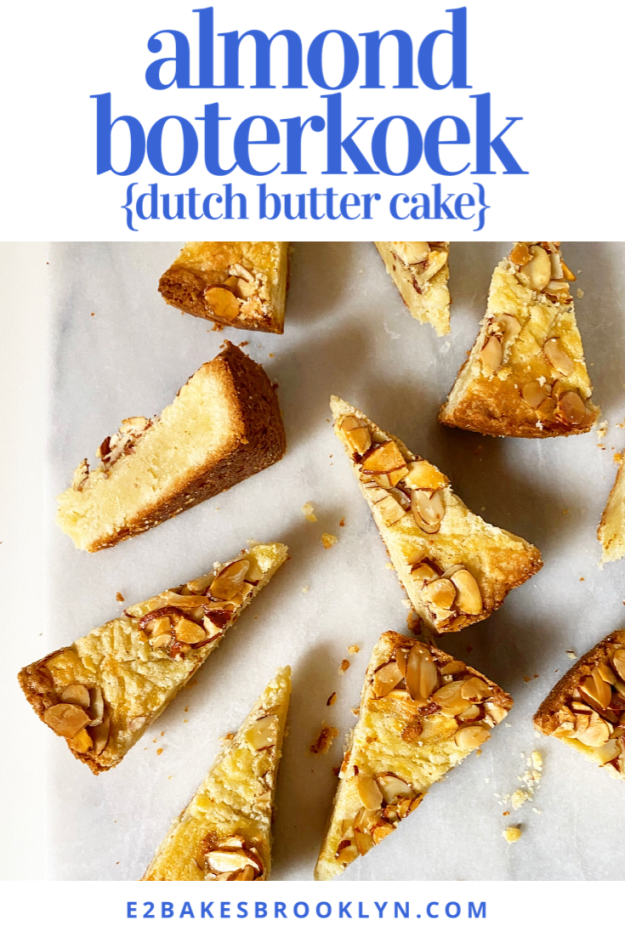
2020: 0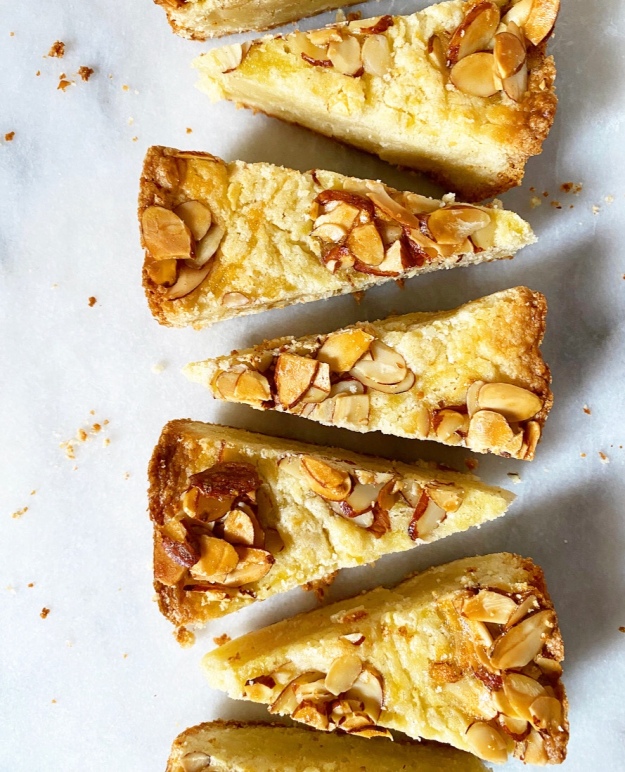 Anyway…David’s go-to Boterkoek (“bow-ter-kook”) already has a hint of almond to complement all the glorious butter, but this one…whoa. It’s super soft in the middle with crispy & buttery edges on the top and bottom, so it’s almost like biting into a piece of marzipan that is coated in a thin layer of butter cake.
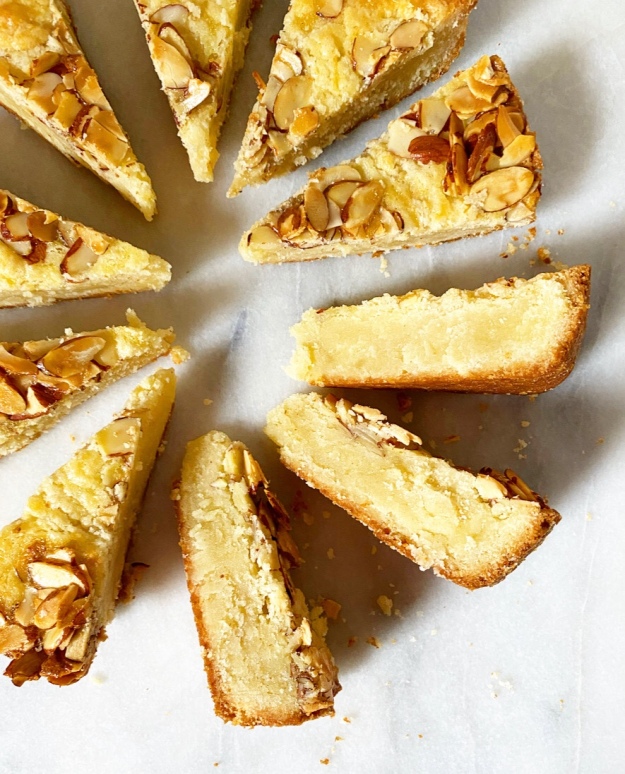 Does that make it sound gross? I promise it’s anything but.
Am I making sense? I don’t even know. What I do know is that adding almond paste to Boterkoek is the closest one can get to having a spiritual experience* with a baked good.
*maybe exaggerating…but also, maybe not.


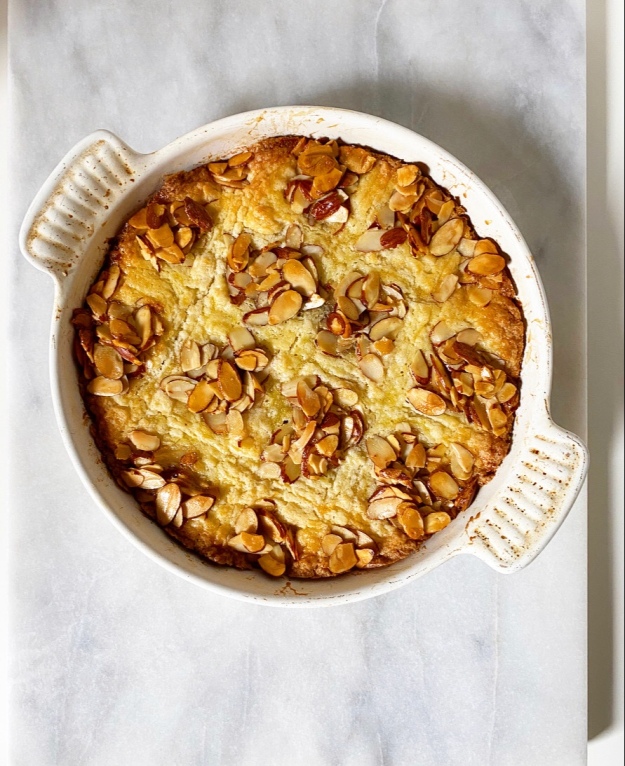 As with David’s O.G. Boterkoek, this one is no big deal to whip up. You will need to break out your mixer, but I promise that’s the fussiest part of the whole process. Well, except for the part where you have to remove a teaspoon of egg from a beaten egg, but that’s not too annoying. I even found time (30 whole seconds!) to make a crackly almond topping, which I used it to decorate the cake in a way that is much more flattering when it’s all sliced up.
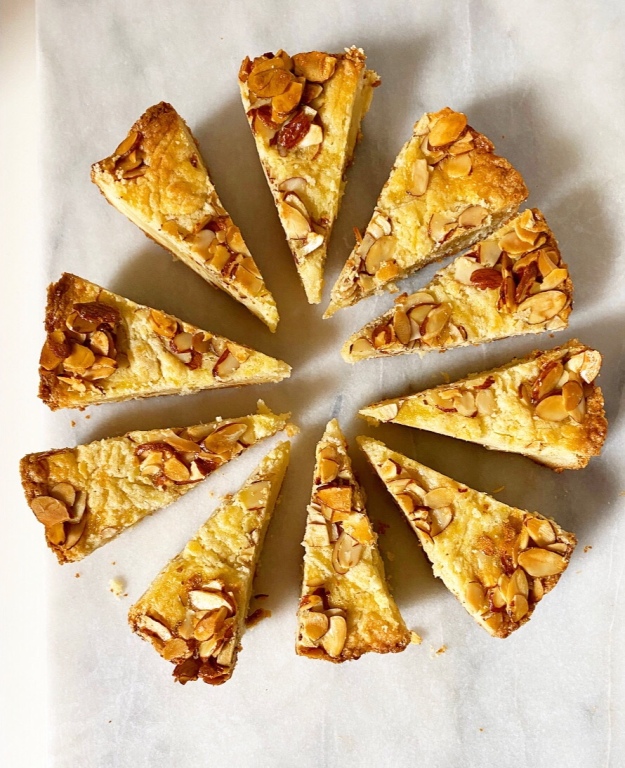
 Texture-wise, this dessert is fairly dense–more like a blondie than an American-style cake. This is because it contains no leaveners, therefore depending on the egg and the air that’s whipped into the butter for its minimal lift. If you want a cakier almond cake, try this one.
 I, however, am more than content with a wedge of this buttery-edged, soft-centered almond cake (or whatever) anytime, anywhere, especially right-this-minute as I simultaneously write a blog post and watch Netflix. Yep.
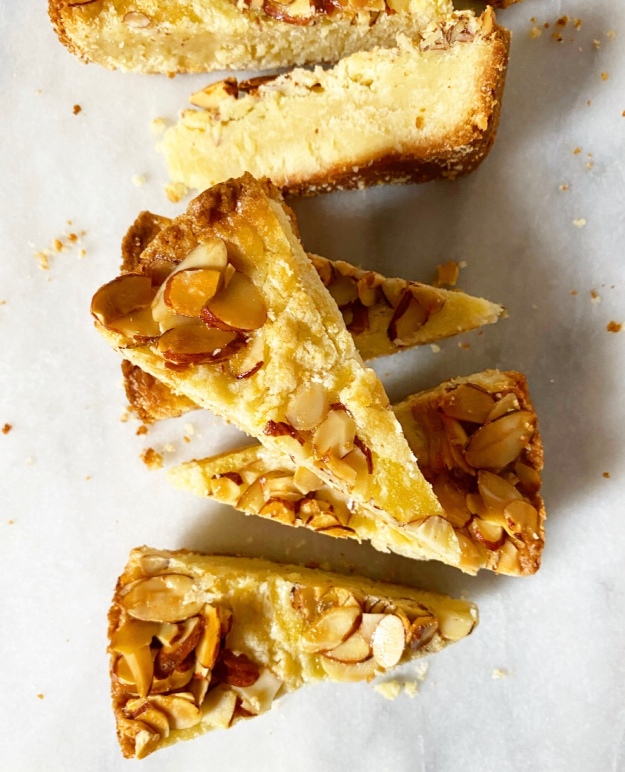
Almond Boterkoek {Dutch Butter Cake}
makes 1 8-inch cake, about 12 servings
1 large egg, room temperature
1 teaspoon water (not hot)
3/4 cup + 2 tablespoons granulated sugar
4 ounces almond paste, pinched into small pieces
1 cup (2 sticks) unsalted butter, softened to room temperature
1 teaspoon pure vanilla extract
1/4-1/2 teaspoon pure almond extract, according to your preference
1 3/4 cup all-purpose flour
1/4 teaspoon Kosher or sea salt
Topping:
1 large egg white, room temperature
1 tablespoon granulated sugar
1 cup sliced almonds
Preheat oven to 350F. Grease an 8-inch pie plate with butter. Set aside.
Crack egg into a small bowl and beat with a fork. Use a 1 teaspoon measuring spoon to remove 1 teaspoon of the egg to a separate bowl. Whisk 1 teaspoon water with the 1 teaspoon of egg to make an egg wash. Set both bowls aside.
In a medium mixing bowl, an electric mixer (or wooden spoon and a lot of elbow grease) to beat sugar and almond paste together until the largest pieces are the size of small peas. Add butter and beat until light and fluffy. Add the larger amount of egg, vanilla and almond extracts, and beat to combine. Add flour and salt and mix until a thick dough forms.
Press dough into prepared pan. Brush egg wash over the top. Use the tines of a fork or edge of a knife to create a crosshatch pattern on top.
Make topping. In a small bowl, use a fork to whisk together egg white and sugar. Stir in almonds. Arrange topping on top of cake as desired.
Bake cake 35-40 minutes, or until golden and glossy on top. Cake will slice cleanly when completely cooled, but may be slices and served warm from the pan after 45 minutes.
Leftovers will keep covered at room temperature for up to 2 days, or in the refrigerator for up to 4. Individual slices may be double-wrapped in plastic wrap and frozen for up to 3 months.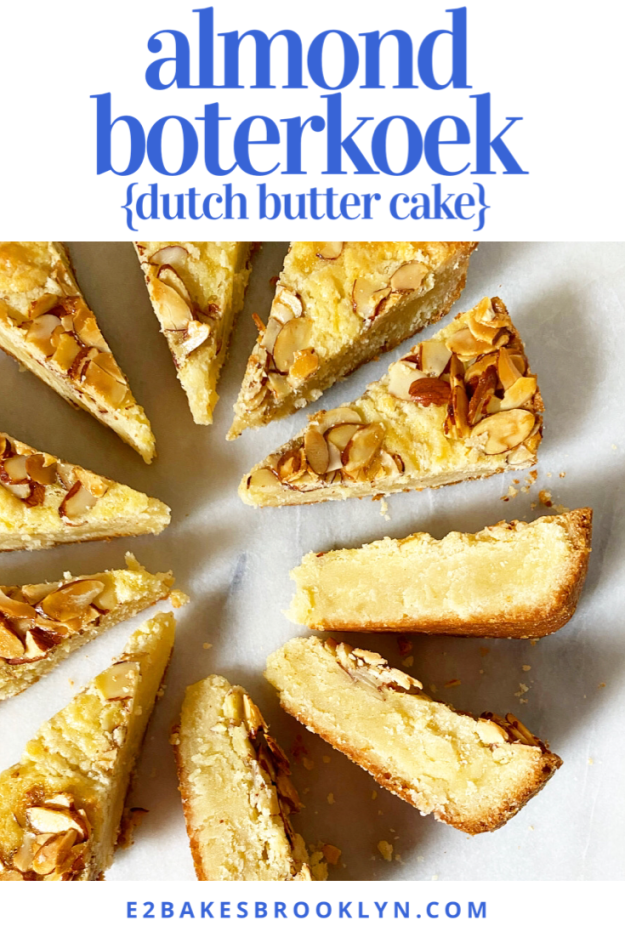

 I try very hard to keep things simple around here. Recipes, techniques, flavors, everything. That doesn’t mean super easy or uncomplicated—just not over-complicated. No more steps or ingredients than absolutely necessary, you know?
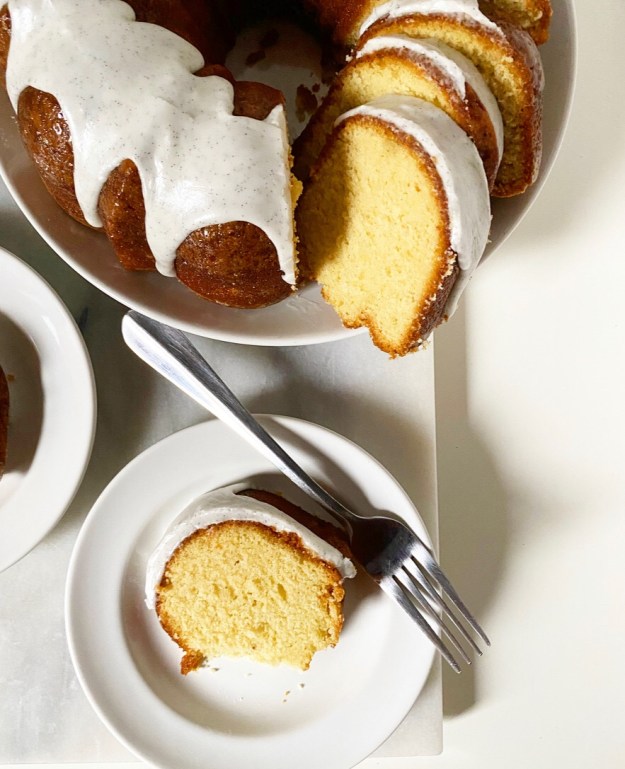
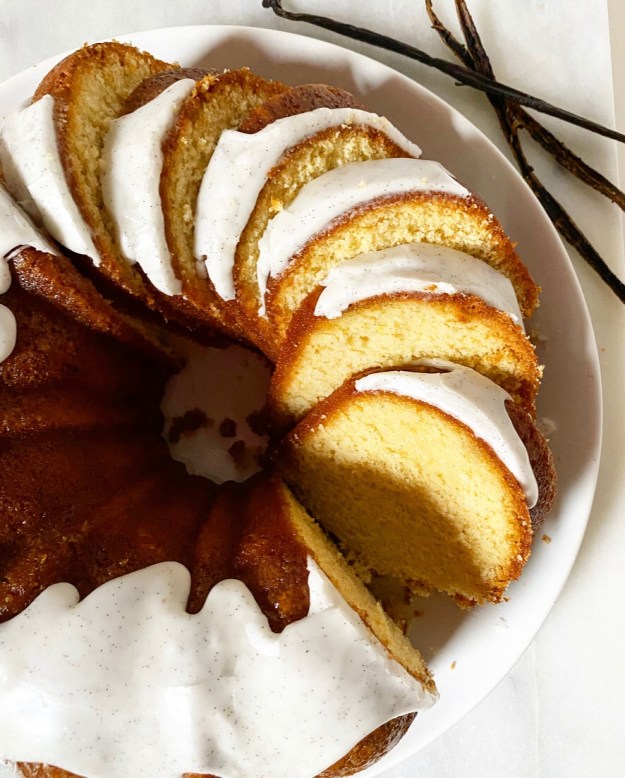 That said, sometimes a simple recipe like this Vanilla Bean Bundt requires several tries, each with a different technique or ingredient, all resulting in…excellent cakes. Really.
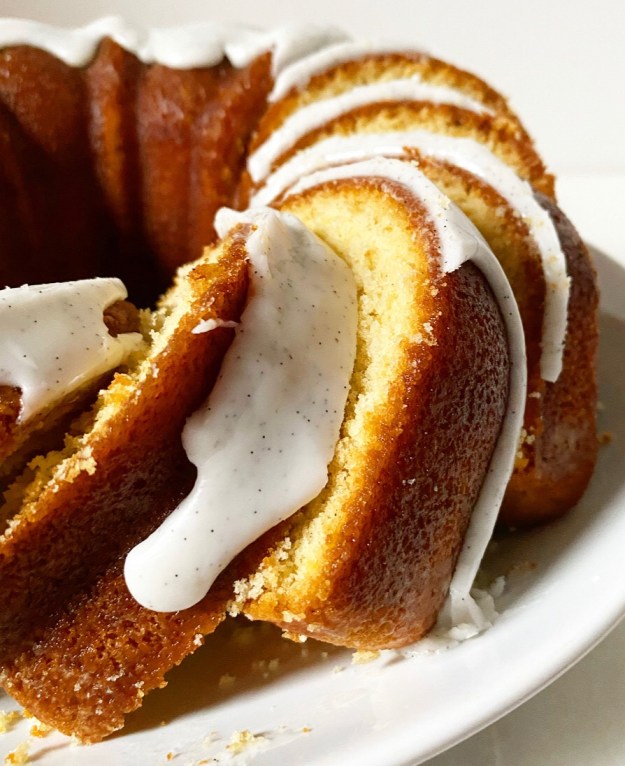 Each one began with the same basic recipe that I’ve used for my
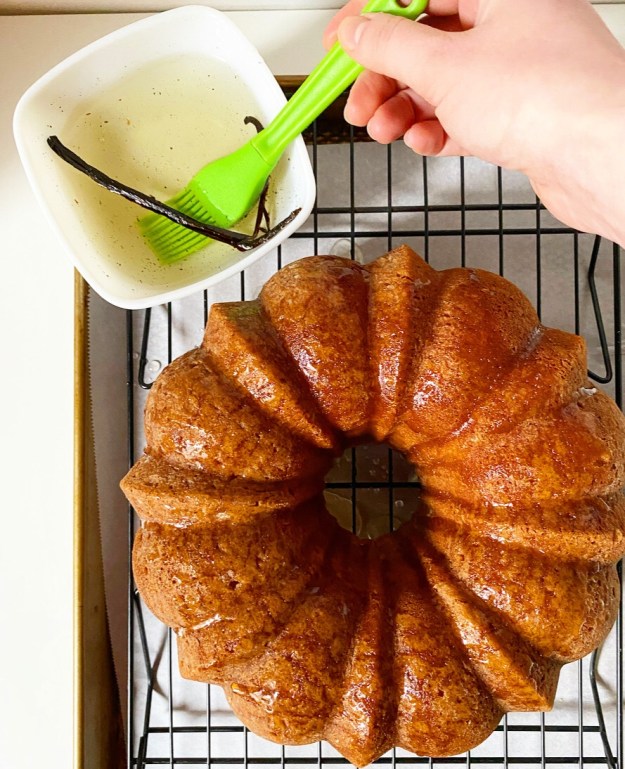
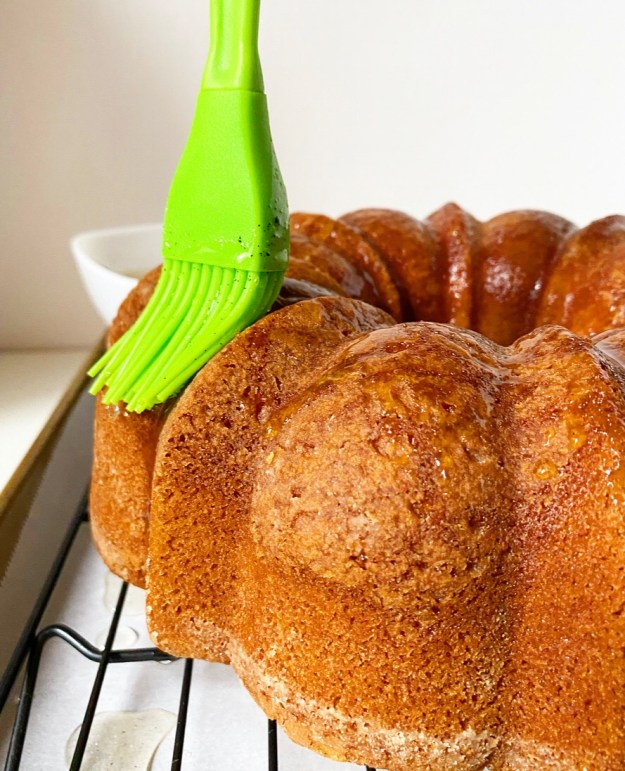
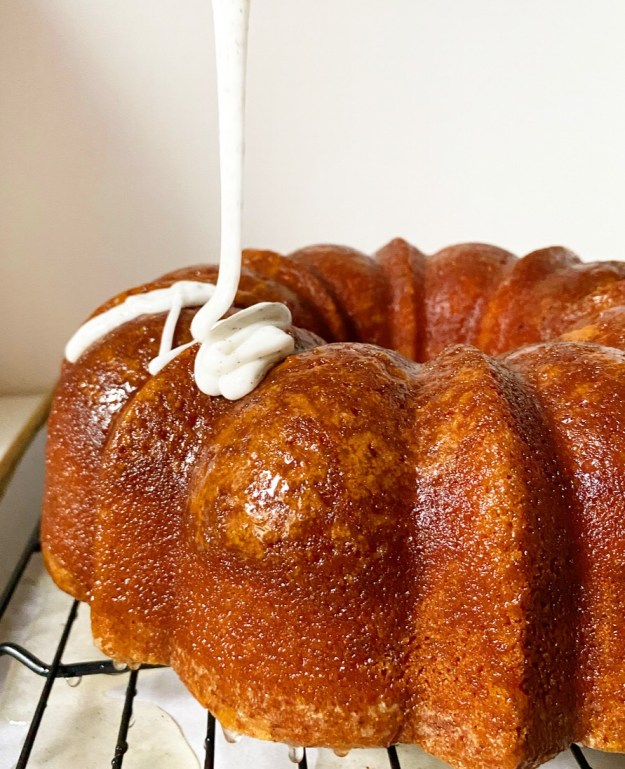
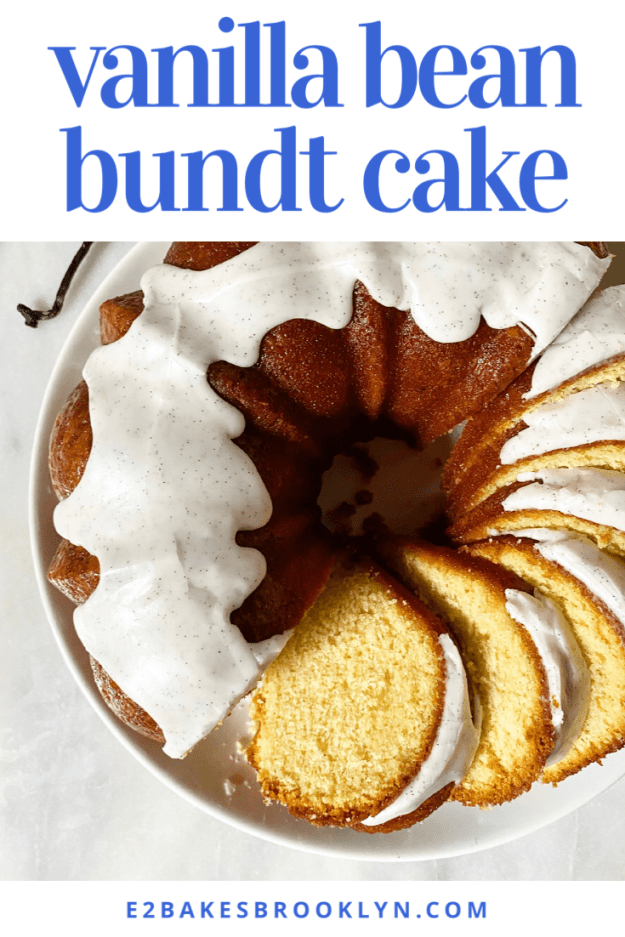
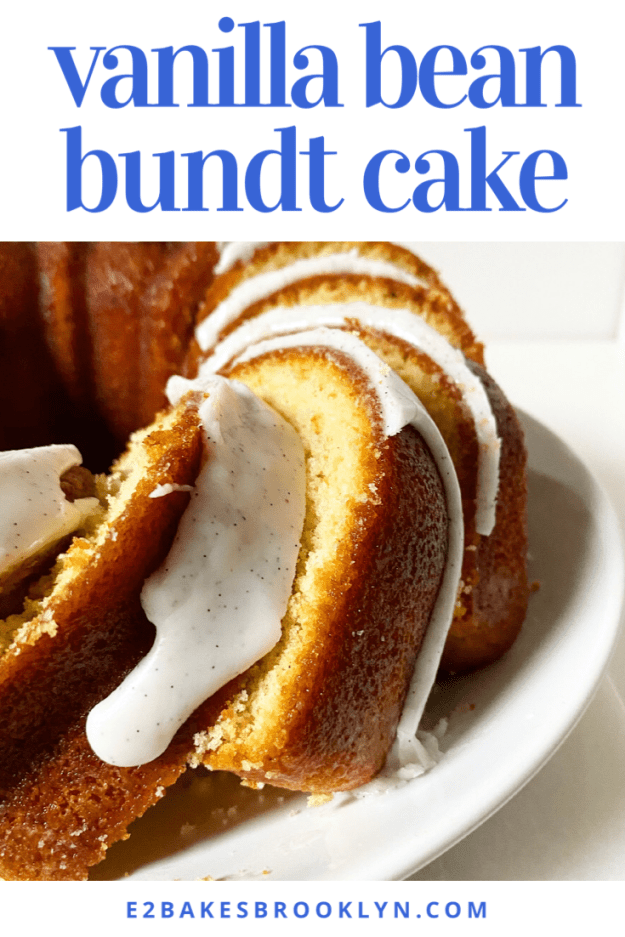
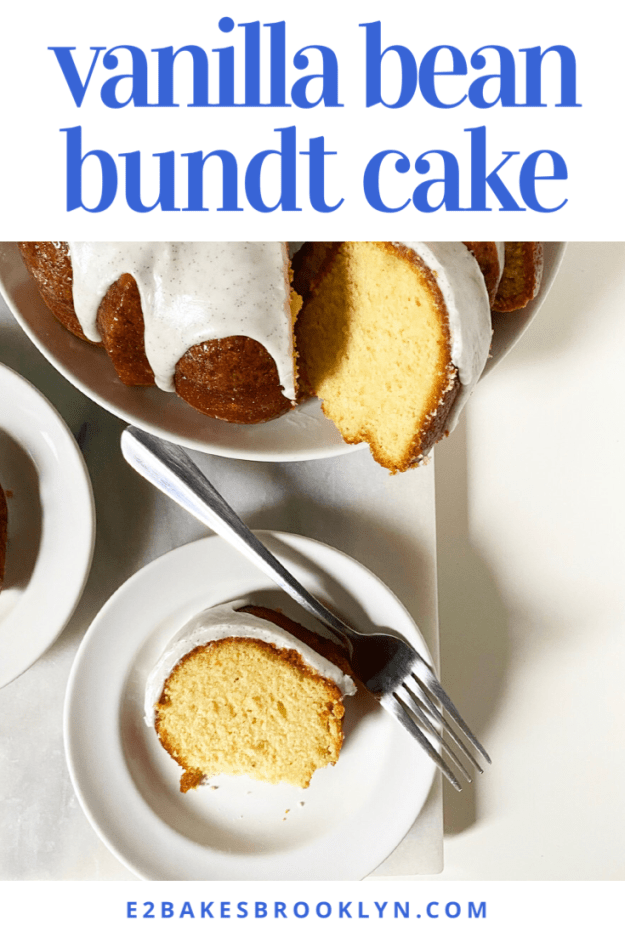
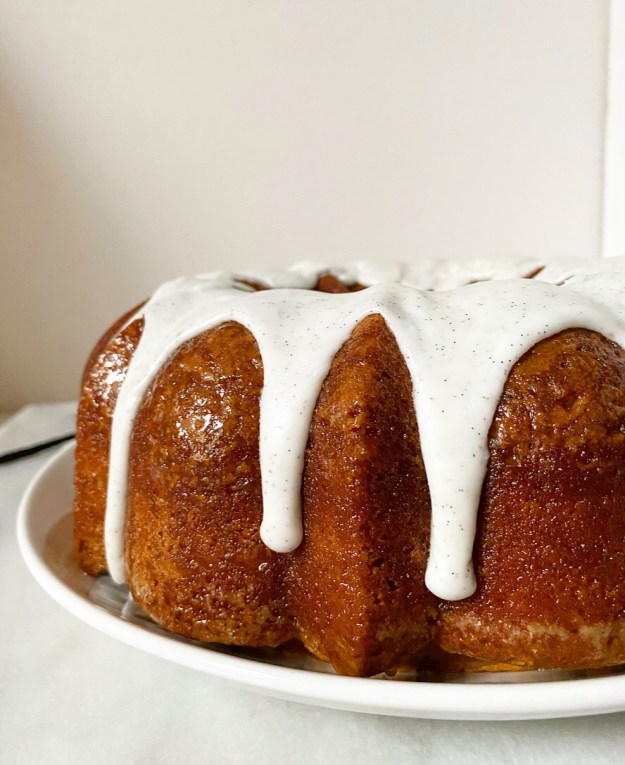 The cake I love the most is #1, so it’s the one I’ve posted below. The seeds of one vanilla bean are whirled into the batter, and the leftover pod is used to make a syrup that is brushed onto the baked cake before icing is poured over the top. The syrup is the element that makes all the difference here—it keeps the cake from being even the slightest bit crumbly, gives it a subtle glossiness, and makes it so that you can smell its dreamy vanilla aroma within a 6 foot radius. Yes, really!
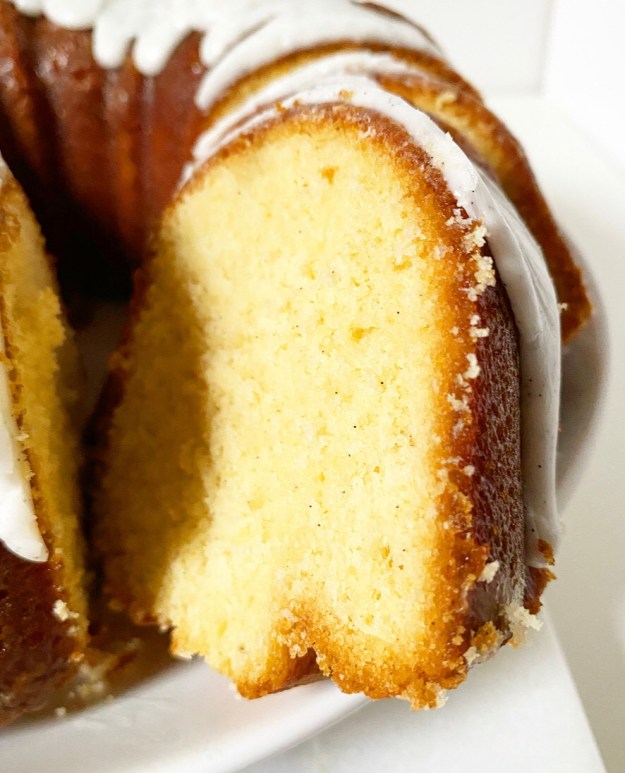 I also like that the pods in the recipe don’t go to waste. I’ve seen other bakers suggest using empty vanilla pods to make vanilla sugar, but how much vanilla sugar does anyone actually use? You could use them to make extract, I suppose, but that takes weeks or months. This way at least one of the pods is used directly in the cake. As for the second, let me know what you do with leftover vanilla pods. I’m interested!
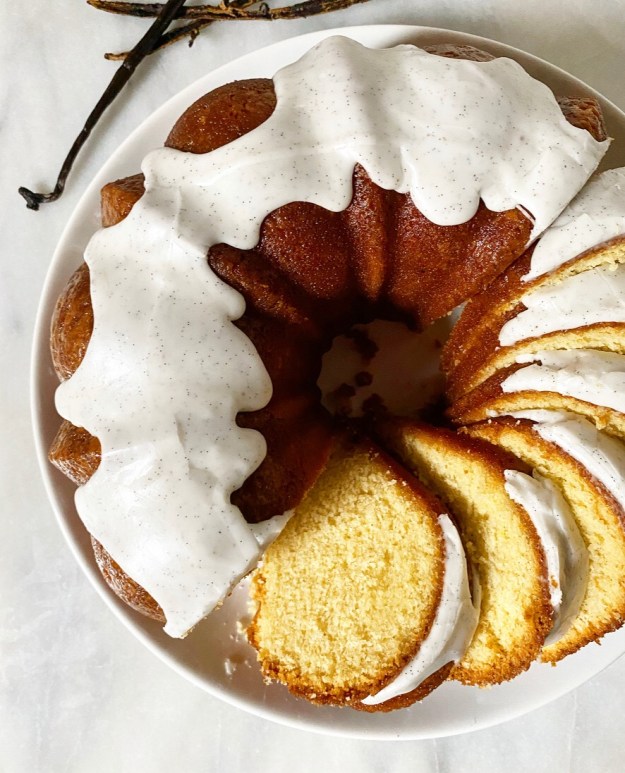 For those of you wondering about the cost of this whole operation, I won’t lie to you: vanilla bean anything is pricey. I buy my vanilla beans at Costco and Sahadi’s, and they run about $6 apiece. You could use two tablespoons of vanilla bean paste (1 per pod) instead, but the paste is about $35 upfront. A single jar contains enough to make this cake four times though, so it’s worth the investment. Oh, and this is a warning that the dark color of the vanilla bean paste will affect the aesthetic outcome of the cake, but only slightly. It will still be absurdly delicious, as all vanilla bean things are.
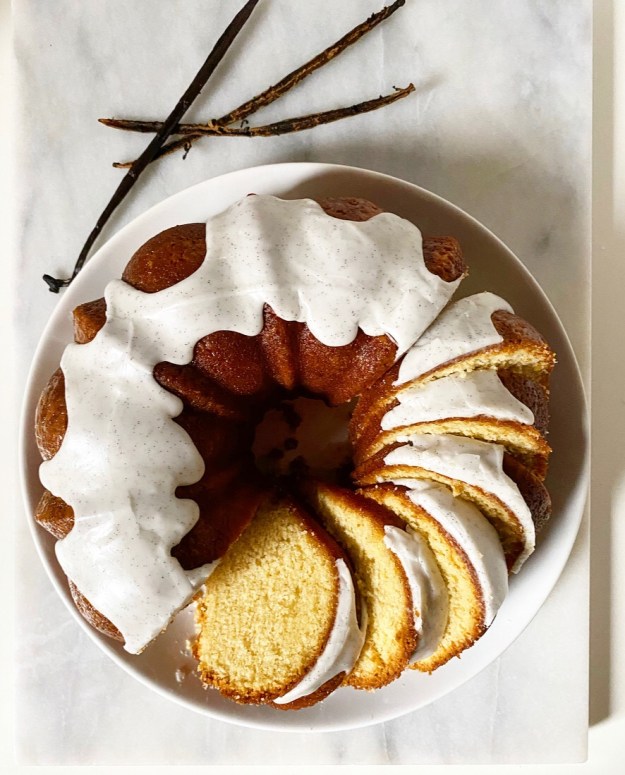 Keep it simple, y’all.
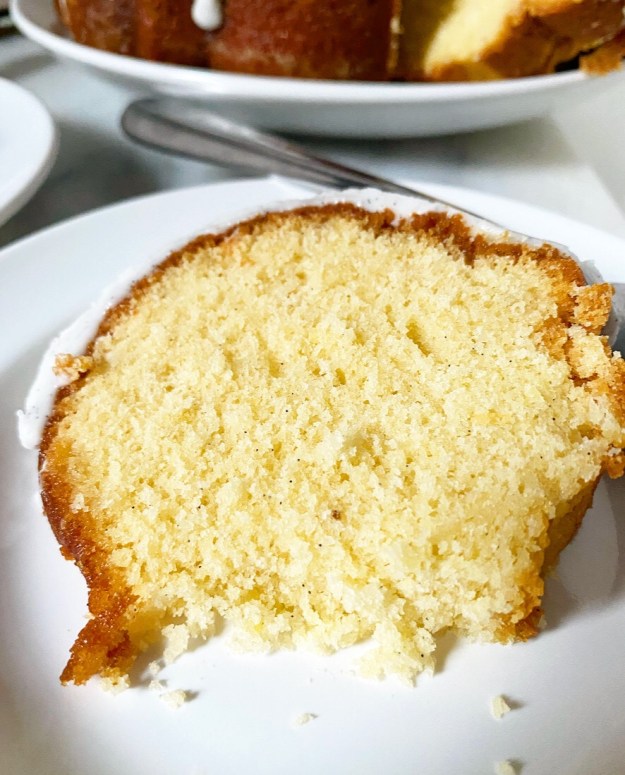
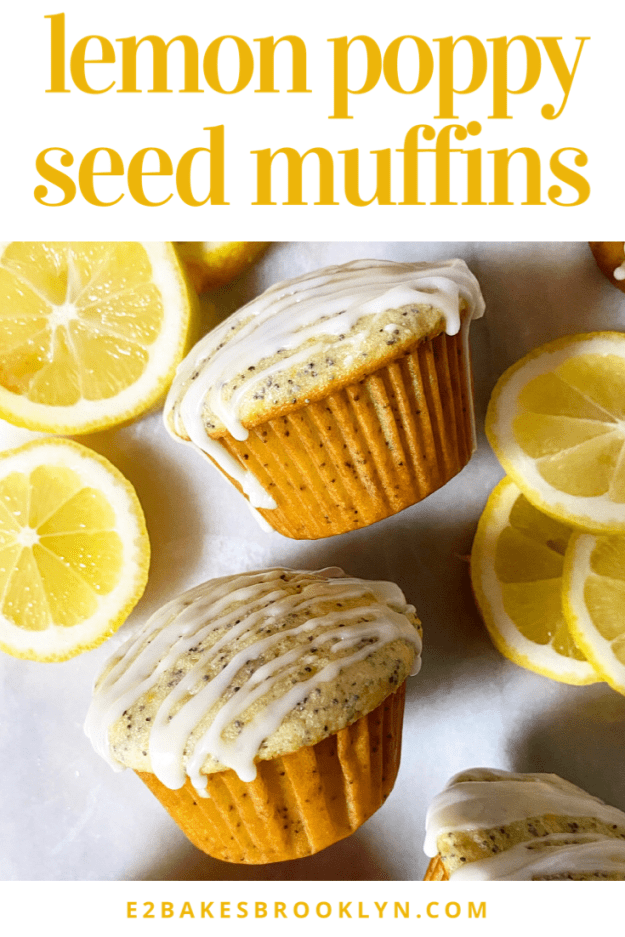
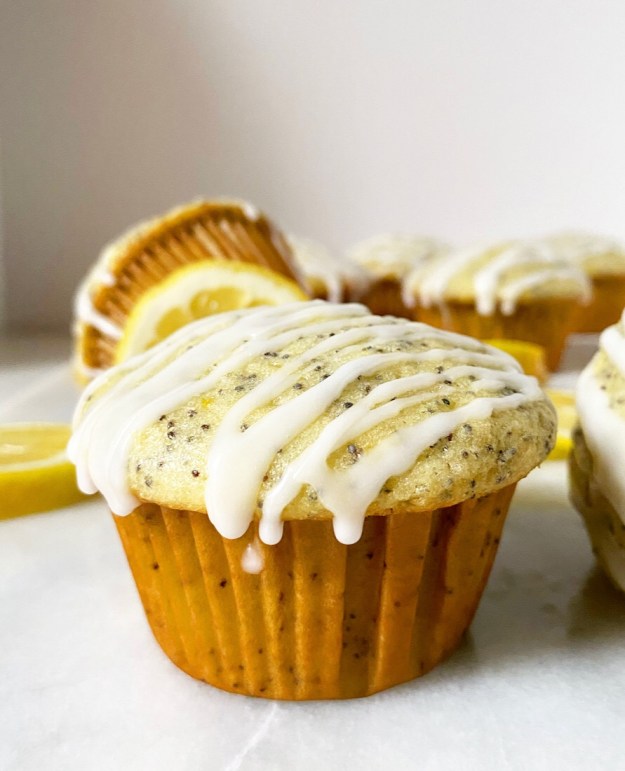 It’s been gloomy out lately, but I’m keeping it sunny in my kitchen with these classic Lemon Poppy Seed Muffins.
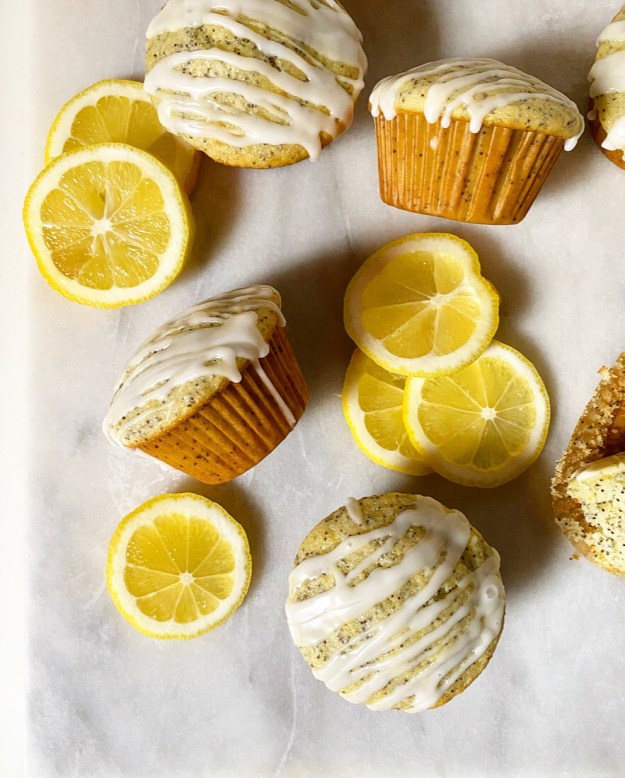 They’ve got loads of bright lemon flavor from fresh zest and juice, a little crunchy texture from poppy seeds, and they stay moist for days thanks to ingredients like eggs, oil and whole milk.
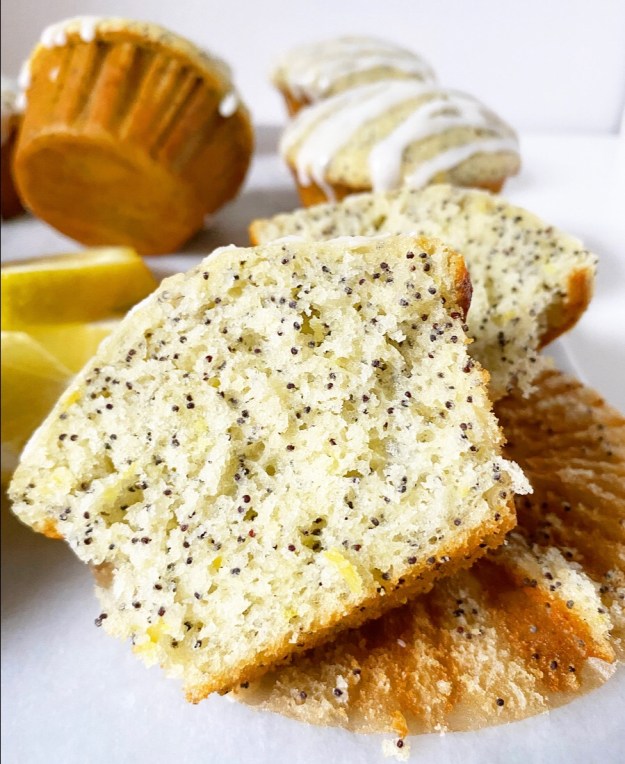 These muffins come together quickly and easily and don’t require a mixer. In fact, a mixer would be a detriment here. The secret to tender Lemon Poppy Seed Muffins (and most muffins and quick breads) is to mix them as little as possible. You can stir the wet and dry ingredients separately as much as you like, but once they’re in the same bowl, you want to stir just 15 or 20 times.
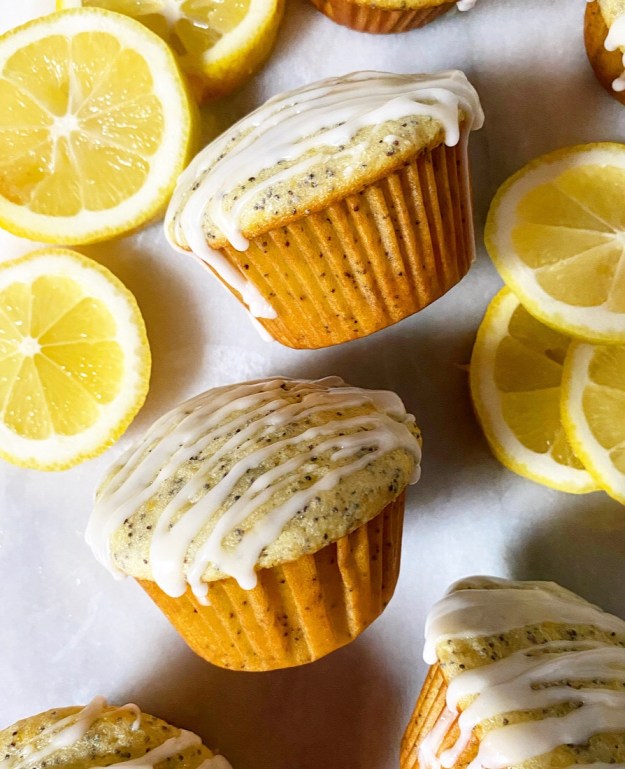 The batter is divided into 12 muffin cups before being baked at 400F for five minutes, and then 350F for fifteen more. That initial blast of heat helps them to dome, while the remaining bake time ensures they cook evenly.
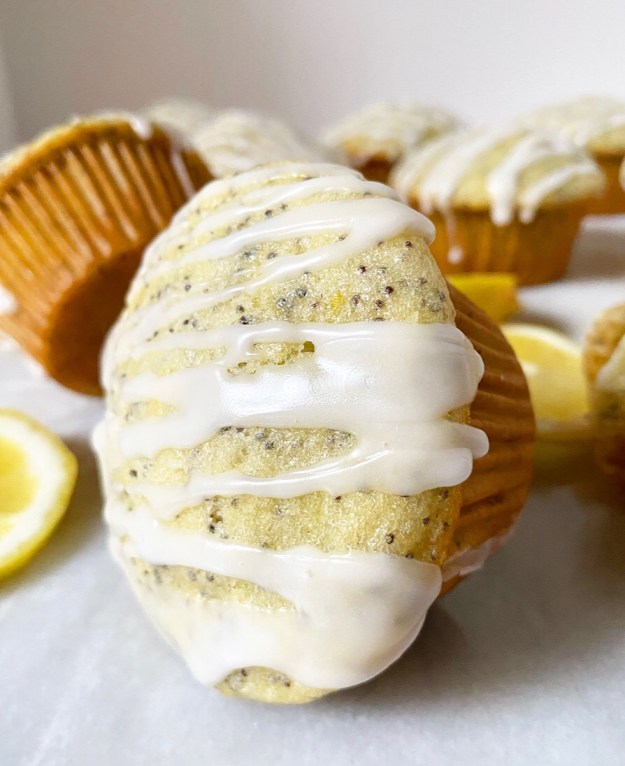 Once baked, let your muffins cool a few minutes before drizzling on a quick lemon glaze. You could skip it in the name of breakfast or health, but…why?
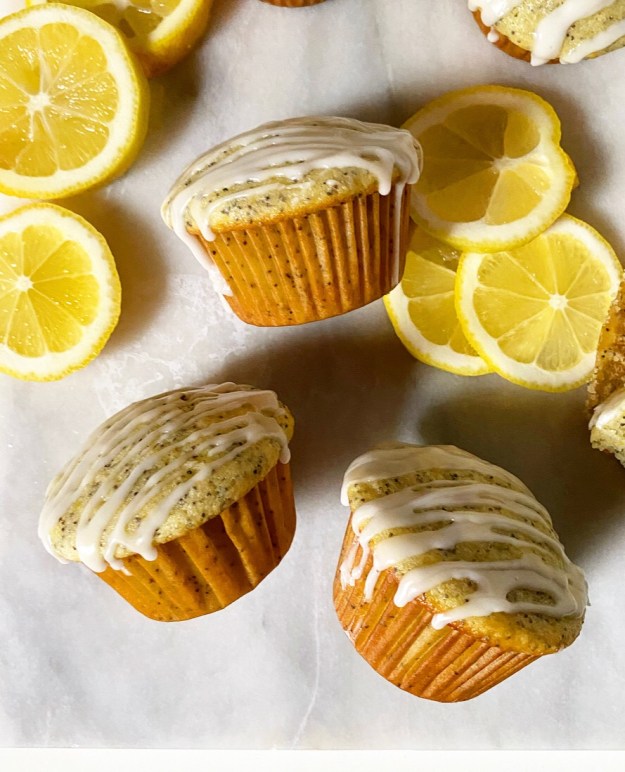 Serve your Lemon Poppy Seed Muffins up with coffee or tea or whatever makes you happy. Good luck resisting a second. I’ve been known to eat three or four of these throughout the day, which seems like a lot, but can you blame me?
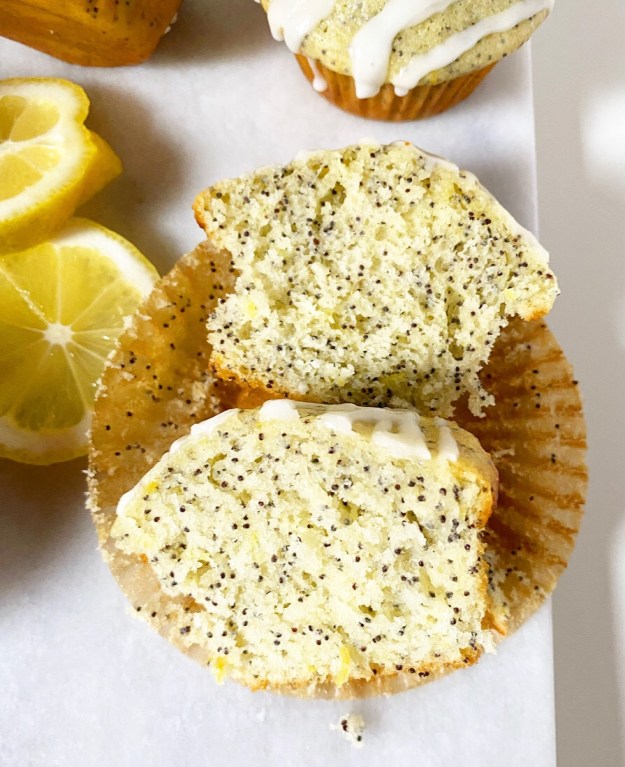

 Happy Valentine’s Day ❤ If you are looking for holiday-appropriate treats, click
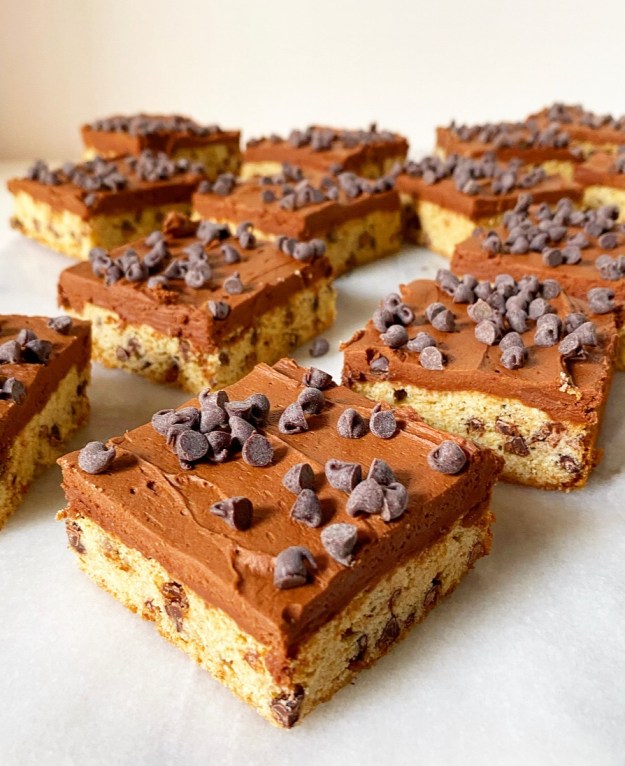
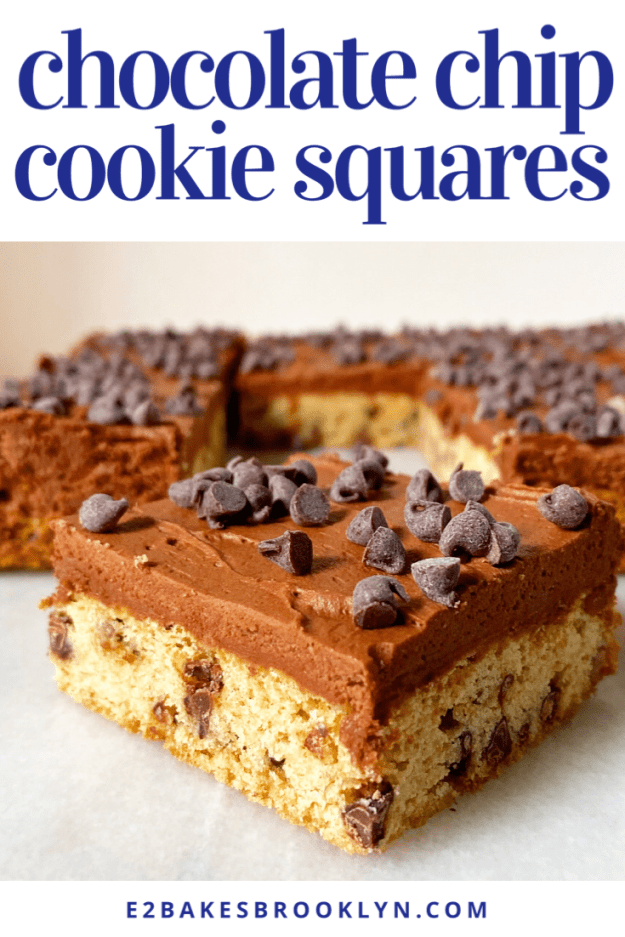
 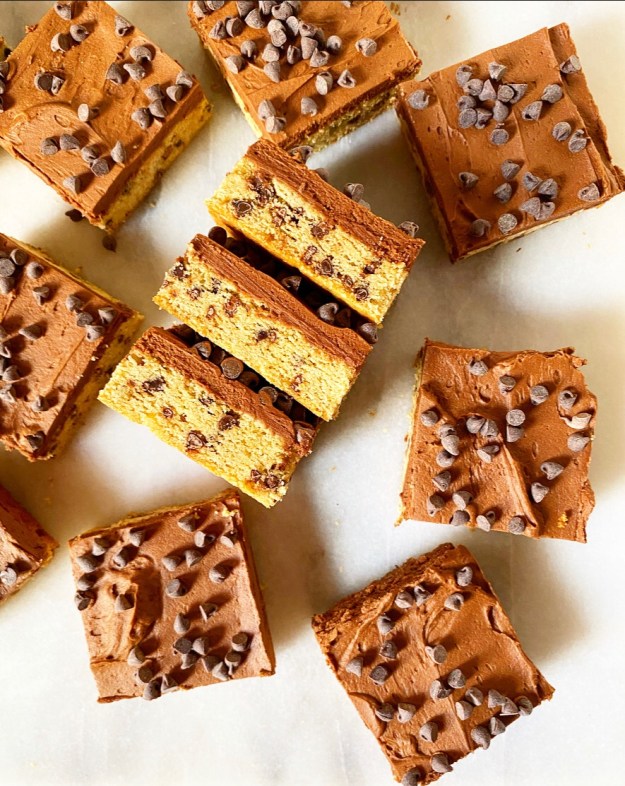 If, however, you are over the heart-shaped baked goods—or, more likely, are looking for something to bake after Valentine’s Day is over—look no further than these very good, anything but boring, extremely square Chocolate Chip Cookie Squares.
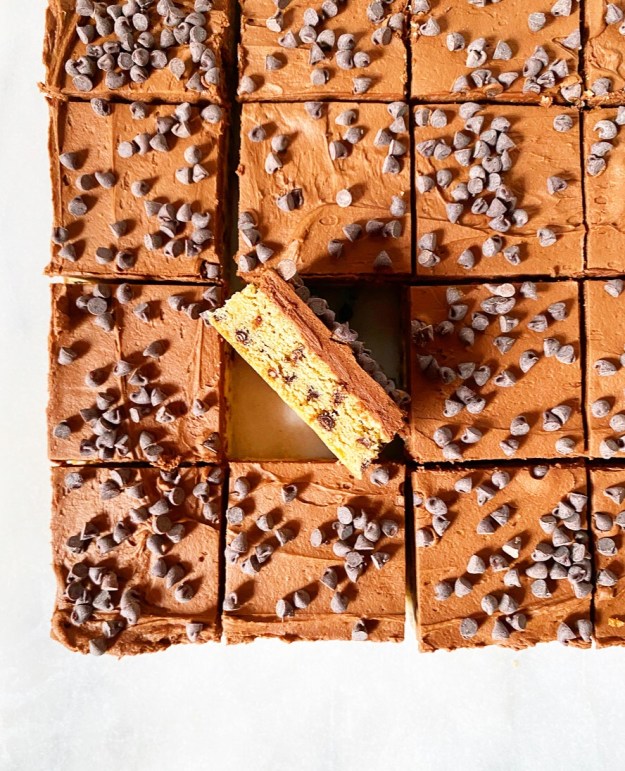 We’re talking about a thick, soft layer of cookie studded with miniature chocolate chips, topped with a blanket of chocolate buttercream, and scattered with more miniature chocolate chips. Always more chocolate chips, am I right?!
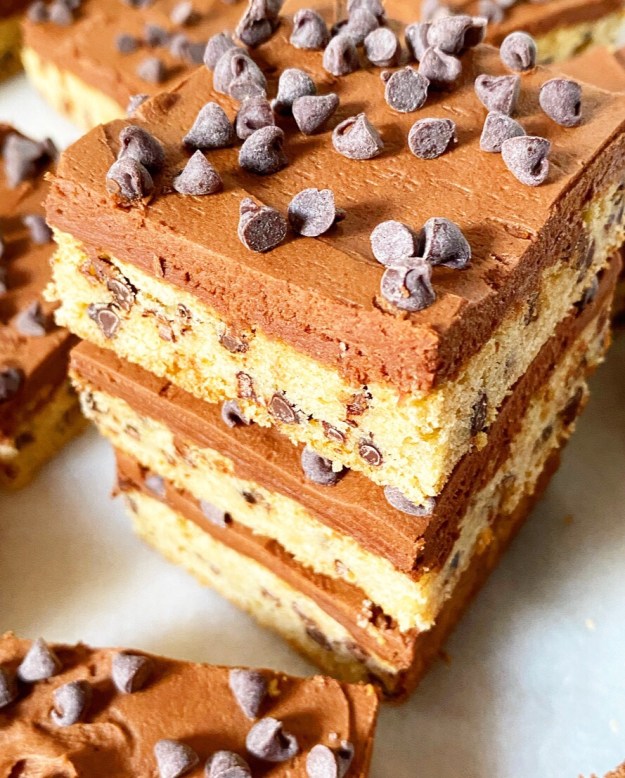 These sweet squares are perfect for a multitude of occasions. They’re one of those recipes to keep in your back pocket for a game or movie night, class party, office break room pick-me-up, friend who needs a treat, picnic, casual birthday #stickacandleinit, or just…Saturday.
 And while they are not red, strawberry-flavored, rolled into truffles or cut into hearts, I know I’d be hard-pressed to pass one up on this fine, frigid Friday Valentine’s Day.


 With all the
 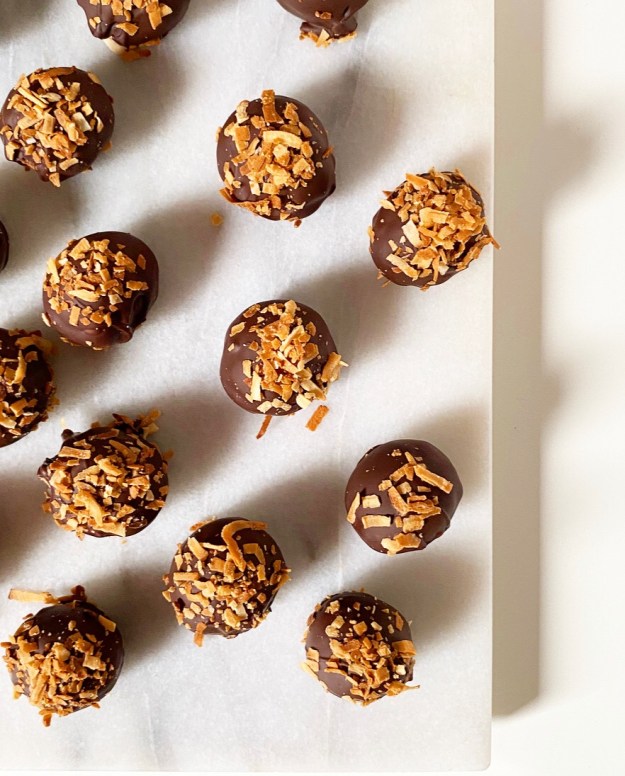 I spent a good chunk of January working on a coconut cookie for the blog, but the recipe’s just not quite “there.” I was a little bummed after round 4, realizing that I was going to have to let the recipe come to me rather than forcing it (baking gets spiritual around these parts). In the meantime though, I had three bags of sweetened flaked coconut taking up space in my kitchen. I realize that bags of coconut don’t have souls, but I swear they were taunting me.
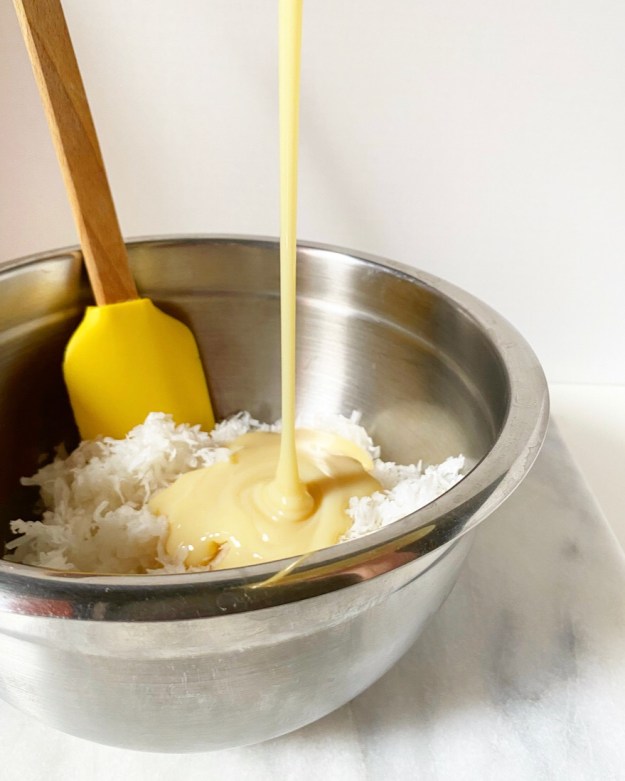


 And so, I threw the contents of one in a bowl with a cup of sweetened condensed milk (a la
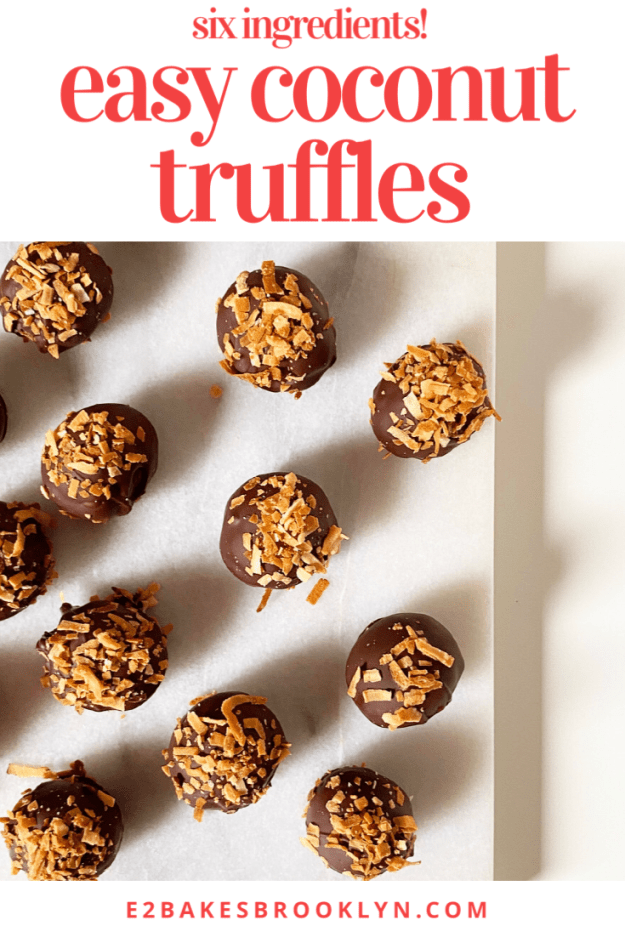
 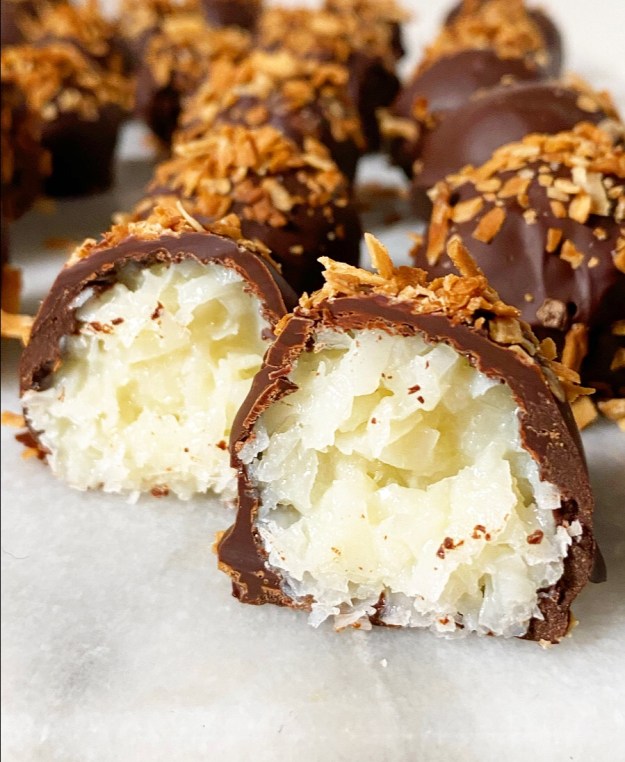 Easy Coconut Truffles are way better than any candy you’ll find in a heart-shaped box, and super fun to make at home. They require a grand total of six ingredients (!) and are chock-full of coconut flavor thanks to the creamy filling and toasty garnish. And even though they’re a little imperfect, they’re completely wonderful.