After nailing the perfect snappy texture in last week’s Vegan, Gluten-Free Gingerbread Cookies, I couldn’t resist taking that formula and making it into linzer cookies.
Traditional linzer cookies are made from a dough that isn’t much more than a sugar cookie with a smattering of ground nuts tossed in for depth and tenderness. My vegan, gluten-free cookie formula already gets all its structure from almonds, but I still found a way to make the final product uniquely linzery. Linzerian? Linzeresque? Anyway…
The gist is that I removed the dark molasses and spices from the dough, lightening the flavor profile with maple syrup and a small, but effective amount of toasted ground hazelnuts. If you can’t get your hands on hazelnuts, pecans will work just as well (plus you won’t have to peel them).
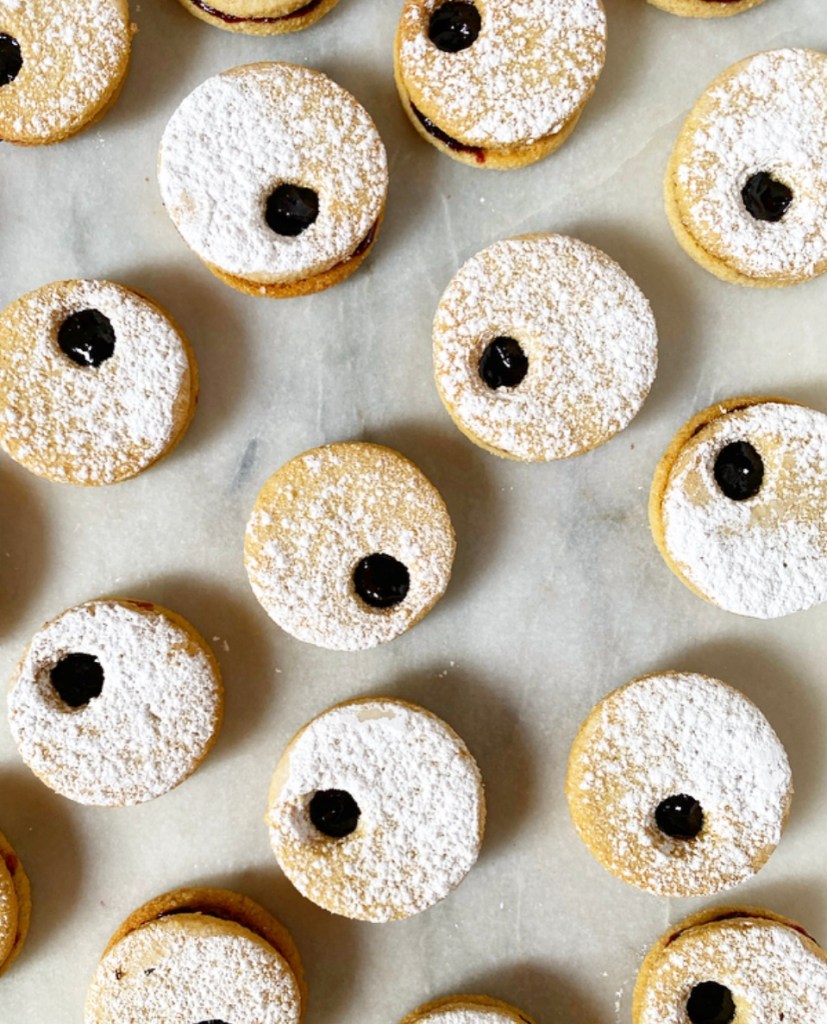
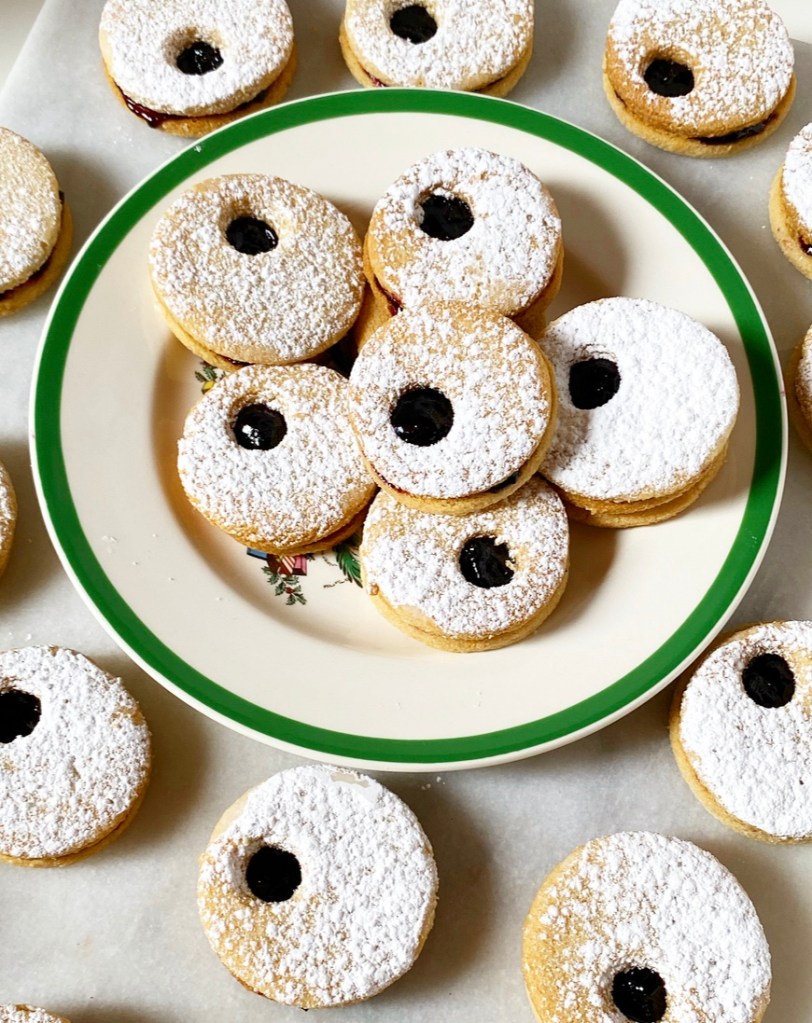
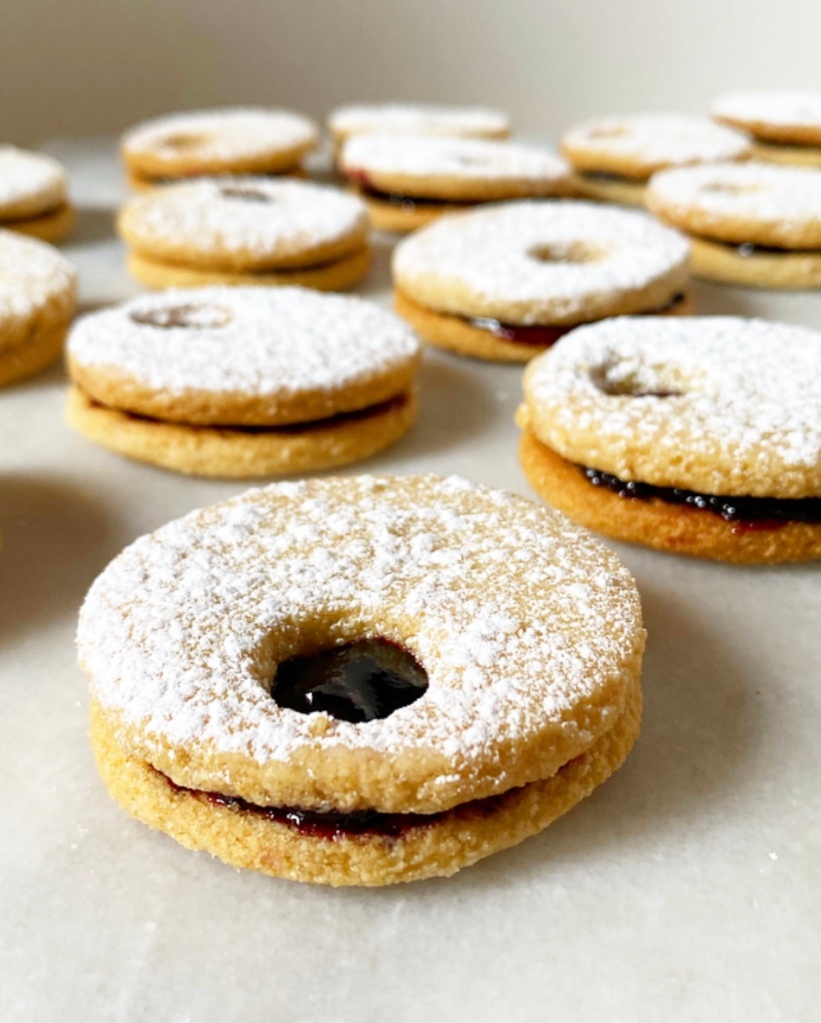
This dough requires a short chill before the usual rolling, cutting and baking. Don’t forget to stamp out a little window in half your cookies for that signature linzer cookie look!

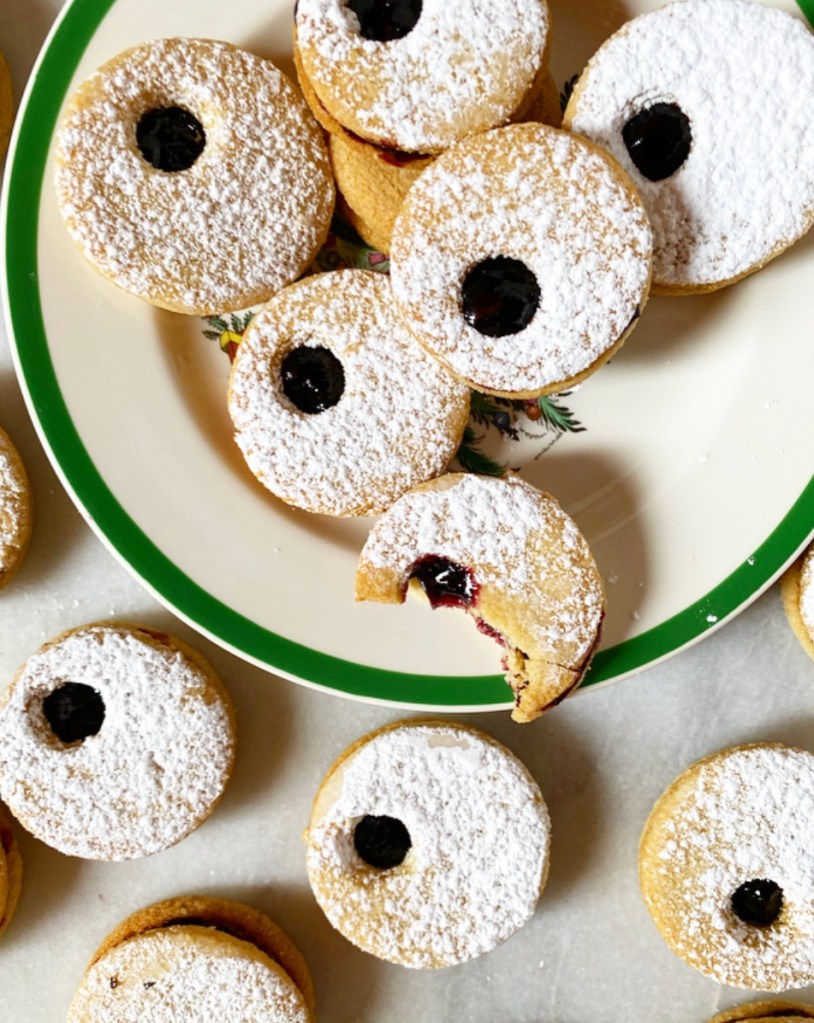
As far as filling goes, you can use any spread you like, but jam is traditional. I’m not much of a jam person, but I had a jar of homemade blueberry jam from my friend Suzette up in Maine, so I used that. Raspberry and strawberry would give festive Christmas red vibes, but I think orange marmalade might be absolute magic paired with the nutty cookies. I’ll have to try that another day though—for now, I’m extremely into these blue-black little picture windows and the signature flavor of my favorite place.
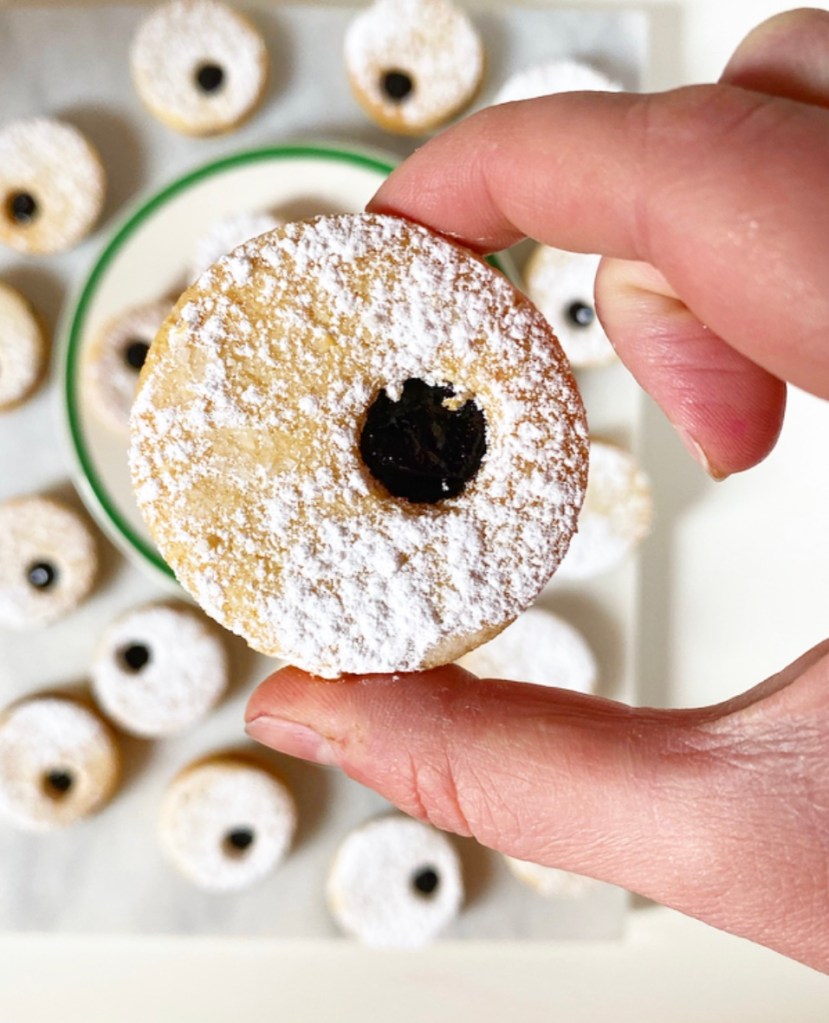
Vegan, Gluten-Free Linzer Cookies are initially very crunchy, but soften a bit as they soak up some moisture from the jam. This is not a bad thing at all, as it makes them easier to eat without getting crumbs on your shirt. That’s very important if, like me, you plan to casually snag a cookie every time you walk by the plate from now until 2022.
Vegan, Gluten-Free Linzer Cookies
makes about 2.5 dozen sandwich cookies
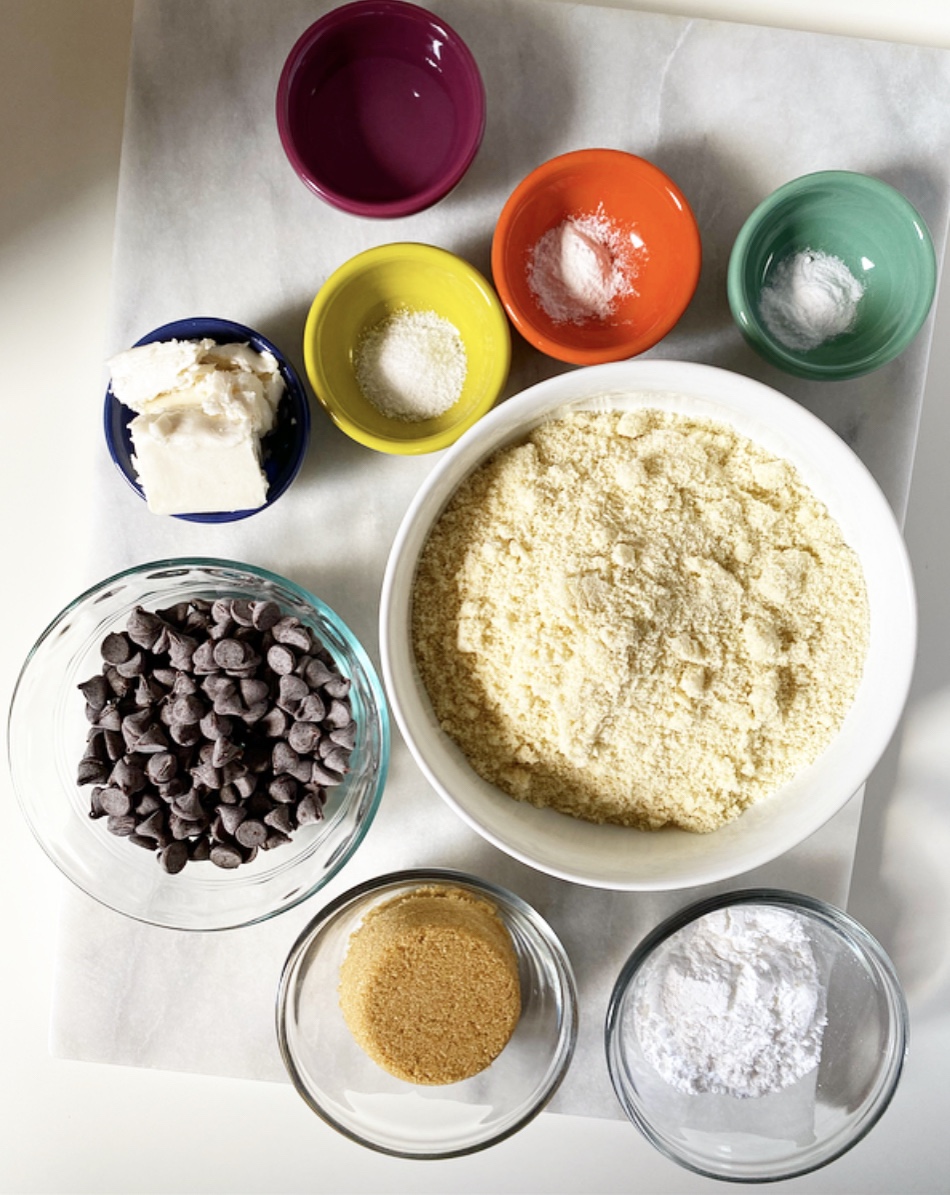
1/2 cup whole hazelnuts (or pecans)
2 1/2 cups blanched almond flour
1 teaspoon baking powder
1 teaspoon Kosher or sea salt
1/2 cup vegan butter, softened to room temperature
2/3 cup granulated sugar
1/3 cup confectioner’s sugar
2 tablespoons maple syrup or light corn syrup
2 teaspoons pure vanilla extract
For assembly:
2 tablespoons confectioner’s sugar
~3/4 cup jam or spread of choice
Special equipment:
rolling pin
2-inch cookie cutter
smaller cookie cutter (I used the large end of a piping tip)
toast and peel the hazelnuts. Place hazelnuts in a dry skillet over medium heat. Stir frequently until fragrant, 7-10 minutes. Immediately transfer hazelnuts to a clean, dry hand towel. Fold towel around the hazelnuts and then rub the towel with the palm of your hand. This will allow the hazelnut skins to loosen. This step does not have to be done perfectly. (If you are using pecans, you do not need to peel them.)
Let hazelnuts cool completely. Transfer to a food processor and pulse until they are a fine meal. Do not over-process or you’ll have hazelnut butter (delicious, but not helpful here).
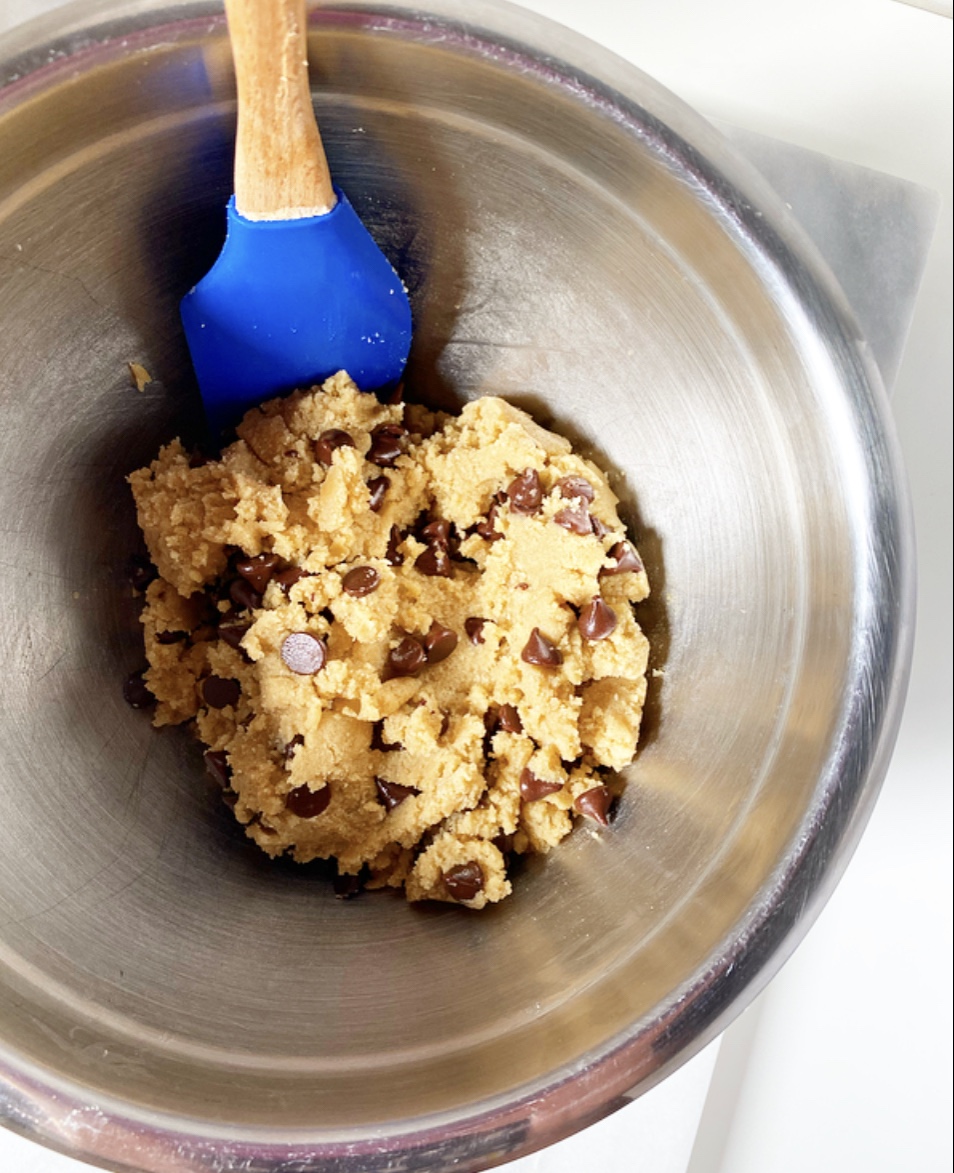
In a medium mixing bowl, whisk together ground hazelnuts, almond flour, baking powder, and salt. Set aside.
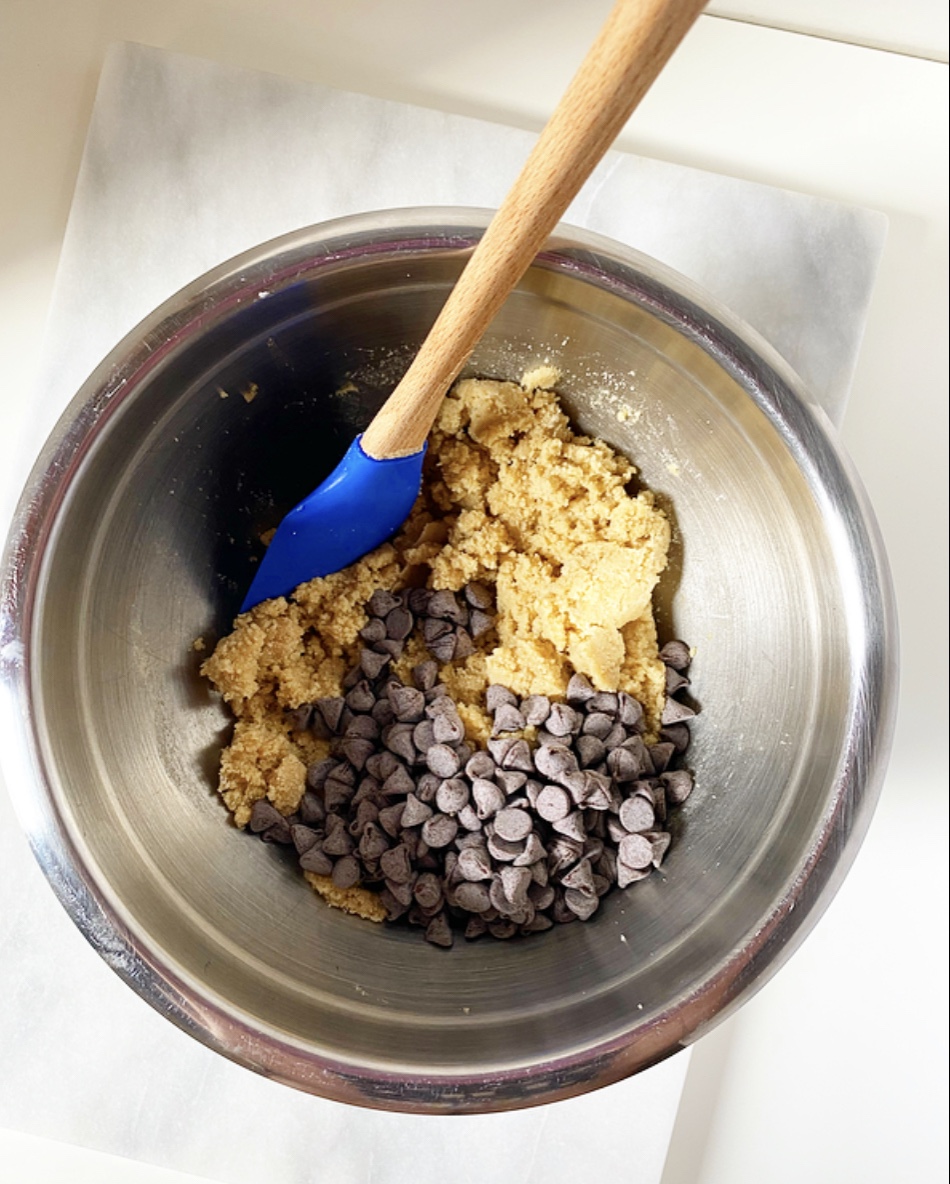
In a separate medium-large mixing bowl, use an electric mixer to beat vegan butter until fluffy (about 2 minutes). Add sugar and confectioner’s sugar and beat until fully combined (about 2 minutes). Beat in maple syrup and vanilla.
Add dry ingredients in two installments, mixing completely after each addition. Dough may look rubbly, but should hold together extremely well when pinched.
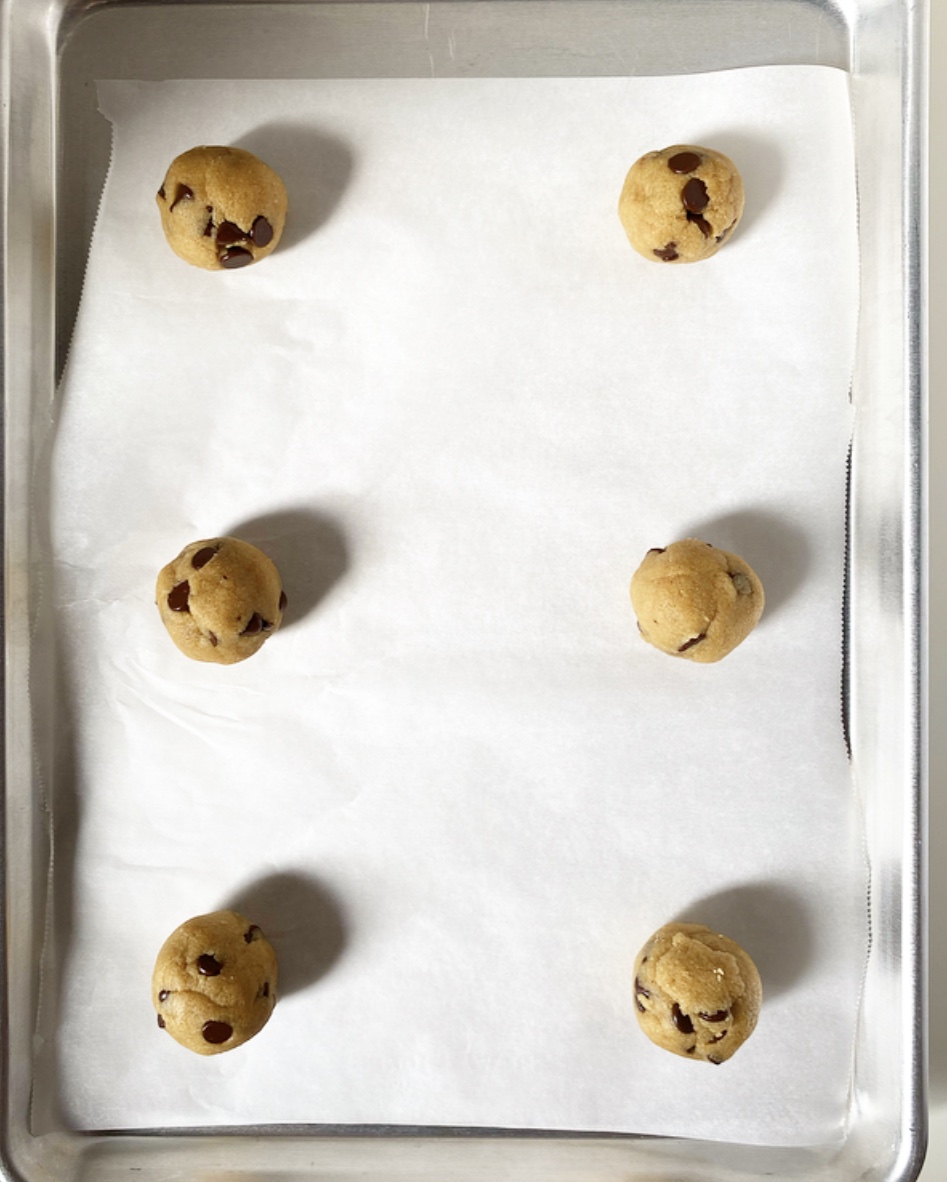
Divide dough in two. Form each half into a disk, then wrap with plastic wrap. Chill for 1 hour or up to 3 days.
Place oven racks in central positions. Preheat oven to 325F. Line two rimmed baking sheets with parchment.
Use confectioner’s sugar to dust a surface and rolling pin. Unwrap one disk of dough and place it on the surface. Use the rolling pin to roll it out to 1/8-inch thickness. A thin offset icing spatula or bench scraper (or similar) will make moving the dough much easier, as will adding more confectioner’s sugar to the surface and rolling pin.
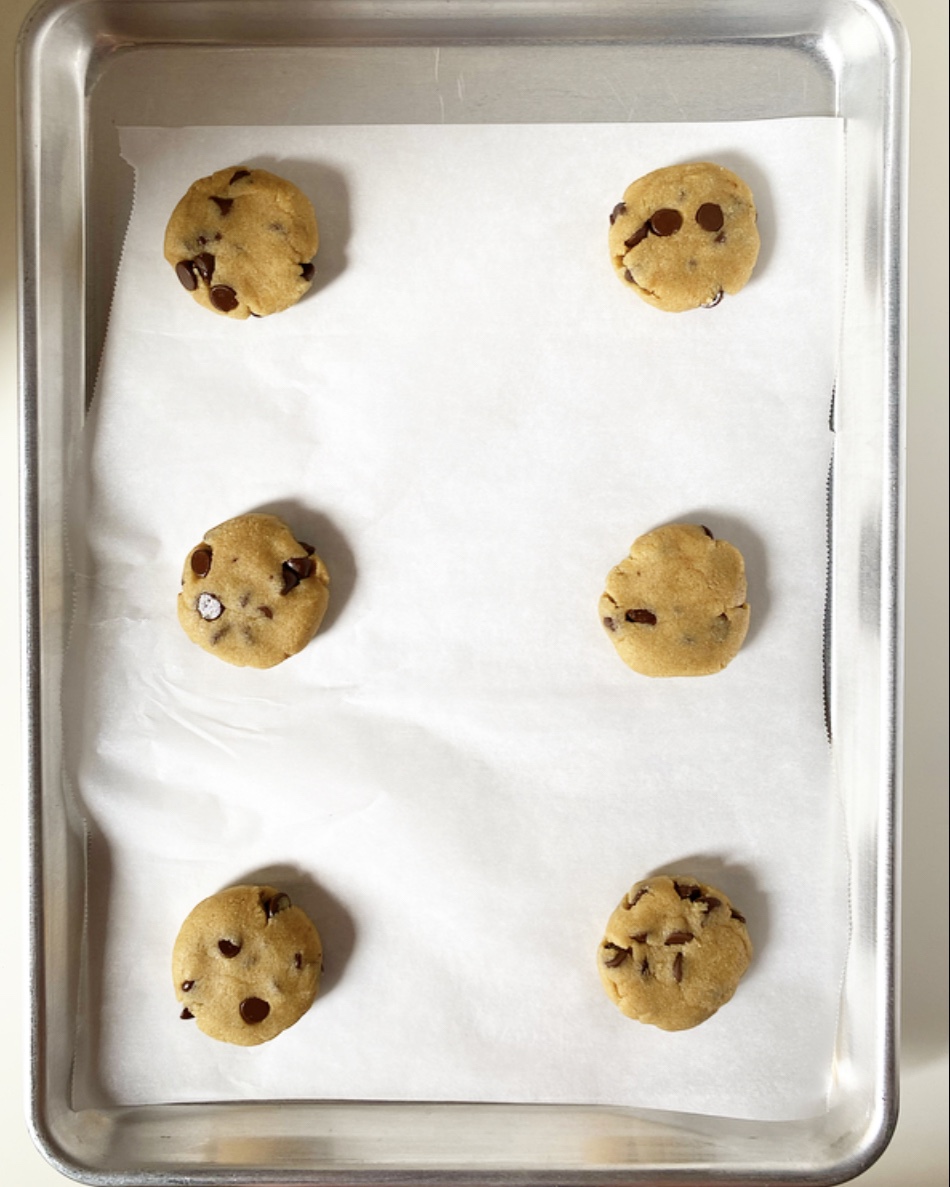
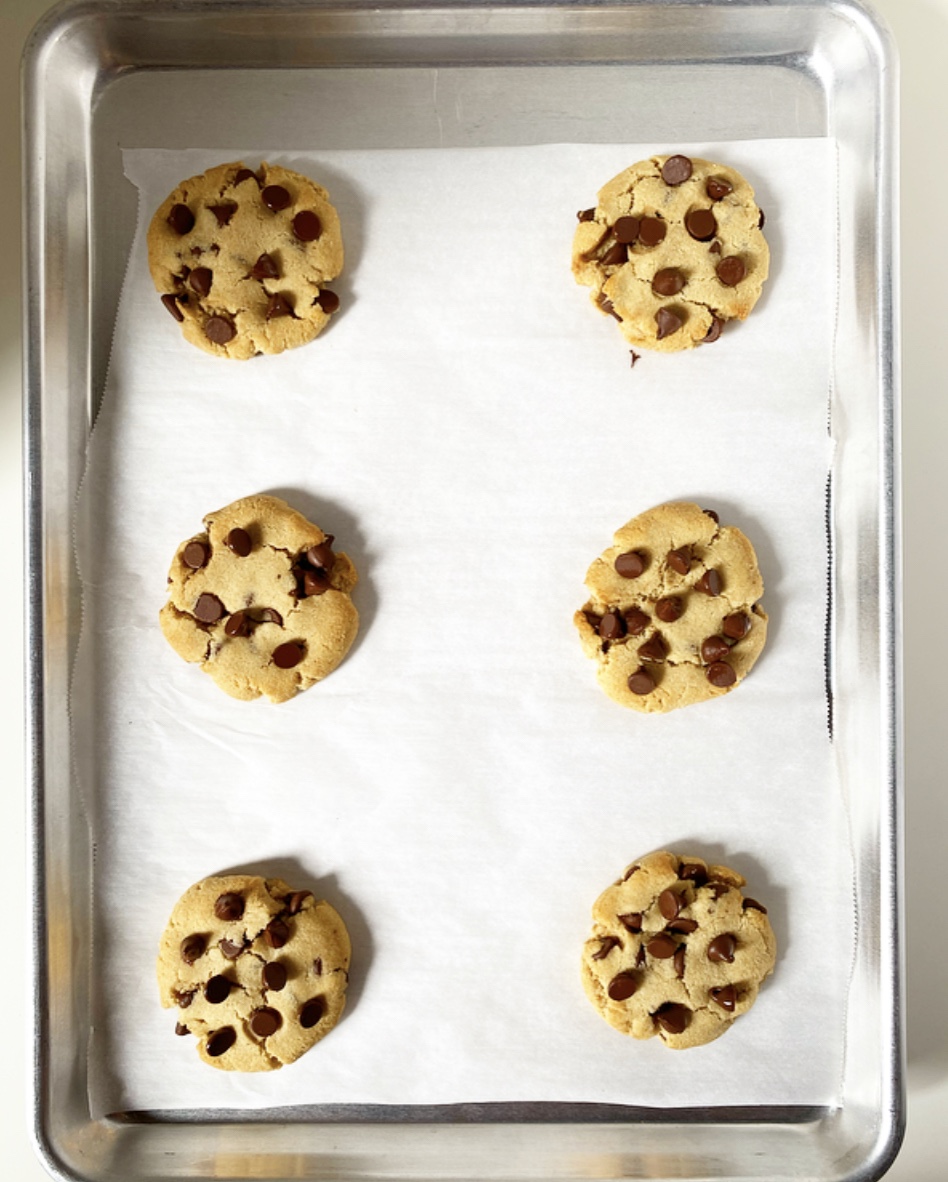
Use a 2-inch rom d cookie cutter to cut cookies, then use the icing spatula to move them to the prepared pans, keeping them 1.5 inches apart. Use a smaller cutter (I used the wide end of a piping tip) to cut windows in half your cookies—these are the tops of your linzers. Bake cookies 12-14 minutes, rotating the pans top-to-bottom and front-to-back at the 7 minute mark.
Let cookies cool 10 minutes on their pans. Use a spatula to remove them to a cooling rack to cool completely.
Repeat rolling, cutting, and baking as needed, re-rolling scraps as needed. Let cookie sheets come to room temperature between batches.
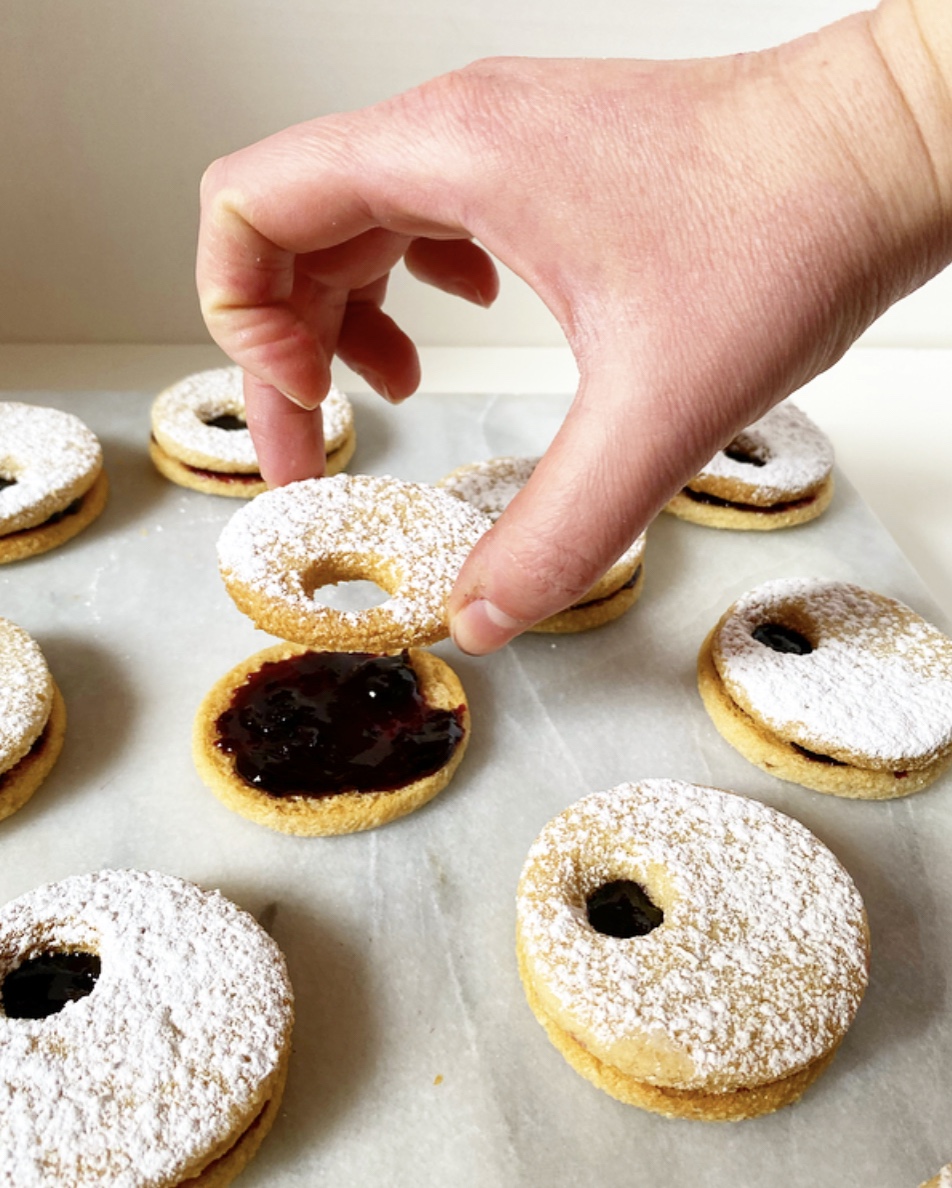
Set a cooling rack over a piece of parchment. Once all cookies are baked and cooled, set the cookies with the centers cut out on a prepared rack. Sift confectioners sugar over the tops.
Spread each whole cookie with jam (amount is based on your preference). Carefully sandwich cookies together. Serve.
Cookies will keep in an airtight container at room temperature for up to 3 days, or in the refrigerator for up to a week. Place wax paper between layers for best storage. Cookies will soften a bit over time.