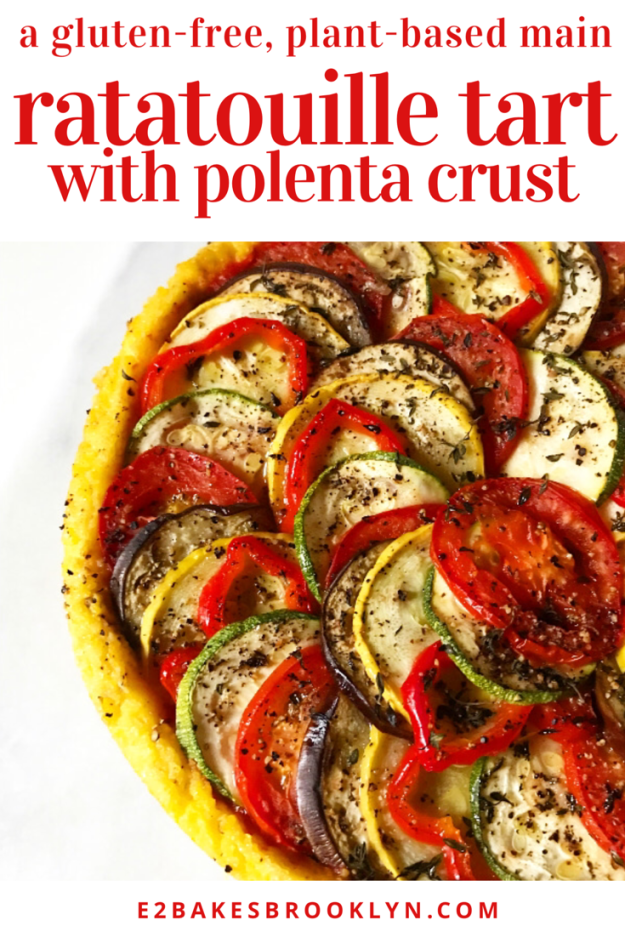
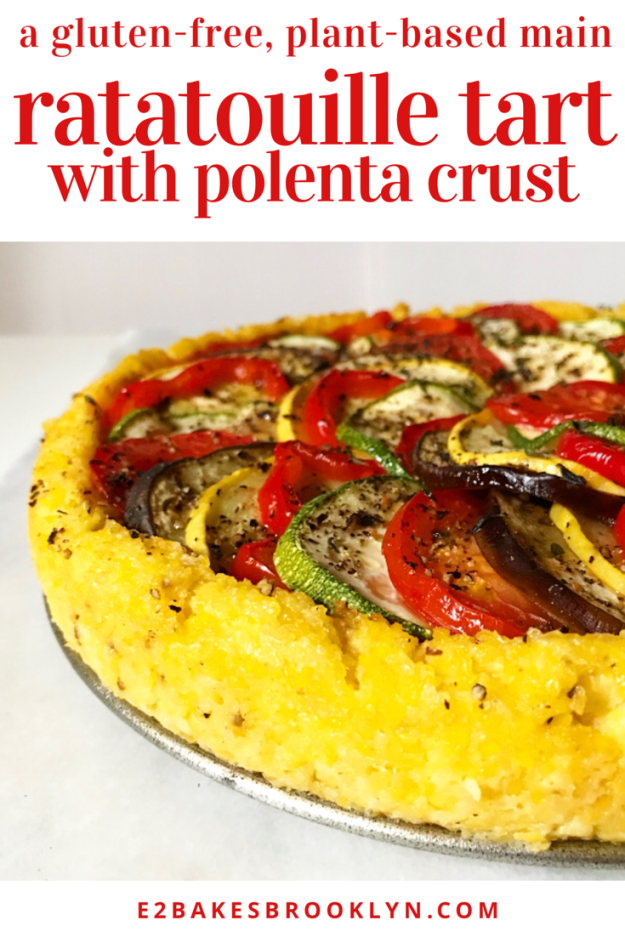
 If you’re searching for a plant-based summer recipe that is as visually striking as it is delicious, look no further. This Ratatouille Tart with Polenta Crust combines two of my favorite things—simply-prepared vegetables and soft corn polenta—and elevates them into one magnificent main. Did I mention that it’s naturally gluten-free and vegetarian?*
*I wrote vegan swaps in the recipe, too.
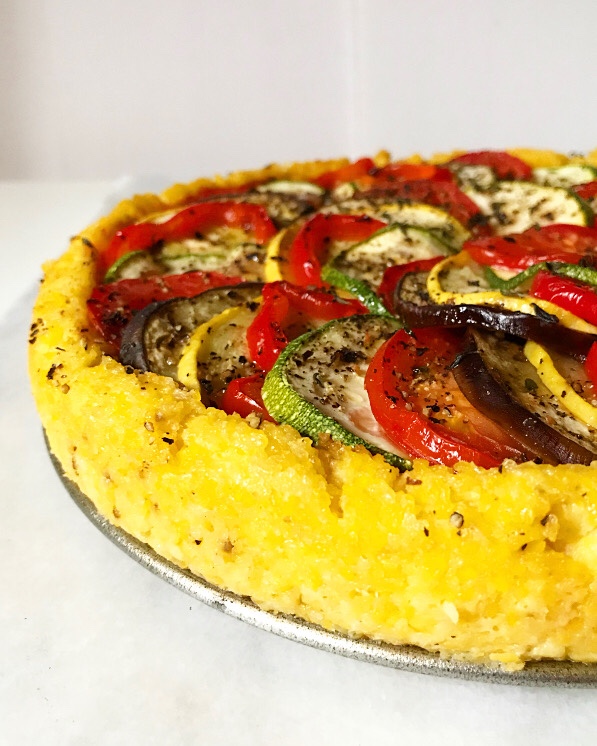
 While this recipe takes some time to prepare, none of the steps are difficult and the results are more than worth the effort! You can make things easier for yourself by preparing the polenta and forming the crust a day ahead.
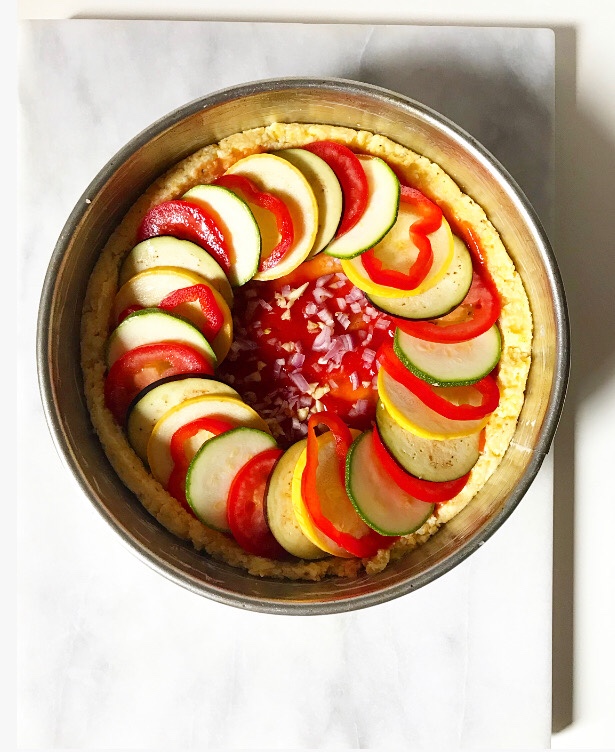
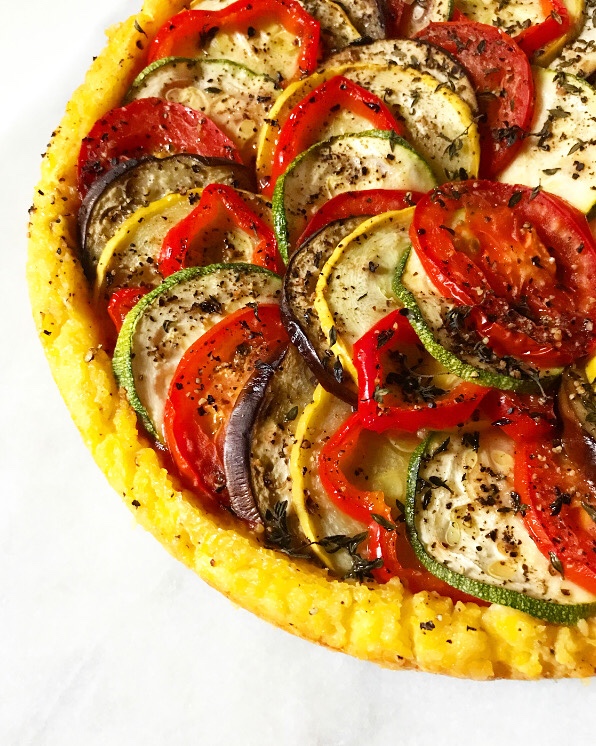
 When you’re ready to bake, spread on some tomato sauce and slice up a bunch of summer produce. If you’re a little fancier than I am and have a mandoline, this would be a great time to use it.
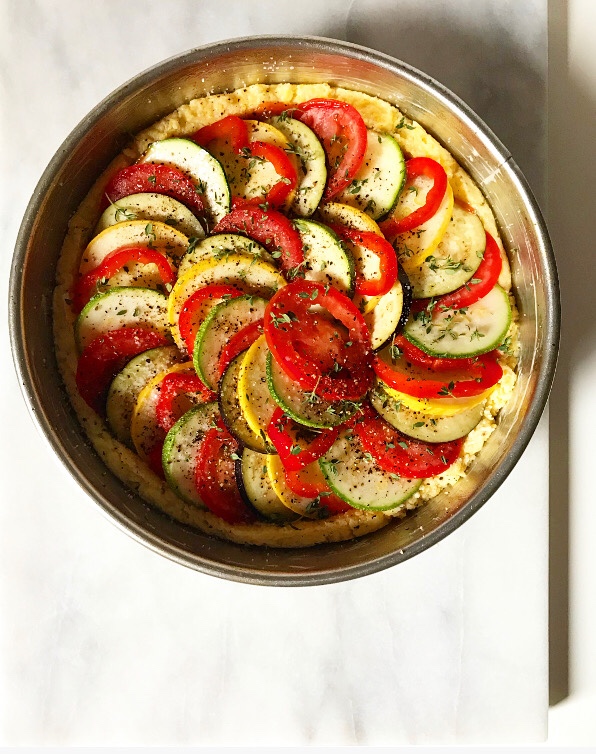
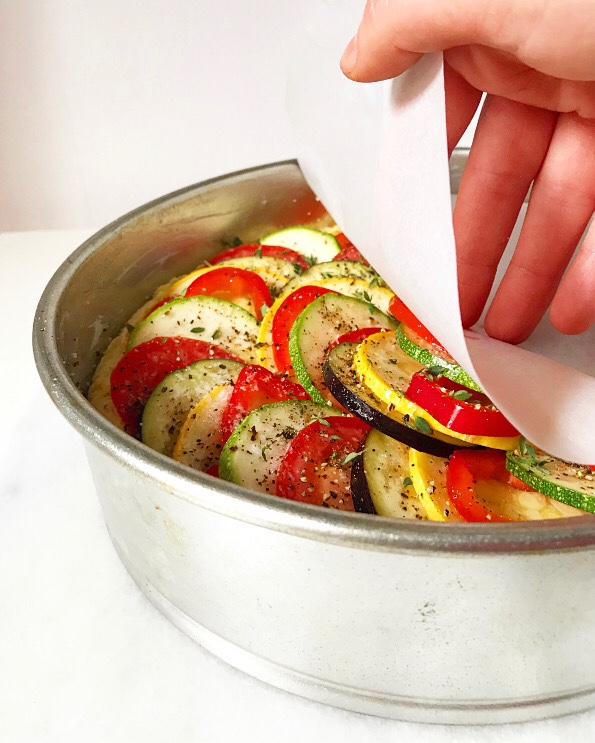 Assemble the tart by arranging the sliced vegetables in concentric circles and finishing them off with olive oil and fresh thyme. Cover the whole thing with a parchment round to ensure that everything cooks evenly. And then…
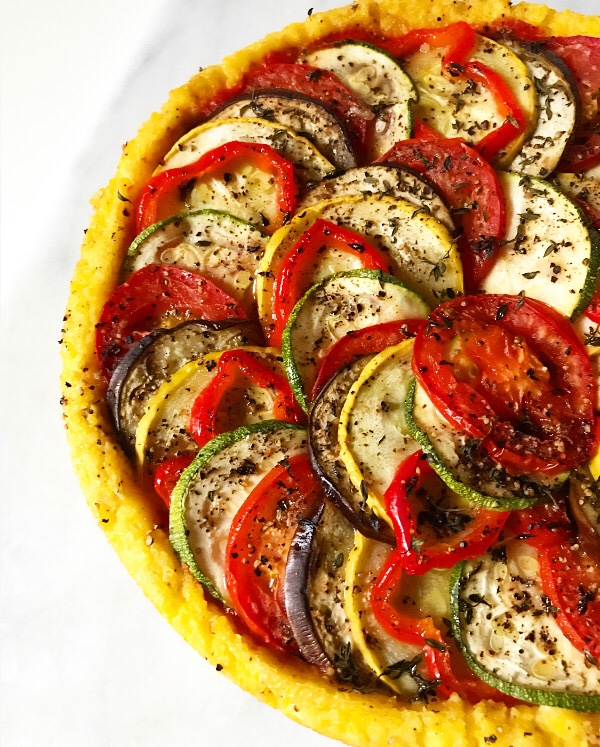
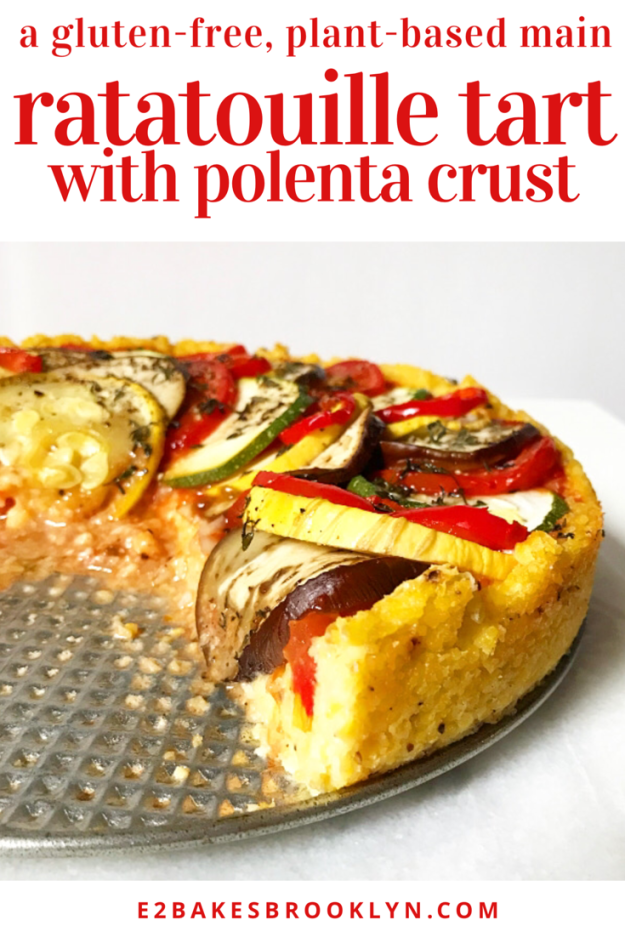
 …well, let’s just say I’ll pray for you during the thirty minutes between baking and slicing. I promise it’ll be worth the wait. I mean, when are polenta and ratatouille not worth the wait?!
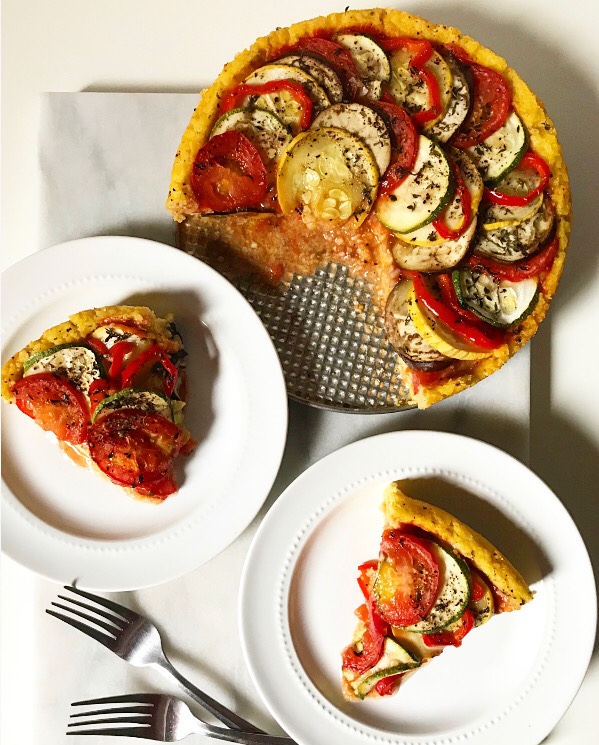
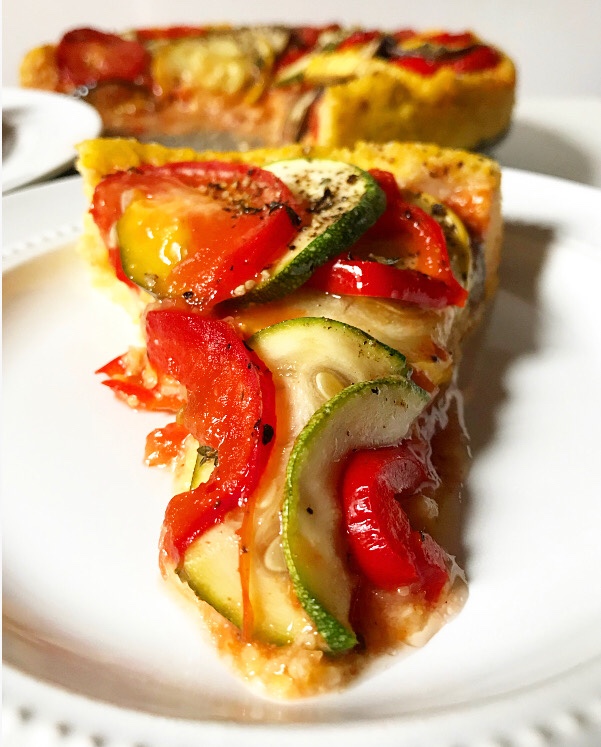 I love this tart when it’s fresh, but you should know that it slices particularly well at room temperature and cold, meaning this is a great make-ahead option. The tart pictured here was made on a Monday and reheated by the slice for lunches all week long.
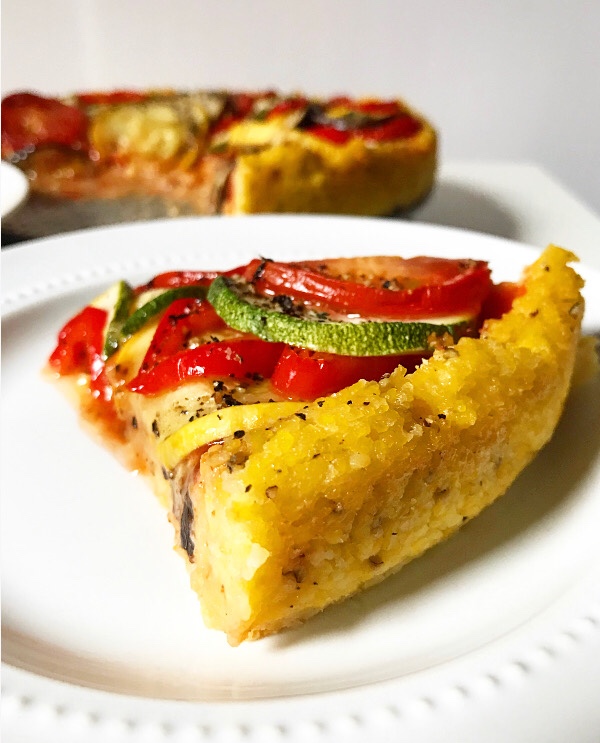 It was exactly as wonderful as it looks.
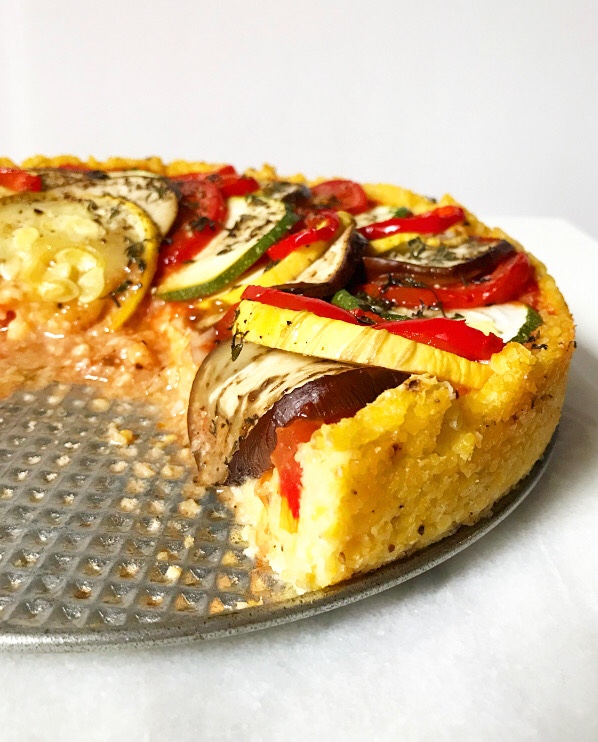
Ratatouille Tart with Polenta Crust
ratatouille adapted from Deb Perelman
makes 1 9-inch round tart, 4-6 servings
Polenta Crust:
2 cups water
1 cup whole milk (or unflavored, unsweetened plant milk)
1/2 teaspoon Kosher or sea salt
1 cup coarse ground cornmeal
2 tablespoons unsalted butter or olive oil
1/2 teaspoon prepared dijon mustard
few grinds freshly ground black pepper
Ratatouille:
1/4 cup tomato sauce
2 cloves garlic, minced
1/2 shallot, minced
1/2-1 teaspoon Kosher or sea salt (based on your taste), divided
~1/2 small, thin eggplant, 1/8 inch slices
~1/2 medium zucchini, 1/8 inch slices
~1/2 medium yellow squash, 1/8 inch slices
~1/2 long, thin red bell pepper, seeded, 1/8 inch slices
~1 1/2 roma tomatoes, 1/8 inch slices
1 tablespoon olive oil
few grinds freshly ground black pepper
1 1/2 teaspoons fresh thyme leaves
For assembly:
9-inch round piece of parchment paper
For serving (optional):
fresh parsley or other herbs
feta or goat cheese
Grease a 9-inch round springform pan or tart pan with removable bottom. Set aside.
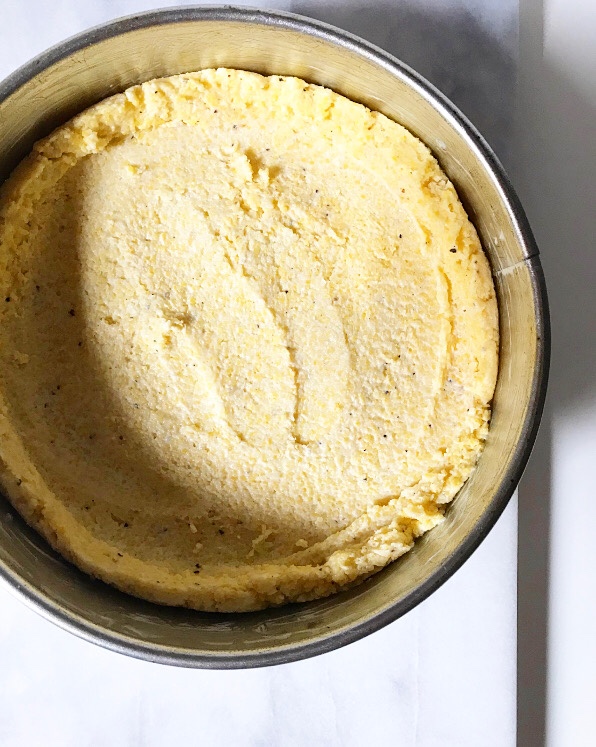
Make polenta. Bring water and milk to a simmer. Keep an eye on it, as milk can boil over dramatically without much notice. Add 1 teaspoon salt. Whisking constantly, add polenta in a thin stream. Reduce heat to medium-low, whisking very frequently for 25-30 minutes, until thick. Remove from heat. Whisk in butter, dijon, and black pepper. Transfer to prepared pan and use a silicone spatula or wooden spoon to spread it to the edges. Let sit for 15 minutes.
Using the back of a wet spoon, press the polenta from the center toward the edges of the pan to create a rustic crust. Set aside. At this point, the crust may be covered and refrigerated for up to 24 hours.
Preheat oven to 375F. Prepare the ratatouille filling. Spread tomato sauce on the bottom of the tart. Scatter minced garlic and shallot over the top, along with 1/4 teaspoon of salt. Starting from the outer edge and working in a concentric circle to the center, arrange sliced eggplant, zucchini, yellow squash, red bell pepper and tomato in an overlapping pattern. Drizzle with olive oil and top with 1/4-1/2 teaspoon salt, black pepper and fresh thyme.
Cut a piece of parchment to fit over the pan, covering all exposed tart. Gently lay it in the pan. Bake tart 45-55 minutes, or until vegetables are tender. Remove and discard parchment. Let tart cool at least 30 minutes before slicing. Serve with fresh herbs or cheese, if desired.
Slices will be neatest at room temperature, but tart may be served at any temperature. Leftovers will keep covered in the refrigerator for up to three days.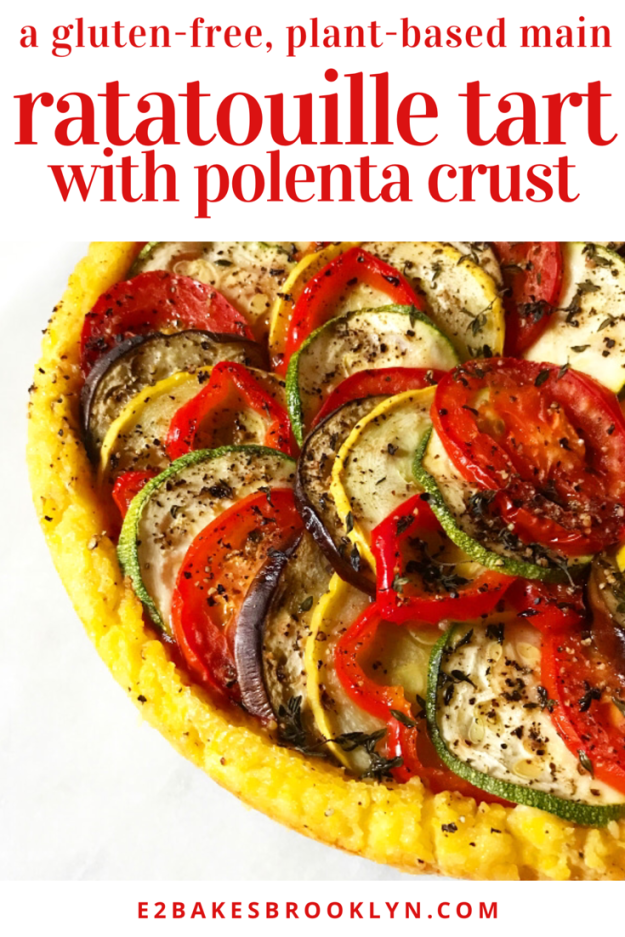
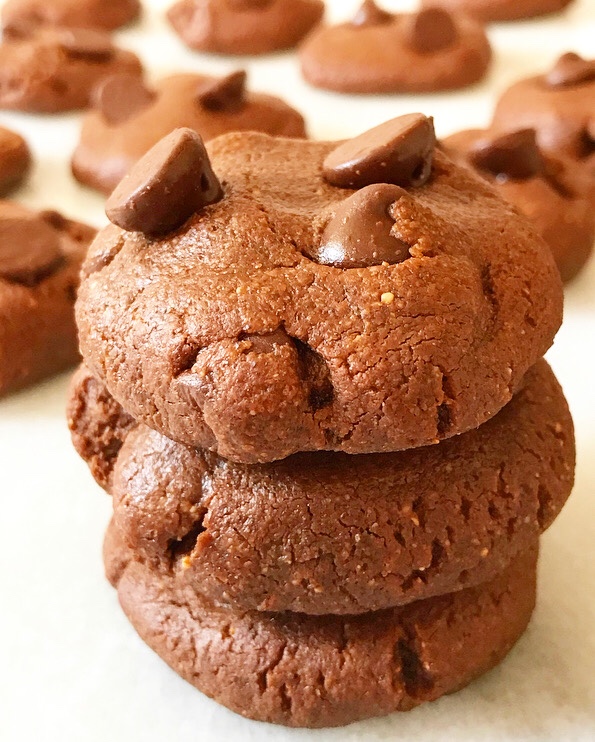
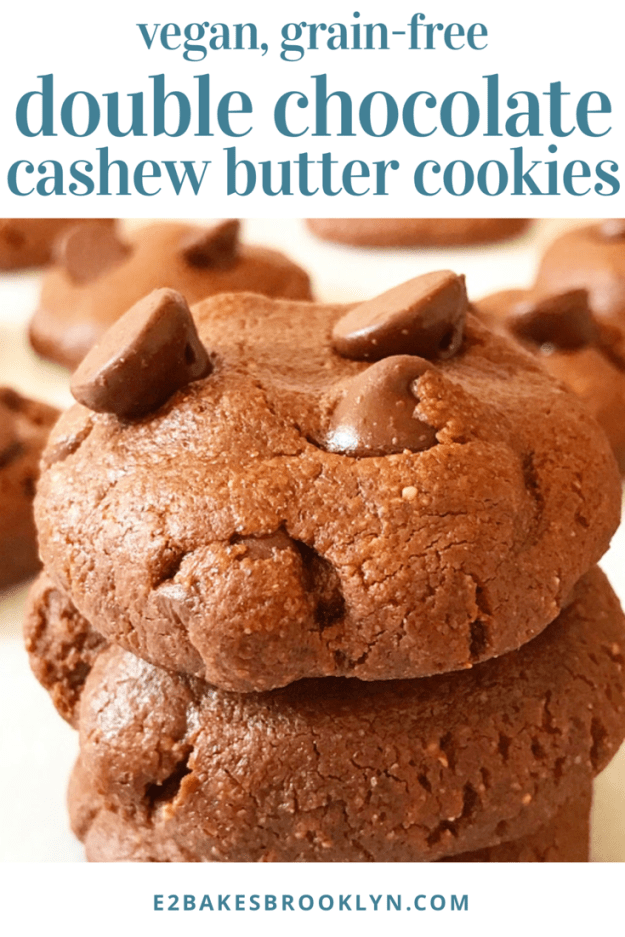
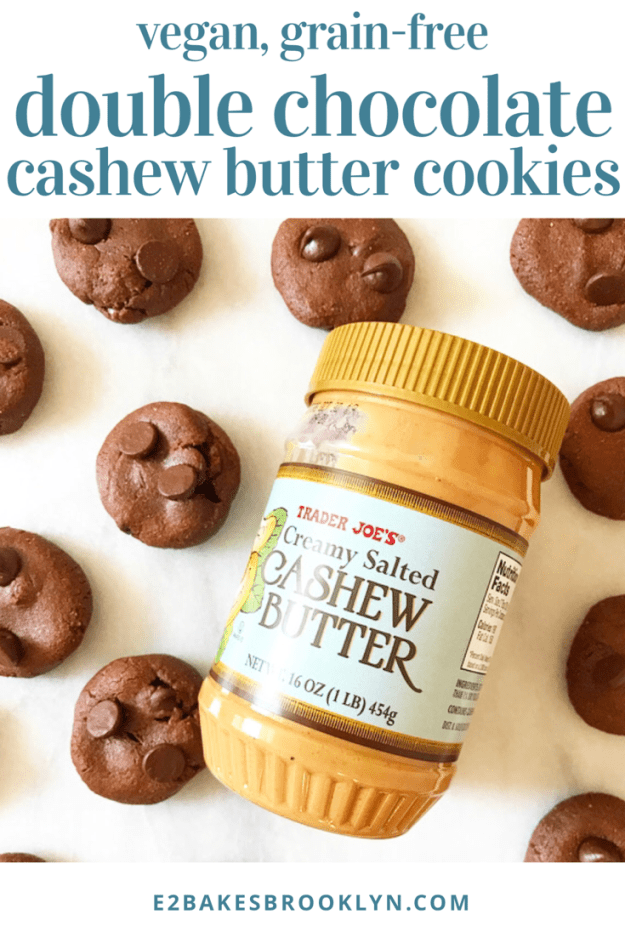
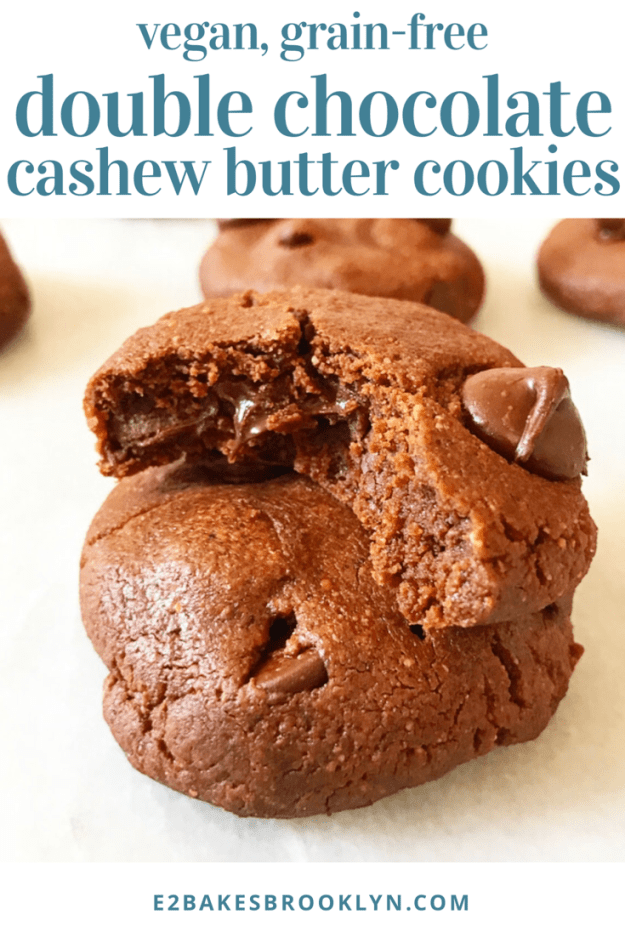
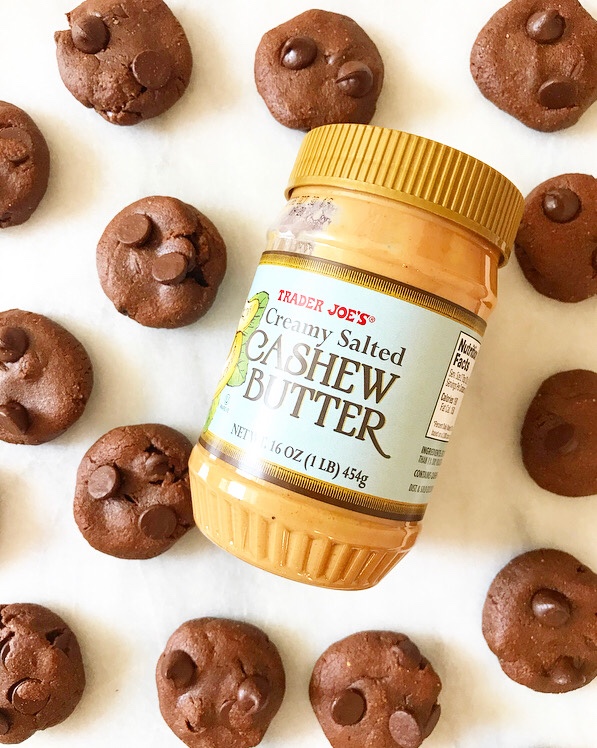 I started dreaming of these Double Chocolate Cashew Butter Cookies when I posted their classic
  These thick, puffy, chewy chocolate cookies are so, so good. And vegan. And grain-free. And dead-easy. Just…what?! Give me alllllll the
 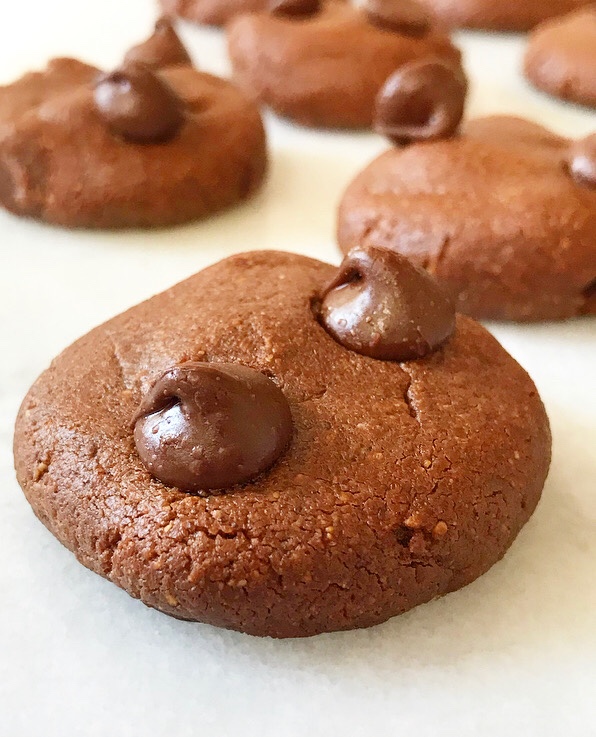 This is a one-bowl, no-mixer, no-chill, cookies-within-30-minutes-of-a-craving recipe. Oh, and should you have some modicum of self-control, these two-bite treats keep incredibly well at room temperature for upwards of a week. In fact, I think they get better as time goes on. The buttery cashew flavor mellows and melds with the cocoa and chocolate chips, and the results are brownie-like and wonderful ❤
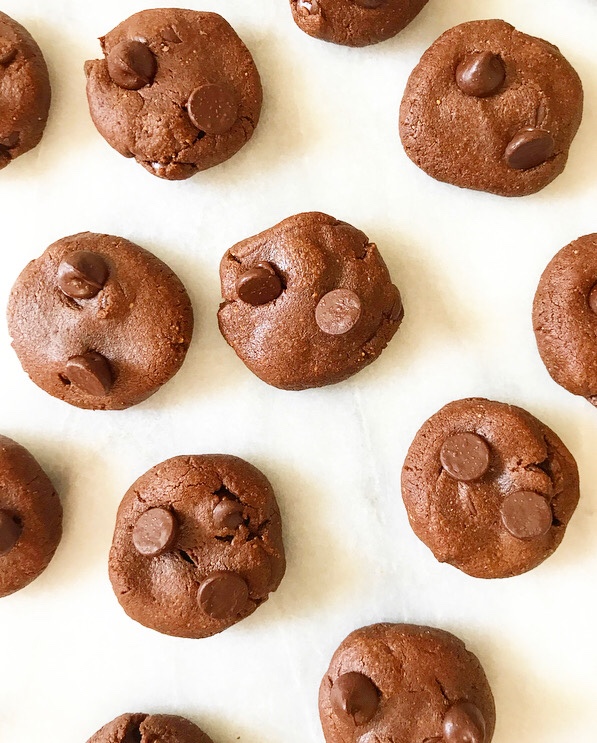 I find good quality, reasonably-priced cashew butter at Trader Joe’s, but if you don’t happen to live in a spot smack in between two TJ’s, never fear. I haven’t tried it, but I am 96% sure you could make these with well-stirred natural peanut butter. And honestly, I think the only way to improve this recipe would be to add peanut butter.
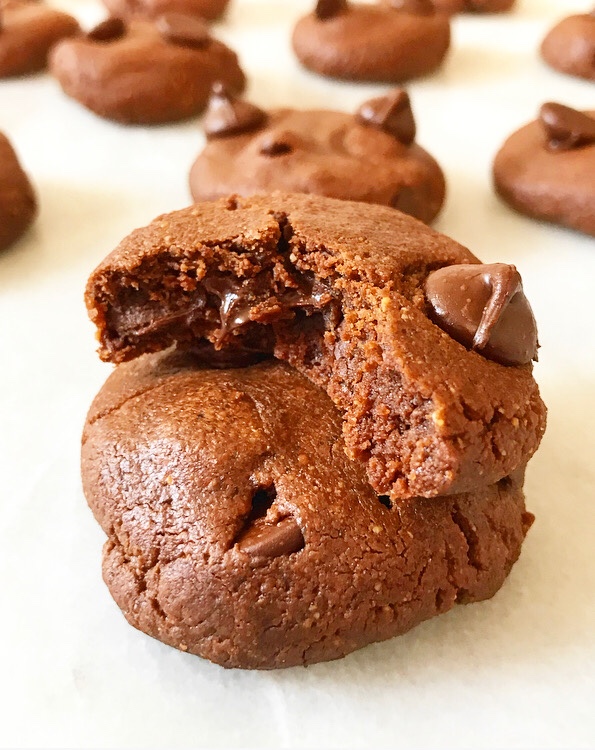
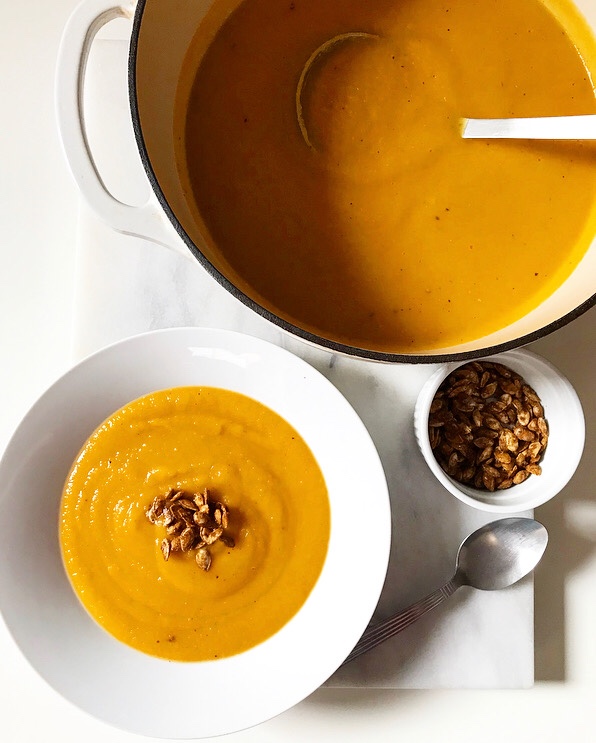 I love January on this blog. It’s not that I’m not into making desserts all the time—and you know I can’t quit baking
 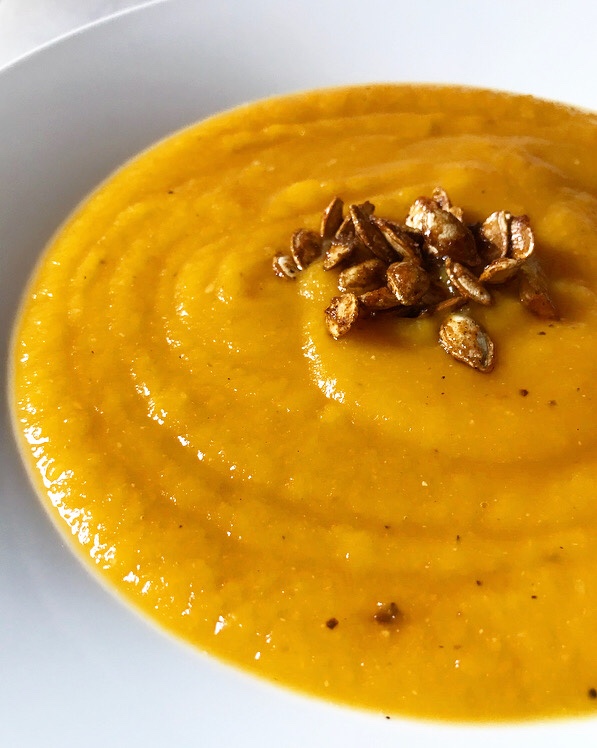 I’ve been making this Roasted Butternut Squash Soup for the last few months and I can’t get enough. It’s super simple to put together and very wholesome and comforting.
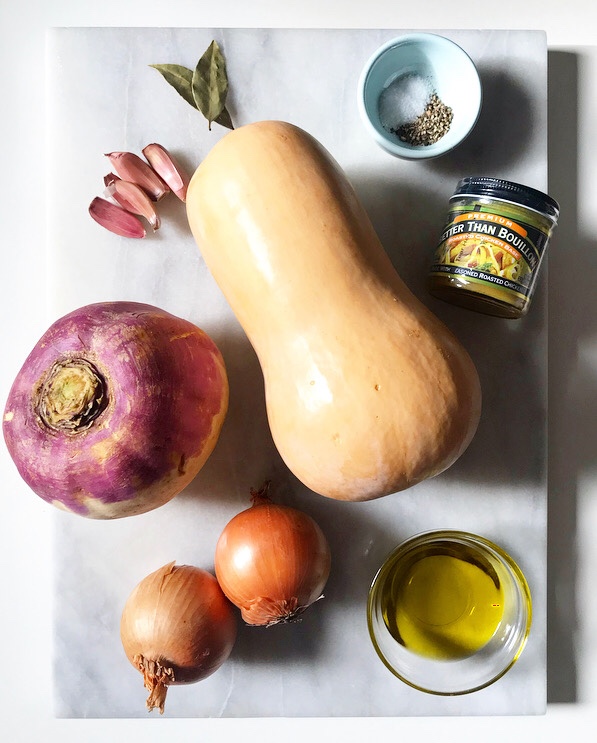 Did I mention that it’s made almost entirely of vegetables and contains zero dairy? This soup’s creamy, velvety texture comes from one unsuspecting secret ingredient: a turnip.* It’s diced up and roasted with the butternut squash until everything is golden and sweet. Yum.
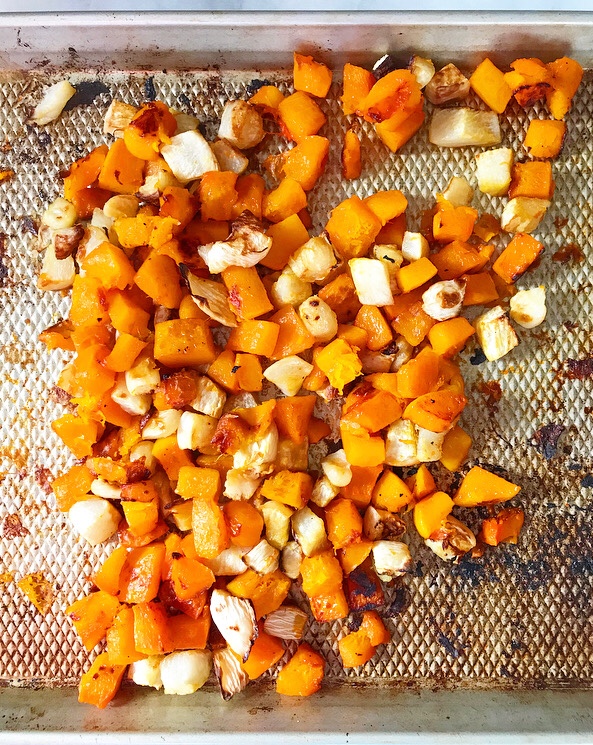
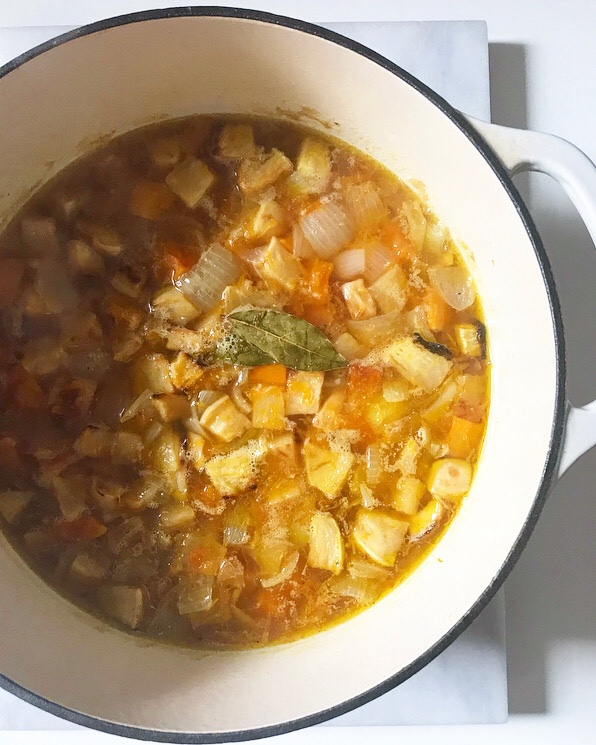 The roasted vegetables are then combined with some softened aromatics and stock (chicken or vegetable, whatever you have on hand), simmered for a few minutes, and puréed into a thick, rich, nutritious soup.
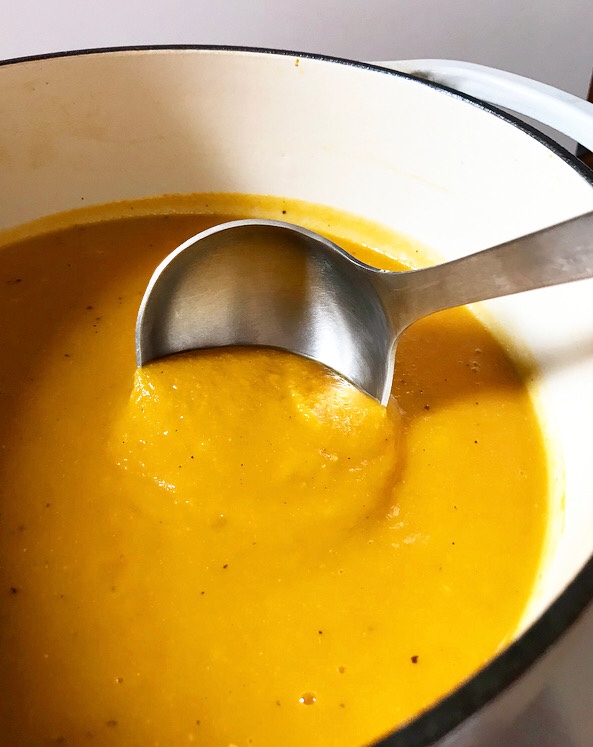
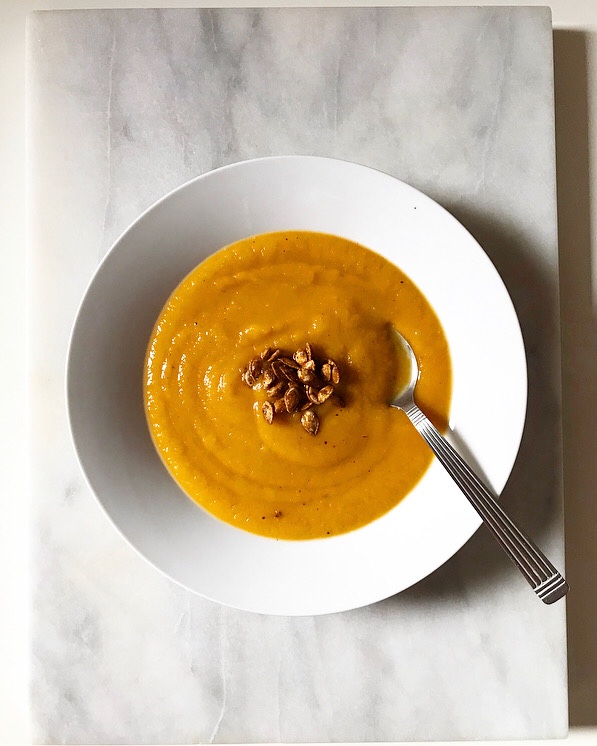 Roasted Butternut Squash Soup provides a great blank slate for any number of garnishes. I was tempted to go with crispy bacon or even a wintry pesto, but decided instead to make something out of the seeds from my butternut squash!
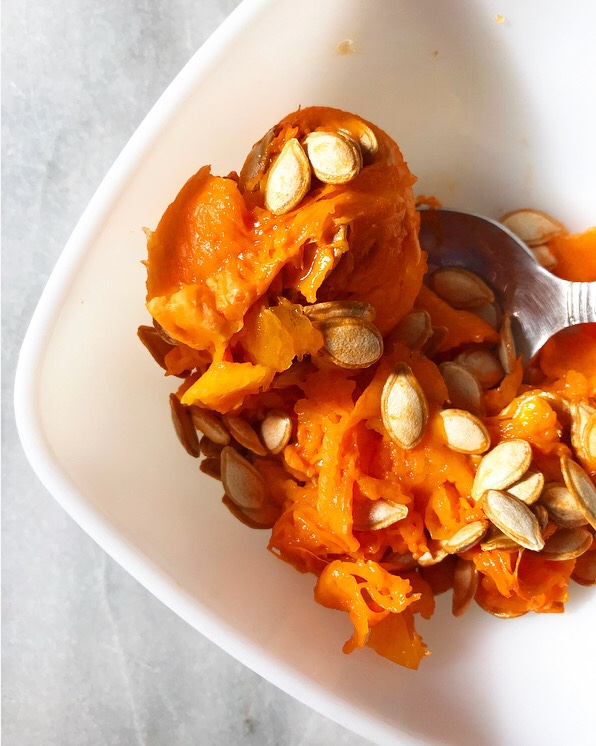
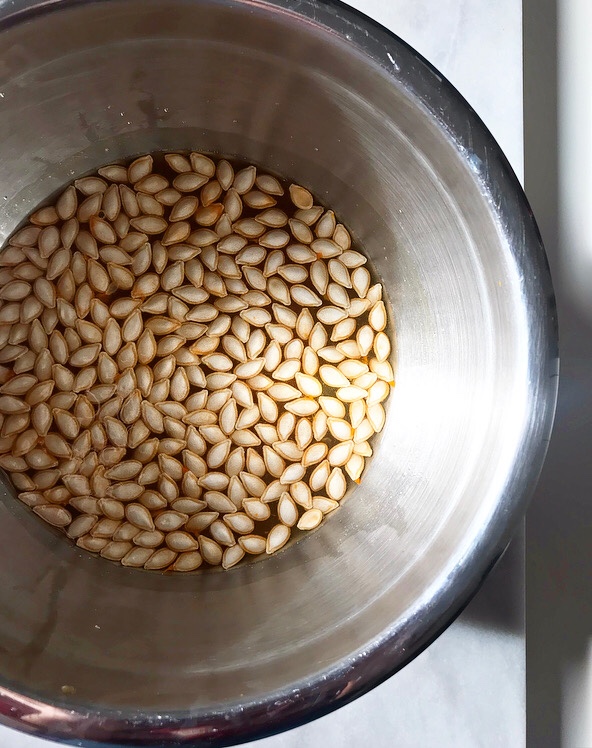
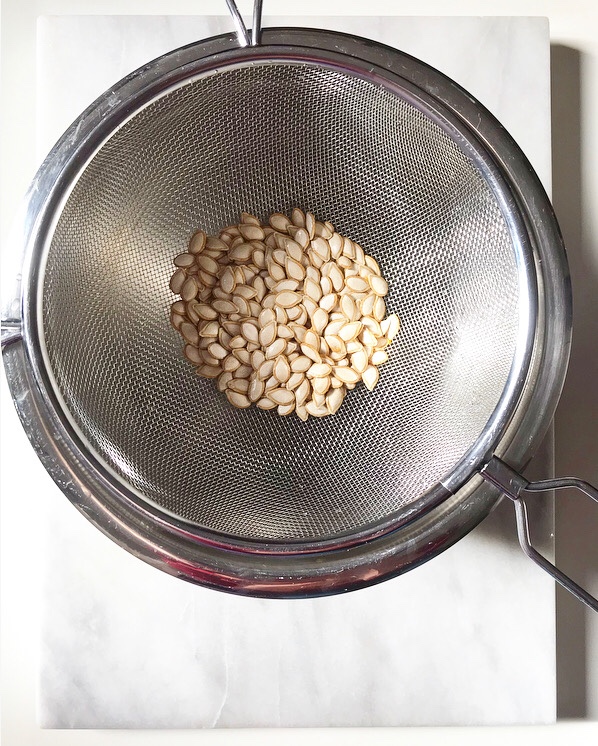
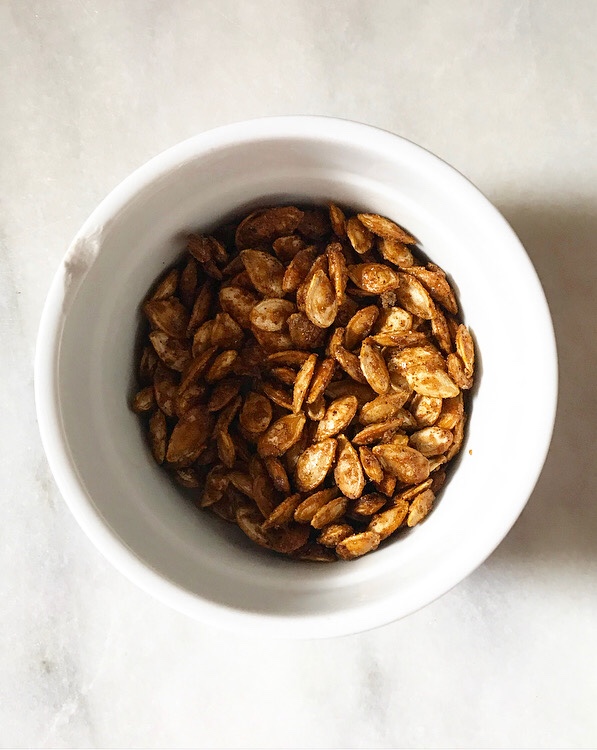 While the vegetables were roasting, I rinsed the seeds to remove the fibrous squash innards. Then I toasted them in a dry pan just until they started to pop. After that, I added some olive oil, maple syrup, ancho powder, cayenne and salt, and stirred until they were brown and crispy.
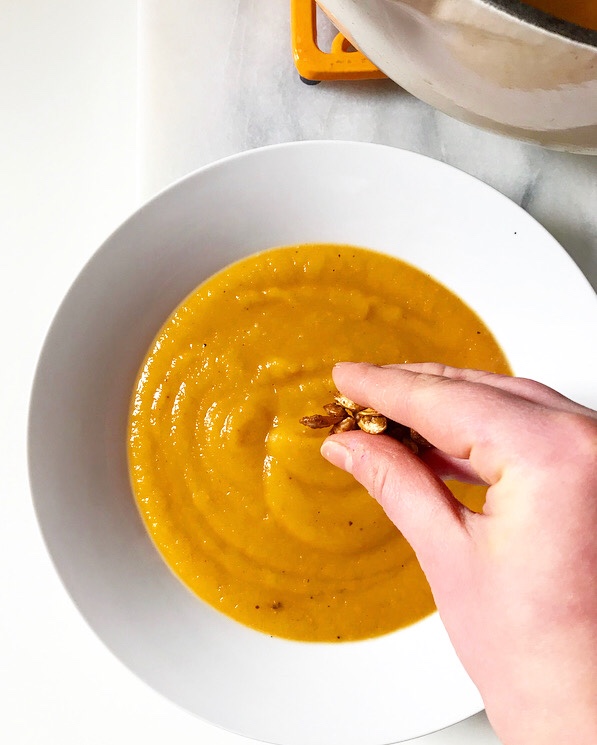
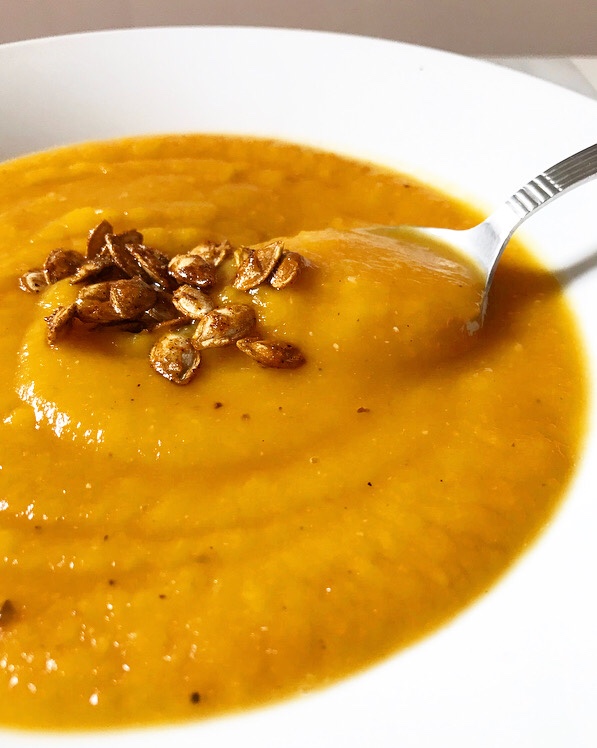 The results are spicy, salty, sweet Maple-Chile Butternut Seeds, perfect for garnishing soup. Or eating by the tiny handful while you wait for your subpar Chinese takeout to arrive, which is exactly what happened to these. Ah, well.
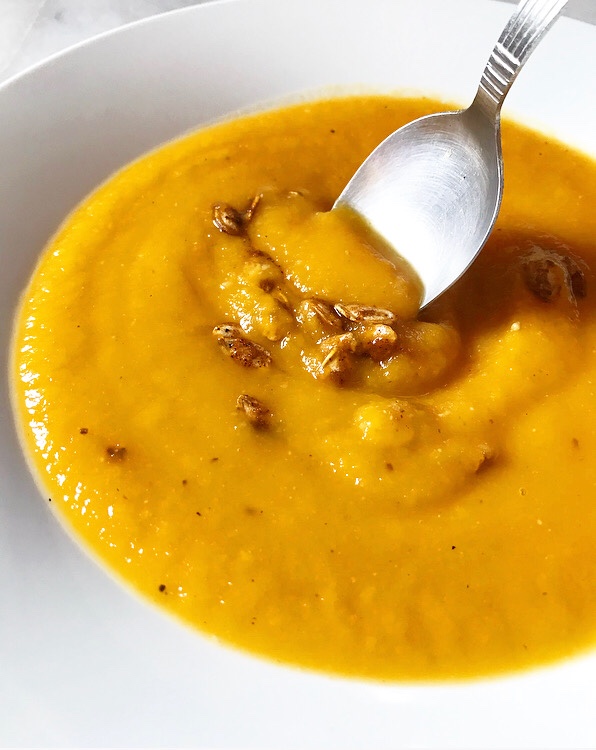


 I don’t spend much time writing about vegetables, seeing as this is a baking blog and all.
 But the truth is that I eat a lot of vegetables. A lot. Gotta balance out all the baked goods somehow, you know?
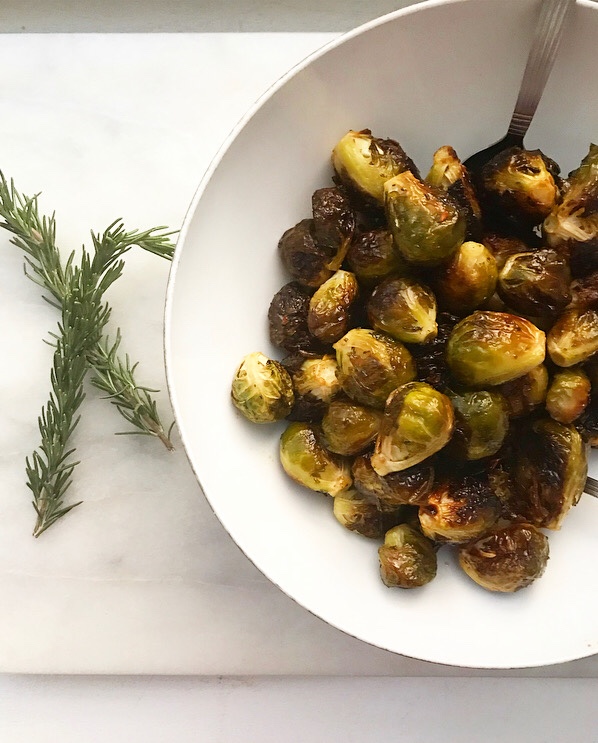
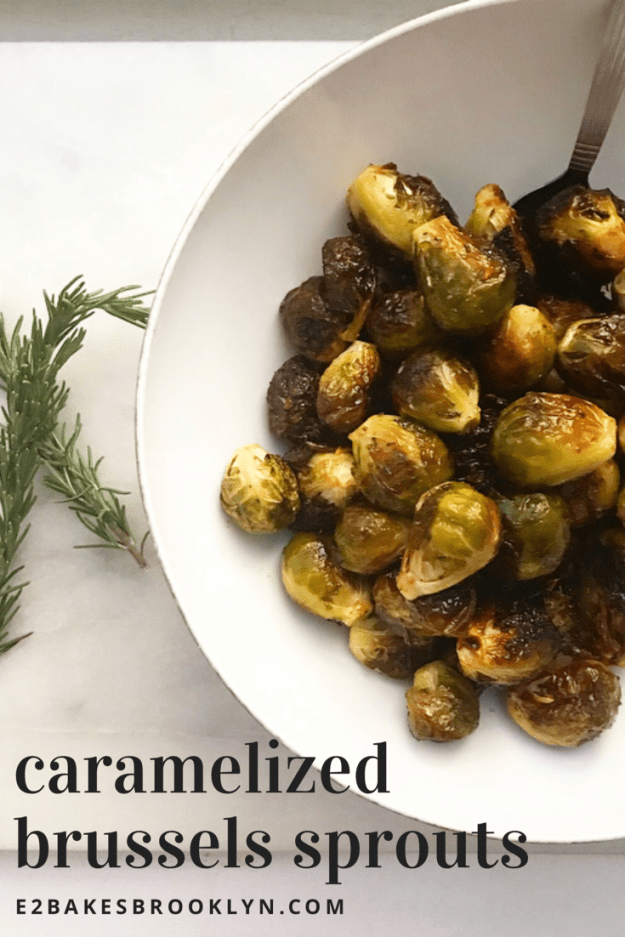
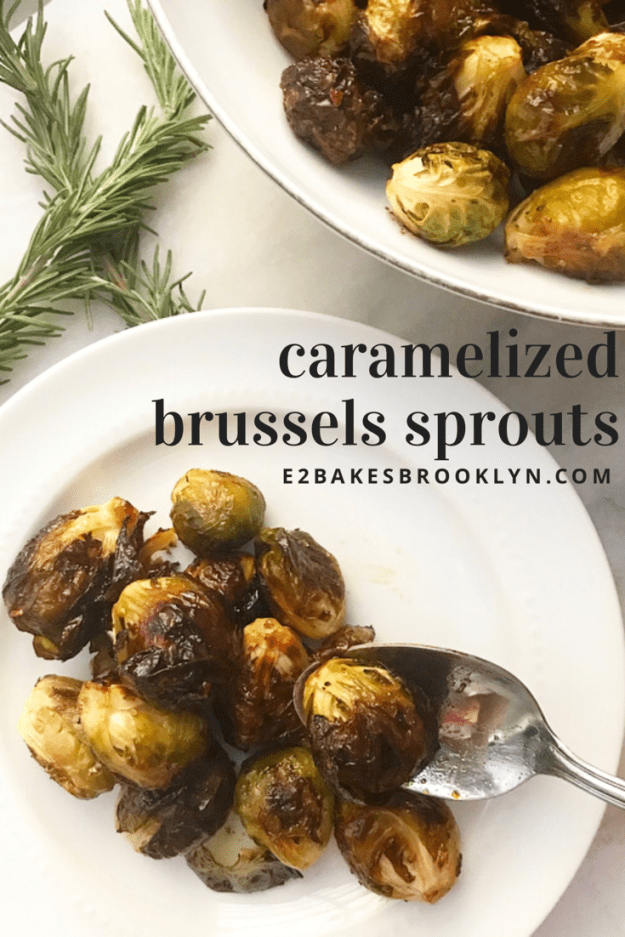
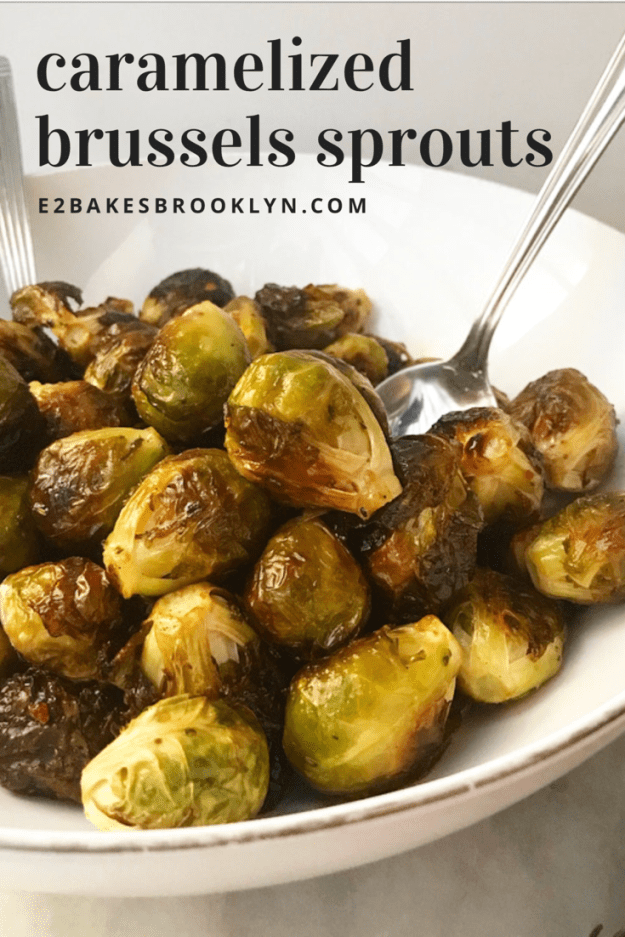
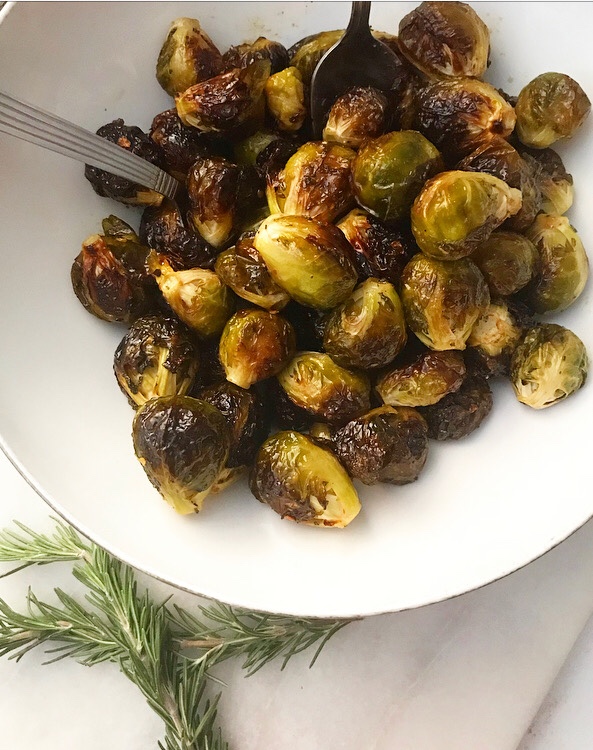 These Caramelized Brussels Sprouts are one of my fall/winter favorites. They’re basically your standard roasted brussels sprouts with the volume turned up. Plus, they’re super easy to make and have this sweet-salty-herby-spicy thing going on that makes them totally irresistible. Like, good luck getting them from the pan to the table without eating half the batch. Don’t say I didn’t warn you.
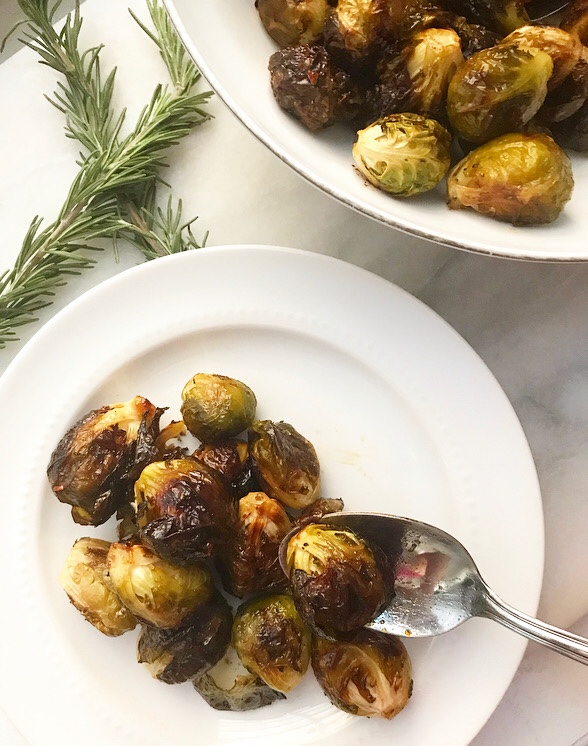 I make Caramelized Brussels Sprouts for regular weeknights all the time, but they’re also great for dinner parties and holidays. I made them for Christmas dinner last year and they were a huge hit with my whole family! I can’t help but think they’d make a great Thanksgiving side dish, too.
 Caramelized Brussels Sprouts are very simple to make. Start by trimming the brussels sprouts and removing any banged-up outer leaves. There’s no need to slice them in half—minimal prep is the name of the game!
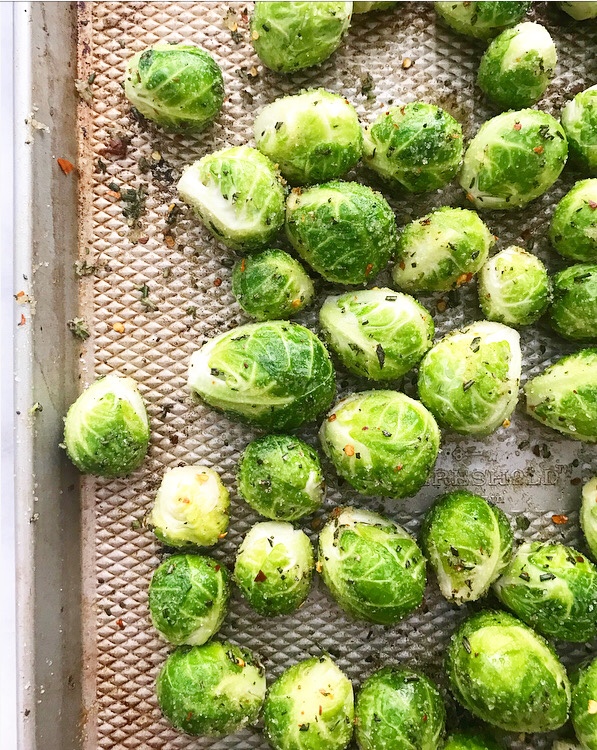 Put the sprouts on a baking sheet and toss ‘em with fresh rosemary, red pepper flakes, salt, a little sugar, and olive oil.
 Roast the brussels sprouts for 40 minutes, giving the pan a good shake every 15 minutes. The resulting sprouts will have deeply browned (but not burnt!), crispy exteriors and buttery-soft centers.
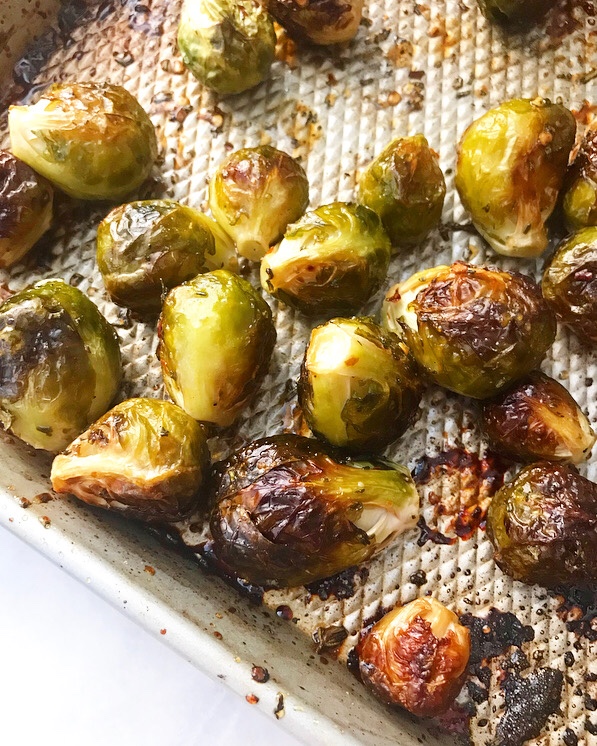 Remember that “sweet-salty-herby-spicy” thing? Well, add “crispy-buttery.”
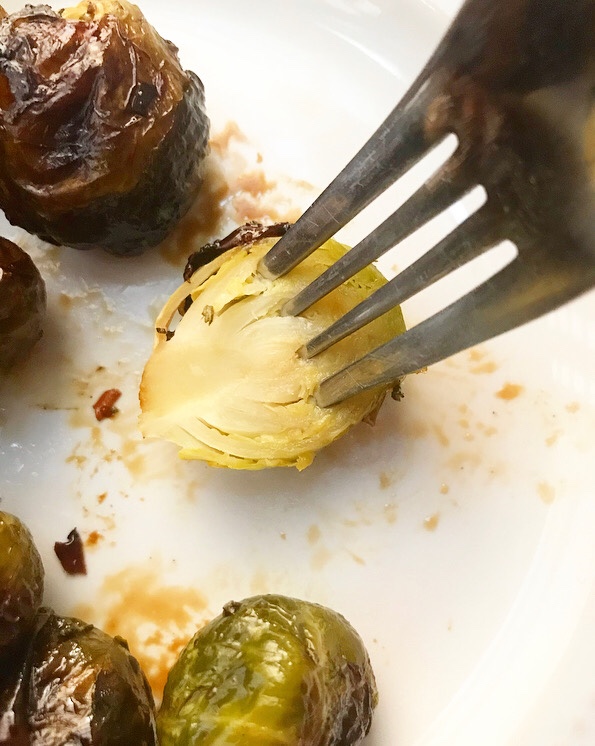 And maybe “-things-dreams-are-made-of.”
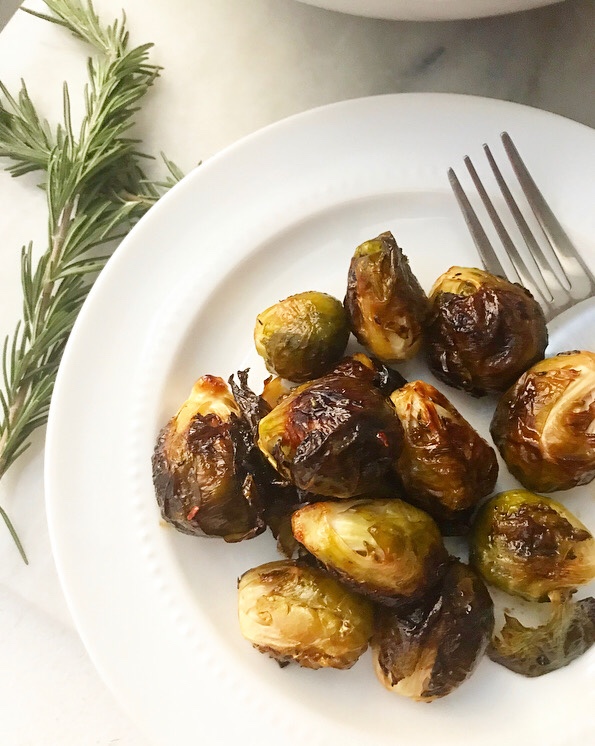
 Let me start by saying that I hope you all had a lovely Halloween, and that I’m so glad it’s over so we can talk about Thanksgiving food.
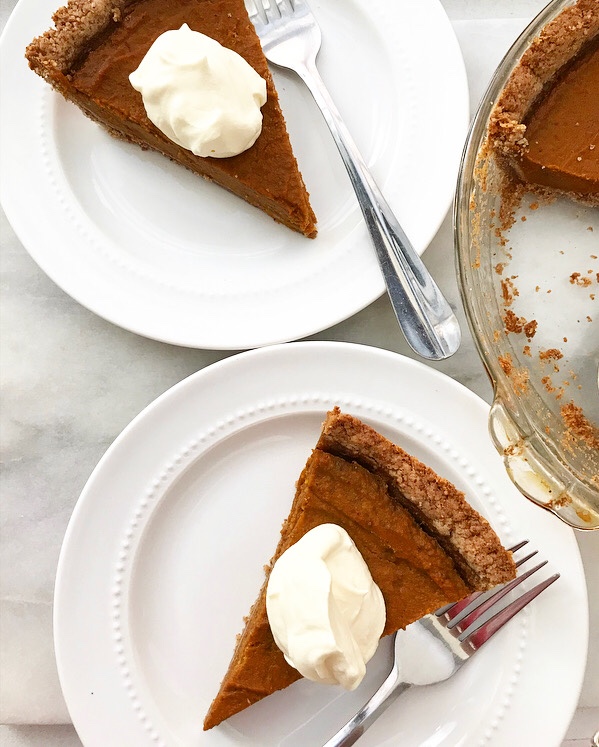
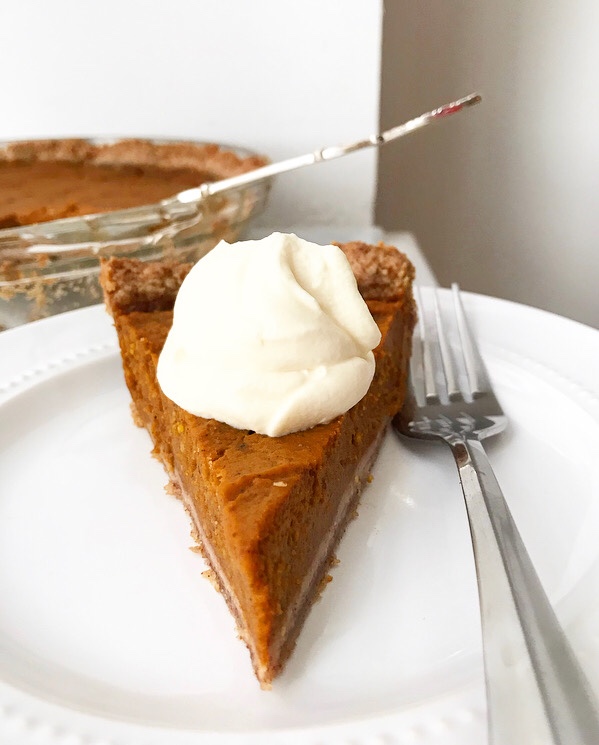 I got a little head start with Wednesday’s
 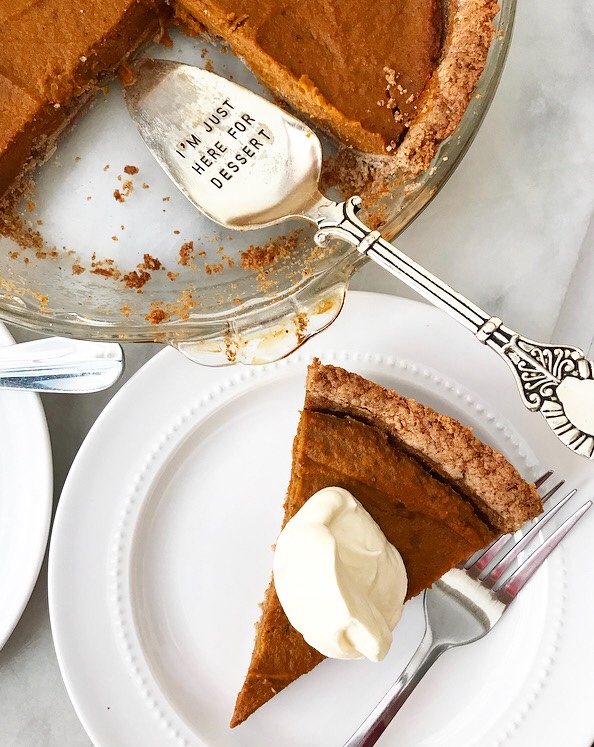 If you haven’t clicked away, never to return…well, good. More pie for us.
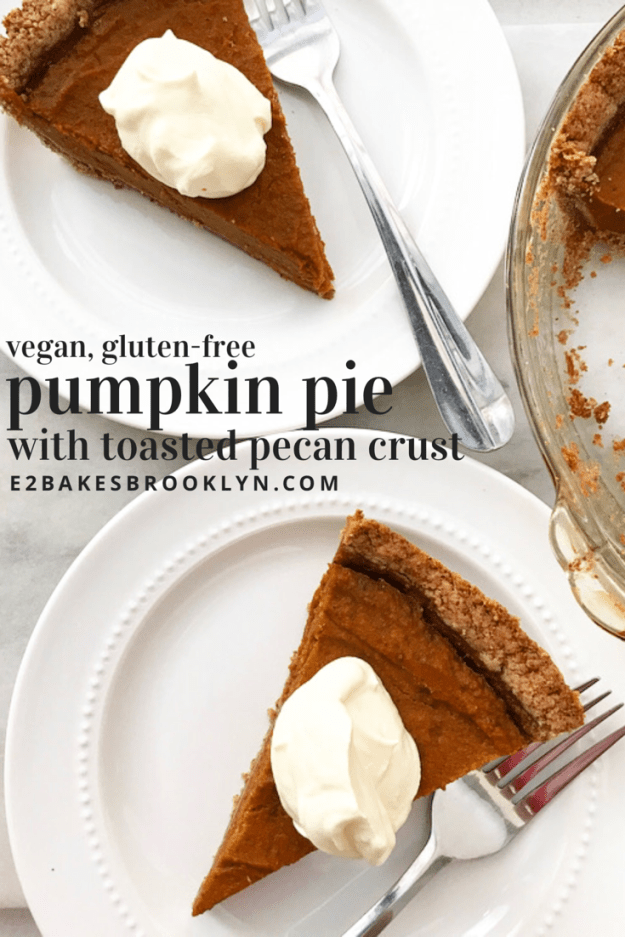
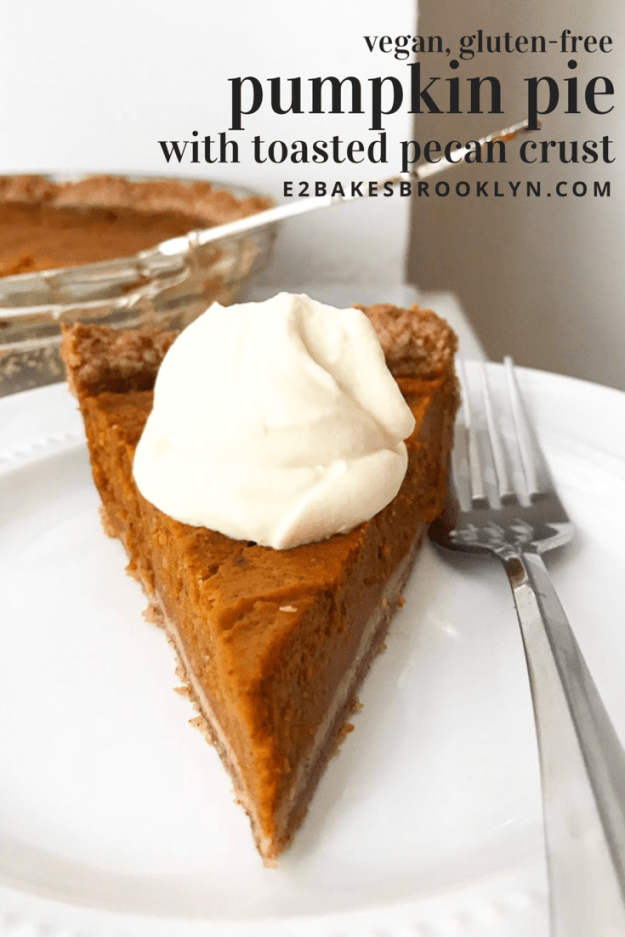
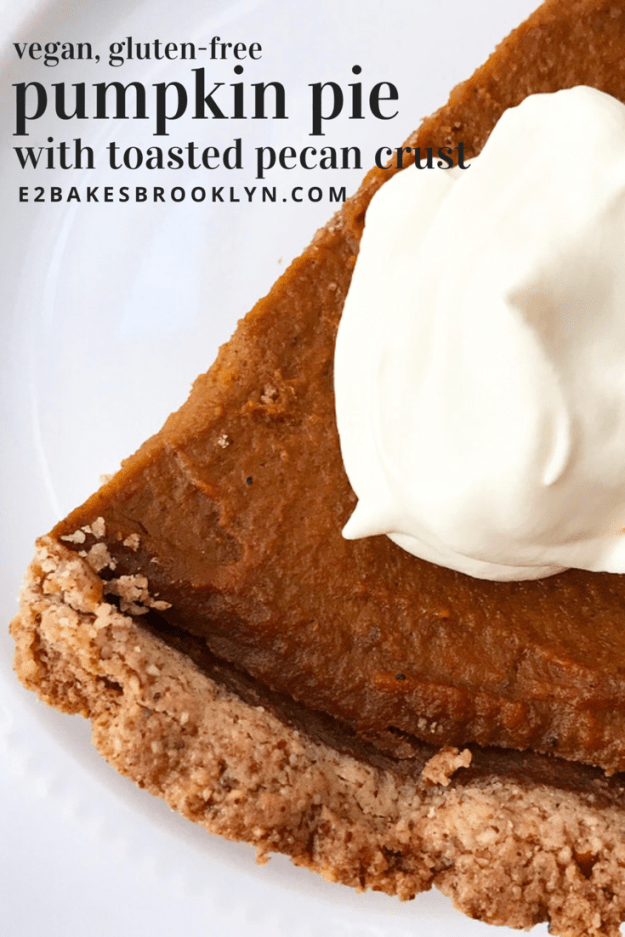
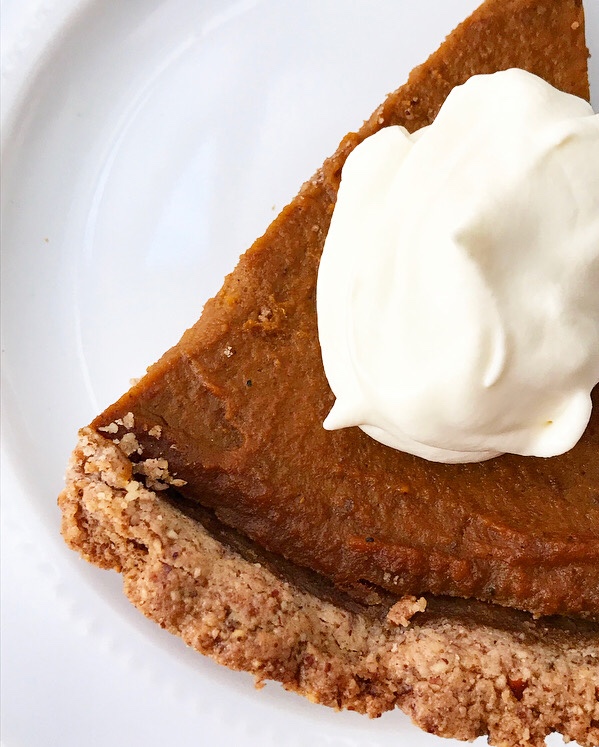 You see, for all the things that this pie is not, it is very much one thing: delicious. Like so good I’m not totally sure why we would eat any other pumpkin pie.
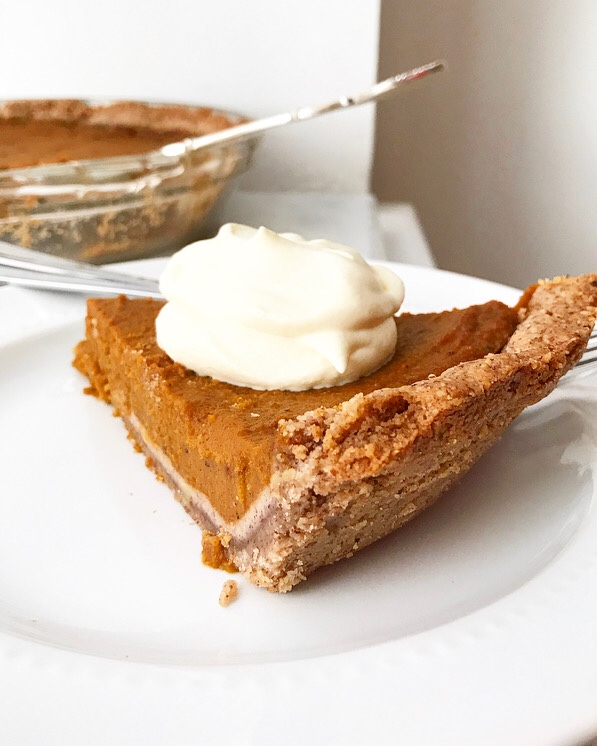 The filling is soft and sweet and perfectly spiced and the crust is mostly made of ground toasted pecans. GROUND TOASTED PECANS. And it’s a press-in crust—no rolling required. Does it get better than that?
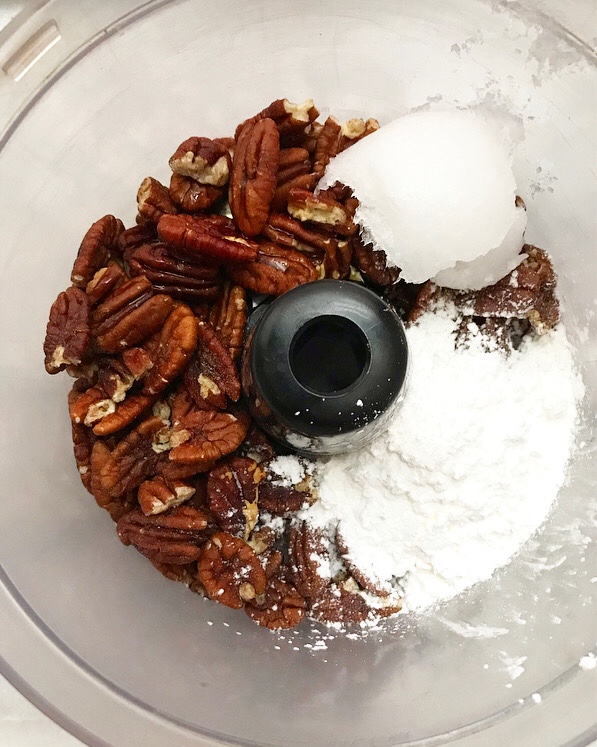
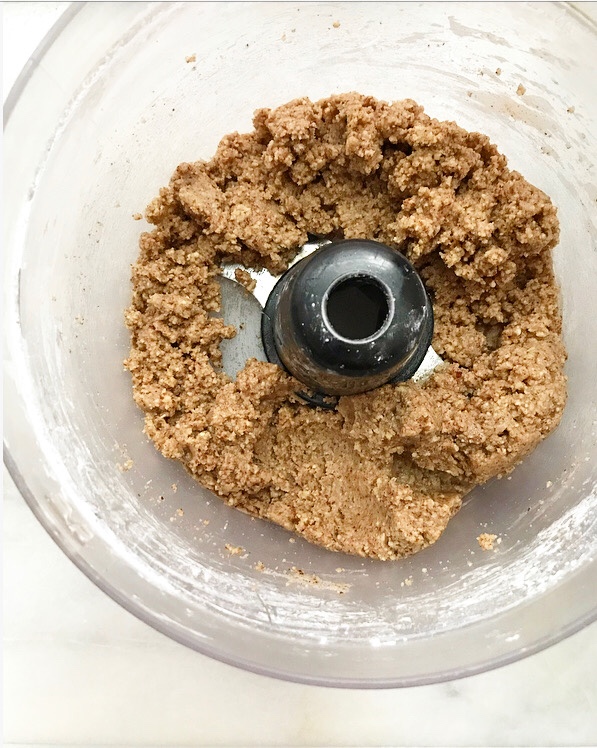
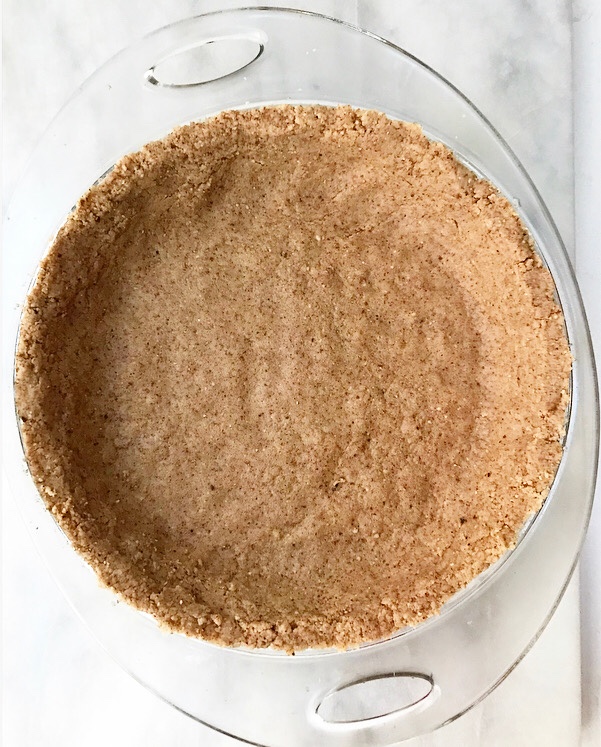 Both elements come together in the food processor.
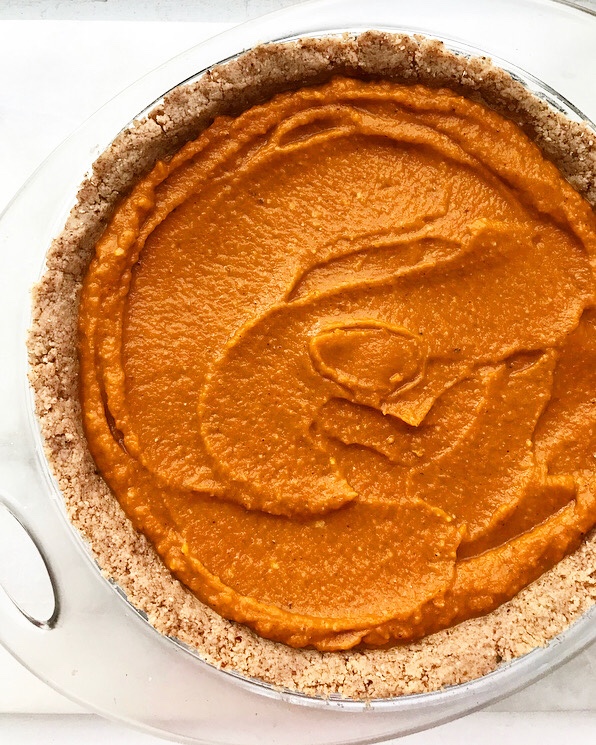 And the whole pie requires exactly nine ingredients.
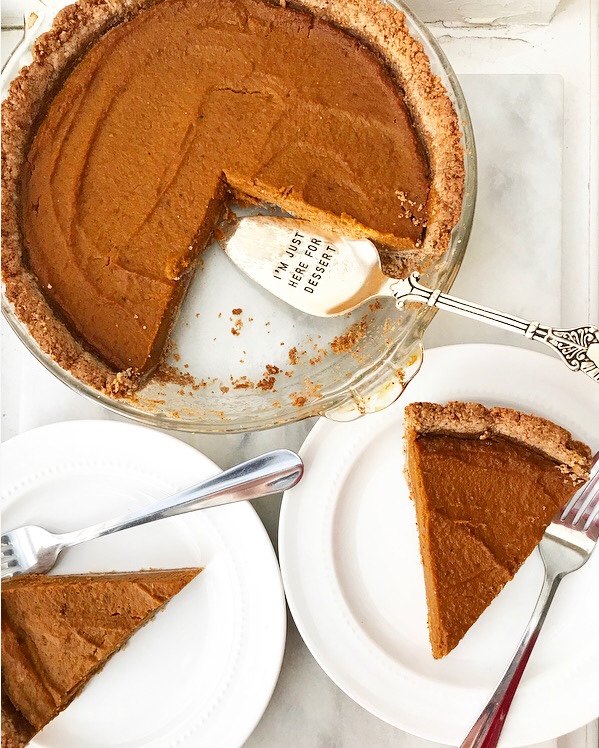 And it’s actually best if it’s made ahead, so you won’t have to give up valuable Thanksgiving Day oven space.
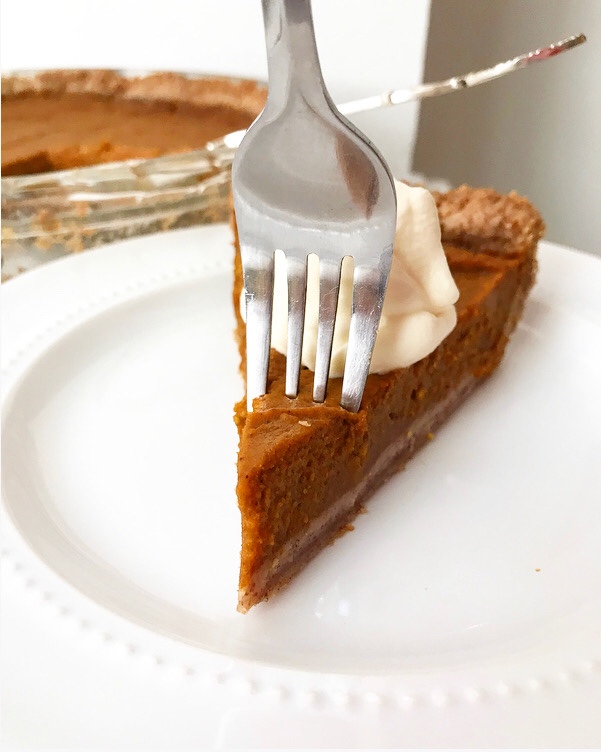 And, again, it’s vegan, gluten-free, and contains just enough sweetener to make it taste like dessert. And make no mistake, it does taste like dessert. I am not the sort of person who is going to get behind a recipe just because it’s “better for you.” Nope. It’s big flavor or go home here at E2 Bakes. If it happens to be somewhat nutritious, that’s just a bonus.
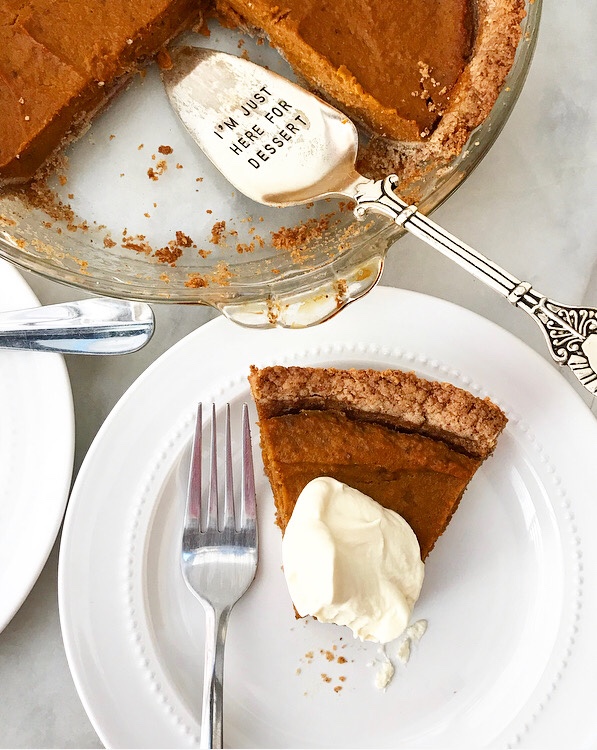 Have a great weekend, y’all ❤