Category Archives: Cakes & Cupcakes

Easter Egg Hunt Cake

Easter Egg Hunt CakeEaster is coming up this weekend! I grew up celebrating in style–a week full of church, family brunch at The Fort Worth Club, and a HUGE egg hunt on a friend’s grandparents’ property. As far as I can tell after nearly ten years (!) in New York, Easter is not a big holiday here. I see a few families in their Easter best, but other than that, it’s just like any other Sunday. That said, just because I’m not planning to wear any pastels or attend any holiday brunches, there’s no reason I can’t celebrate with this adorable, surprise-candy-filled Easter Egg Hunt Cake!Easter Egg Hunt Cake
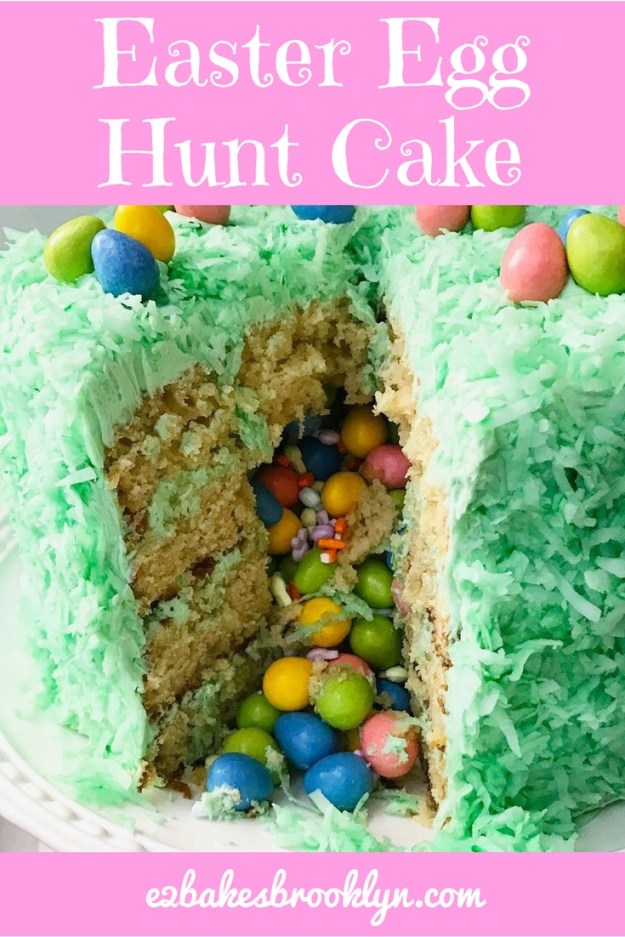
Y’all. Y’ALL. This might be the most sickeningly cute thing I’ve ever made. I had the idea when I saw this Piñata Cake on Sally’s Baking Addiction, and I’ve been hellbent on making this Easter Egg Hunt Cake ever since. From the outside it looks springlike and holiday appropriate (hey there, sweetened flaked coconut!), but then you slice in to find a veritable treasure trove of Easter egg-shaped candy! Seriously, y’all. How cute is this Easter candy avalanche?!Easter Egg Hunt CakeNow, before you go clicking away, thinking that this cake is too much for you to handle, hear me out:

  1. If I can make this cake, anyone can. I can frost a cake, but my decorating skills leave something to be desired. If you can use an offset icing knife, you can decorate this cake!
  2. Hiding the candy in this cake is waaaaay easier than you’d imagine.
  3. Easter Egg Hunt Cake is made with my tried-and-true Vanilla Layer Cake* recipe. That cake and its corresponding buttercream frosting are my two most-requested recipes, and for good reason. They’re simple to put together and sooo good.

*Please forgive those horrendous photos–I’ll be updating them soon.Easter Egg Hunt CakeAre you still reading? I hope so.

Let’s talk cake construction. First and foremost, bake and cool four 9-inch round cake layers and whip together a double batch of (dyed-green) vanilla buttercream frosting. Yes, four layers (1.5 times my standard recipe) and a double the usual amount of frosting. This cake is huge–gotta have plenty of space for all that Easter candy!

First, place a layer of cake on a serving plate and frost the top of it, just like you would for any layer cake. Then (and this is where it gets weird), use a large round cutter to remove the centers of two of your layers. Save those centers for another task, like making a mini-layer cake or a trifle.

Place one of the cut-out layers on the frosted base layer. Top it with a layer of buttercream and the second cut-out layer. Frost that one too.Easter Egg Hunt CakeEaster Egg Hunt CakeSee that hole? Fill it with any egg-shaped Easter candy you like! I used Reeses Pieces Eggs, but you could use chocolate eggs or even jelly beans. I also added some little bunny & carrot-shaped sprinkles, because sprinkles are my love language.Easter Egg Hunt CakeAt this point, you should have one intact cake layer left. Use it to top the other layers, and then frost the tallest layer cake you’ve ever seen.Easter Egg Hunt CakeTo decorate, press dyed-green flaked coconut into the frosting, and then arrange some Easter candy on top. I found this easiest to do by piping little blobs of frosting over the coconut and sticking the candies to them.Easter Egg Hunt CakeAt this point, this cake will look like any old layer cake. Sure, it’s a huge one that’s clearly decorated for Easter, but nobody will suspect the surprise inside. And you, being cool as a freaking cucumber, will act like it’s any old vanilla cake.Easter Egg Hunt CakeBut then, you’ll start to slice the thing…
Easter Egg Hunt CakeEaster Egg Hunt CakeEaster Egg Hunt CakeWhat’s that?! A layer cake full of candy Easter eggs?! How clever of you, you beautiful, talented, homebaking human, you.Easter Egg Hunt CakeEaster Egg Hunt CakeLooking for more Easter-appropriate desserts? Check out these Carrot Cake Blondies, this Lemon Yogurt Cake, and my Coconut Cream Pie! Oh, and keep an eye out for another layer cake coming later this week 💕🐣🐰🍰🎂

Easter Egg Hunt Cake
inspired by Sally’s Baking Addiction
makes one four-layer 9-inch round cake

For greasing the pans:
1/4 cup all-purpose flour
1/4 cup neutral-flavored oil (I like canola)

Vanilla Cake:
4 1/2 cups all purpose flour
1/2 cup cornstarch
1 1/2 teaspoons baking powder
3/4 teaspoon baking soda
1 1/2 teaspoon Kosher or sea salt
2 cups granulated sugar
1 cup light brown sugar, packed
1 1/2 cups (3 sticks) unsalted butter, softened to room temperature
4 large eggs + 2 large egg yolks, room temperature
2 tablespoons pure vanilla extract
3 cups buttermilk, room temperature

Vanilla Buttercream:
1 pound (4 sticks) unsalted butter, softened to room temperature
2 pounds confectioner’s sugar
pinch of Kosher or sea salt
2 tablespoons pure vanilla extract
15-20 drops liquid green food coloring
5-8 tablespoons heavy cream

For Decoration:
1 14-ounce bag sweetened flaked coconut
6-8 drops liquid green food coloring
egg-shaped Easter candies (I used Reeses Pieces Eggs)

For Assembly:
2-2 1/2 cups egg-shaped Easter candies (I used Reeses Pieces Eggs)
1/2 cup sprinkles, optional

Preheat oven to 350F. Prepare the pans. In a small bowl, use a fork to whisk together greasing mixture ingredients. Use a pastry brush to paint mixture onto the entire insides of four 9-inch round cake pans. Set aside.

Make the cake batter. In a medium mixing bowl, whisk together flour, cornstarch, baking powder, baking soda, salt, granulated sugar, and light brown sugar. Set aside.

In a large mixing bowl, cream butter with an electric mixer until light and fluffy, about two minutes. Add eggs and egg yolks one at a time, beating completely after each addition. Beat in buttermilk. Add dry ingredients in three installments, beating just until combined. Scrape down the bowl as necessary.

Divide batter evenly into prepared pans. Tap each full pan on the counter five times to release any large air bubbles. Bake cakes 23-27 minutes, rotating top to bottom and back to front at the halfway point. Cakes are done when a toothpick inserted in the centers comes out clean. Let cakes cool in pans for fifteen minutes. Run a small thin knife around the edges of the pans and invert the cakes onto cooling racks to cool completely.

Make the frosting. In a large mixing bowl, beat butter until light and fluffy, about two minutes. Beat in confectioner’s sugar in three installments, scraping down the bowl as necessary. Beat in salt, followed by vanilla and food coloring. Add in heavy cream until desired consistency is reached.

Prepare the decoration. In a small mixing bowl, use a fork to combine coconut and food coloring until desired color has been reached. Set aside.

Assemble the cake. Place one round on a serving plate and top with a layer of frosting. Set aside.

Use a 4-6 inch cutter (or a wide-mouthed cup or jar) to cut the centers out of two layers. Set centers aside for another use. Place one cut-out layer on the bottom layer and top with a layer of frosting. Place the other cut-out layer on top and frost. Fill the hole in the cake layers with candies and optional sprinkles. Top with the last (fully-intact) layer of cake. Frost cake as desired. Cover with dyed green coconut. Decorate with additional Easter candies as desired.

Layer cake will keep covered at room temperature for up to three days, or in the refrigerator for up to a week.

Easter Egg Hunt Cake

Chocolate Biscuit Cake

Chocolate Biscuit CakeConfession: I know almost nothing about Irish baking. I can make an Irish Chocolate Potato Cake, but beyond that, I’m lost.

Today though, that’s okay. I don’t need to know a single thing about Irish baking to make this Chocolate Biscuit Cake…because it’s no-bake!

Chocolate Biscuit CakeThis cake is not a cake at all, really. It amounts to wheat-based tea cookies (aka biscuits) enrobed in a block of chocolate ganache, basically making it one big truffle. It’s very rich and is just…wow. I don’t know why this isn’t more popular in America. It’s the ultimate icebox cake, and heaven knows we Americans love an icebox cake.

Chocolate Biscuit CakeThe classic cake is just the chocolate and biscuits, but I’ve taken the liberty of making it a little more cake-like (well cheesecake-like) by adding a buttery crust. What can I say? I love a classic, but I also can’t leave well enough alone. This extra step just takes a minute–literally, it happens in the food processor–but I love the textural difference between the big chunks of cookie in the cake and the fine, buttery crumb of the crust.

Press the crust into the pan and freeze it while you make the filling. Chop up a pound of dark chocolate. Yes, a pound. Bring heavy cream, a stick of butter, and a bit of honey to a simmer and then pour it over the top of the chocolate. Leave it to melt for a few minutes before stirring it together to make a sort of souped-up ganache. Fold in a pound of biscuits that have been broken into shards, and then spread it all over the crust. Refrigerate the cake for a few hours before dusting with confectioners sugar and serving in small slices.

Chocolate Biscuit CakeNow you may be wondering, is this big truffle of a cake actually Irish? It was popular a few years ago when Prince William had it for his groom’s cake at the Royal Wedding, so it may be considered more of an English thing. I, however, am deciding it’s appropriate for St. Patrick’s Day because my first-ever Chocolate Biscuit Cake recipe came from the Irish mother of a friend. This is not her recipe, but I now associate this dessert with our emails back and forth about metric vs. empirical measurements. I’ve done a little research to back this up, and it appears Chocolate Biscuit Cake is just as popular in Ireland as it is in England.

Thank goodness for that. It means you can have Chocolate Biscuit Cake tomorrow. Chocolate Biscuit CakeChocolate Biscuit Cake
makes one 9- or 10-inch cake

Crust:
6 ounces digestive biscuits* (about 12 biscuits)
1/4 cup granulated sugar
pinch of Kosher or sea salt
1/2 cup (1 stick) unsalted butter, melted

Filling:
16 ounces dark chocolate, finely chopped
2 cups heavy cream
1/2 cup (1 stick) unsalted butter, cut into pieces
2 tablespoons mild honey (or Lyle’s Golden Syrup)
16 ounces digestive biscuits (about 32 biscuits), broken into pieces
1-2 tablespoons confectioners sugar, for topping (optional)

Butter the inside of a 9- or 10-inch springform pan. Set aside.

Make the crust. In a food processor, pulverize digestive biscuits until they are fine crumbs. Pulse in sugar and salt. Add melted butter and process until combined. Transfer mixture to prepared pan and press into an even layer on the bottom and slightly up the sides of the pan. Freeze for 30 minutes to set.

Make the filling. Place chocolate in a large mixing bowl. Set aside.

In a saucepan, combine heavy cream, butter, and honey. Heat over medium-low, stirring frequently until it comes to a simmer. Remove from heat. Be careful–cream expands rapidly when it reaches a boil.

Pour cream mixture over chocolate and allow it to sit until chocolate melts, about 8-10 minutes. Whisk together until smooth. Fold in broken digestive biscuits. Pour mixture over the top of the crust. Smooth the top as well as you can. Tap pan on the counter ten times to distribute everything evenly. Smooth again. Loosely cover the pan with plastic wrap. Refrigerate for 3 hours, or until set.

Remove cake from refrigerator and discard plastic wrap. Run a small, flexible knife around the edge of the pan. Release the springform. Sift confectioners sugar over the top, if desired. Slice into small pieces and serve.

Cake will keep covered in the refrigerator for several days.

Note:
If you cannot find digestive biscuits in the cookie or international aisles of your grocery store, crisp butter cookies or graham crackers will work here.

Chocolate Biscuit Cake

Red Velvet Cheesecake Bars

Red Velvet Cheesecake BarsWhile I was in Texas this past December, I held a pop-up sale in my parents’ dining room. When I set the date and began to plan the thing, I had grand ideas about what I would have available. The list of ideas included grapefruit bars and pie and Texas-shaped ginger cookies, but when it came down to it, I threw all those ideas out the window and took it easy on myself. The preparation was still intense, but making drop cookies and bars was far simpler than what I had originally planned.

There were Peanut Butter Blossoms, Malted Whoppers Cookies, and Brown Butter Chocolate Chip Cookies, but the first things to go were these Red Velvet Cheesecake Bars. Between their eye-catching color, classic chocolate-meets-vanilla flavor, and the swirls of cheesecake, their quick disappearance is easy to understand.

Red Velvet Cheesecake BarsMaking Red Velvet Cheesecake Bars may sound daunting to some, but they were actually the easiest recipe I made. I mean, there’s no softening of butter, no chilling of dough, no waiting for chocolate to harden. Nope. These bars are ridiculously easy to make, and come together in just a few minutes.

The red velvet base is a play off of my favorite blondie recipe. You’ll notice a few changes from the norm here, most noticeably that they’re bright red, but food coloring isn’t the only thing these bars have in common with their namesake cake: natural unsweetened cocoa is subbed for part of the usual all-purpose flour and a touch of vinegar gives the base that signature red velvet tang.

Red Velvet Cheesecake BarsThe batter comes together with just a whisk and a bowl, but you will need your mixer for the cheesecake. It’s the real star of the show here. I mean, red velvet is great and all, but I am all about that cheesecake layer. There’s nothing new here–cream cheese, sugar, eggs, and vanilla are beaten together before being swirled into the red velvet batter. Everything goes into the oven for about half an hour before taking a seemingly endless four hour chill. For all the ease of preparation here, there is a lot of patience required. I promise it’ll all be worth it once you bite into one of these bars.

Red Velvet Cheesecake BarsLook at that! There’s almost as much cheesecake as there is red velvet! Make a batch this weekend, or use a heart cookie cutter and make them part of your Valentine’s Day ❤ Red Velvet Cheesecake Bars

Red Velvet Cheesecake Bars
makes 24-32 bars

Cheesecake:
16 ounces (2 bricks) full-fat brick-style cream cheese, room temperature
1/3 cup granulated sugar
2 large eggs
2 teaspoons pure vanilla extract

Red Velvet Base:
1 3/4 cups all-purpose flour
1/4 cup natural unsweetened cocoa powder (not Dutch process)
1 teaspoon Kosher or sea salt
1 cup unsalted butter, melted
2 cups granulated sugar
3 large eggs, room temperature
1 1/2 teaspoons white vinegar
2 teaspoons pure vanilla extract
1 tablespoon liquid red food coloring

Place oven racks in the top and bottom positions. Preheat oven to 350F. Line a 9×13-inch pan with foil and grease with butter. Set aside.

Make cheesecake. In a medium mixing bowl, use an electric mixer to beat cream cheese until fluffy. Mix in sugar. Add eggs one at a time, beating until combined. Mix in vanilla. Set aside.

Make the red velvet. In a small bowl, whisk together flour, cocoa powder, and salt. Set aside. In a large mixing bowl, whisk together melted butter and sugar. Add eggs one at a time, whisking completely after each addition. Whisk in white vinegar, vanilla, and food coloring. Use a silicone spatula to fold in flour mixture. Reserve 2/3 cup of the batter before spreading the rest in the prepared pan.

Pour cheesecake mixture over the red velvet batter. Drop spoonfuls of the reserved red velvet over the top and swirl in with a small, thin knife. Tap full pan on the counter five times to release any air bubbles. Tightly cover the pan with foil. Bake on the top rack of the oven for 15 minutes. Remove top foil and place pan on the bottom rack to bake for 15-20 more minutes. Bars are done when the cheesecake layer barely jiggles when the pan is jostled.

Allow bars to cool in the pan on a rack until they reach room temperature. Refrigerate for four hours, until cold. Place bars on a cutting board and remove foil. Use a large chef’s knife to slice them into bars (or a cookie cutter for fun shapes). Serve.

Red Velvet Cheesecake Bars will keep in an airtight container in the refrigerator for up to five days.

Red Velvet Cheesecake Bars

Pear & Cranberry Torte

Updated 11/15/2018 to add better photos.Pear & Cranberry TorteEverybody has their holiday mainstay dish. For some it’s tamales, for others, a glazed ham. For me, it’s this Pear & Cranberry Torte. I found the recipe for a simple cranberry version years ago when I was just learning to bake, and I’ve made it ever since. I made it as written many times, but as I gained more knowledge and confidence in my baking, I made a few adjustments and have had it in my holiday repertoire ever since.Pear & Cranberry TorteWhat’s the difference between a torte and a cake? Besides just sounding fancier than regular cake, tortes are made with minimal to no flour, relying on eggs, sugar, and sometimes leaveners to give them structure. I’ve put one other torte recipe on here, my grain-free version of Molly Wizenberg’s Winning Hearts & Minds Cake. If you or your guests are way into chocolate (or gluten-free!), throw that recipe on your menu.
Pear & Cranberry TorteBut back to today’s torte. It’s a buttery, light vanilla-almond cake full of soft pieces of pear and tart whole cranberries–it definitely tastes like the holidays. Where a lot of holiday desserts are time consuming and require ingredients you don’t use for the other 11 months of the year, this one is simple. With the exception of the pear and the cranberries, you probably have all the ingredients in your home right now.

The cake base comes together in minutes. Cream some butter, granulated sugar, and light brown sugar. Beat in a couple of eggs, some vanilla, and a hint of almond extract. Mix in a mixture of flour, baking powder, and salt before spreading the batter into a buttered springform pan. That’s it! Then just dot the top with chunks of pear (you’ll want to use one that’s ripe but not mushy) and scatter on some cranberries. Dust it all with a tablespoon of sugar before baking for 40 minutes or so.Pear & Cranberry Torte
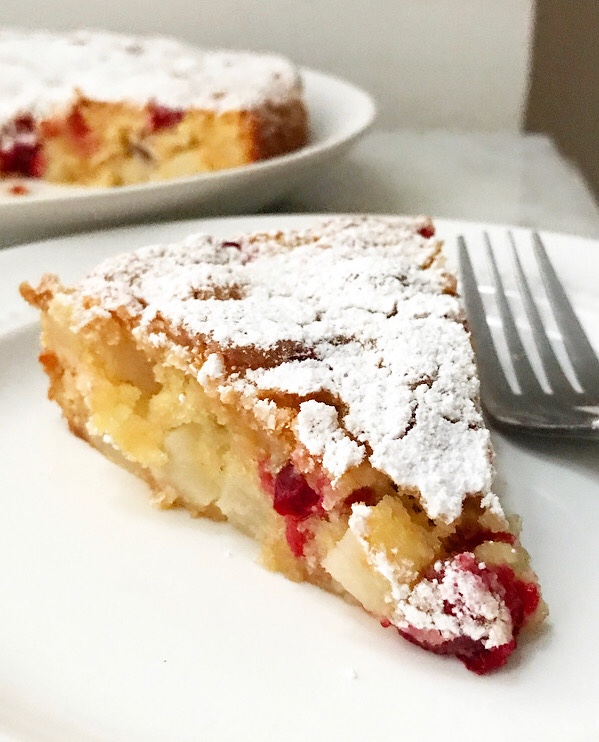
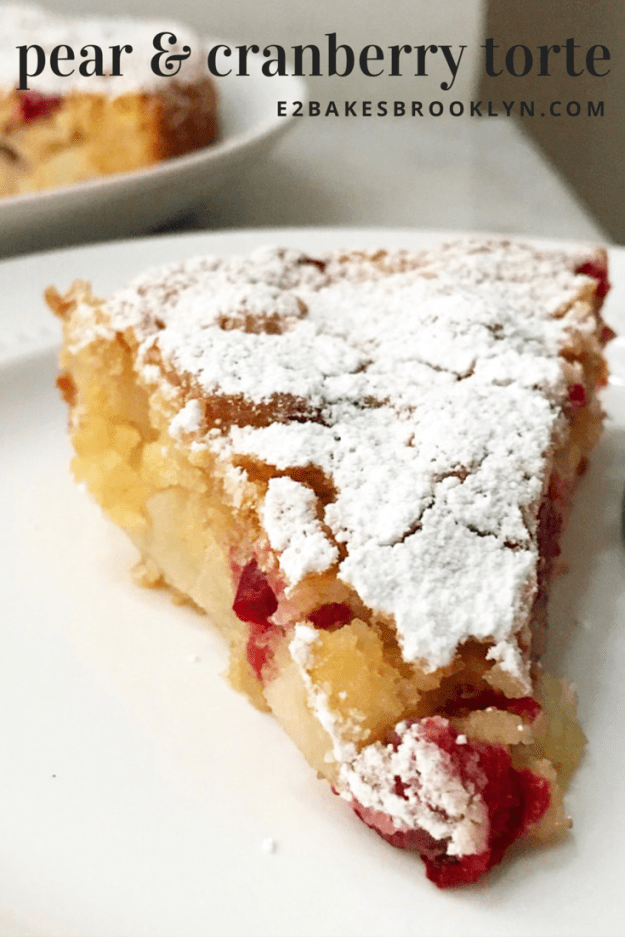
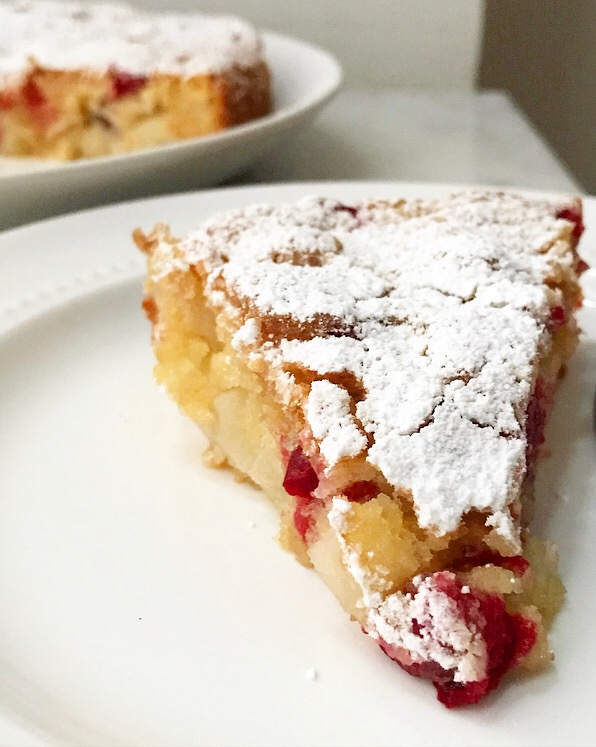
Once baked, Pear & Cranberry Torte has a very rustic appearance. The pieces of pear will buckle into the batter while the cranberries dot the golden brown top crust. The torte may be served warm or at room temperature, and is just as good with whipped cream or a dusting of confectioner’s sugar as it is by its lonesome.

I hope this Pear & Cranberry Torte becomes a holiday mainstay for you. The buttery vanilla-almond cake and seasonal fruit are a delightful end to any holiday meal. And if you’re the kind of person who gives cakes as gifts, this torte is easy to pack and your friends will love it.Pear & Cranberry Torte

Pear & Cranberry Torte
adapted from Lottie & Doof
one 9-inch cake

1 cup all-purpose flour
1 teaspoon baking powder
1/4 teaspoon Kosher or sea salt
1/2 cup unsalted butter, softened to room temperature
1/2 cup granulated sugar + 1 tablespoon, for sprinkling
1/2 cup light brown sugar, packed
2 large eggs, room temperature
1 teaspoon pure vanilla extract
1/4 teaspoon pure almond extract
1 medium pear, cored, peeled, and 1/2-inch diced (about 1 cup cubes)
3/4 cup fresh or frozen whole cranberries

Preheat oven to 350F. Grease a 9-inch springform pan. Set aside.

In a small-medium mixing bowl, whisk together flour, baking powder, and salt. Set aside.

In a large mixing bowl, use an electric mixer to cream butter until very light and fluffy (about 2 minutes). Beat in granulated and light brown sugars. Mix in eggs one at a time, followed by vanilla and almond extracts. With the mixer on low, mix in dry ingredients. Batter will be thick.

Spread batter into the prepared pan. Scatter pear pieces and cranberries over the top and lightly press them into the batter. Sprinkle additional tablespoon of granulated sugar over the top. Bake 40-45 minutes, until a toothpick inserted near the center comes out clean. Let cake cool in the pan on a rack for 15 minutes before running a small, thin knife around the edge and releasing the springform.

Serve warm or room temperature with whipped cream, if desired.
Pear & Cranberry TortePear & Cranberry Torte

Eggnog Bundt Cake

Eggnog Bundt CakeThere are two kinds of people in the world: those who love eggnog and those who hate it. Until a few years ago, I was decidedly in the latter camp. I have an aversion to liquid dairy (I take my coffee black and prefer my cereal to be dry). I am hesitant around creamy things in general, but especially drinks. I have had one glass of eggnog in my life and while I loved the flavor, I just couldn’t handle the texture.

Eggnog Bundt CakeLuckily I’ve learned to bake since then, so I can have the flavor of eggnog without the texture. Last year, I made some rockin’ Eggnog Sandwich Cookies and I’ve been dreaming of other ways to bake with eggnog ever since. A few months ago, it hit me: Eggnog Bundt Cake. Soft, tight-crumbed cake flavored with everyone’s favorite seasonal beverage, scented with cinnamon and nutmeg, and drizzled with glaze.

Eggnog Bundt CakeI know that all the ridges and curves in a bundt pan can make it intimidating–there’s a greater chance that a chunk of cake will stick to the pan or that it’ll break in half when inverted. The secret here is to grease it heavily with a mixture of flour and oil. Whisk equal amounts of them together until a thin paste forms and then paint it over the entire inside of the pan. This creates a barrier between the cake batter and the pan, greatly reducing the chance that your cake will stick. When the cake is done and has had a chance to cool for a few minutes, run a small, thin knife around all of the ridges and curves and invert it onto a cooling rack. The cake will come out of the pan in one piece every time–there’s no hoping and praying about it. There may be a little excess flour on the top of the cake, but it should come off with the swipe of a dry paper towel. Voilà! Easy cake release every time. I use this method with all my layer cakes too, and have excellent results every time.Eggnog Bundt CakeEggnog Bundt Cake

Once the pan is greased, get to work on the cake batter. You’ll see all of the usual suspects here–flour, cornstarch, baking powder, salt, sugar, butter, eggs. But then we put a holiday spin on it and add a full 1 1/2 cups of eggnog and 1/2 teaspoon each of cinnamon and nutmeg! The cake batter will be very thick, but should pour easily into the greased pan. Bake it for nearly an hour before inverting onto a rack and drizzling with a simple glaze made with confectioner’s sugar, more eggnog, and spices.

Eggnog Bundt Cake is soft and moist, perfectly spiced, and full of eggnog flavor. It’s a great dessert for holiday parties, but you could also place it on a cute tray, wrap it with cellophane and a bow, and give it as a gift!Eggnog Bundt Cake

Eggnog Bundt Cake
makes one 12-cup capacity bundt pan

For the Pan:
2 tablespoons all-purpose flour
2 tablespoons neutral-flavored oil

Cake:
2 2/3 cups all-purpose flour*
1/3 cup cornstarch
3/4 teaspoon ground cinnamon
3/4 teaspoon ground nutmeg
2 teaspoons baking powder
3/4 teaspoon Kosher or sea salt
1 cup unsalted butter, softened to room temperature
2 cups granulated sugar
5 large eggs, room temperature
1 1/2 cups eggnog
1 tablespoon pure vanilla extract

Glaze:
1 cup confectioner’s sugar
pinch of ground cinnamon
pinch of ground nutmeg
pinch of Kosher or sea salt
3-4 tablespoons eggnog
1/2 teaspoon pure vanilla extract 

Preheat oven to 350F. Grease the pan. In a small bowl, use a fork to whisk together flour and oil. Use a pastry brush to paint mixture over the entire inside of the bundt pan. Pour out any excess. Set aside.

In a medium-large mixing bowl, whisk together flour, cornstarch, cinnamon, nutmeg, baking powder, and salt. Set aside.

In a large mixing bowl, use an electric mixer to beat butter until very light and fluffy–about 2 minutes. Beat in sugar. Add eggs one at a time, combining completely after each addition. Mix in eggnog and vanilla. Add dry ingredients in two installments, mixing on low until combined. Transfer batter to prepared pan and smooth the top. Tap full pan on the counter five times before baking for 50-55 minutes, tenting with foil at the 25 minute mark. Cake is done when a toothpick inserted in several places comes out clean.

Let cake cool in the pan for 15 minutes. Run a small, thin knife around the outer edges of the pan before inverting the cake onto a rack to cool completely.

Make the glaze. In a small bowl, use a fork to whisk together confectioner’s sugar, cinnamon, nutmeg, and salt. Whisk in 3 tablespoons of eggnog and vanilla. Add another tablespoon of eggnog if you’d like a thinner glaze. Use a fork to drizzle glaze over cake. Glaze will set a bit after 20 minutes. Slice cake and serve.

Cake will keep covered at room temperature for up to three days, or in the refrigerator for up to five.

Note:

You may use cake flour instead of all-purpose. Use 3 cups of cake flour and omit the cornstarch. Proceed with recipe as written.

Eggnog Bundt Cake