Category Archives: Pies & Pie Bars

Chocolate Cream Pie

 Oof. Re-entry has been rough.

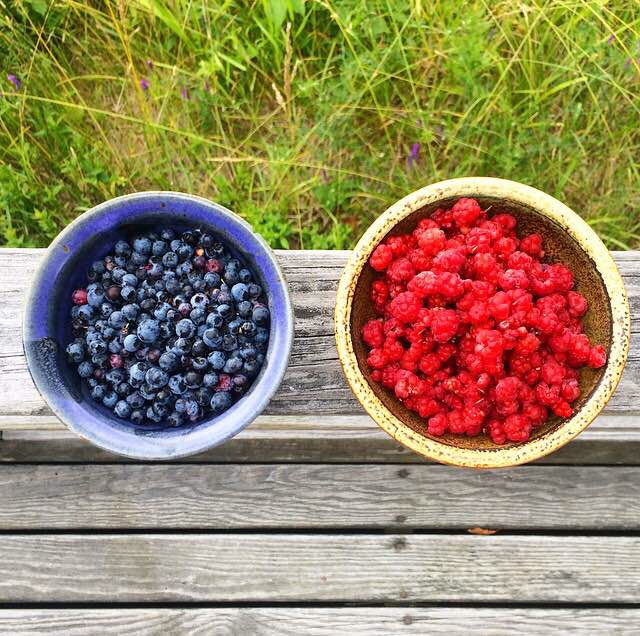
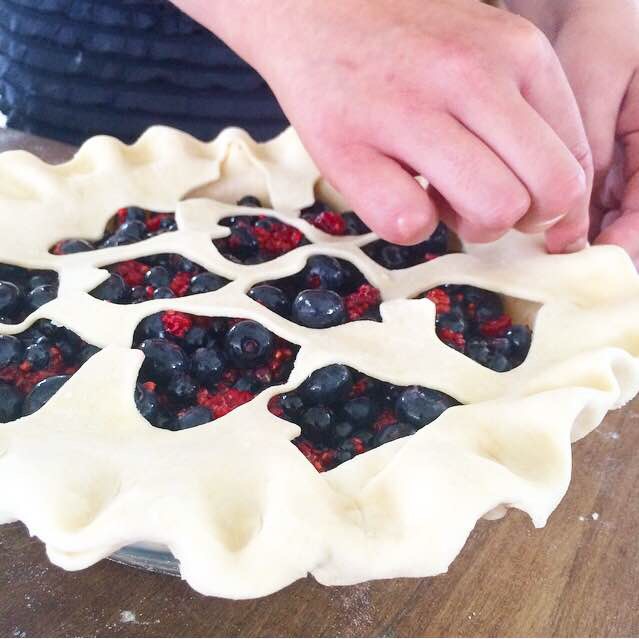
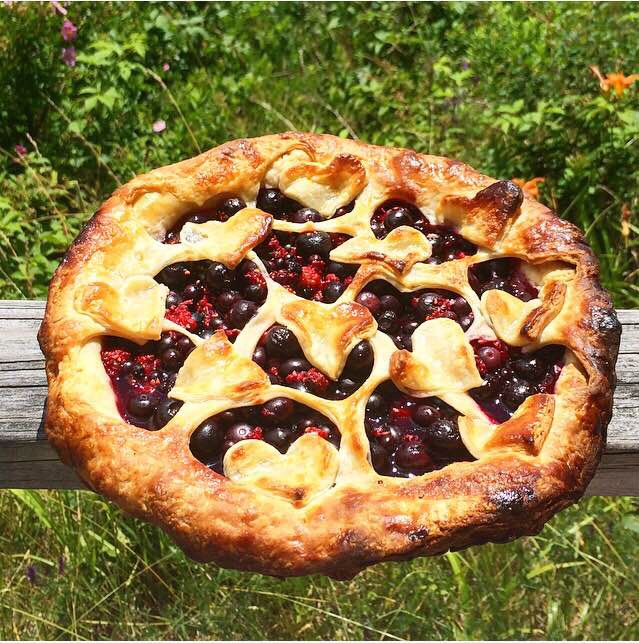
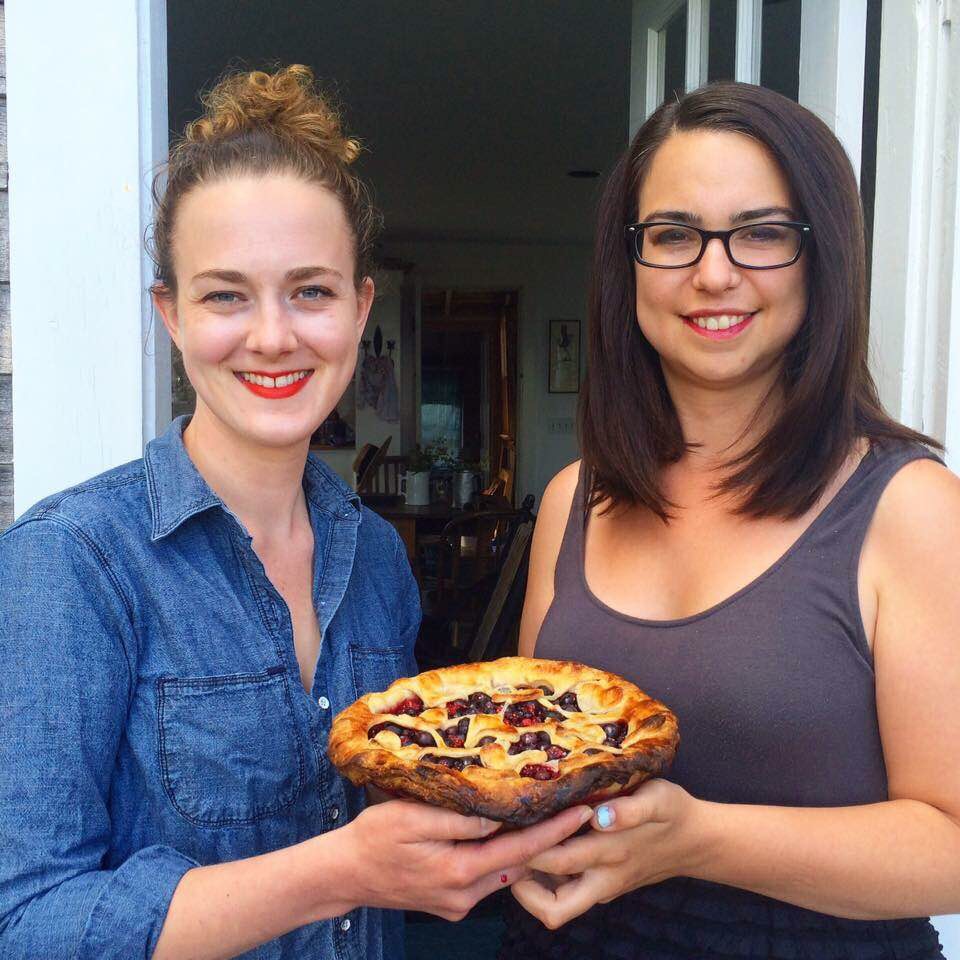
After a week on Swans Island, Maine, with three of my nearest and dearest, I thought I was ready to get back to my life in NYC. Boy, was I wrong. 

We hit absolutely no traffic on the drive home…until we crossed into the Bronx. By that time, we’d been in a hot car for twelve hours and even though we’d had a great time together, we were all ready to be in our respective apartments with the air conditioning going full-blast. When I finally got home at 10:30pm, I was ecstatic to be back. A week in the middle of nowhere had calmed my usual crazy, and I was feeling refreshed and ready to return to work and blogging. 

But life has a way of bringing you back down to earth, and this week has been nothing short of insanity. It’s the end-of-the-month cake rush, so I have had my oven on near-constantly. We are in the midst of a heatwave and the kitchen is the only un-air conditioned room in my apartment, so I have been overheated for days. Getting back to my day job is hard only because I had gotten accustomed to spending my afternoons laying on the beach and going to the general store. This blog has gone completely silent–something that has rarely happened in its nine-month existence. I’ve thrown myself into bed unusually early every night since I’ve been home, wishing I could still be up there in our little house, sleeping with the windows open so I could hear the ocean. 

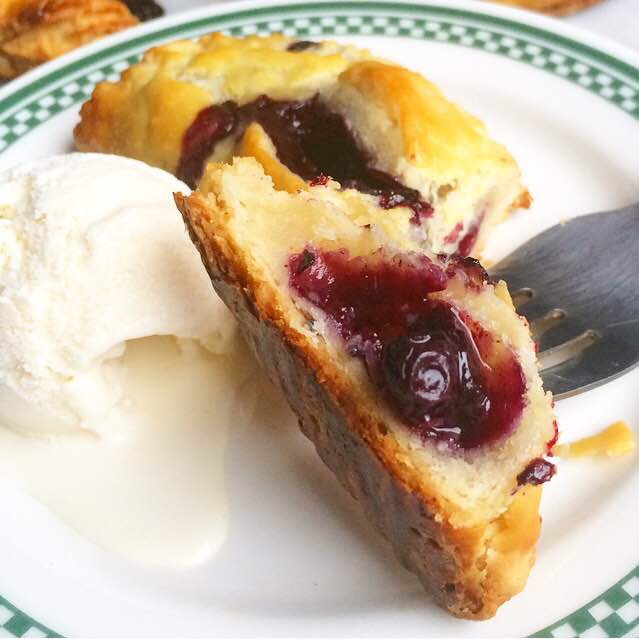
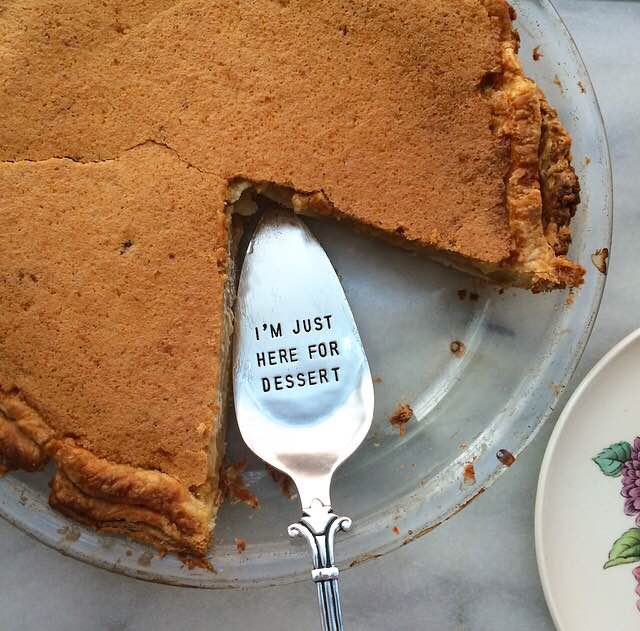
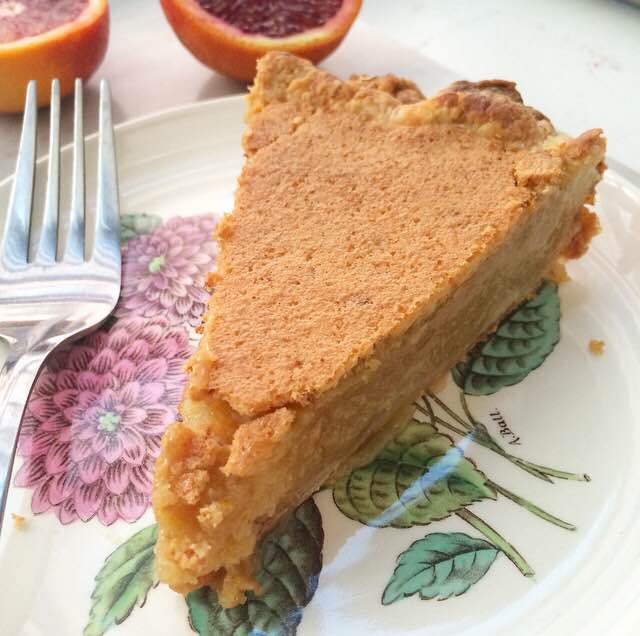
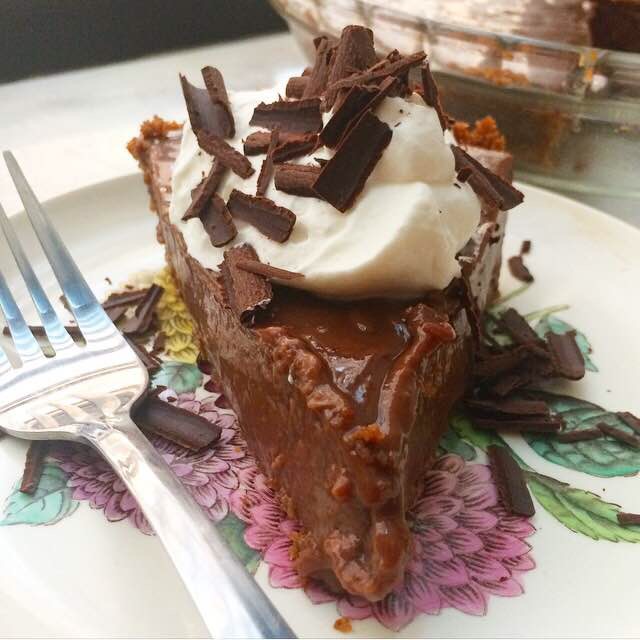
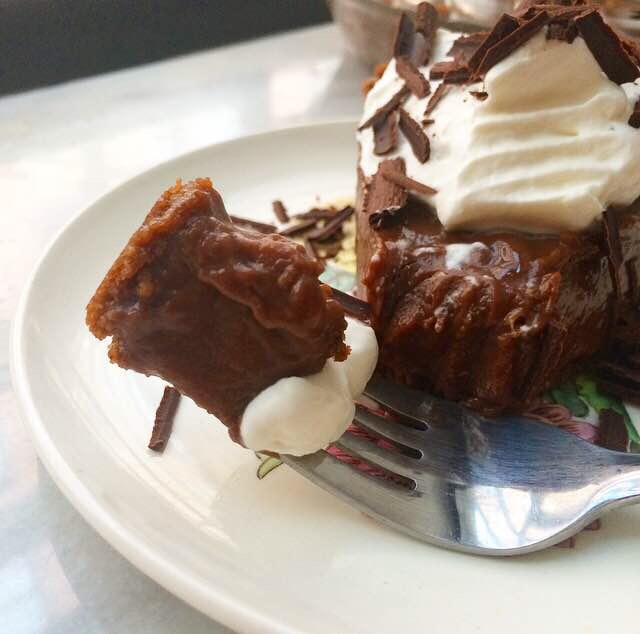
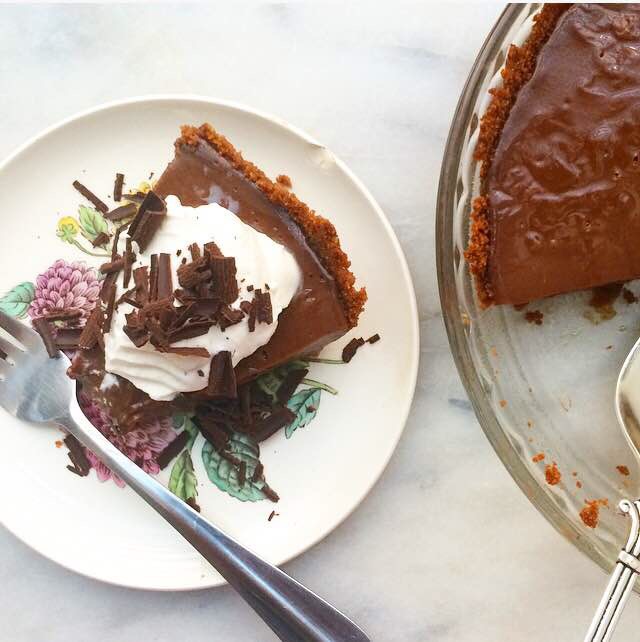
So what do I do when everything seems hard? Make Chocolate Cream Pie. Cold, creamy, and chocolaty with a crumbly graham cracker crust and a ton of whipped cream, it’s the answer to all my problems right now. It’s near-impossible to worry about your to-do list when you’re eating pie, right?! 

 This recipe is an adaptation of the Chocolate Cream Pie recipe found in the original 1952 Betty Crocker’s Picture Cook Book. On my trip to Maine last year, I was lucky enough to find a second-edition copy at a used bookstore in Bath for $6. It’s held together with tape and most of the pages fall out when I open the thing, but I love it so much that I don’t care. It’s a book full of classics (and a few weird things involving gelatin). If you come across a copy, I highly recommend scooping it up while you have the chance. You’ll use it way more than you might imagine.

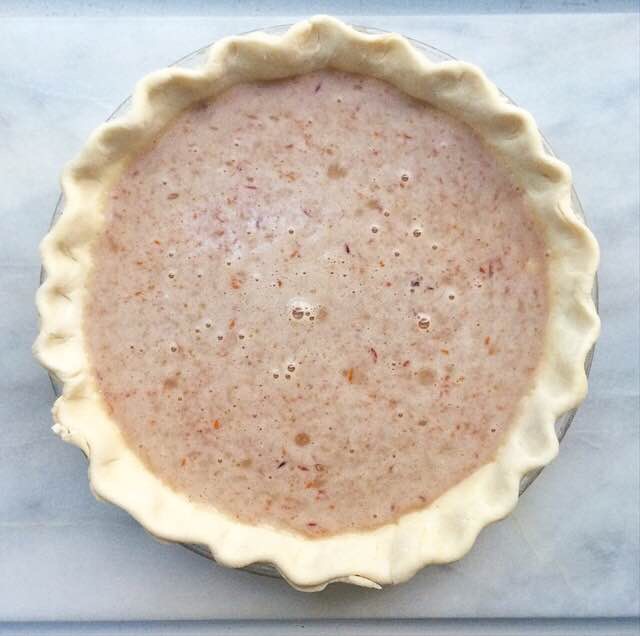
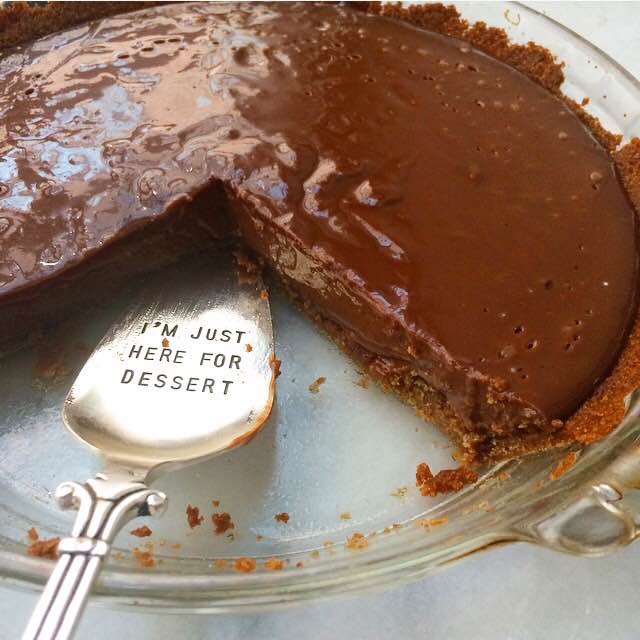
While I love mixing flavors and textures, some things just shouldn’t be messed with, and Chocolate Cream Pie is one of them. The only changes I have made to this recipe are using a graham cracker crust instead of pastry, adding an extra egg yolk and a bit more vanilla, and topping it with freshly whipped cream instead of meringue. There’s no need to mess with it any further. This classic pie is perfect just the way it is. 

 Chocolate Cream Pie
adapted from Betty Crocker’s Picture Cook Book
makes one 9-inch pie

Graham Cracker Crust:
9 full-sheet honey graham crackers
1/4 cup dark brown sugar, packed

1/4 teaspoon Kosher or sea salt
6 tablespoons unsalted butter, melted
Filling:
1 1/2 cups granulated sugar
1/4 cup cornstarch
1/2 cup natural unsweetened cocoa powder
1/2 teaspoon Kosher or sea salt
3 cups whole milk
4 large egg yolks, room temperature
1 tablespoon unsalted butter
2 teaspoons pure vanilla extract

Whipped Cream:
1 cup heavy cream
1 tablespoon granulated sugar
1 teaspoon pure vanilla extract

For Topping:
chocolate curls (optional)

Preheat the oven to 350F.

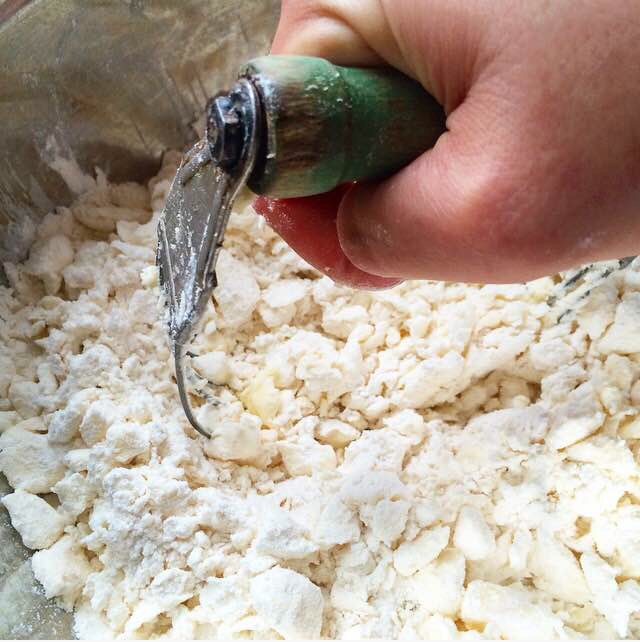
Make the crust. Place graham crackers in the bowl of a food processor and process until no large pieces remain. Add dark brown sugar, salt, and melted butter. Process until the mixture resembles wet sand, scraping down the sides of the bowl as necessary. Transfer the mixture to a 9-inch standard pie plate and use clean hands to evenly press the mixture onto the bottom and up the sides of the pan. Bake crust for 10 minutes. Cool crust on a rack while you prepare the filling.

In a large saucepan, whisk together sugar, cornstarch, cocoa powder, and salt. Place the pan over medium-high heat. Whisking constantly, pour the milk into the dry ingredients. Continue to whisk until the mixture boils for 1 minute. Reduce the heat to low.

In a small bowl, use a fork to whisk egg yolks. Remove 1/3 cup of the warm chocolate mixture from the pot. Whisking constantly, slowly pour chocolate mixture into the egg yolks until completely combined. Add egg yolk mixture to the pot and turn heat back up to medium-high. Continue to whisk until mixture boils for 2 minutes. Remove pot from the heat and whisk in butter and vanilla extract. Pour filling into prepared crust. Press plastic wrap onto the top of the pie and chill for at least four hours or overnight.

Make the whipped cream. In a medium-large mixing bowl, combine heavy cream, sugar, and vanilla. Use an electric mixer to whip cream until stiff peaks form.

Remove plastic wrap from pie. If serving the entire pie at once, spread whipped cream over the entire surface of the pie immediately before slicing and serving. If serving at multiple intervals, top each slice with whipped cream as it is served. Top with chocolate curls, if desired.
Pie will keep covered in the refrigerator for up to three days.

Blue-Razz Pie

 If, hypothetically speaking, I ever wanted to leave New York City for good, I know exactly where I would go. I’d pack my life into a moving truck, drive ten hours north, hop a ferry, and set up camp on Swans Island, Maine. There would be an initial shock, leaving a city of 8 million people and taking residence in a town of 300, but I’m sure I’d adjust quickly. 

As I doubt I have any talent for lobstering (the primary profession among citizens of Swans Island), I think I’d build a little pie shop next door to the general store and live out my days wearing cute aprons, rolling dough, and serving warm slices of local berry pie a la mode. Oh yes, that’s the dream. Or at least it is today.

I’m currently vacationing on Swans Island with my dear friends VJ, Shira, and Liz. As there are two Lizzes here, I have been dubbed Betsy for the purposes of this trip. There’s not much to do here–there’s one store, no restaurants, no TV. Wi-Fi is available only from the porch of the public library and the vestibule in the post office. We’re completely out of our normal routines, instead filling our days with reading, relaxing, building fires, and making meals together. It’s absolutely glorious, and I think I can speak for all of us when I say that we are not terribly thrilled that we’ll have to drive back to Brooklyn on Saturday. 

Liz and I have spent several hours walking down the side of the main road foraging for berries. When I was here last year, I found tons and tons of wild blackberries, but they’re not quite ripe yet. Instead, we’ve done some light trespassing in the name of blueberries and worried about ticks while picking raspberries in a ditch. We have not been arrested or had any ticks, thank goodness, but we have managed to collect just enough berries for pie.

When Liz and I met a year ago, we bonded over our mutual love of pie. She is a filling person, while I prefer the crust–a perfect balance, if you ask me. We have made at least fifteen pies since, including one November evening where we baked three apple pies before virtually passing out during the final game of the World Series. Every single one has been an enjoyable (and delicious) collaboration, but I think the Blue-Razz Pie we made today is my very favorite. 

  And how couldn’t it be? We worked as a team, scouring every bit of woods up and down North Road in an effort to make this happen. On our first visit to the WiFi porch at the public library, we each rushed through checking our email and social media so that we could squat in a ditch and pick blueberries. Yesterday, we took a six hour sojourn to the mainland for provisions and even though we were exhausted when we got back to the island, we put on long pants and went out to gather raspberries near the Back Cove. Our foraging was cut short by rain, but when we got home, Liz cut together a batch of Cream Cheese Pie Dough and we planned to get up the next morning and make pie first thing. 

   She stirred together the filling while I rolled and cut dough. We cut out hearts with an ancient cookie cutter we found in the back of a cabinet full of mismatched pots and pans. Everything got a brush of egg wash and a sprinkling of sugar before being popped into the oven. And forty-five minutes later, we pulled out the most beautifully browned pie, full of bits of wild raspberries and blueberries and smelling like magic. 

 There’s something really amazing about biting into something you made with someone you adore. This pie captures what I love about my friendship with Liz: the teamwork, the creativity, and the sweetness. I can’t wait to make another one. 

 Blue-Razz Pie
makes one standard 9-inch pie

1 recipe Cream Cheese Pie Dough
3 cups fresh blueberries
1 cup fresh raspberries
1/2 cup granulated sugar, plus extra for sprinkling
4 tablespoons cornstarch
1/4 teaspoon ground cinnamon
pinch of Kosher or sea salt
juice of 1/2 lime

Egg Wash
1 egg
1 teaspoon water

On a floured surface, roll out one disc of pie dough to a 12-inch diameter and fit it in the pan. Trim the edges to 1/2-inch of overhang. Refrigerate while you prepare the filling.

In a large mixing bowl, combine blueberries, raspberries, 1/2 cup sugar, cornstarch, cinnamon, salt, and lime. Fold with a wooden spoon until everything is evenly coated. Transfer filling to prepared crust. Refrigerate.

On a floured surface, roll out the other disc of pie dough to a 12-inch diameter. You may use a cookie cutter to cut shapes in the dough before laying it over the top of the filling. If you want a full top crust, lay the rolled-out dough on top of the filling and cut a few vents. Trim the edges to 1/2-inch of overhang, and crimp the top and bottom crust edges together. Refrigerate.

Preheat the oven to 375F. Make the egg wash. In a small bowl, use a fork to whisk together egg and water. Use a pastry brush to brush the entire exposed crust with egg wash. Sprinkle with sugar. Bake for 45-55 minutes, tenting with foil at the 20 minute mark.

Let pie cool completely on a rack. Slice and serve with ice cream, if desired.

Pie will keep covered in the refrigerator for up to five days.

Blueberry Hand Pies

 How was your long weekend? Mine wasn’t really a weekend–I worked all but one day. Sunday, the one day I had completely off, my friend (also named Liz) came over and we made two pies for some Fourth of July barbecues she attended.

Liz and I rolled chilled dough and sliced fruit for fillings. We used a star cookie cutter to make the pies a little patriotic. We had a great time baking together, but at the end of the day we both came to the same conclusion: pie is a labor of love. You can’t just make pie on the fly. Nope. It takes about eight hours from the time you start making the dough to the time the finished product is cool enough to slice. 

I’m always up to make pie when I have the time, but it’s a little less fun when I know I’m not going to get to have any when the whole process is through. It’s especially disappointing when I’m making blueberry pie. Juicy blueberries spiked with cinnamon and lime and baked into a flaky crust–it’s the stuff of summertime dreams! But I am just one person. I do not need a whole pie sitting around. And so, after I put Liz and her pies into a cab, I set to work making these Blueberry Hand Pies. They’re classic blueberry pie, but in cute, convenient single servings 😊 

Blueberry Hand Pies start with my Cream Cheese Pie Dough. It’s super simple to put together and is flexible and easy with which to work. I’ve never had it tear, and that structural soundness is pretty important since it has to be cut, folded, and crimped! As with any pie dough, the key to working with this one is keeping it cold from the time you are cutting the butter and cream cheese into the flour to the minute it goes in the oven. If the dough becomes soft or sticky and any point in the hand pie-making process, refrigerate it for fifteen minutes before continuing. Taking the time to do this extra chilling will ensure super flaky crust.
 The dough is cut into 4 1/2-inch circles before being being filled with a combination of blueberries, a bit of sugar, cinnamon, salt, cornstarch, and lime. Then the edge of the dough is painted with a a semi-circle of egg wash before being folded in half and crimped with a fork. The hand pies are chilled while the oven heats up, then vented and painted with more egg wash before baking for 35-40 minutes, until glossy and golden. 
Where regular pies have to cool completely to room temperature before they can be sliced and served, these little Blueberry Hand Pies can be enjoyed just minutes after they come out of the oven! They’re fantastic by themselves, but I highly recommend enjoying one warm with vanilla ice cream! 

 Blueberry Hand Pies
makes 18 hand pies

1 recipe Cream Cheese Pie Dough,* chilled

Filling:
12 ounces fresh blueberries
1/3 cup granulated sugar
1 teaspoon ground cinnamon
4 1/2 teaspoons cornstarch or arrowroot powder
pinch of Kosher or sea salt
juice of one lime

Egg Wash:
1 large egg
1 tablespoon water

On a floured surface, roll chilled dough out to 1/4-inch thickness. Use a floured 4 1/2-inch round cutter* to cut circles out of the dough. Re-roll scraps as necessary to cut more circles. If dough gets too warm or sticky, place it in the refrigerator for 15 minutes. Place cut circles on a plate and refrigerate at least ten minutes.

Prepare the filling. Place blueberries in a large mixing bowl. Fold in sugar, cinnamon, cornstarch, and salt, followed by lime juice. Filling may seem dry. Set aside.

Make egg wash. In a small bowl, use a fork to whisk together egg and water. Set aside.

Line two baking sheets with parchment paper.

Assemble the hand pies. Lay a circle of dough on a floured surface. Place one tablespoon of the blueberry filling in the middle. Use a pastry brush to paint a semi-circle of egg wash on one half of the outer edge. Fold the unpainted half to meet the painted half, and press down lightly to seal. Crimp with a fork. Lay hand pie on prepared baking sheet. Continue making hand pies until all circles have been used. If anything gets too warm or sticky, refrigerate for at least fifteen minutes.

Once all pies are made, chill the baking pans in the refrigerator or freezer. Preheat oven to 375F. Once oven reaches temperature, remove full pans from refrigerator or freezer. Cut a small vent in each one* before painting with more egg wash. Bake for 35-40 minutes, tenting with foil at the 20 minute mark. Let hand pies cool on pans for fifteen minutes before removing to a rack to cool completely.

Hand pies may be served warm or room temperature. They are best the day they are made, but will keep in an airtight container at room temperature for up to three days or in the refrigerator for up to four days.

Notes:

1. You may use an pie dough recipe you like, or purchased refrigerated pie dough. This recipe requires enough dough for a double crust pie.
2. I use this 4 1/2-inch round cutter. If you do not have one, you may slice the dough into 5-inch squares, although you may get fewer total hand pies.
3. Pies may be frozen after they are vented. Lay them on parchment-lined pans and freeze until solid. Put them in a labeled freezer bag or container for up to two months. When you are ready to bake them, paint the pies with egg wash and bake them for an extra minute or two. No need to thaw.

Friday Favorites

I love anniversaries. Yes, I’m one of those people. If something happened once and warrants commemorating for any reason, I’m the one planning the party.

April 22nd is a big day for me. Today is my parents’ 33rd wedding anniversary, and I have another anniversary going on, too. It’s Earth Day. Heck, it’s my dog’s half-birthday 😜

All of that is great, but I’m writing today because this little blog began exactly six months ago!

Yes, I know six months does not technically constitute an anniversary, but for me, it means a lot. I talked about starting a food blog for six years before actually clicking “Publish.” Since October 22, 2015, I’ve posted 75 recipes. SEVENTY FIVE. Just…how?

I so appreciate all of you who have taken the time to read my posts, leave comments, follow me on social media, and make the recipes! Every time someone tells me they made something from my blog and enjoyed it, it brings me immeasurable joy. The idea that anyone would ever make and like a recipe that I created blows my mind. So, thank you.

And now that I’m done being sappy, let’s celebrate! Here are six of my favorite recipes from the archives to bring you into Spring! 

Chocolate Chip Shortbread Cookies are crunchy, buttery little cookies with all the flavors of a great chocolate chip cookie. They are super simple to make, and absolutely perfect with coffee or tea. I highly recommend using them for ice cream sandwiches 😊 

Spring is here, and that means we have four months of fantastic seasonal fruit ahead of us. More importantly, it means there will be pie! Make sure to use my Cream Cheese Pie Dough–it couldn’t be easier, and it makes the flakiest crust I’ve ever had. 

My grandmother’s Buttermilk Biscuits are one of my best memories of my childhood. Her recipe went with her when she passed many years ago, but I know she’d love mine. These biscuits are the perfect easy breakfast, and they are wonderful with a bowl of soup at dinner. 

It’s the beginning of picnic season, so you’ll need food that’s easy to make, transport, and share with your friends and family. My favorite thing to bring to an outdoor get-together? My Restaurant-Style Salsa! It takes just five minutes to whip up, and it puts prepared salsas to shame. 

And what’s warm weather without ice cream? No-Churn Mint Chocolate Chip Cookie Dough Ice Cream doesn’t require an ice cream maker, and is the creamiest, dreamiest ice cream I’ve made so far! And those little bits of edible cookie dough are everything. 

Springtime just demands carrot cake. But taking the time to make a whole layer cake when the weather is just begging for you to go outside is torture! Save yourself some time and make these Carrot Cake Blondies! They’re every bit as good as traditional carrot cake, and half the work!

Have you made any of these recipes? Let me know in the comments section below, or on Instagram @e2bakesbrooklyn!

Enjoy your weekend 😊

Blood Orange Chess Pie

 This upcoming Monday, March 14th, is Pi Day, y’all! It’s the day when we celebrate math (Pi = 3.14) by eating pie! And while I don’t so much care about math, I really like pie.

But I make hideous pies. Oh, do I ever.

Maybe one day I will be a grandma, and then I’ll make pretty pies. But today, I am thirty and make stupendously ugly ones.

You should know that I made a second one at 2am in an attempt to have something more beautiful to post, but instead, I somehow made it even more hideous! 

But the good thing about ugly pie is that it’s still pie. It doesn’t really matter how it looks, as long as it tastes good. And while this pie is not going to win any beauty contests, it is still really fun to make, and totally delicious. 

 This Blood Orange Chess Pie is a new favorite. Now, you know what blood oranges are, but why is it called chess pie? Well, the short answer is that nobody really knows. Chess Pie is from the southern U.S. by way of England, so there are a lot of theories. Some say it’s because it can be kept at room temperature in a pie chest (“chess”) due to the high sugar content. Others say it’s a southern take on the word “just,” i.e. “It’s jes’ pie.” The most widely believed is that since this pie is like a cheesecake without the cream cheese, the word “cheese” somehow became “chess.” All I know is that it has nothing to do with the board game.

But really, who cares where the name came from? It’s pie and it’s delicious. 

This chess pie is made with blood orange juice and zest, so the soft, custardy filling is perfumed with all sorts of orange goodness. I so hoped the interior would be some shade of pink or red, but the pigment of blood oranges dissipates with heat. But it doesn’t matter when it’s so simple and so good. If you really want a red or pink color though, I suppose you could add a few drops of food coloring, but I don’t think it needs it.

Blood Orange Chess Pie is a snap to put together. Make the crust (I like this one), fit it in the pan, and crimp the edges. Put that in the fridge to chill while you make the filling. Use your fingers to rub blood orange zest into some granulated sugar. This releases the oils in the blood orange peel and starts to melt the sugar. Whisk in four eggs and two egg yolks until everything is really thick and frothy. Make sure your eggs are room temperature–this will help them to fully incorporate into the filling. Slowly whisk in some melted butter. Don’t go too quickly or use piping hot butter, or you’ll get scrambled eggs. Next comes some whole milk and fresh-squeezed blood orange juice. Lastly, whisk in a couple of tablespoons of cornmeal and some salt. The cornmeal acts as our thickener, and the salt helps to offset all that sugar. 

Pour the filling (which will be thin) into the pie crust and bake for 45-55 minutes at 350F, until the filling is firm. If the filling wobbles at all when the pan is jostled, keep baking or you’ll have soup. Everything will get puffy in the oven, but it’ll settle down while it cools.

This pie is best served in small slices with coffee or tea to offset the sweetness. I like it room temperature, but love it straight from the fridge. The top gets crackly, and the interior stays soft and smooth. And it’s full of orange flavor, but not overwhelming at all. Oh, and there’s buttery, flaky pie crust. Yum.

Are you going to make pie this Pi Day? 

 Blood Orange Chess Pie
filling heavily adapted from Southern Style Lemon Chess Pie Filling
makes 1 standard 9″ pie

1/2 recipe Cream Cheese Pie Dough or other good crust
3 tablespoons freshly-grated blood orange zest*
2 cups granulated sugar
4 large eggs + 2 large egg yolks, room temperature*
4 tablespoons unsalted butter, melted and cooled slightly
1/4 cup whole milk
1/4 cup fresh-squeezed blood orange juice
2 tablespoons cornmeal
1/2 teaspoon Kosher or sea salt

Roll out the pie dough, and fit it in a standard 9-inch pie plate. Cut it to 1/2-inch of overhang, then fold the excess under and crimp. Place the prepared crust in the refrigerator while you make the filling.

Preheat the oven to 350F.

In a large mixing bowl, combine the blood orange zest and granulated sugar. Using your fingertips, rub the zest into the sugar until well-combined. Add eggs one by one, whisking after each addition. After all the eggs have been added, whisk the mixture vigorously for two minutes, until frothy and lighter in color. Slowly whisk in melted butter, followed by whole milk and blood orange juice. Mix in cornmeal and salt. Let filling sit for five minutes so large air bubbles can be released.

Pour filling into prepared crust. Bake 45-55 minutes, or until filling is firm when the pan is jostled.

Let pie cool completely on a rack. Blood Orange Chess Pie may be served at room temperature or cold. Pie will keep covered at room temperature for up to three days, or in the refrigerator for up to five days.

Notes:

1. I buy two pound bags of blood oranges at Trader Joe’s. If you do not have or want to use blood oranges, you may use any oranges you like.
2. Eggs may be brought to room temperature quickly by setting whole eggs in a bowl of warm tap water for 5-10 minutes.
3. This recipe requires whole milk. Do not substitute 1%, 2%, fat free, or skim milk.