 Does anything say game day more than chips and dip? Maybe like…wings, but for the purposes of this blog, let’s go with “no.” You simply can’t have game day without chips and dip! I mean, when it comes down to it, everybody’s mostly there for the food, am I right?!
…
I mentioned yesterday that football isn’t my thing, but that won’t discourage me from accepting an invitation for a Super Bowl party. Ohhhh no. I’ve got a strategy.
I’ll come over and make nice during the pre-game show, and then while everyone else is yelling at the TV about first downs and safeties, I’ll be in the back demolishing the guacamole I brought for “everyone.” And by “everyone,” I mean “you may all have two bites and the rest is for me, okay?”
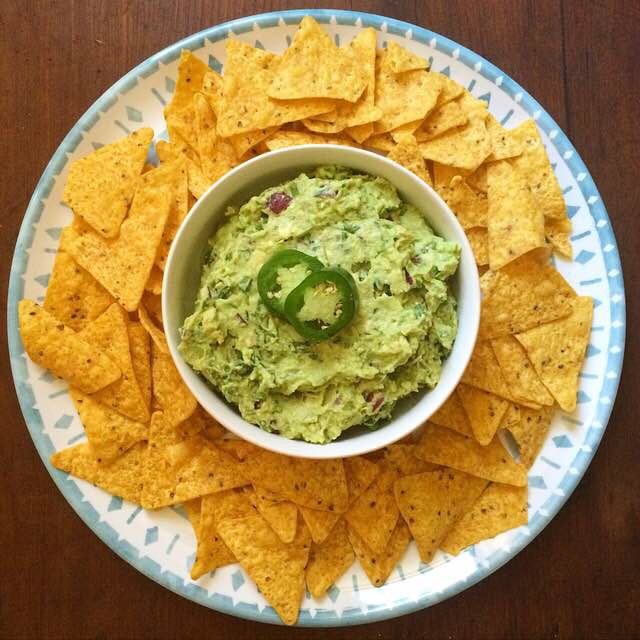
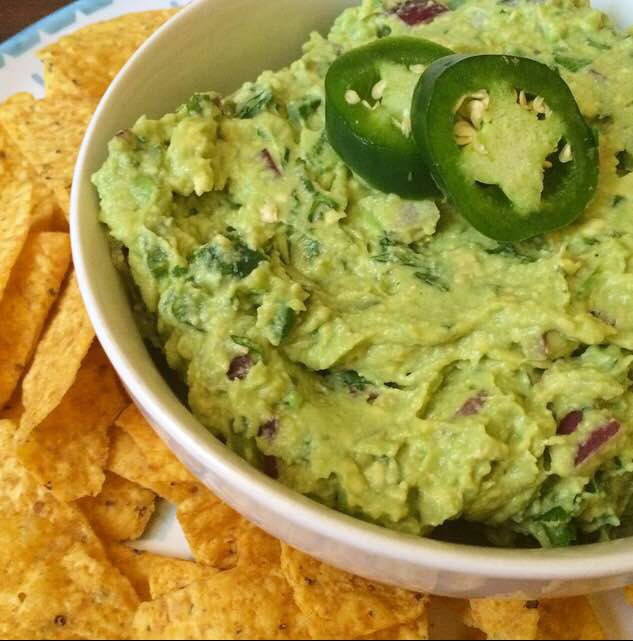 You see, I make ridiculous guacamole. There’s nothing fancy about it–it’s just some vegetables mashed together–but everywhere I take it, it becomes a hit. My friend, David, insists that I make the best guacamole in the world. I don’t know about the world, but how about the best in the four block span between our apartments?
Maybe just my block?
Just my building? Yeah, that sounds reasonable. Let’s go with that.
So, what makes this recipe such a crowd pleaser? It’s all made to taste. Since vegetables are seasonal, and this entire recipe relies on fresh vegetables, the stellar recipe I made in April can taste very blah come October. So taste, taste, taste.
 Start with ripe avocados. They should have a little give when you press the skin lightly with your fingers. If they are super squishy, back away–the insides are probably black and watery. Gross. So grab three ripe avocados. Pit them and scoop the flesh into a large bowl. Then dice half a small onion and add that too. You may use red or white here, but red tends to have a stronger flavor. If raw onion isn’t your favorite thing, go for the white variety. Me though? I like raw onion on everything.
Next, dice up a couple of fresh jalapeños. If you are sensitive to heat, remove the seeds and ribs with a spoon. Then, dice it up. Regardless of how spicy you like your guacamole, it’s a good idea to taste a tiny piece of the jalapeño before adding it to the bowl. If it’s crazy-burn-your-tongue-off hot, maybe only add one full pepper. If it’s mild, go ahead and add two. The batch pictured has two whole large jalapeños, one with seeds and ribs, one without. Oh, and a quick reminder to always wash your hands thoroughly after handling hot peppers. And for the love of everything, don’t touch your face! I made that mistake in 2011, and it took an hour to stop burning 😁
Don’t be like me.
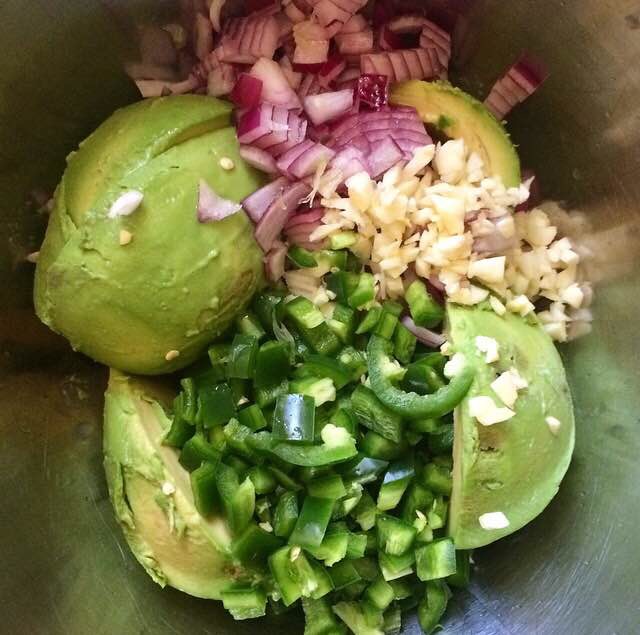
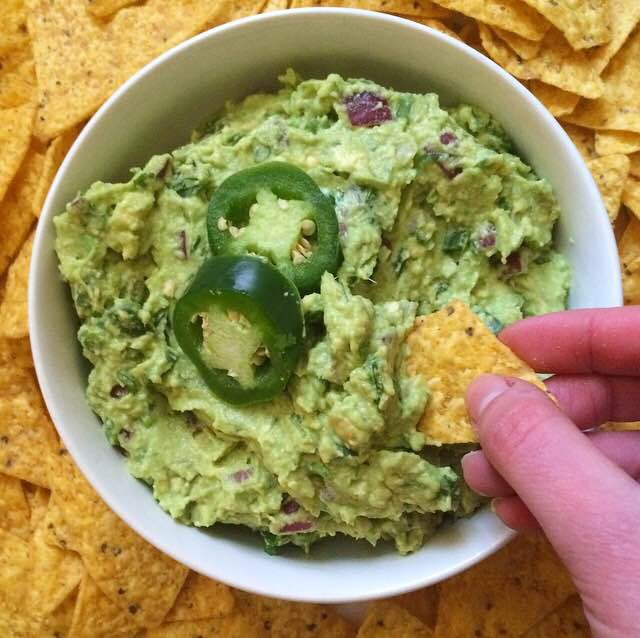
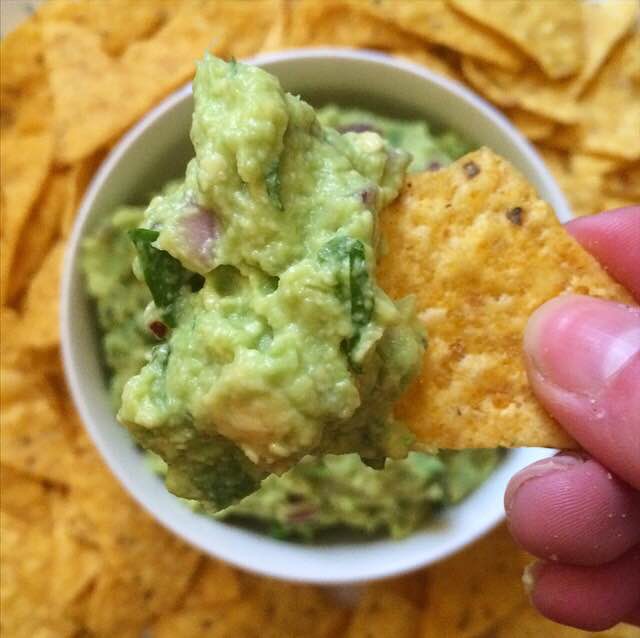
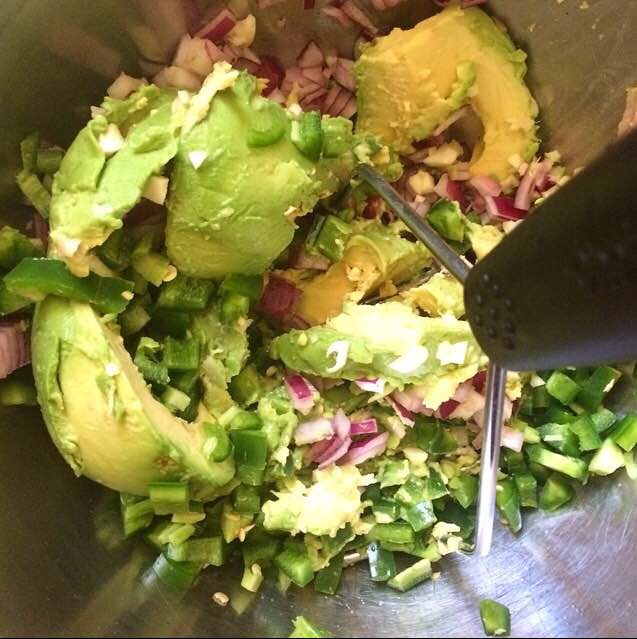 Anyway, mince up some garlic and add it to the bowl. I like two whole cloves, but if you’re sensitive to raw garlic, only add one. Squeeze in the juice of a lime and sprinkle in 1/2 teaspoon salt. Then, grab a potato masher or a fork and mash the living daylights out of everything until it’s to your desired consistency. Fold in some chopped cilantro and taste and adjust. Need more heat? Add more jalapeño! Need more lime? Squeeze another one! Not salty enough? I usually end up adding an additional 1/4 teaspoon, keeping in mind that the chips are salty too. Then put it in a cute bowl and serve it with tortilla chips.
 I know many people like their guacamole with diced tomatoes. I do too, but the February tomatoes I saw at the market yesterday were just too sad to use. If you find some that look good, by all means, use them! I recommend using two or three medium tomatoes that have been seeded. Just dice them the same size as the onion and jalapeños.
So, this weekend, make this guacamole and bring it to your Super Bowl party. It may not be the best in the whole world, but it’ll be the best at your get-together 😊
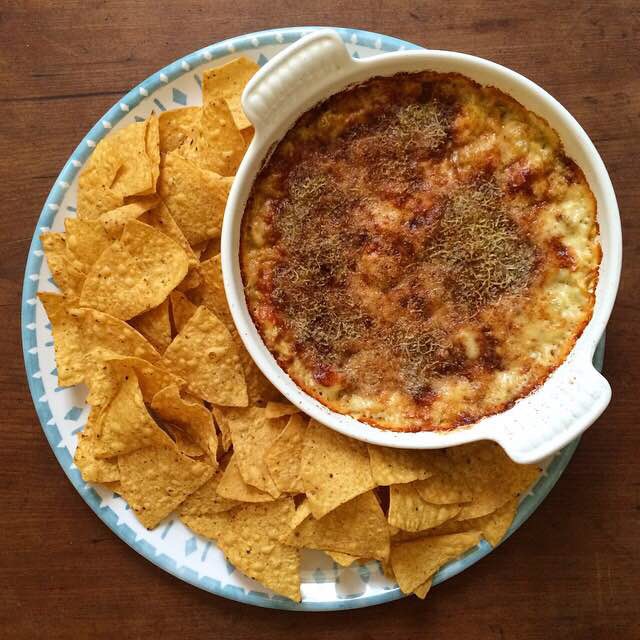
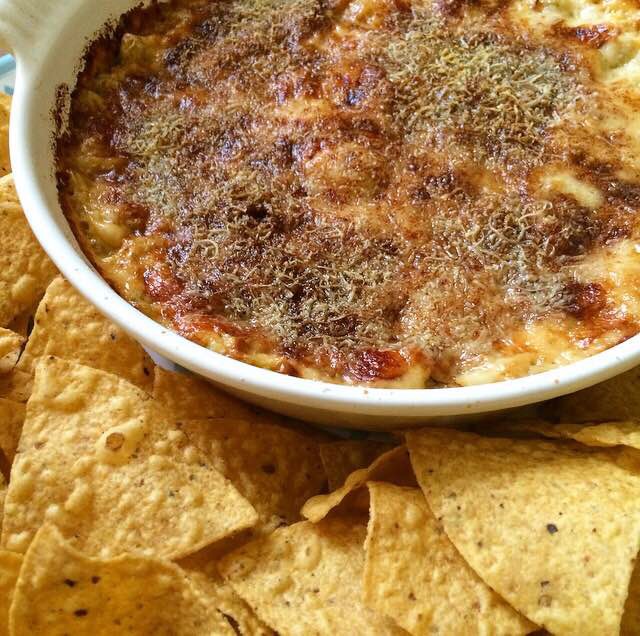
 Need more game day food? Check out my Artichoke Dip, Restaurant-Style Salsa, and Double Chocolate Fritos Cookies!
Classic Guacamole
makes about four cups
3 large ripe avocados, peeled and pitted
1/2 small red or white onion, diced small
1-2 jalapeños, diced small (ribs and seeds removed, optional)
1-2 cloves garlic, minced
juice of 1 lime
1/2 teaspoon Kosher or sea salt, plus more to taste.
1/4-1/3 cup cilantro leaves, chopped
tortilla chips, for serving
In a large bowl, combine avocados, diced onion and jalapeño, minced garlic, lime juice, and salt. Use a potato masher or fork to thoroughly mash all ingredients together. Use a silicone spatula or wooden spoon to fold in cilantro. Transfer guacamole to a serving bowl, and serve immediately with tortilla chips.

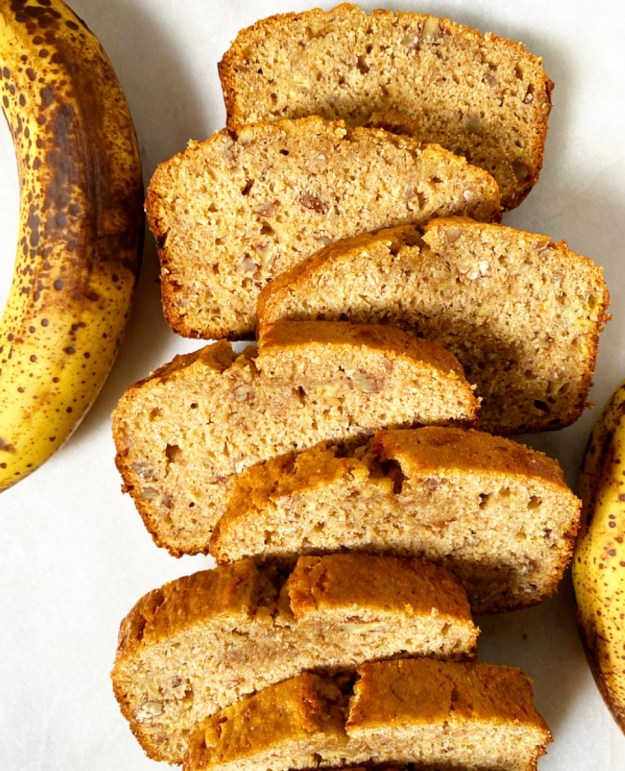
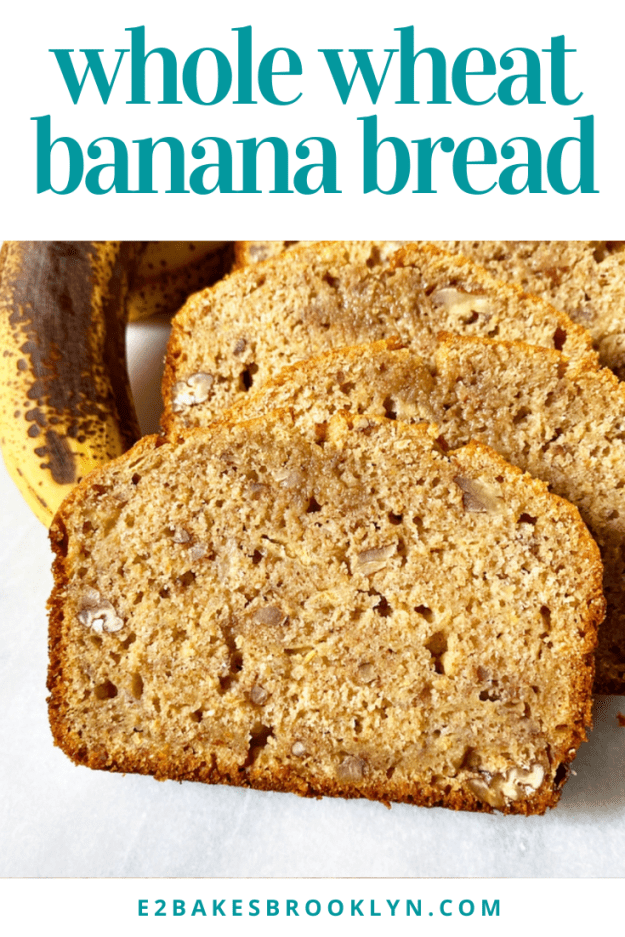
 I go to the same coffee place everyday. It’s an institution on Atlantic Avenue–Moon’s Palace. It’s not flashy, and you won’t find any fancy pour-over there, but the owner, known to me as Mr. Moon, makes a solid cup of coffee. I don’t even have to ask for my order anymore–he and his sons know that if its a weekday, I want a large black coffee, and if it’s a weekend, a second large coffee with foamed half-and-half, for Henry. I’ve been going there so frequently for the last three years that we even have a deal during the summer: they keep all their sad-looking overripe bananas for me (instead of tossing them in the garbage), and I buy them at half-price for banana bread. It’s the best deal in town, as far as I’m concerned: twenty-five cent bananas, and I don’t even have to wait for them to ripen!
 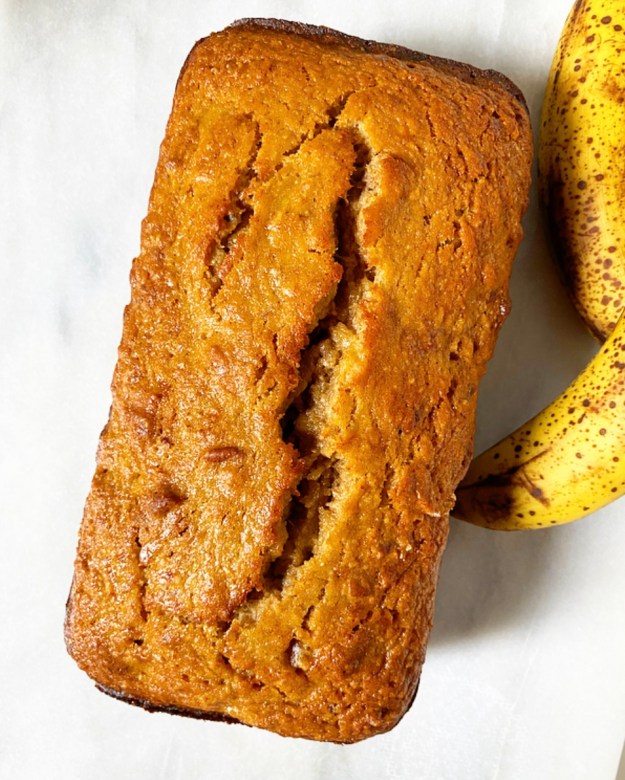 But now it’s winter, and ready-made overripe bananas are harder to come by. I went in last week and grabbed a few bananas that were still bright yellow, hoping to make banana bread in about a week. I put them in a paper bag and left them to ripen, but they refused. Sure, they started to turn a little brown in places, but not nearly enough for really good banana bread. Being the impatient, banana bread-deprived woman I was, I resorted to one of those hacks that probably plague your Facebook feed. I placed the bananas on a lined baking sheet, put them in a 250F oven for twenty minutes, and was rewarded with overripe results!
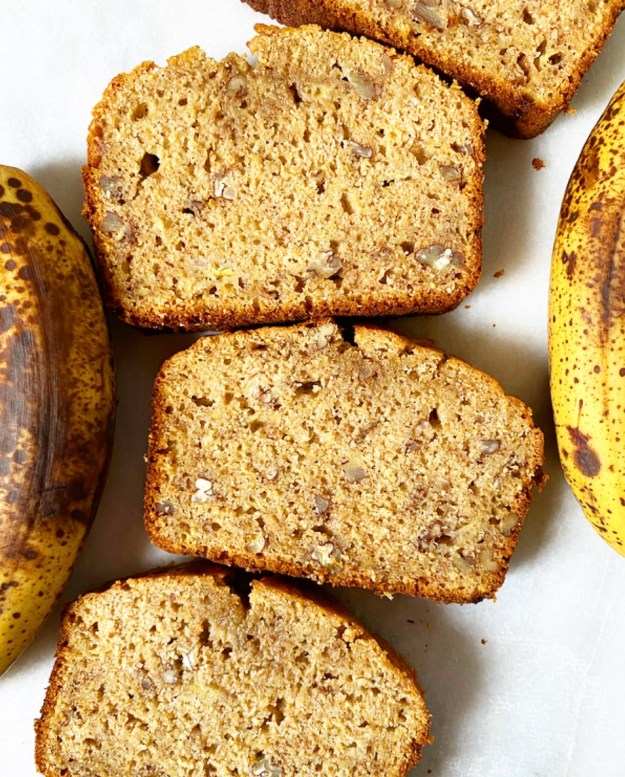
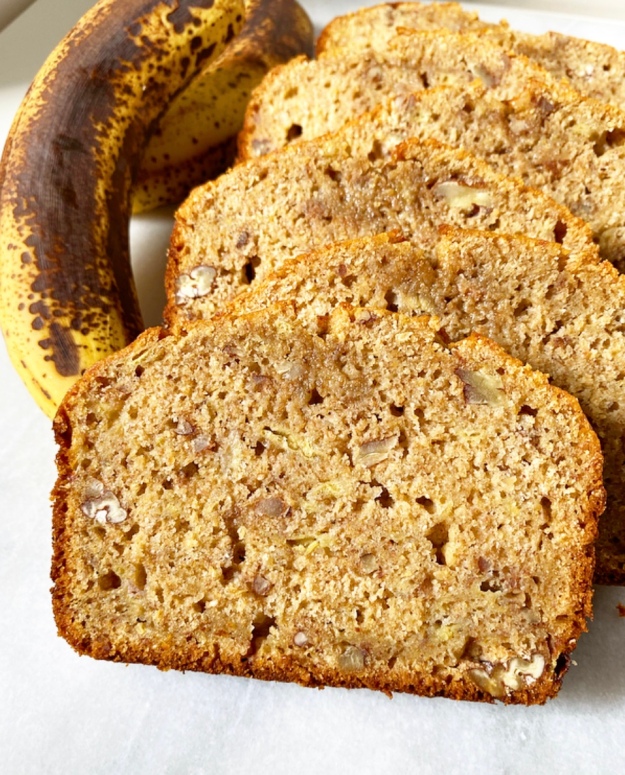 So, now that I’ve played Mother Nature with these bananas, let’s make some banana bread. Whole Wheat Banana Bread, to be exact. Sweet, cinnamon-scented quickbread chock full of bananas and walnuts, with all the nutty goodness of whole wheat. Now, baking with whole wheat flour can be tricky. Since it hasn’t been stripped of the bran and germ like all-purpose flour, whole wheat flour has a grainier texture and higher protein content. Higher protein = more gluten. More gluten = greater potential for tough, dense results. We have to follow a few guidelines to keep this banana bread from being a brick.
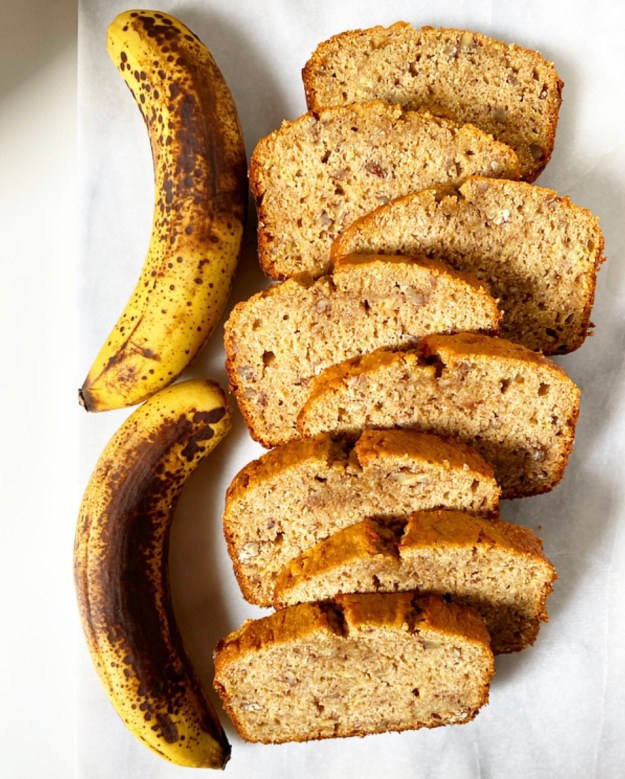 1. Measure the flour properly. American baking is notoriously unreliable when it comes to measurements. This isn’t a problem in countries where they bake by weight–100 grams is always 100 grams. In the U.S., though, measuring is a problem. Since we traditionally measure ingredients by volume, there’s no way to know if two people are using exactly the same amount of an ingredient. Some people measure flour by just scooping it with the measuring cup. This doesn’t allow any air into the flour, and can therefore contribute to over-measuring. In cakes and breads, this can lead to things becoming too dense and dry. In cookies, this can lead to toughness and/or cakey results.
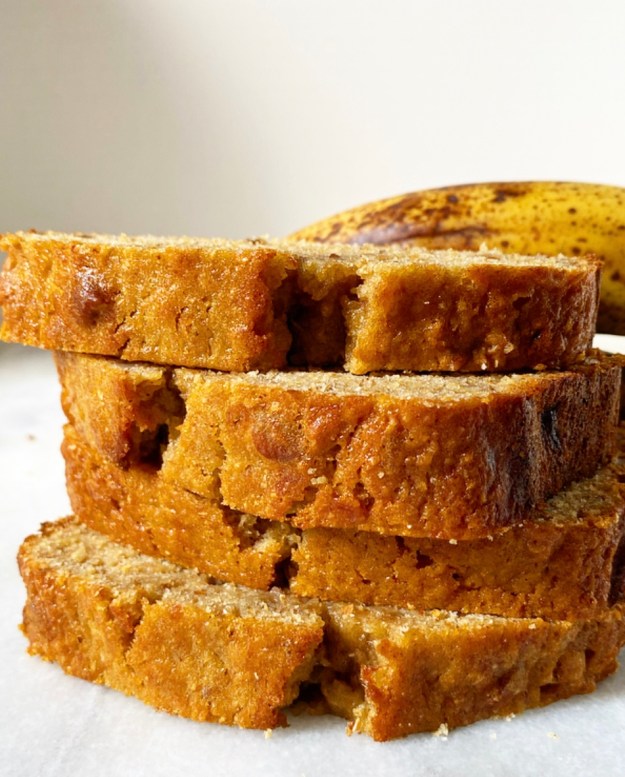 3. Add enough moisture. (Warning: I’m about to say “moist” a lot.) In this banana bread, we need a ton of moisture to counteract the density potential from the whole wheat flour. Here, we use oil so our banana bread stays soft and springy. If we used butter, which is around 15% water, our bread would dry out as the water evaporated over time. Also, there’s so much flavor going on between the bananas, cinnamon, and walnuts that we won’t even notice the lack of butter. So, break out the neutral-flavored oil: canola, vegetable, whatever you have. You may also use melted coconut oil. Next comes brown sugar. We use only brown sugar in this recipe because it’s more moist than granulated sugar, thanks to the molasses. After that, two large eggs. The eggs provide moisture, chew, and additional structure. They help the final product to stay soft and moist-crumbed, which is exactly what we want in banana bread. Lastly comes the milk, which is just extra moisture insurance. You may use any milk you like (including buttermilk, almond, oat, soy, etc.), although I do not recommend skim or fat-free cow’s milk.