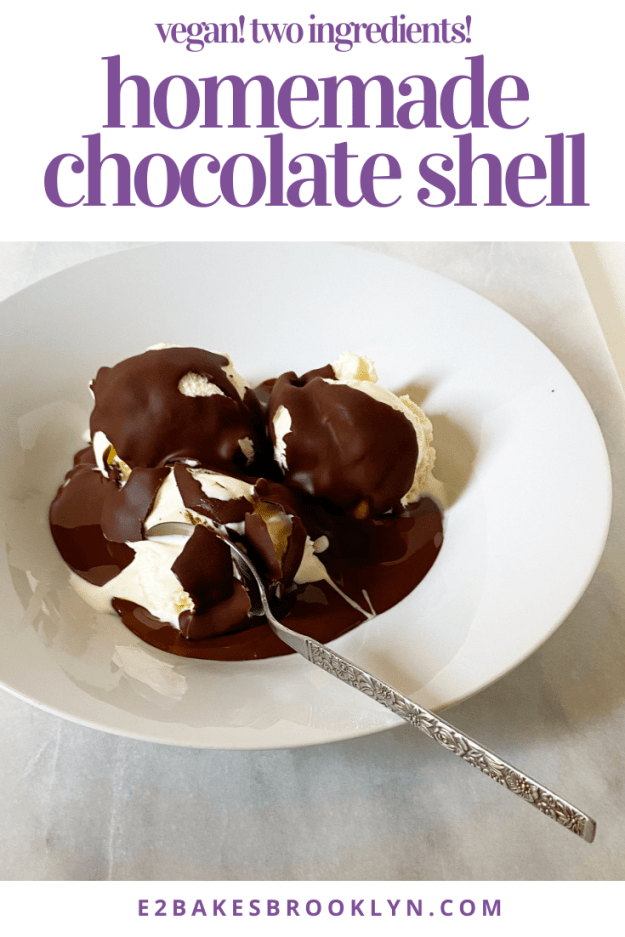
Homemade Chocolate Shell has appeared on here a few times over the years, but always as a part of another recipe. I’ve used it to finish an ice cream cake, as a dip for truffles, and just as a drizzle, but we all know chocolate shell shines brightest on a scoop of ice cream. It’s high time that it gets its own post.
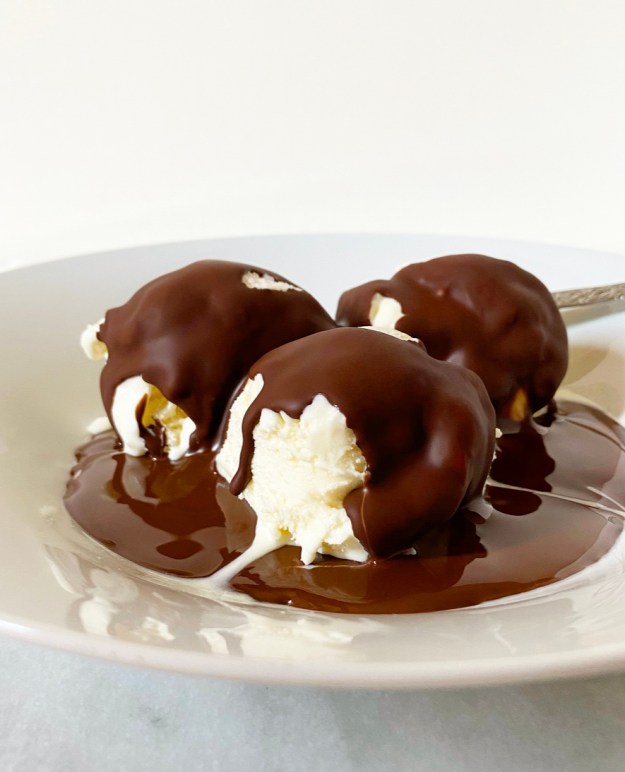 Chocolate shell is both entertainment and dessert. It goes on ice cream (or anything cold) like chocolate syrup and then magically transforms into a hard edible shell right in front of your eyes! It’s no wonder the popular store brand is marketed as Magic Shell.
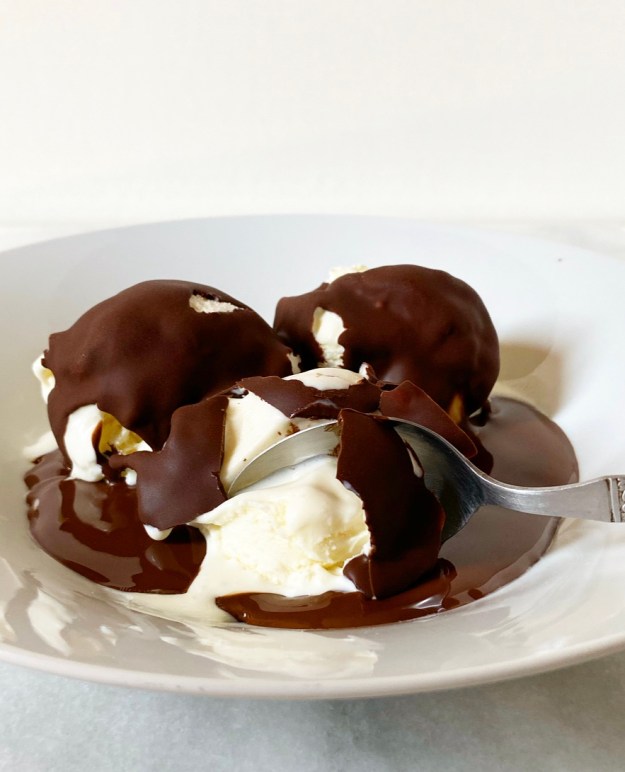 The “magic” of chocolate shell was a mystery to me for years—how did they do that?! Turns out, mostly with ingredients and preservatives that I’d rather not ingest whenever I get a hankering for a bowl of ice cream with a snappy chocolate topping. Imagine my utter delight when I discovered Homemade Chocolate Shell could be made with just two easy-to-find, vegan ingredients!
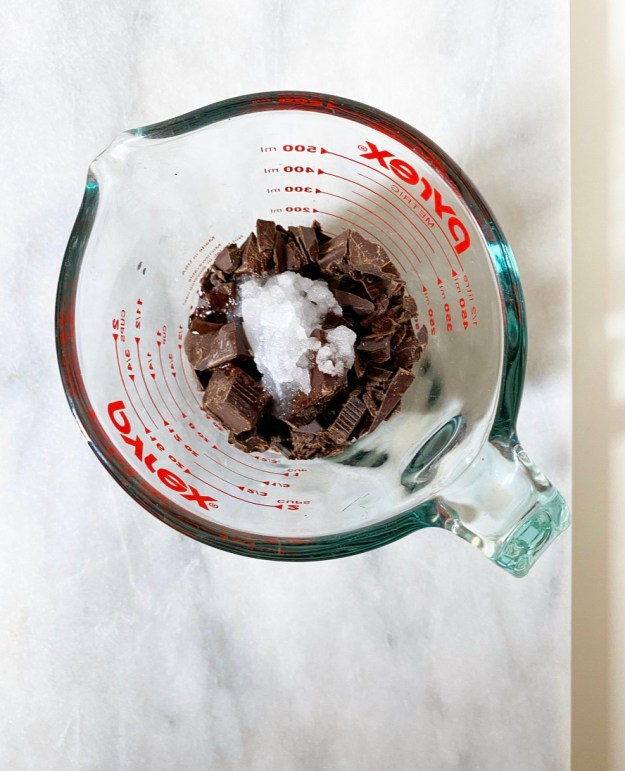
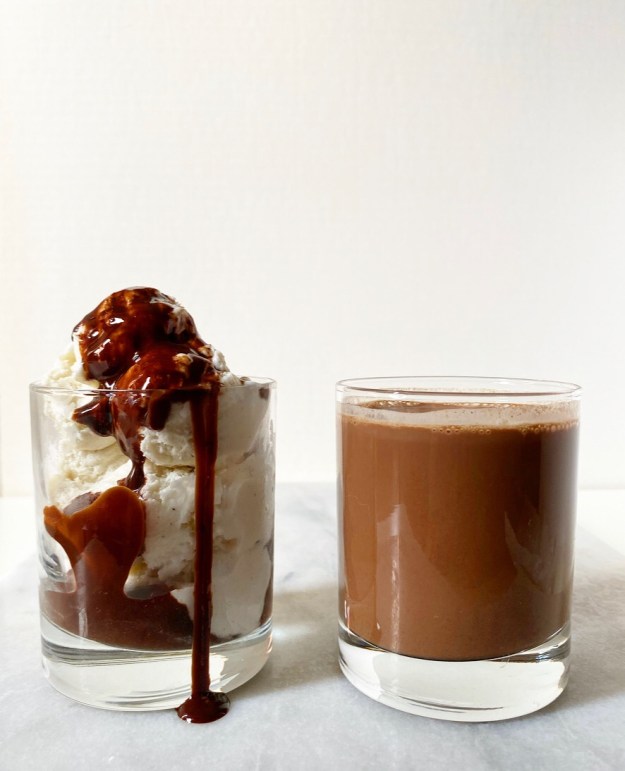
 Yes, all you need to make Homemade Chocolate Shell are four ounces of bittersweet chocolate and two tablespoons of coconut oil. Melt them together, stir until smooth, and then drizzle—or let’s be real, pour—it over a scoop (or three) of ice cream. Then watch as the glossy sauce magically turns into a matte shell in a matter of seconds! It works because coconut oil solidifies at 76F, but that’s way less fun than calling it magic.
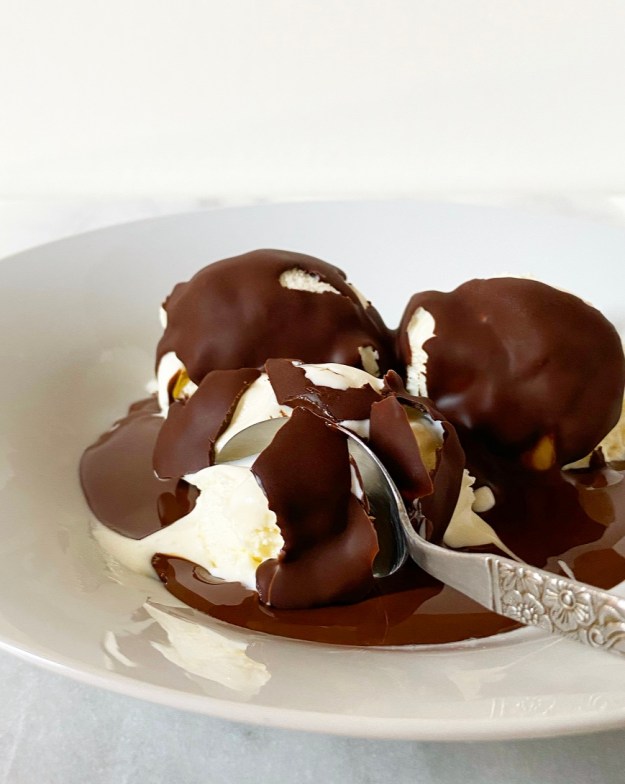 Not only is Homemade Chocolate Shell made of less-terrifying ingredients than the store bought stuff, it’s more delicious, too. You control the quality of ingredients here, and that goes double since there are only two of them. This batch was made with Trader Joe’s Pound Plus Dark Chocolate and refined coconut oil because those are things that I like and keep on hand.
You may wonder, why refined coconut oil? The answer is simple: because it doesn’t taste like coconut. I like my Homemade Chocolate Shell to taste only of chocolate. That said, if you only have extra virgin coconut oil and don’t mind a little coconut flavor in your chocolate shell, it will work just fine. Hands down, my second favorite part of eating Homemade Chocolate Shell is thwacking through it with the side of a spoon. There’s nothing quite like that satisfying snap and the shards of cold chocolate that melt in your mouth.
My first favorite part of eating Homemade Chocolate Shell? Actually eating it. Duh.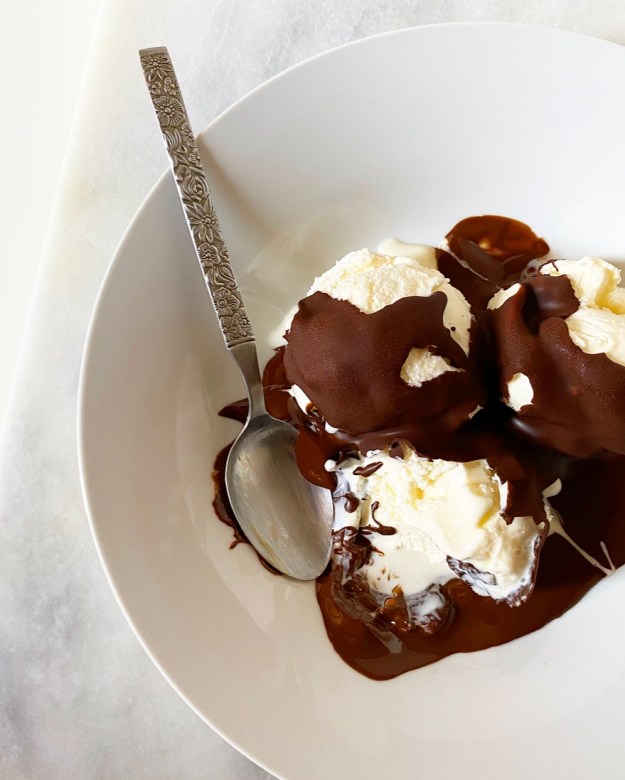
Homemade Chocolate Shell
makes about 3/4 cup
4 ounces bittersweet chocolate, chopped
2 tablespoons coconut oil (preferably refined/high heat)
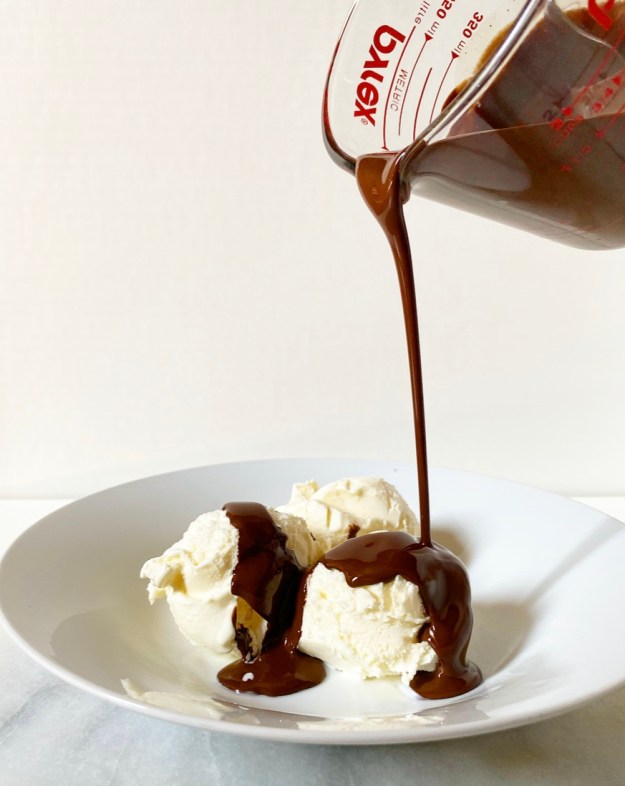
Combine chopped chocolate and coconut oil into a small bowl. Microwave in 15 second increments, stirring in between, until melted. Let cool 8-10 minutes for optimal pouring consistency (so it doesn’t melt off whatever it’s coating). Pour or drizzle over ice cream or use as a dip for other frozen treats.
Leftover chocolate shell will keep in an airtight container at room temperature for up to a week. Reheat by microwaving in 10 second increments, stirring in between, until pourable.
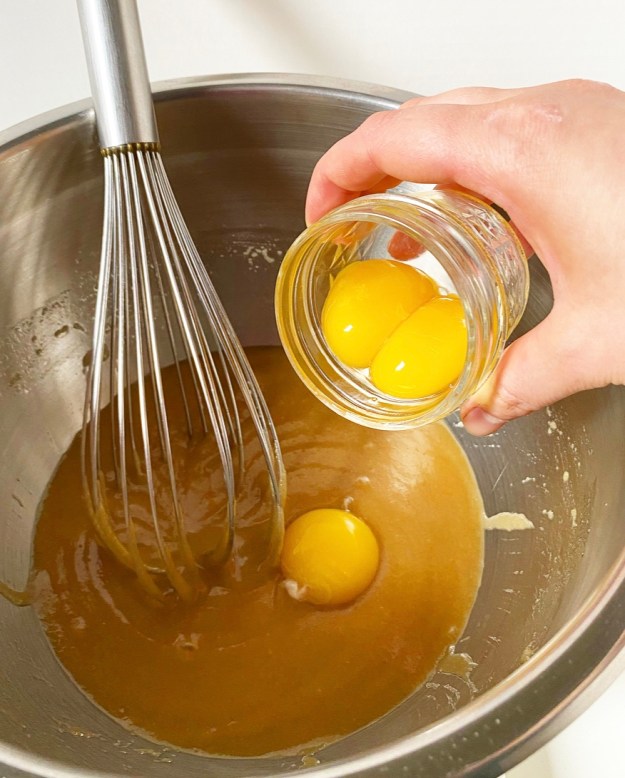
 You know how sometimes you test
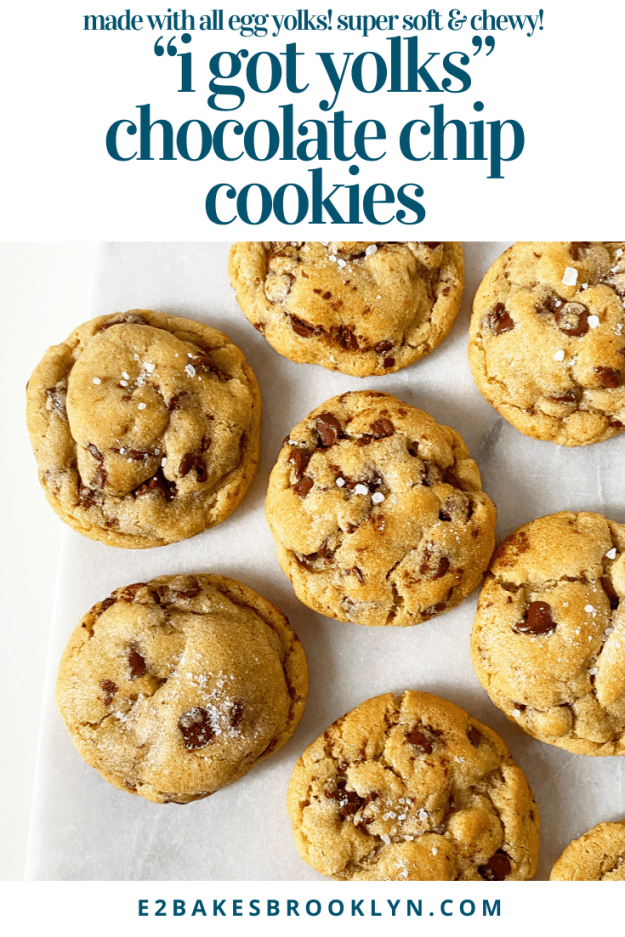
 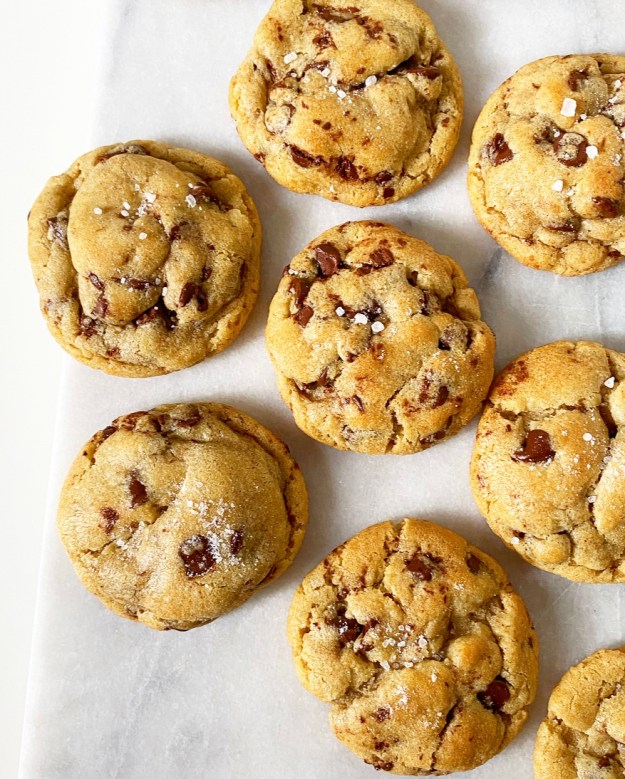 Well, here is something to do with them: “I Got Yolks” Chocolate Chip Cookies!
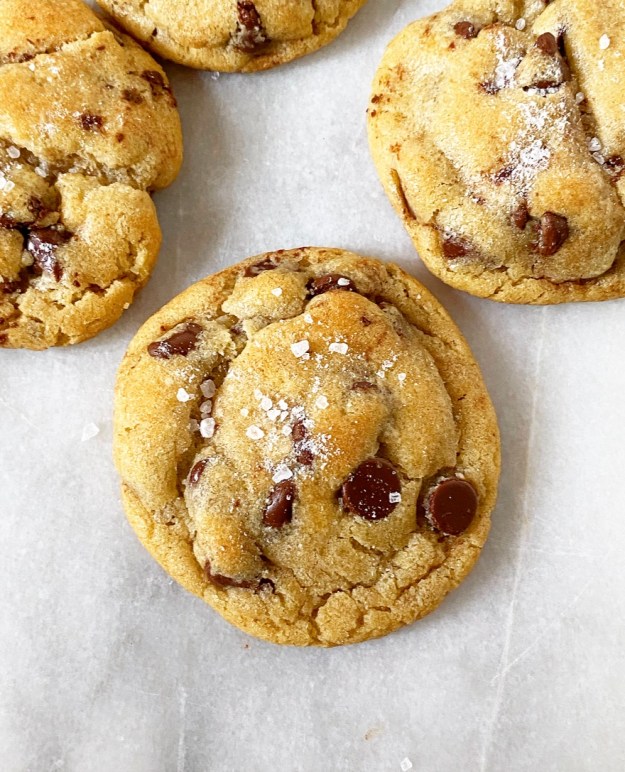 Anyway…this is a recipe born of necessity. Namely, the necessity to not waste good ingredients. Also, the necessity for something that can be eaten immediately or frozen for later or left on your friends’ front steps for a socially distanced surprise. Trust me, they’ll be beyond thrilled with a bag of these.
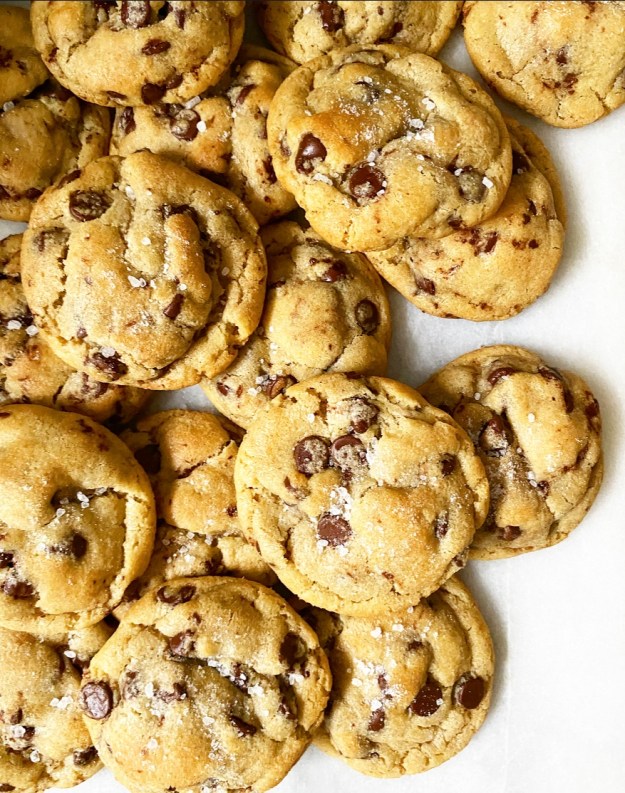
 “I Got Yolks” Chocolate Chip Cookies are, in a word, spectacular. They’re super rich and chewy from three large egg yolks, melted butter, and brown sugar, and incredibly tender thanks to the addition of confectioners sugar. I threw the confectioner’s sugar in the first batch on a whim just to see what would happen and, well, it won’t be the last time. The sweetness, structure and texture it provides are really something—like the
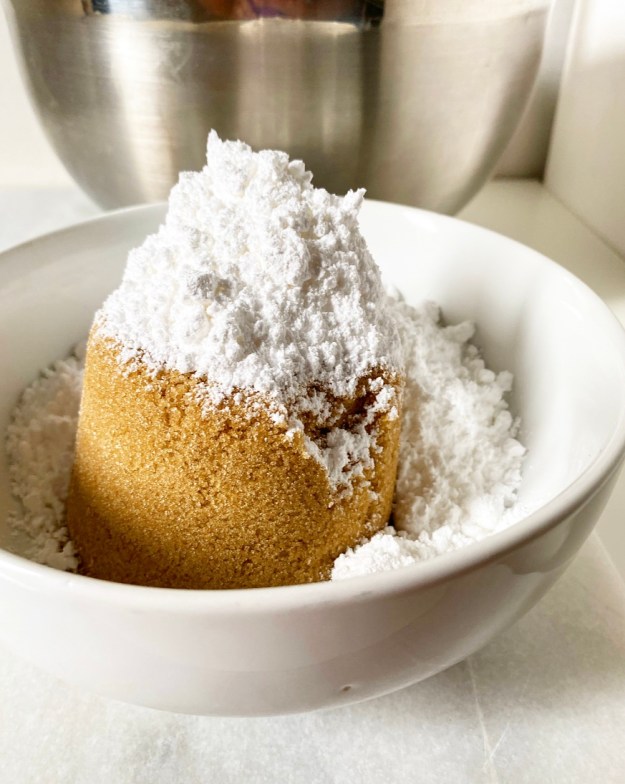
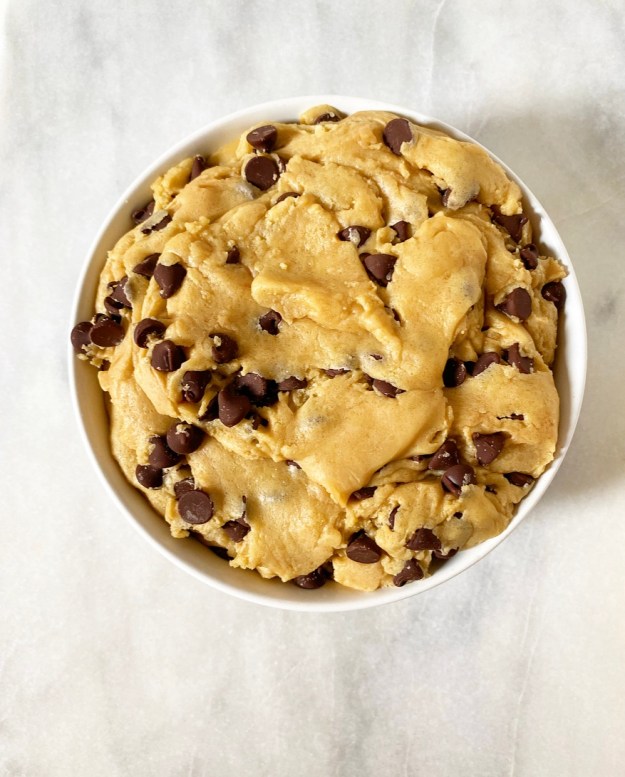
 The cookie dough comes together the same way most
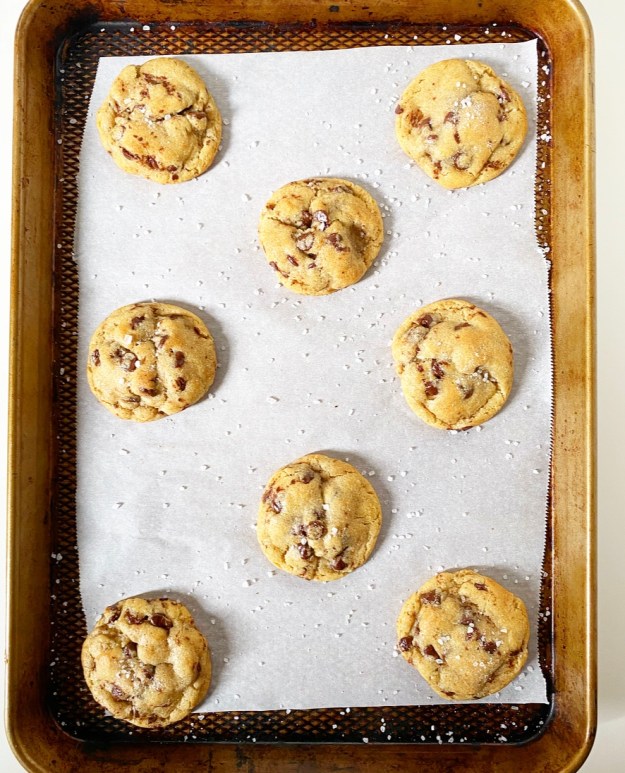
 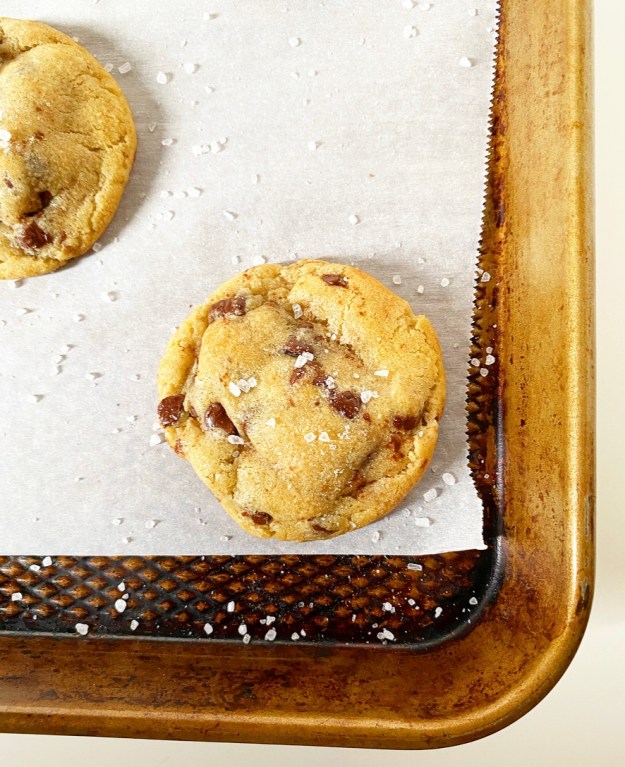 These are not only my current favorite way to use up egg yolks, but also my current favorite chocolate chip cookies. They are nice and thick, with crisp exteriors, soft centers, a rich caramel flavor and the perfect amount of chocolate chips. The confectioner’s sugar in the dough gives them an extra-smooth quality and has the added benefit of keeping them soft for days. That’s saying something—I’m a total diva about day-old cookies.
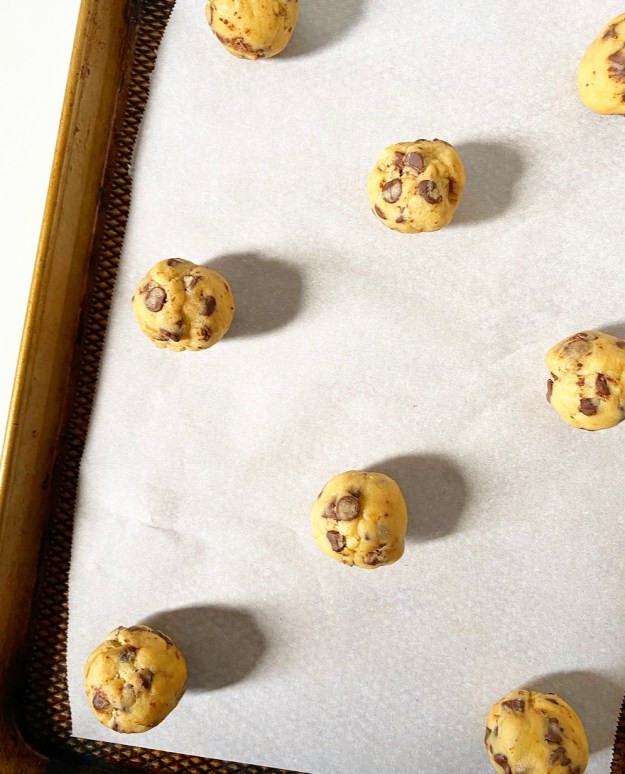
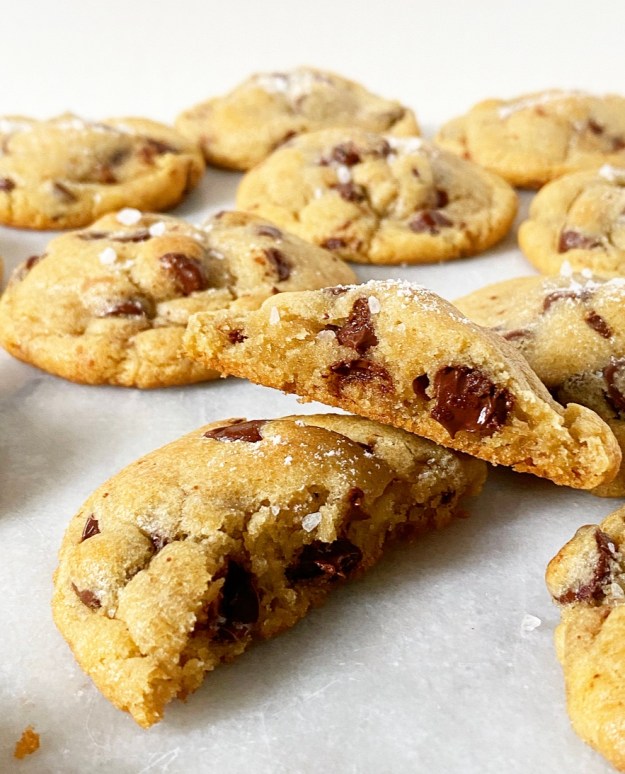 One more great thing about this recipe is that you can age the dough. I suppose you can age any cookie dough, actually, but I rarely have the fridge space. If you’ve never tried it, aging is as simple as keeping the dough in the fridge for up to a week before rolling and baking. By letting it sit for an extended period, you’re allowing the flavors to deepen in a really wonderful way. The exteriors get a light sheen after baking and the brown sugar flavor really sings. Try it. You’ll like it.

 When I posted
 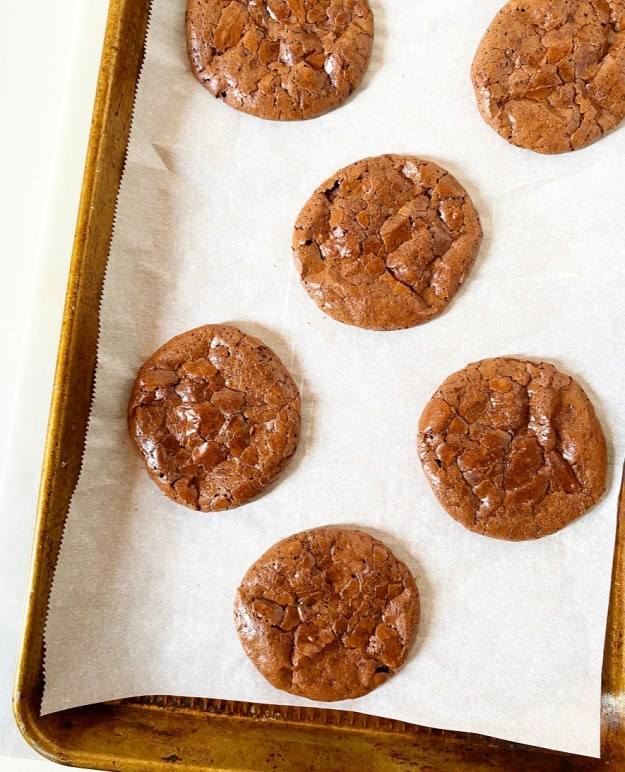 These cookies are on the sweeter side (confectioner’s sugar provides a lot of the structure), so I added a teaspoon of granulated espresso to the recipe to keep them from being cloying with ice cream. I also cut the size of the cookies in half for a dozen medium cookies instead of six large ones.
 Next up, you’ll need to freeze the cookies for about 30 minutes. This helps the ice cream to stay on the solid side and the cookies from getting too soft during assembly. This step is not strictly necessary, but it is good insurance against ice cream sandwich frustration.
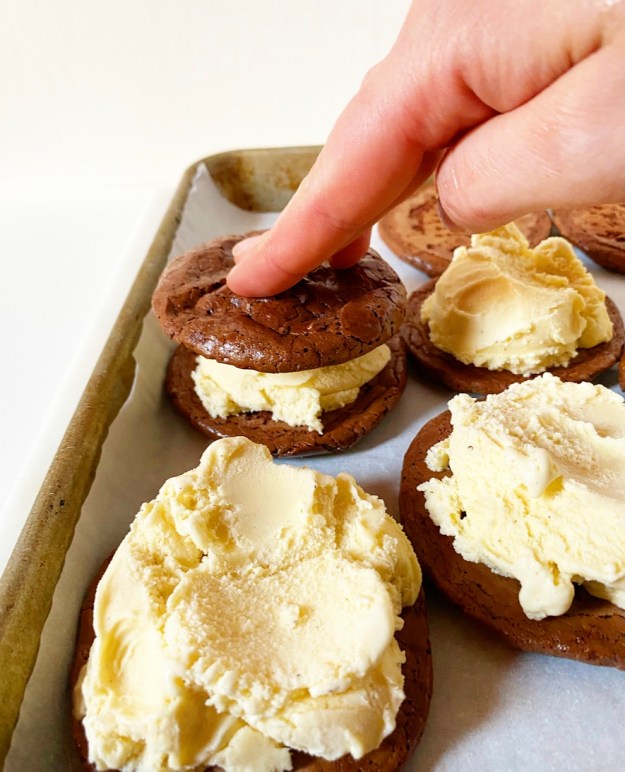 Regarding ice cream, use whatever flavor you want. I went with a mid-level nationwide brand’s vanilla here and it was fine—good, even—but I will go higher quality next time. Oh, and I’ll probably go with mint chocolate chip because it’s my favorite. The point is to use what you love and not settle for less. Cookies are an important part of ice cream sandwiches, but ice cream is the *most* important part.
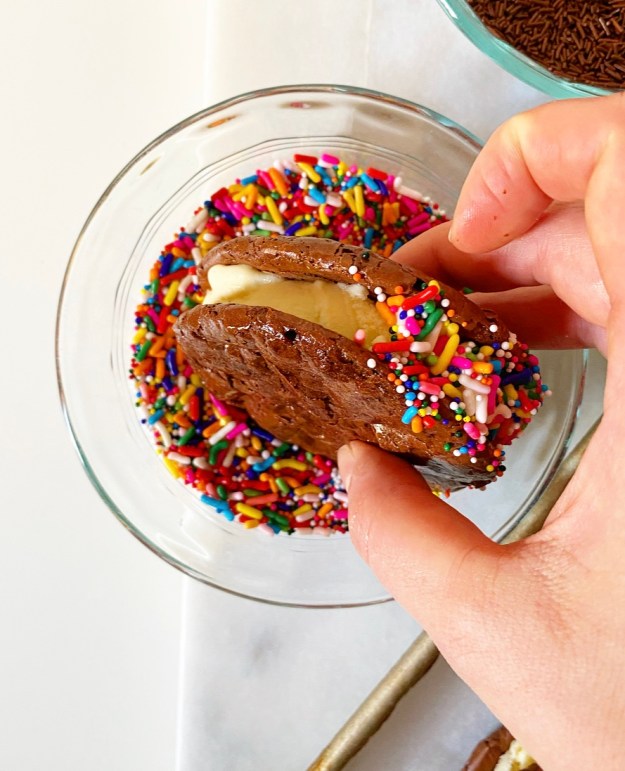
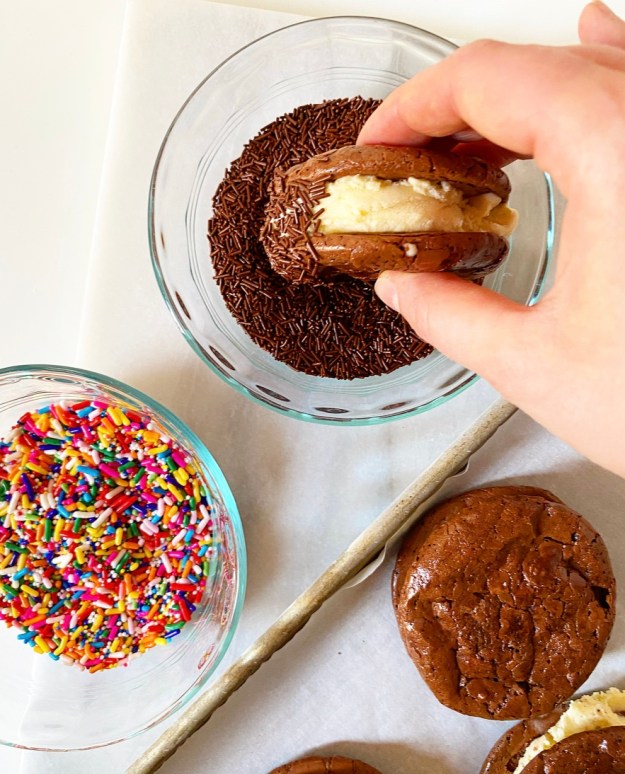 Freeze the sandwiches before rolling them in your sprinkles of choice or chopped nuts or mini chocolate chips or candy bar pieces or crushed Oreos. Again, use what you love and don’t settle for less. <—good life advice?
 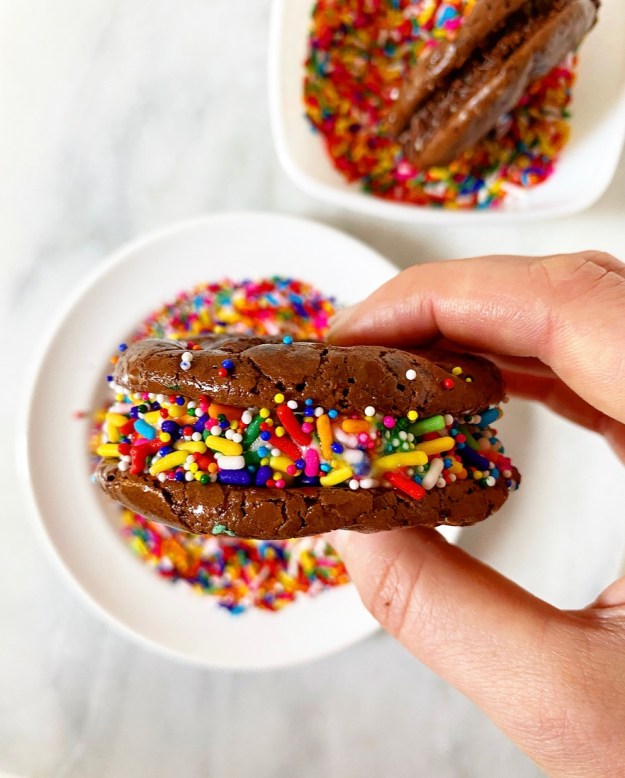 The last step is to freeze your ice cream sandwiches again for several hours or up to a day before digging in. Yes, you can eat them right after assembly, but the ice cream squidges out the sides and then you’re just eating two cookies with a translucent smear of ice cream and a weird smattering of sprinkles and then licking ice cream off a salad plate like a wild animal.
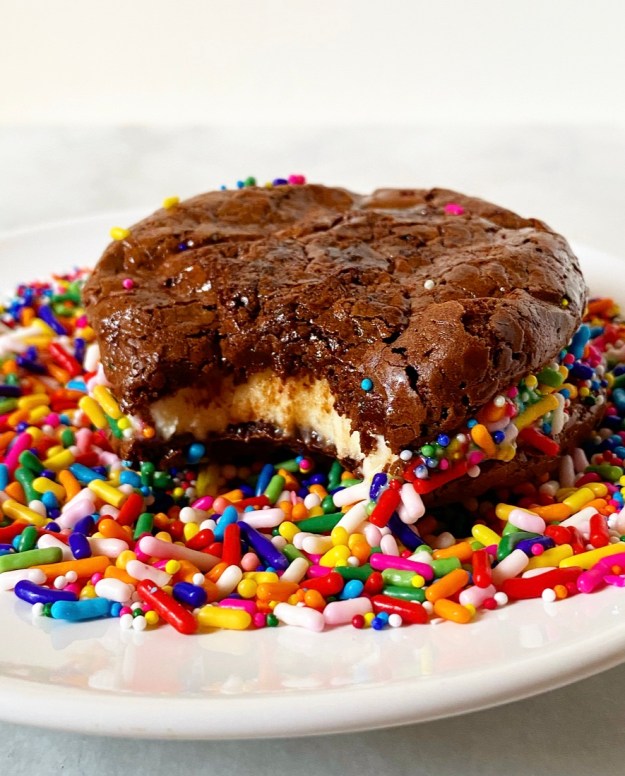 Anyway, freezing the completed ice cream sandwiches for a few hours allows the ice cream to adhere to the cookies so that the sandwiches become single entities. That’s something I really care about with my ice cream sandwiches. Considering how much I loathe the patriarchy, I sure do love to be able to eat things in a ladylike manner.
 I assure you, they’re worth the lengthy freezer time. The cookies never fully freeze, instead softening a tiny bit and getting extra chewy. And then there’s the ice cream and crunchy sprinkles. Like I said, perfect.


 My
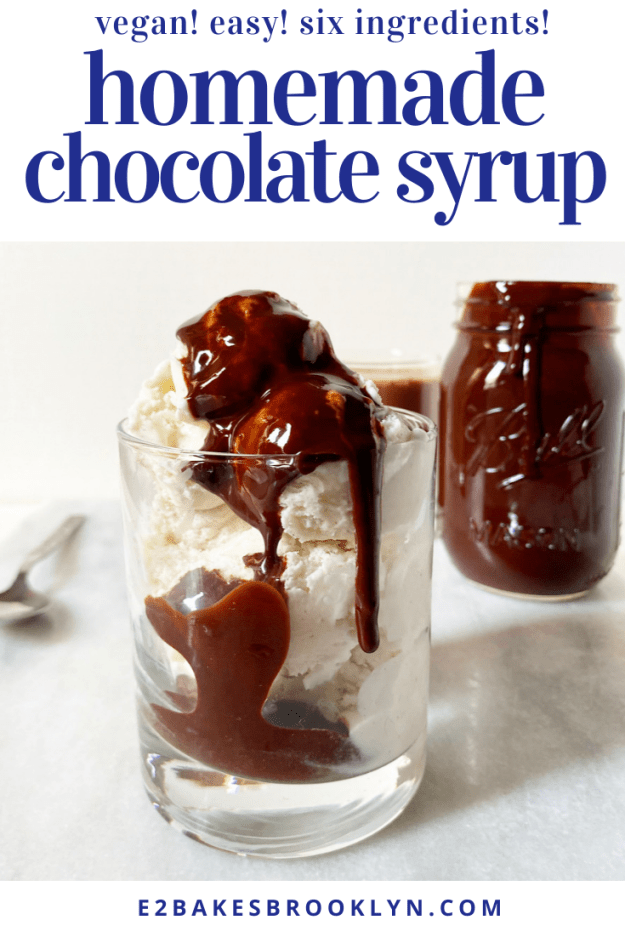
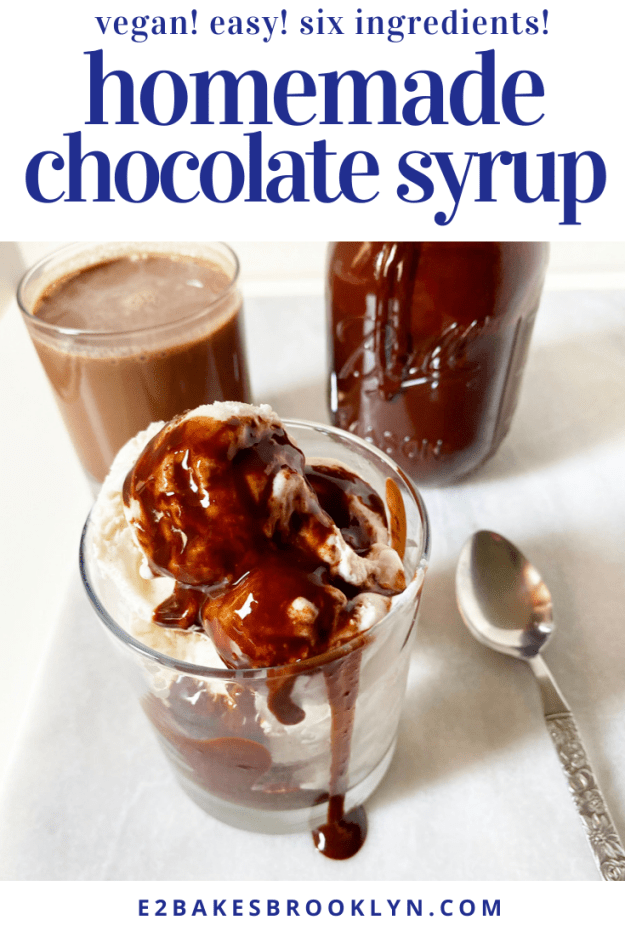
My 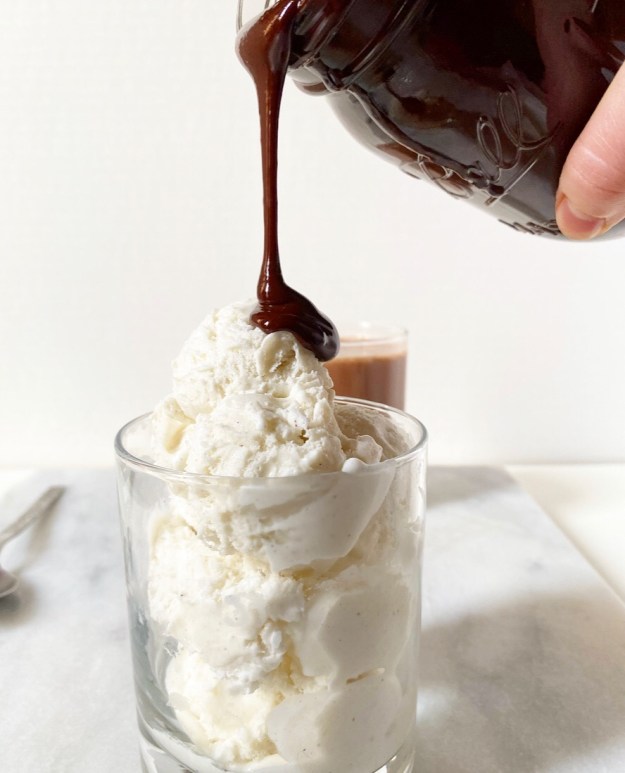 Fast forward fifteen-ish years to me living the professional home baker life in New York in the middle of a pandemic. I can pretty much make whatever dessert I want, and maybe it’s because the weather is warming up or I’m feeling nostalgic or a little homesick, but all I really want right now is vanilla ice cream and chocolate syrup.
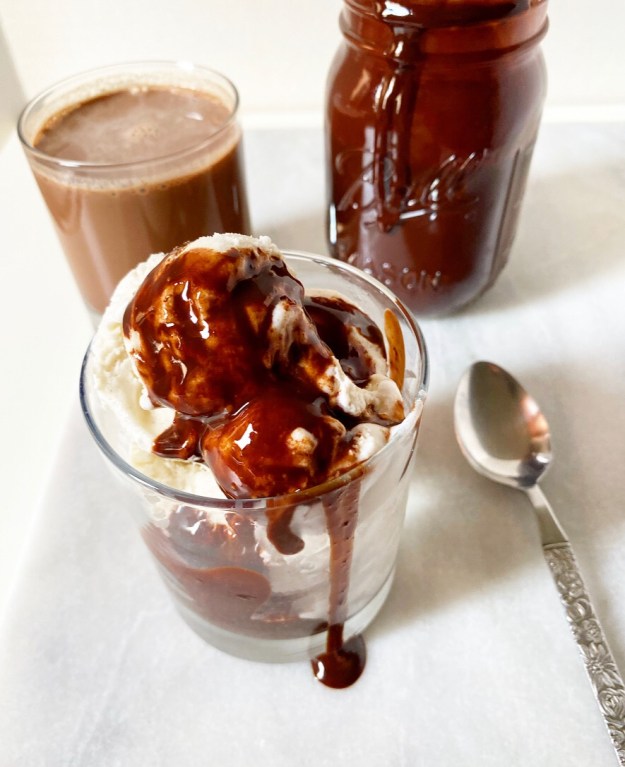 Now, I do not have much desire to begin making my own vanilla ice cream, but Homemade Chocolate Syrup? That, I need. Like many of us, I grew up with Hershey’s Syrup in the fridge, but now that I’ve started making my own chocolate syrup, I’m ruined for storebought forever. Deeply chocolaty, a little tangy, just thick enough, pourable even when it’s fridge-cold—this is the stuff my ice cream dreams are made of.
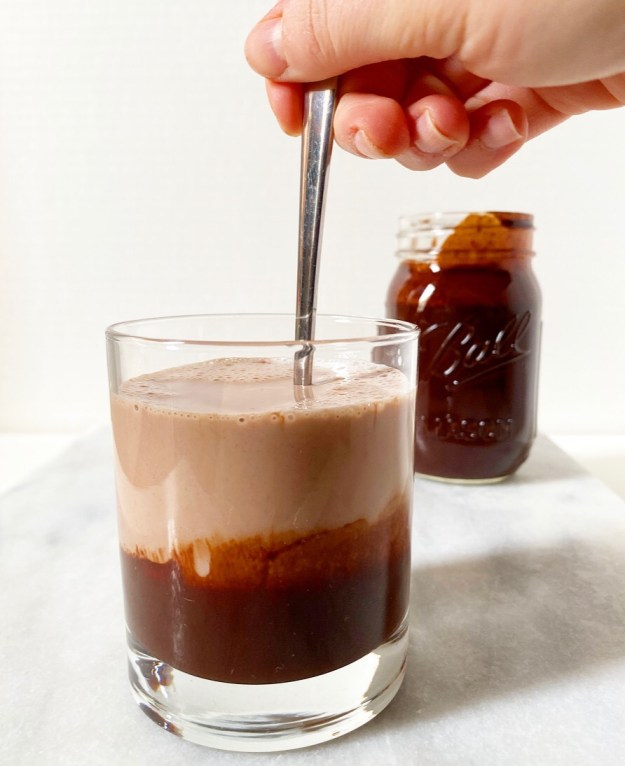
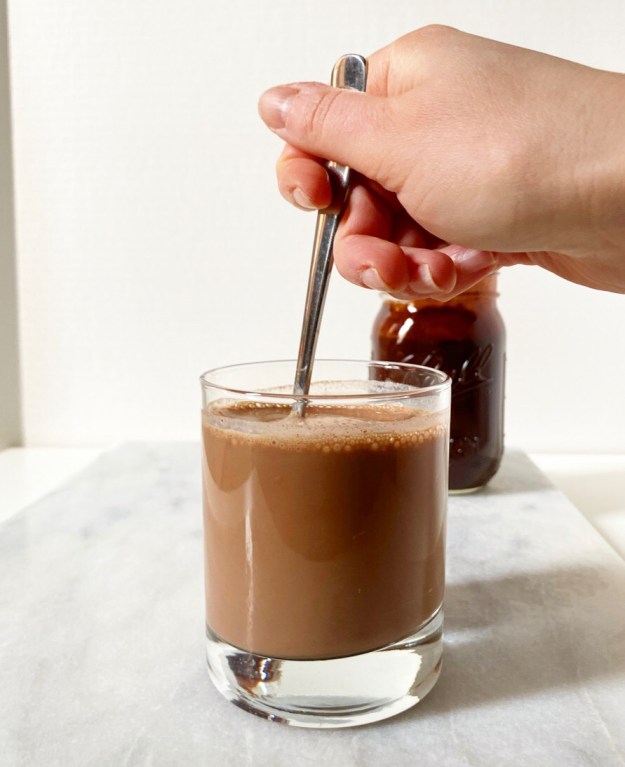
 Also, my chocolate milk dreams. I generally cannot abide liquid dairy, but put some chocolate syrup in a glass of whole milk and I. am. interested.
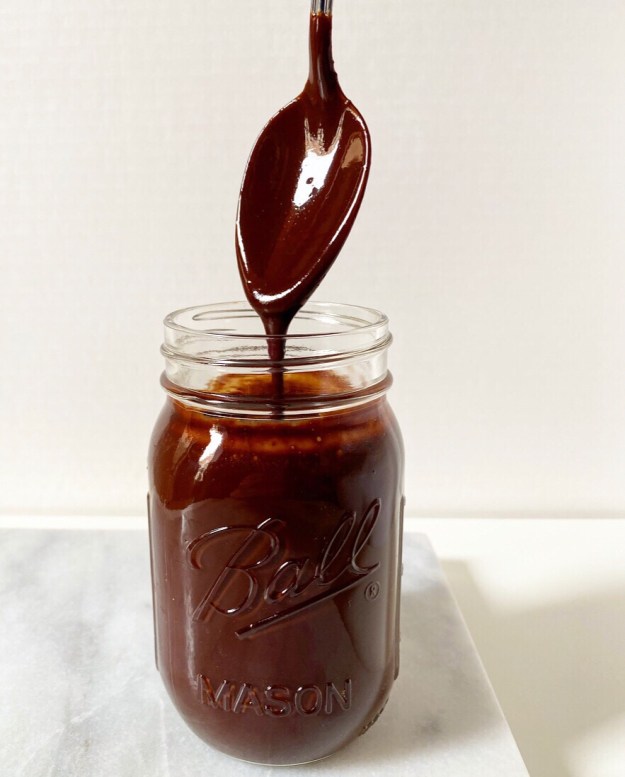 Homemade Chocolate Syrup beats the pants off of every storebought version I’ve ever had. Don’t get me wrong, I wouldn’t turn up my nose if someone offered me a scoop of ice cream with a drizzle of Hershey’s Syrup on top—I’m not a monster!—but it simply can’t compete with this stuff. Where the syrups you’ll find on shelves are cloyingly sweet, lacking in chocolate flavor and full of ingredients none of us can pronounce, this one is super chocolaty from cocoa powder and bittersweet chocolate, has a little depth from brown sugar, and requires six ingredients that you very well may have in your pantry right now. Oh, and it’s vegan.
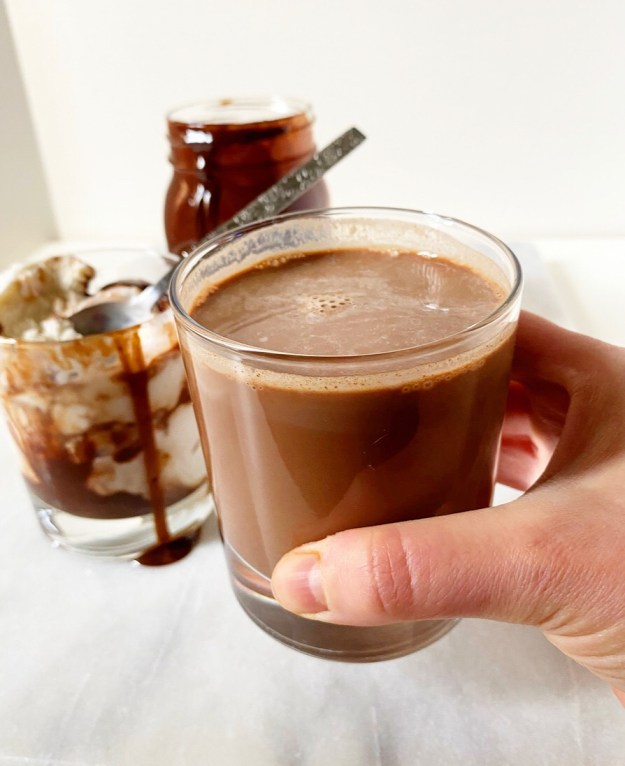
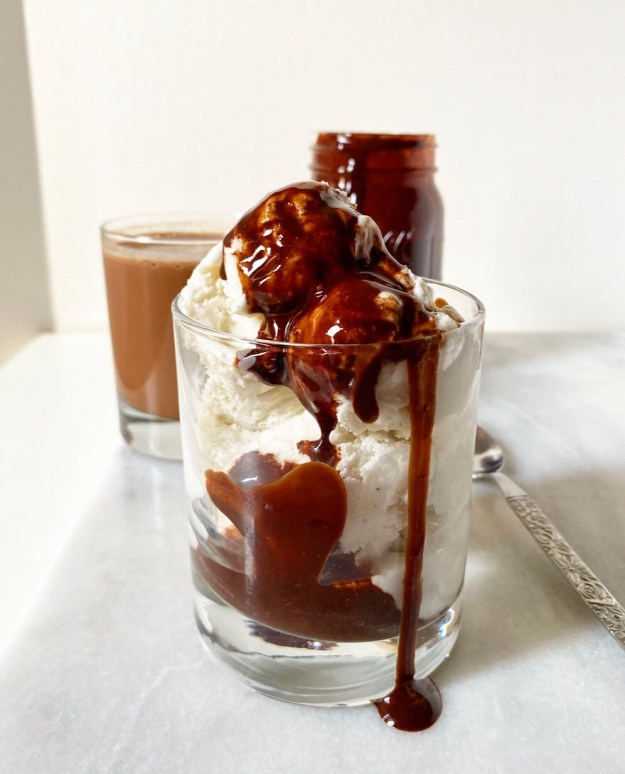 With that, I rest my case…and also tiptoe into my kitchen at 2am for some ice cream and Homemade Chocolate Syrup.
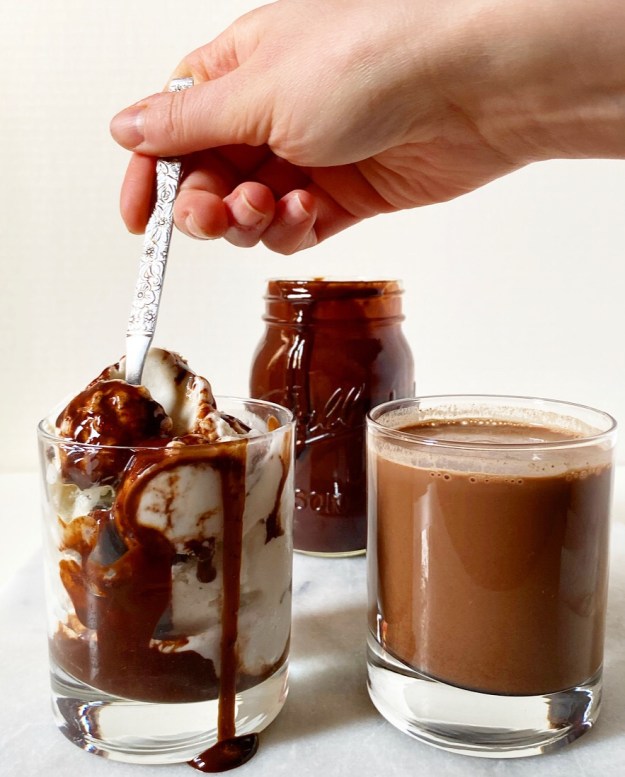

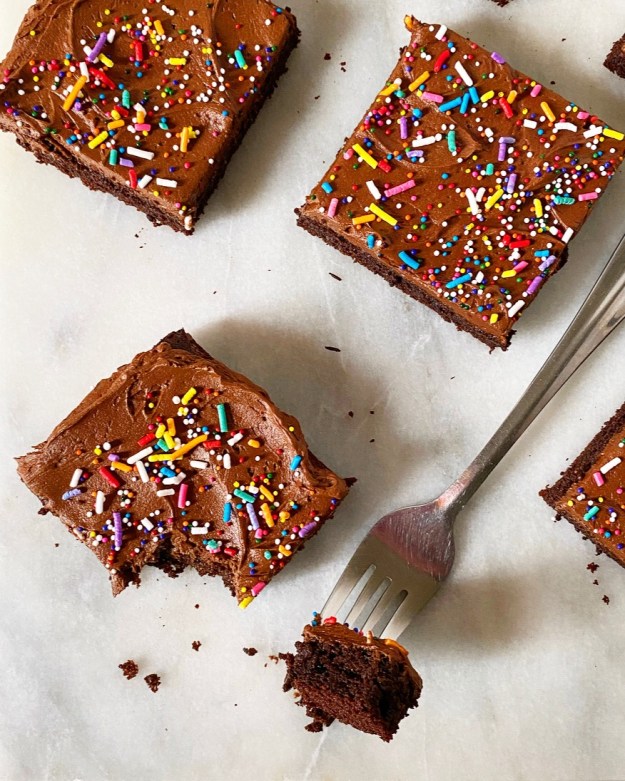 Cake with frosting seems like it’s almost not allowed right now, but this is not just any cake and this is not just any day. Coronavirus be damned.
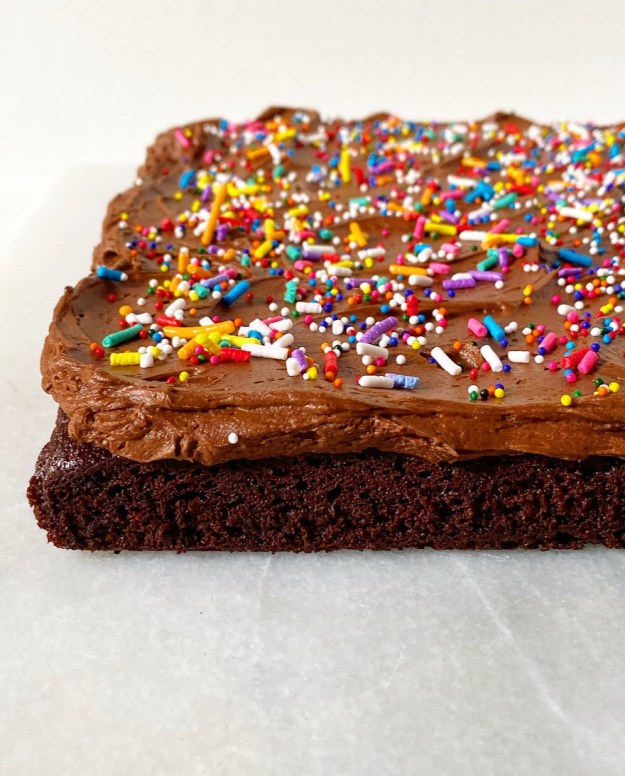 If you’re scratching your head wondering what today is…well, it’s Earth Day, and that is important. But there’s also something that I don’t talk about much on here because it seems mostly irrelevant to the daily operation of a food blog…but it’s actually completely relevant because there would be no E2 Bakes without it. Today marks seven years since I took a drink or a drug. Yep, I’m that sober home-baking food blogger that nobody warned you about.
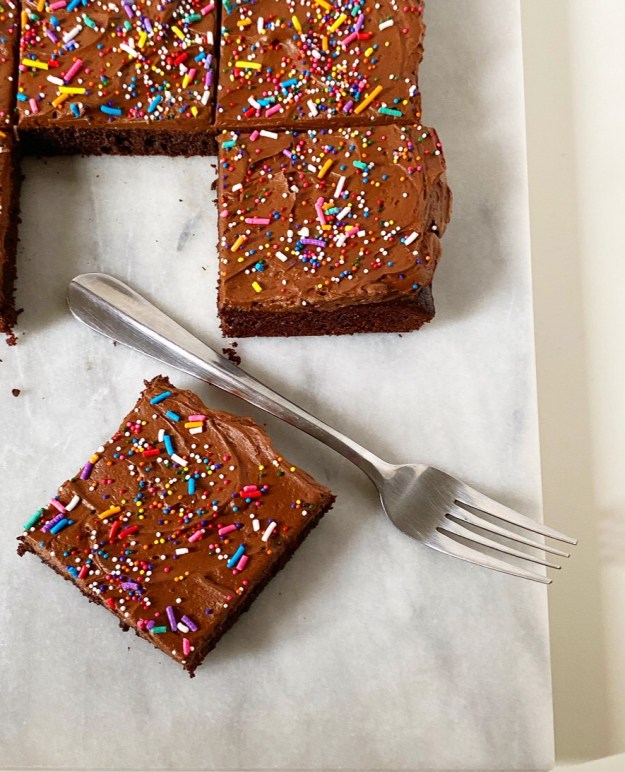 Quitting drinking and putting mind-altering substances in my body is the kindest thing I’ve ever done for myself and the people I love. I’ve gained so much more from that one decision (and many moments of grace and a lot of trudging) than I will ever be able to adequately express, least of all the ambition to run a baking blog. And, well, now you know why there is never liquor in my bakes or wine in my sauces–I can’t post something I can’t test.
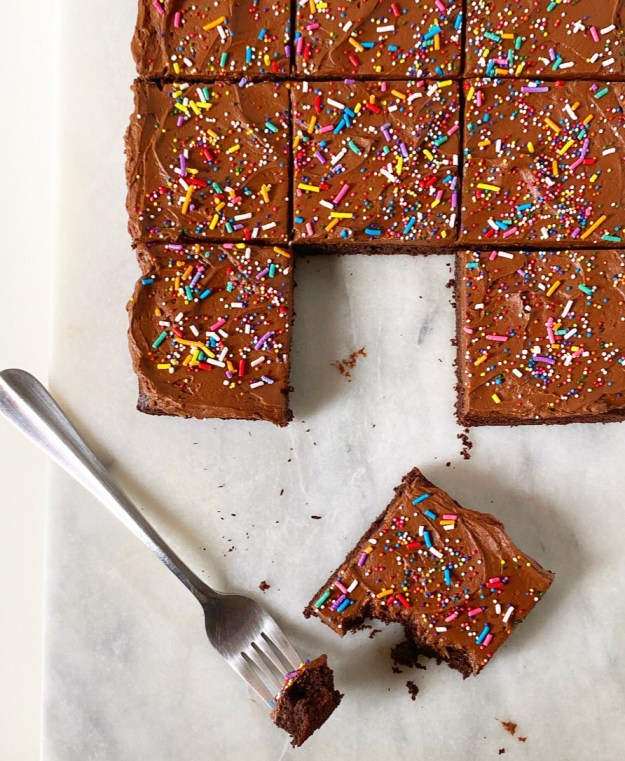
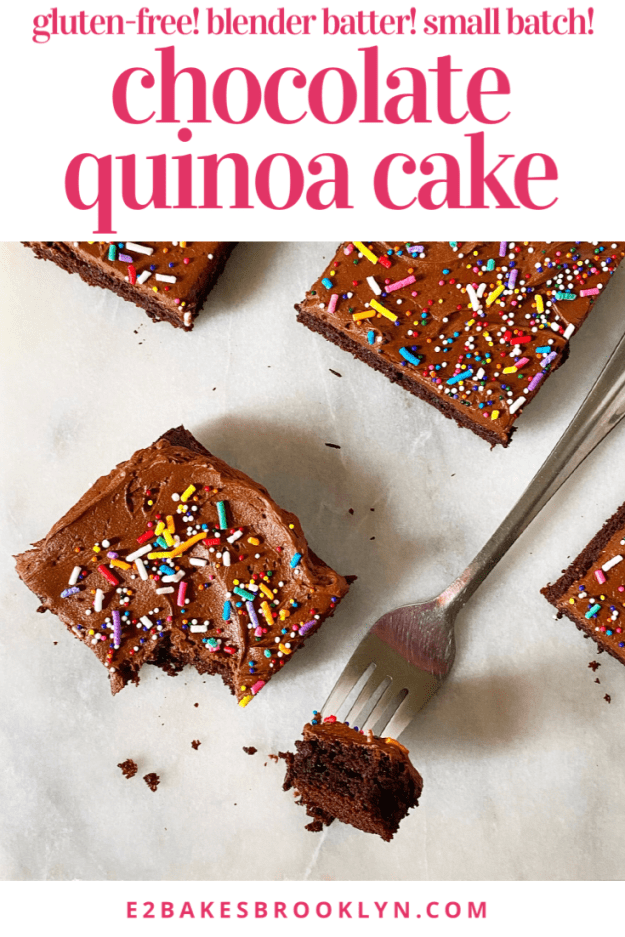
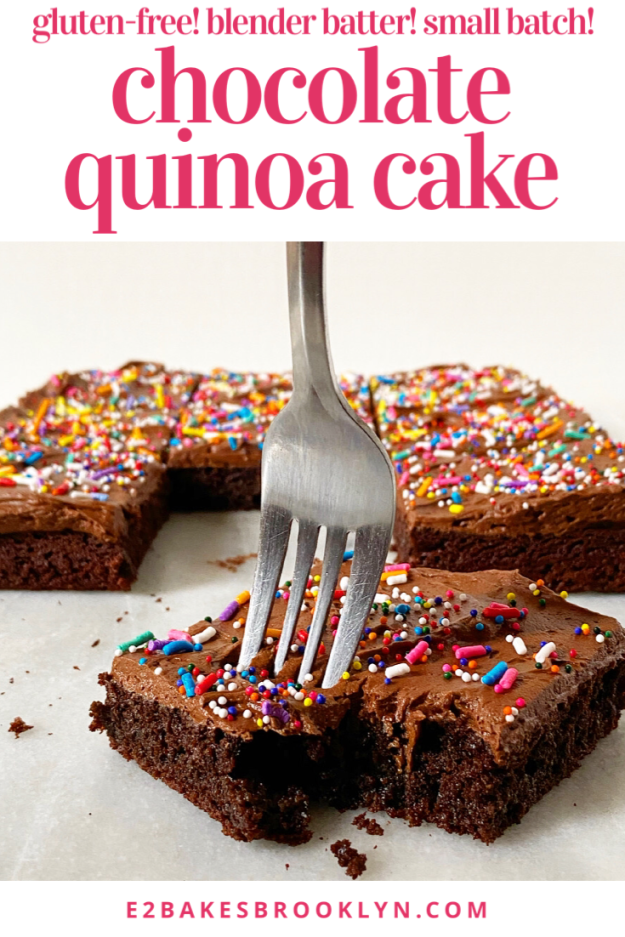
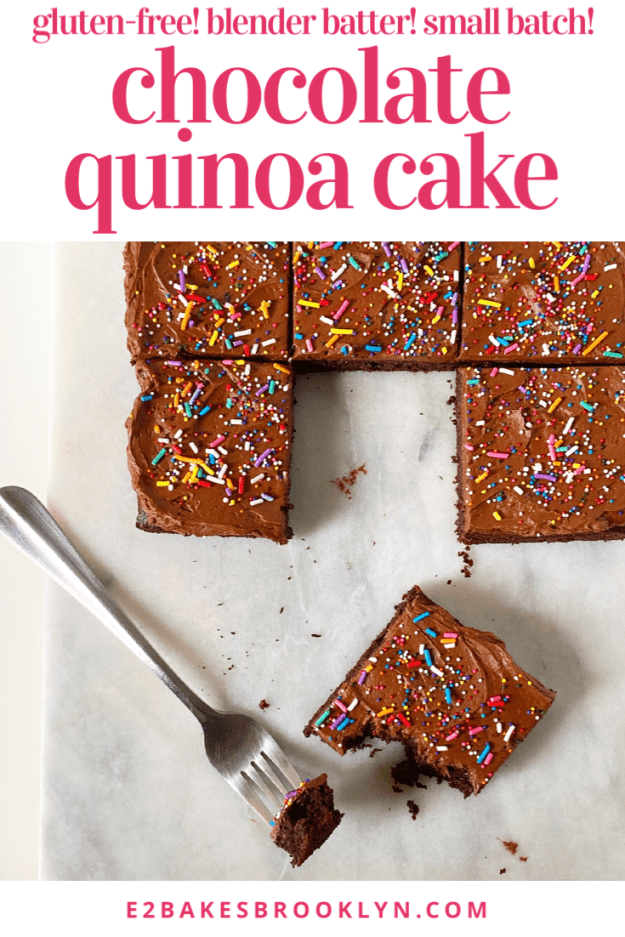
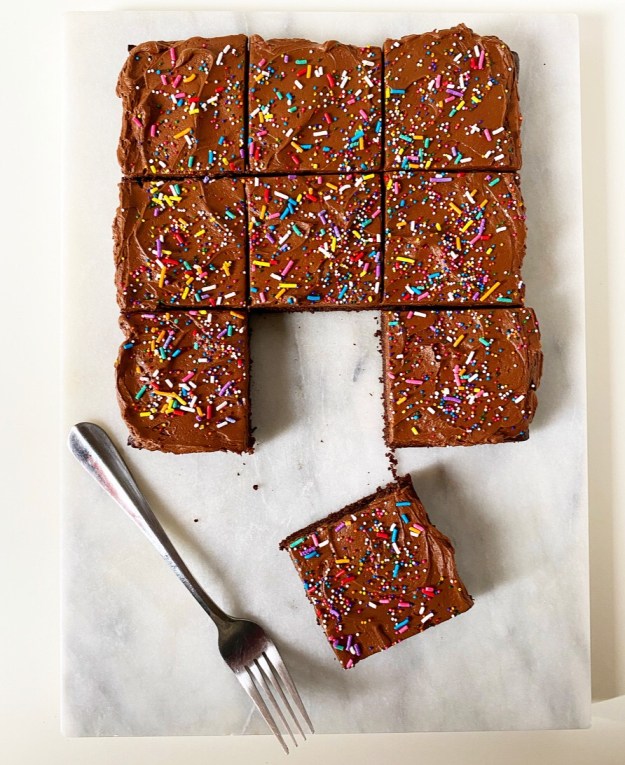 Layer cakes are out for now and flour is difficult to find, but chocolate and frosting (and sprinkles!) are always welcome in my kitchen. Today’s cake is one of the best chocolate cakes I have ever had—so tender and chocolaty! If I weren’t telling you right now, I bet you’d never guess that it’s made with a cup of cooked quinoa instead of flour. For real.
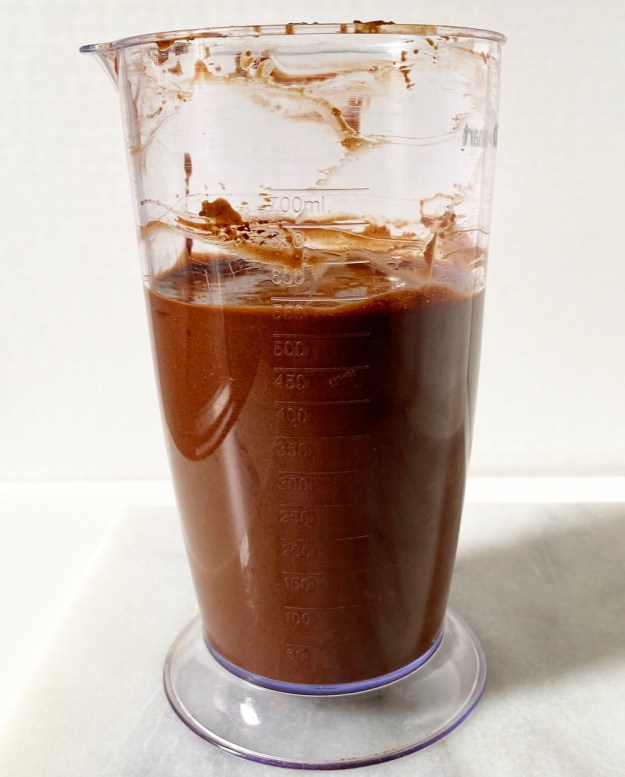
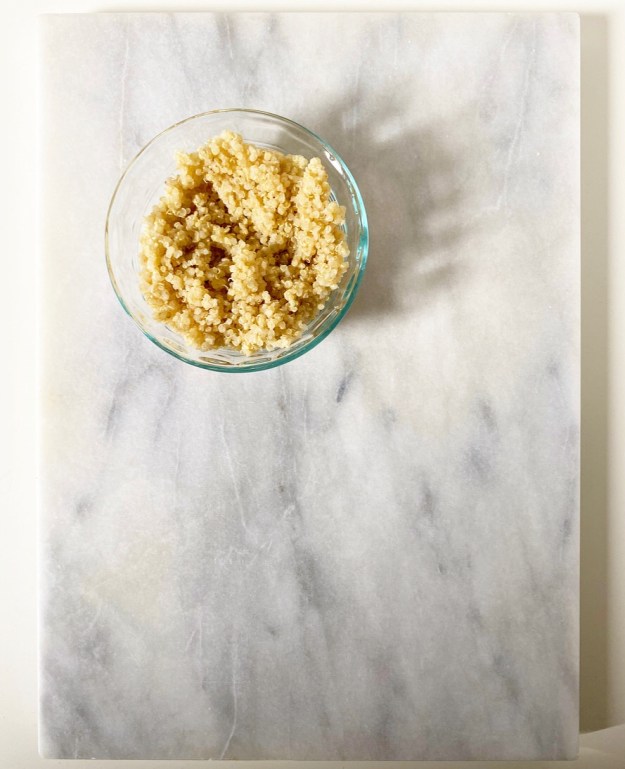 The batter—which includes cocoa powder, a hint of coffee, eggs and milk—is made in a blender to eliminate any whole pieces of quinoa. I wouldn’t recommend making most cake batters in a blender, but since this cake is naturally gluten-free, there’s no need to worry about overmixing or tough cake. Score!
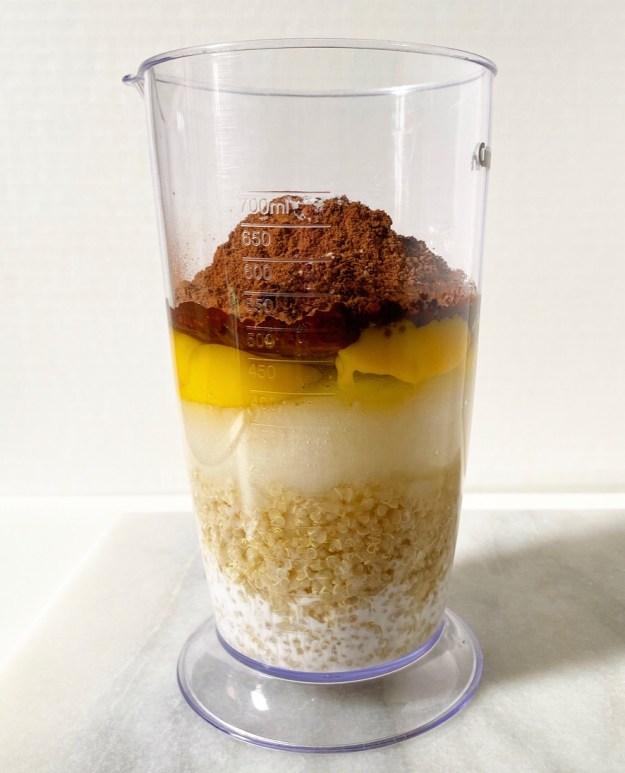
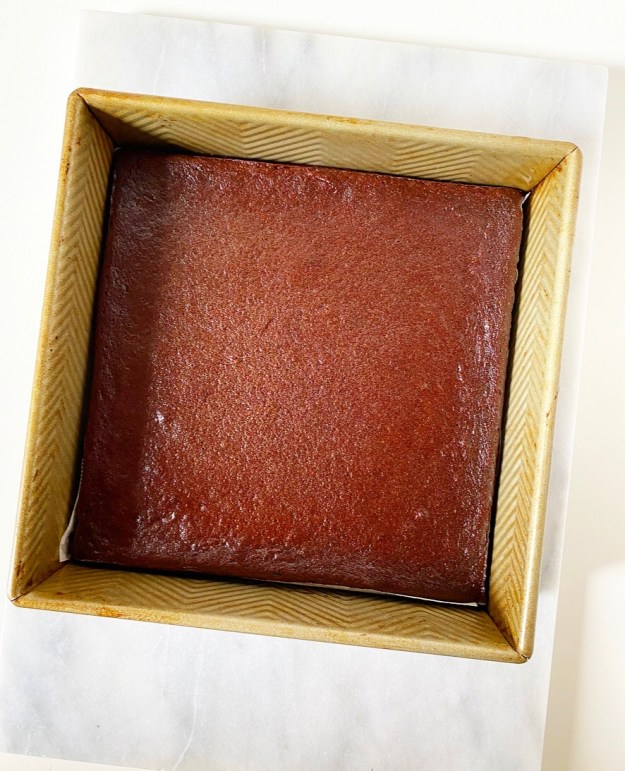 Chocolate Quinoa Cake bakes up in 30 minutes and is thin enough that it cools within an hour. I topped it off with a small batch of chocolate buttercream and dug into my stash of rainbow sprinkles for the occasion.
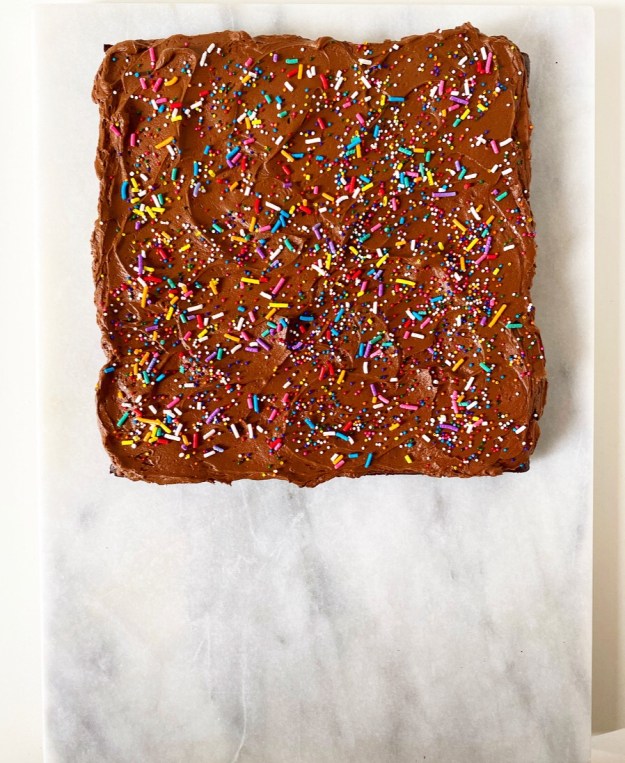 Oh yeah, that’s the stuff.
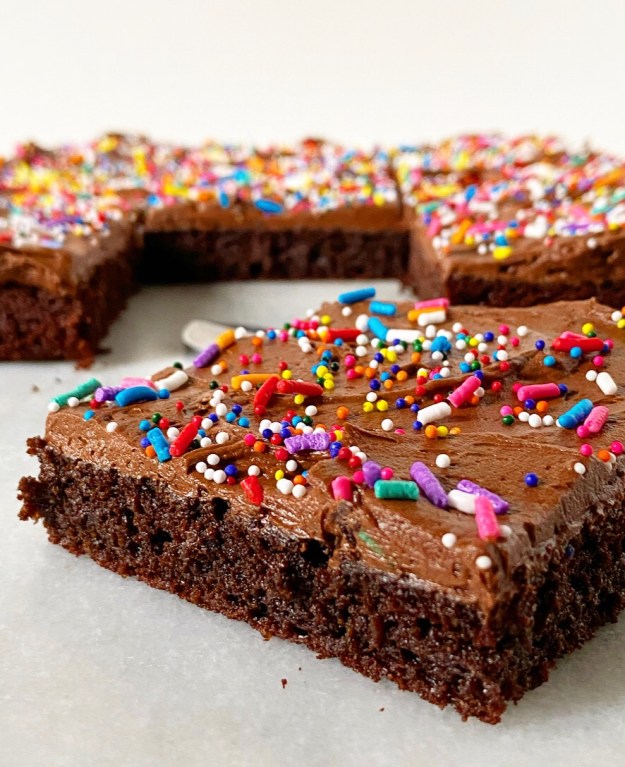 As for quarantine substitutions:
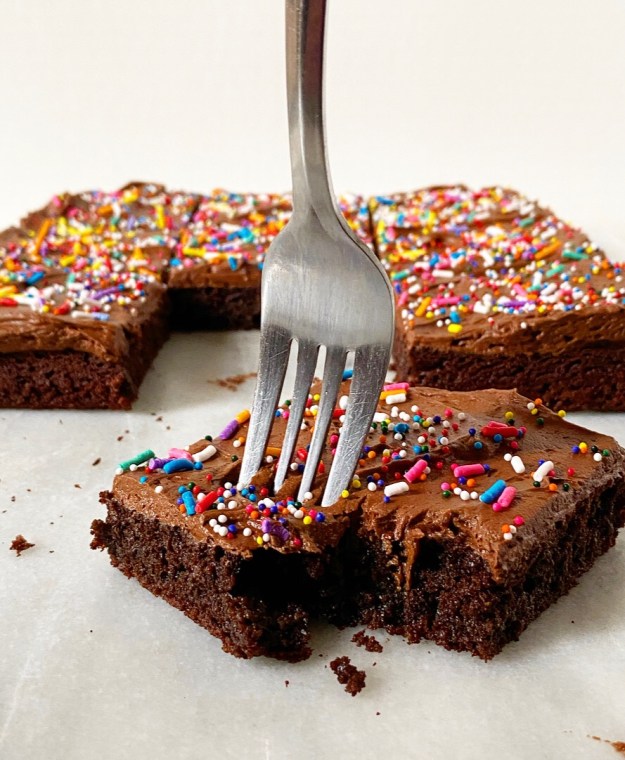 Whew! Okay. Now that you’re armed with everything you need to make a kickass gluten-free chocolate cake, go find something to celebrate. I promise you will.