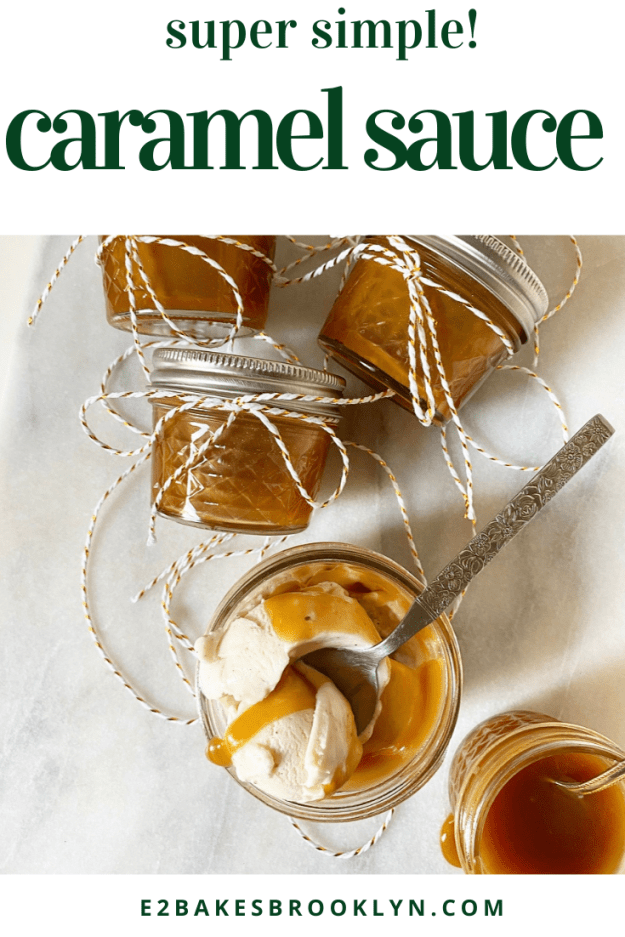
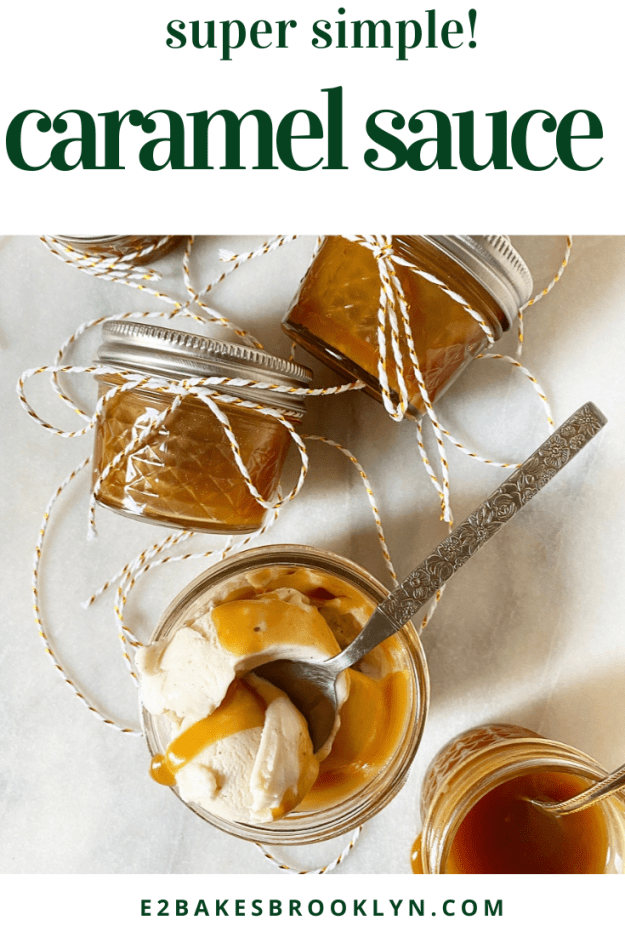
 I know what you’re thinking. “Hasn’t Caramel Sauce already been on here?” Well yes, a few times, but it’s never had its own post and don’t you think it deserves that tiny amount of recognition? I do. Also, it’s my blog and I can do what I want.
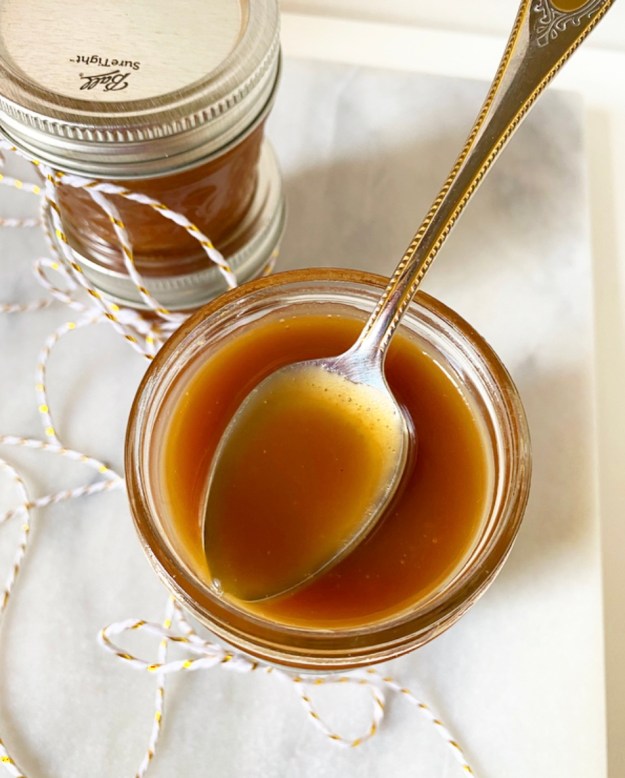 So, why am I posting Caramel Sauce now, at the holidays, instead of mid-summer like every other ice cream topping and dessert sauce in my archives? Because it is perfect for food gifting. Perfect! It’s easy, you can make it days or weeks ahead (watch the dates on your dairy), and who wouldn’t be absolutely thrilled to receive a little jar of homemade Caramel Sauce from someone they love? A monster, obviously.
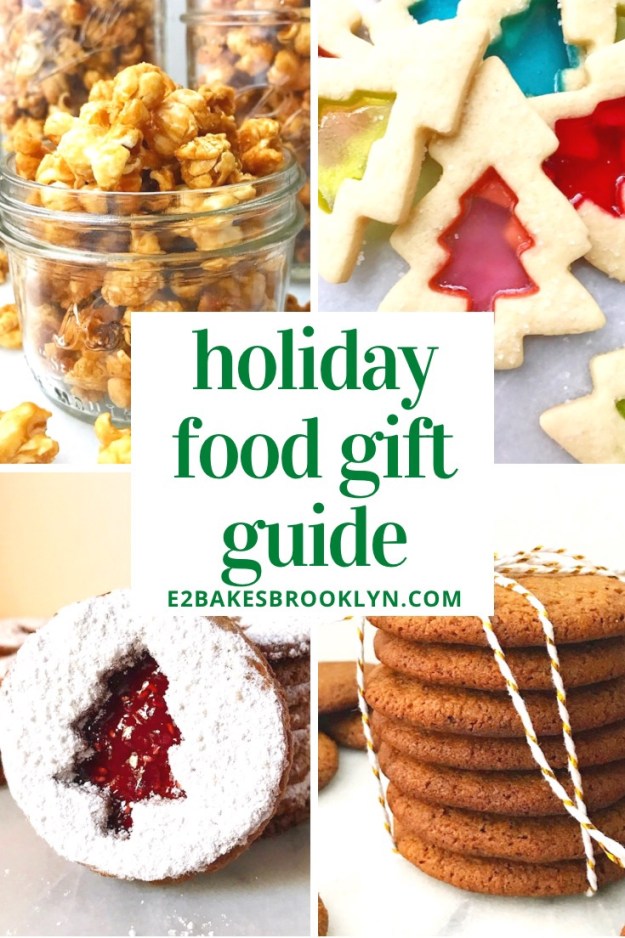
(Why am I phrasing everything as a question today?) Truth is, I’ve been meaning to write a little homemade food gift guide for years, but am just now getting around to it. I am a big proponent of homemade gifts, having done everything from making clay ornaments to puffy painting to sewing stuffed animals. I can tell you from experience that food is definitely the quickest, easiest and cheapest in terms of DIY gifting, and as sugar, butter and flour have been my artistic media of choice for the last 7.5 years, I have learned a lot about what makes for quality food gifts.
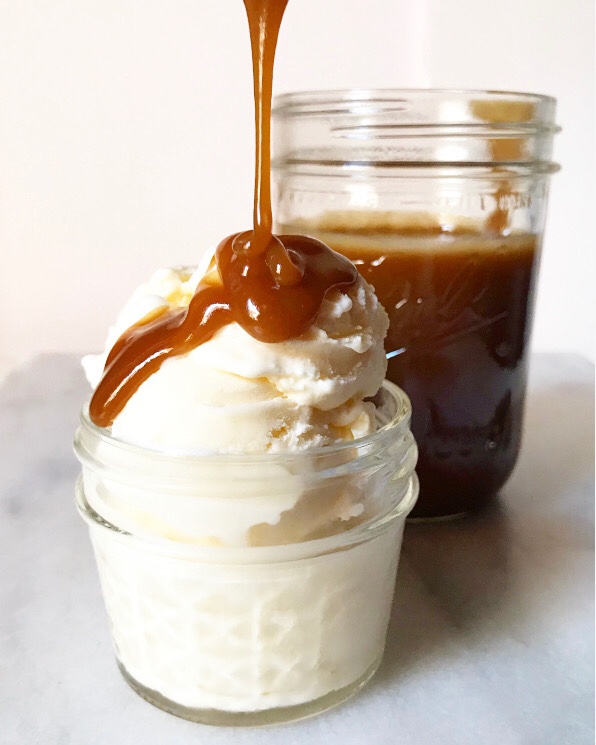
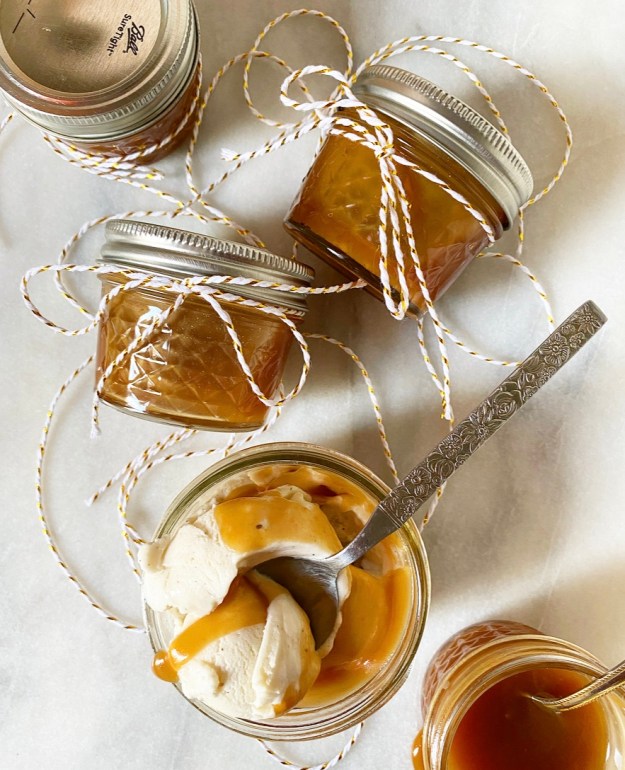
Want to give something saucy? People love an ice cream topping, even in the dead of winter. I’m obviously out here shilling for Caramel today, but you can do Peanut Butter Caramel, Butterscotch or even homemade Hot Fudge without much hassle. You could also go super easy and just microwave a bunch of Chocolate Shell! Just make a batch of any of the aforementioned sauces and divide it among heatproof jars. The jars pictured today are 4-ounce mason jars that I keep on hand, but 8-ounce jars would be great too.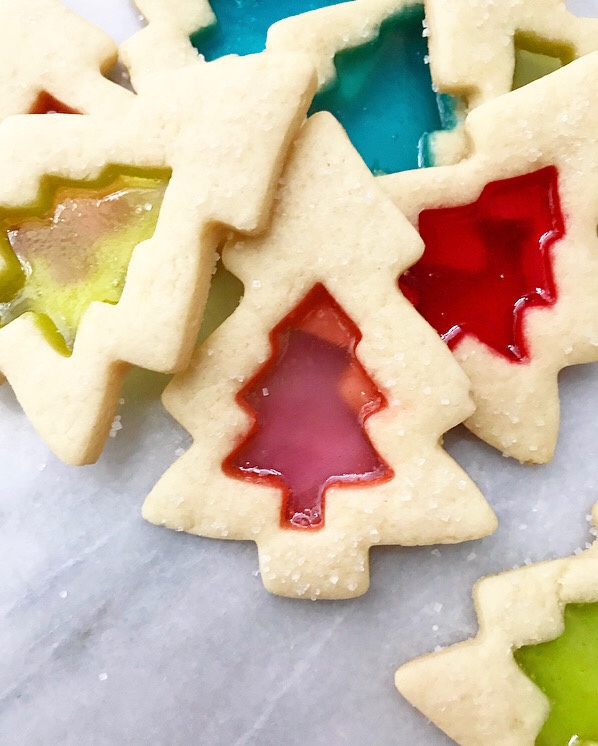
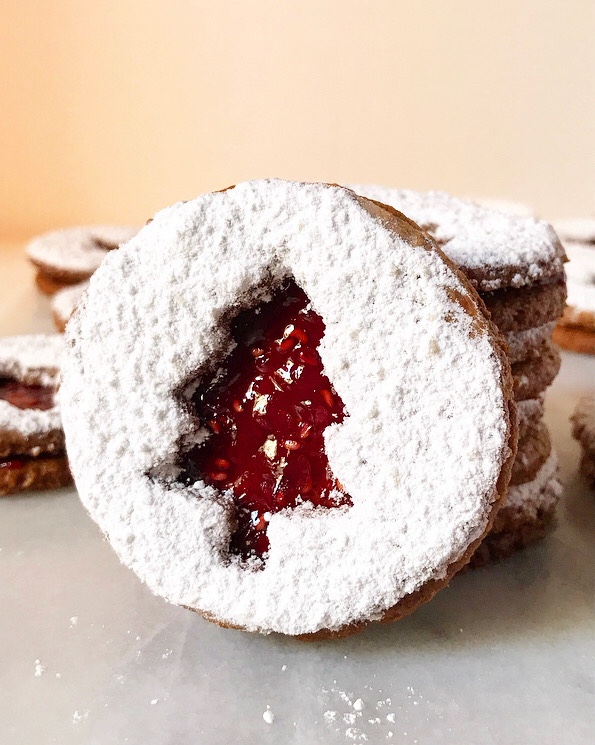
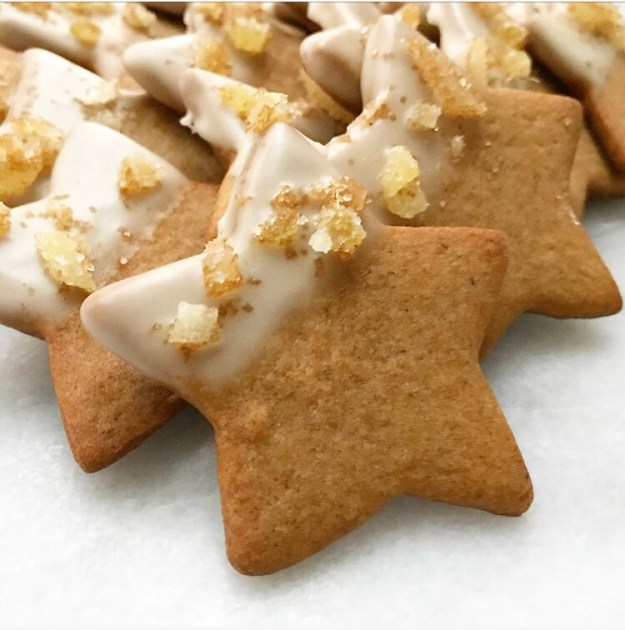


Looking to give cookies? You’re in luck! There are so many holiday cookie recipes that are beyond perfect for gifting. Not only do they look beautiful all boxed (tinned?) up, but they keep incredibly well, especially crisper offerings. Think Iced Sugar Cookies, Candy Cane Cookies, Stained Glass Cookies, Maple Spice Stars, Brown Butter Shortbread, Orange Cardamom Pistachio Shortbread, Gingersnaps, this week’s Peppermint Bark Cookies, Pinwheels, vegan/gluten-free Oat-Pecan Linzers, Pretzel Shortbread, Red Velvet Cheesecake Thumbprints…the list goes on and on.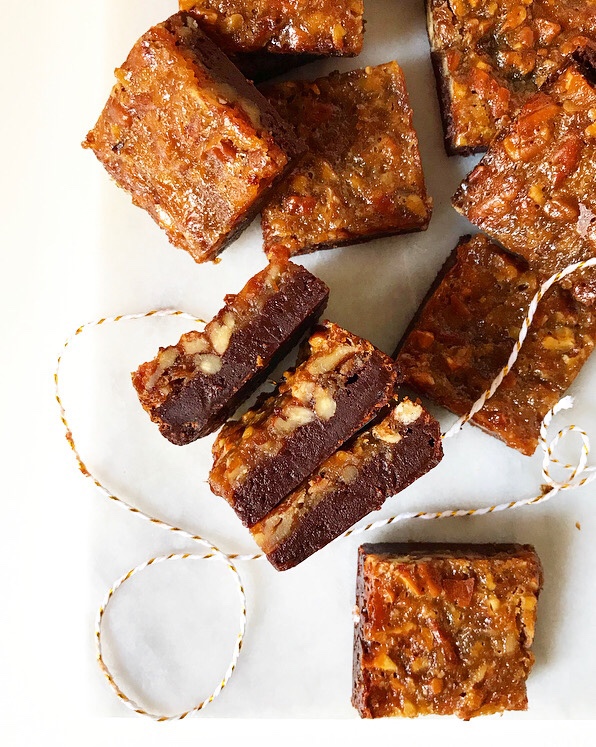 Don’t forget that brownies and blondies are technically cookies, too! Pro tip: you can easily double most of my 9″ square recipes and bake them up in a 9×13″ pan without changing much of anything.
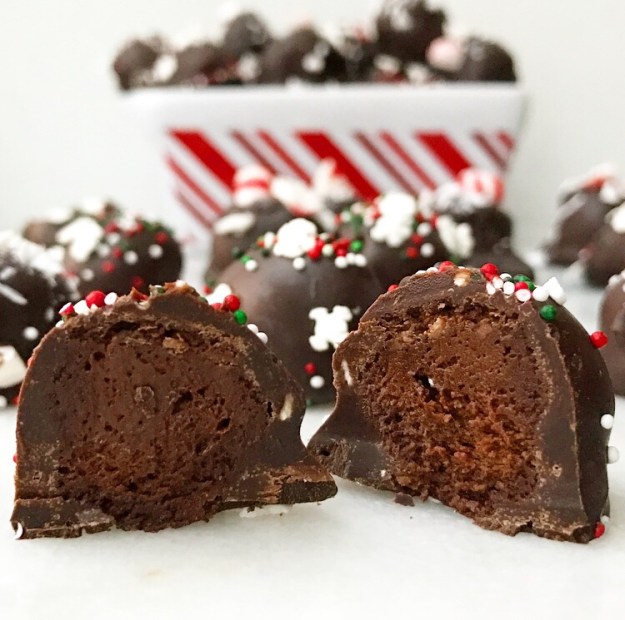
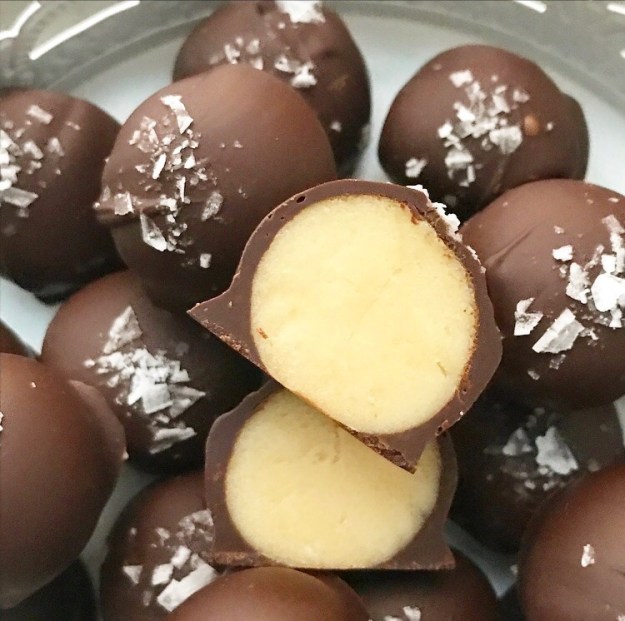
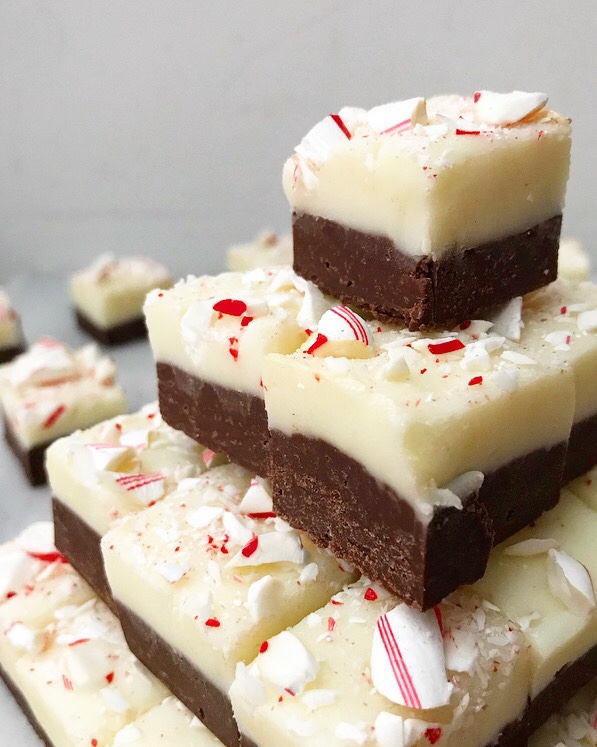
Candy on your mind? I am not the world’s most proficient candy maker, but I have a few tricks up my sleeve. I love a good homemade truffle, especially these vegan Five Ingredient Salted Marzipan beauties. You could also make easy Peppermint Mocha Fudge or Peppermint Mocha Buttercreams. Yum!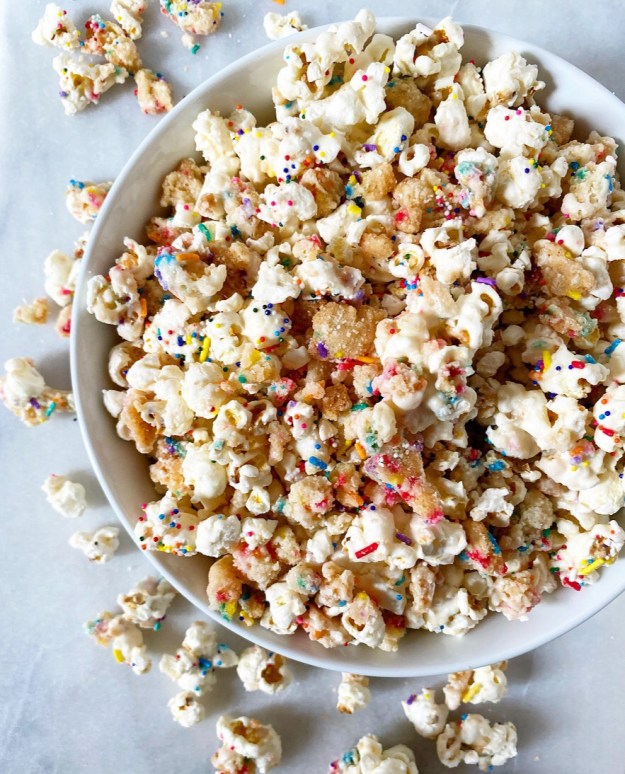
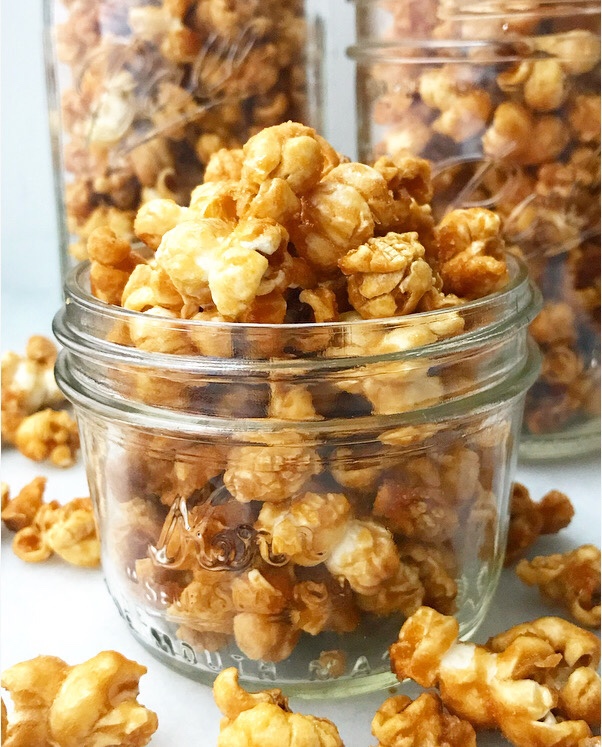 If I were to gift candy this year, I’d go for popcorn. People LOVE popcorn. <–that’s me, I’m people. The Super Sprinkle Popcorn I made over the summer could easily be transformed with some holiday sprinkles. And then there’s Salty Maple Caramel Corn. Ohhh my. It’s salty-sweet easy, gluten-free, and makes enough for several tins. You could even get a little wild and make Sriracha Cracker Jack.

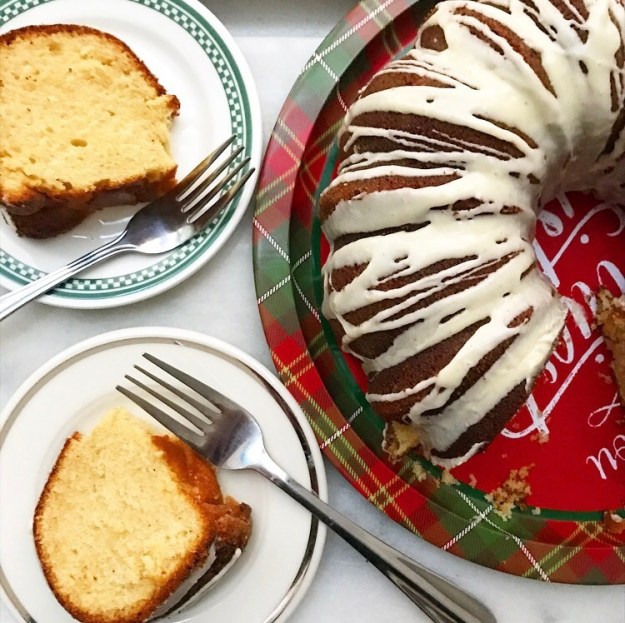
In the mood to make cakes? Well, you’re the kind of friend I’d like to have. Cake definitely takes a little forethought, but if you were to wrap a Boterkoek {Dutch Butter Cake}, Meyer Lemon Drizzle Cake or Eggnog Bundt in cellophane, or deliver a grain-free Winning Hearts & Minds Cake in a (clean) small pizza box, you might just…win hearts and minds. And make someone feel incredibly special.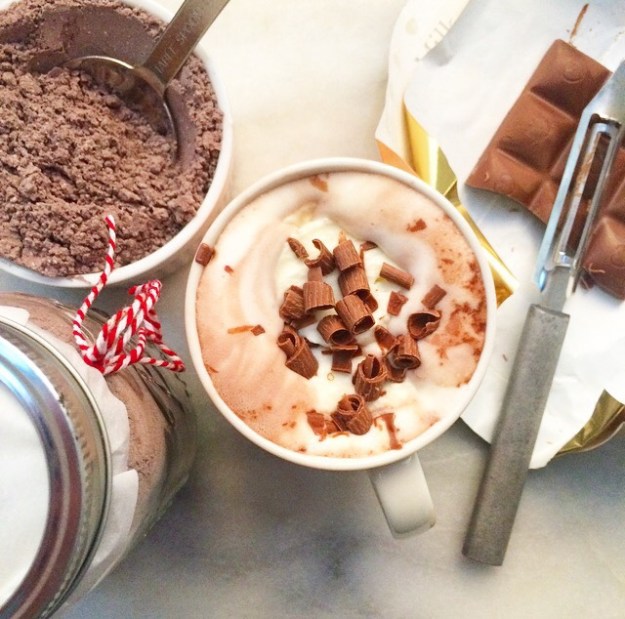

Don’t want to bother turning on your oven? I’ve got you there, too. Make a homemade mix! You can easily jar individual brownie and hot chocolate mixes! Just make yourself an assembly line and write (or print out) little tags with instructions for how to make your brownies or hot chocolate. This will give your friends a little low-maintenance something to do and enjoy during this weird AF holiday season.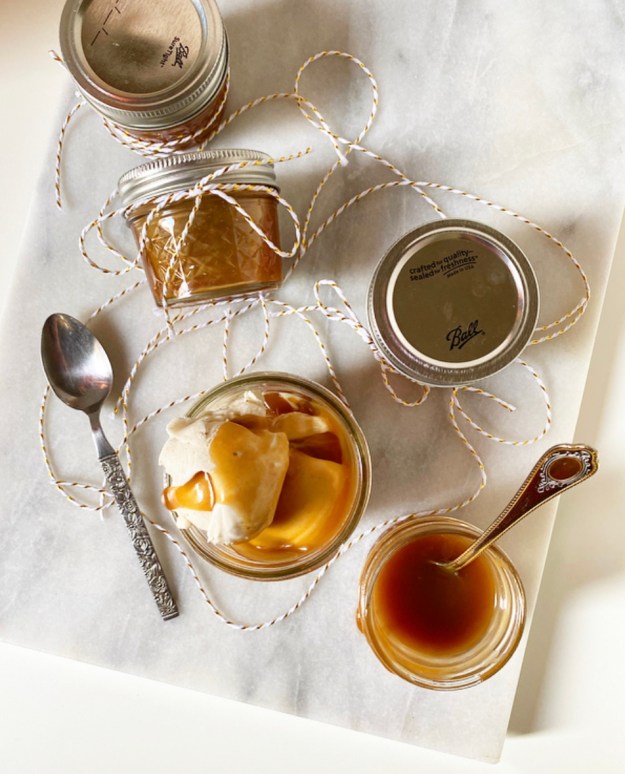 This is just the tip of the food gifting iceberg–I could go on forever. I hope this guide inspires you to treat your friends to something sweet this month. It’s going to be strange and solitary holiday for many of us, and I know a little homemade something would do us all some good.
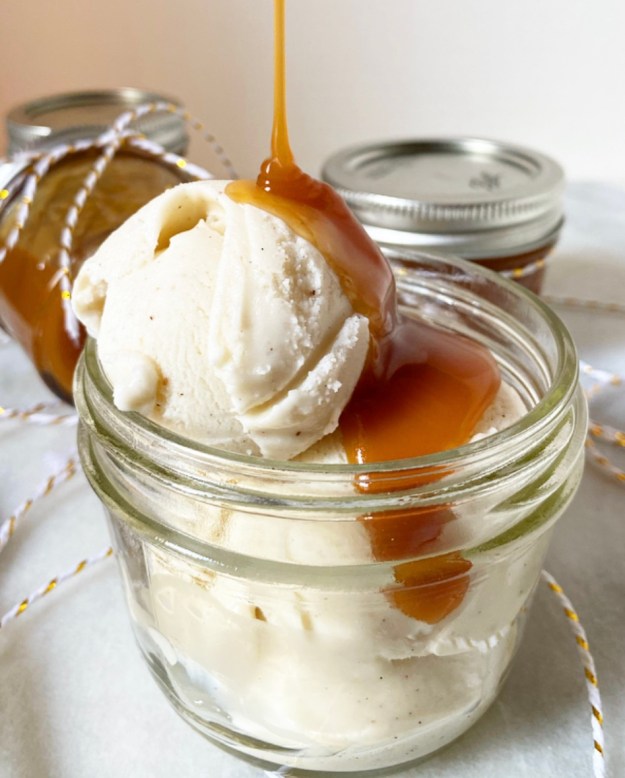
Caramel Sauce
makes about 1 1/2 cups
1 cup granulated sugar
6 tablespoons unsalted butter, cut into pieces
1/2 cup heavy cream
1 teaspoon pure vanilla extract
1/4 teaspoon Kosher or sea salt
Place sugar in a 2-3 quart saucepan over medium-high heat. Whisk sugar until the sugar melts and turns a deep copper color. Whisk in butter until completely incorporated. Remove the pan from the heat and stir in heavy cream. Caramel will bubble violently, but will quickly relax into a smooth sauce. Whisk in vanilla and salt. Transfer sauce to a jar and let cool to room temperature.
Leftover caramel sauce should be kept in the refrigerator. Microwave in 15 second bursts, stirring in between, to reheat.
 How have I never put peppermint bark on here? It’s chocolate, it’s peppermint, it’s festive, it’s iconic, and yet it’s never graced this blog. That is, unless you count assembling it on top of a giant sheet of chocolate cookie and then breaking it into a zillion jagged pieces, which I very much do.
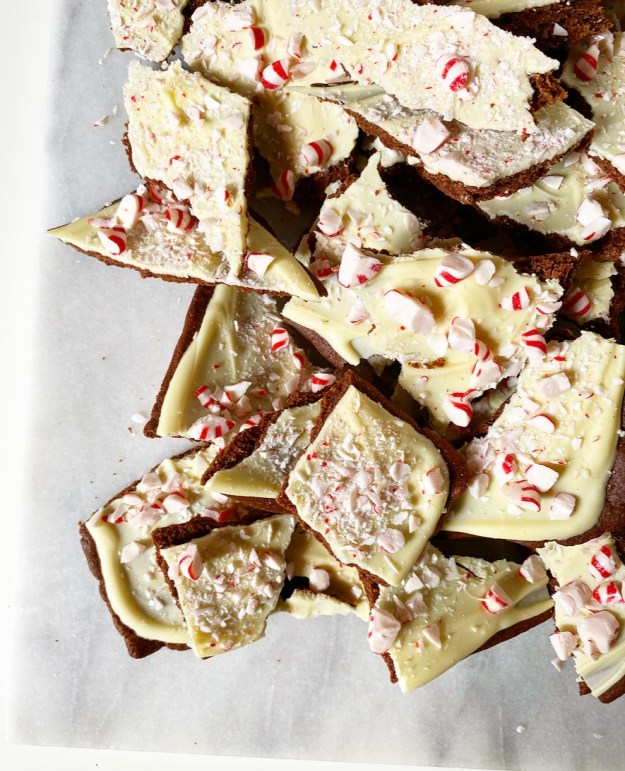 Ooooh y’all, these have been a long time coming. Over the years, I have tested putting peppermint bark on a cookie cake, shortbread bars, potato chips and brownies, none of which have made to on the blog, but these Peppermint Bark Cookies? These are where it’s at. If you make one new cookie recipe this holiday season, let this be it. It’s the best of two worlds (peppermint bark and cookies, duh), surprisingly simple, and so, so good.
 The dough comes together in a flash. It’s just my
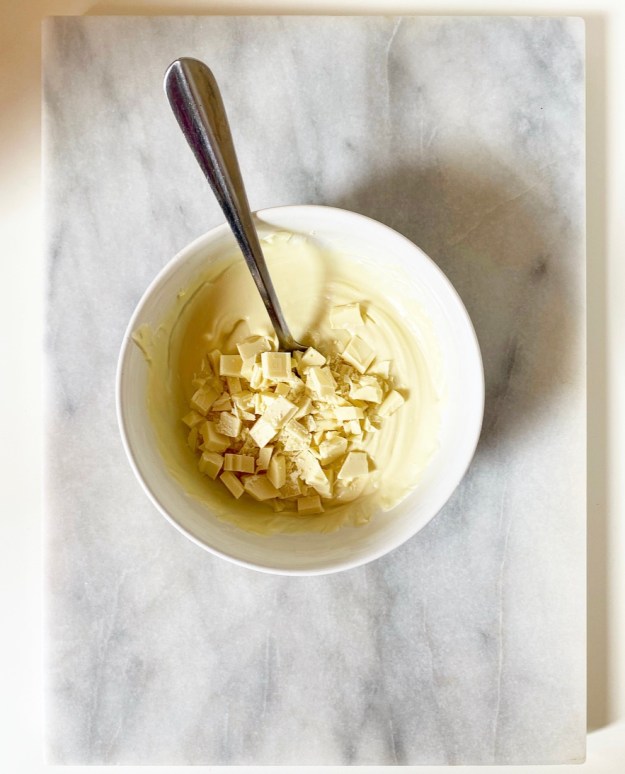
 This part—the peppermint bark part—is easy, but I still have a few tips for you.
 And speaking of peppermint, I like to use starlight peppermints in my Christmas baking. Some bakers prefer candy canes, but peppermints are cheaper ($1!) and look the exact same as candy canes when all bashed up. Oh, and unpopular opinion? They taste better than your average candy cane. Fight me.
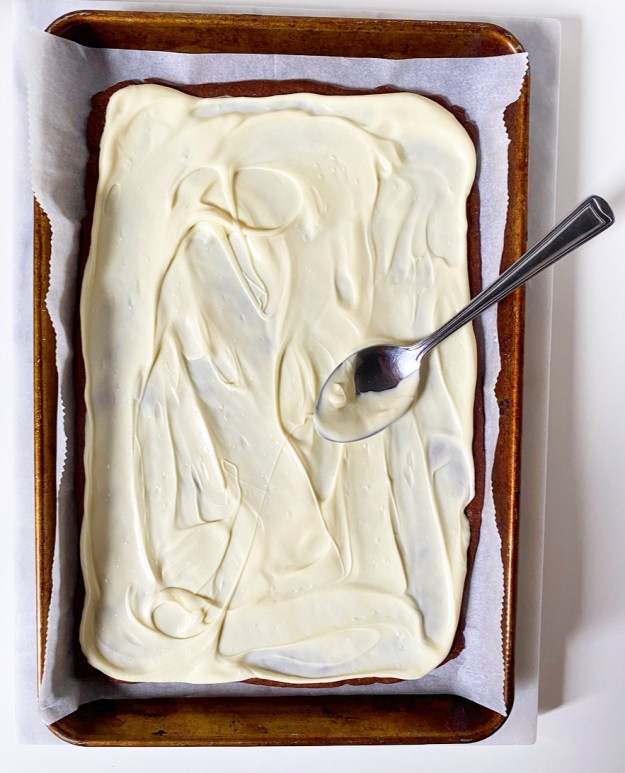
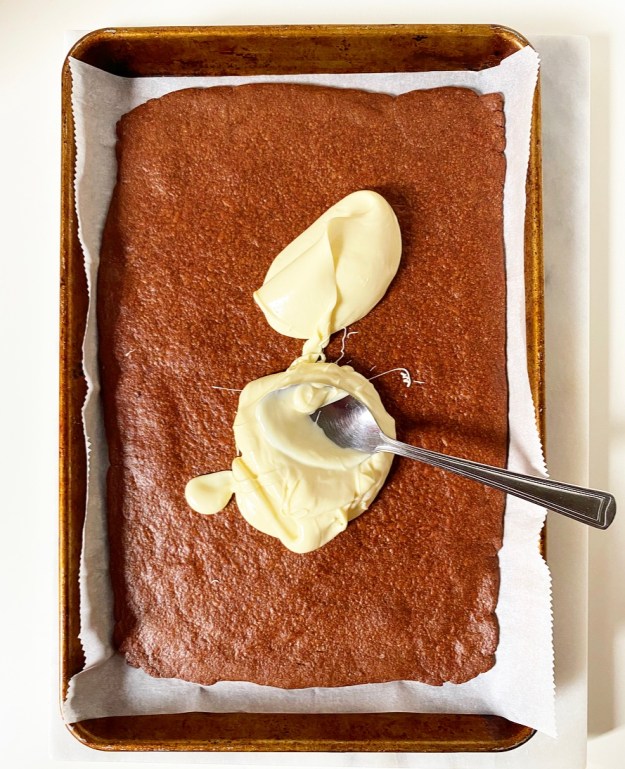
 To make the peppermint bark, spread the melted white chocolate all over the big chocolate cookies and scatter on the bashed peppermints. Then give your cookies a 20 minute freeze to set the bark. You can also let it set at room temperature, but it will take a couple of hours and that seems like a lot when cookies can be had so much sooner.
 The last step in this process is the most fun: breaking the big cookies into shards! Just like with traditional peppermint bark, make the pieces as big or small as you like. Try to let go of the outcome—the charm here is that each piece is different. If you need uniformity with your Peppermint Bark Cookies, you can obviously slice the big rectangles into squares.
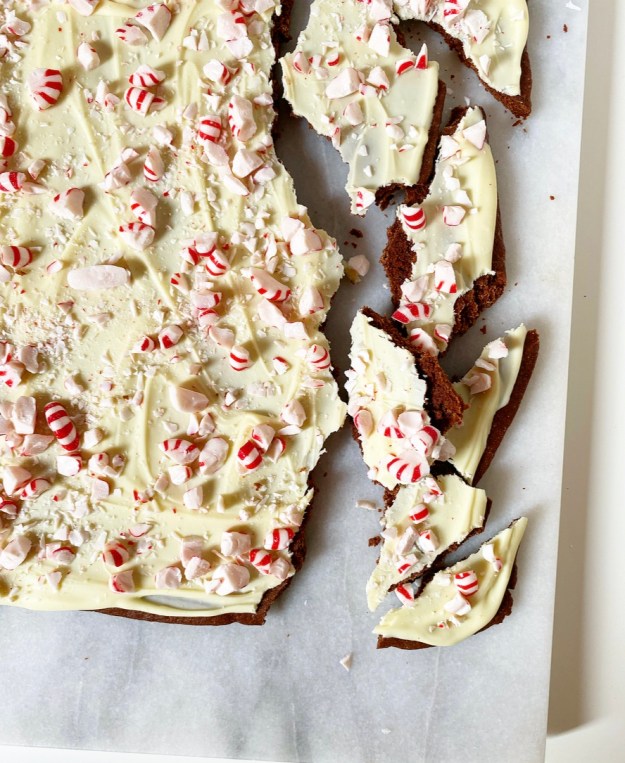 After that, it’s time to treat yourself! These cookies have it all: a soft chocolate base, a layer of smooth, snappy, peppermint-spiked white chocolate, a smattering of candy, and a whole lot of holiday cheer. They’re so delicious that you could easily hoard the whole batch to yourself, but I think they’d be amazing packed up in tins and gifted. And speaking of food gifting, that’s what we’re talking about on Friday. See you then!


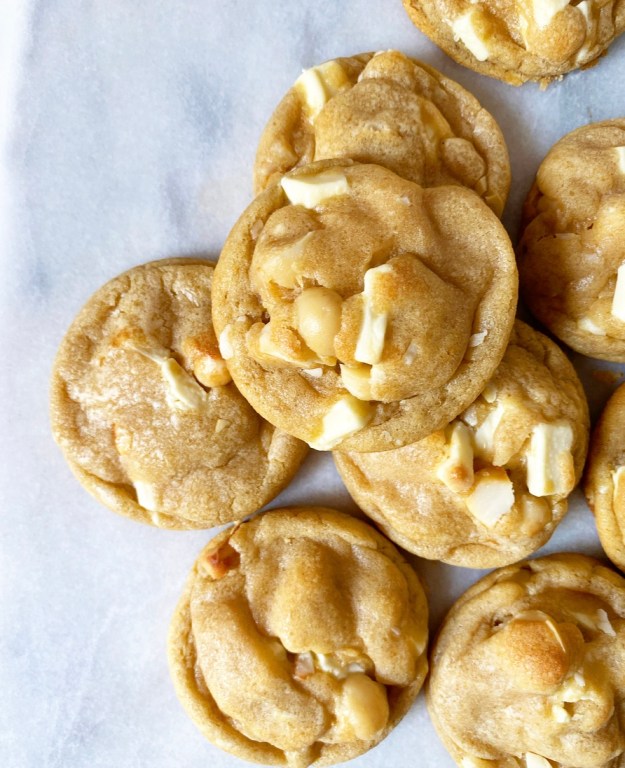 A few years ago, I put out a call for holiday
 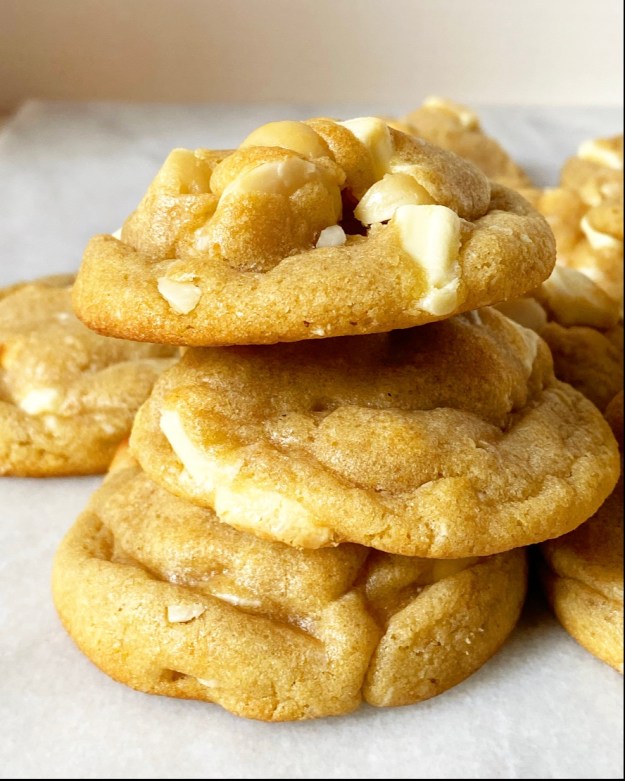 You might be thinking “are white chocolate macadamia nut cookies a holiday cookie?” To that I say…sure, why not?! If someone puts them out at the holidays, I think they’re a holiday cookie. Just because a recipe doesn’t match our own personal experience and nostalgia doesn’t mean it doesn’t align with someone else’s.
 So, here we are with my second holiday cookie of the season: Brown Butter White Chocolate Macadamia Nut Cookies. Yes, that name is seven words long but it is #worthit—brown butter takes this chewy, nutty classic cookie recipe from good to WOW! Like, why have we not been doing this all along?
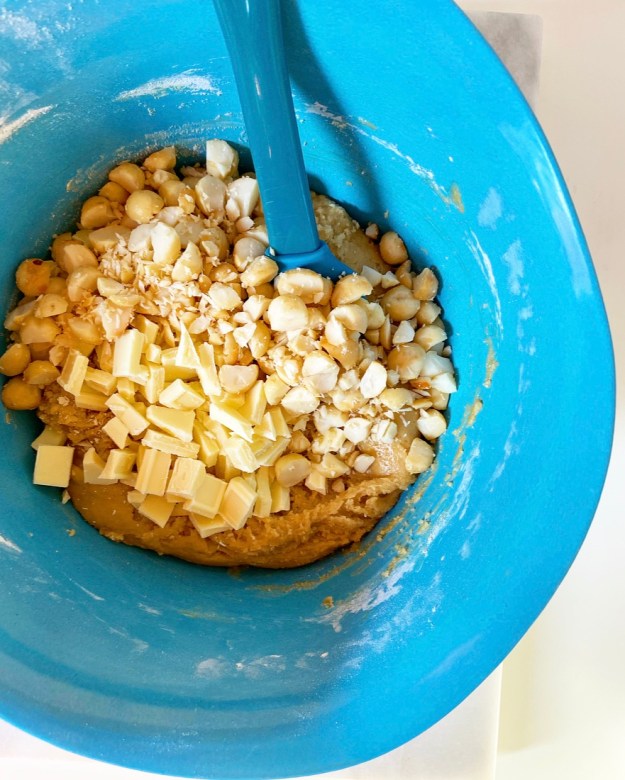 The cookie dough is straightforward and doesn’t require a mixer or anything fancy. I’ve made these with both white chocolate chips (about a cup) and chopped white chocolate, and prefer the chopped stuff every time. It has more cocoa butter, fewer stabilizers, and it just tastes better, period. As for the macadamia nuts, you can use roasted-salted or raw. I love control and have access to raw macadamias through
  And maybe, just maybe, share a few and spread a little holiday cheer.
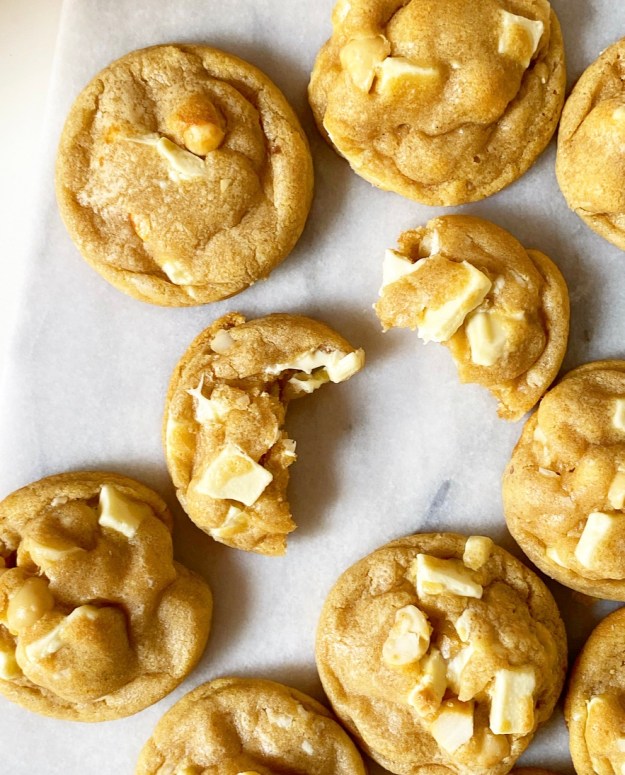


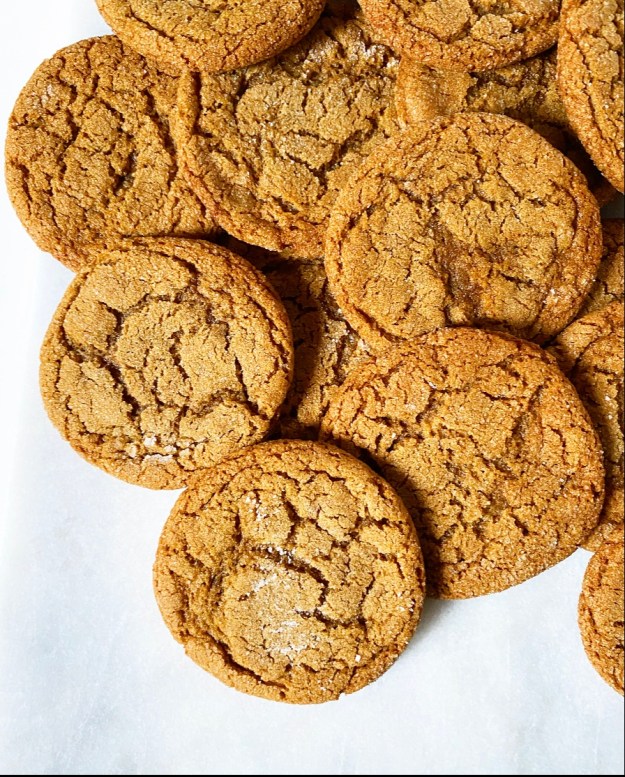 I’ve been a bit lost trying to decide what to make for Christmas this year. In the past, I’ve really gone for it with elaborately
 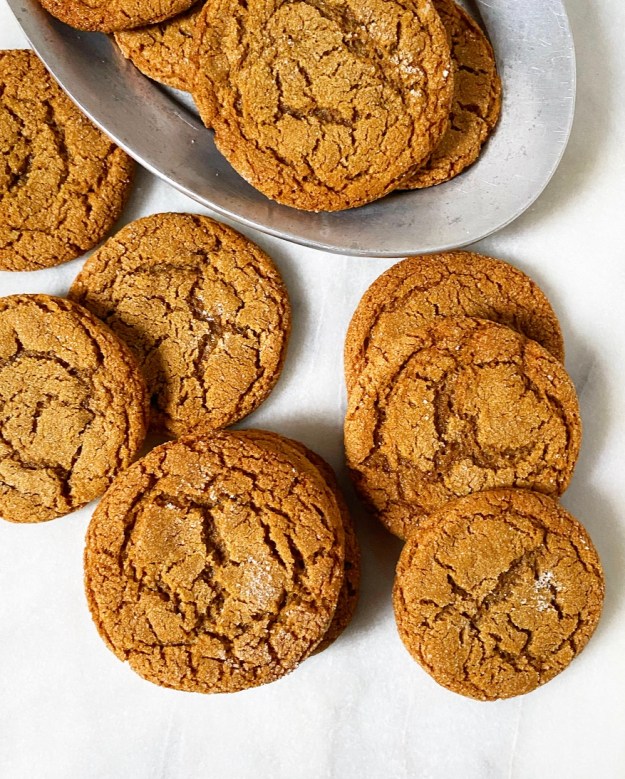 Anyway, this Christmas is going to be simpler around here. I’m not saying there won’t be sprinkles or a buttercream flourish—I’m still me, duh. It just may be a month of less…involved…holiday sweets.
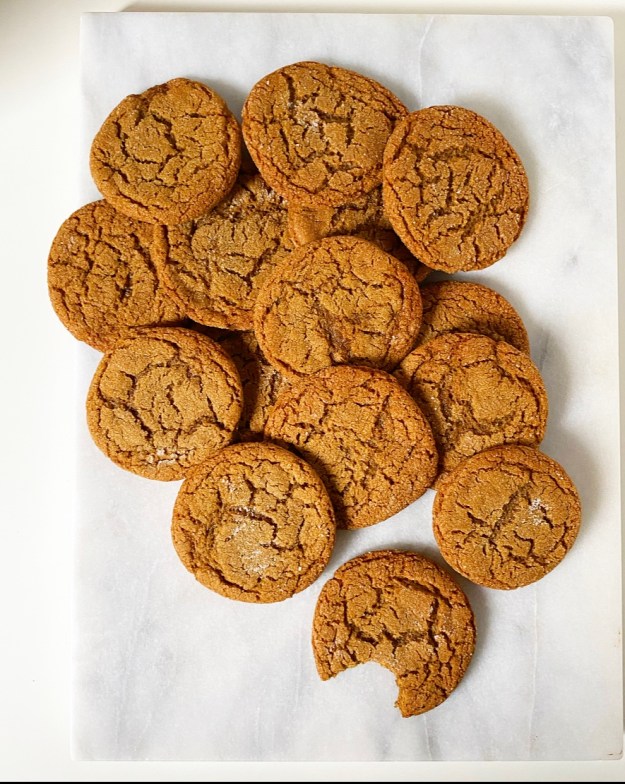 As far as the recipe goes, my path to chewy Molasses Crinkle glory is pretty straightforward. I used my
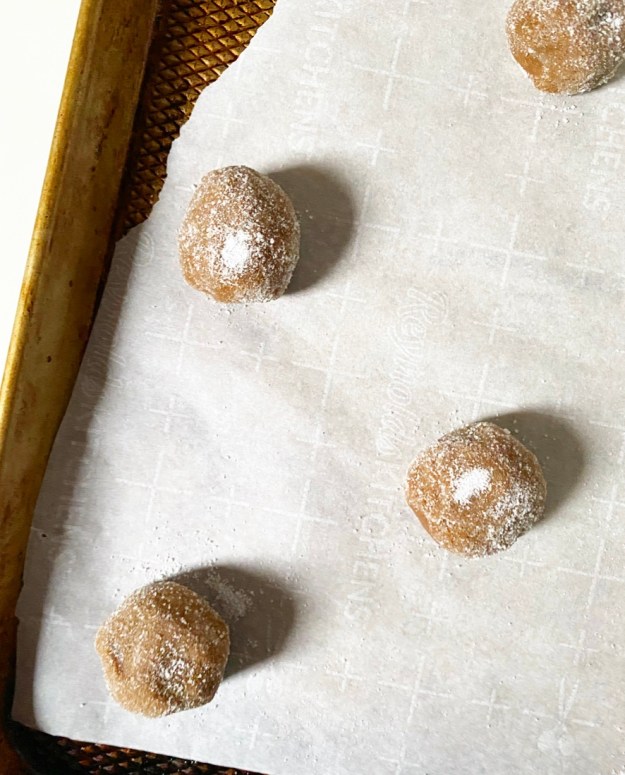
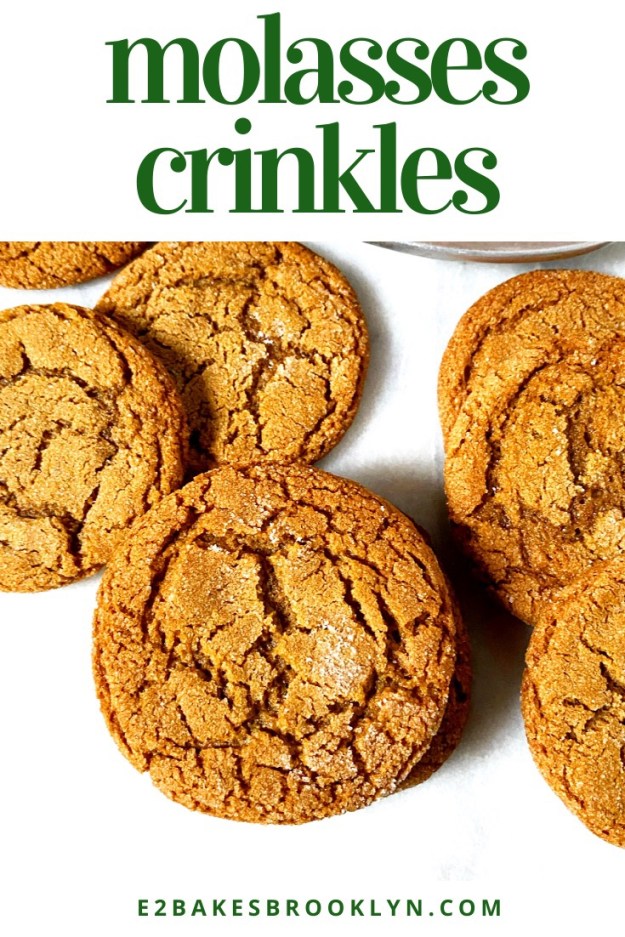
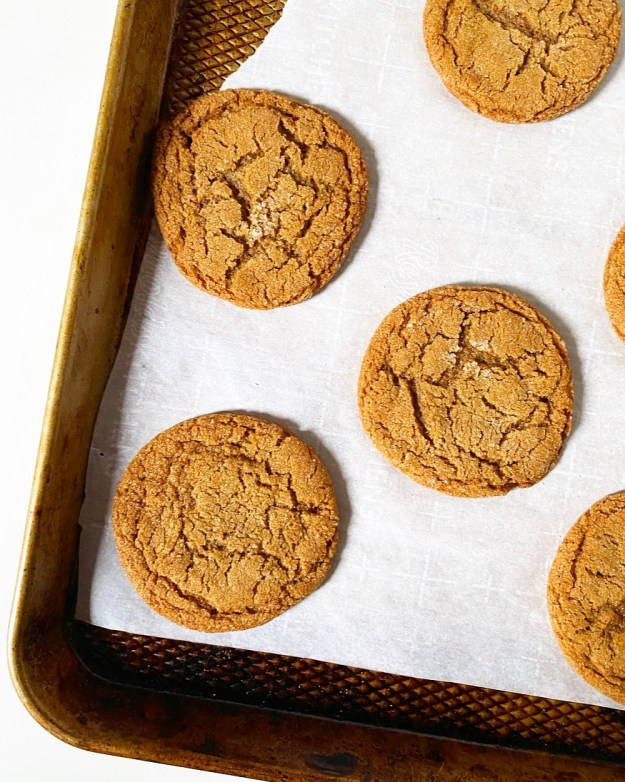 Mix your dough in a pot on the stove and let it relax at room temperature while your oven warms; this will give the gluten time to develop for extra-chewy results! Scoop the dough into balls and roll them in sugar (granulated or a mix of granulated and coarse) before baking for ten minutes. The big crinkles will begin to form during the last two or so minutes of baking, when the dough has spread pretty dramatically and puffs to the point that it breaks the sugar coating. Then, just when you remove the hot cookies from the oven, give the pan a good thwack on the counter and…bam. Crinkle city.
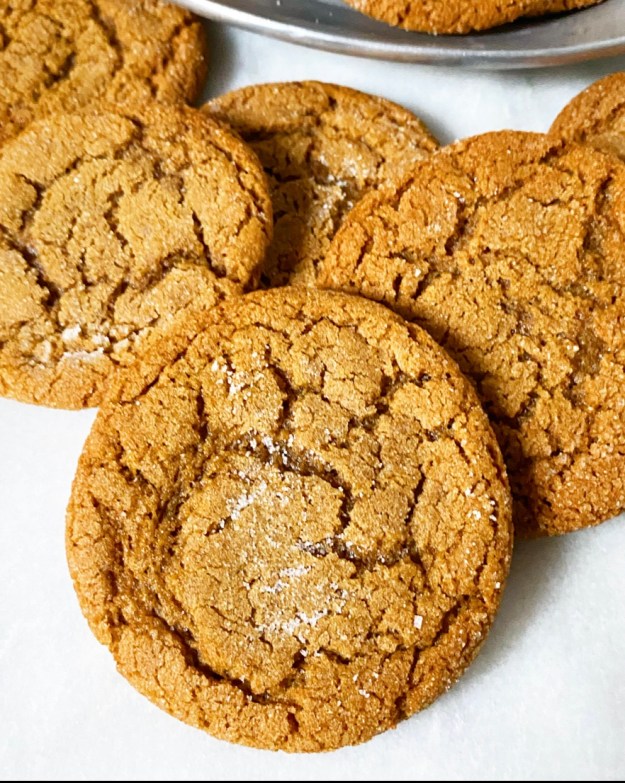 These cookies, y’all. They’re on the thin side, but have tons of surface area and chewy texture and crinkles and a crisp coating, and that’s to say nothing of the molasses and ginger and cinnamon! And make no mistake, these are molasses cookies. Sure, the ginger and cinnamon are quality background flavors, but sticky, bittersweet molasses? She’s the star of this show.
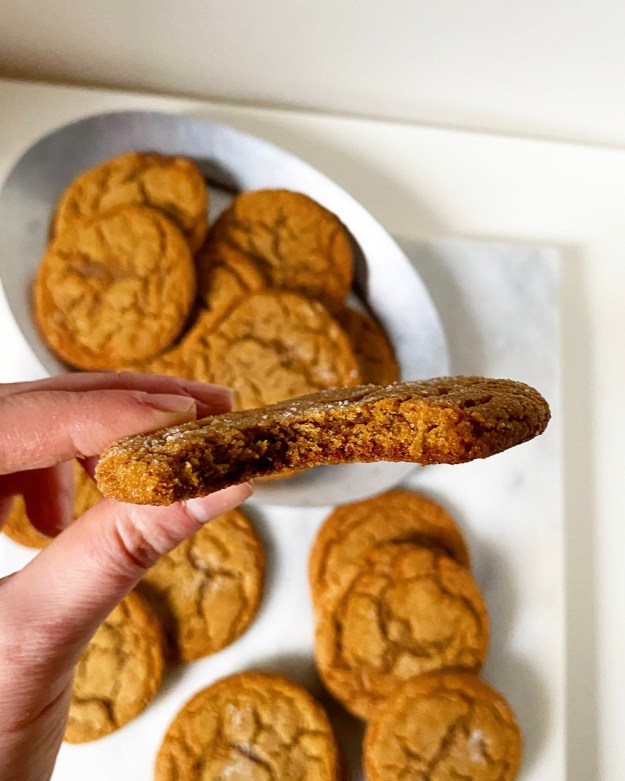 I’ve made three batches of Molasses Crinkles since Thanksgiving, and I’m here to tell you that they keep like a dang dream. Seriously. I keep thinking I’m going to reach into a bag to discover a bunch of molasses frisbees, but nope—chewy as ever.
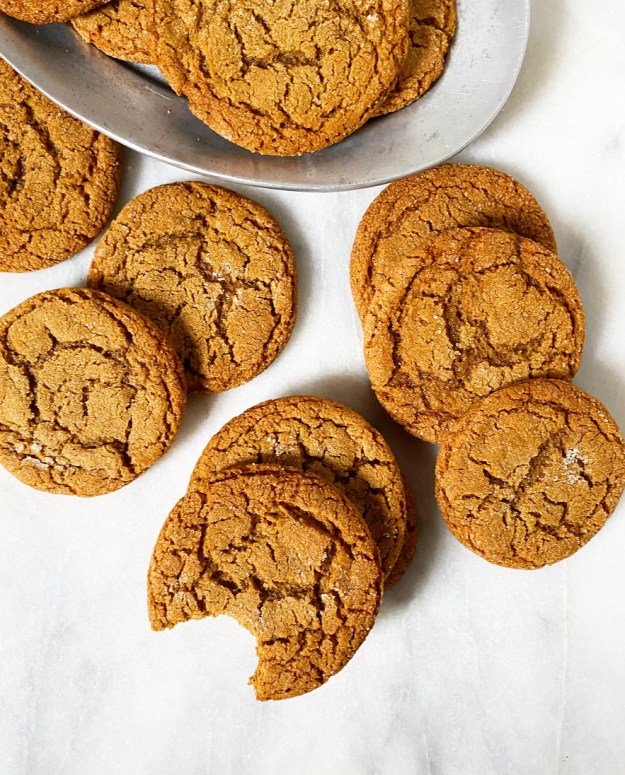

 I had never seen Italian Rainbow Cookies (aka Seven Layer Cookies) until I moved to New York. Come to find, they are everywhere here. I mean everywhere. Little Italy (duh), bakeries, bodegas, bagel shops, grocery stores—everywhere. I can’t go a day without seeing these festive Italian-American confections, and yet, it took me eleven years to try one.
 What can I say? Almond cake, jam, chocolate, food coloring—Italian Rainbow Cookies are kind of a lot. Even when I did finally try one, I wasn’t a huge fan. Most of the versions you see in NYC are mass-produced, and while they are ostensibly fine, they’re nothing to write home about. Dry, too dense, probably full of stuff that wouldn’t go in a homemade cake…
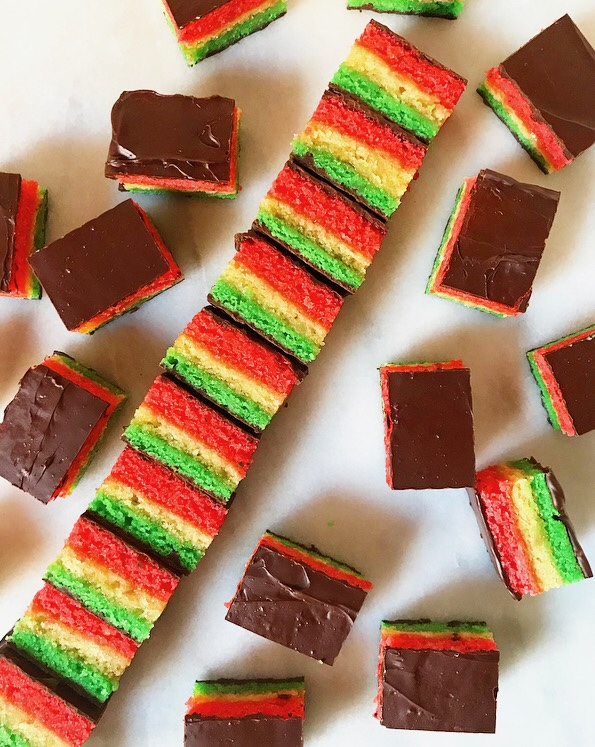 All that is to say that homemade Italian Rainbow Cookies are where it’s at. Sure, they take a little more effort than popping down to the corner store and handing over some cash, but they are also infinitely better, and you don’t have to put on a coat to make them.
 Most Italian Rainbow Cookies are made from a standard torte batter that’s spiked with almond paste. Mine are different though, relying on almond flour instead. These cookies are grain-free—inclusive baking for the win!
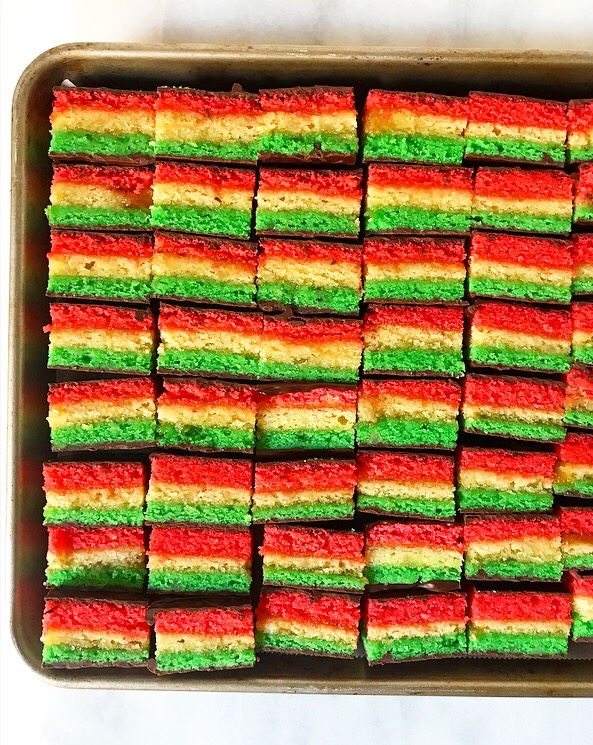 For the colorful layers, I used my

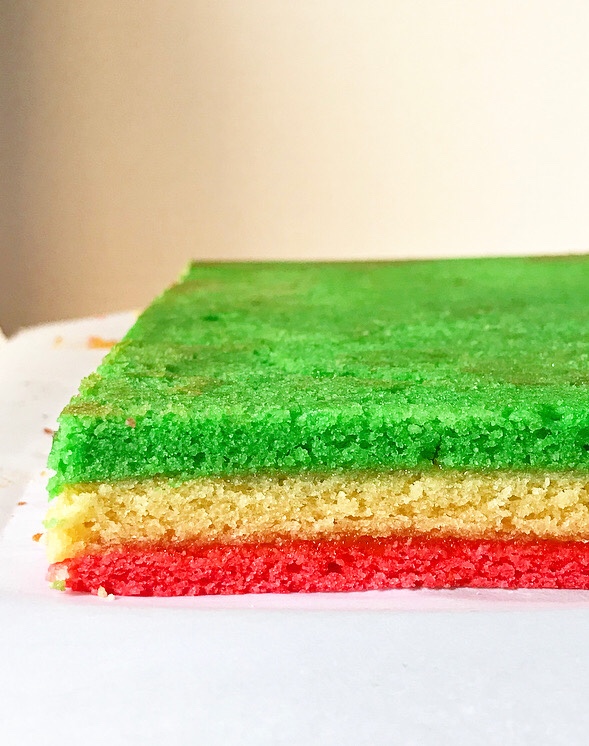 The layers are very thin and will cool quickly. Once you can handle them, spread two of them with jam and stack ‘em up so they resemble the Italian flag. Then put them in your refrigerator and weigh ‘em down for several hours. I like to leave mine in the fridge overnight—you want those layers to become besties for the resties.

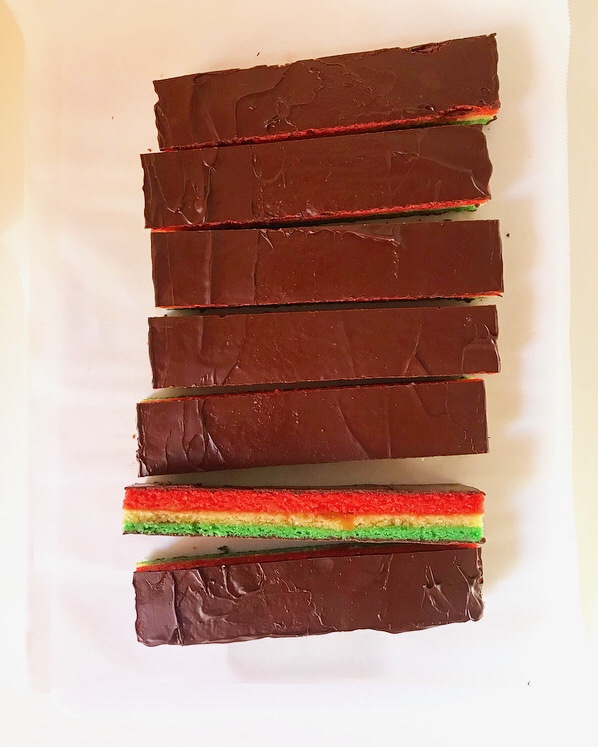 Once the chill time is up, give each side a good swipe of dark chocolate and a chill, and then slice them into as many pieces as you like. The cookies here are 1 1/2”x1” with the total count coming out to 49. That’s enough to keep some, gift some, and still have a few to leave for Santa!
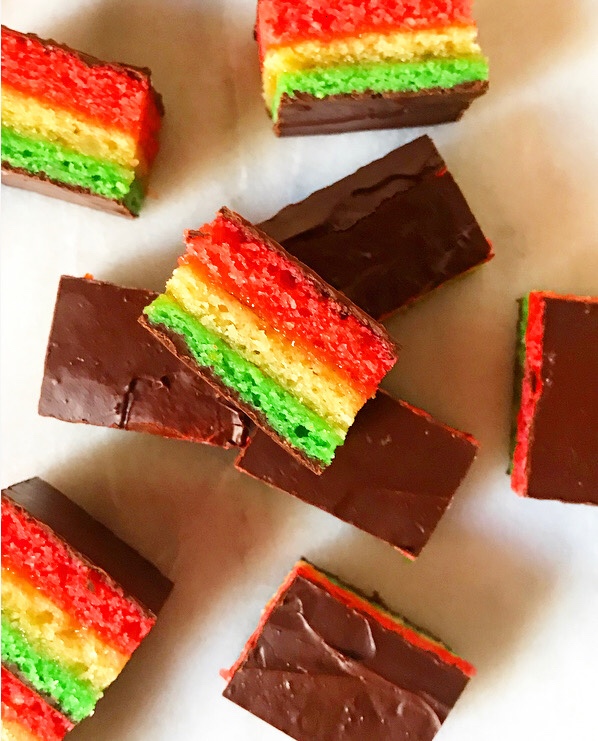 I know this all sounds like a lot of work, but it really happens very quickly and is pretty simple. The most taxing part is making the batter (whipped egg whites alert!) and that’s really no problem. Really, the biggest obstacles between you and a batch of homemade Flourless Italian Rainbow Cookies are time and fridge space.


