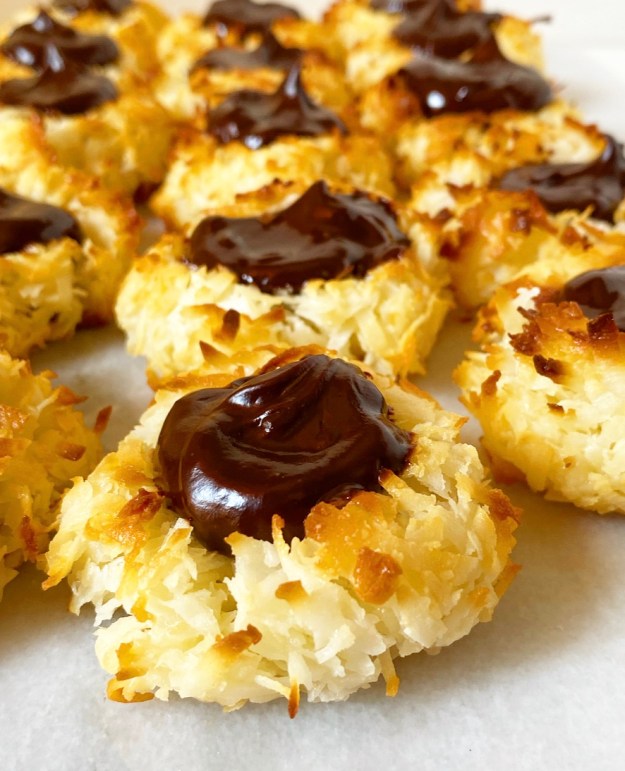
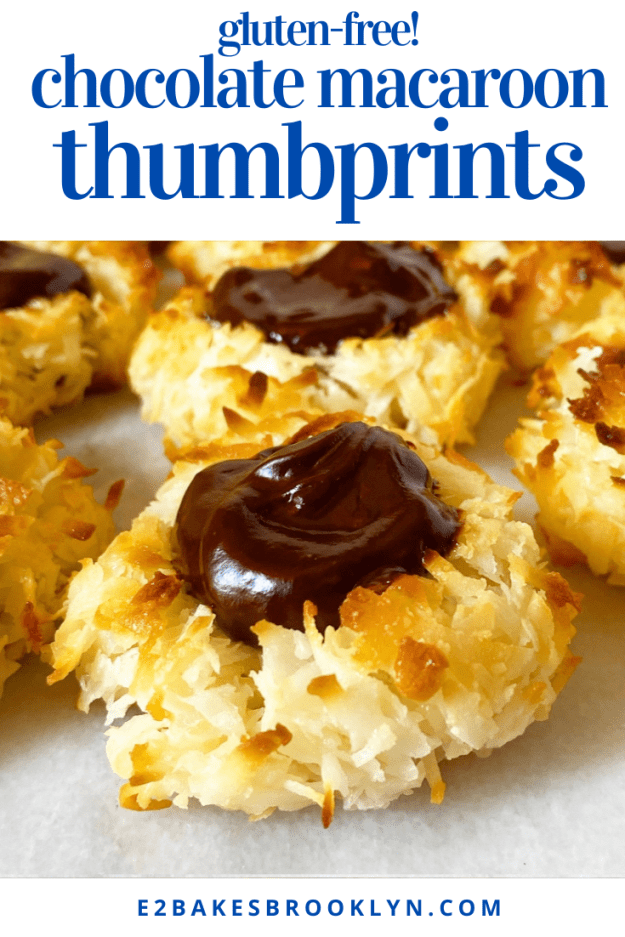
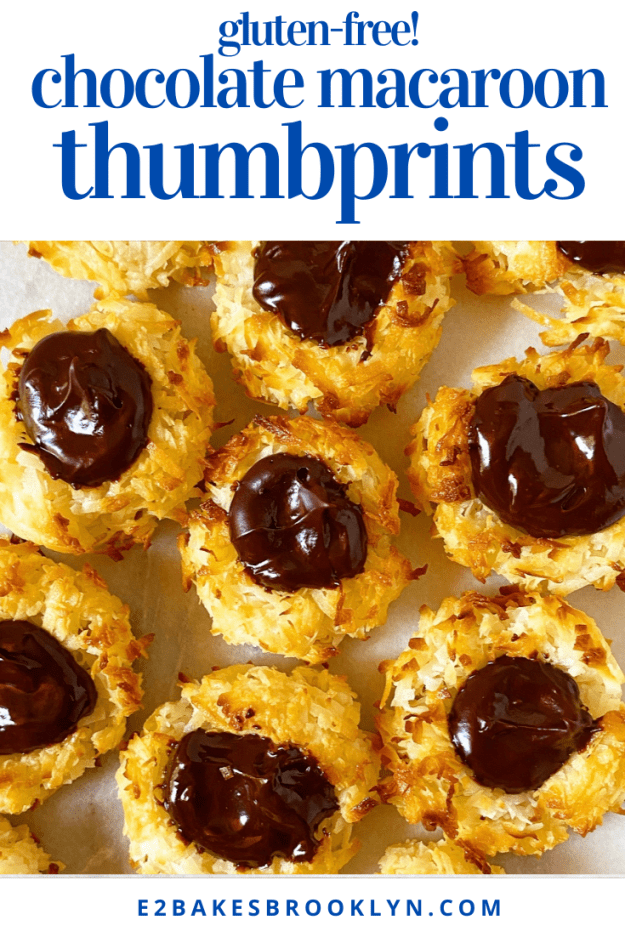
 If these Chocolate Macaroon Thumbprints look familiar, it’s because they are—these are basically just miniature versions of my Chocolate Macaroon Tart, one of my most-made and most-loved recipes ever. The golden coconut exteriors and dark chocolate interiors are a combination that simply can’t be beat (Lemon Meringue obviously excepted).
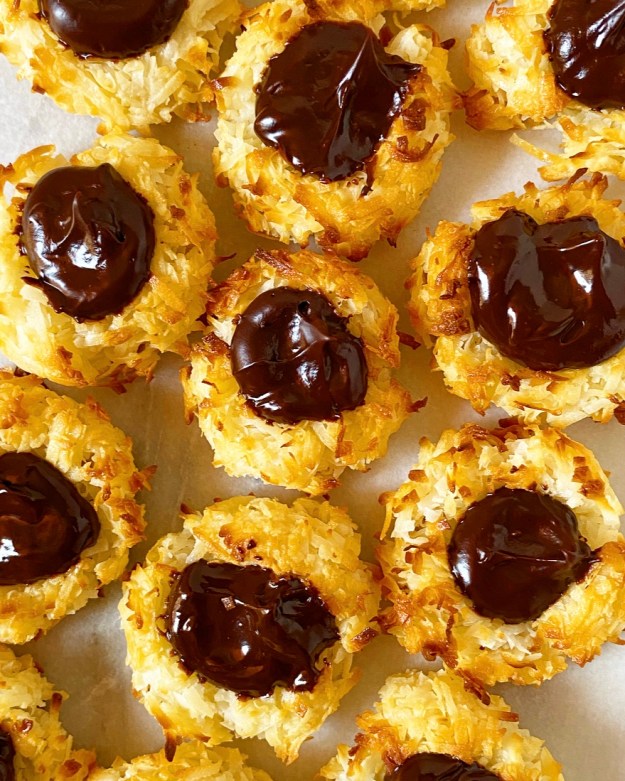 Chocolate Macaroon Thumbprints are made with my trusty gluten- and egg-free Coconut Macaroon base, so they’re soft & light on the inside and toasty on the outside. I made one little tweak to the original recipe and added some cornstarch for a bit more structure, but rest assured that these are just as delicate and chewy as any coconut macaroon you’ve ever had.
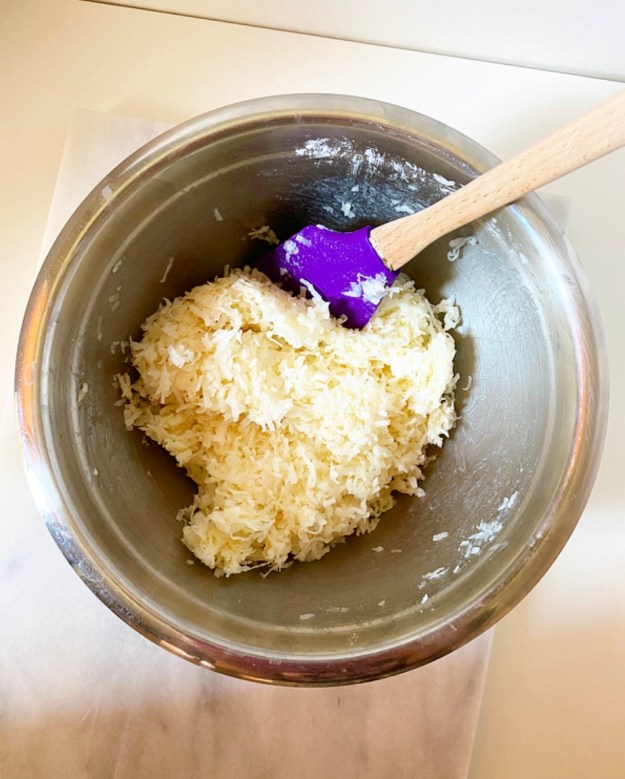

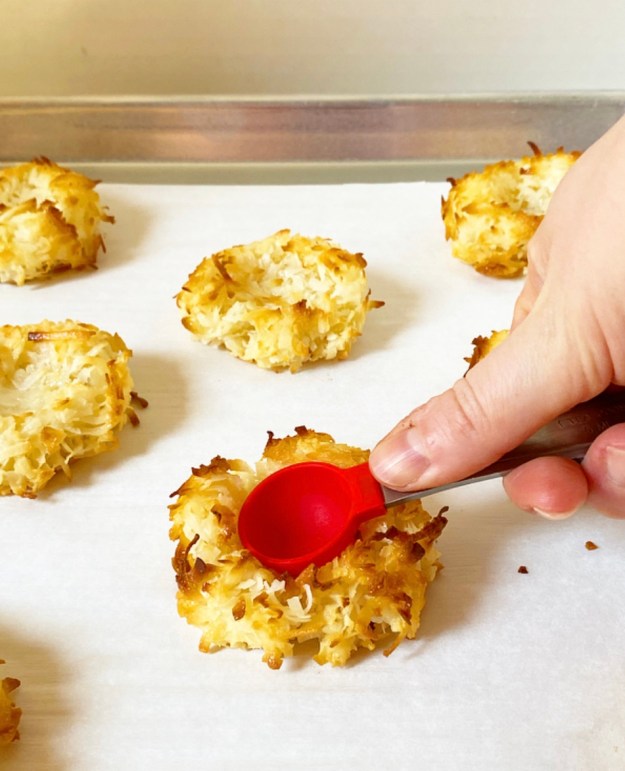 After the coconut base is rolled into balls, little indentations are pressed into each one to create the titular thumbprint. You could use your thumb, of course, but a spoon gives a more consistent shape and size and is way less messy. These initial thumbprints will become shallow during baking, so make sure to give them a second indentation when you pull them from the oven. Bigger thumbprint = more room for chocolate!
 Ohhh yes, these thumbprints are filled to the brim with dark chocolate ganache! It’s no secret that coconut & dark chocolate are perfect together, but the creamy-chewy texture situation here is positively glorious. I can say this with confidence because…well, I’ve eaten a lot of these lately. A. Lot.
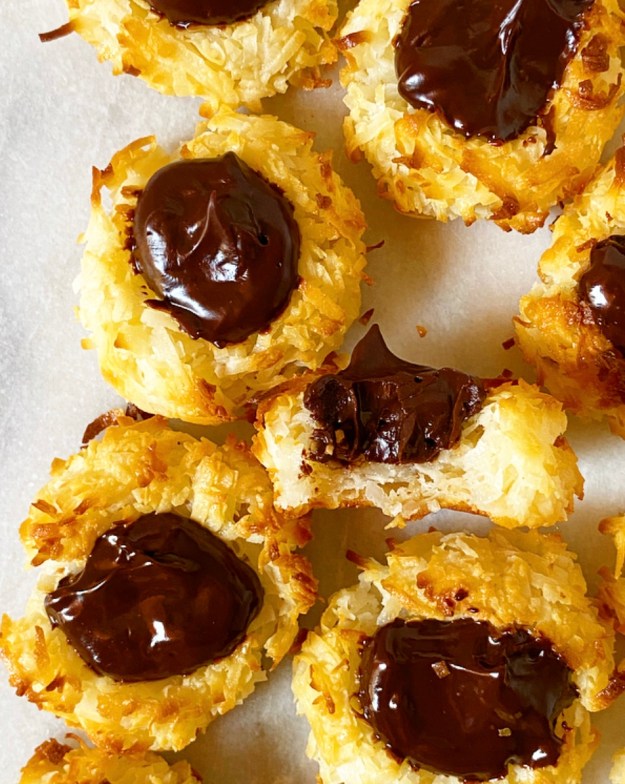 Chocolate Macaroon Thumbprints are a perfect addition to your Easter menu! Follow my lead and leave them plain for a simple & stunning finish, or top the pools of ganache with Easter egg candies for something a little more festive.
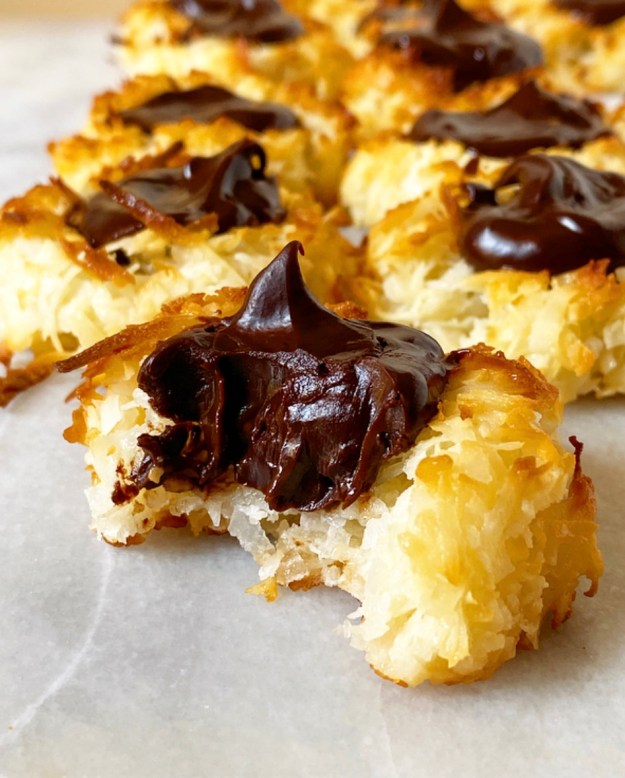
Chocolate Macaroon Thumbprints
makes about 1.5 dozen
3/4 cup sweetened condensed milk
1 teaspoon pure vanilla extract
pinch of Kosher or sea salt
1 14-ounce bag (5 cups) sweetened flaked coconut
1 tablespoon cornstarch
Chocolate Ganache:
6 ounces dark chocolate
1/2 cup heavy cream
Preheat oven to 350F. Line 2 baking sheets with parchment. Set aside.
In a small bowl or liquid measuring cup, use a fork to whisk together sweetened condensed milk, vanilla and salt.
Place coconut in a medium mixing bowl. Toss with cornstarch. Pour in sweetened condensed milk mixture and stir together with a silicone spatula or wooden spoon. Wet your hand and give the mixture a couple of kneads to ensure it’s very well-combined.
Scoop coconut mixture in 1 1/2 tablespoon increments (I used a medium cookie scoop) and form into balls. Place 2 inches apart on prepared pans. Use the back of a very small spoon (like a 1/2 teaspoon) to slowly press a well into each dough ball. Bake 16-17 minutes, until light golden and puffed. When you remove the cookies from the oven, press the back of the small spoon into the centers again. Let cool on pans for 10 minutes before using a spatula to remove them to a rack to cool completely.
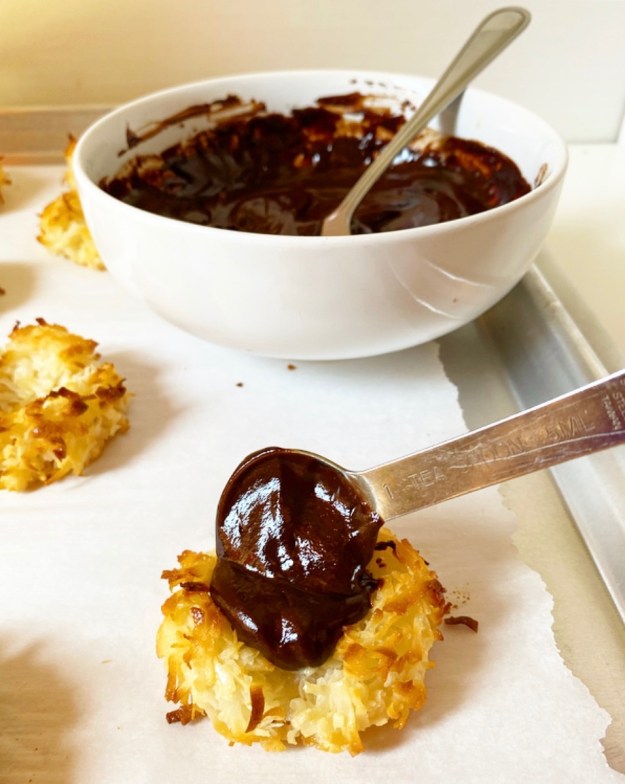
Make ganache filling. Place chopped chocolate in a large measuring cup or heatproof mixing bowl. Heat heavy cream in a small saucepan over medium heat until it is steaming and bubbles are forming at the edge.
Pour warm cream over chopped chocolate. Do not stir. Cover bowl with a lid or aluminum foil for 5 minutes. Remove lid/foil. Use a fork to stir until chocolate and cream are combined and smooth.
Spoon a teaspoon of ganache into the well of each thumbprint. Ganache will begin to set pretty soon at room temperature, setting completely after a couple of hours.
Coconut Macaroons will keep covered at room temperature for a few days.
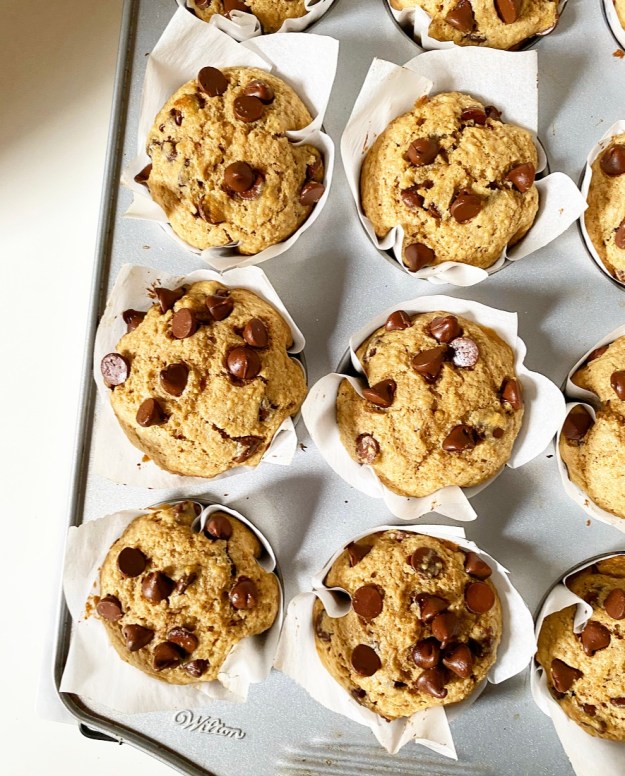 In five years, I’ve deleted exactly three recipes from this blog. I’ve kept terrible photos, absurdly lengthy writing and even some personal stuff on here, so you may be wondering why I’d remove whole recipes. The answer is simple: because they were bad. Not “not perfect,” not “unoriginal.” Just bad. They didn’t taste good and/or work properly, and those are basically the only two requirements for me to put a recipe on here, so I deleted them. Among the group were a batch of Whole Wheat Chocolate Chip Muffins that were truly atrocious, and which I have finally found the time to rework into something delicious.
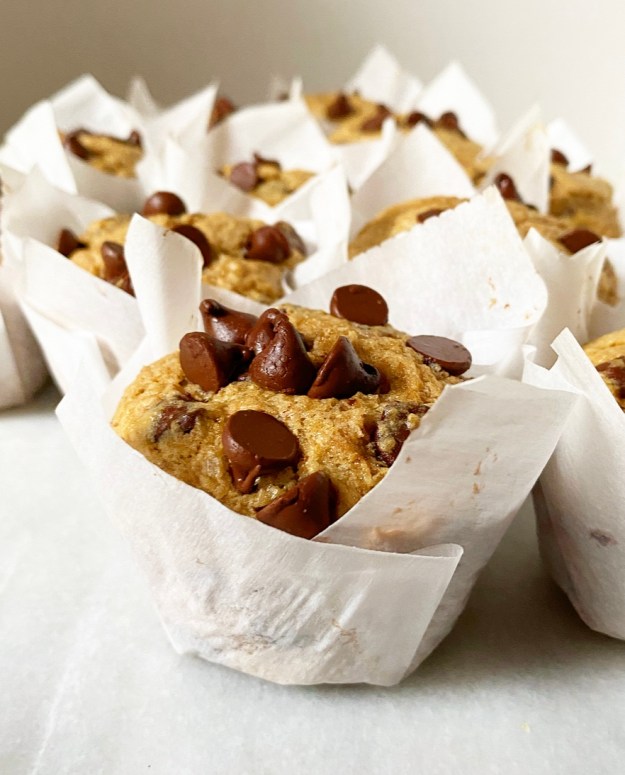 Now, I didn’t intentionally write a terrible muffin recipe. There were circumstances. I wrote the old recipe for Whole Wheat Chocolate Chip Muffins when I was five days off the break-up a four year relationship. That was my first mistake—don’t try to do good work when you’re heartbroken.
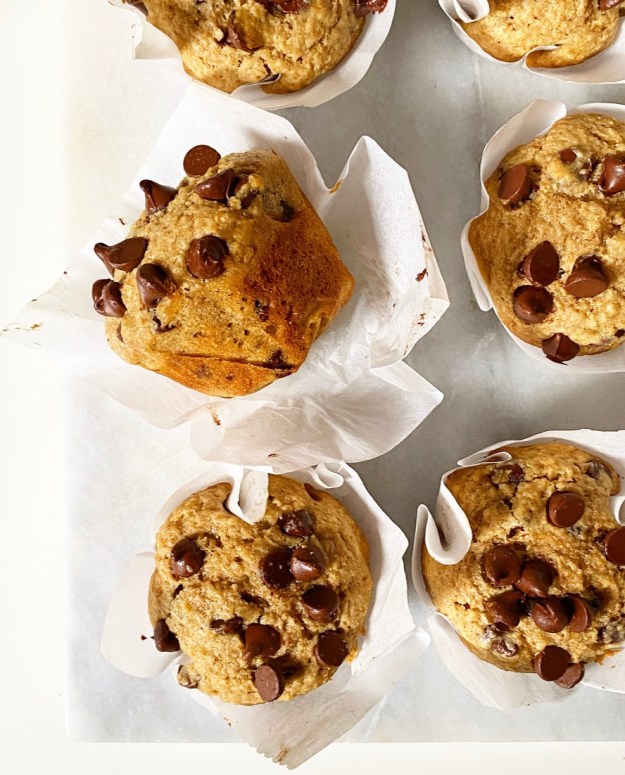 Two weeks ago, I found myself five years more experienced, very over that boyfriend, and with a large bag of mostly-unallocated whole wheat flour. Armed with that and a newfound
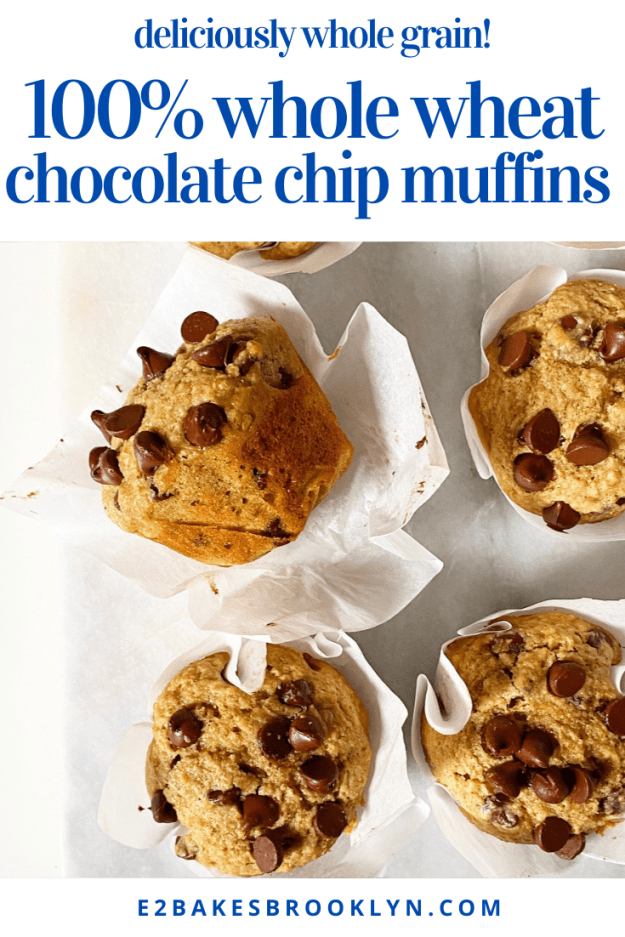
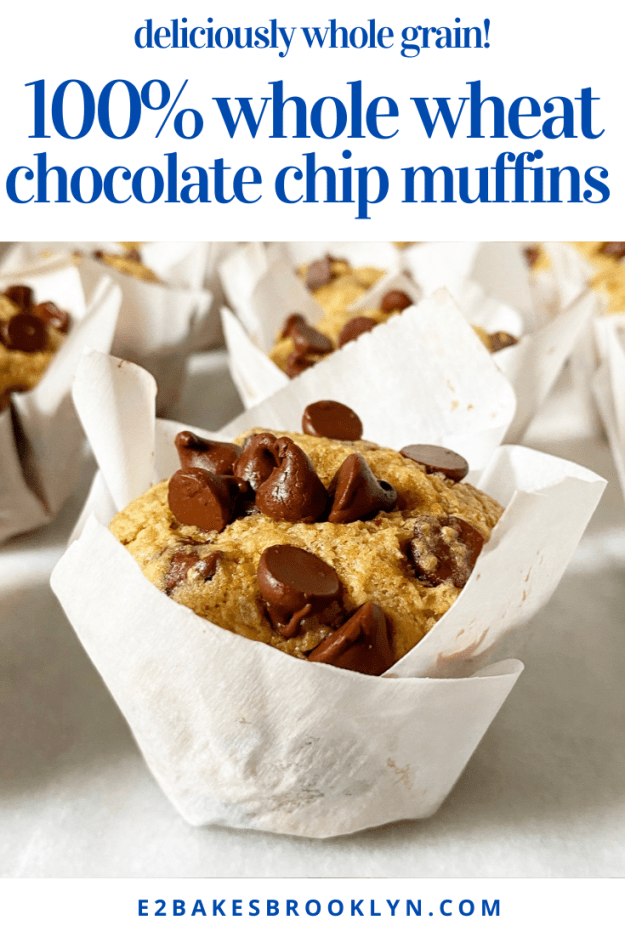
 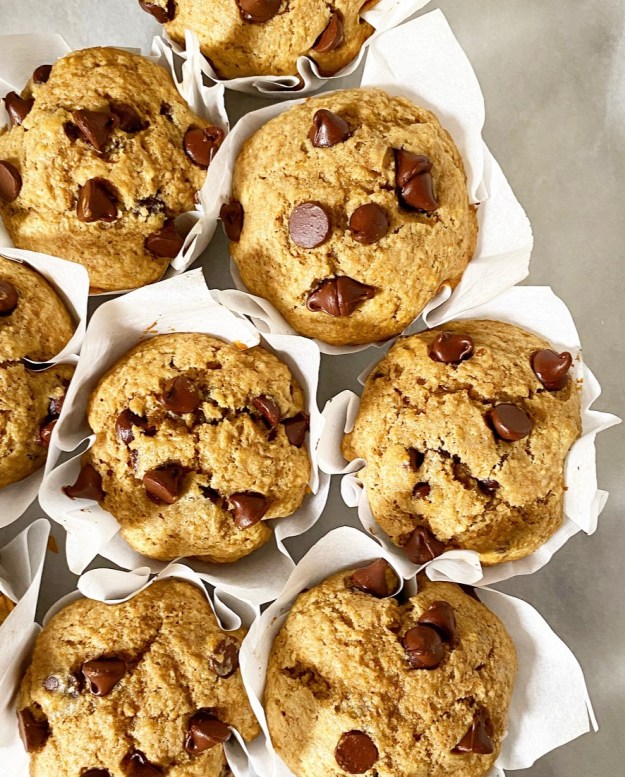 These Whole Wheat Chocolate Chip Muffins are soft and just sweet enough, with plenty of chocolate chips and whole grain flavor. Butter, sour cream and eggs keep them moist and balance the potential for heaviness that comes with using all whole wheat flour. They also get a little lift from starting in a 400F, then continuing at 350F until they’re fluffy, puffy and perfect.
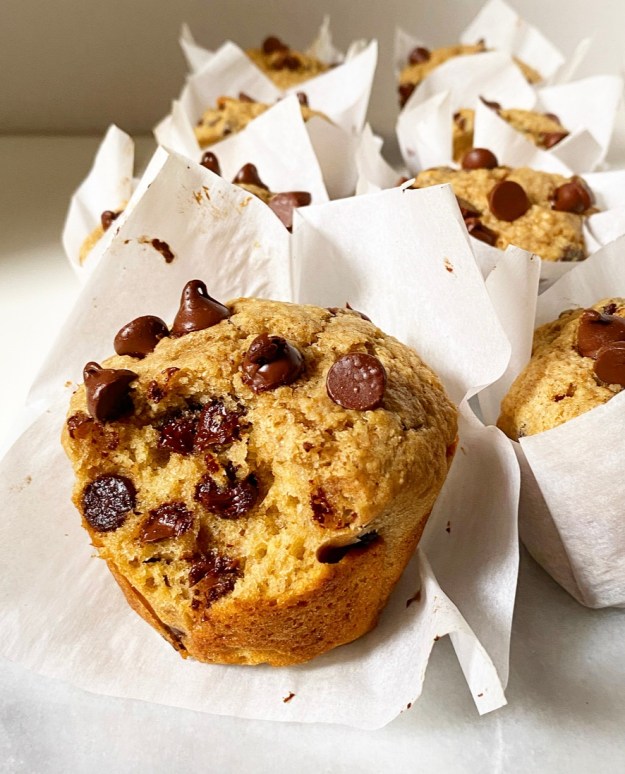

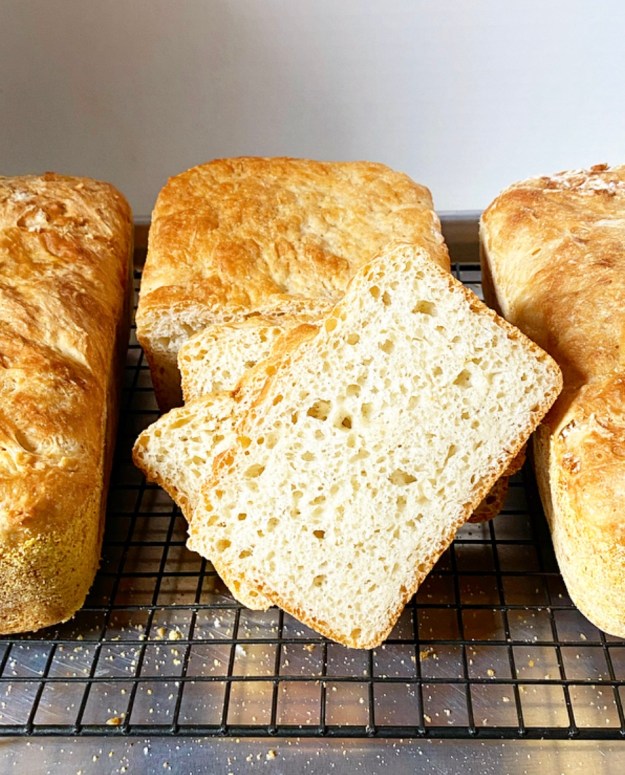
 Today I’m taking this blog into new territory: bread! You won’t find me feeding any sourdough starters or anything, but I have taken a chance on a few bread recipes over the last year because…well, I had some time on my hands. English Muffin Bread is my favorite by a long shot. It’s got all the craggy structure of English muffins, toasts like a dream, and is so delicious it’s kind of ridiculous.
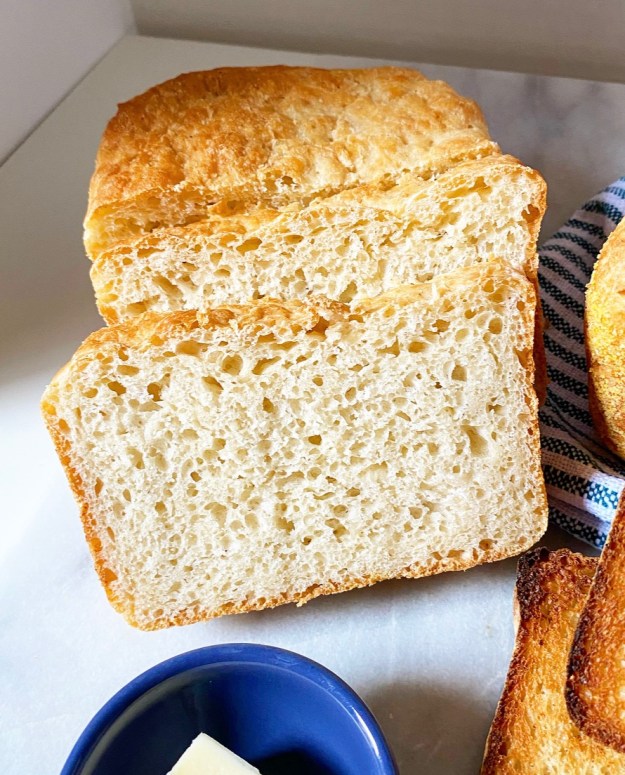 I first heard about English Muffin Bread when
 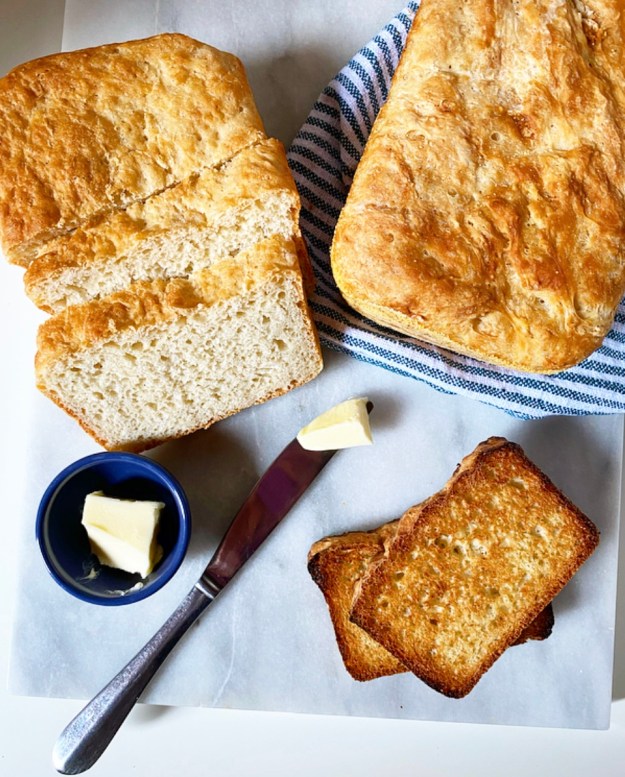 My English Muffin Bread is a one bowl, no-knead, single rise situation. By giving this dough just a few minutes of your time and then a bit of patience, you’ll be rewarded with all the craggy texture you love in English muffins, but in a sliceable, toastable loaf. Two of them, actually.
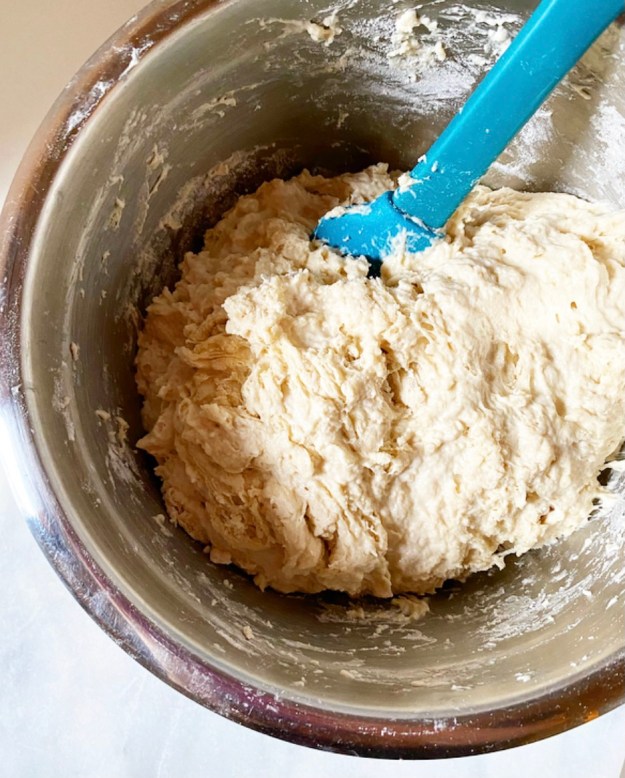 English Muffin Bread couldn’t be easier to make. Simply whisk together flour, a touch of sugar, kosher salt, instant yeast and a little baking soda, then stir in water and melted butter until a shaggy dough forms. Divide your dough in two, then put it in two cornmeal-dusted loaf pans. No, you didn’t miss a kneading step—thanks to the high volume of liquid and the desired texture, there’s no need to knead! <—see what I did there?!
 Let your dough rise for about an hour, just until it peaks over the tops of your pans. The combination of yeast and baking soda along with the single rise mean that the oven-ready dough will be very airy and a little delicate. It should be a bit wet looking and a little jiggly—be gentle with the pans so you don’t knock out any of the holey, craggy structure.
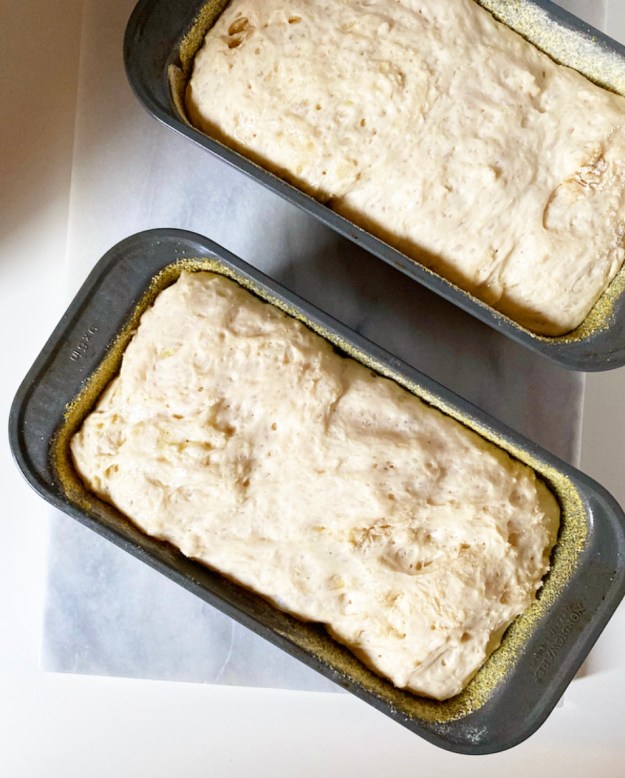 Bake your loaves for 25-30 minutes as 400F, until golden all over and hollow-sounding when tapped. If you’re worried about under-baking, a food thermometer should register 190F when the bread is done.
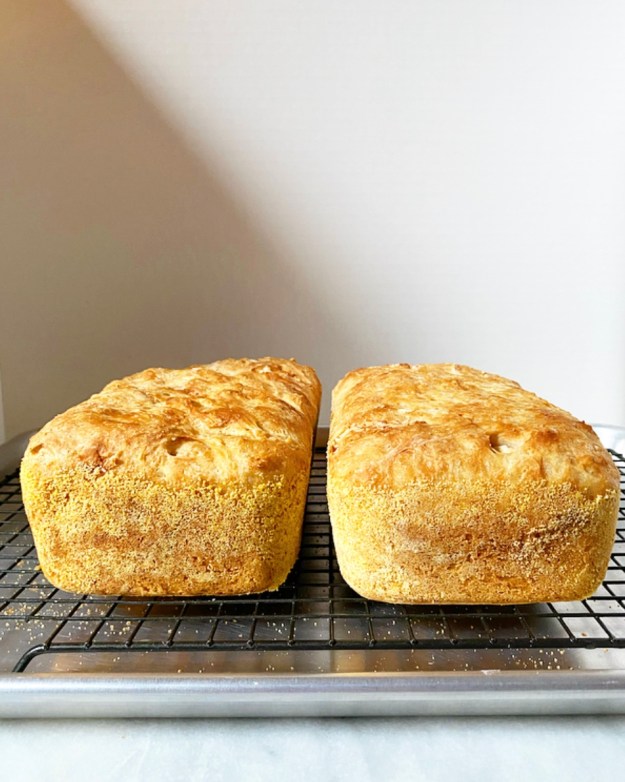
 Turn your loaves out onto a rack as soon as they come out of the oven, then let them cool completely. This is supremely important. Do not let the intoxicating smell of fresh-baked bread tempt you to rip into this while it’s cooling or you will find a gross, gummy mess. The hole structure needs to cool completely for maximum English muffin goodness. I find that cooling takes 2-3 hours, but that’s a small price to pay for the quality of toast you are about to consume.
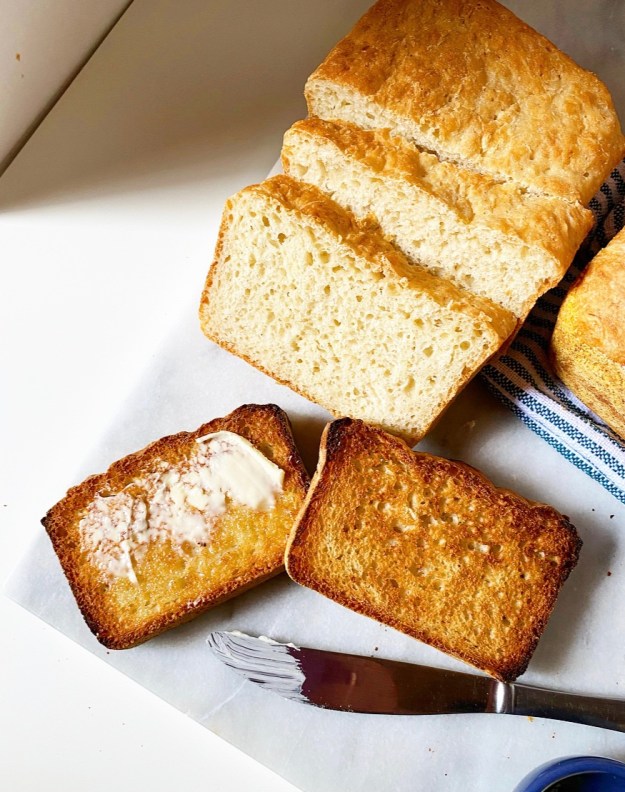 While you can absolutely enjoy a slice of English Muffin Bread without doing anything to it, an extra crispy, golden brown, toasty finish really makes each slice sing. The holes and crags are emphasized, the cornmeal on the edge gets extra crunchy, the minuscule amount of butter in the dough gives it just enough richness. Like a perfectly toasted English muffin, it’s perfect with a smear of soft butter. Or honey. Or jam. Or Nutella. Or peanut butter. Or avocado. Or fried into French toast. Or made into a grilled cheese.
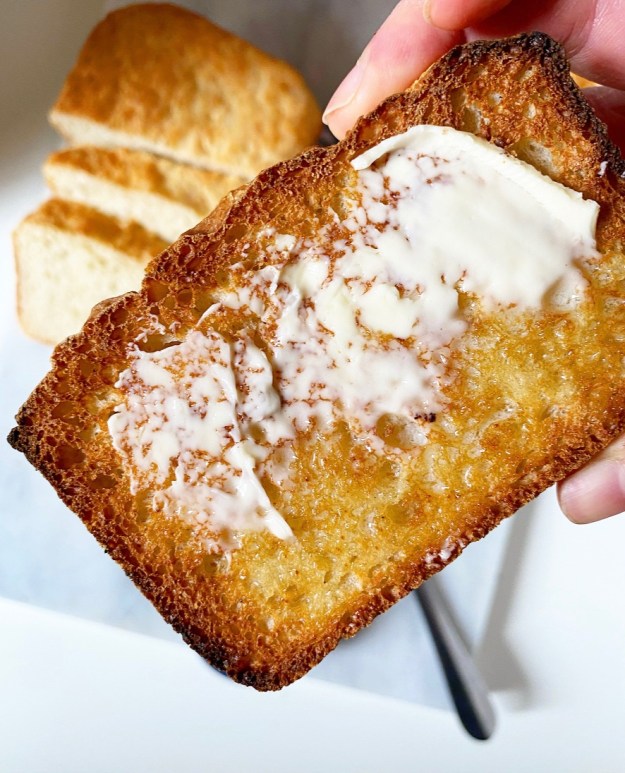
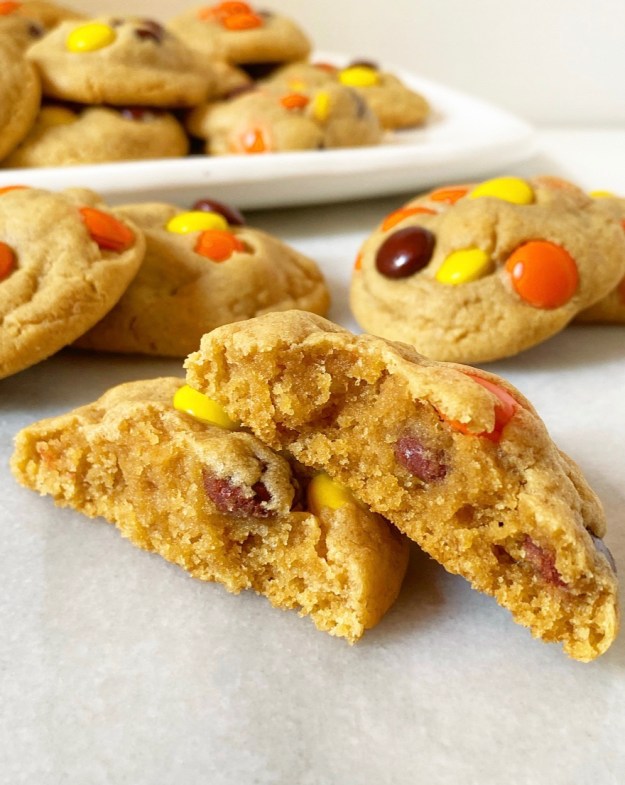
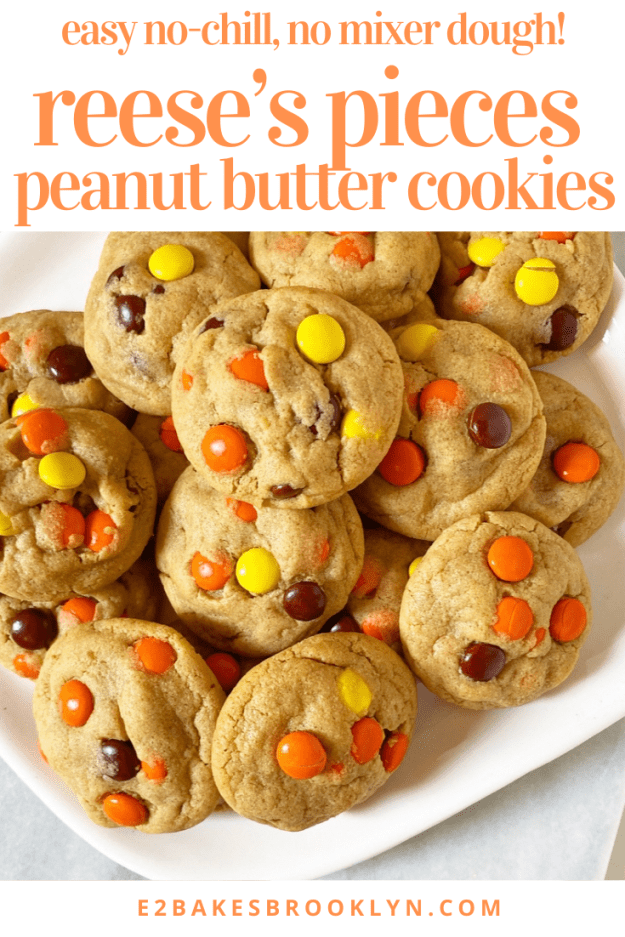
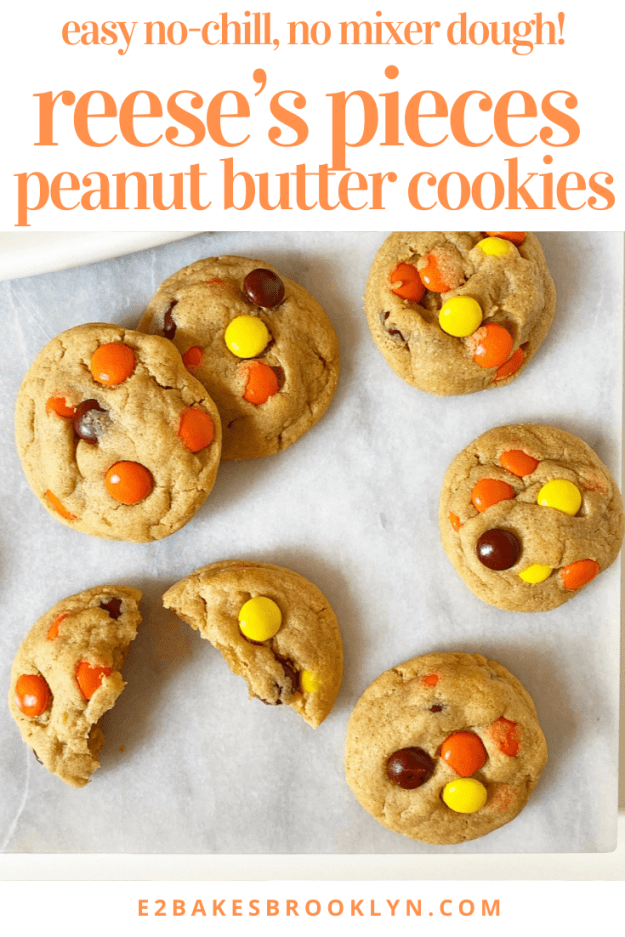
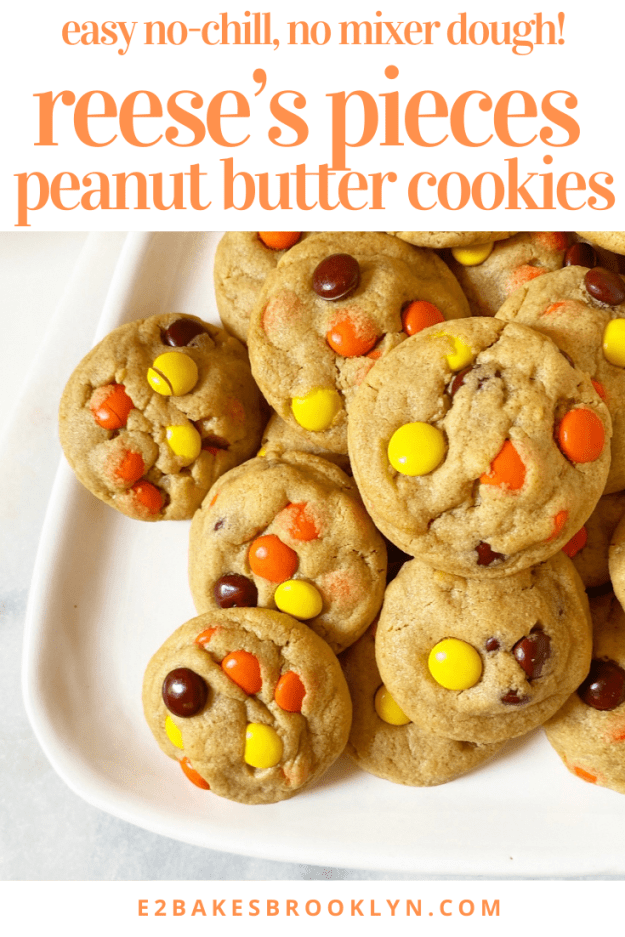
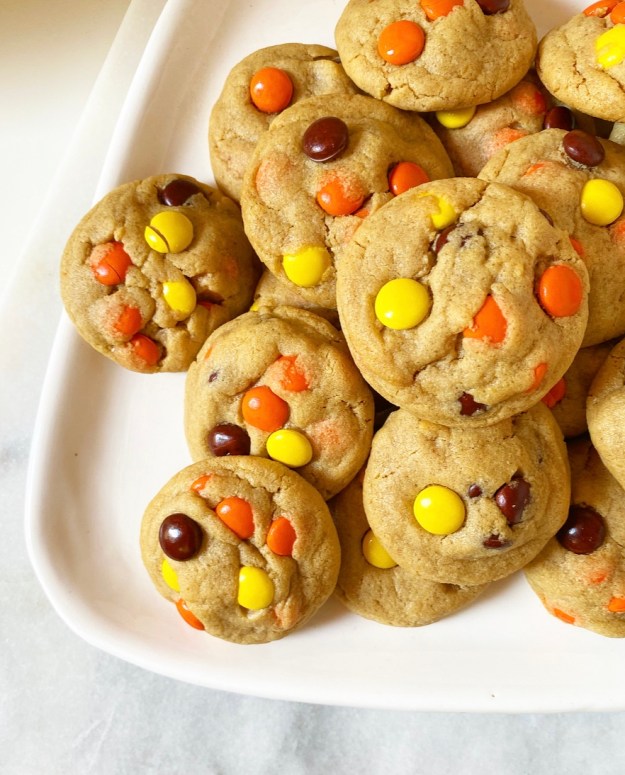 These Reese’s Pieces Peanut Butter Cookies were the maiden voyage of my brand new sheet pans! If the results are any indicator, I think we’re off to an auspicious start.
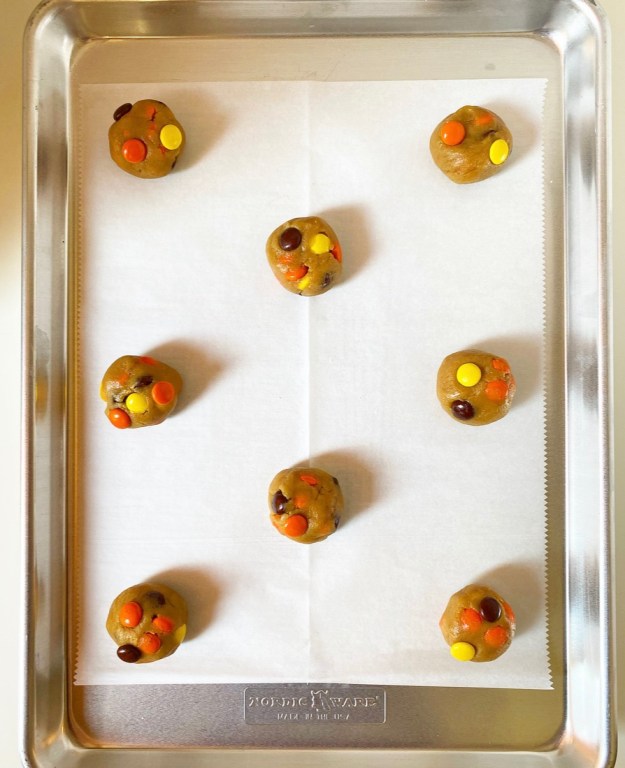
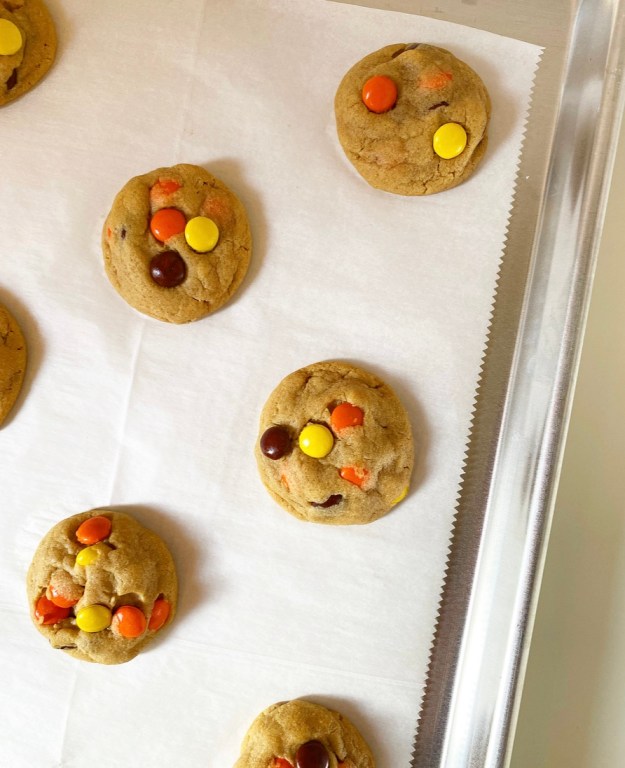 We’re talking thick, soft cookies with tons of peanut butter flavor and an extra peanut buttery crunch from the Reese’s Pieces strewn throughout! You could obviously swap in chocolate chips or M&Ms or any other add-in you like, but I am all about that
 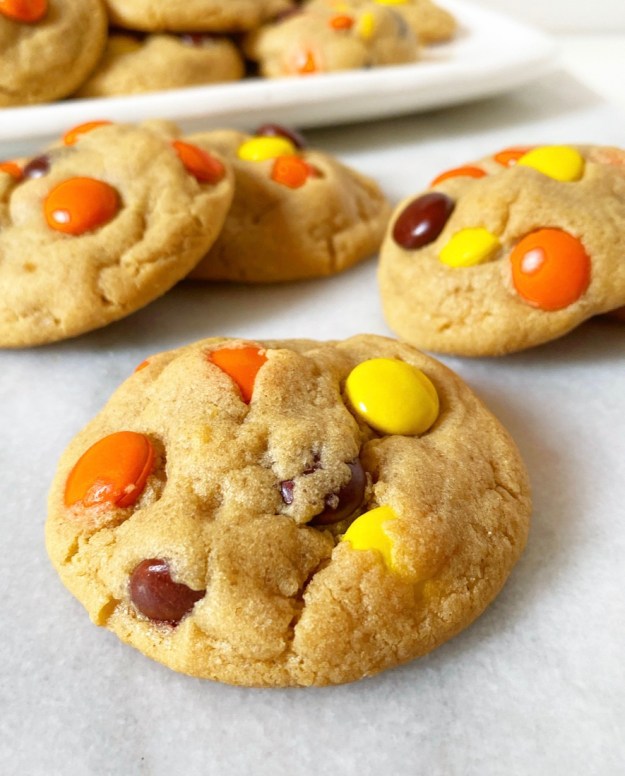 This cookie dough is super fun and easy to make. It comes together in just a few minutes and doesn’t require a mixer or a chill—score! Just mix, scoop, roll and bake. If you were to turn on your oven right now, you could have puffy peanut butter cookies in half an hour. Half an hour!
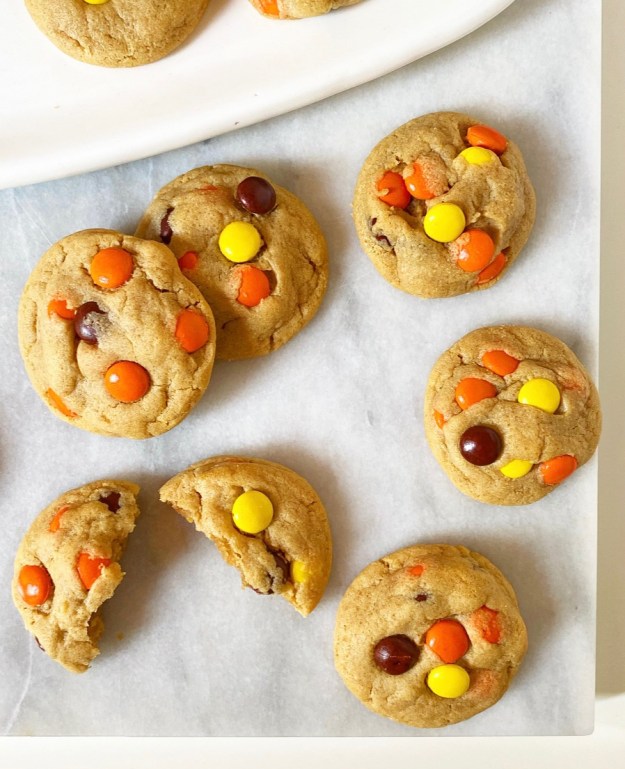
 Pretty sure that’s the height of luxury on the fiftieth weekend of quarantine. Or at least it is around here.
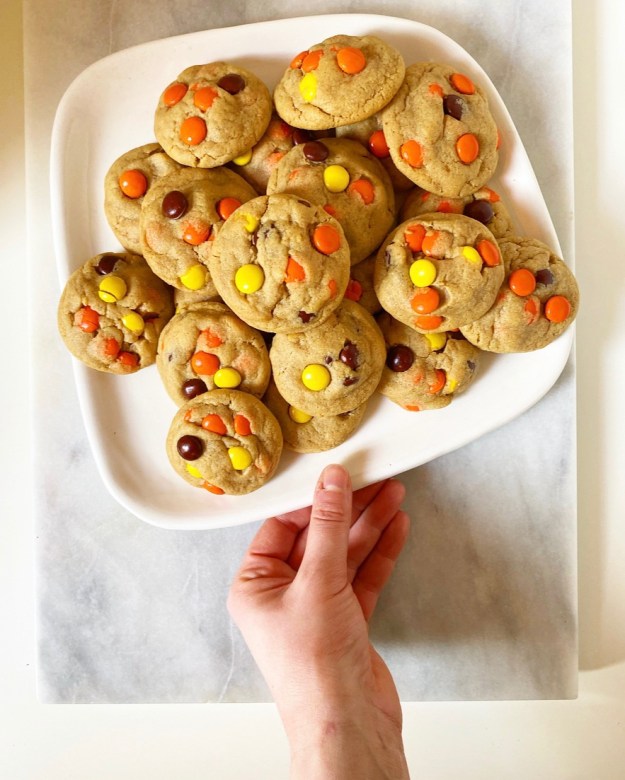
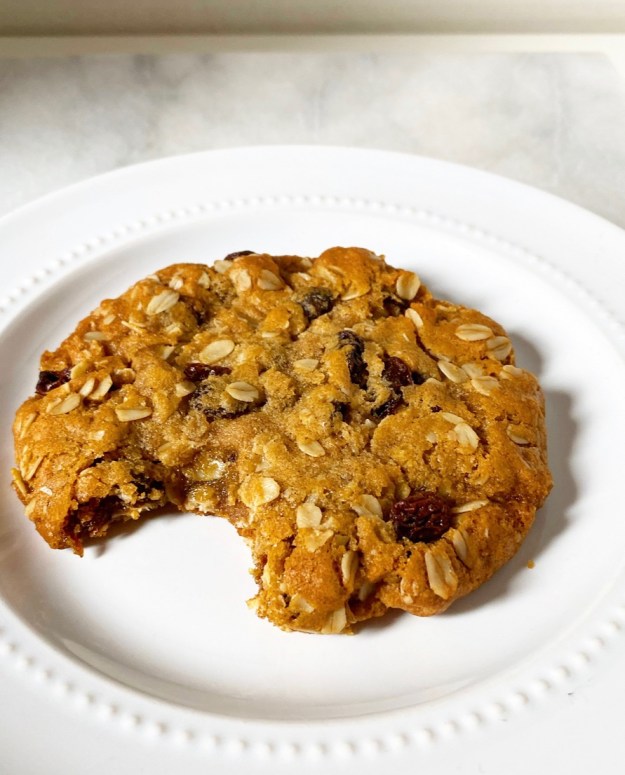
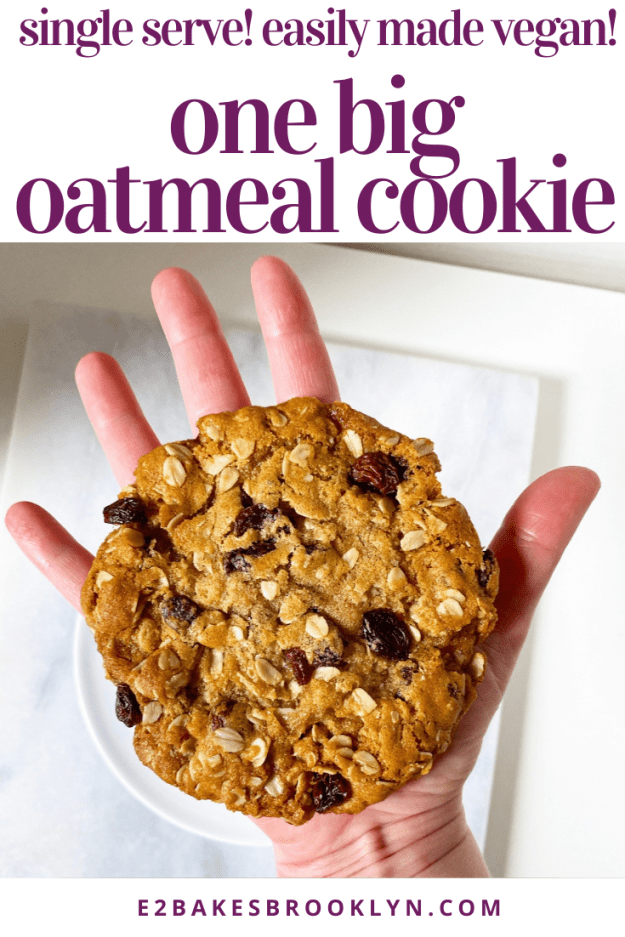
 If you’re the sort of person who loves big cookies and hates sharing, you’ve come to the right corner of the internet. Over the last couple of years, I’ve posted three “One Big” cookie recipes:
 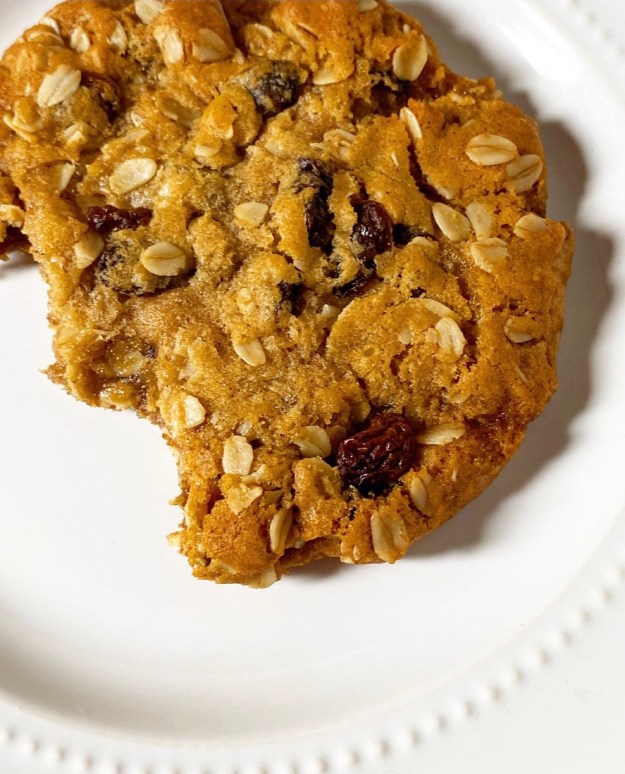 You’d think after posting three single-serve cookie recipes on this site, I’d be able to churn out a new one in my sleep, but you’d be wrong. This lone oatmeal cookie? It took 27 tries. Twenty. Seven. That’s the highest number of concentrated tests I’ve ever done for one recipe.
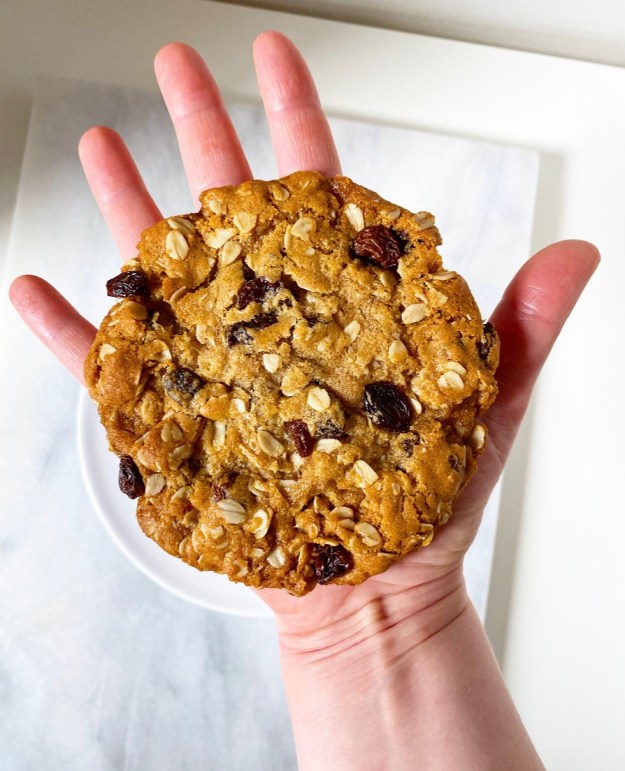 The good news about this recipe, though, is that while it was hard to get it exactly right, it is very simple. Oh, and it makes one kickass, golden brown, chewy as all get-out oatmeal cookie. Oh my goodness, it is so good. Trust me—I’ve bitten into 27 cookies to get this one exactly right. Quality control, you know?
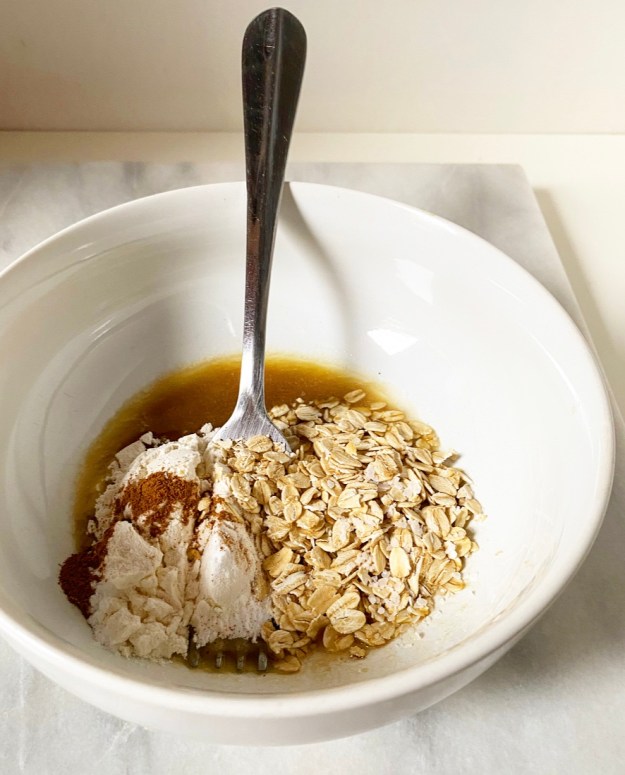 Like all my One Big cookies, the ingredients here are measured by the spoonful rather than in cups. Oats replace some of the usual flour (duh) and I’ve added a hint of cinnamon for that classic oatmeal cookie flavor. You’ll notice that there’s no egg in this dough, as I prefer to use water for such a tiny portion. As a bonus, no egg means this recipe can easily be made vegan! Just swap vegan butter for the dairy butter ☺️
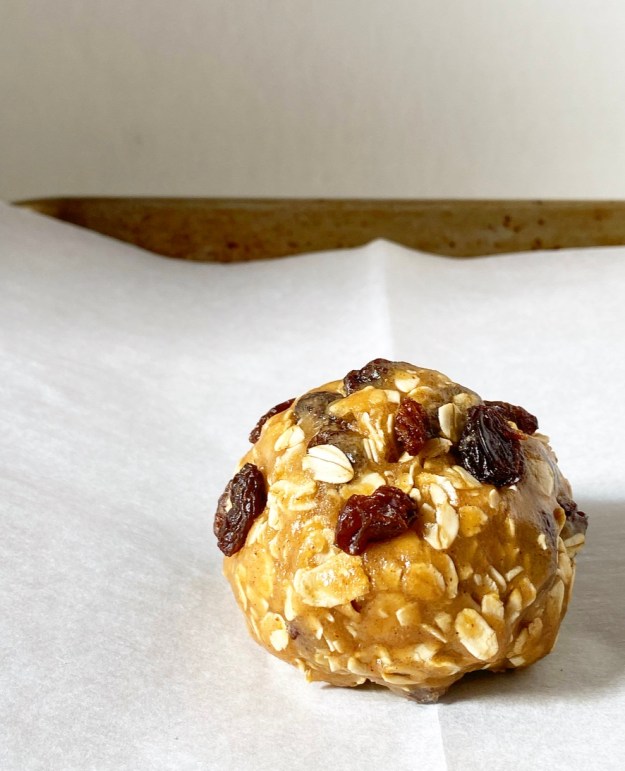
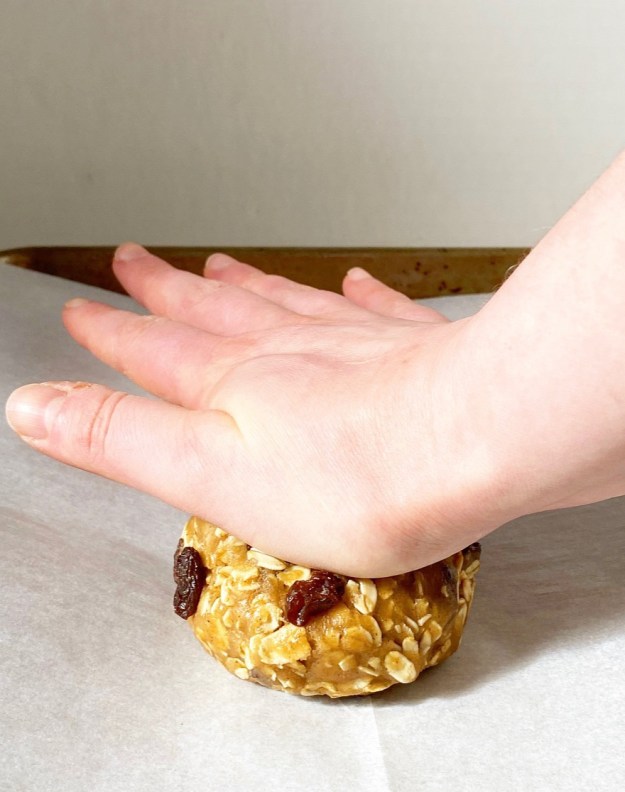
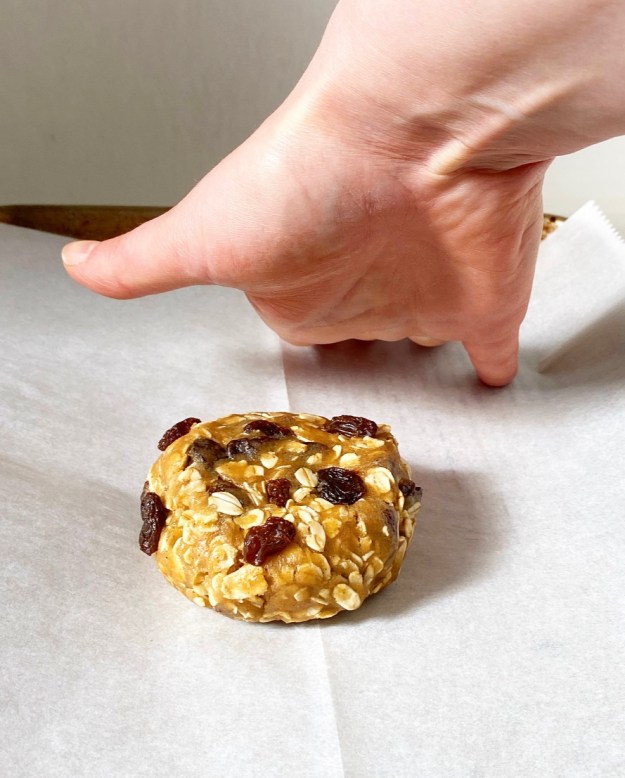 The big secrets to golden, chewy oatmeal cookie success? Before baking, press down on the dough ball to form a puck. This encourages a consistent shape, texture and browning pattern. Nothing terrible will happen if you don’t press down your dough ball, but your cookie likely won’t look like mine.
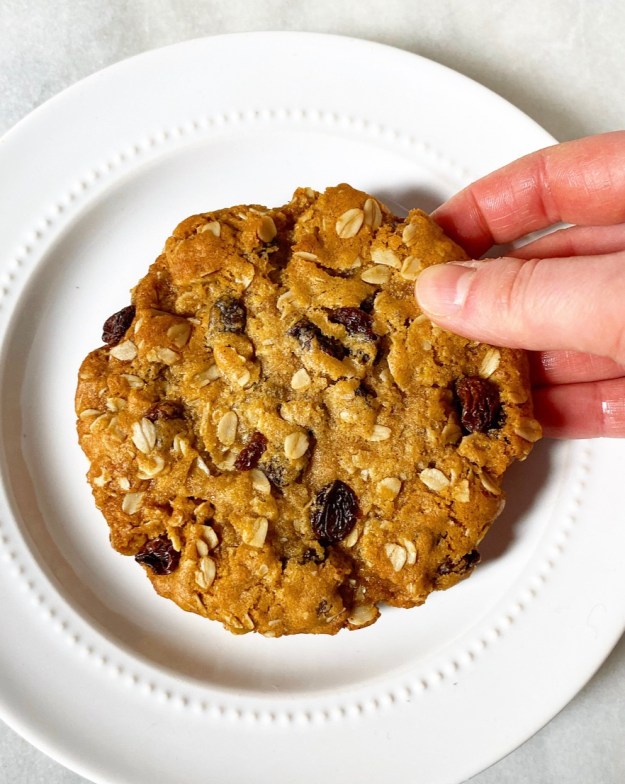 As far as mix-ins go, use whatever you like. I went for classic
 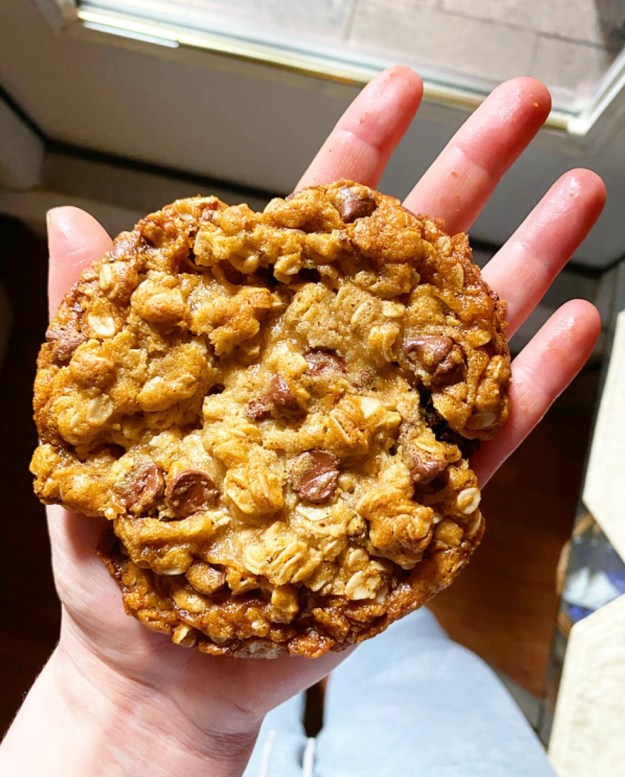 Have a good weekend, y’all. Make yourself a cookie.