 If you’ve been around here a while, you know I loathe Halloween. Biggest Halloween Scrooge there is, right here.
That said, I might do an about-face soon because I finally tried a popcorn ball at the ripe old age of 34 and I loved it. Loved. It. Sweet, airy and studded with candy, it may well make a Halloween-lover out of me! Who knows? It could change the course of my life!
(Feeling dramatic today. Sorry, not sorry.)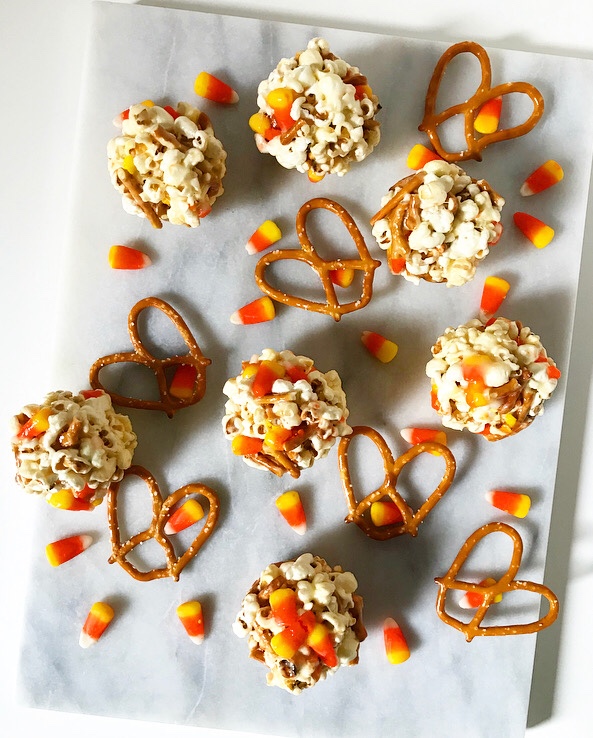 But seriously, I have no idea why I had never had a popcorn ball before a few weeks ago. Maybe it’s a northern thing? Do Texans just not make popcorn balls? Do I secretly love Halloween? Is my entire life a lie???
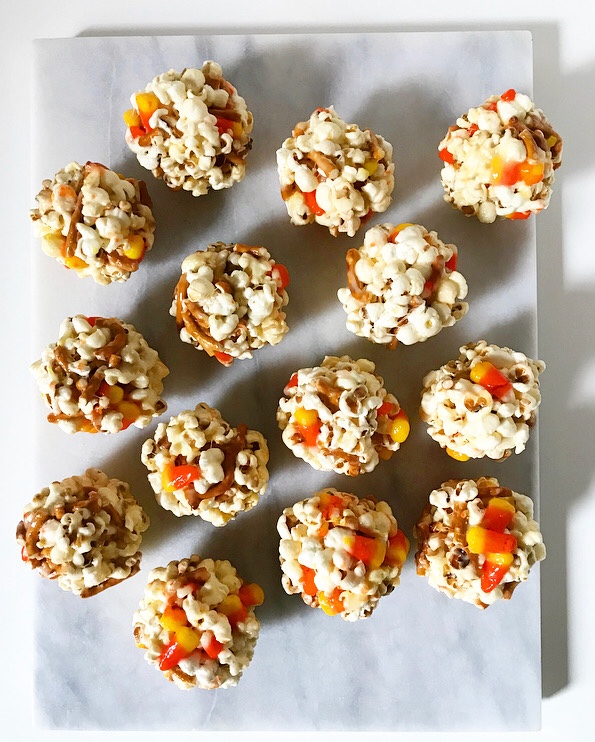 …whatever it is, I am now firmly in support of all things Halloween as they relate specifically to spherical sticky-sweet popcorn. And also candy corn. But nothing else, okay? Okay.
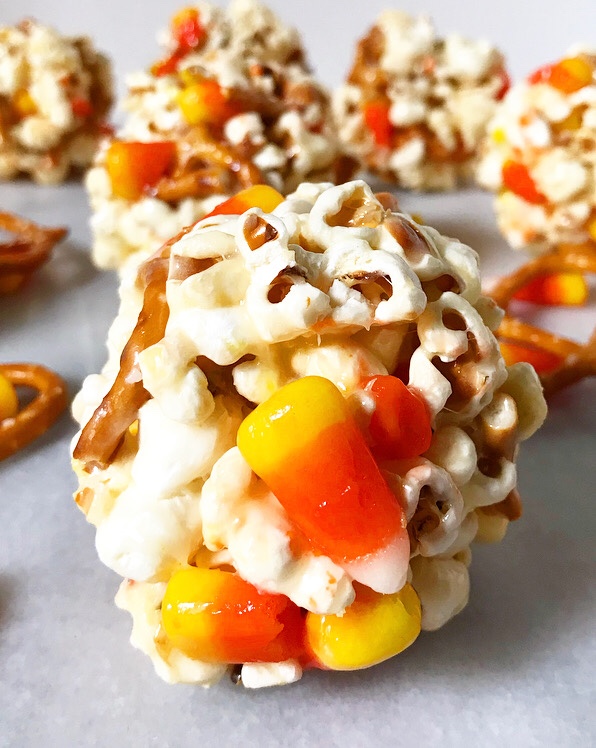
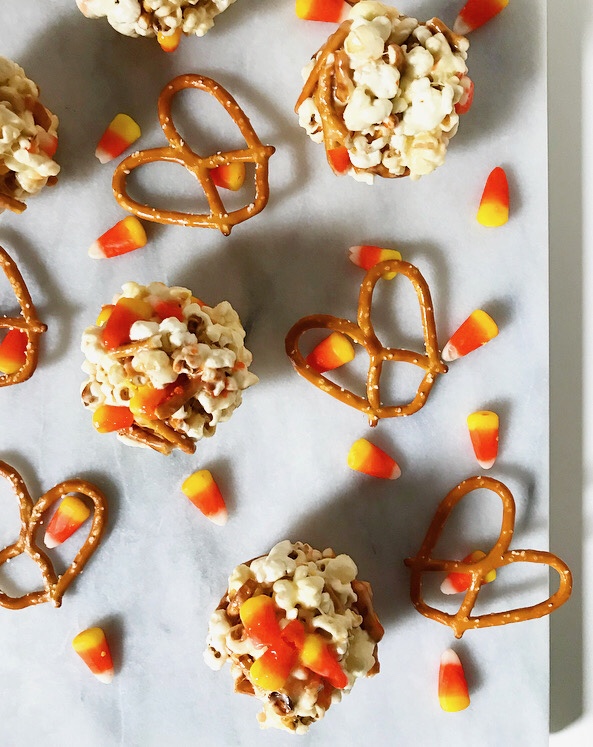
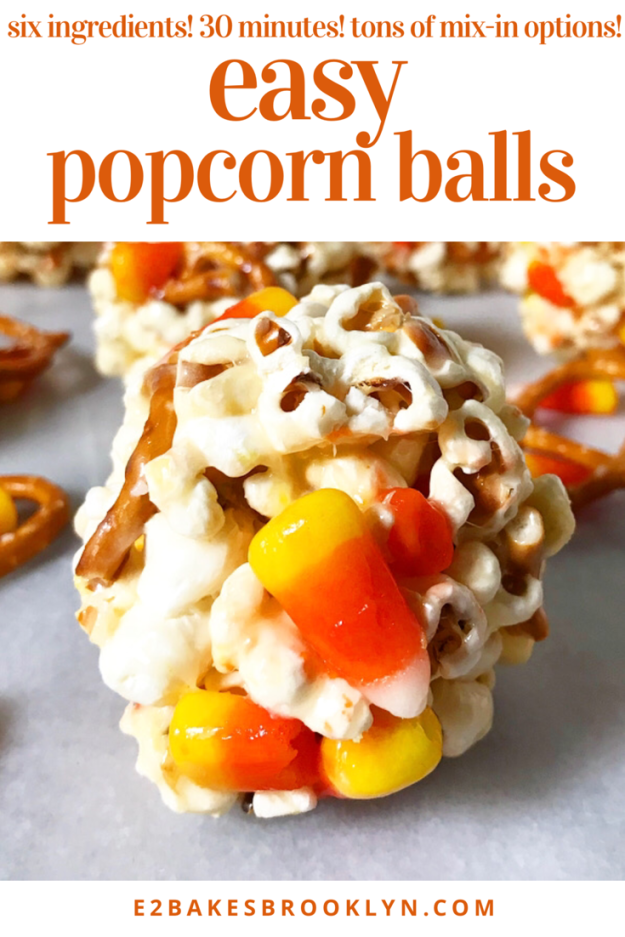
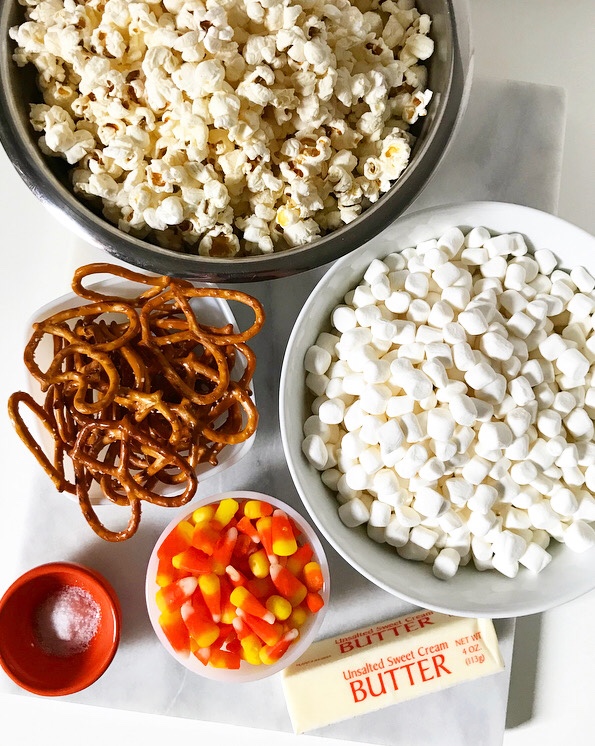 Lots of popcorn ball recipes are molten sugar or caramel-based and require a candy thermometer, but I went in a different, easier direction, using Rice Krispies Treats as a guide. Butter and marshmallows are melted together and flavored with a little salt before 10 cups of plain popcorn are folded in. I like to add mix-ins for flavor/textural diversity, but feel free to leave ‘em out if they’re not your thing. I love (!) the sweet/salty candy corn and pretzel combo I used in this batch, but if those flavors aren’t your bag, don’t fret! I’ve written a list of alternatives in the recipe. You can use pretty much whatever you want, except for un-coated chocolate (it’ll melt).
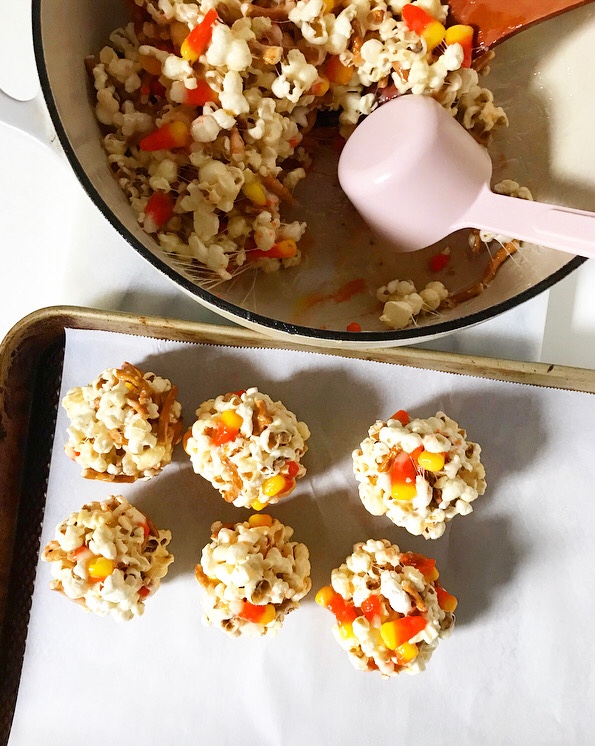

 Once the mixture is to your liking, let it cool for about 5 minutes, just until you can handle it. Then butter your hands and press heaping 1/2 cups of sticky popcorn into balls and set them on a piece of parchment. After that’s done…well, you’re done. Except for the part where you watch the World Series and eat crunchy, just barely gooey, candy corn & pretzel-studded popcorn balls and call it Halloween. Or maybe that’s just me.
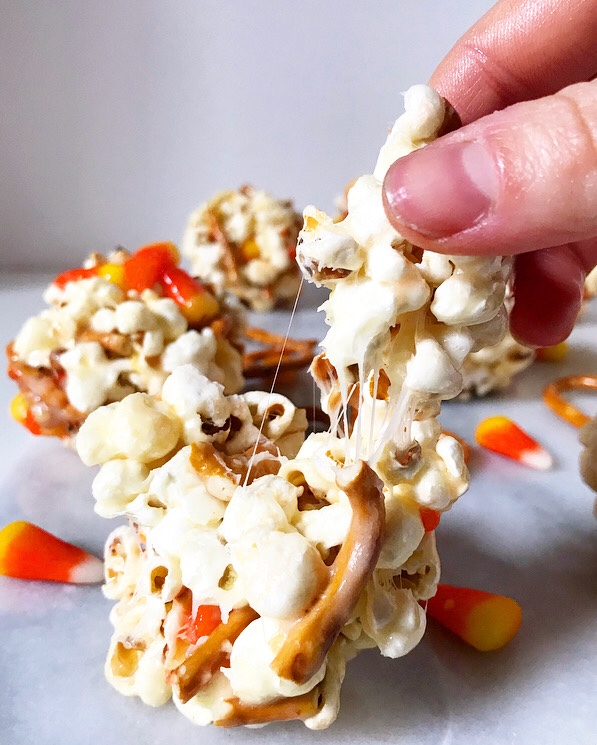
Easy Popcorn Balls
makes about 14 balls
1/2 cup (1 stick) unsalted butter
1 10-ounce bag mini marshmallows (about 6 cups)
1/2 teaspoon Kosher or sea salt
10 cups plain popped popcorn (from about 1/2 cup kernels)
1 cup candy corn
1 cup broken pretzel pieces
Alternative mix-in ideas (use 2 cups total):
M&Ms
Reese’s Pieces
salted peanuts
chopped Twizzlers
broken Oreos
sweet cereal of choice
Line a rimmed sheet pan with parchment. Set aside.
Melt butter a large, heavy-bottomed pot over medium-low heat. Add marshmallows and all and stir until smooth. Carefully fold in popcorn. Remove from heat. Fold in candy corn and pretzels, or other desired mix-ins. Let mixture cool 5 minutes, or until just cool enough to handle but still pliable.
Grease your hands and a 1/2 cup measuring cup. Use the measuring cup to scoop heaping 1/2 cups of the popcorn mixture. Coax it out of the cup by inverting/using your fingers and then use your hands to firmly press the popcorn mixture into a ball. Place the popcorn ball on the prepared pan. Continue, working quickly, until all popcorn mixture is used. Let popcorn balls cool until set.
Popcorn balls are best the day they are made, but may be kept covered at room temperature for up to 3 days. If you are concerned about them sticking together, you can wrap each in plastic wrap.
 Sometimes it takes years of thinking and testing and cursing and problem-solving—or, to be brief, “general creative agony”—to formulate a recipe. Other times, the recipe comes up and metaphorically slaps you in your dessert-obsessed face.
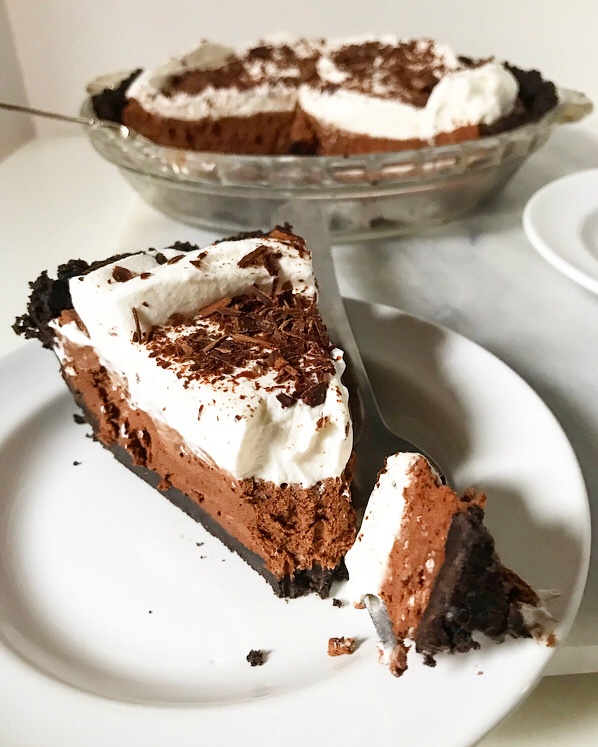
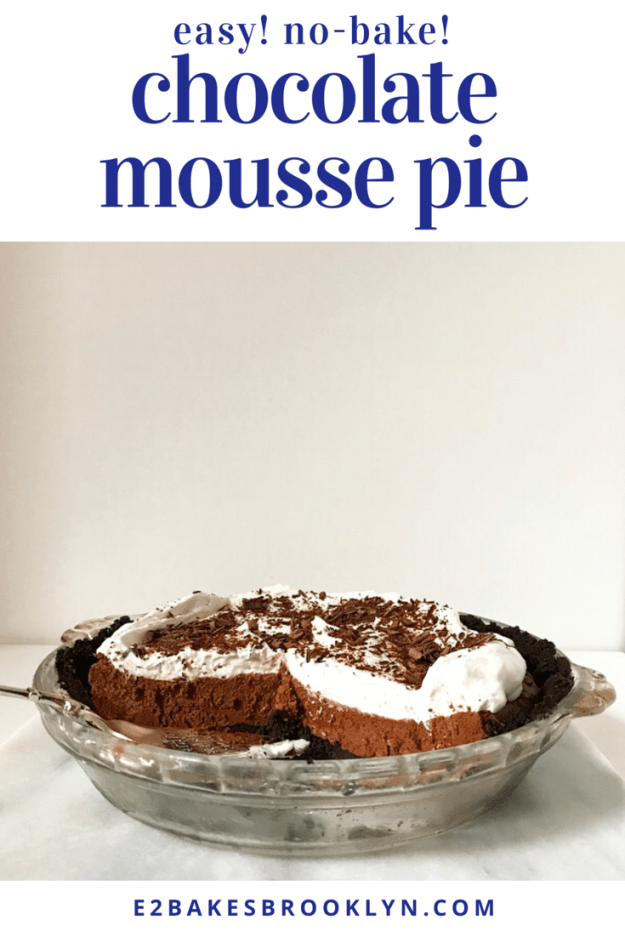
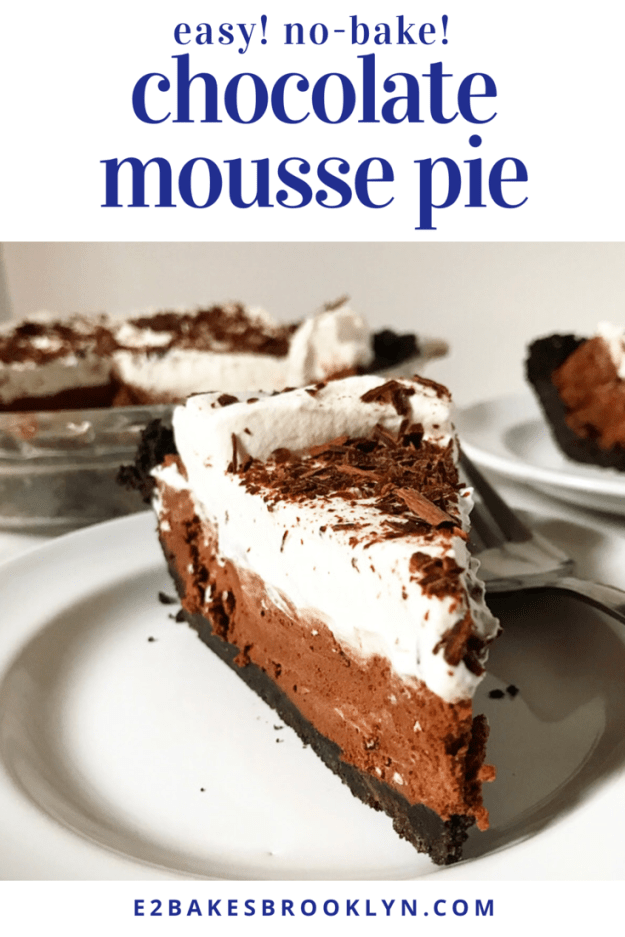
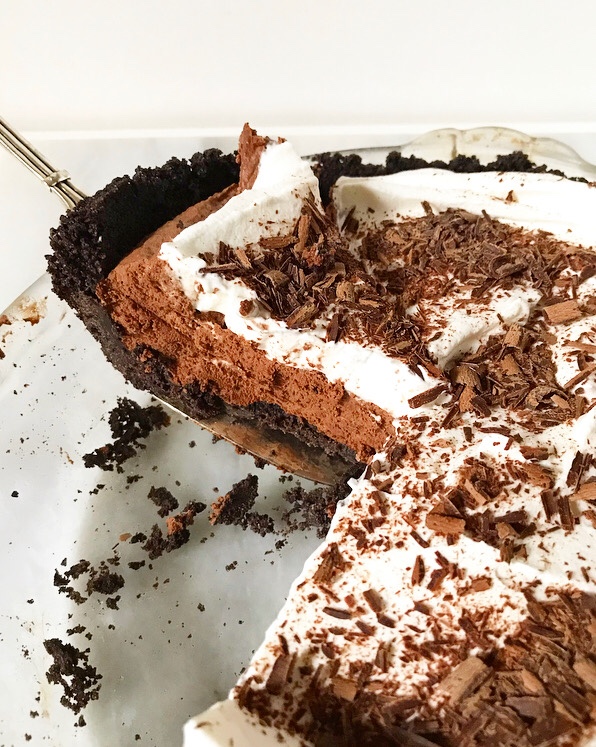 You can guess which sort of recipe this Chocolate Mousse Pie is.
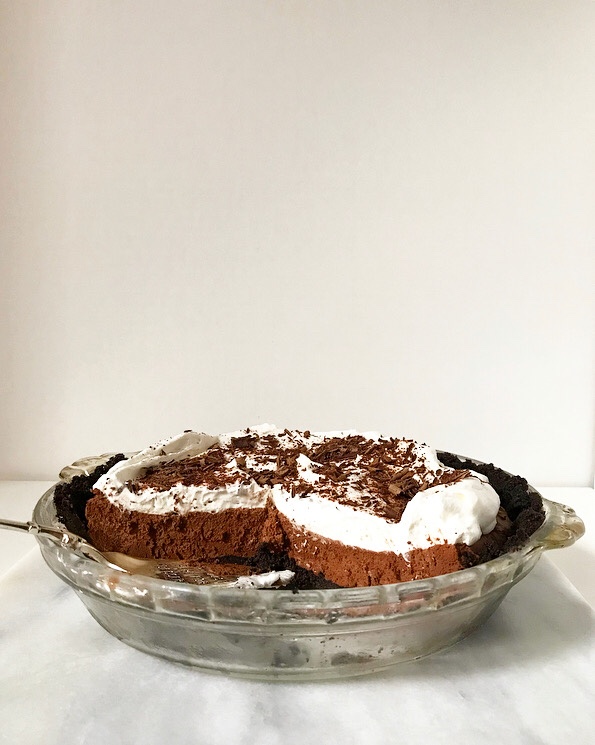 Y’all! How did I not make a Chocolate Mousse Pie sooner? How did it never cross my mind? I’ve had a magnificent
  This is exactly the sort of recipe I love to have in my back pocket. It’s super simple to make and a universal crowd-pleaser. Who can resist fluffy homemade chocolate mousse, whipped cream, and Oreo crumb crust? Not this baker.
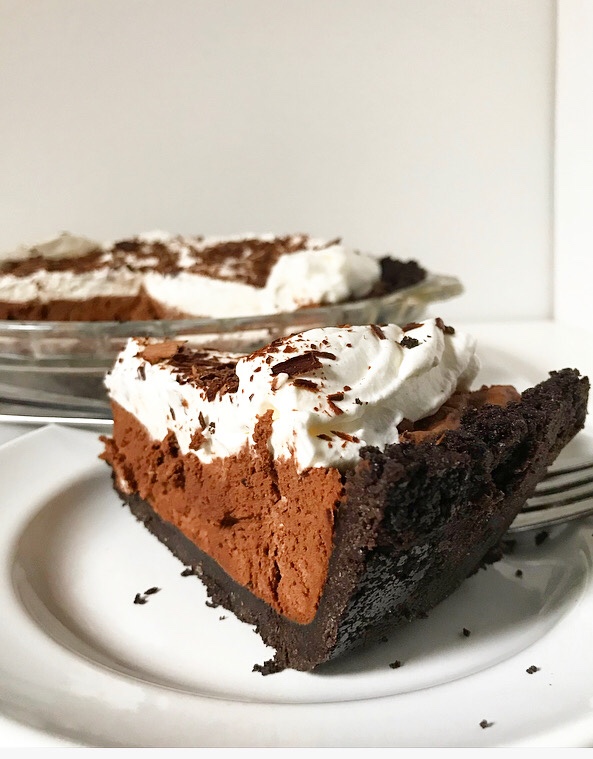 …or should I say “no”-baker? This is a no-bake pie, after all! There are a couple of chilling steps in the recipe, but no need to crank up your oven. I’ve got a few
  But! But. It’s not even
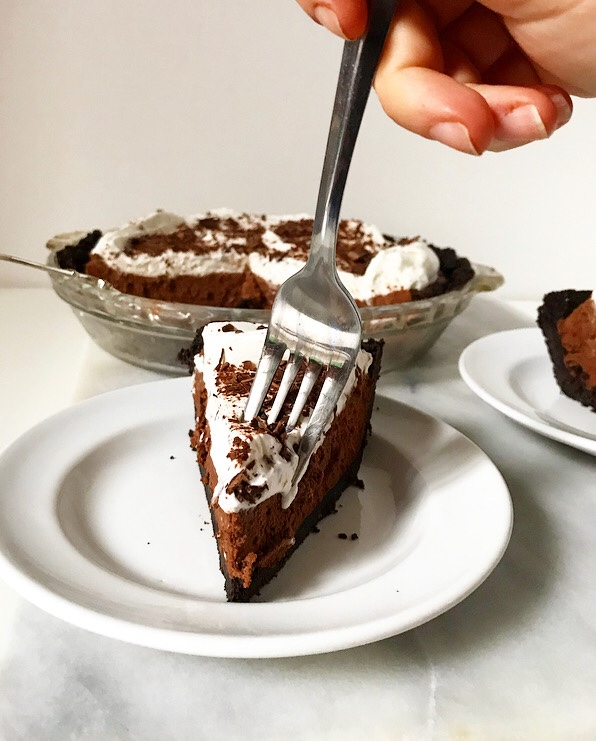

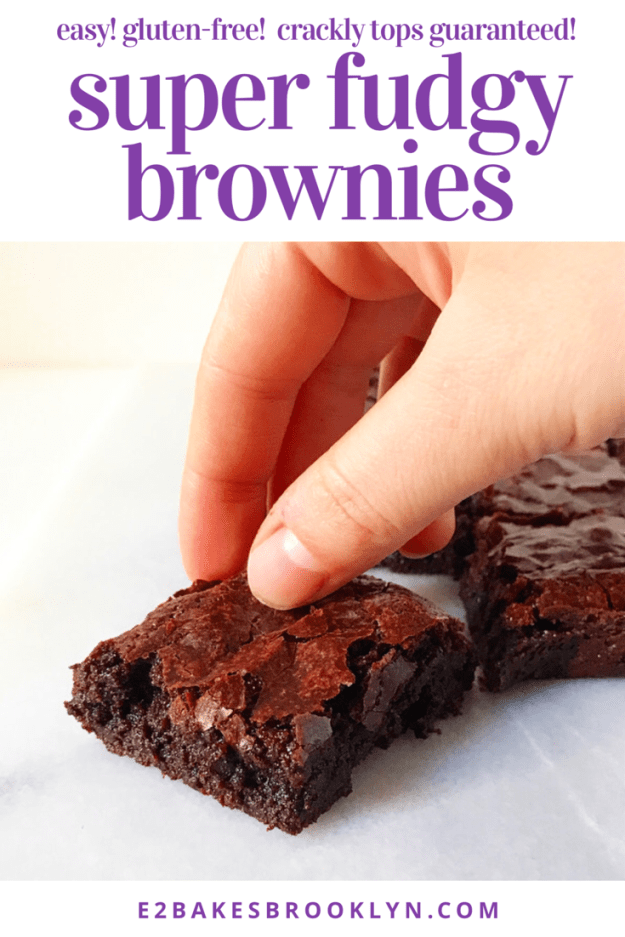
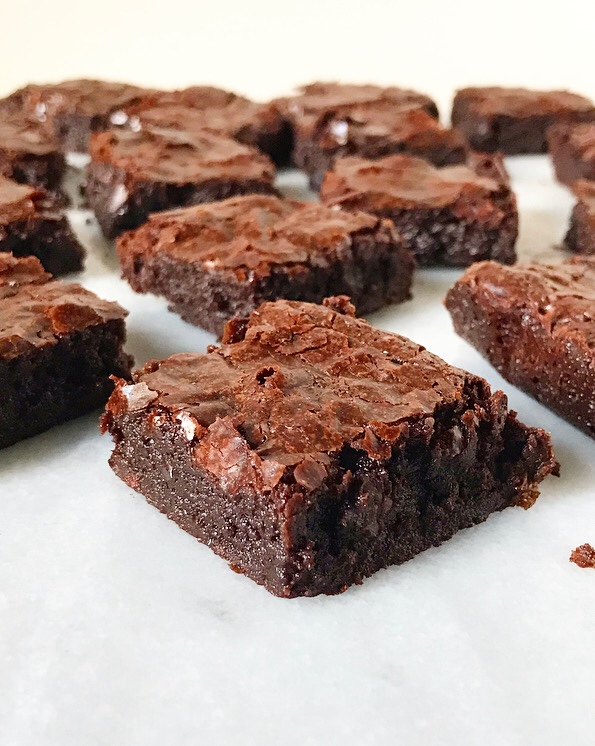 The world doesn’t need another brownie recipe, but I do. Sure, I already have two base
 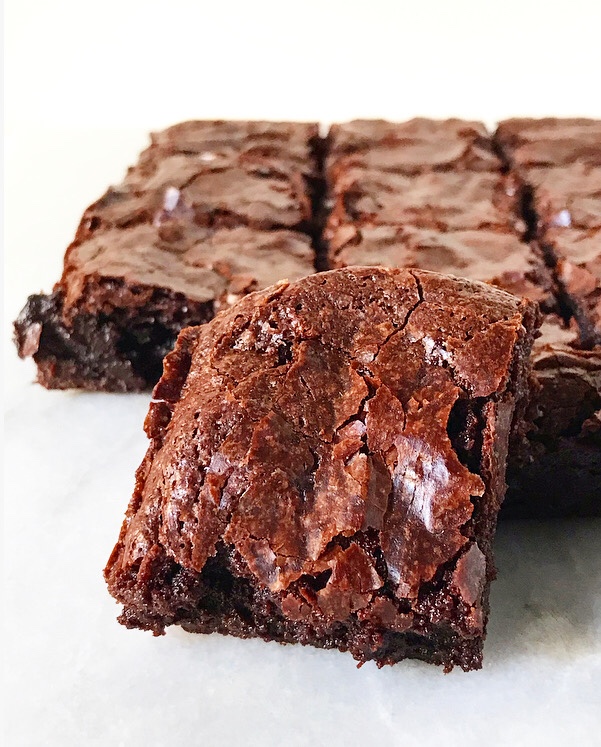 It hadn’t occurred to me that I cared about this until I was talking to a couple of friends about what makes a good brownie. Our notes were similar: fudgy, not cakey at all, not too sweet or light in color. But then they started talking about the paper-thin crinkly top on their favorite boxed mix brownies and I realized I had forgotten about that altogether.
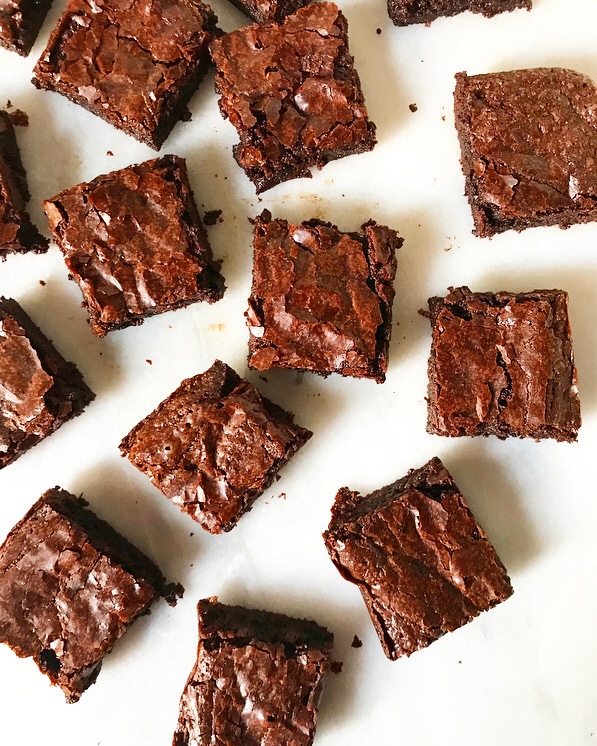 In my defense, I haven’t made boxed mix brownies in at least seven years—probably more like ten. But I’ve also probably eaten
 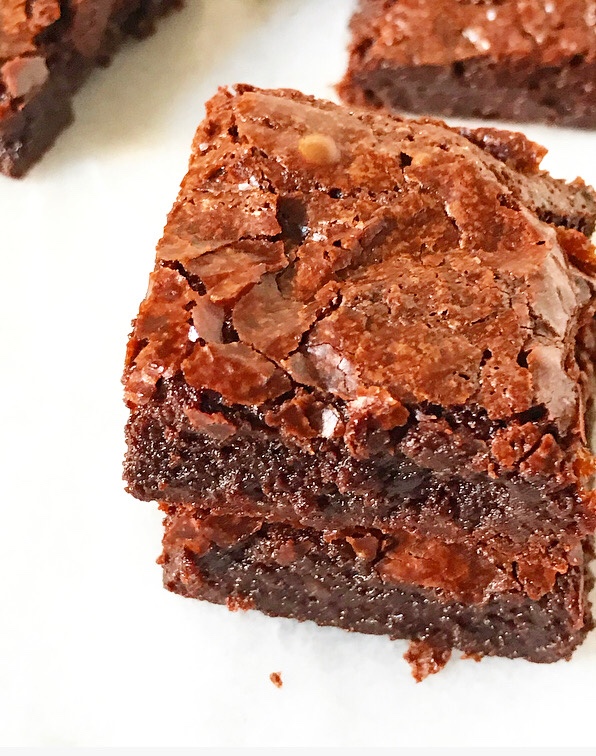 So, what produces that perfect top? Cooking/baking science wiz
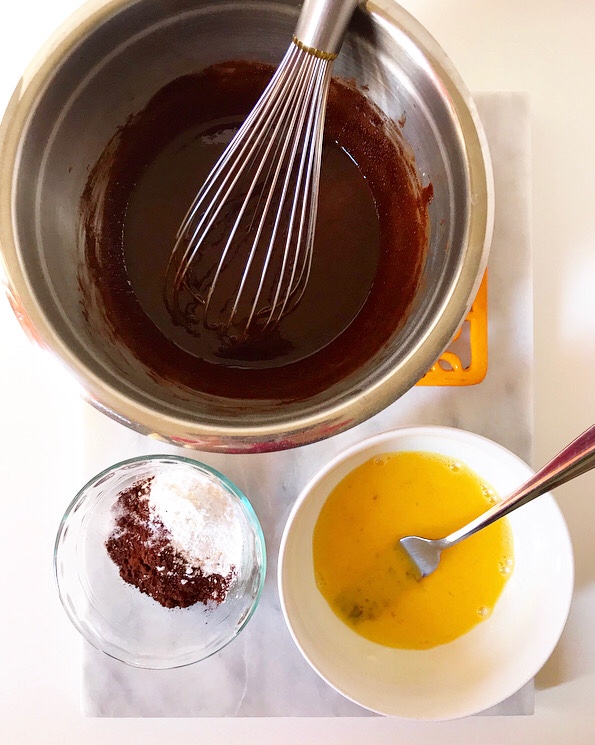
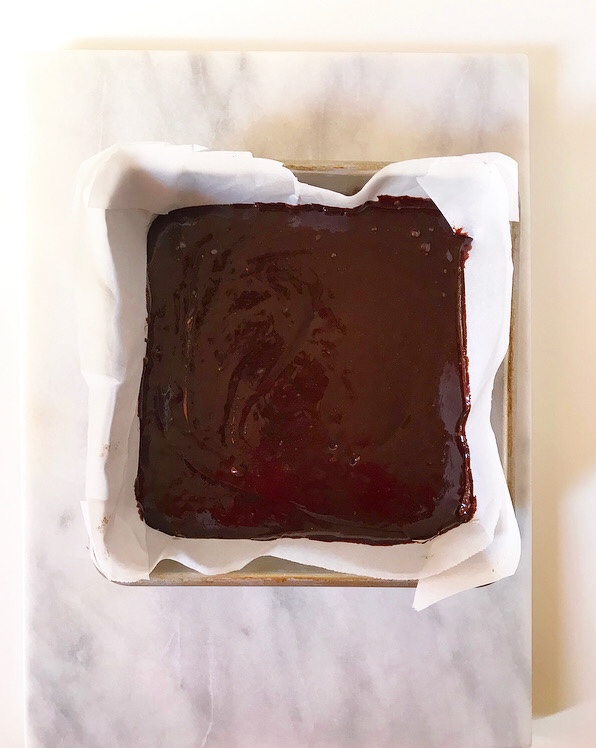 Here, meringue is more…deconstructed. Essentially, sugar is whisked into butter and chocolate that have been melted together. This suspends the sugar in the flavor/texture base of our brownies. Dry ingredients are whisked in, followed by vanilla and a couple of eggs that have been beaten just until they’re starting to get bubbly. The batter is spread into a pan and baked for nearly half an hour, until just set.
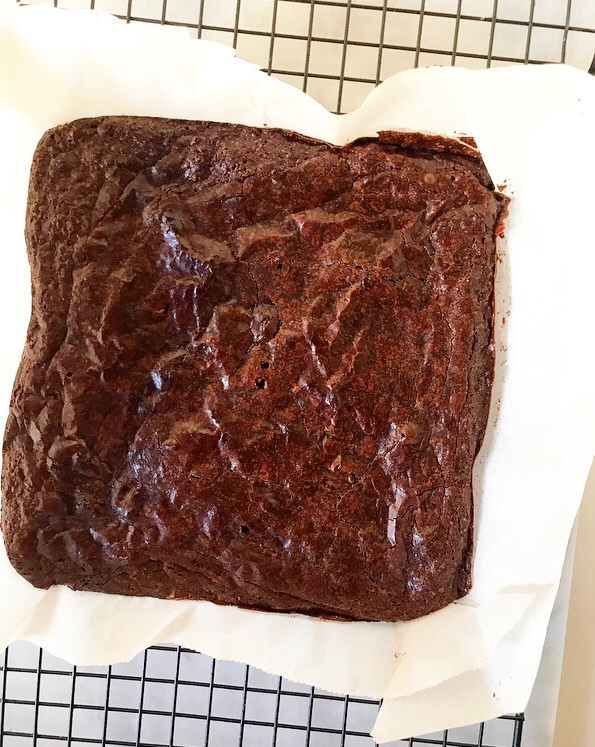 Did that make sense? I think it sort of made sense. I am a C+ chemistry student, y’all. If I had known I’d spend so much time thinking about chemical reactions, I may have paid more attention.
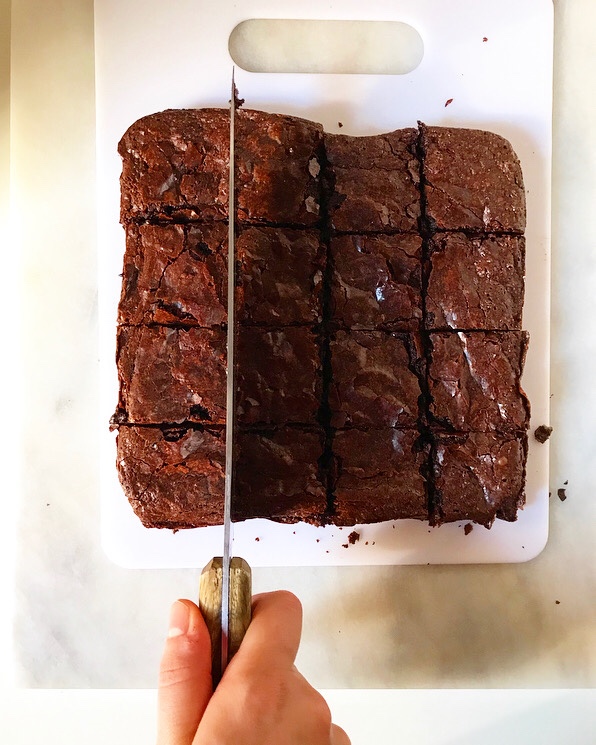 When you look at the recipe, you may notice that I use bittersweet chocolate in these brownies instead of the usual unsweetened chocolate. This is simply because I almost always have bittersweet chocolate (Trader Joe’s PoundPlus Dark Chocolate is my go-to) and almost never have unsweetened. When I want brownies, I want to be able to make them without having to go to the grocery store, you know?! I have reduced the added sugar in this recipe to reflect using sweetened chocolate. If you have (or prefer) unsweetened, just up the sugar to 1 cup.
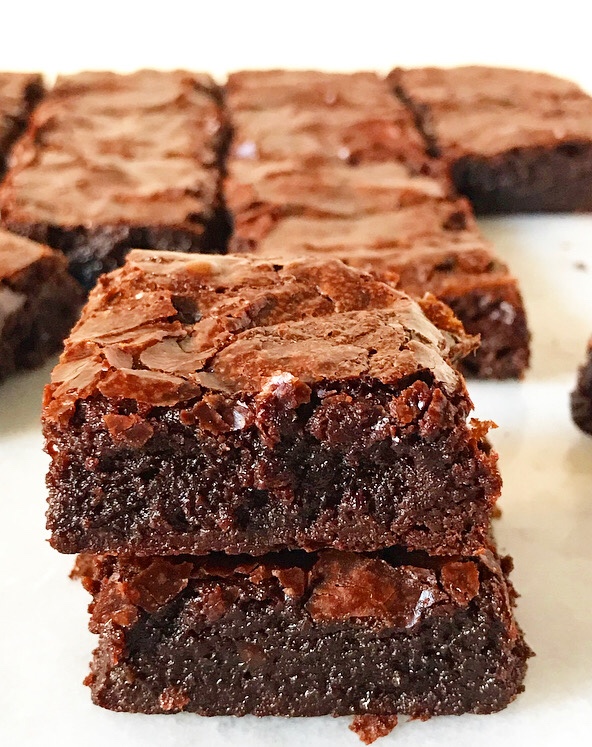 Did I mention that these brownies just happen to be gluten-free? Where many recipes call for flour, the dry ingredients here are a combination of cocoa powder and cornstarch. The cocoa powder provides a little structure and an extra hit of chocolate flavor—yum. As for the cornstarch, you could definitely use an equal volume of flour in its place, but I like the smooth texture it provides here, the same way it does in cakes and cookies. Plus, it means more friends can enjoy these brownies. Yesssss 😊
 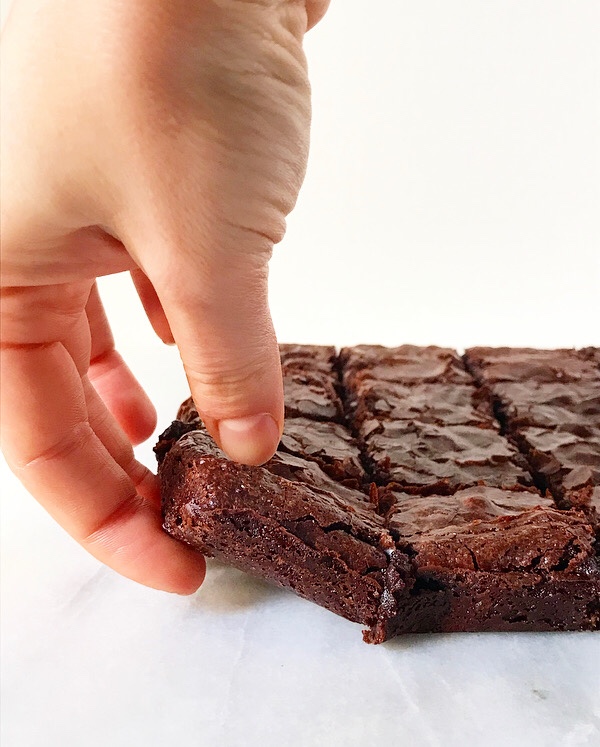 One last thing: this recipe is easy and requires just eight ingredients! I felt this warranted a mention because there is a lot of technical jargon in this post. But I promise these are easy. They’re soooo easy. And super dense and fudgy and delicious. And they have that perfect crackly top. And perhaps you too will soon have a freezer full of brownies. It’s a very good problem to have.
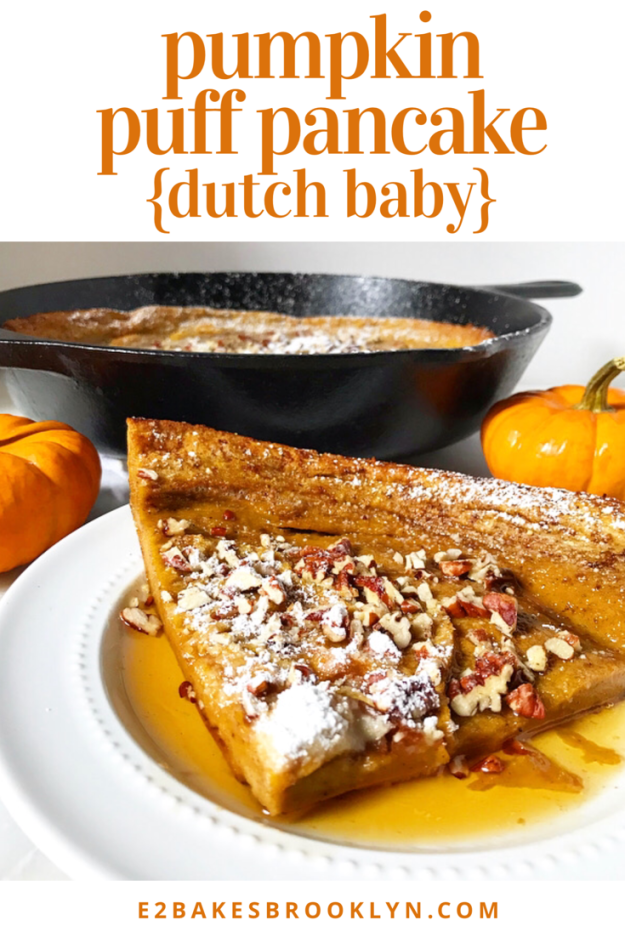
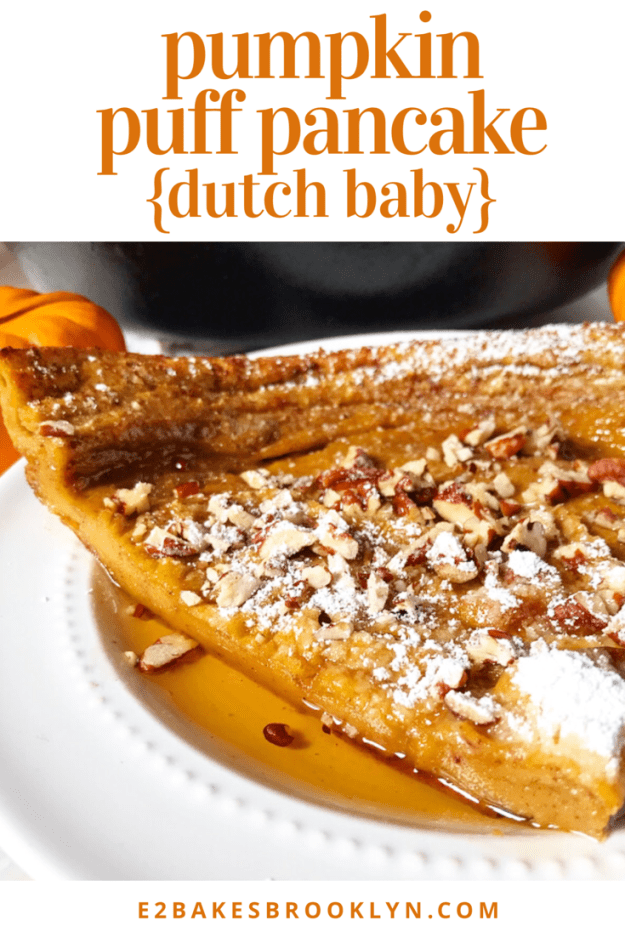
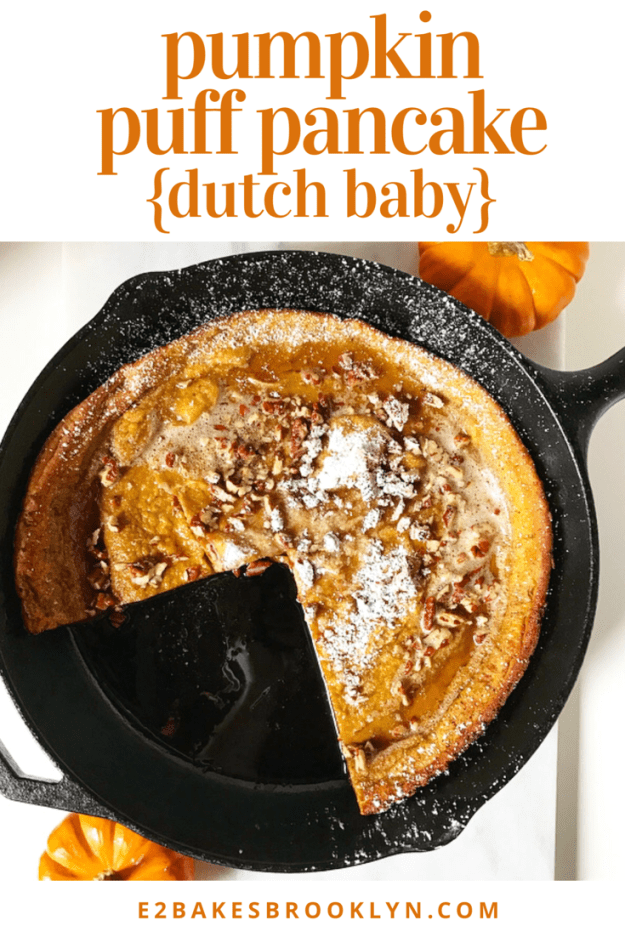
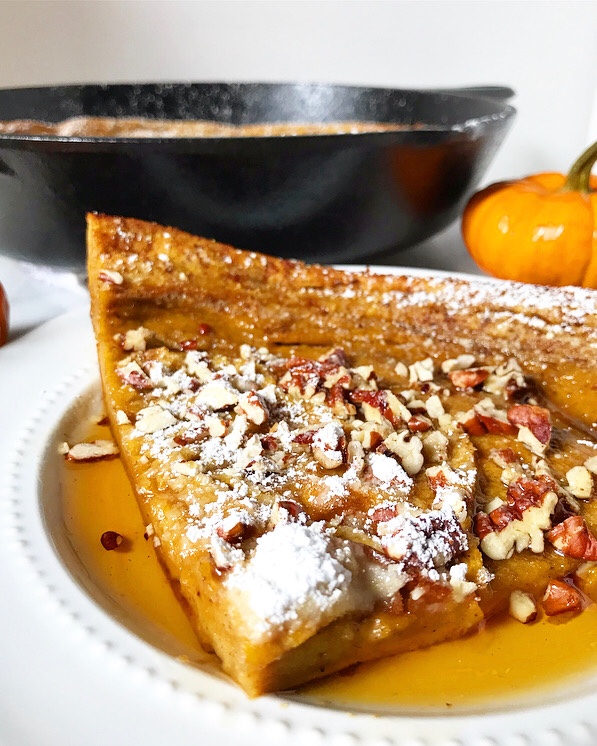 It’s that time! Tomorrow morning will be the first weekend breakfast of fall (even if you are regretting having packed away your summer clothes two weeks ago) and it should absolutely be this Pumpkin Puff Pancake. (And maybe bacon.)
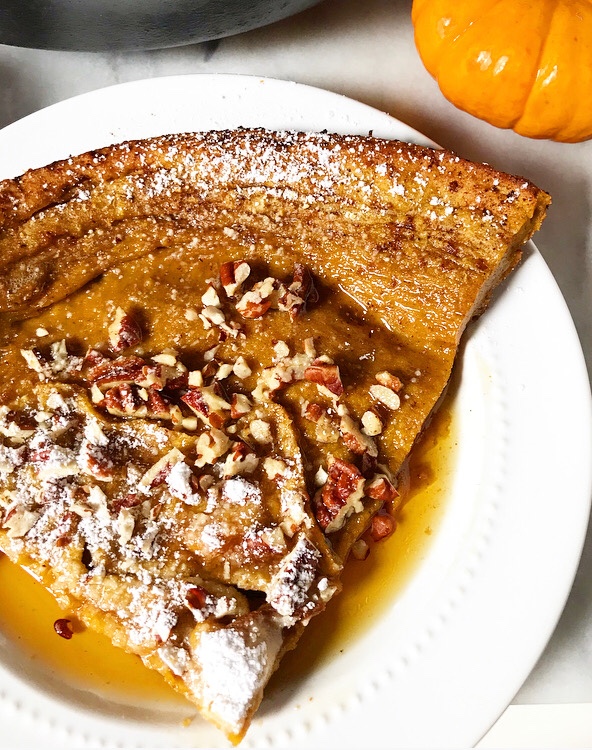 This Pumpkin Puff is simply an autumnal take on
 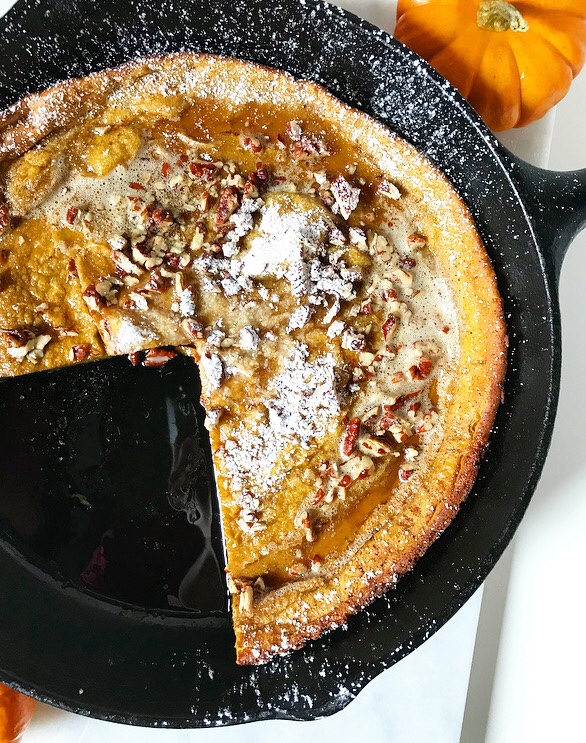 Mix up your
 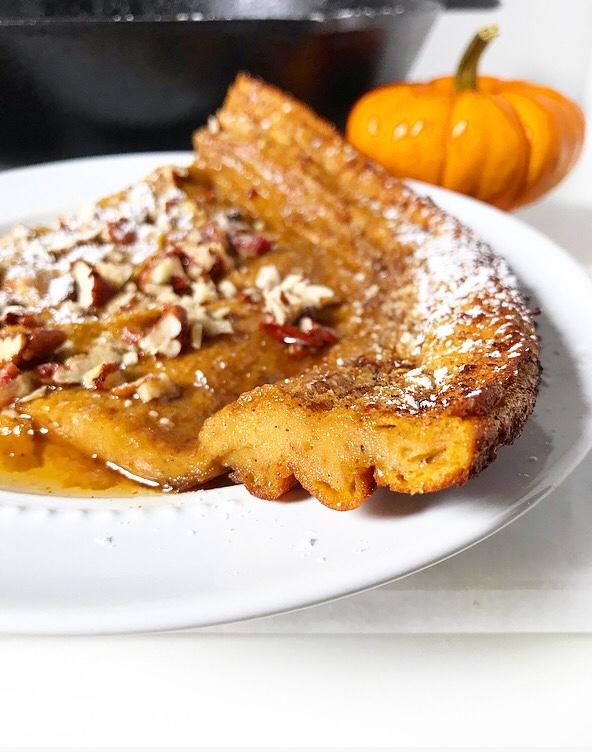 Pour it in a screaming hot pan with plenty of butter and go find something to do for roughly 17 minutes. I recommend figuring out which Emmy-nominated show you can manage to binge watch in its entirety before the broadcast on Sunday night (When They See Us! Pose! Fosse/Verdon!). Or, alternatively, if you’re local, determining which panel you’re going to attend at the
 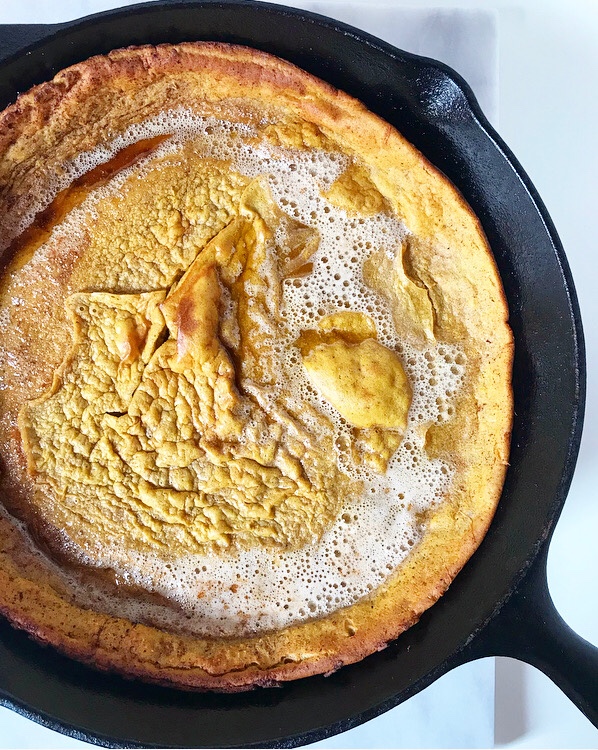 Anyway…when you have decided to watch Sharp Objects and a few episodes of The Good Place…oops, sorry.
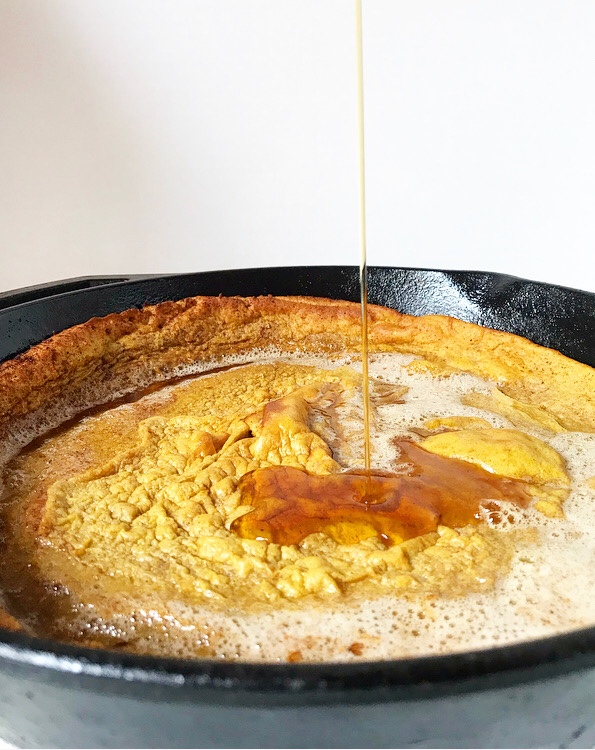
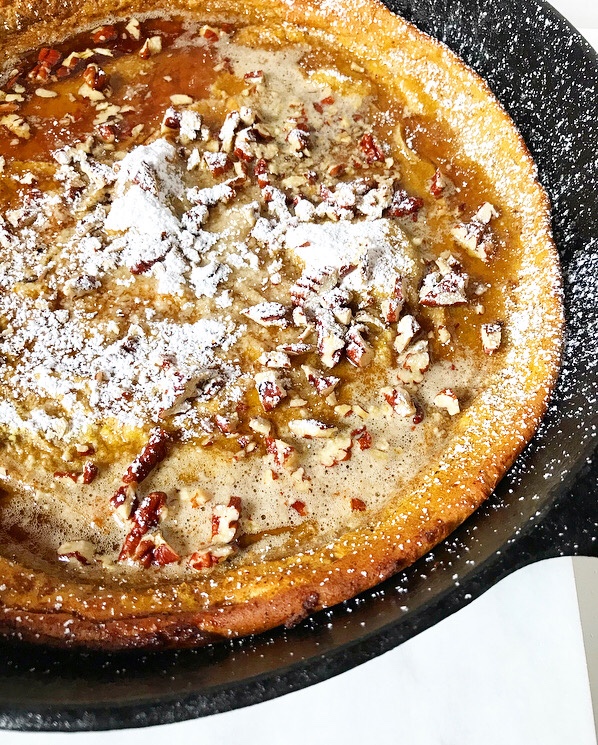
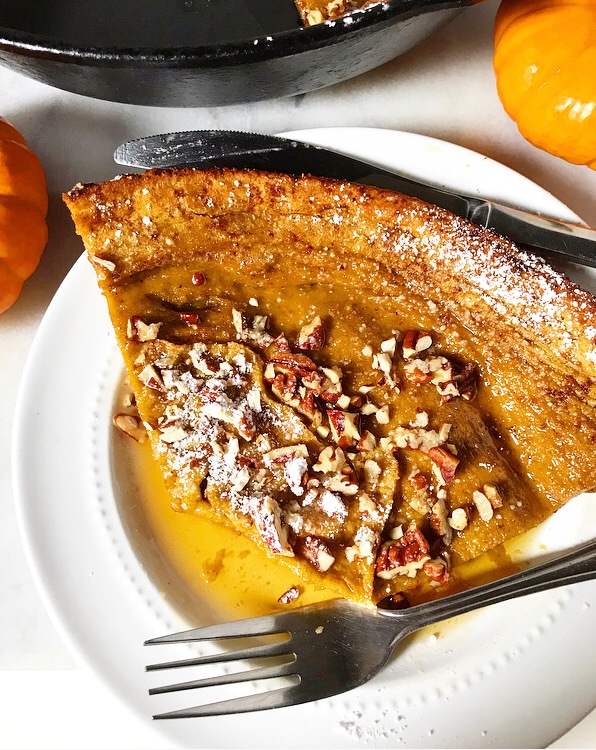
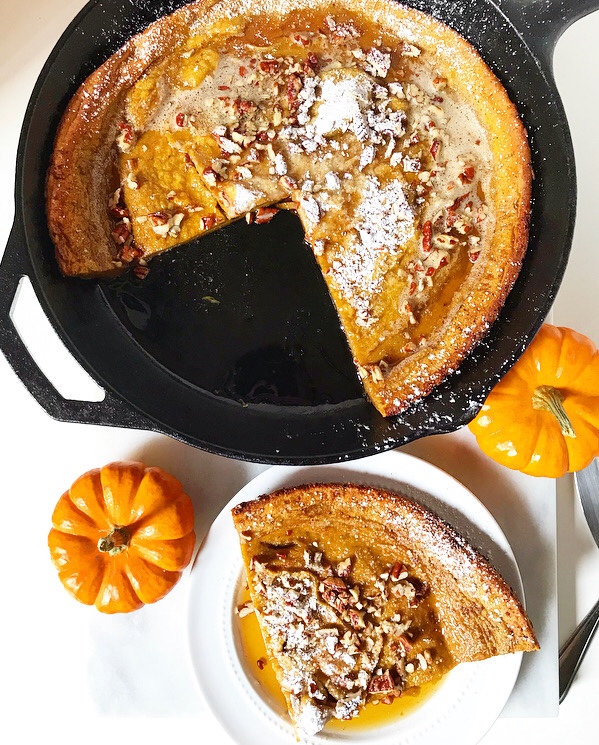 Top it with whatever makes you happy—I went for my usual maple syrup and confectioners sugar, along with some toasted pecans. Keeping it seasonal, you know, because it’s officially fall in my kitchen and on this blog.
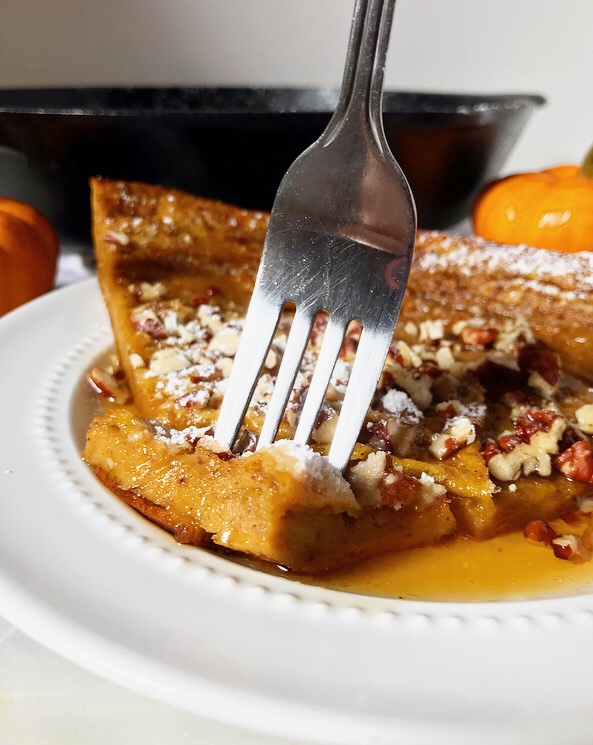
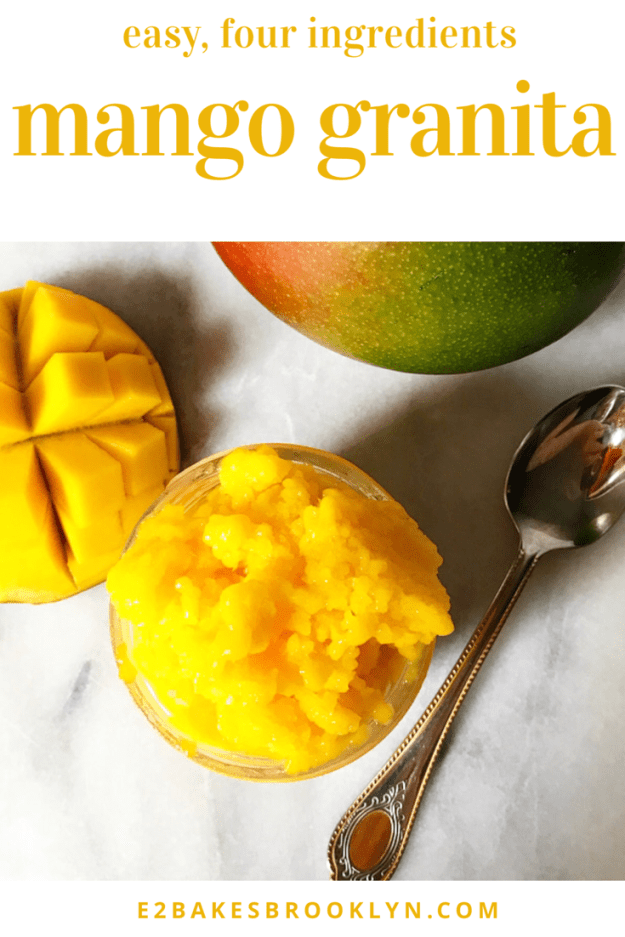
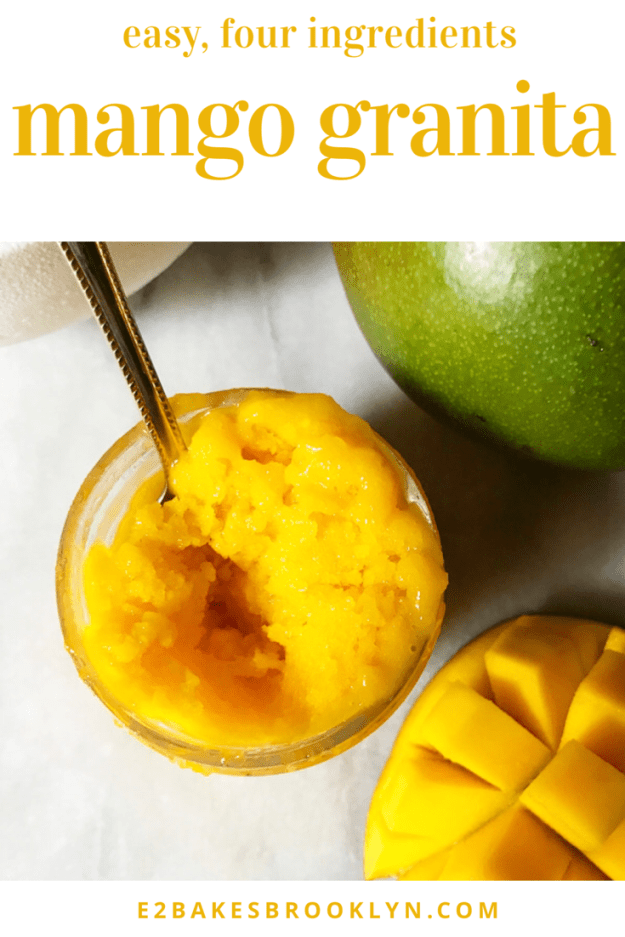
 I first came across a granita recipe in the summer of 2009 and thought “That looks easy and delicious. I’m going to make that.” And then ten years passed.
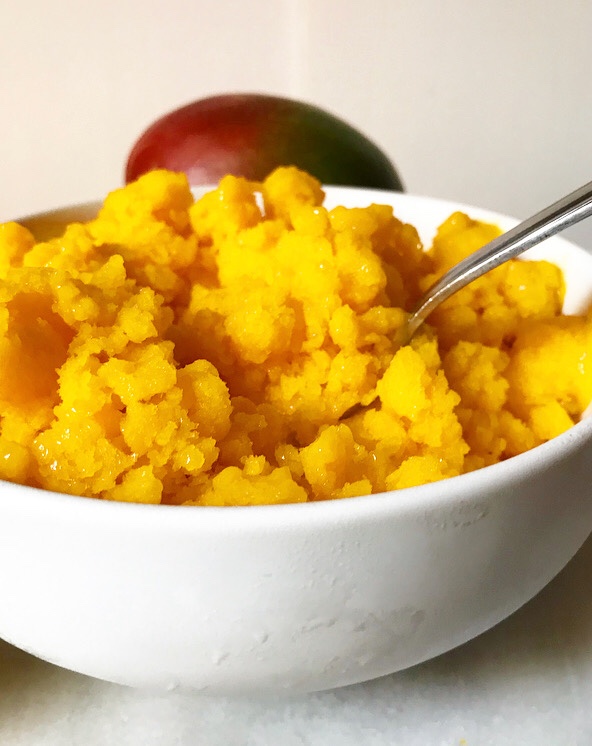
 If you are wondering what the heck I’m talking about, granita is a
 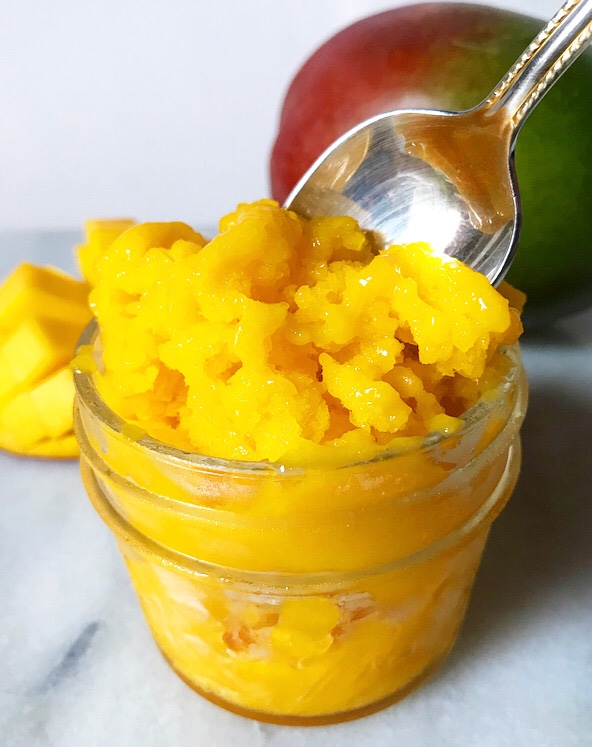 To make this Mango Granita, you’ll need:
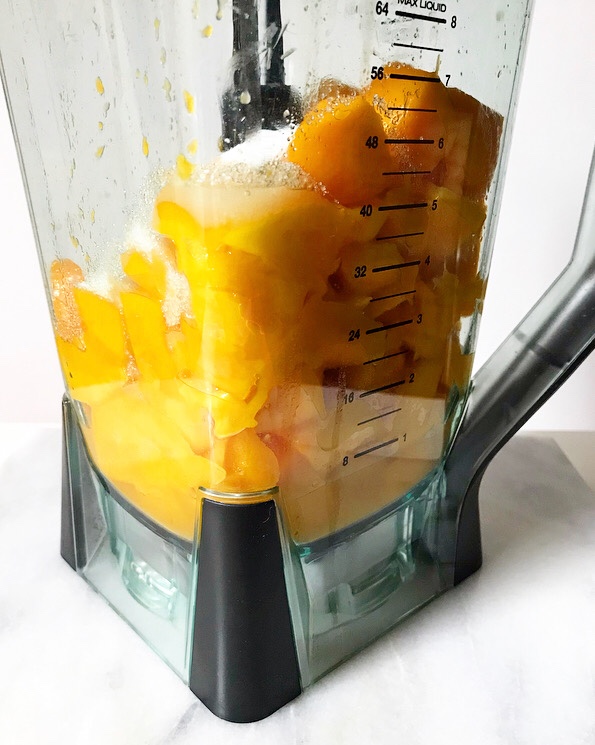
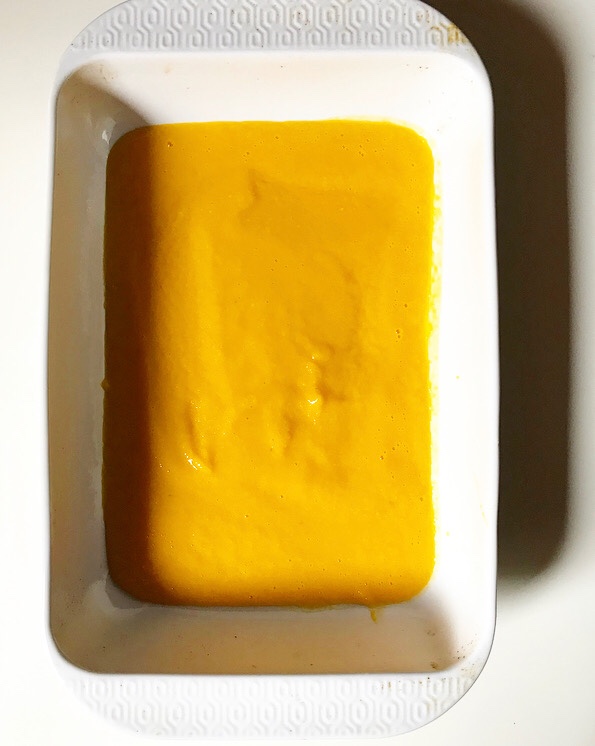 The process is simple. Blitz all the ingredients in a blender until smooth, then pour the purée into a large dish and put it in the freezer for an hour.
 When that time is up, remove the dish from the freezer. Starting at the outer edge, use a fork to drag the frozen purée into the looser center. This will begin the process of making fluffy, snowy ice crystals. At first, you may feel like you’re dragging a fork through soup, but an hour later, it’ll be a different story.
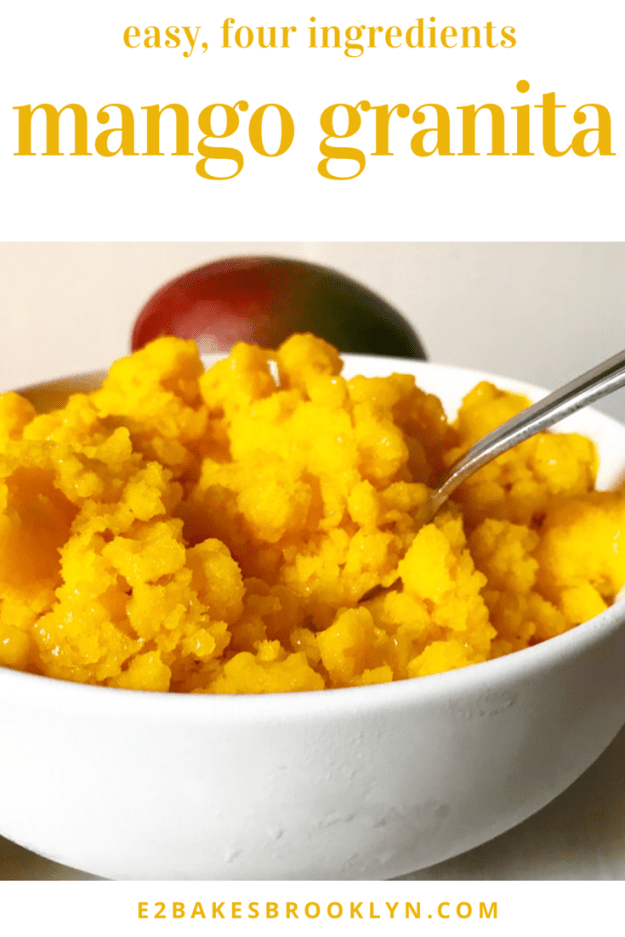
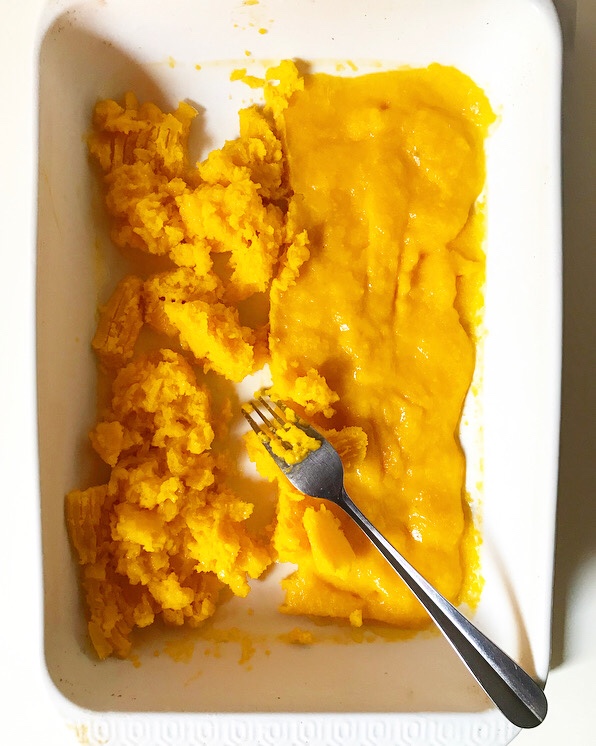 And then, thirty more minutes will go by and crystals will really begin to form! The grainy texture is the “gran-” in granita.
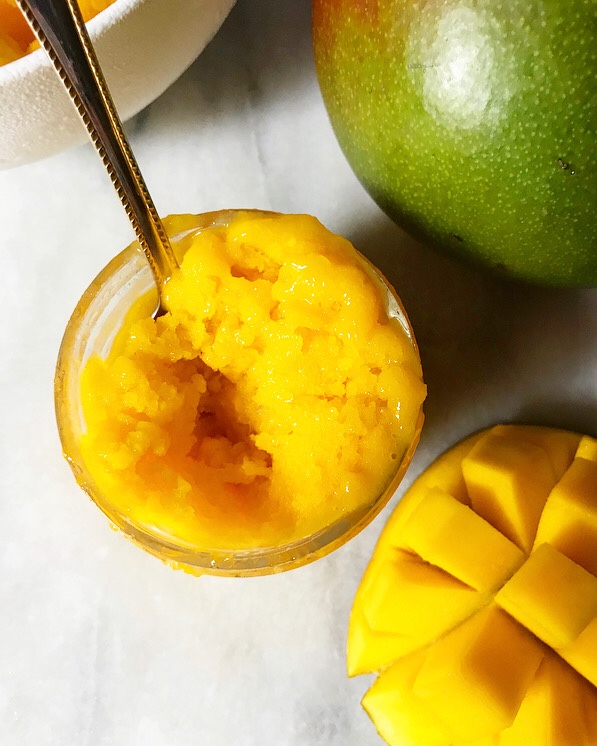
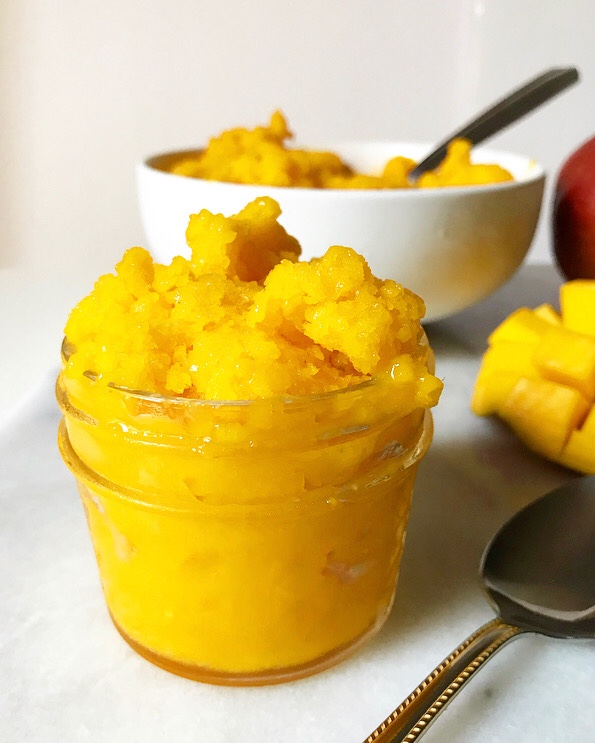
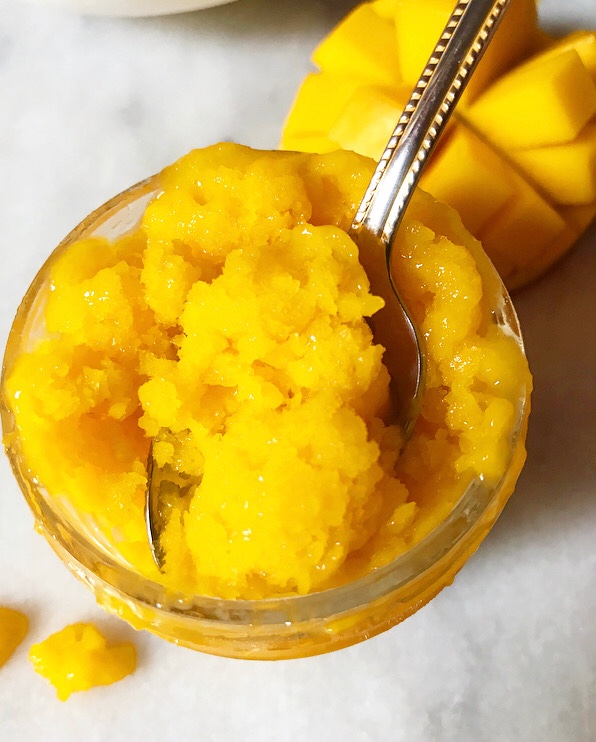
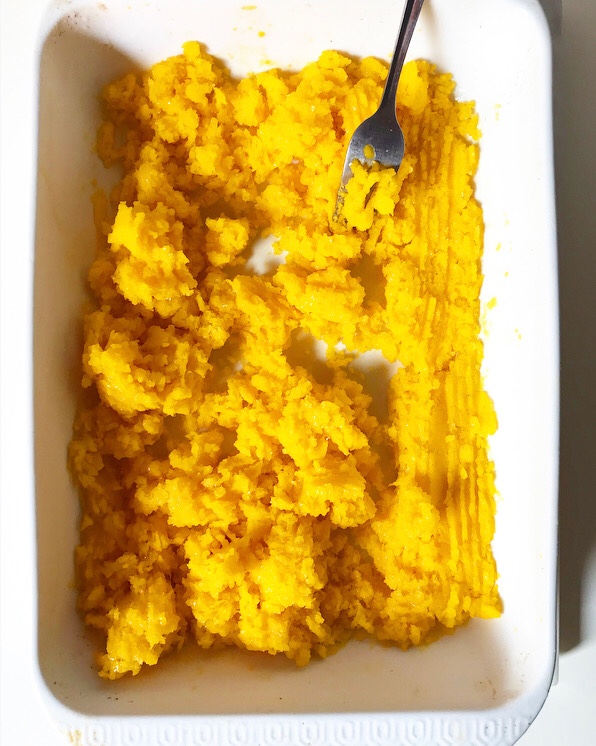 You’ll know it’s ready when it looks like this:
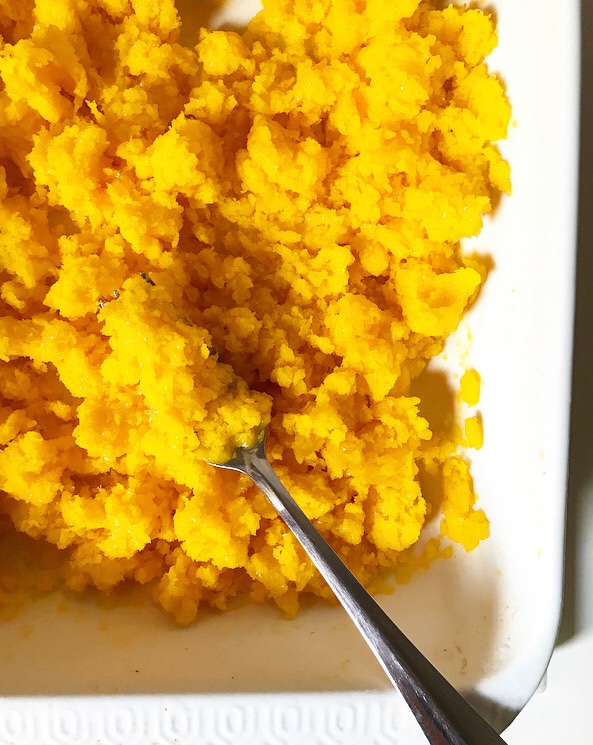
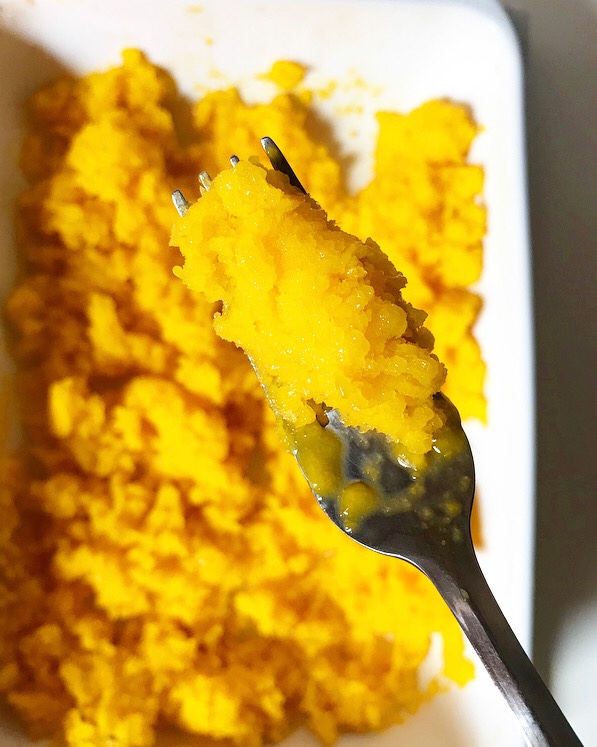
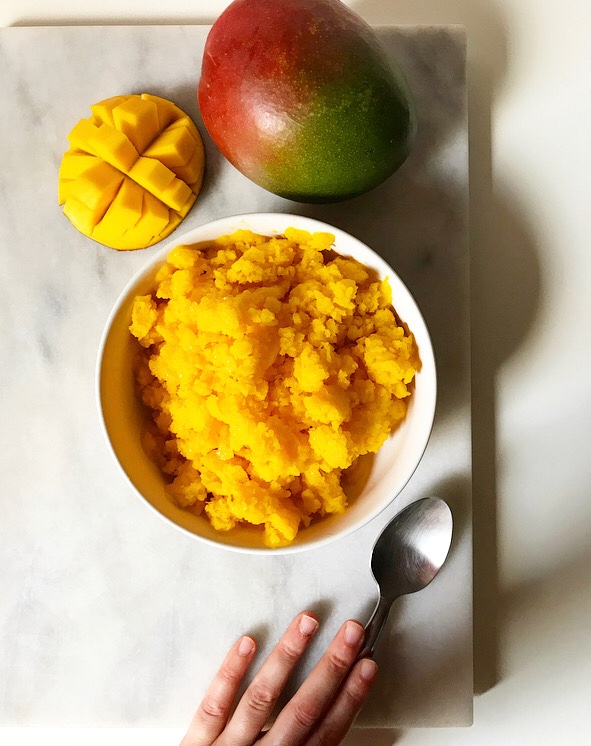 Mango Granita is as delicious as it is beautiful—light and refreshing and perfect for these sweltering last few weeks of summer! The texture is somewhere between a snow cone and a sorbet. Where you might think this would be icy, it’s super smooth and surprisingly creamy. This is the sort of dessert that is great for any occasion from watching Netflix in your PJs to a cookout to a dinner party. It’s vegan, nut-free, low calorie and low sugar–a wonderful option for a crowd!
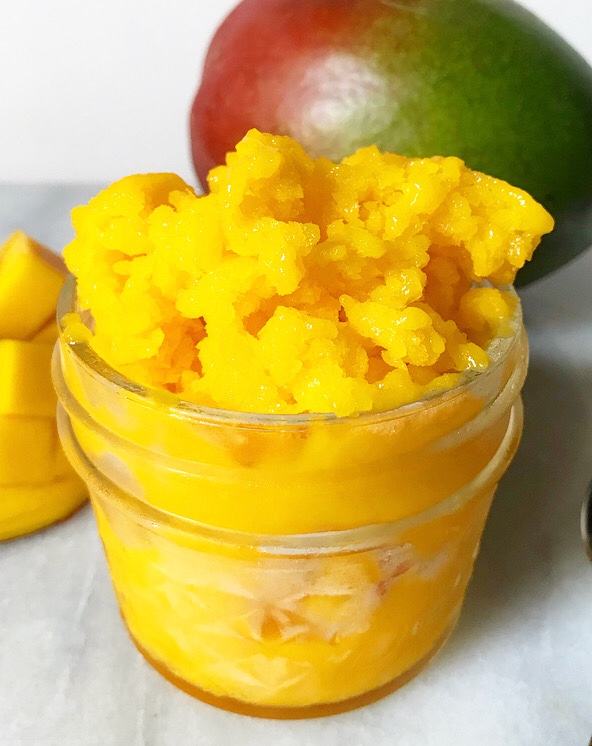
 Before I get to the recipe, here are a few more tips for granita success: